Leaderboard


Popular Content
Showing content with the highest reputation on 06/14/18 in all areas
-
I noticed this morning (after patch tuesday) that some patches were missing on our SUP. Furthermore, SMS_WSUS_SYNC_MANAGER had this weird error: WSUS Synchronization failed. Message: ImportUpdateError: . Source: Microsoft.SystemsManagementServer.SoftwareUpdatesManagement.WsusSyncAction.WSyncAction.SyncWSUS. And wyncmgr.log had this: Sync failed: ImportUpdateError: . Source: Microsoft.SystemsManagementServer.SoftwareUpdatesManagement.WsusSyncAction.WSyncAction.SyncWSUS STATMSG: ID=6703 SEV=E LEV=M SOURCE="SMS Server" COMP="SMS_WSUS_SYNC_MANAGER" SYS=[FQDN-NAME-OF-SERVER] SITE=XXX PID=3036 TID=7664 GMTDATE=ons jun 13 17:41:41.389 2018 ISTR0="Microsoft.SystemsManagementServer.SoftwareUpdatesManagement.WsusSyncAction.WSyncAction.SyncWSUS" ISTR1="ImportUpdateError: " ISTR2="" ISTR3="" ISTR4="" ISTR5="" ISTR6="" ISTR7="" ISTR8="" ISTR9="" NUMATTRS=0 After some troubleshooting I found that deselecting either the category 'Definition updates' or the product 'Windows Defender' made the error go away. Googling and troubleshooting all day, I finally found this on Technet: https://social.technet.microsoft.com/Forums/en-US/0f58a38a-042f-4475-b336-b7de3570ab7e/adding-defender-updates-is-causing-sync-to-fail?forum=ConfigMgrCompliance Looks like there might be a bug somewhere...1 point
-
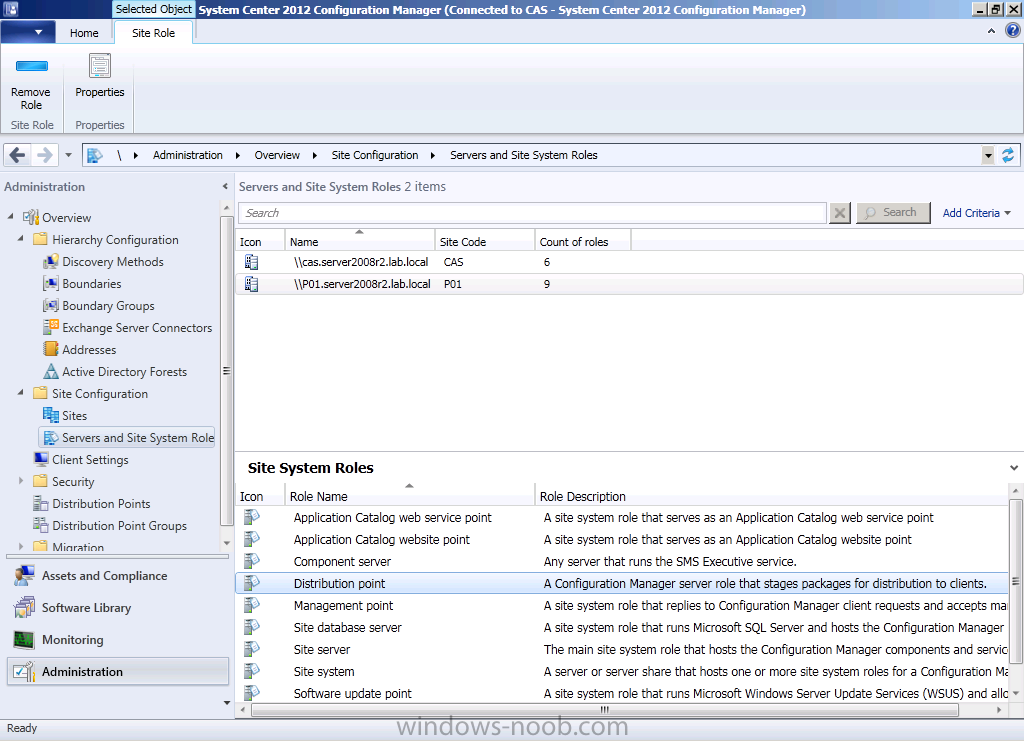
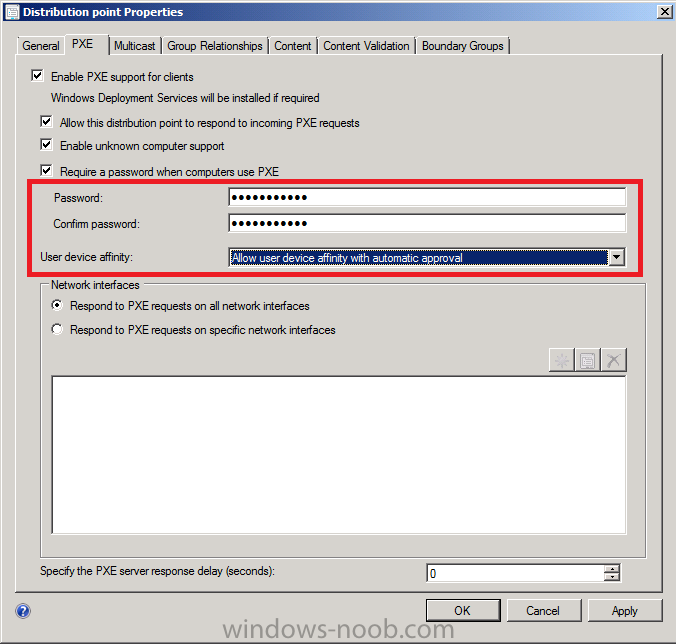
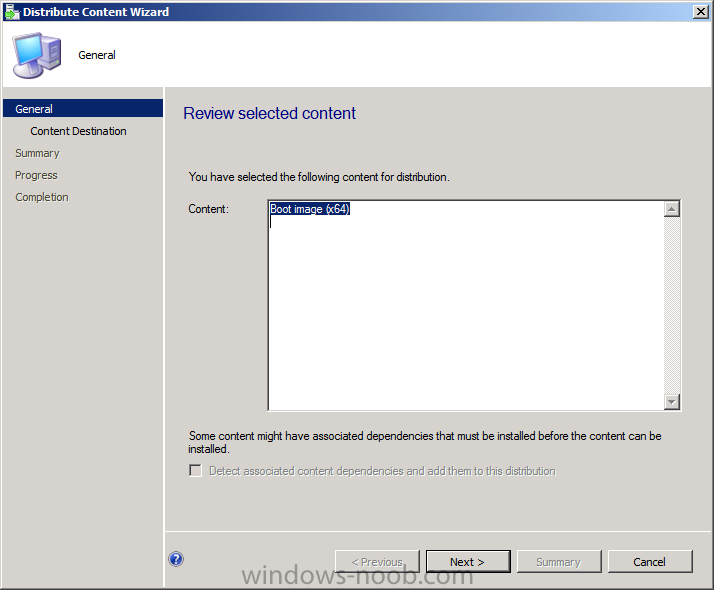
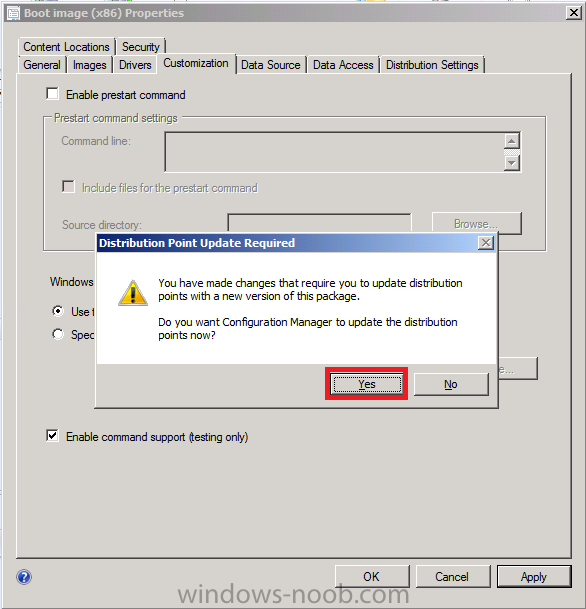
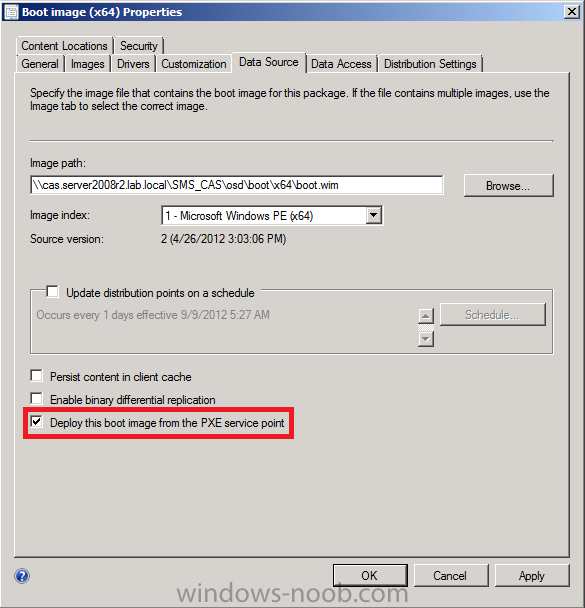
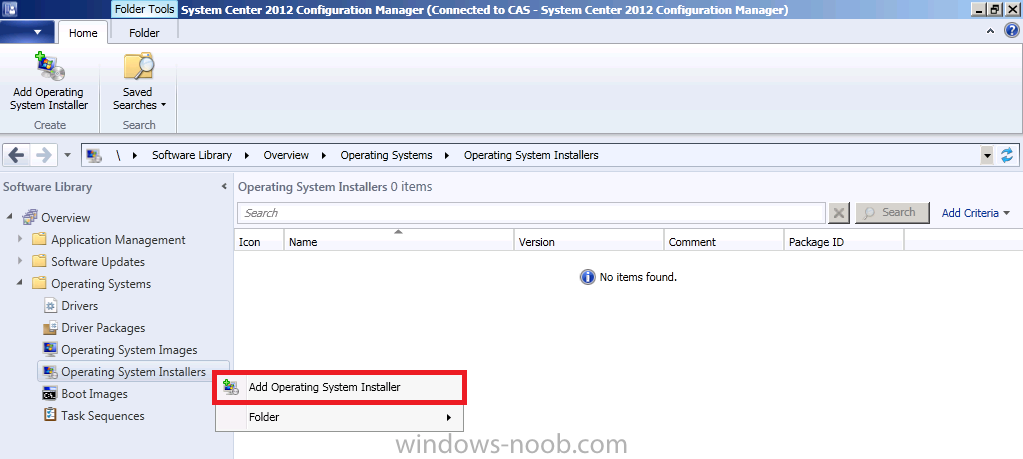
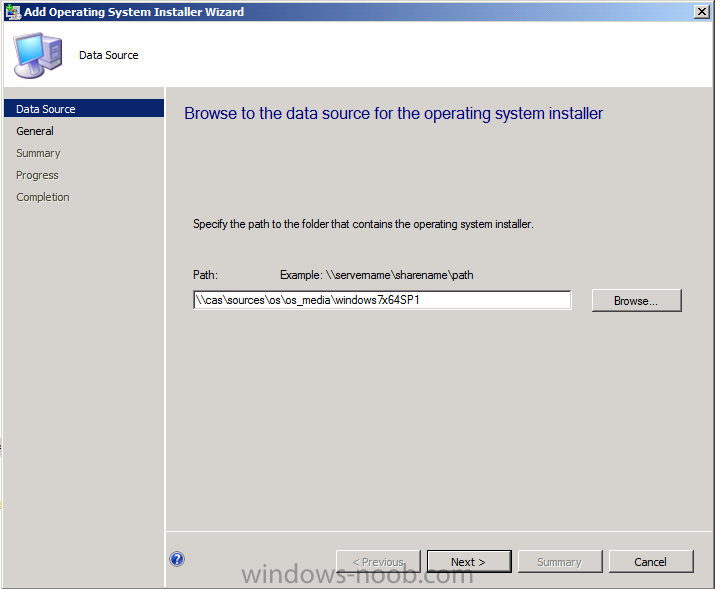
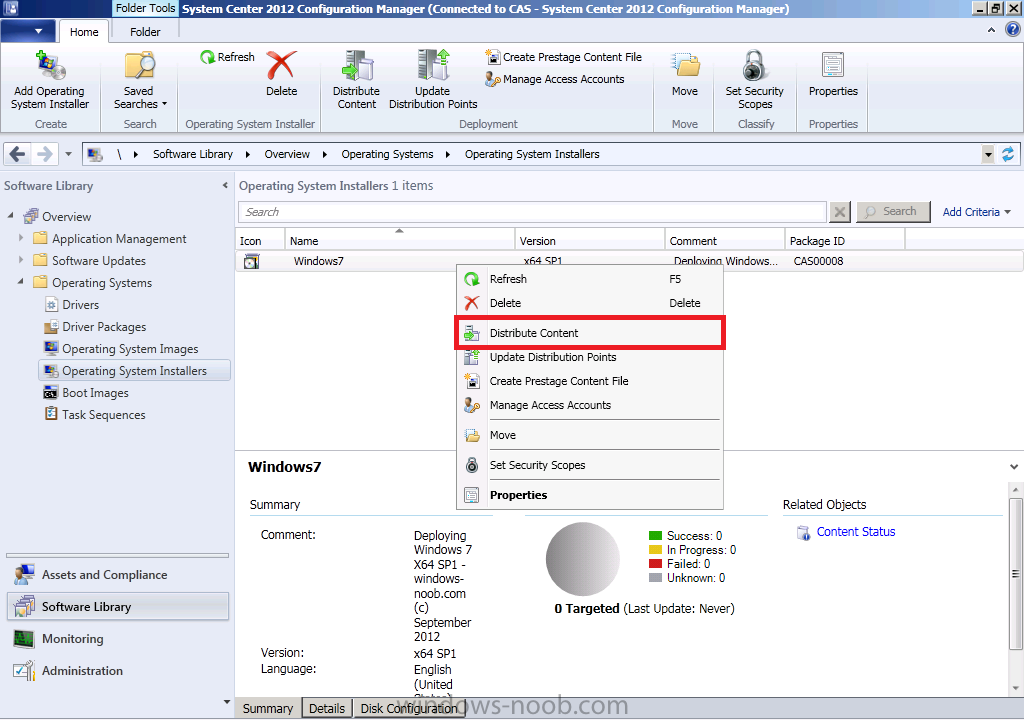
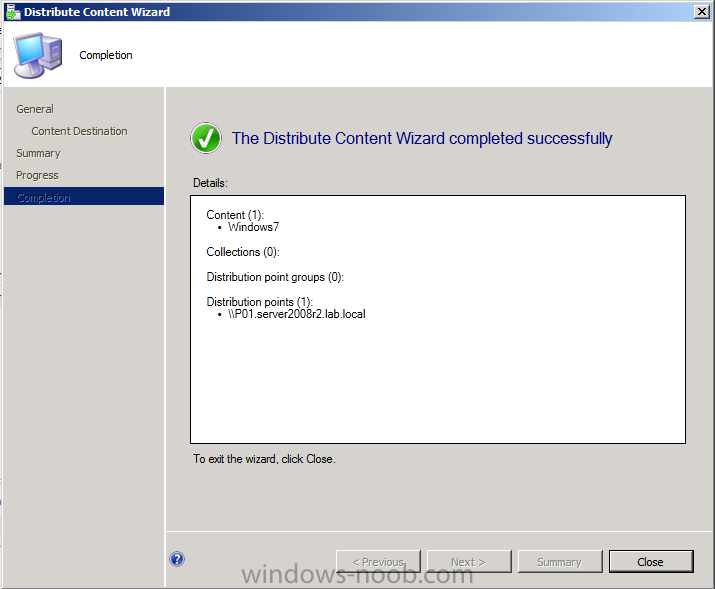
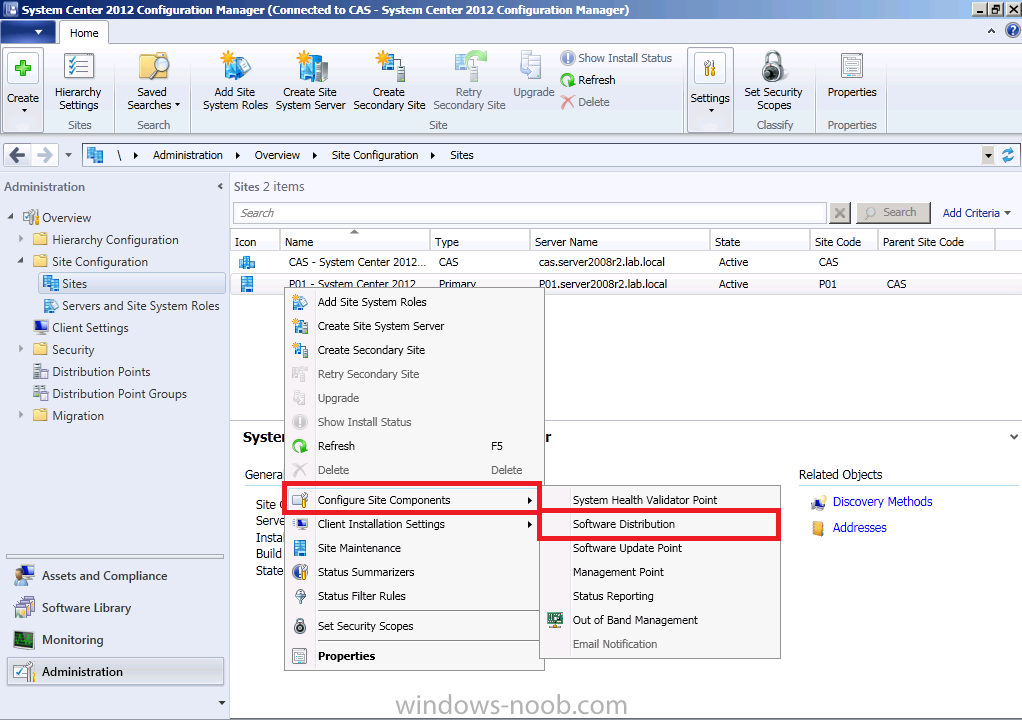
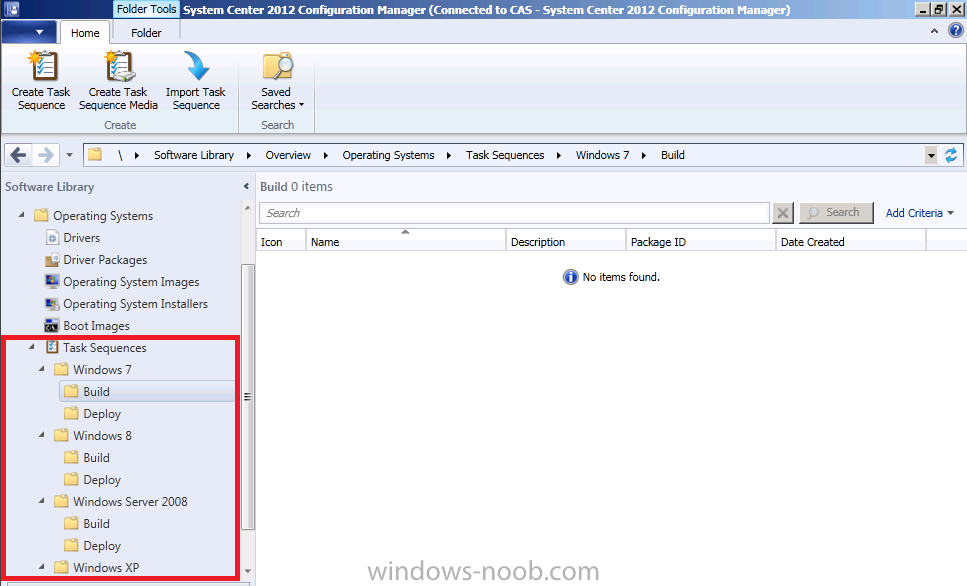
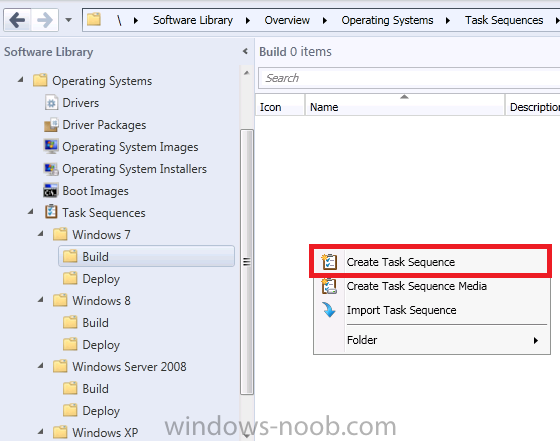
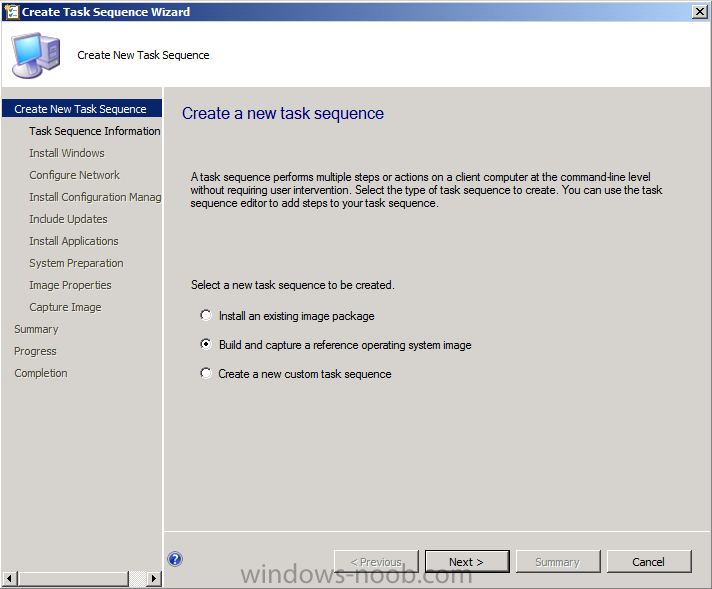
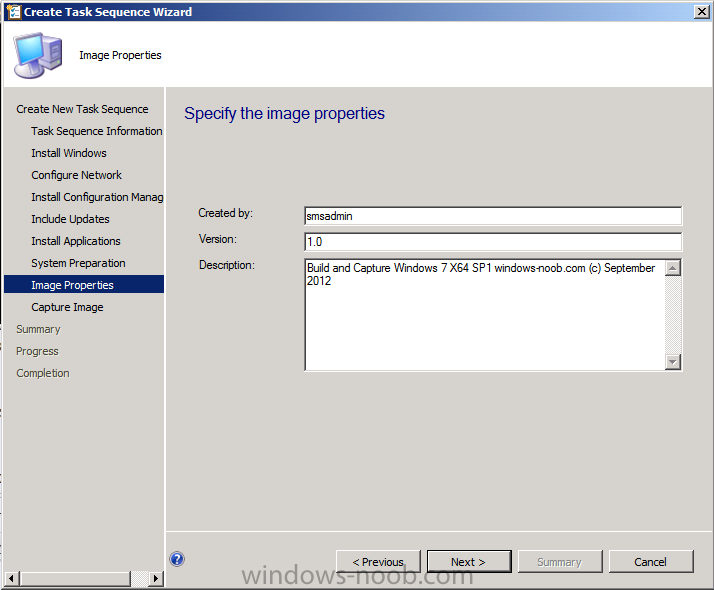
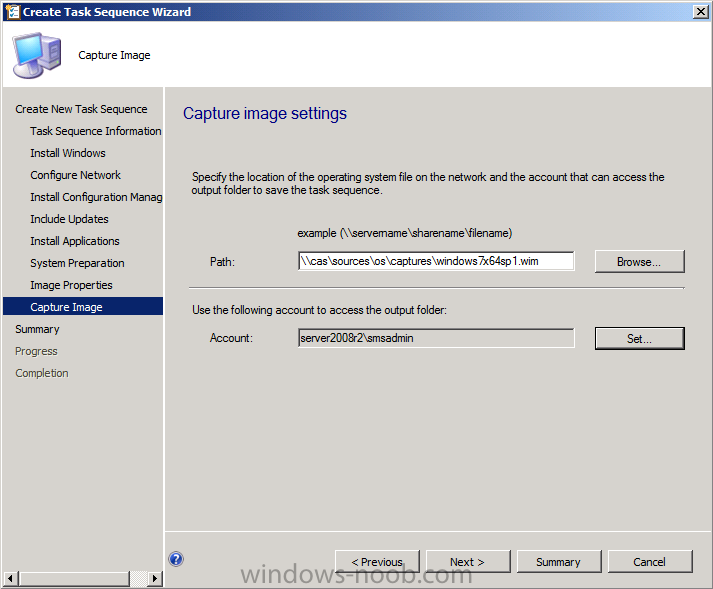
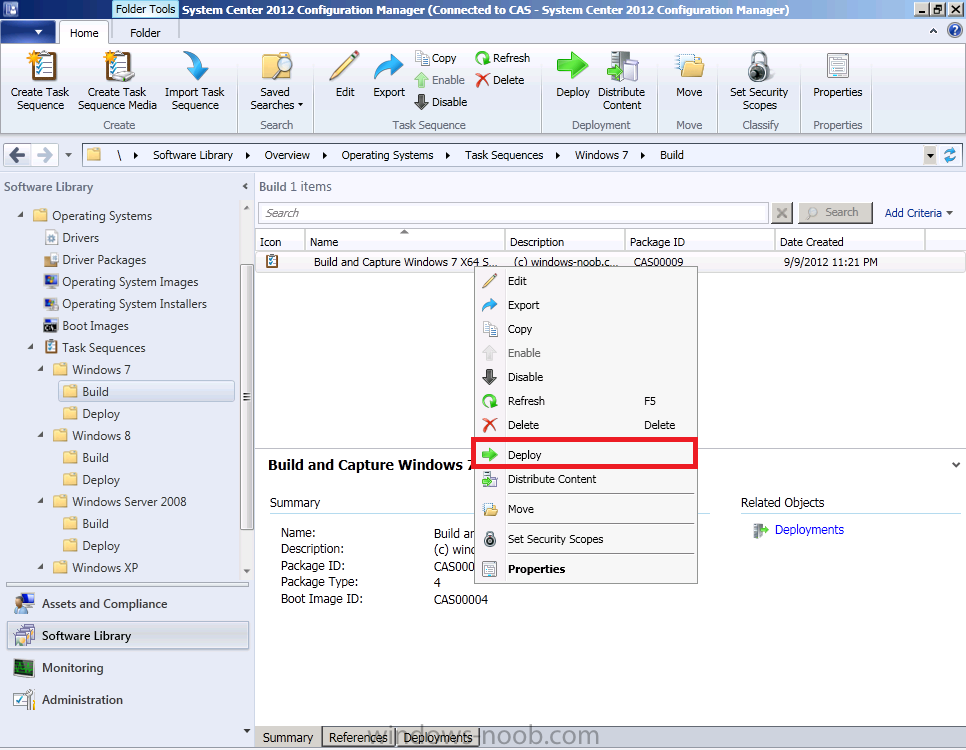
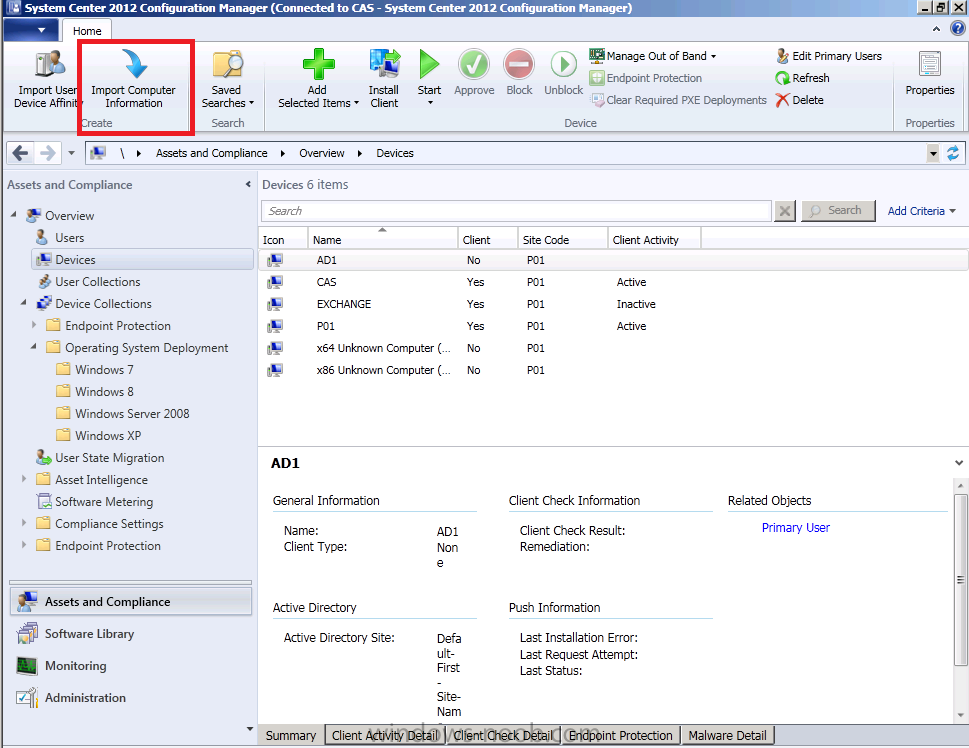
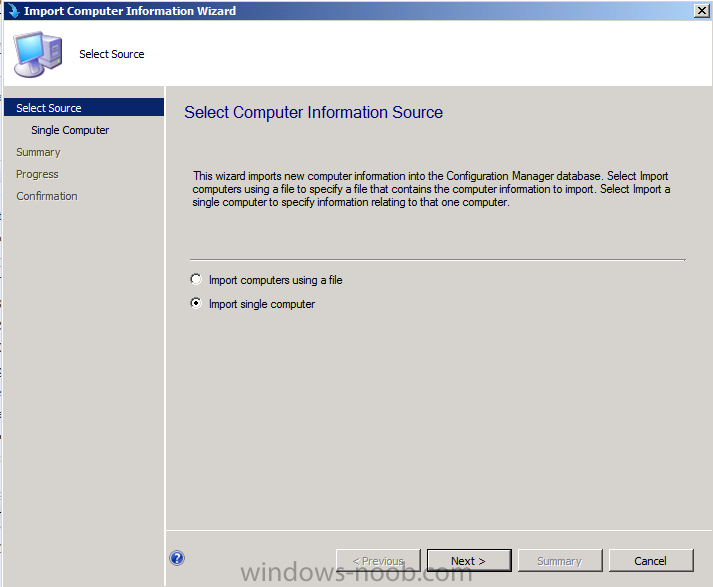
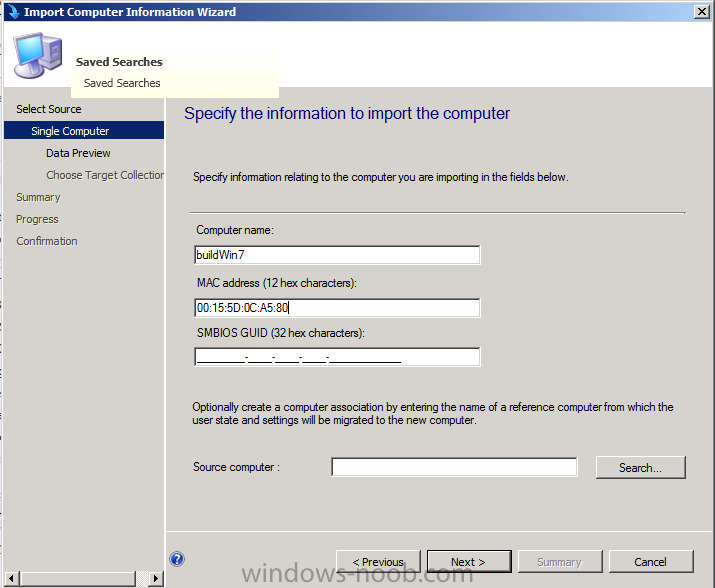
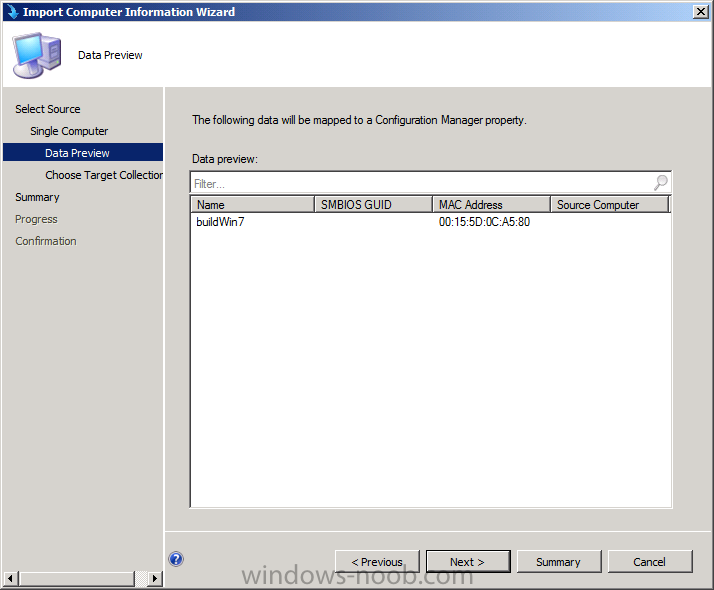
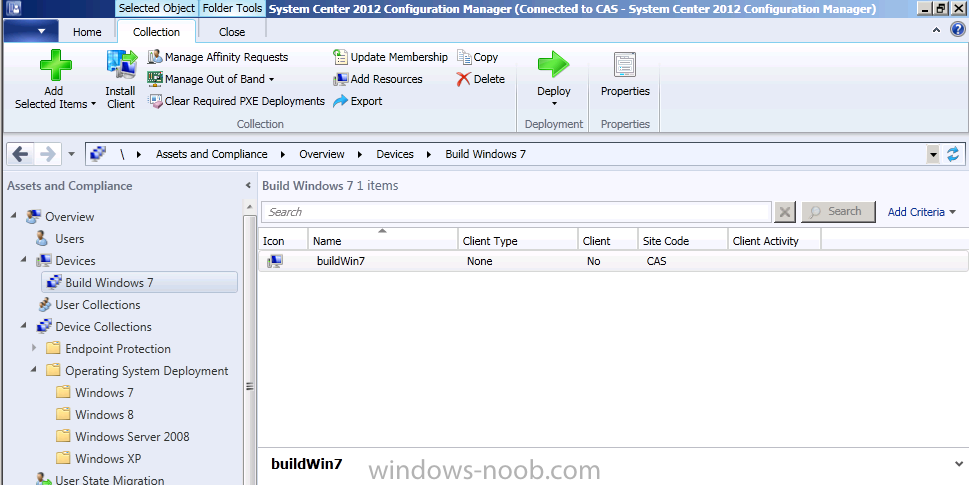
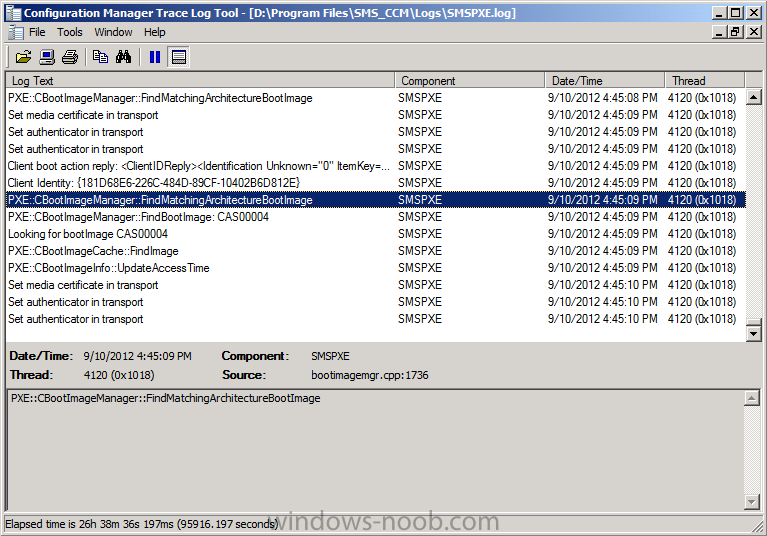
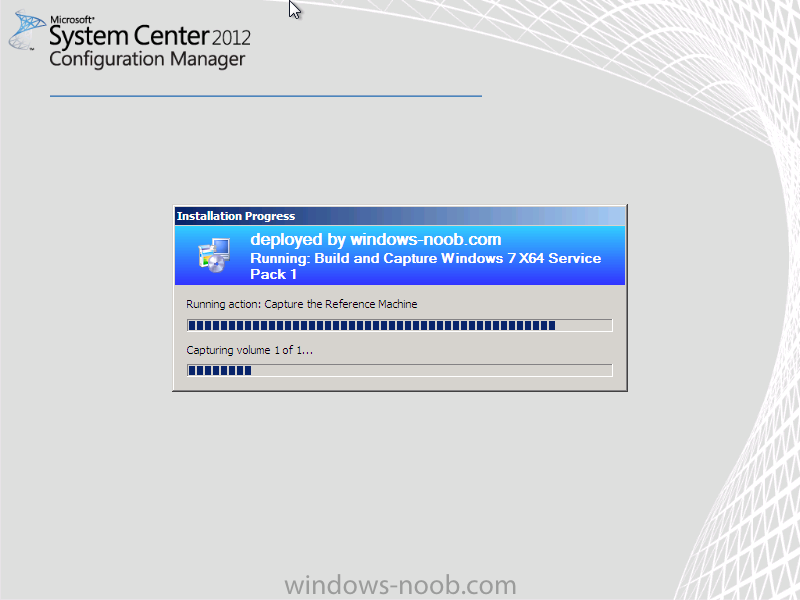
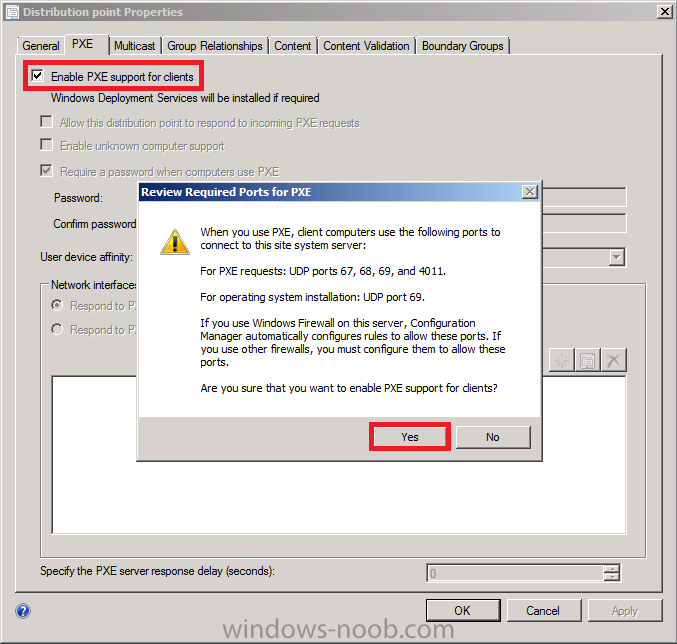
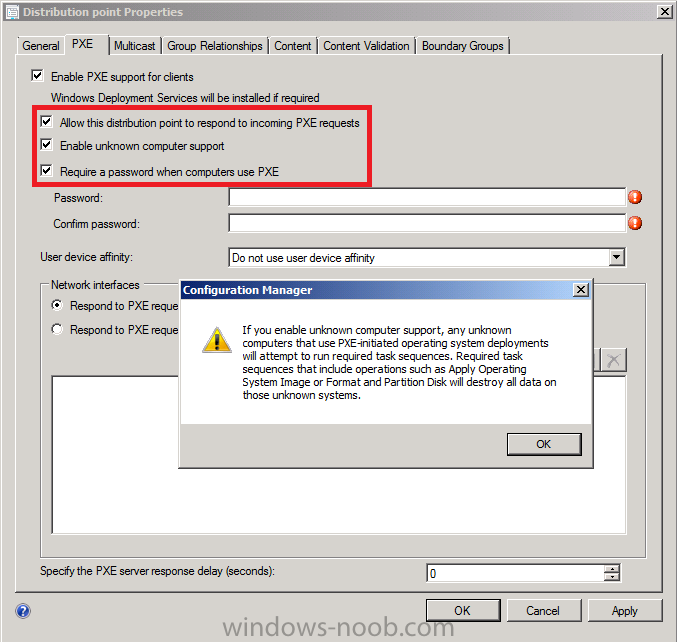
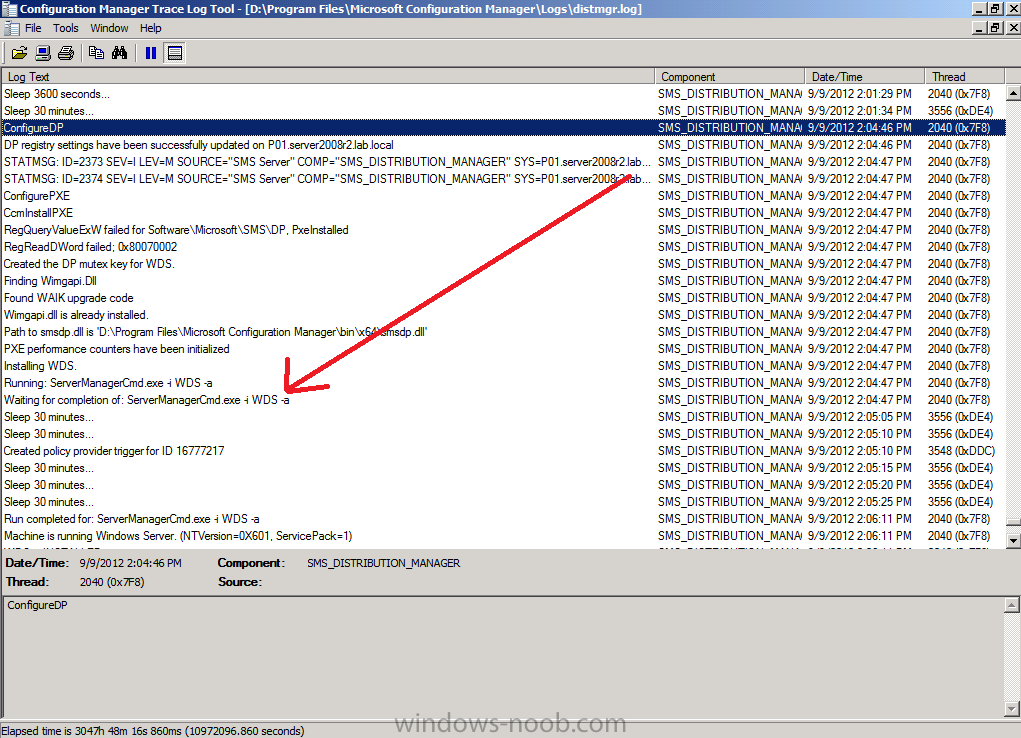
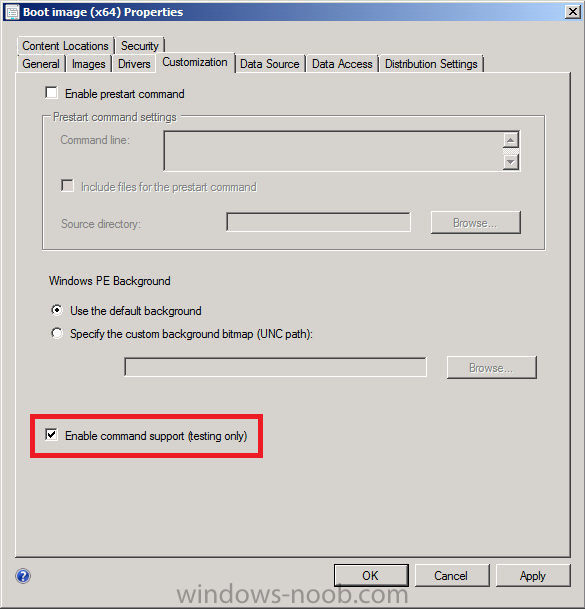
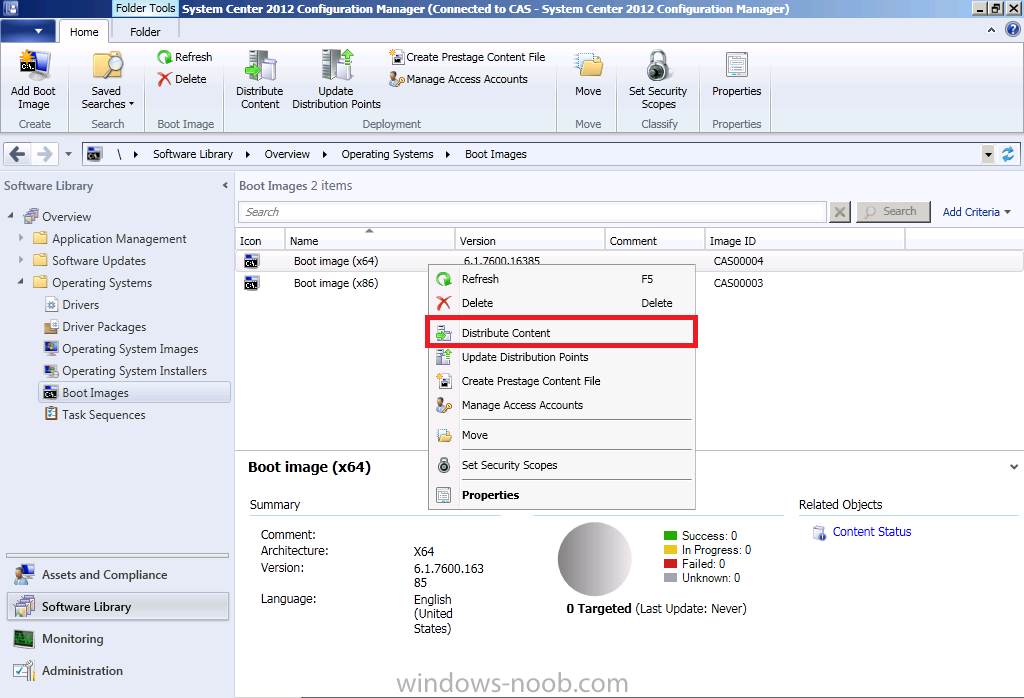
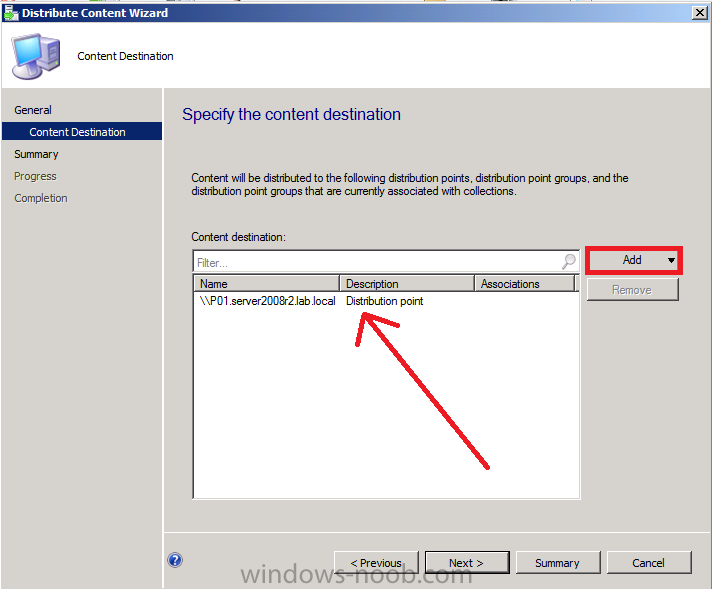
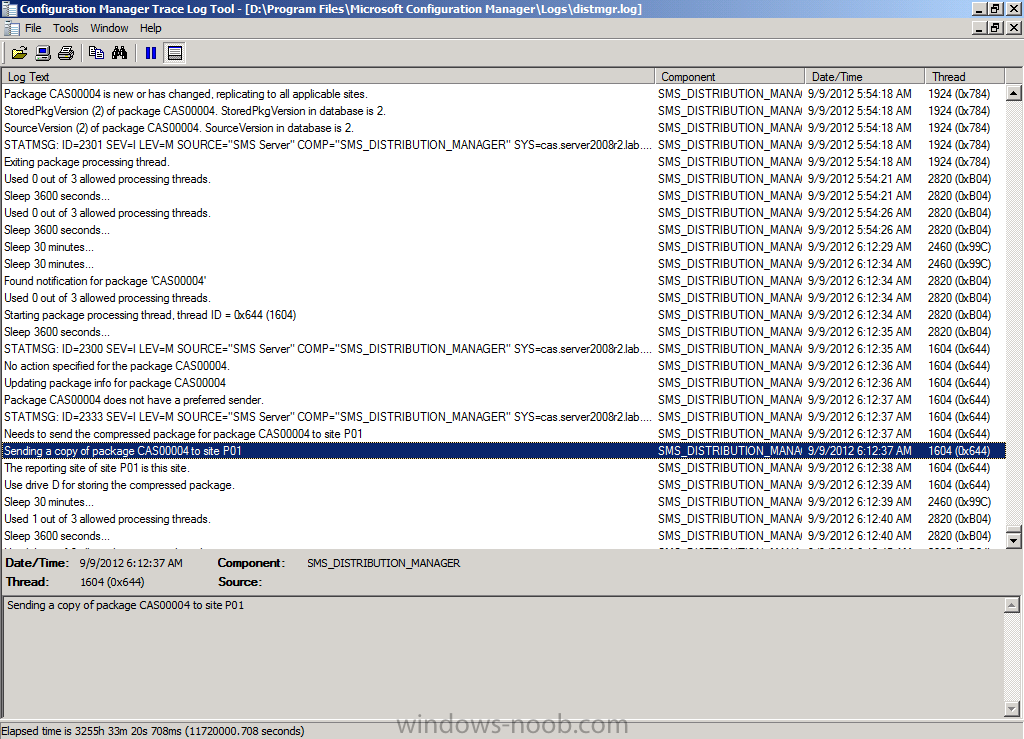
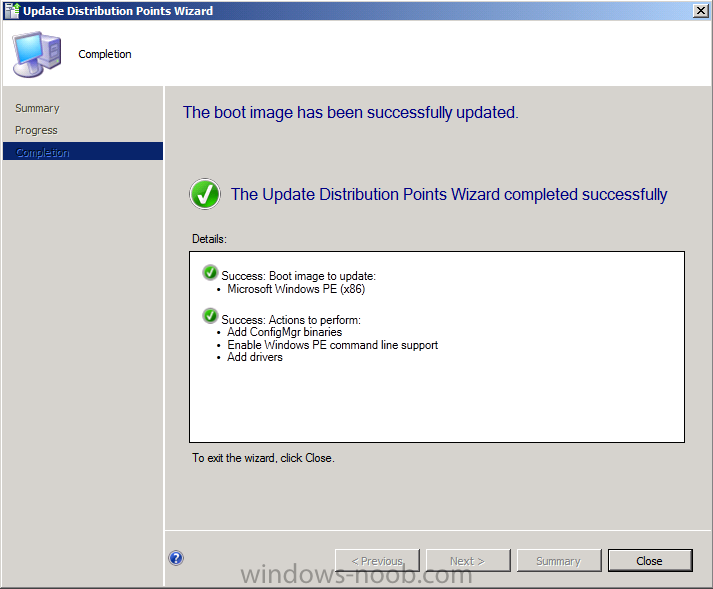
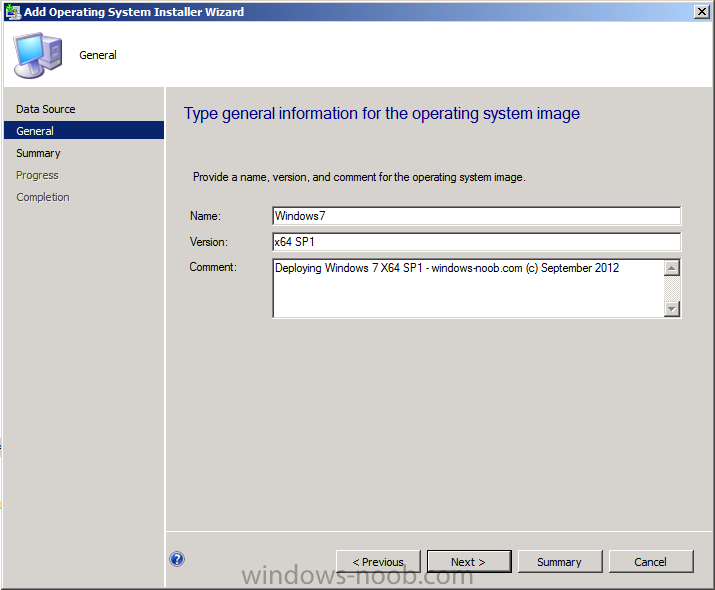
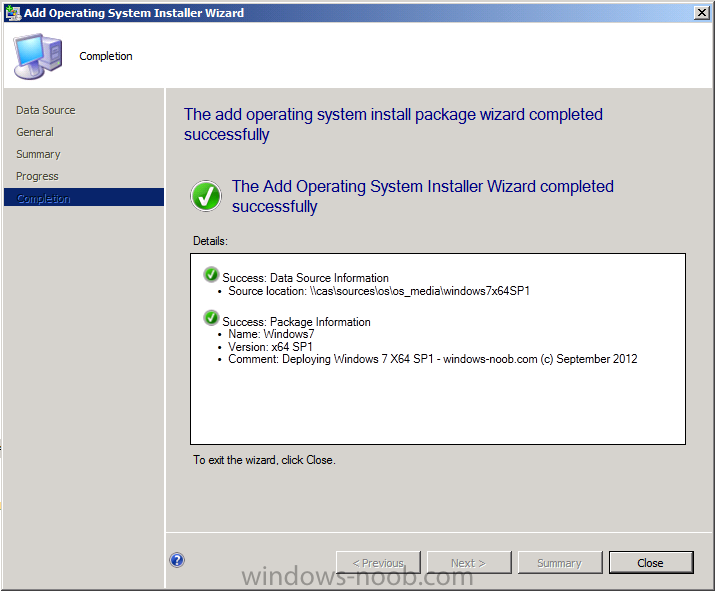
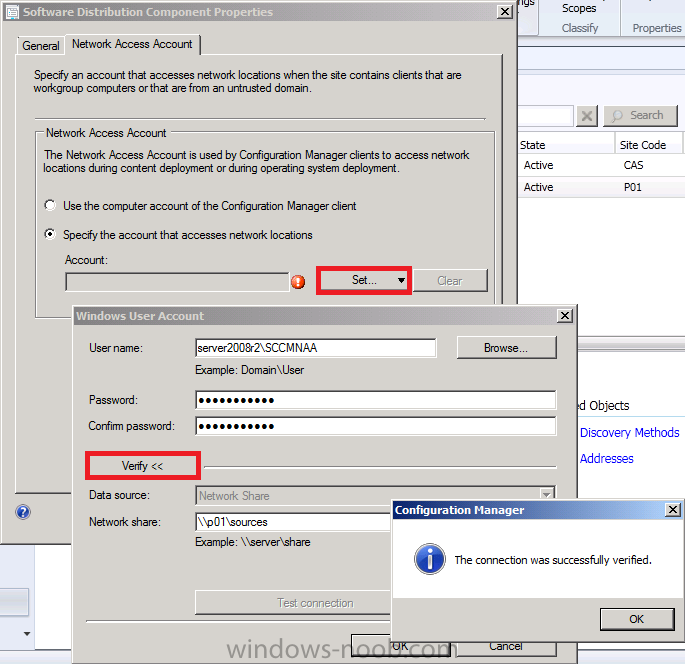
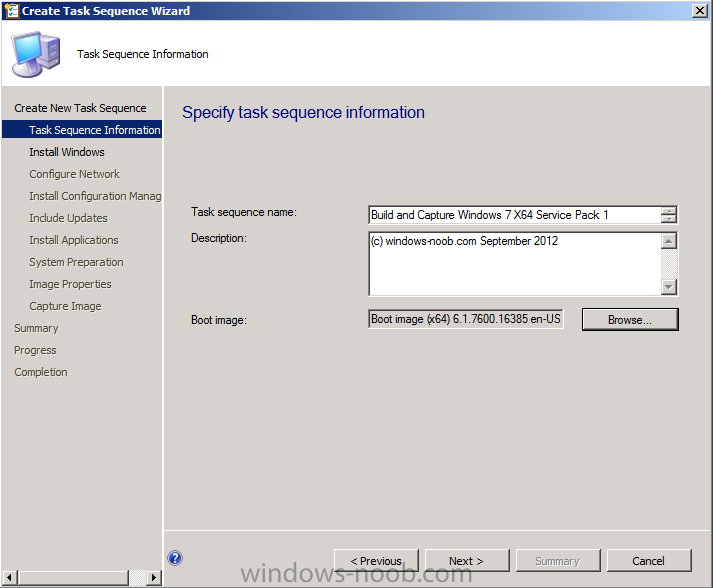
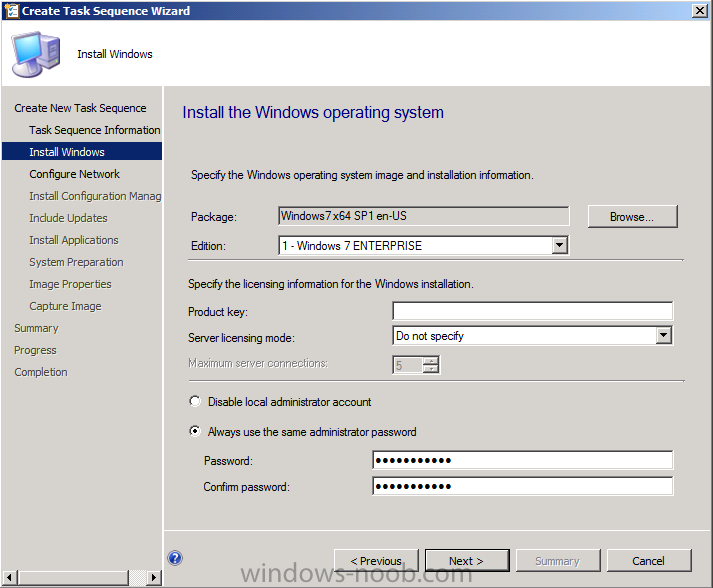
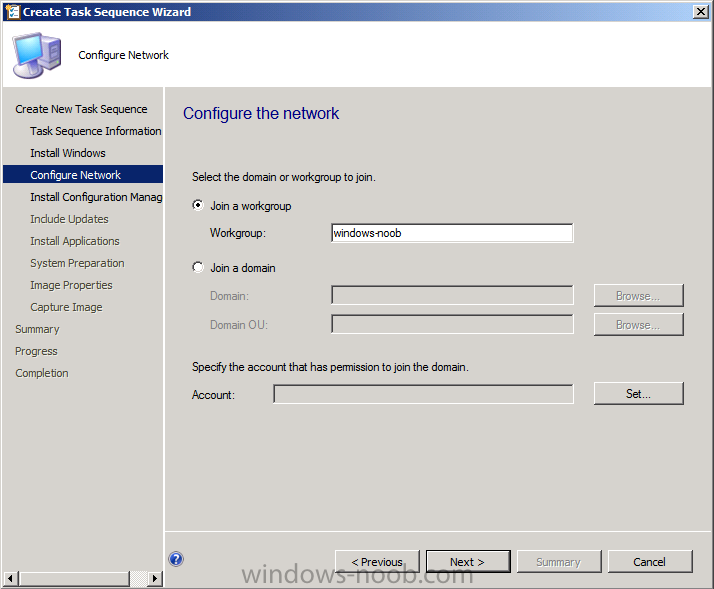
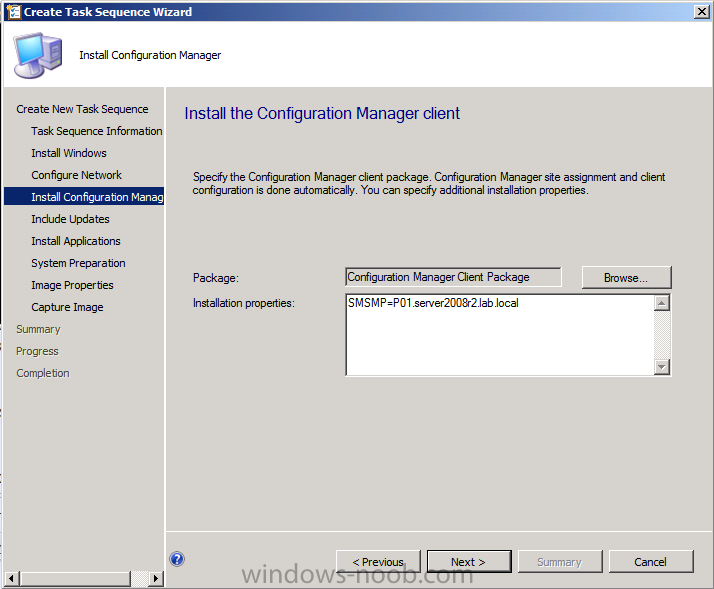
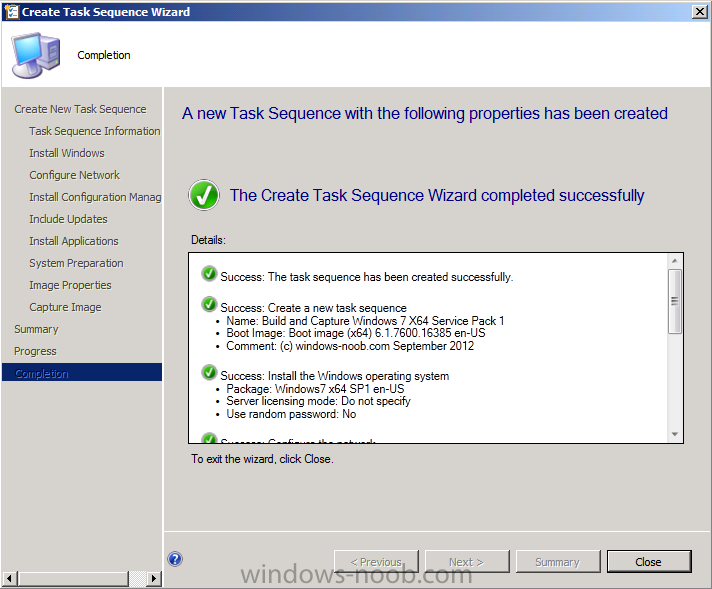
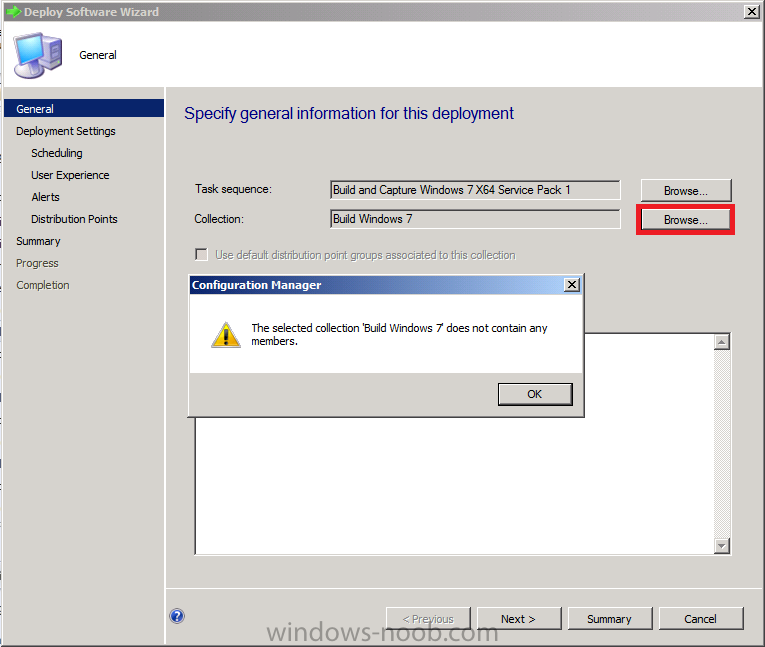
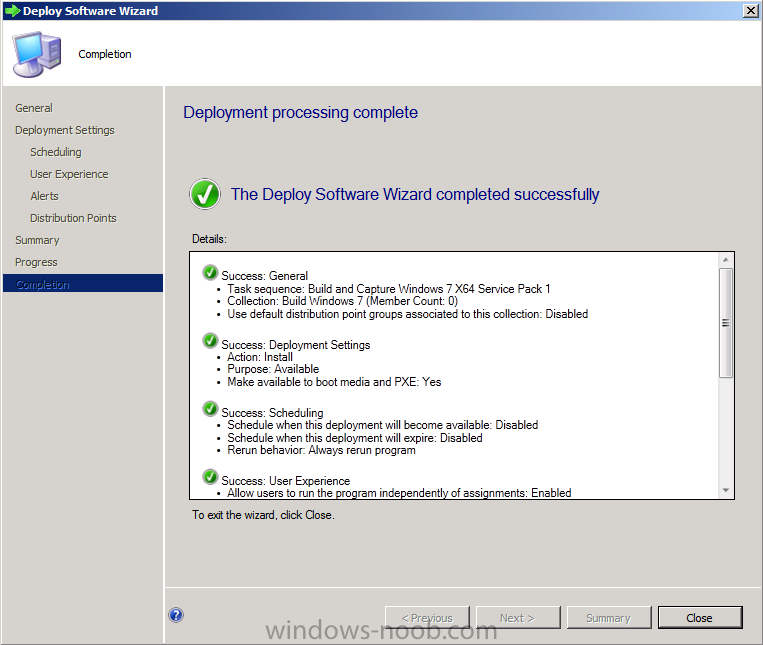
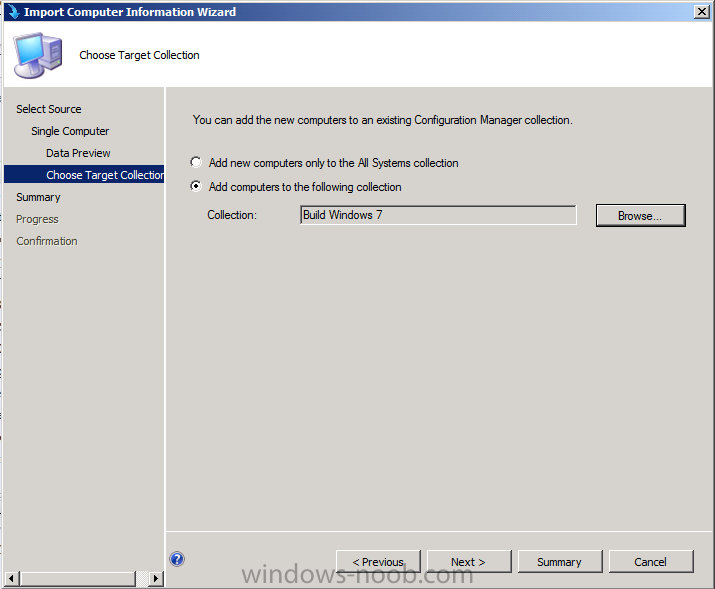
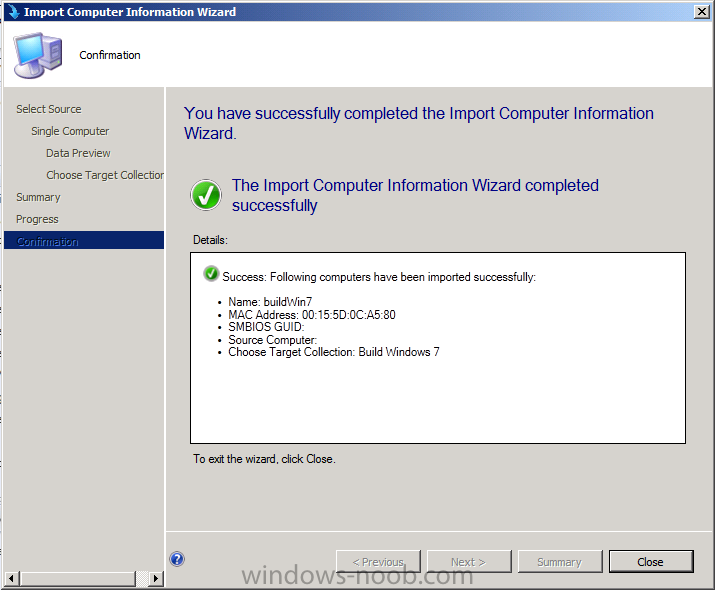
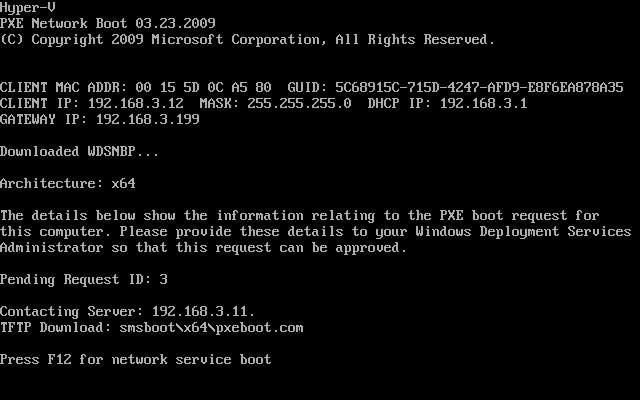
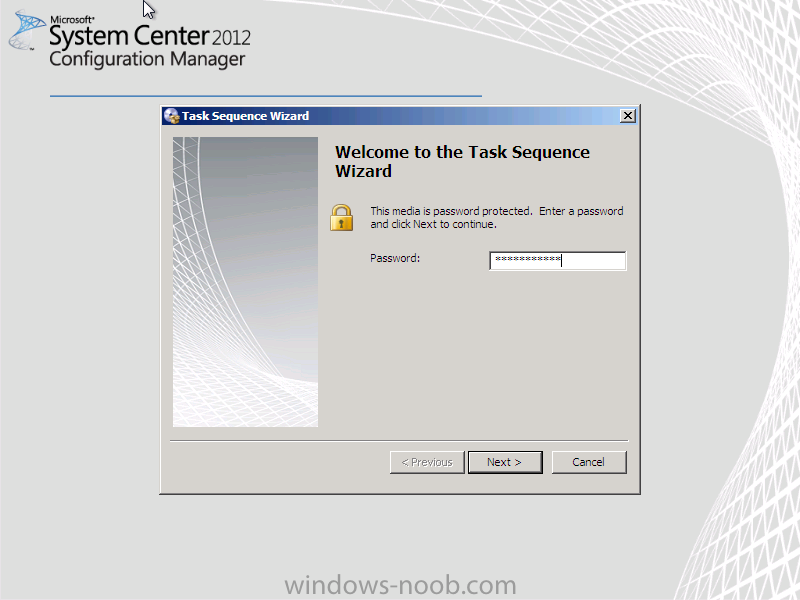
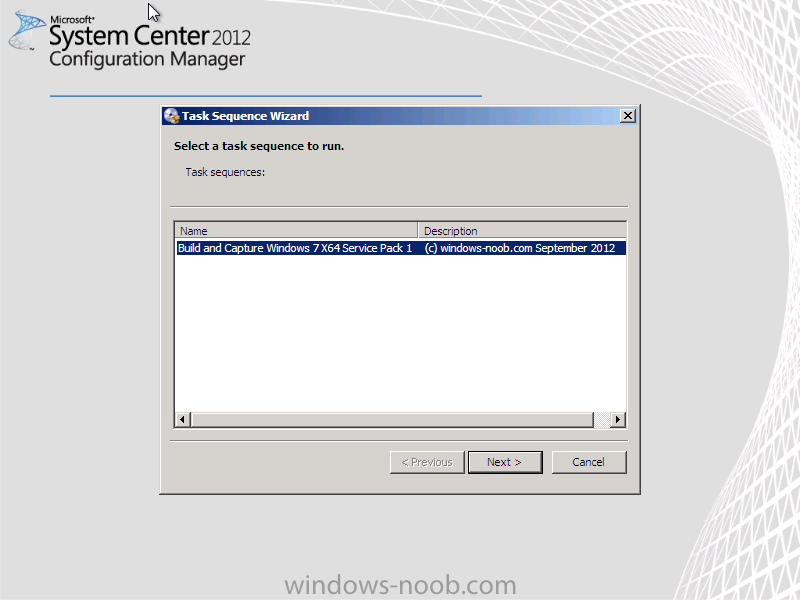
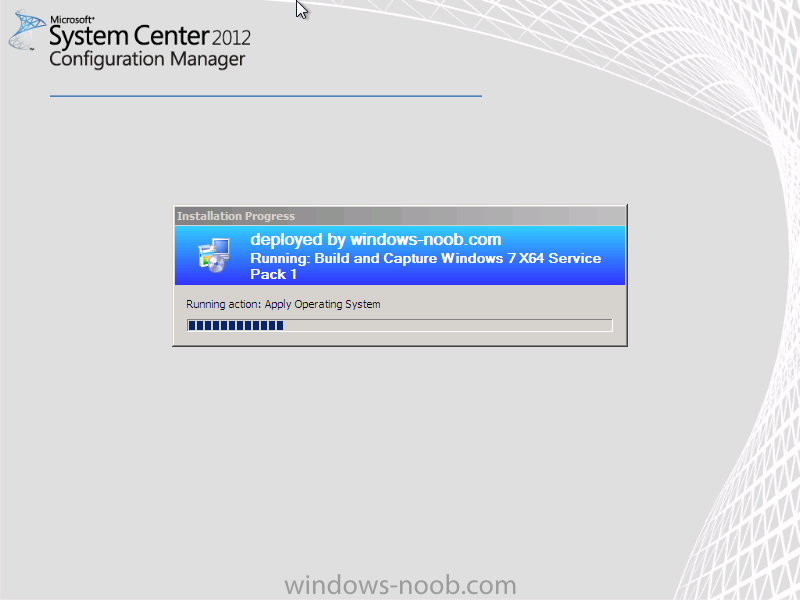
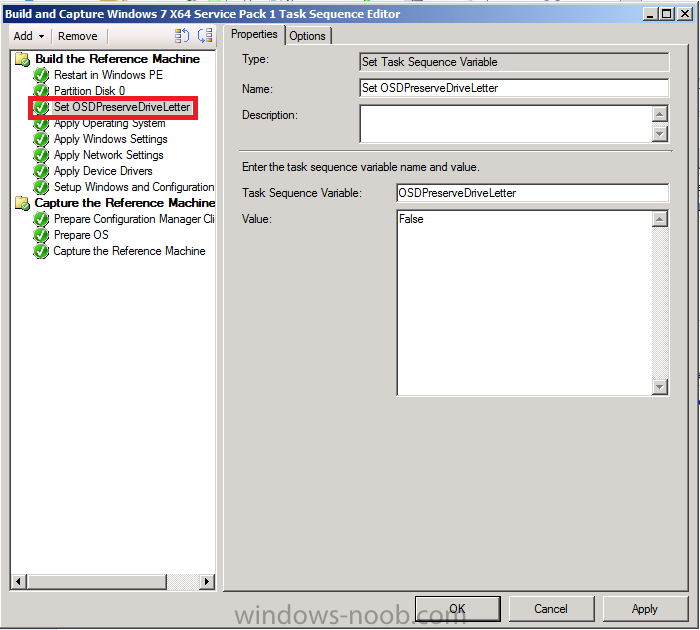
In Part 1 of this series we created our new LAB, we got the System Center 2012 Configuration Manager ISO and extracted it, then copied it to our Active Directory server. We then created the System Management container in AD, delegated permissions to the container, extended the Schema for Configuration Manager. We then opened TCP ports 1433 and 4022 for SQL replication between sites, installed some prerequisites like .NET Framework 4.0, added some features and then downloaded and installed SQL Server 2008 R2 SP1 CU6. We then configured SQL Server using SQL Server Management Studio for security and memory configurations prior to running the Configuration Manager 2012 setup to assess server readiness. Finally we installed a central administration site (CAS). In Part 2 we setup our Primary server with SQL Server 2008 R2 SP1 CU6. We then installed Configuration Manager 2012 on our primary server (P01) and verified that it was replicating to our central administration site (CAS) server. Then we configured Discovery methods for our Hierarchy and then configure Boundaries and Boundary Groups. In Part 3 we configured Discovery methods and configured boundaries and created a boundary group, we then configured them for Automatic Site Assignment and Content Location. In Part 4 we added the Application Catalog roles to our Hierarchy. We then configured Custom Client Device Settings and then deployed those settings to the All Systems collection on site P01. After that we created Custom Client User Settings and deployed them to the All Users collection in order to allow users to define their own User and Device affinity settings. In Part 5 we installed the WSUS server role (it is required for the Software Update Point role). We then installed the Software Update Point role on our CAS and Primary servers and we configured the SUP to support ConfigMgr Client Agent deployment which is a recommended Best Practice method of deploying the Configuration Manager Client Agent. In Part 6 we prepared our server for the Endpoint Protection Point role, and installed that role before configuring custom client device settings and custom antimalware policies. We then deployed those custom client device settings and custom antimalware policies to our newly created Endpoint Protection collections. Now we will add operating system deployment ability to our hierarchy, starting by adding Windows 7 X64. We will use the Build and Capture process to capture a WIM image which we can later deploy to targetted computers using network boot (PXE). PXE boot requires specific settings on our distribution points and the boot images used to deliver the operating system WIM images must also be enabled for PXE support. To get an overview of the Operating System Deployment process please review the following on Technet, and to see what's new is Operating System Deployment in Configuration Manager please see the following from Technet. Step 1. Enable PXE support on the distribution point Perform the following on the CAS server as SMSadmin In the ConfigMgr console, click on Administration, Site Configuration, Servers and Site System Roles, select our Primary Server (P01) as it is the site server hosting our distribution point role. double click on the Distribution Point role listed, select the PXE tab and place a checkmark in Enable PXE support for Clients, answer Yes when prompted about firewall ports (UDP ports 67, 68, 69 and 4011 ). next place a checkmark in the following options Allow this distribution point to respond to incoming PXE requests Enable unknown computer support Require a password when computers use PXE These options allow this distribution point to respond to incoming PXE requests and allow unknown computers to be supported, this is important as it allows you to do bare-metal deployments on unknown computers. That said, you should always think about the what-if scenarios, what-if someone PXE boots their computer by accident and sees the F12 menu, do you want them to automatically gain access to any deployed task sequences or protect yourself from possible damage, if in doubt, enable the password option for added security. When you choose to enable unknown computer support, you'll get a warning popup about required task sequences, take note of the warning and add a PXE password. Adding the PXE password does not prevent systems from being imaged but it does provide one additional layer of protection to stop systems getting imaged by unauthorised users. In addition, if you plan on using User Device Affinity select your UDA settings from the drop down menu. Note: If you want to do Zero Touch deployments then having a PXE password will involve someone having to be present at the computer in order to enter the password (in other words it won't be zero touch anymore...). Having this PXE password prompt is for your security, you do not want to be the one who has to explain to your CTO that all your servers have been imaged with Windows 7. By clicking on Apply you will add PXE support to the distribution point on the Primary server P01. If windows deployment services are not installed on the primary server then that service will be automatically added to that server as part of this configuration. If you have a primary server with multiple partitions and want the windows deployment services RemoteInstall folder to be on a specific drive then you'll need to manually install it prior to enabling this option. Tip: Monitor distrmgr.log on the P01 server to review installation of windows deployment services to support PXE boot on the distribution point on P01. See the screenshot below. Step 2. Distribute both boot images Perform the following on the CAS server as SMSadmin PXE support requires boot images on our distribution points, therefore we need both of our boot images distributed to the distribution points. On the CAS browse to the Software Library workspace, expand Operating System Deployment and locate the boot images. Right click on the X64 boot image and select Distribute Content. the Distribute Content wizard appears click Next and in the drop down Add menu select Distribution Point, select the distribution point listed (P01) continue through the Distribute Content wizard to completion. You can review the distrmgr.log file on CAS to see where it mentions that it is sending the boot image to our Primary server. Note: Don't forget to repeat the above process for both the 32 bit and 64 bit boot images, we need both Architecture boot images (x86 and x64) distributed to our distribution points. Step 3. Enable PXE support on both boot images Perform the following on the CAS server as SMSadmin In order for our computers to boot over the network we must also enable PXE boot support on our boot images. Failure to do so will mean that windows deployment services (which answers the initial PXE requests from the client computers) will fail to find any boot images and PXE boot will fail. On the CAS browse to the Software Library workspace, expand Operating System Deployment and locate the boot images. Right click on the X64 boot image and select properties. Select the Data Source tab and enable the following option Deploy this boot image from the PXE service point. while you are there, select the Customization tab and enable command prompt support (this gives us the ability to troubleshoot deploying images by pressing F8 during deployment, having this functionality will bring up a command prompt once the F8 key is detected, this will allow you to browse the computer in question and locate the SMSTS log files for troubleshooting.) Click Apply when ready, and answer Yes to the distribute images prompt. you will see an update distribution points wizard appear, click Next through the wizard until completion. This takes some time to complete, therefore give yourself some time to complete this task. Note: Don't forget to repeat the above process for the both the 32 bit boot image and the 64 bit boot image. We need both Architecture boot images (x86 and x64) distributed to our distribution points with the PXE options enabled on them. Tip: you can open the SMSProv.log file in CMTrace to review the progress of the boot image changes being made, infact in that log file you can even see that the CMtrace tool itself is now being copied into our boot images by default. Step 4. Enable the Network Access Account. Perform the following on the CAS server as SMSadmin The Network access account is needed during operating system deployment in WinPE to access content on the network which is referenced by the task sequence. This account might also be used during operating system deployment when the computer installing the operating system does not yet have a computer account on the domain. In the ConfigMgr console, select Site Configuration, then click on Sites and right click on our Primary site P01, choose Configure Site Components, Software Distribution (alternatively in the ribbon click on Settings, Configure Site Components, Software Distribution) Click on the Network Access Account tab to specify your Network Access Account user, choose new user, input the user credentials and test the connection (point it to the primary server as a connection test as that's where it will be getting content from) click apply and you are done. Step 5. Add the Windows 7 X64 operating system Perform the following on the CAS server as SMSadmin In System Center 2012 Configuration Manager RTM we use the Setup.exe method of deploying Windows which involves using the entire operating system image media (operating system installer). There are changes to this method in Service Pack 1, however this guide was written when RTM was the only version available, if you are using SP1 then read this post. In this step we will use the Build and Capture process based on an operating system installer image (Setup.exe), this is applicable for Configuration Manager 2012 RTM. In the Operating System Deployment section of the Software Library workspace, select Operating System Installers and right click, choose Add Operating System Installer point to the path where you have previously extracted your Windows 7 X64 files (I mounted the en_windows_7_enterprise_with_sp1_x64_dvd_u_677651.iso and extracted it to \\cas\sources\os\OS_Media\Windows7x64SP1) fill in some details about the image and click next through to completion of the wizard. Step 6. Distribute the Windows 7 X64 operating system Perform the following on the CAS server as SMSadmin In order to access any content it needs to be on a distribution point (which is essentially a network share). Right click on our newly added Operating System installer image and choose Distribute Content, add the P01 distribution point in the Add drop down menu, and continue through the wizard until completion Step 7. Create some folders and collections Perform the following on the CAS server as SMSadmin In order to simplify our operating system deployment process we will create some folders and collections in the following format, one Folder with two or more collections limited to All Systems within. Operating System Deployment (Folder) |___Windows 7 (Folder) |__________________Build Windows 7 (Collection) |__________________Deploy Windows 7 (Collection) The collections do not need any membership queries and will be empty, below is a sample of what to create in Assets and Compliance workspace, Device Collections. You can create them all manually in a couple of minutes or use a powershell script. In Addition to the above, browse to Software Library, Operating System Deployment and select the Task Sequences node, create a similar set of Folder names to further categorize your task sequences, this is optional but recommended as it will make it easier to work with task sequences in the future. Step 8. Create a Build and Capture Task Sequence Perform the following on the CAS server as SMSadmin Navigate to the Windows 7 Build folder in Task Sequences and Right click, choose Create Task Sequence choose Build and Capture a reference operating system from the choices fill in some details about the image, make sure to select a 64 bit boot image when build and capturing a 64 bit image, it is fine to deploy a 64 bit boot image with a 32 bit boot image but for the capture process you need to select a 64 bit boot image. for the Install Windows step, select our previously added operating system installer image and specify a local administrator password Note: [update] if you are completing this guide using Configuration Manager 2012 SP1 then this option is not available, instead, select the WIM file from a previously captured WIM image or point to the Install.WIM file on the Windows media. Please see this post for details for the Configure Network step, choose Workgroup and enter a workgroup name for the Install Configuration Manager step select the built in Configuration Manager client package, for installation properties fill in the FQDN of our primary site so that it knows where the Management Point is if you want to install applications or windows updates. SMSMP=P01.server2008r2.lab.local Tip: you could create a Configuration Manager Client Package from Defintion if you want to have control over the abilit to access this content directly from a distribution point. The built in package does not give you this flexibility as all options are greyed out. however in this example we will not be installing any windows updates or applications until later in the series, so go ahead and click through the next three screens without selecting anything Install Software Updates Install Applications System Preparation and then fill in some properties about the image you are about to capture At this point you are ready to PXE boot your computer. fill in the Capture image settings and make sure that the user specified has appropriate access to the share specified otherwise the capture will fail continue the wizard through to completion. Step 8a. Edit the task sequence Tip: The steps below are for Configuration Manager 2012 SP1 and later otherwise Windows may install on D: Edit the task sequence by right clicking and choose Edit Note: make sure the step occurs before the Apply Operating System Step The step should be a Set Task Sequence Variable step called Set OSDPreserveDriveLetter and set the variable OSDPreserveDriveLetter to false as in the screenshot below when done editing, click Apply and Ok to close the Task Sequence Step 9. Deploy the Task Sequence Perform the following on the CAS server as SMSadmin Locate our newly created task sequence, right click and choose Deploy select the Build Windows 7 collection and click ok to the message (we will add our client in the next step) for Deployment Settings keep the deployment as Available (optional) and make sure to select Make available to boot media and PXE, that makes it three places that you need to select a PXE option:- * on the PXE tab of the distribution point properties * on the Data Source tab of the boot image *on the Deployment Settings of the task sequence deployment continue through the rest of the task sequence deployment wizard until completion. Step 10. Import computer into the Build Windows 7 collection Perform the following on the CAS server as SMSadmin Next you need to import a computer into our Build Windows 7 collection so that it will have the Build Windows 7 task sequence made available to it. To do this click on devices in Assets and Compliance, and in the ribbon click on Import Computer Information. select the second option, import single computer enter the name and MAC address for this computer (for name you can call it whatever you want, for MAC address use the MAC address of the Network card used to PXE boot the computer.) review your data in the Data Preview for the Choose Target Collection step enter the Build Windows 7 collection and then click through the rest of the wizard until completion. The above creates a Direct Membership query in the membership rules tab of the Build Windows 7 collection. Refresh the collection so that you can see the imported computer before continuing, if it doesnt appear ty to update membership then refresh. . Step 11. PXE boot our computer Perform the following on the virtual machine used for build an capture On your virtual machine, PXE boot and you should see the standard F12 menu for PXE boot. You did set the network card as the first boot device didn't you ? ;-) If you don't see any PXE messages then check bios boot order on your Virtual Machine (use Legacy Network cards in HyperV) and reveiw the SMSPXE.LOG. Tip: To troubleshoot PXE issues open the SMSPXE.log file located on D:\Program Files\SMS_CCM\SMSPXE.LOG on your Primary server P01 using CMTrace to get a live scrolling view of whats happening. Notice that the PXE boot screen gives you a lof of information which can help with your troubleshooting, such as the Client IP address and ip address of your DHCP server. Press F12 when prompted... enter your PXE password select your Build and Capture Task sequence and off it goes, time for a well deserved break while Configuration Manager automatically does it's thing and captures your master Windows 7 image. Tip: if you want your Organization name listed instead of IT Organization change it in Computer Agent section of the Default Client Device Settings. and that's it, the image gets deployed too our virtual machine and finally captured to our network share that we specified in the task sequence in a later part of this series we will deploy the captured image using a separate task sequence, and customize it to work with different hardware, add some applications and windows updates. In the next part, we will learn how to Deploy Applications


 1 point