Leaderboard
Popular Content
Showing content with the highest reputation on 08/27/21 in all areas
-
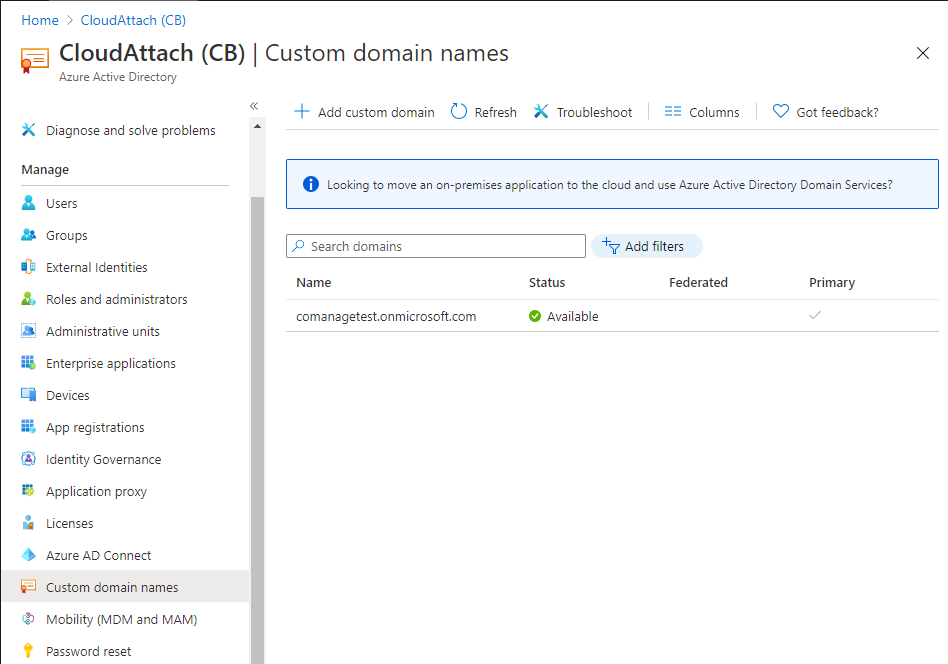
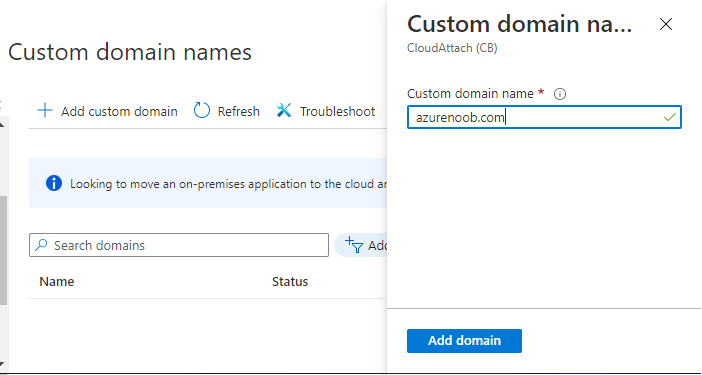
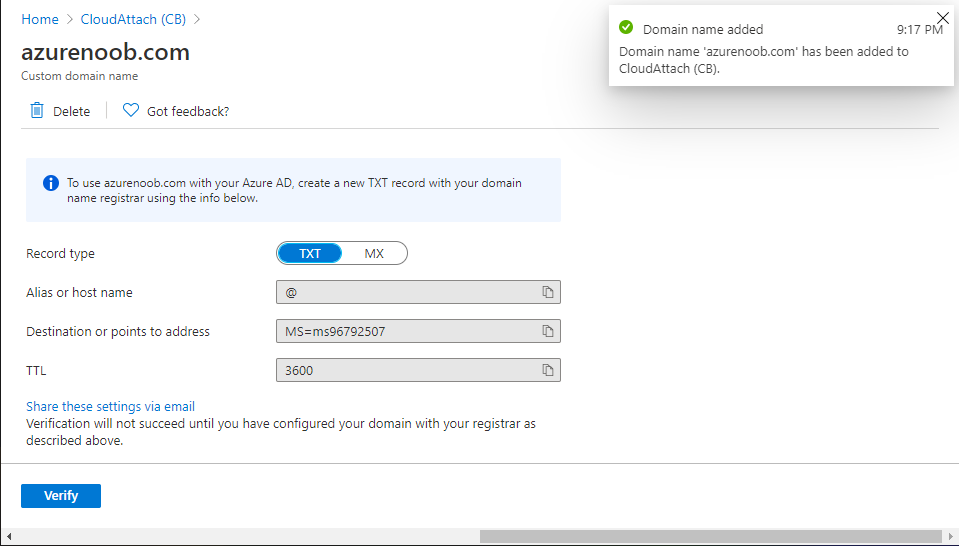
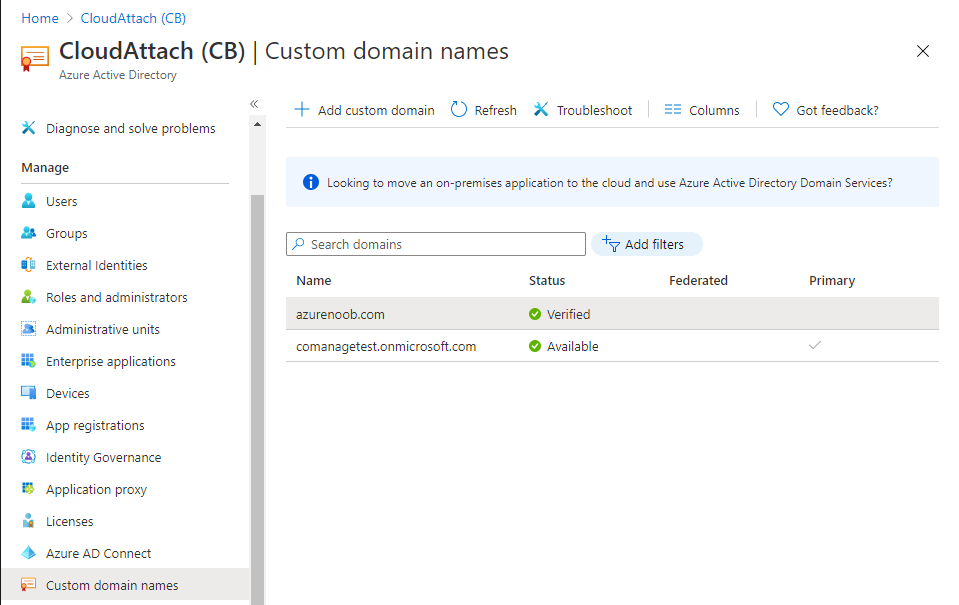
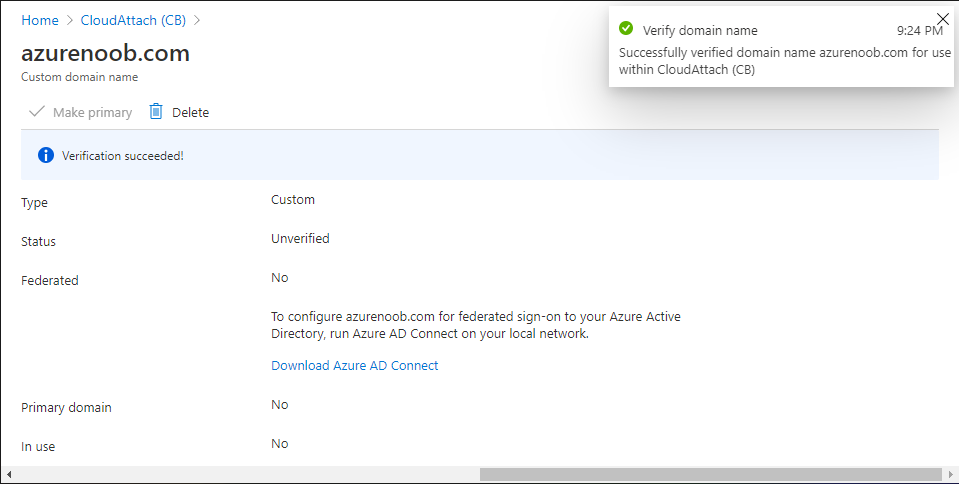
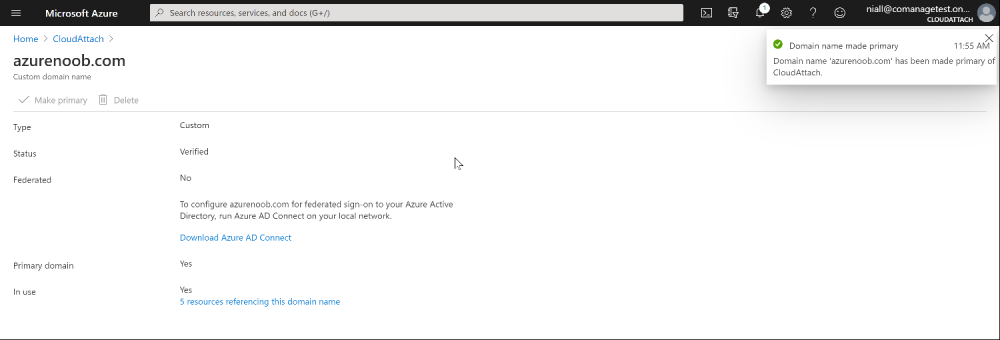
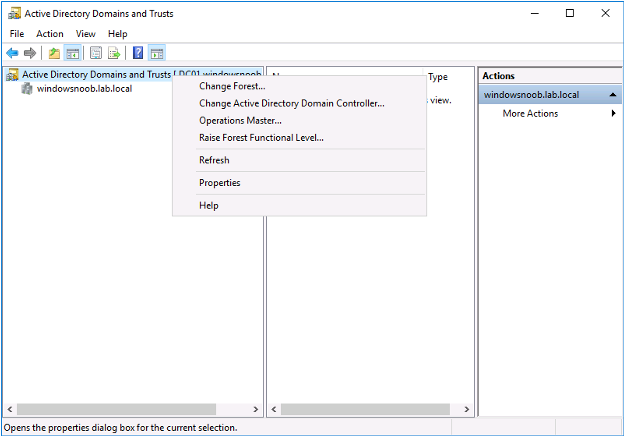
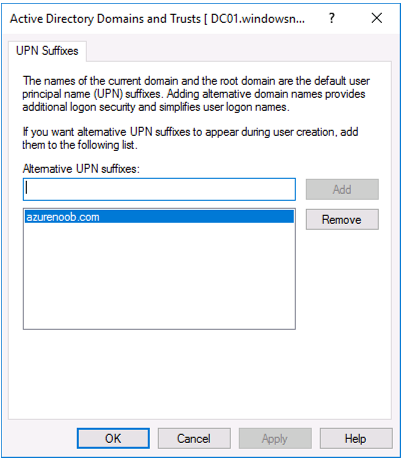
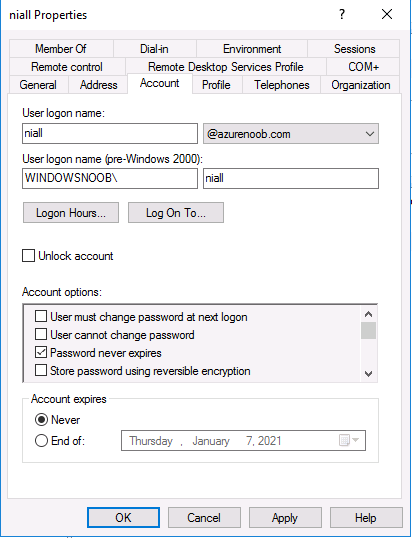
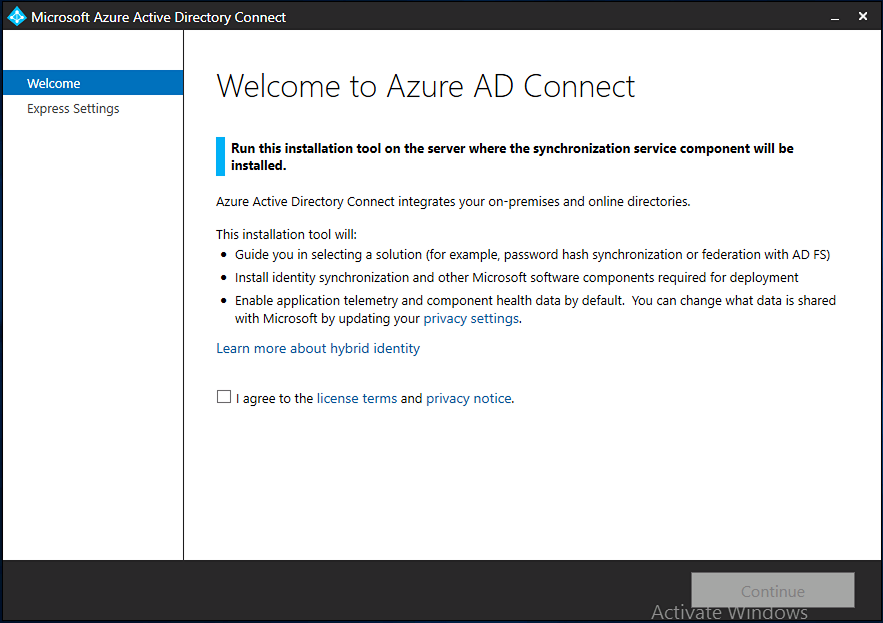
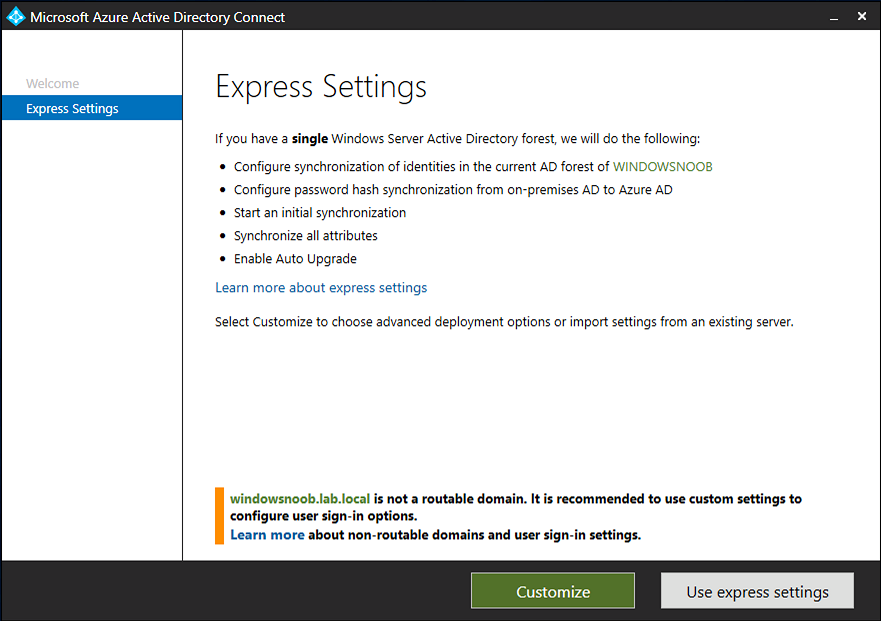
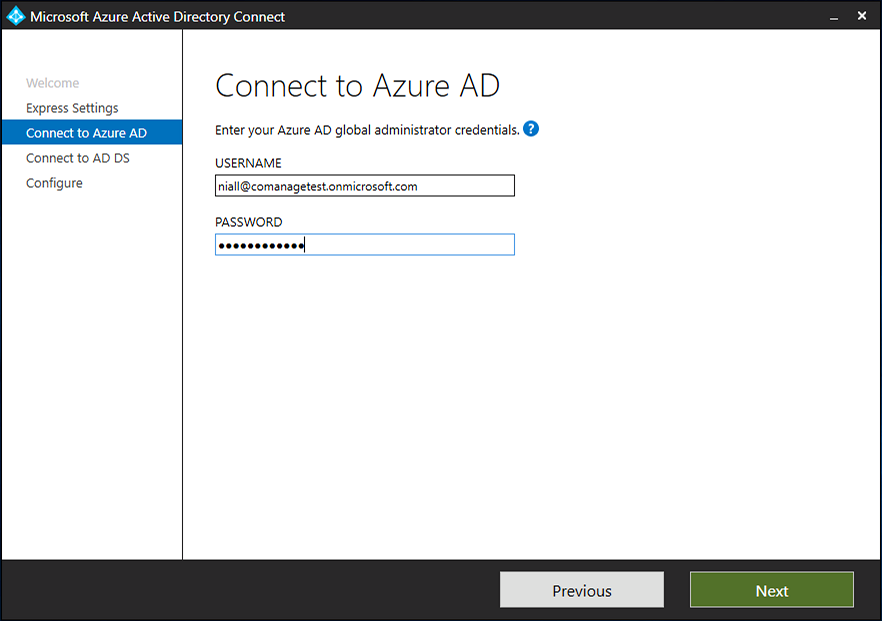
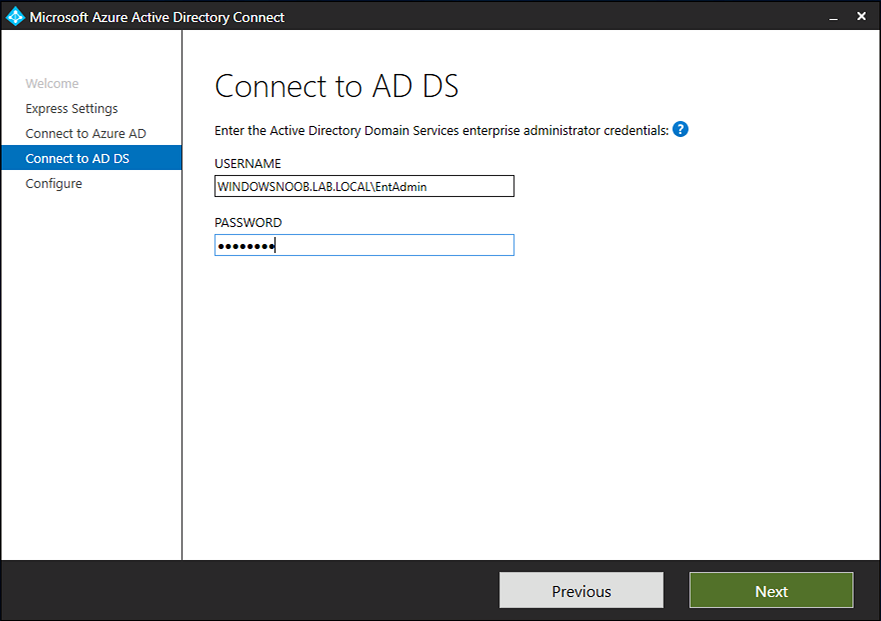
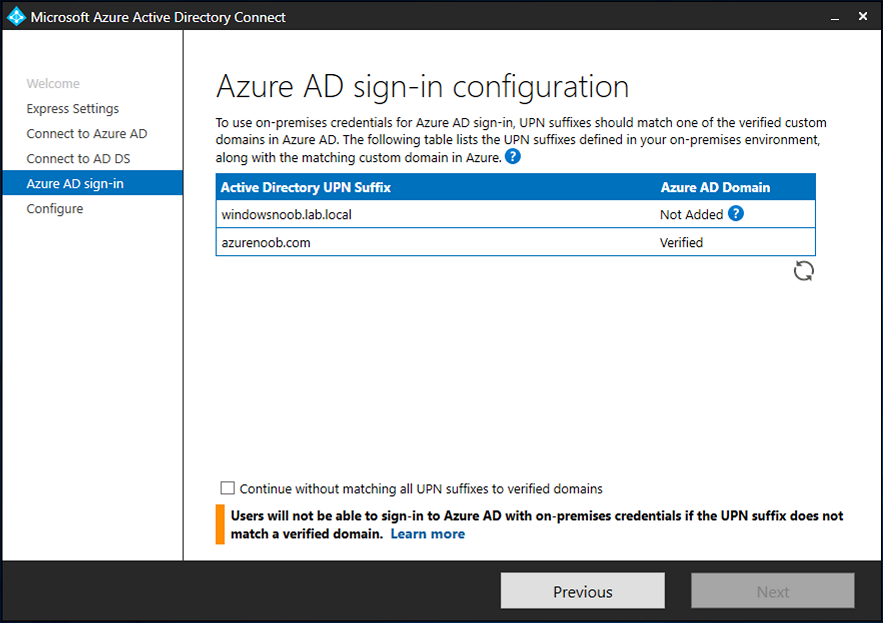
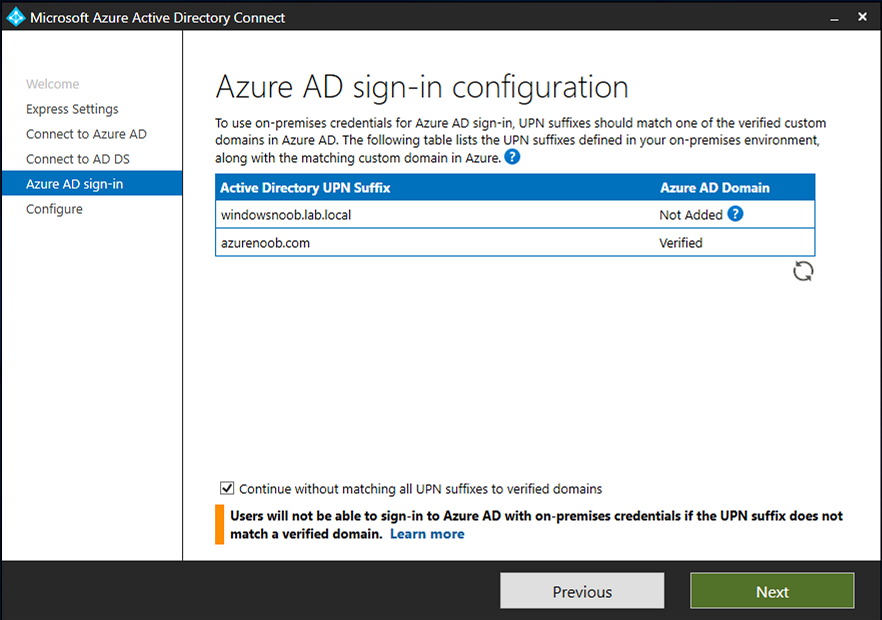
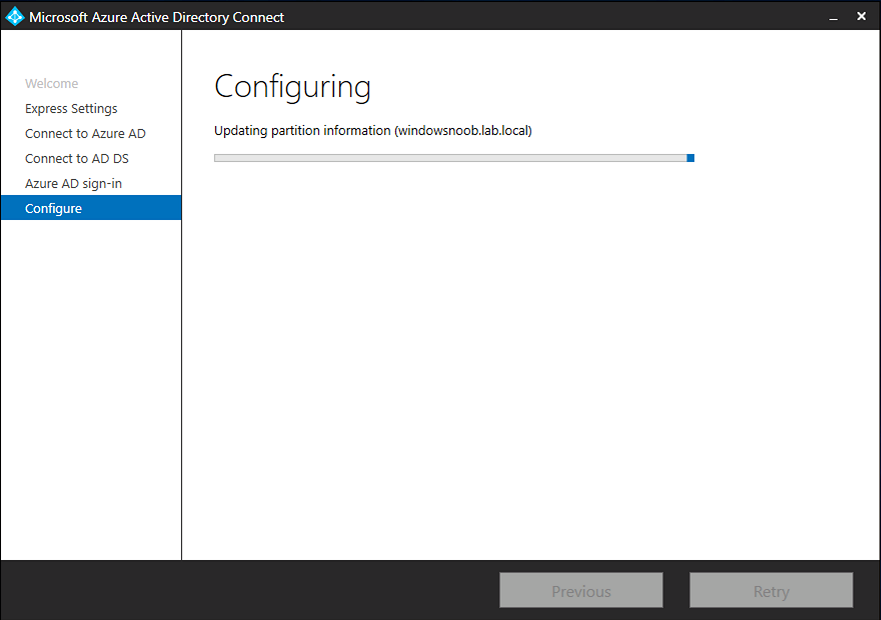
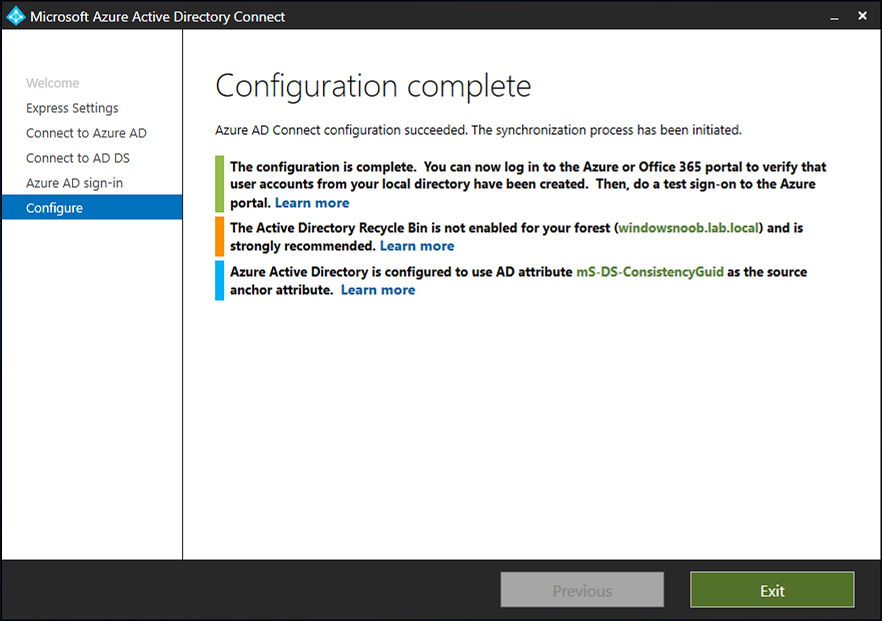
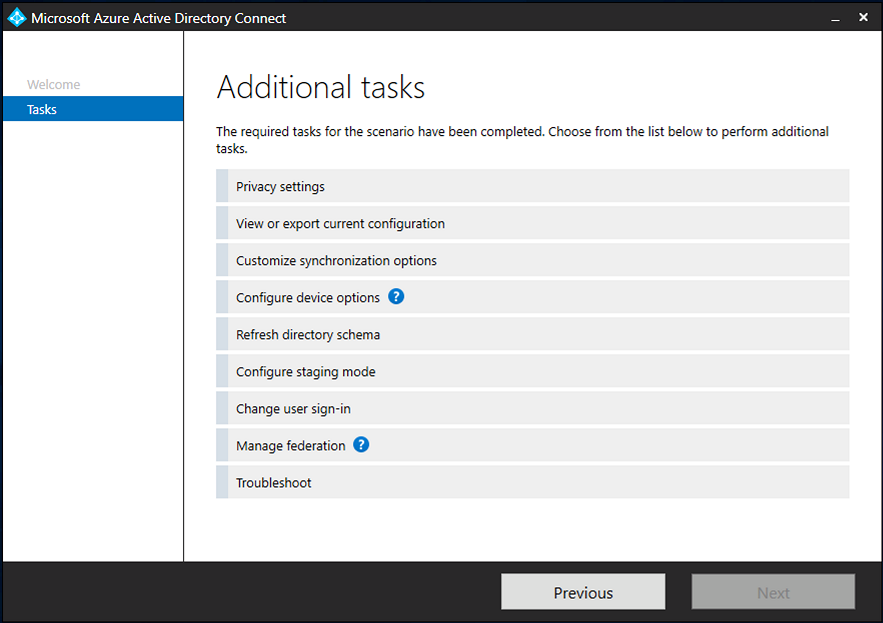
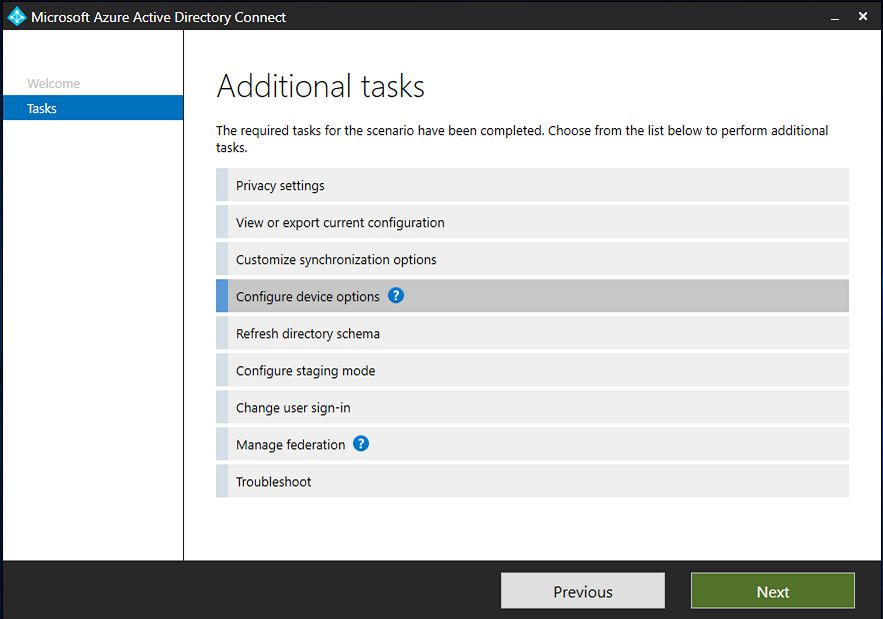
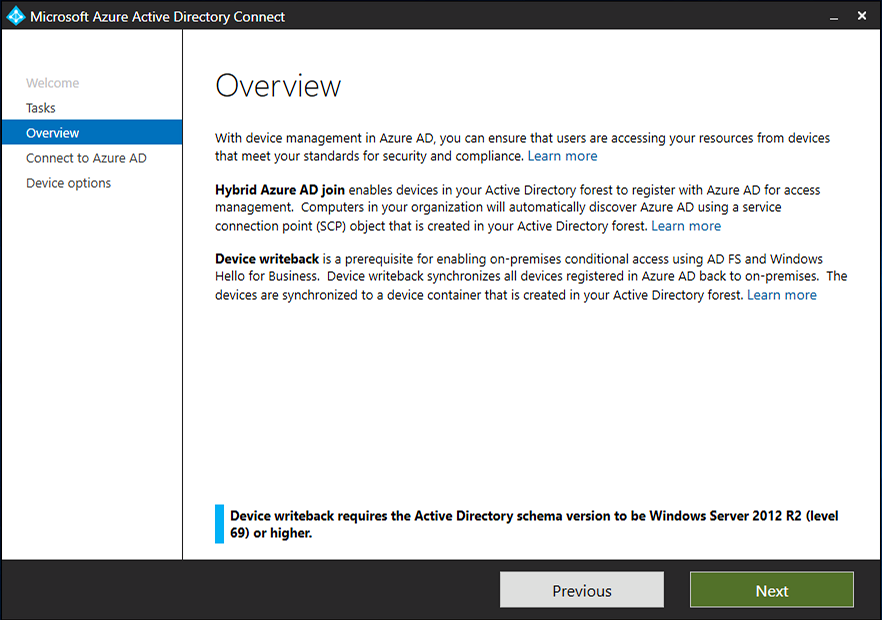
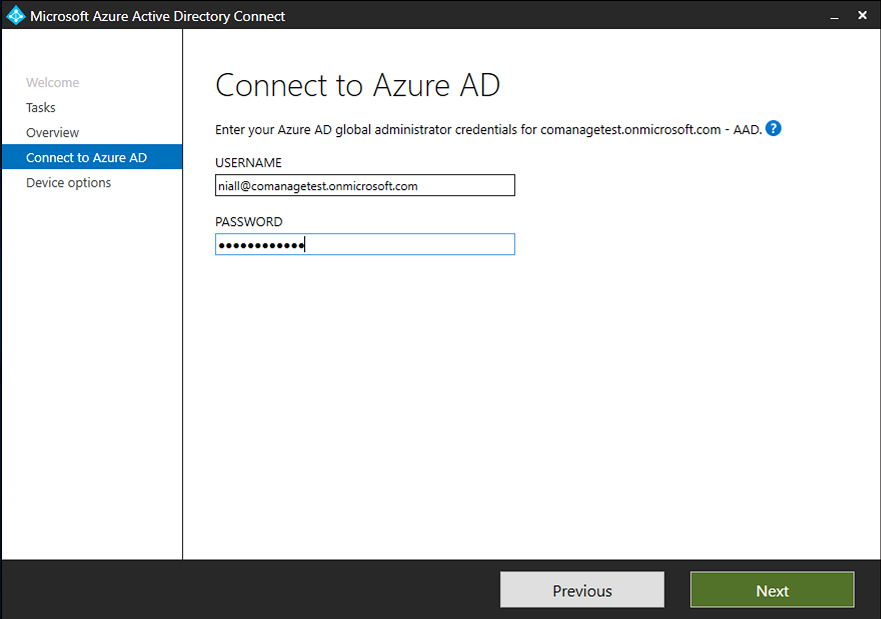
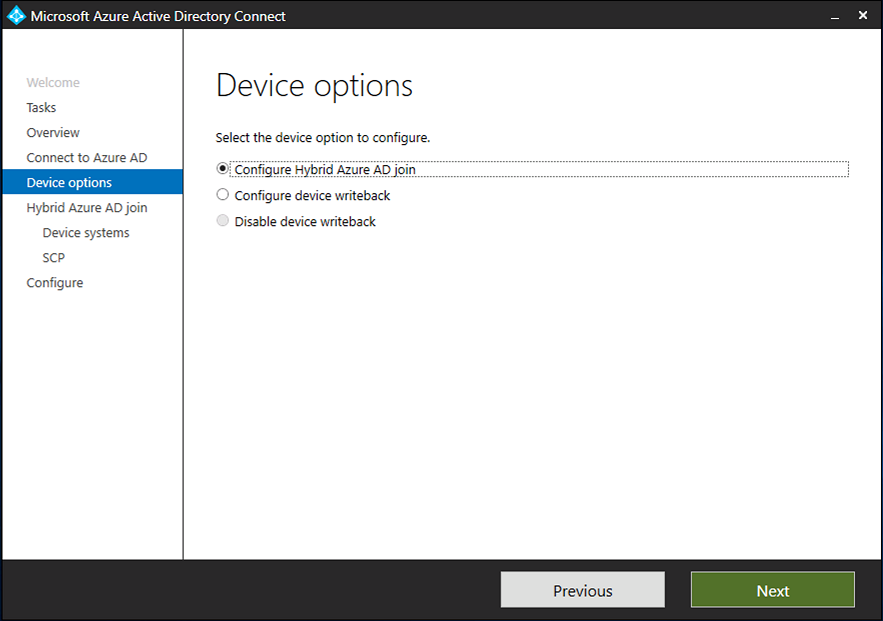
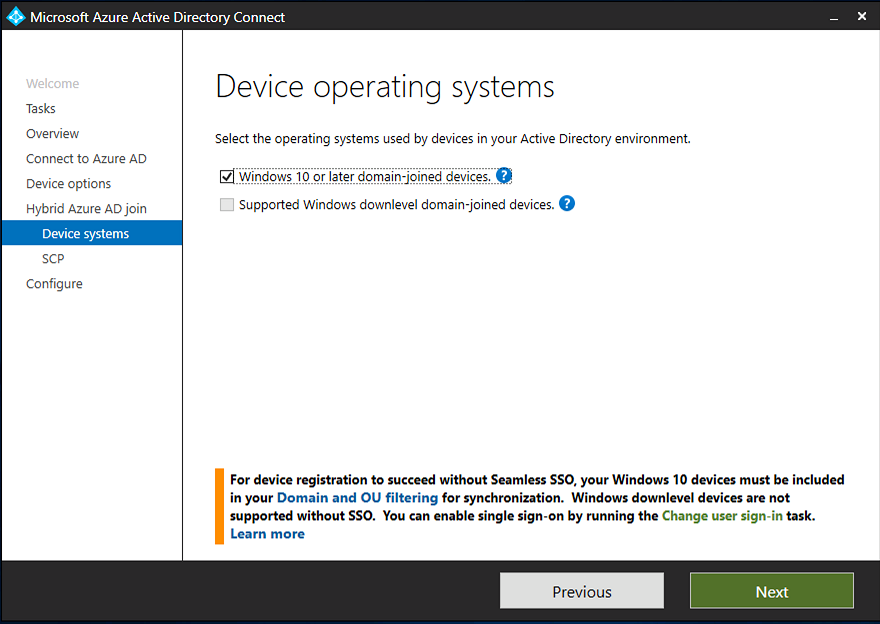
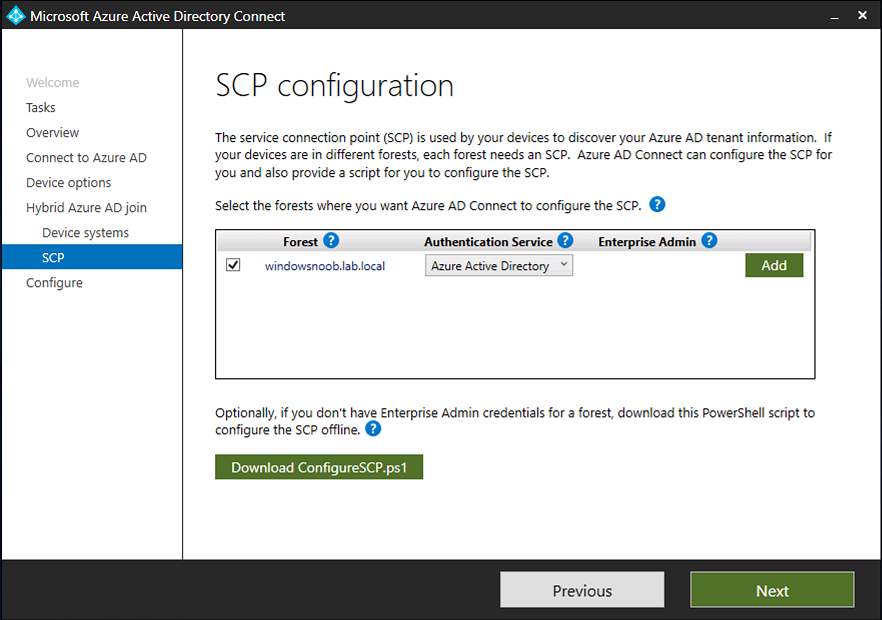
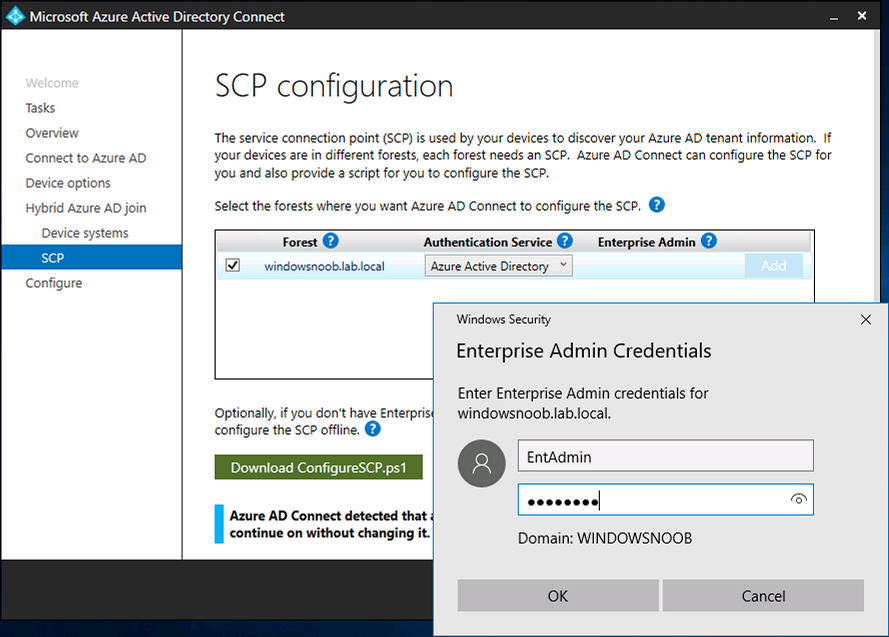
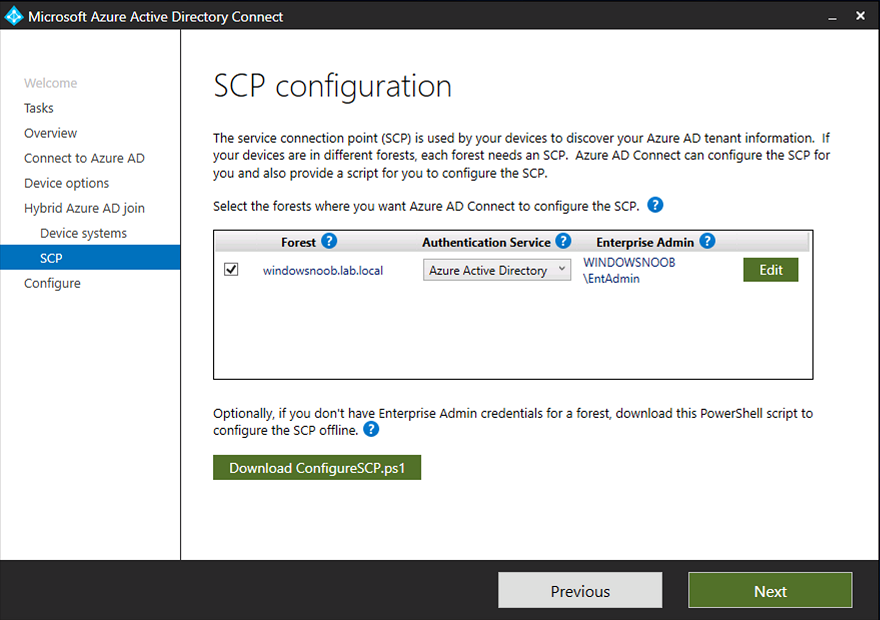
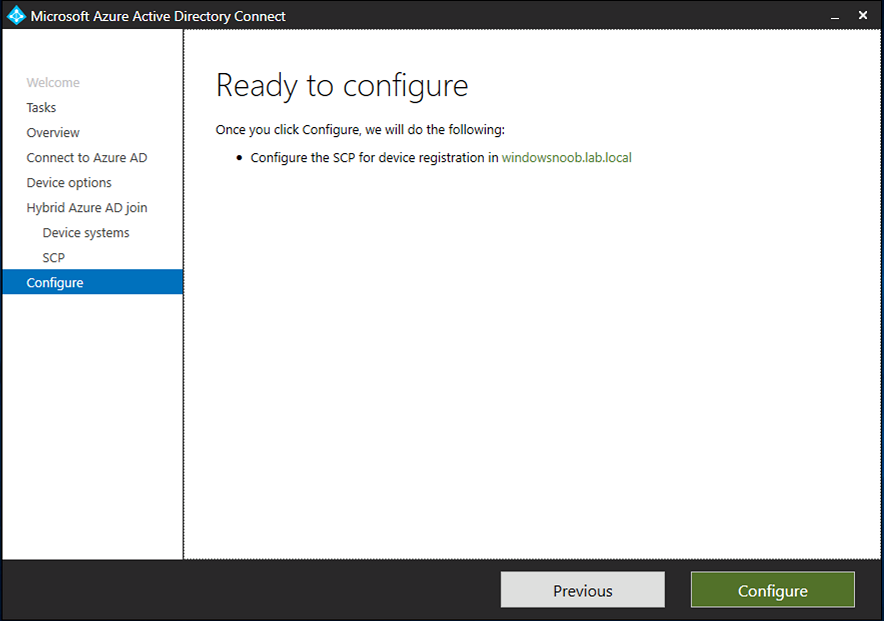
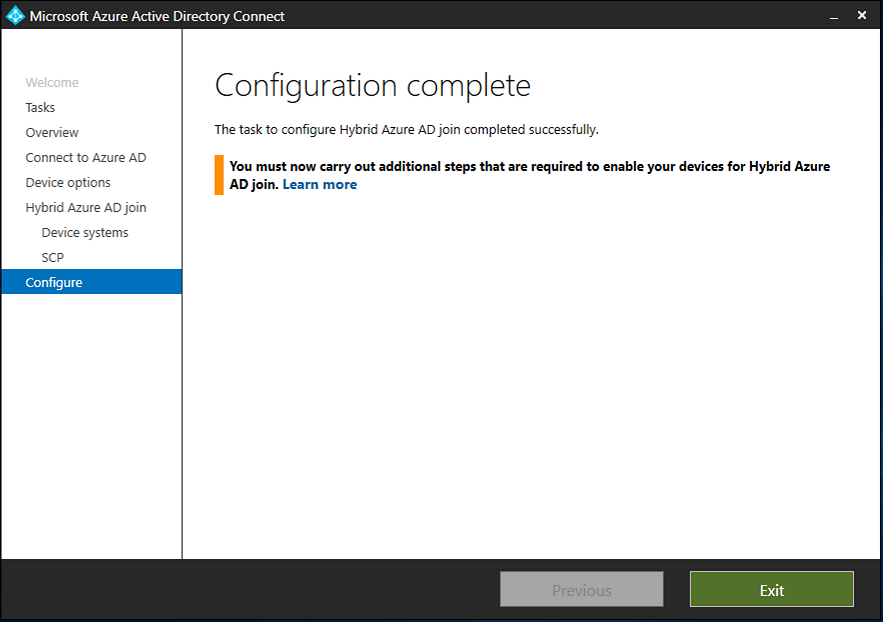
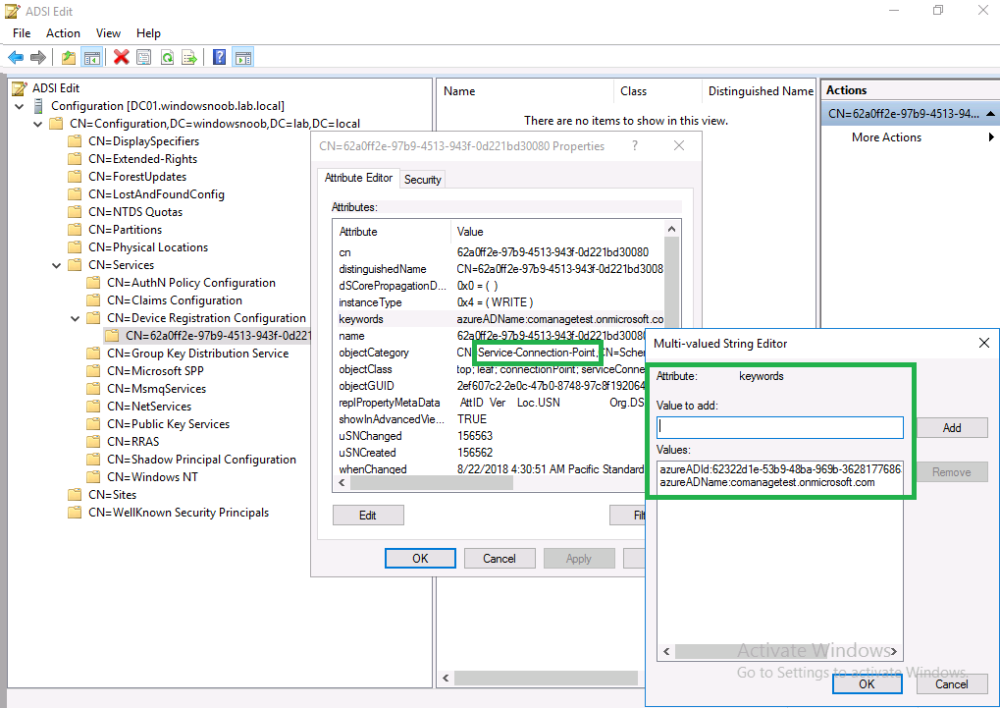
Introduction Microsoft released Windows Intune back in March 2011, this was their launch pad for the management of devices and users in the cloud. This was later renamed to Microsoft Intune and is now known as Microsoft Endpoint Manager. This cloud journey encompassed several new technologies and associated buzz words summarized below. Hybrid MDM – Depreciated, this was the first combination of ConfigMgr and Intune Co-management – The ability to manage devices via ConfigMgr and Intune Co-existence – Using a 3rd party MDM solution together with ConfigMgr Cloud Attach – Attaching cloud components to a ConfigMgr environment Tenant attach – Attaching ConfigMgr managed devices including servers to the cloud This part is the first part in a series of guides about cloud attach in Microsoft Endpoint Manager and the guides are co-written by Niall & Paul, both of whom are Enterprise Mobility MVP’s with broad experience in the area of modern management. Paul is 4 times Enterprise Mobility MVP based in the UK and Niall is 10 times Enterprise Mobility MVP based in Sweden. If you use Twitter and want to see content when we release it then please do follow us: @ncbrady @SCCMentor Why are we writing this? Both Paul and I have worked on multiple cloud-based lab scenarios together over the course of the last year keeping ourselves educated and involved during lock down. We focused on expanding our knowledge about these exciting new technologies that come with the enabling of cloud attach features. That includes advanced cloud capabilities offered via a Cloud Management Gateway (CMG), co-management and additional capabilities available via Tenant attach. This area of modern management is rapidly evolving, now more than ever as workers find themselves working remotely during COVID-19, therefore it’s important to keep up with what’s new and what is changing. Below you can find all parts in this series. Cloud attach - Endpoint Managers silver lining - part 1 Configuring Azure AD connect <- you are here Cloud attach - Endpoint Managers silver lining - part 2 Prepare for a Cloud Management Gateway Cloud attach - Endpoint Managers silver lining - part 3 Creating a Cloud Management Gateway Cloud attach - Endpoint Managers silver lining - part 4 Enabling co-management Cloud attach - Endpoint Managers silver lining - part 5 Enabling compliance policies workload Cloud attach - Endpoint Managers silver lining - part 6 Enabling conditional access Cloud attach - Endpoint Managers silver lining - part 7 Co-managing Azure AD devices Cloud attach - Endpoint Managers silver lining - part 8 Enabling tenant attach Cloud attach - Endpoint Managers silver lining - part 9 Renewing expiring certificates Cloud attach - Endpoint Managers silver lining - part 10 Using apps with tenant attach This multi part blog will focus on helping you get your organization cloud attached, and we will start by assuming that your environment has a few key aspects already setup: PKI enabled (guide) Intune Tenant created Azure Subscription (free trial) Licenses applied, you can grab a free trial of Enterprise Mobility plus Security which includes Intune and Azure AD Premium P2 here (free trial). In this part we will show you how to do the following: 1. Add a custom domain name to Azure 2. Set up a User Principal Name (UPN) for your on-premises Active Directory 3. Set up hybrid Azure AD Join using Azure AD Connect 4. Configure hybrid Azure AD join using Azure AD Connect So, let’s get started. Step 1. Add a Custom Domain Name to Azure Login to https://portal.azure.com select Azure Active Directory to add a custom domain name in Azure AD Directory. Select custom domain names in the left pane and then click the + Add custom domain link in the top ribbon. When presented with the Custom domain name window, enter the name of the domain you own and click the Add domain button. After adding the domain name, you’ll be shown a screen similar to the one below, you can choose to add a TXT or MX record on your DNS provider. In the example below we chose the TXT option. Enter the provided TXT record at your domain name provider. Below is example of the TXT record we entered at out providers DNS management portal. We’ve set the TTL to a low value to get this propagated quickly so that we can verify the domain. Tip: You can use a website such as dnschecker.org to see if the TXT record has propagated and can be queried, when this has happened go back to the Azure portal and click the Verify button to verify the domain. Once the domain is successfully verified, it will report as so in the Custom domain names blade. After the custom domain name is added, you can make it the Primary domain name. To do that do as follows. Select the custom domain name which you have verified above, and click on Make Primary. After doing that your custom domain name will be the new Primary domain name. Step 2. Set up a User Principal Name (UPN) for your on-premises Active Directory With the custom domain name added and set to primary we are going to add an alternative user principal name suffix into the on-premises Active Directory. This will match the domain name we have verified, so our example is azurenoob.com. This is fairly simple to set up, but once configured, we need to set this as the default for our users and we can use a PowerShell script to achieve this. Let us start off by setting the UPN, you will need to be a Domain Admin or Enterprise Admin to achieve this. Open Active Directory Domains and Trusts. Right click on Active Directory Domains and Trusts, and select Properties. Type in your new alternative name suffix into the Alternative UPN suffixes box, and click Add. Click OK. Below you can see we've added azurenoob.com. Now we need to set the alternative UPN as the default UPN for all our users. Thanks to the community we can use a PowerShell script which is already out there to achieve this, and we used a script from martinsblog.dk. You can be granular with this script, so that you only add in a specific OU for your users, or you could run it at the top level of the domain. Below is the properties of an user with the new UPN applied. Step 3. Set up hybrid Azure AD Join using Azure AD Connect You can use Azure AD Connect to integrate on-premises and online directories. It can synchronize computer, user and group objects and assist with single sign-on in both directories as well as password sync. When using the Azure AD Connect it’s recommended to download the latest release. You can obtain this from Microsoft Download Center. A minimum of version 1.1.819.0 is needed, but this is an old version, you would be better off downloading the latest and using the newer features available with that release. Download Azure AD Connect here. After downloading and installing the tool, launch it and Agree to the terms and conditions before clicking Continue. We have the choice of running an express installation or customizing the install. Microsoft recommends using the customize option if you have multiple forests or if you want to configure optional features, otherwise you can continue with the Use express settings option. In the steps below we run through the options you'll see when choosing Use Express Settings. Next, enter the Global Admin login details for your Azure Ad environment. Click Next and then enter the Enterprise Admin credentials for the on-prem Active Directory Domain Services. Note: The Azure AD sign-in configuration page only shows if you did not complete verify your domains in the prerequisites. If you see this page, then review every domain marked Not Added and Not Verified. Make sure those domains you use have been verified in Azure AD. Click the Refresh symbol when you have verified your domains. If you have domains marked as Not Added then see the next step. The azurenoob.com domain is Verified as we verified this domain in Azure AD. This also means we will be able to sign in with the same credentials in our on-premises Active Directory as we also added in the UPN. Select the checkbox to Continue without matching all UPN suffixes to verified domains if one of your UPN suffix values is not added, for example the windowsnoob.lab.local address is in the state Not Added. You will only have this checkbox available if you have a Not Added entry and you must check the box in order to continue. Click Install We have enabled the checkbox for Start the synchronization process when configuration completes as we want the synchronization process to start once we have completed the wizard. If you do not enable this, the sync will be configured but won’t run until you re-run the Azure AD Connect wizard. Click Install. After clicking Install the wizard will start configuring. And after a few minutes it’s complete. You can close the wizard by clicking on Exit. Step 4. Configure hybrid Azure AD join using Azure AD Connect With the express settings configured, we now need to configure Azure AD Connect for hybrid Azure AD join of our on-premises devices. Launch the Azure AD Connect wizard and click Configure to continue. On the Additional tasks page, select Configure device options, and then select Next. Select the option to Configure Device Options. On the next screenshot note that we are interested in Hybrid Azure Ad join and that Hybrid Azure AD join enables devices in your Active Directory forest to register with Azure AD for access management. Computers in your organization will automatically discover Azure AD using a service connection point (SCP) object that is created in your Active Directory forest. On the Overview page select Next. On the Connect to Azure ad page enter the credentials of your Global Admin. On the Device options screen, select Configure Hybrid Azure AD join to synchronize our on-premise devices and to configure them for Azure Ad join. The Service Connection Point (SCP) needs to be configured for each forest where you want to enable Hybrid Azure AD join. We only have the one forest. Click the Add button. Select Windows 10 or later domain-joined devices and then click Next. Select the check box beside your on premise domain and then click Add. Enter your Enterprise Admin Credentials when prompted. Click Next. And at the Ready to configure screen click Next. At the Configuration complete, click Exit. You can verify the success of the above by opening Adsiedit, selecting Services, expand Device Registration Configuration, as shown below in keywords and objectcategory. That's it for this part, join us in Part 2 where we will prepare your environment for a Cloud Management Gateway. Useful links Conditional Access mfa breaks azure ad connect synchronization - https://www.alitajran.com/conditional-access-mfa-breaks-azure-ad-connect-synchronization/ Cloud attach and Microsoft Endpoint Manager - https://techcommunity.microsoft.com/t5/business-continuity-and-disaster/cloud-attach-and-microsoft-endpoint-manager/m-p/1498577 Download Azure AD Connect - Download Microsoft Azure Active Directory Connect from Official Microsoft Download Center Azure AD connect prerequisites - https://docs.microsoft.com/en-us/azure/active-directory/hybrid/how-to-connect-install-prerequisites How to setup Azure AD Connect using express settings - https://docs.microsoft.com/en-us/azure/active-directory/hybrid/how-to-connect-install-express1 point


