


anyweb
-
Posts
9265 -
Joined
-
Last visited
-
Days Won
371
Everything posted by anyweb
-
 can you attach your smsts.log so we can see the error
 -
copy profile is evil !
-
sounds like a bug, have you posted it on uservoice/connect ?
-
not yet, it'll come, be patient
-
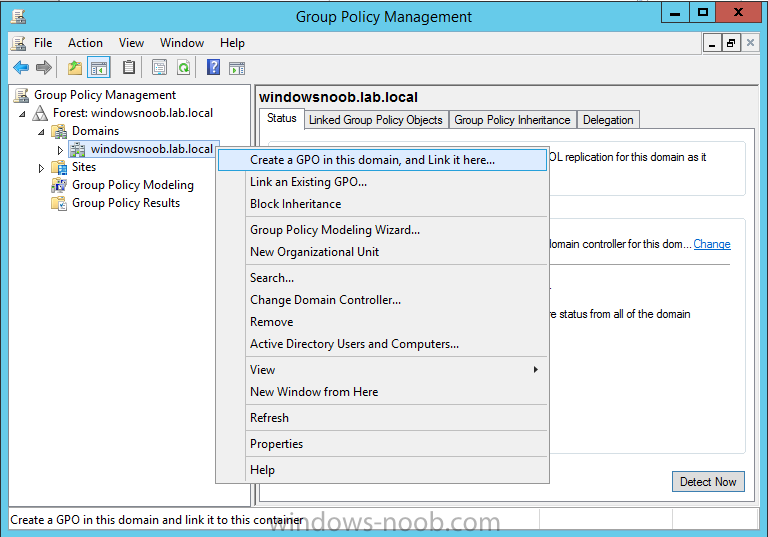
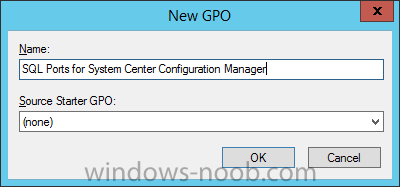
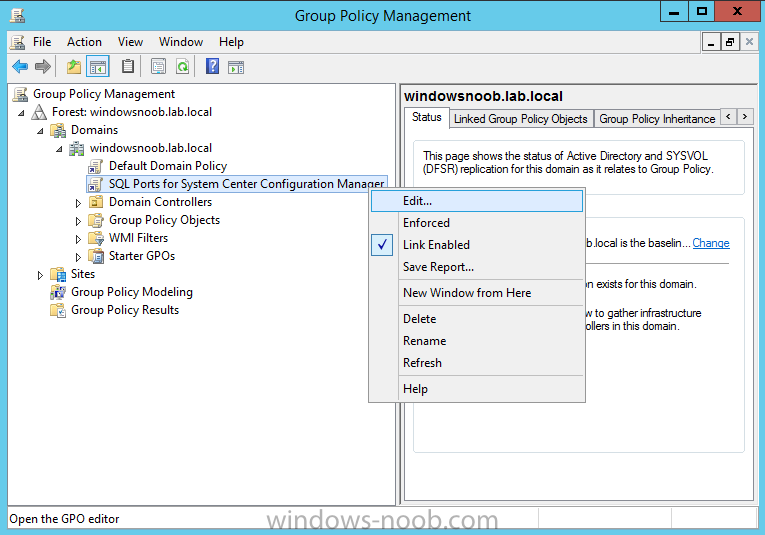
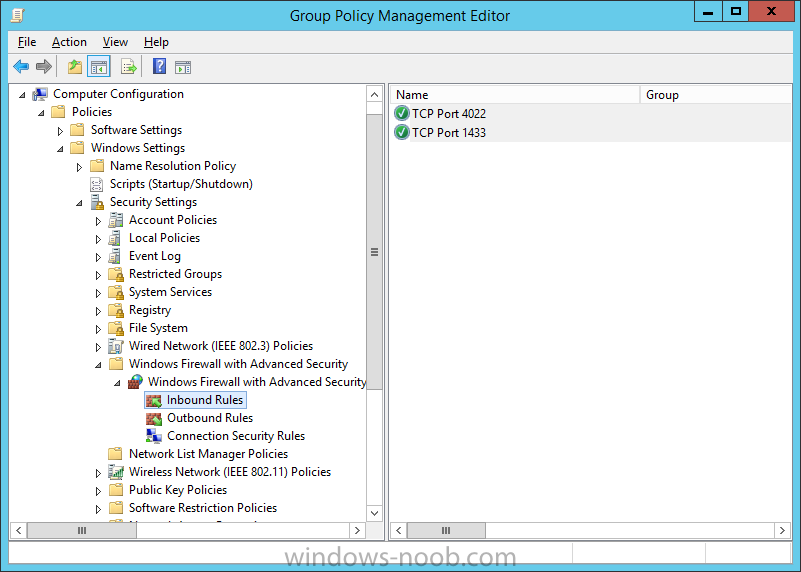
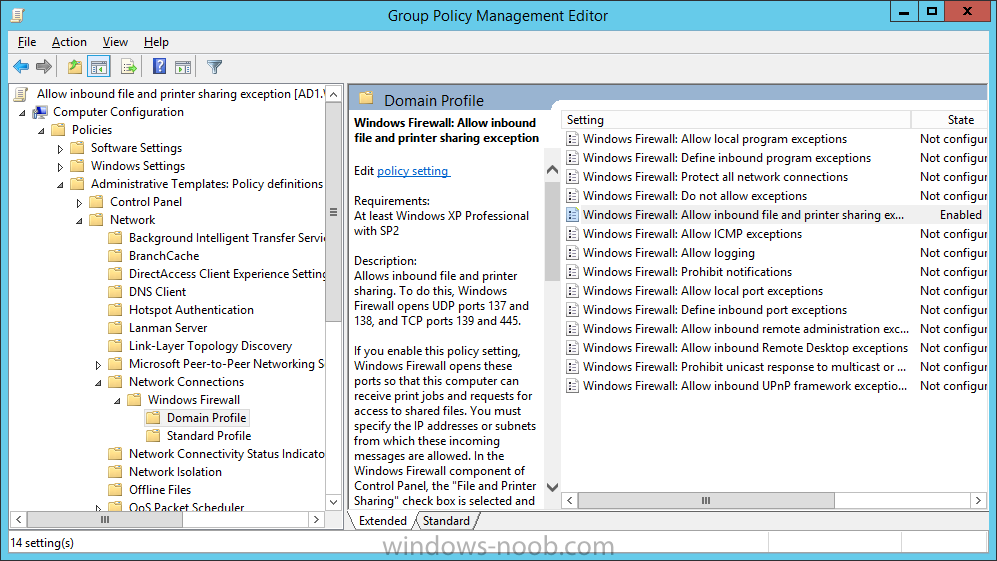
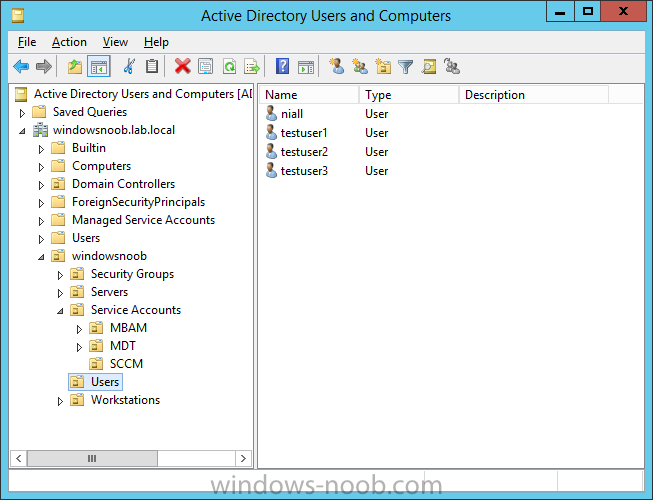
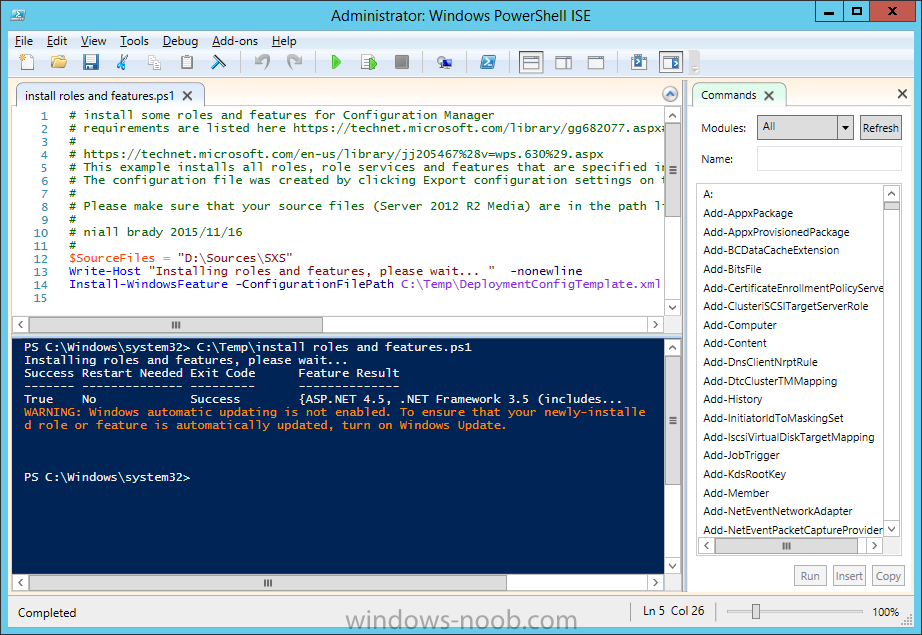
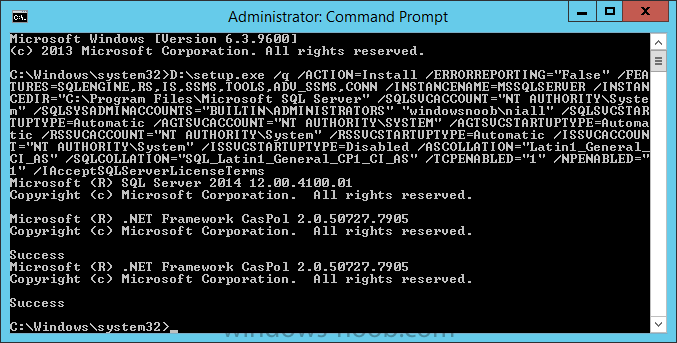
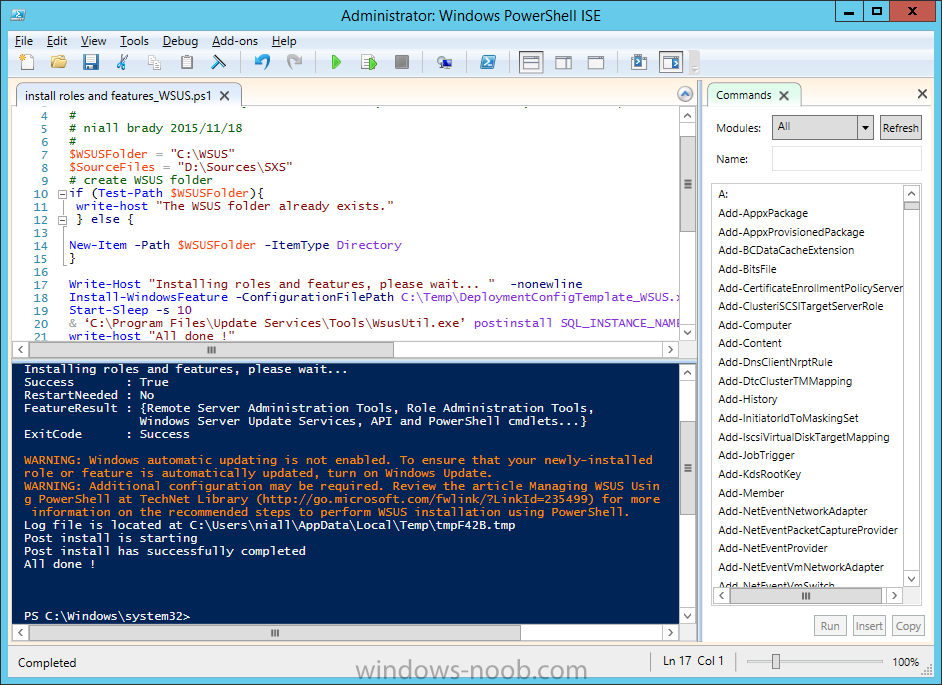
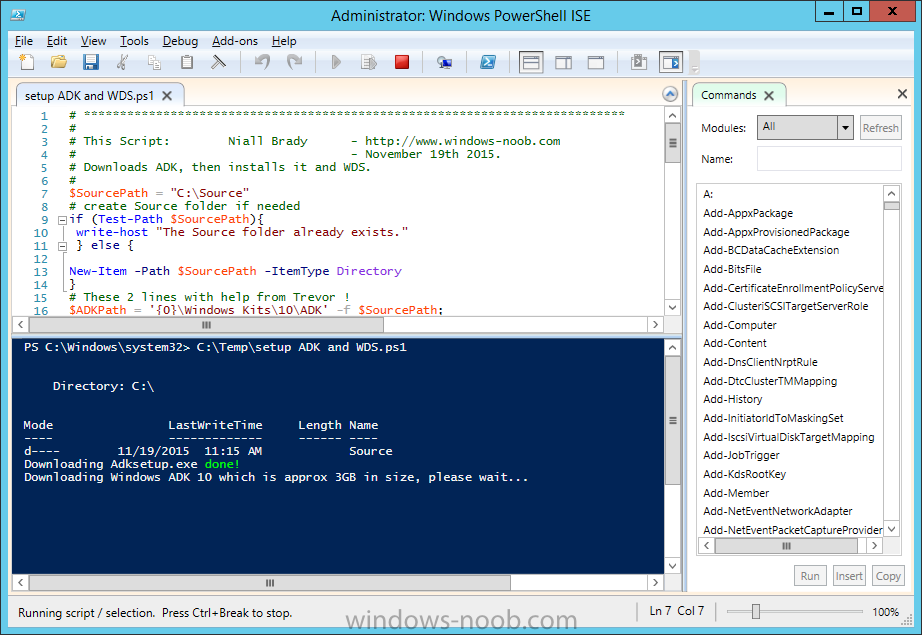
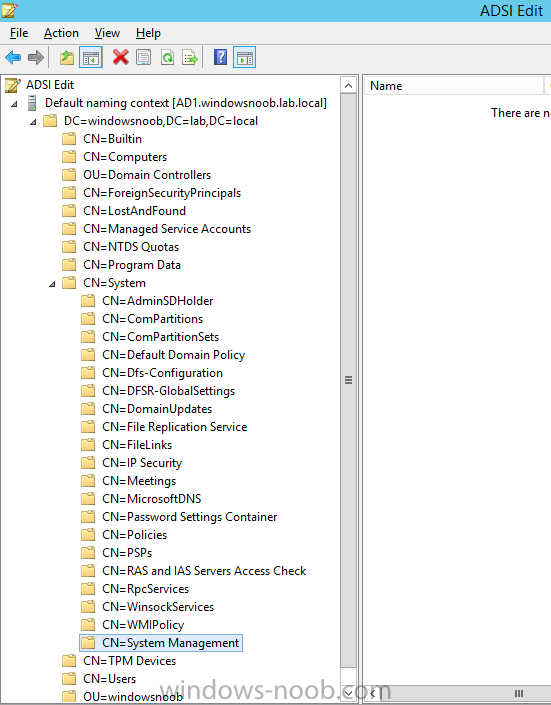
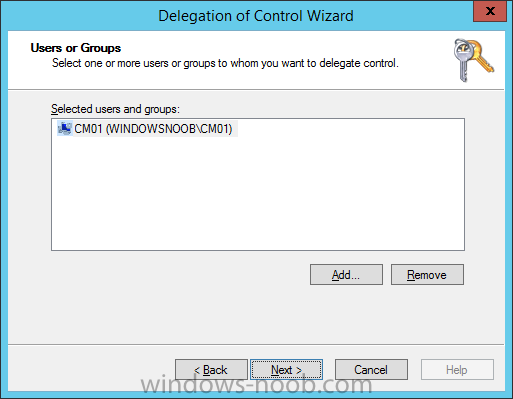
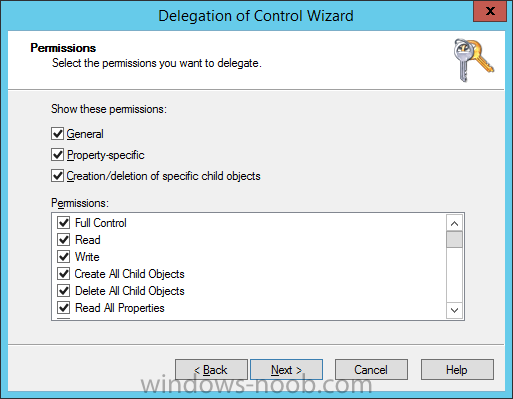
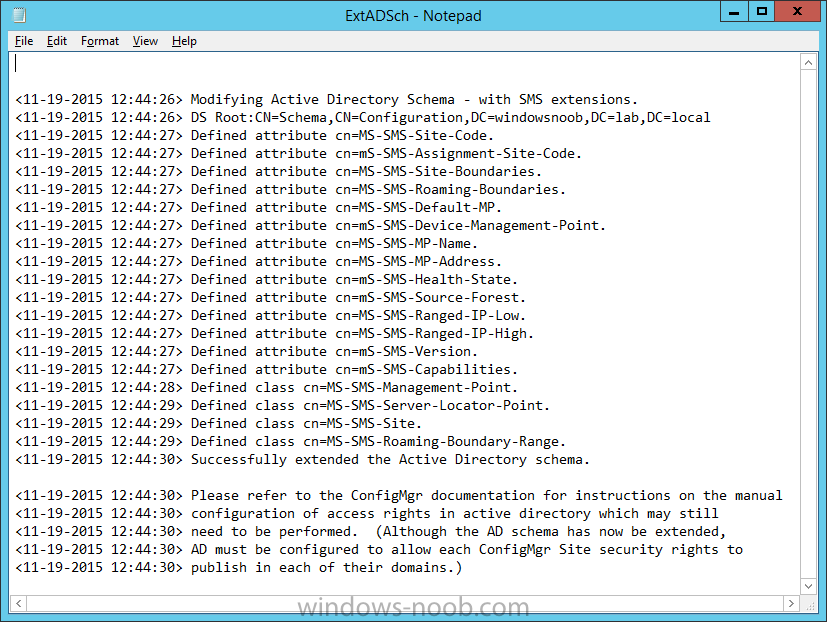
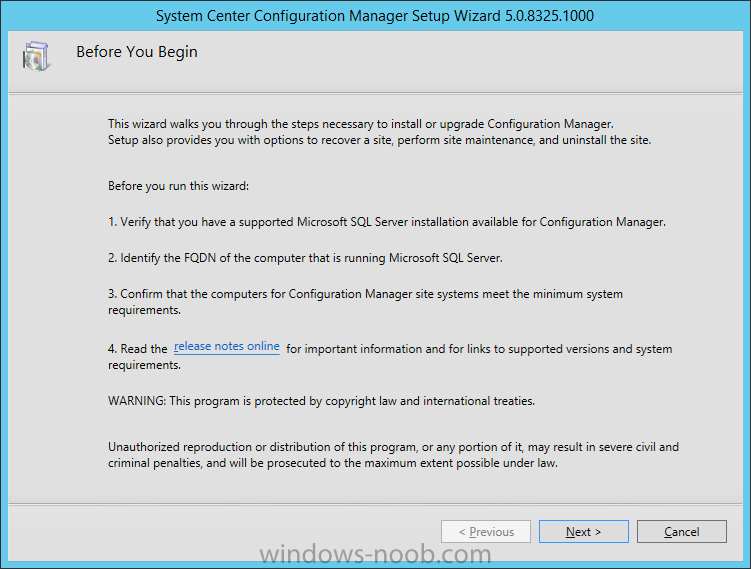
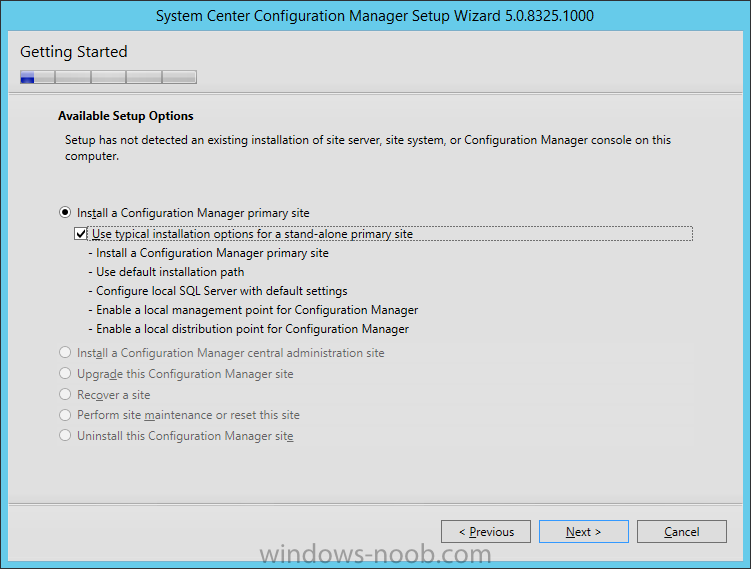
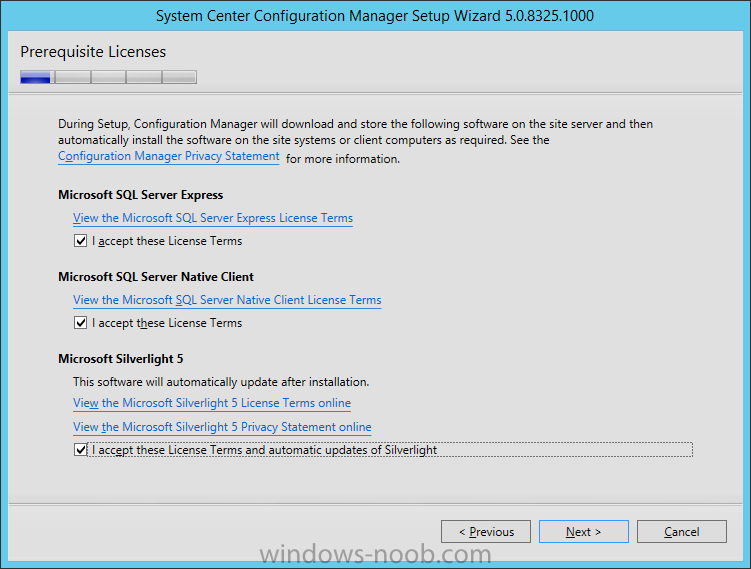
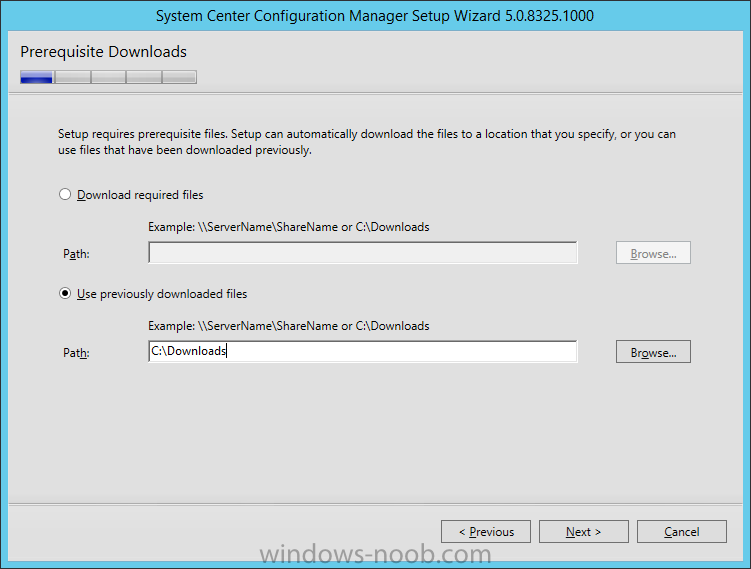
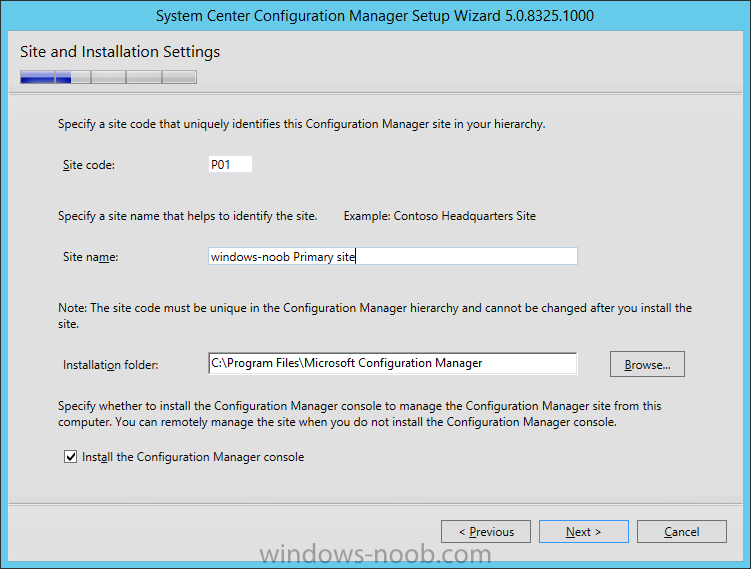
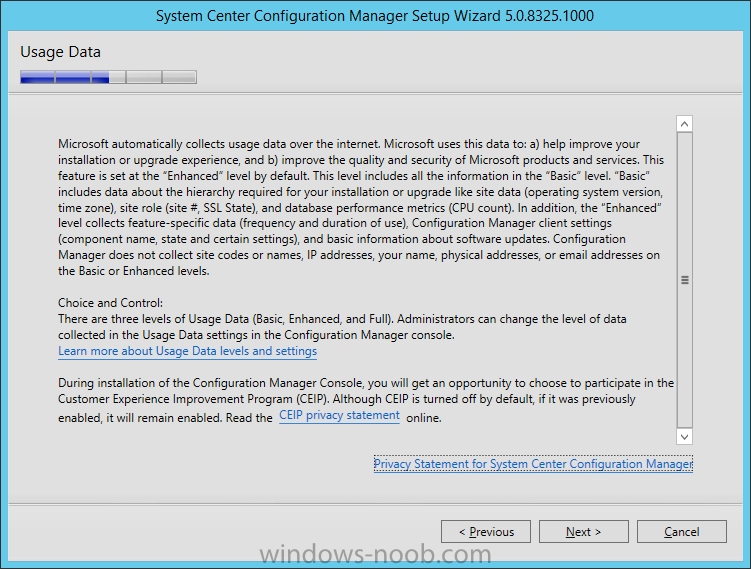
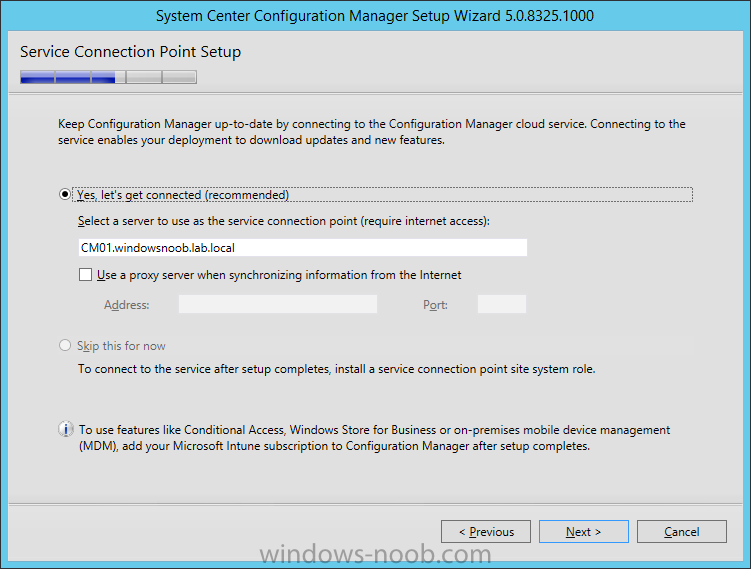
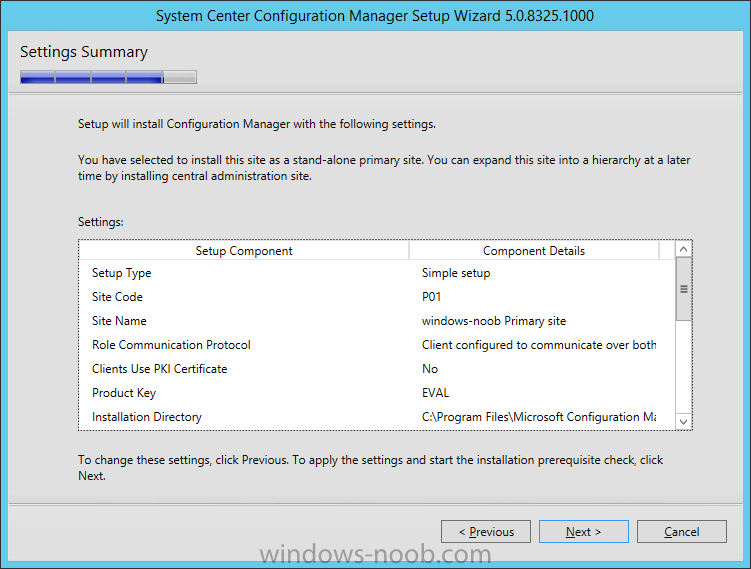
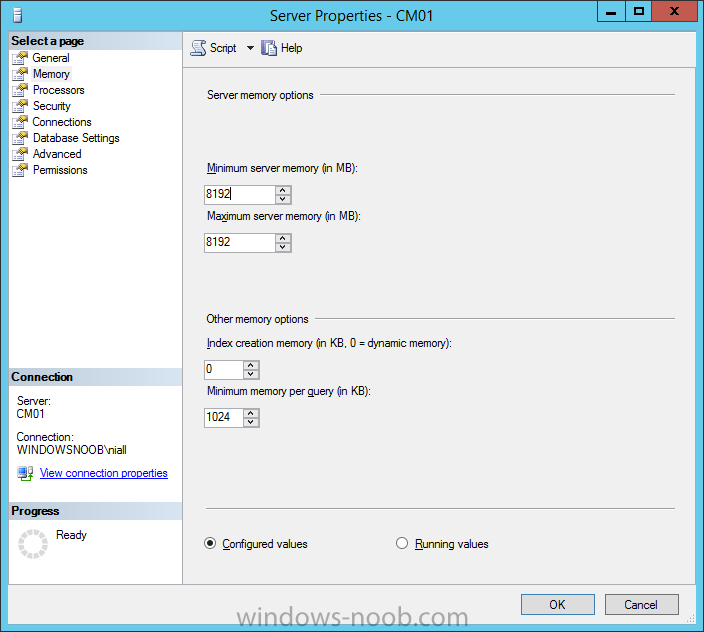
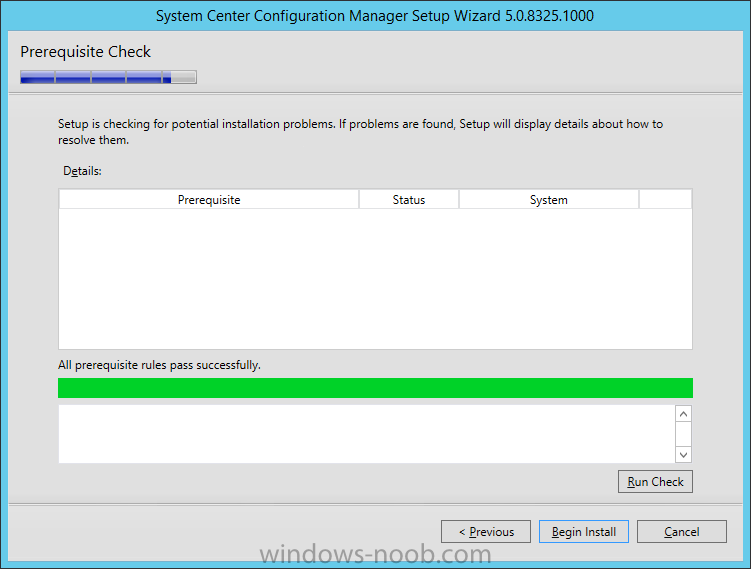
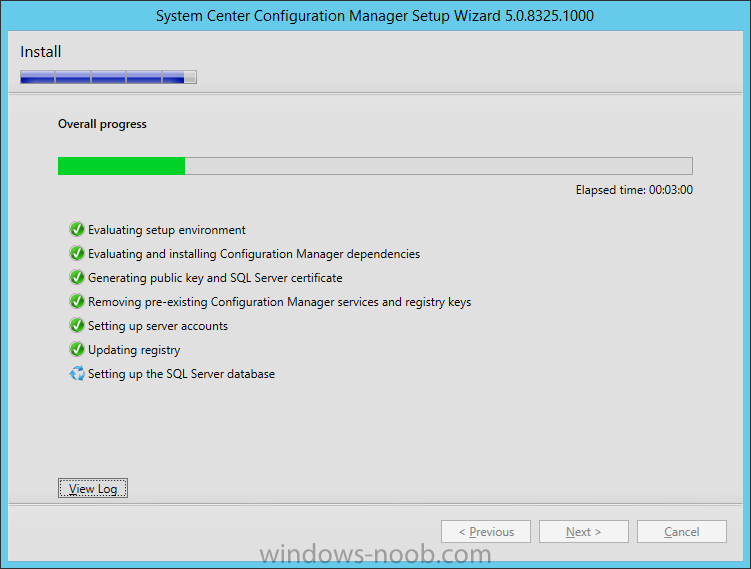
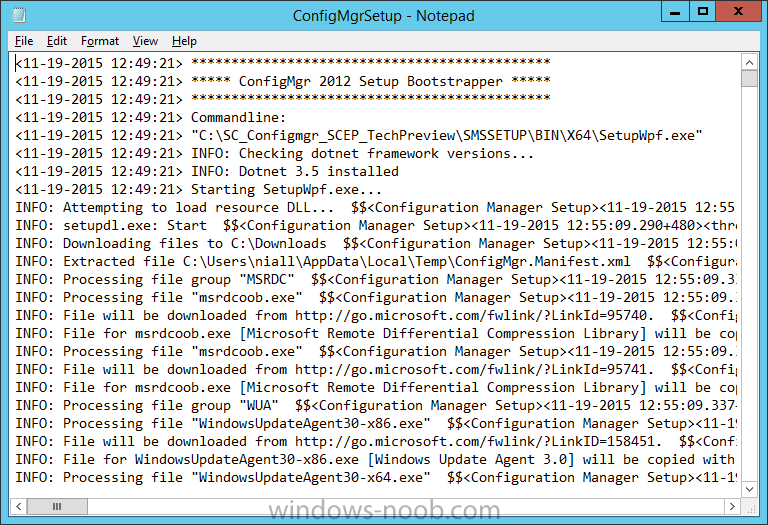
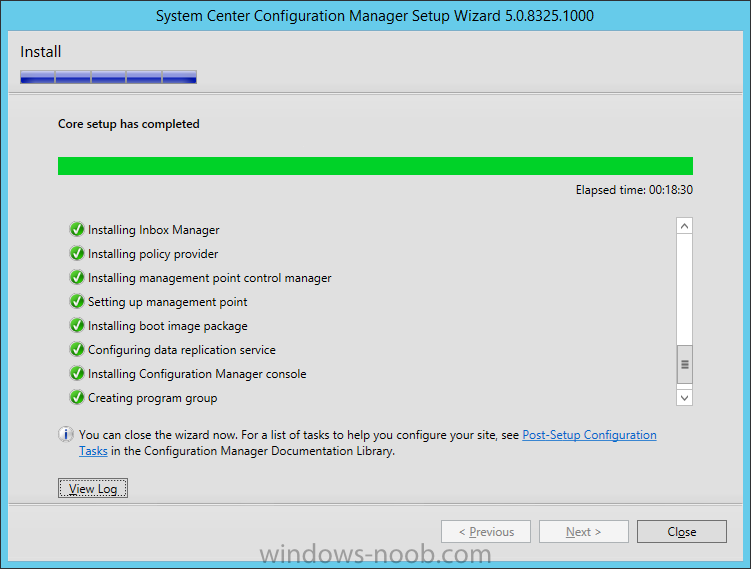
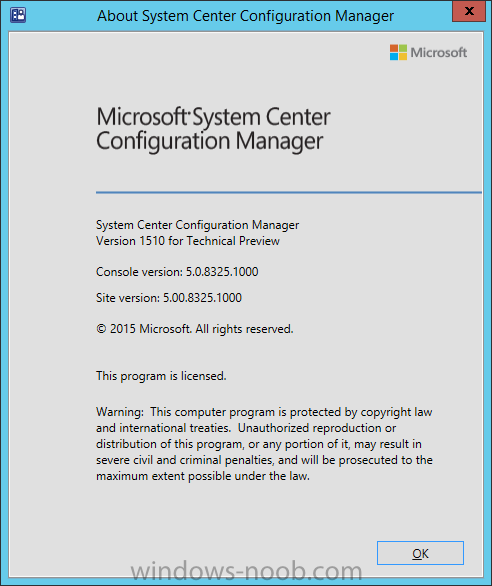
Introduction Microsoft have been hard at work developing the next release of Configuration Manager, and you can test the 4th iteration of it now, called System Center Configuration Manager and Endpoint Protection Technical Preview 4. This post will guide you through installing it from scratch using some automation via scripts. New Features New features in this technical preview include: Mobile Device management (MDM): enhanced feature parity with Intune standalone – With this technical preview, many of the MDM features that are supported via Intune standalone (cloud only) are also enabled for Configuration Manager integrated with Intune (hybrid). We will publish additional information later this year about the specific capabilities which will be supported with a hybrid deployment. Integration with Windows Update for Business – With Technical Preview 4, you have the ability to view the list of devices that are controlled by Windows Update for Business. Certificate provisioning for Windows 10 devices managed via on-premises mobile device management Limitations Note that this evaluation is limited as described below: Each install remains active for 60 days before it becomes inactive. English is the only language supported. Only a stand-alone primary site is supported. There is no support for a central administration site, multiple primary sites, or secondary sites. Only the following versions of SQL Server are supported: SQL Server 2012 with cumulative update 2 or later SQL Server 2014 The site supports up to 10 clients, which must run one of the following: Windows 7 Windows 8 Windows 8.1 Windows 10 There is no support for upgrade to this preview build. There is no support for upgrade to a later build from this preview build. Only the following install flags (switches) are supported: /silent /testdbupgrade There is no support for migration to or from this preview build. Assumptions In this guide I assume you have already installed two servers running Server 2012 R2 as listed below, I also assume you have some knowledge of PowerShell, if you don't, start learning it now ! AD1 Active directory domain controller with DNS, DHCP. IPv4 Address: 192.168.5.1 Subnet Mask: 255.255.255.0 Default Gateway: 192.168.5.199 CM01 Configuration Manager server, joined to the domain. IPv4 Address: 192.168.5.2 Subnet Mask: 255.255.255.0 Default Gateway: 192.168.5.199 I've a Smoothwall Linux firewall running on 192.168.5.199 sharing internet into these vm's. Make sure you have a copy of SQL Server 2014 ready to install as that is the version used in this guide. Step 1. Define some GPO's Note: Perform the following on the Active Directory Domain Controller server (AD1) as Local Administrator To allow SQL to replicate data, open the following TCP ports in the Configuration Manager firewall, 1433, 4022. You can do this by targetting your ConfigMgr servers with a GPO. To create the GPO do as follows. Start the Group Policy Management tool (GPMC.MSC) and create a new GPO. Note: In the example screenshot below I link the GPO to the domain GPO however you should consider creating an OU specifically for your Configuration Manager servers and target this GPO only to that OU (your Configuration Manager servers require this GPO for SQL replication). Give the GPO a name such as SQL Ports for System Center Configuration Manager. When done, right click on the GPO and choose Edit. Select Computer Configuration, Policies, Windows Settings, Security Settings, Windows Firewall with Advanced Security and select Inbound Rules, choose New Rule and follow the wizard for opening up TCP port 1433 as per this guide on Technet. Once done, repeat the above for TCP Port 4022. Optional: Once the above is done, and if you intend on using the PowerShell script in Step 2 to create users and to make a user a local admin on the CM01 server, create another GPO called Allow Inbound File and Printer sharing exception which sets Windows Firewall: Allow inbound file and printer sharing exception to Enabled. This policy is located in Computer Configuration, Administrative Templates, Network, Network Connections, Windows Firewall, Domain Profile. Once done, apply the GPO's by running gpupdate /force on CM01. Step 2. Create users Note: Perform the following on the Active Directory Domain Controller server (AD1) as Local Administrator You can do this manually, or automated using the supplied PowerShell script. To create users manually, add the following users in AD using Active Directory Users and Computers * <your user name>, a domain user, this user will become a local administrator on CM01 * Testuser, a domain user * CM_BA, used for building ConfigMgr created images * CM_JD, used for joining computers to the domain * CM_SR used for reporting services. * CM_CP, a domain user used when installing the Configuration Manager Client for Client Push. * CM_NAA, a domain user, (Network Access Account) used during OSD or use the supplied PowerShell script Create Users Usergroups and OU in AD.zip Download and the unzip the script, run it by opening Windows PowerShell ISE as Administrator on AD1. You may need to edit the script and adjust the variables to your liking for example if you want to change the default password, you may also want to rem out the MDT and MBAM user/groups that are created and change some of the user names within. After running the PowerShell script in Windows PowerShell ISE you'll see something like the following. and in Active Directory Users and Groups you can see the OU and structure it created Step 3. Create the System Management Container Note: Perform the following on the Active Directory Domain Controller server (AD1) as Local Administrator Open ADSI Edit, click on Action, Connect To and click Ok, Double Click on Default Naming Context and the DC= that appears below it. Click on the + and scroll down to CN=System. Right Click on CN=System and choose New, Object, choose Container from the options, click Next and enter System Management as the value as shown below Step 4. Delegate Permission Note: Perform the following on the Active Directory Domain Controller server (AD1) as Local Administrator Open Active Directory Users and Computers. Click on view, select Advanced Features. Select the System Management Container, and right click it, choose All Tasks and Delegate Control. When the Welcome to Delegation of Control Wizard appears click next, then click Add. click on Object Types, select Computers. Type in your Configuration Manager server name (CM01) and click on Check Names, it should resolve. Click Ok, then Next. Choose Create a Custom Task to Delegate, click next, make sure This folder, existing objects in this folder and creation of new objects in this folder is selected. Click next, select the 3 permissions General, Property-Specific and Creation-deletion of specific child objects are selected then place a check mark in Full Control. Tip: Repeat the above for each site server that you install in a Hierarchy. Step 5. Install Roles and Features on CM01 Note: Perform the following on the Configuration Manager server (CM01) as a Local Administrator To support the various features in System Center Configuration Manager, requires some Roles and Features pre-installed on CM01, so let's go ahead and install them. On CM01, login as the username you added to the Local Administrators group and create a folder on C: called temp. Download the following zip file into C:\Temp, the XML file was created using the Export Configuration File option in Server Manager after manually installing roles and features and the accompanying PowerShell script simply installs it. Make sure your Server 2012R2 media is in the drive specified in the script. roles and features and setup ADK.zip Run the script in Windows PowerShell ISE Step 6. Download and install ADK 10 Note: Perform the following on the Configuration Manager server (CM01) as a Local Administrator The Technical Preview prerequisite checker will check for various things, including ADK components such as USMT, Windows Preinstallation Environment, so install it on your server. To do so, either download ADKsetup from here. Or run the following PowerShell script to download and install it for you (including installing Windows Deployment Services). Note: due to issues with Windows ADK 10 for build 1511, i'm using the original Windows 10 ADK in the download script. Step 7. Install SQL on CM01 Note: Perform the following on the Configuration Manager server (CM01) as a Local Administrator Before you install the Configuration Manager you need SQL installed, both SQL Server 2012 and SQL Server 2014 are supported however you will use the latest release, SQL 2014. This line below will install SQL Server with the correct collation needed for ConfigMgr to C:\Program Files\Microsoft SQL Server. If you don't want to use that location you can change it by changing the /INSTANCEDIR in the line listed below in addition, make sure to place your SQL Server 2014 media in D:\ before running the script, if it's on a different drive letter, modify D:\setup.exe accordingly. To start the install, open an administrative cmd prompt on CM01 and change "windowsnoob\niall" to match your domain\username, after you've made the edit, press enter to install SQL Server 2014. D:\setup.exe /q /ACTION=Install /ERRORREPORTING="False" /FEATURES=SQLENGINE,RS,IS,SSMS,TOOLS,ADV_SSMS,CONN /INSTANCENAME=MSSQLSERVER /INSTANCEDIR="C:\Program Files\Microsoft SQL Server" /SQLSVCACCOUNT="NT AUTHORITY\System" /SQLSYSADMINACCOUNTS="BUILTIN\ADMINISTRATORS" "windowsnoob\niall" /SQLSVCSTARTUPTYPE=Automatic /AGTSVCACCOUNT="NT AUTHORITY\SYSTEM" /AGTSVCSTARTUPTYPE=Automatic /RSSVCACCOUNT="NT AUTHORITY\System" /RSSVCSTARTUPTYPE=Automatic /ISSVCACCOUNT="NT AUTHORITY\System" /ISSVCSTARTUPTYPE=Disabled /ASCOLLATION="Latin1_General_CI_AS" /SQLCOLLATION="SQL_Latin1_General_CP1_CI_AS" /TCPENABLED="1" /NPENABLED="1" /IAcceptSQLServerLicenseTerms For a list of options for installing SQL Server 2014, see this page on Technet: https://technet.microsoft.com/en-US/library/dd239405%28v=sql.120%29.aspx Once installed, you should see success messages like below, if not, troubleshoot the error and/or review your command line for typos. Step 8. SQL Memory Configuration. Depending on your memory configuration and server setup, you may also want to configure SQL memory limits as per the following guidance prior to installing ConfigMgr otherwise you'll get warnings when you run the Server Readiness checks. Configuration Manager requires SQL Server to reserve a minimum of 8 gigabytes (GB) of memory for the central administration site and primary site and a minimum of 4 gigabytes (GB) for the secondary site. This memory is reserved by using the Minimum server memory setting under Server Memory Options and is configured by using SQL Server Management Studio. For more information about how to set a fixed amount of memory, see here. If your SQL Server is configured for unlimited memory usage, you should configure SQL Server memory to have a maximum limit. Based on the above recommendations i've configured the SQL Server memory for this standalone primary in my lab as follows: Step 9. Restart the Server open an administrative command prompt and issue the following shutdown /r Step 10. Install the WSUS role Note: Perform the following on the Configuration Manager server (CM01) as a Local Administrator Now that SQL server is installed, we can utilise that for the WSUS database. To install WSUS and configure it to use the database created above, do as follows: browse to the location where you extracted the scripts, C:\Temp Start Windows PowerShell ISE as administrator, then run the install roles and features_WSUS.ps1 script. Step 11. Download and extract the content Note: Perform the following on the Configuration Manager server (CM01) as a Local Administrator You'll need the Technical Preview content in order to install ConfigMgr, and to get it you have to click this link and register (registration is required). Once you have registered you'll be able to download the self extracting exe called SC_Configmgr_SCEP_TechPreview.exe which is 802MB in size. Double click the EXE and let it extract to the default folder C:\SC_Configmgr_SCEP_TechPreview. Step 12. Download the ConfigMgr Prerequisites Open a command prompt with administrative permissions and Navigate to C:\SC_Configmgr_SCEP_TechPreview\smssetup\bin\X64 Run the following line SetupDL.exe C:\Downloads Note: Do not continue until the pre-requisites are downloaded. Step 13. Extend the Schema Note: Perform the following on the Domain controller server (AD1) as Administrator Using Windows File Explorer on the Domain Controller, browse to \\cm01\c$\SC_Configmgr_SCEP_TechPreview\SMSSETUP\BIN\X64 locate extadsch.exe, right click and choose Run As Administrator. A command prompt window will appear briefly as the schema is extended, check in C:\ for a log file called ExtADSch.log it should look similar to this Step 14. Install Configuration Manager Technical Preview 4 Note: Perform the following on the Configuration Manager server (CM01) as a Local Administrator Browse to C:\SC_Configmgr_SCEP_TechPreview and click on Splash.HTA click on Install and then click on Next place a checkmark in Use typical installation options for a stand-alone primary site and click next accept the two pages of EULAs select Use Previously downloaded files and specify C:\Downloads fill in your desired site code and name/path. review your CEIP options and select your Service Connection Point settings (hard coded for now), this is the setting which allows you to decide to keep up to date with Configmgr releases, by being notified about them, or not. You can change the choice later in the console. review the Settings Summary and enjoy the fact that you are following a windows-noob.com guide, so no errors or warnings are reported. Click on Begin Install to install. off it goes... click on View Log to see what's being logged about the install and after a certain period, you are done ! Step 15. Restart the Server open an administrative command prompt and issue the following shutdown /r Step 16. Open the Console Now that everything is installed, open the Configuration Manager console, click on Help, About, here's the version. Download a copy of this guide If you'd like a Microsoft Word copy of this guide download the following (last updated 20, November 2015): Installation of System Center Configuration Manager TP4.zip cheers ! niall


-
what speed are you getting ? what boot image are you using ?
-
Virtualization?! SSD?! Let me know your experience!
anyweb replied to ZeZe's topic in Configuration Manager 2012
i'd get a powerful laptop instead with several SSD's attached, much cheaper and more effective my home lab is running 24/7 and is quite simply a Dell laptop with a modular bay containing a 500GB SSD and an external 1TB SSD attached in addition to another 500GB SSD attached. -
First Major Update for Windows 10 Available Today - Windows 10 version 1511
anyweb replied to anyweb's topic in Windows News
I believe it is still rolling out, i.e. in progress, so if you've applied the hotfix listed above, and if the upgrade category is not showing up then have some patience -
SCCM 2012 R2 Upgrade Error to SP1
anyweb replied to Config_Mgr_noob's topic in Configuration Manager 2012
did you run testdbupgrade first on a copy of your database ? it should have caught this issue secondly, i'd call Microsoft CSS for help with this cheers niall -
First Major Update for Windows 10 Available Today - Windows 10 version 1511
anyweb replied to anyweb's topic in Windows News
it does not appear to be available for Server 2008 R2 currently, I do not know if it will be either, we have to wait for Microsoft to confirm this via their anticipated blog post, as a workaround, you can fire up a SUP/WSUS on Server 2012R2 and apply the hotfix to that server. -
Driver Import stuck on Validate Driver Information
anyweb replied to nazimb's topic in Configuration Manager 2012
next time you see this problem check the smsprov.log and see does it reveal the issue -
great to hear it Leon and welcome to windows-noob.com :-)
- 1 reply
-
- 1
-

-
how to designate pagefile location in OSD Task Sequence
anyweb replied to wilbywilson's topic in Configuration Manager 2012
1st question, why oh why do you have two partitions ? -
First Major Update for Windows 10 Available Today - Windows 10 version 1511
anyweb replied to anyweb's topic in Windows News
what version of WSUS are you using and on what OS ? -
have you seen this ? http://www.windows-noob.com/forums/topic/9368-wds-service-crashing-not-starting-sccm-2012-r2/
-
Win 10 Start Menu
anyweb replied to bman's question in Deploying Windows 10, Windows 8.1, Windows 7 and more...
yeah well copyprofile is evil and will cause you problems sooner or later, don't use it, even if it means you'll have to do lots of steps to get the look you want. Or do use it and wonder why you have issues. -
you are welcome ! you didn't do anything wrong, those images are old boot images i created years ago in my lab so are only specific to my lab, you didn't install MDT back then therefore you don't have them no not necessary ! you don't have them as they are simply old boot images I created in previous releases of MDT the only reason you'd have them show up is if you installed an older version of ADK/MDT and then went through MDT integration into ConfigMgr and then created MDT boot images and finally upgraded as described in this guide.
-
Win 10 Start Menu
anyweb replied to bman's question in Deploying Windows 10, Windows 8.1, Windows 7 and more...
you'll have to come up with scripts, workarounds and so forth to achieve that, what did you customize exactly ? -
Win 10 Start Menu
anyweb replied to bman's question in Deploying Windows 10, Windows 8.1, Windows 7 and more...
don't use copyprofile, it's bad doo doo's. -
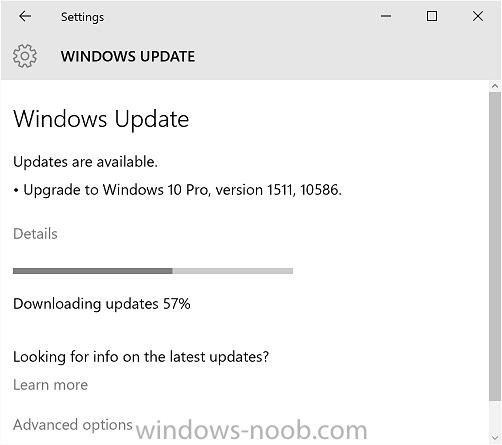
If you logon to MSDN or the Microsoft Volume License websites you'll see some new downloads available for Windows 10, namely: Windows 10 (Multiple Editions), Version 1511 New! Windows 10 Education, Version 1511 New! Windows 10 Enterprise, Version 1511 New! Windows 10 Features on Demand, Version 1511 New! These downloads are for the Threshold 2 release of Windows 10, now called Version 1511 (using the following convention YY//MM). Full details about what these new releases contain are listed in the blog post from Terry Myerson here. You'll notice that the LTSB media isn't updated, and that's what you'd expect for the Long Term Servicing Branch. Note: You may need to install this update on your WSUS or SUP infrastructure to see the upgrade category. https://support.microsoft.com/en-us/kb/3095113 Corporate domain joined pc's can be Current Branch or Current Branch for Business depending on how you want them to 'update' and how often, see this post for details https://technet.microsoft.com/.../mt598226%28v=vs.85%29.aspx If you have defer upgrades selected in Windows update advanced options, then your pc's are using CBB (current branch for business) with an approx 4 month gap after today's release in terms of needing to upgrade. If you attempt to update Windows Home, Pro or Enterprise via Windows Update today you'll see the update as long as you are on Current Branch (CB) Can I deploy this via ConfigMgr ? This update with the new classification “Upgrade” can be sync’d down from WSUS after the hotfix is applied (linked above) if the Upgrade classification is checked explicitly. However, only ConfigMgr vNext clients can complete the end to end installation successfully since this Windows 10 Upgrade is in a different format and requires special handling on the client side. Without ConfigMgr vNext, the install will fail. Using an OSD Upgrade Task Sequence is still the recommended way to upgrade to Windows 10 via the current versions of ConfigMgr (excluding ConfigMgr vNext) as these versions actually do not support Windows 10 upgrade via Software Update Management. cheers niall
-
i'm not using that method (script) however it's documented somewhat here, note that this is for MBAM 2.5sp1 are you using that version or an earlier version ? In the State Restore folder, delete the Enable BitLocker task. In the State Restore folder under Custom Tasks, create a new Install Application task and name it Install MBAM Agent. Click the Install Single Application radio button and browse to the MBAM 2.5 SP1 client application created earlier. In the State Restore folder under Custom Tasks, create a new Run PowerShell Script task (after the MBAM 2.5 SP1 Client application step) with the following settings (update the parameters as appropriate for your environment): Name: Configure BitLocker for MBAM PowerShell script: Invoke-MbamClientDeployment.ps1 Parameters: -RecoveryServiceEndpoint Required MBAM recovery service endpoint -StatusReportingServiceEndpoint Optional MBAM status reporting service endpoint -EncryptionMethod Optional Encryption method (default: AES 128) -EncryptAndEscrowDataVolume Switch Specify to encrypt data volume(s) and escrow data volume recovery key(s) -WaitForEncryptionToComplete Switch Specify to wait for the encryption to complete -DoNotResumeSuspendedEncryption Switch Specify that the deployment script will not resume suspended encryption -IgnoreEscrowOwnerAuthFailure Switch Specify to ignore TPM owner-auth escrow failure. It should be used in the scenarios where MBAM is not able to read the TPM owner-auth, e.g. if TPM auto provisioning is enabled -IgnoreEscrowRecoveryKeyFailure Switch Specify to ignore volume recovery key escrow failure -IgnoreReportStatusFailure Switch Specify to ignore status reporting failure
-
how long have you waited after that ? did you verify if it fails over on that step or not we've only been deploying i5 Surface Pro 3's and have not noticed that behaviour are you installing these apps as dynamic apps (via variables) if so there's a bug in CM12 R2 SP1 that should be resolved (hopefully) in CU2
-
here's a list of known issues that can impact users: After upgrading from one Windows 10 Insider Preview build to another Insider Preview build, Skype messages and contacts will disappear from the Messaging + Skype app. You can get Skype messages and contacts back by navigating to “C:\Users\<USERNAME>\AppData\Local\Packages\Microsoft.Messaging_ 8wekyb3d8bbwe\LocalCache” in File Explorer and deleting or renaming the “PrivateTransportId” file. After deleting or renaming that file, go to the Skype video app and sign out of Skype and sign back in. The Insider Hub might be gone after upgrading to this build. You can get Insider Hub back by going to Settings > System > Apps & features and clicking “Mange optional features”, choosing “Add a feature” and selecting Insider Hub. Fixed in this release: The issue where any audio playing (like music from Groove, or videos from the Movies & TV app) gets reduced by 75% for a period of time after a notification pops up from Action Center is fixed. Pressing the power button on your Surface Pro 3 should put your Surface Pro 3 to sleep instead of shutting it down. We fixed an issue reported by Windows Insiders where a disksnapshot.exe command prompt window would flash randomly. Windows should now remember your previous login type. For example, if you log in with a PIN – it will prompt you for a PIN next time instead of another type. We fixed an issue where Tab previews in Microsoft Edge were appearing as black if the page was not scrolled to the top, and web note clippings were also appearing as black. Small form-factor devices, like the Dell Venue 8 Pro, that boot with rotation or virtual mode screen size set larger than the physical screen size should no longer experience a bluescreen on upgrade. Apps and games should download from the Store more reliably. here's the blog http://blogs.windows.com/windowsexperience/2015/11/05/announcing-windows-10-insider-preview-build-10586/
-
take a look at the below guides:- CM12 in a Lab - How can I deploy a customized Windows 10 start menu using System Center 2012 R2 SP1 Configuration Manager ? CM12 in a Lab - How can I deploy Windows 10 Enterprise x64 with MDT 2013 Update 1 integrated with System Center 2012 R2 SP1 Configuration Manager ? CM12 in a Lab - How can I upgrade to System Center 2012 R2 SP1 with MDT 2013 update 1 integrated ?
-
Windows 10 Threshold 2 (build 10576) is now available to Windows Insiders
anyweb replied to anyweb's topic in Windows News
Update: Winbeta.org have stated the following http://www.winbeta.org/news/windows-10-threshold-2-has-been-signed-off-at-build-10586