anyweb
-
Posts
9273 -
Joined
-
Last visited
-
Days Won
371
Everything posted by anyweb
-
 yes just be aware that when you deploy the new MDT 2013 update 1 integrated task sequence that the boot wim attached to it (should be winpe 10) will take over as the LIFO rule applies (last in, first out) when it comes to deployed task sequences to a collection therefore to avoid your production machines staging the wrong boot wim, redeploy your production task sequences to the same colleciton, the difference is they have Winpe 5.x attached to them,
 -
<![LOG[successfully completed the action (Setup Windows and Configuration Manager) with the exit win32 code 0]LOG]!><time="12:02:29.657-600" date="08-24-2015" component="TSManager" context="" type="1" thread="800" file="instruction.cxx:846"> probably means the latest logs are in the C:\_SMSTasksequence\Logs or C:\Windows\CCM\LOGS folder, can you check there to see what log file you have as the one above looks ok from first looks
-
OSD & PXE: BIOS/UEFI and SecureBoot
anyweb replied to surfincow's topic in Configuration Manager 2012
if you are using UEFI network boot then you must remove the DHCP scope options which you may have put in place for Legacy network boot, instead use iphelpers to direct traffic accordingly. -
you can reuse the old ones with the old toolkit packages no problem, however if you want to use the new content, then you have to create new task sequences
-
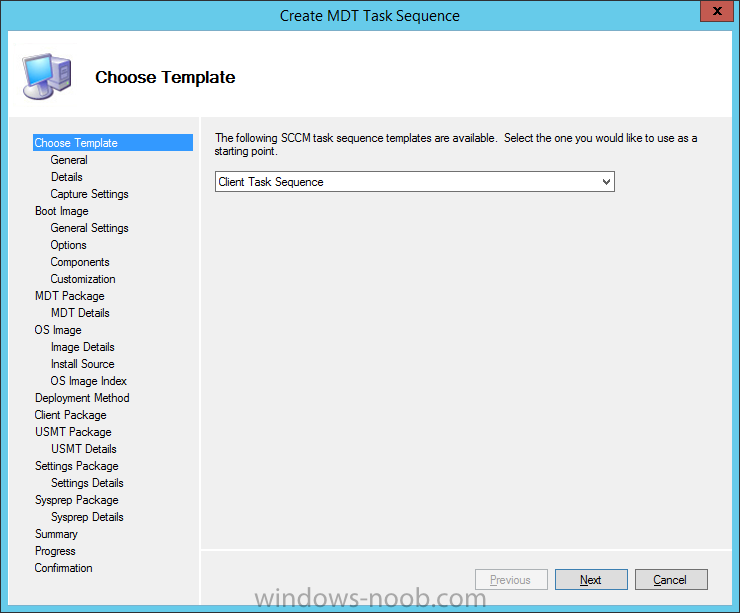
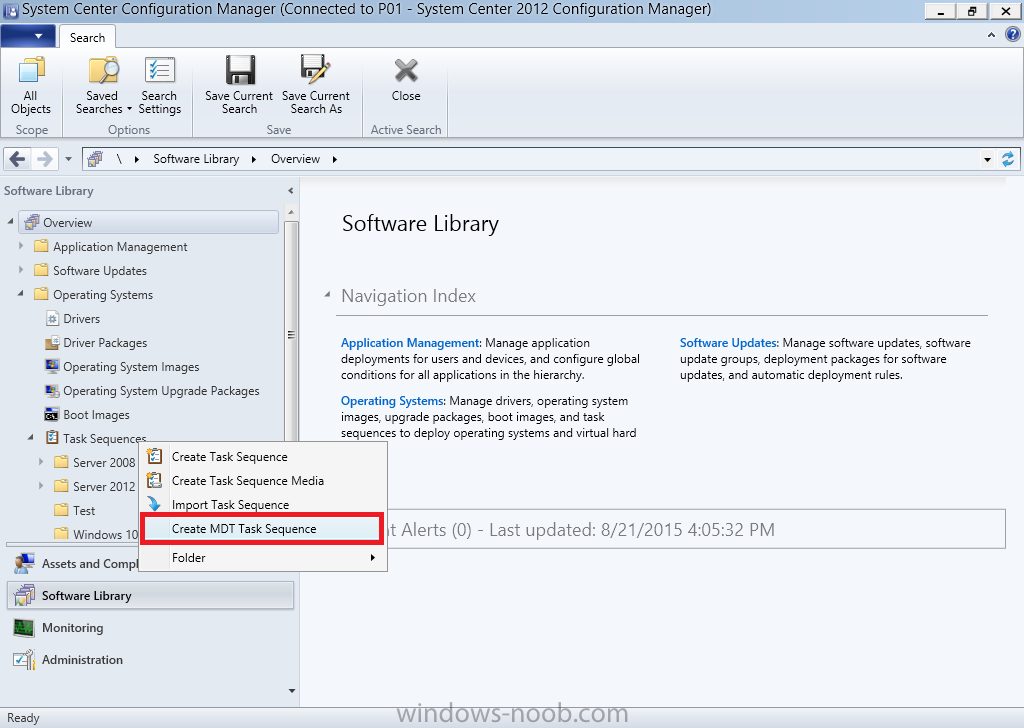
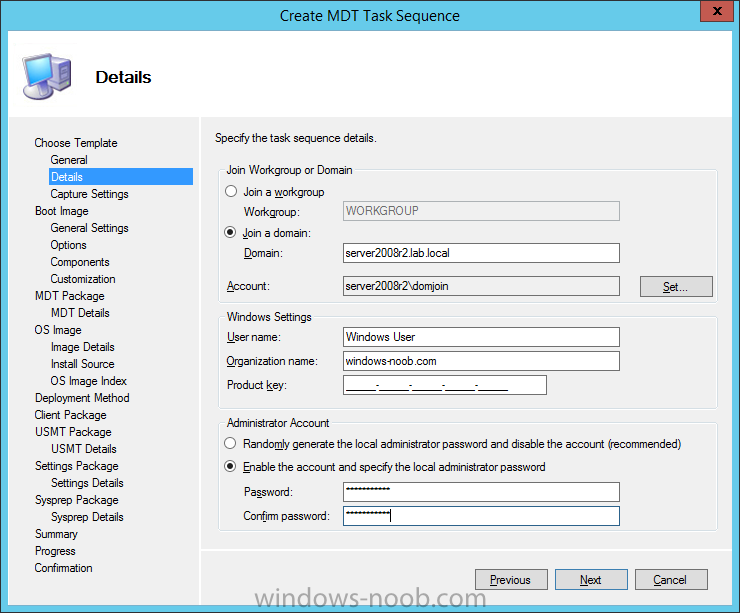
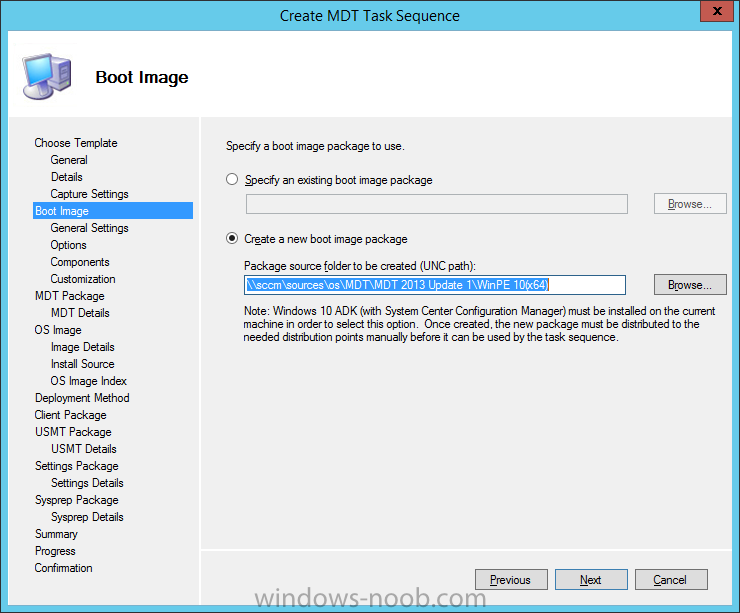
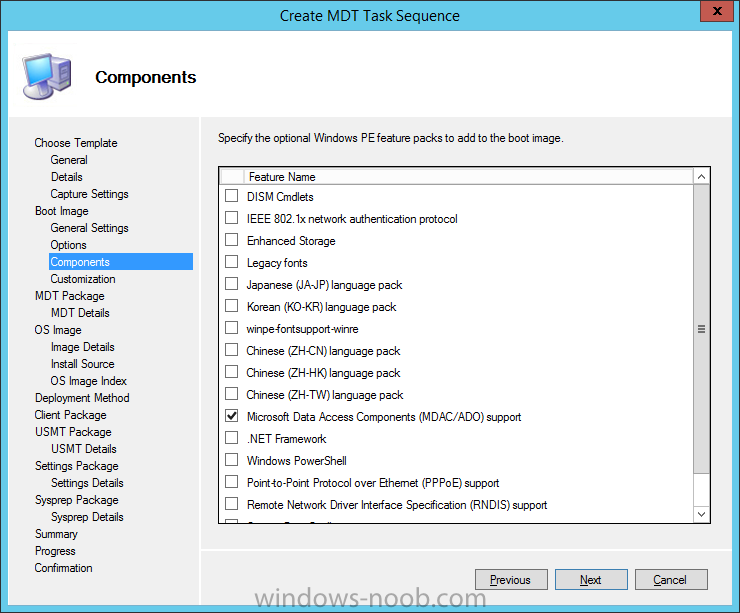
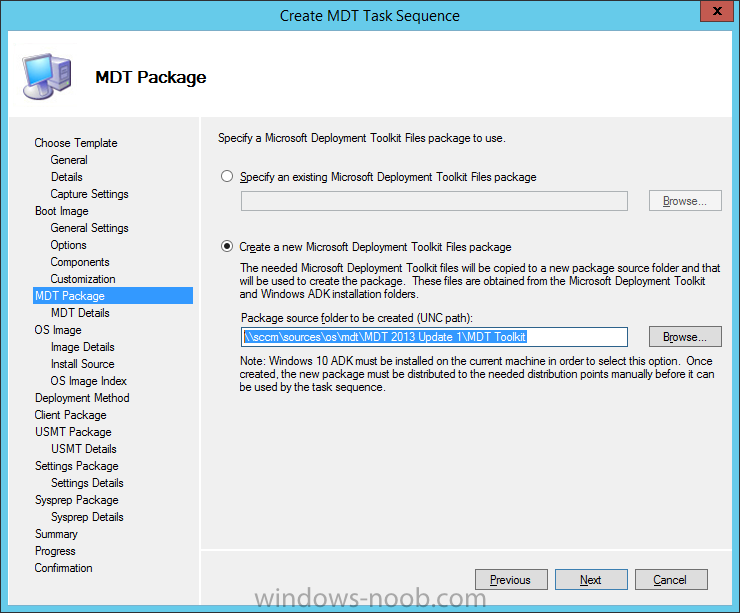
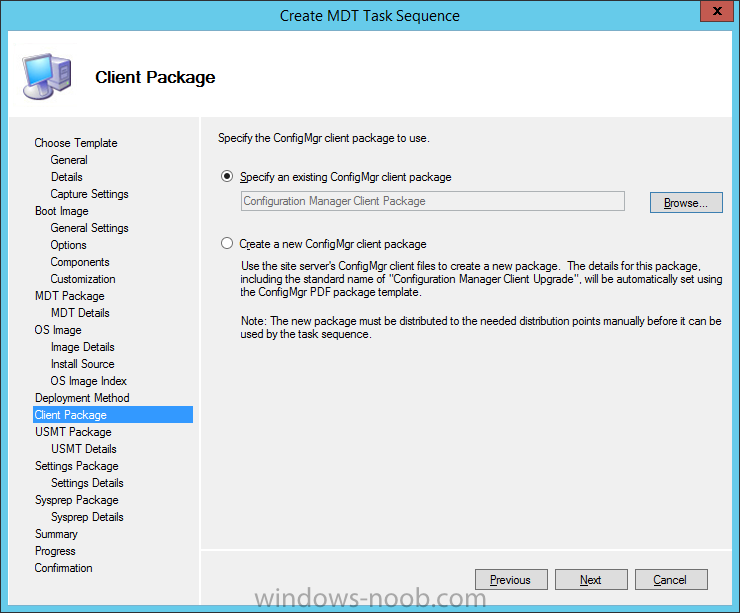
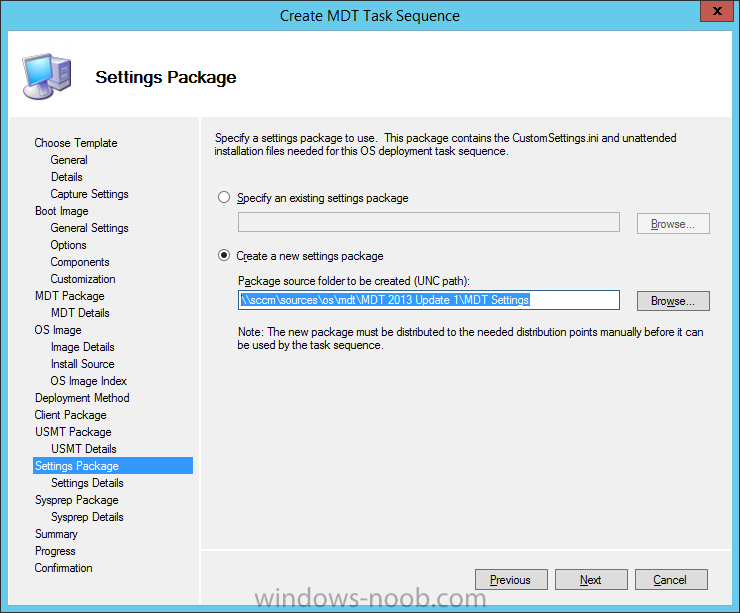
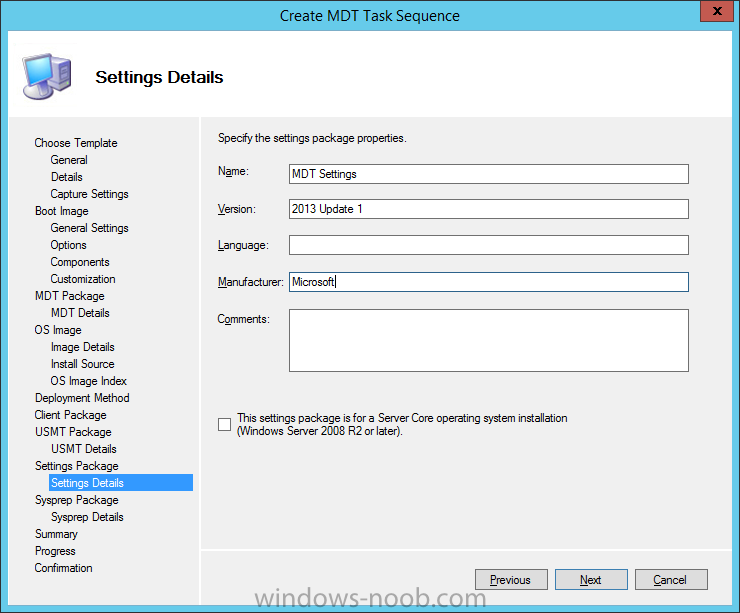
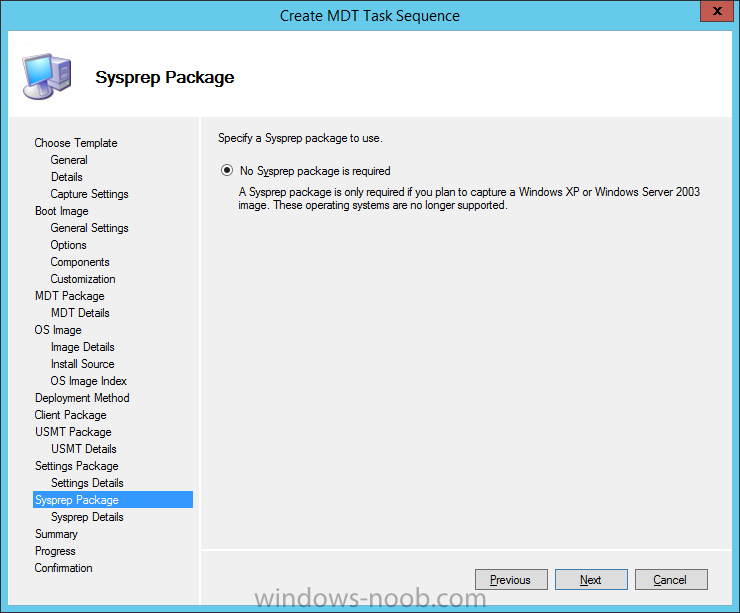
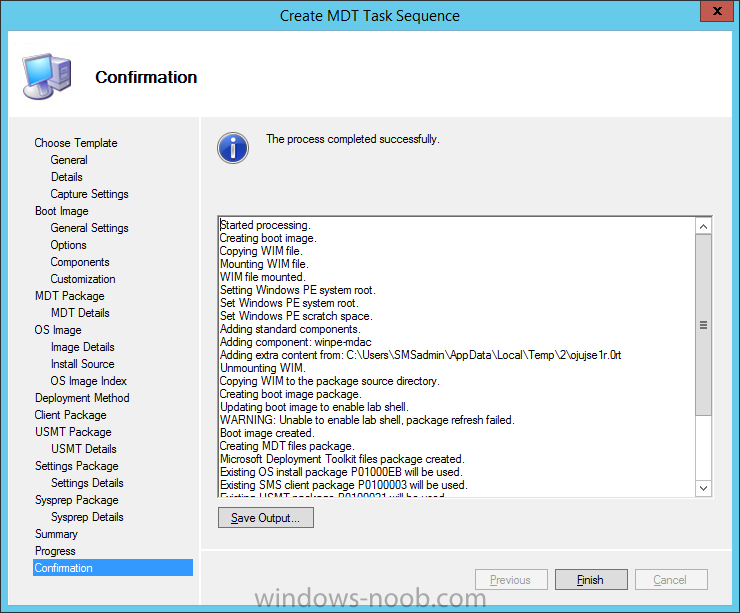
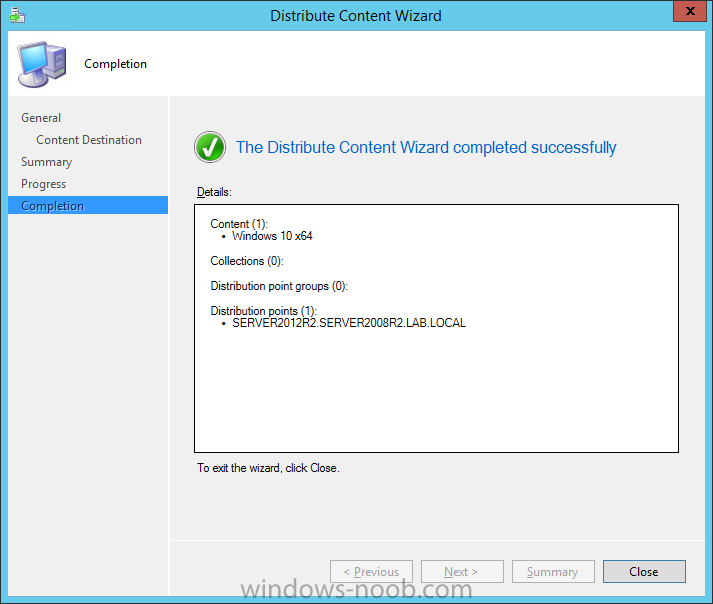
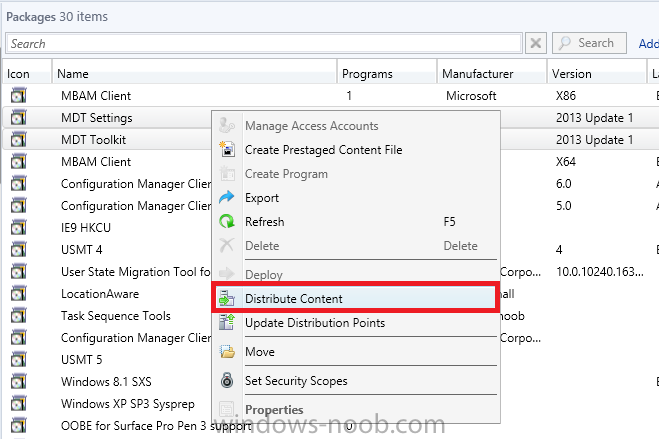
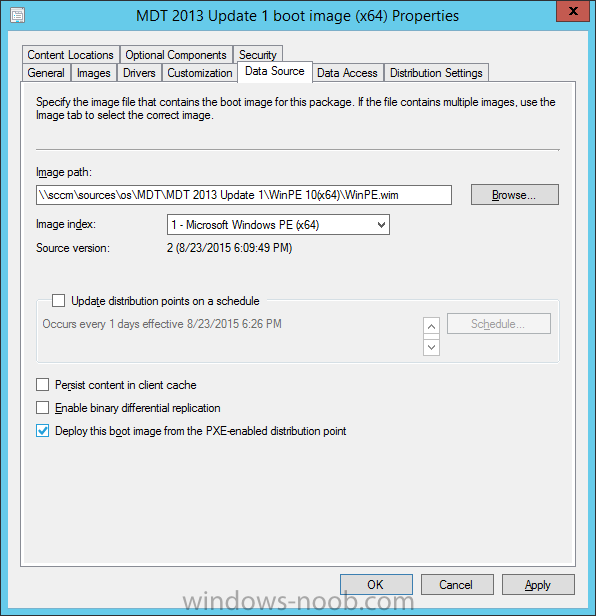
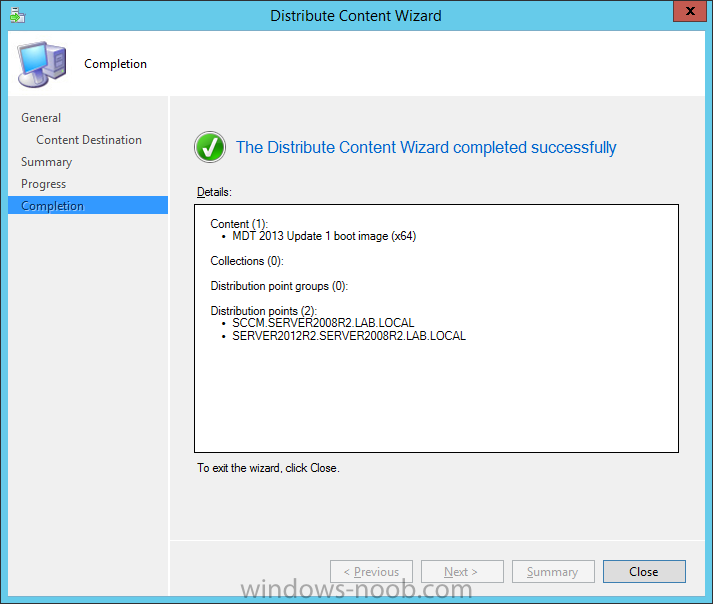
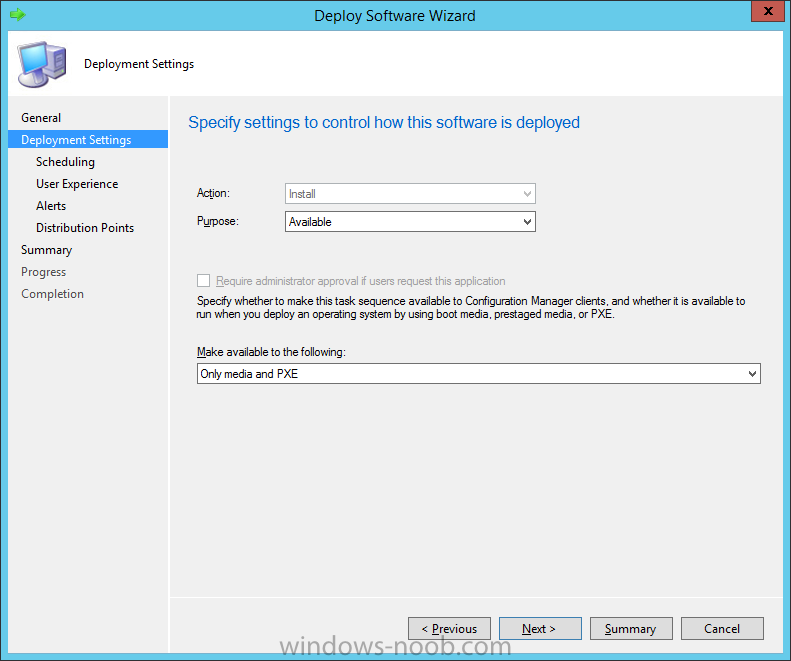
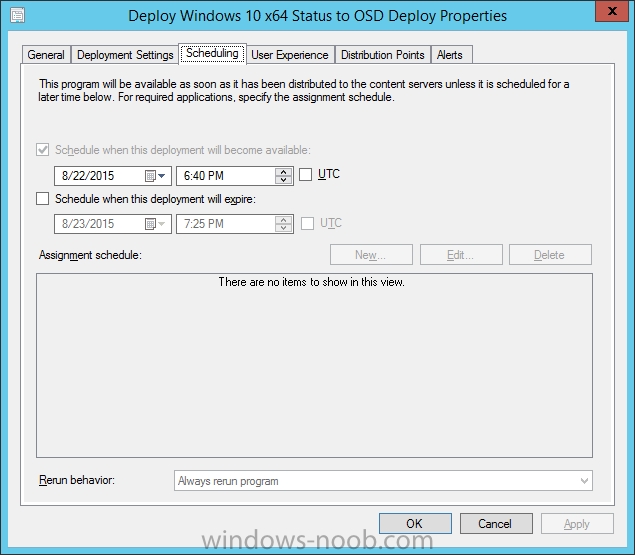
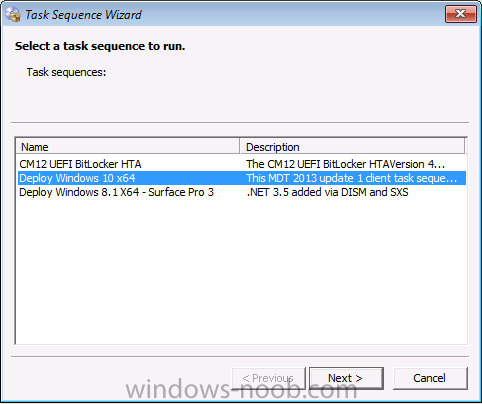
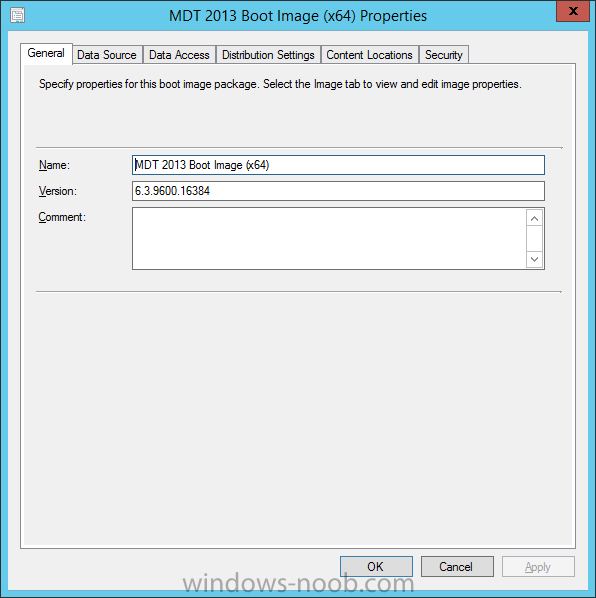
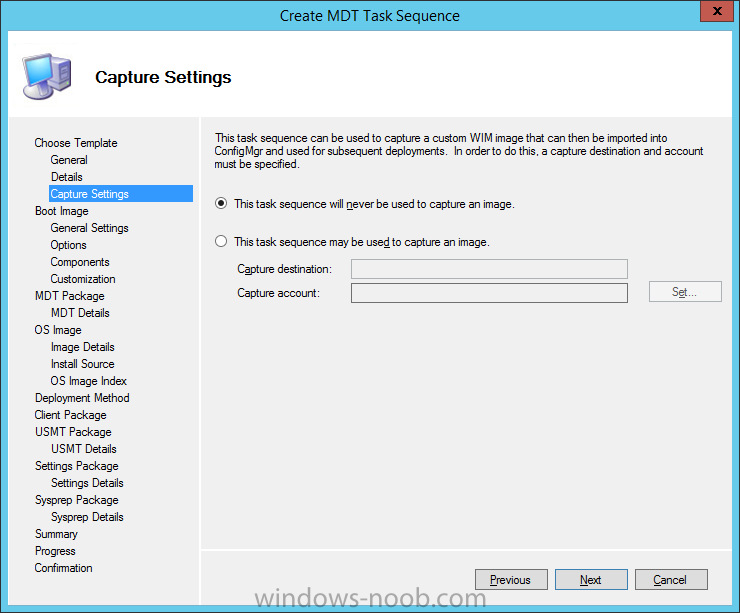
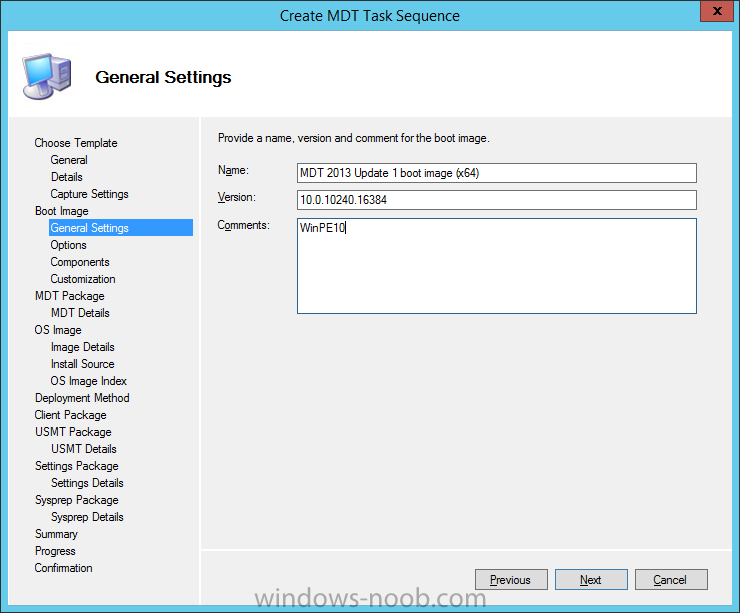
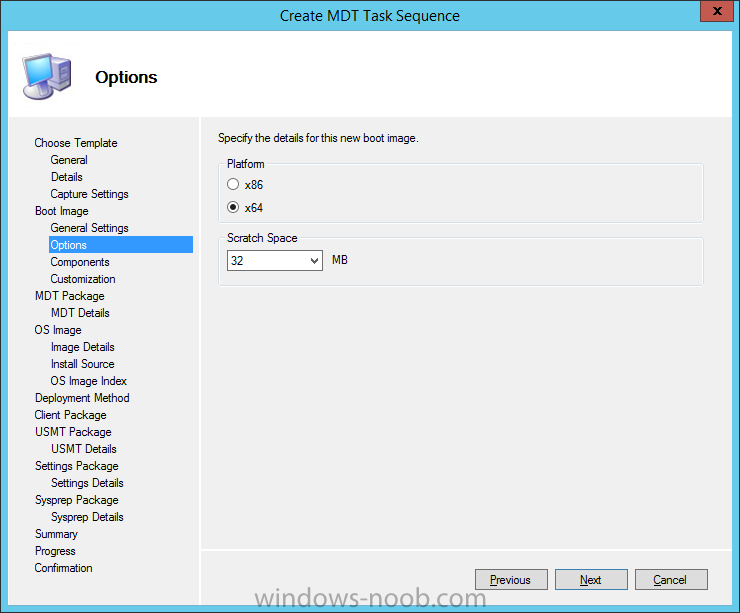
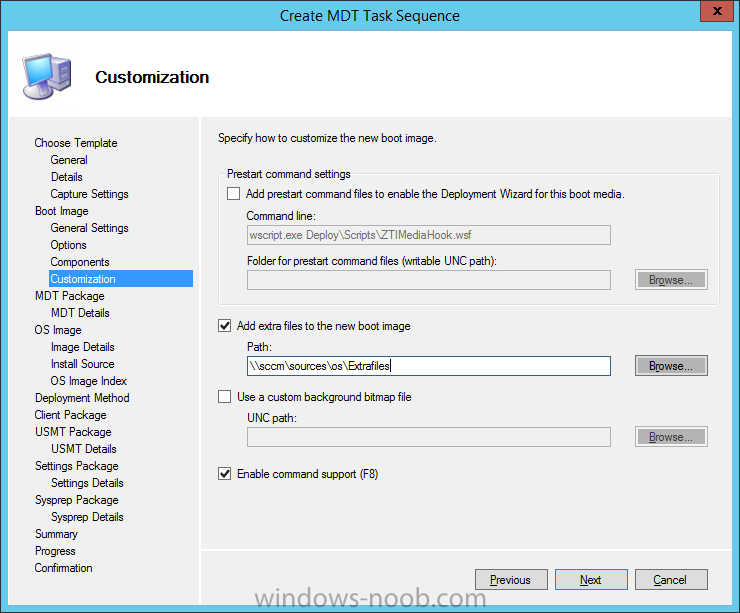
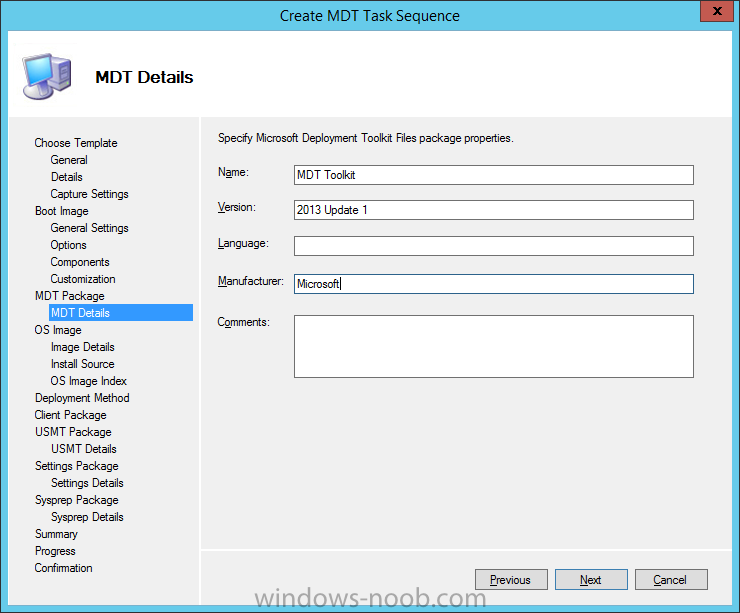
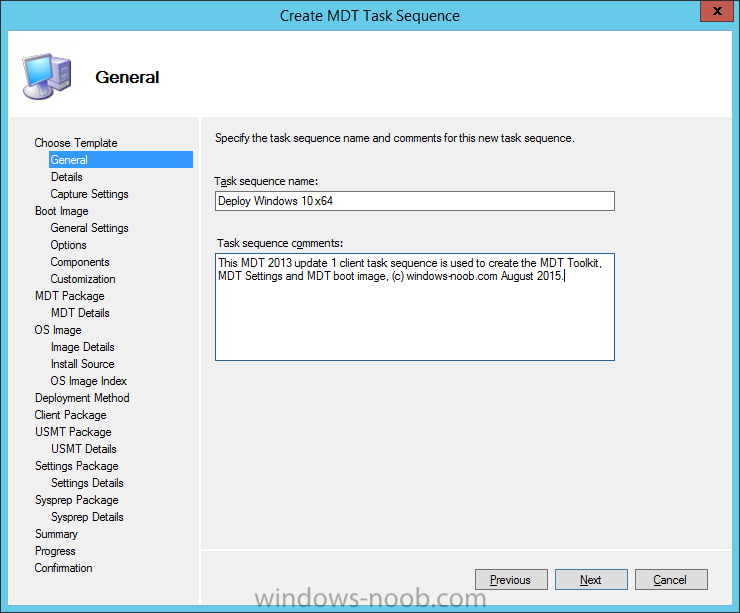
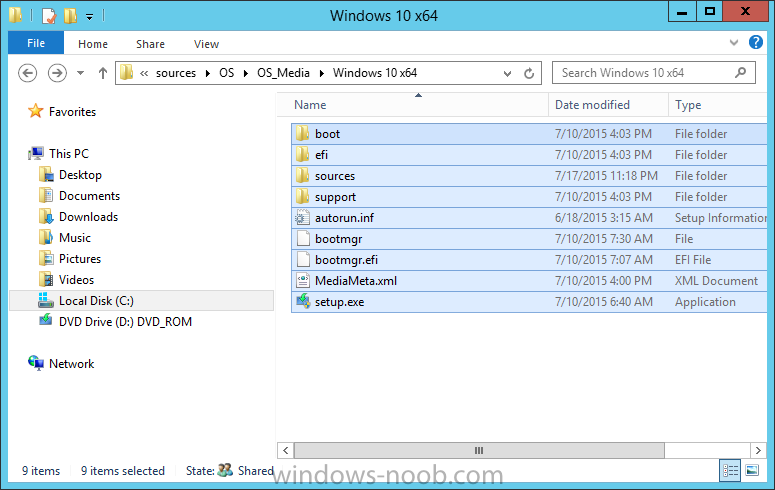
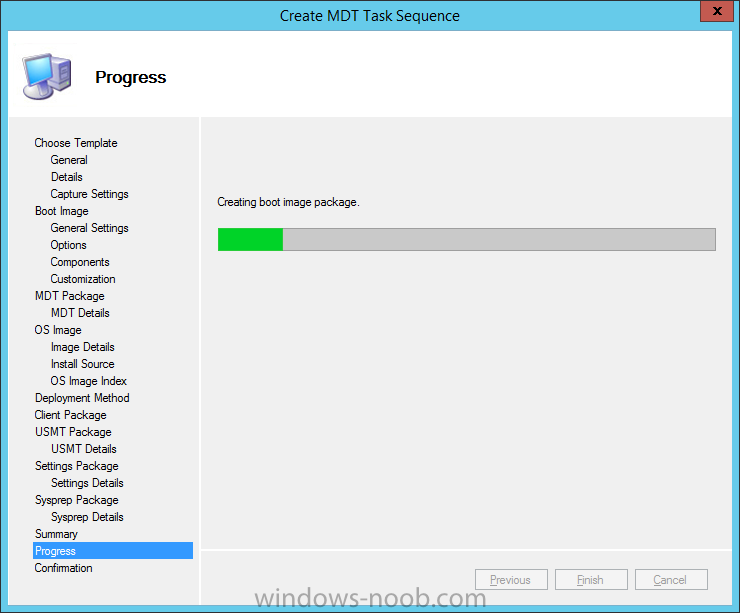
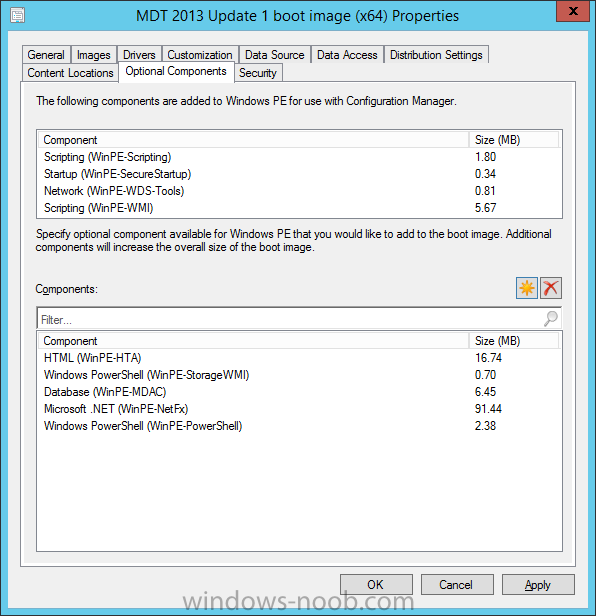
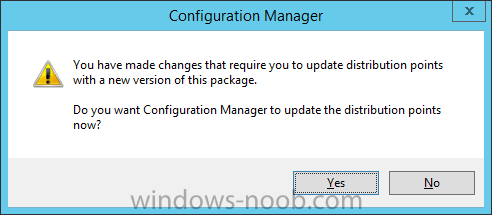
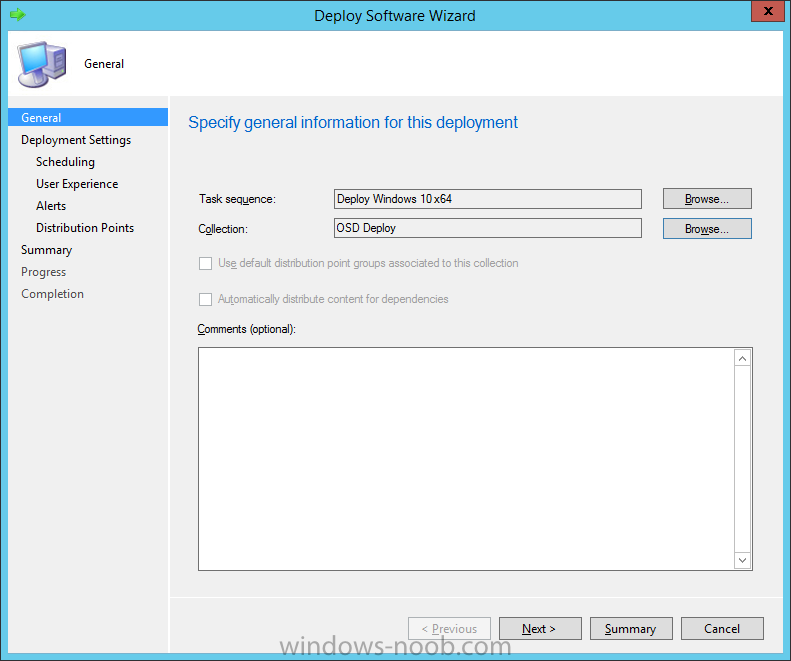
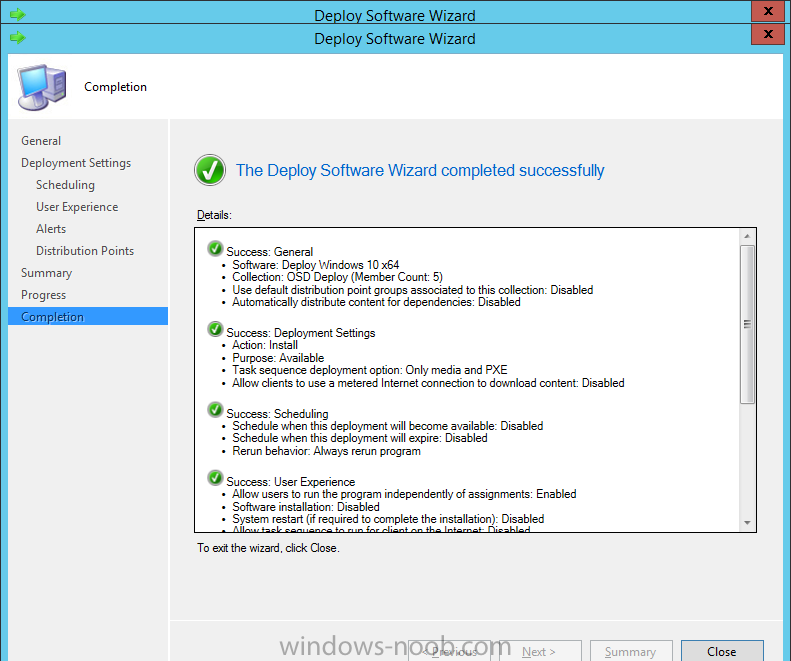
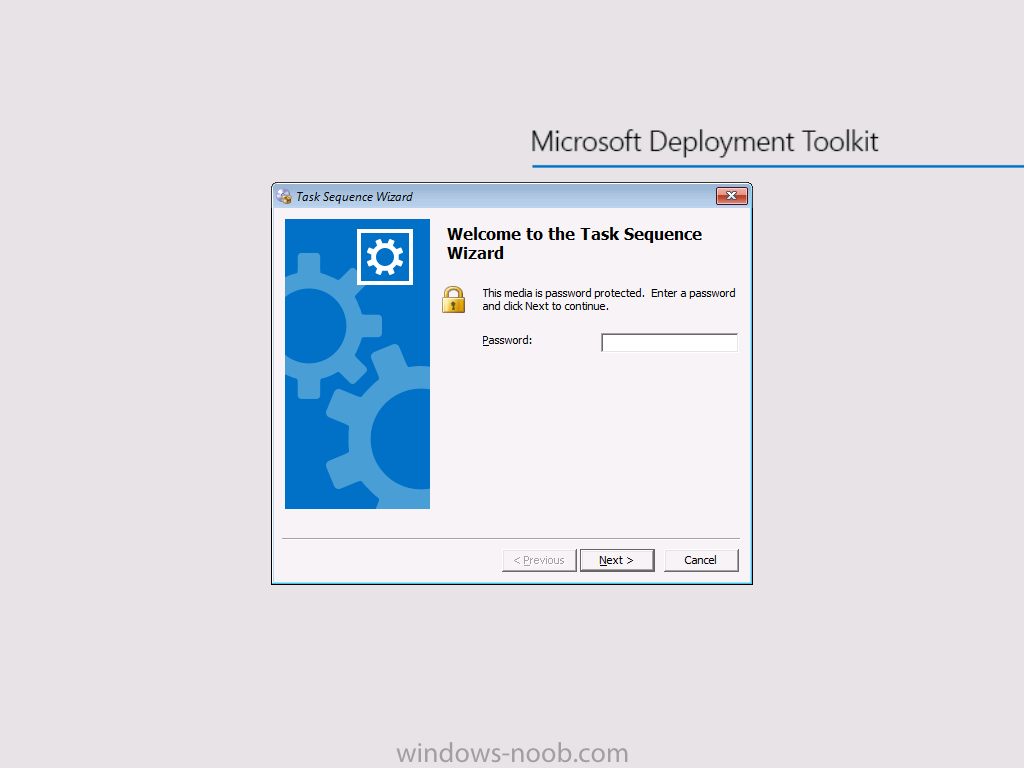
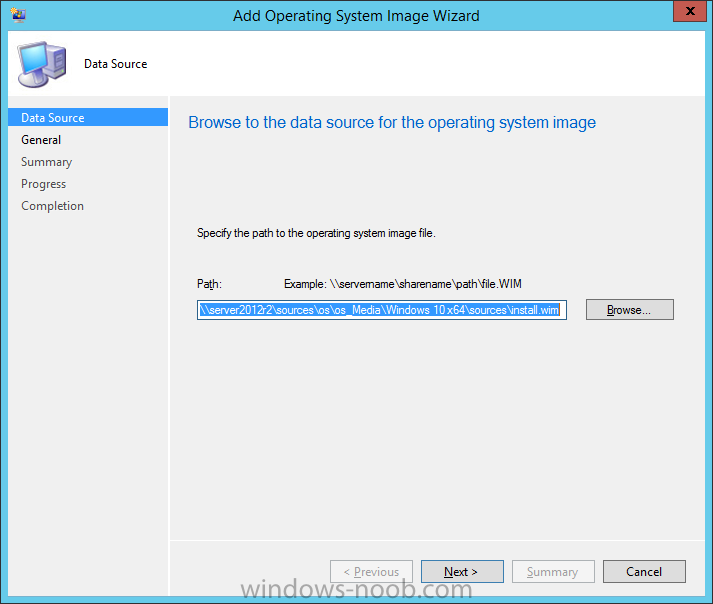
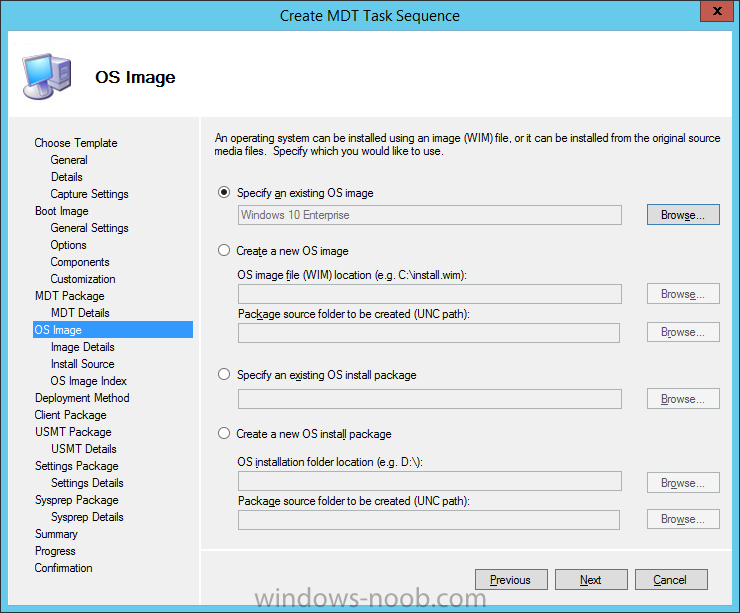
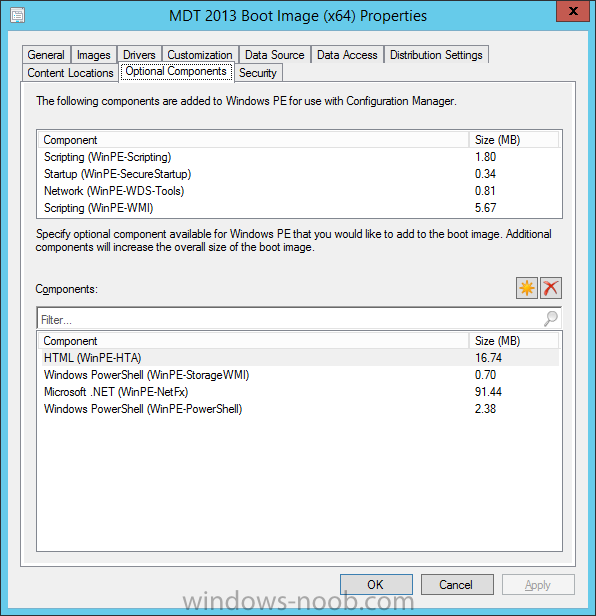
In a previous post I showed you how you can upgrade System Center 2012 R2 Configuration Manager to System Center 2012 R2 SP1 Configuration Manager with MDT 2013 Update 1 integrated. If you haven't upgrade ConfigMgr yet then I urge you to do so before starting this post. In this post I'll show you how you can deploy a clean build of Windows 10 Enterprise x64 by using the official media from Microsoft in a MDT integrated task sequence in ConfigMgr. Before we can do that however we need to create a bunch of new MDT content by creating a new MDT 2013 Update 1 task sequence and choosing from the available options to create the new MDT Toolkit and MDT Settings packages. In addition, we will create a new MDT 2013 Udpate 1 boot image (x64). Note: I should point out that there were some bugs in the initial release of MDT 2013 Update 1 which were excellently documented by Johan here. However, Microsoft has released a new version of MDT 2013 update 1 (September 15th 2015) as documented here and it should resolve most of those bugs. Step 1. Get the Windows 10 Enterprise x64 media I used the Windows 10 Enterprise x64 media from MSDN available here which i then mounted in Windows File Explorer. After mounting the ISO, copy the contents to somewhere useful like \\server2012\sources\os\os_media\windows 10 x64 Step 2. Add a Windows 10 x64 image To add the operating system do as follows. In the ConfigMgr console, select Software Library, then Operating Systems then Operating System Images. Right click and choose Add Operating System Image. Point it to the install.wim file in the sources folder of the Windows 10 Enterprise x64 media you added in Step 1. \\server2012r2\sources\os\os_Media\Windows 10 x64\sources\install.wim and fill in some details about the image and continue through the wizard until completion. Step 3. Distribute the Windows 10 image to your dps Right click the newly added image, choose Distribute Content, and continue through that wizard. Step 4. Create MDT Task Sequence In order to create our new packages (MDT Toolkit and MDT Settings) we need to go through the Create new mdt task sequence wizard. To start that, in the ConfigMgr console click on Software Library, Operating Systems, Task Sequences, right click and choose Create MDT Task Sequence. Choose Client Task Sequence from the list of available options For task sequence name, use Deploy Windows 10 x64 For Details, enter the domain join details, then enter any Windows settings, and lastly enter a Local administrator password in case you decide to deploy this task sequence later and it fails before joining the domain. For Capture Settings, select This task sequence will never be used to capture an image For Boot Image select the second option, this will allow you to create one of the two architecture MDT boot images, specify a suitable source such as \\sccm\sources\os\MDT\MDT 2013 Update 1\WinPE 10(x64) which will be created later by this wizard. for the Boot Image General Settings use the following values: Name: MDT 2013 Update 1 boot image (x64) Version: 10.0.10240.16384 Comment: WinPE10 select x64 architecture for Components, leave the selection as is (there is a bug related to this) For the Customization step let's point it to some preconfigured Extrafiles, basically in the extrafiles folder we create a folder called Windows and in that folder place a text file called smsts.ini which has the following contents [Logging] LOGLEVEL=0 LOGMAXSIZE=524288000 LOGMAXHISTORY=3 DEBUGLOGGING=1 CCMDEBUGLOGGING=1 this will enable better logging in WinPE as per this blog post. For the MDT Package step, not you have the ability to create the new MDT 2013 Update 1 MDT Toolkit Package, by selecting the Create a New Microsoft Deployment Toolkit Package option. For the Package source option use something like \\sccm\sources\os\mdt\MDT 2013 Update 1\MDT Toolkit for MDT Details use the following settings: Name: MDT Toolkit Version: 2013 Update 1 Language Manufacturer: Microsoft Comments For OS Image, select Specify an existing OS image and browse to the previously added Windows 10 Enterprise x64 image. For Deployment Method you get to choose the type of task sequence interaction will be used, if you want your users to have choices then select the UDI option, otherwise select the Zero Touch option to remove choices from the task sequence. In this guide we will select Perform a Zero Touch Installation OS Deployment with no user interaction. for Client Package, select Specify an existing ConfigMgr client package and browse to the one you wish to use. for USMT Package select the User State Migration Tool for Windows 10 package which we renamed in this post. For Settings Package, we need to create our new MDT 2013 Update 1 settings package, therefore select the second option. You only have to do this once, and that is when you upgrade to a new version of MDT. Select Create a new settings package and fill in the path to be created as shown below something like \\sccm\sources\os\mdt\MDT 2013 Update 1\MDT Settings for Settings Details use the following settings: Name: MDT Settings Version: 2013 Update 1 Language Manufacturer: Microsoft Comments for Sysprep Package, set No sysprep package to use and continue through to the end of the wizard. off it goes creating the Boot Image and after a while you'll get a process completed successfully message (hopefully). close the wizard. Step 5. Distribute the new MDT Toolkit and MDT Settings packages Open the ConfigMgr console, and press F5 or refresh the view to see the newly created packages. Select both of the MDT packages, right click and choose distribute content, continue through that wizard until completion. Step 6. Edit the boot image settings. Browse to Software Library, Operating Systems, Boot images and select the MDT 2013 Update 1 boot image x64. Right click and choose Properties, and select the Data Source tab. Place a checkmark in Deploy this boot image from a PXE enabled distribution point. Next select the Optional Components tab and select the yellow starburst to add any new Optional Components that you want in the boot wim including Database (WinPE-MDAC) which was not included due to a bug. click Apply and answer no to the Distribute content to dp's now question close the wizard when done. Step 7. Distribute the new MDT 2013 Update 1 boot image Browse to Software Library, Operating Systems, Boot images and select the MDT 2013 Update 1 boot image x64. Right click and choose Distribute Content, continue through that wizard until completion. Step 8. Deploy the task sequence Browse to Software Library, Operating Systems, Task Sequences and select the Deploy Windows 10 x64 task sequence. Right click and choose Deploy and use the following settings For the General screen choose a suitable OSD Deploy collection for Deployment Settings make sure it is set to Available and deployed to Only media and PXE continue through the rest of the wizard until completion Note: Once you've deployed the task sequence, you may have to set the Deployment available date back a day otherwise it won't show up due to a bug. This ConfigMgr bug is set to be fixed in CU2. Step 9. PXE boot a VM to experience the changes Now everything is in place for testing a deployment of Windows 10 using an MDT 2013 Update 1 integrated task sequence in Configuration Manager. Simply PXE boot a computer that is a member of the OSD Deploy collection. While PXE booting, you can verify that the WIM file it's pulling down is indeed your newly created MDT 2013 update 1 boot image by looking at the boot image package id. It should match the Image ID column beside your new boot wim if it doesn't then you are probably booting from a different task sequence or there are problems with the content of the MDT boot image. Once the boot image has loaded you'll see the new Microsoft Deployment Toolkit background, and the new Windows PE 10 PXE password prompt and you see the list of Task Sequences, if your's doesn't show up, verify the deployment scheduling date as mentioned above. select the Deploy Windows 10 x64 and click next and off it goes... running Windows Setup And we are done. In a later post i'll guide you through adding drivers to the task sequence, until next time adios. Recommended reading New version of MDT 2013 Update 1 released to squash bugs in the first release - http://www.niallbrady.com/2015/09/15/new-version-of-mdt-2013-update-1-released-to-squash-bugs-in-the-first-release/ http://blogs.technet.com/b/msdeployment/archive/2015/08/25/mdt-2013-update-1-release-notes-and-known-issues.aspx


-
Slowness when building machine on SCCM 2012 R2
anyweb replied to Jumanji_21's topic in Configuration Manager 2012
well has something else changed in your infrastructure ? is the slowness only on the wim download ? any errors in smsts.log ? -
Prestaged computer account not used
anyweb replied to spgsitsupport's topic in Configuration Manager 2012
was their a client installed on the computer prior to this ? any smscfg.ini or sms certs present ? -
are you trying this on very fast SSD disks ? Johan mentioned a bug about this on his blog > http://www.deploymentresearch.com
-
good questions ! 1. not sure, but i'll seek clarification from the MS Product group 2. I just updated MDT by running the new msi,. then ran the configmgr integration, where it defaults to wanting to remove the extensions, simply change it to add. however, you'll still have to recreate any MDT task sequences, and create new MDT toolkit and MDT settings, MDT boot images packages, I'm doing up a post on that and will hopefully have it live tonite. cheers niall
-
using SCCM 2012 in a LAB - Part 1. Installation
anyweb replied to anyweb's topic in Configuration Manager 2012
is ConfigMgr running on a Virtual Machine on your laptop ? what is the 'crash' error message ? -
how do i create and push out image....
anyweb replied to artman51164's topic in Configuration Manager 2012
you should not be doing it this way, instead you should use virtual machines (hyperv or vmware) to create a master image on, you can use MDT 2013 (recommened) or SCCM 2012 R2 to build and capture (create reference image) on these devices some guides are below:- using System Center 2012 Configuration Manager - Part 12. Connecting Powershell and building a reference image of Windows 8 with .NET 3.5 using System Center 2012 Configuration Manager - Part 13. Deploying Windows 8 X64 with custom Start screen Create a Windows 8.1 Reference Image using MDT all the above should be enough, if however you insist on using a real computer with already installed apps and drivers as your reference image, you'll most likely end up with issues that cannot be resolved later as the computer was manually setup, you can capture the image using capture media, there are guides here for that, however I'll once again recommend you create a master reference image instead, so that you can fix any issues easily. -
Trouble with Linux clients reaching MP
anyweb replied to bmowens's topic in Configuration Manager 2012
did you review my guide here ? http://www.windows-noob.com/forums/index.php?/topic/9357-how-can-you-manage-linux-based-clients-in-system-center-2012-r2-configuration-manager/ -
can you guys clarify if you upgraded CM12R2 to SP1 after updating to Windows ADK 10 or did you replace Windows ADK 8.1 with Windows ADK 10 after the event ? if after, did you follow Brandons advice here ?
-
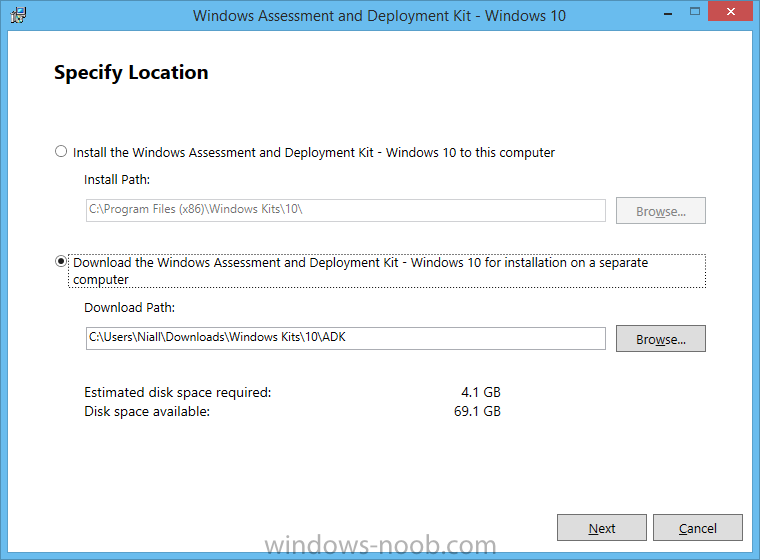
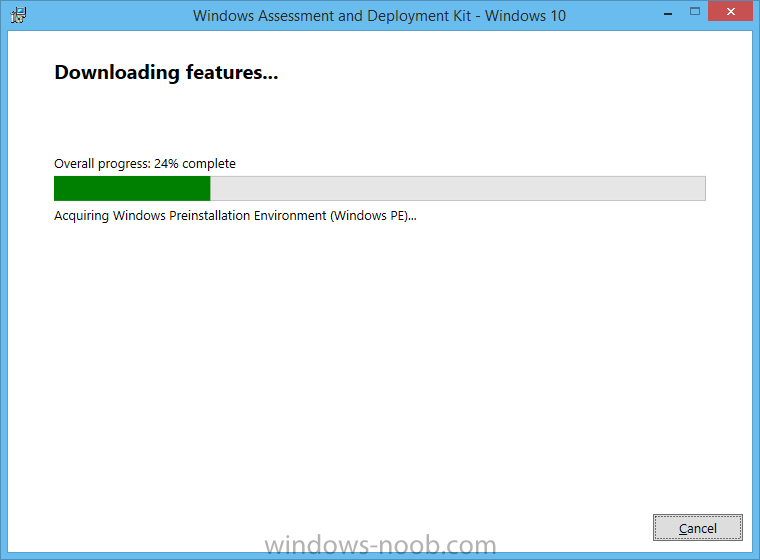
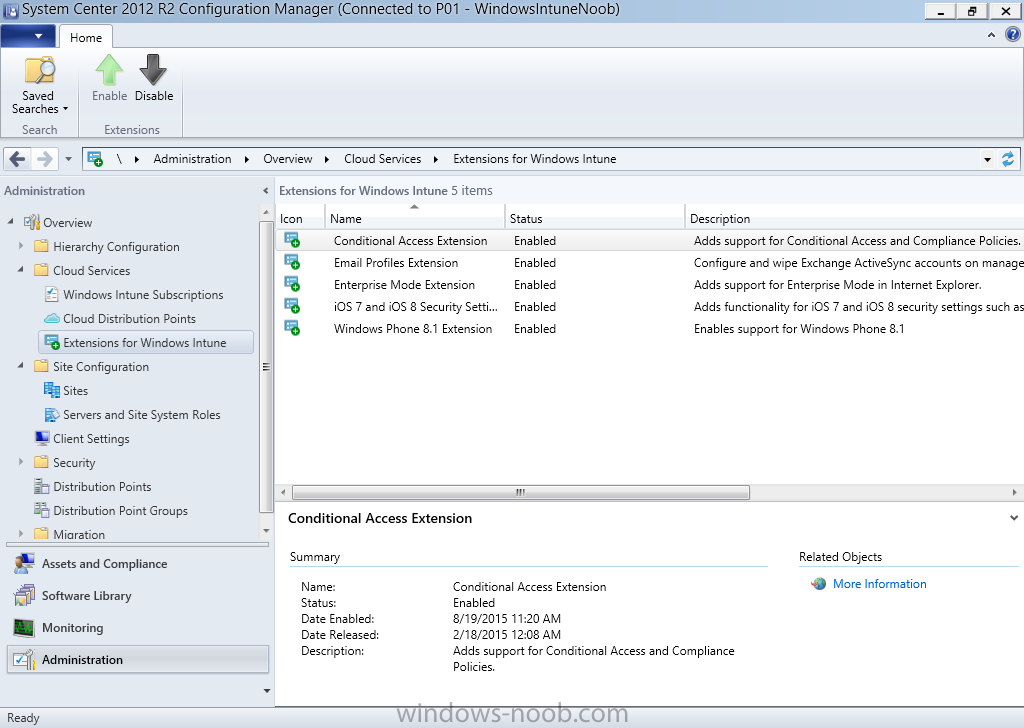
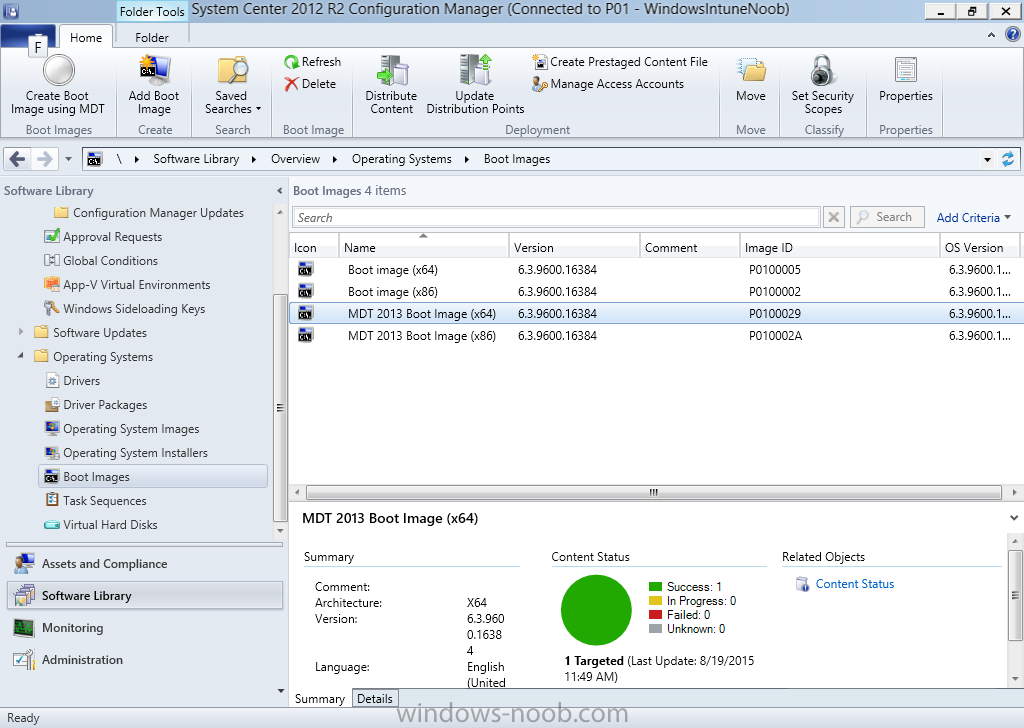
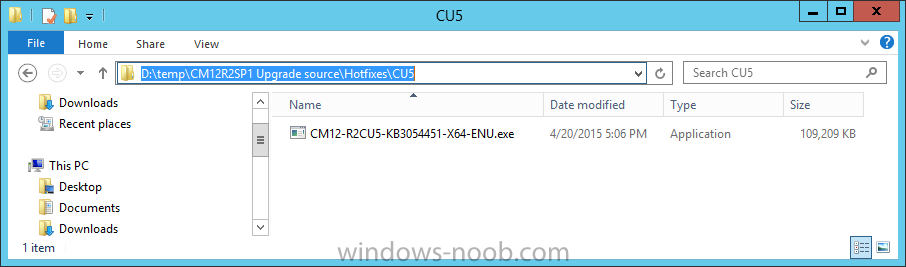
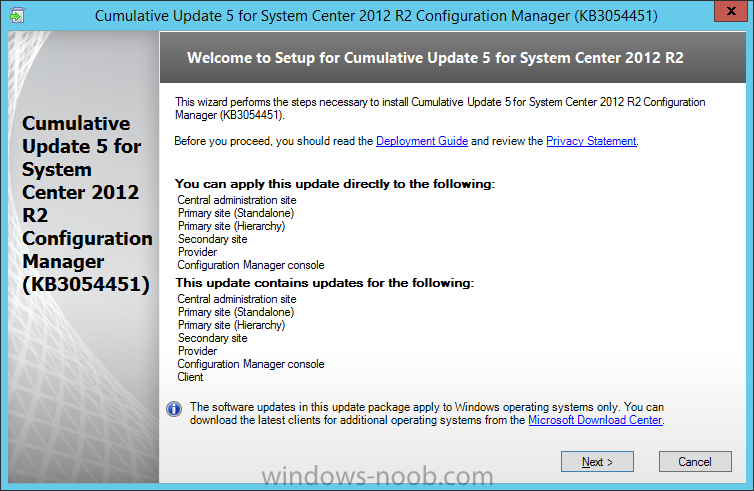
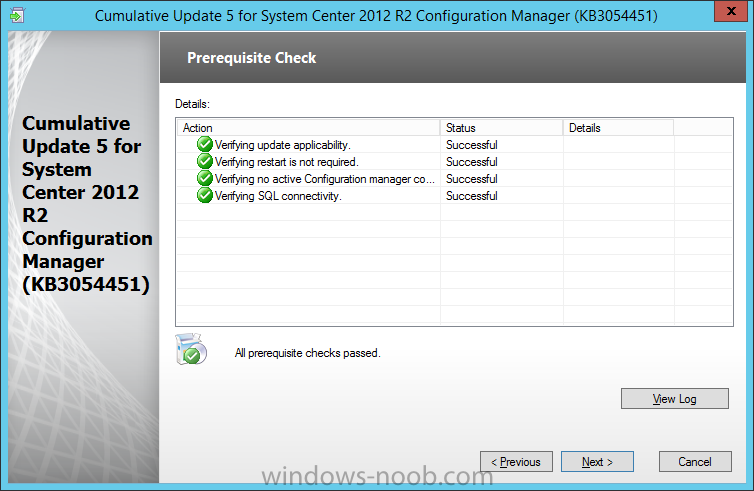
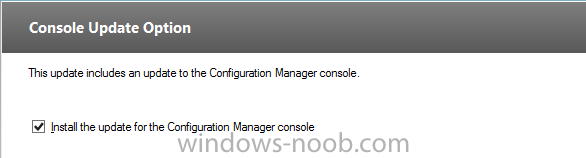
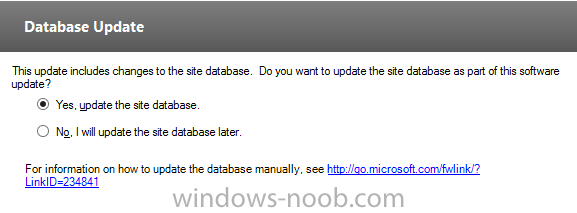
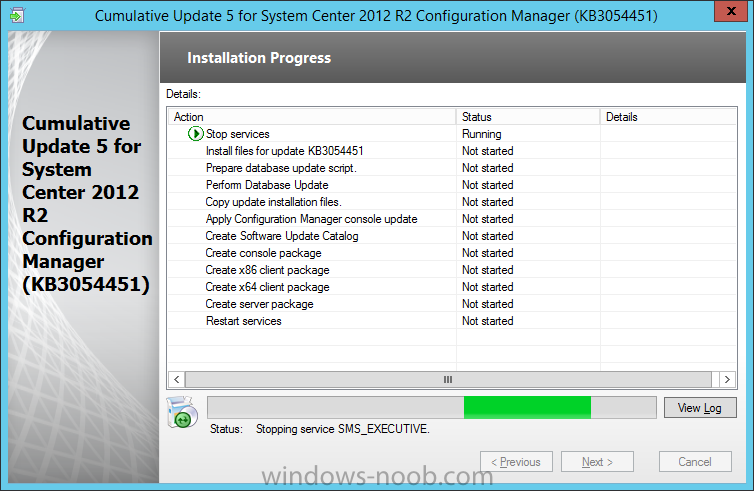
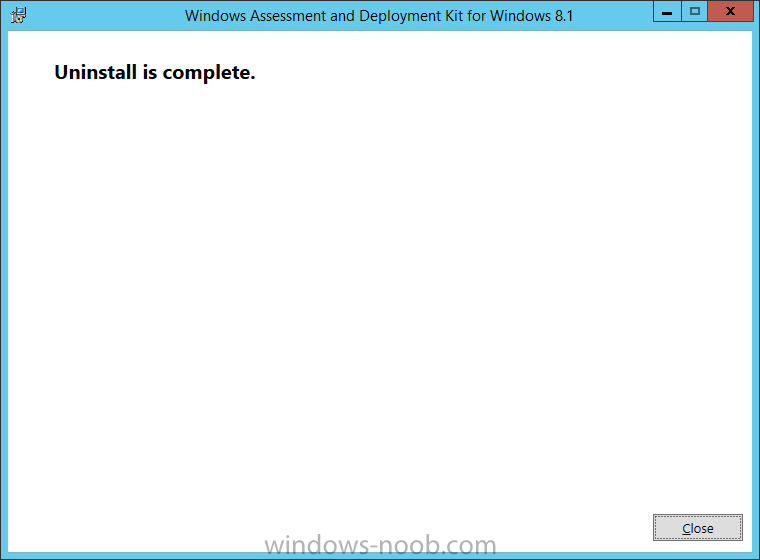
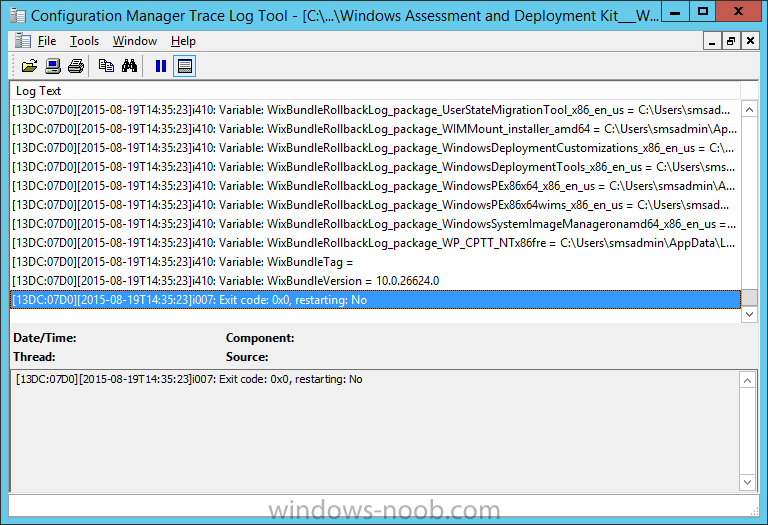
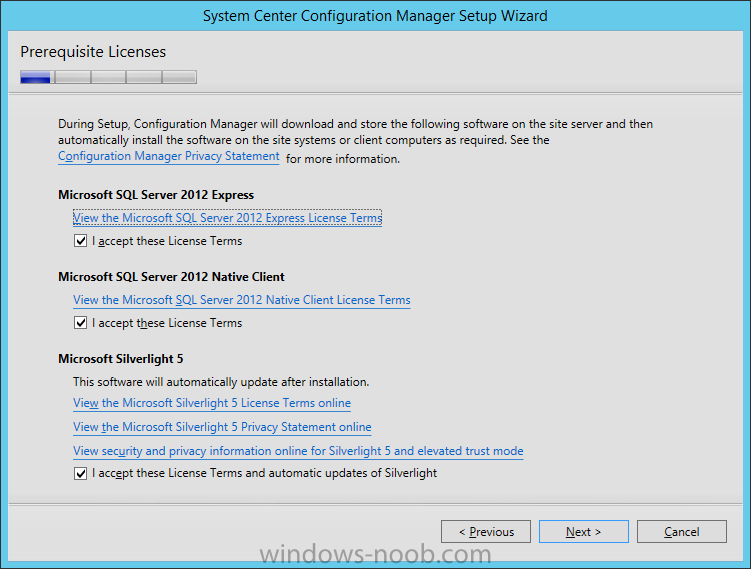
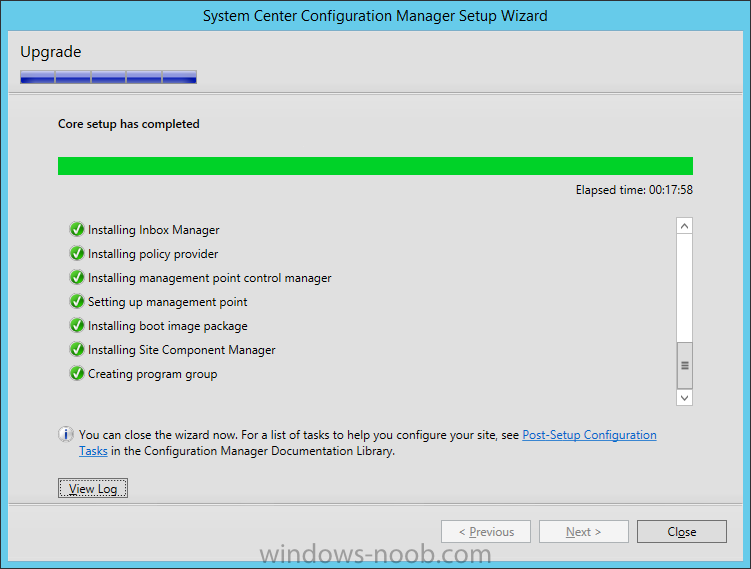
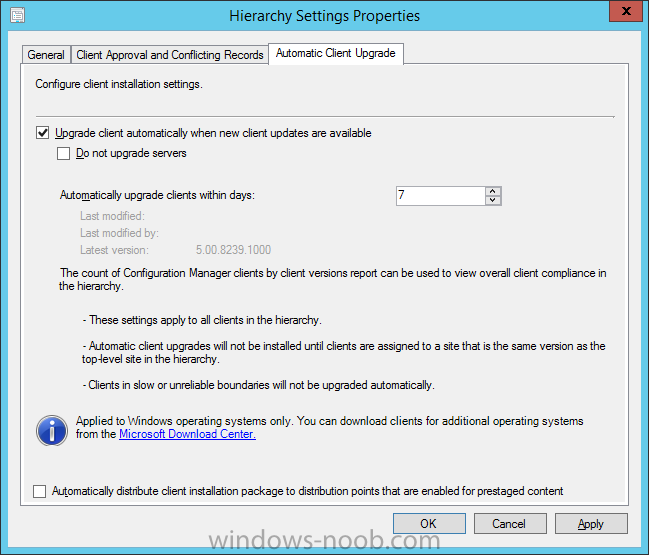
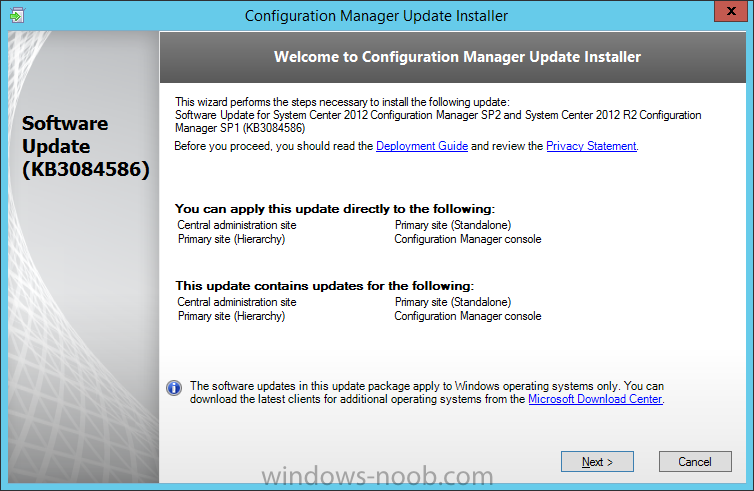
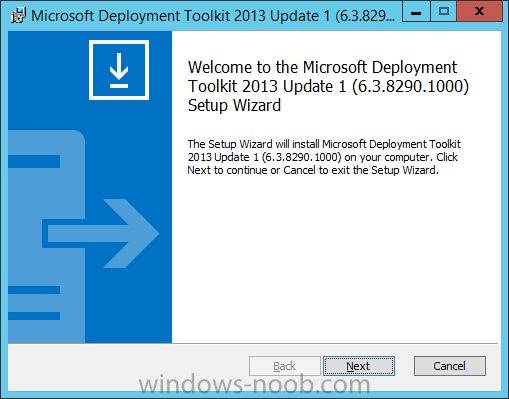
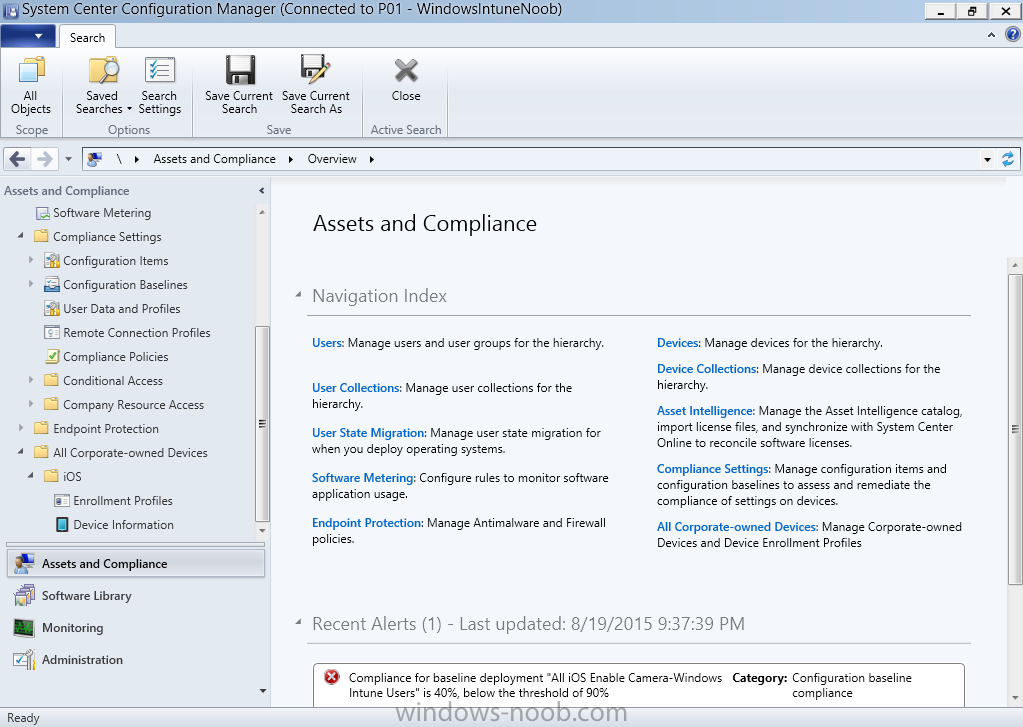
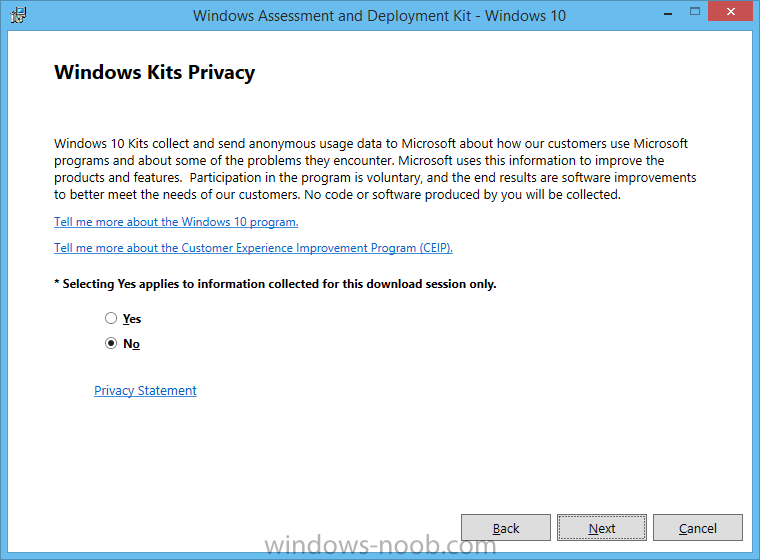
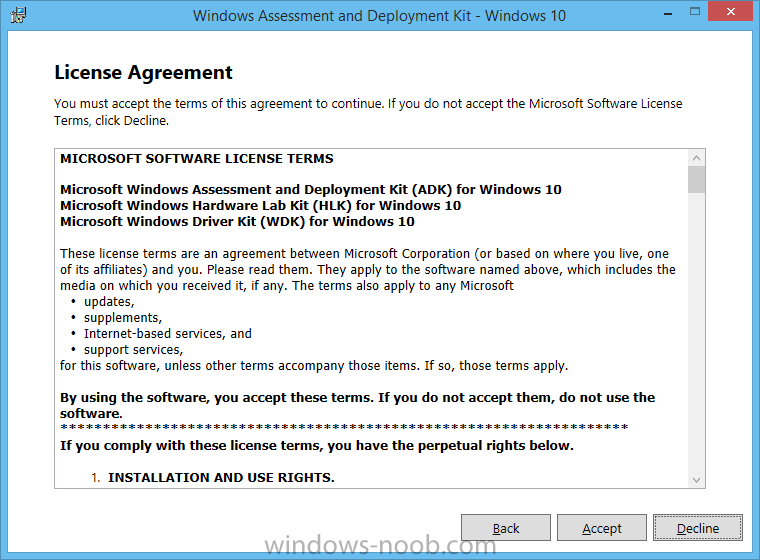
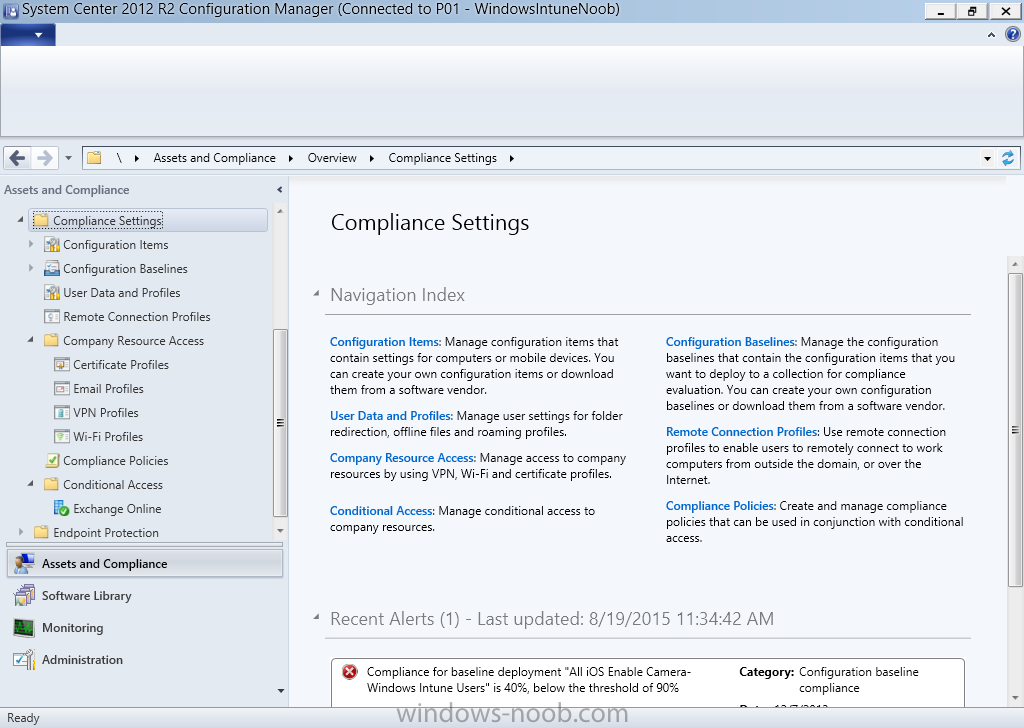
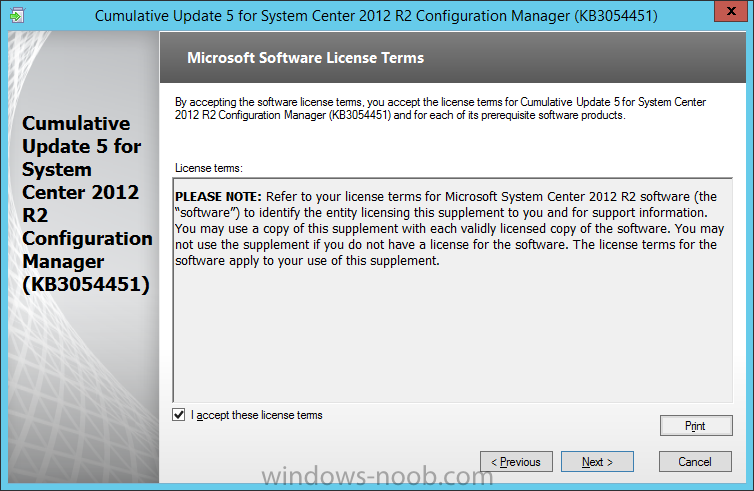
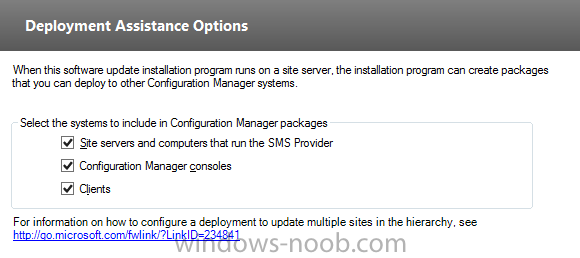
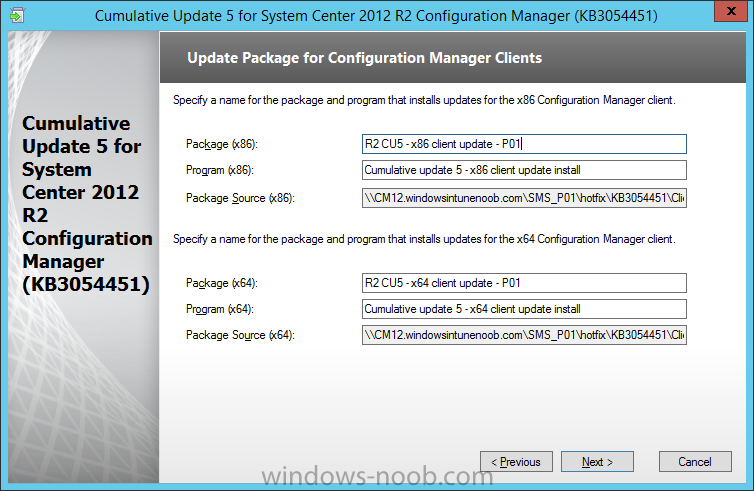
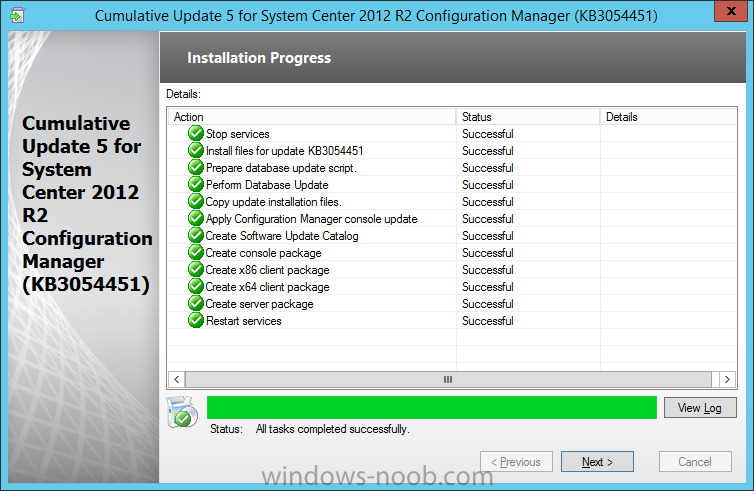
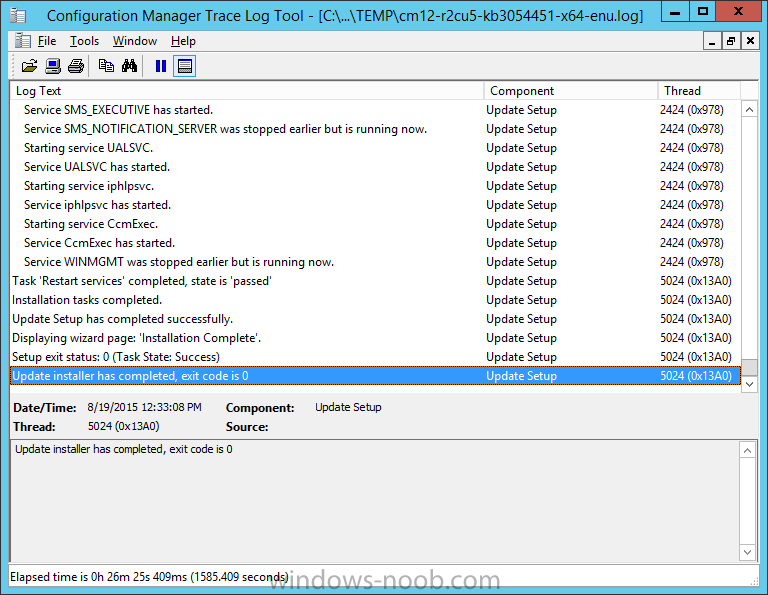
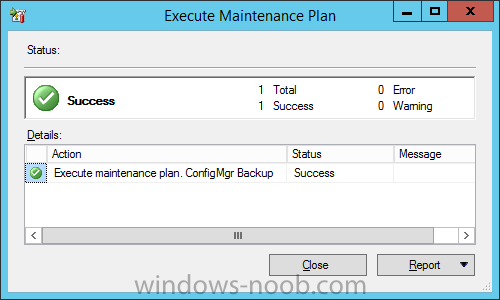
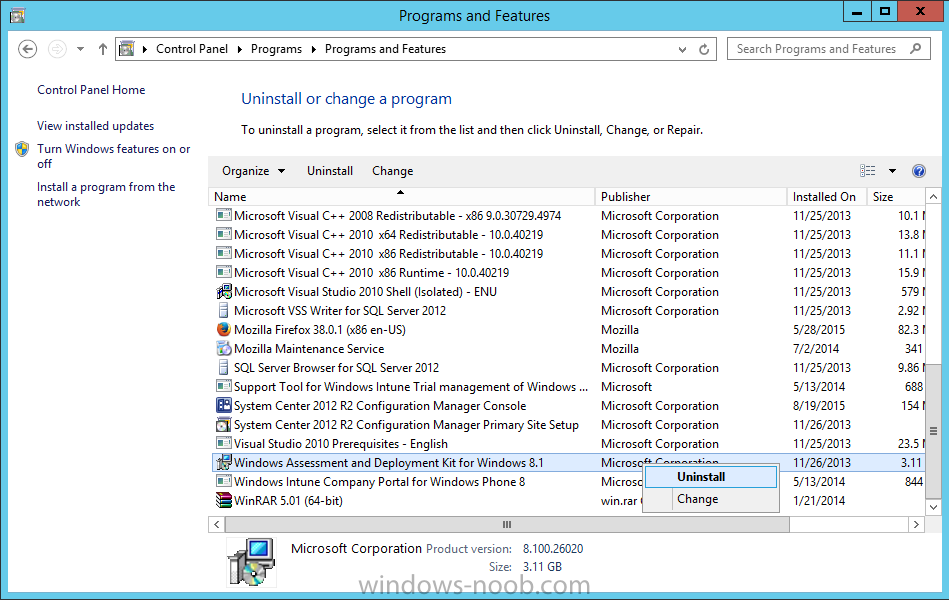
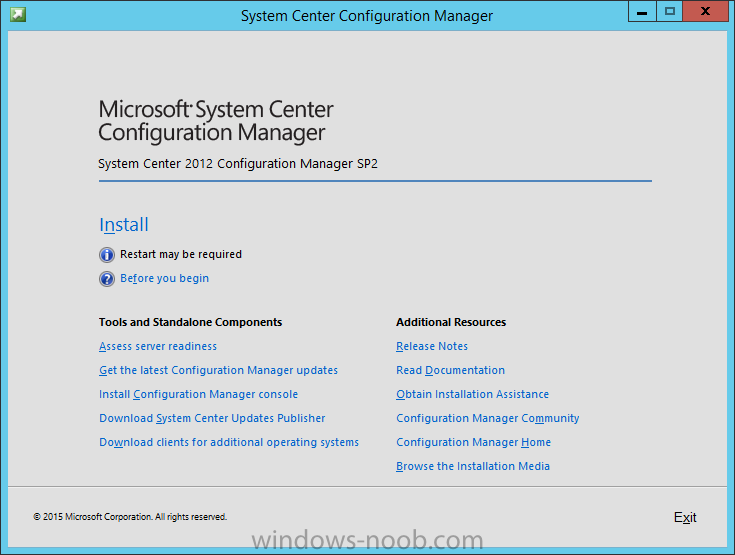
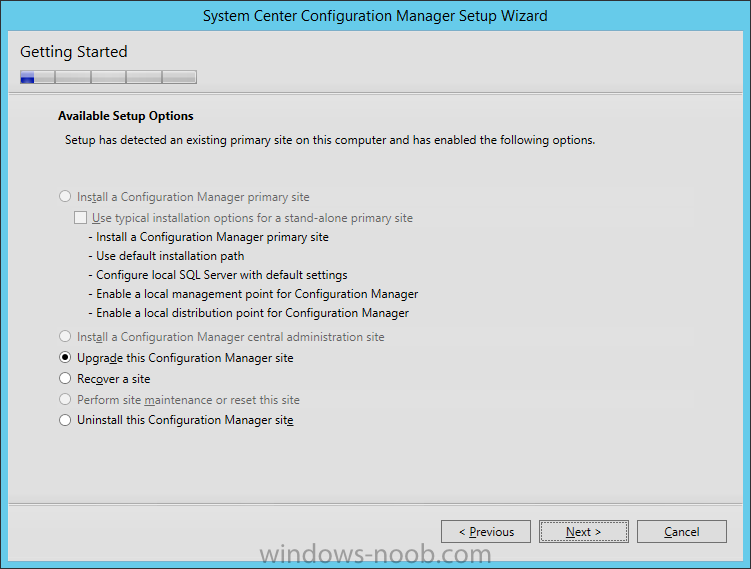
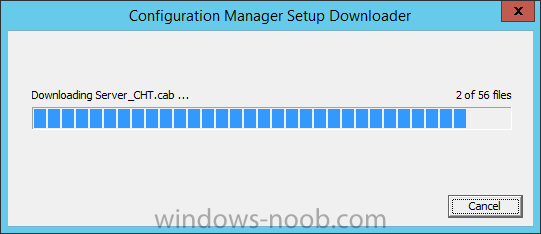
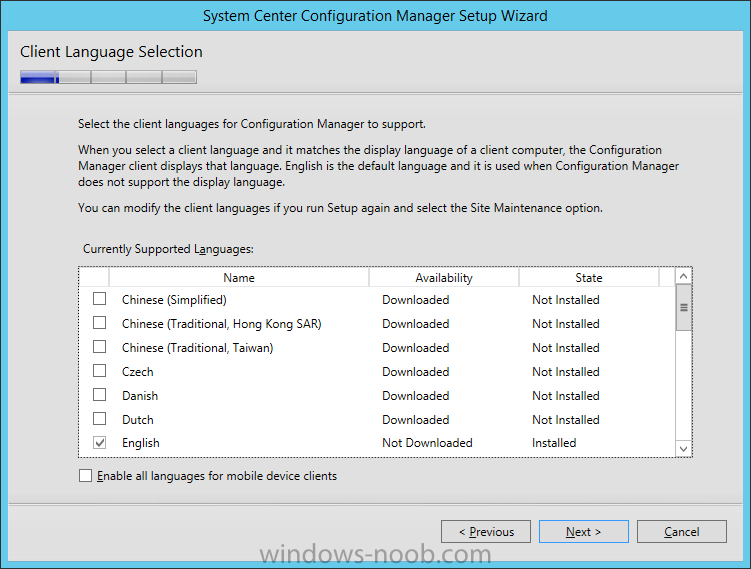
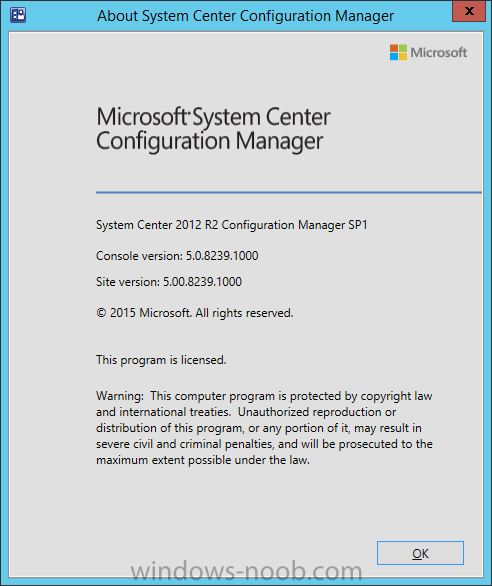
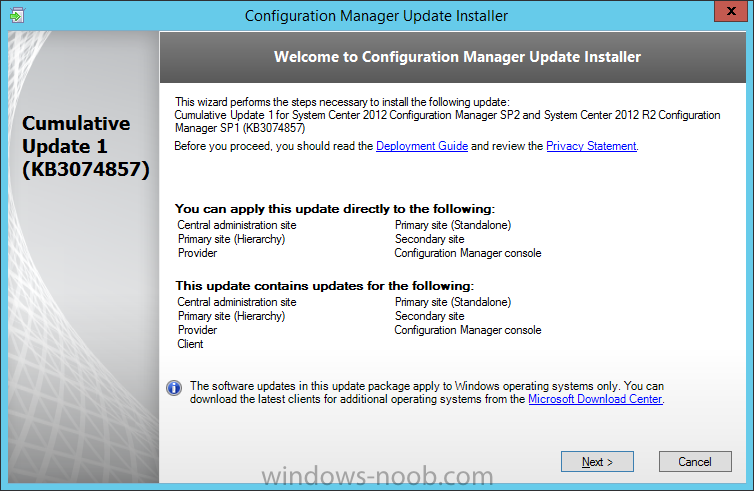
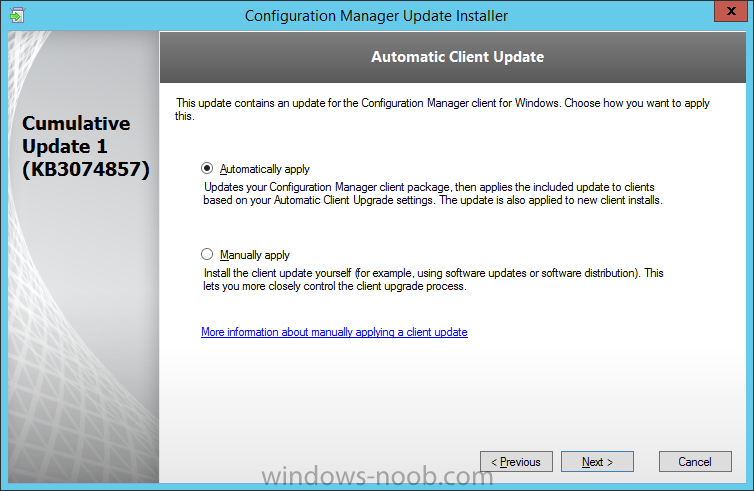
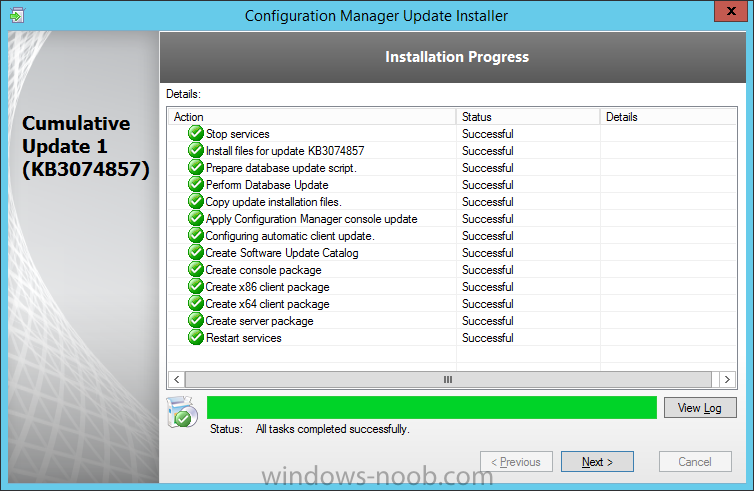
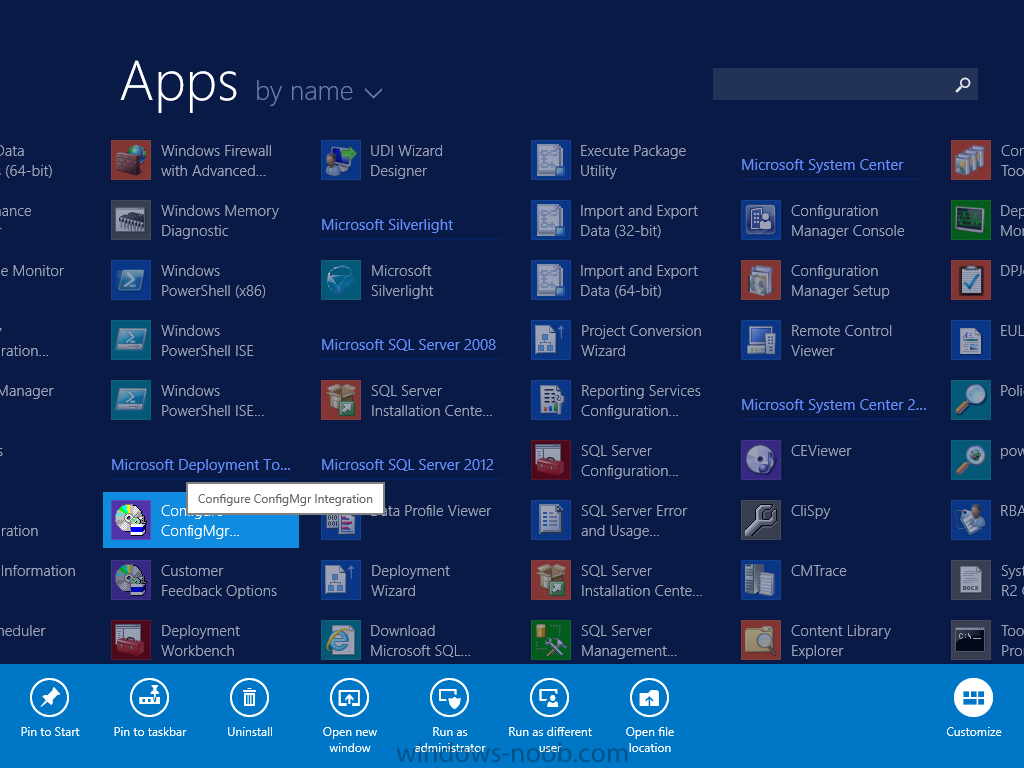
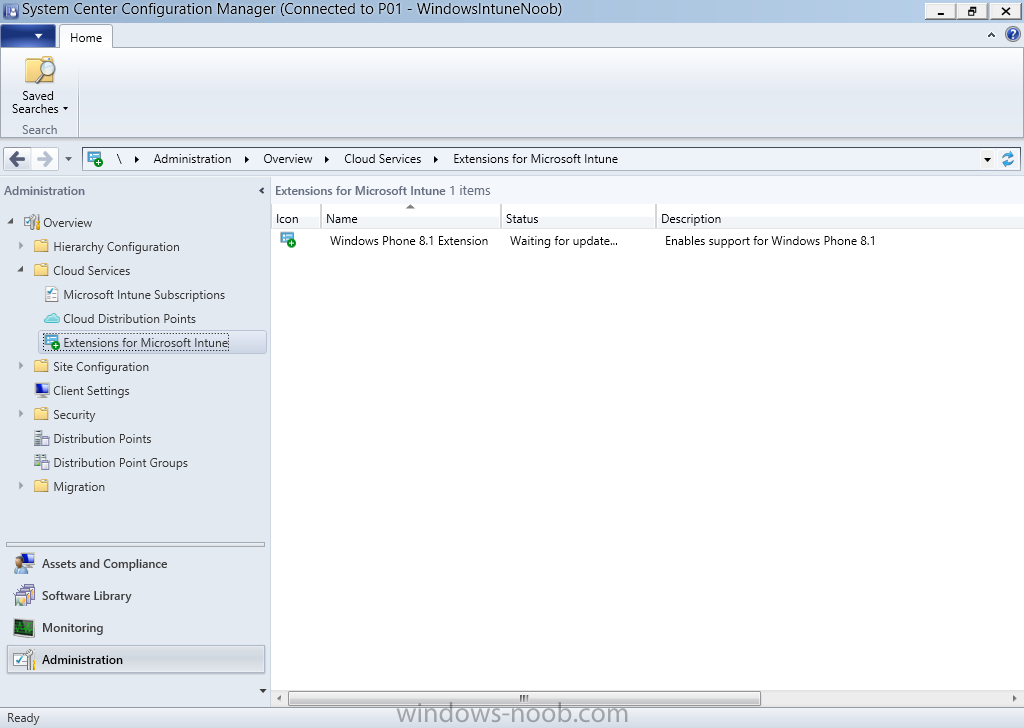
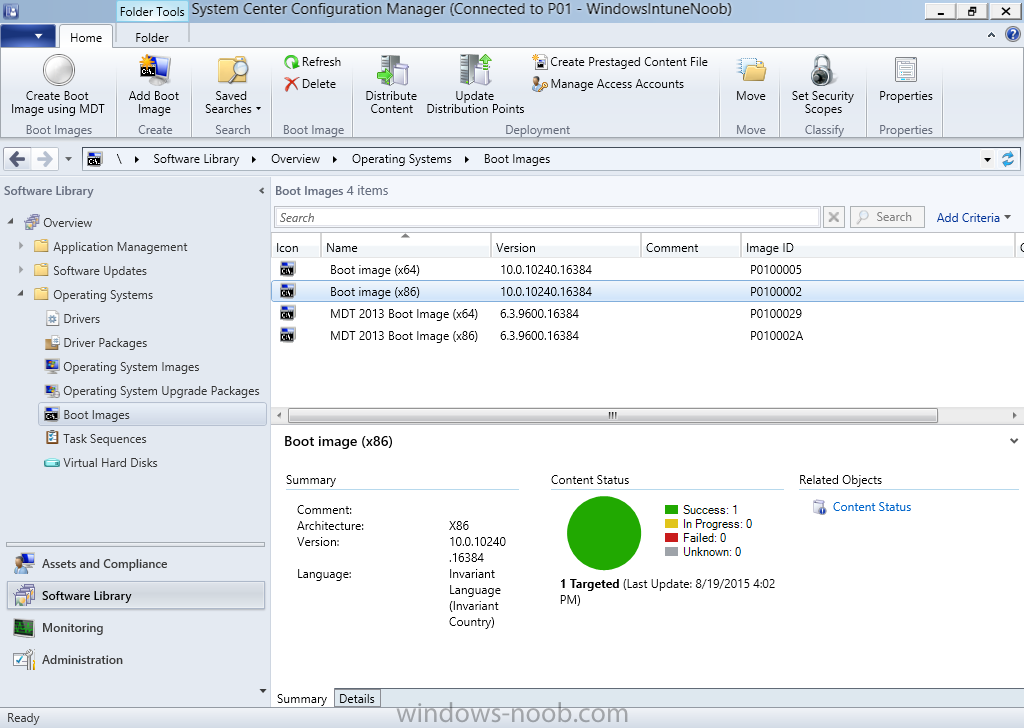
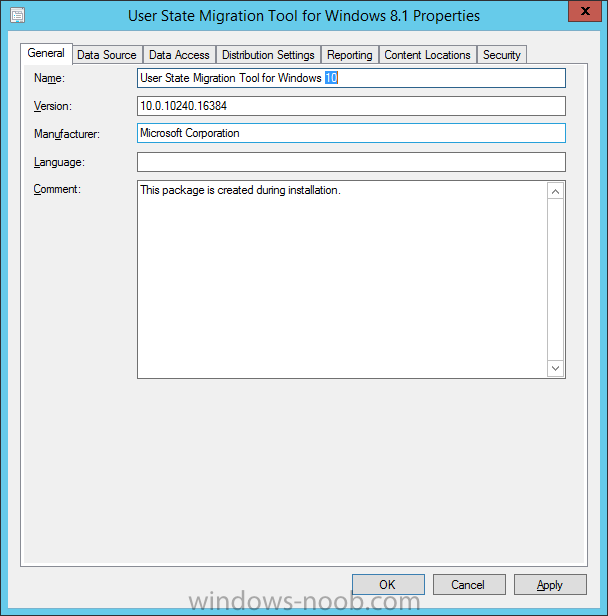
Introduction In the last few months, there's been a plethora of releases from Microsoft, and I wanted to put together a guide that not only covers upgrading a primary from System Center 2012 R2 CU4 to System Center 2012 R2 SP1 CU1 but in addition, covers integration of the recently released MDT 2013 Update 1 to get your environment ready for deploying Windows 10 and to improve the mobile device management (Microsoft Intune) capabilities of Configuration Manager. In this long guide I'll go through the steps you can take to upgrade your infrastructure to support managing and deploying Windows 10 using Configuration Manager 2012 R2 SP1. Note: Before you start the upgrade make sure to put together a plan of actions and refer to the official Technet documentation about planning on upgrading to System Center 2012 R2 SP1 here. A Key point to remember is the upgrade order and it's from the top down in your hierarchy, like so CAS>Primaries>Secondaries>Clients. If you have no CAS, start at the Primary site and work your way down. In addition, you should try and halt any package/application distributions prior to commencing the upgrade so as to minimize load on the affected servers. If you plan on upgrading Secondary sites, make sure to first run the prerequisites checker using the following command prereqchk.exe /SECUPGRADE secondarysiteserver.aaaa.bbb.com. Fix any problems found before you attempt to click on Upgrade via the Configuration Manager console. Step 1. Download the bits There's a bunch of stuff to download before beginning, some of the files are Cumulative Updates and hotfixes which are used to fix issues either before or after the upgrade, while others are the actual content needed for the upgrade process. Hotfixes and CU's: System Center 2012 R2 CU5 - download link System Center 2012 R2 SP1 CU1 - download link Driver bloat hotfix - download link Content: System Center 2012 R2 SP1 - download link (MSDN) download link (Technet Eval), confused ? see here. Windows 10 ADK - download link MDT 2013 Update 1 - download link While most of the above simply involve clicking on links, filling in email addresses (why...) and downloading the content, Windows 10 ADK is different in that you can download the entire source locally for use on other computers, and this is useful as the Windows 10 ADK needs to be installed on any site server hosting the SMS Provider role. To download Windows 10 ADK locally do as follows. Run the already downloaded adksetup.exe and select the second option. Note: There are currently two versions of Windows 10 ADK, use the first one until the issues with the seconds are resolved. set your privacy options accept the EULA and the downloading of features begins... Once you have all the content above downloaded (4.1GB or so), gather it together in one place, and copy it to a temp folder on your Configuration Manager Primary server (or whichever ConfigMgr server is highest in the hierarchy as explained in the note above) such as to D:\temp\CM12R2SP1 Upgrade source After copying the content, extract the Hotfixes to something more meaningful such as hotfixes\CU5 hotfixes\R2CU1 hotfixes\DriverBloatFix Step 2. Restart the server Before continuing, restart the server to make sure no pending operations (such as Windows updates or file rename operations) are waiting for a reboot. Close any open ConfigMgr consoles and issue a reboot as follows via an administrative cmd prompt: shutdown /r Note: If you have the CM DB running on SQL remotely, you should also consider rebooting that at the same time and allow sufficient time for everything to start back up after the reboot. Step 3. Upgrade to CU5 While some people don't consider this, i'd suggest you do. Cumulative Update 5 is even mentioned in the FAQ. To upgrade to CU5 do as follows. Browse to the location of the extracted hotfix, eg: D:\temp\CM12R2SP1 Upgrade source\Hotfixes\CU5 and double click on the EXE within. Click Next at the Welcome screen accept the License terms and click next and verify the prerequesites... (you did reboot didn't you ;-)) click on View Log to open the CM12-r2cu5-kb3054451-x64-enu.log file in cmtrace and then click on Next, place a checkmark in the Install the update for the Configuration Manager console screen and click next. Unless you want to update SQL manually, select the default option for the Database Update screen and click next and click next at the Deployment Assistance Options you'll be prompted to let it automatically create packages for the Servers, Consoles and clients, click next through them all. and then the upgrade to CU5 begins Once complete make sure all looks good in the wizard and the logfile in CMTrace. Logfile below... close the wizard and logfile. Step 4. Restart the server There will be a lot of server restarts during this process, so once again, restart the server to make sure no pending operations are waiting for a reboot. Go get a coffee, take a break and close any open ConfigMgr consoles and issue a reboot as follows via an administrative cmd prompt: shutdown /r Step 5. Review a few things before the upgrade Before doing the major upgrade let's review a few things in the ConfigMgr conolse related to the below: Microsoft Intune integration Operating System Deployment If your Configuration Manager environment is integrated with Microsoft Intune, then take a quick look under Administration, and select Extensions for Windows Intune to reveal what extensions are downloaded and enabled. Secondly you can look at Compliance Settings available before the upgrade. Next, look at Software Library, Application Management, Packages, and look for the User State Migration Tool for Windows 8.1 package, this package is used for migrating data in our task sequences. Check the data source tab and make a copy of that folders within that source location and copy the USMT folders somewhere before upgrading takes place. For example, Create a new USMT 8.1 package and set the source to \\cm12\sources\os\USMT\Windows 8.1. Failure to do the above will mean your USMT package will not be renamed and will point to the new Windows 10 USMT ADK package. While we are at it, look at the boot images on the server, in this case we have 4, two are the two Default Boot Images created when installing Configuration Manager, and the other two boot images are custom boot images which were created as part of MDT Integration with ConfigMgr. Notice the version numbers of these boot images corresponding to the ADK they came from (Windows 8.1 ADK). If you right click on any of these custom boot images and review the tabs available, you can see that you have access to all abilities such as adding drivers or optional components prior to the upgrade. Step 6. Backup Database and then run TestDBUpgrade on a copy of the Database There's two options for backing up your database, using ConfigMgr's options or via SQL server itself. Read below before deciding which is right for you. Note: Failure to backup your database could leave you in a very bad situation. Do not attempt the upgrade without first having done a succesful backup and then copying that backup to another server. Do not run TestDBUpgrade on the ConfigMgr database itself, that will leave it in an unusable state. Use a copy of the successful backup to test the database upgrade process. Backup the database using ConfigMgr Configuration Manager can backup the SQL database for you using the Backup task however it is not compressed in any way and can as a result take up a lot of server space. If that's not an issue for you then go ahead and backup your ConfigMgr database as outlined in this post. Backup the database using SQL server (recommended) However, if you are in any way lacking server space, then it's definitely recommended to backup your database using SQL Server's backup feature which DOES compress the data. Steve Thomson does a great guide on that right here. Once you have backed up the database, copy that backup file, and then run TestDBUprade on the copy of the database backup on another SQL Server (temporary virtual machine is fine) as outlined in Step 6 of my earlier post here. Do not continue until it is successful. Step 7. Uninstall ADK 8.1 You can actually install the Upgrade without removing Windows ADK 8.1 however then you'll have issues deploying Windows 10. By far the best option is to upgrade your whole environment using the new ADK and to do that, you need to remove Windows ADK 8.1 first. To remove it, open Control panel, and uninstall Windows Assesment and Deployment Toolkit 8.1, answer yes to any prompts. when it's uninstalled you'll be notified Step 8. Restart the server Issue a reboot as follows via an administrative cmd prompt: shutdown /r Step 9. Install ADK 10 Now it's time to install Windows ADK 10. Note: After you update the ADK on your site server to Windows ADK 10 you will not be able to edit older boot images in console you will have to manually edit them outside with DISM if still needed. Windows ADK 10 supports deploying Windows 7 and later operating systems. If you do not want to install Windows ADK 10 then you'll have to manually import the Windows 10 capable boot images as outlined here. Using an administrative cmd prompt, browse to the folder you copied the Windows ADK 10 sources files eg: D:\temp\CM12R2SP1 Upgrade source\Windows Kits\10\ADK and run the following command (it's one line !) adksetup.exe /Features OptionId.DeploymentTools OptionId.WindowsPreinstallationEnvironment OptionId.ImagingAndConfigurationDesigner OptionId.UserStateMigrationTool /norestart /quiet /ceip off You can monitor the installation of Windows ADK 10 by reviewing the log files in %temp%\adk.The log file will be called something like Windows Assessment and Deployment Kit___Windows_10_20150819143357.log, and when you have a successful installation you should see Exit Code: 0x0 as per the screenshot below: Step 10. Restart the server Issue a reboot as follows via an administrative cmd prompt: shutdown /r Step 11. Install System Center 2012 R2 Configuration Manager SP1 Finally you get to install the Service Pack :-). Double click the SC2012_SP2_Configmgr_SCEP.exe and let it unzip to the default folder which is C:\SC2012_SP2_Configmgr_SCEP. Once done, start the upgrade by launching splash.hta using File Explorer. click Install to start the installation process and next at the Before you begin screen. Select Upgrade this Configuration Manager site from the choices available. accept the two pages of EULA's Using File Explorer, create a folder on C:\ called downloads and download the requirements to that folder. If you want to download the prerequisites on a different server do as follows:- Open a command prompt with administrative permissions Navigate to .\Configuration Manager 2012 R2 SP1 Install source\smssetup\bin\X64 Run the command below SetupDL.exe C:\downloads Next make your Server language selection and Client language selection if you want to have additional languages available at this site for the Configuration Manager console and for reports, or clear languages that you no longer want to support at this site, and then click Next. and then you'll see the prerequisites check, if there's any warnings or failures fix them prior to continuing. Click on Begin Install the start the actual upgrade and then click on View Log to see the installation progress via the logfile in CMTrace. keep on going until you see Core Setup has completed. Scroll up and down and verify there's no problems, also check the C:\ConfigMgrSetup.log file for any problems indicated. Once you are happy close the wizard and the log file. Step 12. Restart the server Issue a reboot as follows via an administrative cmd prompt: shutdown /r after the restart you can verify the Site Version and it's listed here 5.0.8239.1000 Step 13. Install CU1 CU1 is definitely worth installing for the bug fixes and new Client Upgrade options it offers. Here are the OSD related bugs it fixes listed below. The Smsts.ini file is added to the \Windows\System32 folder instead of to the \Windows folder during operating system deployment. Task sequence packages are downloaded two times when the “Install software packages according to dynamic variable list” option is selected, and the variable SMSTSPersistContent is set to “False.” The package is downloaded one time, deleted, and then downloaded again before the actual installation. Windows 10 drivers do not import. Errors that resemble the following are logged in the DriverCatalog.log file:Initializing driver digest from ‘\\server\Windows10-x64\{Windows10-driver}.inf’\\server\Windows10-x64\{Windows10-driver}.inf is not applicable to any supported platforms.Driver is not applicable to any supported platforms. Code 0x80070661 You might want to enable client upgrade in your hierachy to avail of a new feature in CU1 (client upgrade with the hotfix patch included) prior to installing CU1. To do so click on Administration, Site Configuration, Sites, select your site, click on Hierarchy settings. Click on the Automatic Client Upgrade tab and set it to your desired settings. To install CU1, double click on CM12_SP2R2SP1CU1-KB3074857-X64-ENU.exe and complete the wizard as per Step 3 above. The automatic client upgrade feature is will appear after you are asked whether you want to upgrade the site database or not. and after completion you'll see it's successfully installed, and notice the new console version info = 5.0.8239.1203 If you are prompted to restart the server, then do so otherwise you'll more than likely be prompted to do so when running the next step. Step 14. Install driver bloat hotfix After SP1 was released there were some bugs noted, one of which was Driver Bloat. The following hotfix fixed the issue. I would imagine that it'll be incorporated into CU2 when that releases, but for now, install it or use PowerShell to import your drivers. To install the hotfix, double click on CM12_SP2R2SP1CU1-QFE-KB3084586-X64-ENU.exe and continue through the wizard until completion. once again, notice the new console version info = 5.0.8239.1206 Step 15. Install MDT 2013 update 1 At this point, things are nearly done, we just need to install MDT 2013 update 1 and then integrate it. To install it, double click on the MSI just click next through the wizard, it will automatically uninstall the previous version (MDT 2013). Step 16. Integrate MDT 2013 update 1 If the ConfigMgr console is open, close it. In the Start Screen locate the Microsoft Deployment Toolkit group and click right click on Configure ConfigMgr Integration, choose Run as Administrator. Select the first option, Install the MDT extensions for Configuration Manager. click next and close the wizard when done. Step 17. Review changes in the console Now that you've upgraded everything, it's time to look at some of the changes, first take a look at the Microsoft Intune Extensions, most should have disappeared, if any are remaining then they are still updating or being enabled. Under Assets and compliance you can see another section called All Corporate Owned devices The default boot images should be updated to WinPE 10 (10.0.10240.16384) But the custom boot images remain unchanged, except for the fact that there are now a lot less tabs available in their properties. Any driver changes, or adding/removing optional components or other actions will have to be performed using this method. Notice how the Operating System Installers has changed name to Operating System Upgrade Packages also. In addition, the USMT package is recreated by the installation of Windows 10 ADK and while it is pointing at the correct USMT bits and lists the correct USMT version it is named as User State Migration Tool for Windows 8.1. Simply rename it to User State Migration Tool for Windows 10 and all is good. In the following post, I cover how to create new MDT 2013 Update 1 boot images, the MDT Toolkit Package and MDT Settings packages and task sequences in System Center 2012 R2 SP1 Configuration Manager, until then, adios and thanks for reading. Recommended reading Announcing the availability of CM12 R2 SP1 - http://blogs.technet.com/b/configmgrteam/archive/2015/05/14/announcing-the-availability-of-sysctr-2012-r2-configmgr-sp1-and-sysctr-2012-configmgr-sp2.aspx Planning on upgrading to System Center 2012 R2 SP1 - https://technet.microsoft.com/en-us/library/JJ822981.aspx#BKMK_PlanningR2SP1Upgrade Upgrade FAQ - http://blogs.technet.com/b/configmgrteam/archive/2015/05/19/sysctr-2012-configmgr-sp2-and-systctr-2012-r2-configmgr-sp1-faq.aspx Automatic Client Upgrade feature - http://blogs.technet.com/b/configmgrteam/archive/2015/08/04/automatically-updating-the-configuration-manager-client.aspx MDT 2013 Update 1 release notes and known issues http://blogs.technet.com/b/msdeployment/archive/2015/08/25/mdt-2013-update-1-release-notes-and-known-issues.aspx Downloads You can download a Microsoft Word copy of this guide dated 2015/8/25 from here. The word doc will not be updated after this point. Upgrading to System Center 2012 R2 SP1 CU1 and MDT 2013 Update 1.zip


-
not yet, it's coming... have you upgraded to CM12 R2 Sp1 yet ?
-
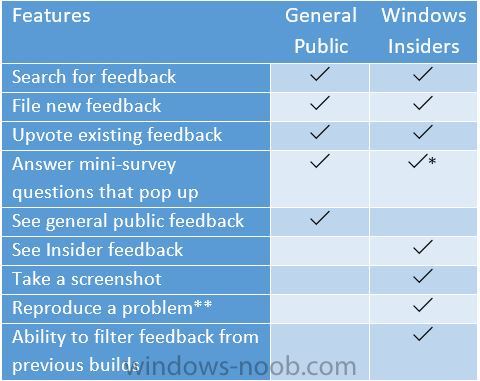
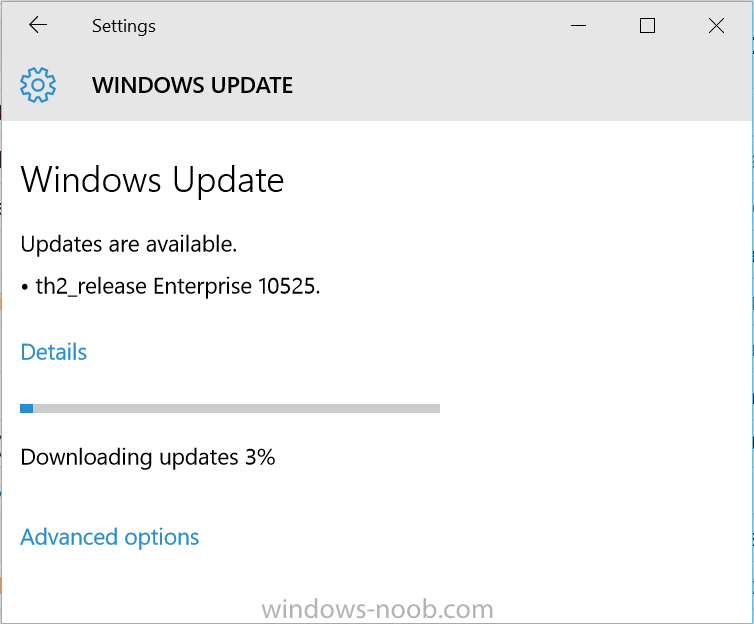
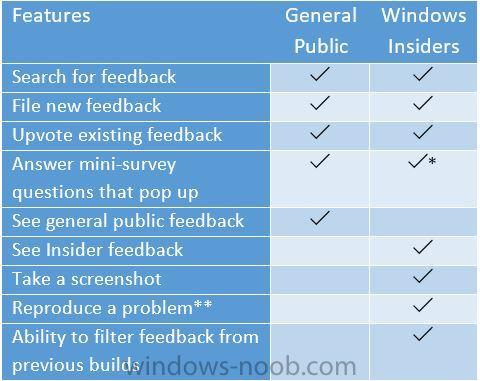
just when you thought Windows 10 was done, along comes another build after RTM, this one is build 10525 and available only to Insiders. With the general availability of Windows 10, the Windows Insider Program will focus on building and delivering Windows as a service by updating Windows 10 with new features and functionality on an ongoing basis. As always, Windows Insiders will be the first to see these new features and changes. Windows Feedback app and Insider Hub Microsoft have decided to include the Windows Feedback app in the released version of Windows 10 for all our customers. This was a very popular Windows Insider suggestion – one of the top 10 upvotes. At the same time, they wanted to continue giving Windows Insiders an exclusive and premium experience when it comes to sending feedback. So, here’s what you can expect from the Feedback app going forward: Build 10525 The most exciting news in this post is that we have a new build for PCs we’re releasing today to Windows Insiders in the Fast ring – Build 10525. This is our first new build since the release of Windows 10, and I’m very happy to talk about one new thing that you’ll see because it really highlights both how your feedback influences the product development as well as illustrating how some things will get implemented at different times depending on when we’re trying to stabilize and drive quality vs. when we’re open for new feature work. more info about this build on Microsofts Windows 10 blog here

-
Offline Servicing Errors
anyweb replied to DaveP's question in Troubleshooting, Tools, Hints and Tips
apologies for missing this, i was going to suggest looking at the dism logs created during offline servicing in C:\Windows\Logs\DISM\dism_sccmAMD64.log to see does it reveal any more info about the failure ? -
if you are only servicing LEGACY network boot then make sure you are pointing to the ip address of the PXE enabled DP, also you may need to use // in stead of \\ eg //SMSBOOT//x64//wdsnbp.com have you tried that ?
-
have you seen this post ? https://social.technet.microsoft.com/Forums/en-US/a535e509-fc6a-483c-bf24-7e2aa064e5b7/deploying-100-of-available-software-updates-during-a-task-sequence?forum=configmanagerosd
-
unless you are doing a clean install, and already have CM12 R2 then use System Center 2012 Configuration Manager and Endpoint Protection With Service Pack 2 for more info please see this post http://www.niallbrady.com/2015/05/16/confused-about-the-system-center-2012-r2-configuration-manager-sp1-and-system-center-2012-configuration-manager-sp2/ cheers niall
-
when creating a deploy windows 7 task sequence on the State Migration step simply point it to the built in User State Migration Tool for Windows 8.1 package that is created in SCCM 2012 R2, remember to distribute this package to all distribution points.
-
no you don't have to install USMT when using Configuration Manager 2012 SP1 or later, what operating system are you planning on migrating from and to ?
-
of course you can do it with configuration Manager, here's some guides for that. CM12 in a lab - Part 7. Build and Capture Windows 7 X64 CM12 in a lab - Part 8. Deploying Windows 7 X64 as regards drivers, no you do NOT need to capture three different images, instead, capture one image from a virtual machine (hyperv or vmware or whatever virtualization software you prefer), and use Apply Driver Package steps in the deploy task sequence to apply the correct drivers to the correct hardware based on wmi queries in the options tab of each step this is explained in more detail here and here (step 5)
-
Tasksequence .hta end message for windows 2012 R2 Server
anyweb replied to Jerrycho's question in Frontends, HTA's and Web Services
well it looks like it is running the step fine and probably displaying the info to SYSTEM which is why you can't see it, have you tried opening the taskmgr and checking if MSHTA.exe is actually running at that point, i know you tried serviceUI.exe which is the suggested workaround, however, do you have the logs of that step also ? -
Tasksequence .hta end message for windows 2012 R2 Server
anyweb replied to Jerrycho's question in Frontends, HTA's and Web Services
what does the smsts.log file tell you about the step in question ?