anyweb
-
Posts
9181 -
Joined
-
Last visited
-
Days Won
366
Everything posted by anyweb
-
ok so that's your partitions after the step ? well if so it's obviously working, or is it ? can you post the SMSTS.log files in there entirety so we can review the step in question and the failure.
-
so 50%+100%=150% of your disk, could be your problem ;-)
-
 doesn't the error include any number, usually that points to the line it's failing on (line number) use NotePad ++ to edit your code, mistakes will show up easier
 -
well this is wrong for starters <input type>"checkbox" id="mycheck" value"OU=Win8,"/> try <input type="checkbox" id="mycheck" value"OU=Win8"/>
-
glad to hear it !
-
did you update the collection membership after importing it ?
-
do tell others what you did in case they have the same issue, good man
-
the default Computers container is just that, a container, it is not an OU.
-
you are getting pxe aborted because you've already used this mac address to image the computer more than likely ? either delete the record in Configuration Manager and then re-import it or clear the pxe boot on that record.
-
Surface Prestage keeps failing
anyweb replied to shrek46's question in Deploying Windows 10, Windows 8.1, Windows 7 and more...
when you set the variable DeploymentType=Refresh it works, see the excerpt from the log so that much works at least, the first real error is shown here what version of MDT are you using and can you show me a screenshot of the validate step so I can get an idea of how you task sequence is setup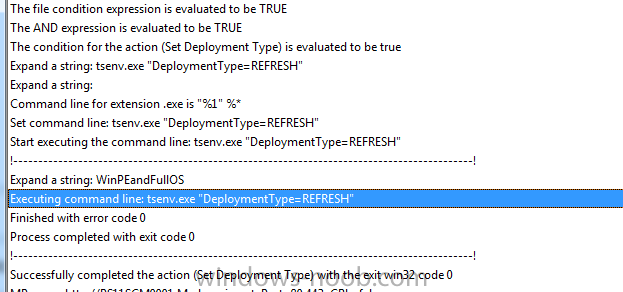
-
ok well have you confirmed that the task sequence is laid down correctly, you can attach the smsts*.log files here so we can verify
-
how you are testing the deployment ? the boot wim is updated with surface pro 3 drivers, are you booting a surface pro 3 ?
-
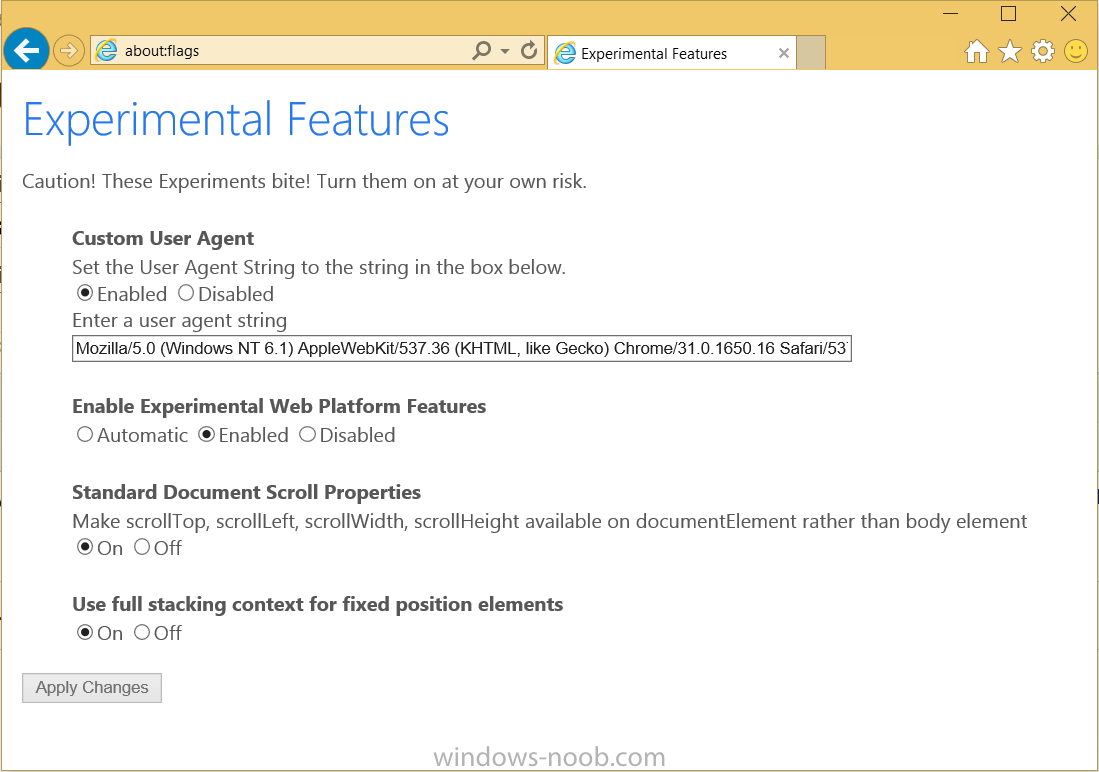
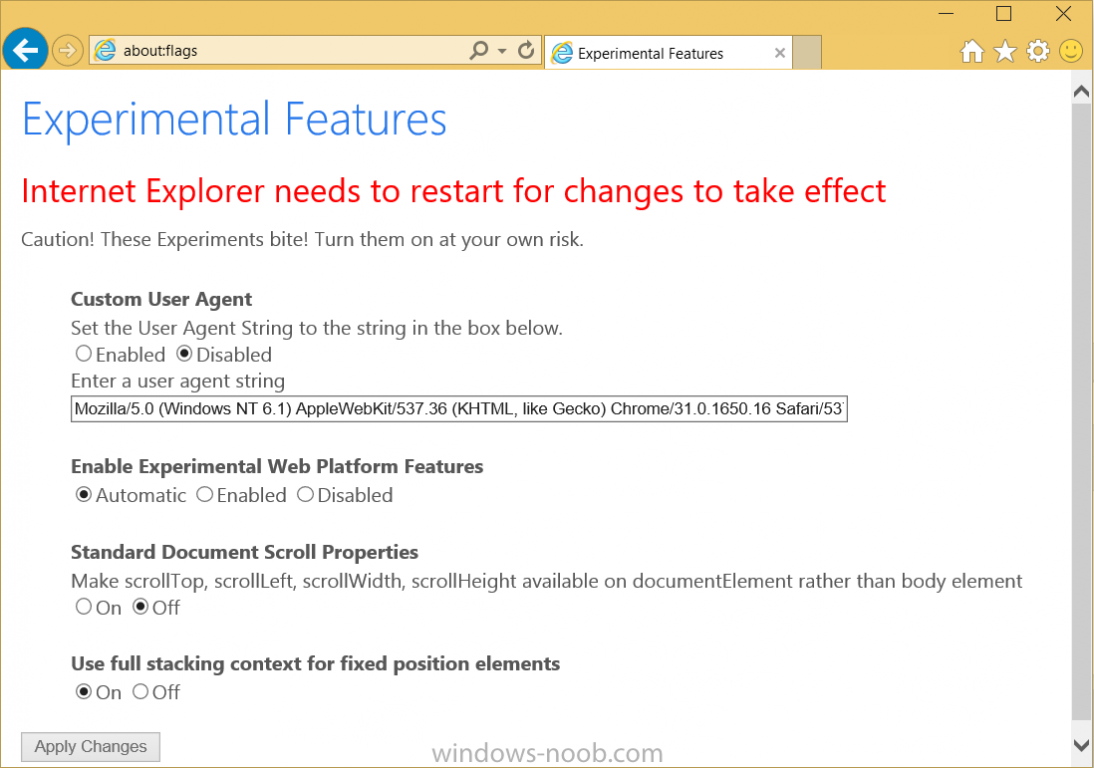
If you'd like to try out the new Spartan rendering engine in IE11 in Windows 10 then do as follows, start IE, and in the address field enter about:flags you'll see something like the below change the settings to the following Custom User Agent: Disabled Enable Experimental Web Platform Features: Automatic Standard Document Scroll Properties: Off Use full stacking context for fixed position elements: On as shown below restart your browser and you are done ! related reading > http://blogs.msdn.com/b/ie/archive/2014/11/11/living-on-the-edge-our-next-step-in-interoperability.aspx?Redirected=true

-
- 1
-

-
are you using Windows 8.1 x64 with Update (the with update part is important...)
-
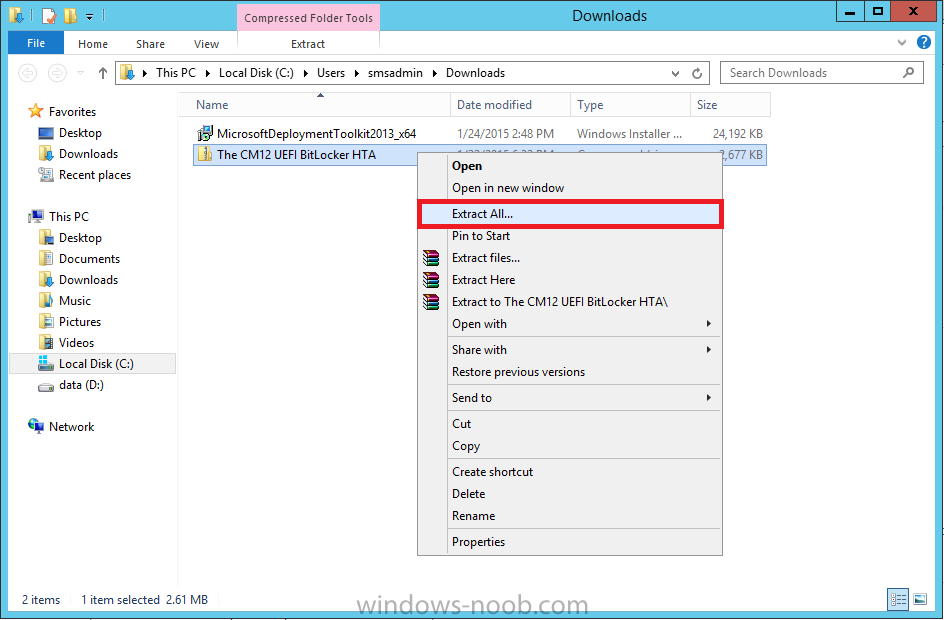
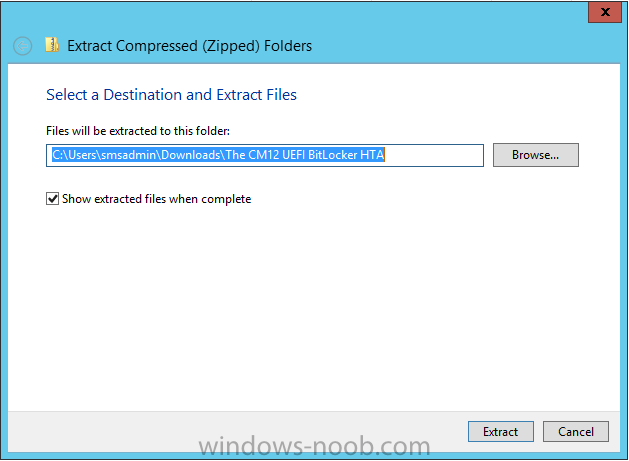
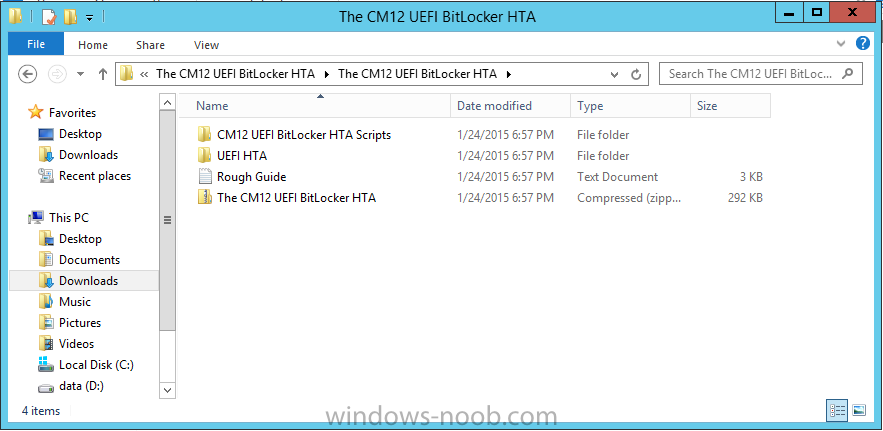
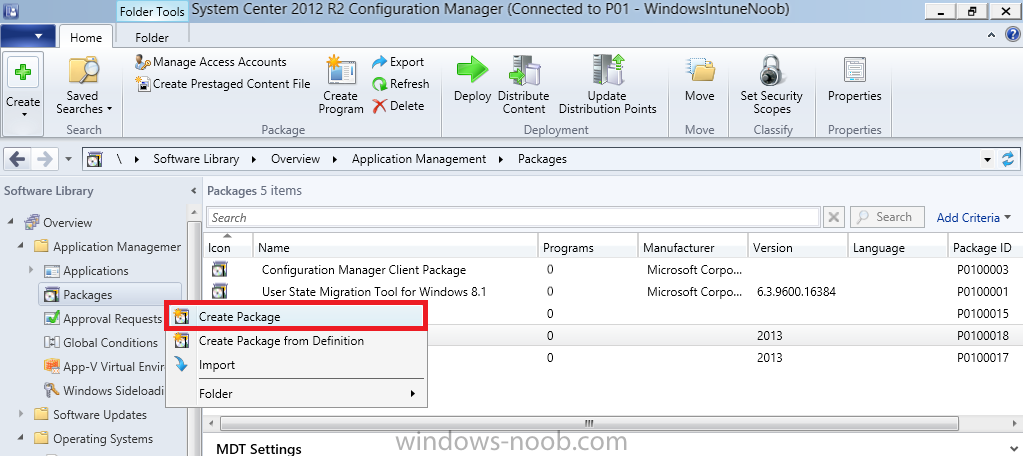
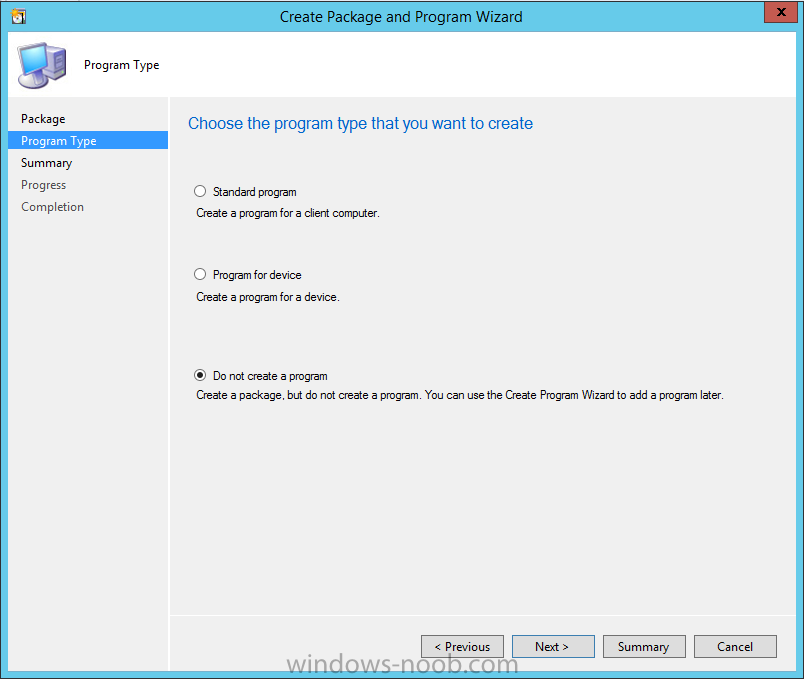
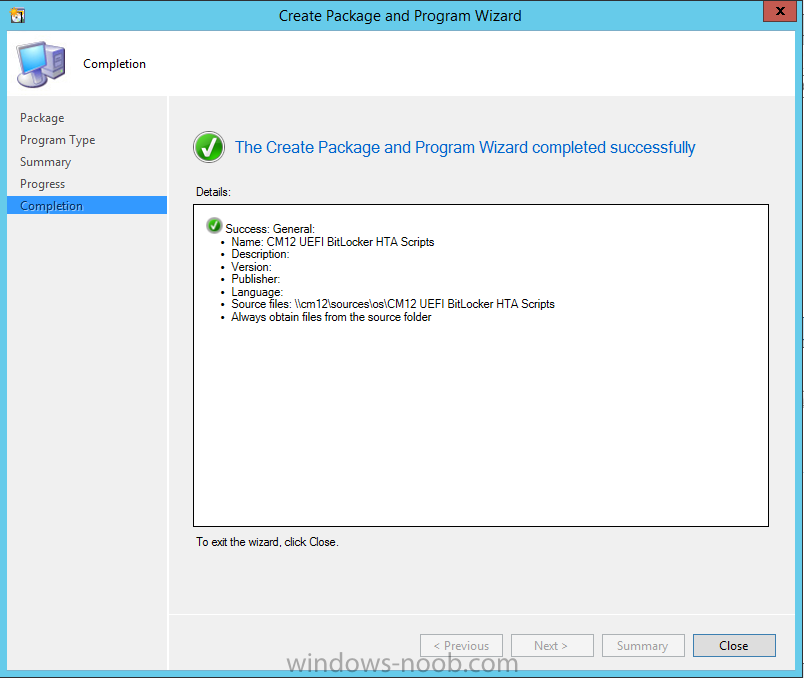
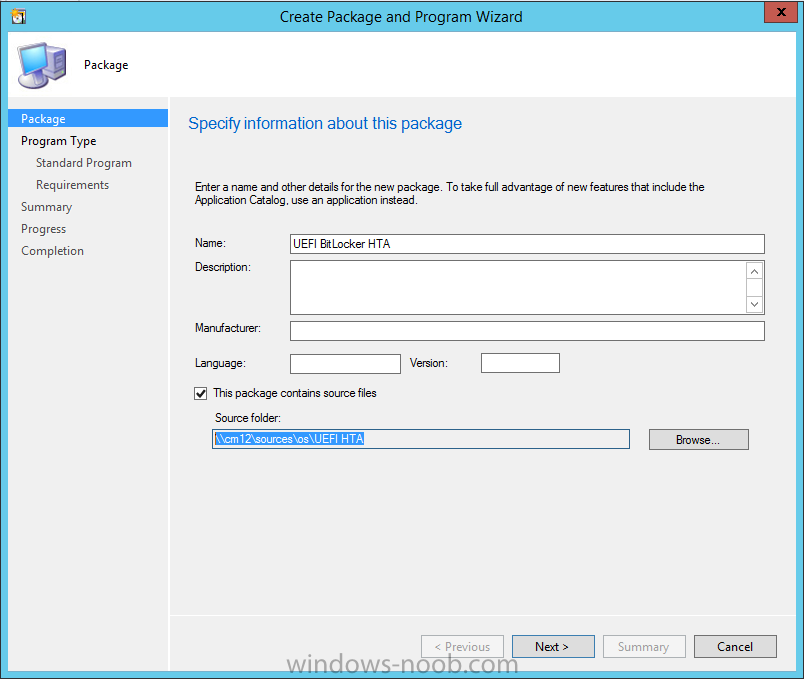
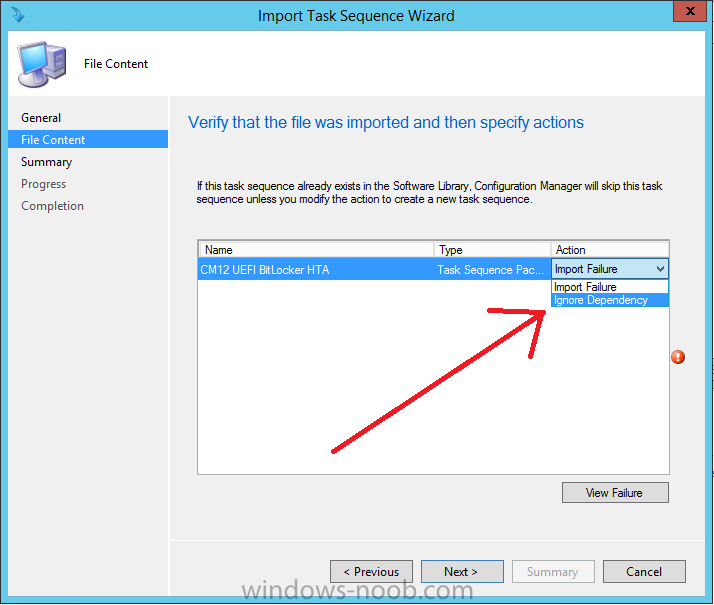
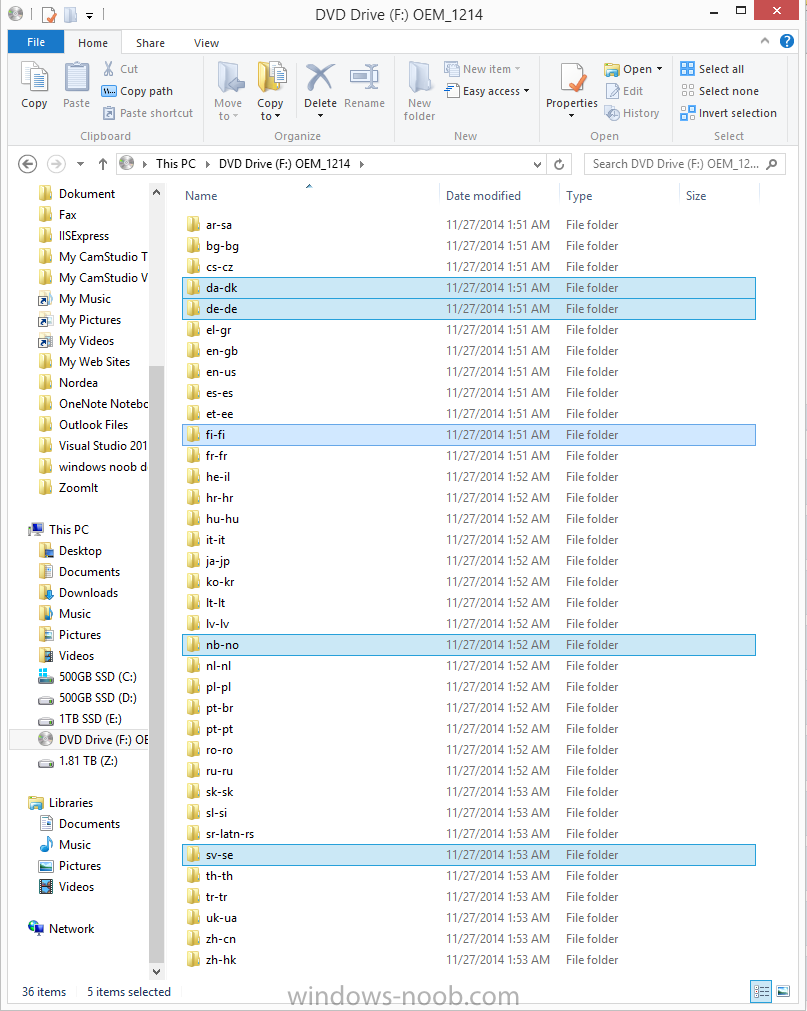
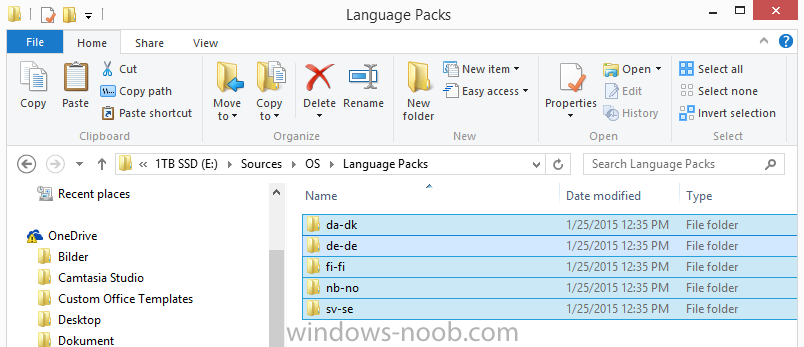
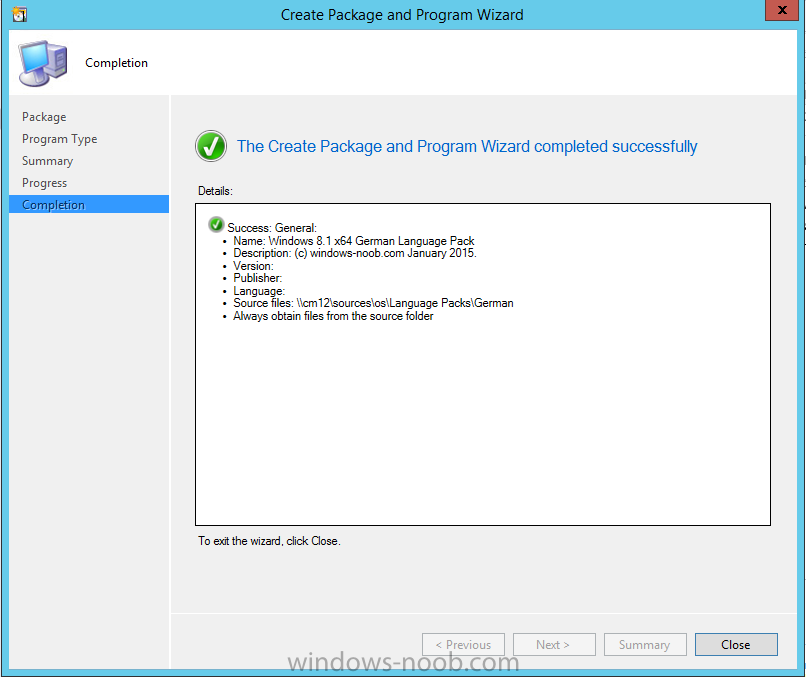
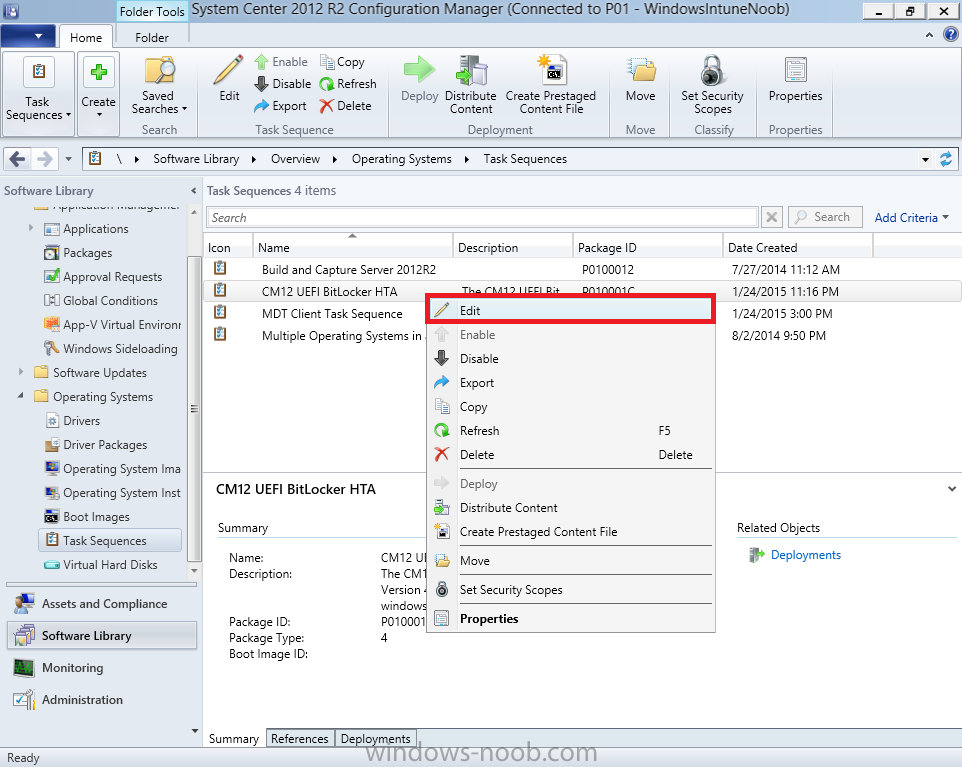
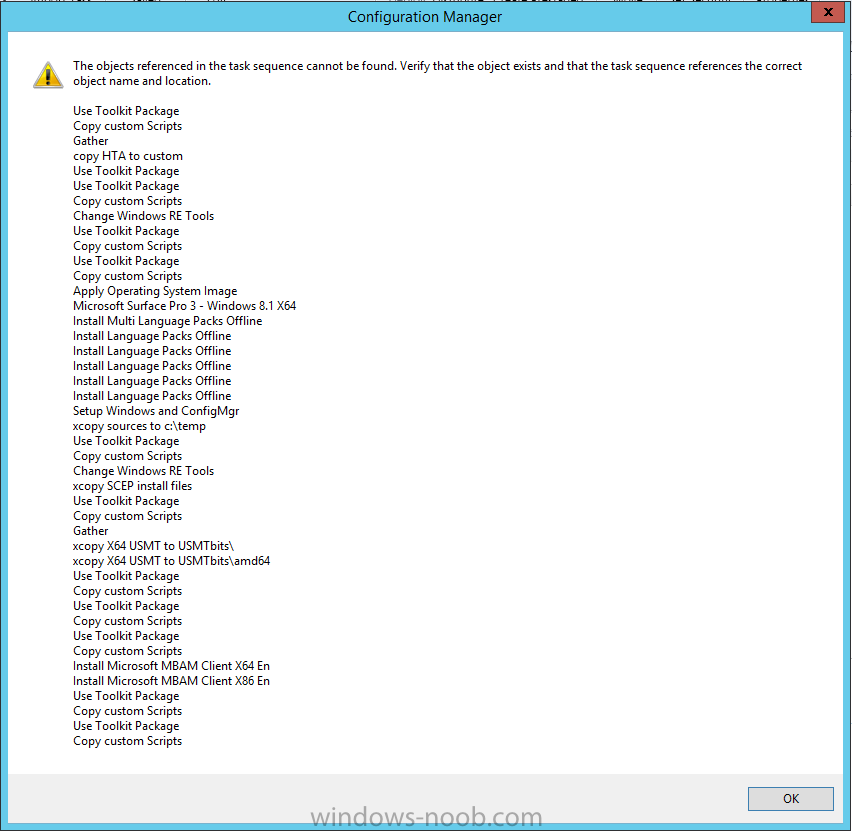
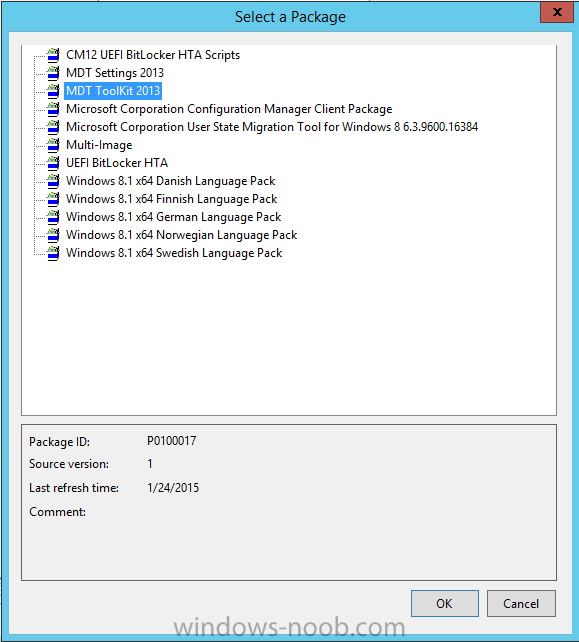
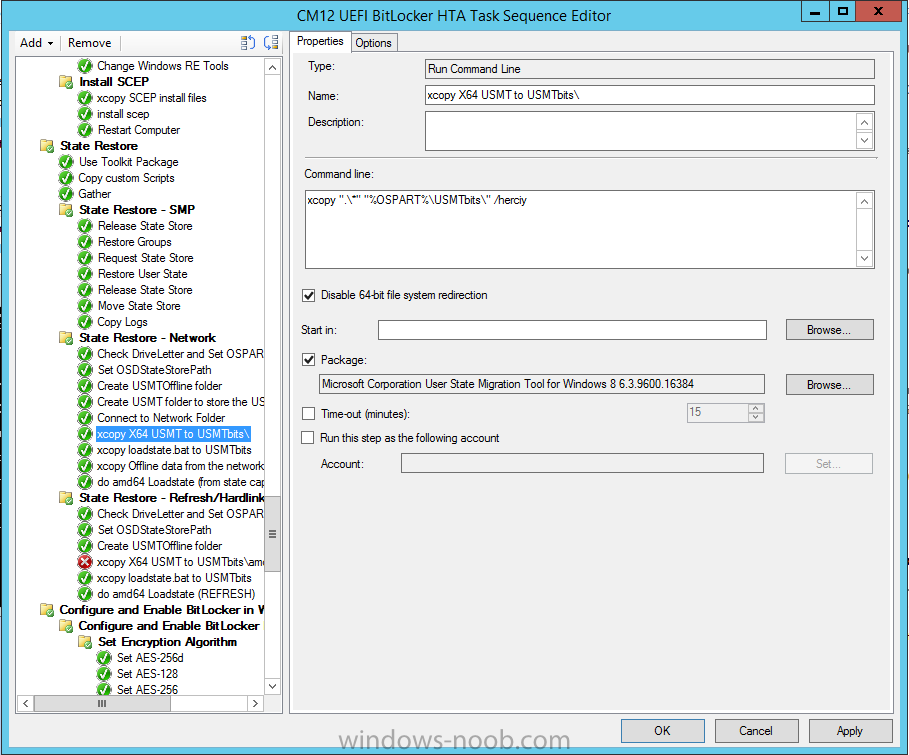
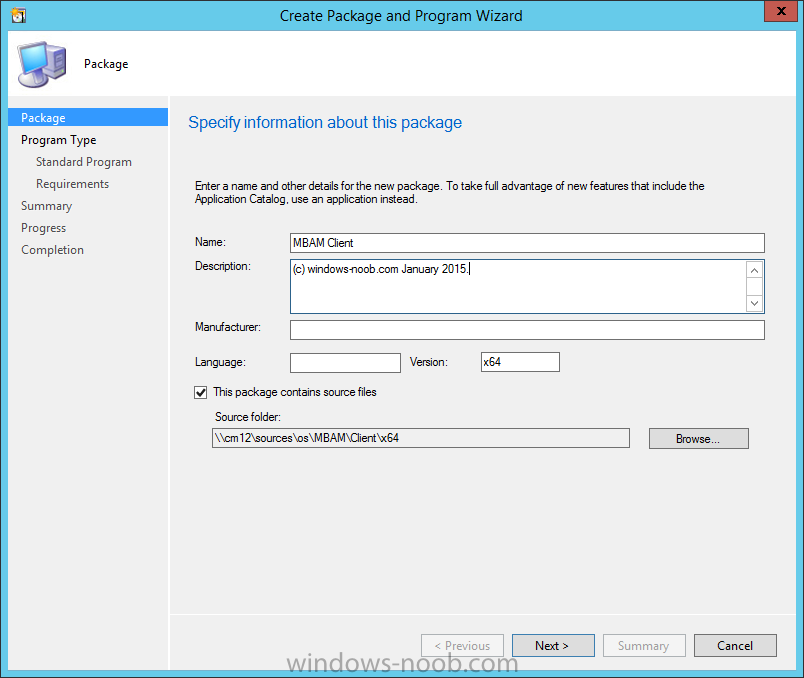
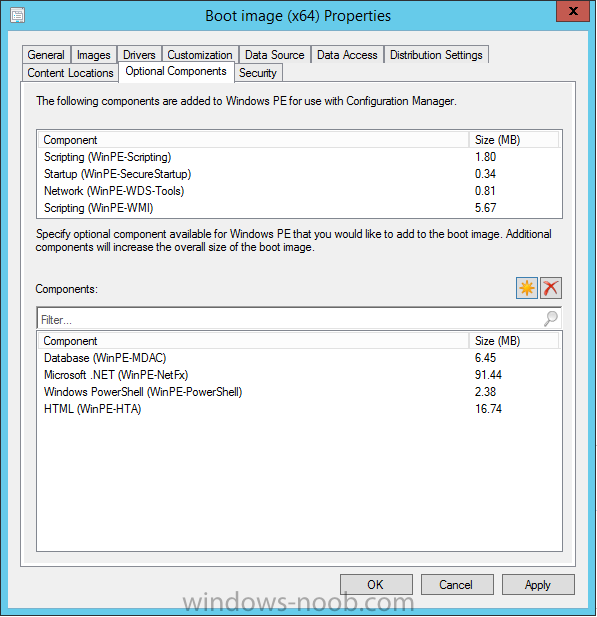
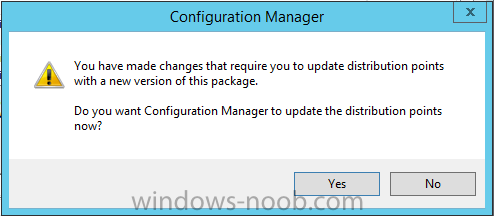
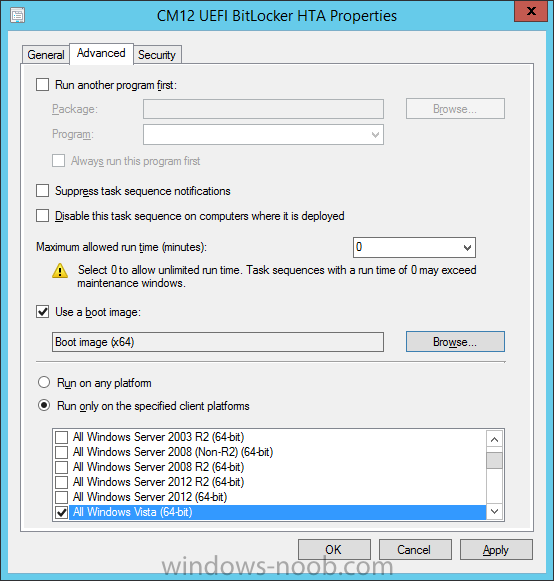
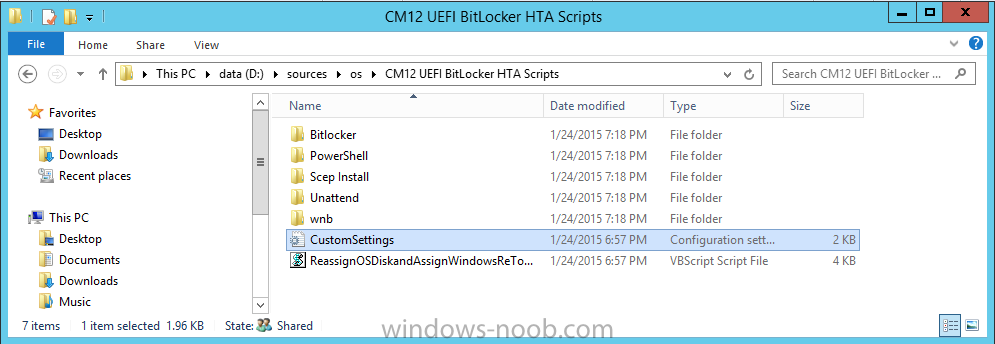
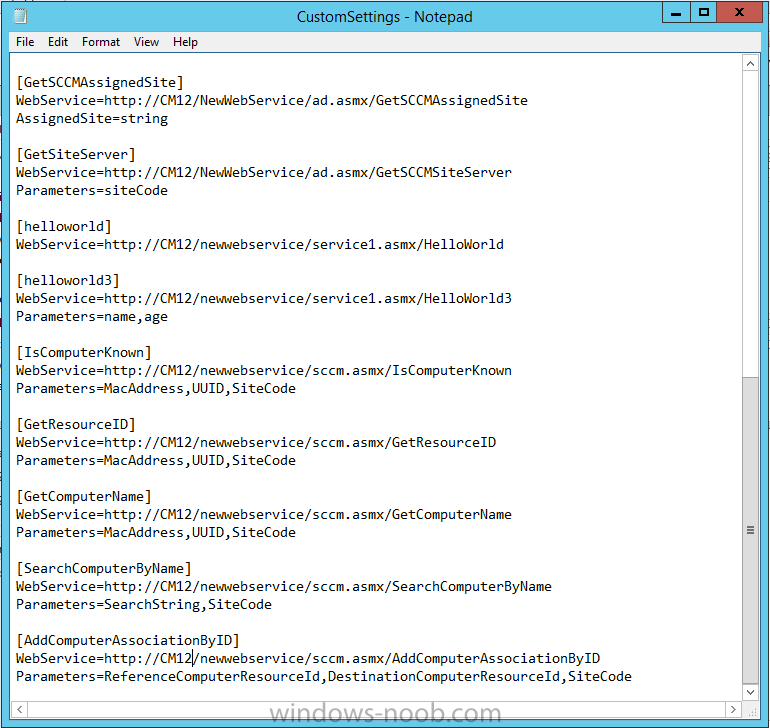
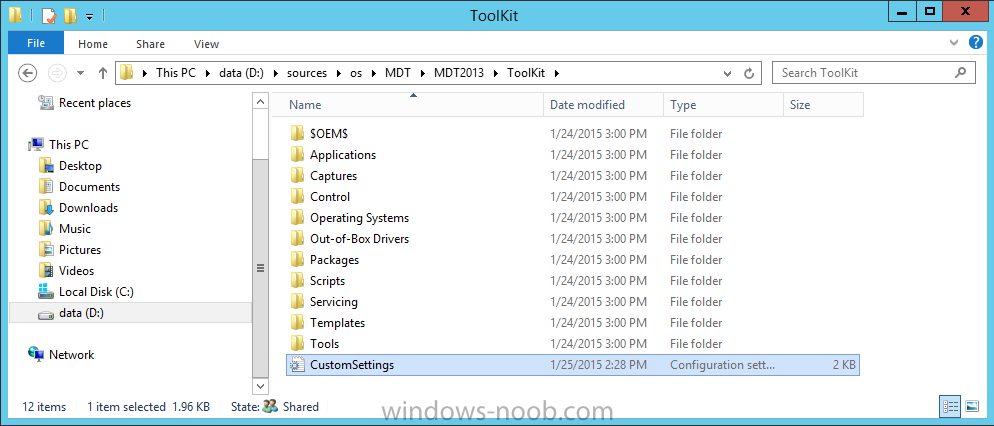
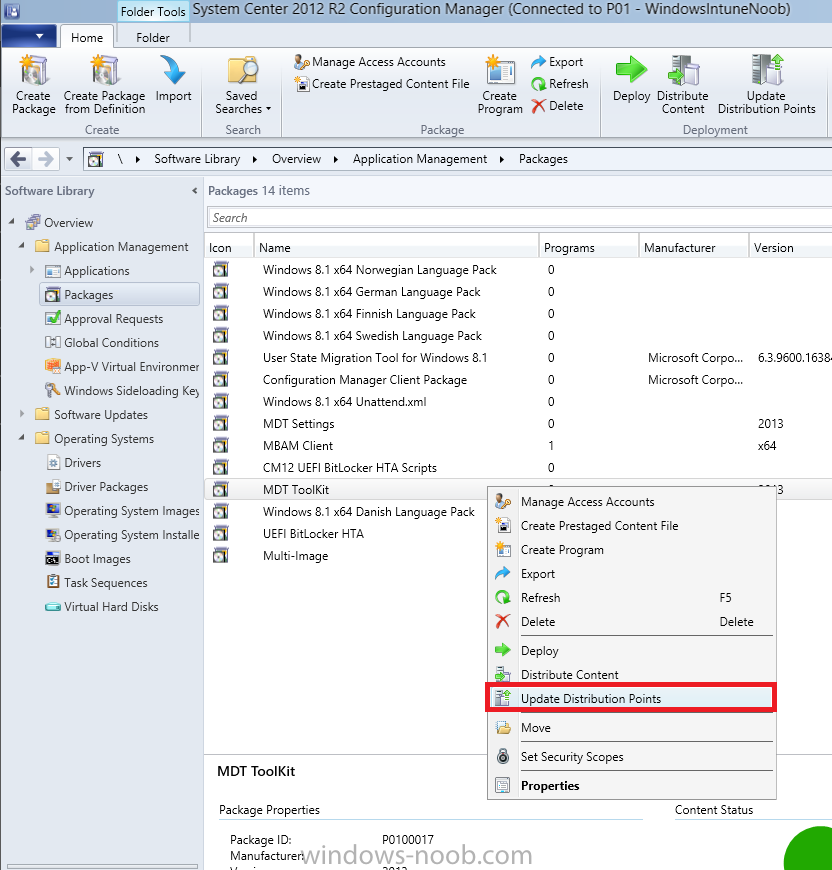
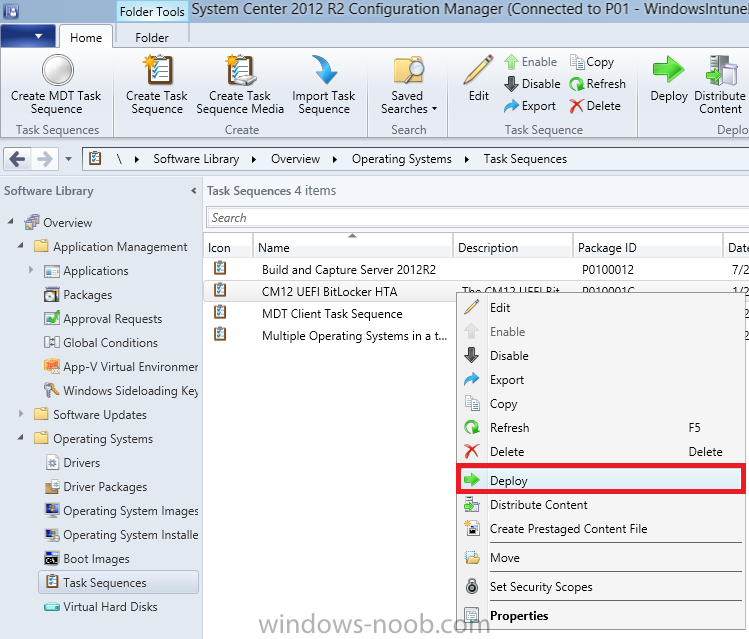
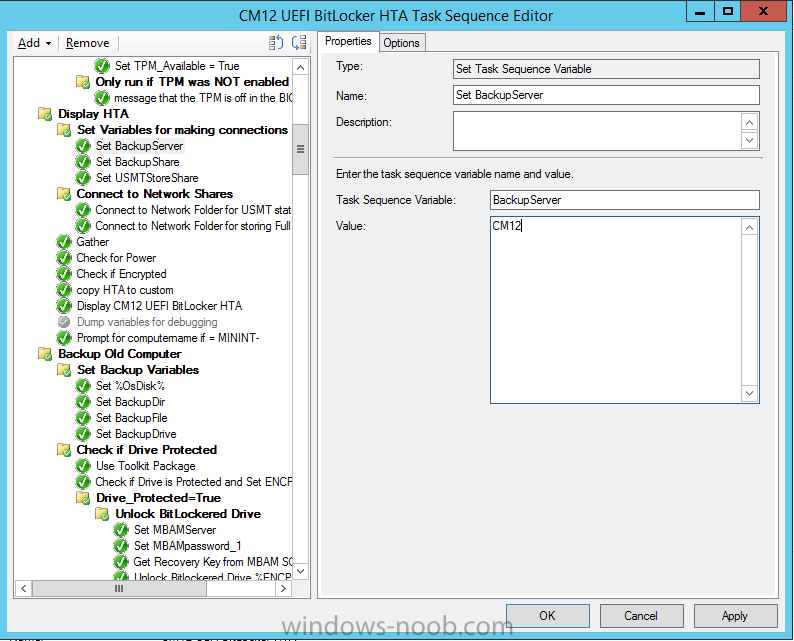
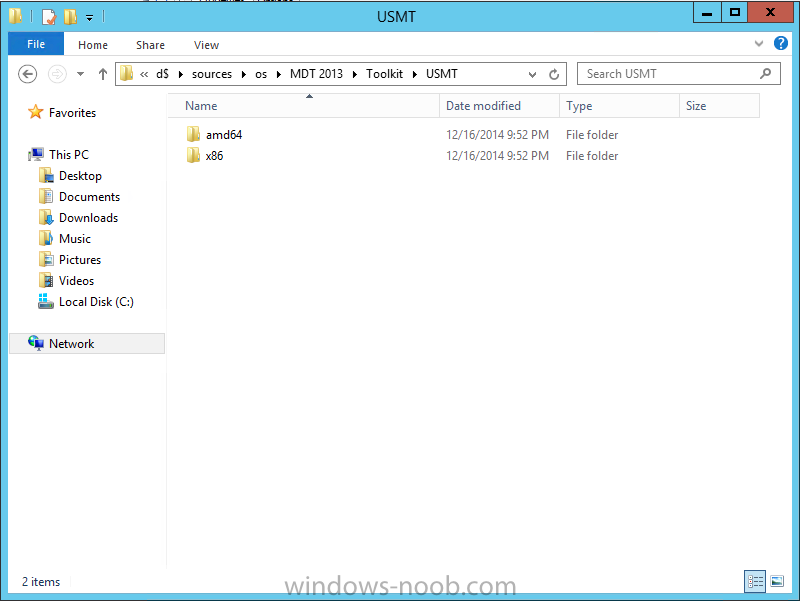
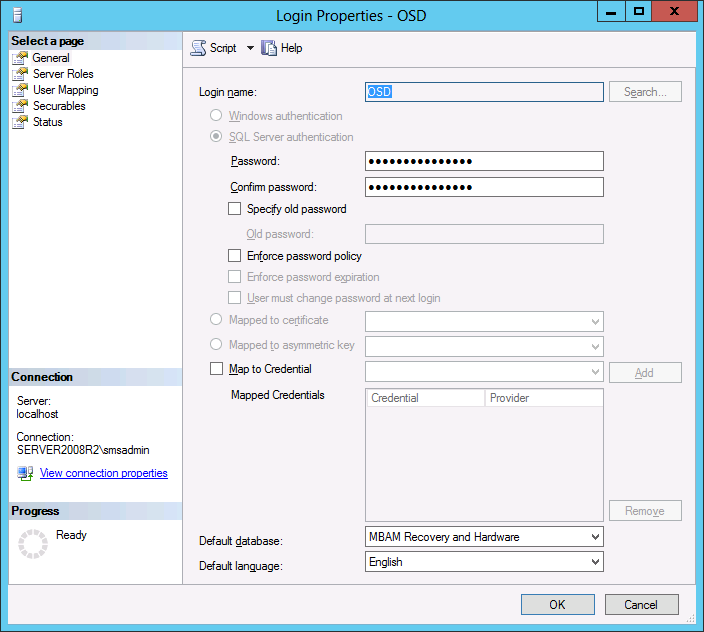
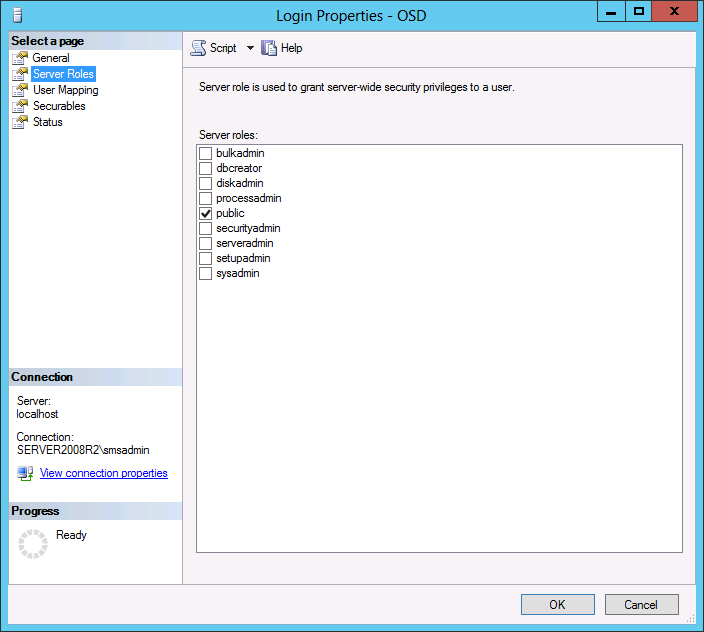
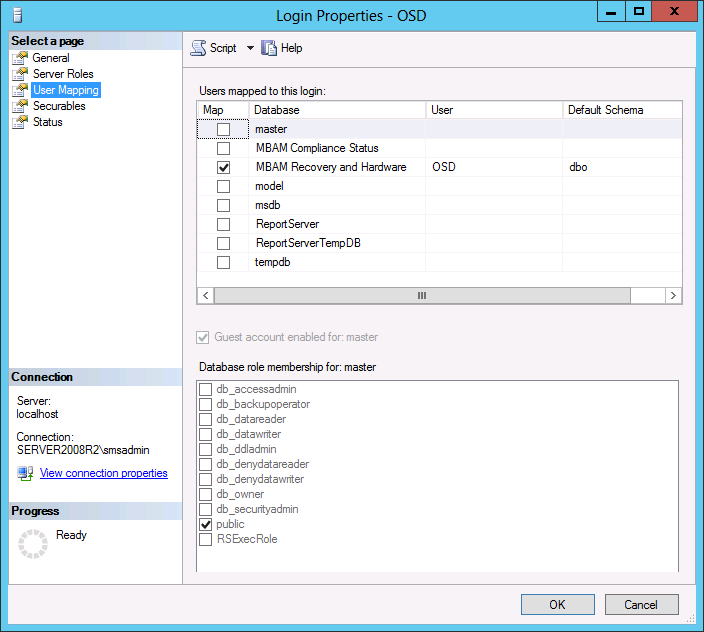
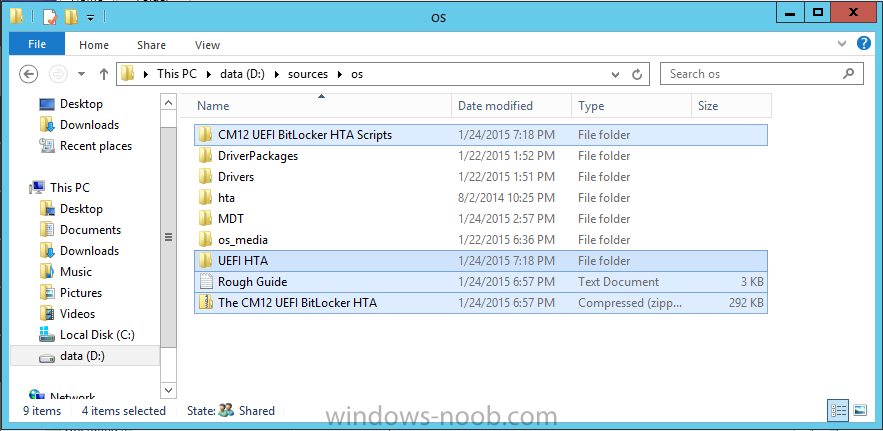
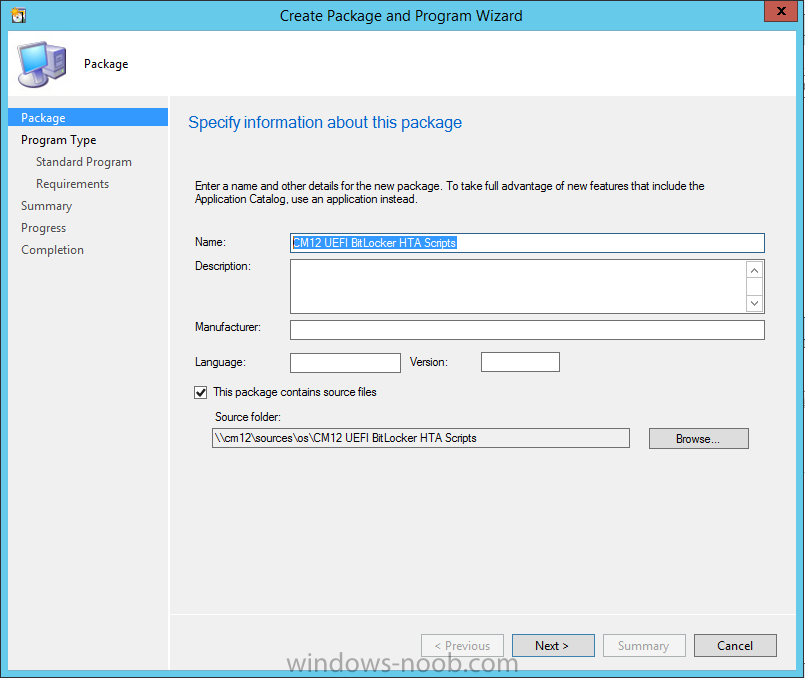
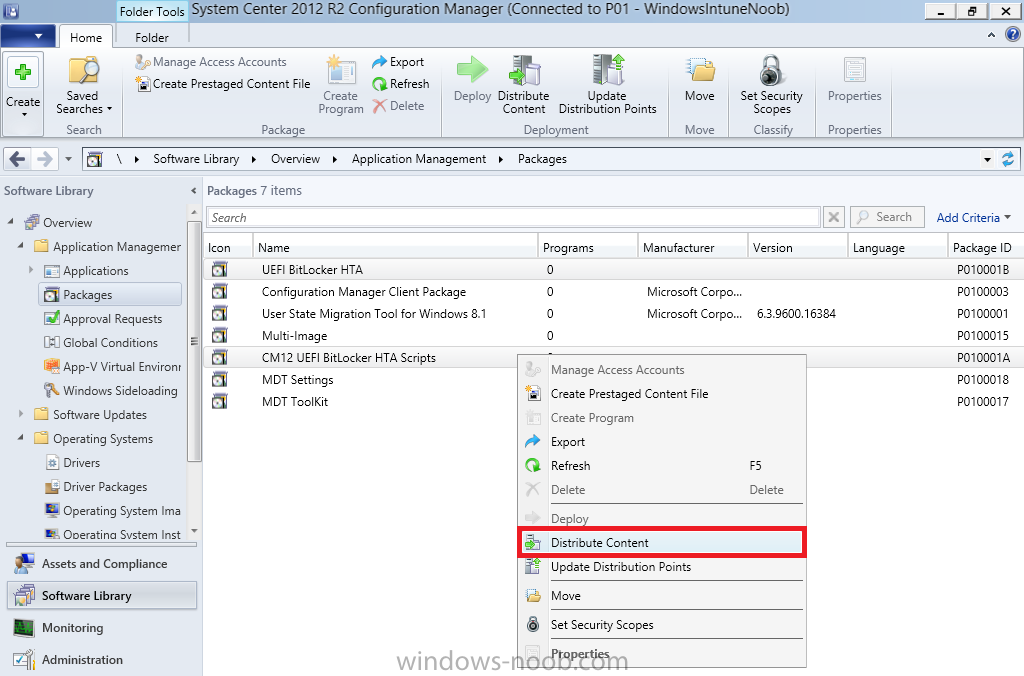
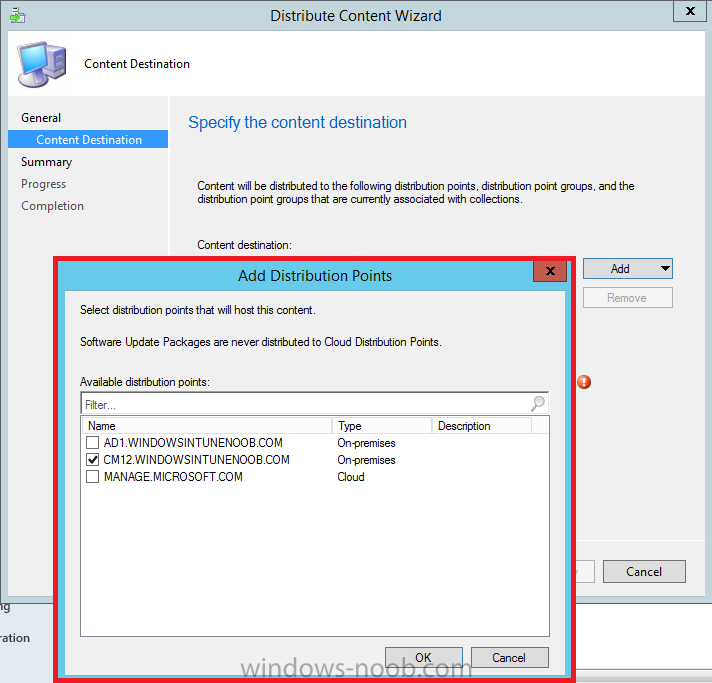
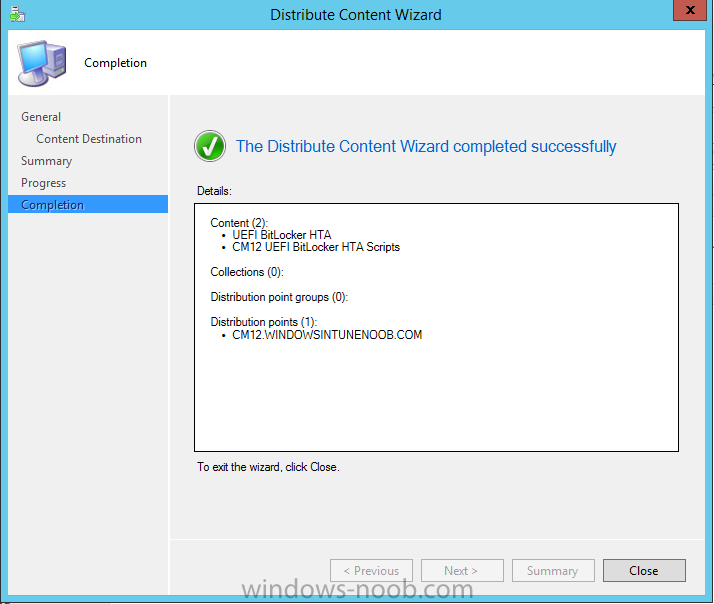
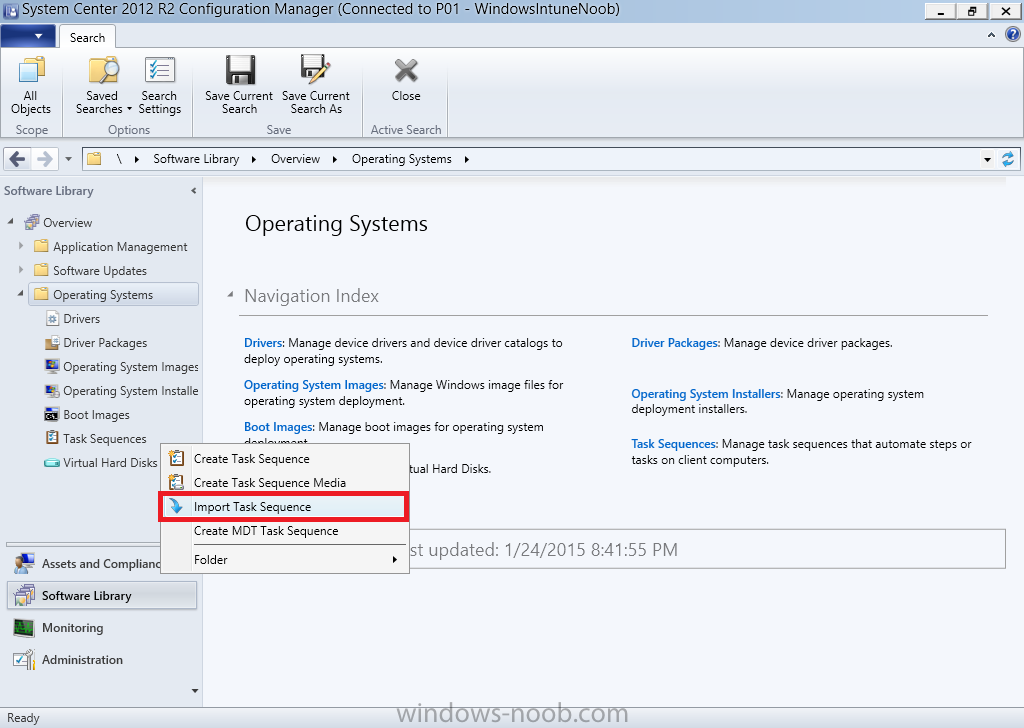
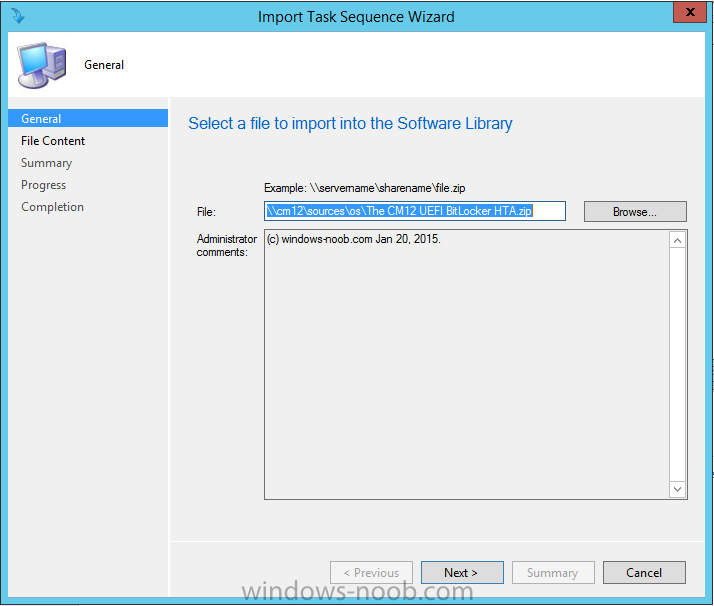
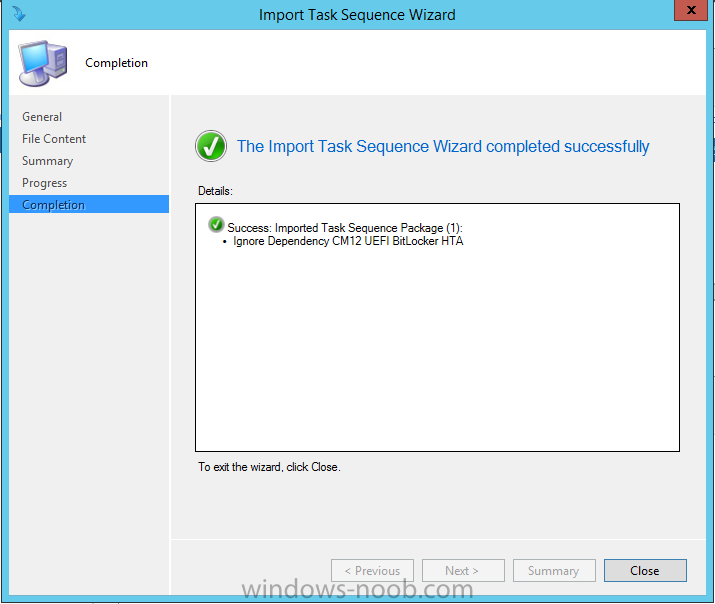
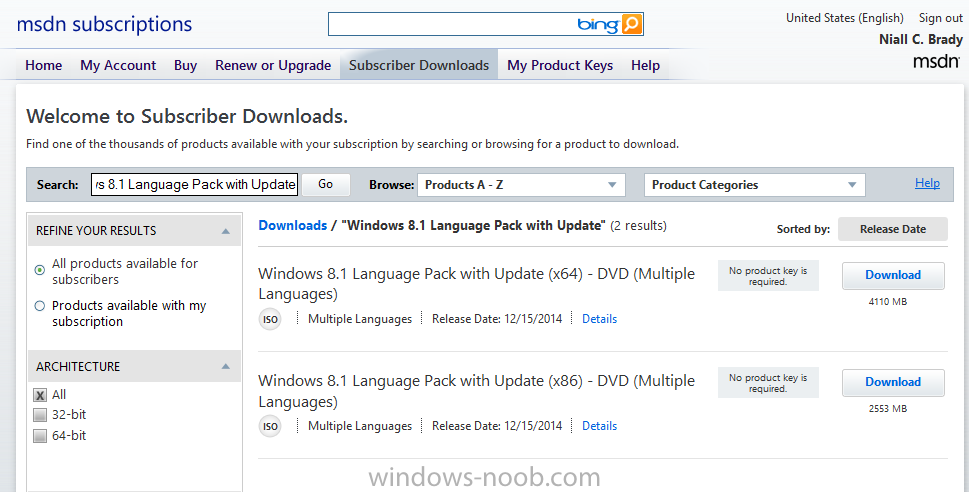
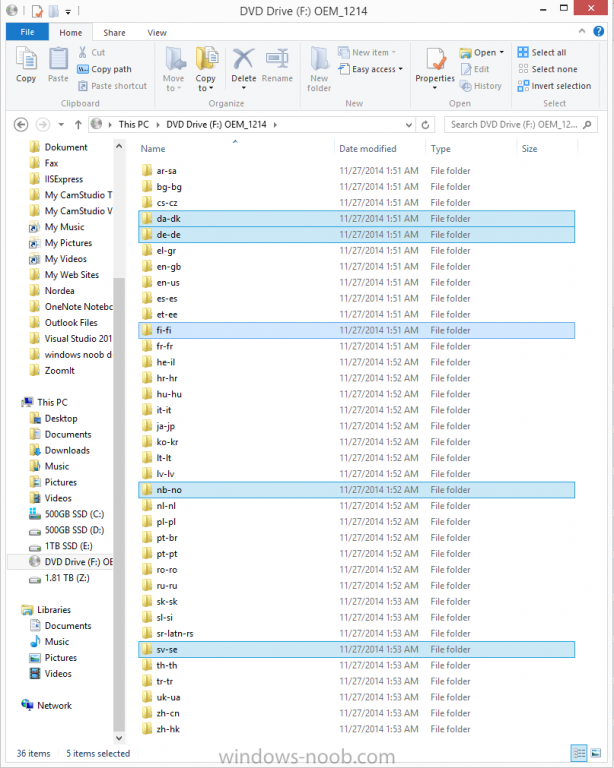
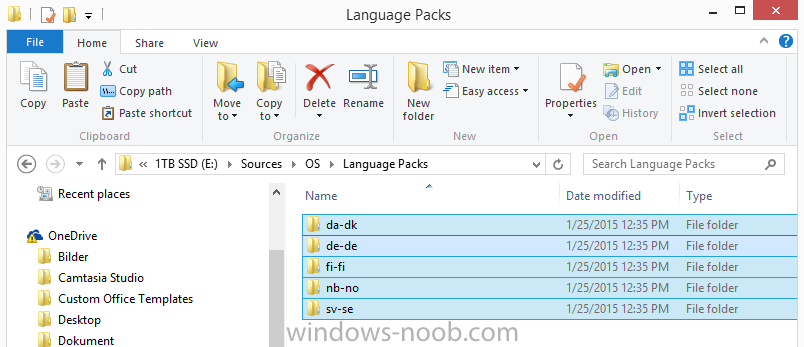
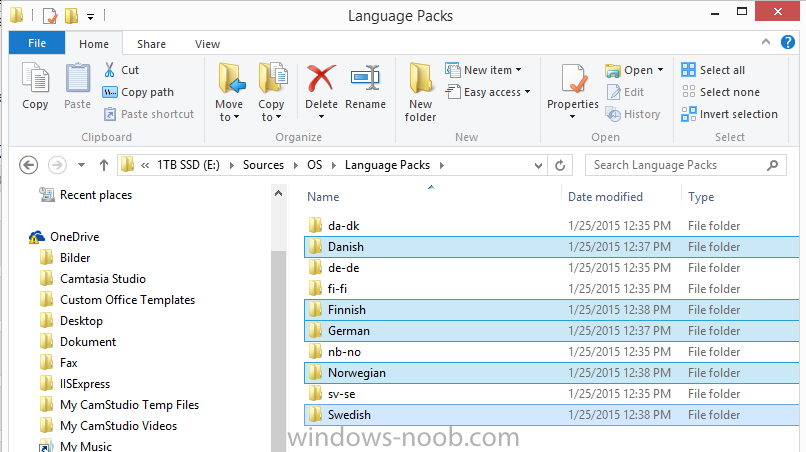
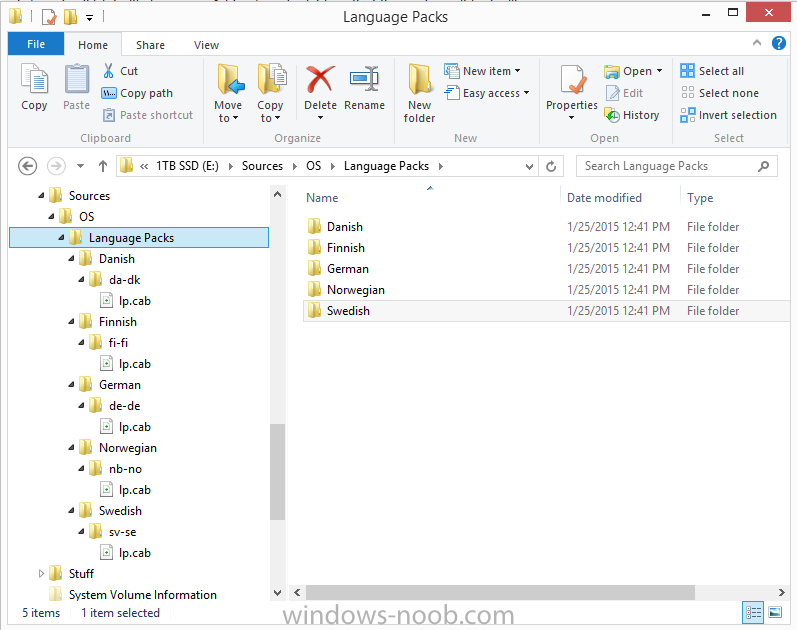
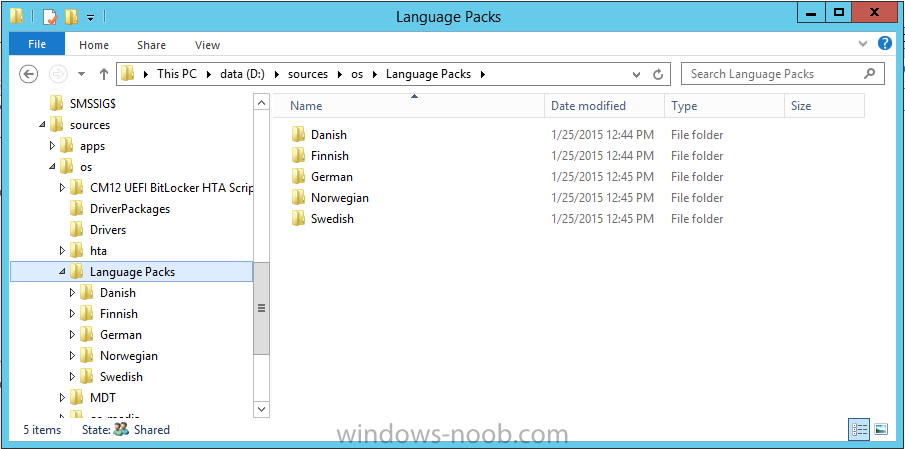
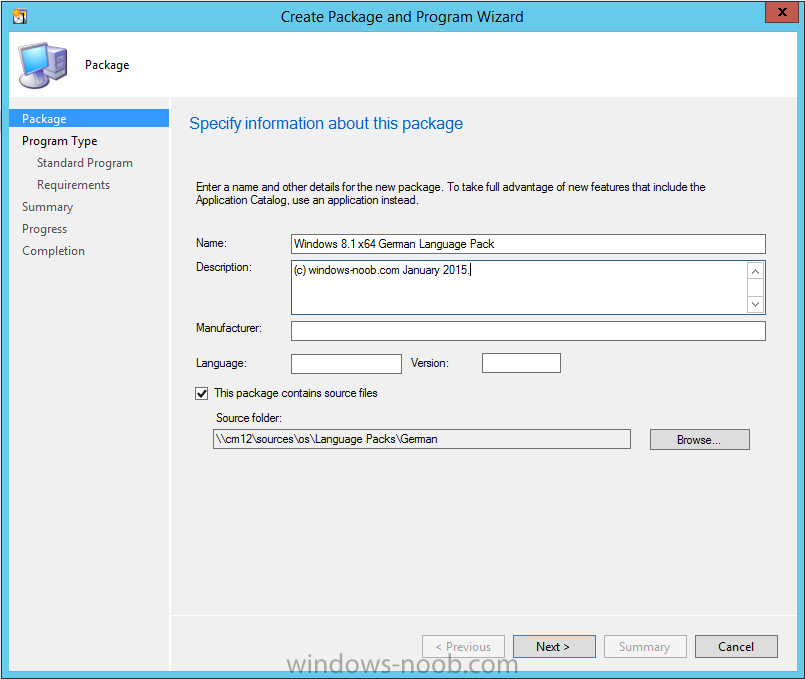
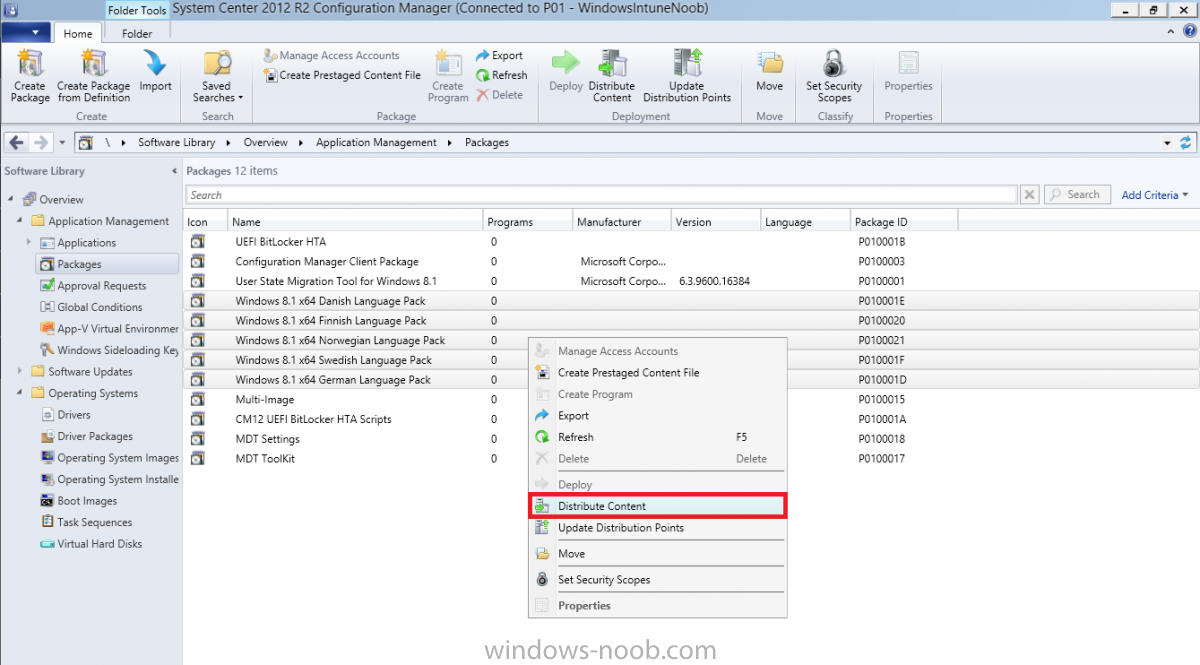
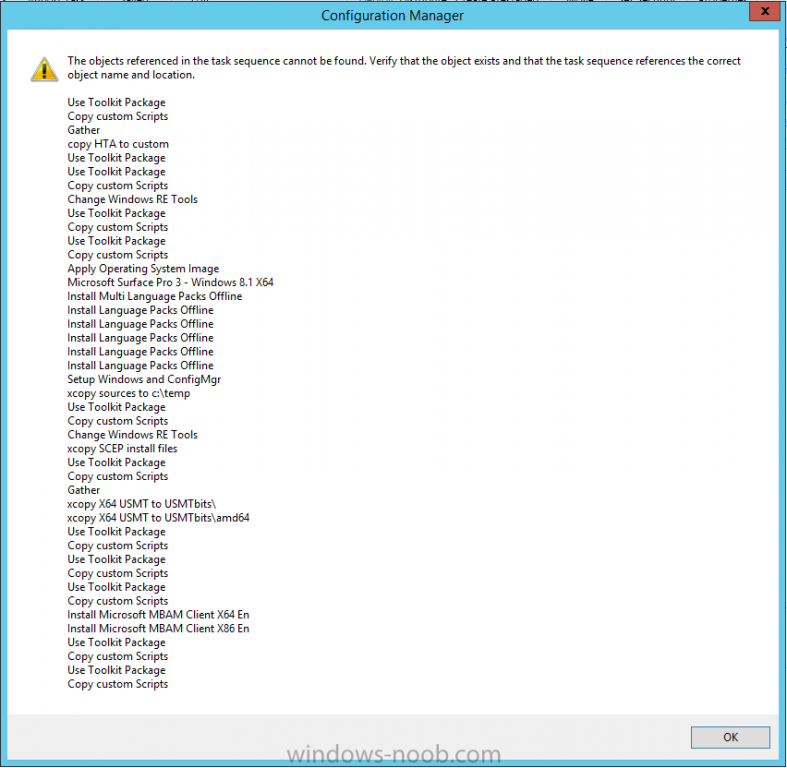
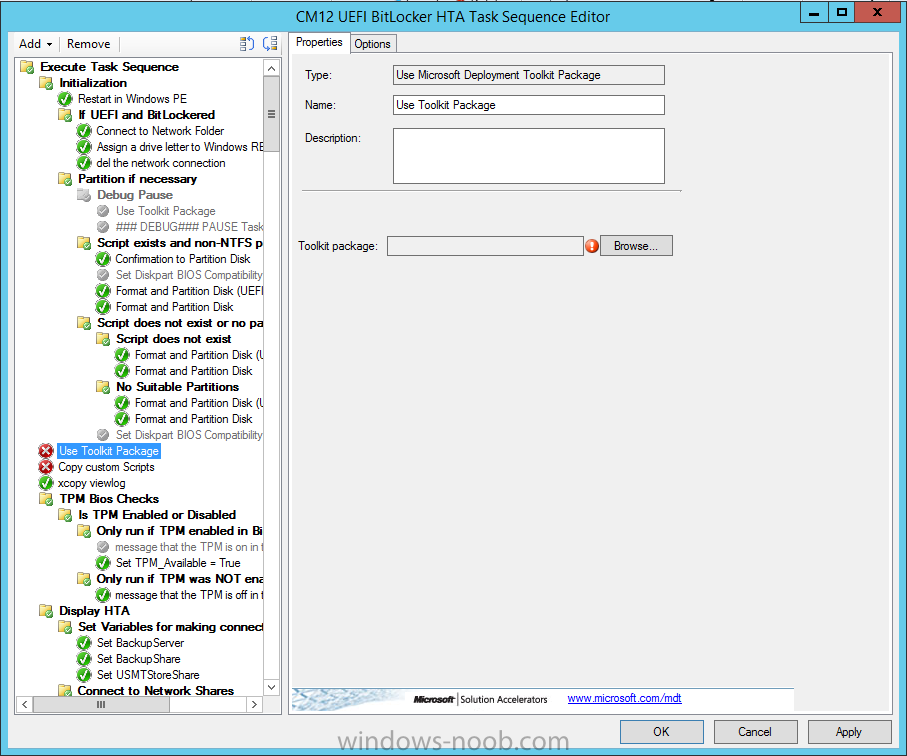
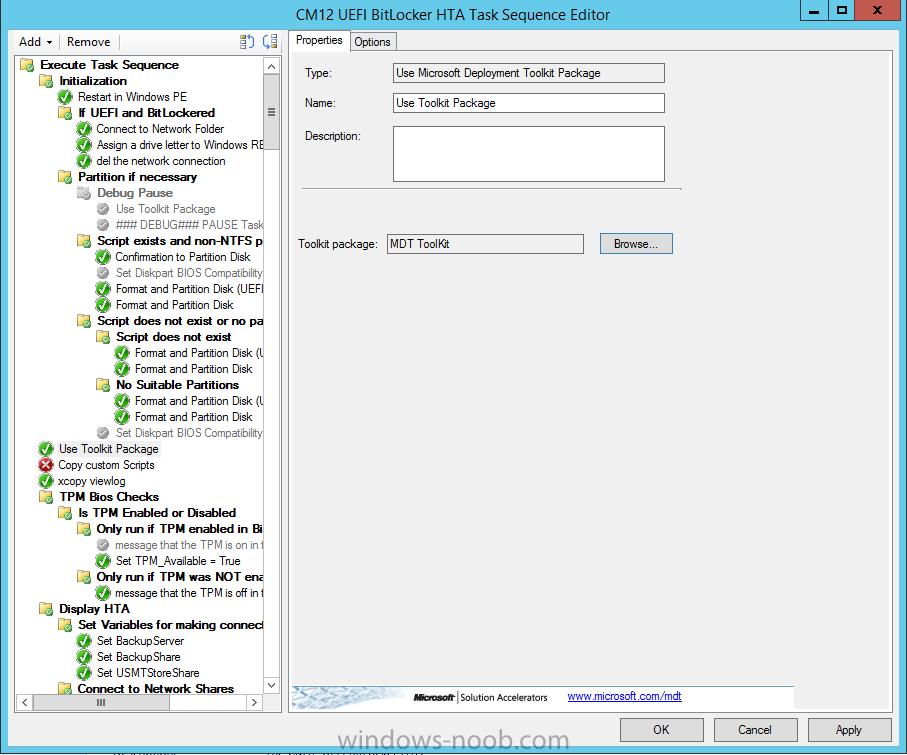
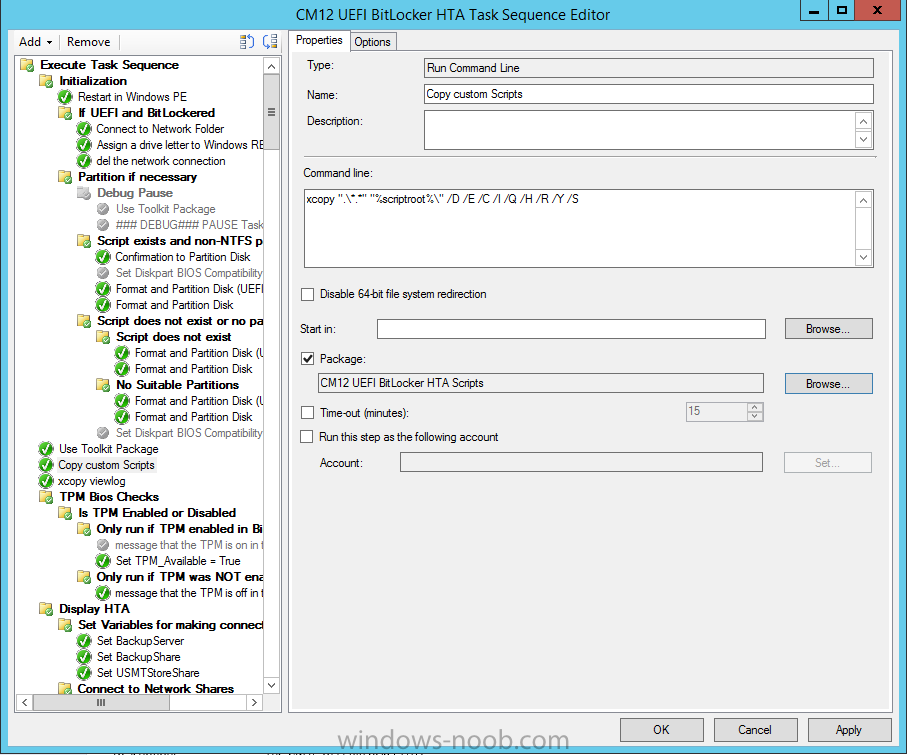
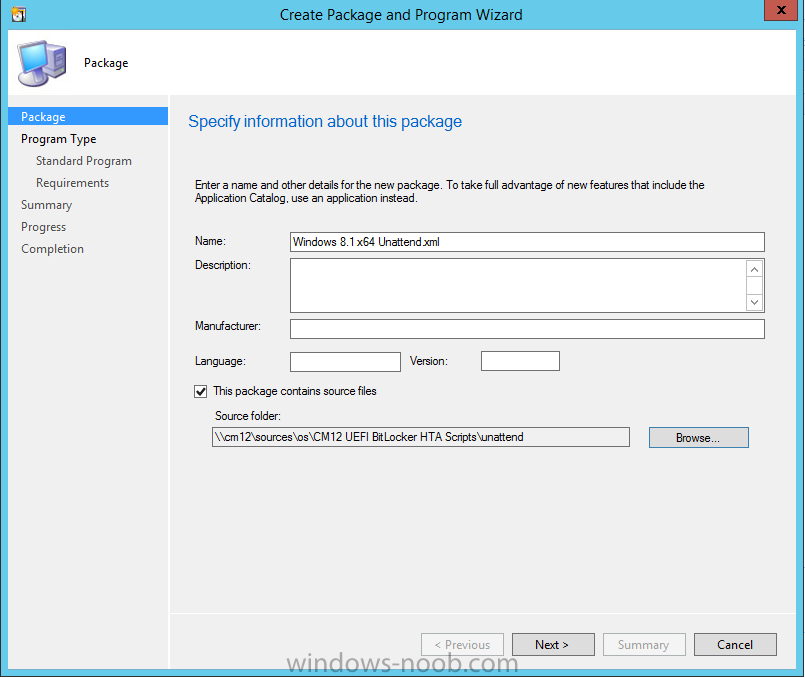
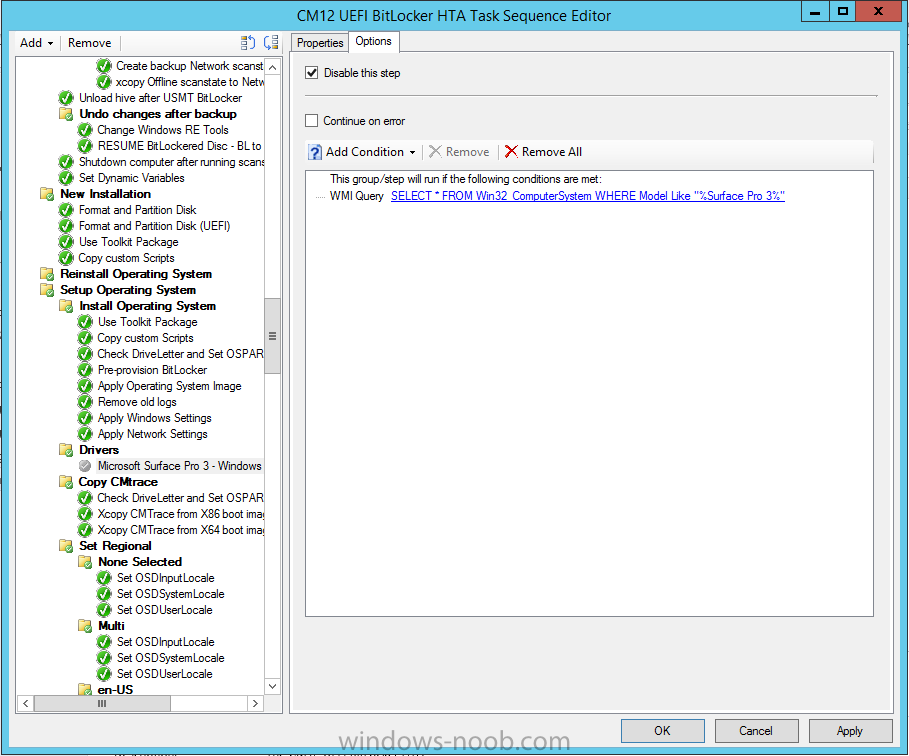
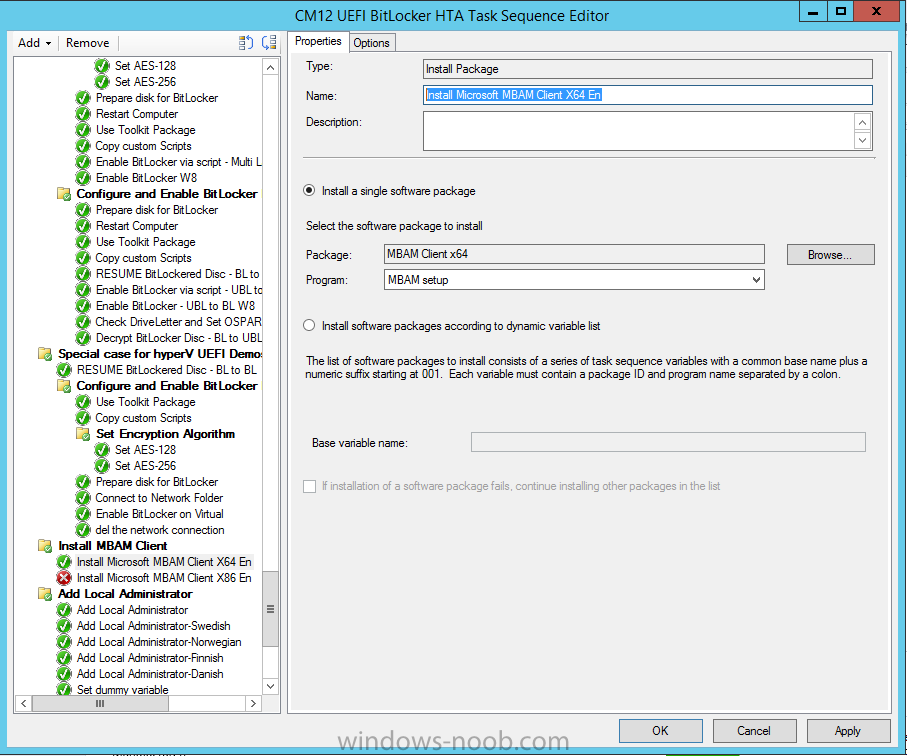
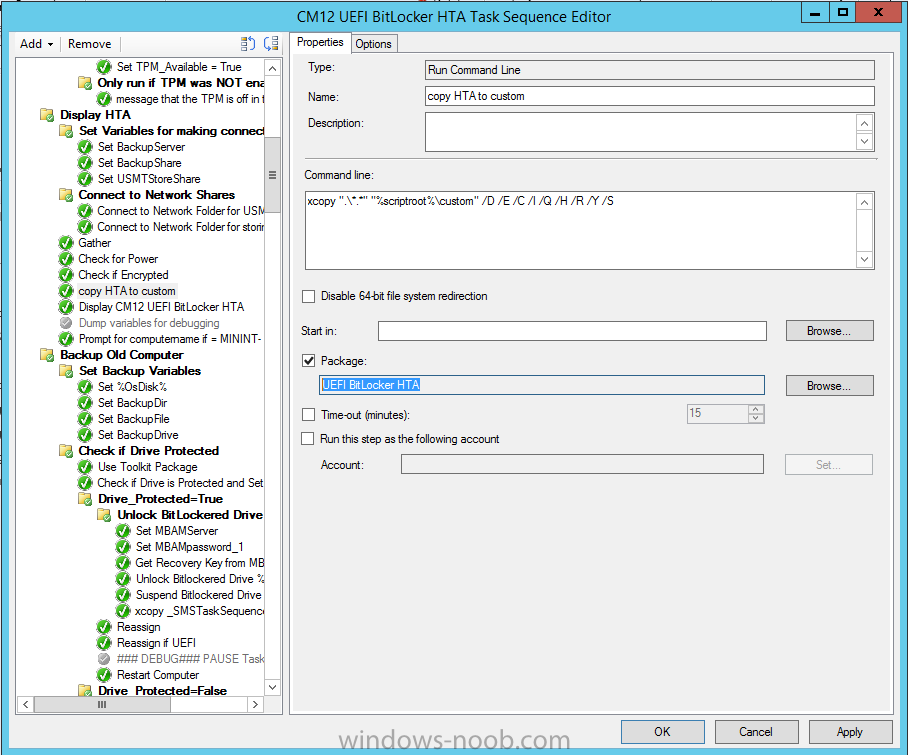
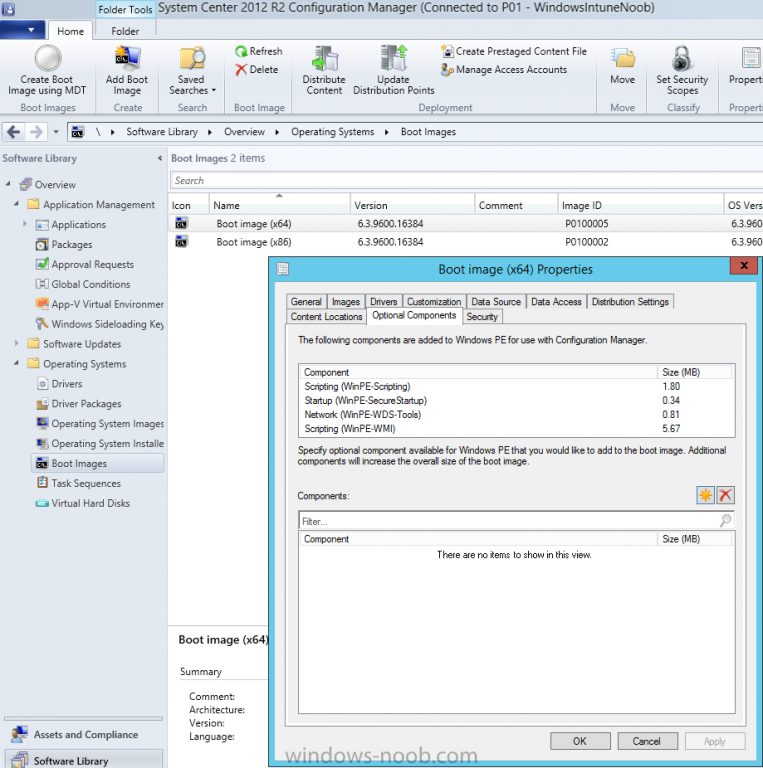
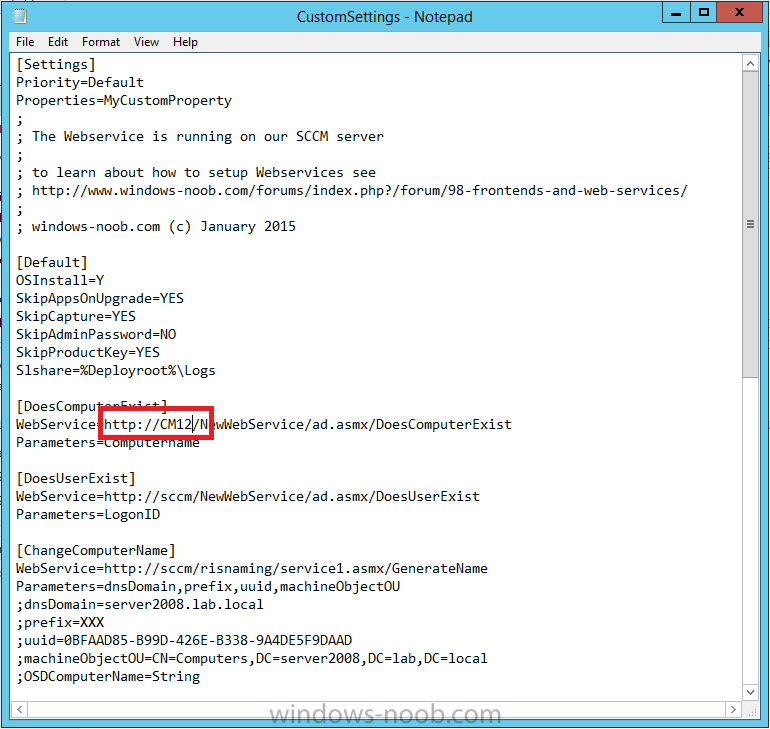
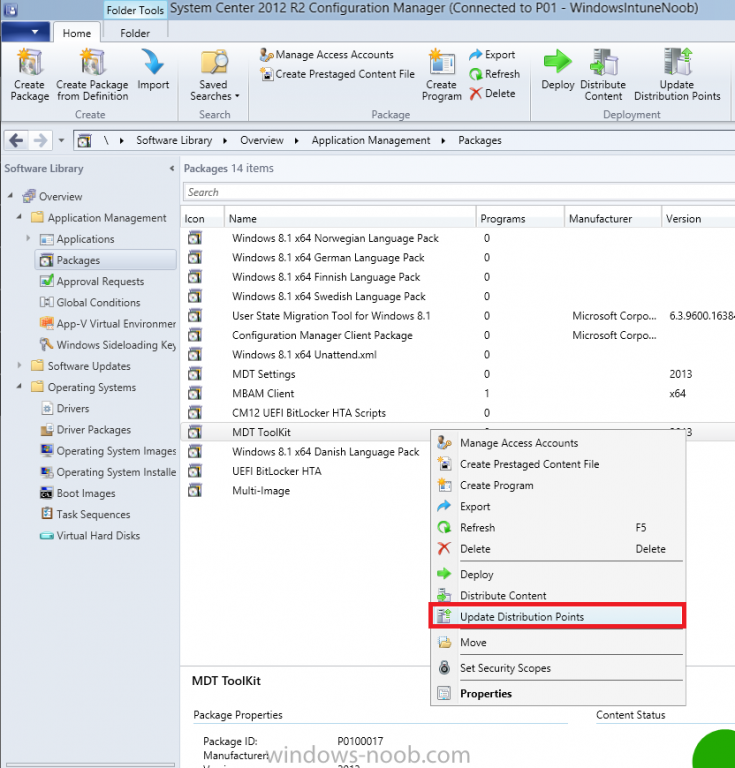
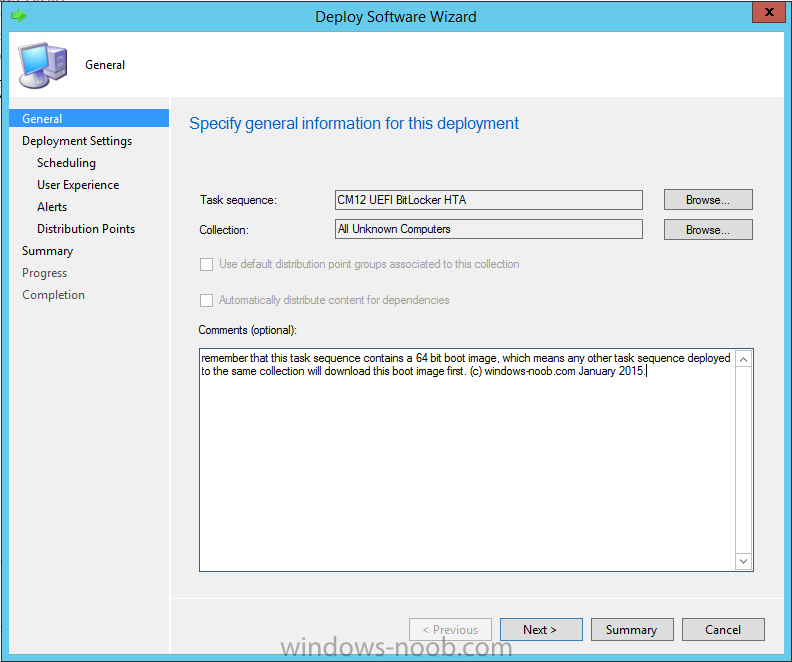
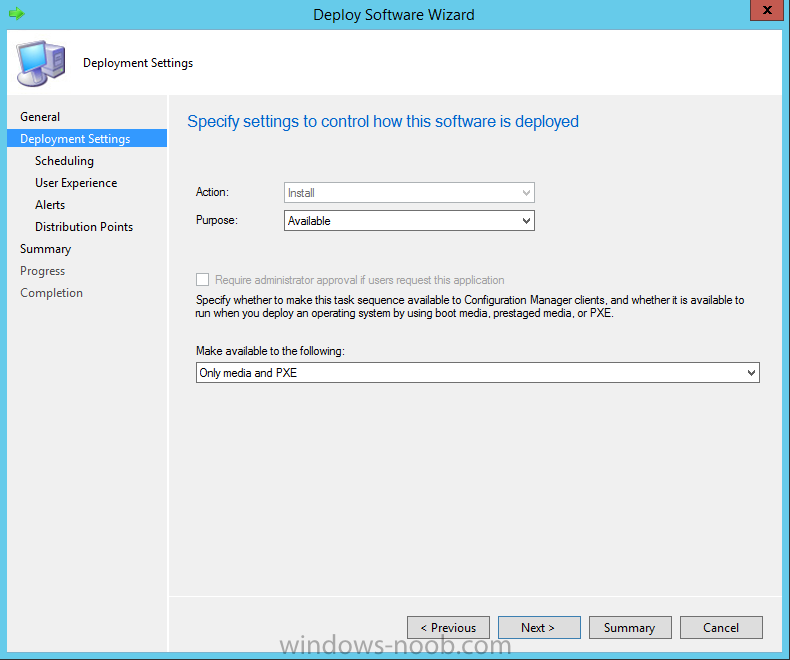
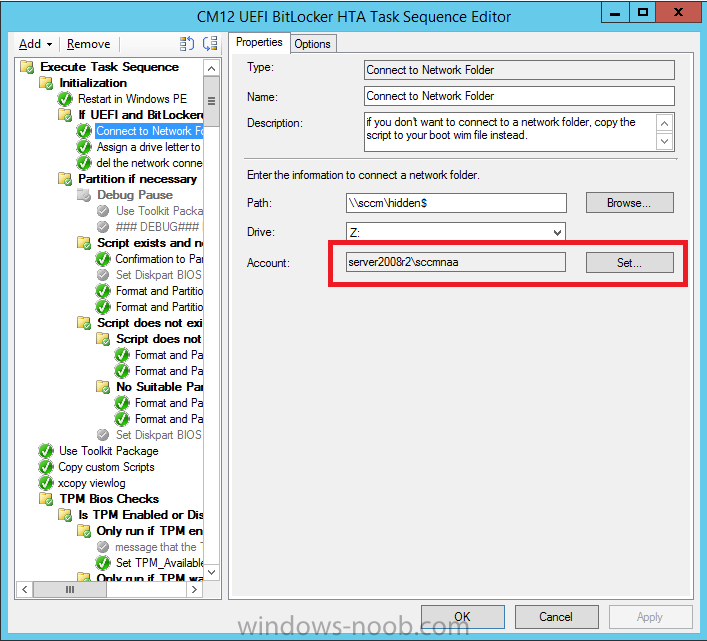
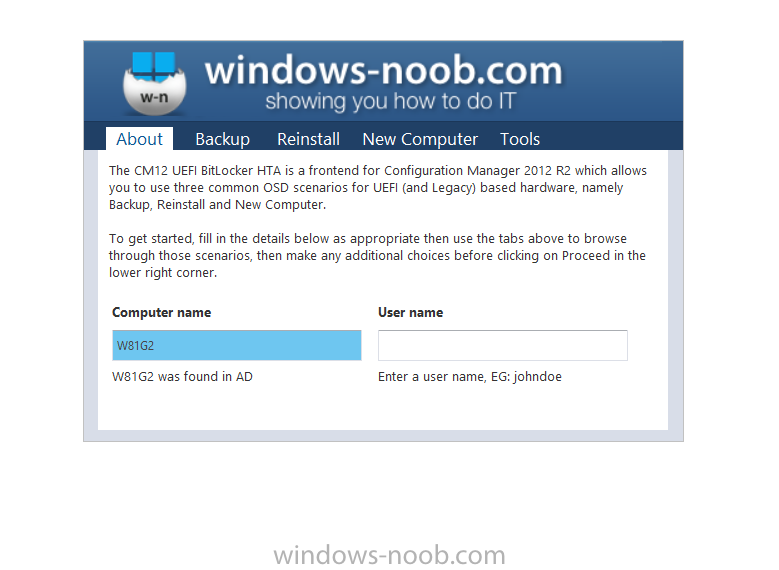
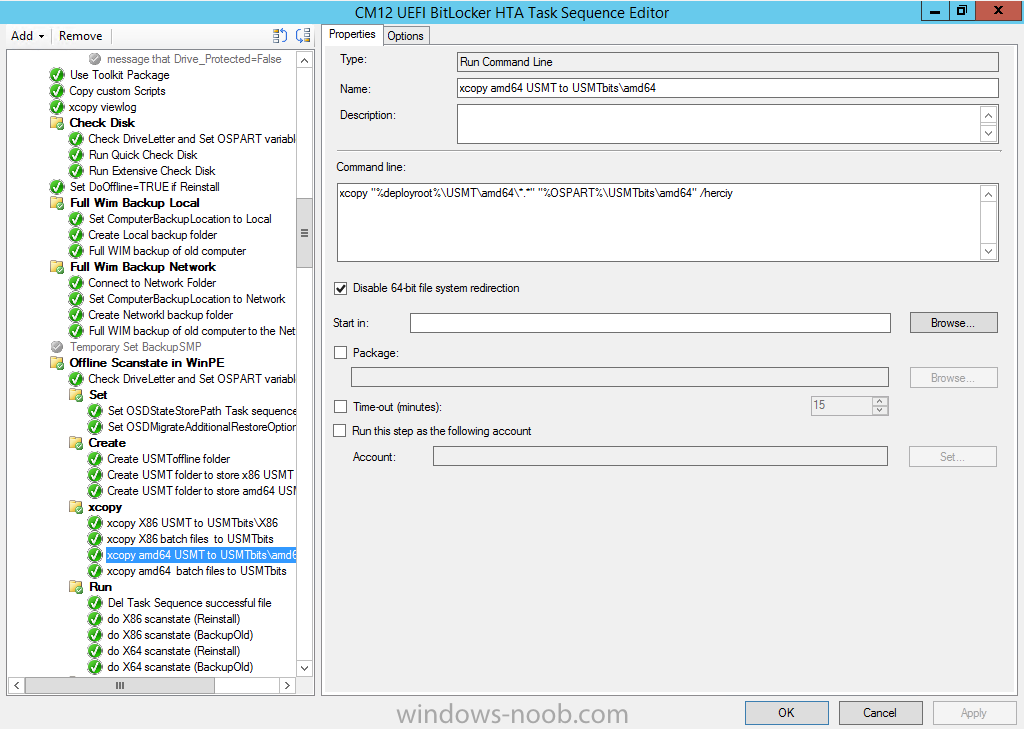
In Part 1 of this guide, you learned about the features available in the CM12 UEFI BitLocker FrontEnd HTA, in this part you will learning about installing it in your environment. However before you start make sure to fulfill the requirements listed below first. Step 1. Fulfill these Requirements first There are some requirements however, therefore before continuing this guide I will assume that you have: Integrated MDT 2013 with Configuration Manager 2012 R2 Installed and configured MBAM 2.0 or later Installed and configured Maik Kosters 7.3 web services If you have not done the above yet, then do so, below are some links that should help you accomplish those tasks. Integrate MDT 2013 with Configuration Manager 2012 R2 - Guide Install and configure MBAM 2.0 or later - Guide 1, Guide 2. Install and configure Maik Kosters web services - Guide (don't forget to install ASP.NET 3.5 and associated ISAPI extensions) ok once the above is done we'll extract some files, create some packages and import the task sequence before satisfying the dependencies within it. Step 2. Extract the downloaded files In part 1 you downloaded the CM12 UEFI BitLocker HTA and now you need to extract it. Right click on the downloaded zip file and choose Extract All. Select a destination for the extracted files the extracted files will extract to a folder called The CM12 UEFI BitLocker FrontEnd HTA, click on that folder to view the contents, it should look like the below Copy everything in that folder to somewhere useful such as \\server\sources\os\ Note: Do NOT extract the zip file contained within the extracted files above. Step 3. Create the CM12 UEFI BitLocker HTA Scripts package Open the Configuration Manager 2012 R2 console. Select the Software Library and then select Application Management then select Packages, choose Create Package as shown below give the new package a name such as CM12 UEFI BitLocker HTA Scripts and point it to the UNC location of the CM12 UEFI BitLocker HTA Scripts folder as shown below Choose Do not create a program continue through that wizard until completion Step 4. Create the UEFI HTA package Select the Software Library and then select Application Management then select Packages, choose Create Package as shown below Give the package a name such as UEFI BitLocker HTA and point it to the folder containing the UEFI HTA files as shown below Choose Do not create a program continue through that wizard until completion Step 5. Distribute the new packages Select the two newly created packages by holding down CTRL when clicking on the packages, right click and choose Distribute Content as shown below Click next, then select the content destination by clicking on the Add drop down, then select Distribution Points, once done, select one or more distribution points that you want the content on continue through that wizard until completion. Step 6. Import the Task Sequence In the Configuration Manager console, select Operating Systems, expand Task Sequences, right click and choose Import Task Sequence as shown below point to the UNC network path where you copied the contents of the extracted ZIP file from step 2 above as shown below in the task sequence file content screen, the drop down menu allows you to change from Import Failure to Ignore Dependency, select that option and click next, this is to allow you to import the task sequence without having the same boot wim image as I used when exporting it, you can click on View Failure to review exactly what dependencies are missing on your site for the task sequence. the import should complete successfully. Step 7. Download the language packs Using your Volume Licence or MSDN subscription access, download the Language packs for Windows 8.1 x64 with Update. Search for the following term Windows 8.1 Language Pack with Update The DVD ISO file should be similar to those shown below on MSDN. Select the x64 iso if your UEFI hardware is 64 bit (most is) otherwise select x86. The language pack download contains the following languages Languages: English, Japanese, Korean, Arabic, Bulgarian, Czech, Danish, German, Greek, Spanish, Estonian, Finnish, French, Hebrew, Croatian, Hungarian, Italian, Lithuanian, Latvian, Dutch, Norwegian, Polish, Portuguese-Brazil, Romanian, Russian, Slovak, Slovenian, Serbian, Swedish, Thai, Turkish, Ukrainian, Chinese - Hong Kong SAR, Chinese - Simplified, Portuguese-Portugal Once downloaded, mount the iso file by right clicking it and choose Mount, then copy the language packs you intend to support to somewhere useful as shown below mark the language packs by selecting the ones you need, and copy them to a temporary folder called Language Packs as shown below Create one folder matching the language of each language pack you have selected, so for example if you selected the da-dk language pack, then create a new folder called Danish. Below I've created 5 folders for my respective language packs. next, copy the respective language pack (eg: da-dk) into it's language folder (eg: danish) so that the end result looks like so copy those files and folders from your temp folder to your Configuration Manager server as shown below Step 8. Create Language packs packages Select the Software Library and then select Application Management then select Packages, choose Create Package as shown below Give the package a suitable name like Windows 8.1 x64 German Language Pack and point to the top folder for that language pack, eg: German as shown in the screenshot below Choose Do not create a program and continue through the wizard until completion. Note: Repeat the above process for each language pack you want made available in the task sequence. Step 9. Distribute Language packages Right click on your newly created language packs and choose Distribute Content, continue through the wizard as shown already in step 5 above. Step 10. Create an Unattend.XML package In the CM12 UEFI BitLocker HTA scripts\Unattend folder, you'll find some xml files, create a package using that folder as shown below Choose Do not create a program and continue through the wizard until completion, when done, right click the package and distribute content to your distribution points as shown in Step 5. Step 11. Create MBAM client packages Locate the MBAM client installation files that are provided with the MBAM software, and create two MBAM packages, one for MBAM x64 and the other for MBAM x86 clients as shown below (for the x64 MBAM package) Create a Standard Program for each package with the following parameters MbamClientSetup.exe /q /l c:\windows\temp\MbamClientSetup.log as shown below continue through the wizard and distribute the packages to your Distribution Points as shown in Step 5. Step 12. Edit the task sequence to fix missing references Right click on the newly imported task sequence and choose Edit as shown below at this point you'll get an extremely long list of missing reference objects, don't panic, it's easier to fix than it looks. Scroll up to the top of the opened task sequence, any package that needs to be re-referenced will be marked with a red x such as the Use Toolkit Package step shown here. Click on Browse beside the missing package, and Select the correct MDT 2013 Toolkit package which you created when you integrated MDT with Configuration Manager by following this guide. The completed step now looks like this The Copy custom scripts step is basically using our CM12 UEFI BitLocker HTA scripts package as shown below, in addition the Change Windows RE Tools step uses the same scripts package. The copy HTA to custom step looks like so (use the UEFI BitLocker HTA package created earlier) Repeat the above process for each and every step that needs it's package fixed. It will take some minutes but once done you can finally save the changes in the task sequence. I'll go through most of the 'different package steps below for your information so that there is no confusion about what goes where. Note: the Unattend.xml file referenced in the Apply Operating System image step is created in step 10 above. If you don't have a Surface Pro 3 in your organization you can disable that step as shown below or create the package using the powershell script as shown in this guide. The USMT package references should point to your ADK created USMT package as shown below Note Each folder in the USMT package (amd64 and x86) should be populated with custom XML files that you create, the batch files used to run them can be modified to suit your needs, or make no modifications at all and use the samples in the download here. The Install Microsoft MBAM Client X64 En step will look like so Step 13. Add PowerShell, MDAC and HTA support to your boot wim image We'll need MDAC support to contact the MBAM SQL server, we'll need PowerShell support to run the ChangeRETools powershell script, and we'll need HTA support to display the CM12 UEFI HTA. To add this support to our boot wim image we need to do as follows: Select the x64 boot wim and right click, choose Properties and Optional Components. Add the following by clicking on the yellow startburst icon, note that Microsoft .NET (WinPE-NetFx) will be added automatically when you select Windows PowerShell, Databse (WinPE-MDAC) HTML (WinPE-HTA) Windows Powershell (WinPE-PowerShell) as shown below Click Apply when done and answer Yes to the prompt below complete the wizard. Step 14. Attach the edited boot wim to your task sequence Right click on the task sequence and choose Properties, select Advanced, next select Use a boot image and point it to the newly updated X64 boot image as shown below. Step 15. Edit the CustomSettings.ini file Locate the CustomSettings.ini file (included in the CM12 UEFI BitLocker FrontEnd HTA scripts folder and edit it to point to your web service urls as shown below repeat the above for each webservice URL encountered pointing to the correct server in your environment Save the file, and copy the new file to the ROOT of your MDT 2013 package like so Finally, locate the MDT 2013 Toolkit package in the console, right click and choose Update Distribution Points as shown below Step 16. Set variables and assign connect to network folder users Edit the task sequence and locate the Connect to Network folder steps *there are a few*, change the network account to one that has permission to the share in question Next change the variable steps to point to server/shares of your making as shown below Set BackupServer Set BackupShare Set USMTStoreShare like so.... Apply your changes and close the task sequence. Step 17. Deploy the task sequence Right click on the CM12 UEFI BitLocker HTA task sequence and choose Deploy as shown below and select an appropriate collection for example All Unknown Computers make it Available (optional) and available only to media and PXE as shown below Tip: you might want to create a UEFI only collection and add known computers to it, then deploy this task sequence again to that collection also. that's it, all that's left to do is to PXE boot a computer and you should see the CM12 UEFI BitLocker FrontEnd HTA in action. In the part 3, I'll go through troubleshooting common problems with this task sequence, until then, adios ! Recommended reading The CM12 UEFI BitLocker Frontend HTA - Part 1. The features. - http://www.windows-n...1-the-features/ How can I install a Web Service ? - http://www.windows-n...-a-web-service/ How to Deploy the MBAM Client to Desktop or Laptop Computers - https://technet.microsoft.com/en-us/library/dn145031.aspx Downloads You can download a Microsoft Word copy of this guide here. The CM12 UEFI BitLocker HTA part 2.zip Summary In this part I've shown you how to set up your environment to work with the CM12 UEFI BitLocker HTA, In part 3, I'll go through troubleshooting common problems with this task sequence, until then, adios ! USMT XML files.zip


-
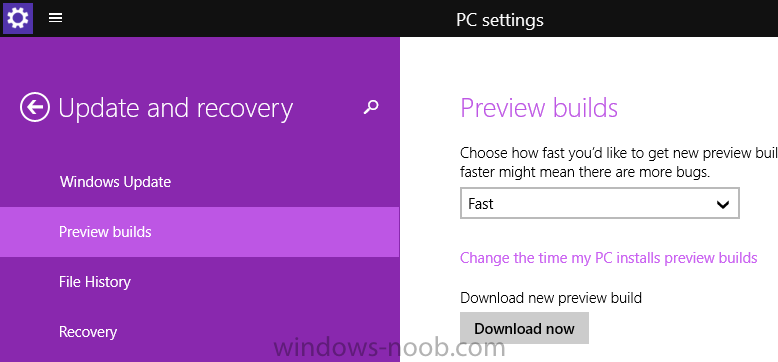
I hope that you were able to watch our live stream on Wednesday, where we shared more details on the Windows 10 experience. If you missed it, you can watch the video on demand anytime and read Terry Myerson’s blog post that recaps the latest Windows 10 news. As Terry mentioned, we continue to be humbled by the amount of feedback and excitement we’re seeing from the Windows Insider community. Some of the new features that Joe demoed on Wednesday will be available for our Windows Insiders starting today with our newest build – 9926. However, not everything you saw on Wednesday is included in this new build. Much is still in-progress and we’re getting it out to you as fast as we can – so you can try it out and give us feedback. Over the course of the next few builds, you will see us refine Windows 10 and continue to improve the experiences as well as quality and stability. If you’re unfamiliar with the Windows Insider Program, this is our community who is helping us build Windows 10. If you’re not a Windows Insider yet, we’d love to have you join – see below. Also make sure you read the list of known issues at the end of this post before getting started. We’re pushing Build 9926 out widely, flighting simultaneously to both “Fast” and “Slow” rings simultaneously as well as available on ISOs since it has been a while since we’ve released a new build out to you. I know it was tough to wait for a new build. The gap between 9879 and 9926 is the longest you should expect to see with the program, because of the holidays and the need to add and stabilize feature payloads. We’ll get new builds out faster moving forward – thank you for being patient with us. Getting started: If you haven’t yet signed up for the Windows Insider program, start here. If you’re currently configured for the Fast or Slow rings, the build is available now. Just like last time, this new build will come to you automatically via Windows Update, installed during your maintenance window if your PC is plugged in and on or sleeping. If you don’t want to wait for it to download and install on its own – you can go to PC Settings, Update and recovery, Preview builds and click the Check Now button to go get it now. This is a full build, and it will be installed as an in-place upgrade, so you’ll go through those colorful “installing your apps” screens again. This is because your account is being re-provisioned after the upgrade. With this build we further converge our preview build distribution with Windows Update, and the new Settings app (which I’ll talk about below) introduces a different way for configuring how you receive new builds from us (whether you’re on the Slow ring or Fast ring) as a Windows Insider. more via Windows blog > http://blogs.windows.com/bloggingwindows/2015/01/23/january-build-now-available-to-the-windows-insider-program/


-
Surface Prestage keeps failing
anyweb replied to shrek46's question in Deploying Windows 10, Windows 8.1, Windows 7 and more...
can you share your entire smsts.log, ? -
ok so post your working solution here so others can benefit :-)
-
I think you should use SysNative instead like so http://www.samlogic.net/articles/sysnative-folder-64-bit-windows.htm If you for example specify this folder path in your application's source code: C:\Windows\Sysnative the following folder path is actually used: C:\Windows\System32
-
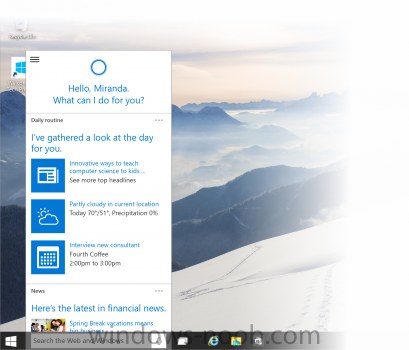
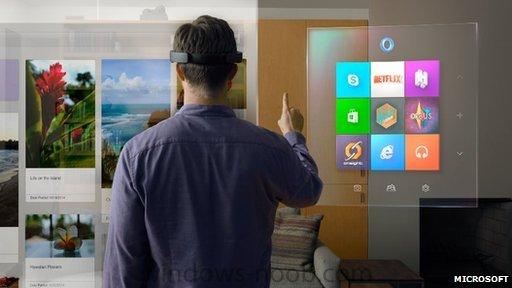
Microsoft has revealed that Windows 10 will bring its voice-controlled assistant Cortana to PCs. It also unveiled a headset that it said would one day project the operating system over views of the real world. In addition, the firm announced that the OS upgrade would be offered free of charge for devices running Windows 8, Windows 7 and Windows Phone. The offer, which is limited to the Windows 10's first year of release, may aid its adoption. It marks a change in strategy from Microsoft's previous policy of charging for major updates, and could help avoid a repeat of the relatively slow uptake of Windows 8. One analyst suggested the firm had needed to renew interest in its ecosystem. "Overall, we know that about only about 10% of computers are running Windows 8 and the adoption rate among companies is similar or lower," said Frank Gillett, an analyst at the Forrester consultancy. "Developers are not paying much attention to Windows for mass market consumer apps, and you could even argue that for enterprise software most of the energy is going into mobile apps for iPad and Android tablets. "Windows 10 is in effect a huge invitation to software developers to write exciting, powerful applications that will draw consumers. "My hunch is that they can succeed in getting a new generation of PC and tablet applications. The challenge is getting people interested in its phones." Holographic helmet It is likely to be years away from release, but Microsoft's chief executive Satya Nadella said the HoloLens headset represented a "magical moment" of "category creation" that developers lived for. via > BBC News

-
The Windows team shared more Windows 10 experiences and how Windows 10 will inspire new scenarios across the broadest range of devices, from big screens to small screens to no screens at all. You can catch the video on-demand presentation here. Windows 10 is the first step to an era of more personal computing. This vision framed our work on Windows 10, where we are moving Windows from its heritage of enabling a single device – the PC – to a world that is more mobile, natural and grounded in trust. We believe your experiences should be mobile – not just your devices. Technology should be out of the way and your apps, services and content should move with you across devices, seamlessly and easily. In our connected and transparent world, we know that people care deeply about privacy – and so do we. That’s why everything we do puts you in control – because you are our customer, not our product. We also believe that interacting with technology should be as natural as interacting with people – using voice, pen, gestures and even gaze for the right interaction, in the right way, at the right time. These concepts led our development and you saw them come to life today. Delivering Windows as a Service and a Free Upgrade to Windows 10Today was a monumental day for us on the Windows team because we shared our desire to redefine the relationship we have with you – our customers. We announced that a free upgrade for Windows 10 will be made available to customers running Windows 7, Windows 8.1, and Windows Phone 8.1 who upgrade in the first year after launch.* This is more than a one-time upgrade: once a Windows device is upgraded to Windows 10, we will continue to keep it current for the supported lifetime of the device – at no additional charge. With Windows 10, the experience will evolve and get even better over time. We’ll deliver new features when they’re ready, not waiting for the next major release. We think of Windows as a Service – in fact, one could reasonably think of Windows in the next couple of years as one of the largest Internet services on the planet. And just like any Internet service, the idea of asking “What version are you on?” will cease to make sense – which is great news for our Windows developers. With universal Windows apps that work across the entire device family, developers can build one app that targets the broadest range of devices – including the PC, tablet, phone, Xbox, the Internet of Things, and more. For our enterprise customers, we’ll continue to support the way many of them work today, with long-term servicing for their mission critical environments. With Windows 10, a best practice we recommend for many enterprise devices is to connect to Windows Update and be kept up-to-date with the latest security and productivity improvements as soon as they are available. You can learn more about our commitment to enterprises here, with much more to come in the following months. Everything about Windows 10 – the experiences, delivering it as a service and the free upgrade – means ongoing value to all our customers. The new generation of Windows is a commitment—a commitment to liberate people from technology and enable them to do great things. New Windows 10 ExperiencesTogether with our Windows Insiders, we’re well way on our way to making Windows 10 the largest-ever open collaborative development effort Microsoft has ever shipped. Since we launched the Windows Insider Program in September, we’ve been joined by 1.7 million Windows Insiders, who have delivered over 800,000 pieces of feedback. We are truly co-creating the future of Windows with you and we’re humbled by your valuable role in this new open development process. Today, we shared new details on the experience coming to Windows 10, including: Cortana, Microsoft’s personal digital assistant, comes to PC and tablet, for the first time with Windows 10. Cortana learns your preferences to provide relevant recommendations, fast access to information, and important reminders. Interaction is natural and easy via talking or typing, with advanced features to control Cortana for more trustworthiness and transparency. Windows 10 for phones and tablets – Windows 10 for phones and small tablets features a fast, fluid and familiar experience that seamlessly interacts with your PC. A new web experience for Windows 10 – Code-named “Project Spartan,” the next generation browser was built with greater interoperability, reliability and discoverability, with a new look and feel built just for Windows 10. Advanced features include the ability to annotate by keyboard or pen directly on the webpage and easily share with friends, a reading view that is distraction free, displaying the article in a simplified layout for a great reading experience for Web articles online and offline, and the integration of Cortana for finding and doing things online faster. Office universal apps on Windows 10 offer a consistent, touch-first experience across phone, tablet and PC with new versions of Word, Excel, PowerPoint, OneNote and Outlook. Designed from the ground up to run on Windows, you can easily create and edit Word documents, annotate slides in real-time with new inking features or easily present PowerPoint presentations, and with new touch-first controls in Excel you can create or update spreadsheets without a keyboard or mouse. The next version of the Office desktop suite is also currently in development, more on this in the coming months. New universal applications will ship with Windows 10, offering innovative new experience applications, consistent across the device continuum, for Photos, Videos, Music, Maps, People & Messaging, and Mail & Calendar. These built-in apps have an updated design that look and feel the same from app to app and device to device. Content is stored and synced through OneDrive, enabling you to start something on one device and continue it on another. via > blog.windows.com
-
show me a screenshot of where you copied the operating system files to please
-
Windows 8.1 Enterprise Evaluation in Windows 8.1 Enterprise Evaluation x64 install.wim can't be right, look at the path, the wim will generally always be called install.wim
-
i didn't use that version so I don't know, but if you can get your hands on the Enterprise ISO you should see the same thing as I did.
-
copy the entire contents of your Windows 8.1 with update extracted iso to E:\Source\Operating Systems\Windows 8.1 x64 or whatever your path is, they try running the script again