anyweb
-
Posts
9181 -
Joined
-
Last visited
-
Days Won
366
Everything posted by anyweb
-

The CM12 BitLocker FrontEnd HTA
anyweb replied to anyweb's question in Frontends, HTA's and Web Services
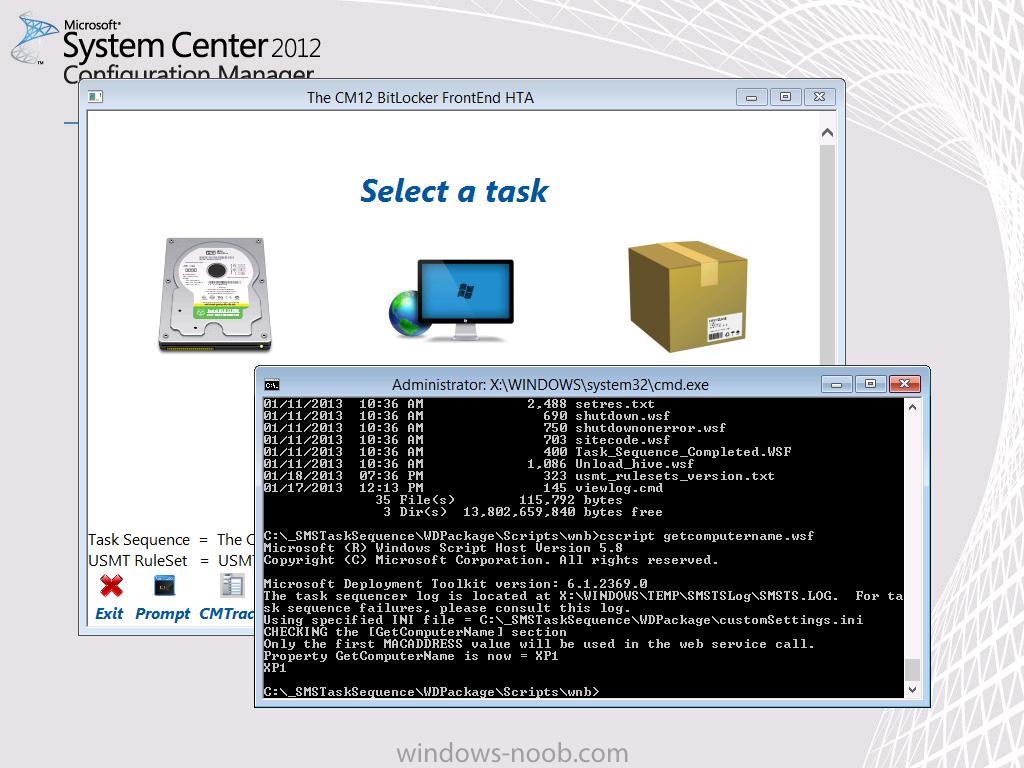
ok open a command prompt and do cscript.exe getcomputername.wsf do you see similar output to me below ?
-
The CM12 BitLocker FrontEnd HTA
anyweb replied to anyweb's question in Frontends, HTA's and Web Services
hard to tell without logs, can you zip em up and attach them ? -
how can i remove any application which created????
anyweb replied to mohd.S.H's topic in Configuration Manager 2012
highlght the application and look at the deployments tab, you'll see the deployments there which you can either delete or retain. -
when you pxe boot do you see the prompt to press F12 ? or are you seeing something else ? have you tried pressing F8 once the boot.wim loads or does it not get that far ?
-
no idea, but interesting story :-)
-
you mean controlling what boot wim get's used ? that's decided by the task sequence it is attached to, and the order of when it was deployed, so for example if i deploy a task sequence with a x86 boot wim to All Unknown Computers, and then PXE boot an unknown computer, it will download that x86 boot wim
-
MDT2013 + SCCM 2012 R2 - Monitoring via MDT WorkBench
anyweb replied to dozi's topic in Configuration Manager 2012
have you actually confirmed via the smsts.log file that the installation has completed successfully ? -
Multiple OSD Task Sequences on one USB
anyweb replied to xc3ss1v3's topic in Configuration Manager 2012
and here's the post http://www.windows-noob.com/forums/index.php?/topic/11053-how-can-i-dynamically-deploy-multiple-operating-systems-with-system-center-2012-r2-configuration-manager/ -
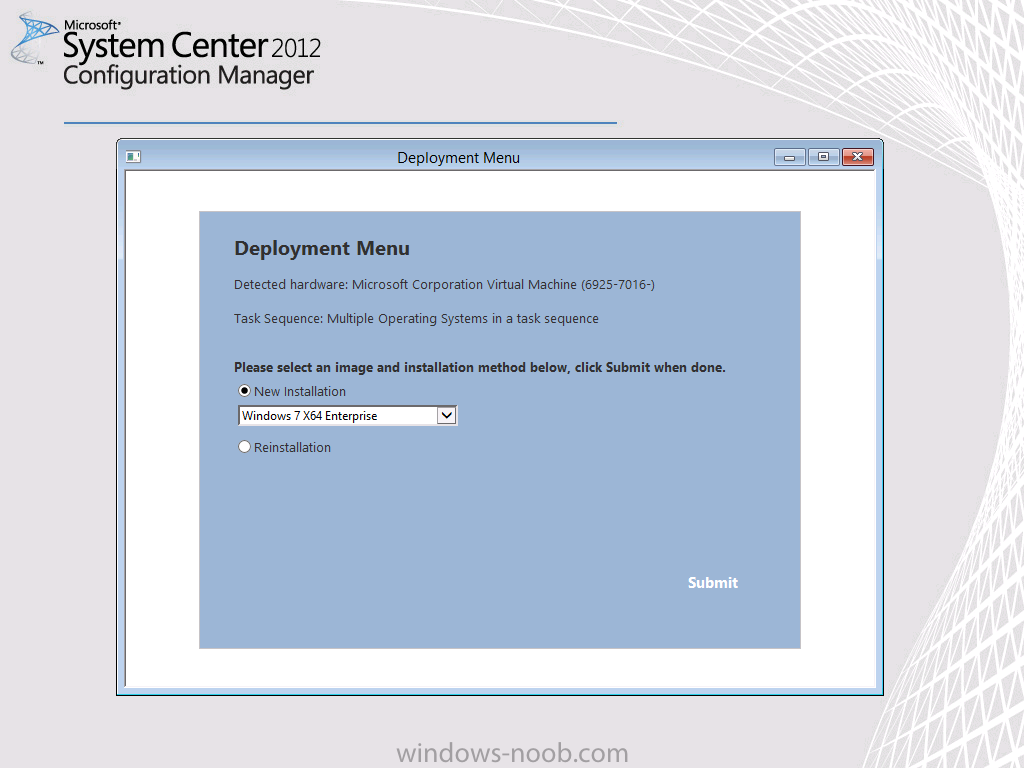
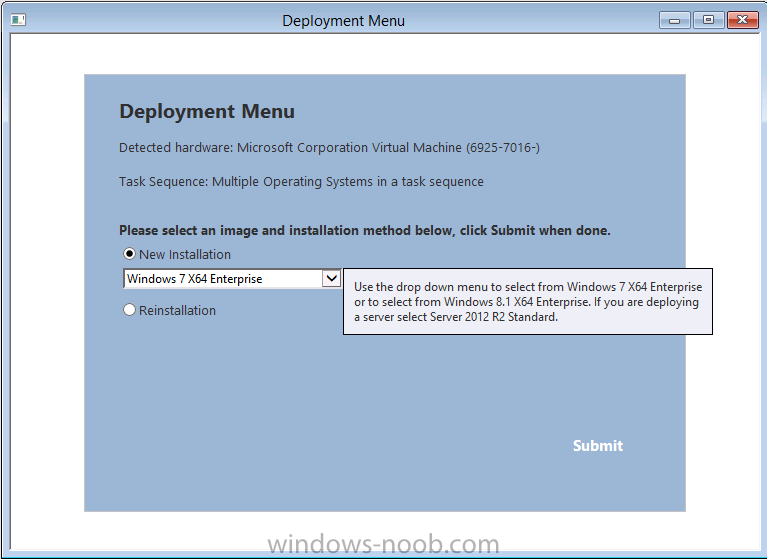
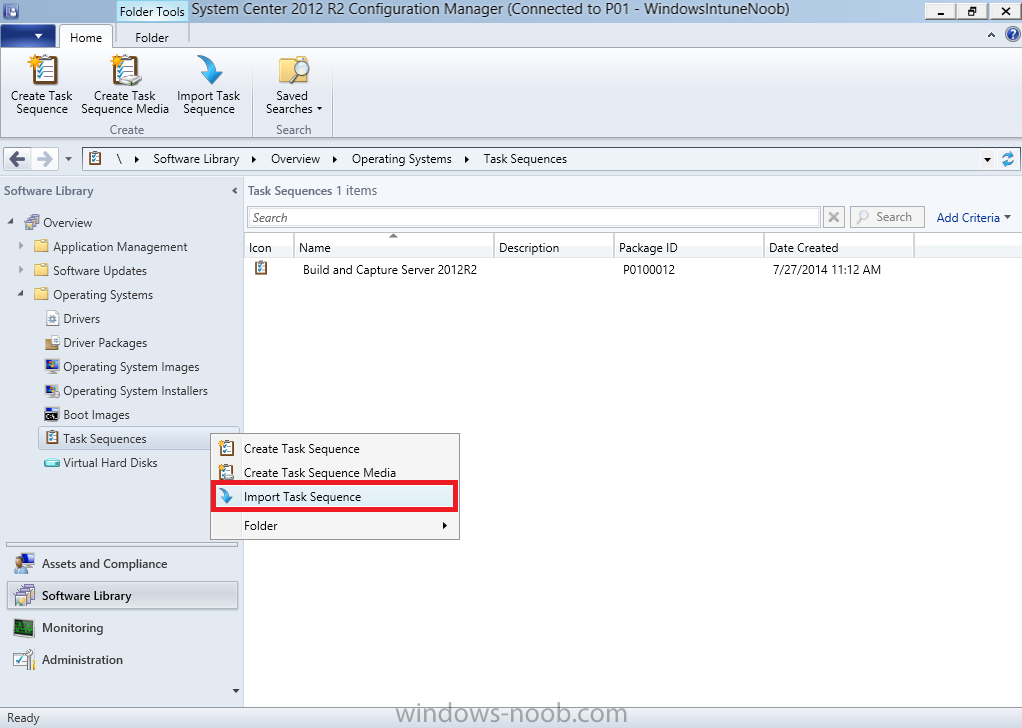
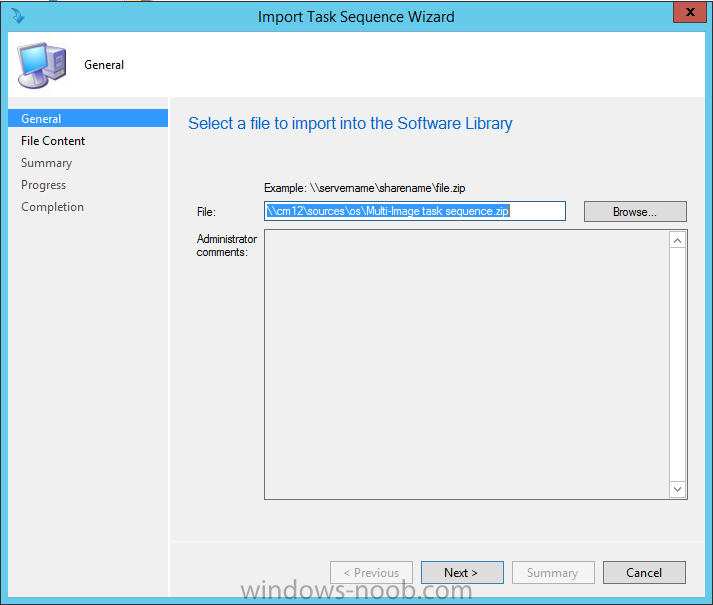
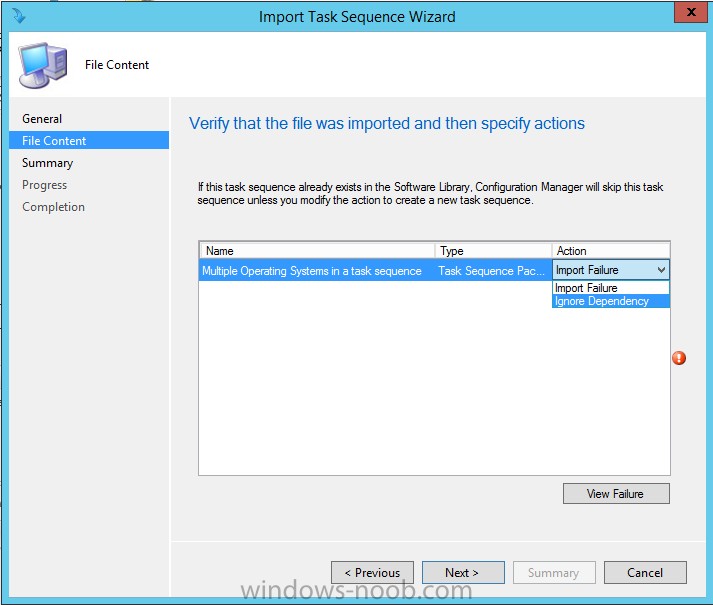
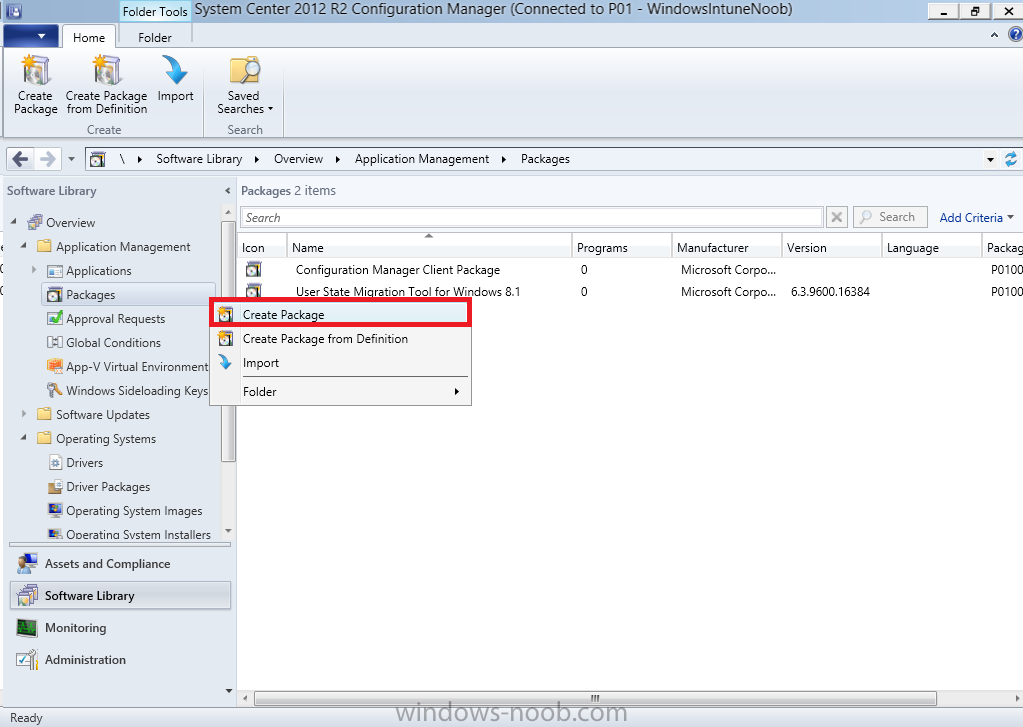
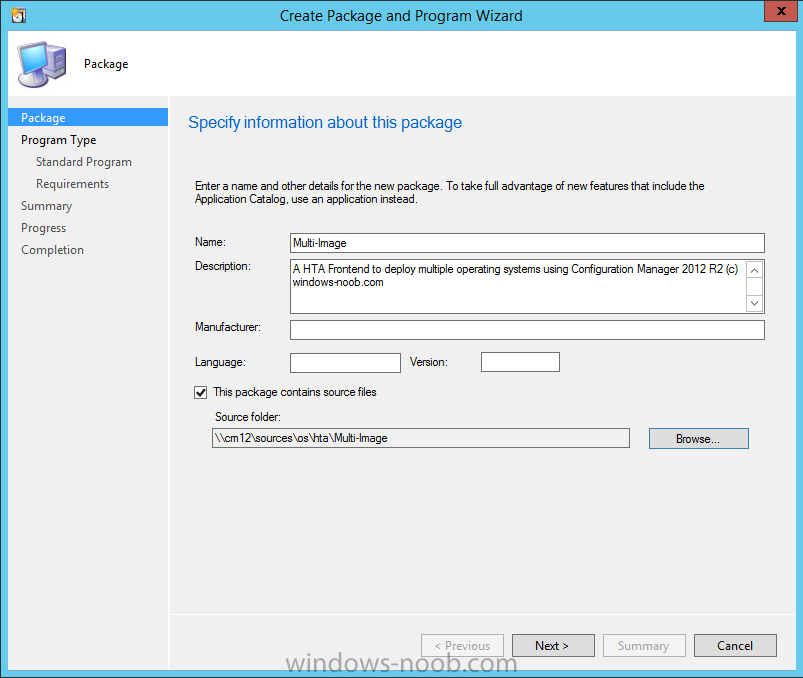
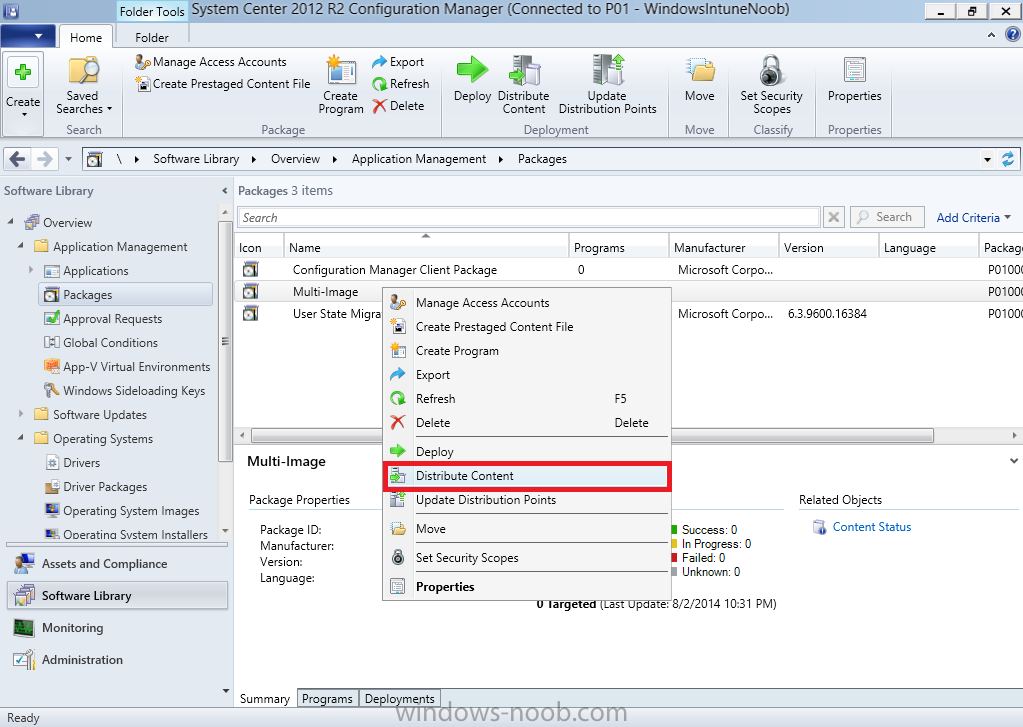
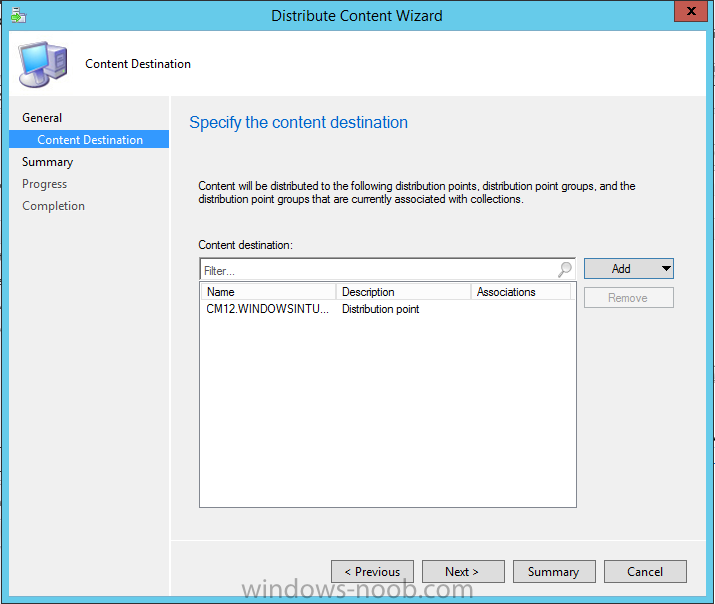
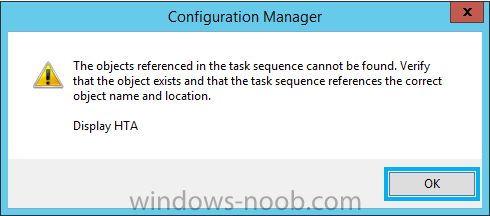
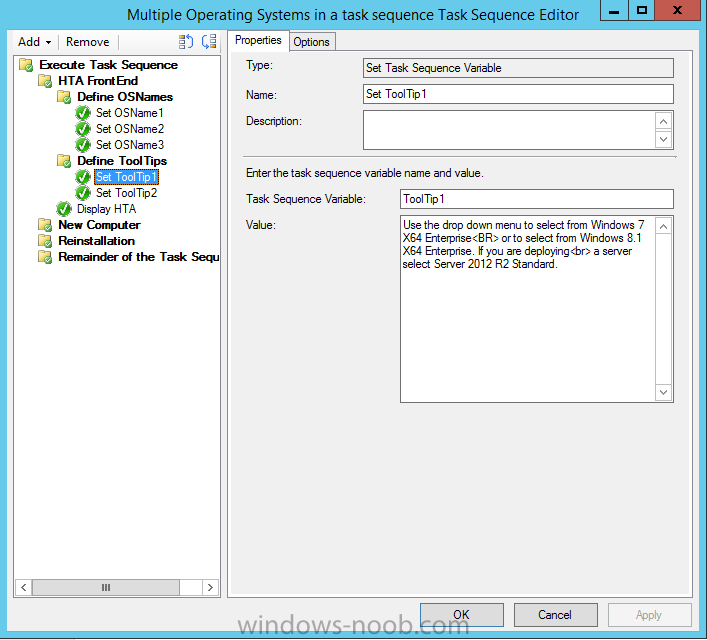
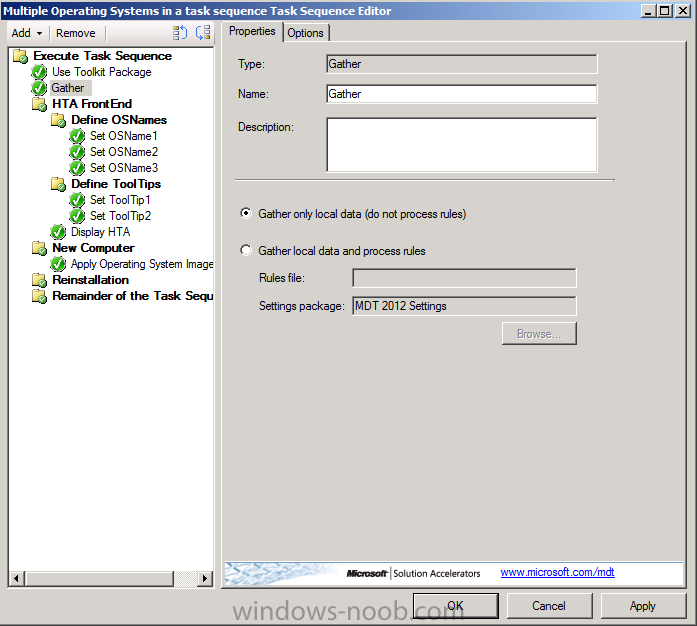
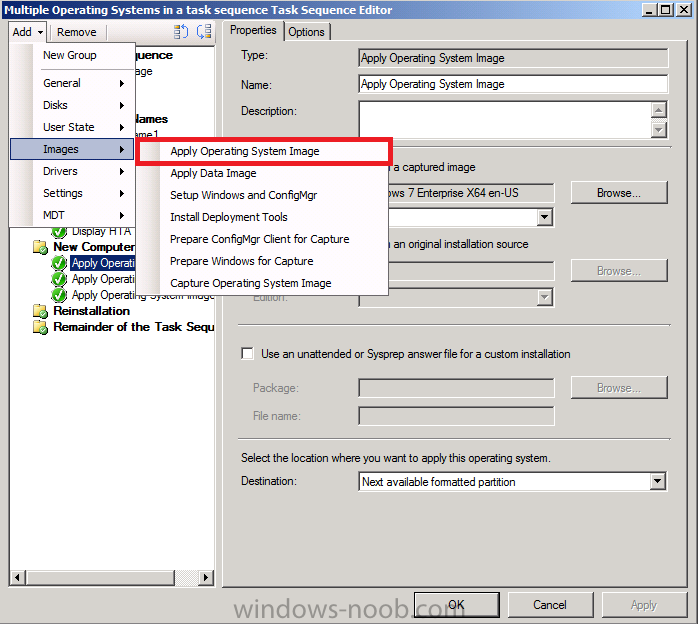
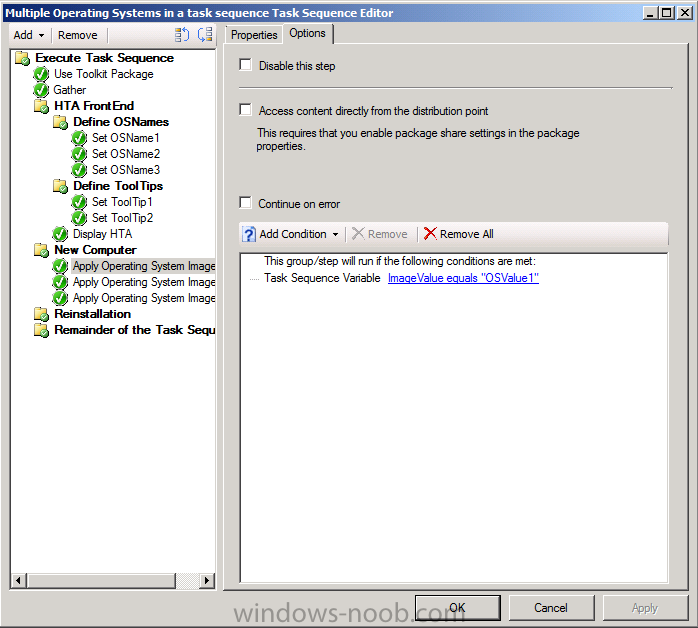
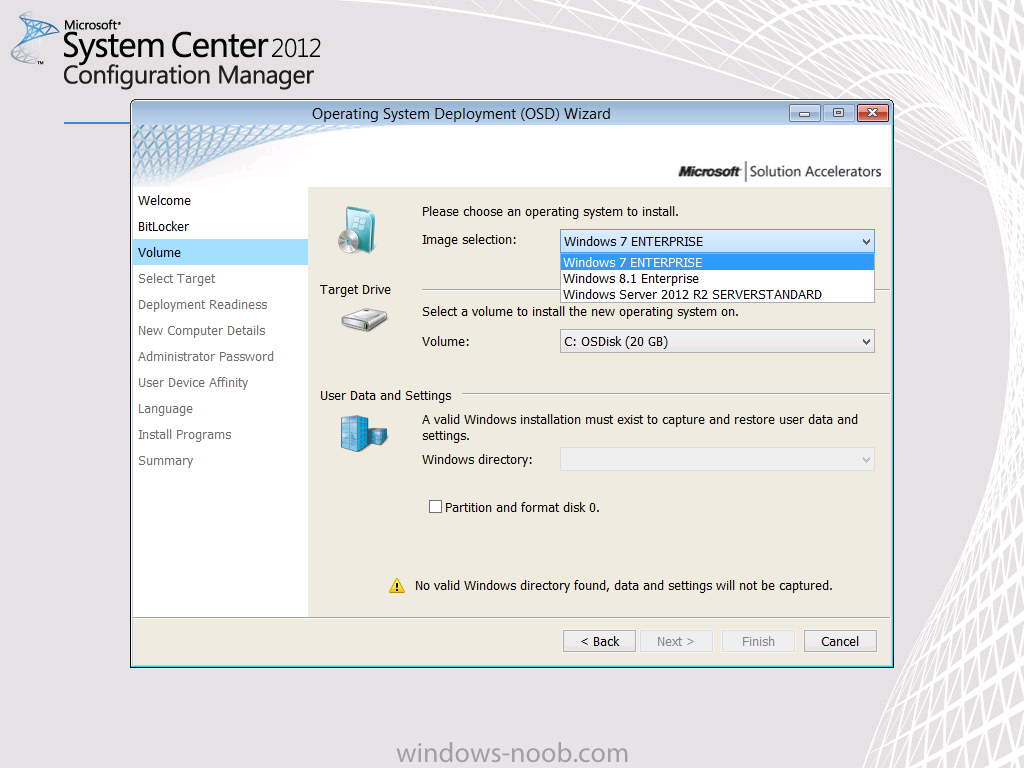
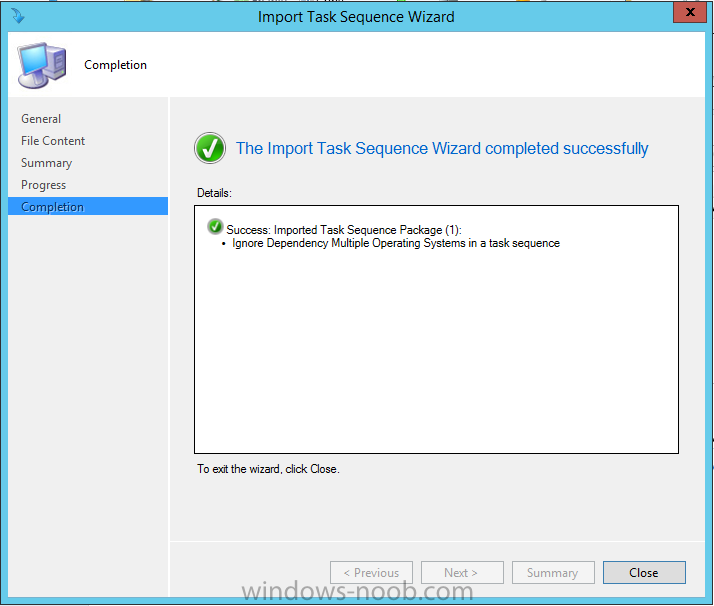
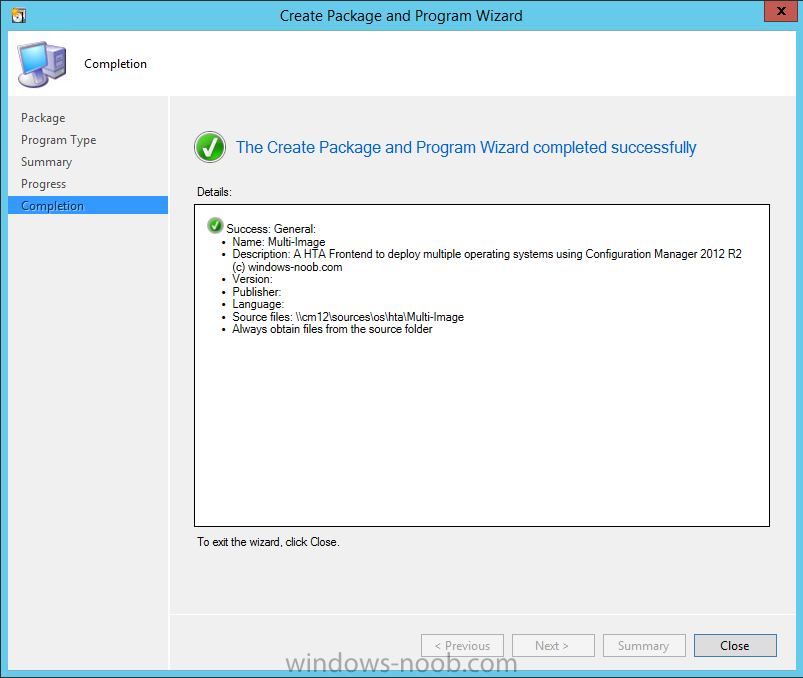
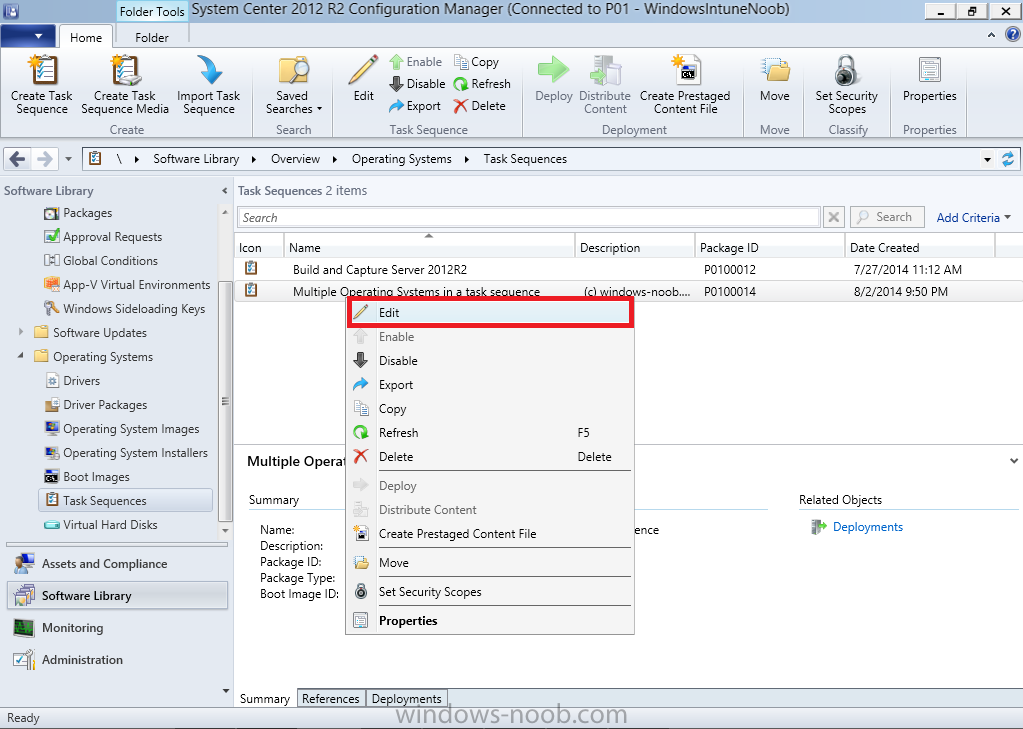
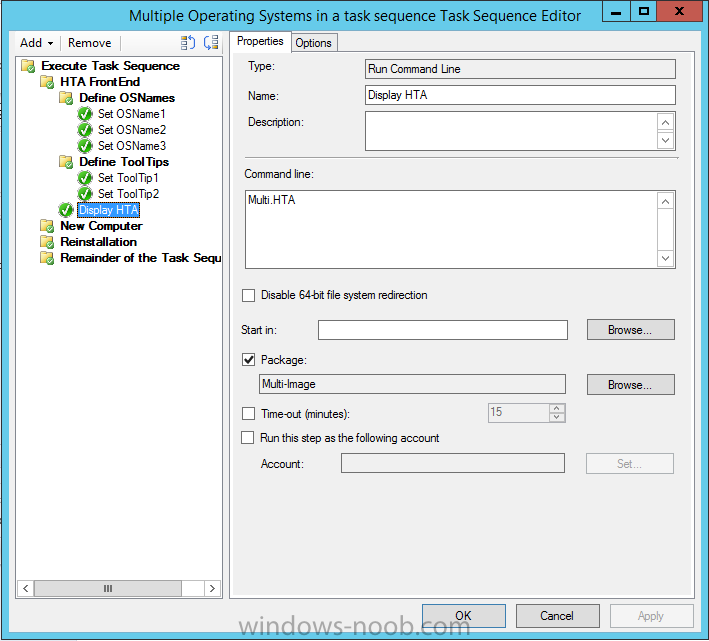
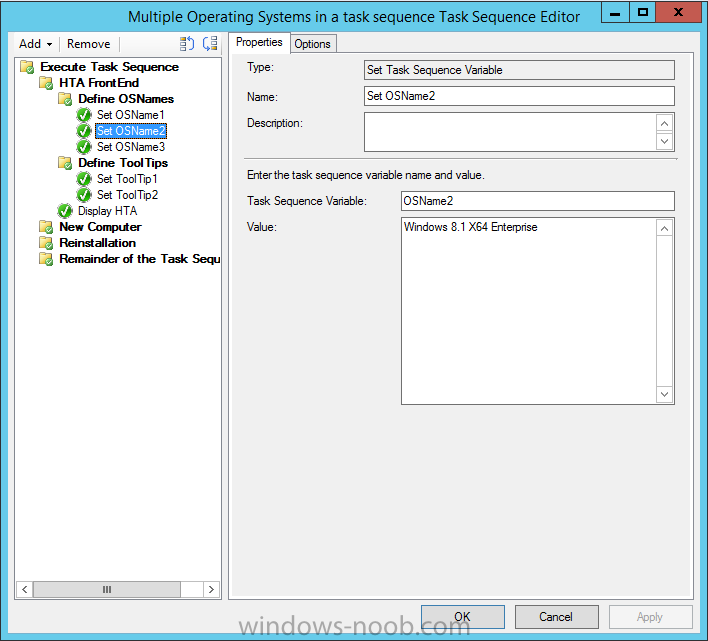
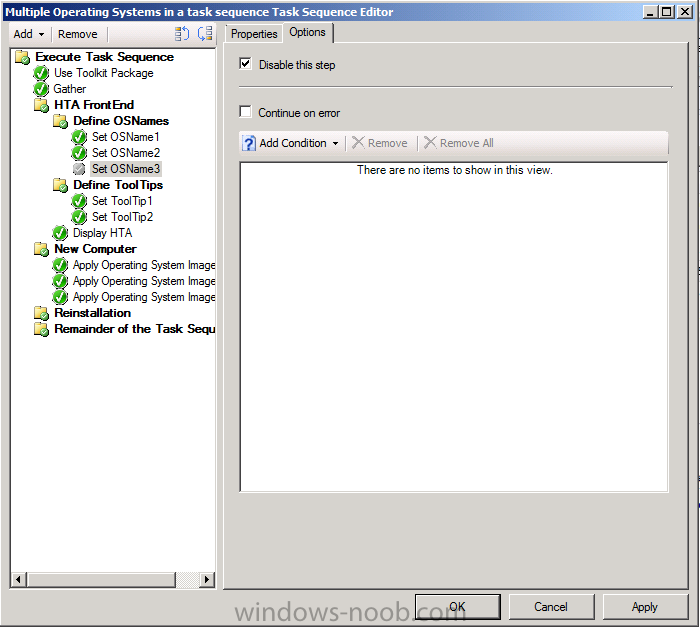
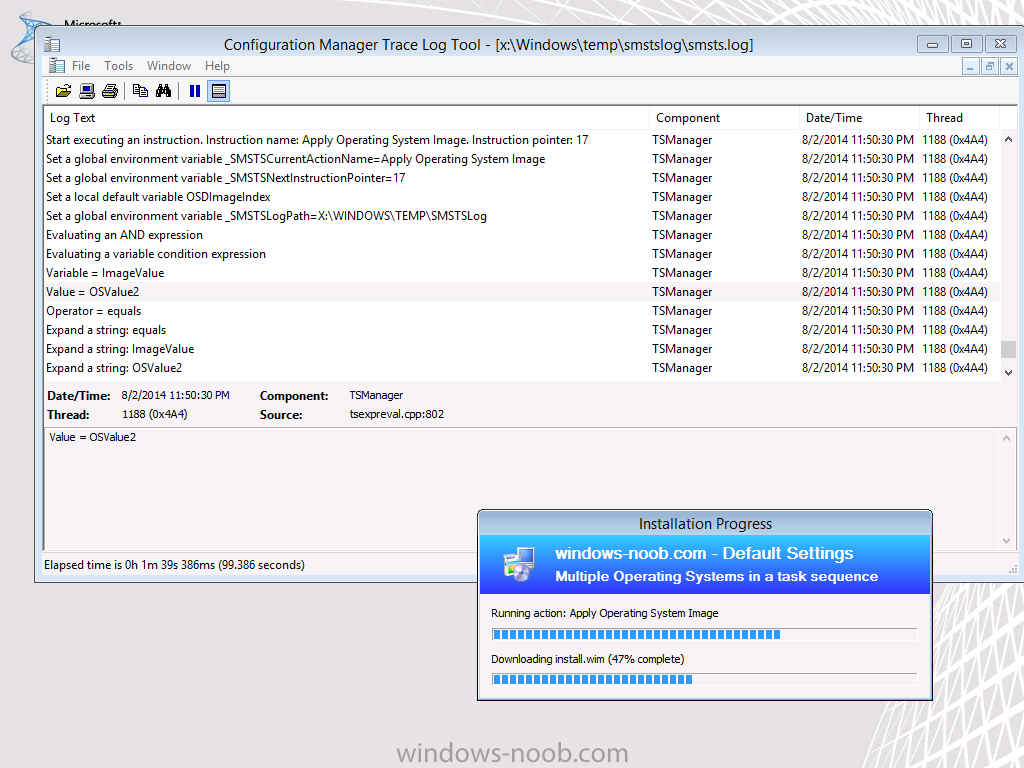
Introduction Traditionally you deploy one operating system per task sequence but there are times when you might want to deploy more than operating system in the same task sequence. There are a variety of ways of doing this, for example you could use a MDT based User Driven Installation (UDI) task sequence which in turn requires you to use the UDI Wizard Designer to edit the Volume page and add, remove or re-order Operating System wim images which can then be displayed to the end user (shown below). This works well as long as you are willing to use UDI based task sequences and the associated UDI Designer Wizard and don't mind updating the MDT Toolkit Files package after doing so. Alternatively you could use a dynamic task sequence which uses a HTA FrontEnd (hypertext application or web page..) that is based on variables set in the task sequence itself. The HTA method is more dynamic as you do not need to update the MDT Toolkit files package every time you make a change to one of the operating systems included in the task sequence and you don't need to use a User Driven Installation based task sequence either. Here is what the FrontEnd looks like you can click on the drop down menus to select from the Operating Systems that you make available In addition you can use tooltips (by hovering over a drop down menu) in this task sequence to display helpful info to the end user about what each operating system is for. So how is it done ? I'll show you. Step 1. Get the Task Sequence Download the Multiple Operating Systems in a Task Sequence below. Multi-Image task sequence.zip You need to import it into your Configuration Manager server. To Import it, in the Configuration Manager console navigate to the Software Library and find the Operating Systems section, right click on Task Sequences and choose Import Task Sequence as shown below. browse to the UNC path where you downloaded the ZIP file above click next, you will get an import failure for the boot wim, select Ignore Dependency as shown below The task sequence is imported successfully. Step 2. Get the HTA Download the Multi Image HTA below Multi-Image.zip Unzip these files and copy them to a folder on your Configuration Manager server. Next, create a package by doing as follows, select Application Management in software Library, and choose Packages, right click and choose Create Package fill in some info about the package, call it Multi-Image Select do not create a program continue through the wizard until done Step 3. Distribute the package Right click on the Multi-Image package and choose Distribute Content, distribute it to all your distribution points as shown below continue until the wizard is complete. Step 4. Edit the Task sequence Right click on the Multiple Operating Systems in a Task Sequence task sequence and choose edit, you'll probably see the error below, it's ok we are going to add that package next... On the Display HTA step, click on the Browse button beside Package, and select the Multi-Image so it looks like below Once done, take a look at the three OSName variables, they are what is shown to the end user in the Multi-Image HTA. You can set these variables to match whatever three (or two or more) operating systems you are deploying in this task seqence. in addition you can define the two tooltips used in the HTA If you want the HTA to display make/model and serial number info then add a MDT Toolkit Files step, immediately followed by a MDT Gather step as shown below (this is optional, and requires MDT Integration with Configuration Manager 2012.) Now you need to add your operating system images, under the New Computer Group,click add,choose images and then apply operating system image as shown below click on browse and browse to your selected operating system image Next, select the Options tab, and add a condition (Task Sequence Variable) and enter the following info, ImageValue = OSValue1 as shown below repeat the above for each Operating System Image you want to deploy, however set the options value for the variable ImageValue to OSValue2 or OSValue3 as appropriate. You don't need to make all three available, you can simply disable one or two in the task sequence if you want and they won't appear in the HTA. Dynamic ! for the purpose of this task sequence, you can go ahead and add a boot wim and then deploy it for testing, obviously you'll want to customize the task sequence to do all the actions you normally do, below you can see that the second Operating System image was selected (OSValue2) and is being deployed as logged in SMSTS.log That's it, job done ! Summary Deploying multiple operating systems with Configuration Manager 2012 R2 is easy enough and there are many ways of doing it, this method is dynamic and I hope you try it out !. Related Reading CM12 in a lab - Part 16. Integrating MDT 2012 with Configuration Manager 2012 CM12 in a lab - Part 17. Using MDT 2012 with Configuration Manager 2012 CM12 in a lab - Part 18. Deploying a UDI Client Task Sequence Downloads You can download a Microsoft Word copy of this guide here. Multiple Wim Images in One Task Sequence.zip


-
Multiple OSD Task Sequences on one USB
anyweb replied to xc3ss1v3's topic in Configuration Manager 2012
i'll do a blog post on it shortly, so please wait. -
Multiple OSD Task Sequences on one USB
anyweb replied to xc3ss1v3's topic in Configuration Manager 2012
you could simply add the logic for two task sequences into one task sequence (containing two operating system images), that would be the way I'd do it, and use something like the attached to pick your image/os download the files for that here Multi-Image.zip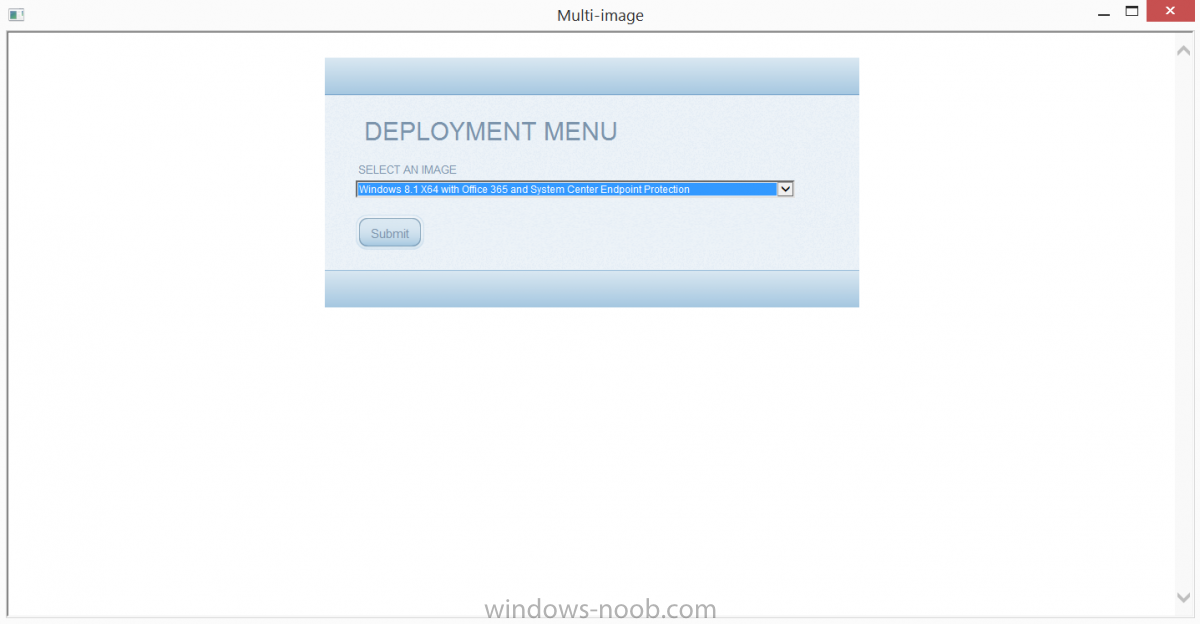
-
great, do let me know how it goes for you !
-
Deploying Server 2012 R2 U1 with SCCM 2012
anyweb replied to adz's topic in Configuration Manager 2012
can you attach the smsts.log file please -
to not enforce a deadline you'd have to deploy your updates one by one or as members of a software update group and make the deployment Available, that way, the user is never forced to isntall any update, however that kind of defeats the purpose of installing updates (which are to keep your computers secure) so going back to your problem, are you computers installing updates at the deadline or not ?
-
How Do You Run A Powershell Script In The Task Sequence
anyweb replied to FazzaGBR's topic in Configuration Manager 2012
simply create a package with no program, the package should contain your powershell script, distribute the package to your distribution points. once done, you can create a Run PowerShell Script step in your task sequence, like so the Package should refer to the package you created above the script name is the actual powershell script, eg path\to\myscript.ps1 and the parameters are whatever parameters the powershell script expects to be provided such as variables %somevariable% the Powershell execution policy should be set to Bypass (unless you've signed the script yourself) below is a sample powershell script being run in a task sequence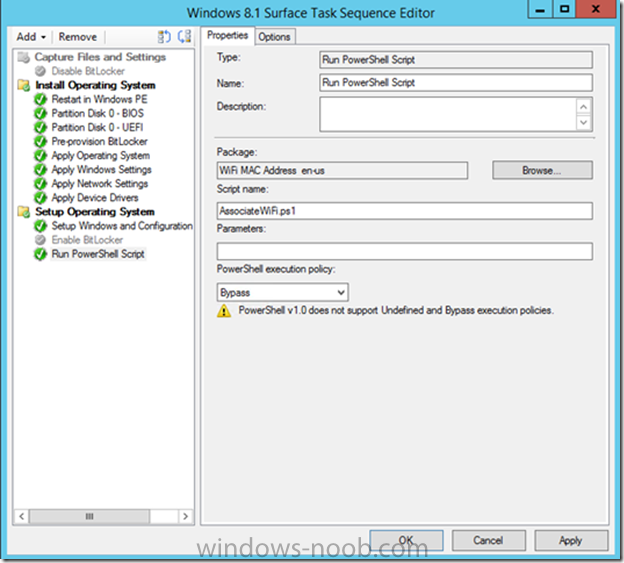
-
see my reply in the other thread, simply use what method works best for your environment
-
using SCCM 2012 in a LAB - Part 1. Installation
anyweb replied to anyweb's topic in Configuration Manager 2012
there is no best way, one way has certain requirements and the other method has it's own requirements, there are many ways to install the client it's up to you to decide which methods are best applicable in your environment, many use client push but it's one of the most difficult methods to get working (firewall, local admin rights issues etc) -
The Client is on the same subnet as the ESX host as the SCCM server what network drivers are you using for the Configuration Manager server NIC
-
Conflicting SQL Server Service Broker Port
anyweb replied to sysadmin101's topic in Configuration Manager 2012
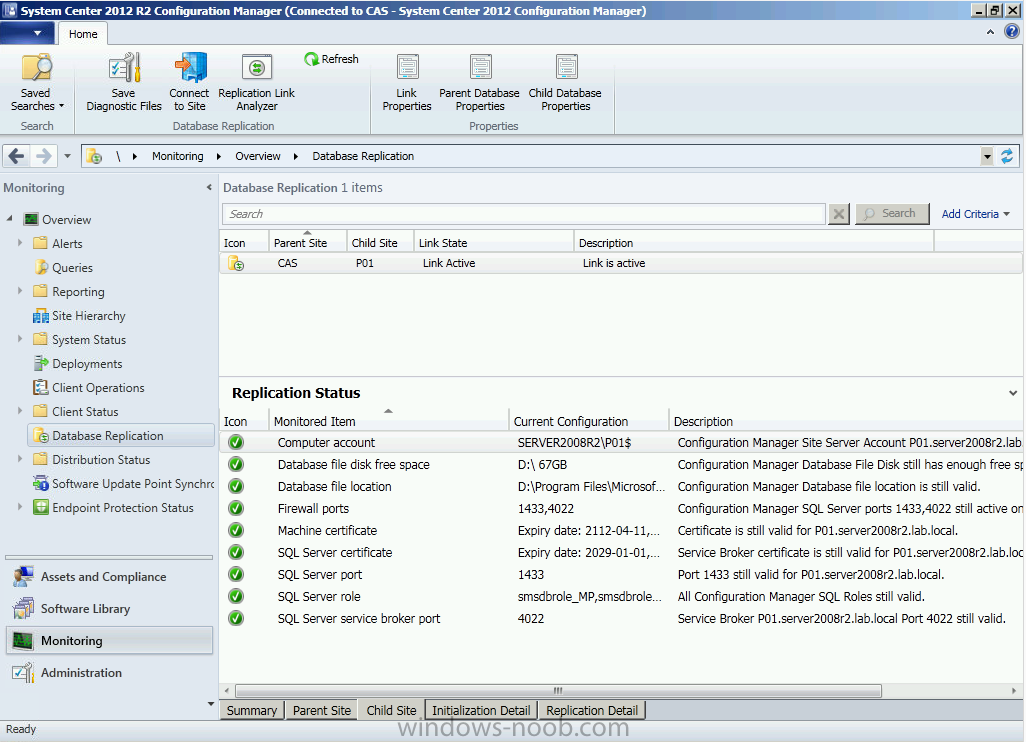
in my Lab environment, both CAS and PRI are running on the same port 4022 as shown below, is this also a lab environment you've setup, if not, why did you install a CAS ? CAS Primary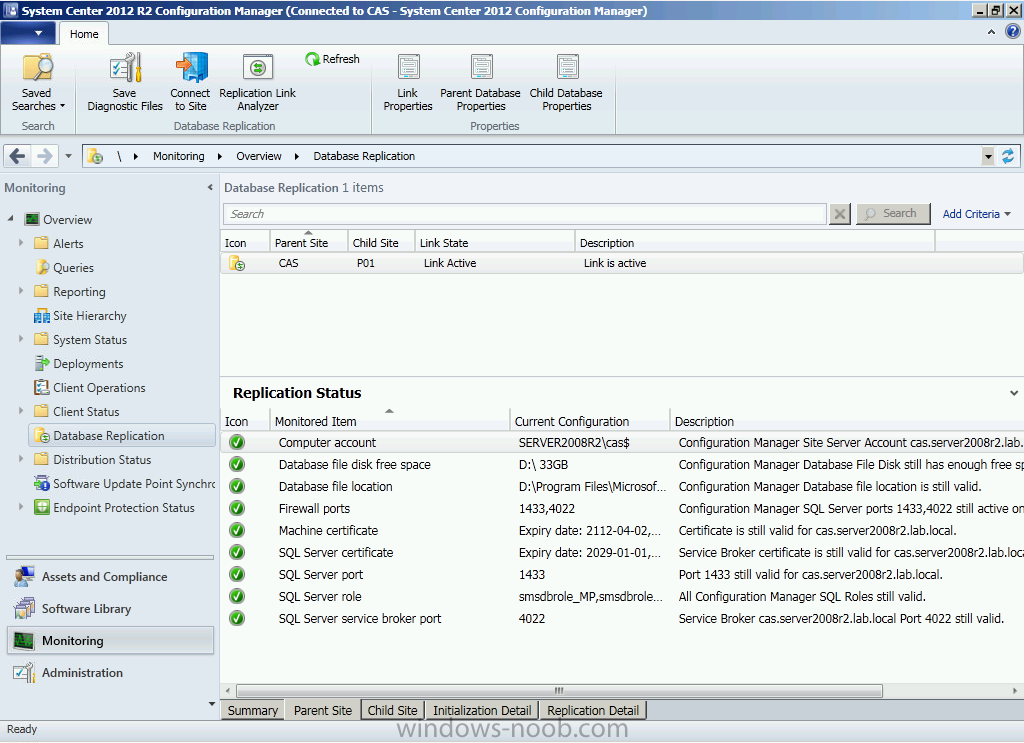
-
by enforcing a Deadline, you are forcing the installation of Updates which in some cases can cause reboots (if the updates themselves require a reboot) to be completed before the deadline is reached, you cannot set a deadline of 0 days, you didn't say if your ADR configured for Client Local Time or UTC ? same goes for your maintenance window settings there are three things that cause the system restart window you are seeing deployment notification is enabled for the client user notification is not set to 'hide in software center and all notification' an installed update (or updates) requires a reboot are you sure your maintenance windows are configured correctly and that the client computer is not in another collection with different maintenance windows ?
-
great stuff Lionel, for the benefit of others coming to this thread, please share with them how you determined the clients were getting their updates from WSUS
-
well it sounds like the clients are using WSUS or the Internet to download their updates, have you verified any of the settings in your Software Update Collections, for example add some virtual machines to those collections and test deploying updates to them, what happens (if anything)
-
thanks Garth !
-
SCCM 2012R2 - Deploying Windows Updates - Guidance Needed
anyweb replied to FazzaGBR's topic in Configuration Manager 2012
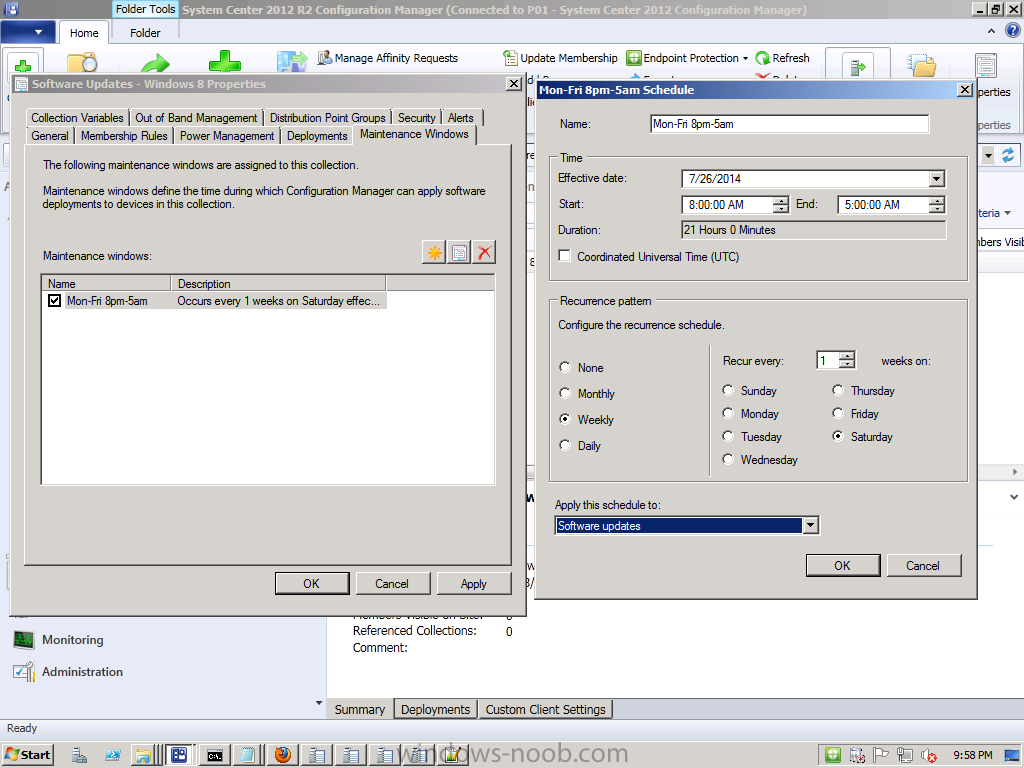
if you want Software Updates to install after hours then use Maintenance Windows, right click on your respective Software Updates collection and choose maintenance windows, you could configure a schedule something like this... make sure your computers are in this collection (and if they are in any other that also has software updates deployed to it check the schedule/maintenance windows on that collection) and they should deploy the updates during the maintenance window, you may also want to configure notification settings, and basically deploy your SUG (software update group) to this collection, then TEST it ! cheers niall
-
welcome to the forums ! good to have you onboard :-)