anyweb
-
Posts
9266 -
Joined
-
Last visited
-
Days Won
371
Everything posted by anyweb
-

web services and noob questions
anyweb replied to hotdogwater's question in Frontends, HTA's and Web Services
have you looked at your application pool settings for the webservice ? -
just install teamviewer and Allow Remote control, then drop me a mail with the username/password needed to access it, and let's agree on a time that works for both of us niall@windows-noob.com
-
Deploy Linux with MDT 2012 Update1
anyweb replied to jagadish.n86's question in Microsoft Deployment Toolkit (MDT)
What linux distro is it ? have you seen Johan's post on deploying Linux with MDT, that would be the first place to start. -
yeah it does. and it will be logged. you just have to find the log. if you can do teamviewer i can remote in and take a look
-
apologies for the delay your post got missed in all the others, however now I have and nothing stands out in the logs you provided which probably means you are taking them from the wrong location, sometimes the 'actual' error may be in another smsts.log file to find it try doing this on the root of each drive letter dir /s smsts*.log start on drive letter X: (i'm guessing that's where the failure logs are) post any logs you find here and i'll take another look
-
Once you enable a PXE enabled distribution point in Configuration Manager, then it is in control of PXE deployments and will deliver any task sequences you have deployed within Configuration Manager, that means any TS's you have deployed via MDT standalone will not be seen as only one PXE server can respond at a time. It is trivial though to use both, just disable/stop the WDS service on the PXE server you want to disable, the other will answer the clients call. to understand MDT integration with Configuration Manager do take a look at the guides below, it should get you started.. CM12 in a lab - Part 16. Integrating MDT 2012 RC1 with Configuration Manager 2012 CM12 in a lab - Part 17. Using MDT 2012 RC1 with Configuration Manager 2012 CM12 in a lab - Part 18. Deploying a UDI Client Task Sequence
-
sccm 2012 task sequence media USB not detected
anyweb replied to apug666's topic in Configuration Manager 2012
yup, I was waiting for this... R2 CU1 fixes this, have any of you upgraded to R2 CU1 yet and tried creating media on those 'fixed disks' devices ?, the fix is listed below:- -
Can't remove driver from driverpack (so it seems)
anyweb replied to P3nnyw1se's topic in Configuration Manager 2012
can you post your smsts.log file so we can see the failure ? -
Endpoint Protection suddenly causing issues with XP
anyweb replied to dedmete's topic in Configuration Manager 2012
this should be fixed with the latest definition updates (ending with .64), have you tried it ? -
the easiest way to do a refresh scenario is with this task sequence, you don't even have to think as it's done the hard work for you, try it and see ! don't be put off by the bitlocker stuff, you don't have to use it if you don't want to. CM12 in a Lab - The CM12 BitLocker FrontEnd HTA - video CM12 in a Lab - The CM12 BitLocker FrontEnd HTA
-
if you have local access to the box use a pause command as detailed here http://www.windows-noob.com/forums/index.php?/topic/8846-how-can-i-pause-a-task-sequence-in-system-center-2012-configuration-manager/ if you are not local you can even remote to the machine using VNC by getting a remote user to allow the connection as detailed here http://www.windows-noob.com/forums/index.php?/topic/2781-how-can-i-make-troubleshooting-failed-deployments-easier/
-
Client machine keeps rebooting itself during PXE
anyweb replied to jester805's question in boot images
is wmi missing from your boot wim ? also, do you get an ip address ? have you added any network drivers to your boot wim ? what client are you booting ? -
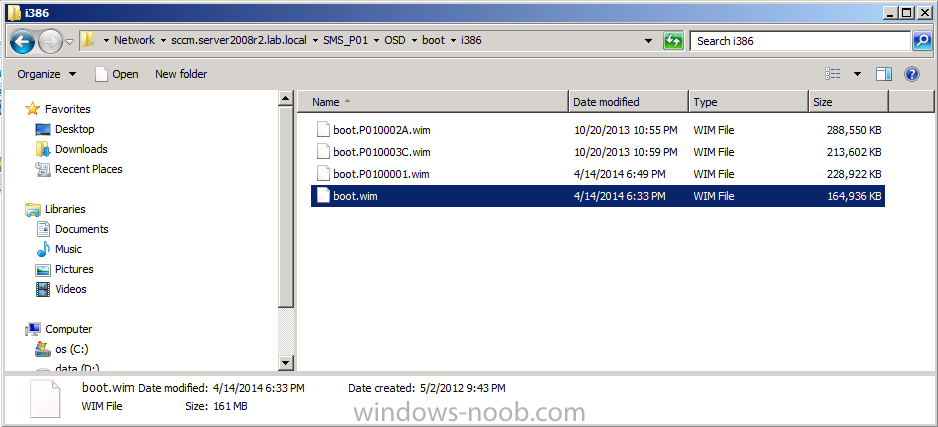
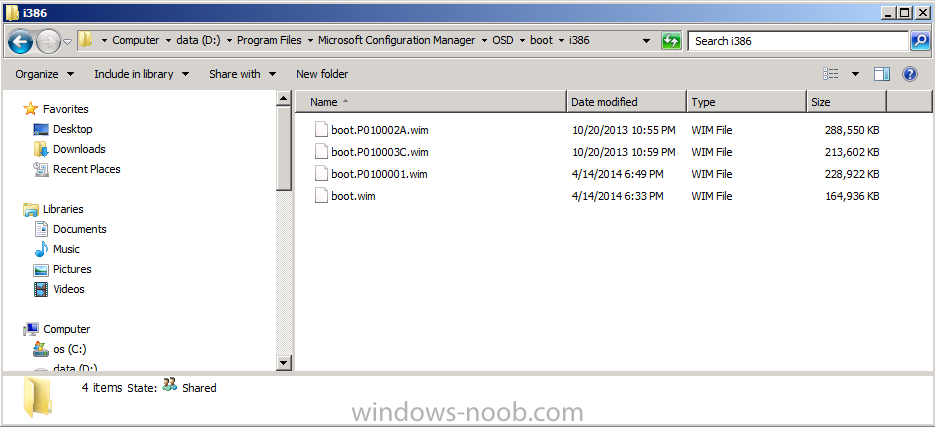
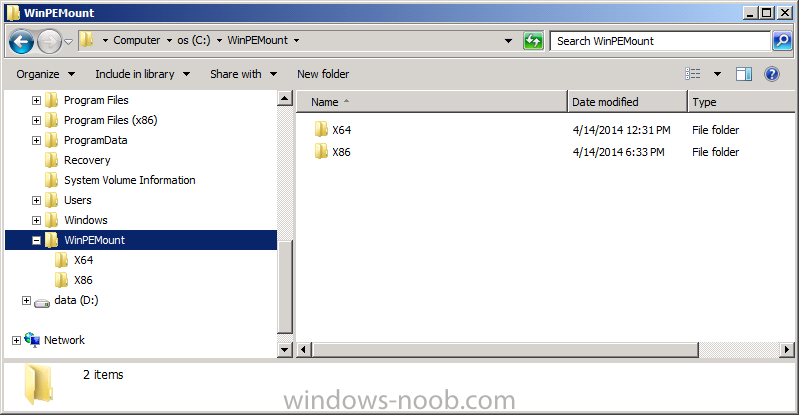
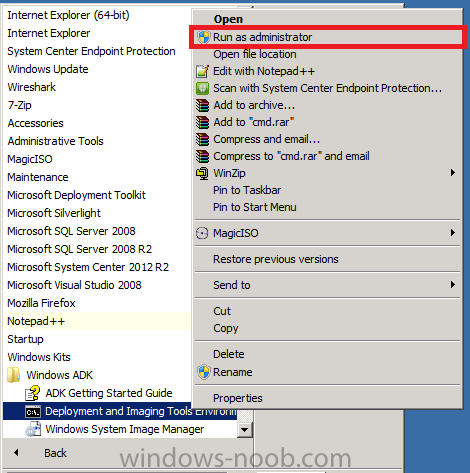
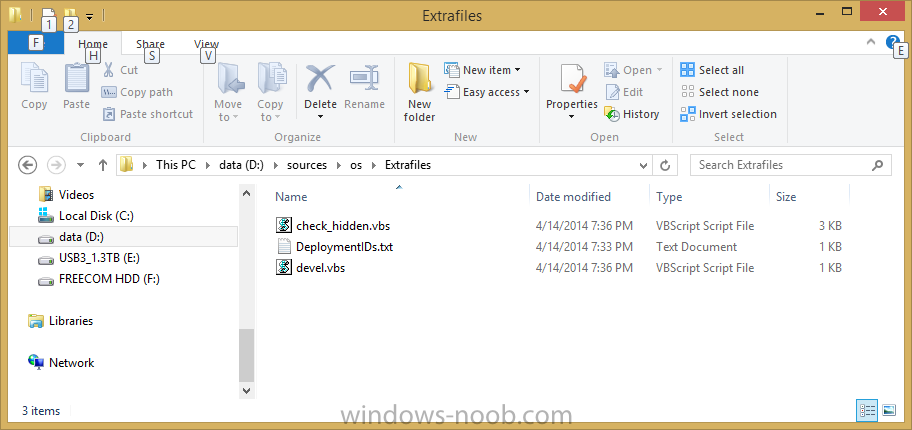
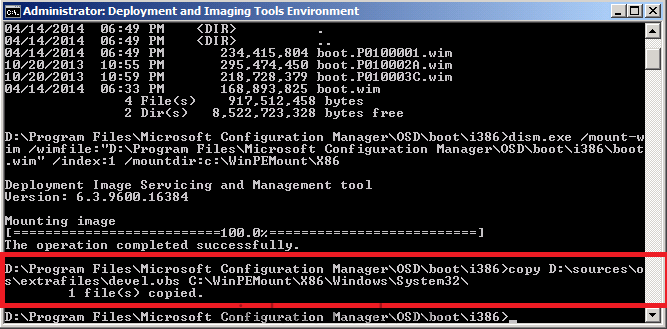
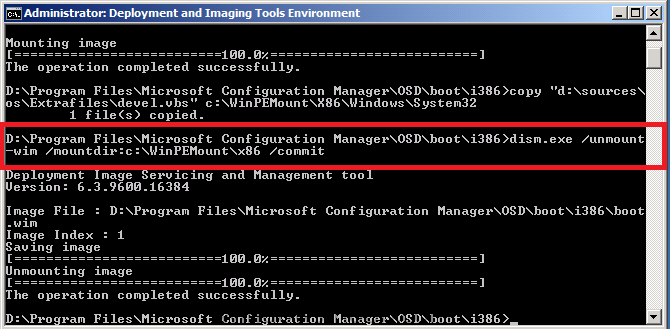
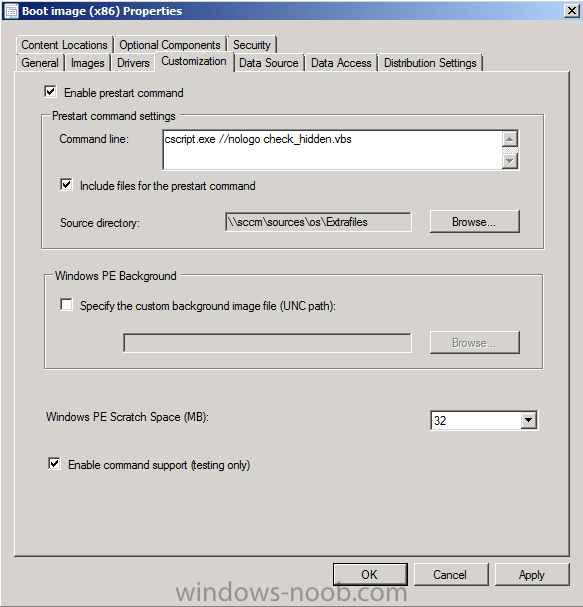
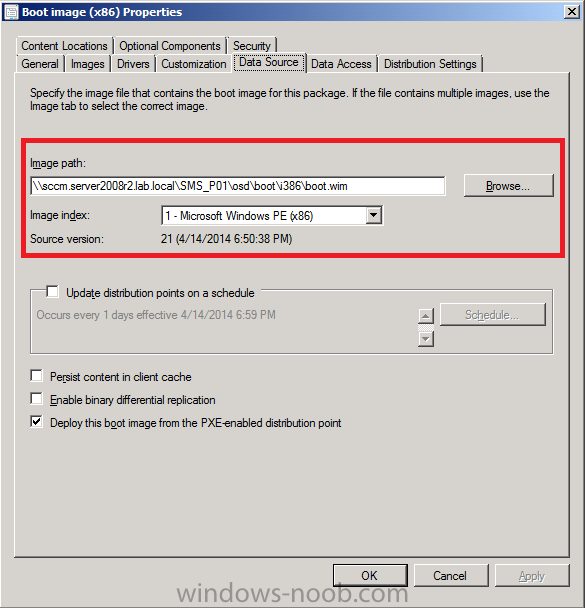
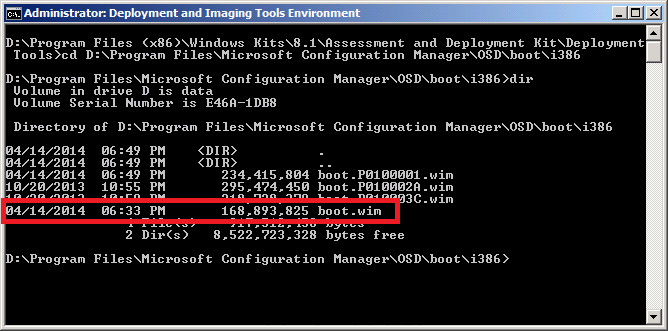
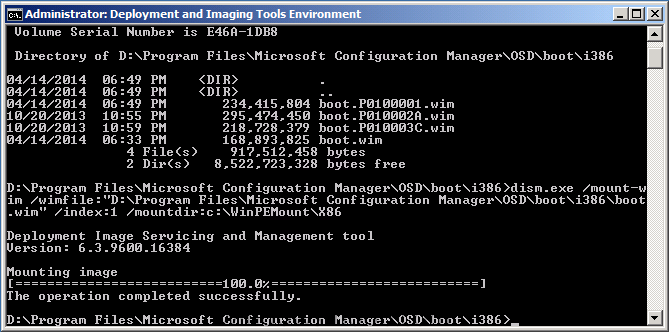
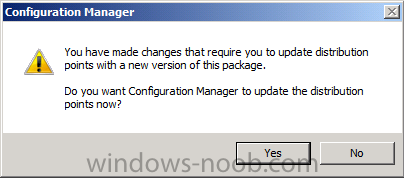
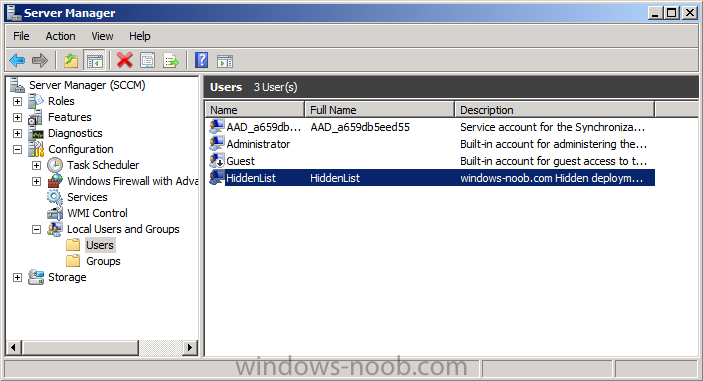
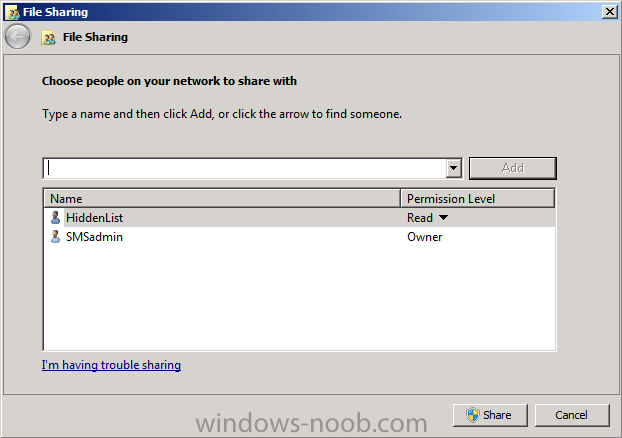
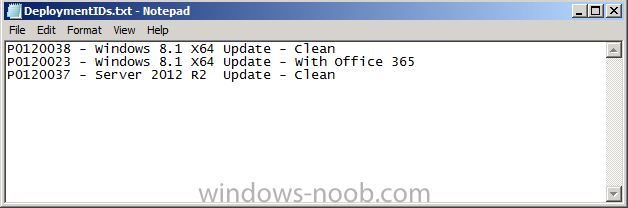
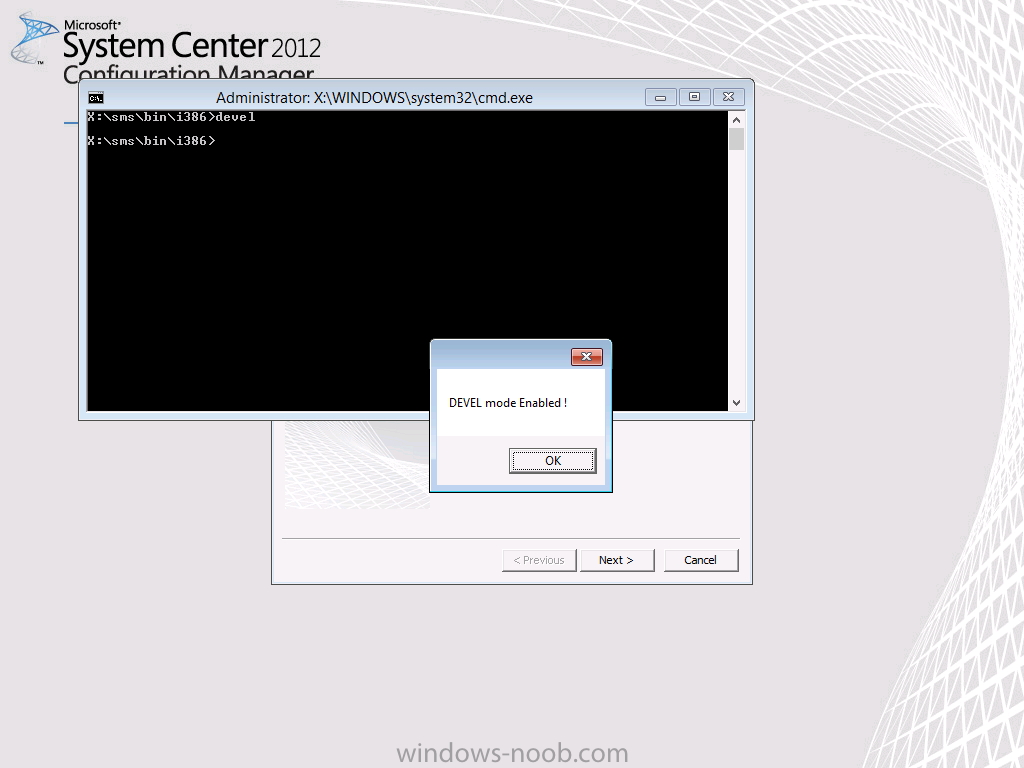
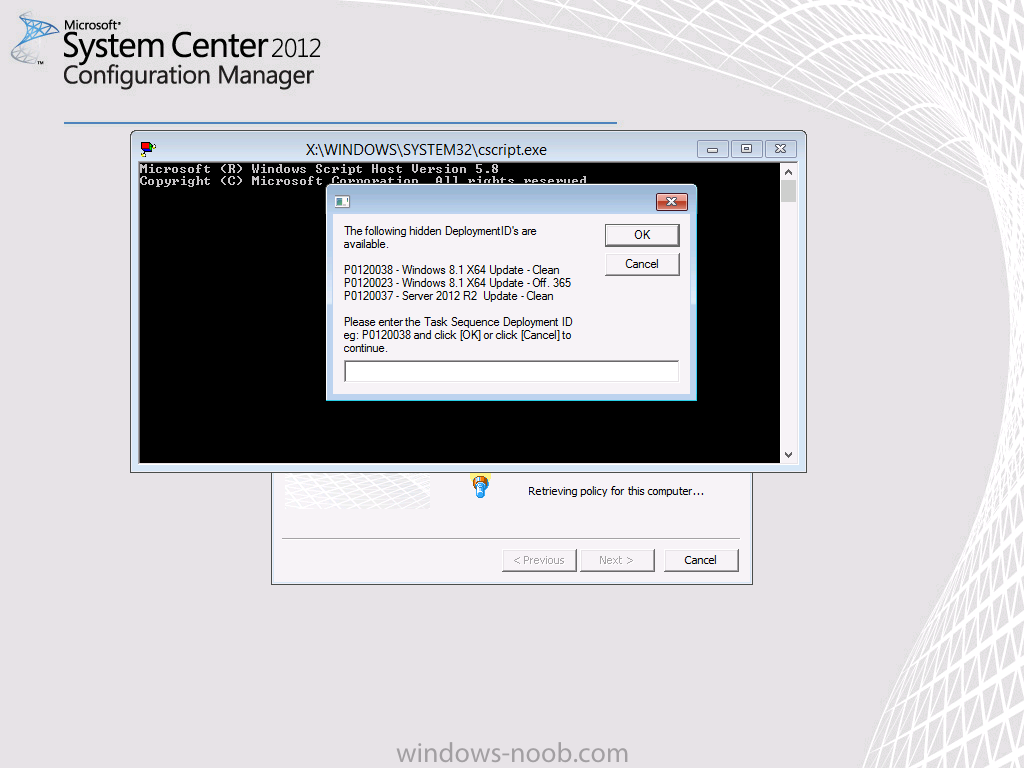
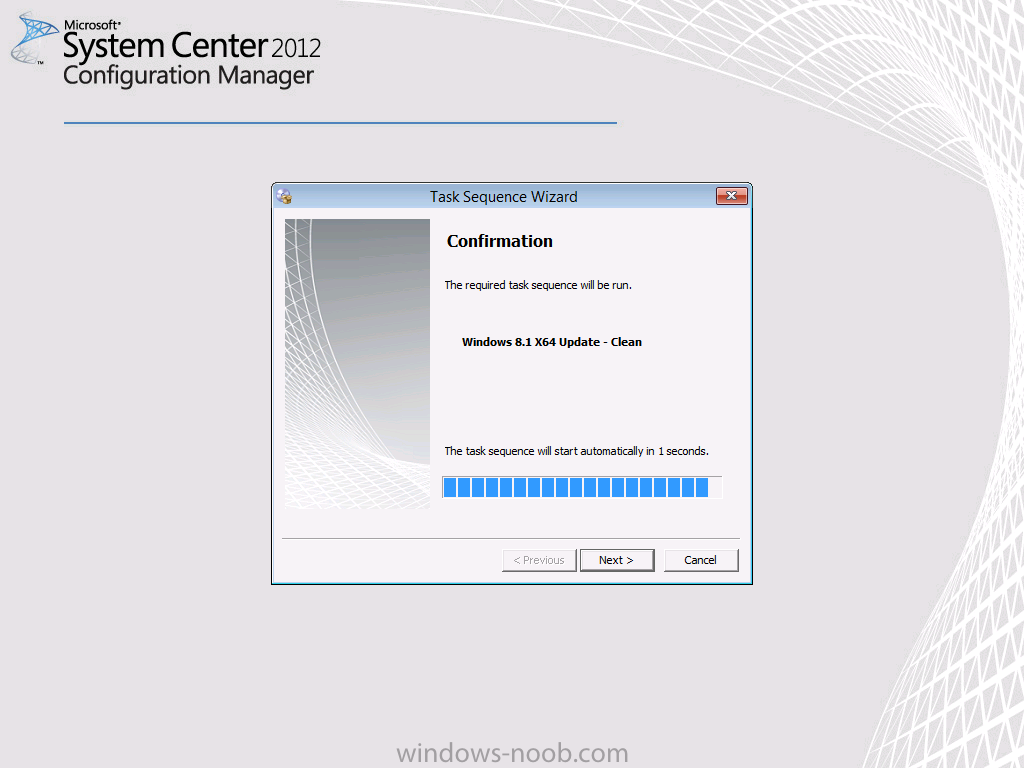
Introduction In a previous post I explained how to deploy hidden task sequences in Configuration Manager by using the SMSTSPreferredAdvertID variable. You can use that method (or variations of it) to Deploy Task Sequences that are hidden and only available via PXE or Media. In this post I will show you how you can have multiple hidden task sequences available on-demand via a simple script and using a prestart command, the idea for this developed between myself and my esteemed work colleagues (thanks Magnus/Jimmy :-)) and that inspired me to put something together. How does the on-demand bit work ? The prestart command will only popup a prompt (on-demand) if the following file (X:\hidden.txt) is present on a client that is PXE booting. We place the file there by using a script (devel.vbs) and that script is invoked when a user presses F8 and types Devel prior to entering the PXE password. Once the file is present, the prestart script will check for another file (DeploymentIDs.txt on a UNC share) and if found, display the contents of that in a prompt to the end user. The end user will enter their choice and our variable is set. Done. Step 1. Download the files Download the following files Extrafiles.zip and unzip to somewhere useful like D:\sources\os\extrafiles Step 2. Create some temporary directories To enable the on-demand ability, we need to add a script to our boot image, and to do that we'll inject a file called devel.vbs into our boot wim image. This file needs to be accessible even before the prestart command kicks off so we will mount our boot wim file to inject it. To mount the boot wim we need some temporary storage so create some folders on C:\ like so C:\WinPEMount |__X86 |__X64 as shown in the screenshot below Step 3. Add a script to the boot image Locate the boot wim that you use most often in your task sequences in the console and identify it's path. In the example below we will edit the i386 (X86) boot wim, but you can just as easily replace the path with X64. browse to the data source listed in the properties and you'll probably see a few wim files, the file we are interested in is called boot.wim as every time your boot wim file is updated (for example adding drivers), this file is used as the source for all changes. This file will be present locally on our Configuration Manager primary server in the following path D:\Program Files\Microsoft Configuration Manager\OSD\boot\i386\boot.wim assuming Configuration Manager is installed on D:\. Tip: Before making any changes to your boot wim files, make a copy of them and store them safe. We will modify the boot wim file in the local path. To inject files we first need to mount the file with DISM. Use the version of DISM that comes with System Center 2012 R2 Configuration Manager, the correct version is included in ADK 8.1 and the correct version of DISM is 6.3.9600.16384. To start the correct version of DISM locate it in your start menu and right click on the Deployment Imaging Tools and Environment cmd prompt, choose Run as Administrator and change directory to the directory that has your boot wim file. You can check the contents of the directory to verify that the boot wim file is present. using Dism mount the image using the following command dism.exe /mount-wim /wimfile:"D:\Program Files\Microsoft Configuration Manager\OSD\boot\i386\boot.wim" /index:1 /mountdir:c:\WinPEMount\X86 press Enter when done Using Explorer, or a command prompt, copy the file called devel.vbs from our downloaded files from Step 1 to C:\WinPEMount\X86\Windows\System32 for example like in the screenshot below Now the file is in place, commit our changes (save the changes) to the boot wim file. dism.exe /unmount-wim /mountdir:c:\WinPEMount\x86 /commit as shown in the screenshot below Step 4. Add a prestart script to the boot image Now that we've injected our needed script, we need to add our prestart command. To do that bring up the boot wim properties and browse to the Customization tab, fill in the details Command Line: cscript.exe //nologo check_hidden.vbs Include files for the Prestart command: \\sccm\sources\os\extrafiles like in the screenshot below Click Apply, and OK and answer Yes to the Distribute Content question. continue through the wizard until completion. Step 5. Create a local user and a hidden share On a suitable server (I used the Configuration Manager primary server in my lab, in production you may want to separate it), create a local user called HiddenList with a password matching the one in the check_hidden.vbs file downloaded in Step 1 above. Next create a folder called Hidden$ and share it, grant the local user HiddenList read access to the share. Note: Don't forget to edit the Check_Hidden.vbs file downloaded in Step 1 and change the ip address and share name to match the one created above. Step 6. Copy DeploymentIDs.txt to the hidden share Copy the DeploymentIDs.txt file downloaded in Step 1 to the hidden$ share, edit the file in notepad making sure that it includes the DeploymentIDs and friendly name of the Hidden Task Sequences you have deployed in your environment. The Deployment ID value of a task sequence can be found by looking at Step 8 of this post. This text file will be the 'template' that is shown to the end user so make sure to enter the correct values. Step 7. Verify and Test Now everything is in place to test out the theory above. So PXE boot a computer and when you get to the PXE password screen, before entering the password press F8 and type devel. If you followed the guide above you should see a popup telling you that Devel mode Enabled. Click Ok and close the command prompt window. Enter the PXE password and press Enter. The prestart command in the boot wim should display the following prompt. Note: if you didn't enable Devel mode above then it won't popup the prestart prompt at all. That is on-demand in action! after typing in your deploymentID and pressing enter you should see the following Success ! Summary The SMSTSPreferredAdvertID is a great variable and allows us to deploy hidden task sequences, however selecting that Task Sequence deploymentID is usually hard coded via a script to one DeploymentID or relies on the user knowing the values. This method allows you to conveniently use SMSTSPreferredAdvertID on-demand (by pressing F8 and typing Devel), and having a list of available hidden task sequences and their respective Deployment ID's on screen. cheers niall


-
Forcing a client to look towards a particular SUP
anyweb replied to Kiltedjedi's topic in Configuration Manager 2012
agreed but you can use Rob's tools here to force a client to use a specific management point (basically by denying access to another mp via localhosts..., perhaps the same will work for SUP selection) -
debugging this issue would be much easier if you use a pause step before and after the apply driver package step, see how here. this will enable you to see if the query is correct and whether the step has issues (for example, hash errors on the driver package)
-
The CM12 BitLocker FrontEnd HTA
anyweb replied to anyweb's question in Frontends, HTA's and Web Services
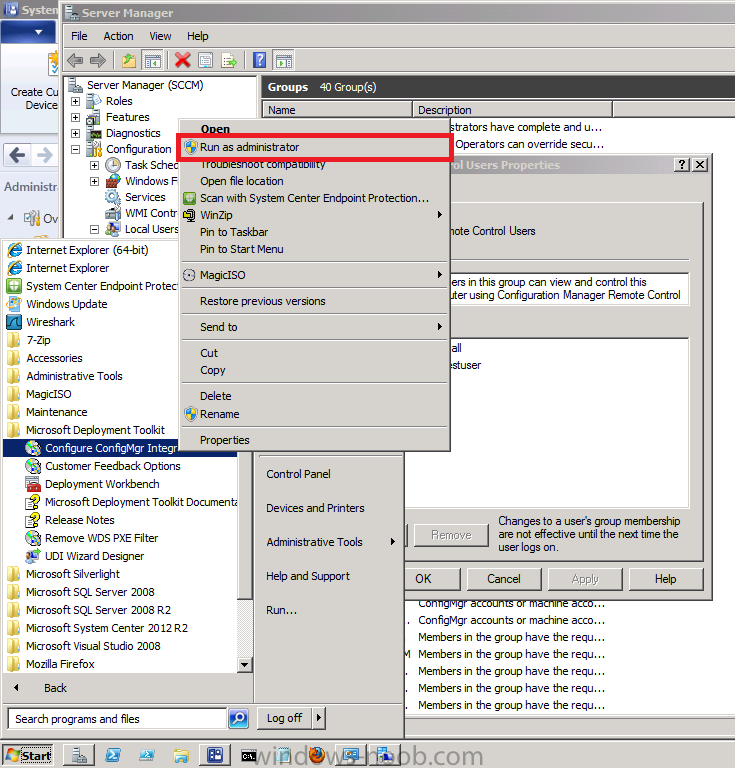
that looks like you have not integrated MDT properly with CM12, did you right click and choose 'Run As Administrator' when doing so ? see screenshot below if you are using SErver 2012 then use the Start screen to do the same thing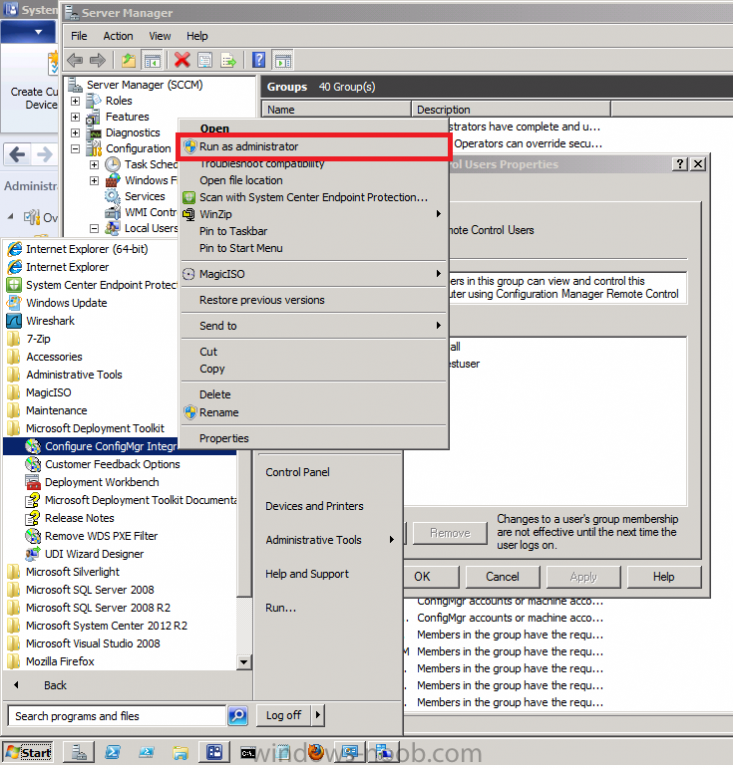
-
check the collection properties and verify that the computer you imported is added as a query or direct membership query, if not, add it yourself, perhaps the collection hasn't updated yet, try to manually update membership. here;s a quick guide to importing devices into configuration Manager
-
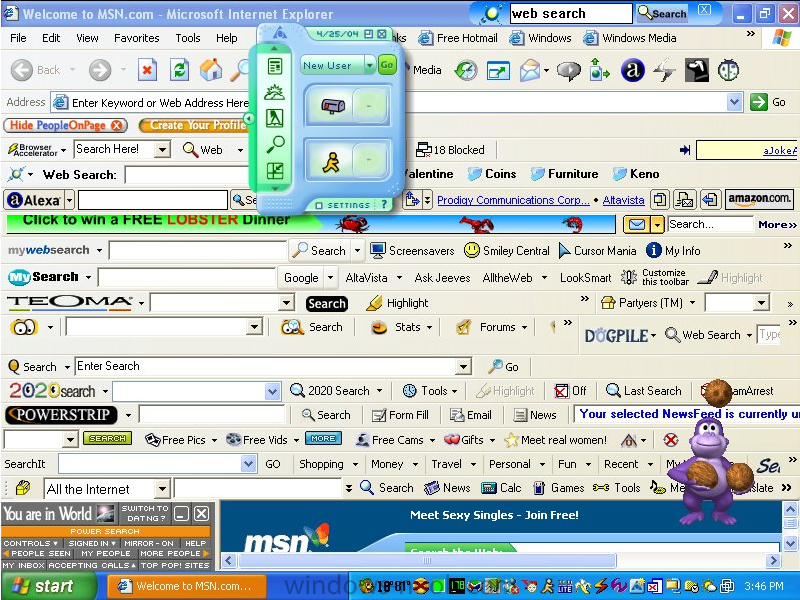
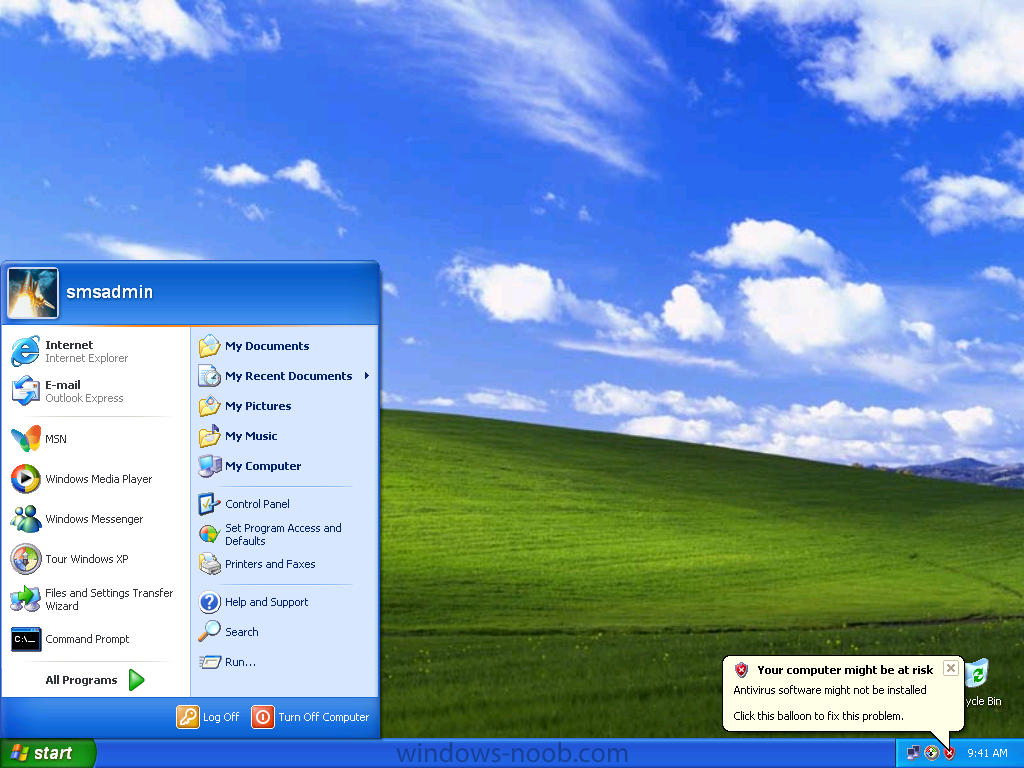
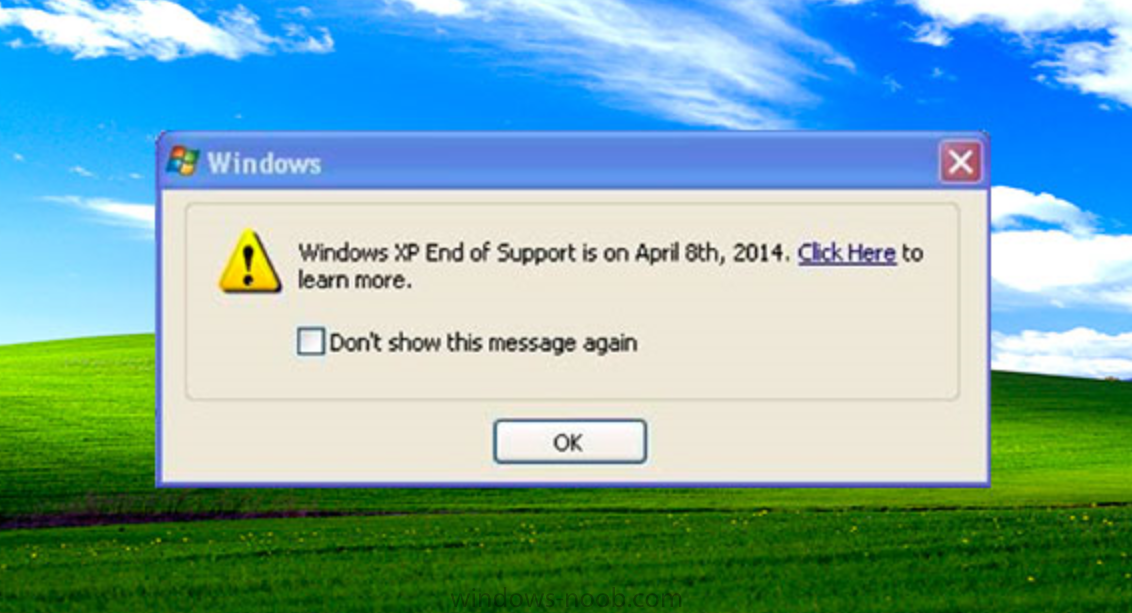
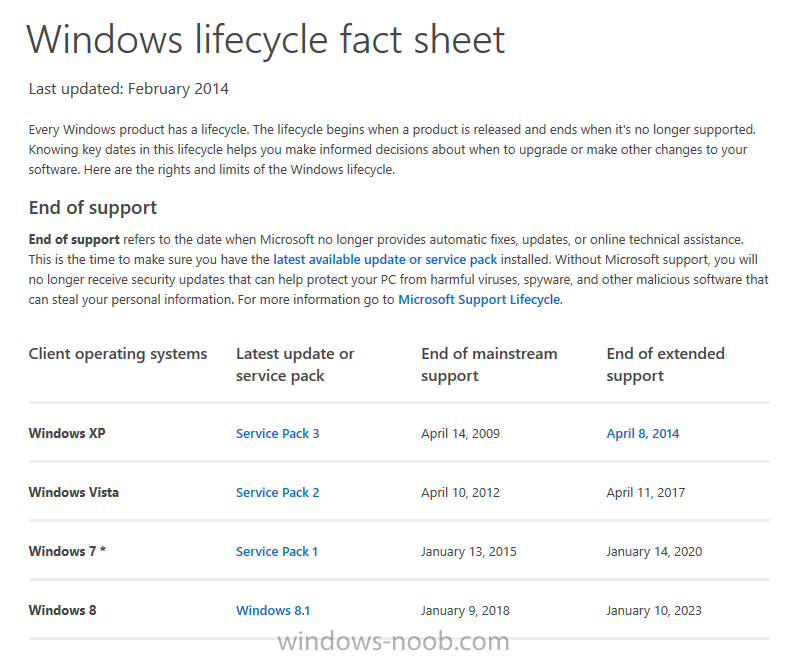
Today (April 8th, 2014) marks the End of Life (EOL) of Windows XP, one of the most popular operating systems from Microsoft, however many people are probably still unaware of the fact (and there are probably many who simply don't care). The operating system was released to manufacturing (RTM) on August 24, 2001, and generally released for retail sale on October 25, 2001. XP grew in popularity because it was easy to use and worked on most hardware. I bet most of you have a cousin or friend that is still running Windows XP on a computer at home, today. However, all was not roses with Windows XP, it gained notoriety by being labelled as insecure due to the many worms targeting the unpatched OS and gave Microsoft a bad reputation, so much so that Bill Gates told his employees to get serious about security. In August 2003 the Blaster worm exploited a vulnerability present in every unpatched installation of Windows XP, and was capable of compromising a system even without user action. In May 2004 the Sasser worm spread by using a buffer overflow in a remote service present on every installation. I was onsite with a customer when they got infected and the result was spectacular, systems beeping and rebooting left right and center. You've probably dealt with an infected or insecure XP desktop at one stage or another, and it's quite likely that Internet Explorer looked something like the screenshot below. Securing XP however was possible with some work but it's not that straightforward or easy and for that reason many people just couldn't be bothered. However, Bills memo made a dent in Windows as we know it, as security within Windows XP and especially later operating systems (Windows Vista, Windows 7, Windows 8) from Microsoft improved in leaps and bounds. Today however, is an important day as Microsoft will no longer provide security updates for Windows XP. The message is clear, you'll have heard it over and over, to move away from XP to a supported operating system such as Windows 7 or Windows 8.x, and there are many migrations tools available to help you with that such as this one from windows-noob.com. Microsoft themselves have of course provided many useful courses including this one Migrating from Windows XP to Windows 8.1 and an interactive Windows XP to Windows 8 Migration Guide. Note: Existing Windows XP security updates, service packs, etc. will still be available for download after today (April 8th) however you won’t see any new updates for Windows XP on any subsequent patch Tuesday. I do have a feeling however that the message below (recurring every 8th of the month) will be seen by many people over the coming ....dare I say it... days, months, years... But still, I guess we'll miss it, XP, in all it's glory, it was a nice operating system wasn't it ?


-
works fine using this task sequence. CM12 in a Lab - The CM12 BitLocker FrontEnd HTA - video CM12 in a Lab - The CM12 BitLocker FrontEnd HTA
-
we at windows-noob.com care what you think of the site, and want to keep it fresh and exciting, so what do you want to see more of on windows-noob.com, please vote !
-
isn\t the /wait:True command what you guys are trying to do, i.e. add a wait until done via a pause...? we are pre-provisioning many computers here (windows 7 and windows 8) and havn't seen this issue yet, what type of hdd's are you using ?
-
what's wrong with your existing server, maybe we can fix it ? when migrating from one installation of CM12 to another they should be the same version, so you could migrate from CM12SP1 (your current broken server) to another CM12SP1 and then upgrade that one to R2, however I'd try fixing the problems with your existing server first.
-
Remove Deleted Application From Software Center
anyweb replied to rrasco's topic in Configuration Manager 2012
have those systems received new application policy yet ? -
can you post a smsts.log file from one machine with the problem please
-
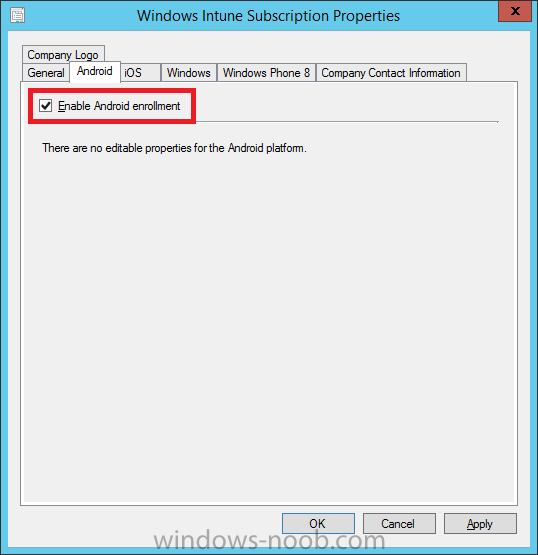
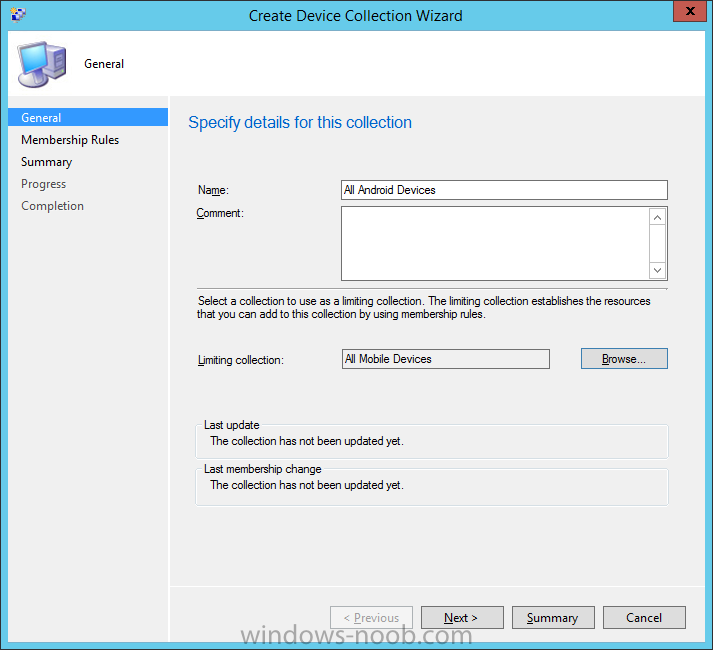
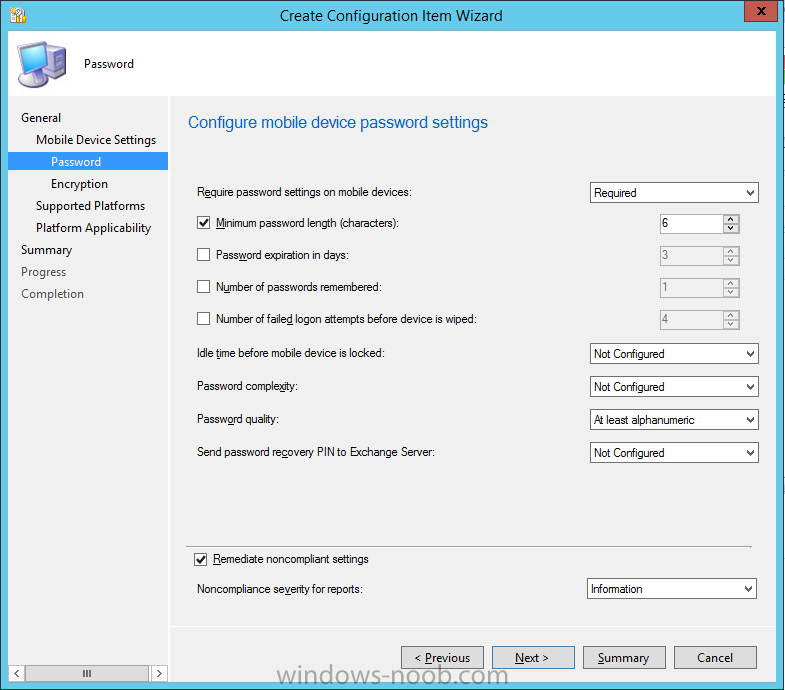
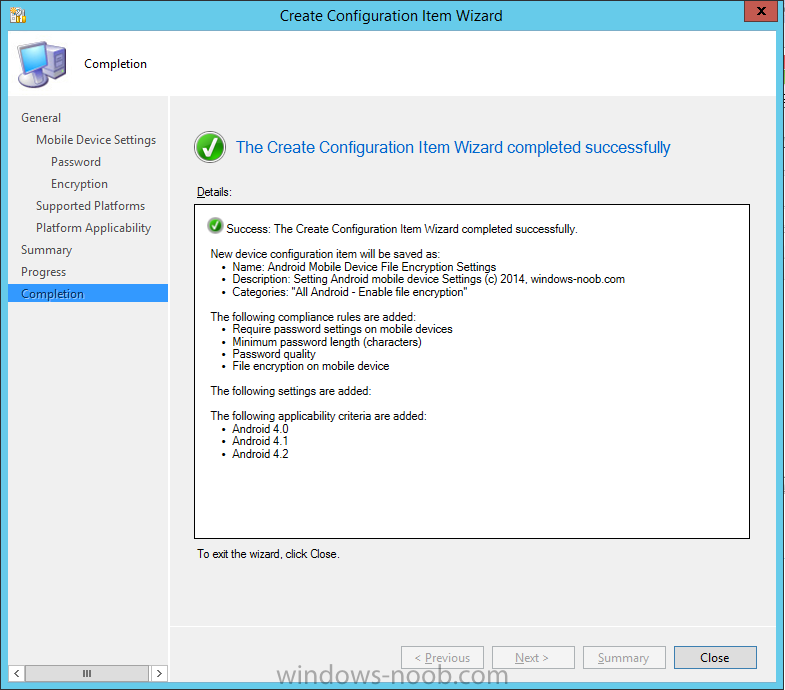
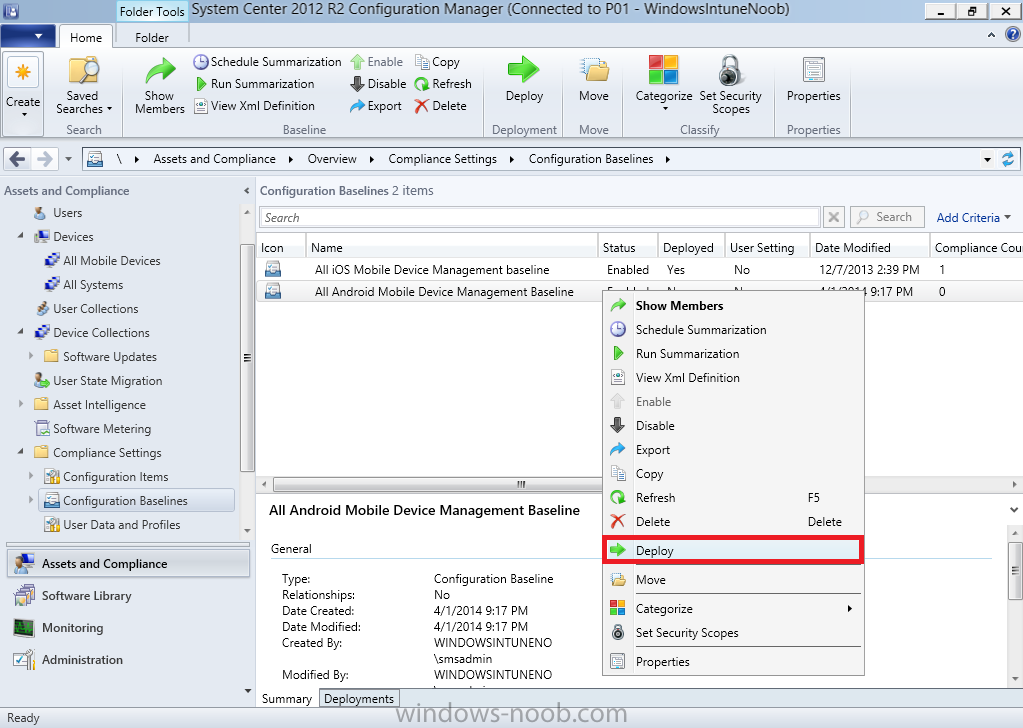
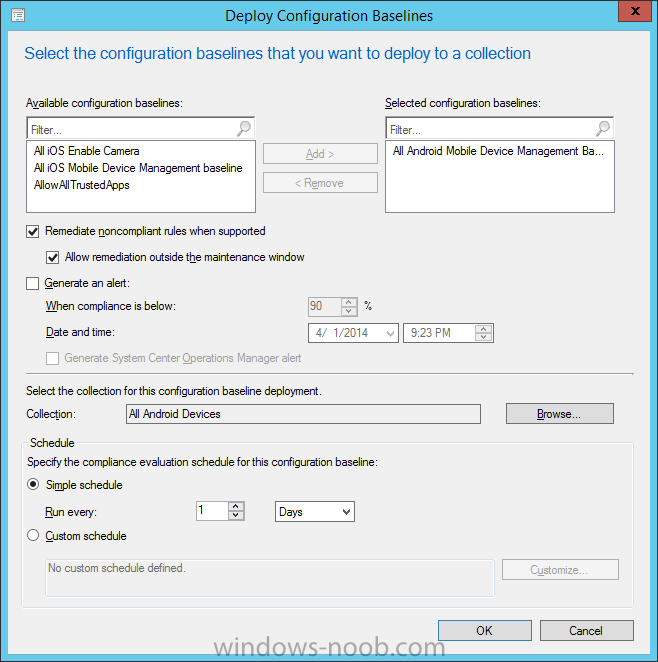
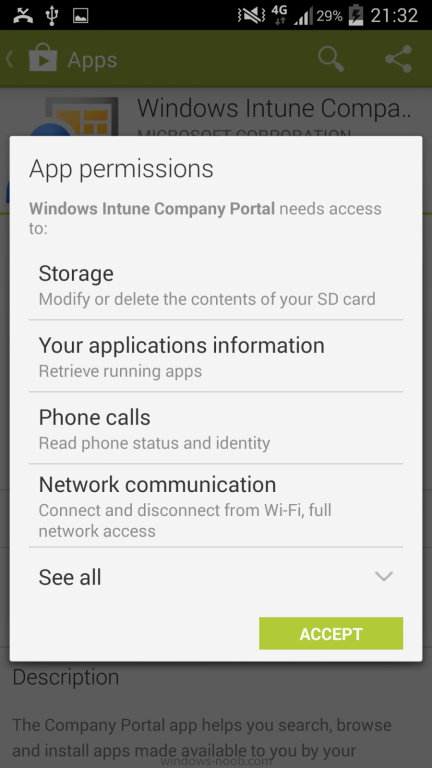
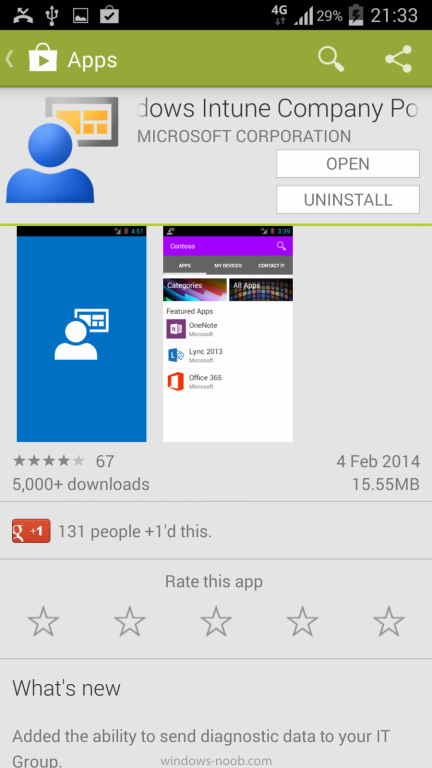
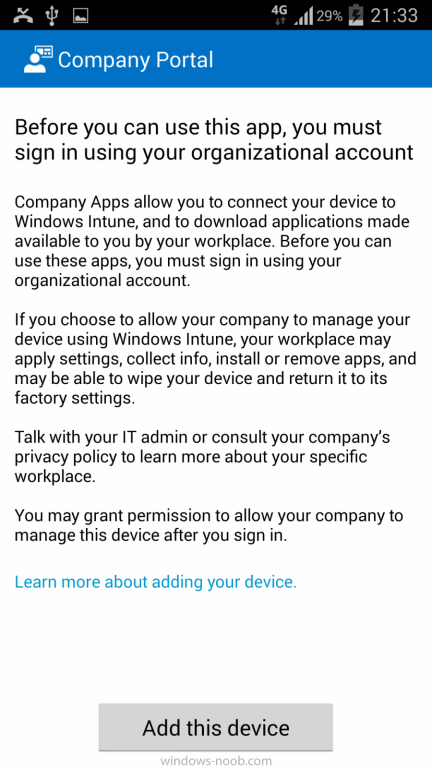
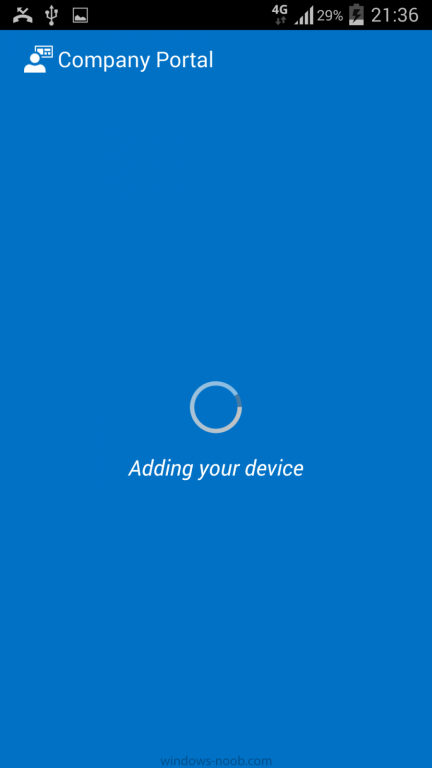
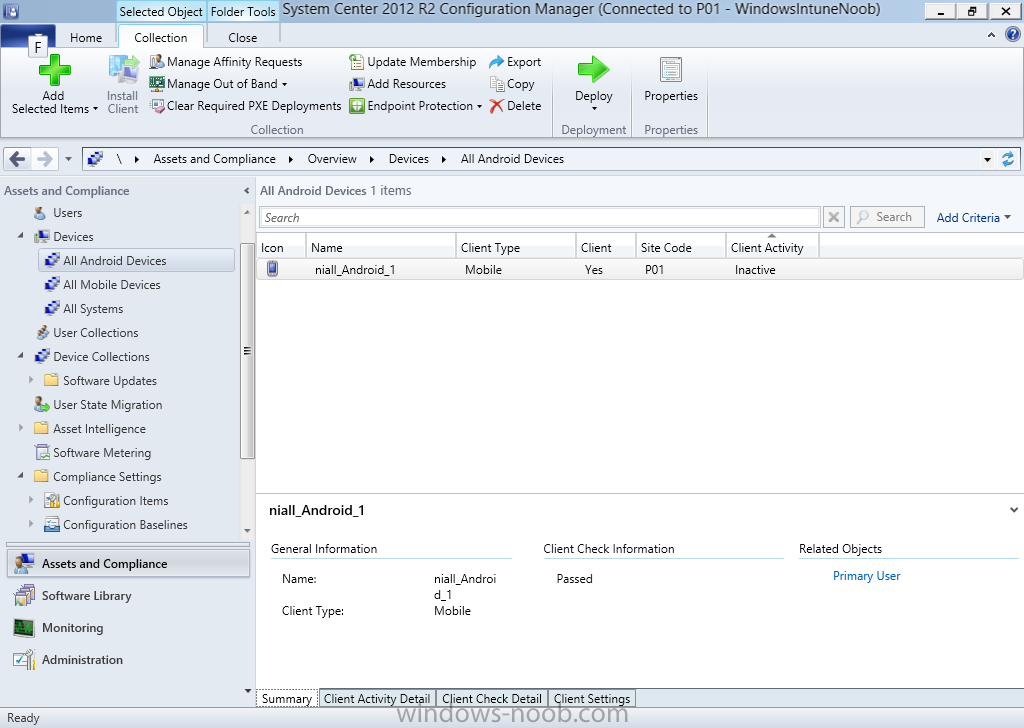
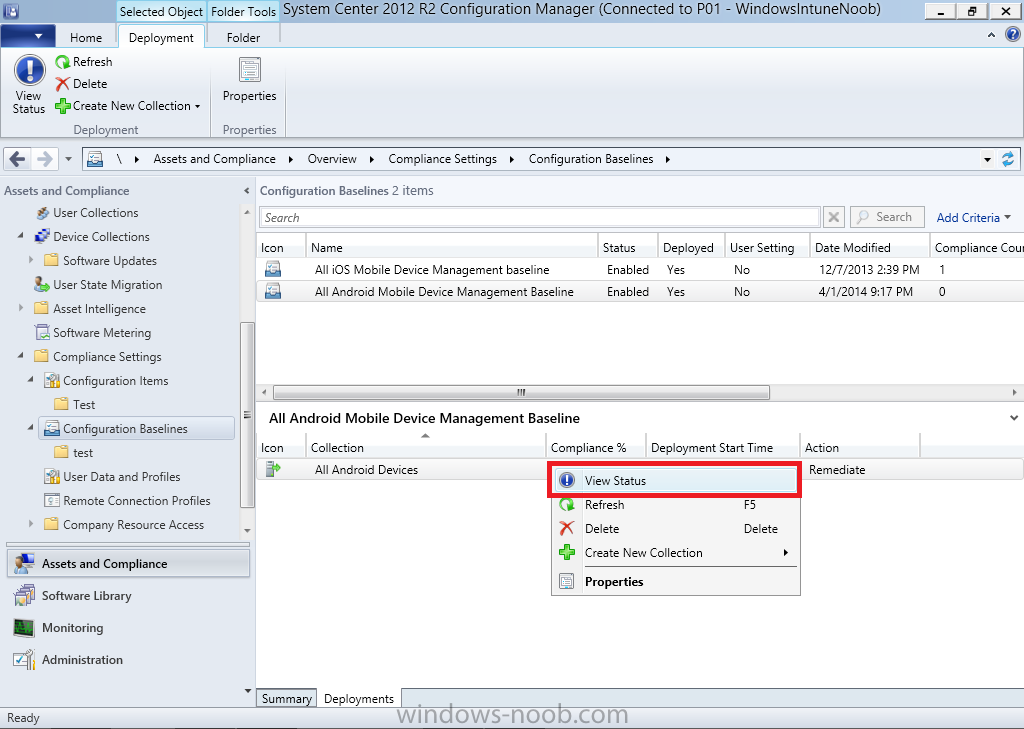
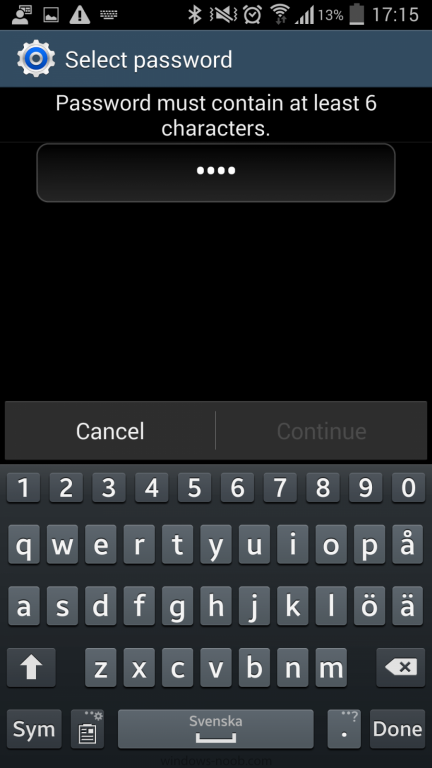
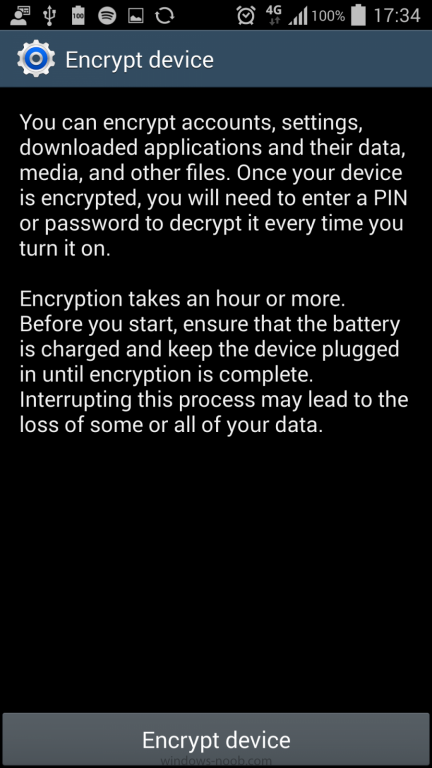
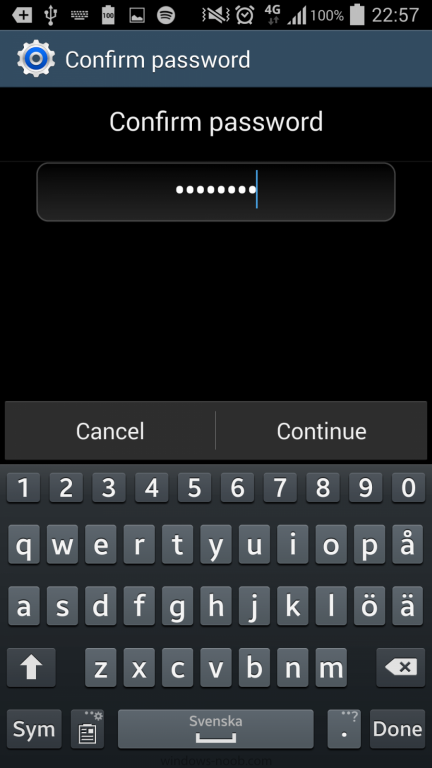
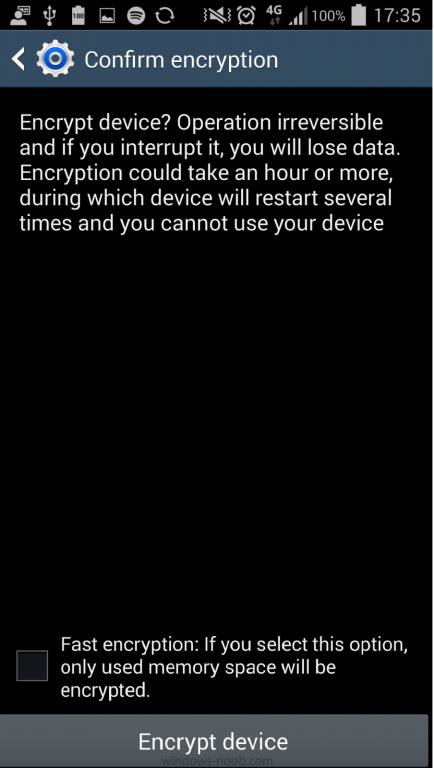
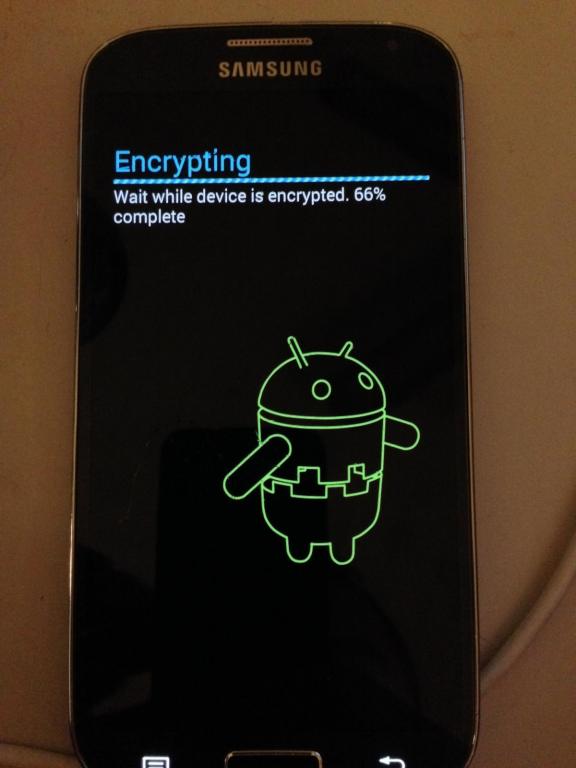
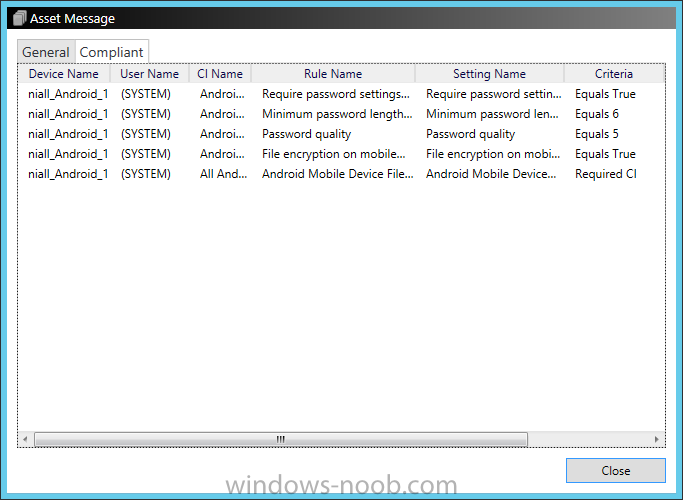
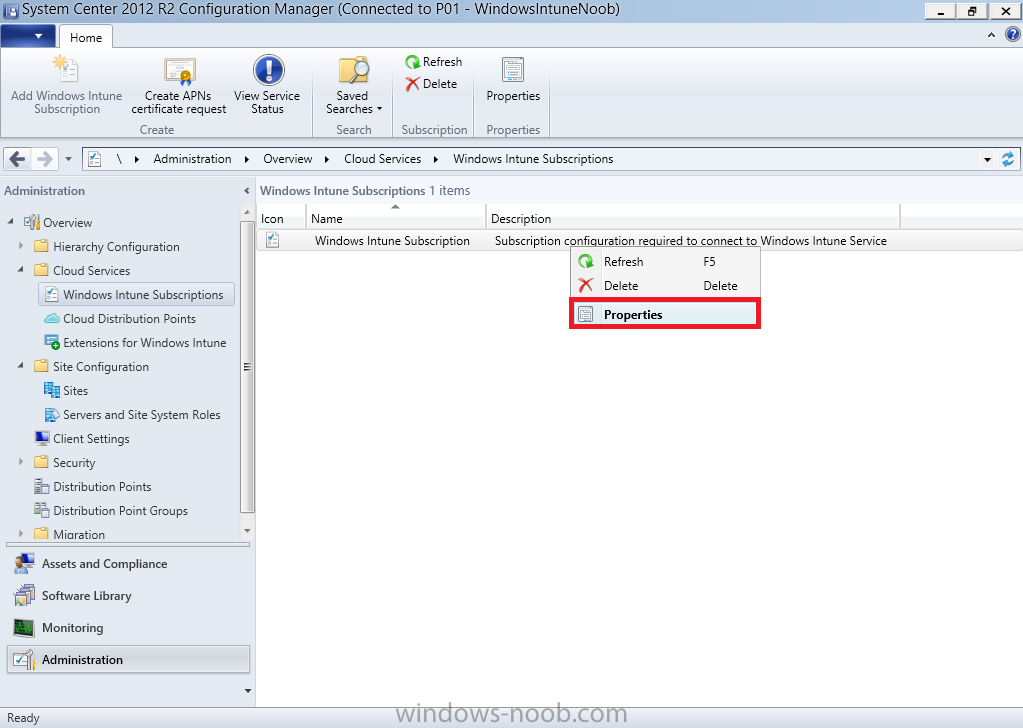
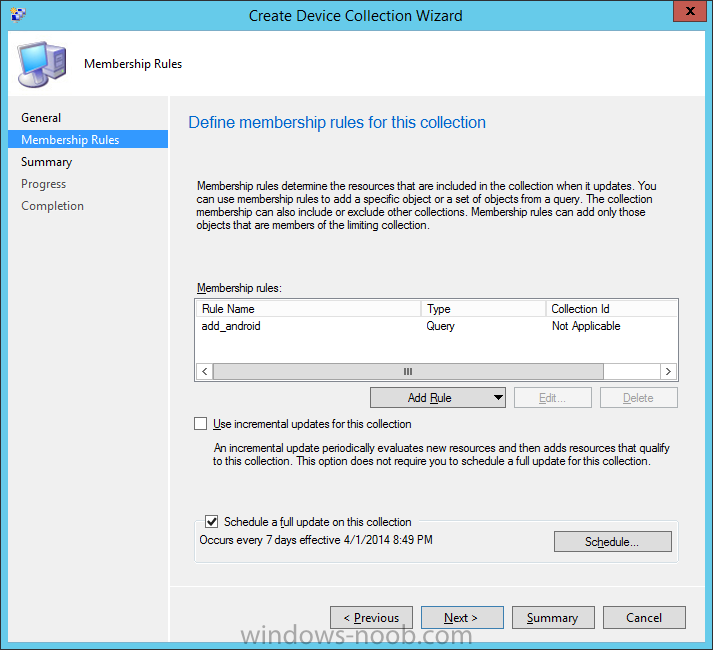
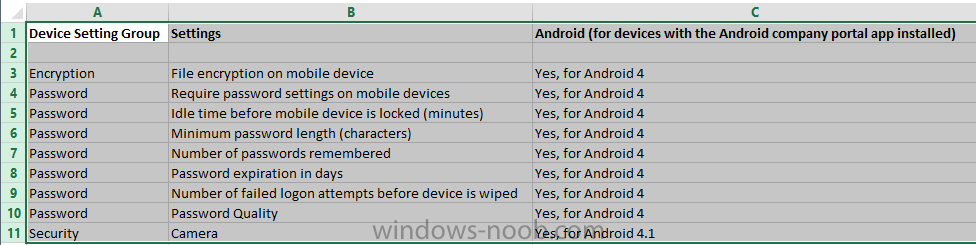
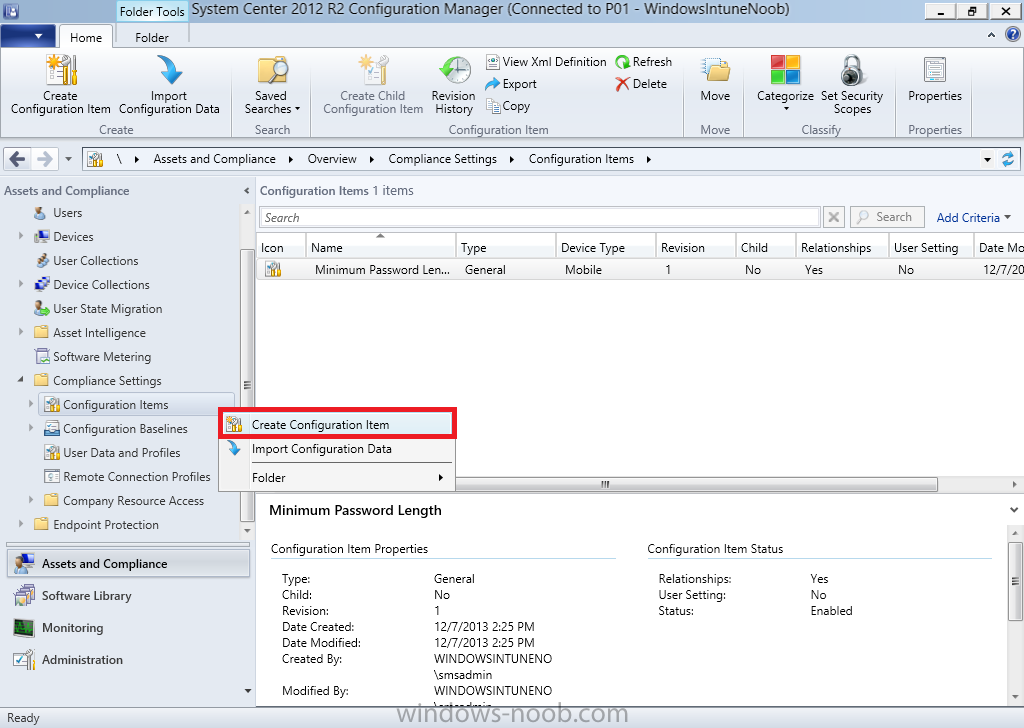
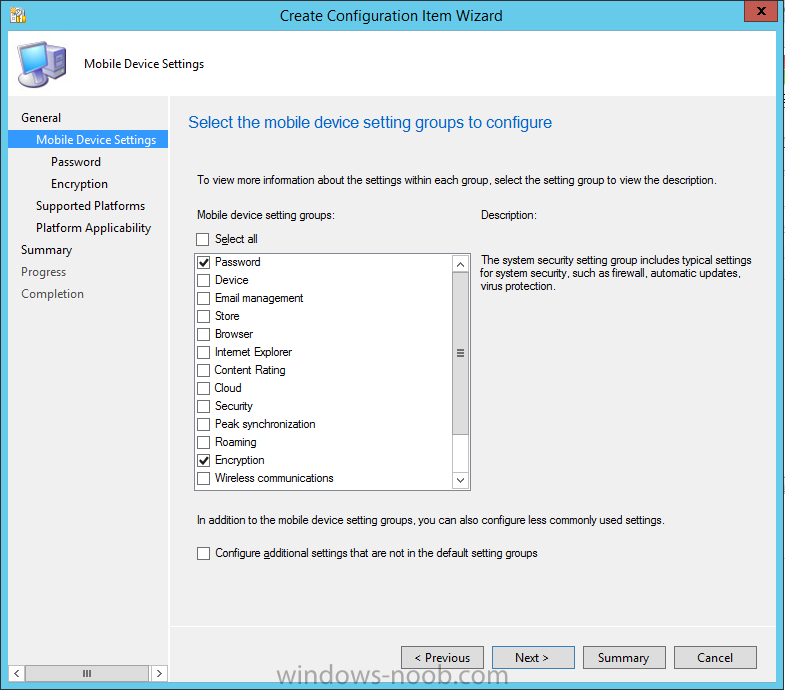
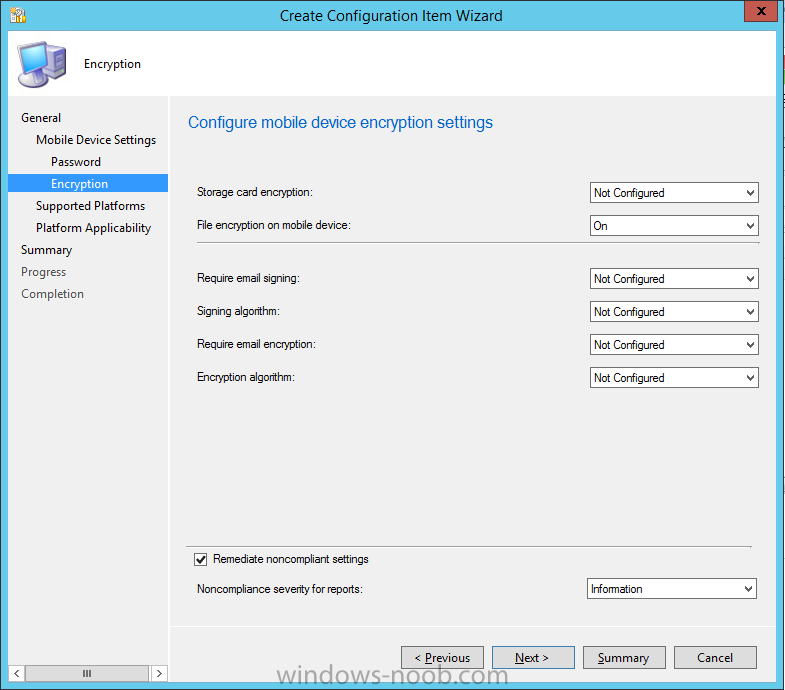
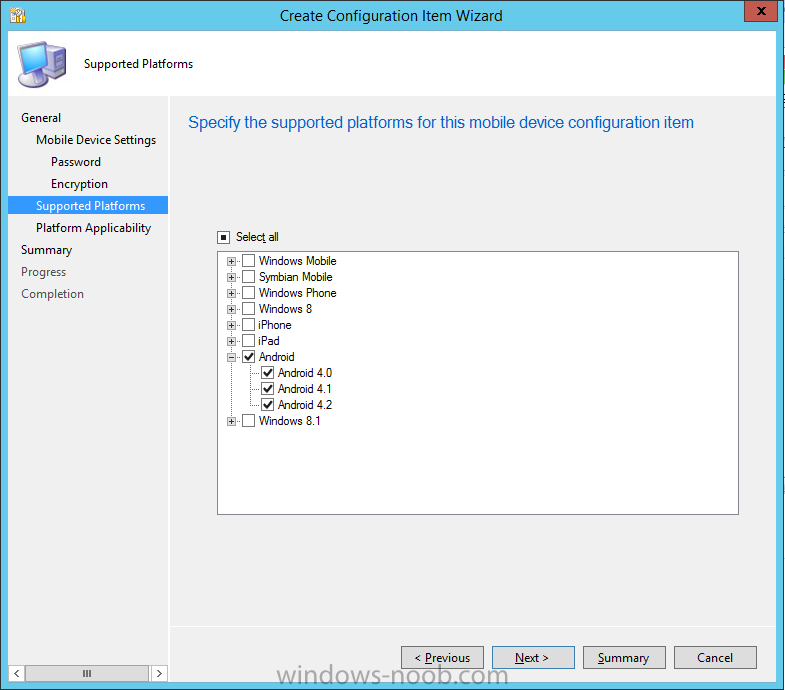
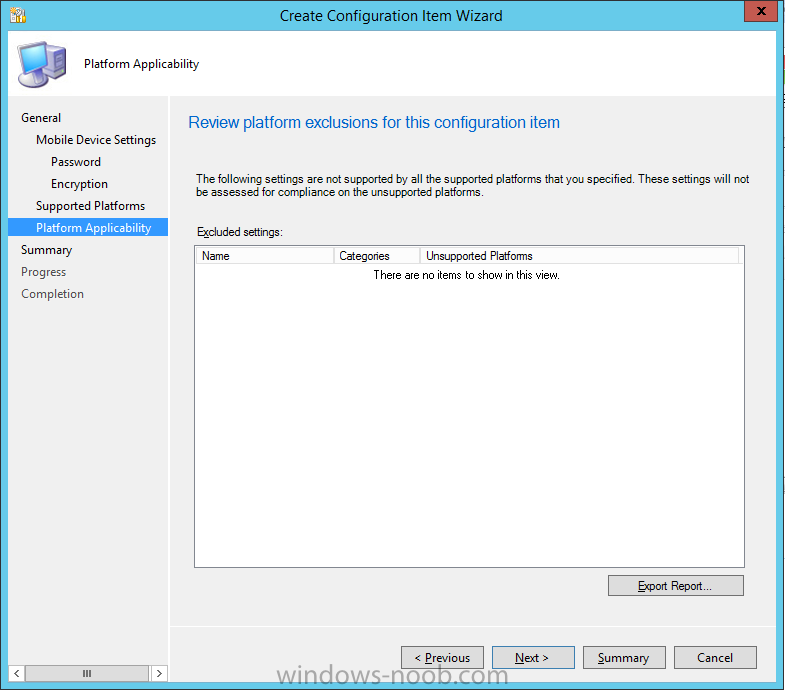
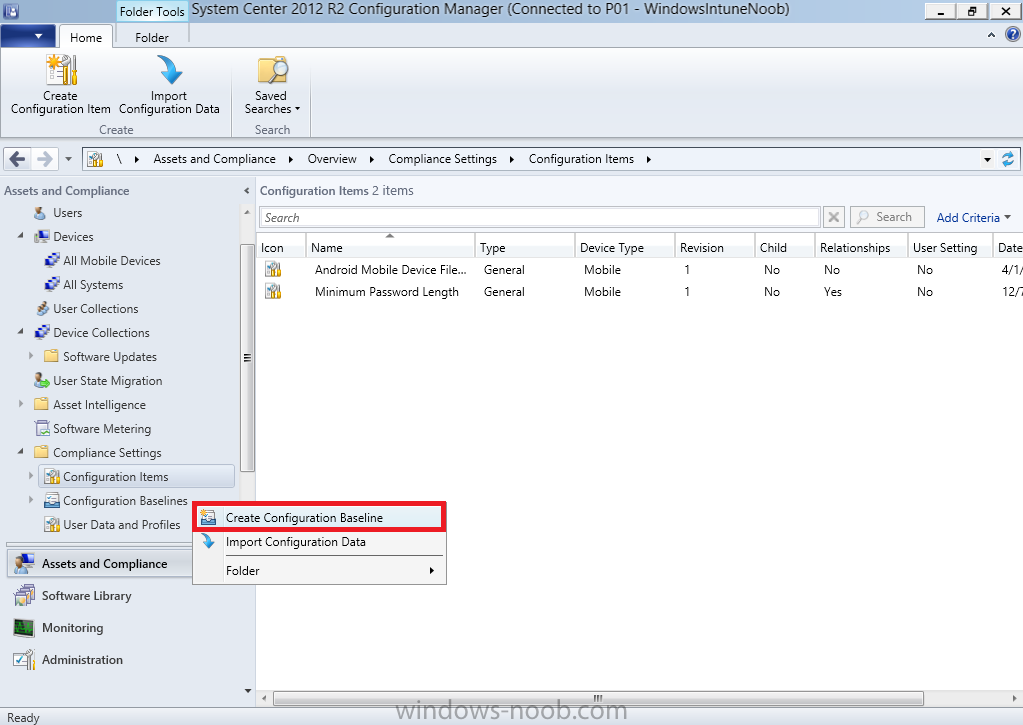
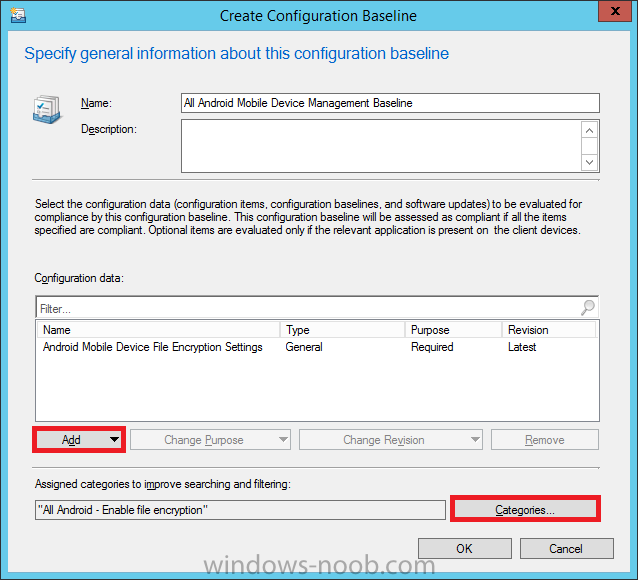
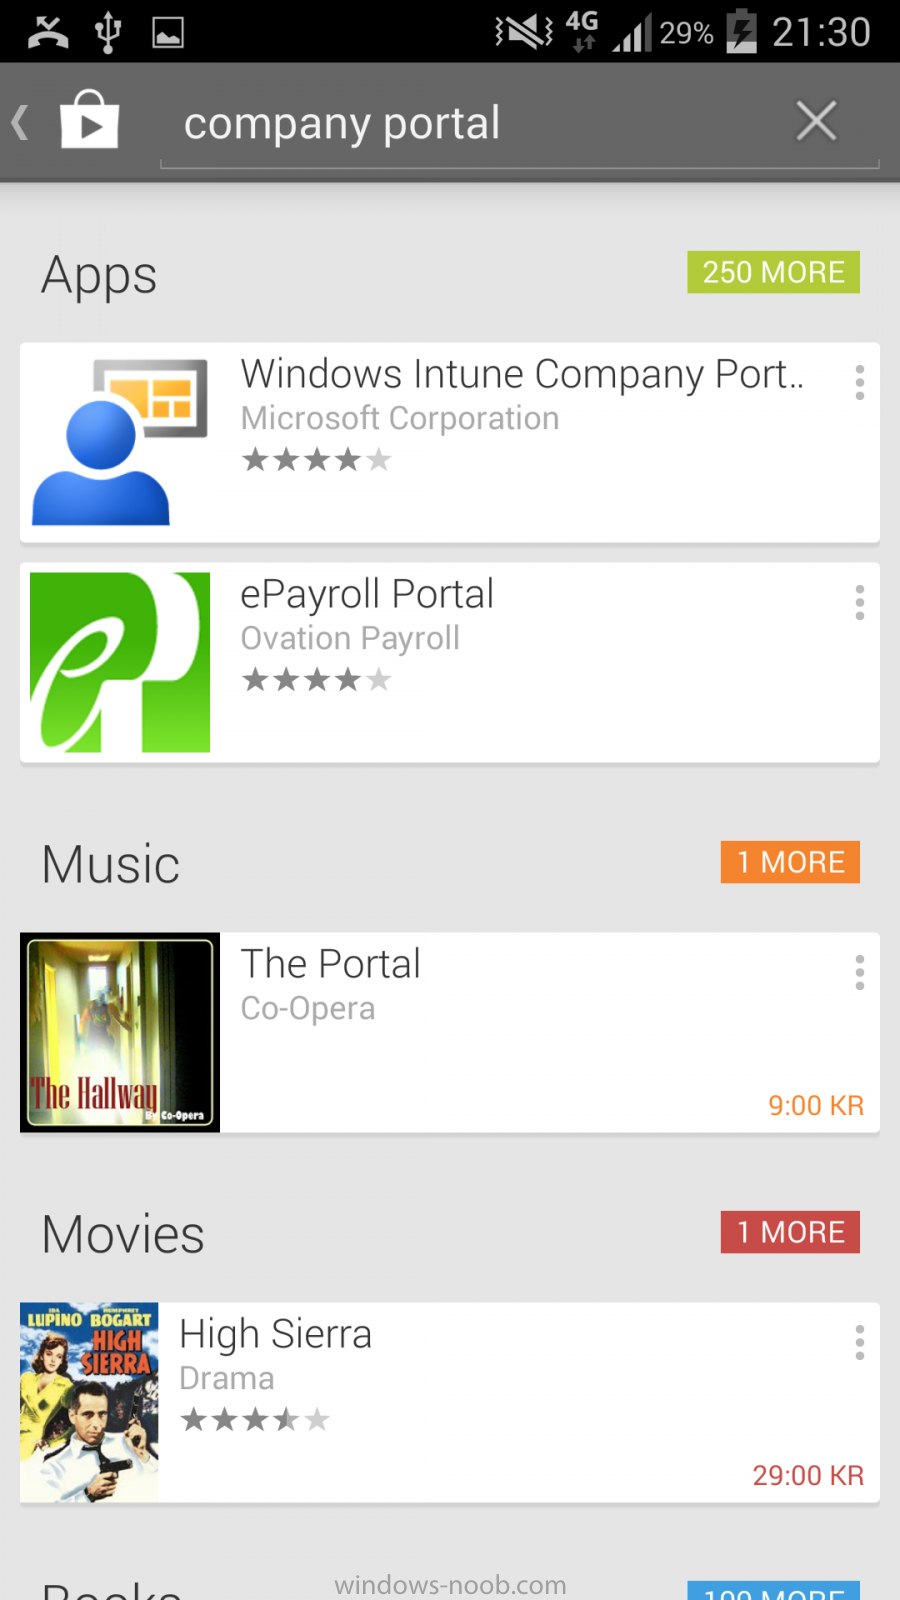
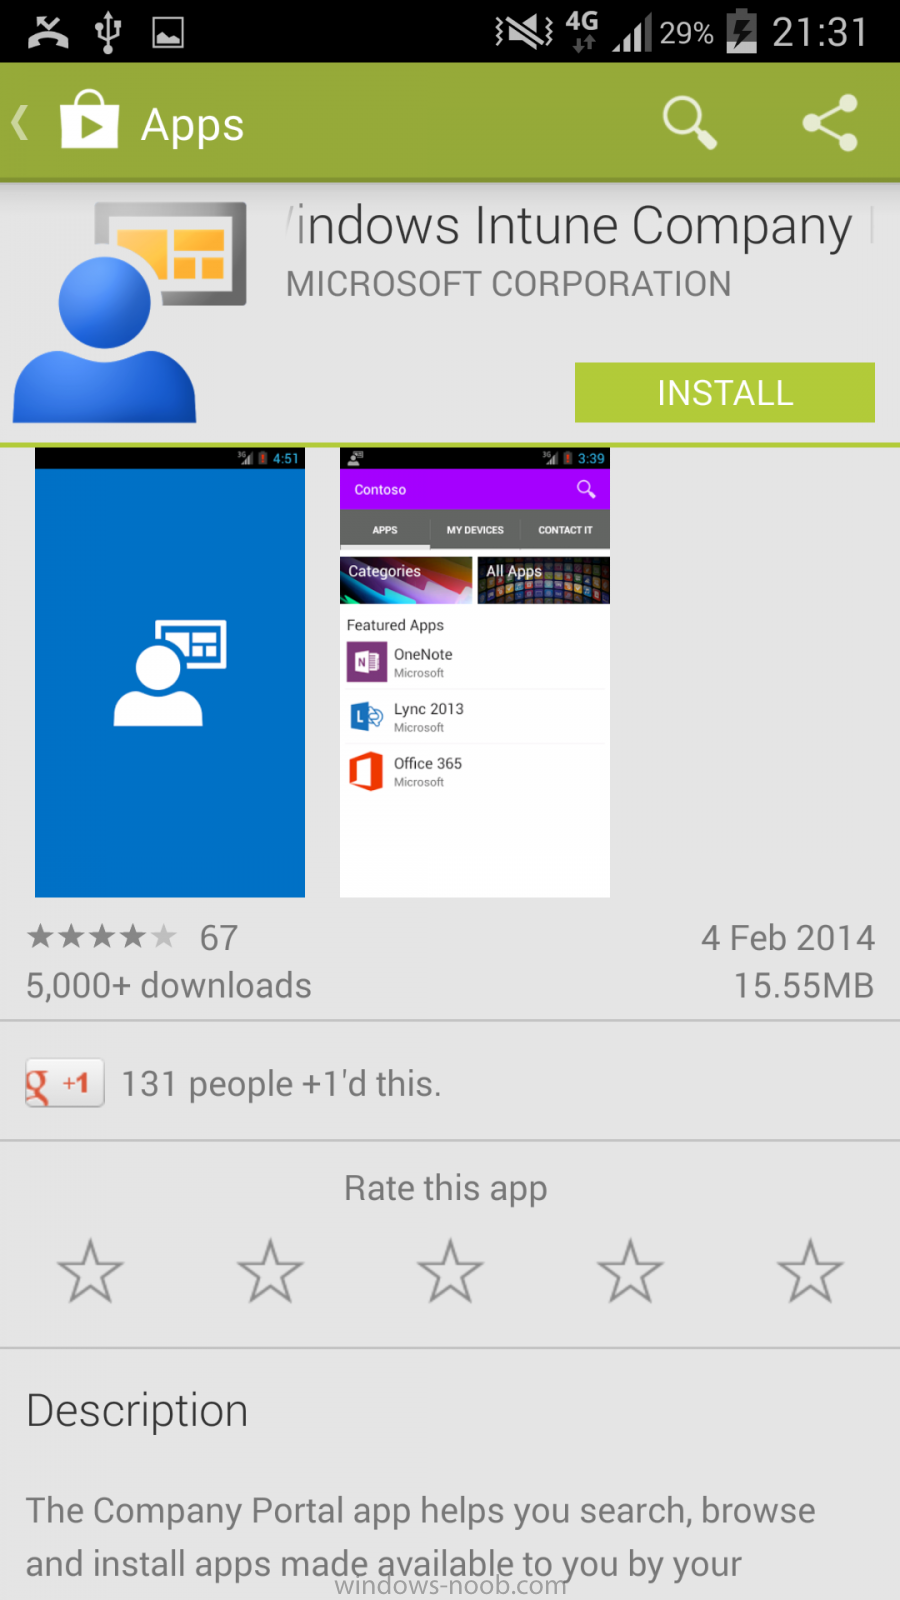
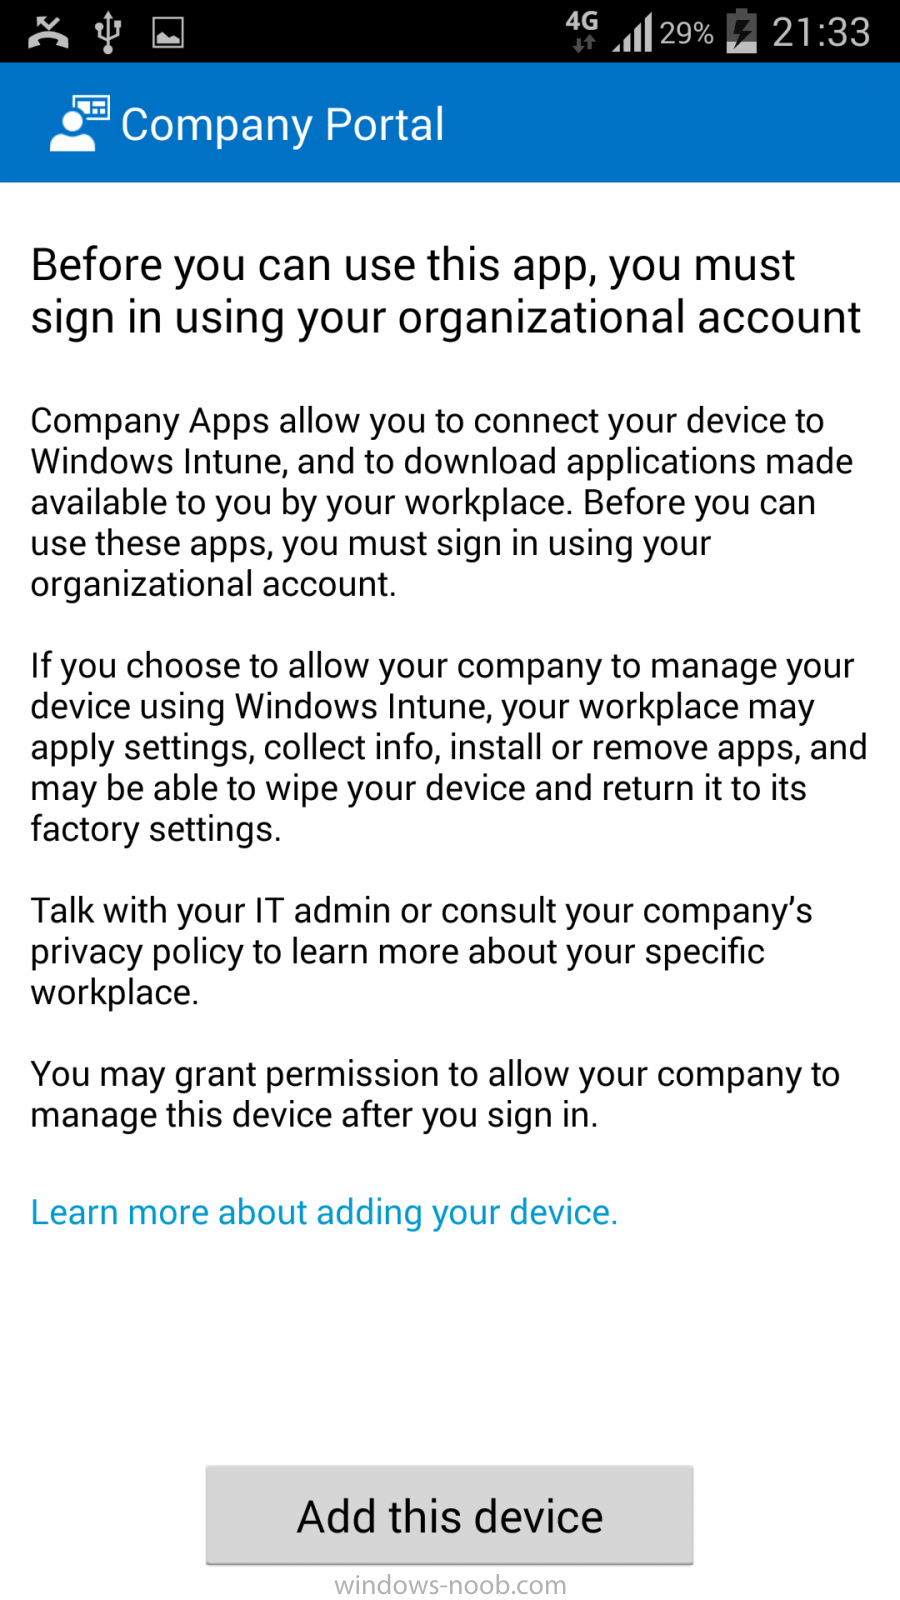
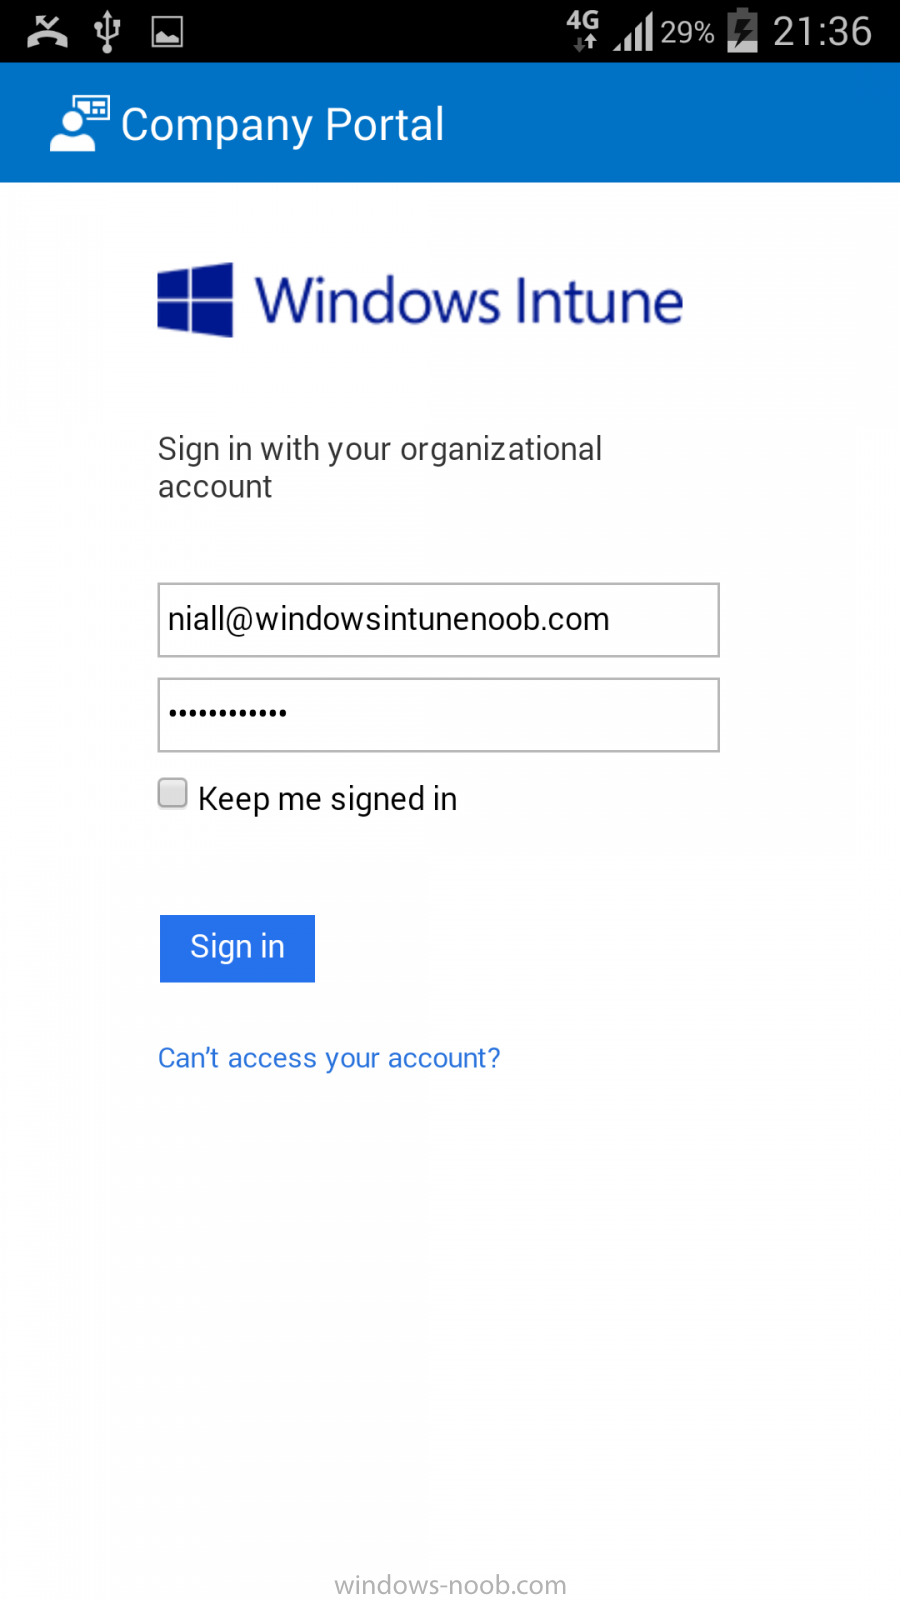
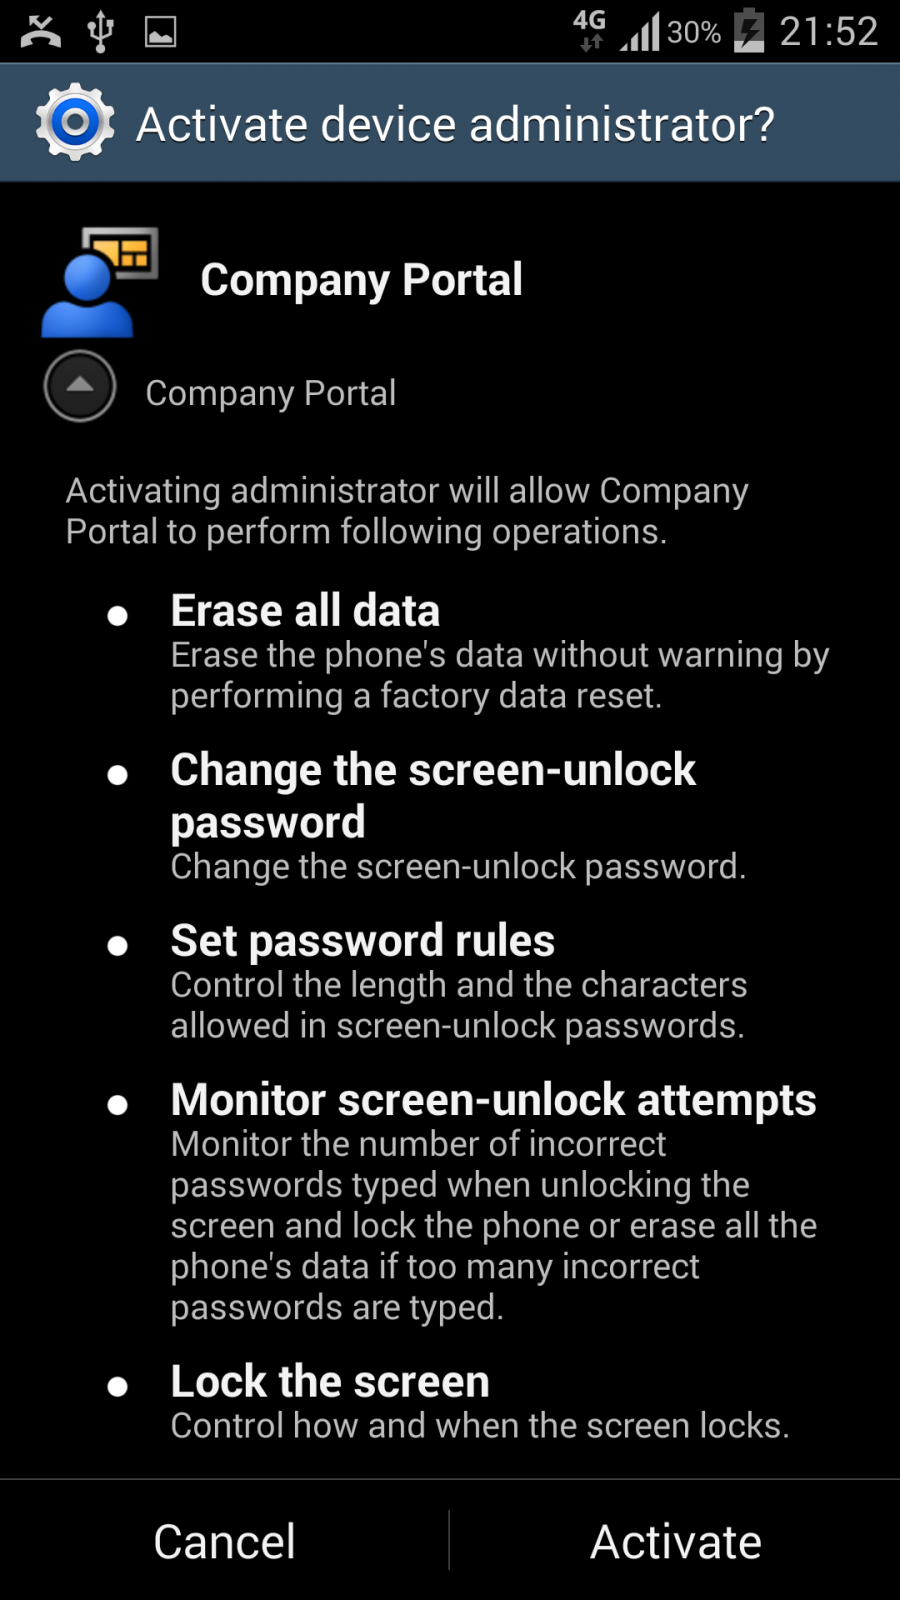
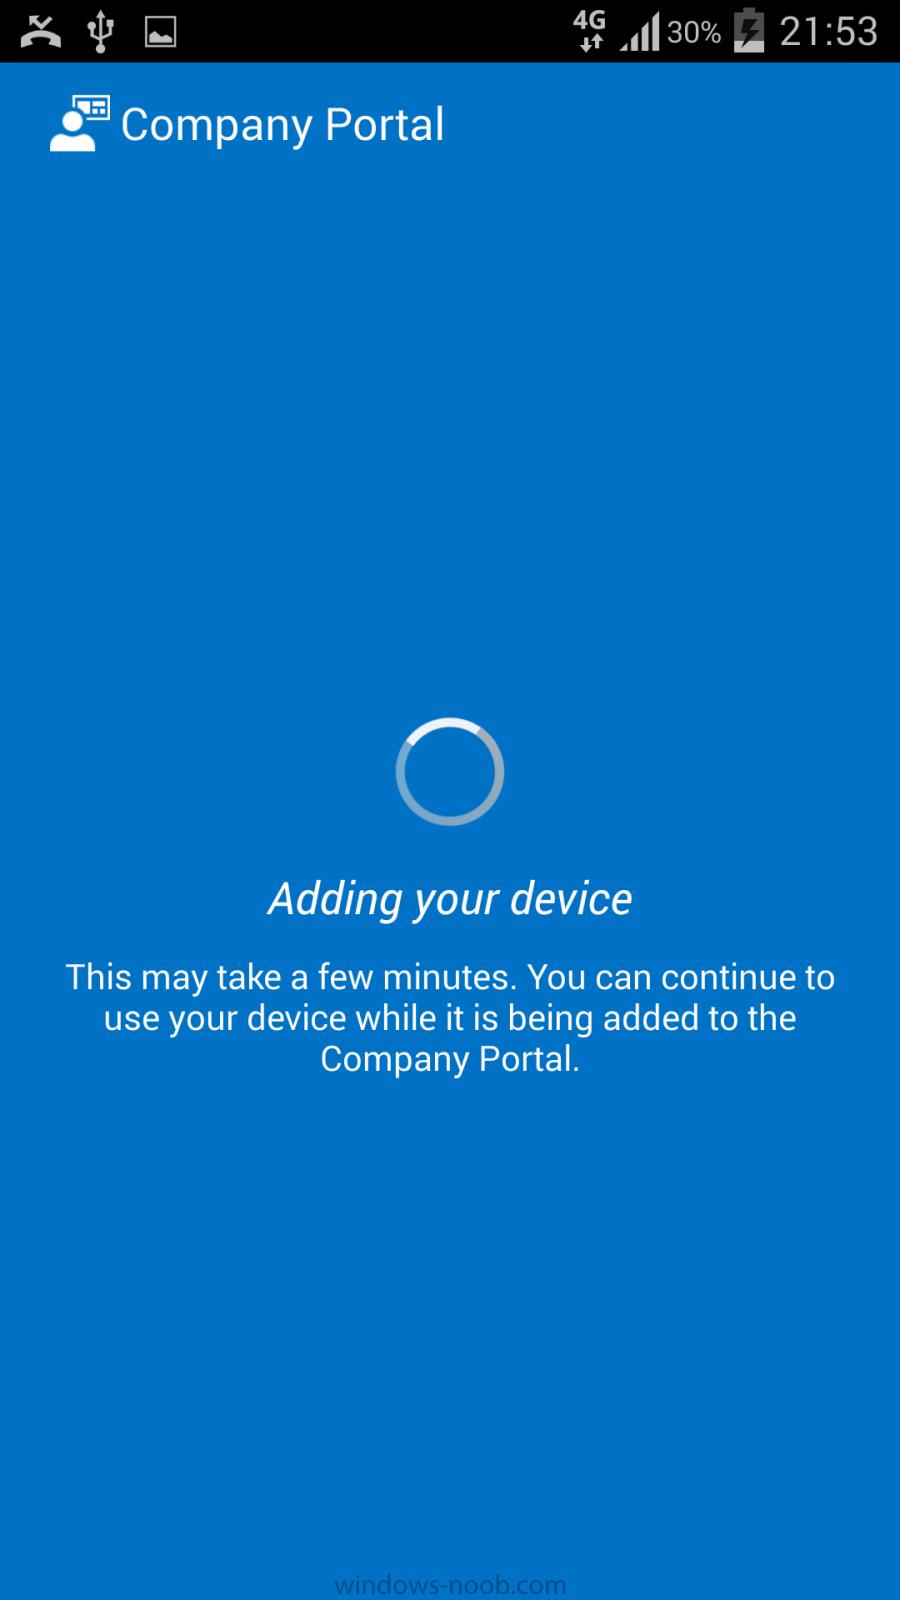
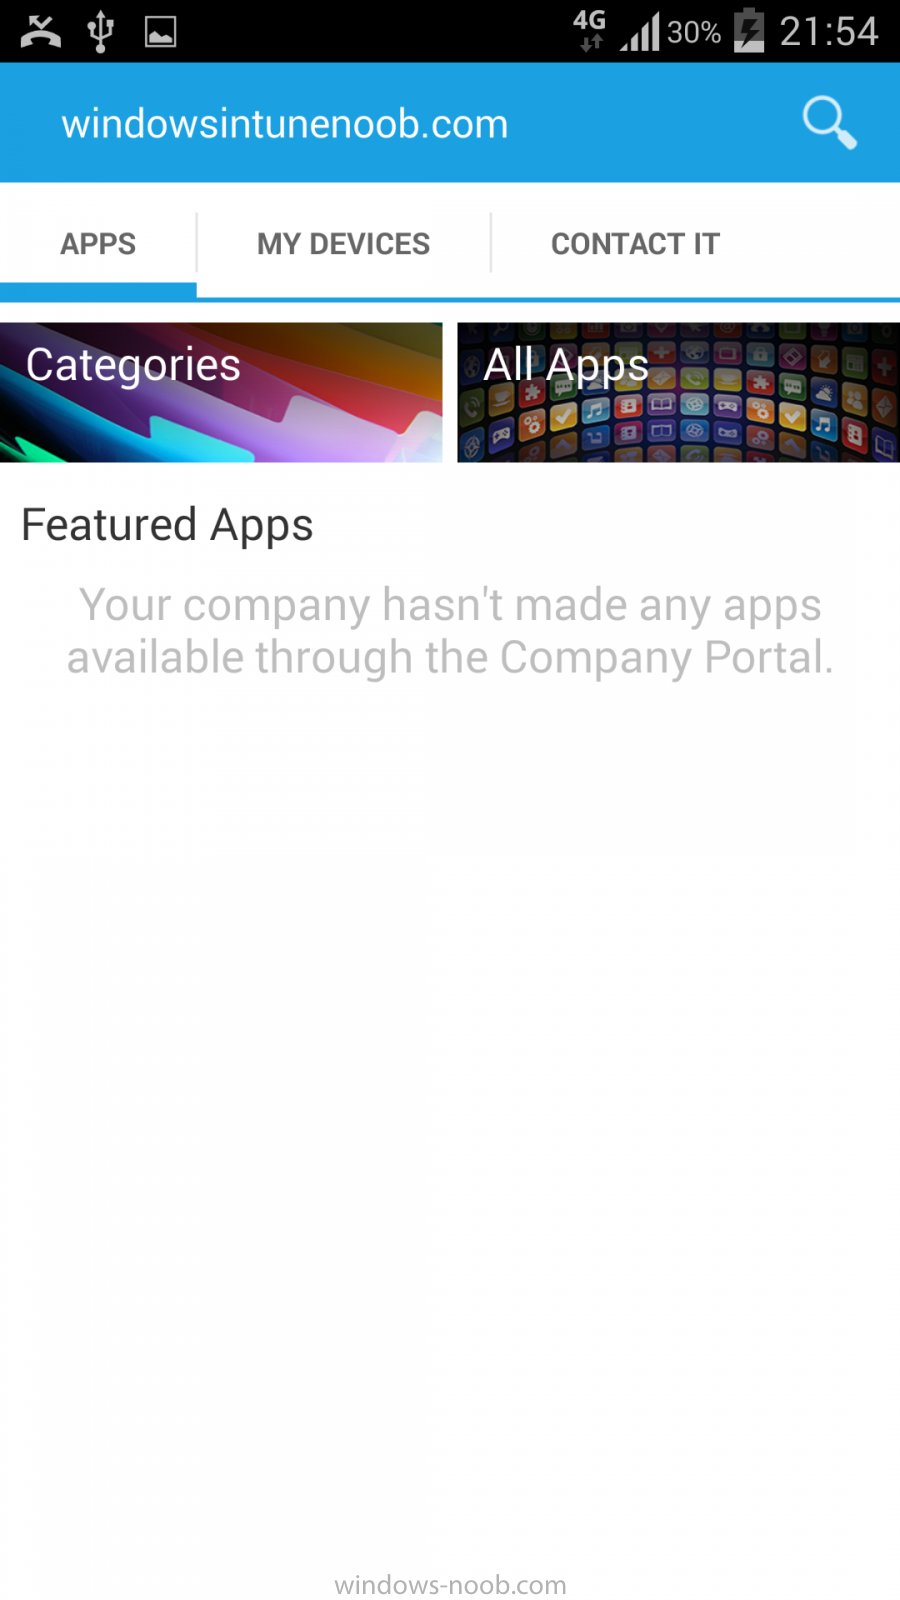
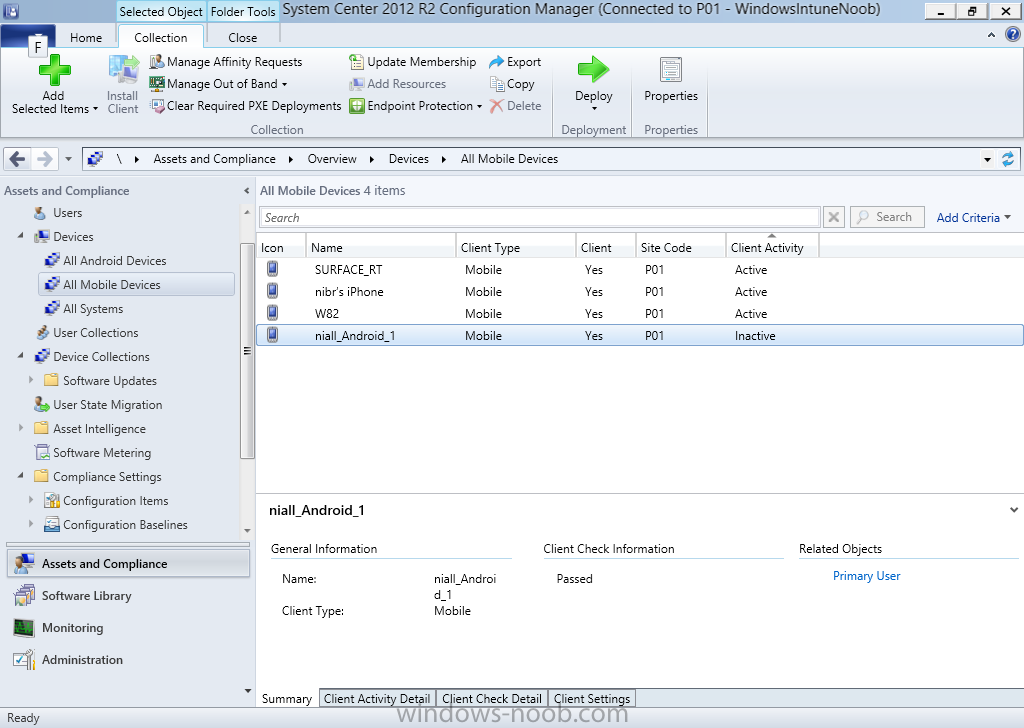
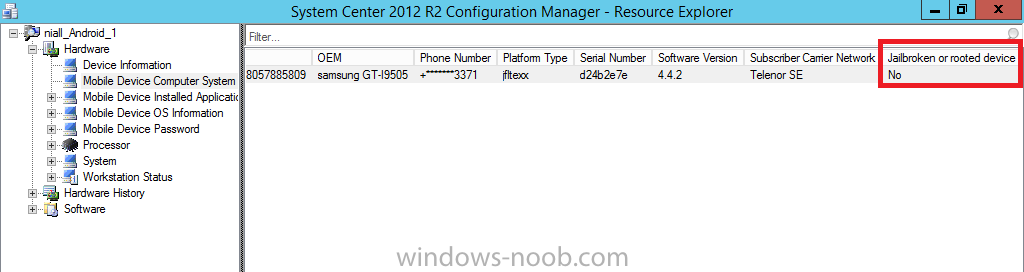
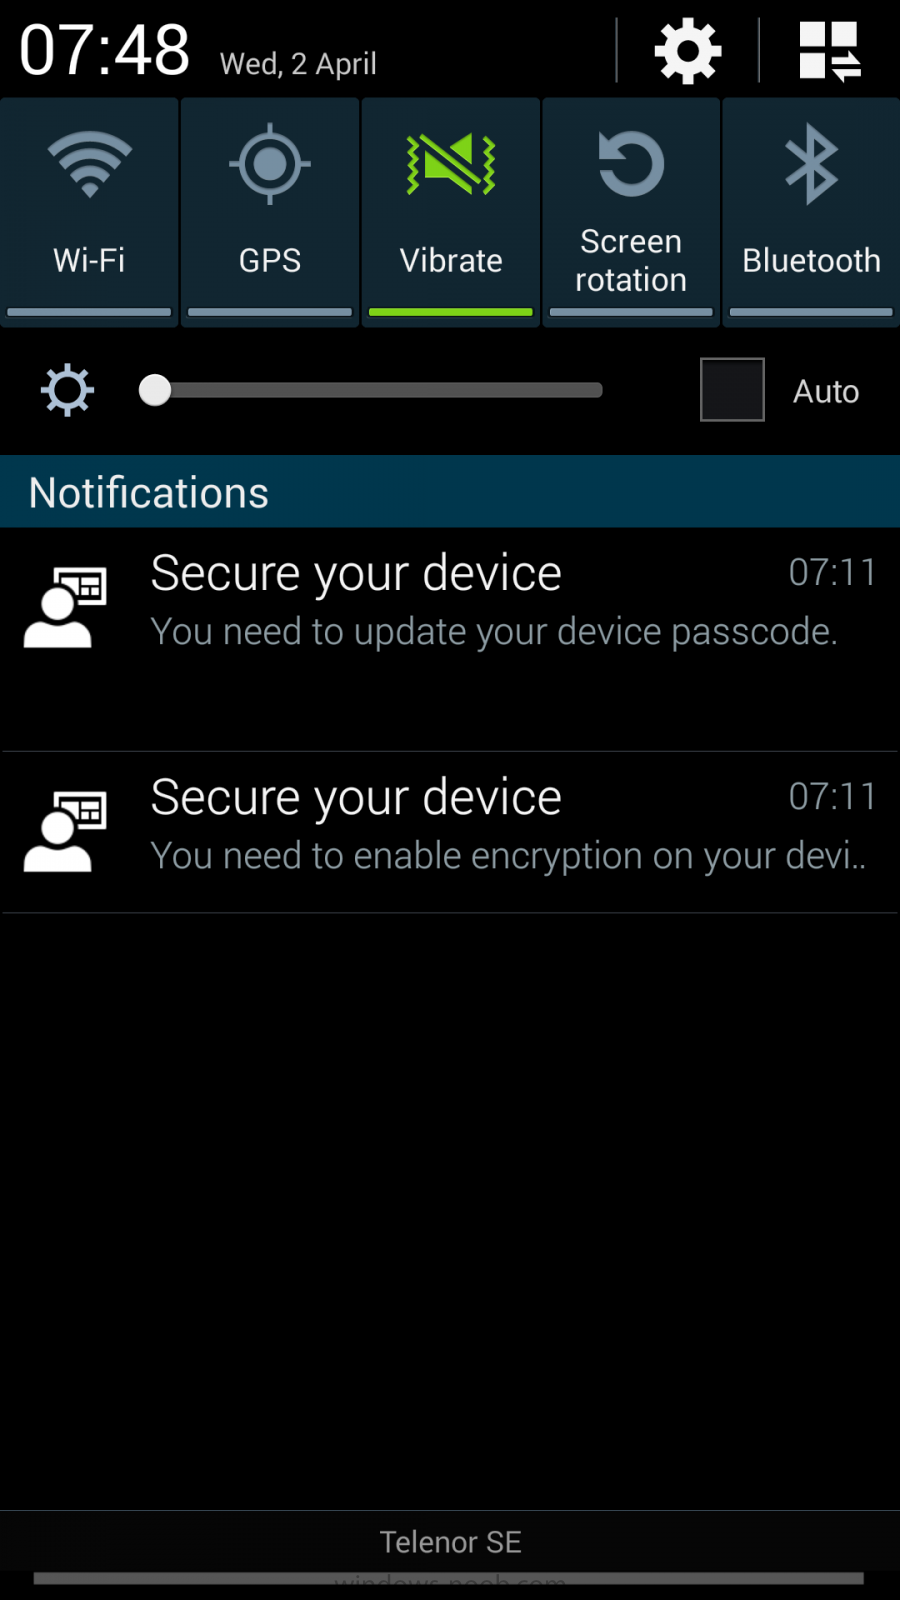
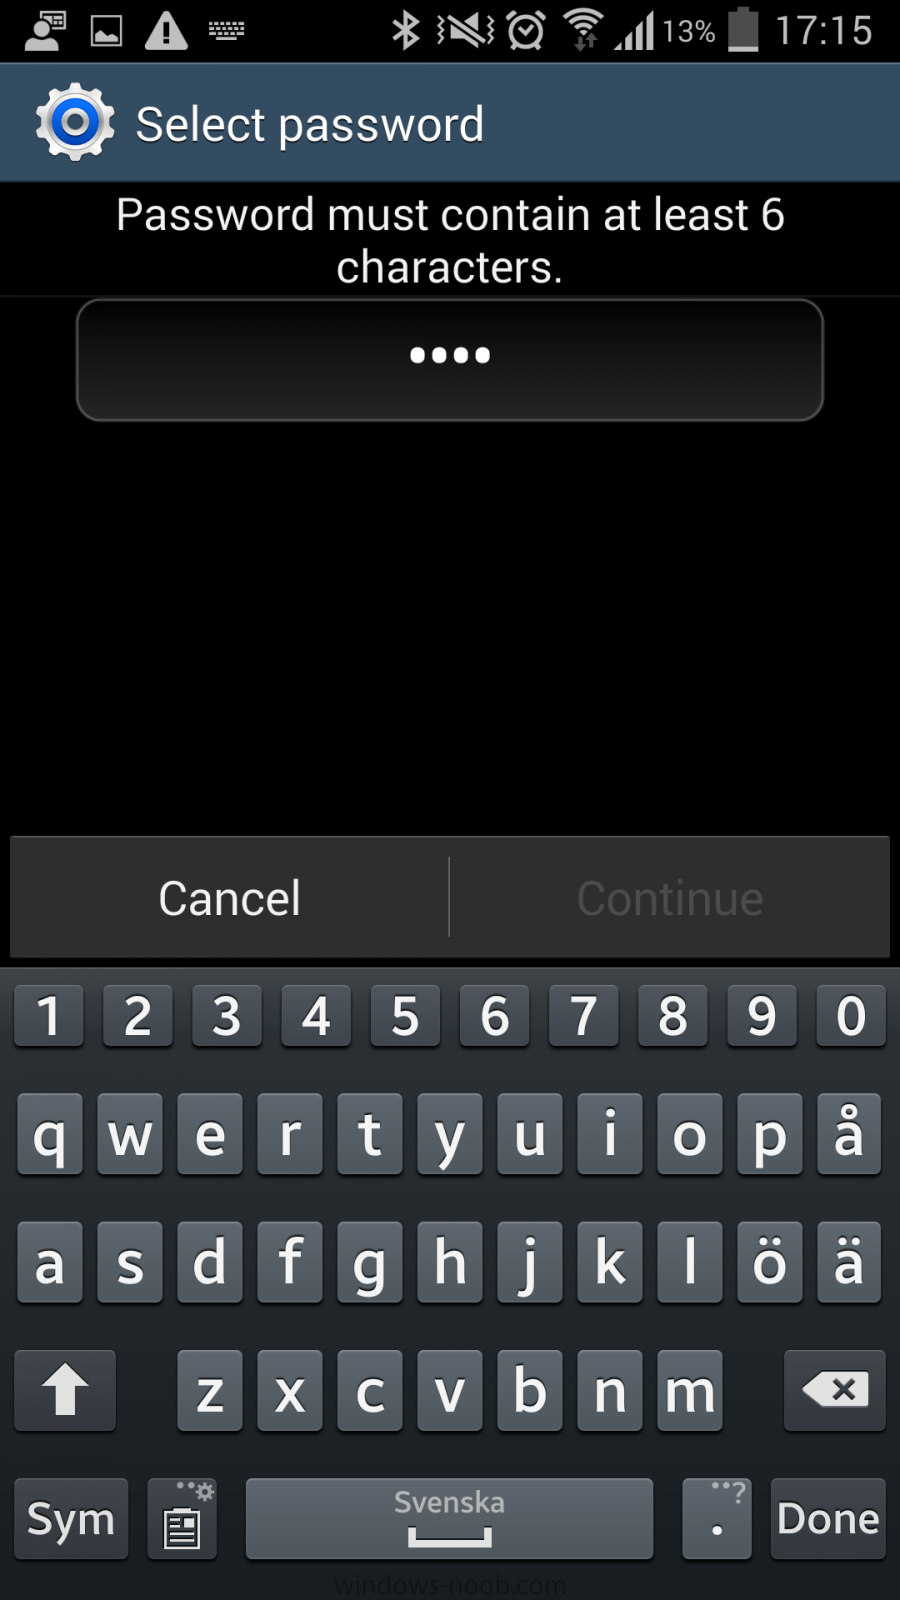
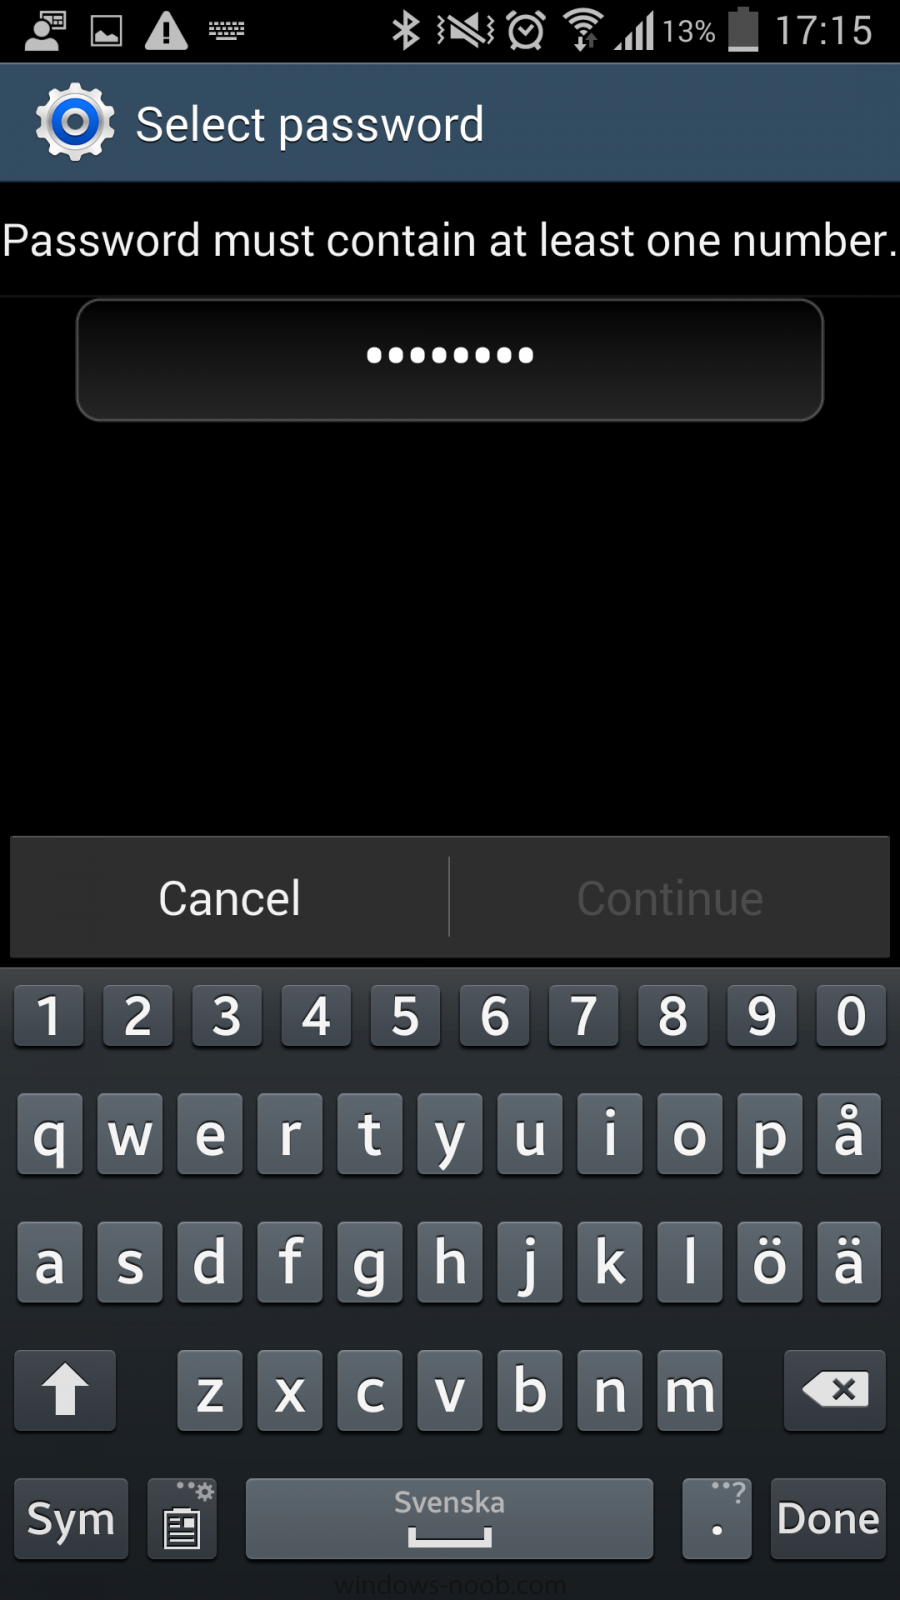
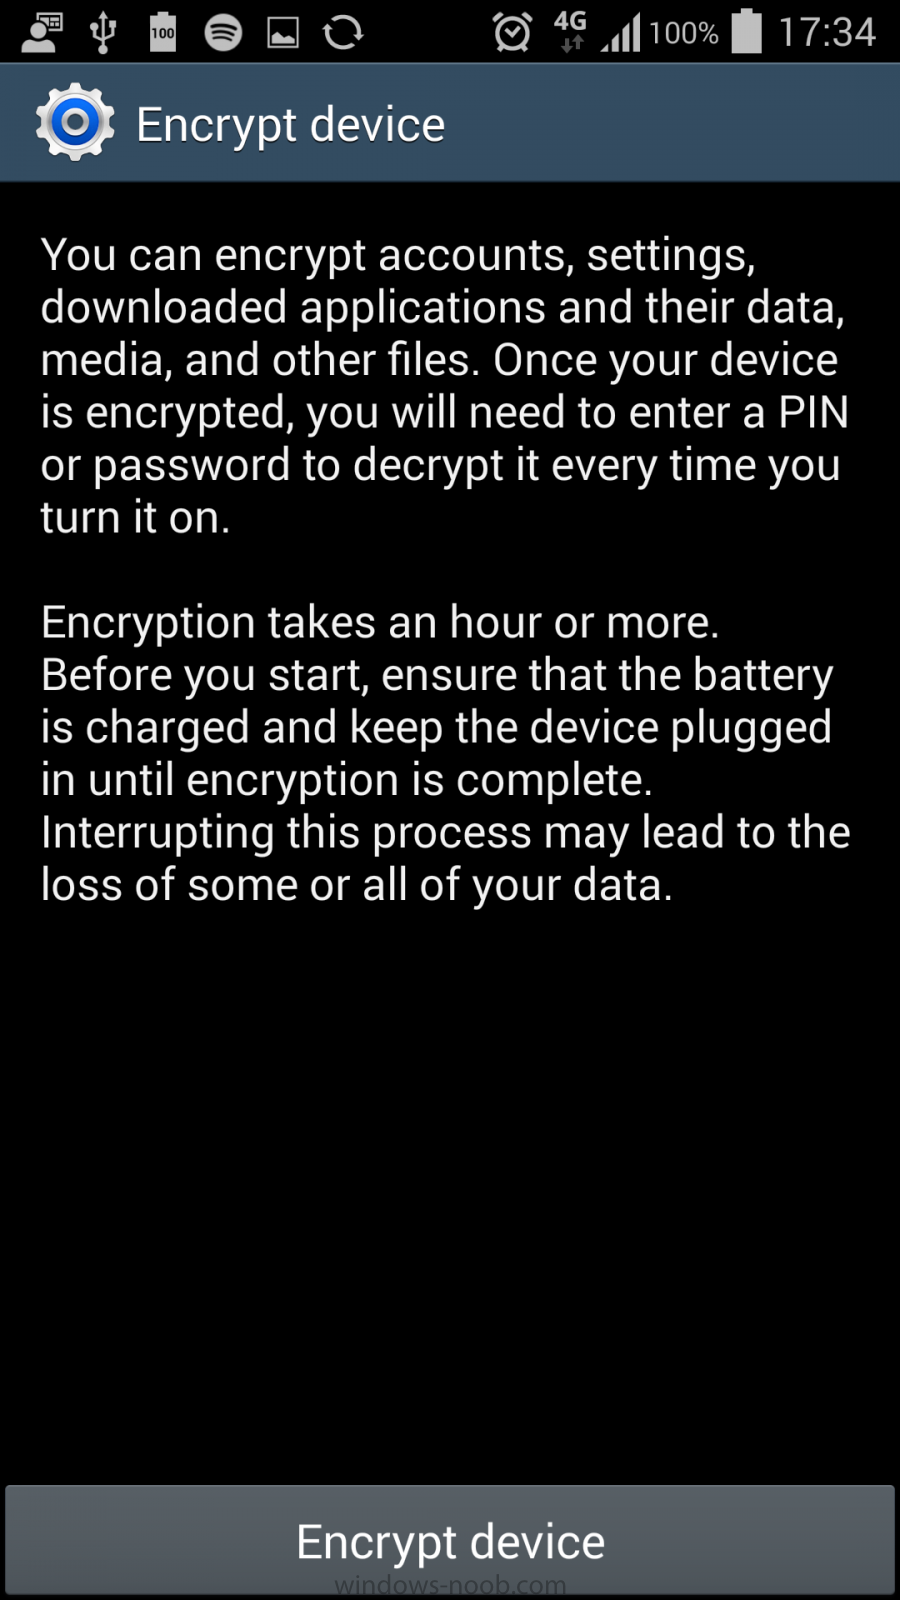
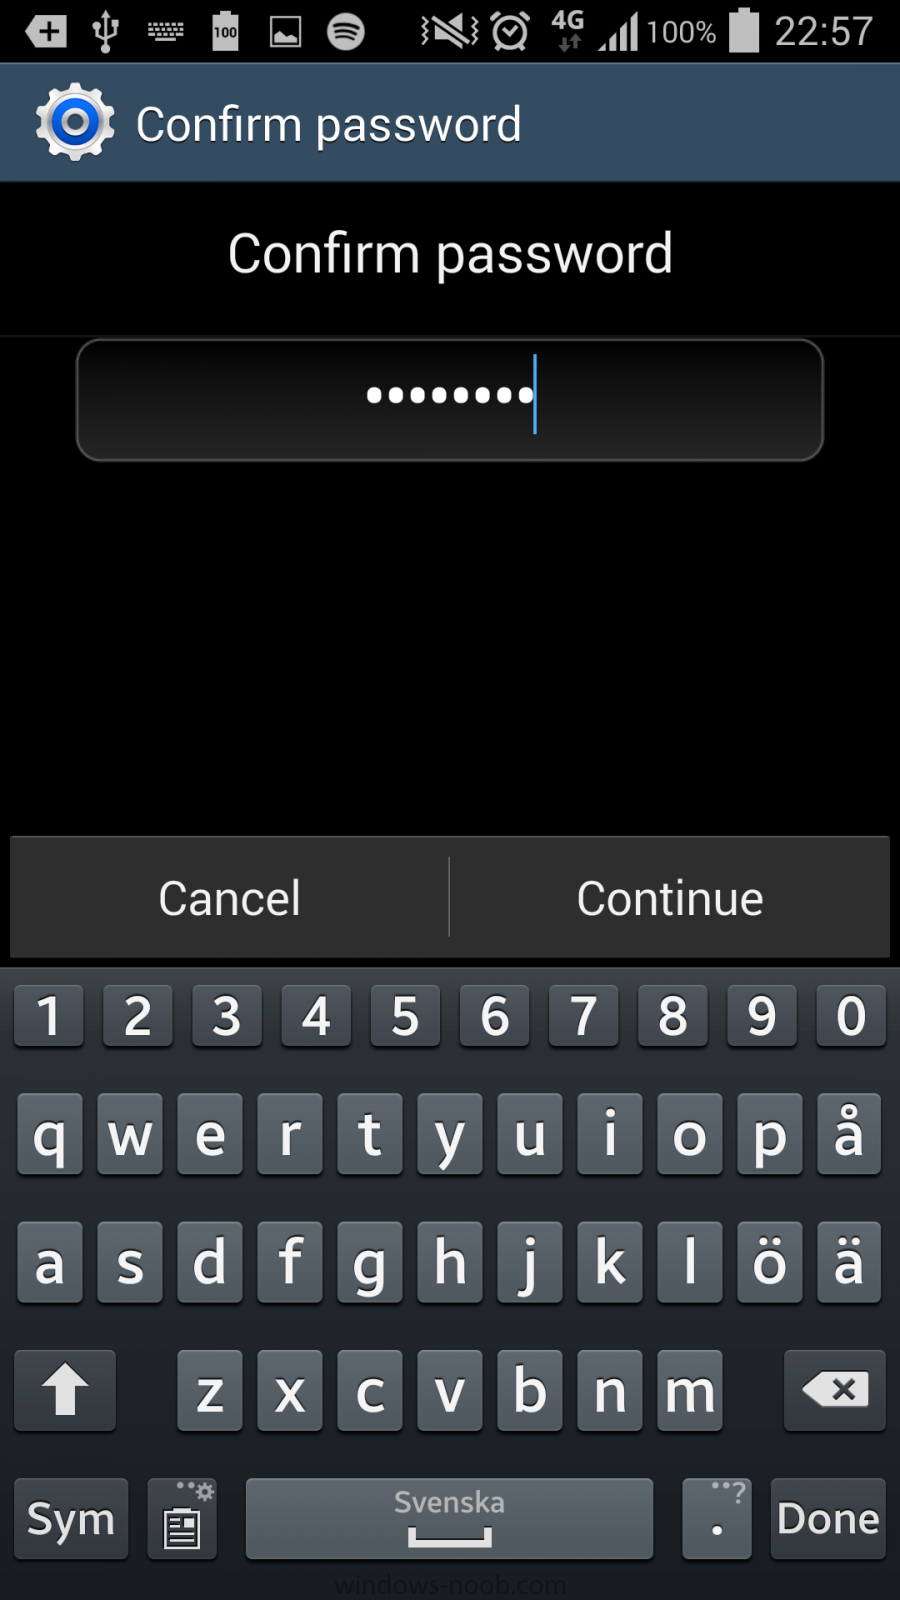
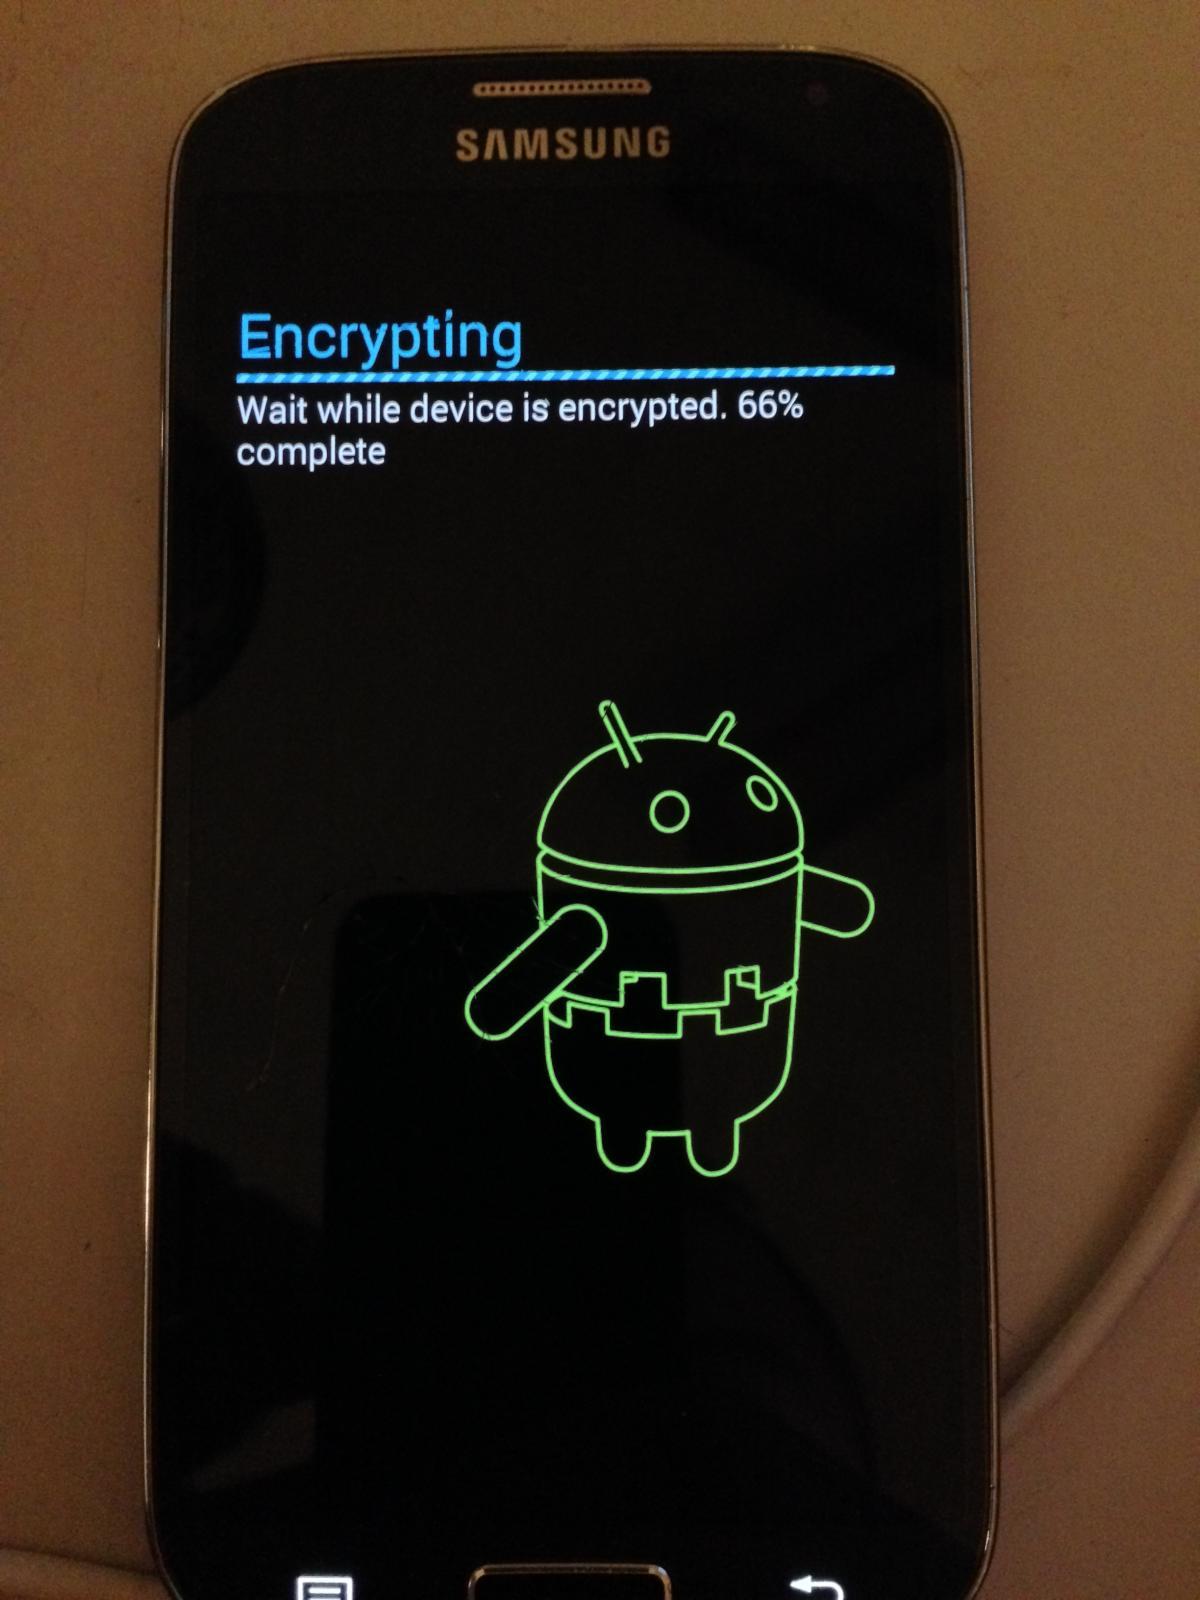
In Part 1 of this mini series we integrated Windows Intune with System Center 2012 R2 Configuration Manager. In Part 2 we added Support for iOS devices (Iphone, iPad). In Part 3 we learned the difference between App Package for iOS (*.ipa file) and applications from the Apple App Store. We learned how to deploy them to iOS devices and configured the deployment type so that the applications were made available to the user based on the iPhone or Ipad operating system version, in addition we also checked device Ownership information and deployed the application based on those requirements. In Part 4 we learned how to use and configure compliance settings in order to enable or disable certain configurable features on iOS devices. We enforced a Password requirement and enforced a minimum password length as this is a common requirement for organizations. In Part 5 we enabled support for Windows 8.1 devices (both Windows RT 8.1 and Windows 8.1 Enterprise) so that they could be managed via System Center 2012 R2 Configuration Manager integrated with Windows Intune. In Part 6 we deployed Windows 8.1 apps (appx) to Windows 8.1 devices. In Part 7 we looked at how to make Windows 8.1 store apps available in the Company Portal and how to make them featured apps with their own categories. Now we will add support for Android and learn how to deploy mobile device settings to Android devices. As security of company data is so important these days, being able to encrypt files on a device is a great asset, and we will use mobile device settings (Compliance Settings) to enable File encryption on these Android devices. Users can download the Android company portal app from Google's Android store (Google Play) and that allows them to enroll Android devices. With the Android company portal app, you can manage compliance settings, wipe or delete Android devices, deploy apps, and collect software and hardware inventory. If the Android company portal app is not installed on Android devices or if you are using Configuration Manager SP1, then you will not have all the management capabilities, such as inventory and compliance settings, but you can still deploy apps to Android devices. Step 1. Enable Android support In the System Center 2012 R2 Configuration Manager console, browse to Administration, expand Cloud Services and right click on the Windows Intune Subscriptions, select Properties like in the screenshot below Select the Android tab, and place a checkmark in Enable Android Enrollment like in the screenshot below click Apply, then ok, and that's it, you are done. Step 2. Create an All Android Devices Collection Create a new collection called All Android Devices liimited to All Mobile Devices, we will use this collection to house our Android devices and to target them with Android specific deployments. with a membership query for Android devices select SMS_R_System.ResourceId, SMS_R_System.ResourceType, SMS_R_System.Name, SMS_R_System.SMSUniqueIdentifier, SMS_R_System.ResourceDomainORWorkgroup, SMS_R_System.Client from SMS_R_System where SMS_R_System.OperatingSystemNameandVersion like "Android%" continue through to the end of the Create New Collection wizard. Step 3. Create a Configruation Item to configure mobile device settings for Android Next we will configure mobile device settings for Android. This is done in a few parts, first we create the configuration item containing the settings, next we add them to a configuration baseline, and finally we deploy the configuration baseline to our previously created All Android Devices collection. The following page on Technet explains the settings available for Android (for devices with the Android company portal app installed) and other mobile platform types, but to summarize the following 9 settings are currently available for the Android Platform (as of March 2014). In Assets and Compliance, select Configuration Items, right click on it and choose Create Configuration Item. Give it a suitable name such as Android Mobile Device File Encryption Settings and create a new category called "All Android - Enable file encryption" like in the screenshot below. As File encryption requires a passcode being set on the Android device, select Password and Encryption from the settings groups available For the Password screen, select a Minimum Password Length of at least 6 characters (6 characters containing at least one letter), like in the screenshot below, making sure to sure to set a checkmark in Remediate noncompliant settings otherwise the Password setting won't be forced For the setting, File Encryption on Mobile Device change the drop down menu to On, make sure to set a checkmark in Remediate noncompliant settings otherwise it won't Encrypt anything, Note: The Storage Card Encryption option is not currently available for Android so don't bother selecting it. In fact, the only option applicable to Android on this screen is File Encryption on Mobile device. For Supported Platforms de-select All, and only select Android as in the screenshot below If you did everything like I've shown above, then the Platform Availability screen will be blank, and that's ok, if you selected an additional option previous to this that was not compatible with the Android platform you'll see it here, if so click back and remove it, continue the wizard through to completion. Step 4. Create a Configuration Baseline Right click on Configuration Baselines and choose Create Configuration Baseline. A Configuration Baseline can contain one or more Configuration Items. give the baseline a useful name like All Android Mobile Device Management Baseline and click on Add, select the previously created Android Mobile Device Encryption Settings CI like in the screenshot below, and then select the All Android - Enable File Encryption category Step 5. Deploy the Configuration Baseline Now we are ready to deploy our mobile device settings for Android to a collection. In this example, we will deploy it to our previously created collection called All Android Devices. Note: You can deploy compliance settings for Mobile Devices to a user or device collection. If you deploy the baseline to a user collection, the compliance settings are applied to all the enrolled devices for those users. Right click on the All Android Mobile Device Management baseline configuration baseline created above and choose Deploy. select the option to Remediate and browse to the device collection called All Android Devices, select your desired compliance evaluation schedule, every 1 day is sufficient in a lab, perhaps every 7 days in production is better. Step 6. Enroll an Android Device On an Android 4.0, 4.1 or 4.2 device start up Google Play (Play Store) and search for Company Portal, you should see Windows Intune Company Portal listed, select it and choose Install click Accept to the App Permissions and click Open once installed, you'll be prompted to sign in using your organizational account, do so by clicking on Add this device enter your credentials and click on Sign In, it should say adding your device.... and after a delay you should be prompted to Active device administrator, click on Activate and then it continues adding your device, after which you'll be displayed with the Company Portal Step 7. Check the status of your Android devices in the console In the Configuration Manager console, check All Mobile devices, your Android devices should appear here first (once they have enrolled successfully) You should also check the All Android Devices collection next, if your device doesn't appear here yet try Update Membership After hardware inventory data has been uploaded you can start Resource Explorer and see what details it provides, including if the device is a Jailbroken or rooted device or not Lastly you can monitor the Deployment status of your Configuration Baseline by clicking on View Status to see how compliant your Android devices are for the deployed baseline. To view status, click on the Configuration Baseline, select Deployments, and right click on the deployment, then select View Status like in the screenshot below. Step 8. Verify the settings on an enrolled device Now everything is in place for your changes to take place, on a targeted Android you should see that notifications arrive for the two major changes we initiated namely Device Passcode File Encryption The following screenshot shows what the notification will look like on a Samsung Galaxy 4 when entering the new Password you'll be prompted to enter at least 6 characters and you'll be reminded that it must contain at least one number, exactly as we set in the Mobile Device Compliance Settings The File Encryption screenshots are shown below, when clicking on the Encrypt Device in the Android notification screen. Tip: Enforcing Compliance on the Android device requires user interaction. The user is prompted via notifications and the user must consent prior to the change taking place. Clicking on Encrypt Device will prompt for your password and one final screen before the encryption begins... Once it does begin the device will restart (a few times) while it encrypts the file system Once Encryption is complete you can verify the compliance of the device in the Console, by clicking on More Details That's it, Job done ! Thanks to my eldest son Christopher for lending me his Samsung for this guide. Recommended Reading CM12 in a Lab - How can I manage modern devices using System Center 2012 R2 Configuration Manager ? - Part 1 CM12 in a Lab - How can I manage modern devices using System Center 2012 R2 Configuration Manager ? - Part 2 CM12 in a Lab - How can I manage modern devices using System Center 2012 R2 Configuration Manager ? - Part 3 CM12 in a Lab - How can I manage modern devices using System Center 2012 R2 Configuration Manager ? - Part 4 CM12 in a Lab - How can I manage modern devices using System Center 2012 R2 Configuration Manager ? - Part 5 CM12 in a Lab - How can I manage modern devices using System Center 2012 R2 Configuration Manager ? - Part 6 CM12 in a Lab - How can I manage modern devices using System Center 2012 R2 Configuration Manager ? - Part 7 Summary Android devices are becoming common place in our workplaces and homes, from sophisticated phones to feature rich tablets, they are gaining market share rapidly. In this post we learned how to enable support for Android devices in System Center 2012 R2 Configuration Manager with Windows Intune integration. We also saw how to enroll those devices, and how to deploy Mobile Device Settings to control up to 9 different settings on these devices. We also looked at the Company Portal and in our next post we'll look in more detail at it's features and how to deploy Apps. Downloads For Offline reading you can download a Microsoft Word copy of this guide below. How can I manage modern devices using System Center 2012 R2 Configuration Manager Part 8.zip Continue on to Part 9.