anyweb
-
Posts
9181 -
Joined
-
Last visited
-
Days Won
366
Everything posted by anyweb
-
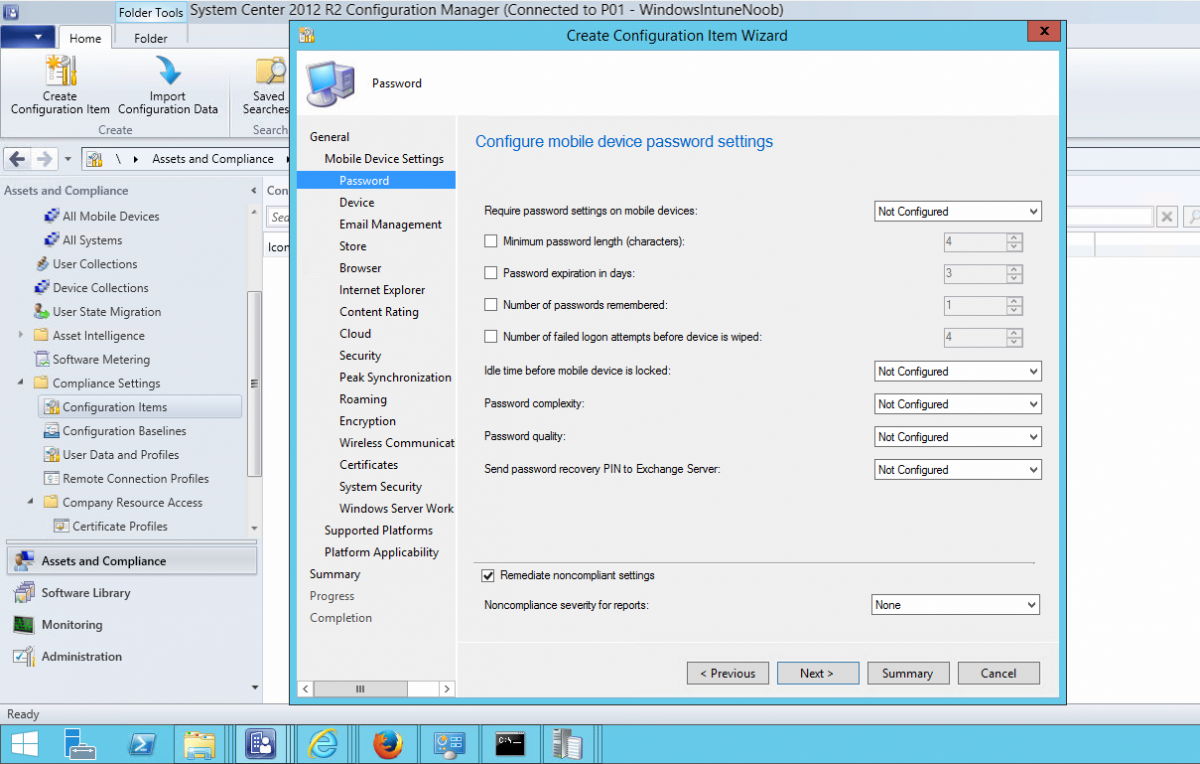
 you manage your mobile settings (policies) in CM12 using Compliance Settings, I will post this shortly when and if i get time, but here's a screenshot to give you an idea.
-
thanks David ! I will be covering Android devices shortly, just need time to write the guides... but basically you enable Android support (like we did with iOS support in part 2) and then download and install the SSP from Google Play, once done enroll the device and you'll be able to manage it via Configuration Manager - not Intune, once you set the management authority to Configuration Manager then all management of these devices is done via Configuration Manager, so yes what you are seeing is correct, I assume the collection you are referring to is the Windows Intune Users collection we created above in Configuration Manager and not in Intune...?
-
you should be able to deploy he R2 version of the client without having the SP1 client installed first, no problem
-
When I blogged recently about Microsoft's plans on the operating-systems front following Windows 8.1, I mentioned a couple of "spring 2015" releases. It turns out the Microsoft codename for that wave of deliverables is Threshold. A couple of my contacts have confirmed that Microsoft Executive Vice President Terry Myerson recently mentioned the Threshold codename in an internal email about plans for his unified operating-system engineering group. If all goes according to early plans, Threshold will include updates to all three OS platforms (Xbox One, Windows and Windows Phone) that will advance them in a way to share even more common elements. (The codename Threshold, for those wondering, derives from the planet around which the first halo ring orbited in the original Halo game launched back in 2001. Threshold joins "Cortana," Microsoft's answer to Siri, as yet another codename with its origins in the Xbox franchise.) From what I've heard, Threshold doesn't refer to a single Windows OS -- not even the expected, converged hybrid comprised of the Windows Phone OS and Windows RT. Instead, the codename refers to the wave of operating systems across Windows-based phones, devices and gaming consoles. The Xbox One OS, Windows 8.x OS and Windows Phone 8 OS already share a common Windows NT core. As we've heard before, Microsoft is working to deliver a single app store across its myriad Windows platforms. Company officials also are laboring to make the developer toolset for all three of these platforms more similar. But Threshold will add another level of commonality across Microsoft's various Windows-based platforms, sources said. With the Threshold wave, Microsoft plans to support the same core set of "high value activities" across platforms. These high-value activities include expression/documents (Office, and the coming "Remix" digital storytelling app, I'd think); decision making/task completion (Bing, I'd assume); IT management (Intune and Workplace Join, perhaps?) and "serious fun." CEO Steve Ballmer mentioned this concept of high-value activities at back in July when he announced Microsoft's cross-company reorg to make the company more focused around its new "One Microsoft" mission. Before Microsoft gets to Threshold, the company is on track to deliver an update to Windows 8.1 (known as Windows 8.1 Update 1) around the same time that it delivers Windows Phone "Blue" (Windows Phone 8.1). That's supposedly happening in the spring 2014/Q2 2014 timeframe, from what my sources have said. I've asked Microsoft officials if they'd confirm any of this information about Threshold. No word back so far. By Mary Jo Foley via Zdnet - http://www.zdnet.com/microsoft-codename-threshold-the-next-major-windows-wave-takes-shape-7000023832/
-
hi Malik4u 1. i've added the url and here it is again 2. yep should be fine, but verify it as listed above.
-
hi all, here are my slides from the presentation I gave at TechCamp 2013 in Ireland, the observant amongst you will figure out that my current mini-series on 'modern device management' is closely related to this content. CM12 in a Lab - How can I manage modern devices using System Center 2012 R2 Configuration Manager ? - Part 1 CM12 in a Lab - How can I manage modern devices using System Center 2012 R2 Configuration Manager ? - Part 2 Download the slides here - Niall Brady - TechCamp2013.pptx there are ample notes describing the content in the slides themselves. cheers niall

-
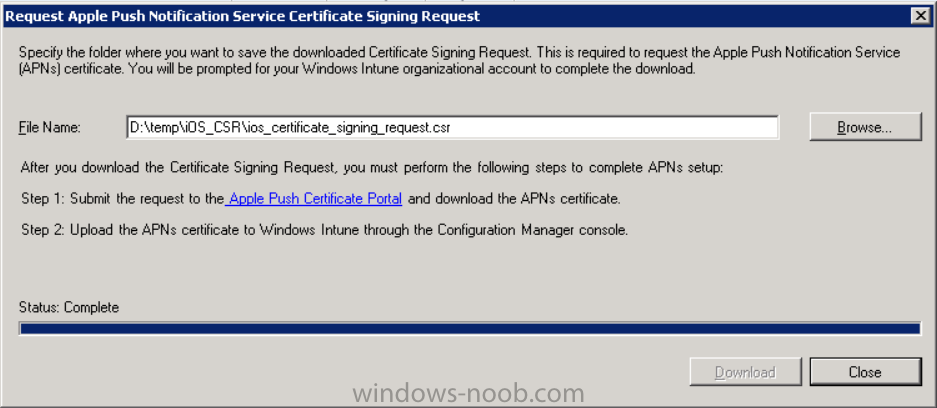
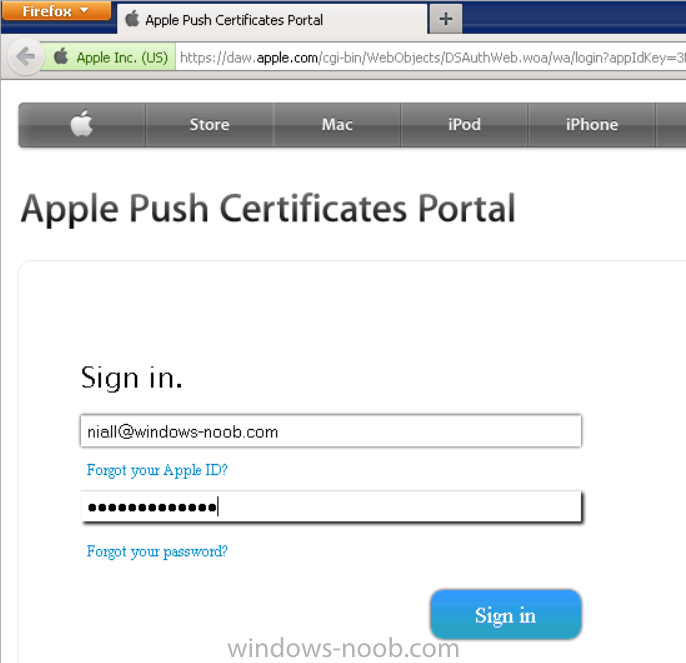
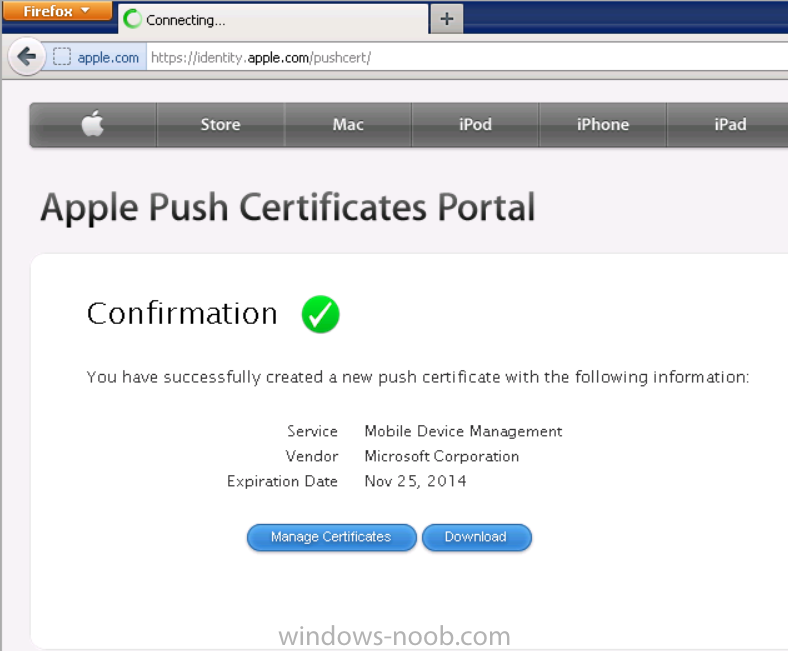
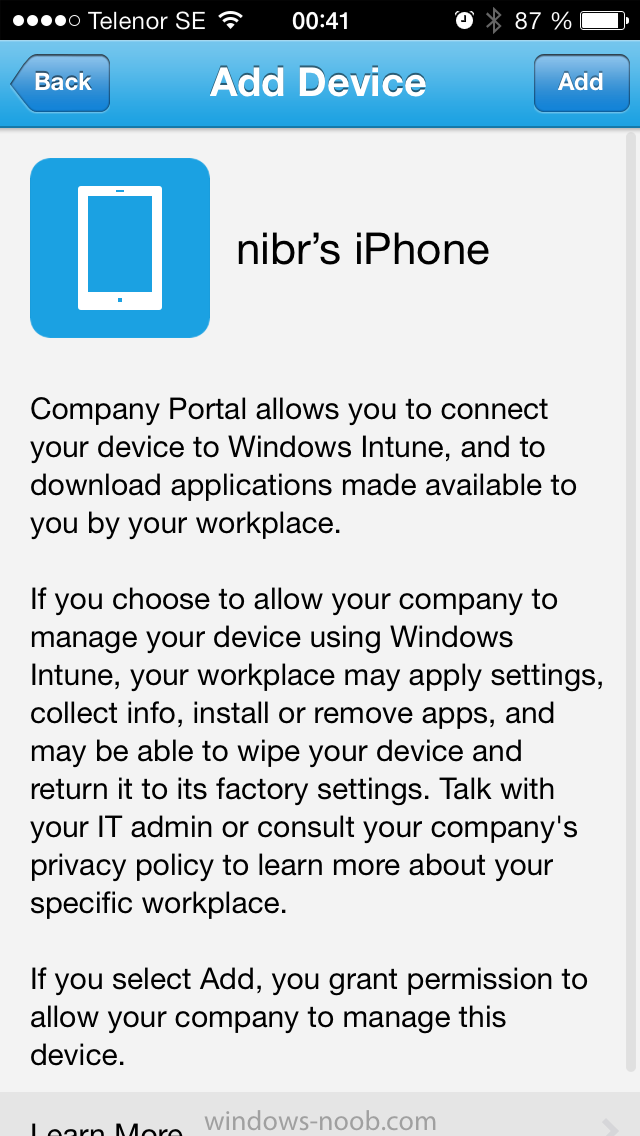
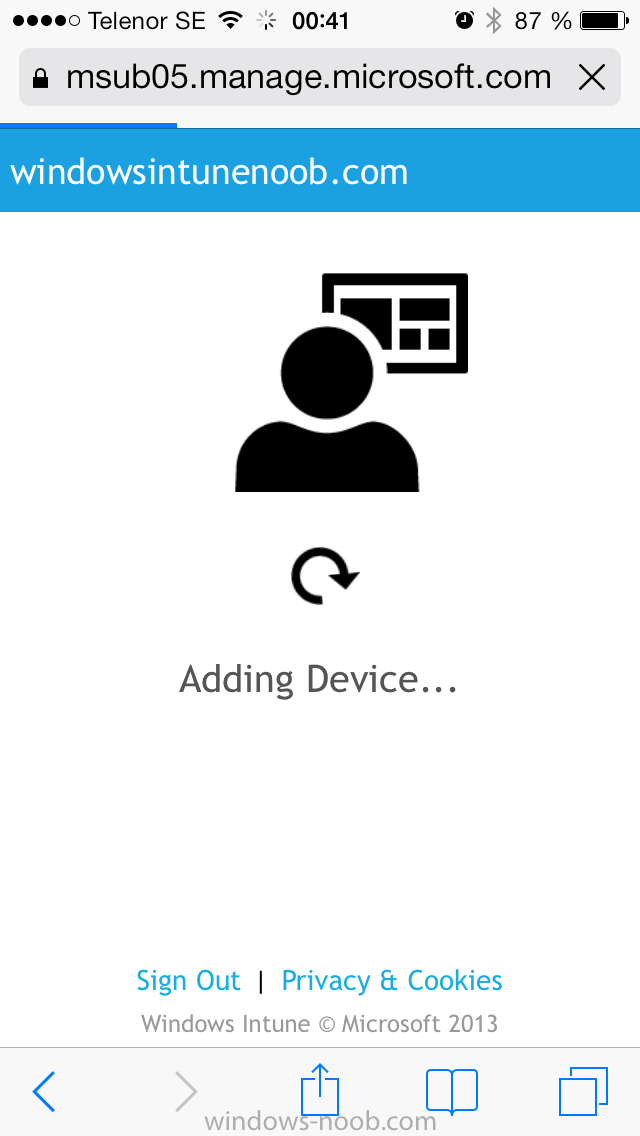
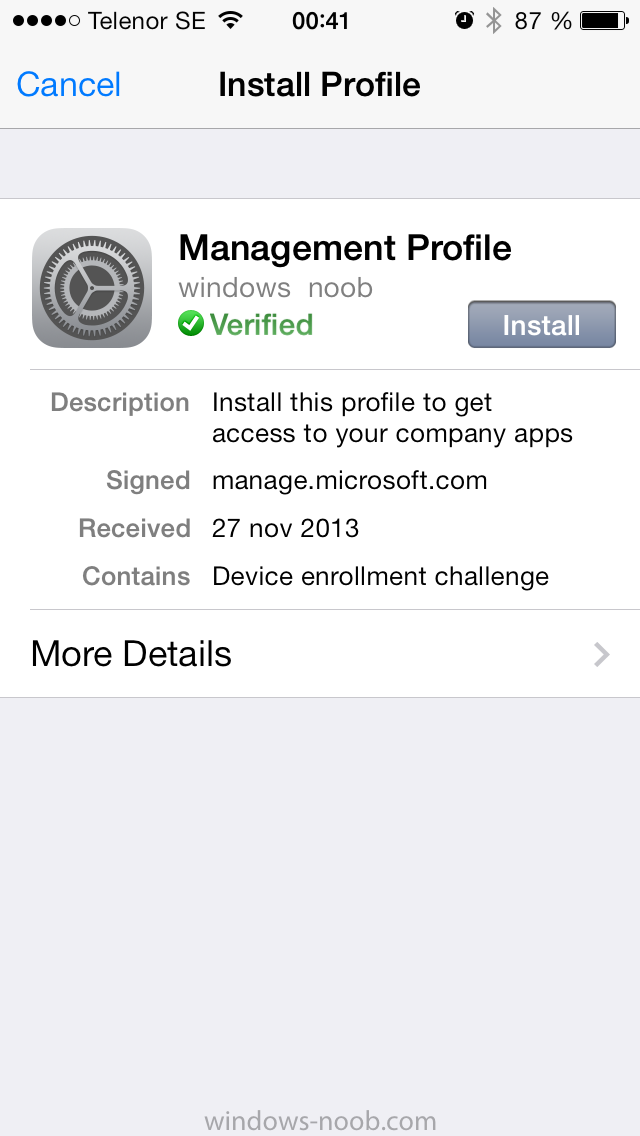
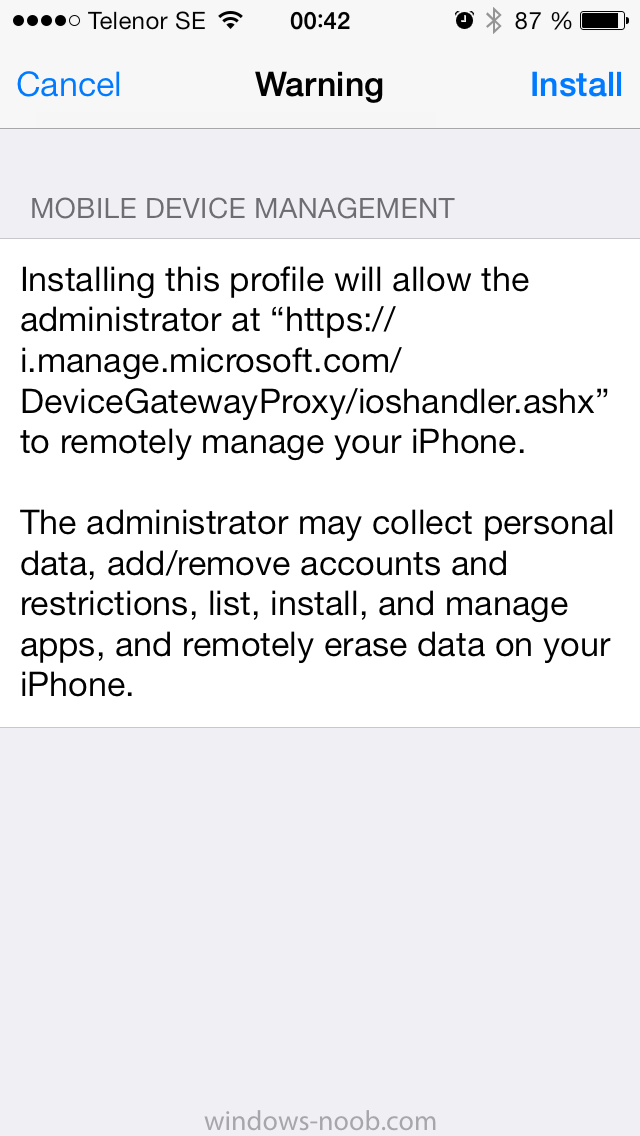
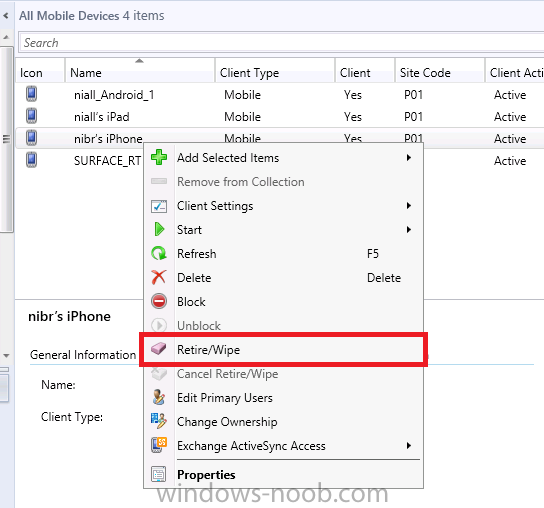
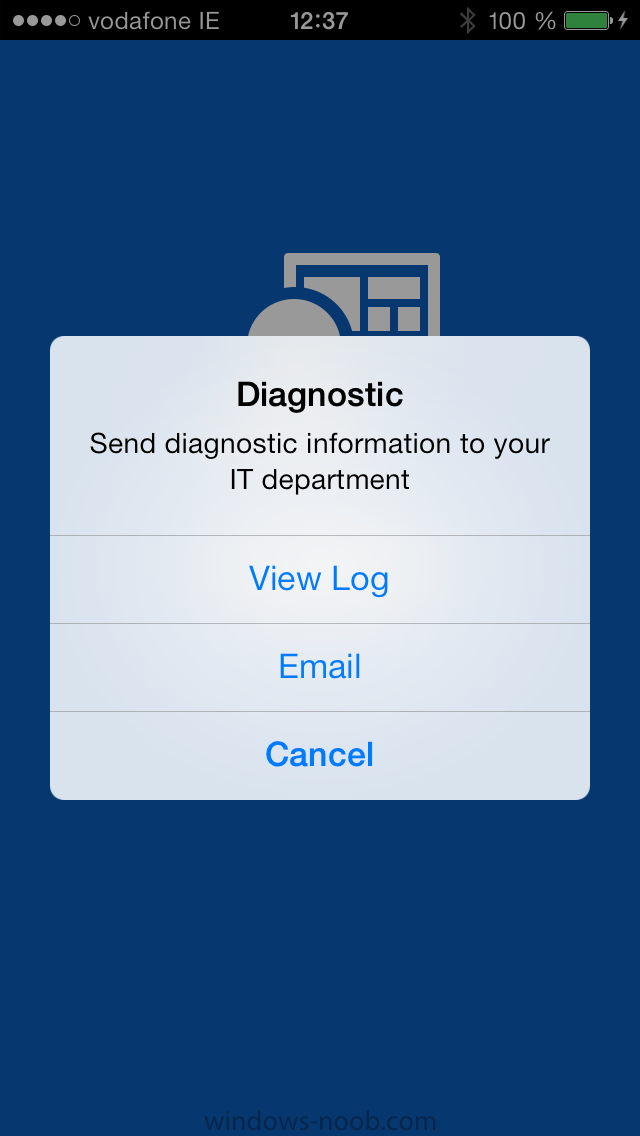
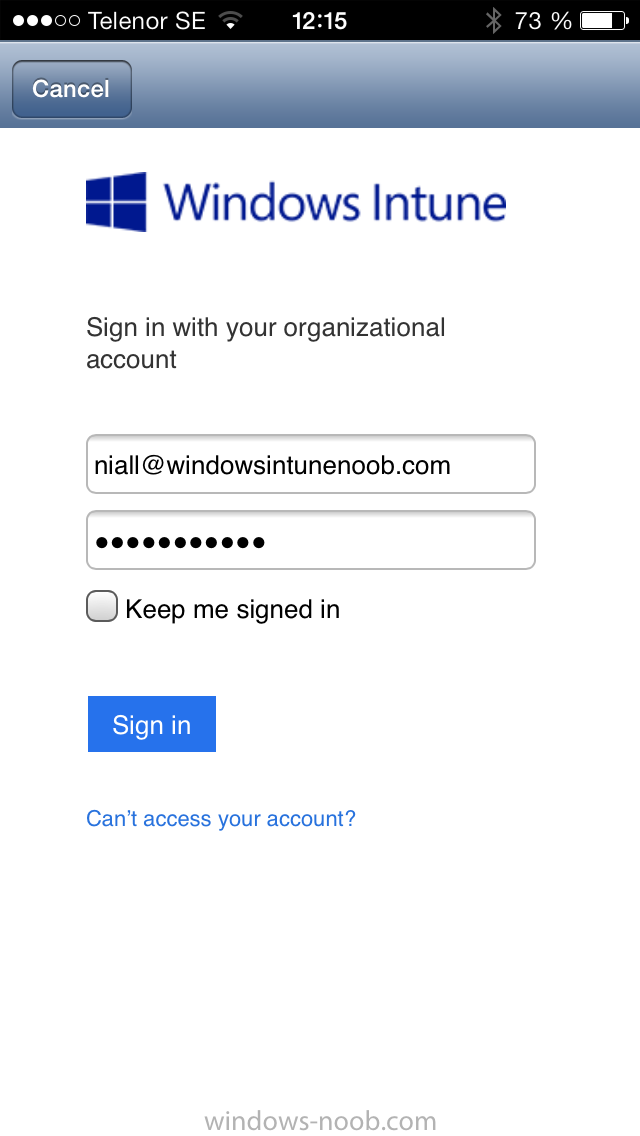
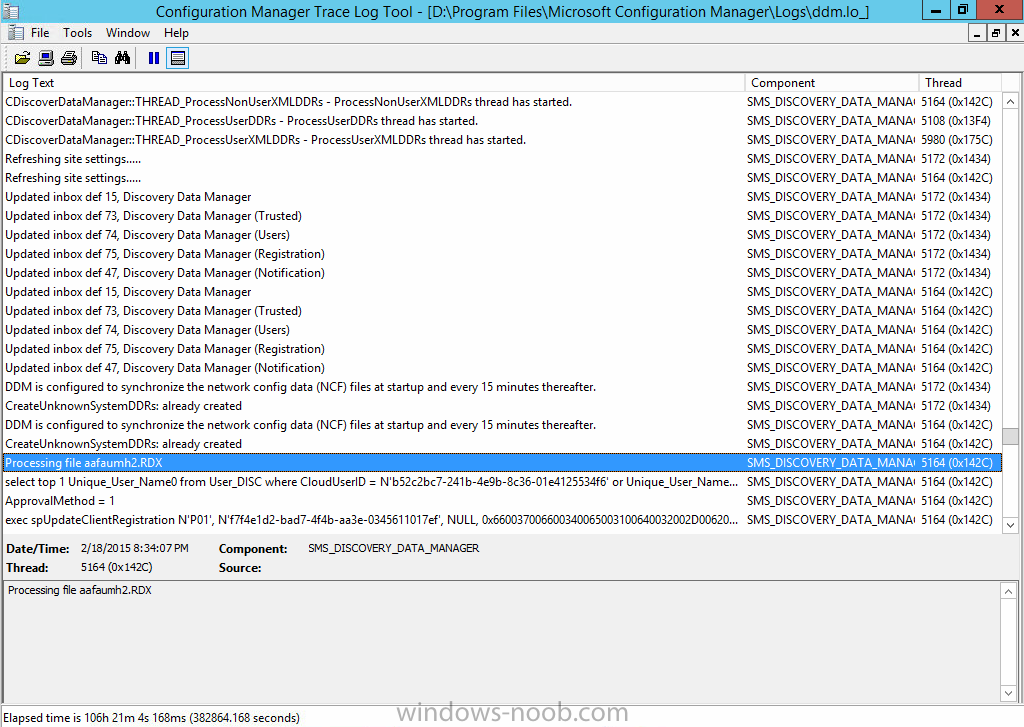
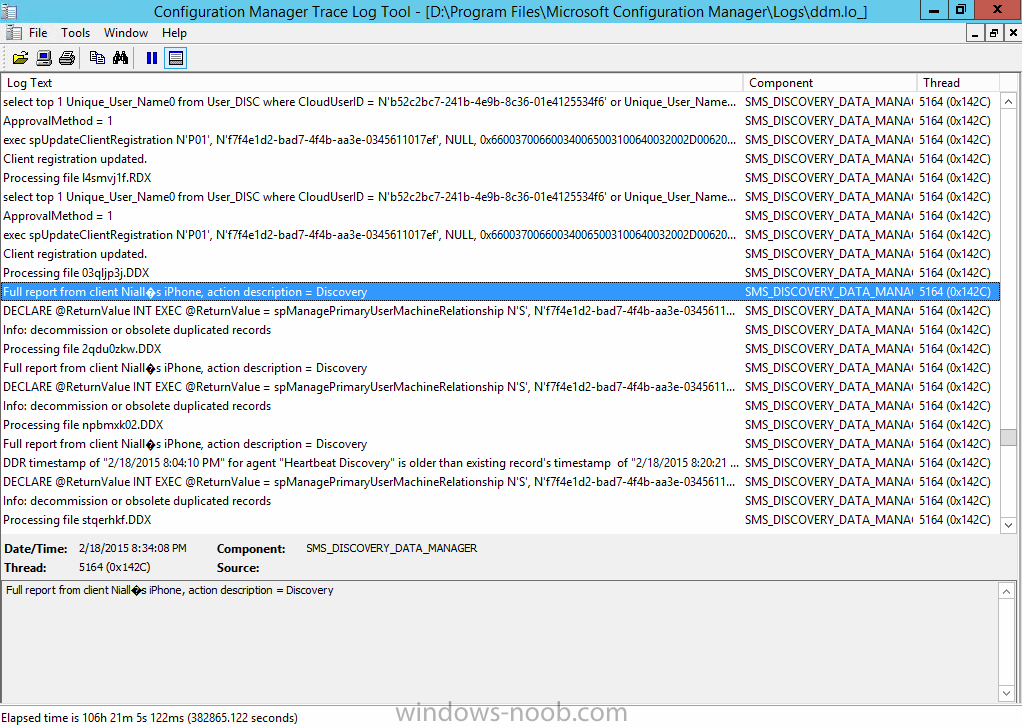
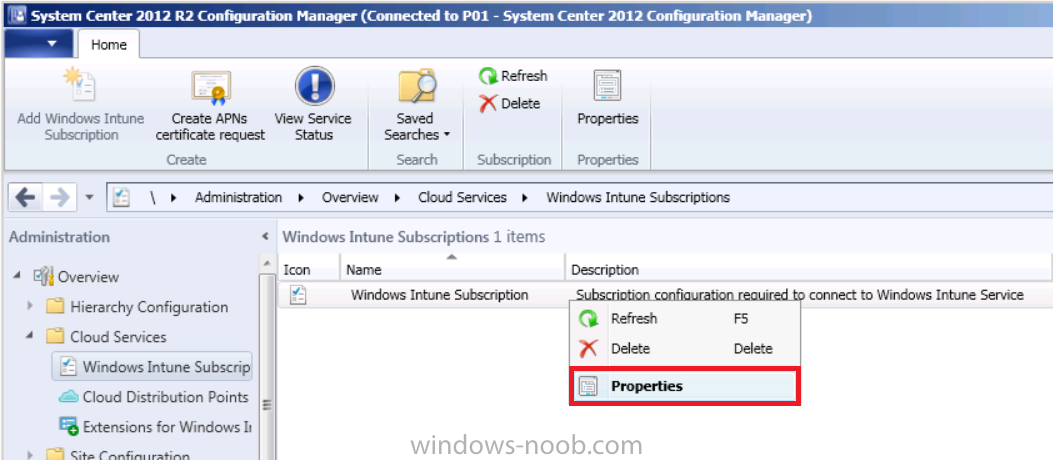
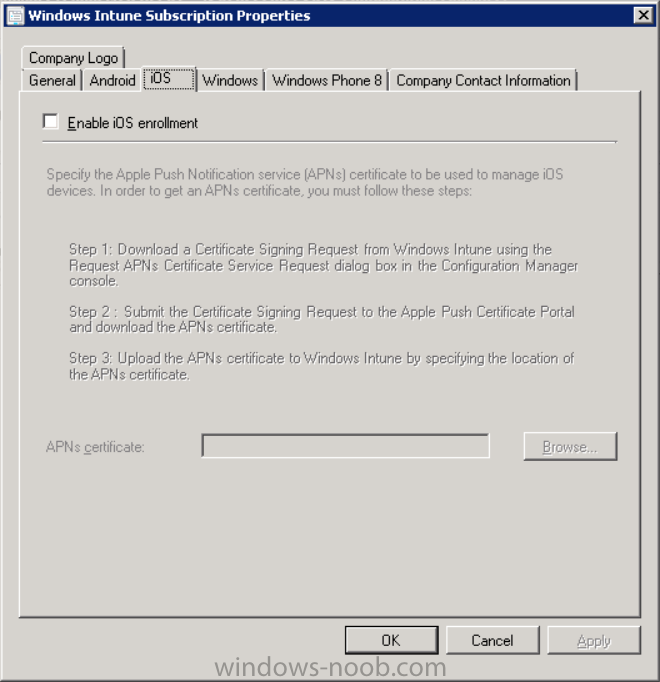
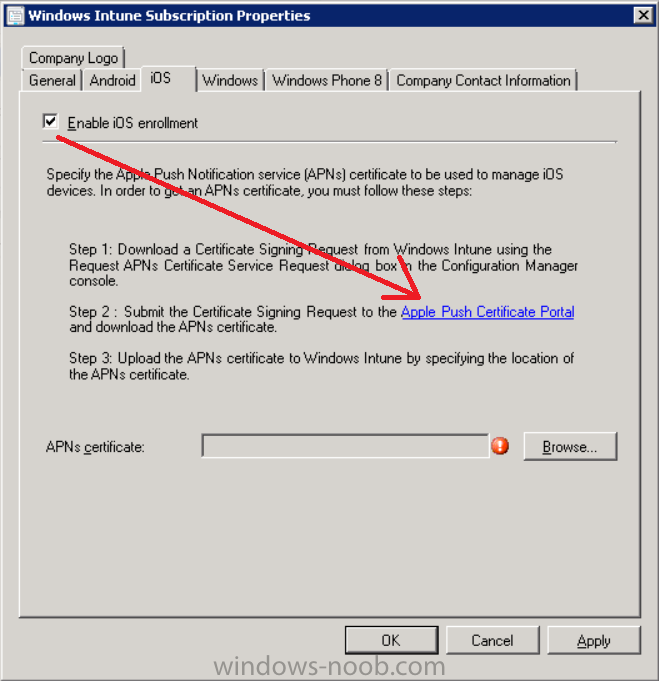
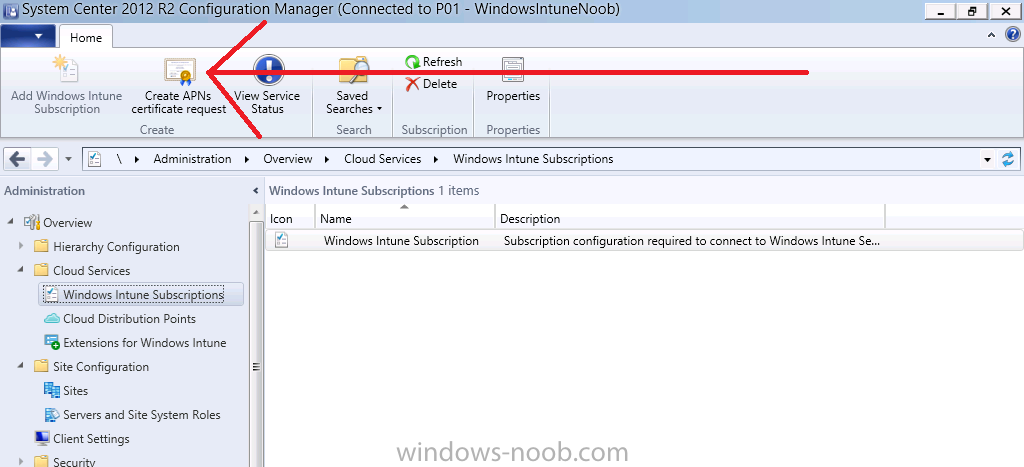
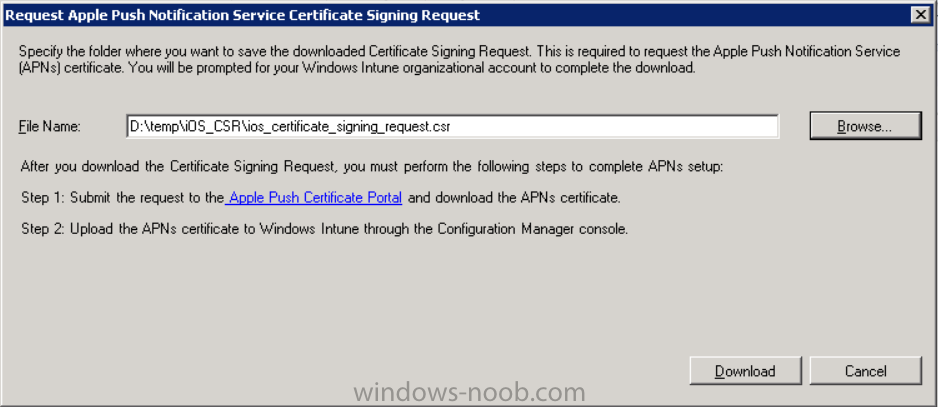
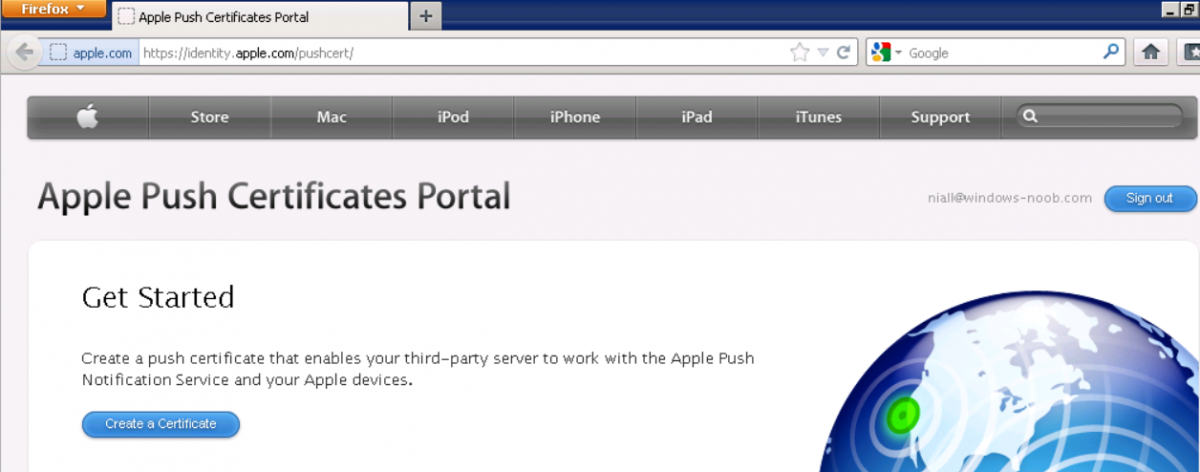
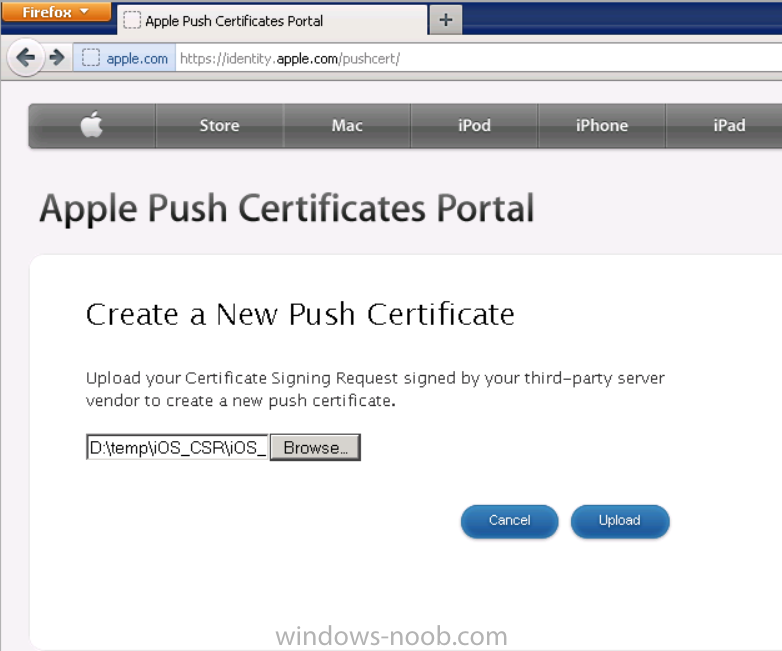
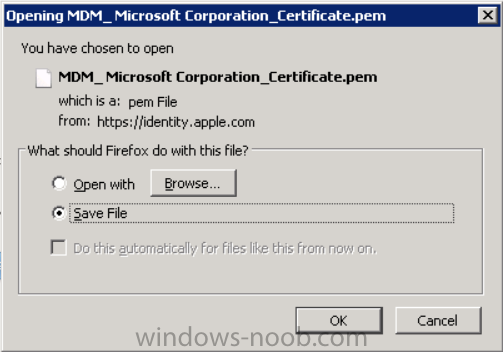
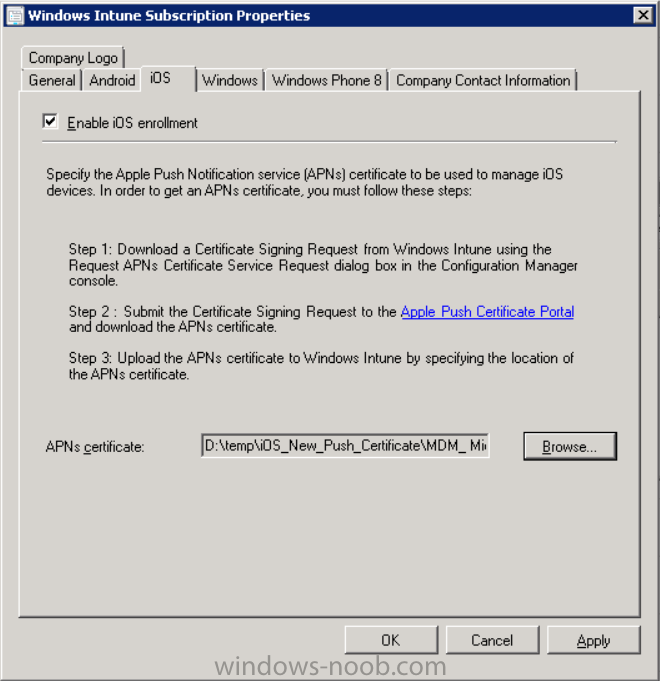
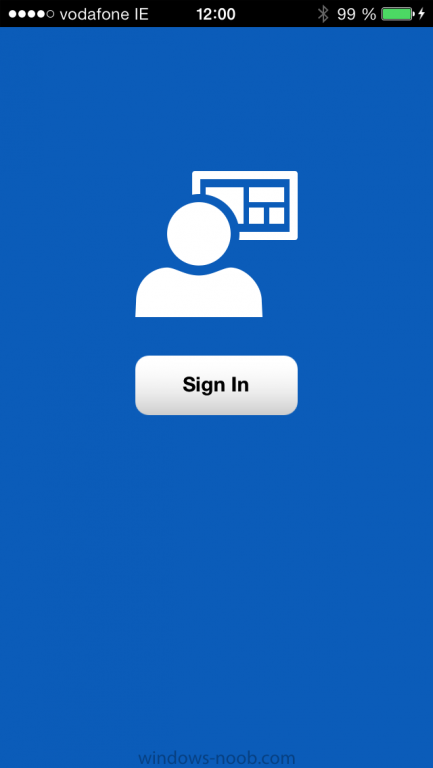
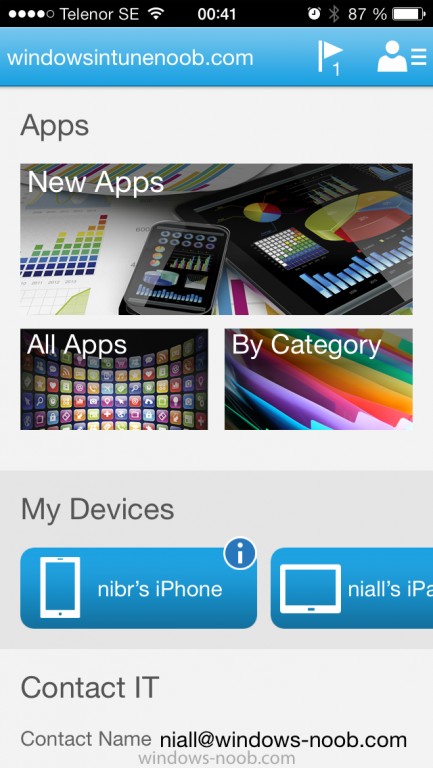
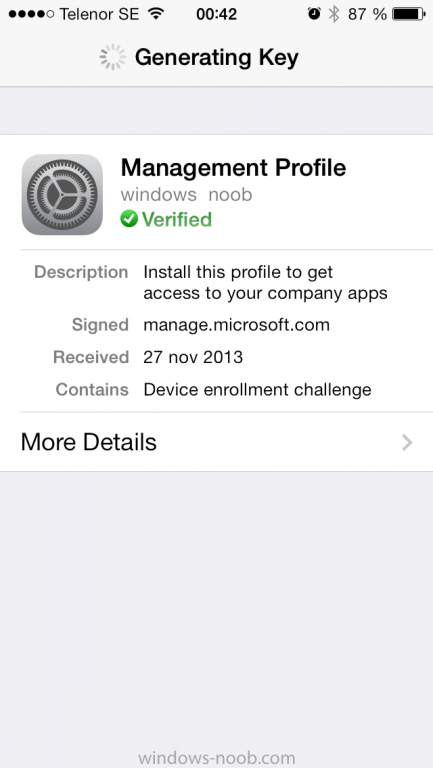
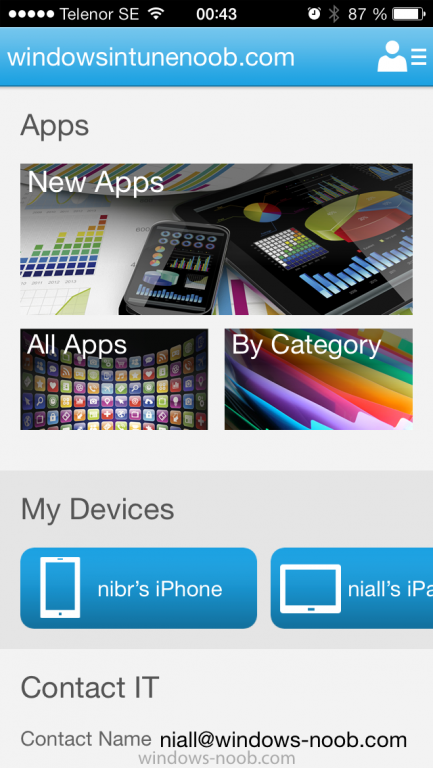
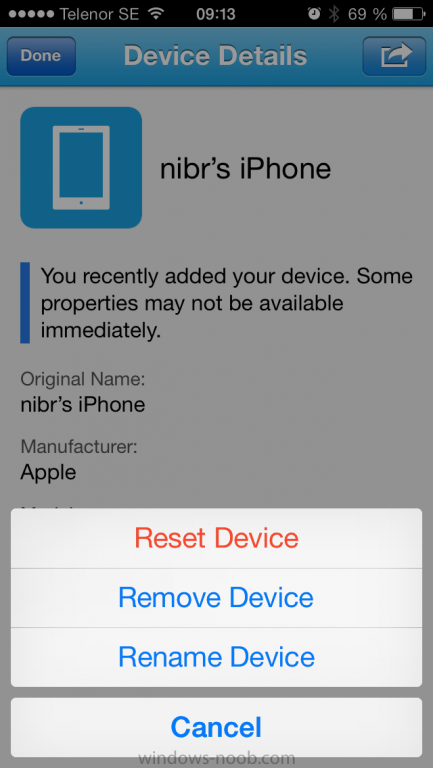
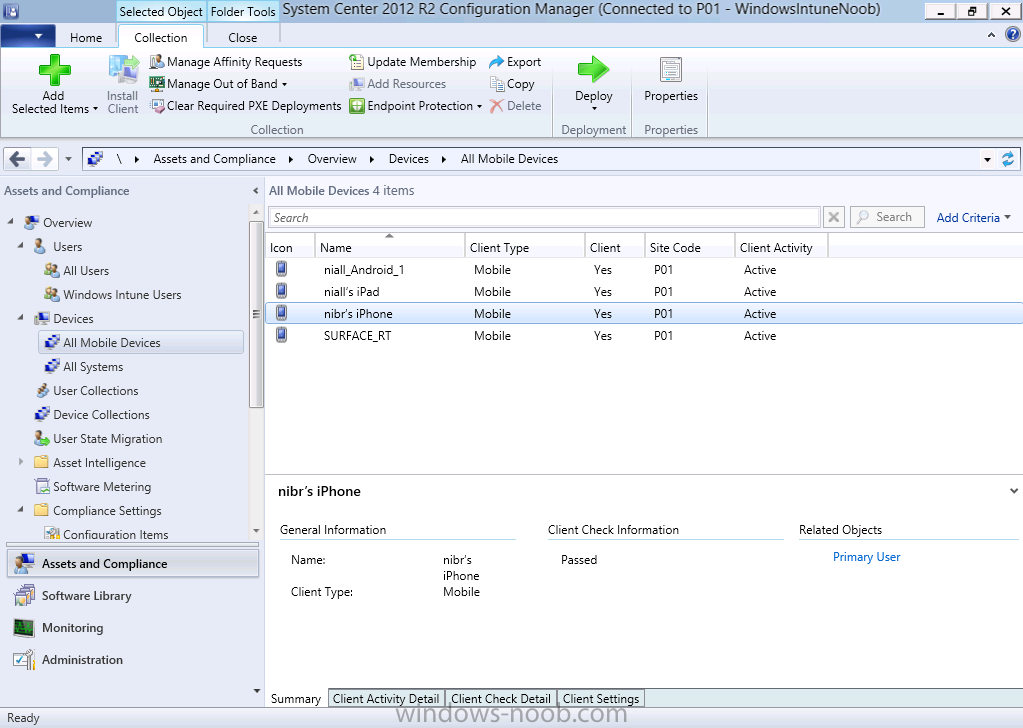
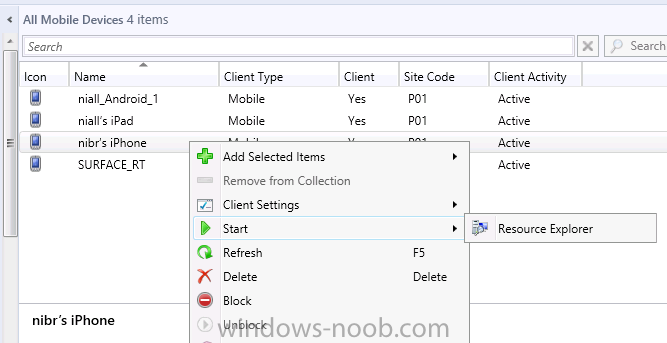
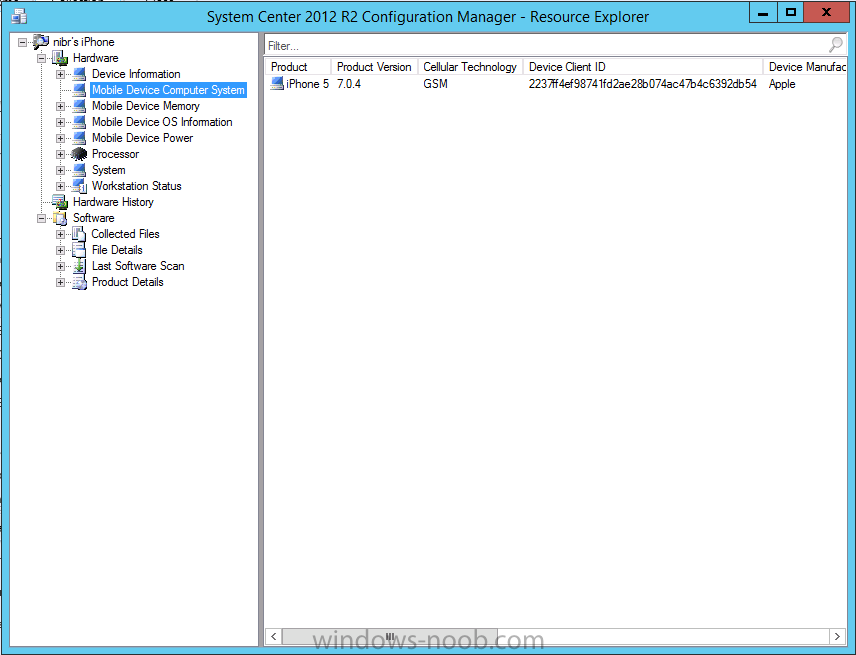
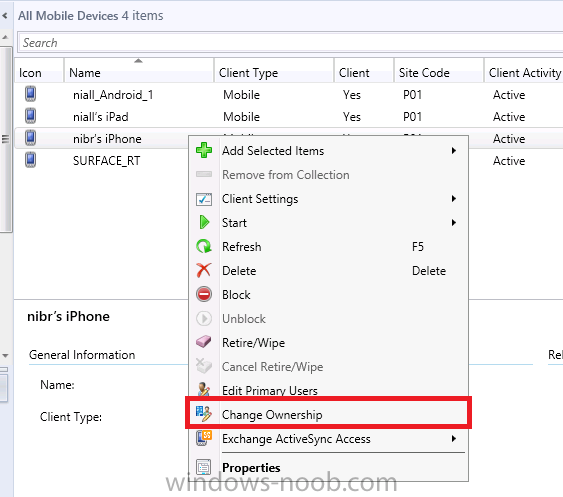
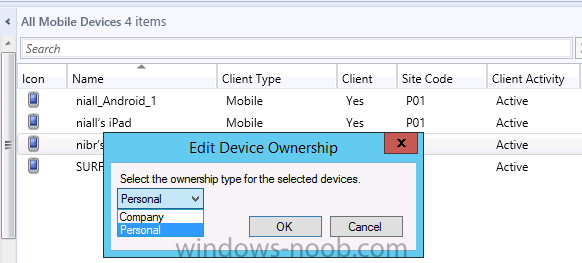
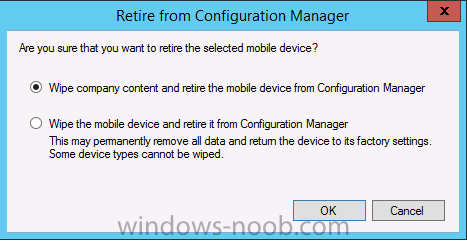
Introduction In Part 1 of this mini series we integrated Windows Intune with System Center 2012 R2 Configuration Manager. In this part we will add Support for iOS devices (Iphone, iPad). Many companies today have users with company or personal owned iPhones with one or more iPads so being able to manage these devices and offer them application choice via a Company Portal is a good thing. In order for iOS devices to check for policy, they need to be contacted by the Apple Push Notification service (APNs). Each company needs an APNs certificate to allow Windows Intune to contact Apple to make this request. When a new policy is created, Intune then contacts Apple for those devices, the devices then check the Intune service for new policy. Users can enroll iOS devices by using the iOS company portal app which was made available in the App store on November 19th 2013. The Windows Intune company portal app can be installed on iOS devices as of iOS 6. The company portal app will allow users to perform the following actions: Change or reset passwords. Download and install company apps. Enroll, unenroll, or wipe company content from their devices. Step 1. Create an APNs Certificate Request Before adding iOS enrollment support we first need to complete a few steps to enable our iOS devices to talk to Windows Intune. In the console click on Create APNs certificate request. You’ll be prompted where to store the Certificate Signing Request, give it an appropriate path and file name such as in the example below, then click on Download and enter your Windows Intune credentials when prompted. Once the download is complete click on close. Step 2. Submit the request to the Apple Push Notification service portal. In the Configuration Manager console, browse to Cloud services in Administration, select your Windows Intune Subscription and right click it, choose properties. the brings up the Windows Intune Subscription properties, click on the iOS tab. Place a checkmark in Enable iOS enrollment and then click on the Apple Push Certificate Portal link as shown in the example below: Note: Please use something other than Internet Explorer for the steps below otherwise you may have issues with the certificate PEM files from Apple. Instead use FireFox or Chrome for these steps. You have been warned ! sign in with your (previously created) Apple ID to the Apple Push Certificates Portal, once logged in to the Apple site, click on Create a Certificate Agree to the terms and conditions if you want to continue and click on Accept Browse to the certificate signing request file you saved in the steps above and click on Upload Once it’s done creating your certificate you should receive a confirmation like the example below, however if you did not – make sure to read my note above about Internet Explorer. Tip: Notice the expiration date, it is one year from the day you created the certificate. You’ll have to repeat the process of creating a new certificate one year from now to continue managing iOS devices. Click on Download to download the PEM file (if it’s not a PEM file read my NOTE above) and then save the PEM file Copy the newly downloaded PEM file to somewhere useful like D:\temp\iOS_New_Push_Certificate\. Step 3. Add the APNs Certificate Back in the Enable iOS Enrollment Wizard, browse to the PEM file above and click on Apply then OK. Close the wizard. Step 4. Enroll an iOS device On an iOS device open the Apple App Store., search for Company Portal, select the Windows Intune Company Portal from the list of available apps Install it by clicking on Open/Install. Once installed locate the app on your device and click on it. Enter your public domain Intune credentials (or Active Directory credentials if you setup ADFS) Click on sign in and you will be presented with the company portal. Notice the 'i' beside my phone device, that means it is not enrolled yet. Click on the device to start the enrollment procedure Click on Add Device, You will be presented with information about the portal, click on Add in the top right corner. the device get's enrolled to Windows Intune. You'll get prompted to install the MDM Profile, click on Install then click on Install Now... and off it goes... you'll again get prompted to click on Install (with a warning about what the administrator can do with your phone) and if all goes well your device will be successfully enrolled. Tip: If you have any problems with the enrollment, shake the phone/ipad while the company portal is open and you'll see the following screen, this allows you to troubleshoot via viewing the log file or you can email the log file. Note: if you shake the device during enrollment (while safari is open) nothing will happen, simply click on the link at the bottom of the enrollment screen to go back to the company portal and Shake the device then, the troubleshooting ability should then appear. Once your iOS device has enrolled you can verify things on the server side, for example open the DDM.Log to review details of the device DDR being created (see below), a file is spotted in the inbox and shortly after some discovery information is sent including the device name and the username used to enroll the device and discovery info being processed Step 5. A quick look at the features. In the company portal you can now review what features are available on this device by clicking on the device name , on the phone itself you can do the following from the portal reset rename remove as shown below and of course you can select to install apps from the app store (we havn't added any yet, that is coming in the next part of this series). In the Configuration Manager console browse to Assets and Compliance, your device should be listed there in the All Mobile Devices collection. right click the device and choose Start, Resource Explorer and you'll get to see what details have been captured from your iOS device, cool ! you can also define the ownership of the device as there are new Global Conditions set up to allow you to target software/settings to devices based on ownership. Note: All devices enrolled via Intune into Configuration Manager will have the device ownership set to Personal by default. Right click the device and choose Device Ownership choose Personal or Company from the options available. And we can also do selective wipe/retire via the Retire/Wipe menu This pops up a new menu describing the two choices available to you. Related reading How can I manage modern devices using System Center 2012 R2 Configuration Manager ? - Part 1 James Bannan, an awesome Configuration Manager MVP - http://www.jamesbannanit.com/ James and Peter demoing BYOD - Unifying BYOD Management with Windows Intune and Configuration Manager 2012 - http://channel9.msdn...and/2013/WCL309 What’s New in System Center 2012 R2 Configuration Manager - http://technet.micro...y/dn236351.aspx How to Manage Mobile Devices by Using Configuration Manager and Windows Intune http://technet.micro...e10#BKMK_RTcert Support Tool for Windows Intune Trial Management of Window Phone 8 - http://www.microsoft...s.aspx?id=39079 Set up Windows Intune Direct Management for Windows Phone 8 Mobile Devices - http://technet.micro...y/jj733640.aspx How to: Edit DNS records - A, CNAME, MX, TXT, and SRV https://help.hover.c...-MX-TXT-and-SRV Configuring Configuration Manager SP1 to manage mobile devices using Windows Intune- http://blogs.technet...ows-intune.aspx Deploying and Configuring Mobile Device Management Infrastructure - http://channel9.msdn...MS/2013/UD-B309 Windows Intune Company Portal App - http://blogs.technet...-available.aspx Summary We've learned how to successfully enroll iOS devices using the Windows Intune Company Portal available from the Apple App Store. Once enrolled the devices appear in Configuration Manager and can be managed. That's all for now, In our next part we will learn how to add applications for iOS devices in our Company Portal. Until next time, adios! Downloads You can download a Microsoft Word copy of this guide here: How can I manage modern devices in System Center 2012 R2 Configuration Manager Part 2 - Adding support for IOS devices.zip cheers niall


-
sure thing
-
to be clear, you need to install ADK 8.0 to install SP1 and you then need to uninstall ADK 8.0 and install ADK 8.1 to upgrade to R2.
-
if the task sequence is failing for whatever reason then the client WILL be stuck in provisioning mode, this is NORMAL and a symptom of the failed installation. what you need to find out is why the installations are faliing, and fix that problem cheers niall
-
I have the same problem and have raised a ticket on connect with Microsoft
-
are any updates being installed as part of the task sequence (for windows silverlight or .NET)
-
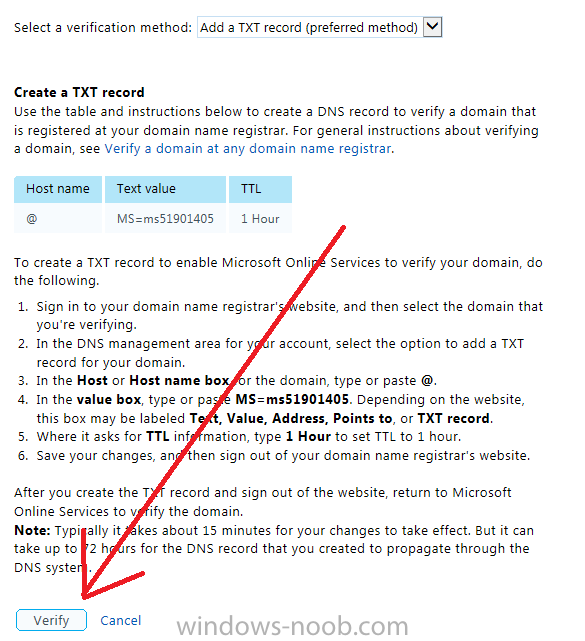
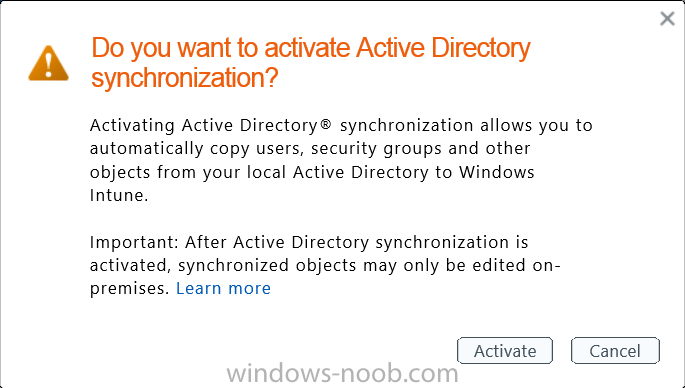
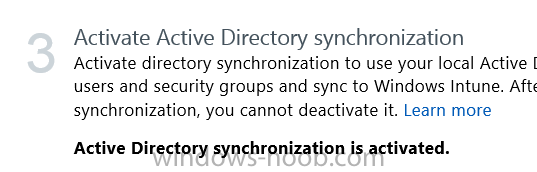
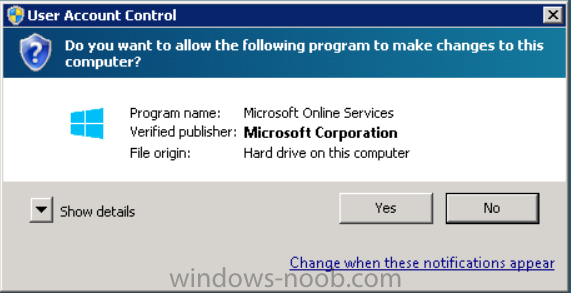
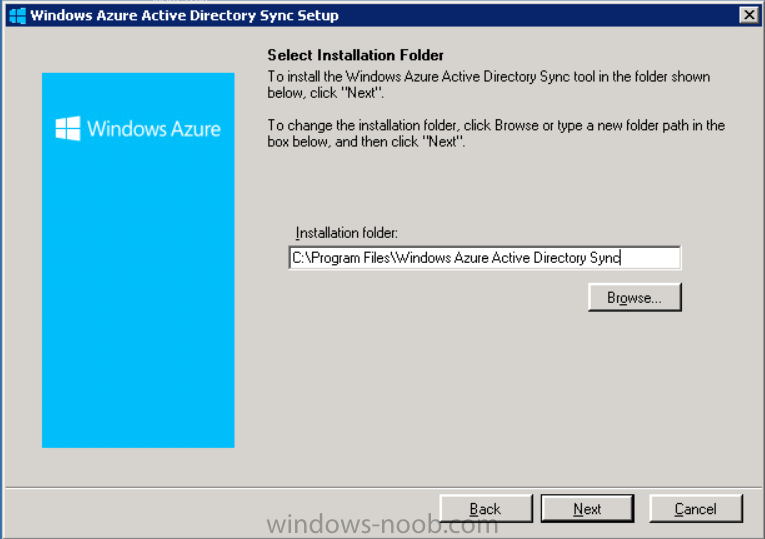
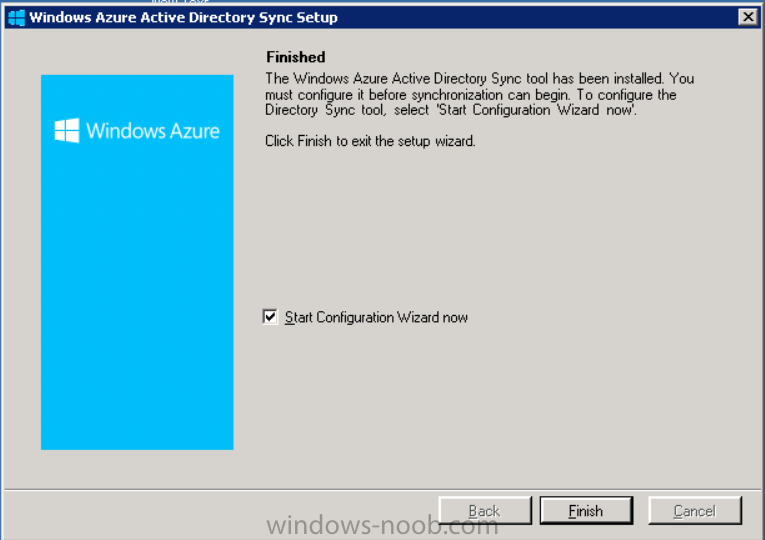
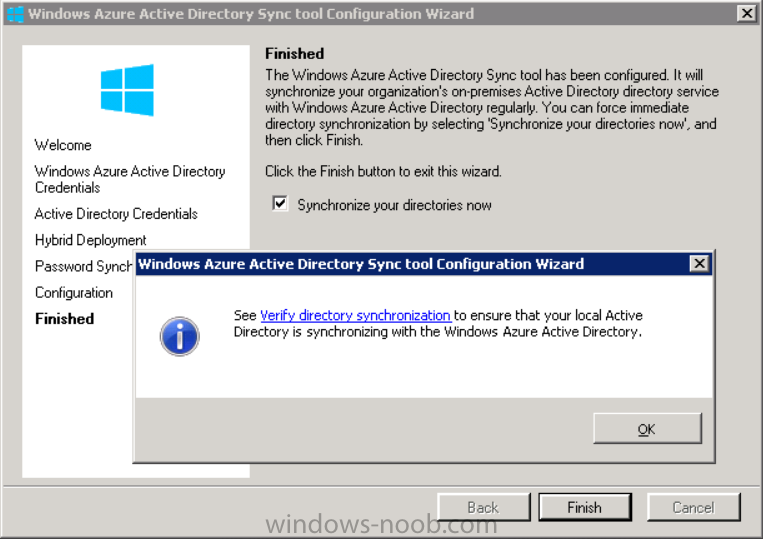
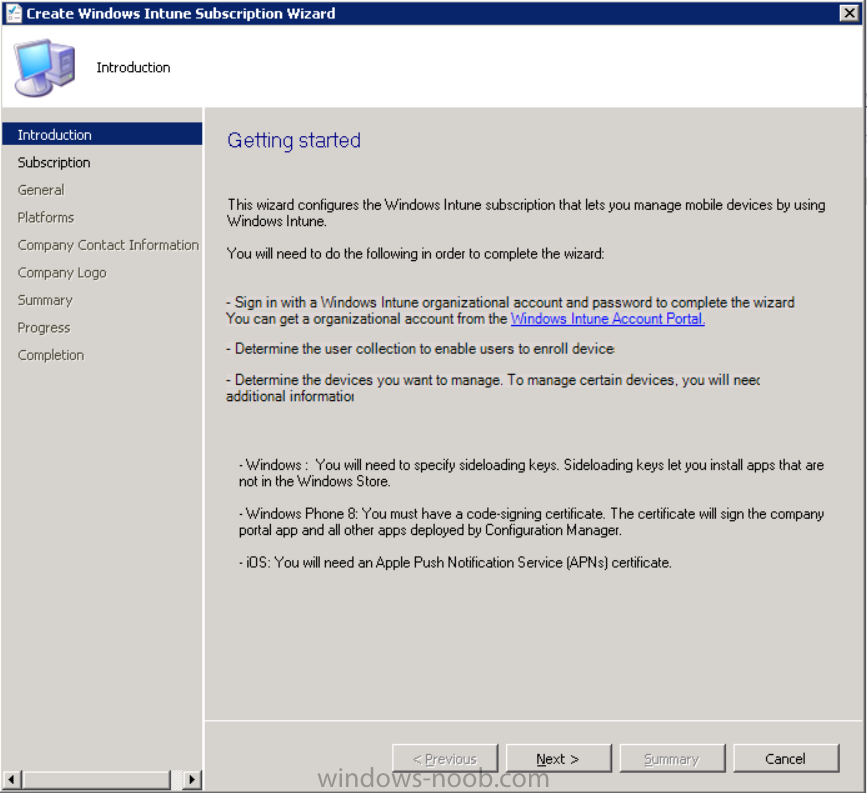
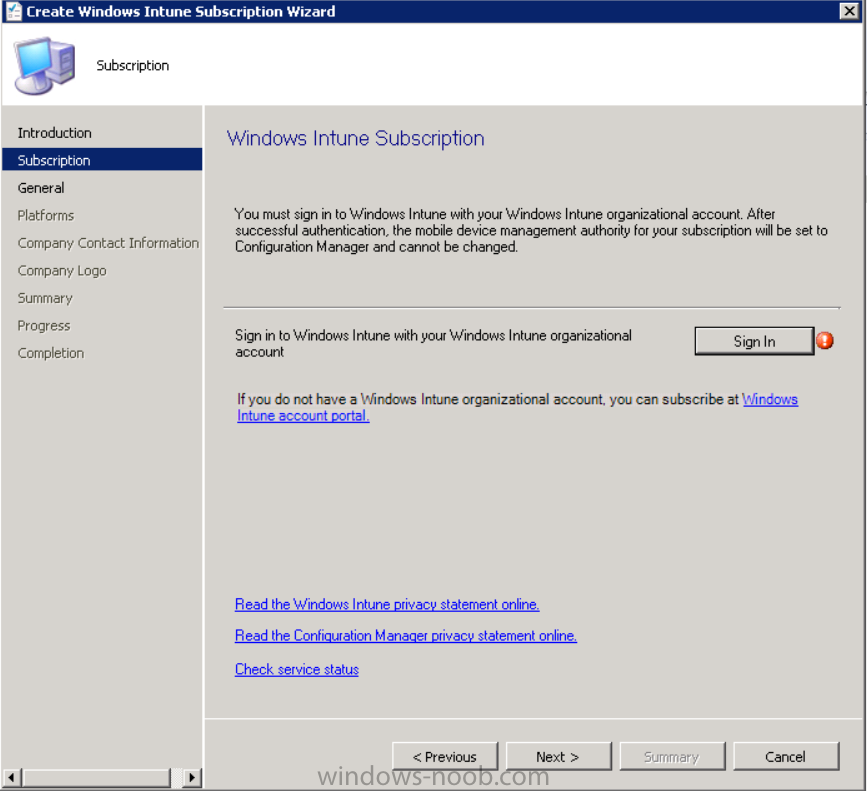
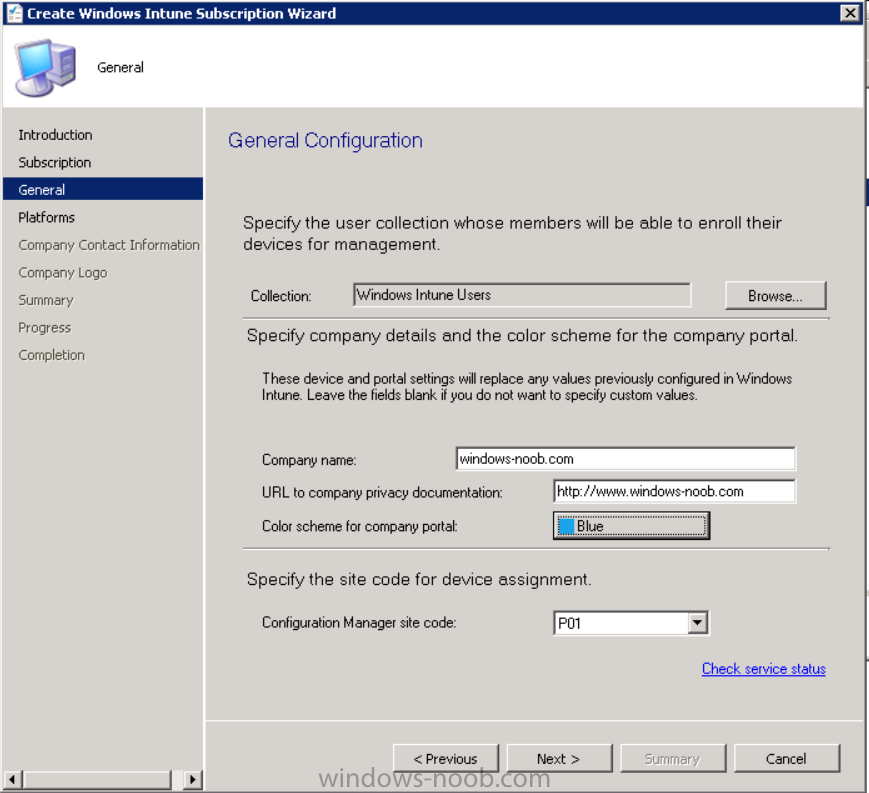
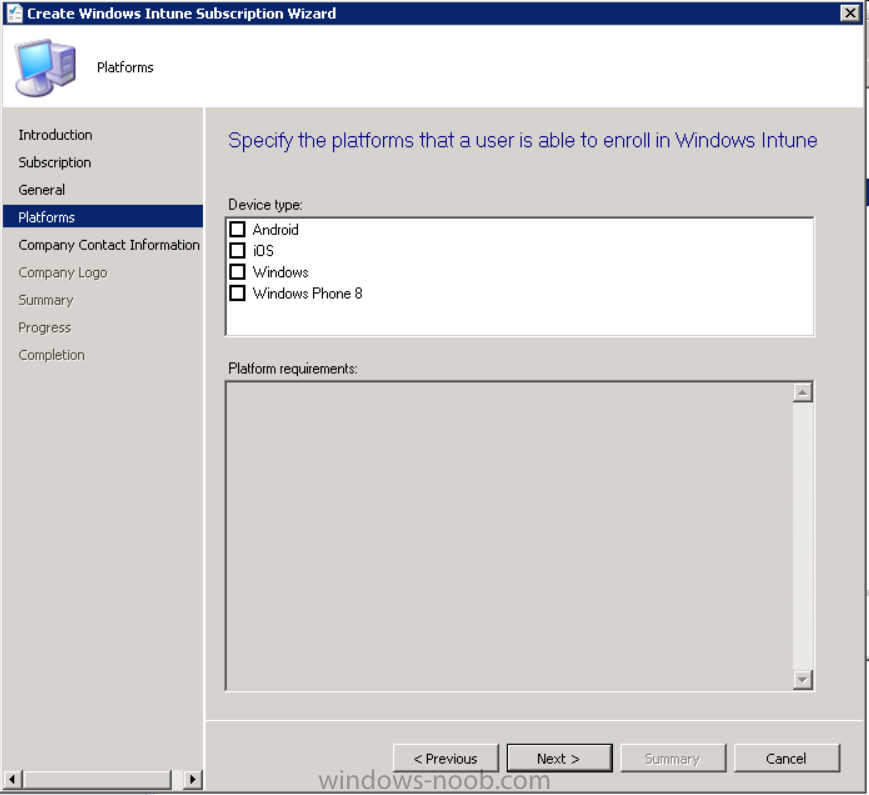
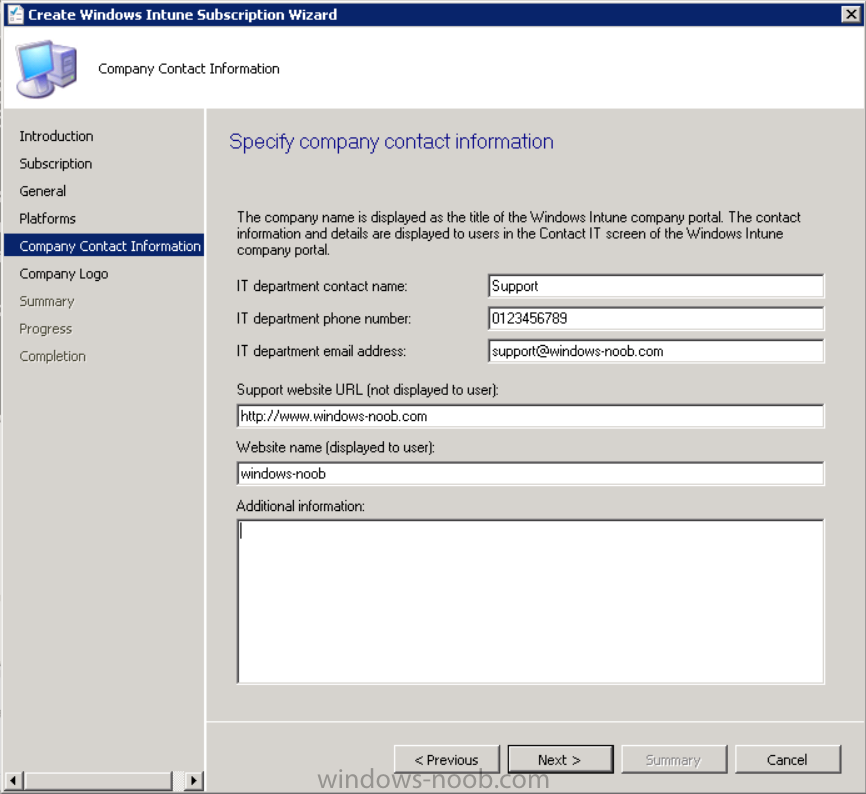
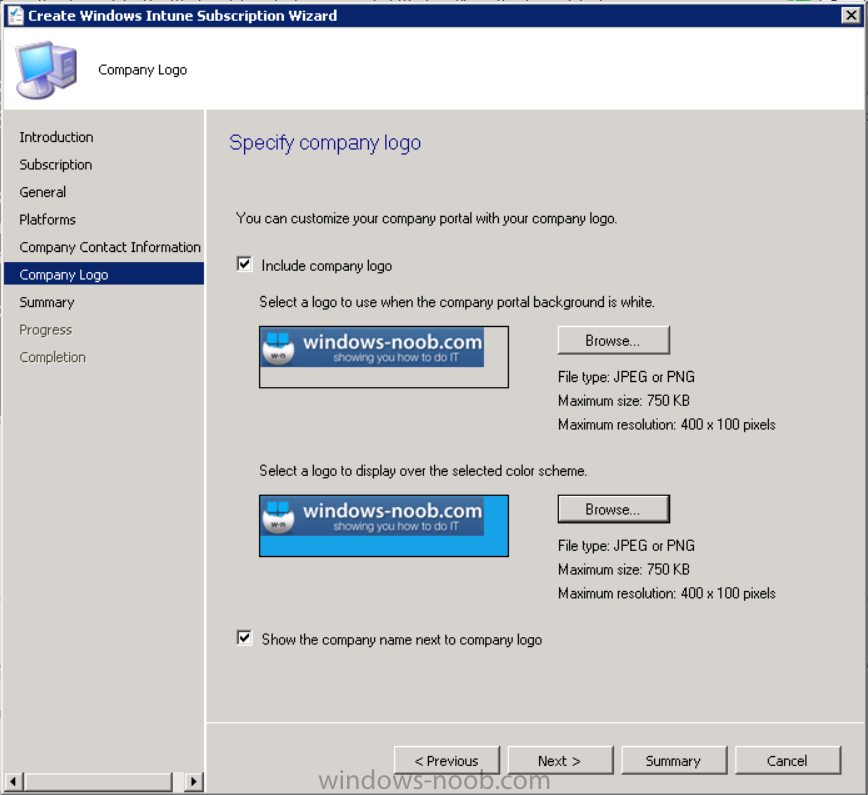
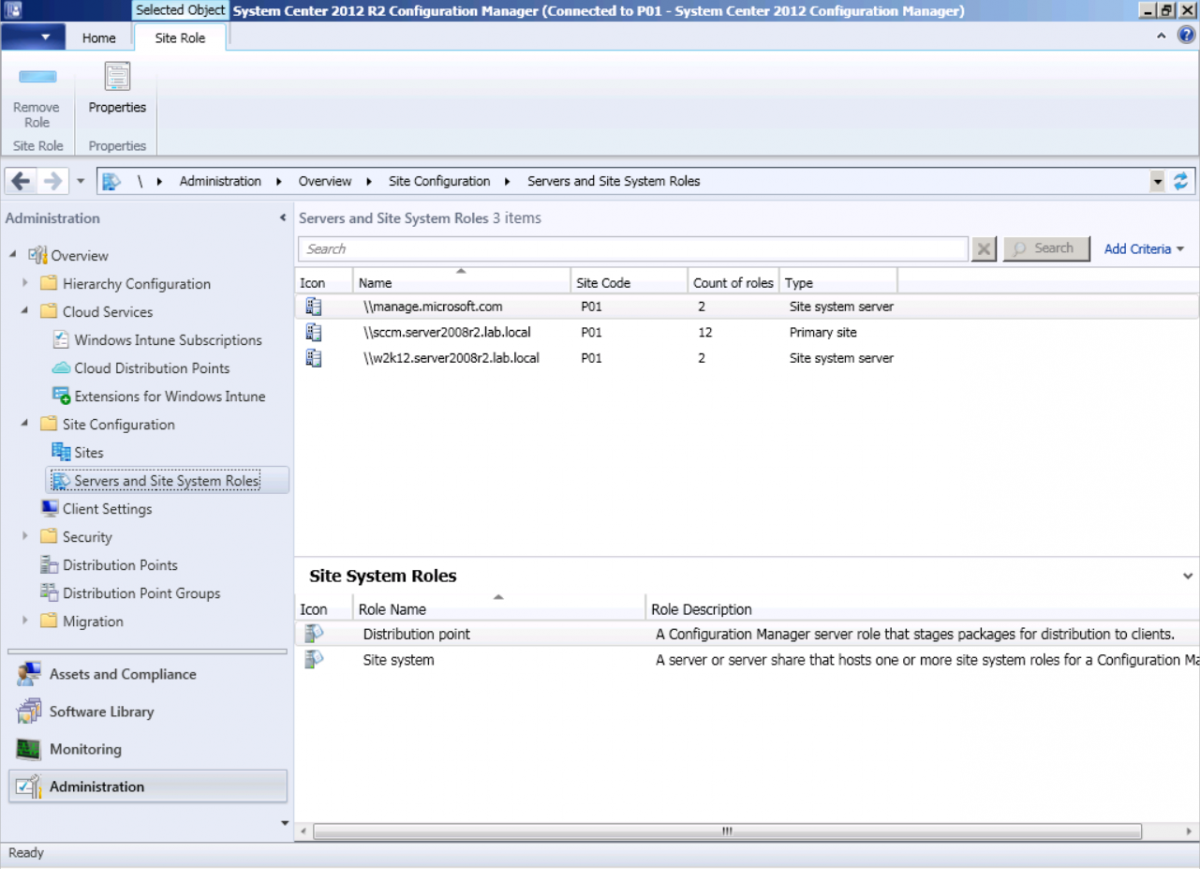
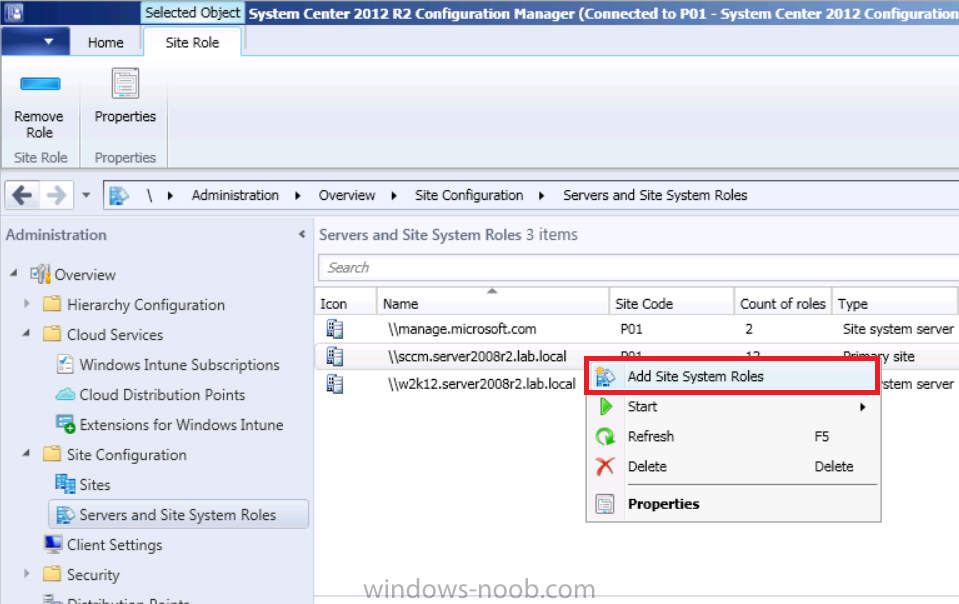
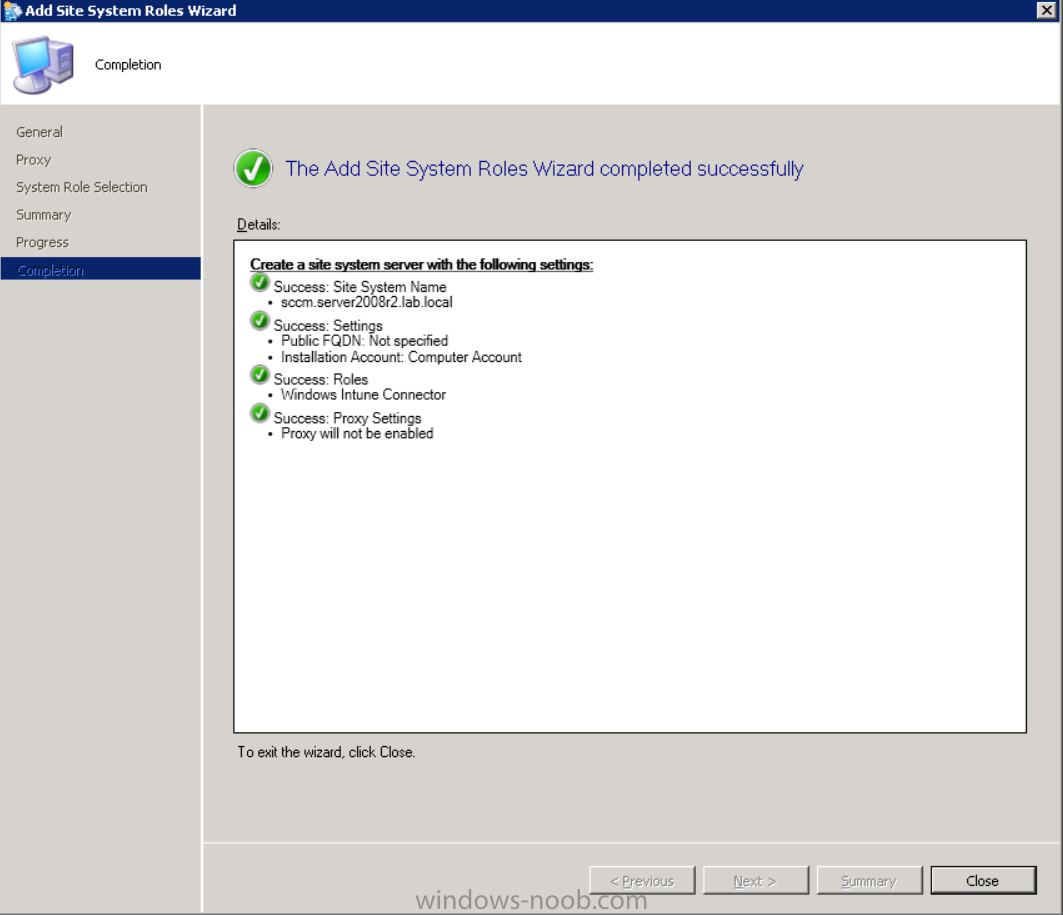
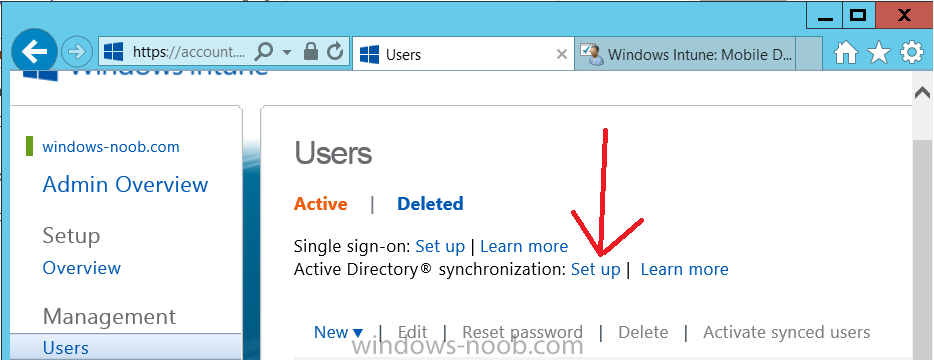
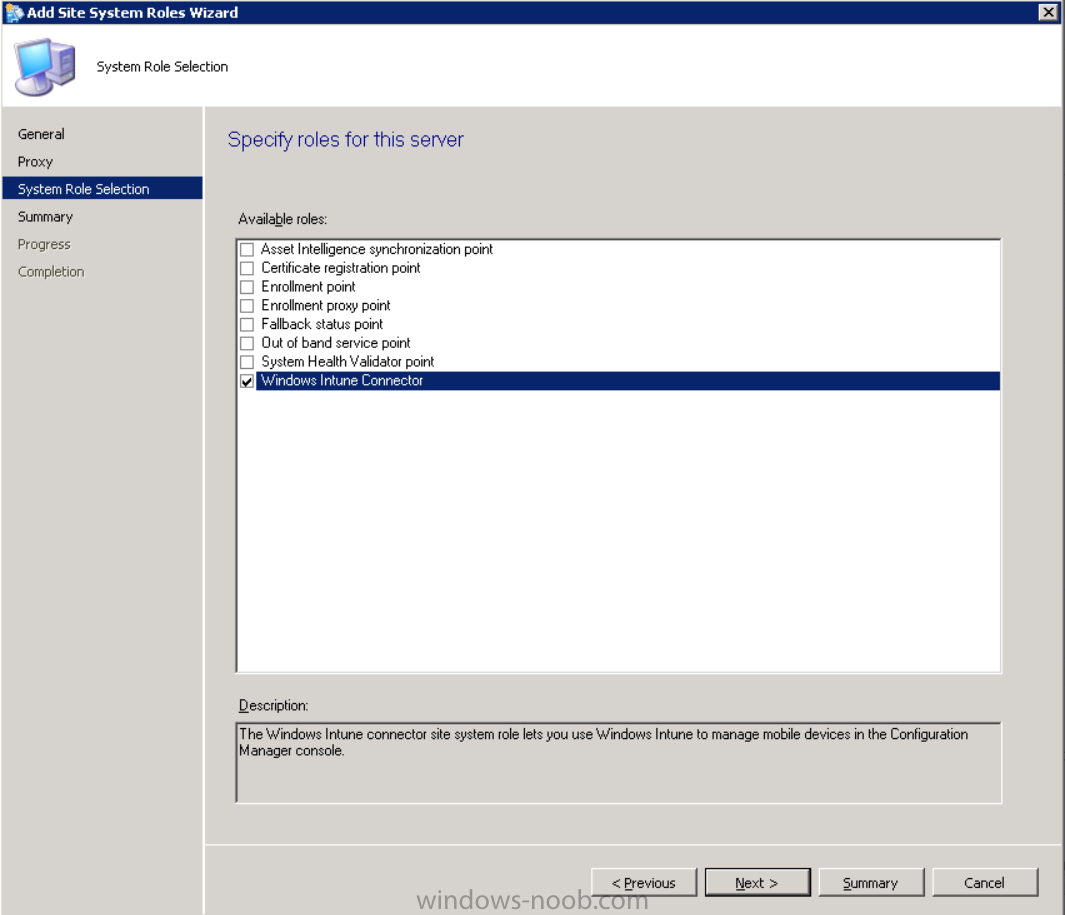
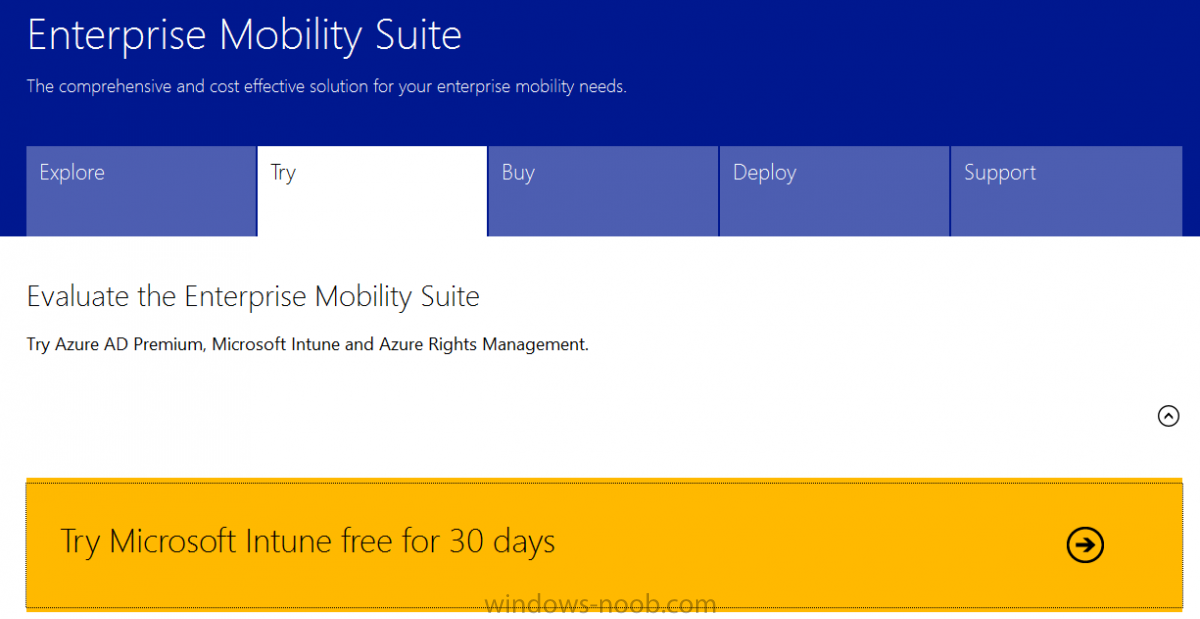
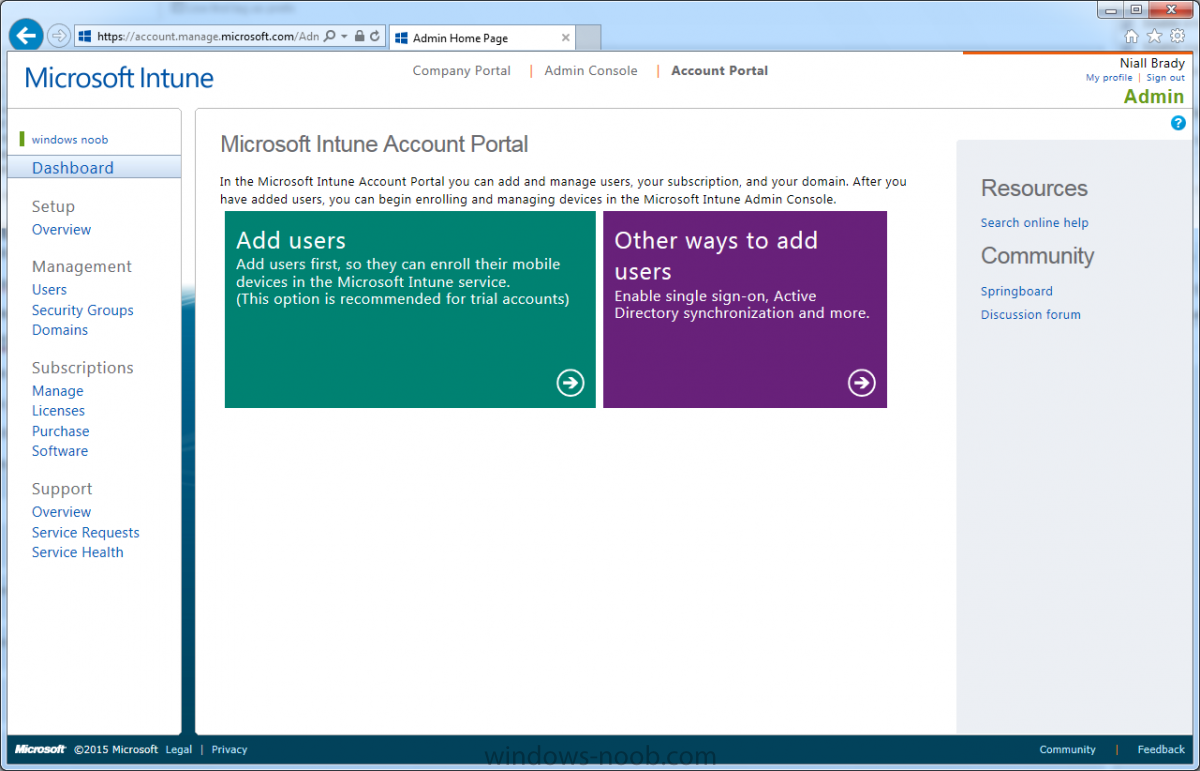
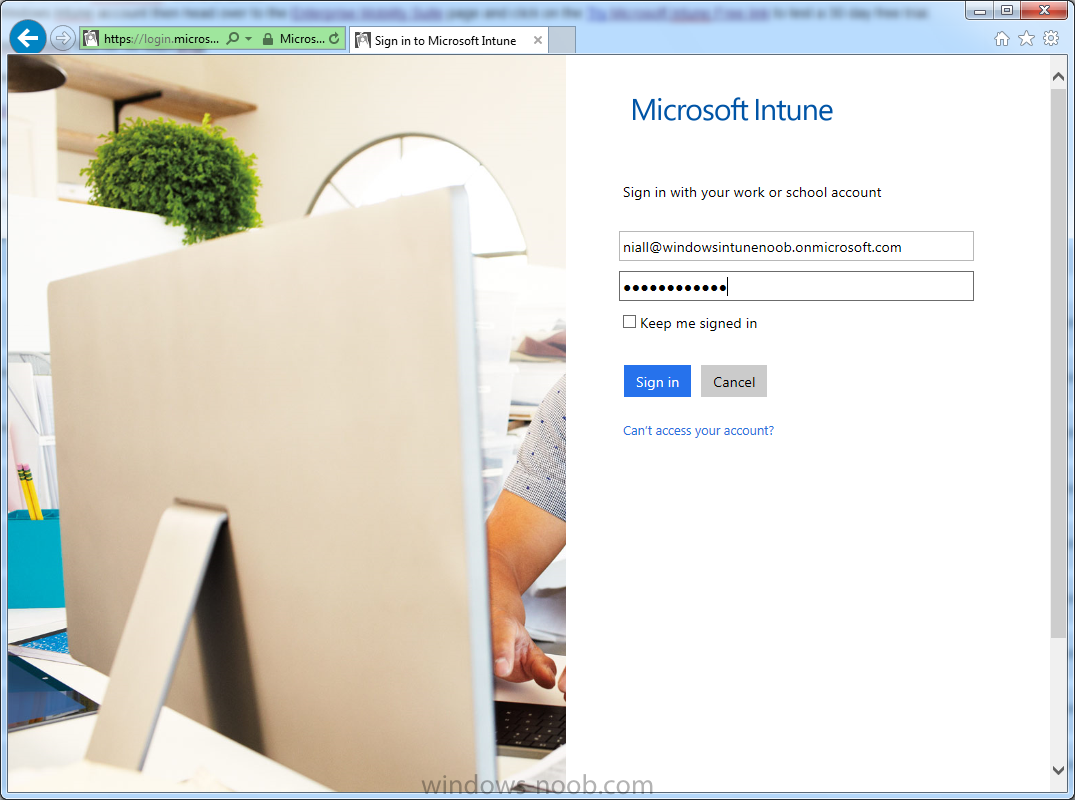
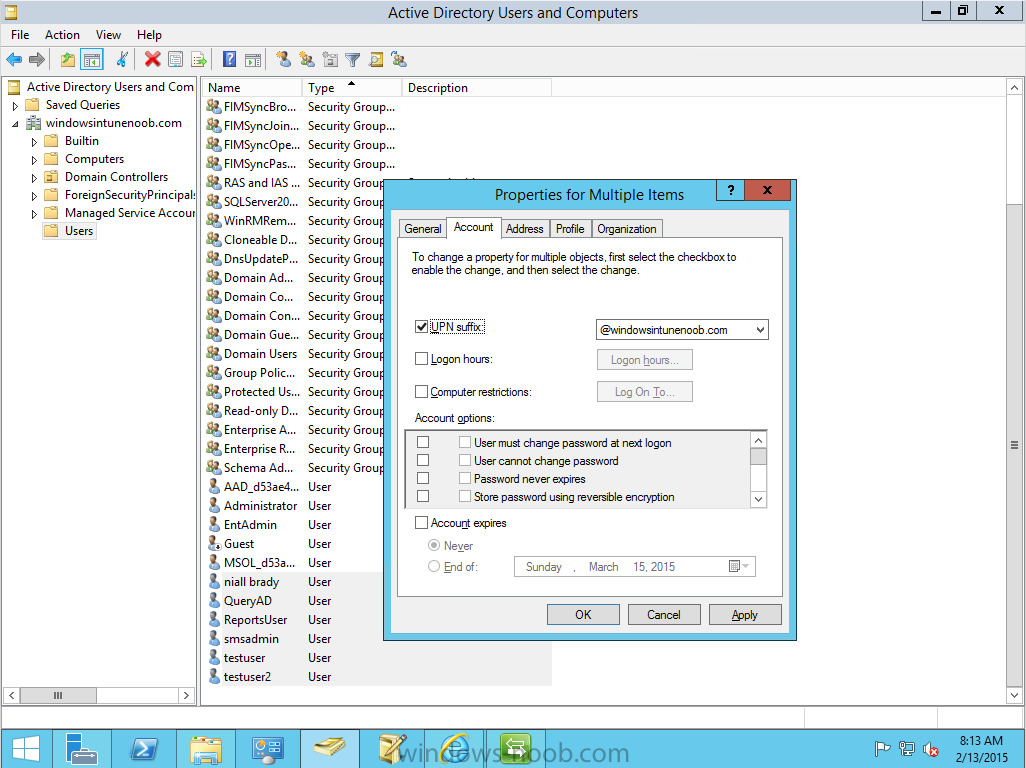
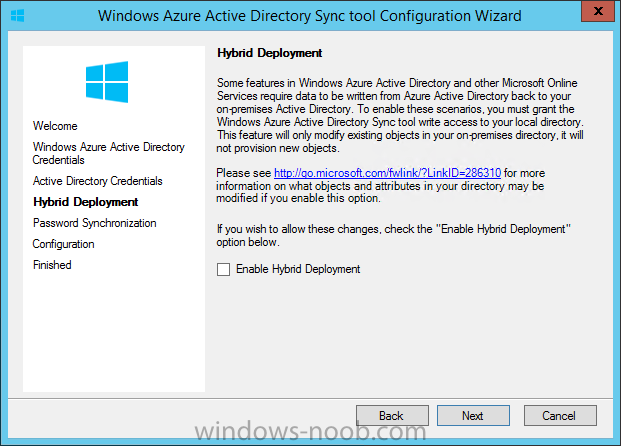
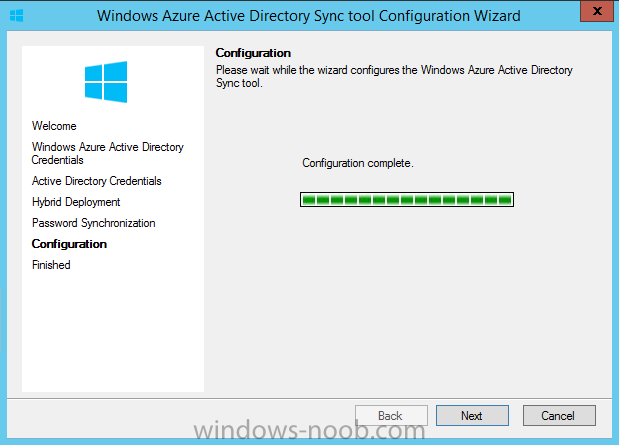
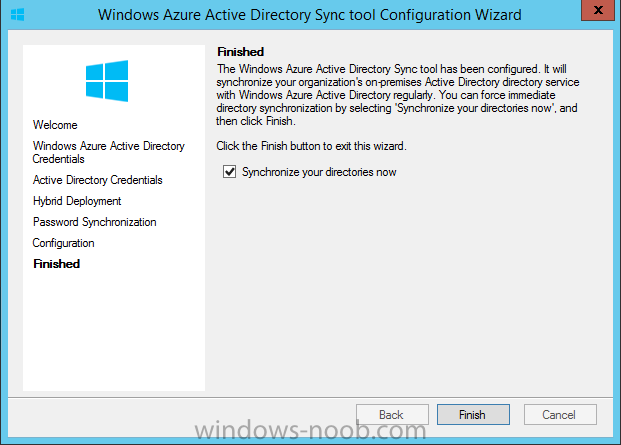
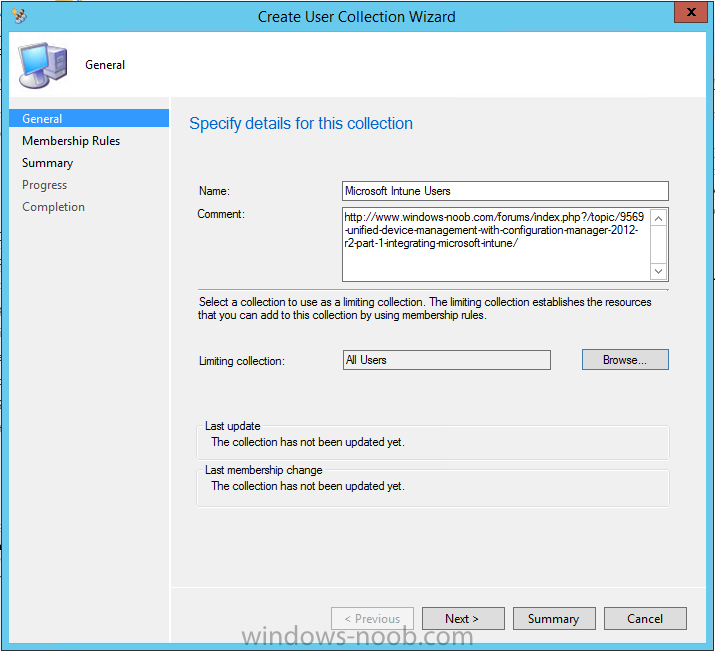
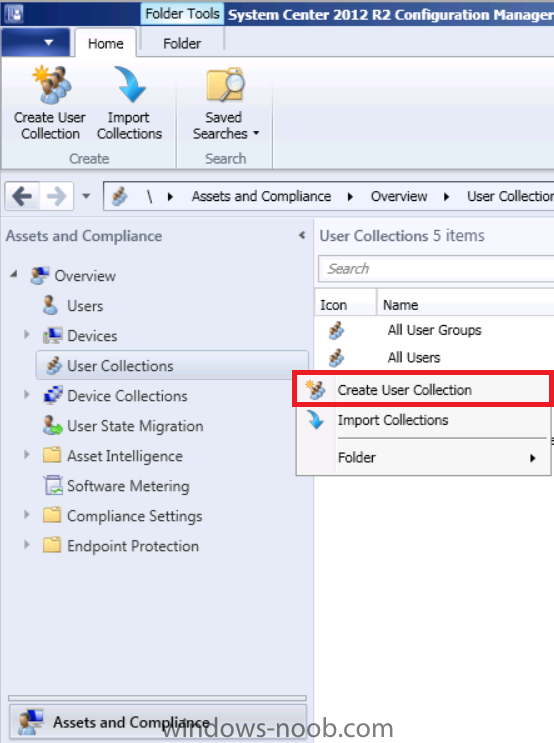
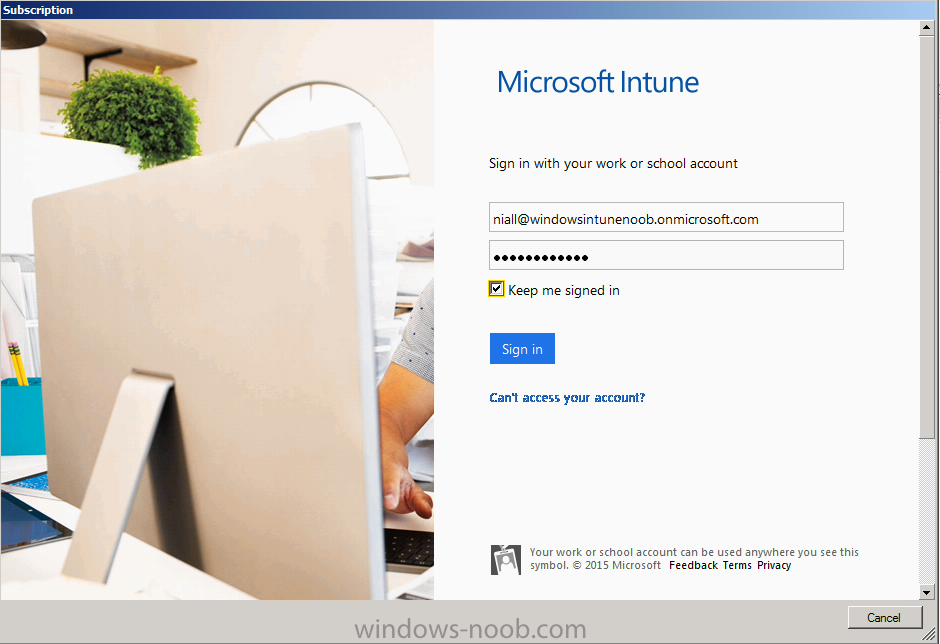
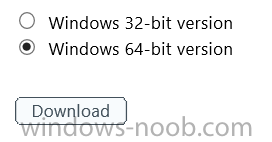
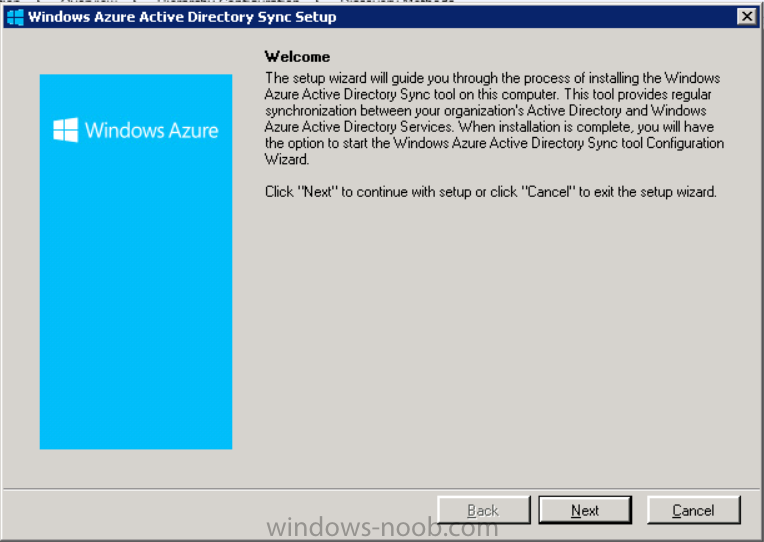
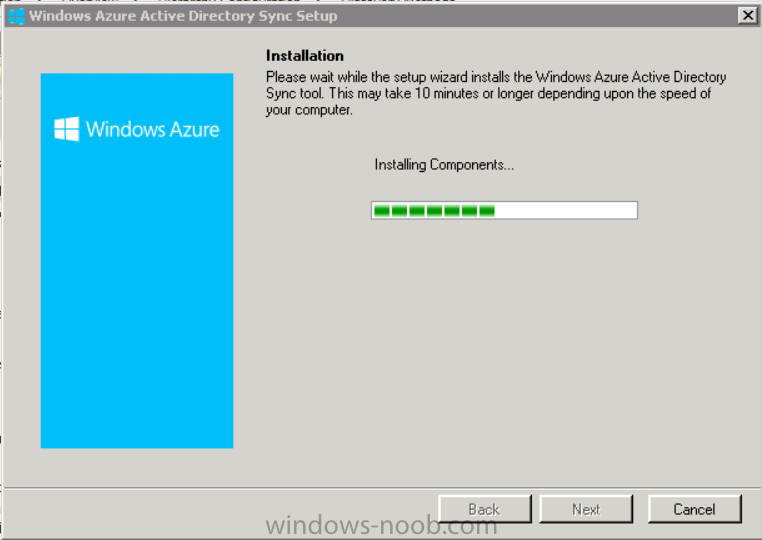
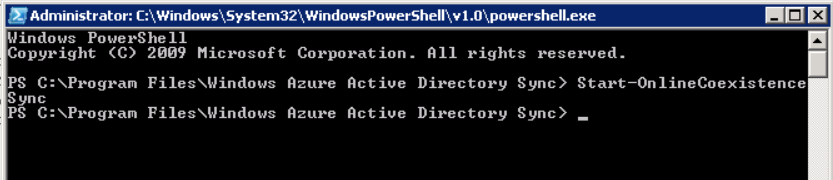
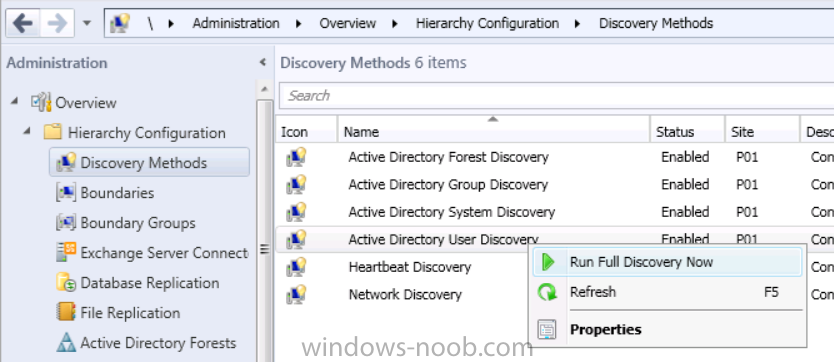
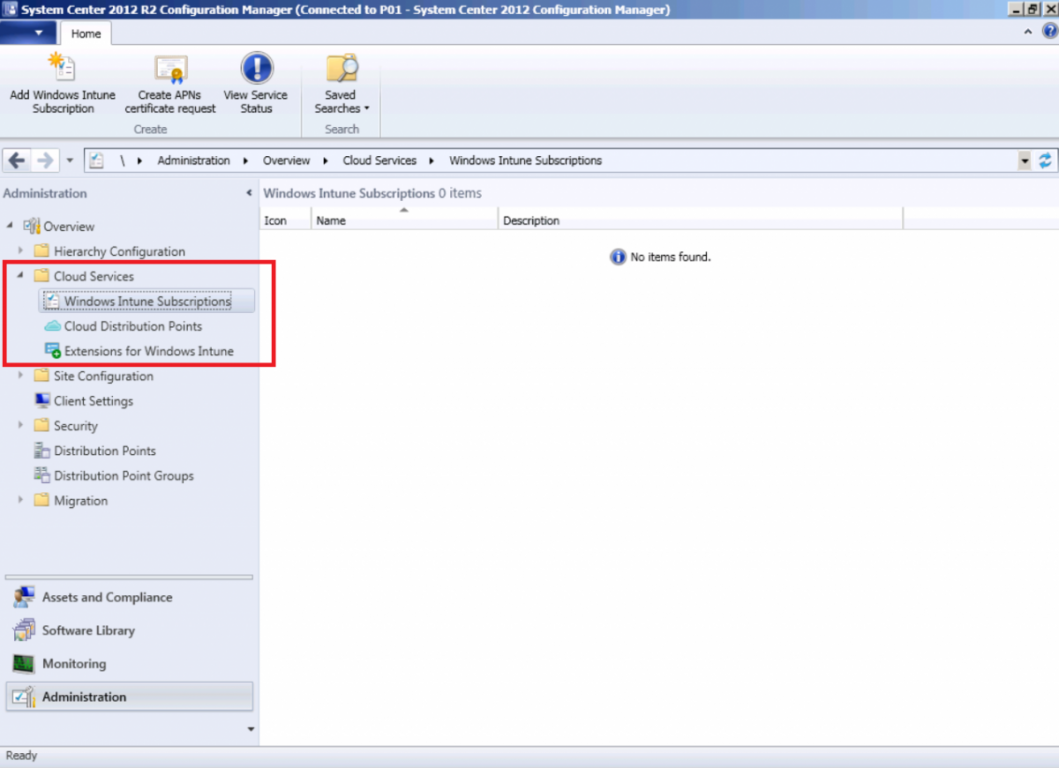
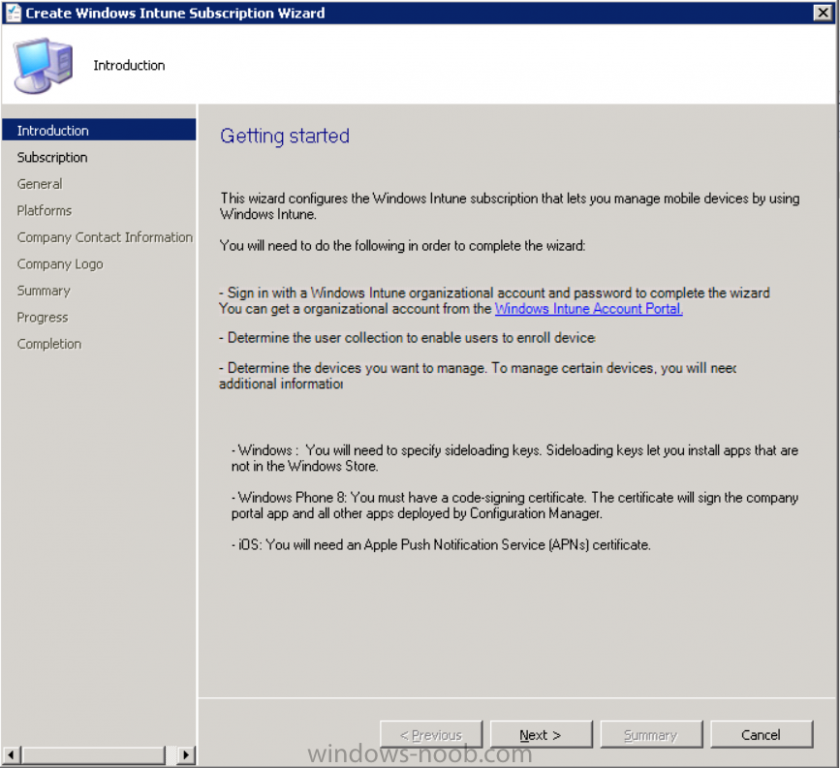
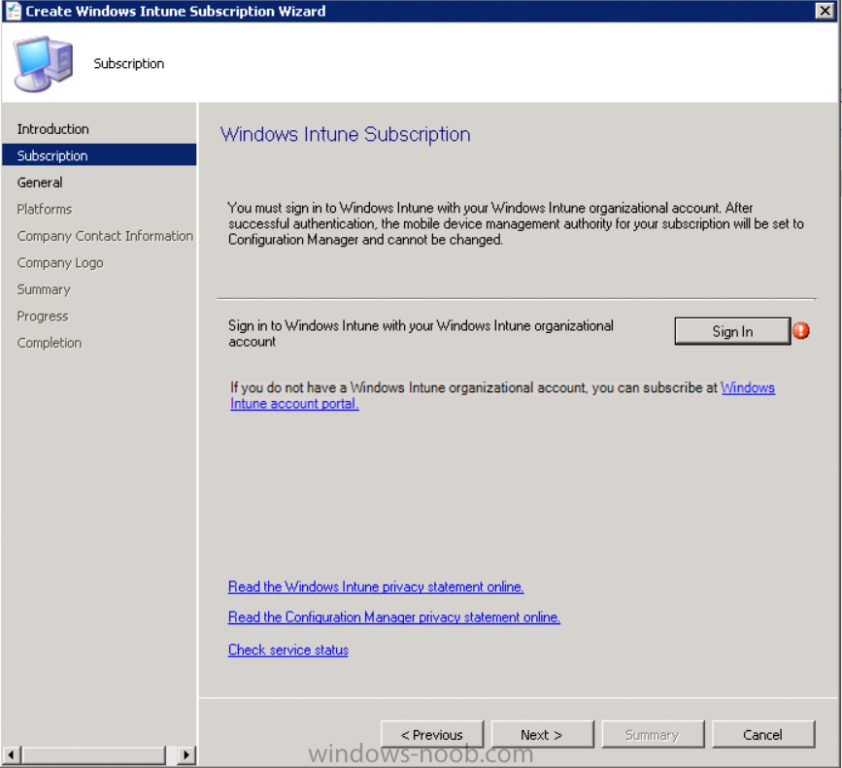
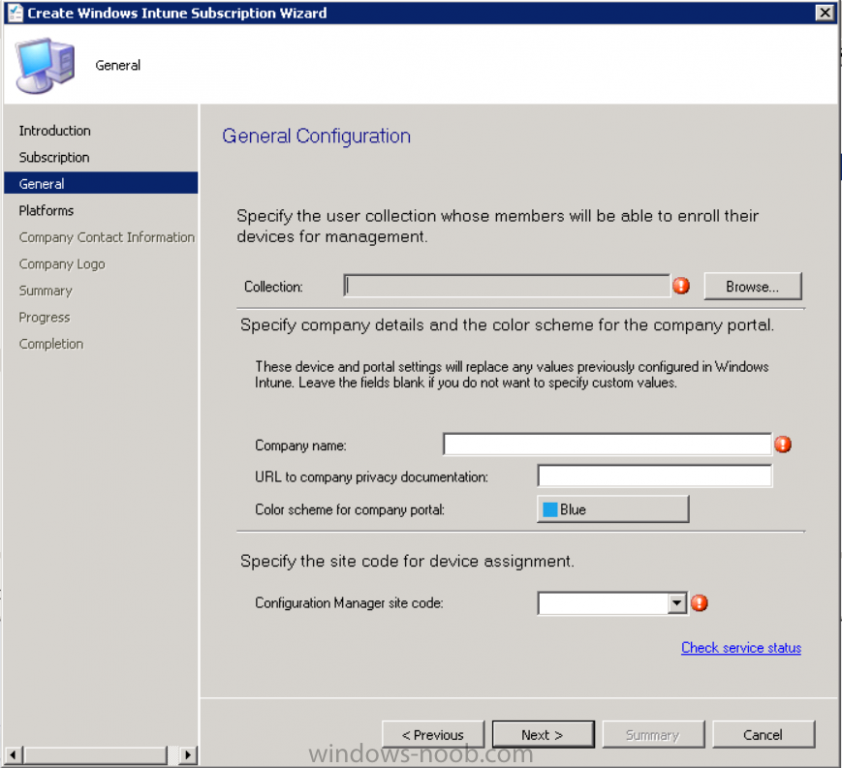
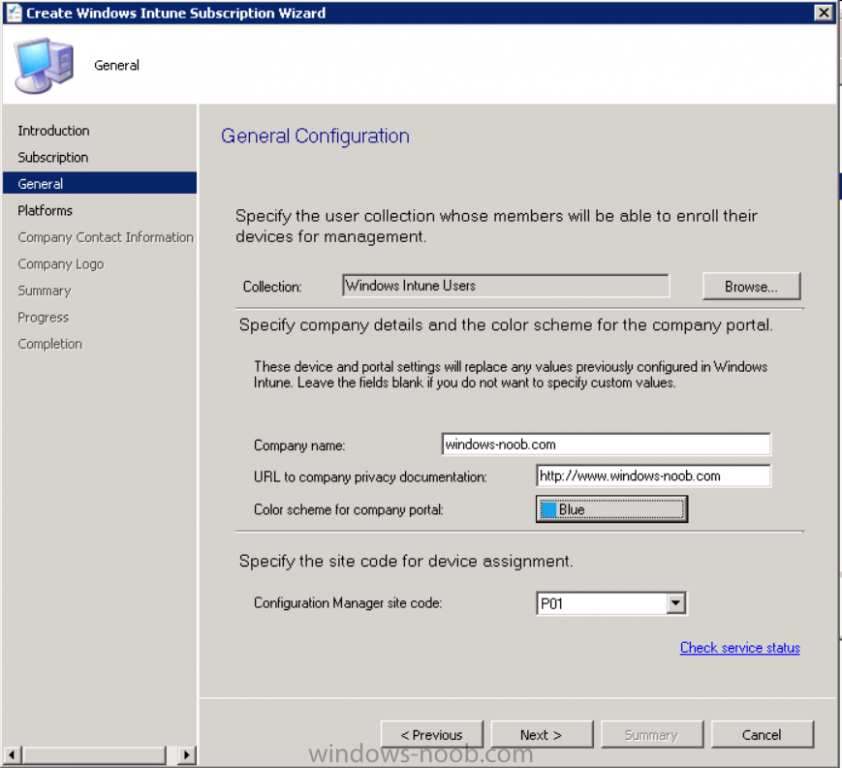
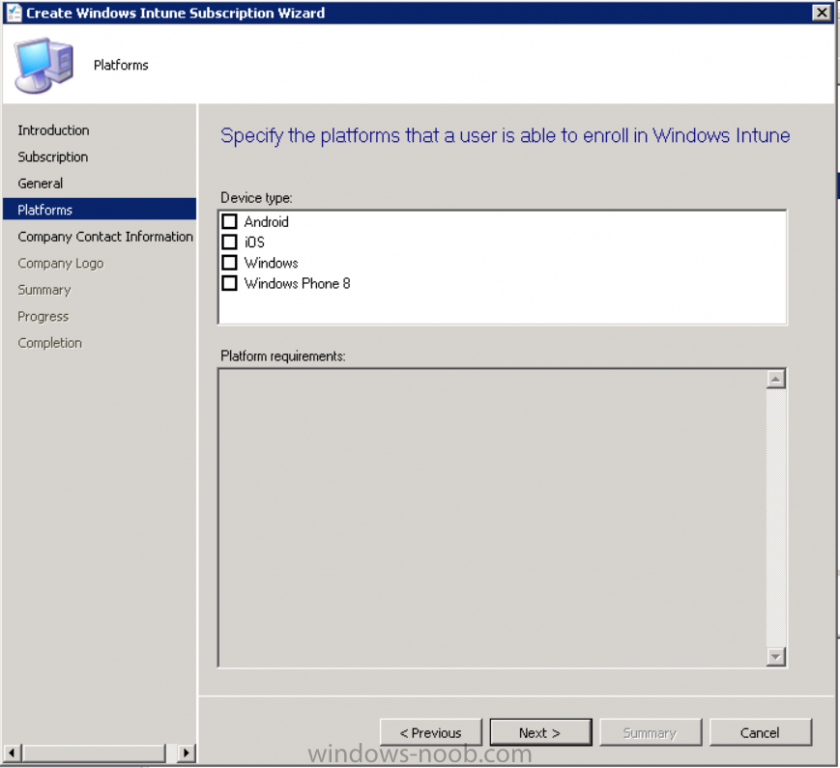
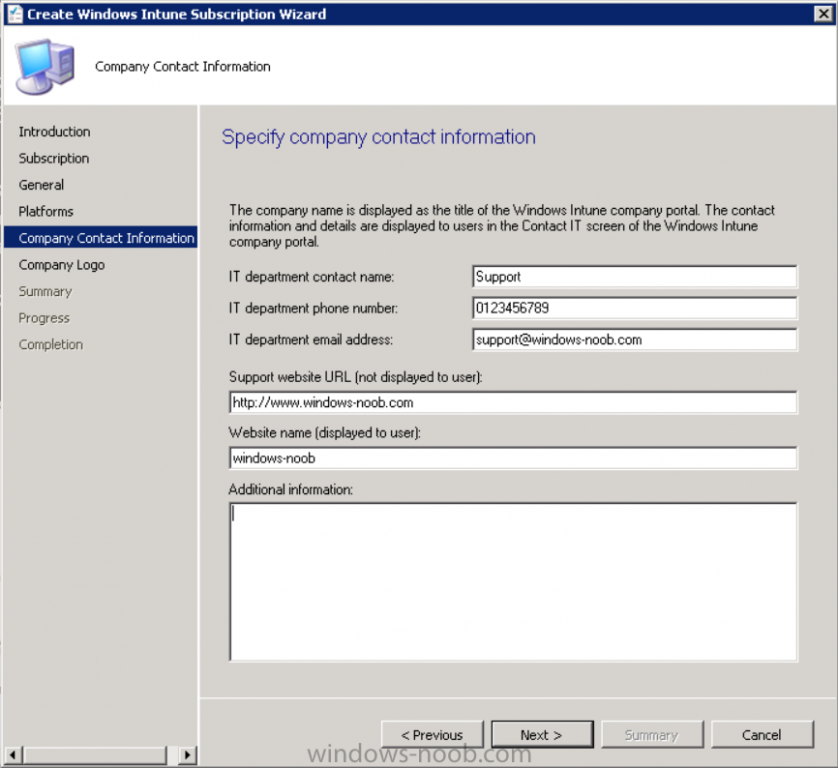
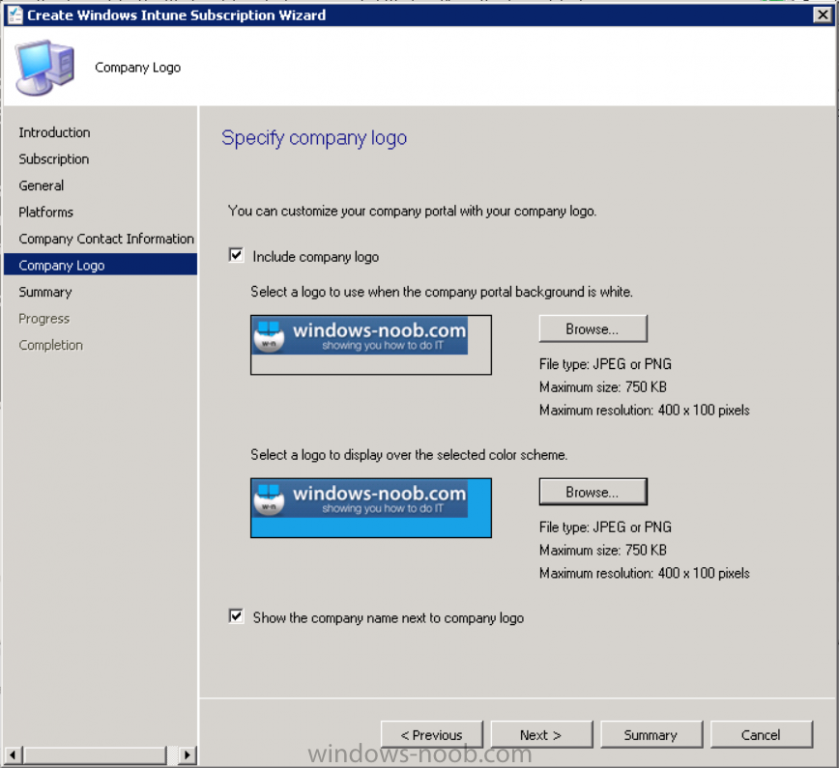
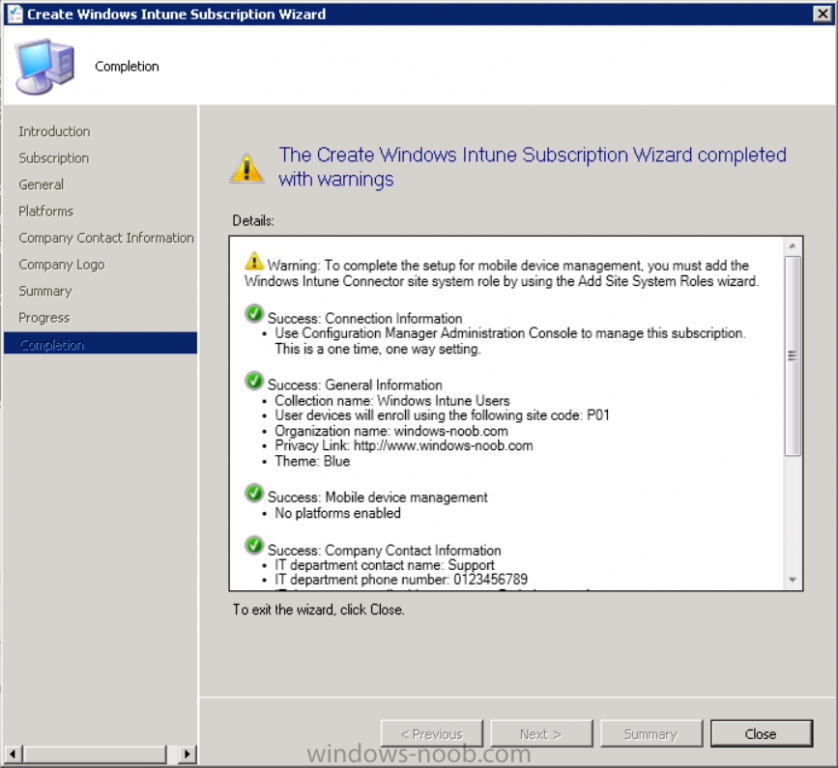
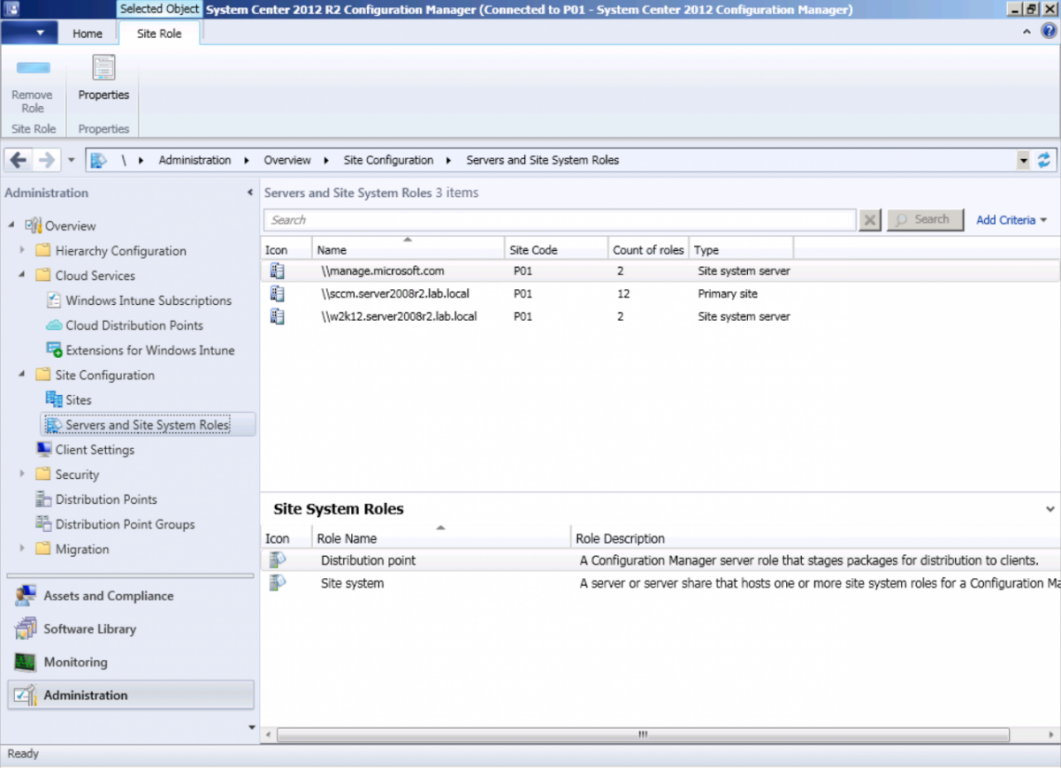
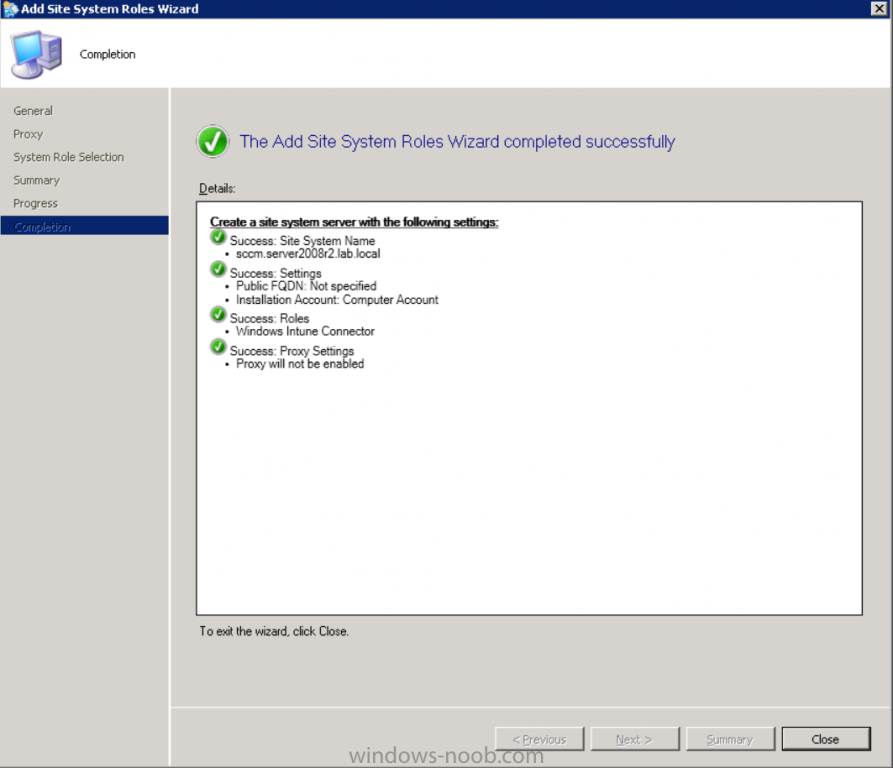
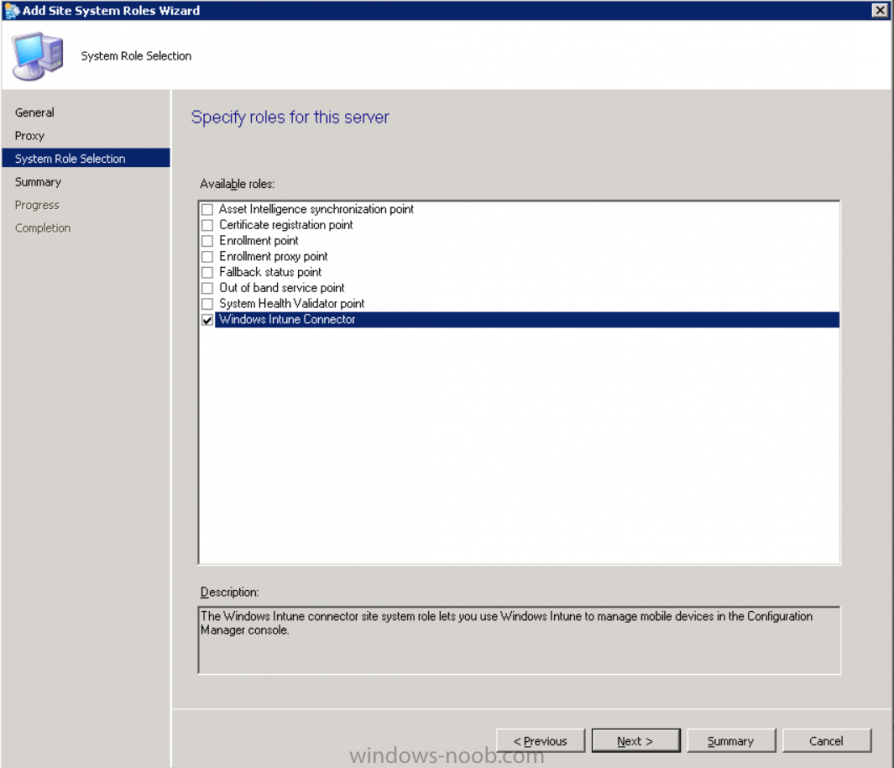
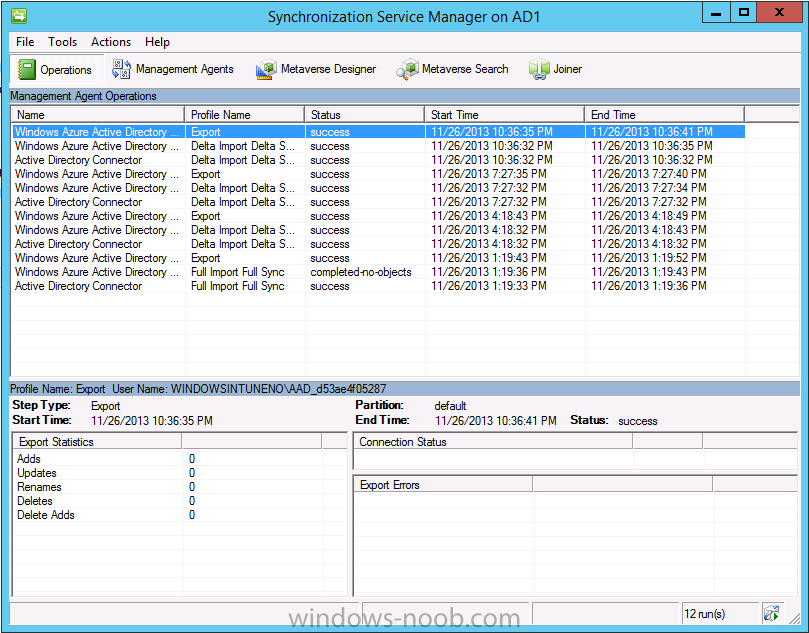
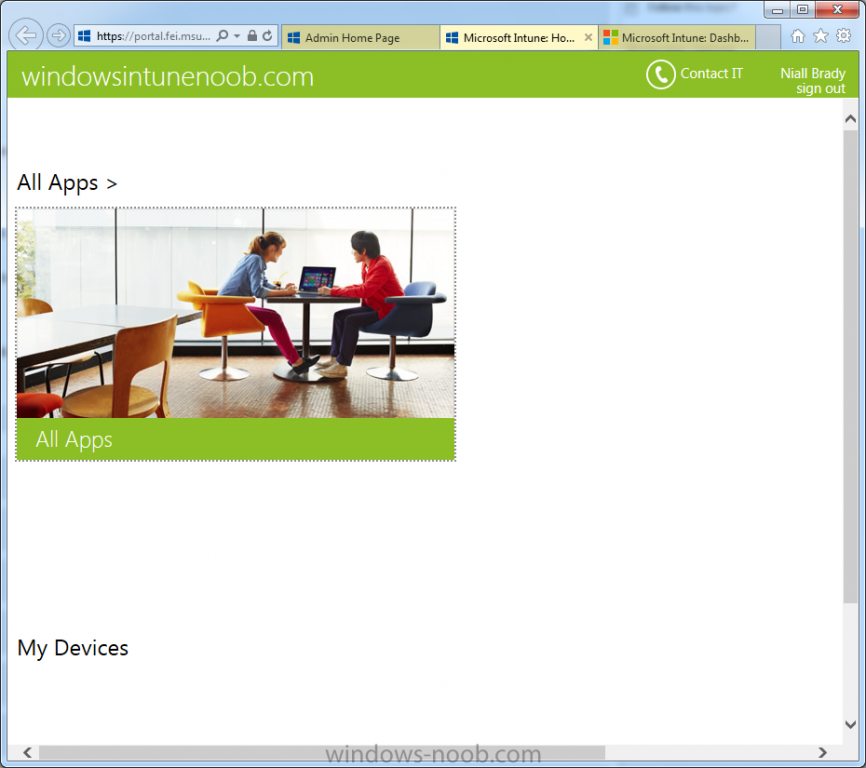
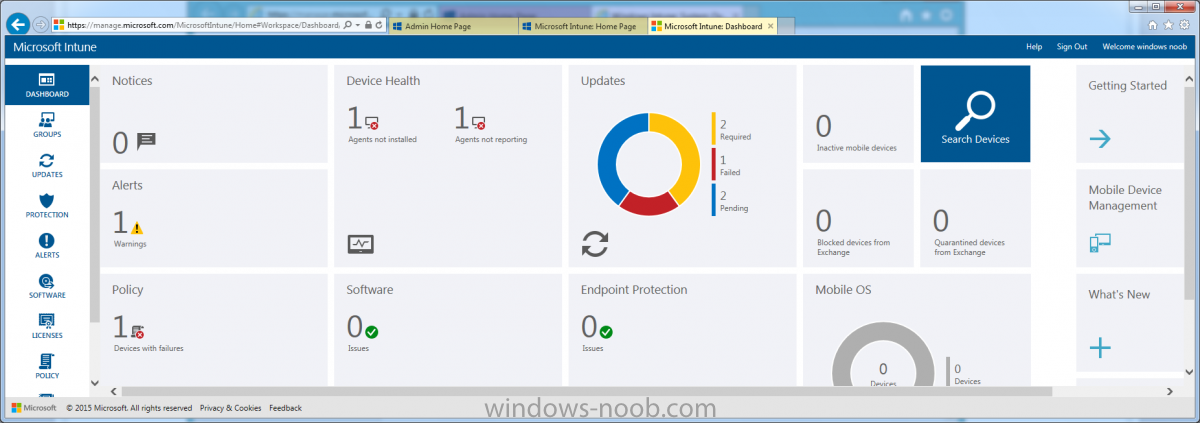
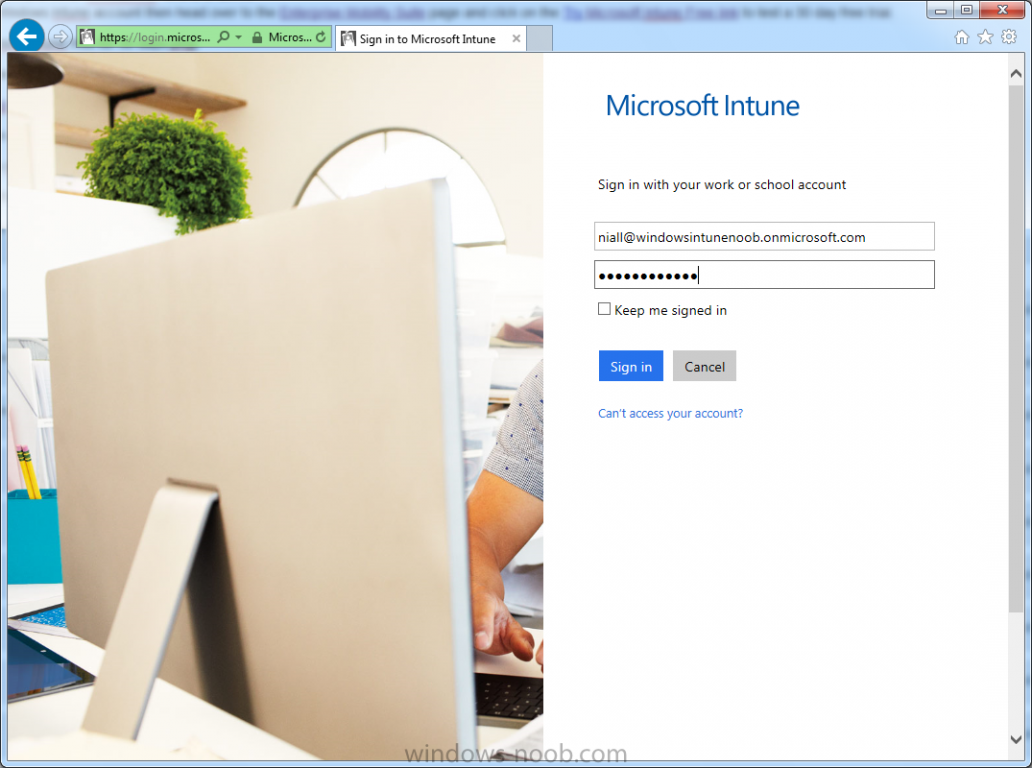
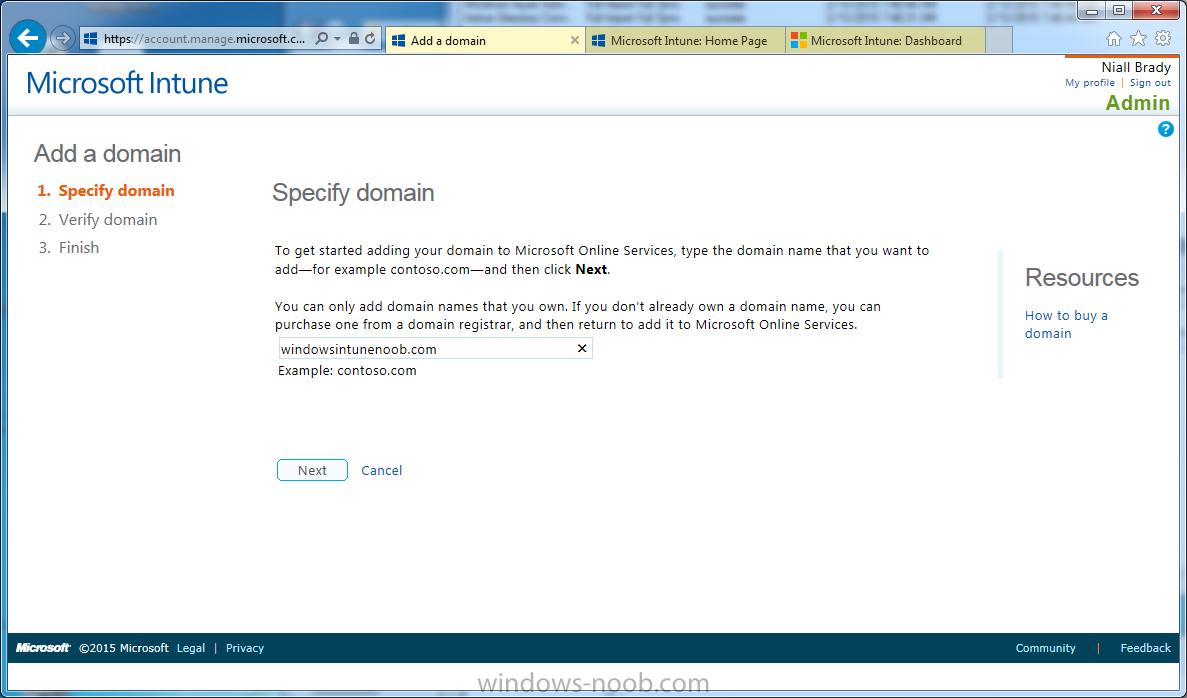
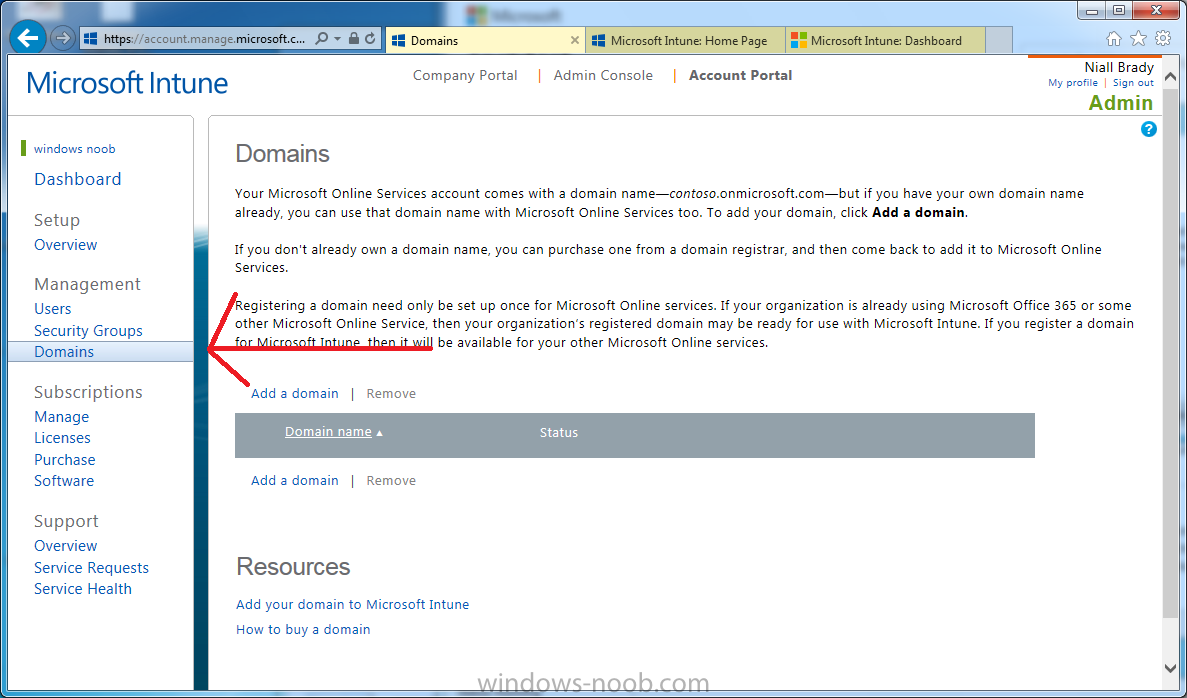
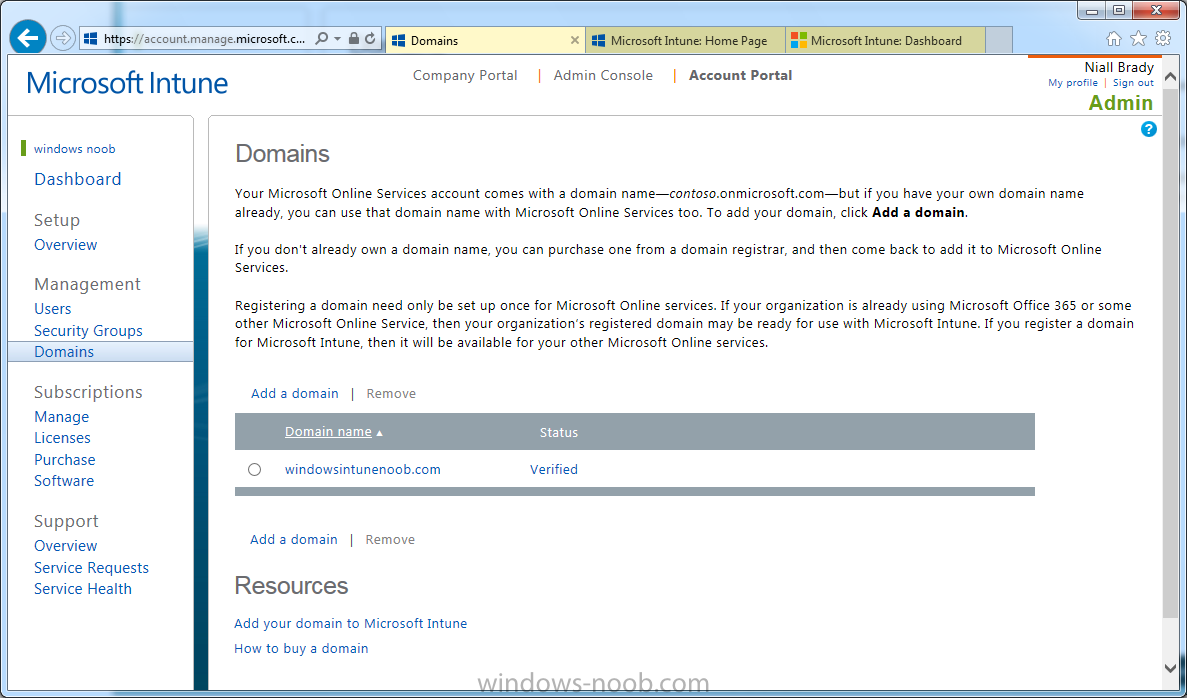
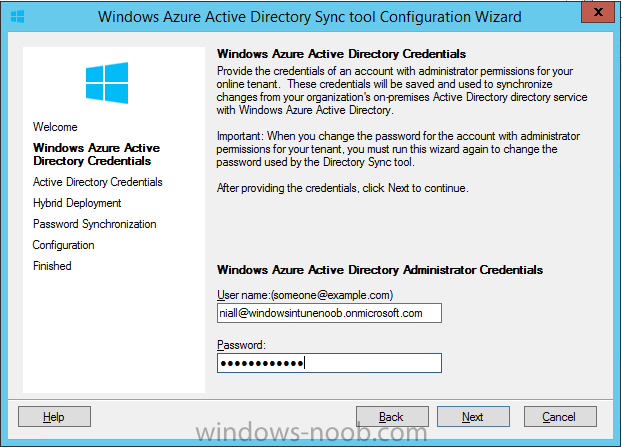
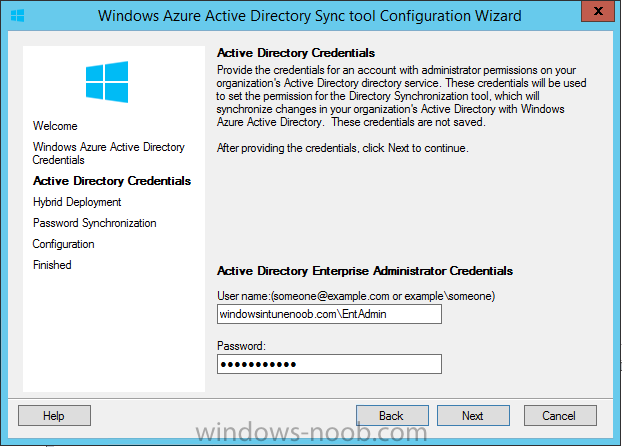
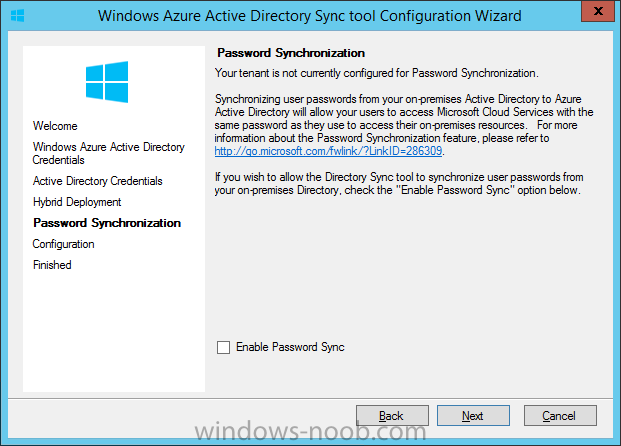
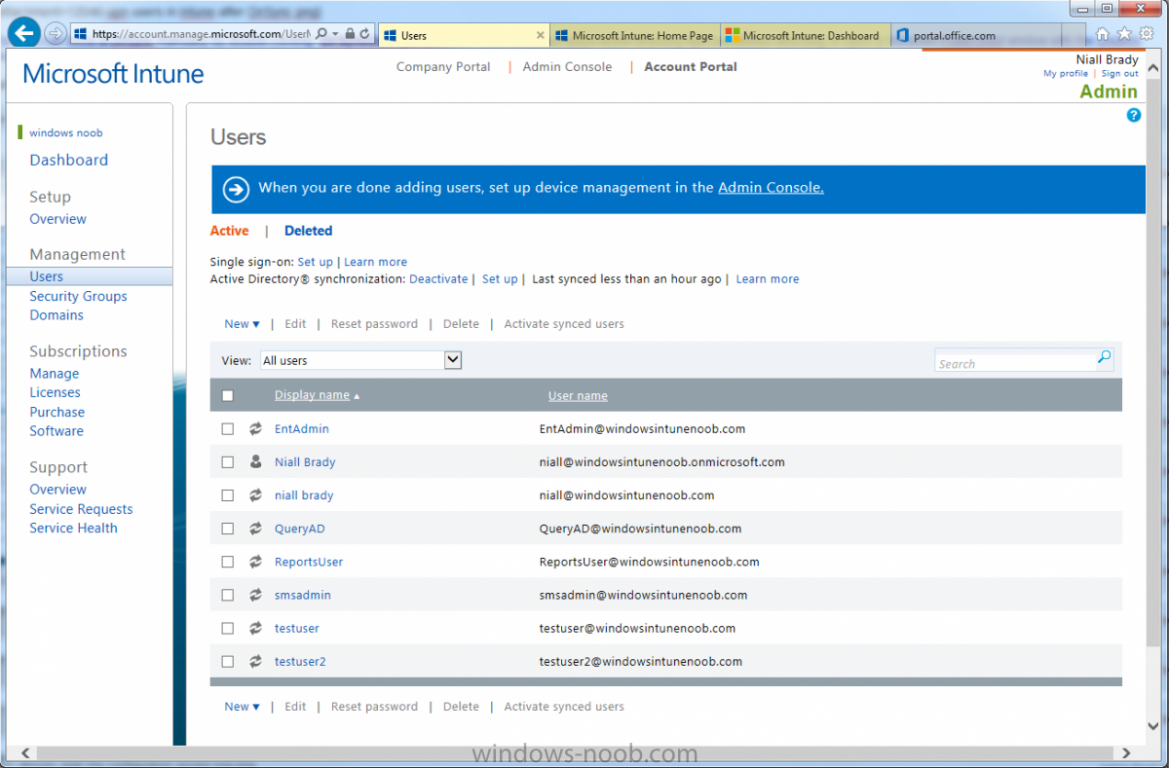
Introduction Mobile device management (MDM) in Configuration Manager is possible via the following methods Enrollment by Configuration Manager Mobile Device Legacy Client Exchange Server Connector The methods above provide you with different abilities, Enrollment by Configuration Manager let’s you manage older and less popular hardware such as Windows Mobile 6.1 Windows Mobile 6.5 Nokia Symbian Belle whereas the Mobile Device Legacy client can manage similar older mobile operating systems such as Windows CE Windows Mobile 6.0 Finally you can do remote wipe or settings control for devices managed by Exchange 2010 using Exchange ActiveSync by using the Exchange Server Connector. How does Microsoft Intune fit into all of this ? Microsoft Intune can be utilized in two main ways Standalone - Intune managed and run in the cloud Hybrid - An on-premise System Center 2012 R2 Configuration Manager environment which is connected to Microsoft Intune in the cloud As you’ll probably want a single pane of glass for managing your modern mobile devices as well as your company servers and computers, integrating Microsoft Intune with Configuration Manager 2012 R2 is a logical next step. In this post I’ll show you how to integrate Microsoft Intune with System Center 2012 R2 Configuration Manager to form a hybrid scenario in order to perform unified Mobile Device Management. By integrating System Center 2012 R2 Configuration Manager with Microsoft Intune you have unified Mobile Device Management (MDM) of modern mobile devices such as Android, Windows Phone 8, iOS, Windows RT. This ability has been in place since Configuration Manager 2012 SP1 but has been updated with several new abilities and refined with the release of System Center 2012 R2 Configuration Manager and several times since then, in addition, Windows Intune was renamed to Microsoft Intune (see this blog post for details). When you use Configuration Manager with Microsoft Intune, you have the following management capabilities: You can retire and wipe devices. You can configure compliance settings on devices. These include settings for passwords, security, roaming, encryption, and wireless communication. You can deploy line of business apps to devices. You can deploy apps from the store that the device connects to, Windows Store, Windows Phone Store, App Store, or Google Play. You can collect hardware inventory. You can collect software inventory by using built-in reports. In this mini-series of guides on managing modern devices I will show you what you need to do to successfully integrate Configuration Manager 2012 R2 with Microsoft Intune and then manage them. Step 1. Get a Microsoft Intune account If you don’t already have a Microsoft Intune account then head over to the Enterprise Mobility Suite page and you should see a heading which says "Try the Microsoft Enterprise Mobility Suite" and beneath that is a Try Now button. Click on the Try Now button to test a 30 day free trial. After the 30 day free trial is complete you'll be asked if you want to buy a subscription as Microsoft Intune isn’t free, there is licensing cost involved. To get details of those costs please review the Microsoft Intune Licensing FAQ which can be found here. After signing up you can login to the Microsoft Intune Account portal using the credentials you specified (while will be something like user@domain.onmicrosoft.com) as shown below You will be presented with a webpage page like the one below: At the top of the screen you’ll notice three main tabs, These tabs are described below and each one is click-able and will take you to the respective page once you have created credentials above: Company Portal Admin Console Account Portal The Company Portal pictured below, will open a new window that shows applications added to Microsoft Intune and deployed to the logged in user, it will show All devices (for the logged on user, with a maximum of 5 devices per user) and some support options. The Admin Console pictured below, is where you’ll do your day to day activities in Microsoft Intune for Standalone Intune environments. This is Silverlight powered so you’ll most likely get prompted to install Silverlight if it’s not already installed. The Account Portal pictured below, is where you manage Microsoft Intune subscriptions, licenses and initial setup of Intune Users. Step 2. Add a public company domain In order to ensure users are synchronized correctly you must create or have access to a verified public domain within the Microsoft Intune Account Portal. If this step is not performed you might end up with users with onmicrosoft.com UPN (User Principal Name) related names. Logon to https://account.manage.microsoft.com/ which is the Microsoft Intune Account Portal and click on Domains under Management in the left pane. Next, click on Add a Domain and enter your domain name as shown in the screenshot below: Click on Next, you’ll be asked if you want to verify using a TXT or MX record, I have chosen TXT in this example (and it’s the recommended choice as the other option could potentially give you issues). To allow Microsoft Online Services to verify your domain you will need to logon to your domain registrar or DNS provider for the domain in a separate web browsing session. The steps are listed below Logon to your Domain provider (eg: GoDaddy) and select the domain that you're verifying, editing or adding a DNS record to. In the DNS management area for your account, select the option to add a TXT record for your domain. In the Host or Host name box for the domain, type or paste @. (If your domain registrar doesn’t let you enter an @ symbol then simply remove it (leave the @ blank). An @ in the Hostname represents the blank record for the root domain (eg: windowsintunenoob.com). In the value (or data) box, type or paste MS=ms57610744. (Note: this was the value I was prompted to add, your value will most likely be DIFFERENT, enter the value that you were given.) Depending on the website, this box may be labeled Text, Value, Address, Points to, or TXT record. Save your changes. Once done you can check those settings by clicking on Edit again and it should look something like this (again, this is in your DNS providers web page, not the Intune Account Portal). In the Microsoft Intune account portal Domain section, click on Verify to verify the Account like in the screenshot below Once the account is verified you should see something like the following Click on close Step 3. Create a CNAME DNS entry In order to enroll Windows Phone 8, Windows RT and Windows 8.1 devices you’ll need to create a CNAME DNS entry which directs EnterpriseEnrollment to manage.microsoft.com In your domain registrar, add a new CNAME record like the one below (note: the screenshot below shows a different domain name to my Intune domain name, use whichever is appropriate for your company) To do this create a CNAME resource record for the verified domain in the public DNS. The CNAME resource record must contain the following information: Alias name: EnterpriseEnrollment Fully qualified domain name (FQDN) for the target DNS host: EnterpriseEnrollment.manage.microsoft.com Step 4. Setup User Principal Names for your Users Before you synchronize the Active Directory user account, you must verify that user accounts have a public domain UPN. For more information, see Add User Principal Name Suffixes in the Active Directory documentation library. To ensure that users that will be managed have the above Public Domain as their primary User Principal Name (UPN) in Active Directory you can verify the UPN attribute in Active Directory Users and computers. The Active Directory attribute for each user is synced up for each user to the corresponding user in Microsoft Intune. You can apply the UPN suffix via a script or manually in ADSIedit. To create a UPN suffix for a forest see this post (thanks @NickolajA). Step 5. deploy and configure Active Directory Federated Services (ADFS) If you plan to use single sign-on, Deploy and configure Active Directory Federated Services (ADFS) as described here. In this guide I am not configuring or using ADFS for SSO but you may want to do so. If I do publish a guide for setting up ADFS in the future i'll amend this post to reflect that. Step 6. Enable Active Directory synchronization Note: The dirsync tool is being depreciated, use the AD Connect tool instead from here. For a comparison chart between the tools – DirSync, AADSync, AD Connect, and FIM, refer to this link: https://msdn.microsoft.com/en-us/library/azure/dn757582.aspx Activating Active Directory synchronization allows you to automatically copy users, security groups and other objects from your local (on premise) Active Directory to (a cloud based) Windows Intune. In the Windows Intune Admin Console select Users and click on Active Directory synchronization: Set up. Follow the guidance on the page it links to (which are the first 3 steps shown below) and when ready click on Activate Another window will pop up, click on Activate again. If all goes well you’ll be informed that Active Directory synchronization is activated. Next you download the actual dirsync.exe tool to run on your Domain Controller, choose the correct architecture. Once downloaded make sure that you have .NET Framework 3.5 SP1 and .NET Framework 4 installed on the computer which you run the DirSync tool, then run the tool with suitable credentials. (I ran it as a Domain Enterprise Administrator). Click next at the welcome Accept the EULA and then select the installation directory And click next again to let it install When the installation is complete (it takes some time to install all the components) click Next and place a checkmark in Start Configuration Wizard now then click Finish. On the DirSync tool Configuration wizard welcome screen click Next and logon with your Admin credentials that you used when setting up Microsoft Intune. For example in my lab I use niall@windowsintunenoob.onmicrosoft.com These credentials will be saved and used to synchronize changes to your users from your organization’s on-premise Active Directory with Windows Azure Active Directory. Next enter your active directory enterprise administrator credentials, after entering your AD credentials (eg: windowsintunenoob\EntAdmin) If you want to enable Hybrid Deployment select it here next you'll be prompted if you want to enable Password Synchronisation. If you require this then select Enable Password Sync, and click Next, this is not the same as Single Sign on, but does reduce complexity as described here. Once done you’ll see configuration complete Let it complete until Finished. Once done if will allow you to Sychronize your directories You’ll then get a message prompting you to click on a link for details about the Active Directory synchronization progress - http://technet.microsoft.com/en-us/library/jj151797.aspx Click Ok. At this point you can wait a bit before once again browsing the Users link in Microsoft Intune. It should have populated with your users if all went well with DirSync. In addition you can browse Groups and you’ll see your Active Directory User Groups listed. Tip: You can force a DirSync manually by double-clicking DirSyncConfigShell.psc1 in the Windows Azure Active Directory Sync installation directory, to open a Windows PowerShell window with the cmdlets loaded. In the Windows PowerShell window, type Start-OnlineCoexistenceSync, and then press ENTER. And finally, you can also monitor DirSync activity using the MiiSync tool located in C:\Program Files\Windows Azure Active Directory Sync\SyncBus\UIShell, however you should log off as the current user and logon again before running the tool (so that the correct AD Security group membership is updated for your profile.) Note: If you haven't verified your own domain name with Microsoft Intune as the primary domain, then the Primary UPN of your user accounts in Active Directory that are added as members of the Windows Intune Users (or Microsoft Intune Users) collection must match the domain you are using in intune, for example : someuser@somedomain.onmicrosoft.com. Also keep in mind that user accounts must be activated if you are not synchronising passwords using DirSync - which means before that user can enroll a device they should login to the Intune Portal themselves on a web browser and set/change their password. Step 7. Perform Active Directory User Discovery In the Configuration Manager console perform a User discovery as shown below, this will mean Configuration Manager will have the most up to date details of your users including any UPN changes you made above. Step 8. Create a user collection called Microsoft Intune Users Micrososft Intune will need a user collection to allow users to enroll their devices, so let’s go ahead and create one. In the System Center 2012 R2 Configuration Manager console select Assets and Compliance then select User collections, right click and choose Create User Collection. The create user collection wizard will appear, give the collection a suitable name like Microsoft Intune Users and limit it to the All Users collection or whichever User collection you deem appropriate. Note: Earlier versions of this guide created a collection called Windows Intune Users, however since Microsoft renamed Windows Intune to Microsoft Intune in October 2014, you should probably do the same, therefore any screenshots or references to a Windows Intune Users collection in these guides should be replaced with Microsoft Intune Users. Continue through the wizard until completion. Once you’ve created the User collection add some users to it using whatever method you wish (direct membership or query). Step 9. Add Microsoft Intune Subscription In the System Center 2012 R2 Configuration Manager console select Administration, and expand Cloud Services, select Microsoft Intune Subscriptions from the options available. In the ribbon above, click on Add Microsoft Intune Subscription The create Microsoft Intune subscription wizard appears Click on Next and you’ll be presented with the Microsoft Intune sign in page. This will pop up a Set the Mobile Device Management Authority window. Place a checkmark in the check box and click on OK. Selecting this choice will ensure that Configuration Manager will manage your mobile devices by using the Microsoft Intune connector and any mobile devices currently managed by Intune will now be managed by Configuration Manager. This is not reversible, so if you want to manage your mobile devices with Windows Intune then don’t select this option. Tip: If you have computers currently managed by Intune then they will remain managed by Intune. Only mobile devices will be managed by Configuration Manager if you chose it to be the authority above. You’ll be presented with the login page, fill in your details used in Step 1 and click on Sign In. After signing in click on next, you’ll see the General Configuration screen Click on browse and browse to the Windows Intune Users collection we created earlier, next fill in the Company name and URL to company privacy documentation, finally select the color scheme for the company portal and the Site code used for Device Management. Next you will get the platform support screen, leave all 4 choices deselected. We will enable one of them in the next part of this guide. The 4 choices you have and their requirements if any are explained below: Android: There are no platform requirements for Android devices. iOS: You will need an Apple Push Notification Service (APNs) certificate. Windows: You will need to specify sideloading keys. Sideloading keys let you install apps that are not in the Windows Store. Windows Phone 8: You must have a code-signing certificate. The certificate will sign the company portal app and all other apps deployed by Configuration Manager. For now, select no platforms, we will add them later. Then click next, and fill in the company contact information And add your company logo And click through to the completion notice, take note of the warning at the top of this screen. Step 10. Add the Microsoft Intune Connector role Note: The Windows Intune Connector role does not appear until after you have completed the Windows Intune Subscription wizard. In Site Configuration, expand Servers and Site System roles and note that you now have a new site system server listed, namely manage.microsoft.com. Select your Primary server and right click, choose Add Site System roles. Note: If you have a hierarchy, you must install this role on the CAS server. Fill in appropriate details for the General page and if you use a Proxy to access the internet then add those details on the Proxy page, on the System role selection page select our Windows Intune Connector role. The Windows Intune Connector role is like a gateway between Configuration Manager and Windows Intune (in the cloud) and it checks every 5 minutes for changes and relays that information up to manage.microsoft.com. Complete the Add Site System Roles wizard. To verify if the connector role installs correctly refer to the Sitecomp.log logfile which records details of the Windows Intune connector role installation. Congratulations you've completed the first part of this mini-series, in the next part we will add iOS support. cheers niall Log Files The following Log Files are useful for troubleshooting problems with Windows Intune Integration in System Center 2012 R2 Configuration Manager. clouddmp.log dmpdownloader.log dpmuploader.log cloudusersync.log For a full list of logfiles related to the Windows Intune Connector see here Related reading Unified Device Management with Configuration Manager 2012 R2 - Part 2, adding Support for iOS devices Unified Device Management with Configuration Manager 2012 R2 - Part 3, deploying apps to iOS devices Unified Device Management with Configuration Manager 2012 R2 - Part 4, configuring compliance on iOS devices Unified Device Management with Configuration Manager 2012 R2 - Part 5, enabling support for Windows 8.1 devices Unified Device Management with Configuration Manager 2012 R2 - Part 6, deploying Windows 8.1 apps (appx) Unified Device Management with Configuration Manager 2012 R2 - Part 7, deploying Windows Store apps Unified Device Management with Configuration Manager 2012 R2 - Part 8, adding Android devices Unified Device Management with Configuration Manager 2012 R2 - Part 9, deploying Apps to Android devices Unified Device Management with Configuration Manager 2012 R2 - Part 10, adding Windows Phone 8 devices Unified Device Management with Configuration Manager 2012 R2 - Part 11, using Intune Extensions James Bannan, an awesome Configuration Manager MVP - http://www.jamesbannanit.com/ James and Peter demoing BYOD - Unifying BYOD Management with Windows Intune and Configuration Manager 2012 - http://channel9.msdn.com/Events/TechEd/NewZealand/2013/WCL309 What’s New in System Center 2012 R2 Configuration Manager - http://technet.microsoft.com/en-us/library/dn236351.aspx How to Manage Mobile Devices by Using Configuration Manager and Windows Intune http://technet.microsoft.com/en-us/library/2c6bd0e5-d436-41c8-bf38-30152d76be10#BKMK_RTcert Support Tool for Windows Intune Trial Management of Window Phone 8 - http://www.microsoft.com/en-us/download/details.aspx?id=39079 Set up Windows Intune Direct Management for Windows Phone 8 Mobile Devices - http://technet.microsoft.com/en-us/library/jj733640.aspx How to: Edit DNS records - A, CNAME, MX, TXT, and SRV https://help.hover.com/entries/21204757-How-to-Edit-DNS-records-A-CNAME-MX-TXT-and-SRV Configuring Configuration Manager SP1 to manage mobile devices using Windows Intune- http://blogs.technet.com/b/configmgrteam/archive/2013/03/20/configuring-configuration-manager-sp1-to-manage-mobile-devices-using-windows-intune.aspx Deploying and Configuring Mobile Device Management Infrastructure - http://channel9.msdn.com/Events/MMS/2013/UD-B309 Windows Intune Company Portal App - http://blogs.technet.com/b/windowsintune/archive/2013/11/25/windows-intune-company-portals-for-ios-and-android-now-available.aspx Downloads You can download a Microsoft Word version of this guide here. How can I manage modern devices in System Center 2012 R2 Configuration Manager - Part 1 - Integrating Windows Intune.zip


-
when you deployed Windows 8.1 did you install .NET 3.5 from the SXS on the Windows 8.1 media or Windows 8 media...
-
Can I stop SCCM from auto deleting WSUS folders?
anyweb replied to monsouj's topic in Configuration Manager 2012
"CM can delete them and will with a maintenance task each week. You can't see or edit this task. " from Brian's post here -
see this post for details of how to do it
-
check the built in templates for ADR creation, there are two, one is for patch tuesday. Once you've checked that then do check part 9 here.
-
what happens when you click on 'get help with this error' ? what does your windowsupdate.log and wuahandler.log file look like ?
-
can one of you with the problem video the boot sequence from F12 to the error and upload it here please
-
R2 doesn't support Windows XP at all, you'd need to import a WinPE 3.1 boot wim in to R2 just to properly deploy Windows XP, and the version of USMT would be USMT 4
-
ah good old typos they get us all
-
I havn't added that post yet, hopefully soon
-
well the fish has come and gone twice with to 'public betas' of Windows 8, so it's quite likely we'll see another version of it in the future
-
dont do anything in wsus, your SUP controls what wsus syncs and when
-
well you need to deploy whatever script you have to a collection and to run hidden test the script on a virtual machine and run the script with system permissions *use psexec to test it*