anyweb
-
Posts
9278 -
Joined
-
Last visited
-
Days Won
371
Everything posted by anyweb
-
 did you follow my guide exactly ? did you set UDA options on the distribution point ?
 -
if you want to patch systems with updates released before you started your cycle then create baselines for each year containing updates for that platform eg: Windows 7 updates - 2013 Baseline Windows 7 updates - 2012 Baseline and so on....
-
the clients will get their updates from the sources in the order that you specify so if you specify only UNC shares then that's where they'll get them from, is that enough info ?
-
when the guide was written (RTM) there was no such option. But I will amend it for everyones benefit.
-
welcome Nigel
-
what is the version number listed in control panel for your Windows ADK 8.1 ?
-
are you using at least 1gb of ram in your deployment test machine ? what errors are your logs telling you ?
-
the links i provided are the same url's used to automatically update definition updates from Microsoft, see here If you are running a 32-bit Windows operating system, download the latest updates manually at http://go.microsoft.com/fwlink/?LinkID=87342 (http://go.microsoft.com/fwlink/?LinkID=87342). If you are running a 64-bit Windows operating system, download the latest updates manually at http://go.microsoft.com/fwlink/?LinkID=87341 (http://go.microsoft.com/fwlink/?LinkID=87341). if you want to get more details about when they are updated see this link
-
the restriction is because the Client os (windows 7, windows 8, etc) can not host Windows Deployment Services, that is a server service, therefore you cannot enable PXE on dp's running on a client os. you can however enable PXE on a dp on a server running Server 2012 R2 no problem
-
you can also deploy EXE files by manually specifying the application deployment type
-
thanks ! as to your issues 1. are you using the Microsoft Surface nic ? 2. try installing the configmgr console on a windows 7 computer and create the standalone media there cheers niall
-
have you seen CM12 in a lab - Part 17. Using MDT 2012 RC1 with Configuration Manager 2012 CM12 in a lab - Part 18. Deploying a UDI Client Task Sequence or http://www.windows-noob.com/forums/index.php?/topic/4045-system-center-2012-configuration-manager-guides/
-
SCCM 2012 R2 - New Standalone Install Failure with ADK 8.1
anyweb replied to briannbk's topic in Configuration Manager 2012
no problem, you did the right thing by posting here and including a screenshot :-) -
at first it looks like the network is ok <![LOG[Found network adapter "Intel® PRO/1000 MT Network Connection" with IP Address 192.168.1.146.]LOG]!><time="19:39:10.825+480" date="11 but then theres loads of dns failures like this so either you have DNS issues or its dropping the ip address, can you ping the FQDN of your mp after it fails ?
-
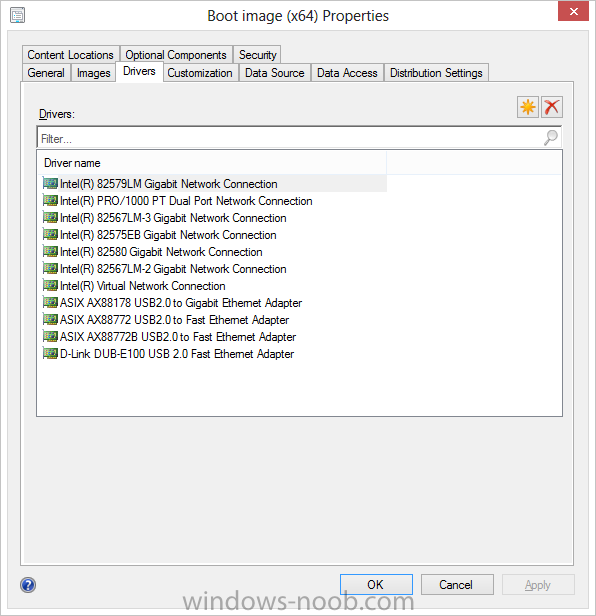
enable cmd support and press F8 prior to it bombing out, then grab the smsts.log file located in x:\windows\temp\smstslog\smsts.log post it here to add drivers to your boot image simply right click the boot image attached to your task sequence, select the drivers tab then add a driver by clicking on the yellow star... point to the required driver and continue through the wizard, only add NETwork drivers that you actually need by verifiying if lack of network (ipconfig is a good test) is actually your problem.
-
SCCM 2012 R2 - New Standalone Install Failure with ADK 8.1
anyweb replied to briannbk's topic in Configuration Manager 2012
it's complaining that the ADK is not installed on the server named SCCMSQL01, is that the case ? -
Suggested Methods for Windows Migration Configuration
anyweb replied to BzowK's topic in Configuration Manager 2012
hey Ben, take a look at the CM12 BitLocker frontend HTA it does User data migration (and a whole lot more) in an easy way, the techs pxe boot, make their choices in the hta and sit back while everything gets installed. even if you are not using bitlocker it might give you some ideas, CM12 in a Lab -The CM12 BitLocker FrontEnd HTA - video CM12 in a Lab - The CM12 BitLocker FrontEnd HTA as regards application installation we have migrated 1000's of computers from XP to 7 using dynamic application detection (basically using a webservice to see what ADSG a user is in and those groups are of course tied to applications, so if the user is in that group they get the app installed during the ts, dynamically). The link below shows a similar method (although not using a webservice) to do dynamic application installation. How can I install multiple applications based on Active Directory Security Group membership in a Task Sequence - Dynamic application Installation -
Help: How to add DotNet Framework 3.5 to Windows 8 during OSD Task sequence
anyweb replied to gvlaarho's question in How do I ?
i use everything in the SXS folder (and sub folders) - you dont need all of the 'source' -
SCCM 2012 R2 - New Standalone Install Failure with ADK 8.1
anyweb replied to briannbk's topic in Configuration Manager 2012
which server did you install ADK 8.1 on ? -
are you sure the boundary is correctly defined, is it a subnet/ip range or ad site boundary ?
-
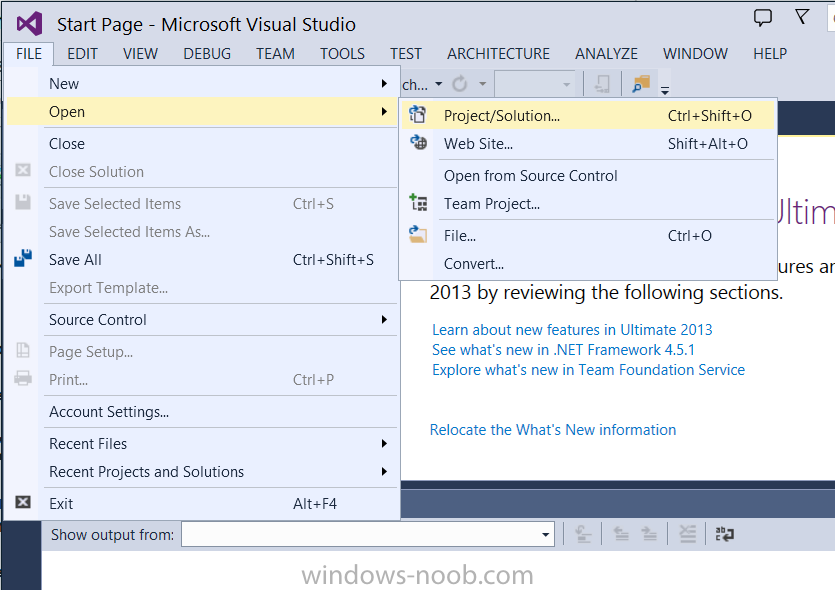
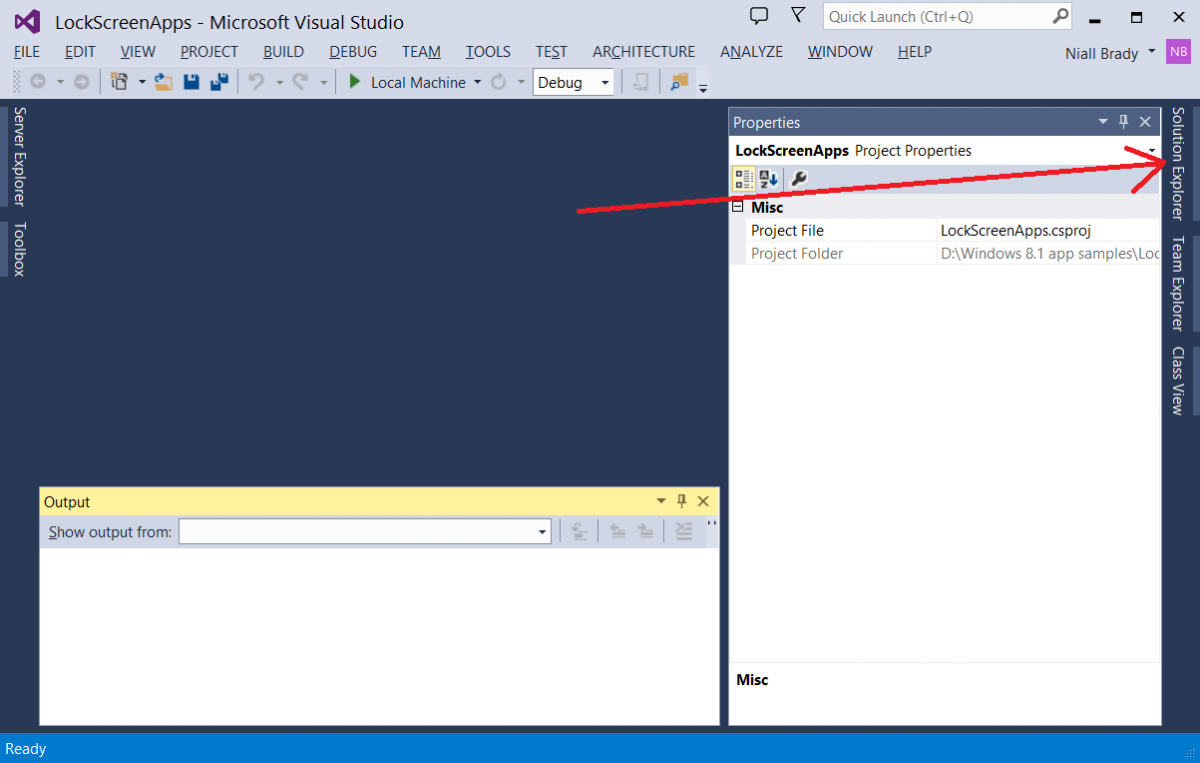
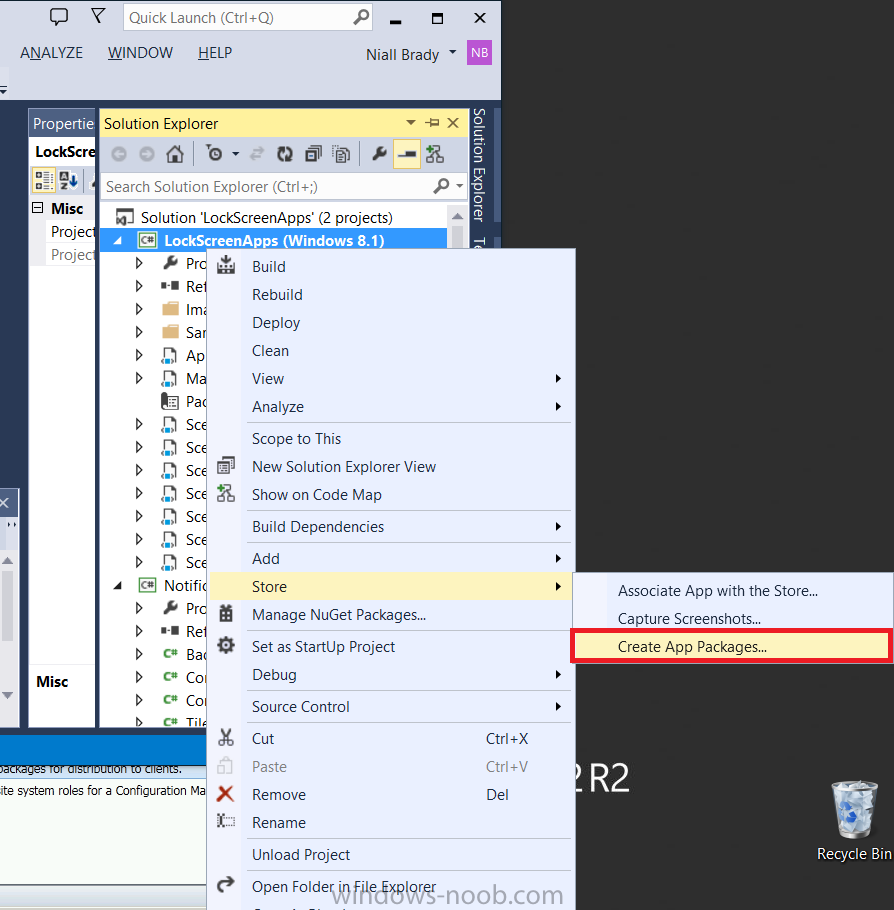
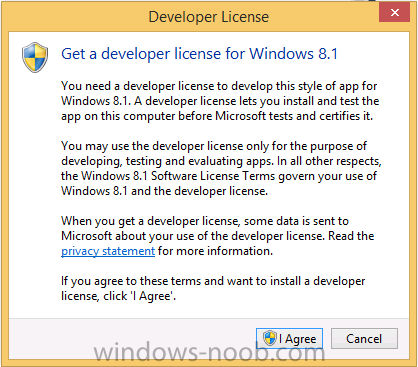
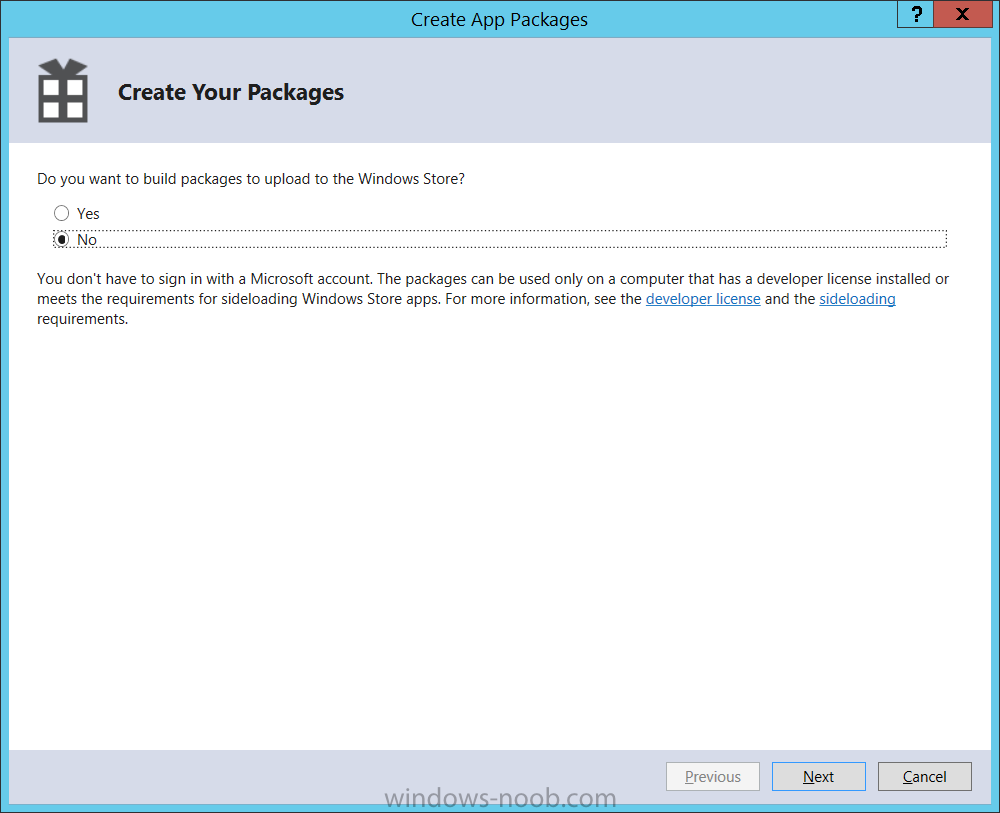
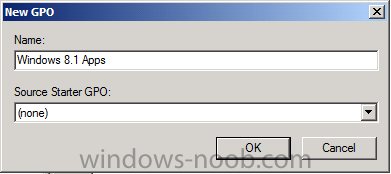
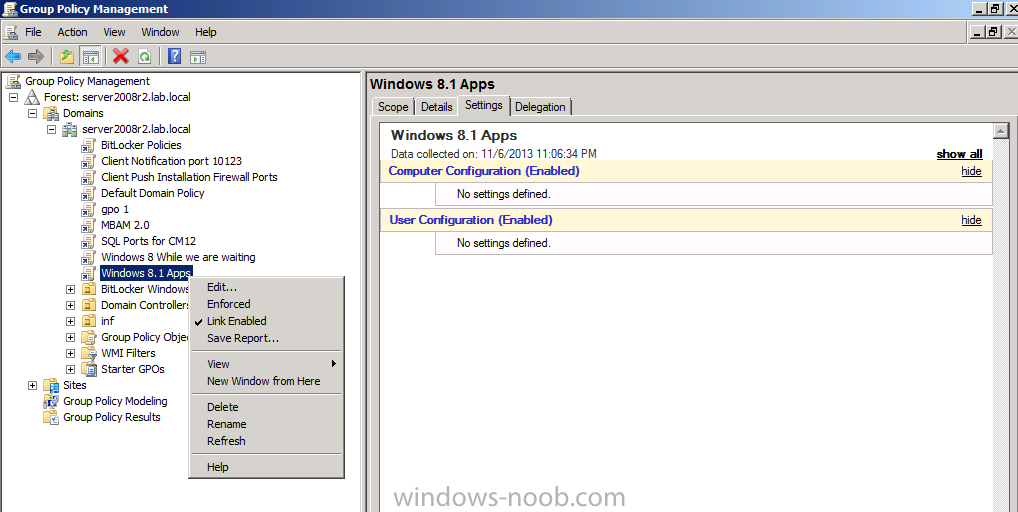
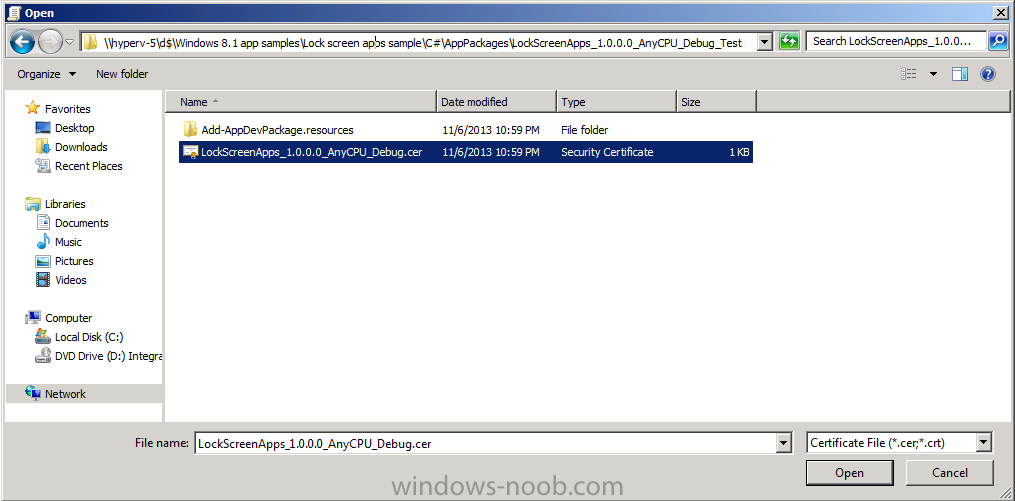
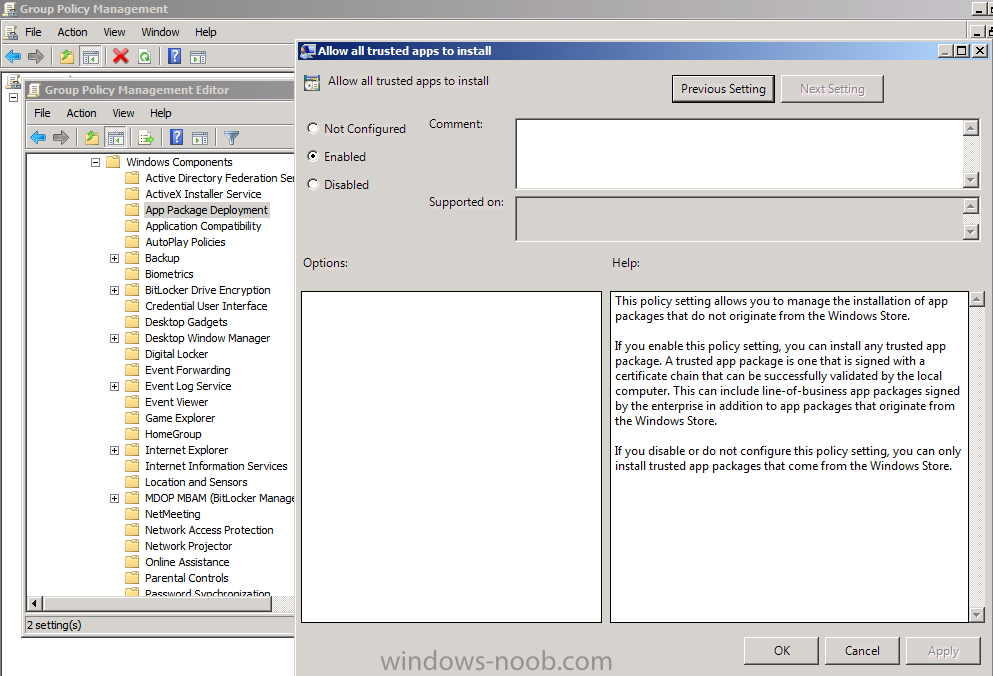
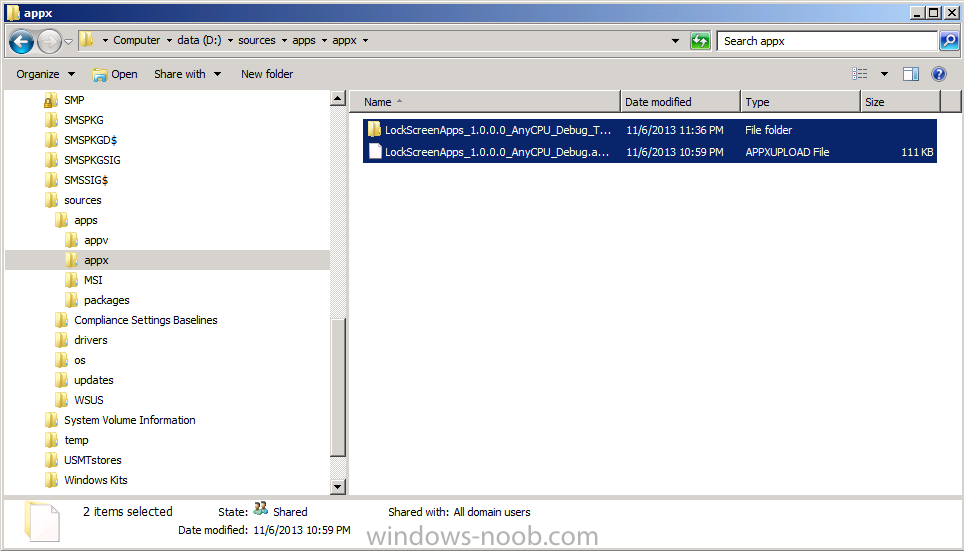
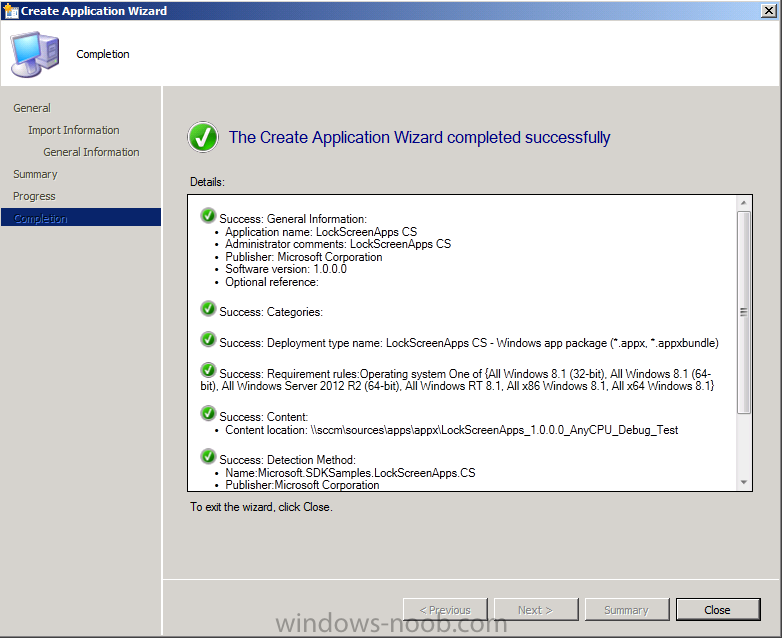
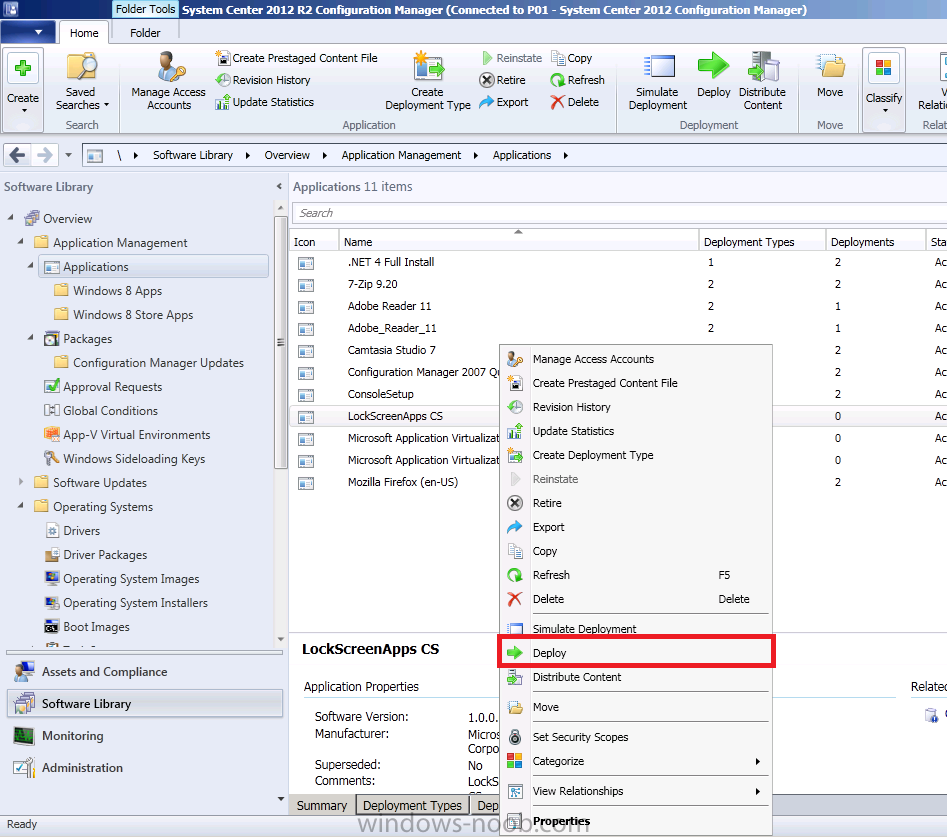
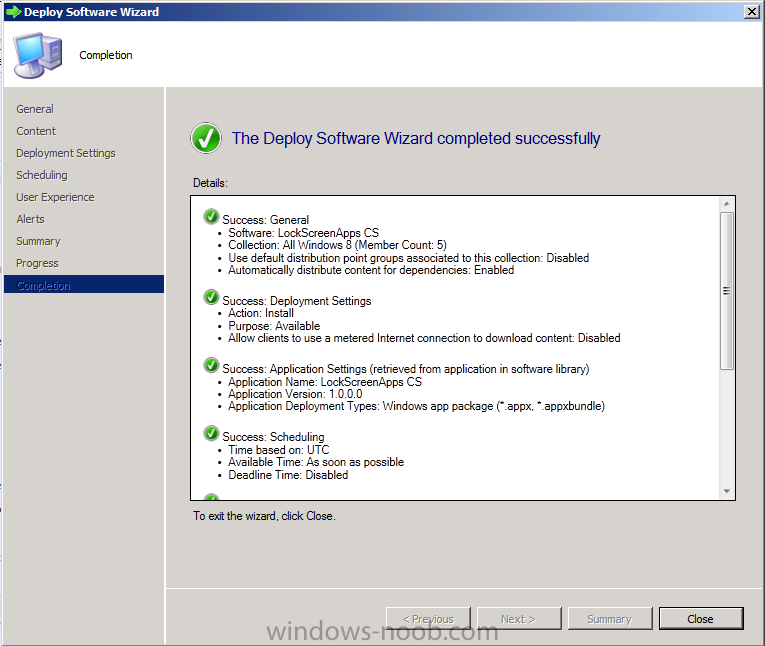
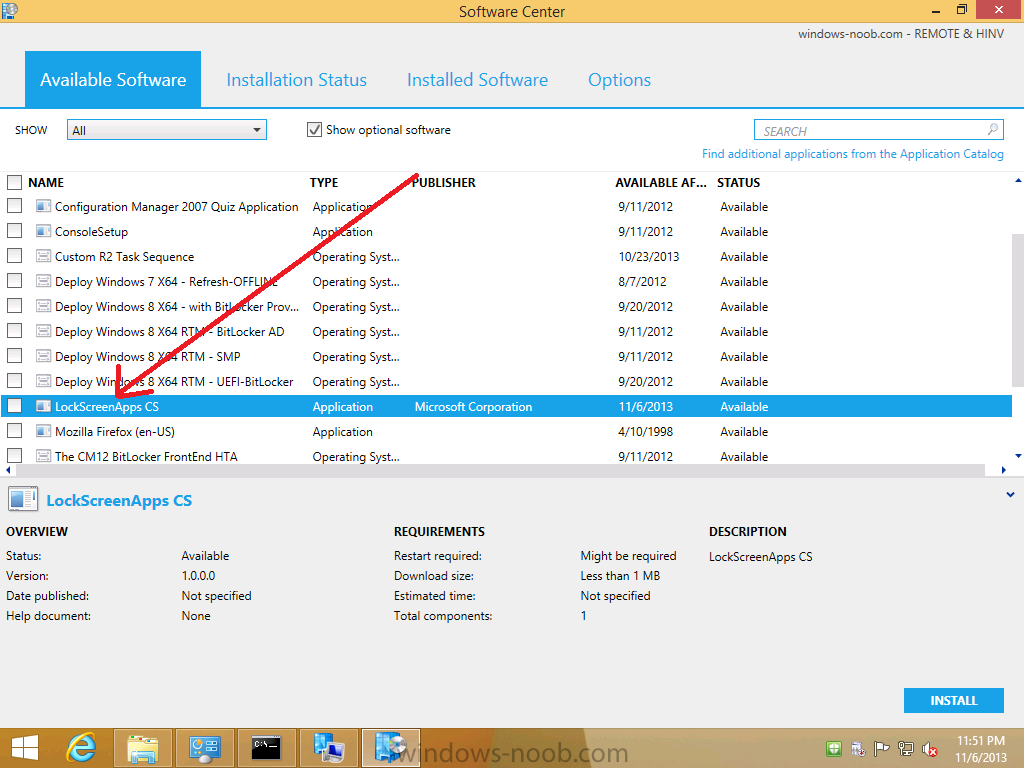
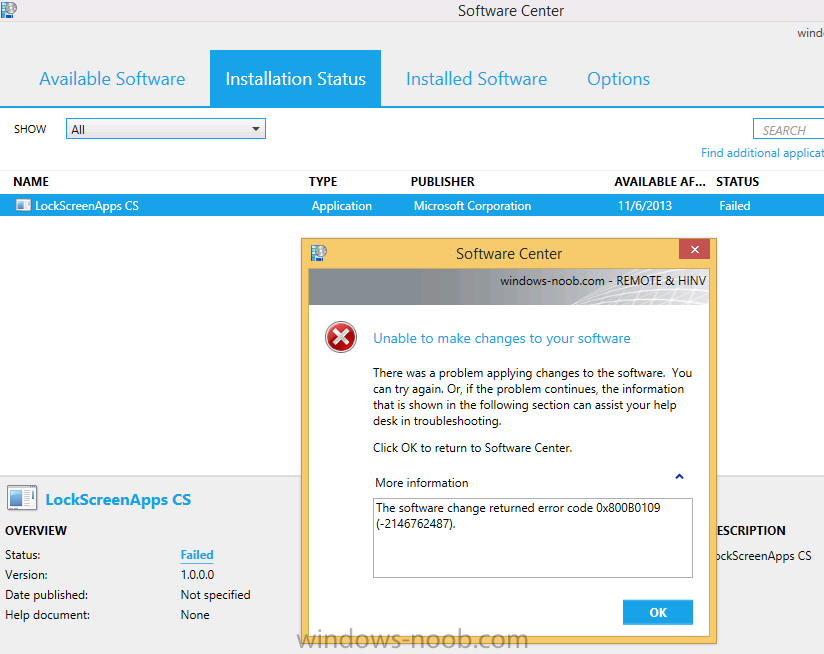
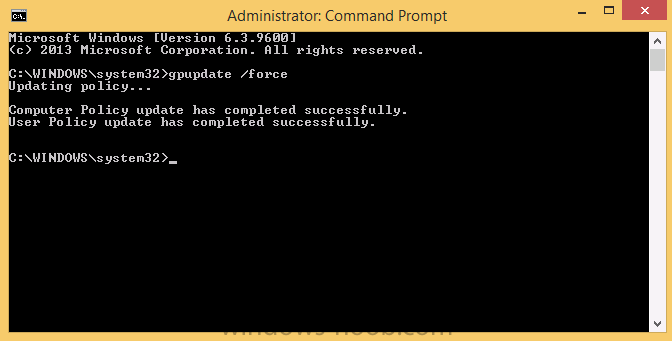
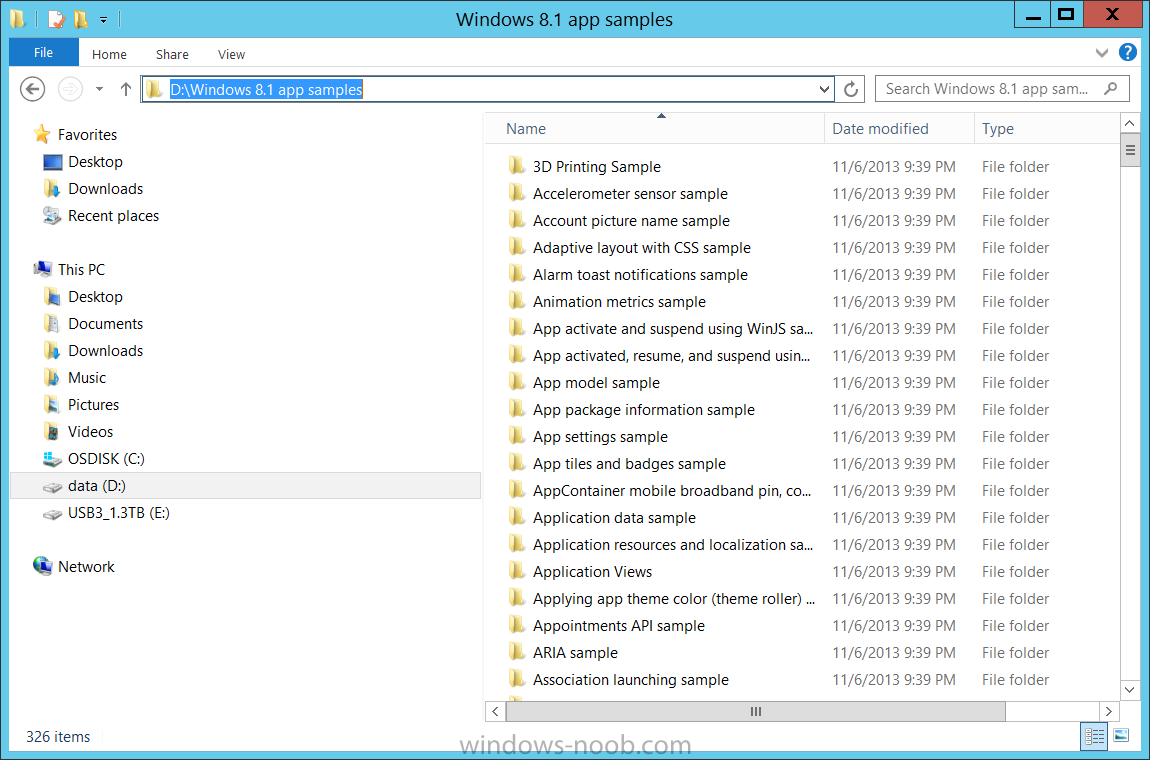
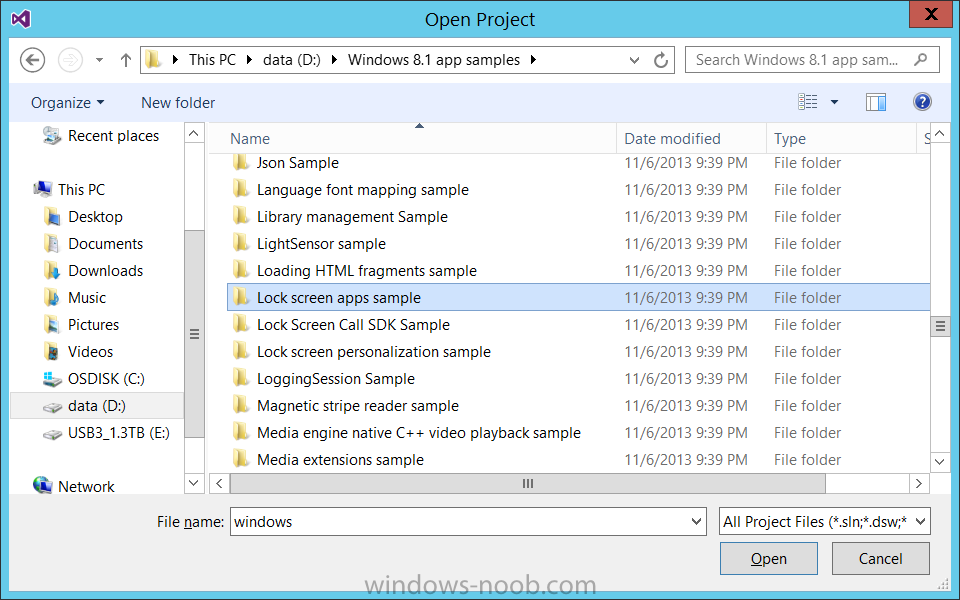
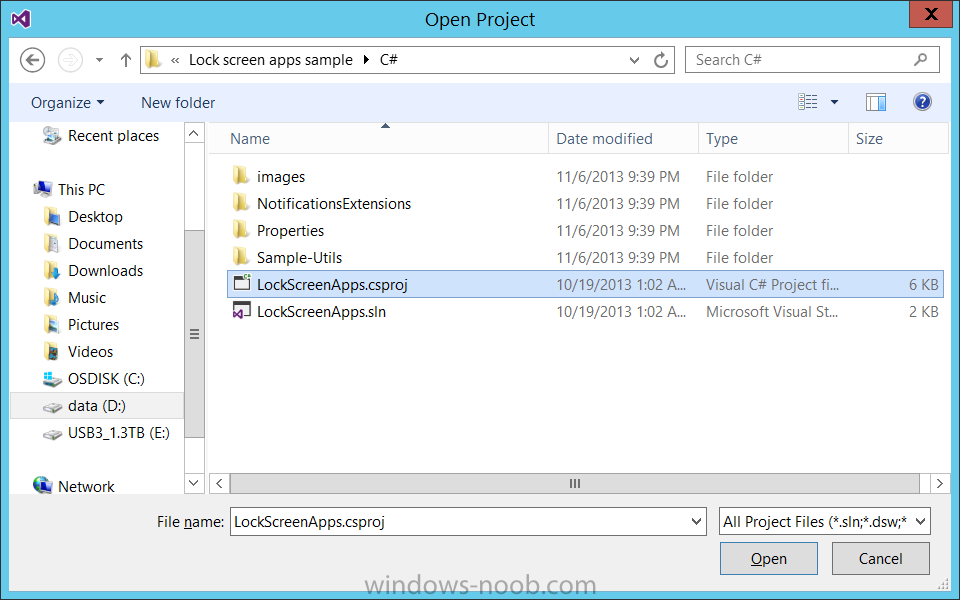
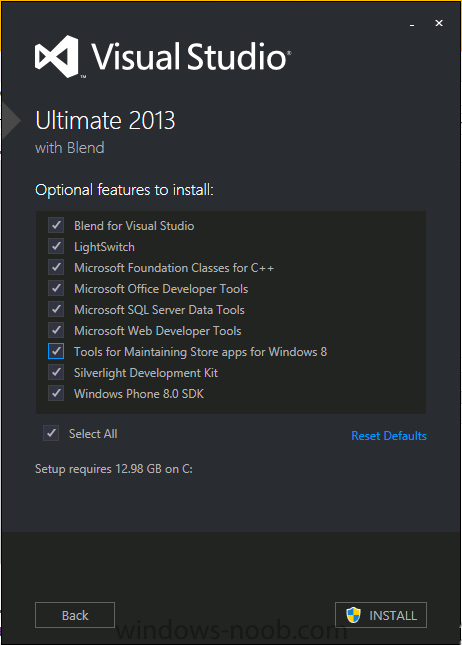
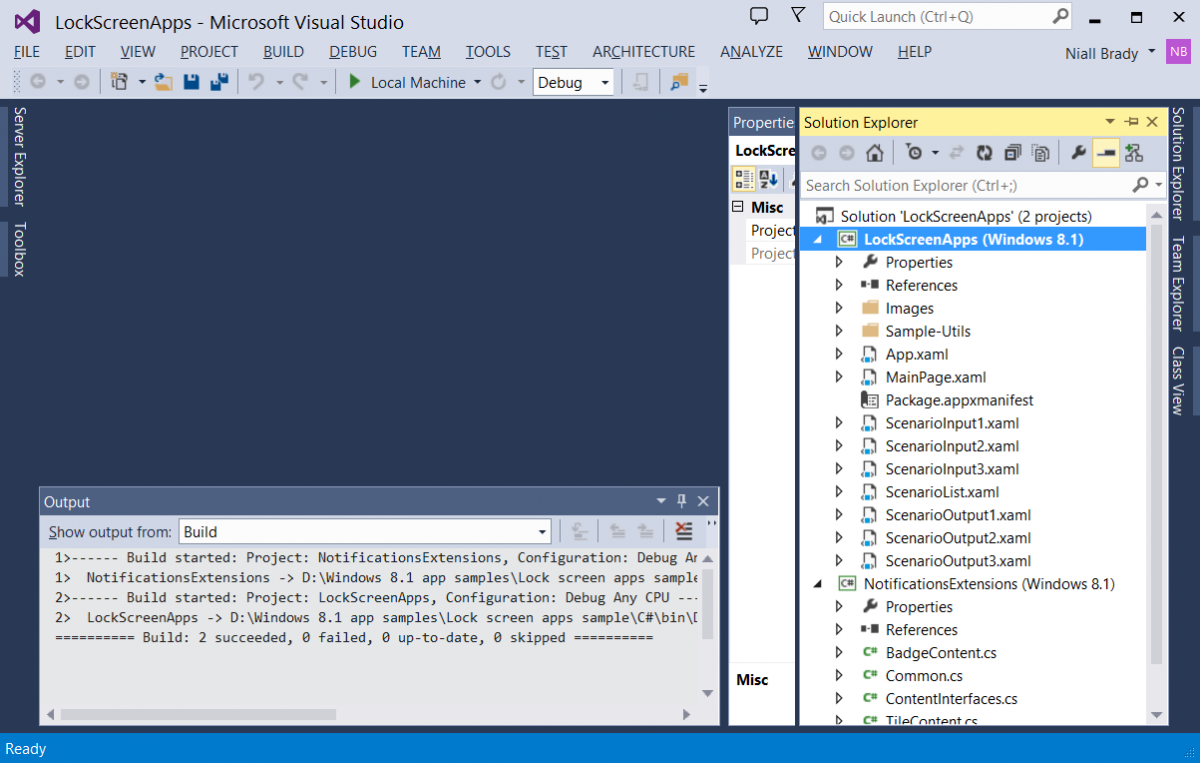
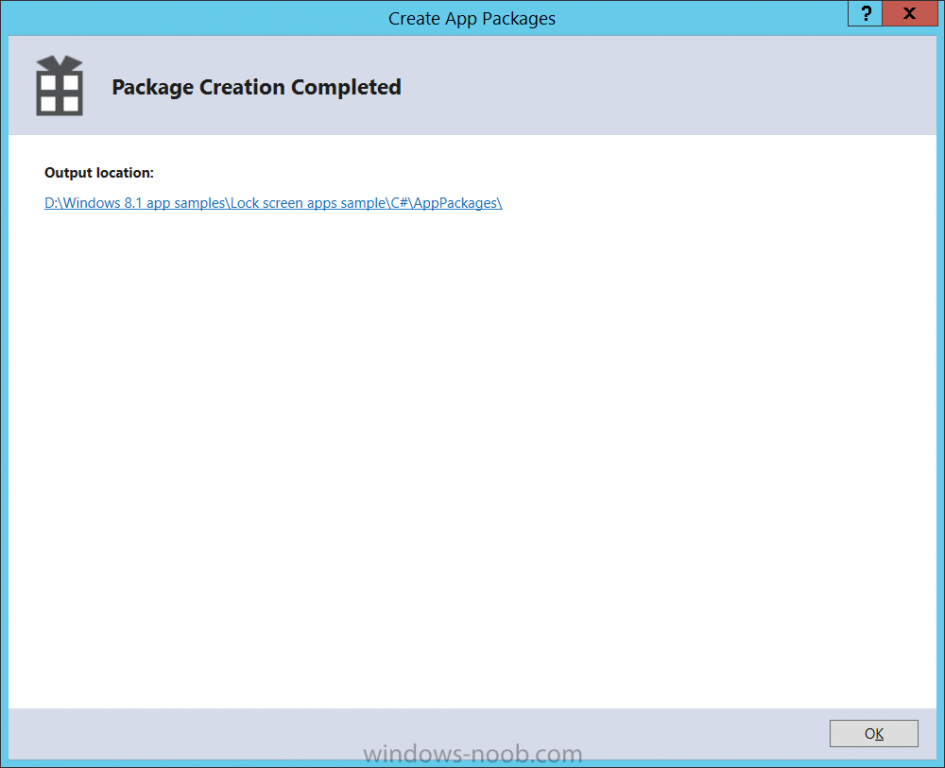
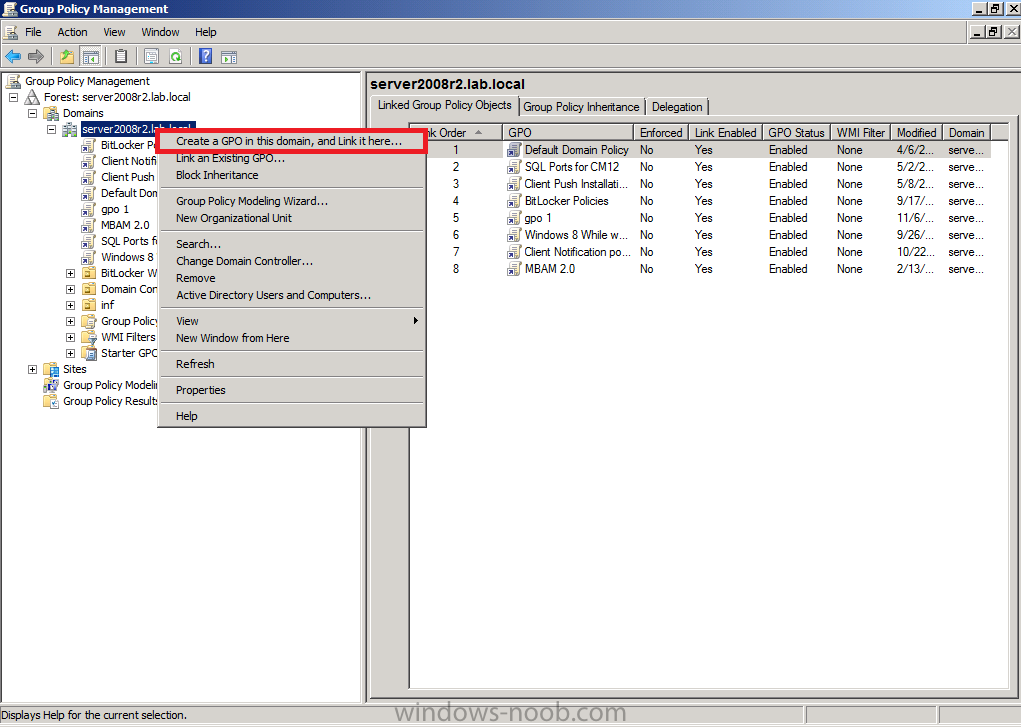
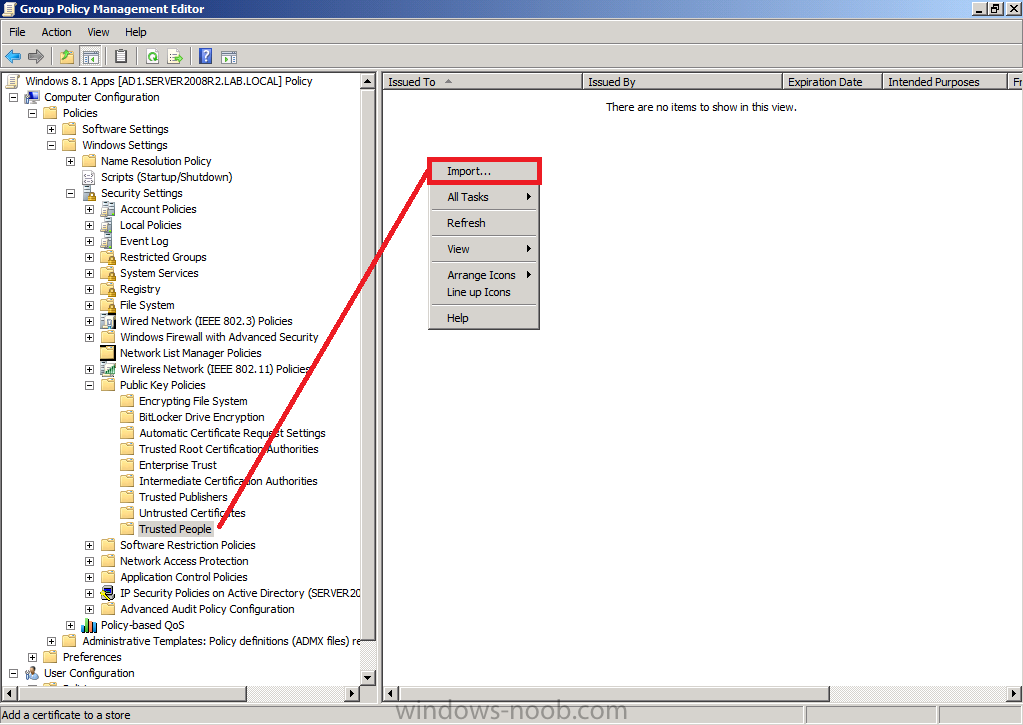
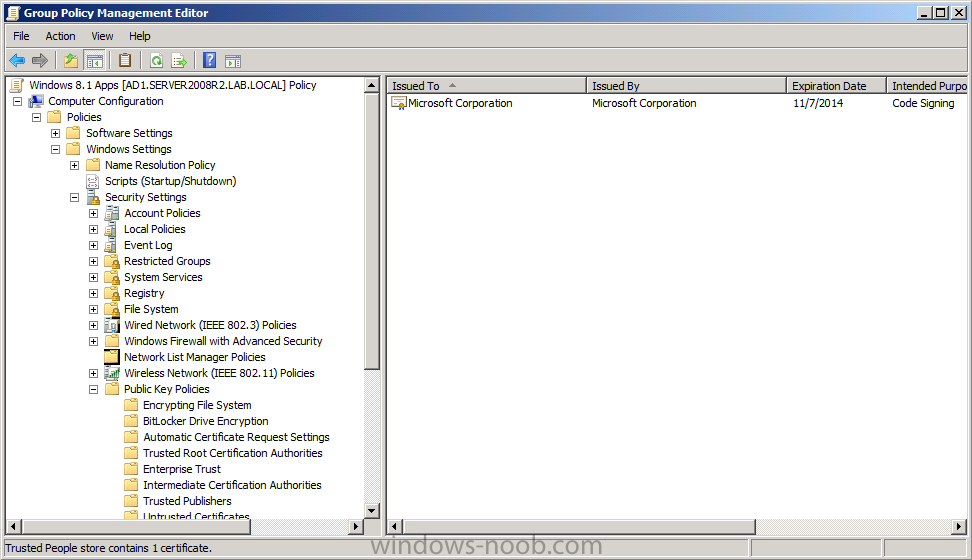
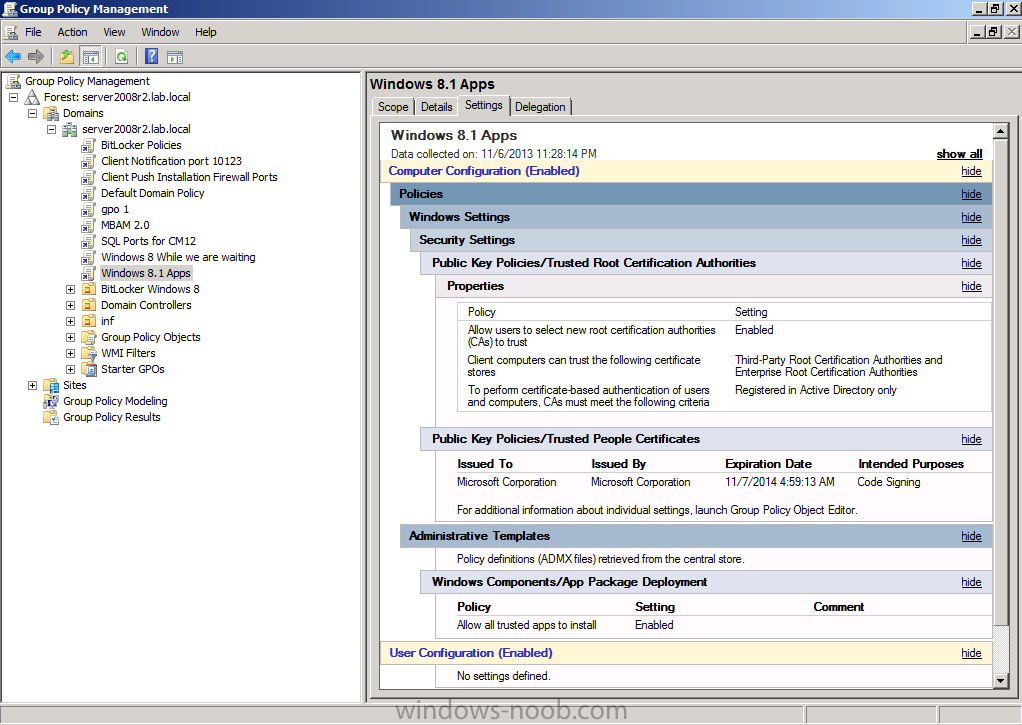
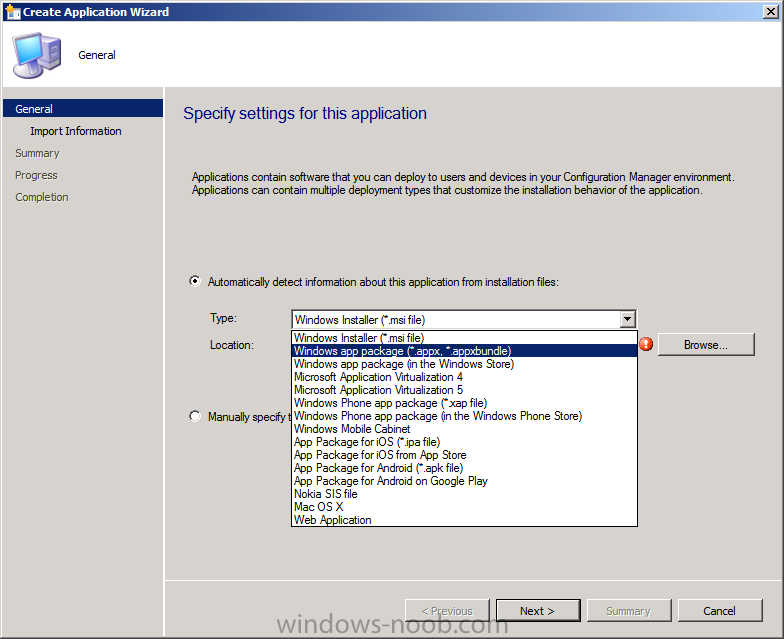
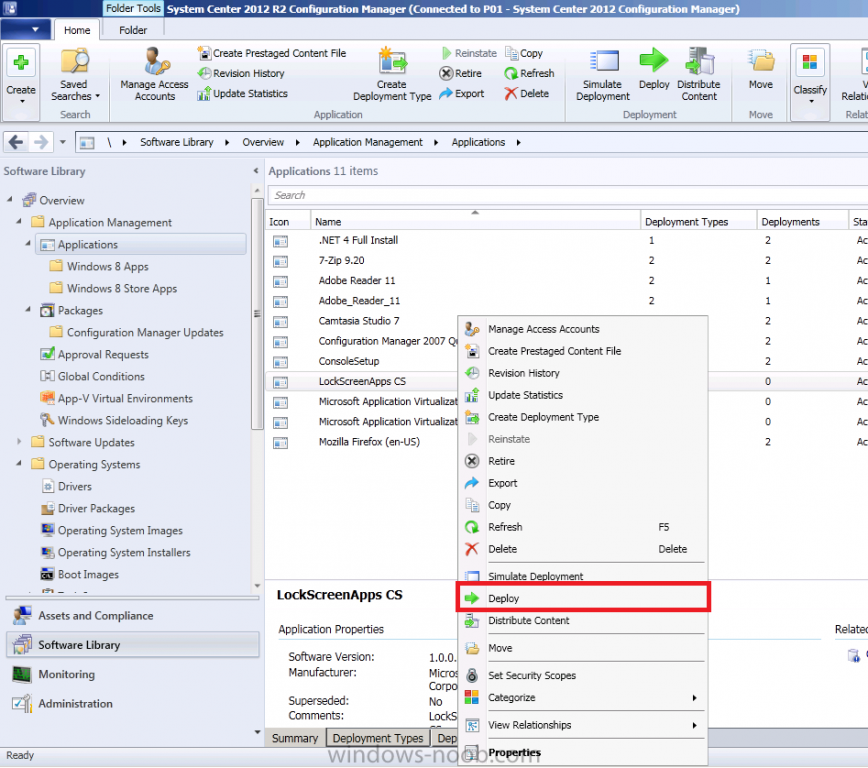
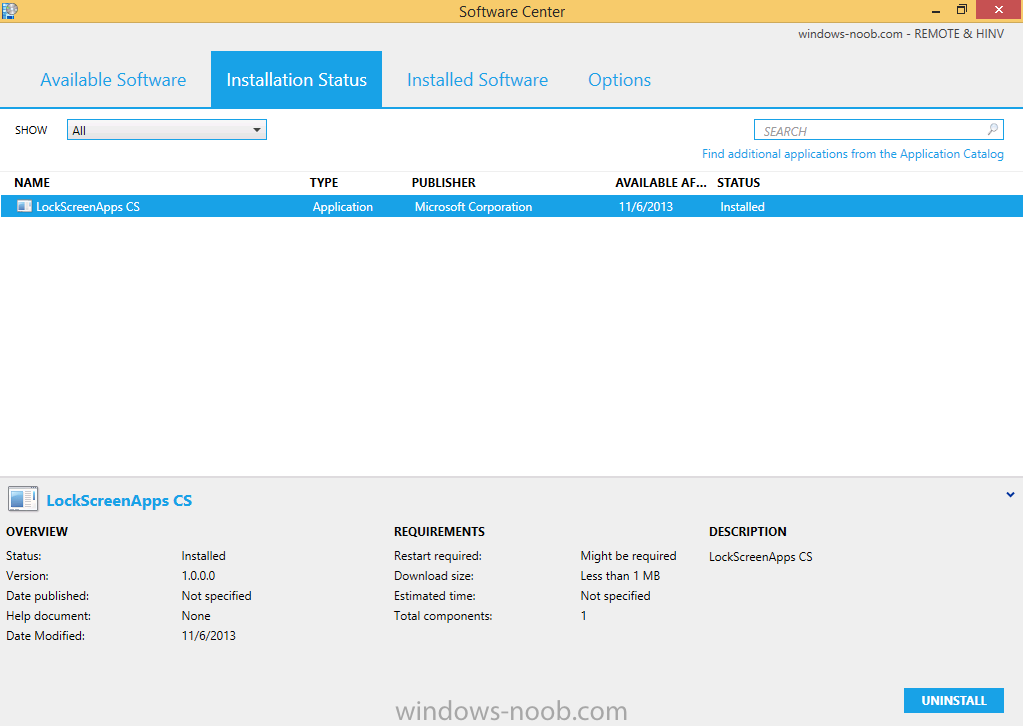
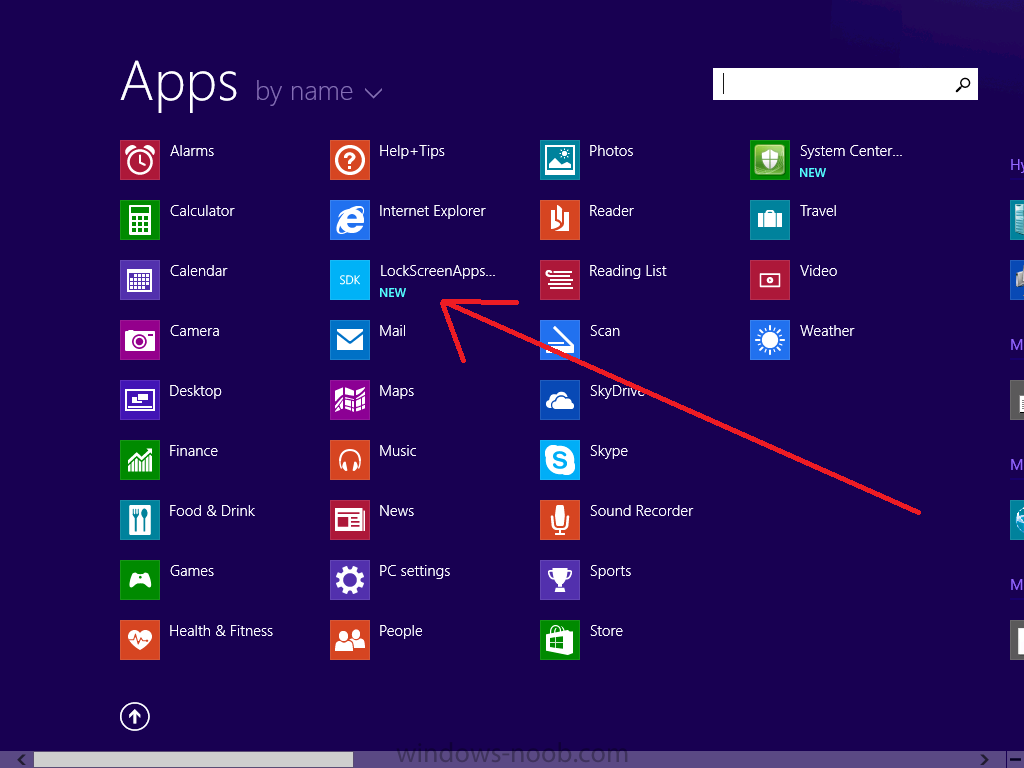
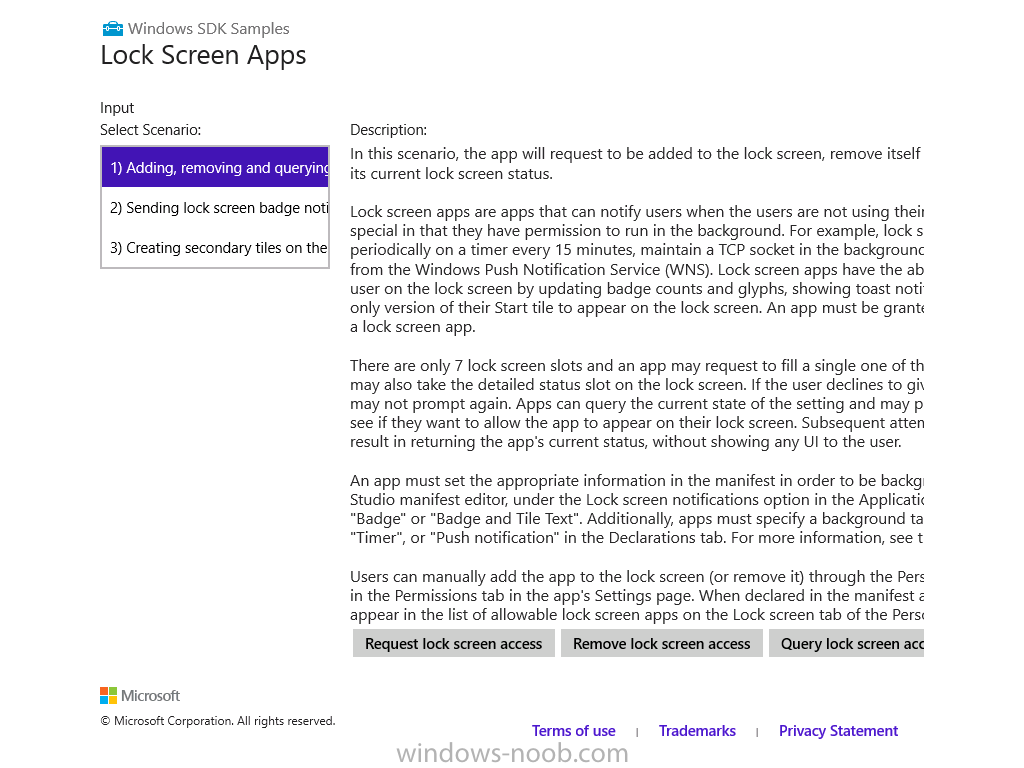
Introduction You now have the ability to develop your own applications and then deploy them to new exciting operating systems thanks to the recent releases of the following products: System Center 2012 R2 Configuration Manager Visual Studio 2013 Windows 8.1 Server 2012 R2 In this post I'll show you how to create a quick modern style (formally Metro) test application using Visual Studio 2013 and then add that application into System Center 2012 R2 Configuration Manager and finally deploy it to a Windows 8.1 computer. Note: Windows 8 Store apps can be installed from the Store or from a distribution point using a process known as sideloading. You can get details about sideloading keys required for those apps here. You can also install LOB Windows Store apps that are not signed by the Windows Store. The apps must be cryptographically signed and can only be installed on a computer that trusts the signing certificate. I assume you've already downloaded and installed Visual Studio 2013 on Server 2012 R2, you could install it on a Windows 8.1 computer if you wish, in fact that is a necessary minimum operating system level if you want to develop for Windows 8.1. For your reference I used en_visual_studio_ultimate_2013_x86_dvd_3009107.iso available on MSDN. Note: I'm not a developer, I'm doing this to give you some ideas about using modern style apps in Configuration Manager 2012 R2. Step 1. Download and extract the Windows 8.1 app samples Microsoft provides a whole bunch of example code/applications that you can use to create your first masterpiece. Download them from here and extract them locally. I downloaded the full zip package and extracted it to D:\Windows 8.1 app samples like in the screenshot below Step 2. Import an Application into Visual Studio Start Visual Studio 2013, if this is your first time it may be a bit overwhelming, don't worry you'll soon get some action. I'd recommend a high resolution monitor for this type of work. I've already signed in with my Microsoft Live account so you can see my name in the top right corner. Click on file and choose Open, Project/Solution select a sample app from the list of 250 or so apps, I've selected Lock screen apps sample below and select the C# folder within and then select the .csproj file within that folder (LockScreenApps.csproj) and click on Open If you don't have one already, you will be prompted to get a Developers License (it's free). So go ahead and get one. and after signing in to your live account you'll get the license... Your first project is loaded and you've got a developers license ! Step 3. Build and then Create app packages We've got the code, let's build it. Click on Solution Explorer to the right to expand that menu if it isn't already expanded. Right click on your app listed in Solution Explorer and choose Build (or rebuild if trying again....) any messages about the build will be reflected in the output window Now that it has built the code, right click the application and choose Store, then Create App packages. select No when asked do you want to upload to the Store (Windows store), we are only testing after all... leave the output location as default and click on Create, note that you can change the version number of the application here, cool :-) and if all goes well you'll be informed that it's done Step 4. Create a GPO for Deploying Windows 8.1 apps In Active Directory start up Group Policy management (gpedit.msc) and choose to create a new Group Policy Object give it a suitable name and once done right click and choose Edit In order to deploy an appx app (modern style app) via Software Center certain requirements must be met on the client, and these can be done via Group Policy. So expand Computer Configuration, Policies, Windows Settings, Security Settings, Public Key Policies,Trusted People right click and choose import to import the needed certificate for each app you want to deploy, browse to the CER file located in the AppPackages directory that you just built the app in (see screenshot below) make sure you are placing it in the Trusted People Certificate Store, click your way through the wizard The certificate appears, note the expiration date, when it expires you'll no longer be able to deploy the app with that certificate. Next, set the following setting in the GPO Computer Configuration, Administrative Templates, Windows Components, App Package Deployment, Allow all trusted apps to install (Enable) If you don't have that setting then you'll need to import it by logging on to a Windows 8 computer, copy the admx file from Windows 8 to %logonserver%, Logoff Active Directory, Logon AD, run gpedit.msc and the new templates are there. the finished GPO should look like this Step 5. Copy the new app to your Configuration Manager server Copy the new application to your sources share on the Configuration Manager server. Step 6. Create and deploy the application in Configuration Manager 2012 R2 In the Configmgr Console expand Software Library and Applications, choose Create Application. select Windows app package (*.appx, *.appxbundle) from the drop down menu point to the appx file in the files we copied in Step 5 above continue through the wizard until completion. I won't go into details about Deploying the app as it's the same process as any application, just right click and choose deploy, go through that wizard... make sure to to Deploy it to a Device collection that contains our Windows 8.1 computer, make it an available (optional) deployment. and to distribute it to your distribution points. Step 7. Test the new app on a Windows 8.1 computer Logon to a Windows 8.1 computer and open software center, you should see our new app, click Install. after a few moments if it fails with The software change returned error code 0x800B0109 like in the screenshot below, then make sure to update Group Policy like so... gpupdate /force then try again. This time it will work :-) and there it is on the Start screen ! click on it to see what happens cool or what ! until next time, adios ! Related Reading How can I install System Center 2012 R2 Configuration Manager ? - http://www.windows-noob.com/forums/index.php?/topic/8451-how-can-i-install-system-center-2012-r2-configuration-manager/ Deploying enterprise apps - http://msdn.microsoft.com/en-us/library/windows/apps/jj657971.aspx Windows 8.1 app samples - http://code.msdn.microsoft.com/windowsapps/Windows-8-Modern-Style-App-Samples Get a Developers License - http://msdn.microsoft.com/en-us/library/windows/apps/hh696646(v=vs.110).aspx Planning to Deploy Windows 8 Apps in Configuration Manager - http://technet.microsoft.com/en-us/library/jj822984.aspx What is a Windows Store App - http://go.microsoft.com/fwlink/?LinkId=264710 How to Add and Remove Apps - http://technet.microsoft.com/en-us/library/hh852635.aspx For more information about how to sign an app and using certificates, see App Packaging Tools.


-
Cannot install .NET 3.5 on Windows 8.1 during OSD TS
anyweb replied to Robert R.'s topic in Configuration Manager 2012
it works fine for me but i'm using the SXS folder from the Windows 8.1 media, cheers niall -
sure you can do it that way, use the Include rule. not every customer will want all their servers updated the same way or time however hence having different ADR's can be beneficial (for reporting too...)
-
Can't connect to ConfigMgr 2012 SP1 R2 console
anyweb replied to mniccum's topic in Configuration Manager 2012
have you tried ipconfig /flushdns ? -
whats not working exactly, you need to say exactly what is failing and where cheers niall