anyweb
-
Posts
9195 -
Joined
-
Last visited
-
Days Won
367
Everything posted by anyweb
-
 I would not do anything unsupported, I've pinged Microsoft again for comment, if they come back to me i'll let you know
 -
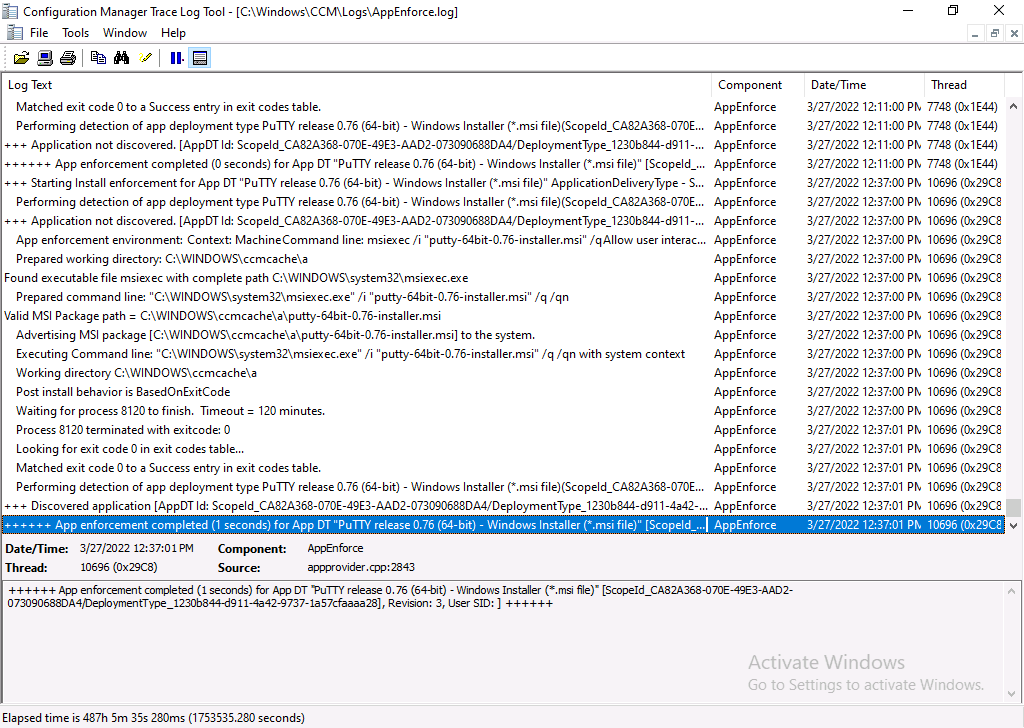
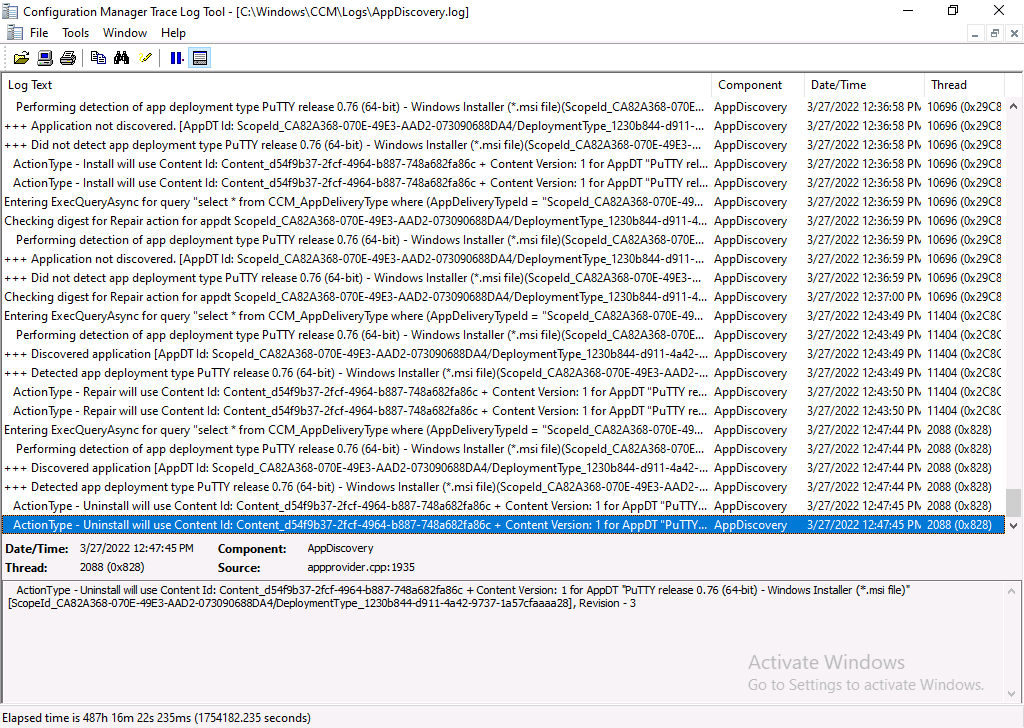
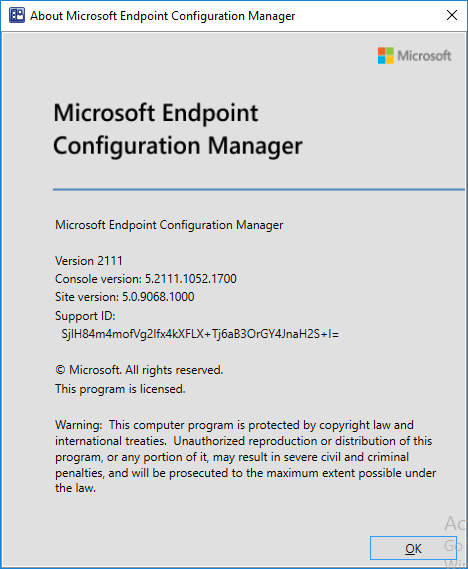
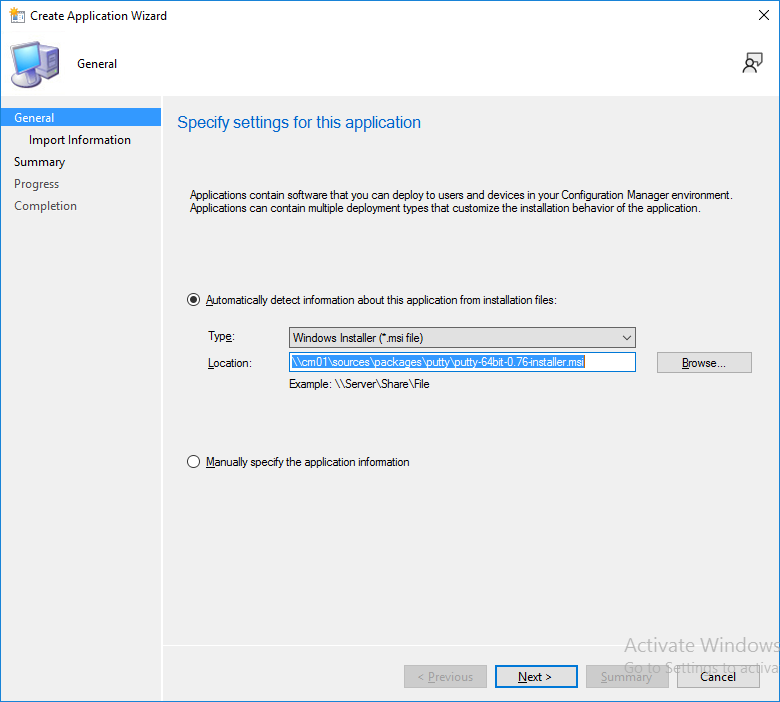
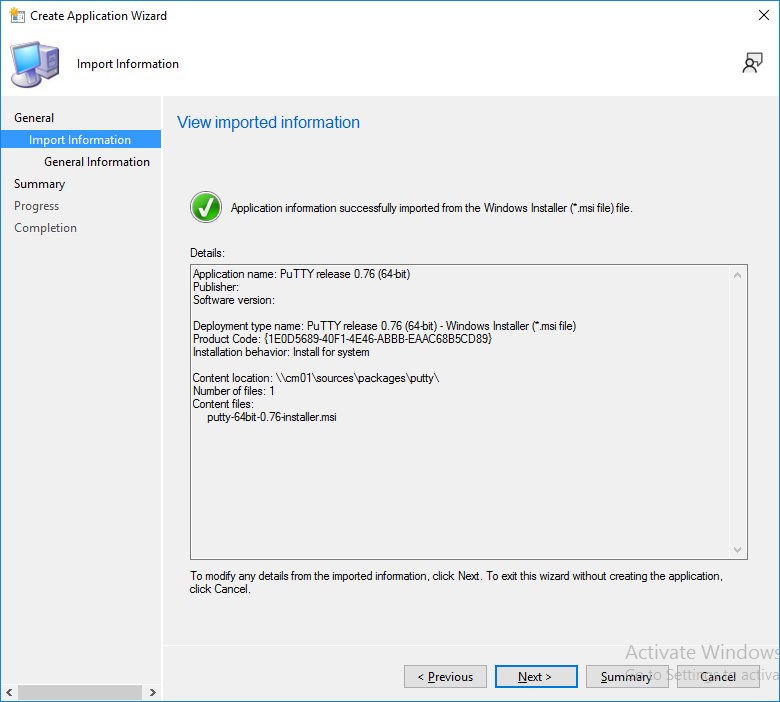
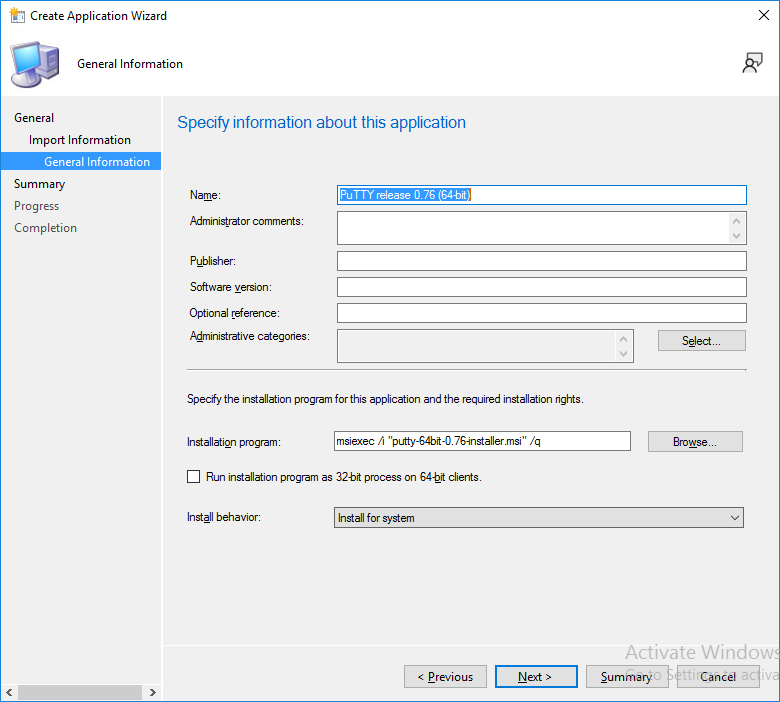
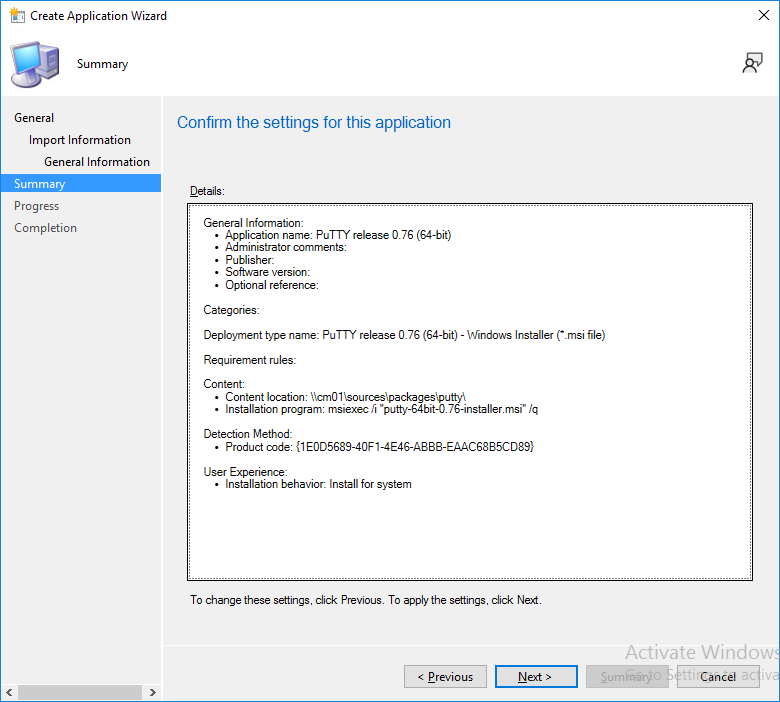
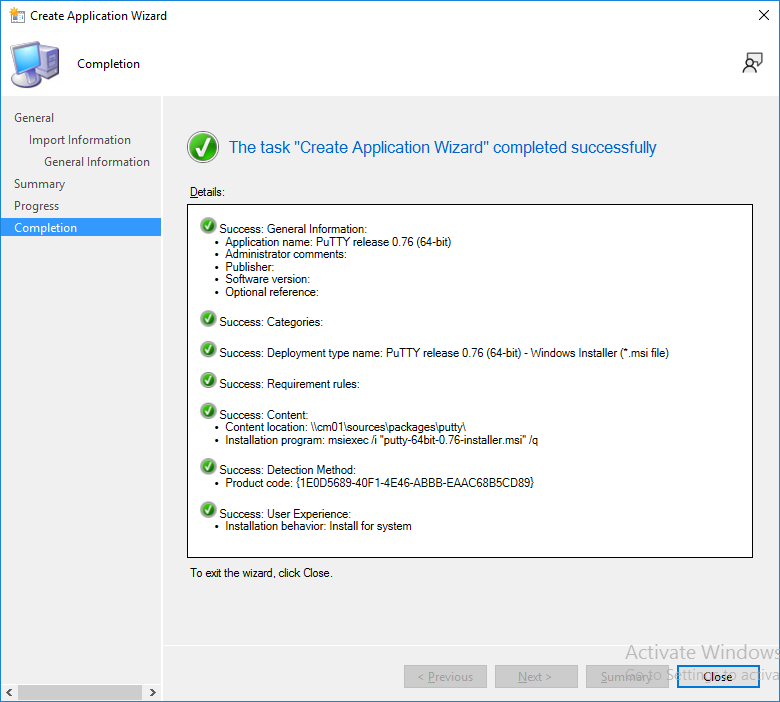
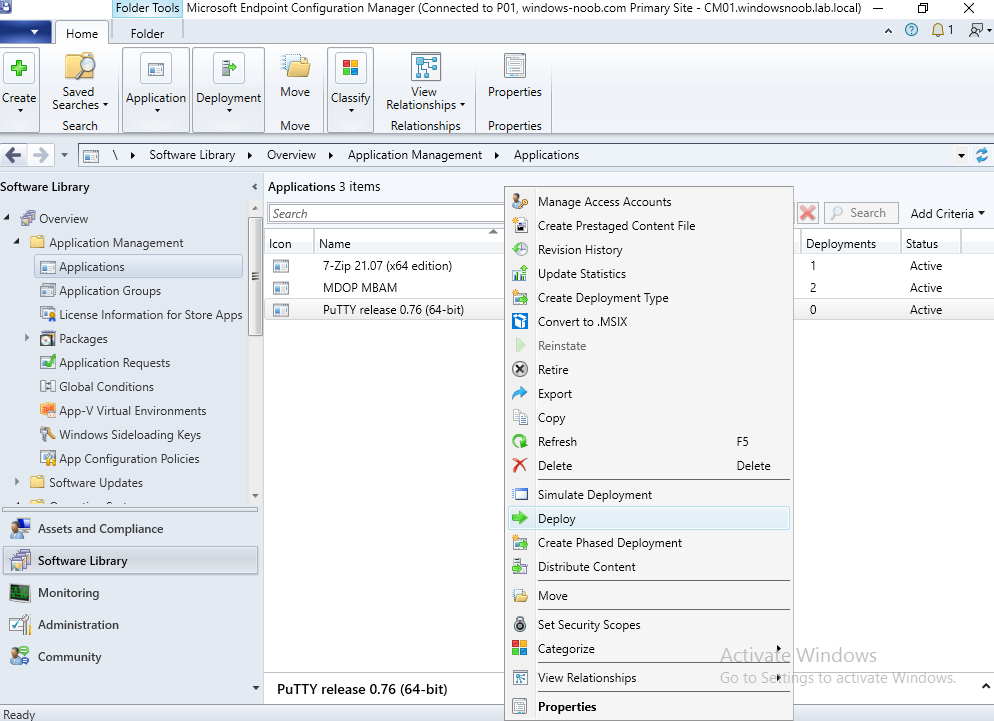
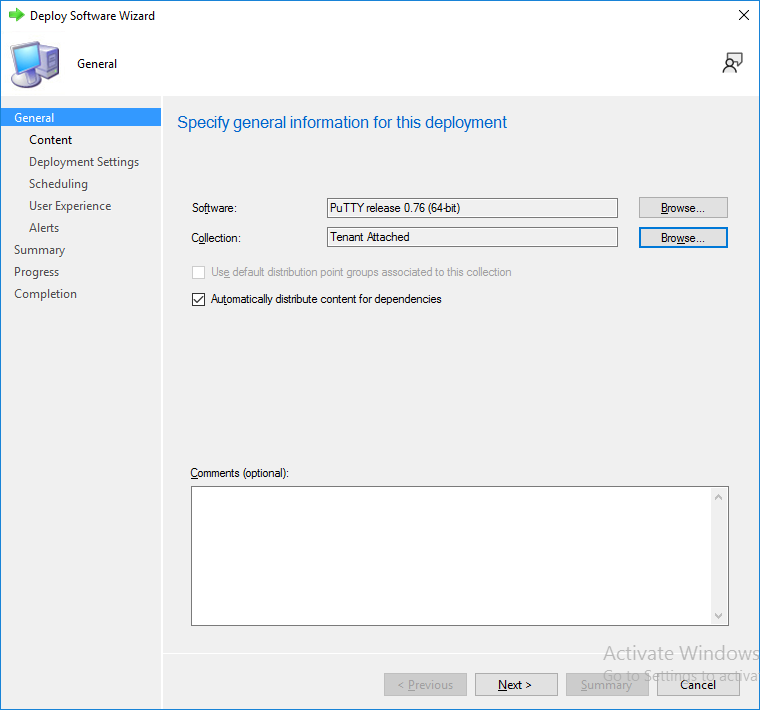
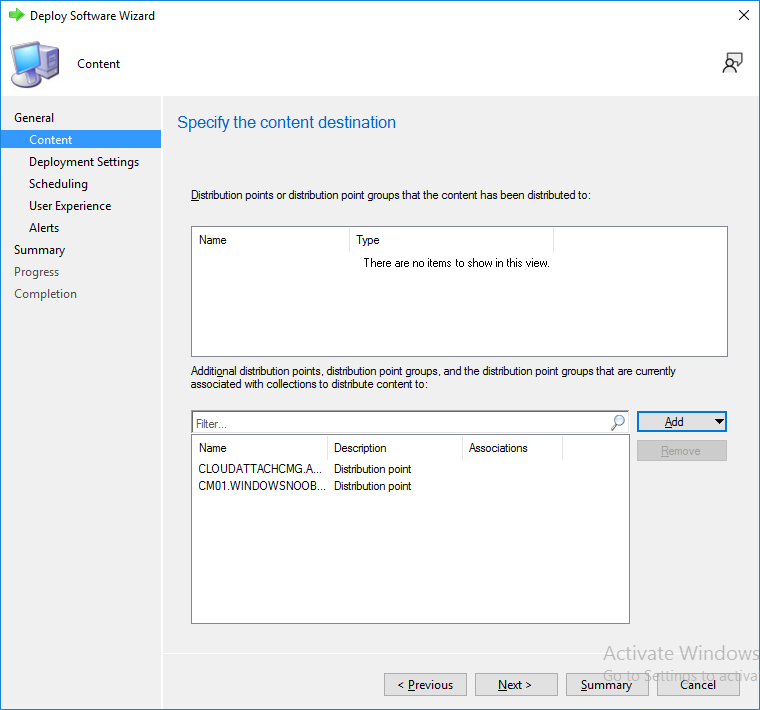
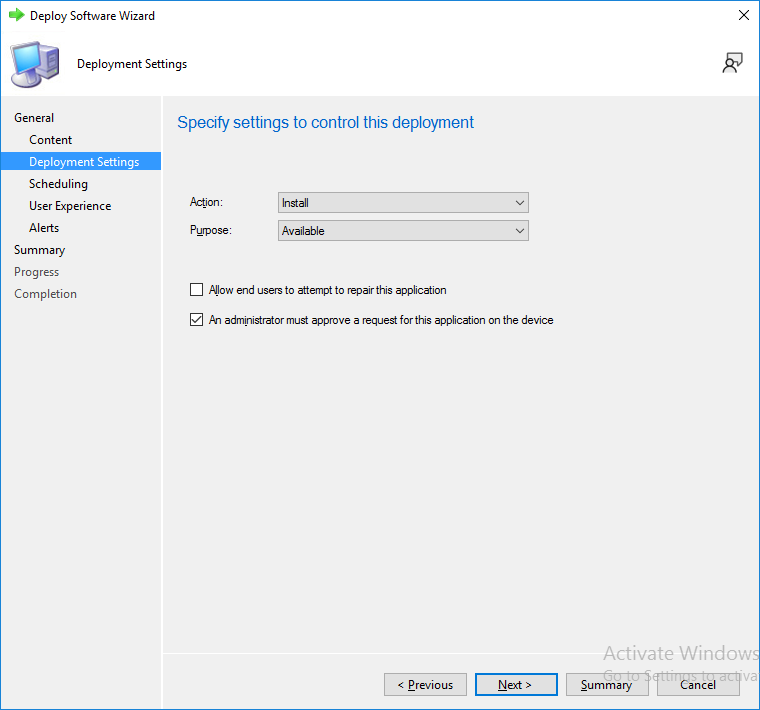
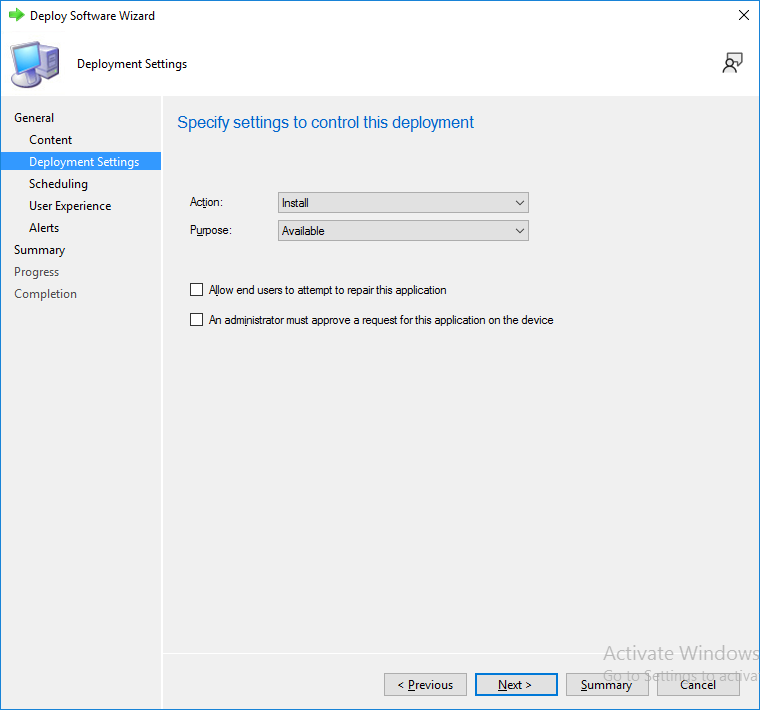
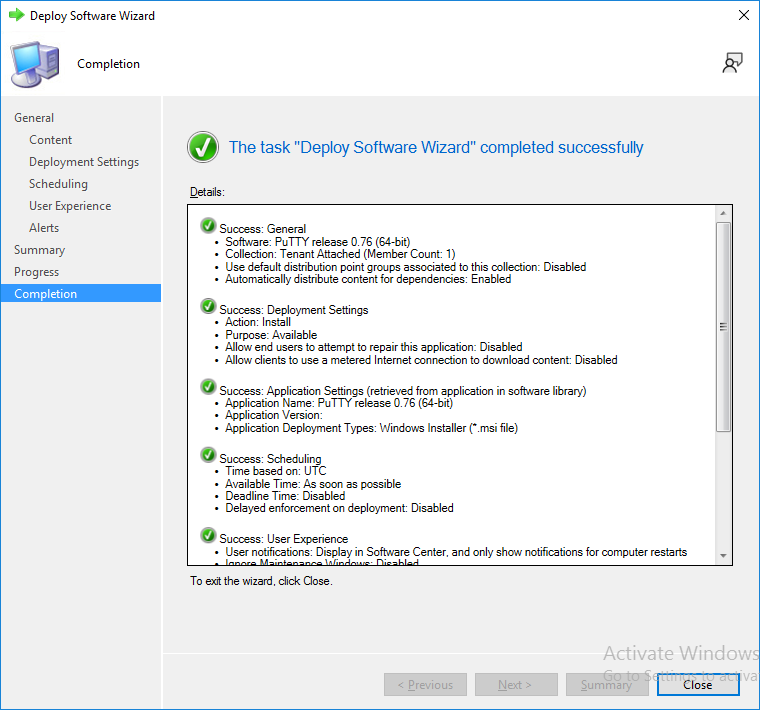
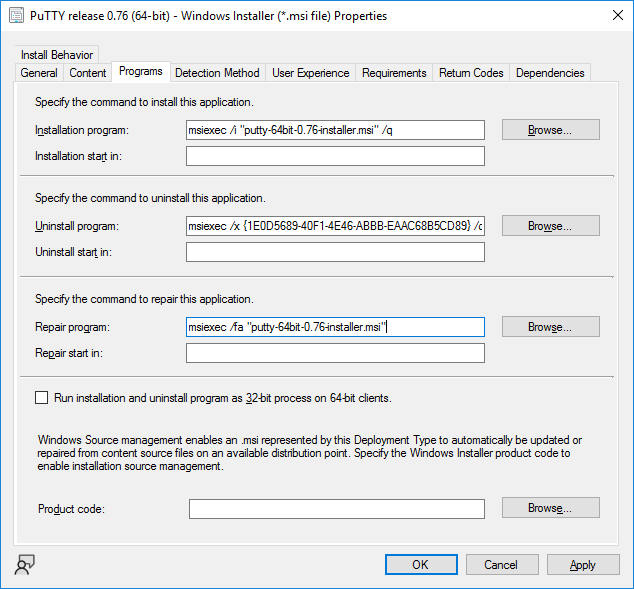
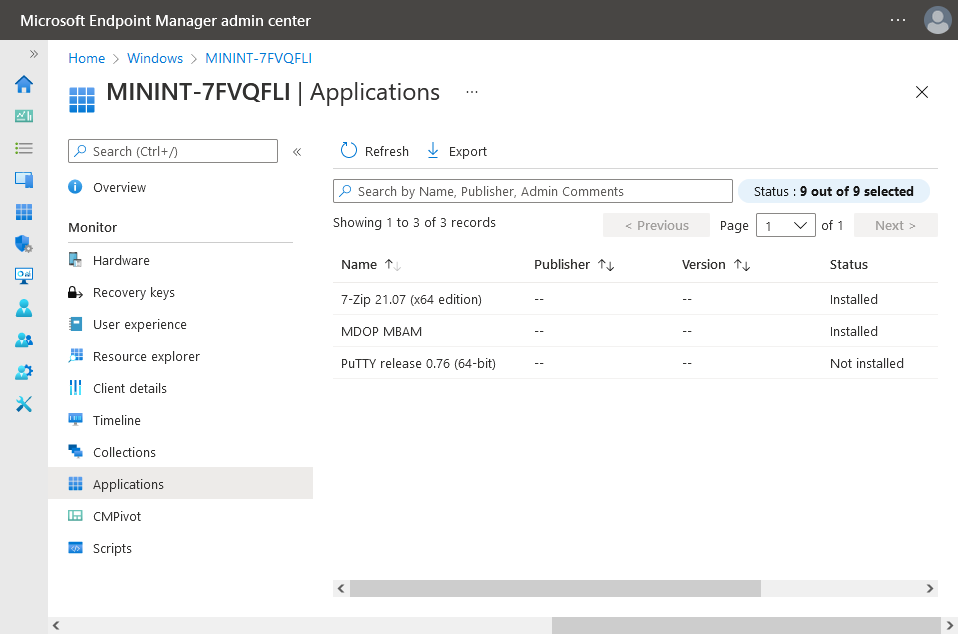
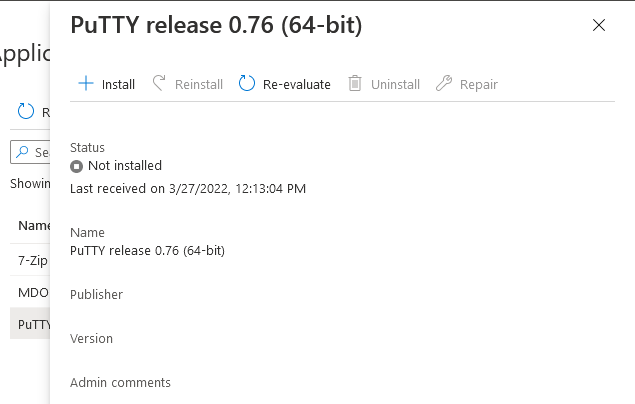
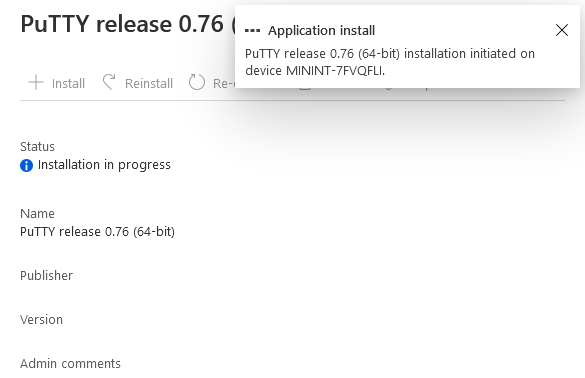
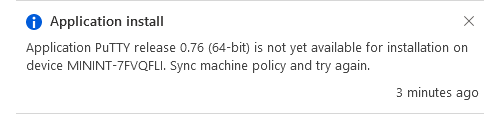
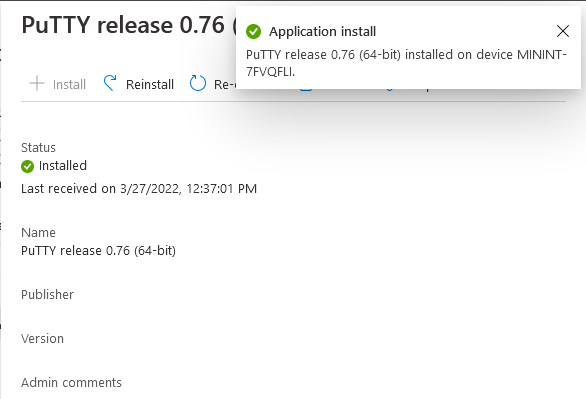
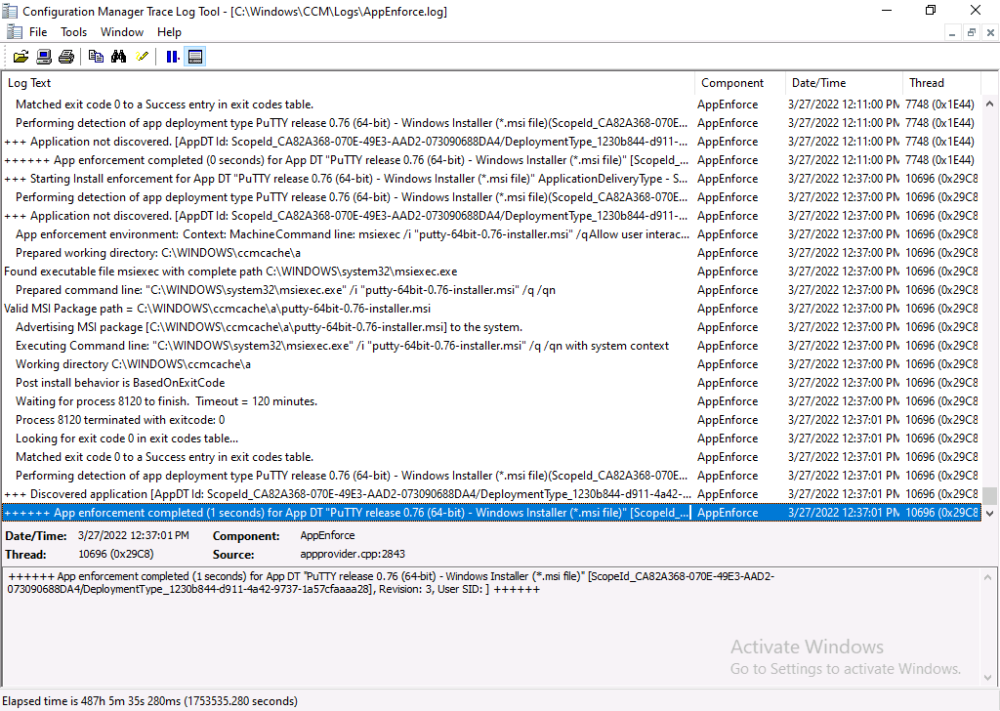
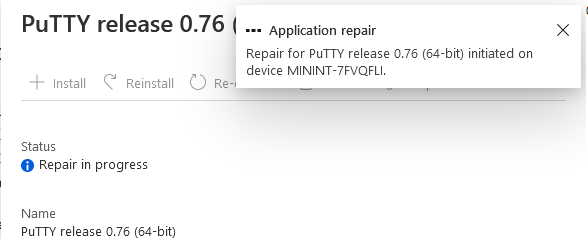
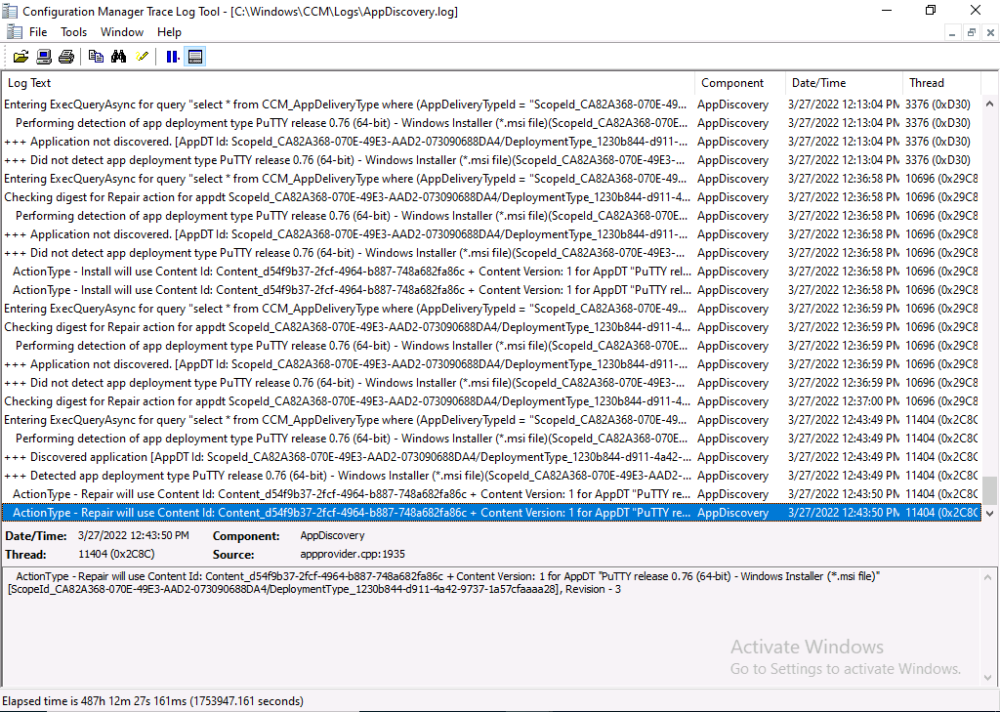
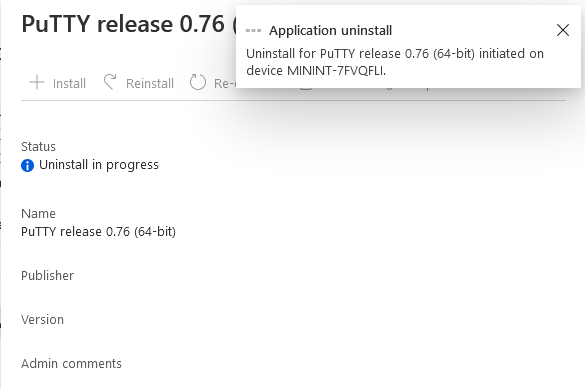
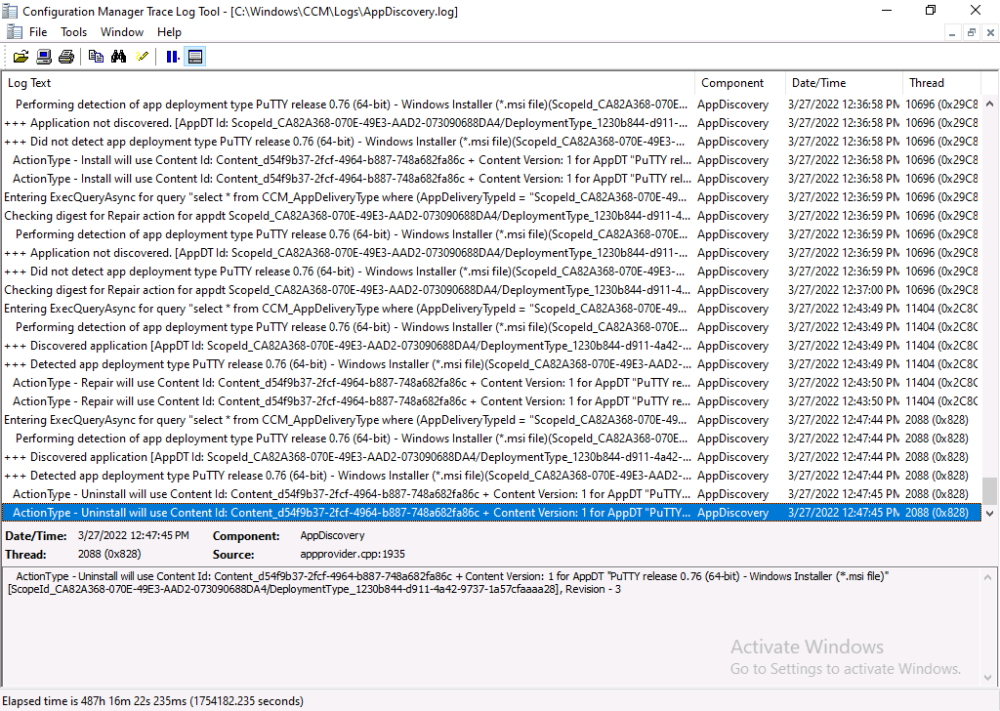
This is part 10 in a series of guides about cloud attach in Microsoft Endpoint Manager, with the aim of getting you up and running with all things cloud attach. This part will focus on using some of tenant attaches features. This series is co-written by Niall & Paul, both of whom are Enterprise Mobility MVP’s with broad experience in the area of modern management. at the time of writing, Paul is a 5 times Enterprise Mobility MVP based in the UK and Niall is an 11 times Enterprise Mobility MVP based in Sweden. In part 1 we configured Azure AD connect to sync accounts from the on premise infrastructure to the cloud. In part 2, we prepared Azure resources for the Cloud Management Gateway, in part 3 we created the cloud management gateway and verified that everything was running smoothly. In part 4 we enabled co-management. With co-management, you retain your existing processes for using Configuration Manager to manage PCs in your organization and you gain the additional advantage of being able to transfer workloads to the cloud via Endpoint Manager (Intune). In part 5 we enabled the compliance policies workload and reviewed how that affected a co-managed computer. In this part we will enable conditional access and see how that can be used to deny access to company resources. In part 6 we configured conditional access and used it to deny access to company resources unless the device was encrypted with BitLocker. In part 7 we showed you how to co-manage Azure AD devices. In part 8 we enabled Tenant Attach and looked briefly at it's features. In part 9 we renewed a soon to be expired certificate which we created about a year ago in part 2. In this part, we'll take a closer look at using tenant attach, in particular, using the Apps feature with your tenant attached devices. Note: Screenshots used in this blog post were taken from Configuration Manager version 2111. Your wizards may offer more (or less) options if you are using a different version of Configuration Manager. Below you can find all parts in this series. Cloud attach - Endpoint Managers silver lining - part 1 Configuring Azure AD connect Cloud attach - Endpoint Managers silver lining - part 2 Prepare for a Cloud Management Gateway Cloud attach - Endpoint Managers silver lining - part 3 Creating a Cloud Management Gateway Cloud attach - Endpoint Managers silver lining - part 4 Enabling co-management Cloud attach - Endpoint Managers silver lining - part 5 Enabling compliance policies workload Cloud attach - Endpoint Managers silver lining - part 6 Enabling conditional access Cloud attach - Endpoint Managers silver lining - part 7 Co-managing Azure AD devices Cloud attach - Endpoint Managers silver lining - part 8 Enabling tenant attach Cloud attach - Endpoint Managers silver lining - part 9 Renewing expiring certificates Cloud attach - Endpoint Managers silver lining - part 10 Using apps with tenant attach <- you are here Tenant attach became GA (Globally available) in early February 2022 as documented here. I blogged about that last month here. Step 1. Adding an application In this example we'll add an application in Configuration Manager called Putty. Head over to this page to grab the latest MSI available. At the time of writing that's version 0.76. After downloading the MSI, in Configuration Managers Software Library node, select Applications and choose Create Application. Point to the location where you've copied the MSI file as shown below. click next For the Specify information about this application screen, click next click next again and the Create Application Wizard is complete. A summary is displayed. Click Close. Step 2. Modifying the application To allow for application repair, you'll modify the deployment type of this application. To do that, select the newly created application and choose the Deployment Types tab. Right click on the deployment type and select Properties. Select the Program tab. In the repair program section, fill in msiexec /fa <MSI> click Apply and click OK to close the Deployment Type window. Step 3. Deploying the application To make an application available for installation to tenant attached devices, you'll need to deploy it correctly. Let's get started. Right click on the newly added app from step 1, and choose Deploy. On the Specify general information about this deployment screen, click on Browse and browse to the tenant attached devices collection that you intend to target with this application. Specify the content destination by clicking on Add and selecting the distribution points or distribution point groups you want to add this content to Next, at the Deployment Settings screen, you'll see the following. To use this application with tenant attach, place a check in the An administrator must approve a request for this application on the device checkbox. Continue through the wizard to completion, below is the summary. Step 4. Reviewing the tenant attach app features On a tenant attached device, open the MEM console and select the tenant attached device you will test these app features on. Click on Applications in the left node. Any apps that you've made available to tenant attached devices using the above method will show up. Here you can see the Putty application is listed, with a status of Not installed. Select the application you've made available to tenant attach to get more options. The options available include: Install Reinstall Re-evaluate Uninstall Repair As you can see the Install and Re-evaluate options are the only valid options at this time, so go ahead and click + Install. The notifications area in the MEM console gives you some information about the fact that it's installing the app. but a few moments later, you see this... Ok, so maybe we were too fast, let's trigger a machine policy on that computer. Click on Overview and then click Sync Machine Policy. Answer Yes when prompted. If you click away and click back to Overview you'll see the status of that action. Go back to Applications. Click + Install. After a few moments you should see this. On the client, you can of course check control panel or the start menu to verify the app is installed or you can review the following logs: AppDiscovery.log AppEnforce.log AppIntentEval.log Here's a sample. If you then try and click on Repair in the MEM console Note: The repair option will be greyed out if you didn't yet add the repair command line in the Repair Program. and then review the AppDiscovery.log you'll see the following... And finally, you can choose to Uninstall the app, via the MEM console. and after some moments... This action is also reflected via the logs on the client itself. So there you have it, the ability to easily install, uninstall or repair applications on tenant attached devices all via the Microsoft Endpoint Manager console. Join us in the next part when we'll take a look at more tenant attach features.


-
Did you know that 29% of data loss cases are caused by accident? As World Backup Day nears, we think back to all the incidents, data loss scares, and near-disasters that we’ve experienced over the years – and how grateful we were to have backup during those times! If you use Microsoft 365/Office 365, Hyper-V or VMware, celebrate with Altaro. All you have to do is sign up for a 30-day free trial of either Altaro VM Backup or Altaro Office 365 Backup – it’s your choice! What can you win? • Receive a guaranteed $20 Amazon voucher when you sign up for and use the trial of Altaro Office 365 Backup or Altaro VM Backup - Get a chance to WIN one of our Grand Prizes when you complete the sentence “You know you’re a SysAdmin when…” What are you waiting for? Sign up now!

-
ok, well if the instructions here don't help then i'd recommend you contact your HP technical account manager for assistance with this issue, are you sure you used the same service account to install the software as you are using to uninstall it ?
-
I've not seen it, was this installed on your client computer with the console, or did you install this on the site server itself ?
-
As we know hybrid cloud adoption varies across the industry. And whether or not you’re planning to go hybrid or fully to the cloud, Microsoft is slowly nudging sysadmins there with changes in its tech solutions and licensing models anyhow. Some of these being the developments in Microsoft’s core hybrid cloud solution for on-prem, Azure Stack HCI (not to be confused with Azure Stack). By leveraging crucial Windows Server technologies such as Hyper-V, and Storage Spaces Direct, Microsoft has big plans for Azure Stack HCI and, whether you like it or not, it will inevitably shape your hybrid cloud strategy. The Altaro webinar on 23 March, How Azure Stack HCI is forcing changes in your datacenter, will teach you about the key developments and how they will impact your datacenter management. Microsoft MVP Andy Syrewicze will be joined by fellow MVP and Azure Stack HCI expert Carsten Rachfahl to break down and demo live Azure Stack HCI, and what it means for you and the technologies you use. The hour-long webinar is free to join and will cover key Azure Stack HCI concepts, changes to storage and networking you should be aware of, how to manage Azure Stack HCI, along with cloud management and Azure integrations. With Azure Stack HCI, there are operational considerations to keep in mind like the fact that pricing for this deployment option is paid as a monthly service, or the fact that future on-prem features in the Windows Server stack are likely to leverage Azure Stack HCI exclusively. That said, not only will this webinar show you the benefits of Azure Stack HCI, but it will show you how it will fit into your tech stack long-term. Andy and Carsten will help you prepare for these major developments, so you'll be ready for what's next. And if you have any questions about hybrid cloud or Azure Stack HCI, you can get them answered by these experts during the webinar Q&A. Learn more and register: How Azure Stack HCI is forcing changes in your datacenter Don't miss out on this comprehensive lesson on how to navigate and integrate Azure Stack HCI into your datacenter management.
-
Introduction Microsoft released Technical Preview Configuration Manager version 2203 and it contains some cool new features, one of which is the ability to Escrow Bitlocker recovery info to your Configuration Manager database. This is a much debated, sought after ability, and now you can test it. I have tested and verified that it works ! So what’s new about this ability ? previously to escrow BitLocker recovery password info to your configuration manager site during a task sequence you would have used a Powershell script. That powershell script is no longer supported (even though it actually works again with TP 2203, I’ve verified it). The Powershell script method caused a stir when Configuration Manager 2103 was released as you can read about in the below two blogs: Now however, you no longer need the powershell script as the feature is a simple checkbox. So now we know what’s changed, let’s take a look. Prerequisites Keep in mind the following prereqs before trying this out. Either of the following options will do: Create an Encryption Certificate in the site database (see here) Create a Bitlocker Management policy and opt-in to plaintext key storage on the Client Management tab. Enabling the ability In a task sequence locate the Enable BitLocker step, you’ll see a new setting to allow you to escrow the key to your configuration manager database highlighted in the screenshot below. By placing a check mark in Automatically store the recovery key in: The Configuration Manager Database Like so.. This setting will force the task sequence process to store the Bitlocker recovery info in your CM database DURING OSD(operating system deployment) before the Windows login screen. This is the security feature that many companies have been asking for ! Note: You do NOT need to install the MDOP Agent as part of the task sequence and you do NOT need to run any PowerShell script for this functionality to work. Seeing the ability in action After PXE booting the device, the task sequence formats the hdd… And shortly after the Pre-Provision Bitlocker step takes place… After laying down the Operating System the task sequence reboots into Windows Setup, and after that it installs the Configuration Manager client. At this point I’ve manually created a txt file to pause the task sequence BEFORE logging on to the desktop. Note: You do not need this step, this is done to prove that the key is uploaded to Configuration Managers database during OSD. and here’s the proof ! The recovery info in the right screenshot (during OSD) is now present in Configuration Managers database ! And as we also selected to store the key in Active Directory domain services, here it is. Troubleshooting Close analysis of the SMSTS.log file reveals the following key moments in the Enable Bitlocker step, notice pwd:AD_CM shown below…this confirms that you’ve selected both Active Directory and Configuration Manager to store the recovery info. Note: If you did not select to upload to Configuration Manager database, but upload to Active Directory domain services, then you’d see the following, pwd:AD Note: If you only select to upload to Configuration Manager database,then you’d see the following, pwd:ConfigMgr Next you can see it reveal that current BitLocker protection is detected as Off and that it’s setting registry keys for escrowing the key to AD and more… and it adds the volume to the payload it will verify the info returned from the server, in the case below it didn’t find the key escrowed yet so waits 5 minutes before checking again and after some time… it detects the key is escrowed ! Job done ! Want more ? check out my video on the subject here well done Microsoft and well done @frederic
-
what's in the bgbisapiMSI.log log file ?
-
MDT fail at the end of the installation
anyweb replied to Nolfir's question in Microsoft Deployment Toolkit (MDT)
here's the failure... <![LOG[Executing command line: cscript.exe "%SCRIPTROOT%\LTIApply.wsf"]LOG]!><time="15:14:36.471+480" date="02-28-2022" component="TSManager" context="" type="1" thread="2028" file="CommandLine.cpp:819"> <![LOG[Process completed with exit code 5624] which then leads to... Failed to run the action: Install Operating System. Unknown error (Error: 000015F8; Source: Unknown) <![LOG[Let the parent group (Install) decides whether to continue execution]LOG]!><time="15:22:24.166+480" date="02-28-2022" component="TSManager" context="" type="0" thread="2028" file="instruction.cxx:1037"> <![LOG[The execution of the group (Install) has failed and the execution has been aborted. An action failed. Operation aborted (Error: 80004004; Source: Windows) why is there an F:\ drive referenced in the log.... <![LOG[Let the parent group (Install) decides whether to continue execution]LOG]!><time="15:22:24.166+480" date="02-28-2022" component="TSManager" context="" type="0" thread="2028" file="instruction.cxx:1037"> <![LOG[The execution of the group (Install) has failed and the execution has been aborted. An action failed. Operation aborted (Error: 80004004; Source: Windows)]LOG]!><time="15:22:24.166+480" date="02-28-2022" component="TSManager" context="" type="3" thread="2028" file="instruction.cxx:221"> <![LOG[Could not find CCM install folder. Don't use ccmerrors.dll]LOG]!><time="15:22:24.166+480" date="02-28-2022" component="TSManager" context="" type="0" thread="2028" file="String.cpp:1364"> <![LOG[Failed to run the last action: Install Operating System. Execution of task sequence failed. Unknown error (Error: 000015F8; Source: Unknown)]LOG]!><time="15:22:24.166+480" date="02-28-2022" component="TSManager" context="" type="3" thread="2028" file="engine.cxx:249"> <![LOG[Executing in non SMS standalone mode. Ignoring send a task execution status message request]LOG]!><time="15:22:24.166+480" date="02-28-2022" component="TSManager" context="" type="1" thread="2028" file="utils.cpp:6604"> <![LOG[Task Sequence Engine failed! Code: enExecutionFail]LOG]!><time="15:22:24.181+480" date="02-28-2022" component="TSManager" context="" type="3" thread="2028" file="tsmanager.cpp:1273"> <![LOG[****************************************************************************]LOG]!><time="15:22:24.181+480" date="02-28-2022" component="TSManager" context="" type="1" thread="2028" file="tsmanager.cpp:1301"> <![LOG[Task sequence execution failed with error code 80004005]LOG]!><time="15:22:24.181+480" date="02-28-2022" component="TSManager" context="" type="3" thread="2028" file="tsmanager.cpp:1302"> <![LOG[Cleaning Up.]LOG]!><time="15:22:24.181+480" date="02-28-2022" component="TSManager" context="" type="1" thread="2028" file="tsmanager.cpp:794"> <![LOG[Removing Authenticator]LOG]!><time="15:22:24.181+480" date="02-28-2022" component="TSManager" context="" type="1" thread="2028" file="tsmanager.cpp:922"> <![LOG[Cleaning up task sequence folder]LOG]!><time="15:22:24.181+480" date="02-28-2022" component="TSManager" context="" type="1" thread="2028" file="utils.cpp:2707"> <![LOG[File "F:\_SMSTaskSequence\TSEnv.dat" does not exist. (Code 0x80070005)]LOG]!><time="15:22:24.181+480" date="02-28-2022" component="TSManager" context="" type="3" thread="2028" file="CcmFile.cpp:219"> <![LOG[Unable to delete file F:\_SMSTaskSequence\TSEnv.dat (0x80070005). Continuing.]LOG]!><time="15:22:24.181+480" date="02-28-2022" component="TSManager" context="" type="1" thread="2028" file="CcmFile.cpp:1154"> see if you have an LTIApply.log anywhere and what does it reveal... -
well those clients would have been using the working CMG before it broke during conversion right ? and that's where they are getting their policy so if the CMG is down (broken) they cannot get new policy, so you'll have to get creative in terms of how to target those clients, see below and linked here for some suggestions, but you'll need a working CMG before trying these so you'll need to stand up a new working CMG... "Once the cloud management gateway (CMG) and the supporting site system roles are operational, you may need to make configuration changes on Configuration Manager clients. Clients that can communicate with the management point automatically get the location of the CMG service on the next location request. The polling cycle for location requests is every 24 hours. If you don't want to wait for the normally scheduled location request, you can force the request. To force the request, restart the SMS Agent Host service (ccmexec.exe) on the computer. For devices that aren't connected to the internal network, there are several options to configure them with a CMG location. For more information, see Install off-premises clients using a CMG. Note By default all clients receive CMG policy. Control this behavior with the client setting, Enable clients to use a cloud management gateway. For more information, see About client settings."
-
ok an update on this, if you want it working right now then I'm afraid you'll have to delete it and start again from scratch (including uploading all the content) don't mess with cnames it's not supported, you might get it to work, but it's not supported so don't bother. I've given your experience as feedback to the Microsoft product group and they are taking the feedback seriously, sorry for the hassles...
-
can you share the cloudmgr.log with me, feel free to remove any references to your company in the log.
-
what does the connection analyzer tell you ?
-
have you tried looking at your distribution point configuration status in Monitoring ? what does that tell you also, why do you have a CAS and three primaries, are you managing 150,000 clients (or more) ?
-
my experience was back when I wrote the script used in this blogpost, and at that time, it was the only way I could get Windows Autopilot to work in our environment. Our environment has changed since then and no longer uses the same type of proxy, you could say now that it now resembles a transparent proxy and therefore there's no longer any need to use the script. if you can, avoid using Hybrid azure ad join, it's more trouble than it's worth. When I initially wrote the script it was so that we could test Windows Autopilot on the internal LAN, a lot has changed since then and we've learned a lot too. The best advice I can give you is to try modifying this script to work with your environment, or determine if you need it at all based on what happens in Windows Autopilot, maybe you can add exclusions for the urls used during Windows Autopilot, there are lots of options. as regards point 3, you could always use a different network (think of it as an enrollment network) to get your devices through Windows Autopilot OOBE and complete enrollment, you could then apply whatever network/proxy settings you want AFTER windows autopilot is complete using some of the methods I describe here
-
Displaying a welcome page after Windows Autopilot completes
anyweb replied to anyweb's topic in Microsoft Intune
ok so the script will create a scheduled task for each user but basically won't do anything for defaultuser0, as that's not a real user, it's only used by Windows Autopilot during the ESP, so... after the Account Setup phase (user account) part of the ESP is done, and you logon to the desktop, what scheduled tasks do you see ? -
Displaying a welcome page after Windows Autopilot completes
anyweb replied to anyweb's topic in Microsoft Intune
hi @MagnusL I've tested it with AzureAd joined devices only as that's what we use, and it works fine in that scenario, so when you checked task scheduler can you show me what it did create ? ive not seen a defult0 user before, DefaultUser0 yes, but not the other one... did you heavily modify the scripts ? -
there's only one way to find out, try it ! i recommend trying it out using a virtual machine connected to the same network as the network you intend to test, that way you can try different settings in the script on the fly
-
Displaying a welcome page after Windows Autopilot completes
anyweb replied to anyweb's topic in Microsoft Intune
hi, the link works fine you just need to be logged in to download files from windows-noob.com -
how did you configure WSUS, did you use SQL or SQL express, if you used SQL, which version ? have you looked at event viewer for more details ?
-
ok have you updated Server 2016 with the latest patches from windows update ?
-
is WSUS separate from Configuration Manager ? what version of Windows Server is it running on ?
-
Introduction I saw an interesting tweet from @brucesaaaa where he talked about issues observed in multiple tenants during Windows Autopilot enrollment with required Win32 apps. The following was seen for required deployments of Win32 apps during Windows Autopilot enrollment: ESP did not flag these apps as required Required apps took hours and hours to install App install output codes (like for reboots) were not working Problem The problem was investigated and narrowed down to the version of Microsoft Win32 Content Prep Tool that the technicians were using to create the Win32 apps. The is very easy to understand as many admins simply download the tool and re-use it over and over. I’m guilty of that too !, the app I created below was created with 1.8.2.0 and the current version is 1.8.3. I’m not sure what version of the app that caused their issues but as soon as they downloaded the latest version and repackaged their apps the problems went away. Analysis I did some checking with a Win32 app I recently created. If you rename the app from it’s original filename.intunewin extension to filename.zip you can extract the contents. Open the detection.xml file in the metadata folder. If you open the XML file in a suitable reader, you can see the version of the tool that it was made with by reviewing the ToolVersion property highlighted below in yellow. If you start the Microsoft Win32 Content Prep Tool (IntuneWinAppUtil.exe) and use a -v it’ll show the version info. IntuneWinAppUtil -v I guess that Microsoft could force that people use the latest and greatest version of their tool by scanning that detection.xml file prior to accepting the file. Or at the very least inform the user of possible problems if they choose to ignore the fact. This should bypass any issues caused by using older versions of the tool to package the Win32 App. Interesting problem, let’s see where it goes ! cheers niall
-
i'm using the most up to date windows 11 and my taskbar doesn't autohide, i'd imagine lots of people would complain if that did happen without their involvement
-
i've never noticed that, are you sure you are not setting some policy/registry key for that ?