-
Posts
9253 -
Joined
-
Last visited
-
Days Won
369
Everything posted by anyweb
-

Unable to boot up PXE using SCCM 2012
anyweb replied to outsiders_86's topic in Configuration Manager 2012
in addition, have you verified in the SMSPXE.log that this mac address is showing up ? -

Help me install and configure Sccm 2007SP2 R3 properly
anyweb replied to Balthier's topic in Configuration Manager 2007
have you seen this http://www.windows-noob.com/forums/index.php?/topic/1064-sccm-2007-guides/ follow the guides in Setup SCCM section and use the SP2 media instead of SP1 as per the guides, finally when all is done install R3. -

Can I stop SCCM from auto deleting WSUS folders?
anyweb replied to monsouj's topic in Configuration Manager 2012
can you clarify this statement please are you using Configuration Manager to download and deploy updates or WSUS ? -

Add device to specific device collection, during OSD?
anyweb replied to TheHasselhoff's topic in Configuration Manager 2012
yes using a script of via web services like Maik Kosters -
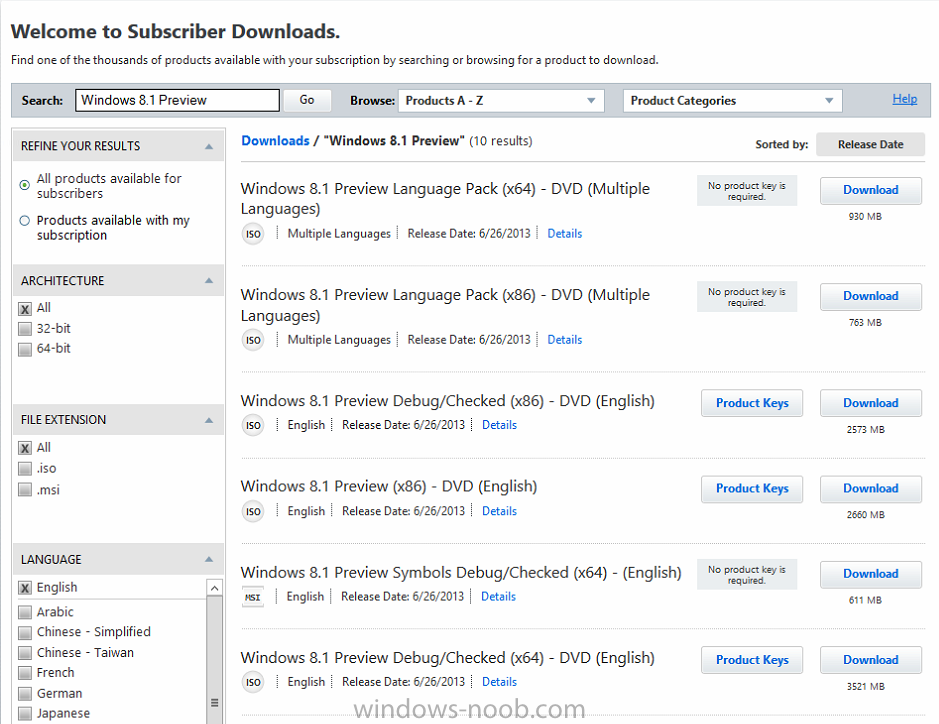
do you have an MSDN subscription ? it's not free
-
you shouldn't be installing drivers in a build and capture task sequence as you should be using virtual hardware (driver agnostic) for the build and capture process, save the driver installation for the Deploy task sequence, and that is covered here many times. The log to look at when troubleshooting anything OSD related is smsts.log or smsts*.log cheers niall
-

Multiple Site Issue - Seems Related, But Can't Find Solution
anyweb replied to BzowK's topic in Configuration Manager 2012
hi ben, have you tried deleting everything in the system management container in AD and see what get's re-populated ? (it should auto populate within an hour, or if you reboot the servers even quicker) try that and see what happens -
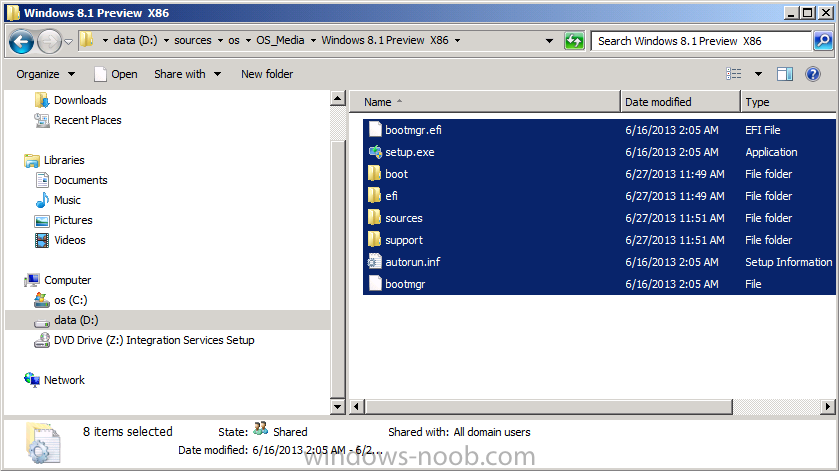
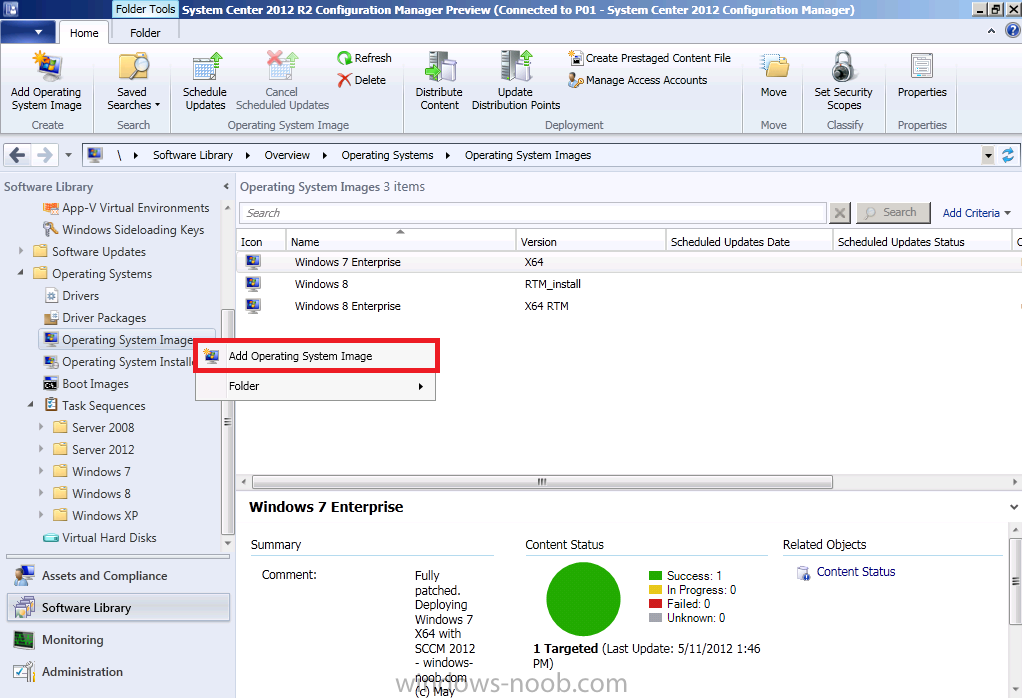
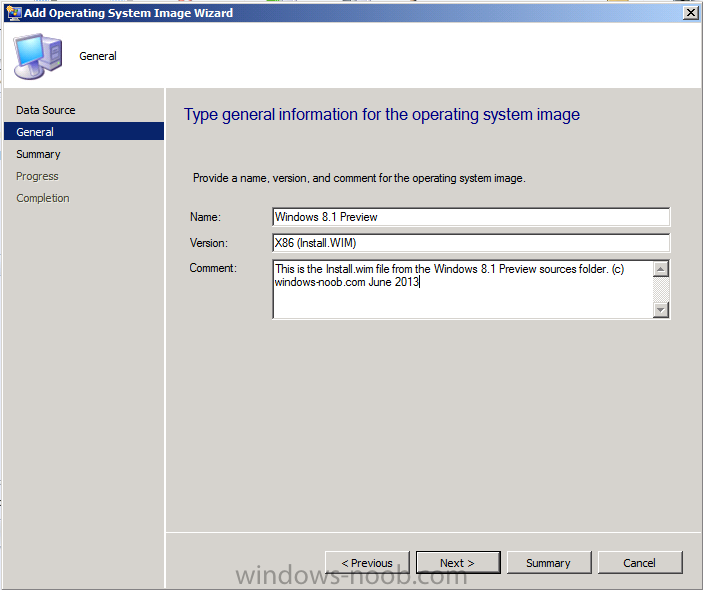
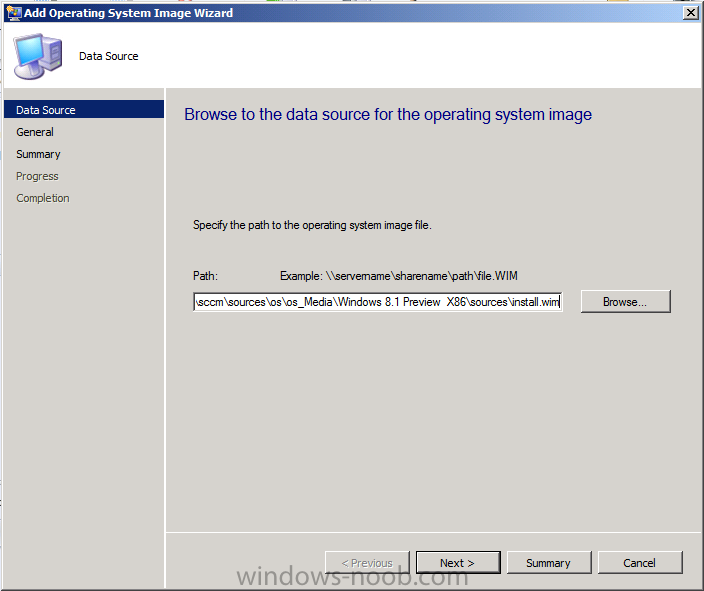
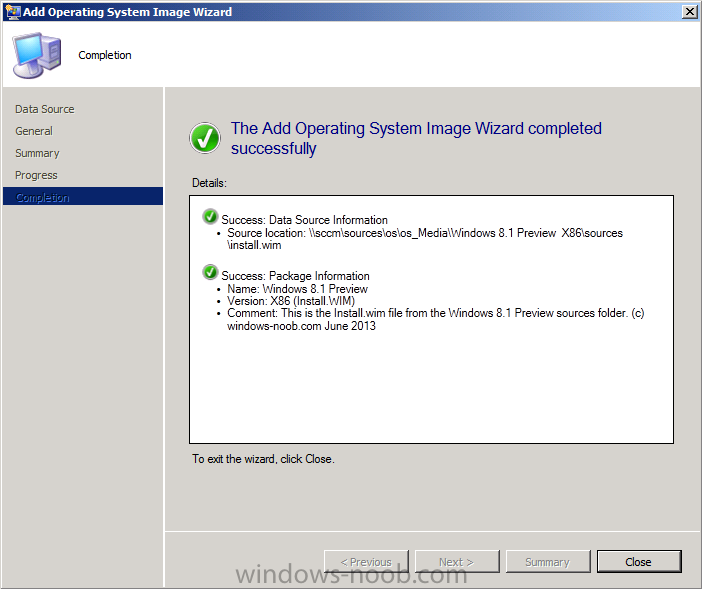
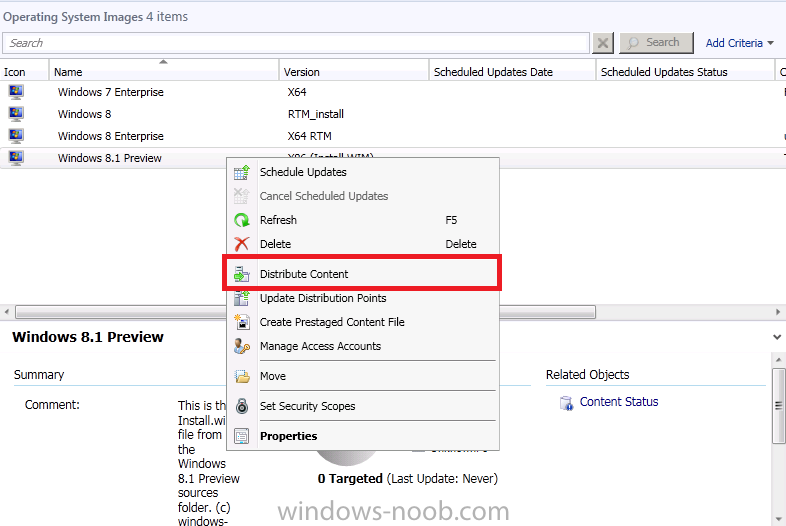
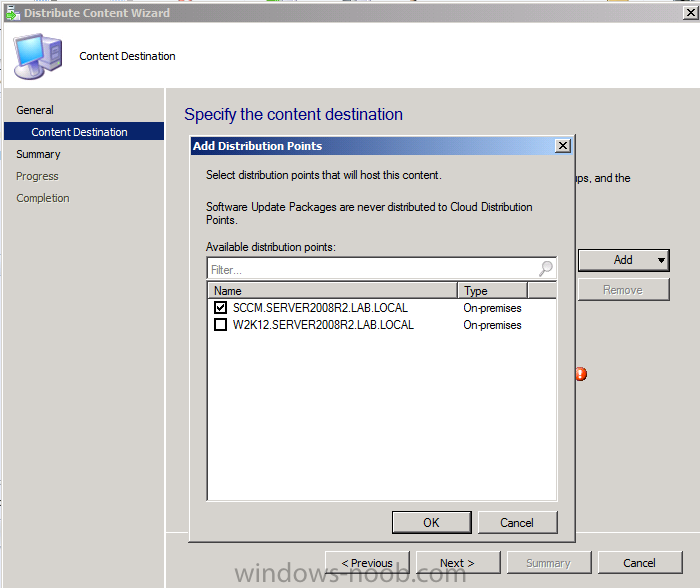
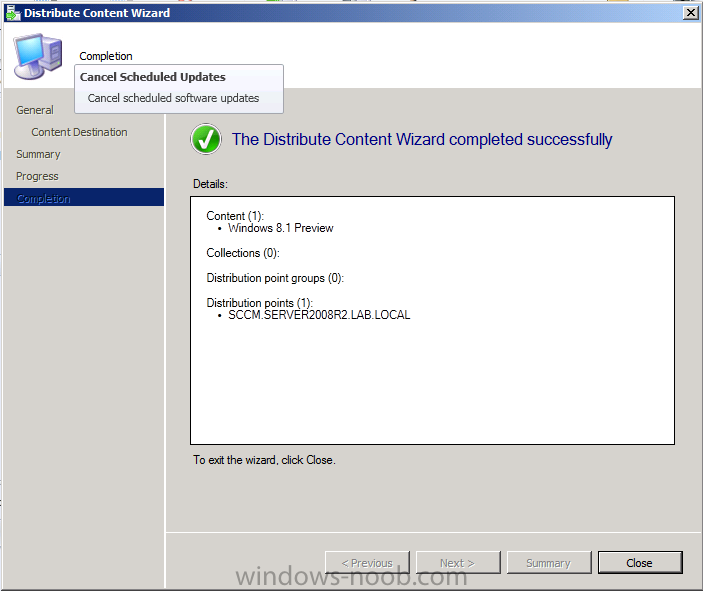
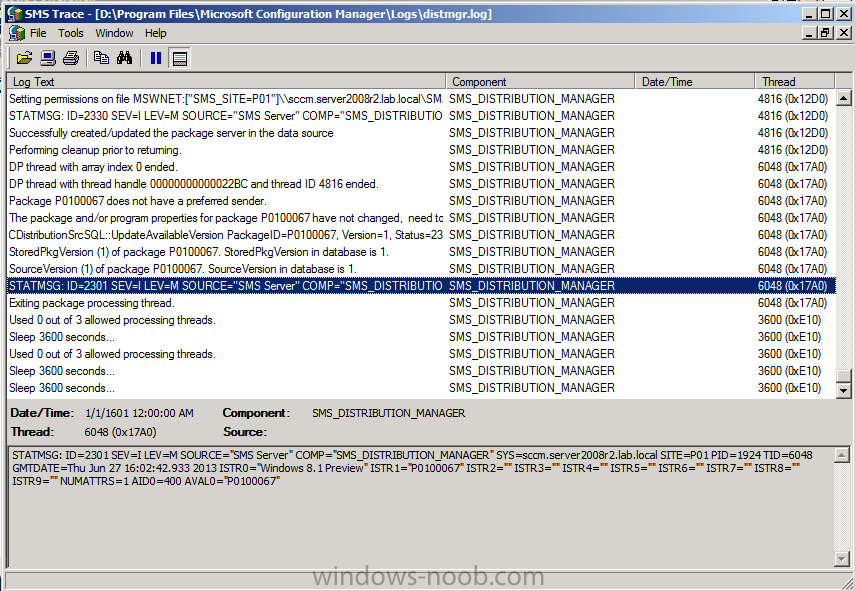
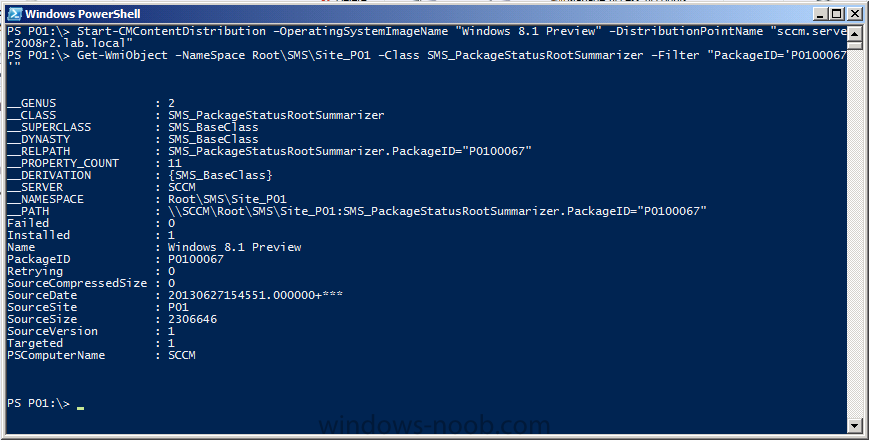
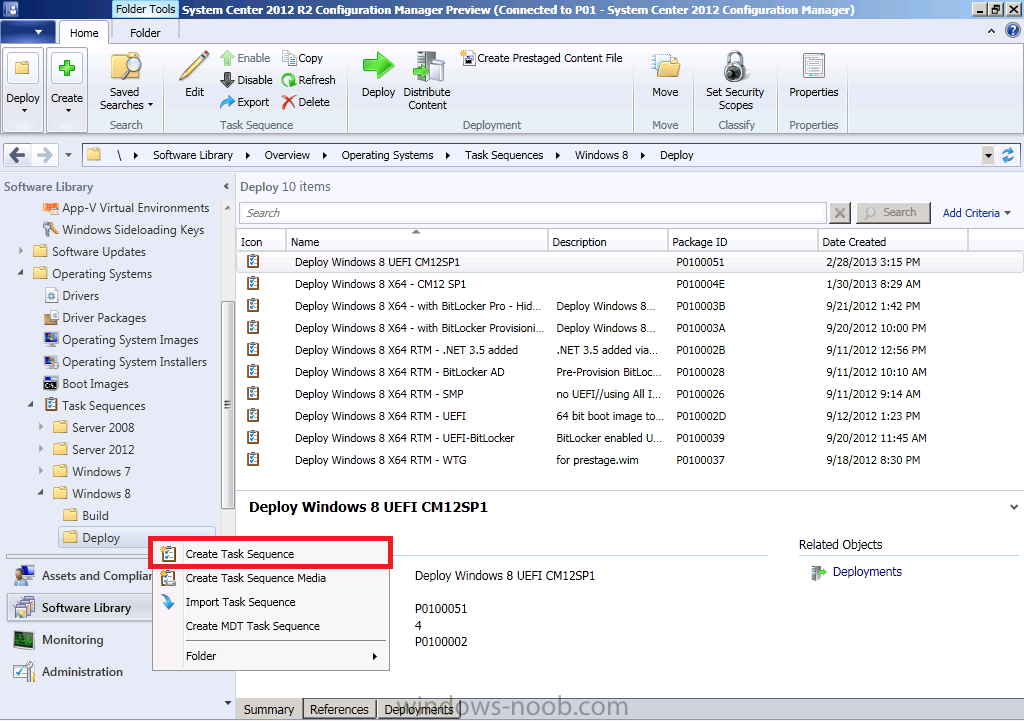
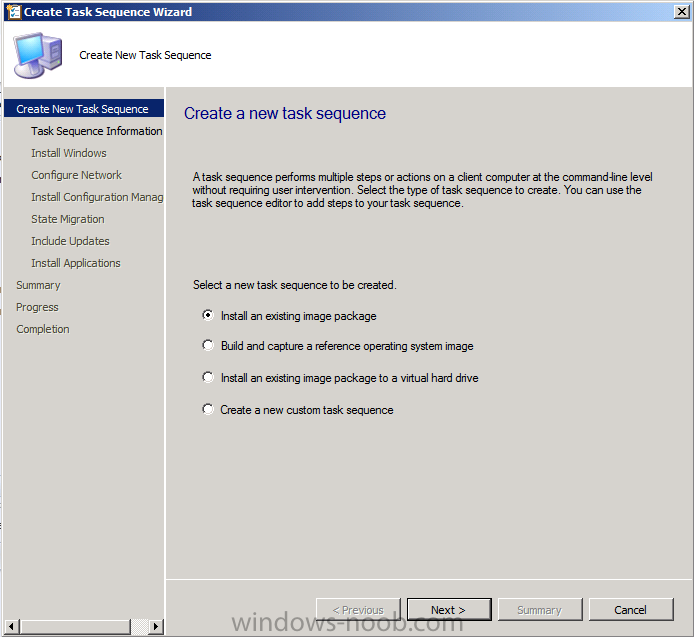
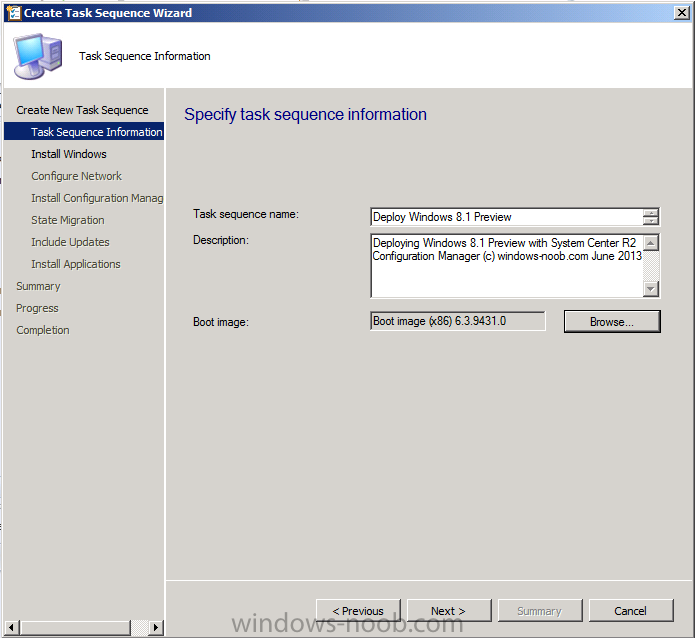
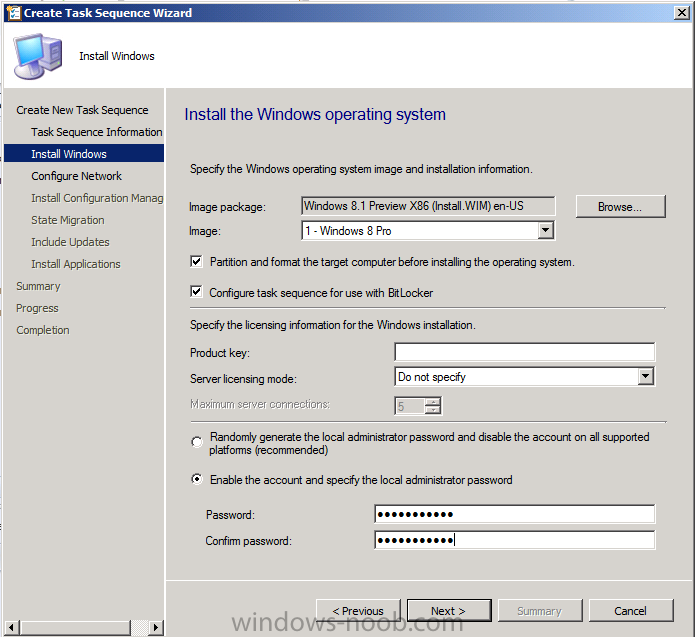
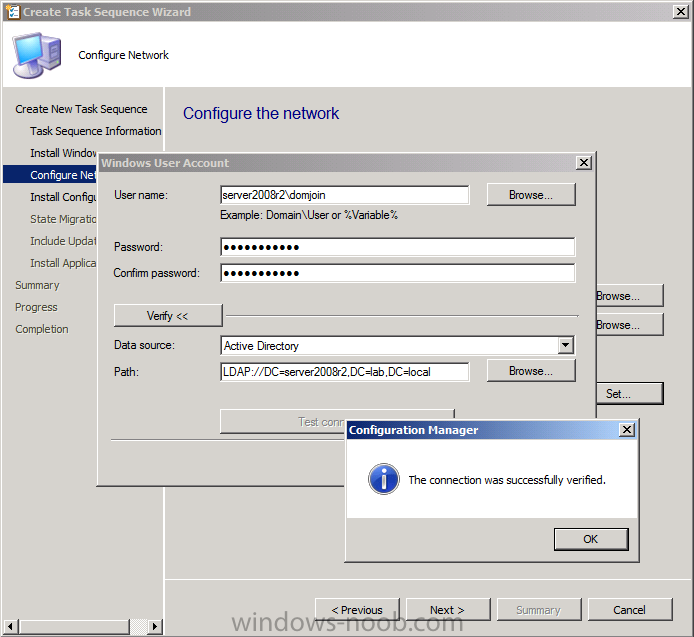
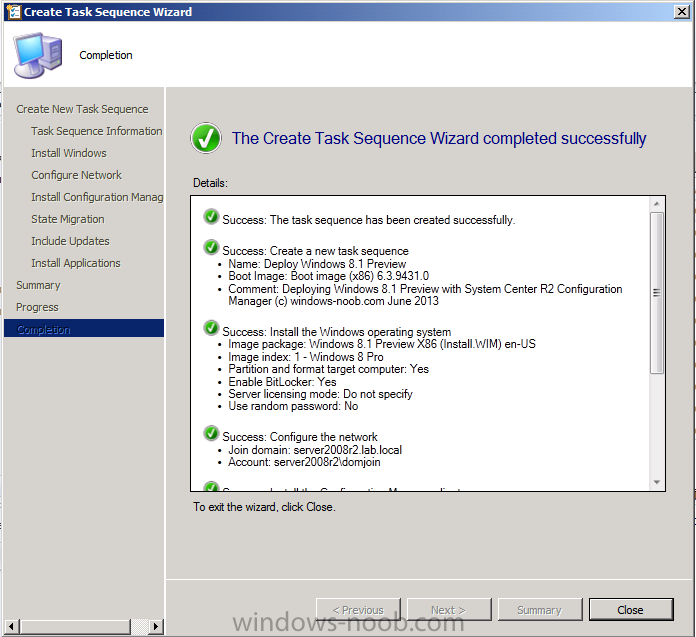
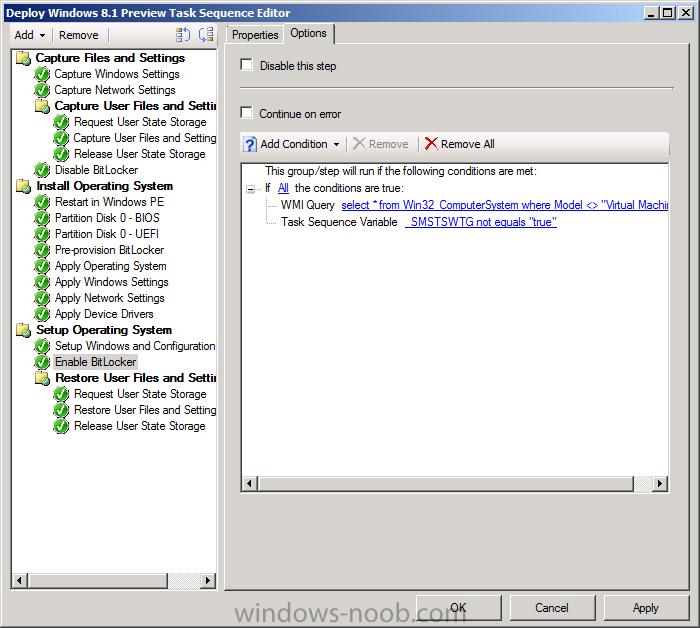
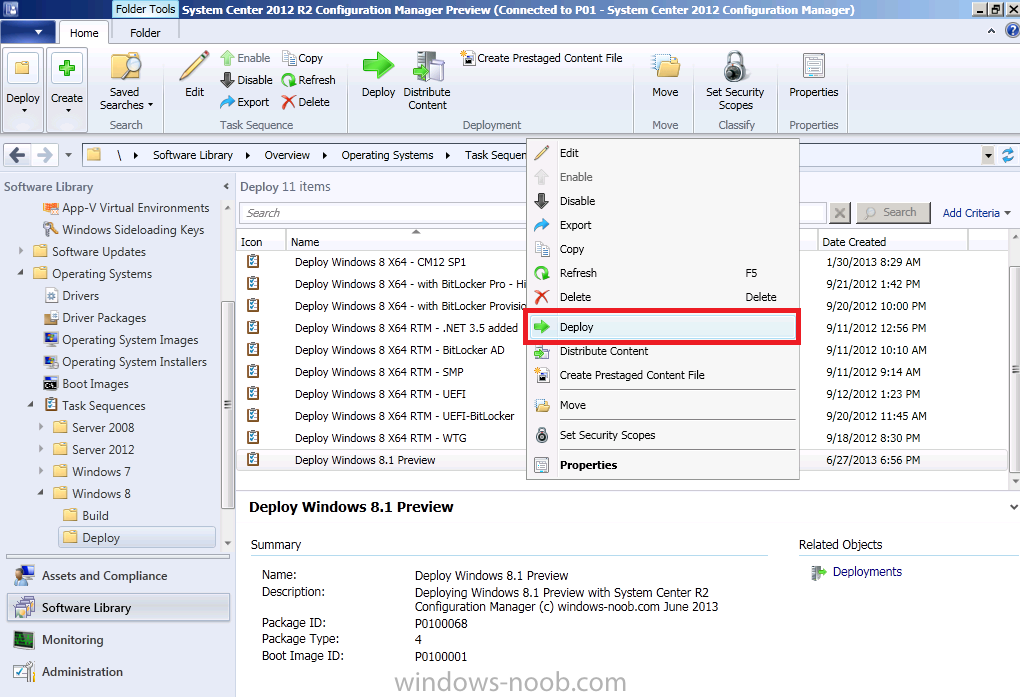
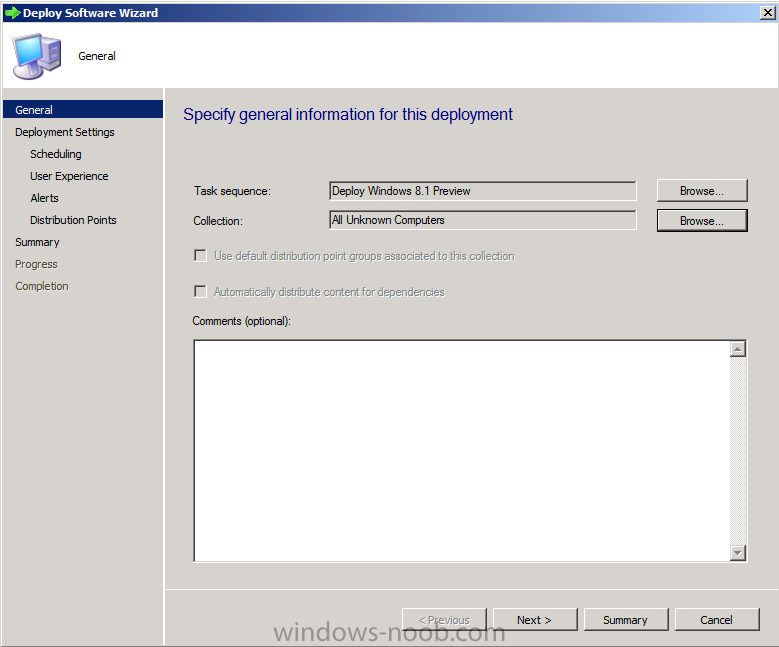
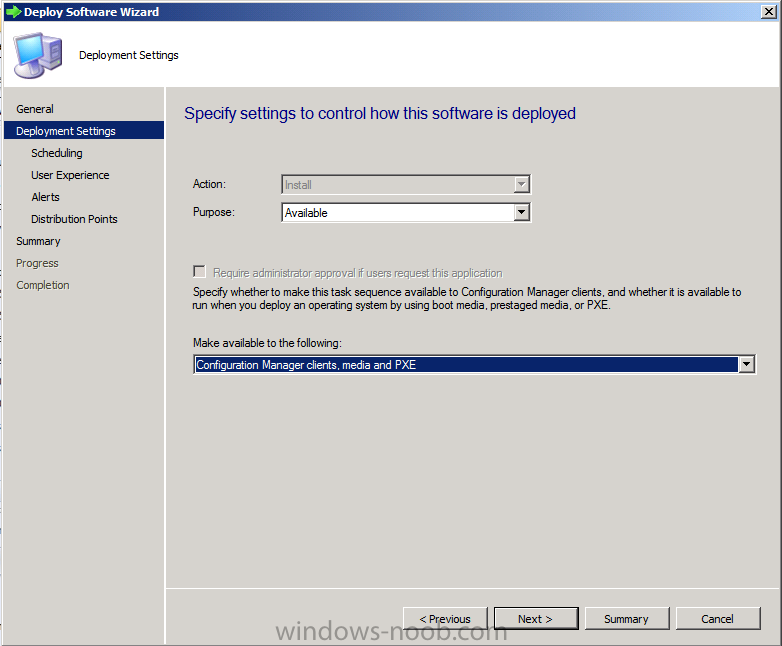
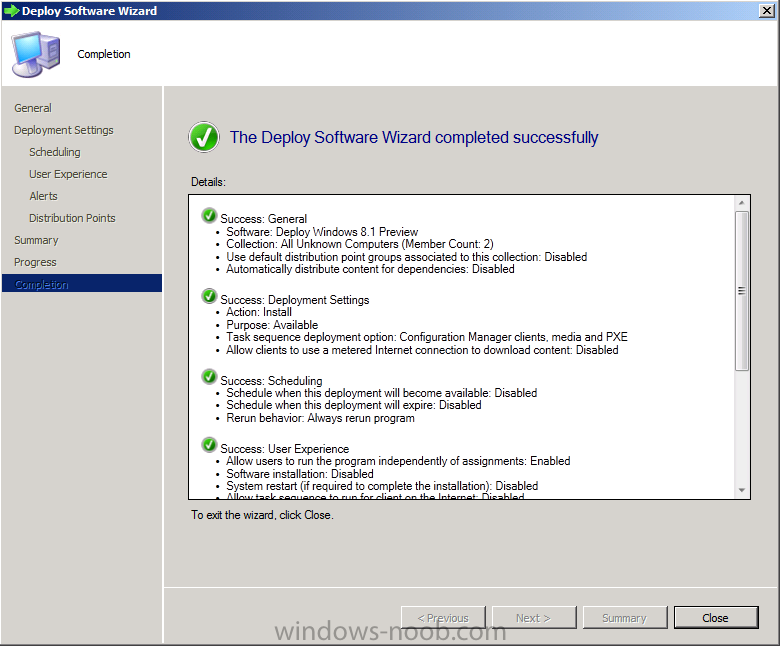
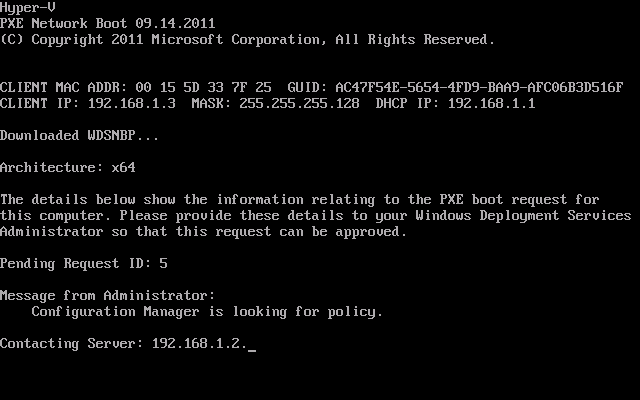
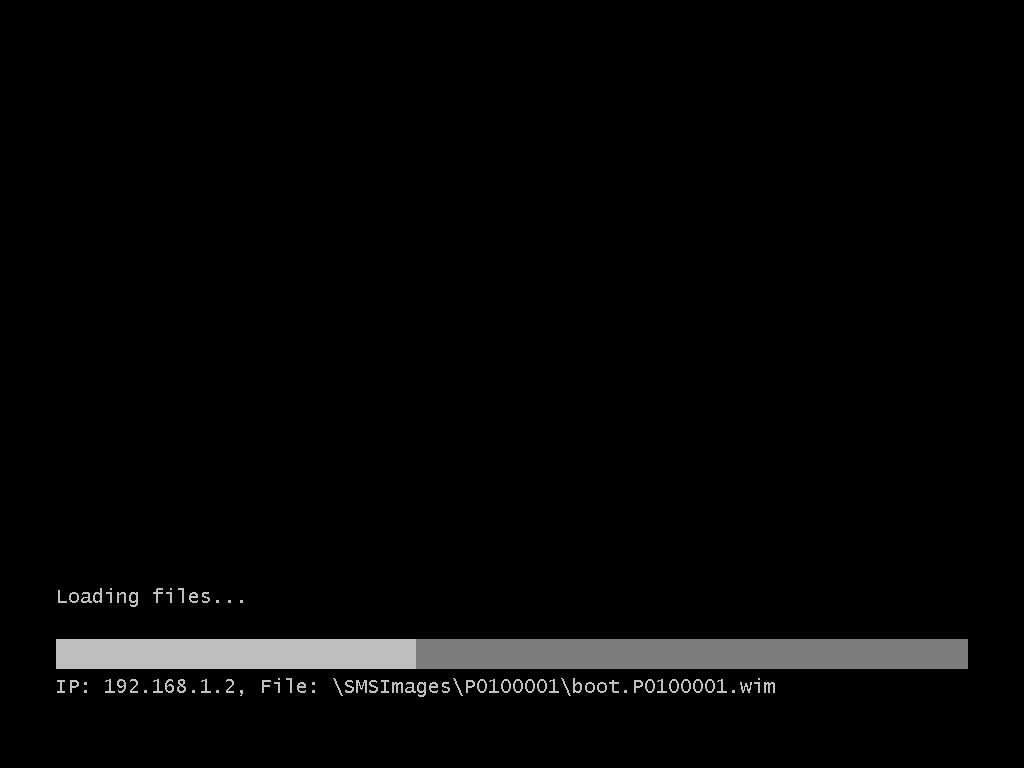
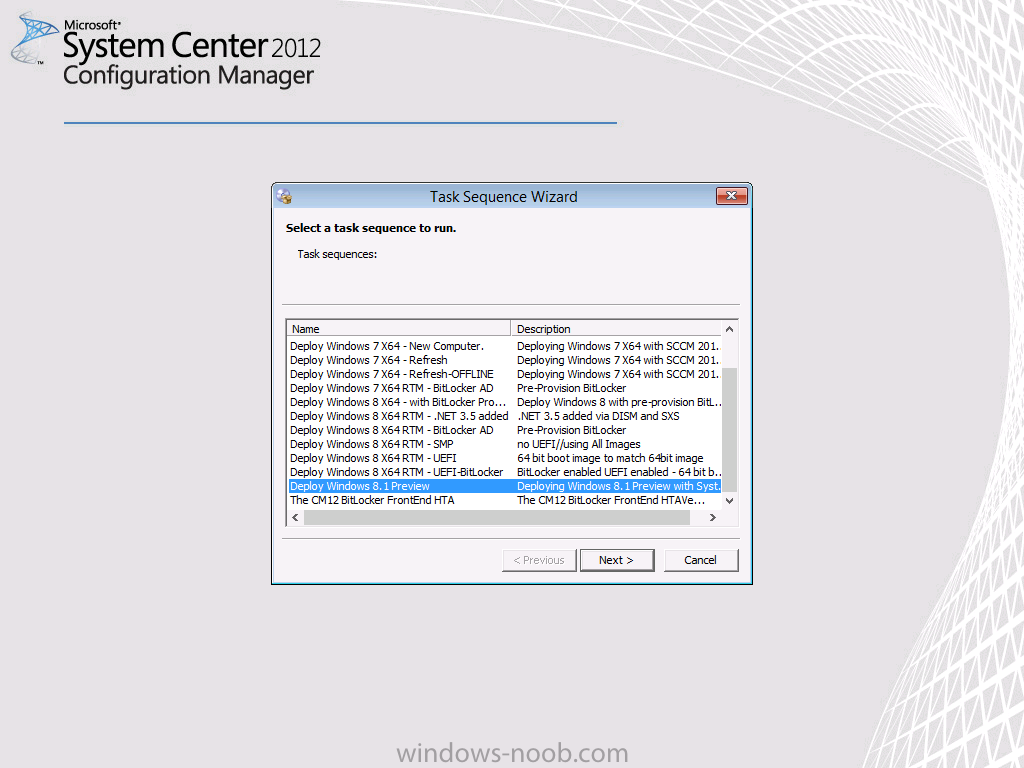
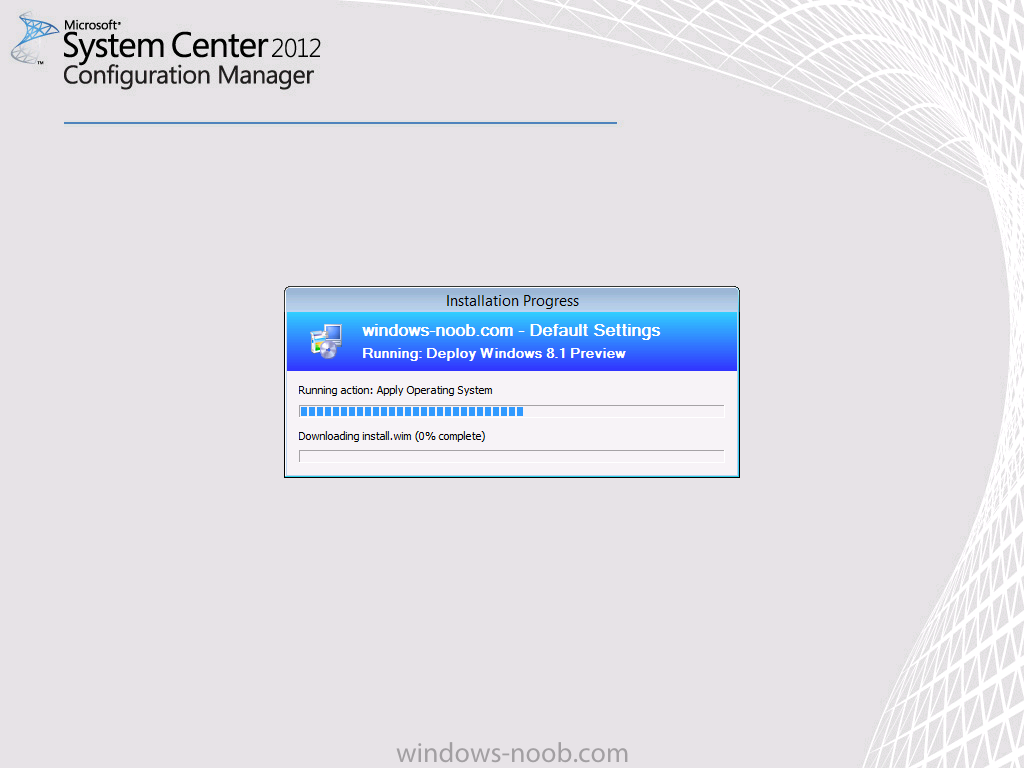
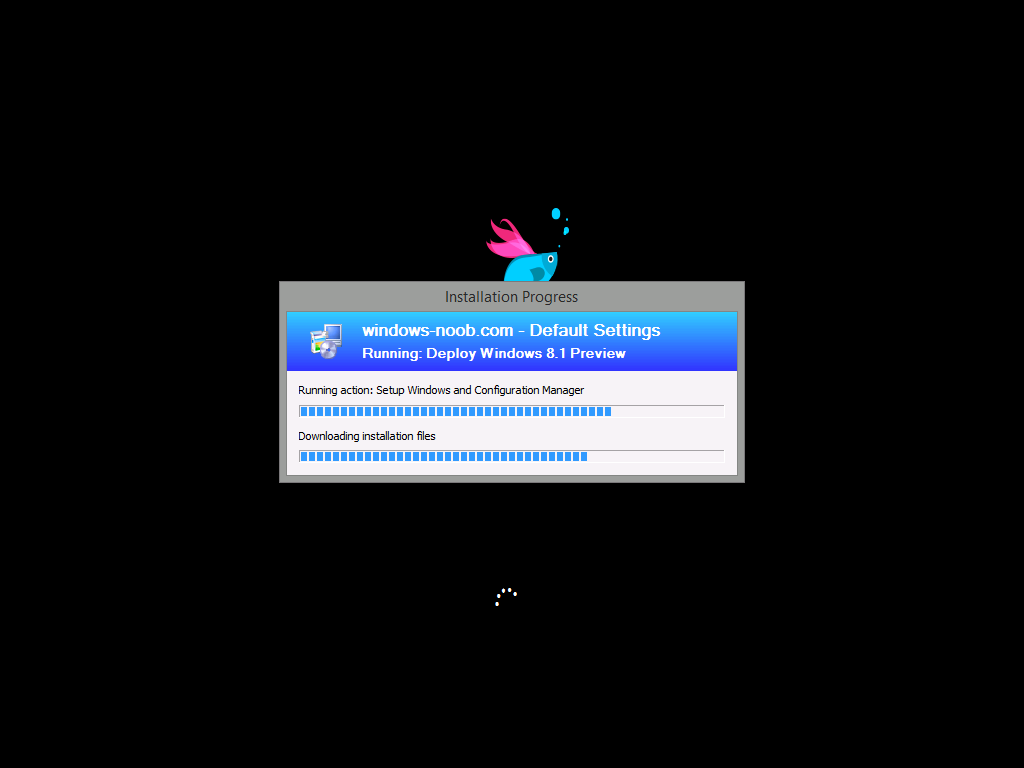
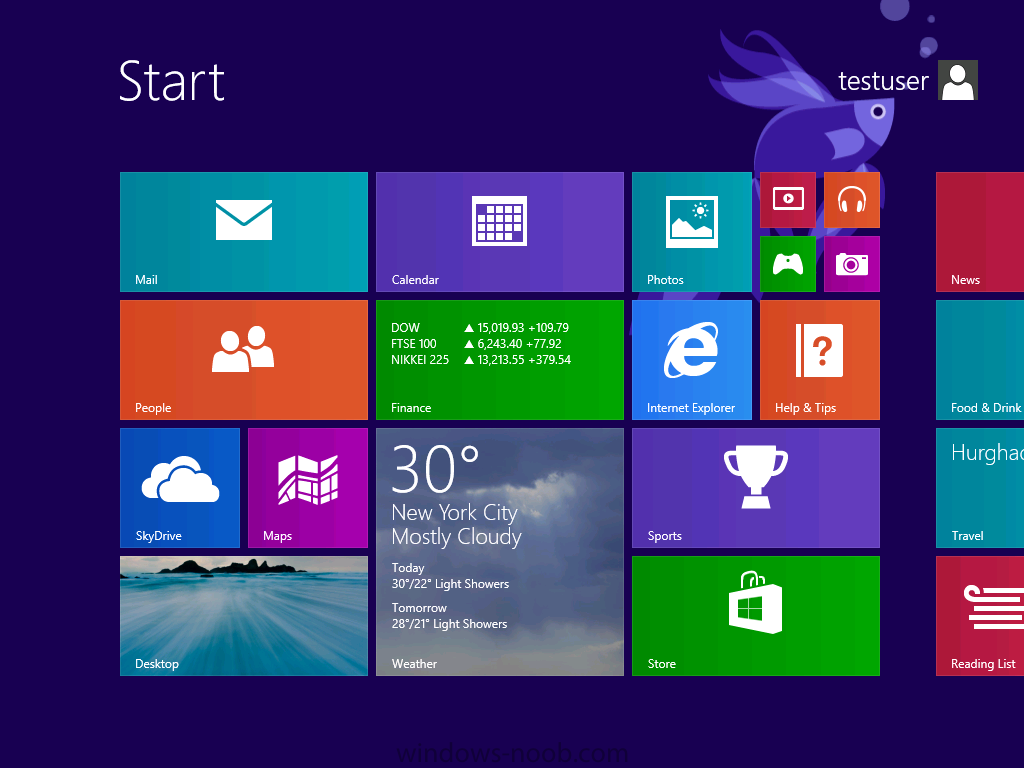
Introduction AT the build conference in San Francisco yesterday Microsoft unveiled a preview version of Windows called Windows 8.1, and in conjunction with the recent release of System Center 2012 R2 Configuration Manager preview, we have the ability to deploy this new OS to see what's changed both in Configuration Manager and in Windows 8.1. A lot has changed with the introduction of System Center 2012 R2 Configuration Manager including a whole bunch of Operating System Deployment changes listed here and that includes support for Windows Server 2012 R2 and Windows 8.1. In this guide we will use System Center 2012 R2 Configuration Manager to Deploy Windows 8.1 Preview. If you have not yet installed R2 then follow this guide. Note: Prior to installing R2 I have installed both CU1 and CU2 for System Center 2012 Configuration Manager SP1, as they contain several fixes (PowerShell amongst others). I'll use PowerShell wherever possible in this guide and i'd suggest you begin to do so to (if you haven't already), if you missed my introduction to PowerShell in Configuration Manager then please see this post. Step 1. Get the Windows 8.1 Preview ISO and extract it Download the preview version of Windows 8.1 from MSDN.com or from this link, extract the ISO and copy extracted files and folders to your sources share on your Configuration Manager server. I copied it to \\sccm\sources\os\os_media\windows 8.1 preview X86 Step 2. Add the Windows 8.1 Install.WIM file We need to add our operating system image file to Configuration Manager, to do so we can use two methods, either in the console using manual steps or in using powershell. Method #1 - Do it in the console In the Operating System Deployment section of the Software Library workspace, select Operating System Images and right click, choose Add Operating System Image Point the wizard to the Install.WIM file in the sources folder of your extracted media files, eg: \\sccm\sources\os\os_media\windows 8.1 preview X86\sources\install.wim On the General screen, fill in information about the Windows 8.1 Preview image you are adding and edit the version or description info so that it clearly points out that this is the Install.WIM file that you are using (to make it clear later when adding Windows 8.1 Preview images to any Deploy Windows 8.1 task sequences). continue with the wizard through to completion. Method #2 - Do it using PowerShell In a powershell console use the following (point it to your path) New-CMoperatingSystemImage -Name "Windows 8.1 Preview" -path "\\sccm\sources\os\OS_Media\Windows 8.1 Preview X86\sources\install.wim" -Version "X86 (Install.WIM)" -Description "This is the Install.wim file from the Windows 8.1 Preview sources folder. (c) windows-noob.com June 2013" Step 3. Distribute content to our Distribution points Now that we've added the image to Configuration Manager we need to distribute it to our distribution points otherwise our client computers cannot download it. Method #1 - Do it in the console Right click on the image and choose Distribute Content click next at the Review Selected Content screen, click on Add to add your distribution points, select the distribution points from the list available and continue through the wizard until completion. Method #2 - Do it using PowerShell In a powershell console use the following (point it to your distribution point) Start-CMContentDistribution –OperatingSystemImageName "Windows 8.1 Preview" –DistributionPointName "sccm.server2008r2.lab.local" and review the distribution of the image via distmgr.log or via PowerShell by specifying the package ID of the Operating System Image. Get-WmiObject –NameSpace Root\SMS\Site_P01 –Class SMS_PackageStatusRootSummarizer –Filter "PackageID='P0100067'" Step 3. Create a Deploy Windows 8.1 task sequence In the console right click on Task Sequences, choose Create Task sequence choose Install an existing package, (side note there is a new option since the introduction of R2, and that new option is called Install an Existing image package to a virtual hard drive, this setting is for Virtual Machine Manager use). fill in the task sequence information and select the X86 boot image (note that the version of the boot image is 6.3.9431.0) Select the newly added Windows 8.1 Preview image, it has two indexes Windows 8 Pro and Windows 8, enter your local administrator password, decide if you want to use BitLocker disc encryption or not, enter the Product key (otherwise you'll get prompted later on) and click next when done Note: in the screenshot above the product key is blank for security purposes, make sure to fill yours in if you do NOT want to be prompted during the task sequence deployment. for configure network settings, enter a domain join account, and verify that it works before continuing click next through the wizard until completion. Step 4. Edit the task sequence Right click on our newly created task sequence and choose Edit. Locate the built in Enable BitLocker step and add the following wmi query for root\cimv2 so that it won't run on Virtual Machines otherwise the task sequence will bomb out on hyperV virtual machines... select * from Win32_ComputerSystem where Model <> "Virtual Machine" click Apply to save the changes and then click Ok. Step 5. Deploy the task sequence Method #1 - Do it in the console Right click on the task sequence and choose Deploy and choose a collection, in my example i'll use the All Unknown Computers collection set the deployment purpose as Available (optional) and make if available to Configuration Manager Clients, Media and PXE. click next through the wizard until completion Method #2 - Do it using PowerShell Use the following, replace the package ID listed below with the package ID of your Deploy Windows 8.1 Preview task sequence. Start-CMTaskSequenceDeployment –TaskSequencePackageId "P0100068" –CollectionName "All Unknown Computers" –Comment "© windows-noob.com June 2013" –Deploypurpose "Available" –MakeAvailableTo "ClientsMediaAndPXE" Step 6. PXE boot and a new (unknown) computer PXE boot a computer (I use hyperV virtual machines with legacy nics added as the first boot device), press F12 when prompted to start the network boot process the boot wim file will be downloaded, note that this is a new version since you already updated Windows ADK to 8.1 to support deploying Windows 8.1 and you can clearly see that the version of WinPE has changed, with the new Fish logo, cute select our Deploy Windows 8.1 Preview task sequence and off it goes... the Windows 8.1 wim file get's downloaded and applied, and the computer reboots to start windows setup, we get to see the fish again (do you remember where we saw him before, it was in Windows 8 Consumer Preview here) before a few more reboots to get windows ready for the next stage, installing the Configuration Manager client, before being presented with the new login screen for Windows 8.1 so login with your testuser credentials to see the new start screen and the new desktop cool ! job done. Summary In this guide (there is an index here) you've learned how to Deploy Windows 8.1 Preview with System Center 2012 R2 Configuration Manager, you've learned the steps required to successfully deploy that image and finally you've done most of the work using PowerShell Cmdlets (where available). Congratulations !
-
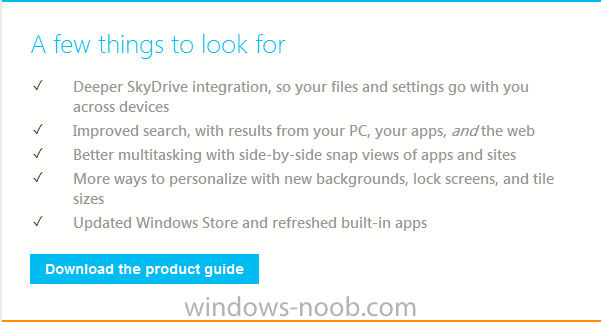
the Build conference is underway in San Francisco and developers there are getting access to a preview release of Windows 8.1, if reports floating around on Twitter are to be believed and if we are lucky we will be able to download the preview also via the following link http://windows.microsoft.com/en-us/windows-8/download-preview let me know if the ISOs appear there soon will you it seems it's already available, hint: check MSDN while it's downloading you can look at the following list of things to look for cheers niall
-

SCCM 2012 upgrade to SP1 and pre-existing boot images
anyweb replied to Buggin's topic in Configuration Manager 2012
for the sake of others reading this topic, no you do not need to update your boot images as the upgrade process takes care of that for you, however in some cases things can go wrong (such as with antivirus exclusions not being setup correctly) and in those cases you'll need to rebuild the boot images as described here -
sure it's possible, but i'd recommend you do a install on a standalone server, don't you have a lab ?
- 7 replies
-
- step by step
- guides
-
(and 1 more)
Tagged with:
-

how can I install SCCM 2007 in Windows Server 2008
anyweb replied to anyweb's topic in Configuration Manager 2007
yes the steps are the same, use the newest SP available which is Configuration Manager 2007 SP2. -
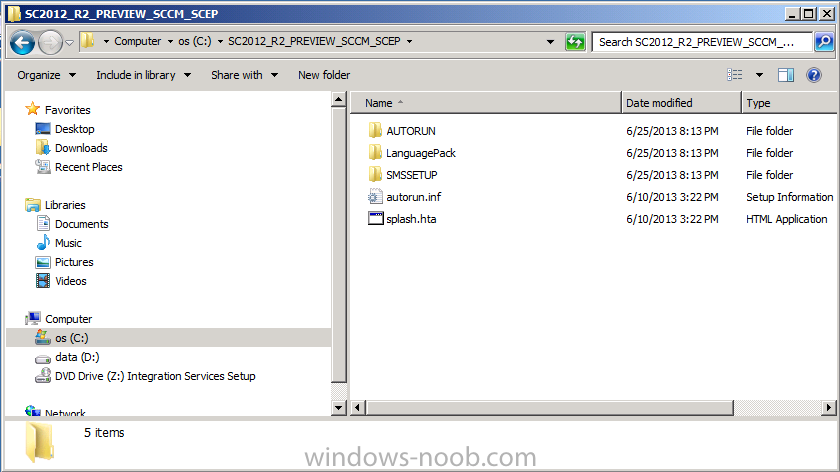
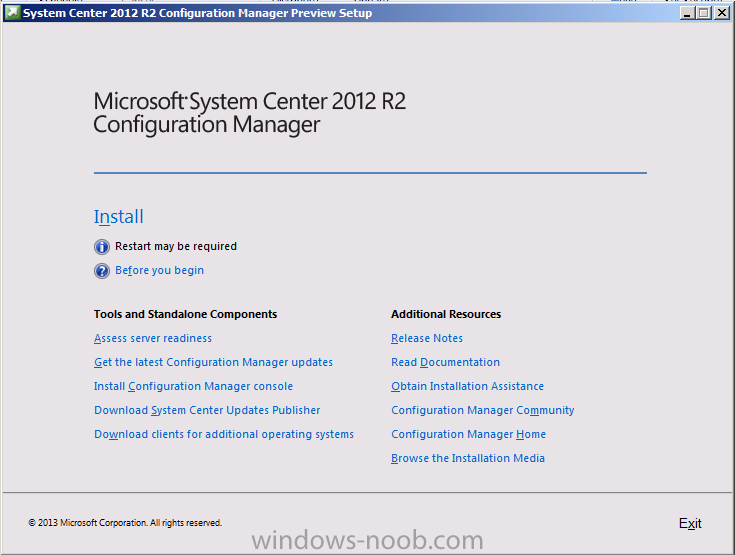
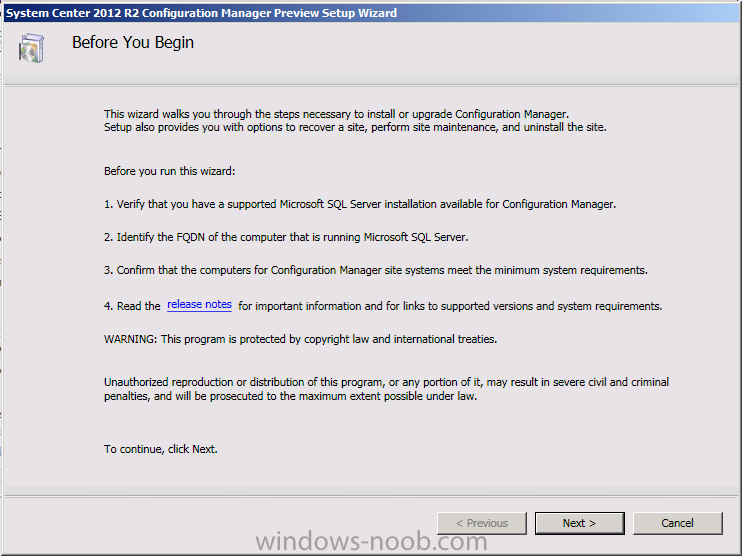
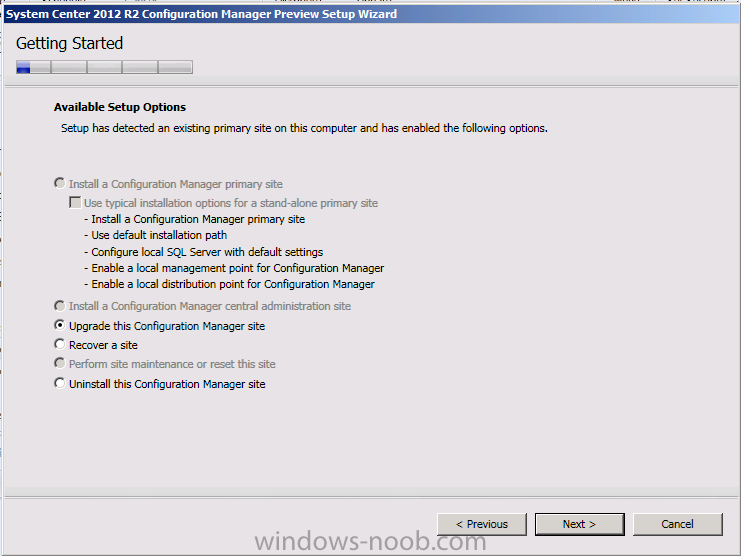
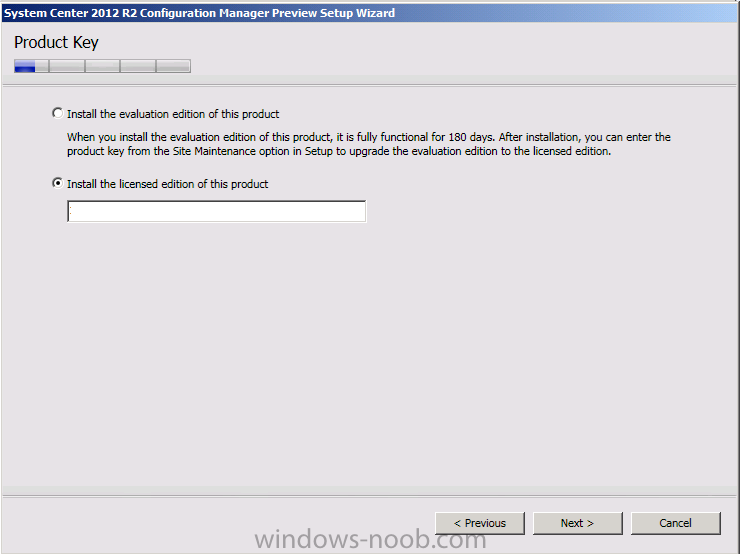
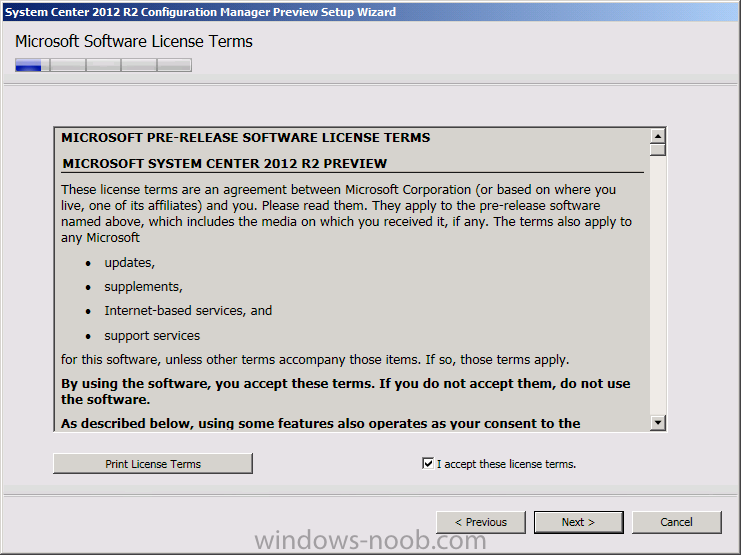
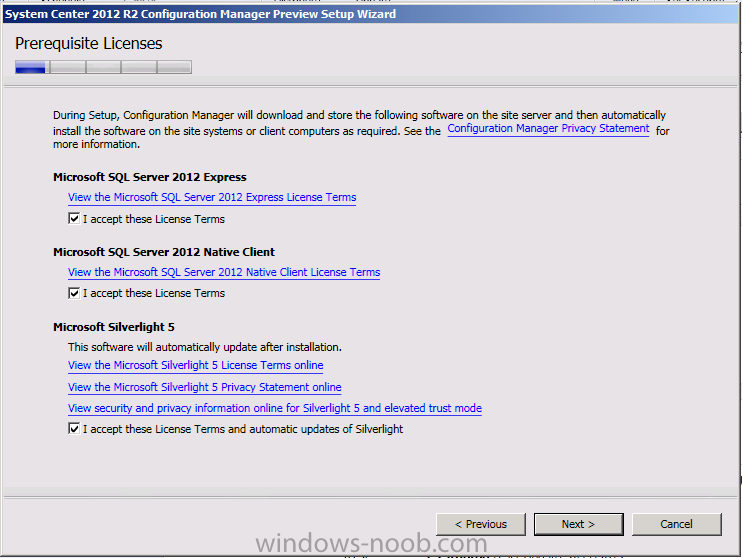
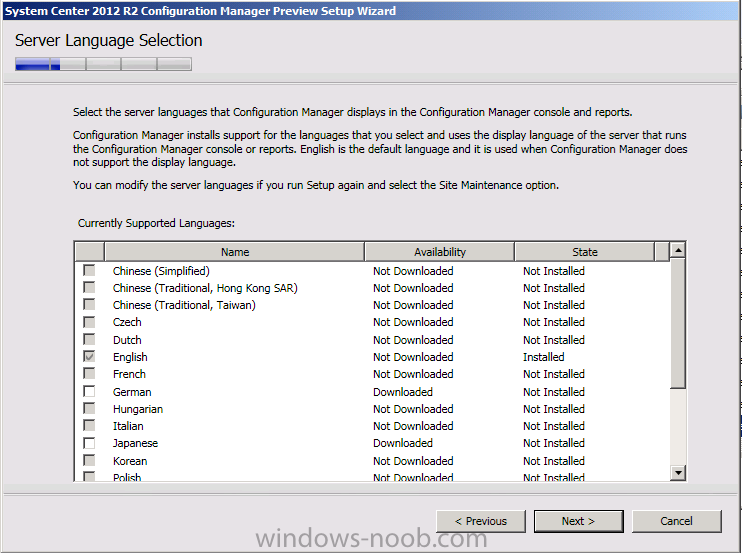
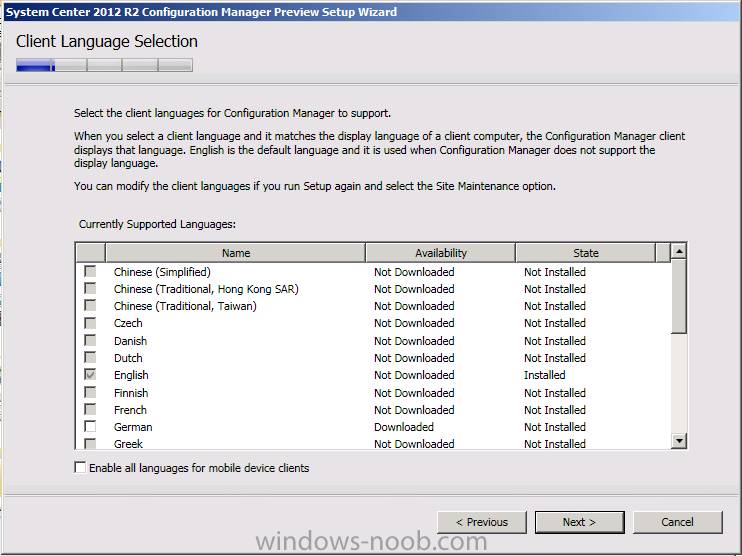
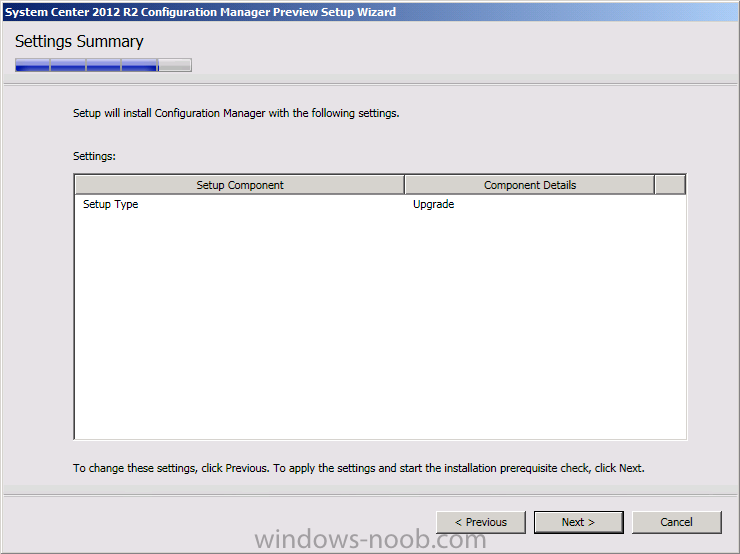
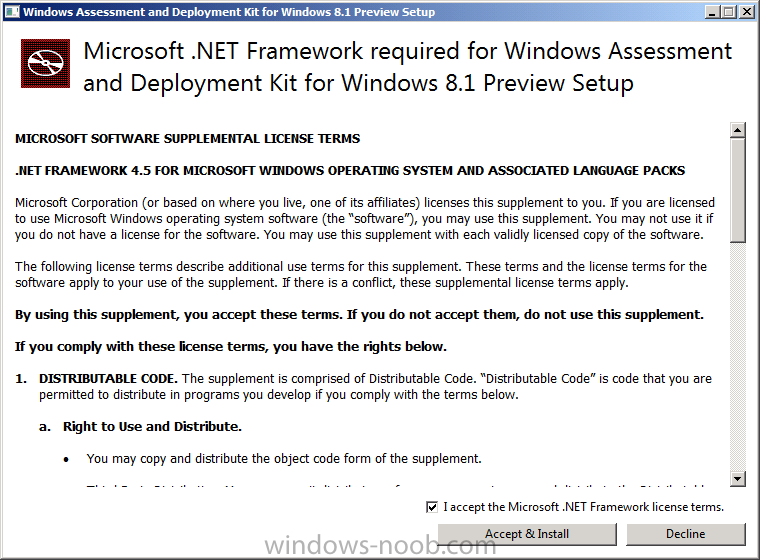
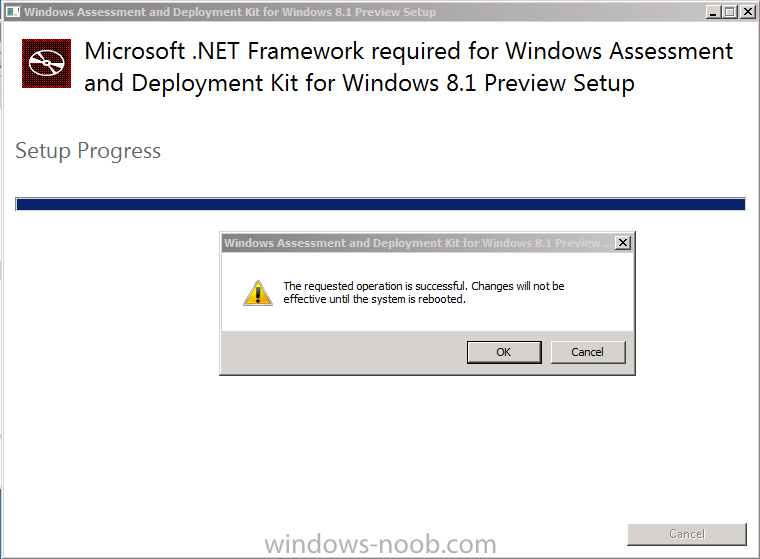
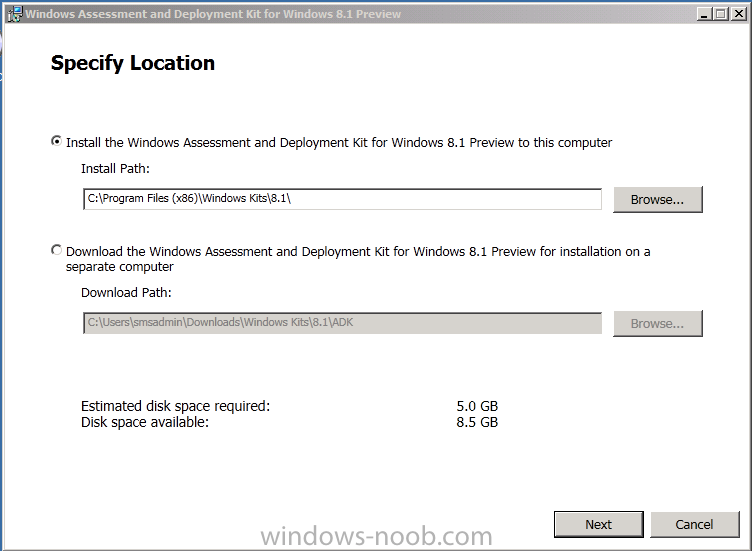
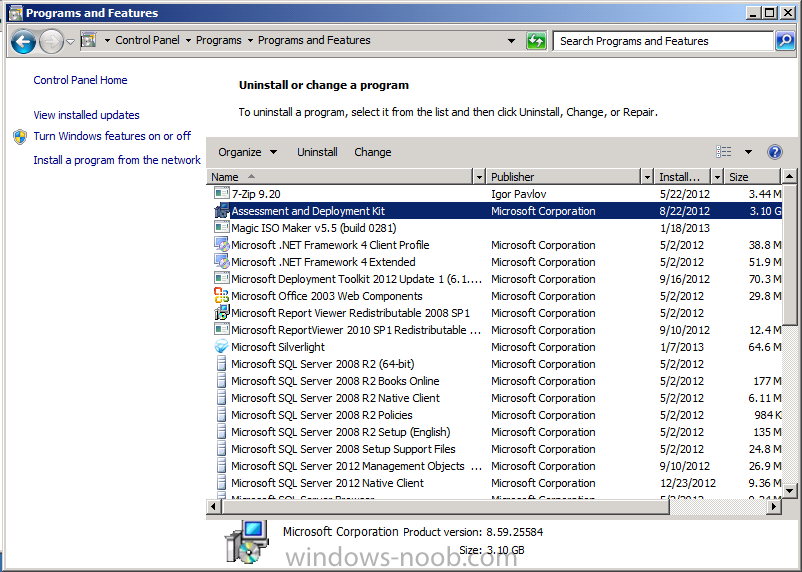
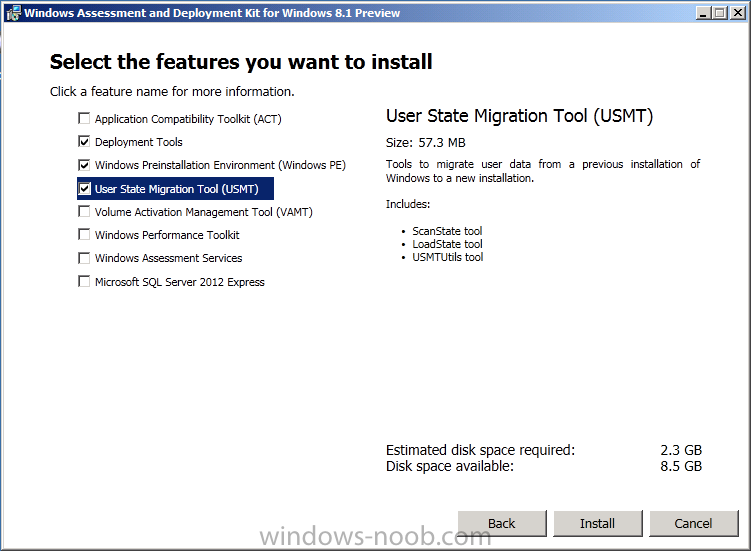
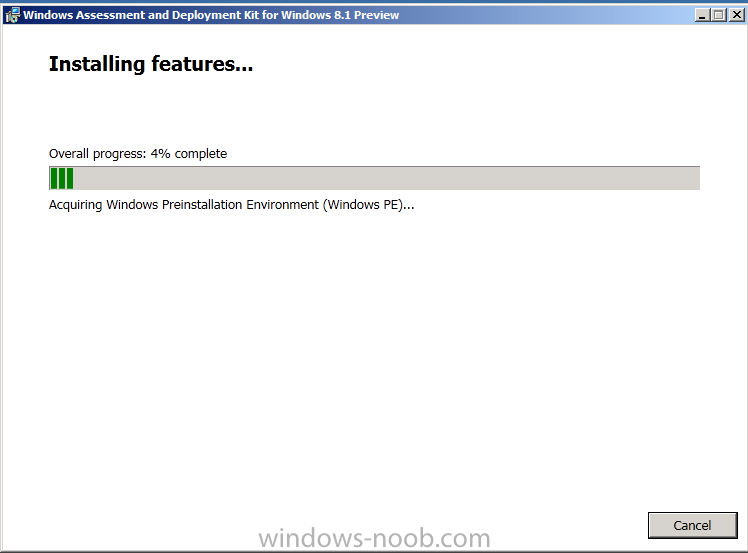
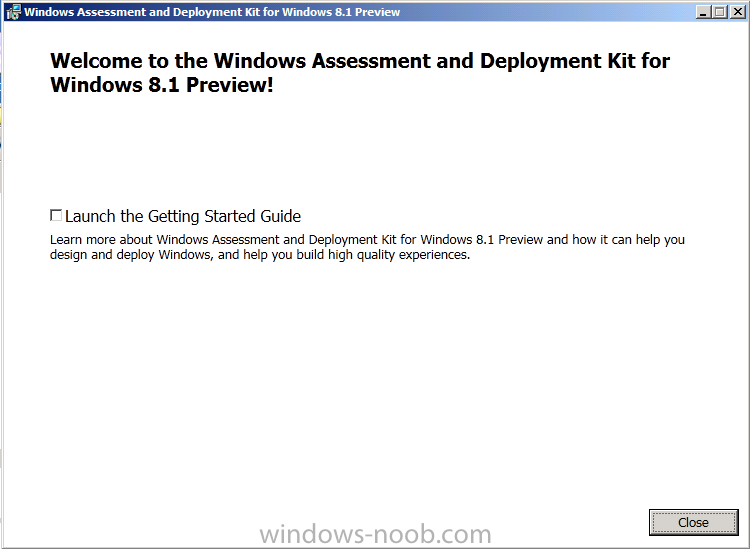
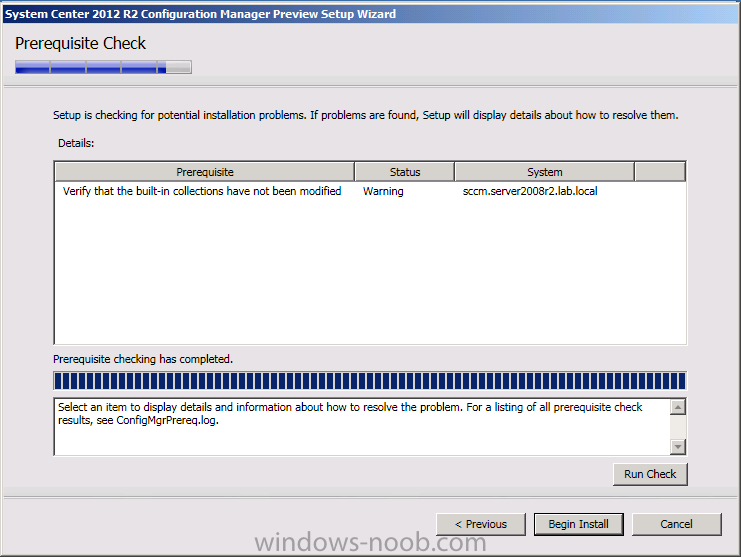
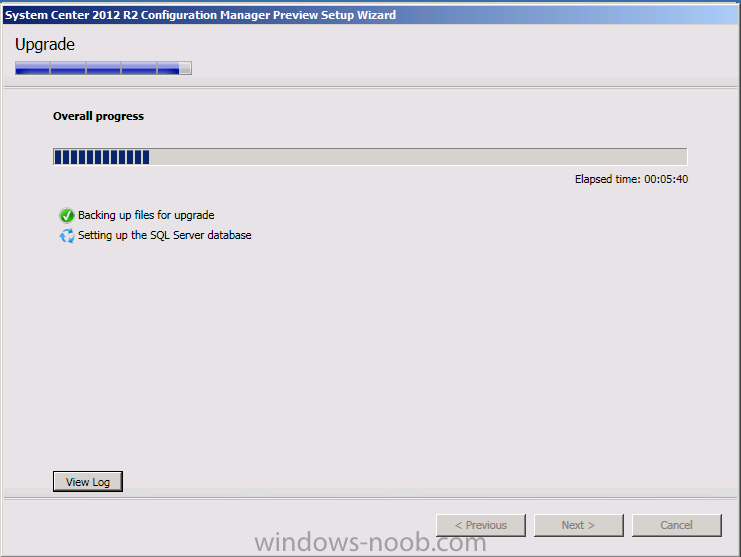
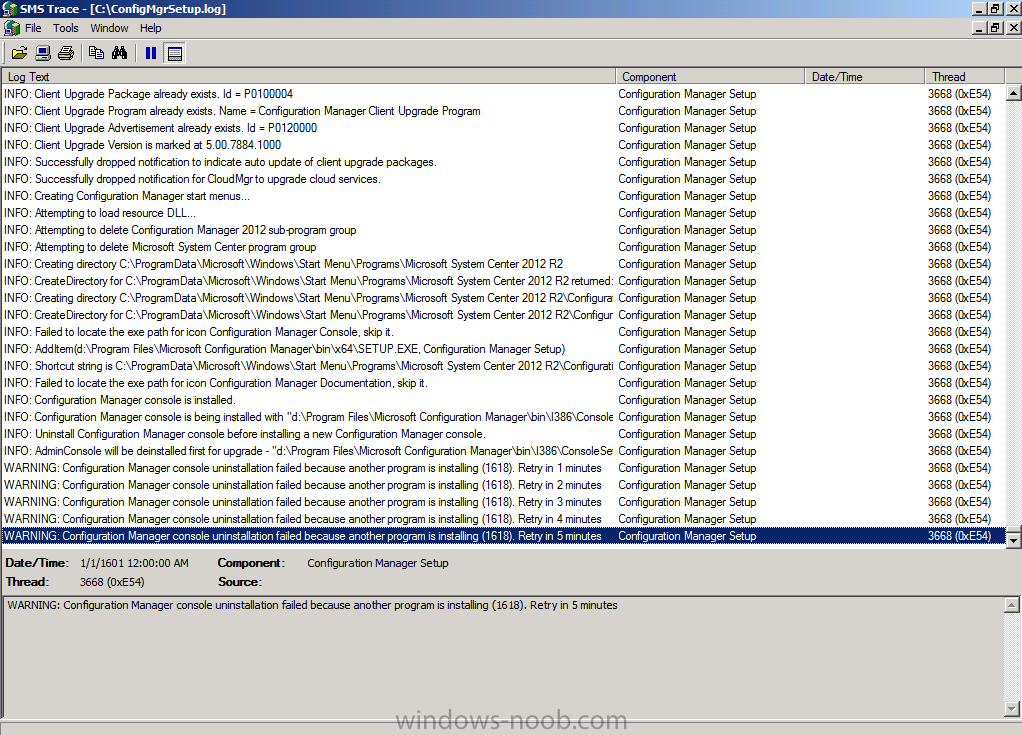
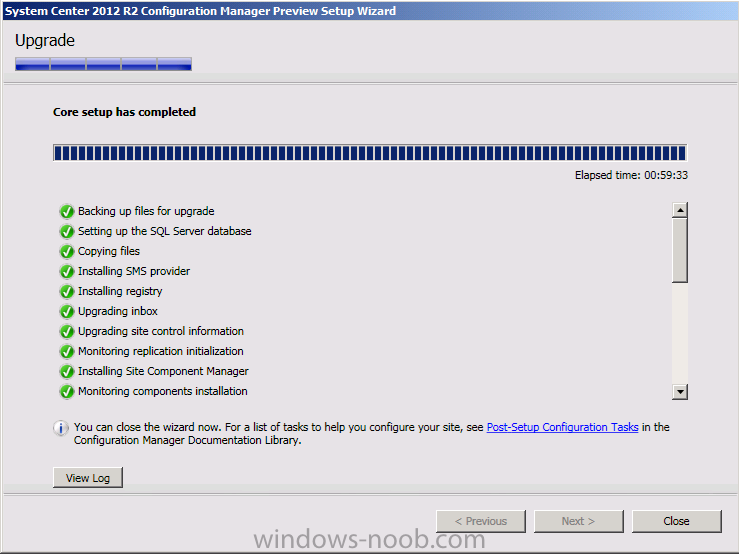
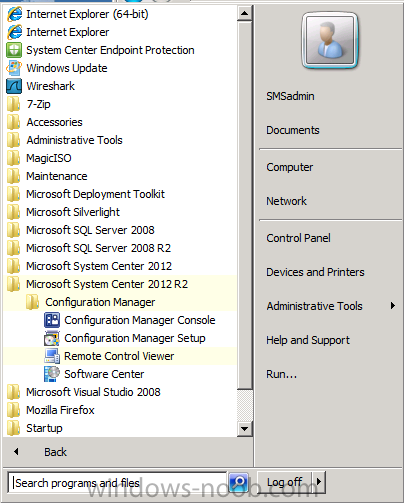
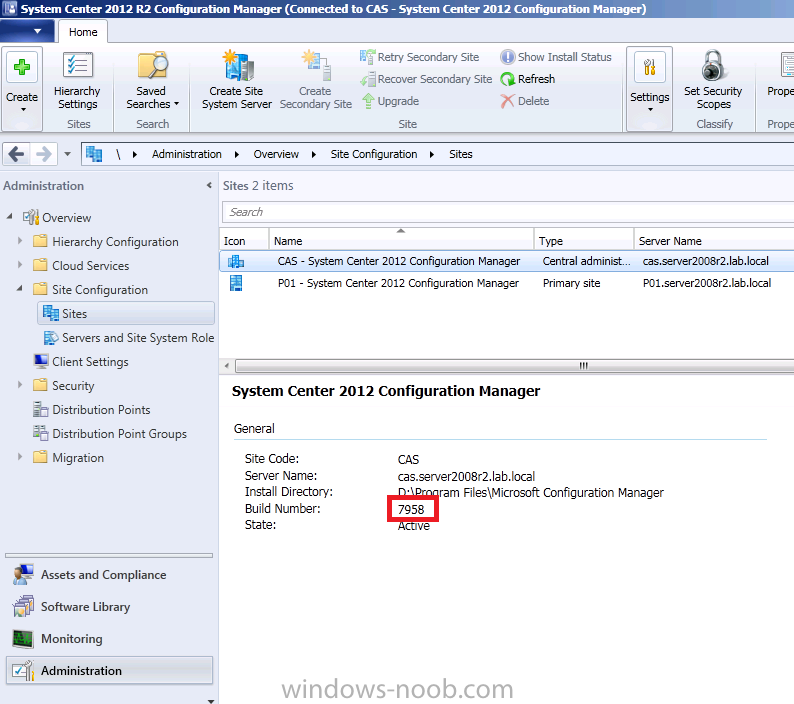
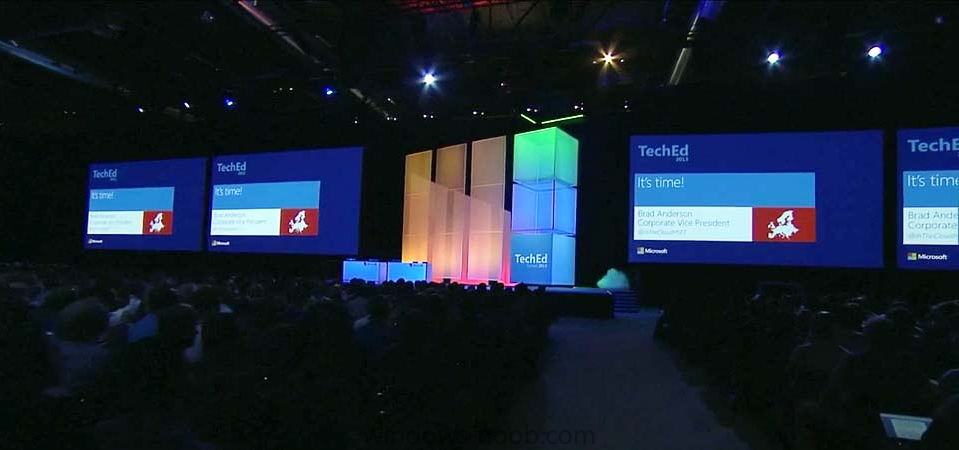
Introduction Today at Tech Ed Europe 2013 in Madrid, Brad Anderson announced the availability of System Center 2012 R2 Configuration Manager preview (amongst other things). In this post I will focus on installing the R2 preview release on Configuration Manager 2012 SP1 (which just so happens to have Cu2 installed). In the past, R2 releases for System Center products traditionally add cool features to an otherwise complete product so this is going to be exciting. Note: Test upgrading to R2 in a LAB before doing it in production and always backup your database before doing so. When upgrading a hierarchy always upgrade from the Top down, for example that would be CAS ---> Primaries ---> Secondaries ---> clients Step 1. Get the goodies You can get the System Center 2012 Configuration Manager R2 Preview release from here. Once you've downloaded the bits extract them to somewhere like C:\SC2012_R2_Preview_SCCM_SCEP Once done, download Windows ADK 8.1 from here. Step 2. Uninstall Windows ADK 8.0 Before you install R2, you'll need to satisfy certain prerequisites, and one of those is ADK 8.1, and as part of that you'll need to uninstall Windows ADK 8.0, it's not sufficient to simply install ADK 8.1 over ADK 8.0. Open control panel and locate Windows Automated Installation Kit, click it and choose Uninstall (it's the one with version 8.59.25584). Once uninstalled, no need for a reboot. Step 3. Install Windows ADK 8.1 Now that you've removed the previous version, download the new ADK to support Windows 8.1 and Server 2012 R2 from here. Update: A new version of ADK 8.1 was released in the last week, see this post before continuing. Run adksetup and accept the .NET 4.5 FrameWork agreement, make sure you've 2.25 GB free space on your C:\ drive before attempting to continue otherwise you may get a strange ASIA failure message (if you do get any failures, check %temp% for the .net installation logs to see why it failed.) clicking on OK will enforce a reboot so if you don't want a reboot at this time, then wait before clicking ok. after the reboot, login and you'll see the specify location screen for the new Windows ADK installation click next through the wizard and select at least the following 3 components User State Migration Tool (USMT) Windows Deployment Tools Windows PreInstallation Environment (Windows PE) and the installation should continue...slowly but surely... click close when done. Tip: Installation of the ADK will produce several logs for the separate components in %temp%\adk if you have any issues with the installation of the ADK open those logs individually in CMTrace to look for any errors during the installation. Step 3. Install/Upgrade to R2 Tip: before starting the install consider stopping any in-progress package distributions (or waiting until they are complete) and stop all normal activities in the console (package/application creation etc). Also reboot the server (s) involved before commencing the upgrade in case any update required a reboot that could interfere with the below process. Always upgrade your Primary servers first, then upgrade any secondaries. Now that we've fixed Windows ADK, browse to the extracted System Center 2012 Configuration Manager R2 files and click on splash.hta to start the wizard and click on Install to start the installer, you will be presented with the before you begin screen, click next and then you'll see the available setup options on the Getting started screen, it should auto detect that you have a primary installed and that you are upgrading the site you can choose whether to input your license key or not, I entered the key it works fine accept the EULA to continue and place checkmarks in the products listed for Prerequisite licenses choose to download the setup prerequisites locally or from a previously downloaded location and then select the server languages that Configuration Manager will support and then the client languages review the settings summary and the Prerequisite check will complete, it may list warnings (which are usually ok to ignore) or errors (failures, which you must fix). Click Begin install to continue (in the screenshot below I've modified a system collection, it's ok, and it's ok to continue) time for a siesta (if you are in Madrid :-)) while it installs, as this will take some time..., click on View Log to view the installation in CMTrace Once the installation of System Center 2012 R2 Configuration Manager is done you'll see the following, I'd recommend you scroll up and down to verify all listed components are green, close the wizard when you can. and start the new console via the new Start menu link, notice the R2 reference the console appears, congratulations you've installed System Center 2012 R2 Configuration Manager. Notice the new build number of 7598 in the screenshot below Further Reading What’s New in System Center 2012 R2 Configuration Manager - http://technet.microsoft.com/library/dn236351.aspx System Requirements Installation Guide Evaluation Guide cheers niall.
-
I have to ask why you are looking for an ISO for a discontinued product (it's not supported anymore), the supported products are Configuration Manager 2007 and Configuration Manager 2012, I'd recommend you use/lab/learn them instead.
- 7 replies
-
- step by step
- guides
-
(and 1 more)
Tagged with:
-
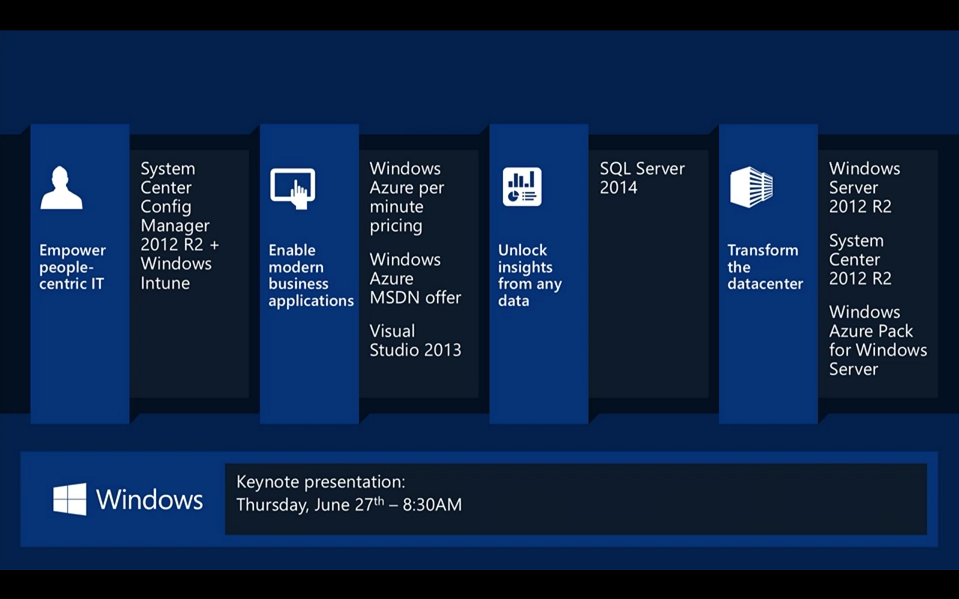
Today at TechEd Europe 2013 in hot hot hot Madrid (it's really hot here I can tell you!), Brad Anderson gave his keynote address to thousands of TechEd Europe delegates and it was a great performance from the seasoned professional that Brad is, naturally there were some new announcements to make such as the immediate availability of preview software for Windows Server 2012 R2, System Center 2012 R2 and SQL Server 2014. Microsoft customers such as Aston Martin explained why they are moving to the cloud with Microsoft and why it's benefiting their enterprises. speaking of Aston Martin you can win one of those awesome cars for yourself by checking out this cool competition from Microsoft. What about the new stuff ? There was plenty to demo and talk about today at Tech Ed Europe including the following, below are the new preview releases !, I'd recommend you get downloading to experience them for yourself ! Note: at this point the R2 Preview download for Configuration Manager is pointing to a SCOM_R2 download, that will be fixed shortly... Windows Server EvaluationsWindows Server 2012 R2 Preview for IT Professionals Windows Server 2012 R2 Preview on Windows Azure Windows Server 2012 R2 Preview for Developers Windows Server 2012 R2 Essentials Preview System Center and Windows Intune EvaluationsSystem Center 2012 R2 Preview Datacenter/Private Cloud System Center 2012 R2 Configuration Manager & Endpoint Protection Preview Windows Intune 30 Day Free Trial SQL Server EvaluationsSQL Server 2014 Community Technology Preview 1 SQL Server 2014 Community Technology Preview 1 on Windows Azure Windows Azure Evaluation Windows Azure Free TrialWindows Azure Pack Windows Azure Pack for those that want all the details here the transcript of what Brad talked about today in Madrid cheers niall
-

Software Updates - Stuck at Downloading (0% complete)
anyweb replied to arr0ww's topic in Configuration Manager 2012
have you tried restarting IIS ? -
translated from google please understand that this is an English forum, so we write in English here, thanks.
-
these samples are for Configuration Manager 2007 only.
-

how can I install SCCM 2007 in Windows Server 2008
anyweb replied to anyweb's topic in Configuration Manager 2007
where are you seeing that message, can you show a screenshot


