anyweb
-
Posts
9176 -
Joined
-
Last visited
-
Days Won
366
Everything posted by anyweb
-
 <![LOG[Failed to create D:\_SMSTaskSequence (1392)]LOG]!><time="19:19:52.394+480" date="02-07-2013" component="TSPxe" context="" type="3" thread="1152" file="utils.cpp:1175"> try diskparting the hard disc, format it and start again in diskpart do like so sel disk 0 clean cre par pri format fs=ntfs quick assign exit
 -
Database Replication stuck on "Link is being configured"
anyweb replied to JHBPJF's topic in Configuration Manager 2012
did you follow the guide exactly ? for example the GPO's for sql synchronization ? did you skip anything ? -
I havnt tested it yet with Server 2012, have you tried bypassing that step ?
-
SCCM 2012 Windows 7 OS Deployment Failure 0x80072efe
anyweb replied to SethCarter's question in Deploying Operating Systems
have you tried a diffferent network switch/hub/port/cable ? have you tried different network drivers for the x1 ? -
Cannot Uninstall CAS!
anyweb replied to OWeathersby's question in Troubleshooting, Tools, Hints and Tips
no, the child site is the one that would populate it's own settings, so are they there or not ? -
Upgrading System Center 2012 to System Center 2012 SP1
anyweb replied to dimayugaalj's topic in Configuration Manager 2012
ok the upgrade guide is complete and you can review it here -
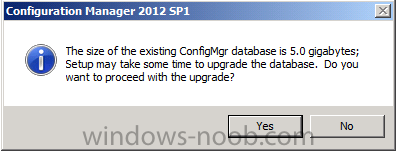
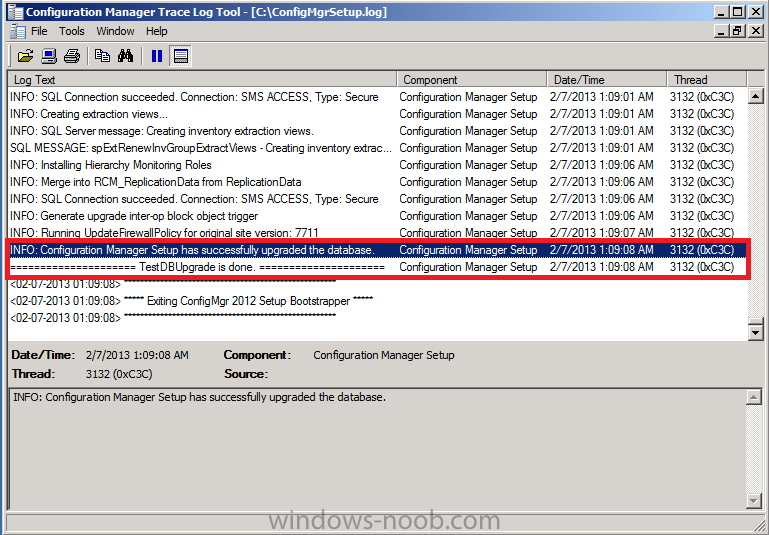
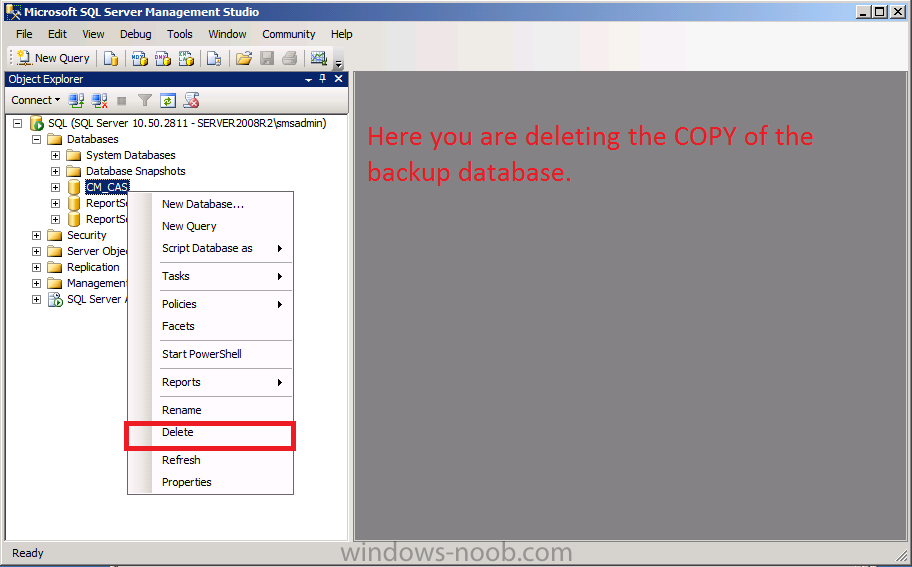
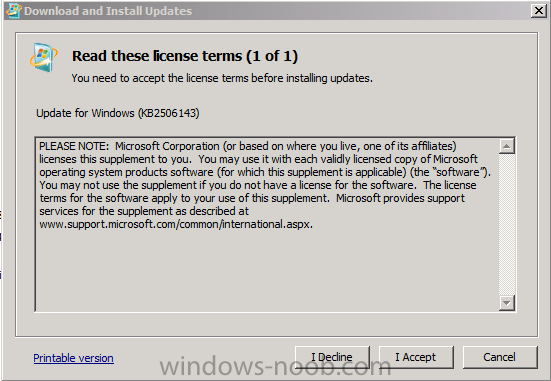
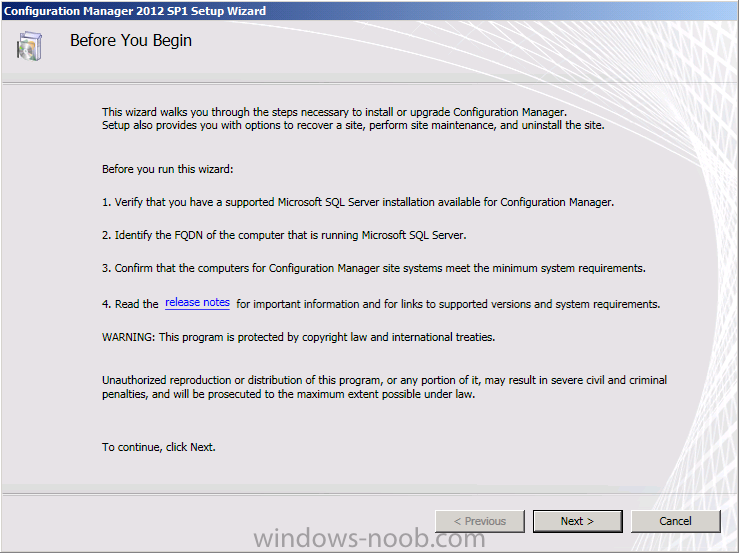
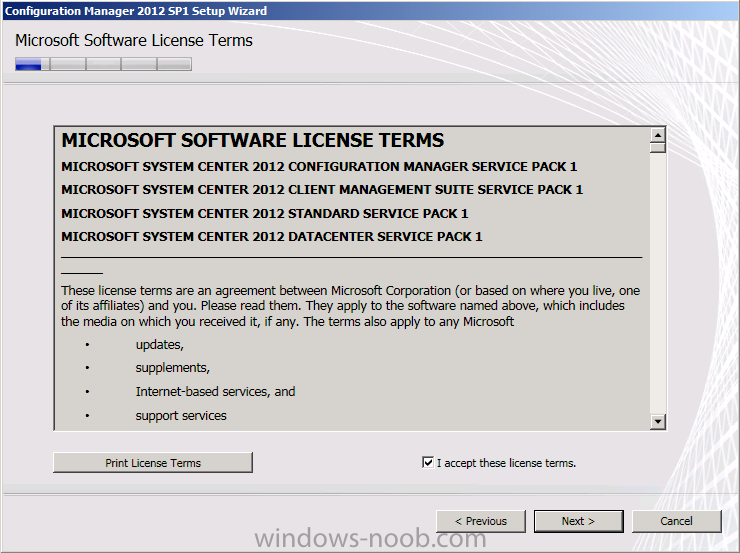
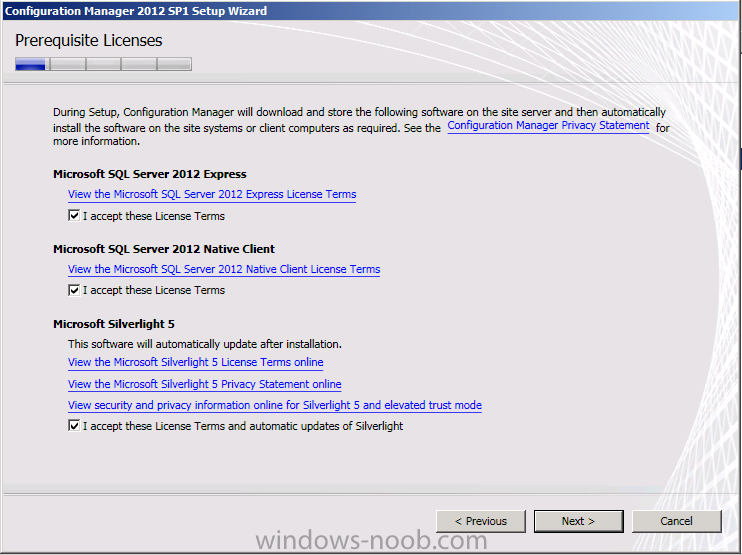
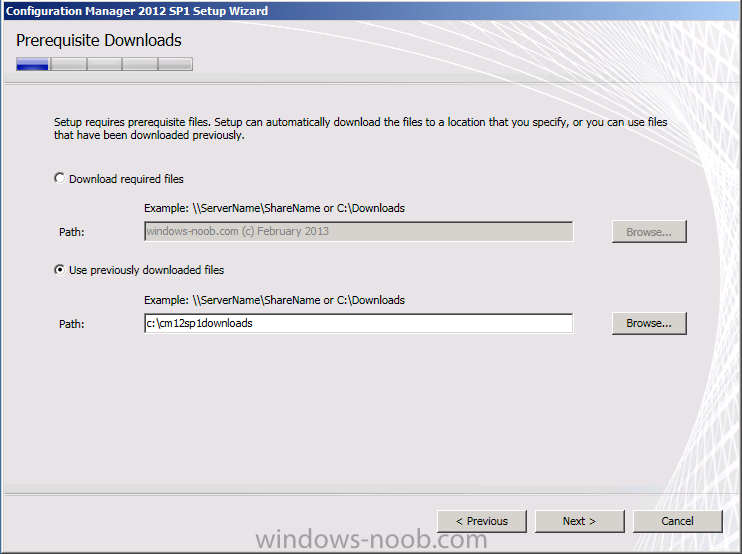
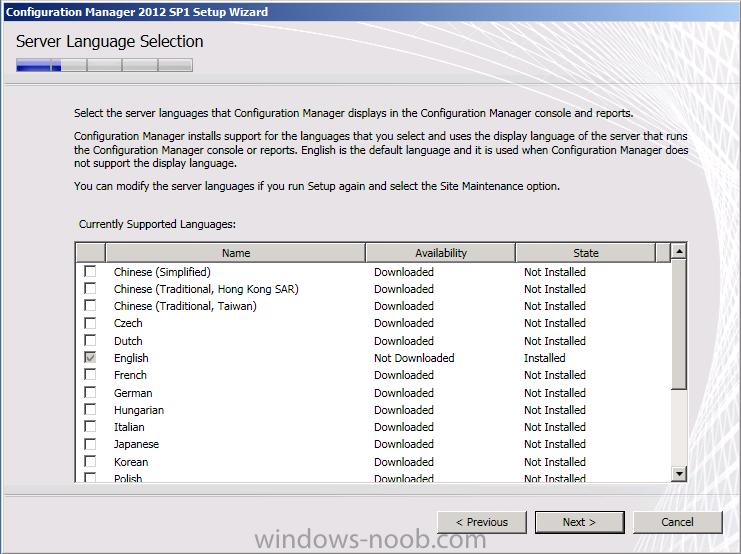
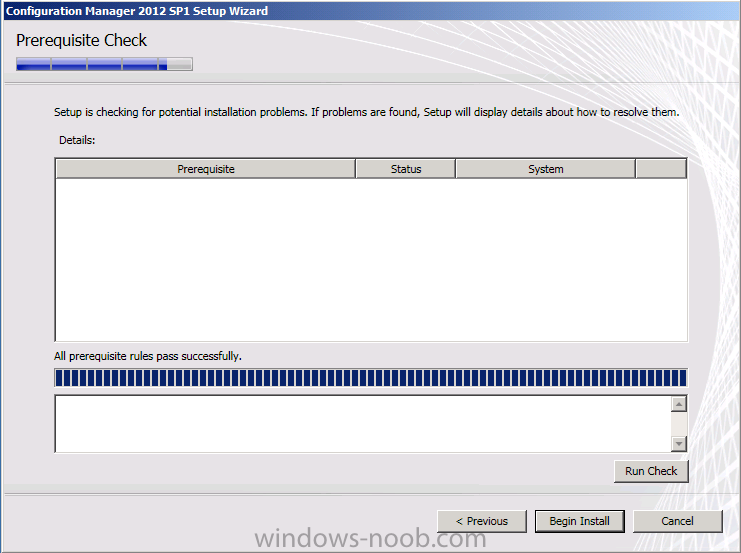
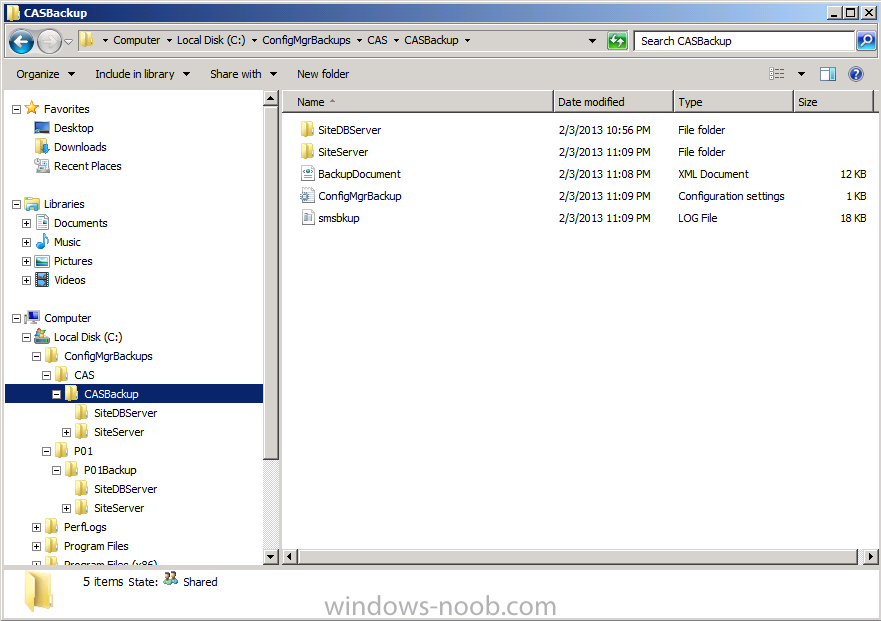
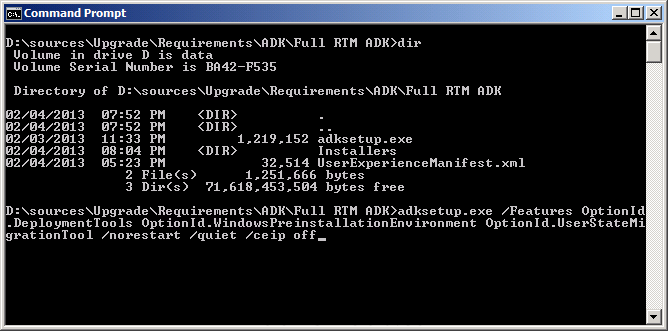
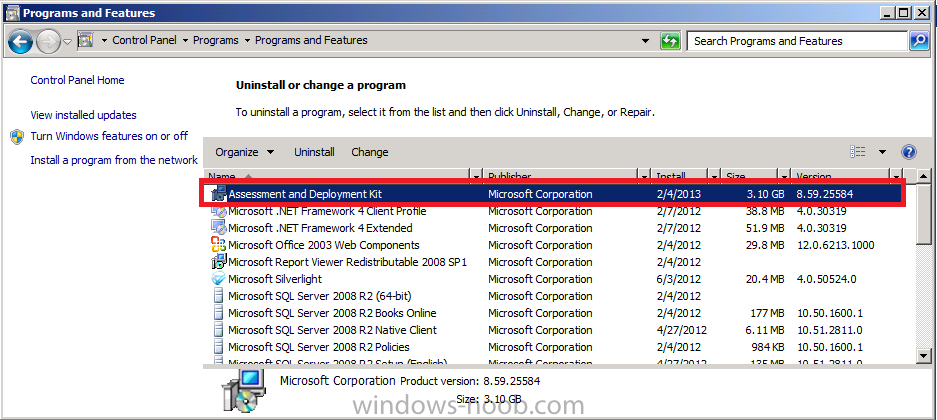
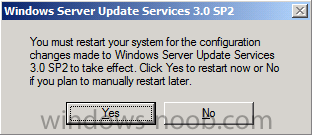
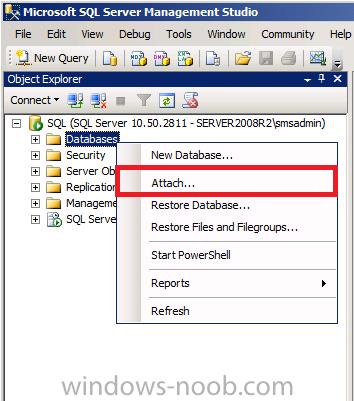
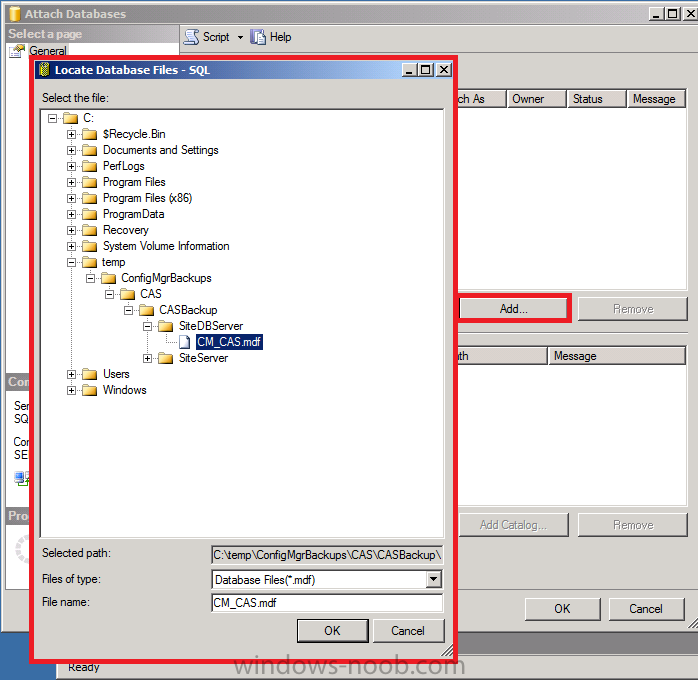
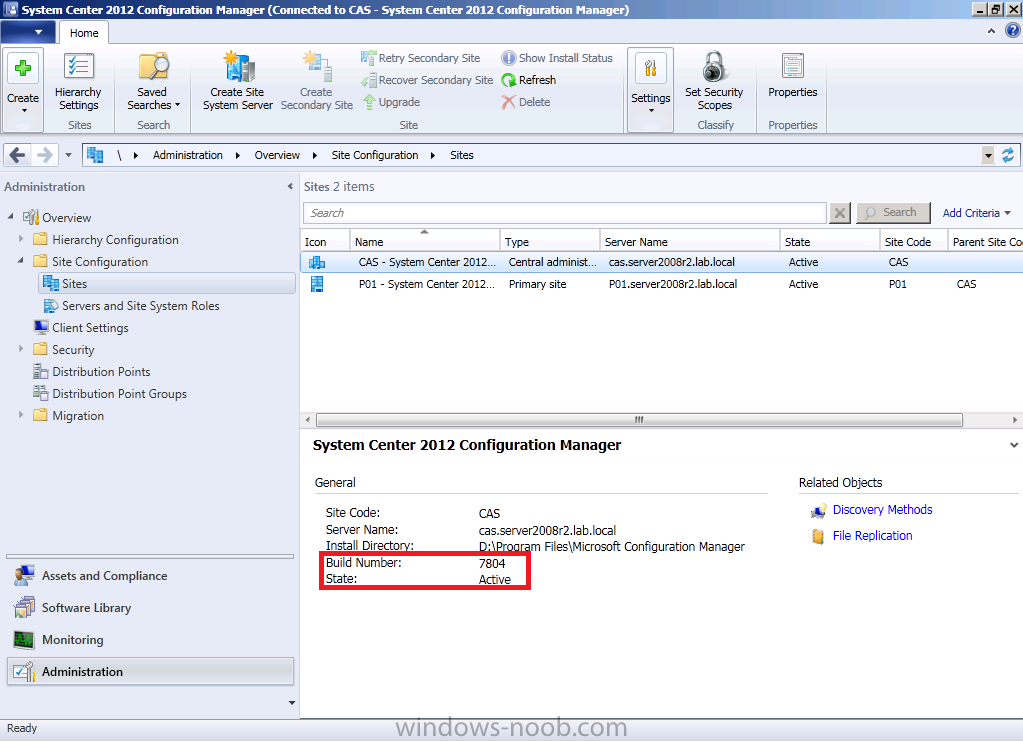
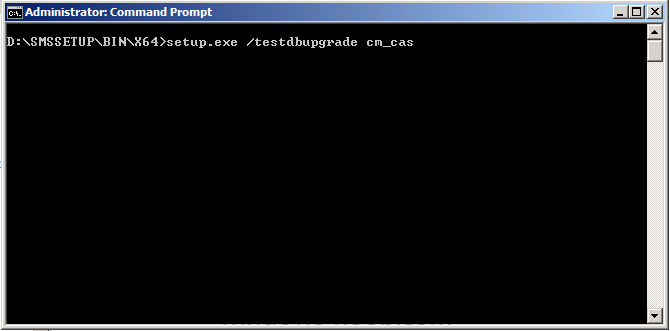
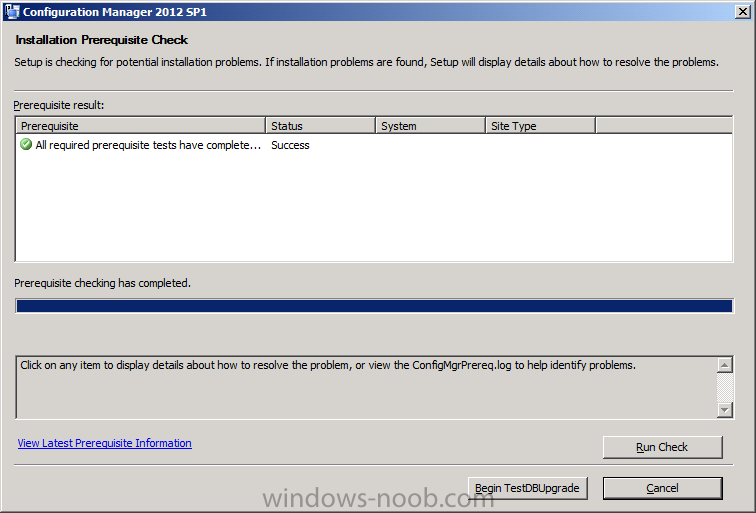
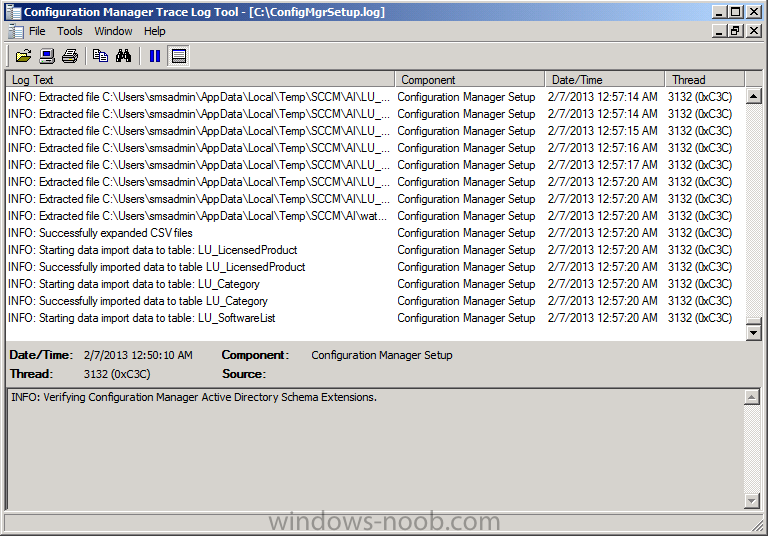
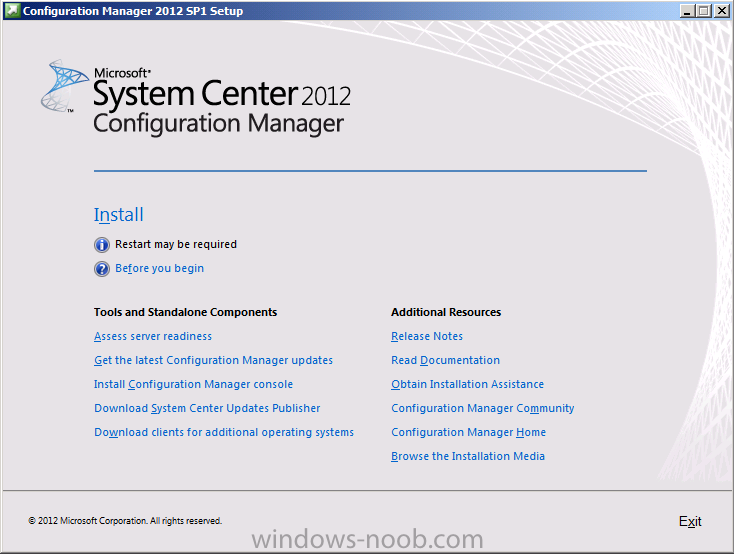
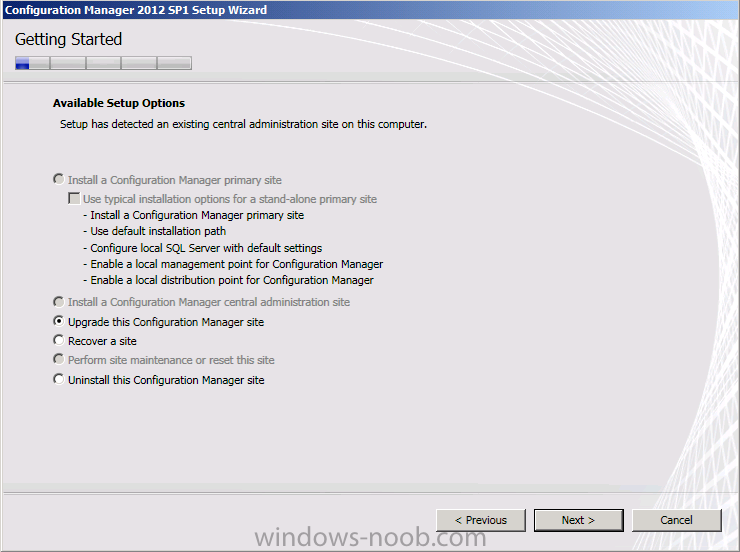
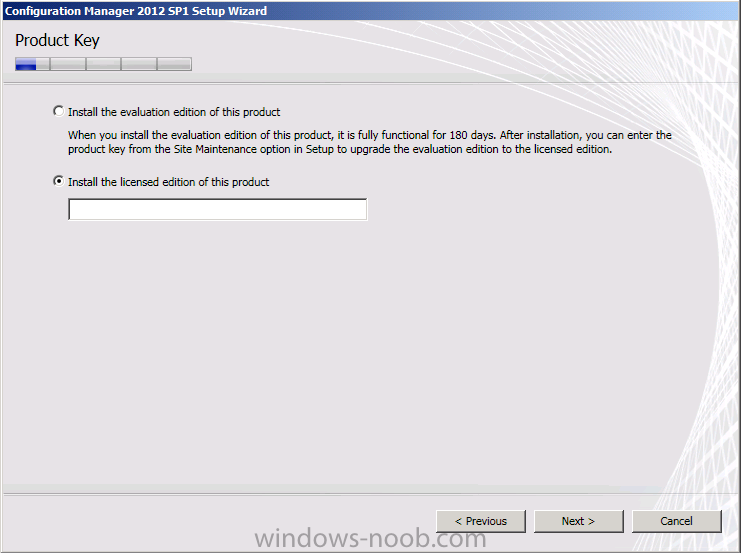
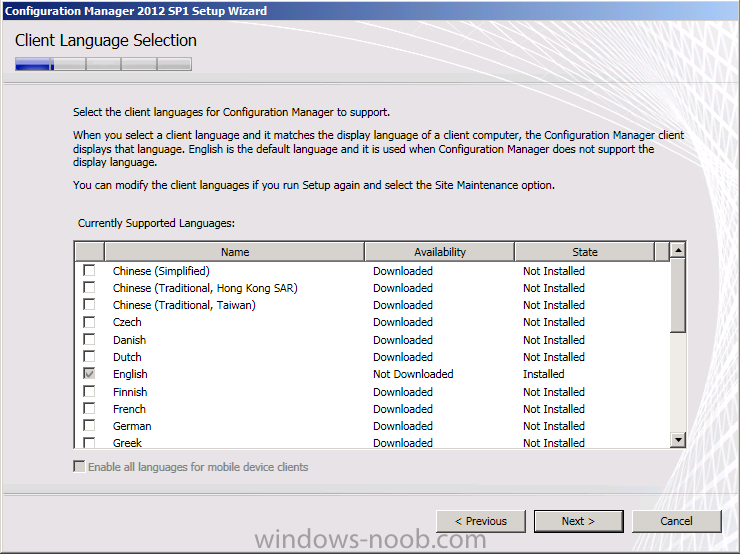
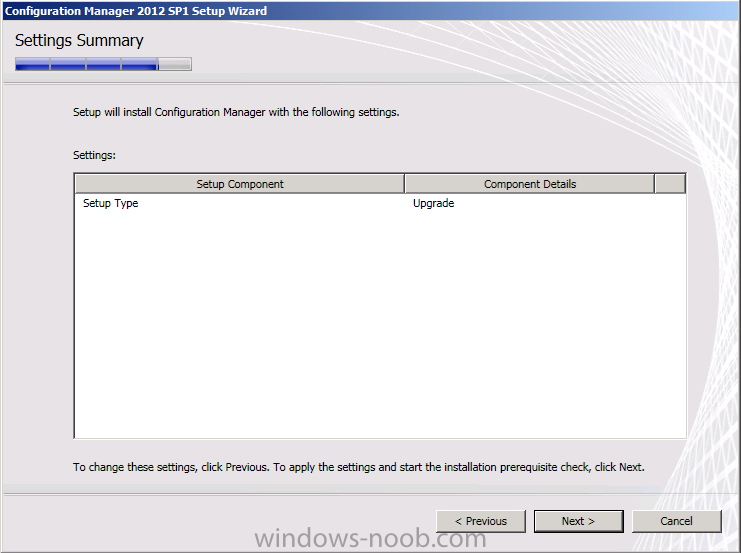
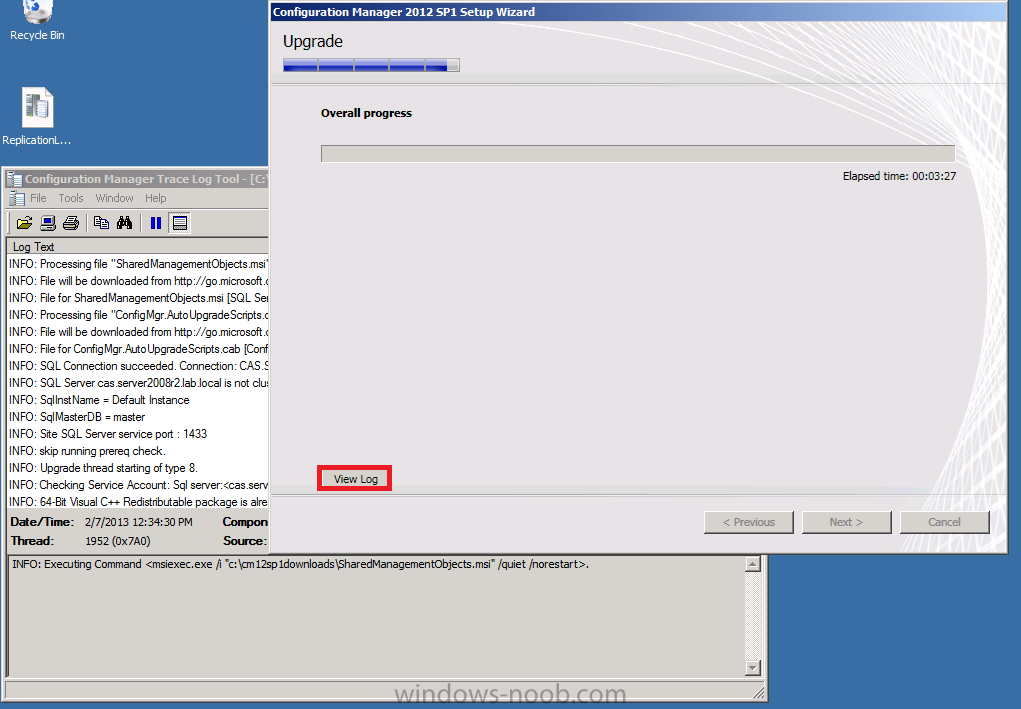
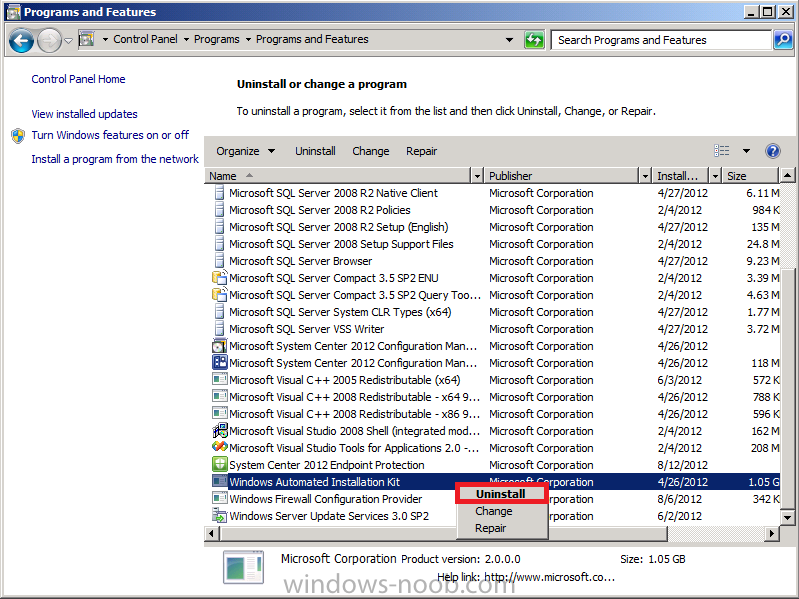
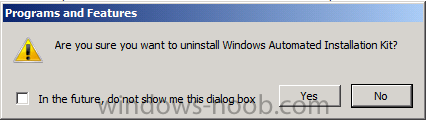
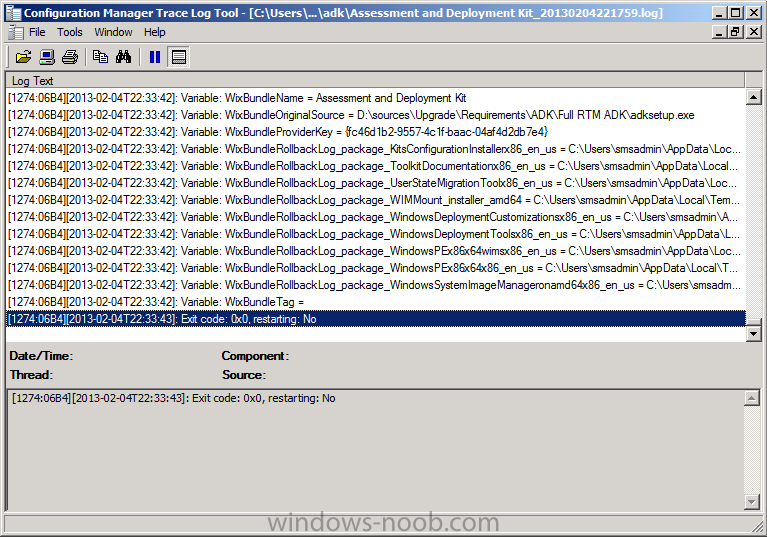
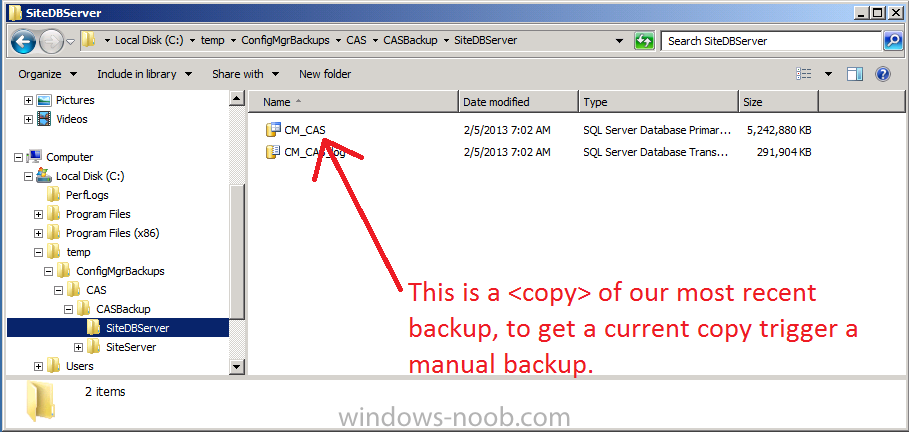
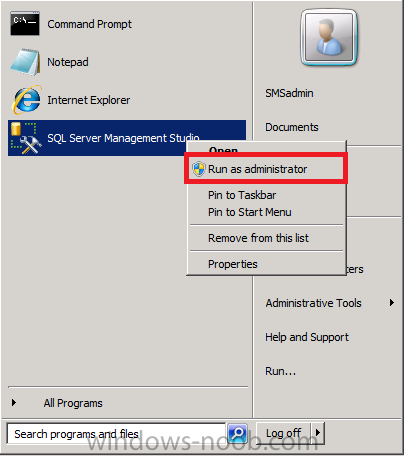
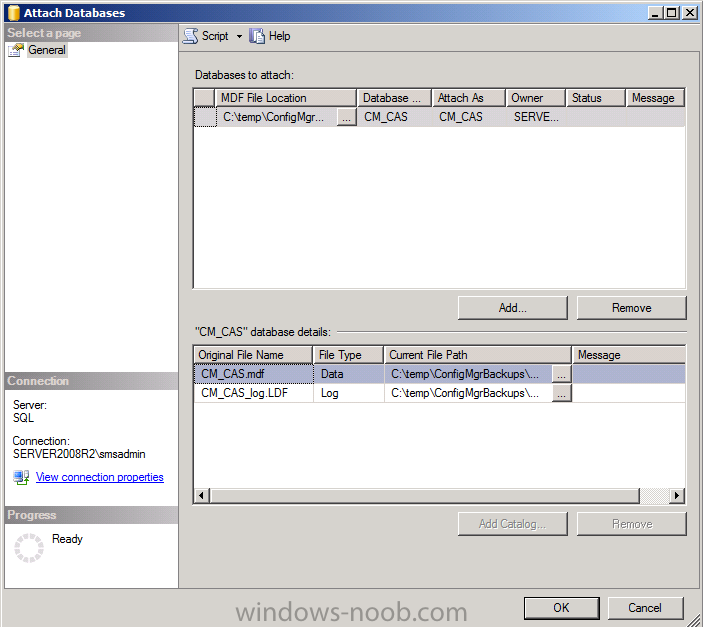
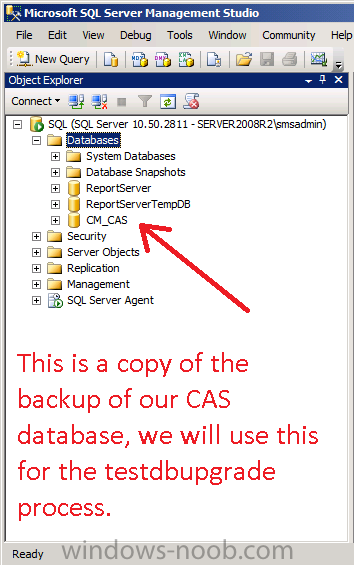
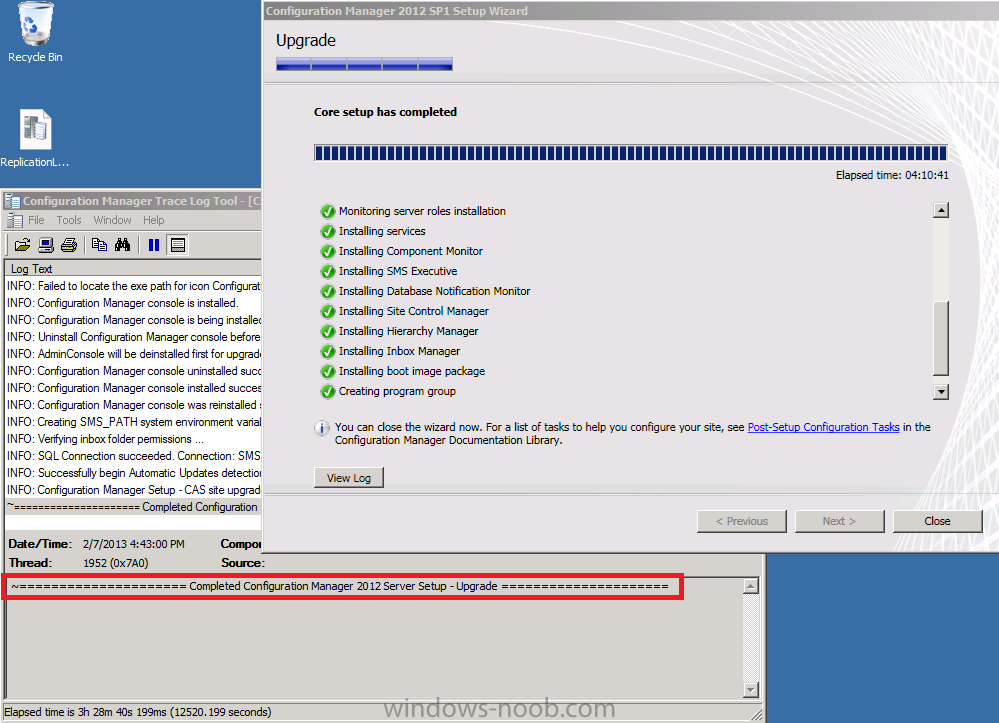
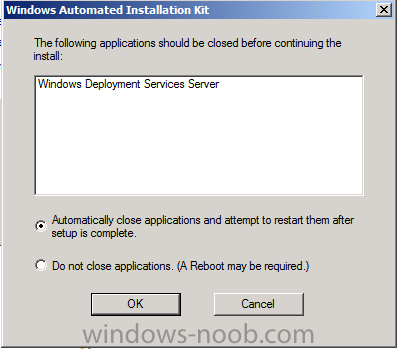
In Part 1 of this series we created our new LAB, we got the System Center 2012 Configuration Manager ISO and extracted it, then copied it to our Active Directory server. We then created the System Management container in AD, delegated permissions to the container, extended the Schema for Configuration Manager. We then opened TCP ports 1433 and 4022 for SQL replication between sites, installed some prerequisites like .NET Framework 4.0, added some features and then downloaded and installed SQL Server 2008 R2 SP1 CU6. We then configured SQL Server using SQL Server Management Studio for security and memory configurations prior to running the Configuration Manager 2012 setup to assess server readiness. Finally we installed a central administration site (CAS). In Part 2 we setup our Primary server with SQL Server 2008 R2 SP1 CU6. We then installed Configuration Manager 2012 on our primary server (P01) and verified that it was replicating to our central administration site (CAS) server. Then we configured Discovery methods for our Hierarchy and then configure Boundaries and Boundary Groups. In Part 3 we configured Discovery methods and configured boundaries and created a boundary group, we then configured them for Automatic Site Assignment and Content Location. In Part 4 we added the Application Catalog roles to our Hierarchy. We then configured Custom Client Device Settings and then deployed those settings to the All Systems collection on site P01. After that we created Custom Client User Settings and deployed them to the All Users collection in order to allow users to define their own User and Device affinity settings. In Part 5 we installed the WSUS server role (it is required for the Software Update Point role). We then installed the Software Update Point role on our CAS and Primary servers and we configured the SUP to support ConfigMgr Client Agent deployment which is a recommended Best Practice method of deploying the Configuration Manager Client Agent. In Part 6 we prepared our server for the Endpoint Protection Point role, and installed that role before configuring custom client device settings and custom antimalware policies. We then deployed those custom client device settings and custom antimalware policies to our newly created Endpoint Protection collections. In Part 7 we added operating system deployment ability to our hierarchy by adding Windows 7 X64. We used the Build and Capture process to capture a WIM image which we can later deploy to targeted computers using network boot (PXE). PXE boot requires specific settings on our distribution points and the boot images used to deliver the operating system WIM images were therefore also enabled for PXE support. In Part 8 we added Applications to our Software Library and configured the requirements in the Deployment Type to add new abilities to the application delivery process. We monitored the approval process of our applications and saw how requirements can influence whether an application is installed or not and we noted the difference between deploying to Users versus Devices. Now we will take a look at how Automatic Deployment Rules can be used to automate the deployment of windows updates on Patch Tuesday using a recurring schedule to patch your infrastructure using Software Updates. In Part 9 we created some folders and collections using a PowerShell script to make targeting of Windows Updates easier, we then performed a full synchronization of our Software Update Point before creating an Automatic Deployment Rule (ADR) for Windows 7 monthly updates for Patch Tuesday. In Part 10 we monitored our previously created ADR and monitored the downloading and deployment of those updates both to the distribution points and finally to our Windows 7 client computers. We reviewed the process in fine detail in order to understand the sequence of events when an ADR is run on a schedule. Now we will upgrade our Hierarchy to the recently released System Center 2012 Configuration Manager Service Pack 1. Note: This upgrade is important as it adds lots of new functionality in addition to bug fixes, however you should approach the upgrade with caution, proper planning and of course testing. Testing is strongly advised in a lab prior to implementing in production. Please also review the Release Notes for details of known issues and workarounds. When upgrading your Configuration Manager hierarchy you should always use a top-down approach, that is you upgrade the CAS first, then you upgrade the primaries, then you upgrade any secondaries underneath (you can upgrade secondary sites by using the Configuration Manager console) and finally you upgrade the clients using whatever method you wish. To recap this is the order you upgrade to System Center 2012 Configuration Manager Service Pack 1. CAS Primaries Secondaries Clients Tip: Depending on your hardware and network infrastructure the upgrade process itself can take some time so it is a good idea to schedule the upgrade of your site servers accordingly and communicate any possible downtime there may be while the upgrade is taking place. Possible disruption to service could affect operating system deployment, software distribution, reporting, software updates, and antivirus amongst others. Backup Before doing anything to our site servers, you should verify you have a recent backup (I'd recommend you take a manual backup if your schedule does not have a recent backup). For details of how to backup your Configuration Manager server please see the following post. It is not uncommon that something in the upgrade causes an issue with setup and that in itself may crash or interrupt the upgrade process, therefore having a solid backup (of your CAS and primaries) before starting the upgrade is a very important step. Please do not continue this guide until you have completed a full backup of the CAS and P01 servers. In the screenshot below you can see the backup files are in place for both the CAS and P01 servers. You should also review the Smsbkup.log file on both the CAS server and the Primary site servers to review that the backup was complete and that it succeeded. Note: If your upgrade to Configuration Manager SP1 fails for whatever reason and if you have no backup, then you may need to reinstall the site from scratch. It is always an important part of any site installation strategy to implement a backup solution and verify it works. Having a backup means that you can recover the site if there's a problem. Download the Media Before we start we need the media, so go ahead and download the Microsoft System Center 2012 Configuration Manager Service Pack 1 media. In addition we'll need the Windows ADK (required for deploying Windows 8 and Windows Server 2012), therefore before continuing please download the files needed for the upgrade: Download SP1. To download System Center 2012 Configuration Manager Service Pack 1 log on to your Volume License site and download the media from there, note that it was updated recently to fix an issue with Clients not getting installed correctly after the upgrade. You should not be using the MSDN or Technet versions of Configuration Manager Service Pack 1 to install in production see here for more details. Download Windows ADK. You must download and install Windows ADK before you run the System Center 2012 Configuration Manager SP1 setup. Windows ADK must be installed on the site server and on any server that is running the SMS Provider even on any system hosting a remote sms provider. To download the Windows ADK go here. Download and install Windows Management Framework 3.0 - you can download the WMF 3.0 from here. Review the checklist Microsoft has provided a list of things you should consider (Upgrade Checklist) as part of your upgrade strategy and it's found right here. Make sure to read it before undertaking an upgrade, things can go wrong and you need to be prepared for disaster recovery before starting. Successful preparation means preparation for success. The first thing in that checklist is to ensure that your computing environment meets the supported configurations that are required for upgrading to System Center 2012 Configuration Manager SP1. That means we need to install the required prerequisites on each computer that hosts a site system role. Several site system roles require new or upgraded prerequisites. For general information about supported platforms and prerequisite configurations, see Supported Configurations for Configuration Manager. Step 1. Uninstall the Windows Automated Installation Kit Perform the following on the CAS server as SMSadmin First on our list is the Windows Assessment and Deployment Kit, but before we install that we need to remove the Windows Automated Installation Kit. , In control panel, add remove programs, locate the Windows Automated Installation Kit and choose Uninstall. answer yes to the prompt If your site is a Primary and has a PXE enabled distribution point you'll be prompted to Automatically close Windows Deployment services choose the default (as we'll reboot later) Step 2. Install the Windows Assessment and Deployment Kit Perform the following on the CAS server as SMSadmin The following three components from the ADK must be installed: User State Migration Tool (USMT) Windows Deployment Tools Windows PreInstallation Environment (Windows PE) Select at least those three options otherwise you’ll get prerequisite check failed errors when it comes to installing Configuration Manager 2012 SP1. The other options are optional. Copy the previously downloaded ADK source files to D:\sources\Upgrade\requirements\ADK\Full RTM ADK We wil use a script to install the ADK with the three components above and no questions asked. Here's the script, execute it in the directory where you've copied the full ADK installation files. adksetup.exe /Features OptionId.DeploymentTools OptionId.WindowsPreinstallationEnvironment OptionId.UserStateMigrationTool /norestart /quiet /ceip off as per the screenshot below Once done, you can monitor the installation by reviewing the log files in %temp%\adk, you can locate your %temp% folder by typing SET in a command prompt and you'll see the environment variables revealed. The log file will be called something like Assessment and Deployment Kit_20130200204221759.log, and when you have a successful installation you should see Exit Code: 0x0 as per the screenshot below:- Tip: Installation of the ADK will produce several logs for the separate components in %temp%\adk if you have any issues with the installation of the ADK open those logs individually in CMtrace to look for any errors during the installation. You can also verify the the ADK is installed via the Control Panel, select Programs and Features, it'll be listed as installed as per the screenshot below Step 3. Install WSUS hotfix to support Windows 8 and Server 2012 Perform the following on the CAS server as SMSadmin The following is necessary to support Windows 8 and Windows Server 2012. Download and install the WSUS hotfix listed below, reboot when prompted. http://support.microsoft.com/kb/2734608 Note: 2734608 contains 2720211 so you only need to install 2734608. Step 4. OSD Related A/V Exclusion Considerations Perform the following on the CAS server as SMSadmin Consider excluding the following OSD related folder prior to running Setup otherwise you may have problems with boot images not getting populated. For more details please see this Technet post. Add the following to your Antivirus Exclusions list: C:\Windows\TEMP\BootImages Step 5. Install Windows Management Framework (WMF) 3.0 Perform the following on the CAS server as SMSadmin System Center 2012 Configuration Manager SP1 requires Windows PowerShell 3.0. If you are not running Windows Server 2012, you must download and install Windows Management Framework (WMF) 3.0. You can download WMF 3.0 from here. Once installed, restart the server when prompted. Step 6. Run testdbupgrade on a copy of the database Perform the following on a TEST SQL server as a local administrator user and sysadmin This step is optional but highly recommended. It is used to verify if our database will have any issues with the Service Pack 1 upgrade process. Doing this could save you a lot of time rebuilding in case something goes wrong. Note: Do not use this procedure on your production database, only use a copy of the current database, (a copy of the latest backup database should be sufficient, to get the most current backup you can trigger the backup manually). Do not run testdbupgrade more than once on the same database copy. If you have not implemented a backup solution yet then do so now. Browse to the share where your database is backed up and copy that database file to a server running the same version of SQL Server and with the same collation as installed on the CAS/Primary. Tip: Please review Step 11 of this guide to see how to quickly install a TEST SQL Server with the same specifications as our CAS and Primary servers. This TEST SQL server will be used only for the TestDBUpgrade process. In the below screenshot notice that there is a copy of the CAS database which was previously backed up by triggering a manual backup as described here, and then copied to this TEST SQL server. Next we need to restore our copied database into another SQL server. On the TEST SQL server login as a user who has sysadmin permissions on that SQL server (I granted the smsadmin user both local administrator permissions and sysadmin permissions on this SQL Server). In the start menu locate SQL Server Management Studio, right click and choose Run as Administrator otherwise you'll get read-only errors when trying to attach the database once SQL Server Management studio starts, right click on Databases and choose Attach. When the attach databases window appears click on Add and browse to our copy of the latest backup, it will be in the SiteDBServer folder of our copied backup. and click ok to see the details of the database COPY Click ok, once done, the copied database is now in our test SQL server. Now we are ready to run testdbupgrade, so get the Configuration Manager 2012 SP1 media, open a command prompt and browse to Setup.exe in the following location on the source media for Configuration Manager SP1: SMSSETUP\BIN\X64. Once done, run the following command, replace CM_CAS with the name of the database COPY that you attached on this test SQL Server. setup.exe /testdbupgrade CM_CAS If you get an error about SQL Native Client not being present, then please refer to this post to resolve that. The wizard will appear and should look like so if not, resolve any errors or warnings before continuing. Open the following logs using CMTRACE on your test SQL server C:\ConfigMgrPrereq.log C:\ConfigMgrSetup.log Click on Begin TestDBUpgrade to continue, you may get a question about the size of the database and whether to continue, answer Yes. at this point the wizard will close, and the setup program will do a test upgrade on your copied database and you can review it's progress in CMtrace. After some time the log file should reveal the following: If the test upgrade was unsuccessful review the log and fix any errors on your production server(s) prior to attempting the upgrade, then backup the database again, and re-run TestDbUpgrade on that new copy of the database, yes it takes time but it will save you having to fix the problems on your production server mid-upgrade. If successful, you can now delete the copied database on the Test SQL Server. Right click the CM_CAS database, select Delete leave defaults, click ok. Step 7. Upgrade to Service Pack 1 Perform the following on the CAS server as SMSadmin Now we are nearly ready to start the upgrade process on our CAS server, however before doing so check the following: Restart the site server and each computer that hosts a site system role to ensure that there are no pending actions from a recent installation of updates or from prerequisites. If you have your 2012 hierarchy connected to a 2007 hierarchy for migration purposes, you will temporarily need to click the Stop Gathering Data button in the Migration workspace in order to install SP1, you can resume this gathering after the upgrade is complete. If you have made any changes to the built-in collections copy those collections before running setup. Before you upgrade a site, close the Configuration Manager console that is installed on the site server until after the site upgrade is completed. Verify that replication between the CAS and any child primaries is OK, if it is not use the Replication Link Analyzer to troubleshoot, fix those problems before running setup. Verify that the Component logs in the monitoring workspace are green and that they are no obvious issues with your site before trying to upgrade it. Trying to upgrade a broken site may result in a broken upgrade. Check if your site system Installation account is set to "Use the site server's computer account to install this site system" - if it is not then please review this post. Ok, now we are ready to upgrade, Insert the dvd (or mount the ISO) and run splash.hta or browse to <ConfigMgrServicePackInstallationMedia>\SMSSETUP\BIN\X64 and run setup.exe. The wizard appears, click on Install, answer yes to any UAC prompt. review the Before you begin notes, click next Upgrade will be automatically selected in Available Setup Options, click next enter your license key or use the evaluation option and Accept the EULA Accept the prerequisite licenses next you get to choose whether to download some prerequisite files or to use previously downloaded Service Pack 1 files (624 MB) Tip: If you don't have an internet connection on your Configuration Manager server then you can download the required updates on another computer by doing like so:- Open a command prompt with administrative permissions Navigate to .\Configuration Manager 2012 Install source\smssetup\bin\X64 Run SetupDL.exe and set the target dir (eg: SetupDL.exe C:\cm12sp1downloads) Next make your Server language selection if you want to have additional languages available at this site for the Configuration Manager console and for reports, or clear languages that you no longer want to support at this site, and then click Next. and select any client languages for your clients review the summary The prerequisite check should complete without any errors, if there are errors fix them before continuing, if there are warnings take note of them, I would recommend fixing them also before continuing. If you followed all the advice above you should have no errors or warnings. Click on Begin Install and then View log in order to monitor progress in CMTrace This will take some time, be patient and watch the log above for any errors. When the process is complete the wizard will say Core Setup has completed however I would still look in the log and wait until the following line is observed. =============== Completed Configuration Manager 2012 Server Setup - Upgrade =============== click on Close. Starting the console shows the new build number. Job done ! Step 8. Repeat the process for all primary servers Perform the following on the P01 server as SMSadmin Now that the CAS is upgraded we can start upgrading our primary servers, if you only have one primary (P01) then upgrade it before dealing with any secondaries or clients. Repeat all the steps above, but obviously use a copy of the Primary servers backup file for the TestDBUpgrade process and perform the actual upgrade on the primary servers themselves. Those points may seem obvious but I just need to point it out. Repeat the process above for all Primary servers within the hierarchy. Step 9. Upgrade any secondary servers. Perform the following on the CAS server as SMSadmin Below is the process from Technet:- Verify that the administrative user that runs Setup has the following security rights: Local Administrator rights on the secondary site computer Infrastructure Administrator or a Full Administrator security role on the parent primary site System administrator (SA) rights on the site database of the secondary site In the Configuration Manager console, click Administration. In the Administration workspace, expand Site Configuration, and then click Sites. Select the secondary site that you want to upgrade, and then, on the Home tab, in the Site group, click Upgrade. Click Yes to confirm the decision, and to start the upgrade of the secondary site. Note: The secondary site upgrade progresses in the background. After the upgrade is completed, you can confirm the status in the Configuration Manager console. To confirm the status, select the secondary site server, and then on the Home tab, in the Site group, click Show Install Status. Step 10. Upgrade clients. Perform the following on the CAS server as SMSadmin Although a Configuration Manager primary site or secondary site can support communication from clients that have a lower service pack version, this communication should be a temporary configuration. Clients that run a previous service pack version of Configuration Manager cannot use the new functionality that is available with the new service pack version of Configuration Manager so you'll want to upgrade them to avail of the new functionality. Tip: When you upgrade the top-level site of a hierarchy to a new service pack, the client installation package on each distribution point in the hierarchy is also updated. When you upgrade a primary site, the client upgrade package that is available from that primary site is updated. When you upgrade a client, the current client software is uninstalled and the new client software version is installed. To upgrade clients, you can use any method that Configuration Manager supports. Recommended reading: As you can see from the above, upgrading your environment should not be taken lightly, plan it, test it in a lab, and verify before implementing in production. Just because the service pack is out doesn't mean you should upgrade on day one. Get your environment ready for the upgrade, then do the actual upgrade. Once you have updated your hierarchy you'll have access to a wealth of new functionality from the Configuration Manager team. please review the following posts below for planning advice, best practice, and of course gotchas. Technet: Release Notes for Configuration Manager 2012 SP1 - http://technet.microsoft.com/en-us/library/jj739872.aspx Supported Configurations for Configuration Manager - http://technet.microsoft.com/en-us/library/gg682077.aspx Planning to Upgrade System Center 2012 Configuration Manager - http://technet.microsoft.com/en-us/library/jj822981.aspx Upgrade Configuration Manager to a New Service Pack - http://technet.microsoft.com/en-us/library/jj865691.aspx Configuration Manager 2012 RTM to SP1 Upgrade Overview - http://blogs.technet.com/b/configmgr_geek_speak/archive/2012/12/20/configuration-manager-2012-sp1-rtm-installation.aspx Other: How to upgrade System Center 2012 Configuration Manager to SP1 - http://support.microsoft.com/kb/2801416?wa=wsignin1.0 Windows Management Framework 3.0 - http://www.microsoft.com/en-us/download/details.aspx?id=34595 System Center 2012 SP1 Woes, Gotchas, and Workarounds - http://myitforum.com/myitforumwp/docs/system-center-2012-sp1-woes-gotchas-and-workarounds/ SP1 KB’s being released http://support.microsoft.com/kb/2801420 - List of public KB articles and major fixes that are included in System Center 2012 Configuration Manager SP1 http://support.microsoft.com/kb/2801416 - How to upgrade System Center 2012 Configuration Manager to SP1 http://support.microsoft.com/kb/2801822 - Application Catalog link breaks if you change the regional settings decimal separator in Software Center in System Center 2012 Configuration Manager http://support.microsoft.com/kb/2798548 - Application Sanity check fails during the System Center 2012 Configuration Manager SP1 Beta prerequisite check http://support.microsoft.com/kb/2798545 - Application evaluation fails in System Center 2012 Configuration Manager running on Windows XP http://support.microsoft.com/kb/2798547 - Support for Mac and Linux/UNIX clients in System Center 2012 Configuration Manager and System Center 2012 Endpoint Protection http://support.microsoft.com/kb/2739984 - Changes to built-in collections are overwritten when you upgrade to System Center 2012 Configuration Manager SP1 http://support.microsoft.com/kb/2803196 - System Center 2012 Configuration Manager Application Catalog does not refresh on F5 in Windows 8 or Windows Internet Explorer 10 ok that's it ! you have now upgraded your hierarchy to System Center 2012 Configuration Manager Service Pack 1, congratulations ! once you've done all of the above you'll want to go to the next part - Part 12. Connecting Powershell and building a reference image of Windows 8 with .NET 3.5 cheers niall.


-
On February 6, the Microsoft Surface team took to Reddit to do its second AMA (Ask Me Anything) question and answer session about the Surface Pro. Participants in the chat asked about everything from why Microsoft made the ARM-based Surface RT available months ahead of the Intel-based Surface Pro, to why the Surface Pros didn't end up using a lower-power Intel IvyBridge chip. Various members of the Surface team provided answers to a number of the questions. The Softies told participants Microsoft is working on a fix for Windows 8 to help with display-resolution issues around the Desktop that some reviewers, including Windows SuperSite's Paul Thurrott, mentioned. And they hinted about the possibility of a keyboard with additional battery built in. They also said that Microsoft would make the Surface Pro available in retailers outside of just the U.S. and Canada "in the coming months." I've pulled out a few of what I considered the more candid and interesting bits from the session and paraphrased the questions. The full AMA with the Surface team is here. Q: Why was there a 3 month gap between the Surface RT and Surface Pro, especially given the fact the Surface Pro uses the higher-power Intel Ivybridge Core i5 and not the next-generation Haswell processor? A: "This is simple. We started the Pro 3 months after we started Surface RT :-) That is exactly when we staffed the team to go and bring this product to life!" Q: Why couldn't Microsoft have done something to get better battery life out of the Surface Pro, which is getting about half of the battery life (around four to five hours) of the Surface RT? A: "This product is optimized in every way to take advantage of the full third generation core i5 it runs, yet give the best battery life. If you compare it to say a MacBook Air, you will quickly see that pound for pound in battery size vs battery life, you will find optimizations that puts Surface best in its class. That said we picked a smaller battery to be sure we were able to give you the same performance and to keep it thin. This kept the weight under 2lbs, and still kept it thin enough to take advantage of our great Windows work for inking and give you a great inking experience (like pressure sensitive inking, ability to do kanji, great sketching)." Q: Surface Pro has a high resolution for a 10.6-inch screen, but it needs to be scaled to 150% to be usable on the desktop. Windows 8 doesn't allow for independent scaling between the Surface Pro and an external monitor when using an extended display option. Will Microsoft fix this in Windows 8? A: "The Windows team is aggressively working on this feature to fix this for all high resolution Windows devices. We don’t have a date yet to share, so sorry. But in the meantime here are some things I do to maximize my external monitor experience.I personally use 125% scaling.. and like that better for what I use Surface Pro for… see more things on the screen.. and the size of the text suits me just fine. Next I make sure my Second Screen is set to Extended mode. Then I adjust my Office apps using the built in zoom control (lower right of office apps) to set the desired text size. In Windows 8 the Desktop can be thrown on your second monitor and operate all your office apps... nice. For Outlook if I have on my second monitor I switch Outlook into mouse mode. Also in Outlook you can change your Zoom Setting in new message (compose window under zoom).. and it will also persist (which is nice). In IE desktop.. same thing.. the zoom persists on the desktop.. And I use IE 10 desktop in desktop mode.. and the touch version of IE10 on my Surface modern screen. You can also change the width of the cursor under Ease of Access. Also… not a must but, if you use a high resolution external monitor it also help a lot." Q: Why didn't Microsoft simply provide a USB flash drive with the disk recovery image on it in the Surface Pro box to free up more disk space in the product? A: "We could have done this, but then there would be a chance it would be lost. We give you the ability to make one if you choose and free up the space..... There ha(ve) also been questions about why including the recovery image by default. Ideally, you will never need your recovery image, however this is a choice we would prefer the customer to make vs. having the customer need the recovery image not realizing they needed to create one themselves." Q: Does Microsoft have any plans for an external battery or for a thicker keyboard cover that has an extra battery? A: "That would require extending the design of the accessory spine to include some way to transfer higher current between the peripheral and the main battery. Which we did..." Q: What are the new connectors on the bottom of the Surface Pro for? A: "Wow - I'm pumped you caught that - we haven't announced what they are for but they aren't an accident! At launch we talked about the "accessory spine" and hinted at future peripherals that can click in and do more. Those connectors look like can carry more current than the pogo pins, don't they?" Q: On the Surface Pro, is the boot loader unlocked so I can load other operating systems? A: "Like other Windows 8 machines, you can access BIOS settings and turn off secure boot, enabling you to load other OSes." The Surface Pro goes on sale as of February 9. Microsoft provided some Microsoft Stores and Best Buy stores with display Surface Pros as of February 3 so that users near those retail outlets can get some hands-on time with them. Microsoft decided against taking Surface pre-orders, but some retail outlets are providing those interested in buying with "reservation cards" for the devices. Microsoft also provided some reviewers (and "non-reviewers," including me) with Surface Pros so we could try these systems ourselves. via ZDNet > http://www.zdnet.com/why-did-microsoft-deliver-surface-rt-before-pro-and-other-pesky-questions-answered-7000010935/

-
SCCM 2012 SP: BGB http proxy Error 25001. 80070057
anyweb replied to bpsoft's question in Troubleshooting, Tools, Hints and Tips
thanks for updating this with the resolution. -
Upgrading System Center 2012 to System Center 2012 SP1
anyweb replied to dimayugaalj's topic in Configuration Manager 2012
for thoses of you waiting, please just realise that I am in the process of doing it, i'm half way done, however it's taking time as I want to do it right and document it properly, I hope to have it done by the end of this week but no promises, it all depends on how the current progress goes. -
Upgrading System Center 2012 to System Center 2012 SP1
anyweb replied to dimayugaalj's topic in Configuration Manager 2012
i'm working on it, soon done, be patient please, the guides take a lot of work. -
Cannot select Operating system installer
anyweb replied to LimeLover's topic in Configuration Manager 2012
if i get time I will update it, however i'm busy working on the next post and all the posts take a lot of time to accomplish, the design change was done because running the installer (setup.exe) was basically an unsupported way (according to the Windows team at least) of installing these operating systems with different versions of WinPE, therefore Microsoft decided to move to the supported method (using install.wim) but still give you the possibility of changing back to the 'old' method if needed. -
Cannot Uninstall CAS!
anyweb replied to OWeathersby's question in Troubleshooting, Tools, Hints and Tips
you could check the System Management container and delete everything that is in there, it will autopopulate from your CAS again once rebooted or the sms_component_manager service restarts... -
you can reinstall SQL, read here for more details. http://www.niallbrady.com/2012/03/13/about-to-install-configuration-manager-2012-check-your-sql-collation-first/
-
Cannot Uninstall CAS!
anyweb replied to OWeathersby's question in Troubleshooting, Tools, Hints and Tips
I'd give Microsoft a call on this problem, please do let us know what they say -
that should work ok, however measuring compliance on that ADR will be more challenging as you are mixing updates in the same ADR, if you dont care about compliance and reporting then you should be ok, or if you think 'general' compliance is good enough. Normally with servers you want to have a clear picture of what servers are patched (compliant) versus those that are not, in addition to the above, the Configuration Manager client knows which software updates to isntall even if you offer it windows updates from another OS altogether.
-
if pxe boot aborts then you need to clear the last PXE boot on that computer object in the console (right click,..) as regards "Failed to resolve selected task sequence dependencies. Code(0×80040104)" you need to examine the SMSTS.log file and find out what package(s) are not on the distribution points and once done resolve them
-
how can I backup System Center 2012 Configuration Manager ?
anyweb posted a question in backup and restore
Introduction Backing up your Configuration Manager hierarchy is important for a variety of reasons including: preparation for avoiding loss of data preparation for upgrade failure and ability for site rollback preparation for hardware failure If you don’t enable the site maintenance backup site server task then you will have no site backup to recover in the case of a hardware or other catastrophic failure (by default it is not enabled). It is important to backup regularly on a schedule and to store those backups on another server in case the Configuration Manager site server itself has a hardware failure. Thankfully the site maintenance task called Backup site server makes this easy to do. Step 1. Enable the Site maintenance Backup task Our first task is to enable the built in site backup task in site maintenance. In the Administration workplace, expand Site Configuration and select sites and select your Primary site server that you want to backup, in the ribbon click on Settings and then click on Site Maintenance like in the screenshot below. A list of Maintenance tasks appears, select Backup Site server and click on Edit below to enable the task. Next we need to enable the task, so place a check mark in the box provided Next you need to choose where to store the backup, click on Set Paths and browse to a network path (recommended) or local drive on the site server (not recommended due to hardware failure) to store the site data and site database backup. On my networked server chosen to store the backups I’ve created a share called ConfigMgrBackups with sub folders in it named after the site code of the Primary site servers eg: \\ad1\ConfigMgrBackups\CAS \\ad1\ConfigMgrBackups\P01 \\ad1\ConfigMgrBackups\P02 \\ad1\ConfigMgrBackups\P03 and I’ve give the computer account of the site server Write permissions of that share. Note: The computer account of the site server and the computer account of the SQL Server, if SQL Server is installed on another computer, must have Write NTFS and share permissions to the shared network folder. Next decide when you want the backup task to take place, choose what is appropriate for your environment and try to minimize network bandwidth interruption during office hours by scheduling the backup task during non-business hours. This is a recommended best practice approach. Note: As a best practice, consider a backup schedule that is outside active working hours. If you have a hierarchy, consider a schedule that runs at least two times a week to ensure maximum data retention in the event of site failure. In my example below I am backing up on a Wednesday and Saturday and the backup task starts after 2am and before 5am. If you want to be alerted when a site backup fails then place a check mark in the appropriate box. Click on Apply to apply the changes and then Ok to close this window, you will see that the Backup Site Server task is now listed as enabled in Site Maintenance. Step 2. Manually start a Site Backup In order to verify our backup is working properly, we could wait until the scheduled time, or we could trigger it manually. To speed things up we want to manually trigger the task, to do this open up Services.msc on your primary server and locate the SMS_SITE_BACKUP service, it’s listed as Manual and not started, right click the service and choose start. While the backup task is running we can review the appropriate log and that is Smsbkup.log. In <ConfigMgrInstallationFolder>\Logs, review Smsbkup.log for warnings and errors. When the site backup is completed successfully, you should see Backup completed with a timestamp and message ID STATMSG: ID=5035. Below you can see the Smsbkup.log file open in CMtrace during the SMS_SITE_BACKUP process. Step 3. Verify backup completed successfully Once the backup is complete look for the following line in your Smsbkup.log file along with the STATMSG 5035: Backup Completed - Sun Feb 03, 13:49:21, 2013 And on our network server you can see the following files have populated in our share Success ! Step 4. Archiving your backupAfter successfully backing up the site, the Backup Site Server task automatically attempts to run a file that is named AfterBackup.bat. You need to manually create the AfterBackup.bat file and place it in <ConfigMgrInstallationFolder>\Inboxes\Smsbkup. ] If an AfterBackup.bat file exists, and is stored in the correct folder, the file automatically runs after the backup task is completed. The AfterBackup.bat file lets you archive the backup snapshot at the end of every backup operation, and automatically perform other post-backup tasks that are not part of the Backup Site Server maintenance task. Fellow ConfigMgr MVP Garth has published a sample AfterBackup.bat file here. Step 5. Supplemental Backup Tasks The Backup Site Server maintenance task provides a backup snapshot for the site server files and site database, but there are other items which are not backed up using this scheduled task and you must consider these items when you create your backup strategy. The following items should be backed up using whatever method you deem appropriate, for example using Data Protection Manager if that's what you use to backup data in your organization. Custom Reporting Services Reports (backup the report server database files) Content Files (Verify that you include both the content library and package source locations in your file system backup for the site server.) Custom Software Updates (backup your SCUP 11 database) In a later post I’ll show you how to restore a site backup in the event of a site failure. cheers niall Recommended reading: Restoring Backups - https://blogs.technet.microsoft.com/canitpro/2013/10/30/step-by-step-testing-system-center-2012-configuration-manager-backups-for-restoration/ Backup and Recovery in Configuration Manager - http://technet.microsoft.com/en-us/library/gg712697.aspx#BKMK_SiteBackup Support Tip: A Backup Site Server maintenance task may fail to run in ConfigMgr 2012 - http://blogs.technet.com/b/configurationmgr/archive/2012/08/01/support-tip-a-backup-site-server-maintenance-task-may-fail-to-run-in-configmgr-2012.aspx How to recover a Configuration Manager 2012 site using a restored database - http://stevethompsonmvp.wordpress.com/2014/08/01/how-to-recover-a-configmgr-2012-site-using-a-restored-db/ SQL Server backup recommendations for Configuration Manager - http://stevethompsonmvp.wordpress.com/2013/06/07/sql-server-backup-recommendations-for-configuration-manager/ -
the one thing you havent listed above is usb media, if PXE is failing for whatever reason you can always use standalone media
-
well what errors are you seeing ? is the device X86 or X64 ?
-
Upgrading System Center 2012 to System Center 2012 SP1
anyweb replied to dimayugaalj's topic in Configuration Manager 2012
i'll post a guide about this soon (time willing) but in the meantime make sure you've got a backup of your database before starting and do a testdbupgrade on a copy of the database. -
using SCCM 2012 RC in a LAB - Part 8. Deploying Windows 7 X64
anyweb replied to anyweb's topic in Configuration Manager 2012
you need to find out what that package is (GR2000004) and update it to your distribution points -
it should work with greater than 4gb, the keys i used in the above were 8gb in size
-
hi and thanks ! see my response below for details http://www.windows-noob.com/forums/index.php?/topic/6382-cannot-select-operating-system-installer/
-
using SCCM 2012 in a LAB - Part 1. Installation
anyweb replied to anyweb's topic in Configuration Manager 2012
what info did you enter on the Database Information page.