anyweb
-
Posts
9277 -
Joined
-
Last visited
-
Days Won
371
Everything posted by anyweb
-
are you using a legacy network card on the virtual machine settings ?
-

Task Sequences Cannot Locate ANY Packages on DP - Need Help!
anyweb replied to BzowK's topic in Configuration Manager 2012
yup without a boundary and without the boundary being in a boundary group your clients cannot find their dp's, so you've solved your own problem Ben :-) -
SCCM 2012 Task Sequence Failure 0x8007000e
anyweb replied to Jazzee's topic in Configuration Manager 2012
how much RAM is in the machine ? -
why not just uninstall the dp role, wait, then reinstall it
-
are you checking from the top most site in your heirarchy ? or is it a standalone server ?
-
SCCM 2012 error 0x80070002 when apply and capture OS
anyweb replied to winterwy's topic in Configuration Manager 2012
i think you are missing part of the log file, check in x:\windows\temp\smstslog -
how are you initiating client push to the client ? post your exact steps.
-
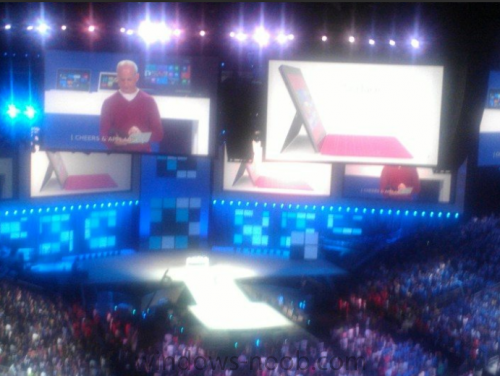
Microsoft is continuing to eke out the Windows 8 news. The latest tidbit is Windows 8's exact availability date is going to be October 26. (The last we heard at the Microsoft Partner Conference a week ago is it would be in "late October.") October 26 will be the date Windows 8 will be available preloaded on new PCs and also to those purchasing it through one of the upgrade programs Microsoft has announced recently. Based on previous Microsoft statements, it also seems October 26 will be the date that Windows RT-based Surface PCs/tablets from Microsoft will be available via the Microsoft Stores and select online outlets. Microsoft officials shared the exact date on July 18 with the thousands of Microsoft salespeople attending the Microsoft Global Exchange Conference in Atlanta, according to a July 18 post on the Windows team blog. (Update: I've added a photo of Microsoft Windows President Steven Sinofsky at MGX, about which one attendee of the conference tweeted and posted publicly today.) Windows 8 is on track to be released to manufacturing by the first week of August, officials said last week. Windows Server 2012 and Visual Studio 2012 also will be released to manufacturing at the same time. But Windows Server 2012 won't be available to customers until September, Microsoft officials have said. Execs have declined to say when developers will be able to start using the final Visual Studio bits. Microsoft officials said last week that business users with volume-licensing contracts will be able to get their hands on the final Windows 8 bits shortly after the product is released to manufacturing, which will be two-plus months before the product is generally available via retail. Microsoft officials are declining to say when those with MSDN and TechNet subscriptions will be able to obtain the final Windows 8 bits. Microsoft officials have said those upgrading from Windows XP, Windows Vista, Windows 7 and the Windows 8 Release Preview will be able to buy upgrade copies of Windows 8 for $40 each. Microsoft officials have not said how much the promised System Builder SKU will be for those who want to build their own PCs. They also have not said whether a full, non-upgrade version will be available via retail and how much it will cost. But the unofficial word is Microsoft may be dropping full packaged product at retail with Windows 8. via Zdnet > http://www.zdnet.com...-26-7000001158/
-
did you enable client push ?
-
try usmtutils.exe http://technet.microsoft.com/en-us/library/dd560752%28WS.10%29.aspx
-
are you sure you are using the right boot image ? have you tried pressing F8 and running the HTA using mshta.exe bla.hta ?
-
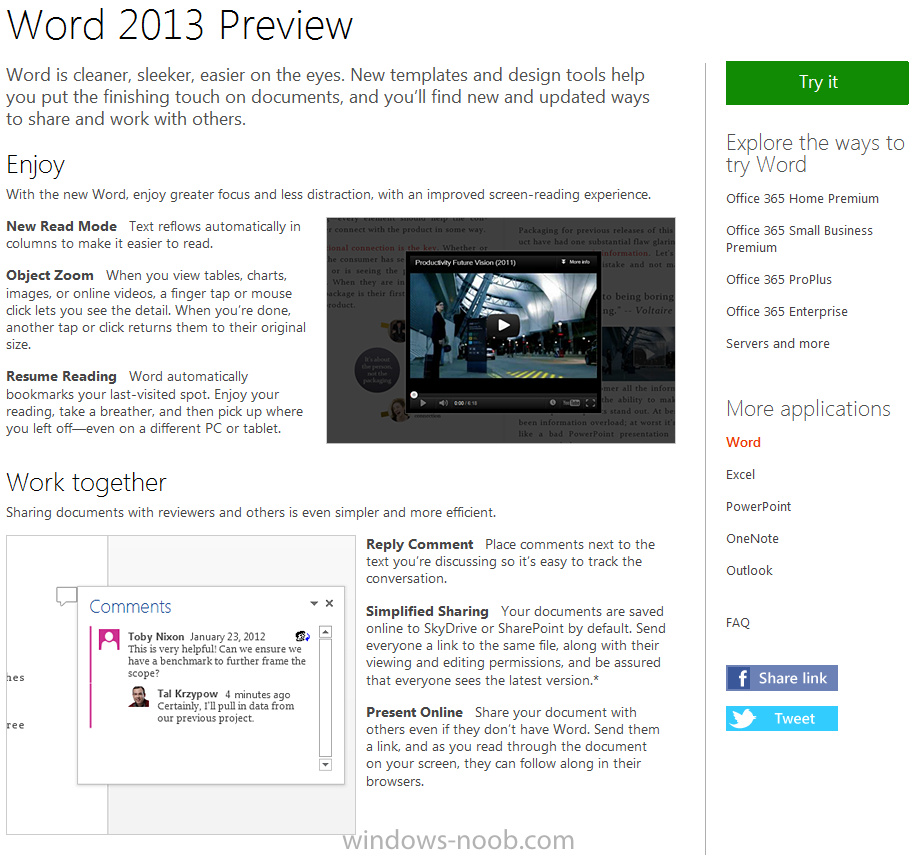
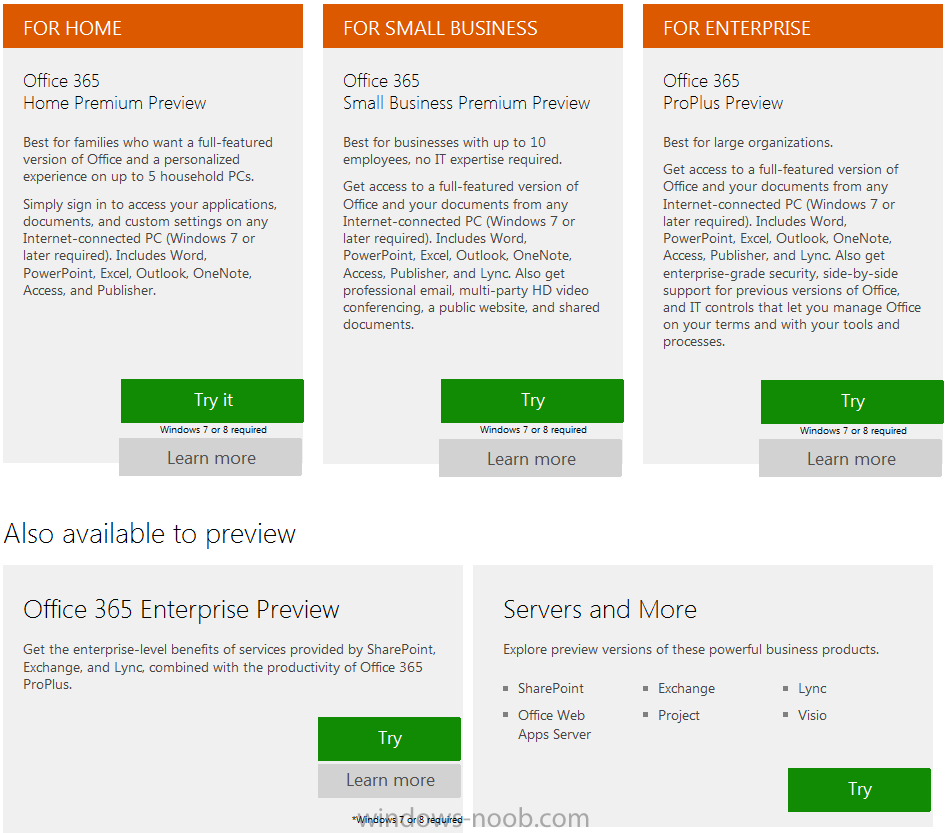
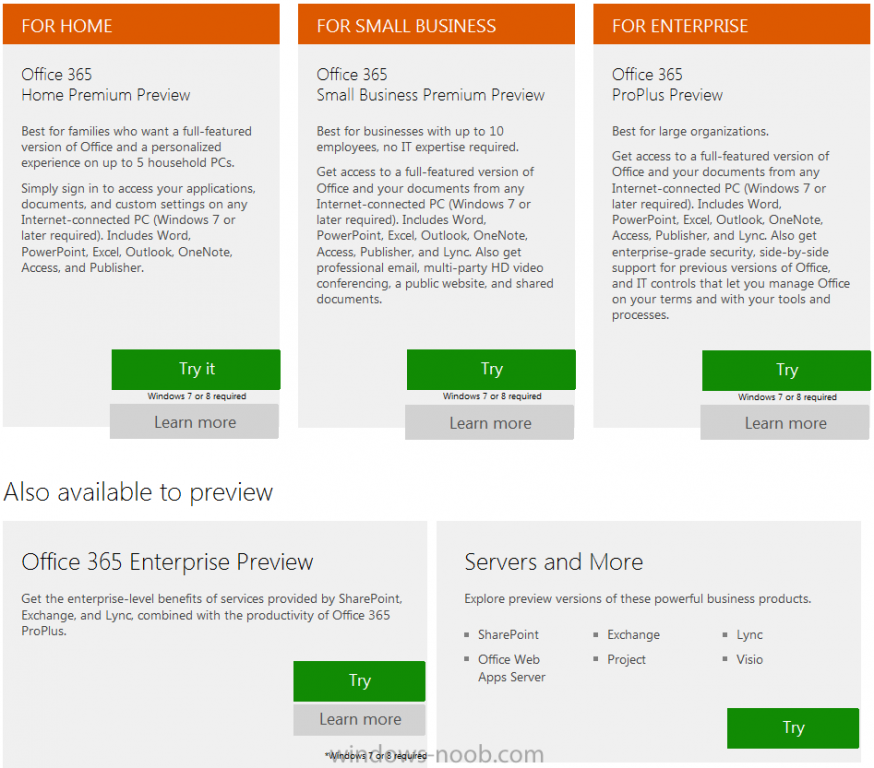
Microsoft yesterday announced the availability of Office 2013 Customer Preview, you can download it here clicking on Word 2013 brings you to the following page, and then you can click on Try It to see what downloads are available, there aer versions for Home, Small Business, Enterprise and Enterprise Preview. cheers niall


-
update distribution point packages automatically
anyweb replied to maffef's topic in Configuration Manager 2012
have you looked at this post yet ? using Configuration Manager 2012 RC in a LAB - Part 14. Performing a side-by-side Migration from Configuration Manager 2007 Part 14. Performing a side-by-side Migration from Configuration Manager 2007. -
Capture Windows 7 PC Fails with Error 0x80004005
anyweb replied to davidstonar's topic in Configuration Manager 2012
you really need to find the smsts.log file, have you checked in x:\windows\temp\smstslog ? what point does it fail at ? -
SCCM 2012 RTM - Capture of a machine 'blank slates' original machine
anyweb replied to dverbern's question in System Center Service Manager
the process of capturing an image run's sysprep which in essence reverts windows to a 'default' state, you should really only be capturing images on Virtual hardware, have you tried that ? -
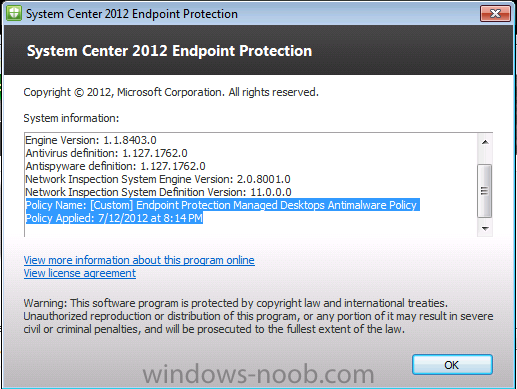
yes, choose the Dashboard report in the Endpoint Protection category, then select Antimalware Policy application status on computers, and drill further into that report by clicking on the graph itself
-
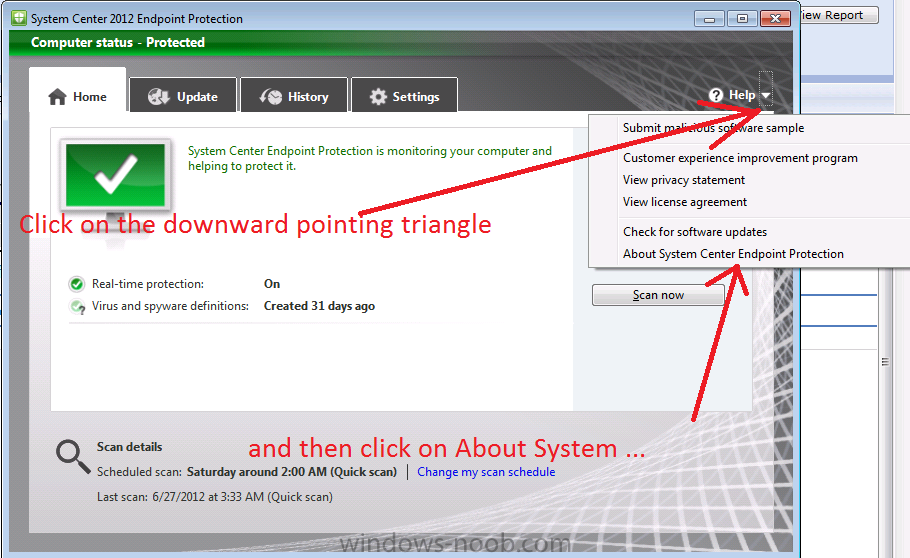
sure, but first you must understand that the Antimalware Policy and Client settings for Endpoint Protection are two separate things and they are 'picked up' by the client when it does its' normal machine policy as defined in the site's (or collection) Client policy which is one of many settings you can define for Client settings. By default this value is 60 minutes, in other words you have to wait one hour for the policy to get retrieved from it's management point, you can speed this up by manually going to the client and opening up the configuration manager client agent in control panel and clicking on the actions tab and running a machine policy retrieval, or you can target Custom Client Settings with a client policy set to update every 5 minutes to a collection where you want machines to update their policy quickly,whatever you do above once the client retrieves it's policy from the management point it will apply the necessary changes and in Endpoint Protection terms if it was a custom antimalware policy you can verify on the SCEP client itself by clicking on the downward pointing arrow in the help screen and see when the policy was last applied by clicking on About System Center Endpoint Protection to see what the Policy Name is and when it was applied if you want to verify changes to your Antimalware policy right now then change something in it's name (add some square brackets or a full stop) and then do a machine policy update on the client, as you can see the policy change has been noticed..


-
those SQL port policies are for the Configuration Manager servers that are hosting SQL server so that they can replicate to each other.
-
does it work ? of course it does, see for yourself... XP to 7 using hardlinking.wmv this video is to clarify a post on technet. The task sequence for hardlinking is in the link below Some Sample XP to Windows 7 task sequences showing Hardlinking hardlinking and SMP note: there is no audio in this video.
-
when you say they look right does it list the correct antimalware policy that you created or not ? if it is the correct policy then what settings have you made in that policy ?
-
id bump up the main hdd to 240gb or more if possible, with configuration manager 2012 you'll fill that up in no time at all. trust me and you'll want to have your CM12 labs on the SSD if possible as it's much faster than sata.
-
UDI Wizard - Keyboard and Locale Settings not applied
anyweb replied to pforeman100's question in Microsoft Deployment Toolkit (MDT)
and it's also covered here on windows-noob.com -
Guide - Security Permissions for Remote Control Users
anyweb replied to hypercube33's topic in Configuration Manager 2012
maybe you should include a link to your other guide and screenshots too :-) -
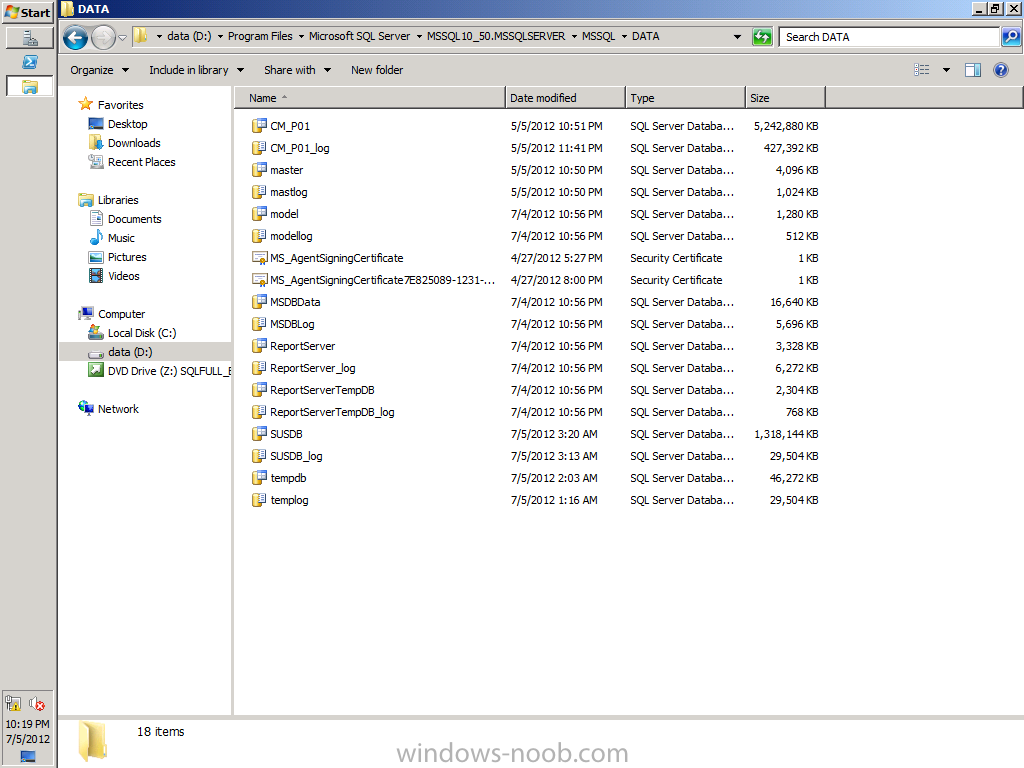
yeah thats ok, check what SQL is storing on D:\ you'll see it's all the important bits (logs and database), in the screenshot below i'm showing you the contents of the DATA folder on D:\

-
Introducing: The BitLocker Frontend HTA
anyweb replied to anyweb's question in Frontends, HTA's and Web Services
hi yannara, do you mean you'd like a place to put a company logo in each window ?