anyweb
-
Posts
9277 -
Joined
-
Last visited
-
Days Won
371
Everything posted by anyweb
-
 to speed things up you can force a manual Machine Policy update (use the coonfiguration manager client actions tab to do that)
 -
MDT 2012 and SCCM 2012 - Integration error.
anyweb replied to sybux's topic in Configuration Manager 2012
look here then is the path full ? lack of space ? access denied ? -
using SCCM 2012 in a LAB - Part 2. Add SUP and WDS
anyweb replied to anyweb's topic in Configuration Manager 2012
SQL server 2012 is not supported so i have no idea if it will work or not, likely it won't but good luck trying, as regards the WDS role it will be automatically installed by enabling PXE on the DP. Look at the distrmgr.log file to get details of that -
i havnt tried what you are trying to do but you could configure configmgr as normal and enable PXE, then once done reconfigure WDS to point to your pxe chain, this may work, but i havn't tried it, so maybe you can try it ?
-
using SCCM 2012 in a LAB - Part 1. Installation
anyweb replied to anyweb's topic in Configuration Manager 2012
nope, it's not supported at this point, use the supported versions listed here. -
if f8 doesnt work at which boot image are you using ? did you update the boot image to the dps after enabling command prompt support at what point during the task sequence are you pressing f8 ? have you tried another keyboard ?
-
using SCCM 2012 in a LAB - Part 2. Add SUP and WDS
anyweb replied to anyweb's topic in Configuration Manager 2012
interesting result and thanks for sharing. -
don't worry about it, that's just the updates needed during installation, have you downloaded them separately already or ?
-
using SCCM 2012 in a LAB - Part 2. Add SUP and WDS
anyweb replied to anyweb's topic in Configuration Manager 2012
ok, well double check all my steps in the guide, you must have missed something or you are not telling me the whole story. as a troubleshooting step, you can open the wsus console and trigger a sync in ConfigMgr, what you should see is WSUS starting a sync, do you ? -
using SCCM 2012 in a LAB - Part 2. Add SUP and WDS
anyweb replied to anyweb's topic in Configuration Manager 2012
triggering a sync causes Configmgr to ask WSUS to sync with Microsoft Update, do you need to configure proxy settings or something ? -
using SCCM 2012 in a LAB - Part 2. Add SUP and WDS
anyweb replied to anyweb's topic in Configuration Manager 2012
the CAS should be the Active SUP. -
using SCCM 2012 in a LAB - Part 2. Add SUP and WDS
anyweb replied to anyweb's topic in Configuration Manager 2012
you need to install the SUP role on both the CAS and the Primary, do that first, then perform a manual sync on the CAS. you must have missed something somewhere, can you double check all the steps i cover and also check your component status logs on both CAS and the Primary. -
using SCCM 2012 in a LAB - Part 2. Add SUP and WDS
anyweb replied to anyweb's topic in Configuration Manager 2012
did you install the SUP role on both the CAS and your Primary ? -
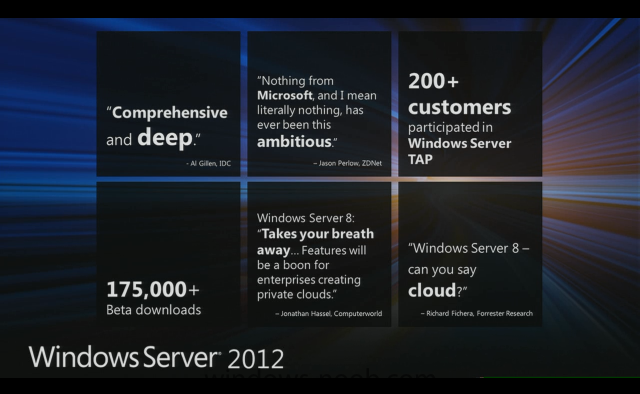
System Center 2012 was released was released yesterday and as a result all System Center 2012 products are available now! You can read more about the Microsoft Private Cloud here: http://www.microsoft.com/en-us/server-cloud/new.aspx and you can download the Microsoft Private cloud Evaluation software form the TechNet Evaluation Center: http://technet.microsoft.com/en-us/evalcenter/hh505660.aspx Microsoft also created a System Center 2012 track on Microsoft Virtual Academy. Currently there are 2 courses. But new courses will be added in the near future. Start learning System Center 2012 now: https://www.microsoftvirtualacademy.com/colleges/SystemCenter2012

- 1 reply
-
- 1
-

-
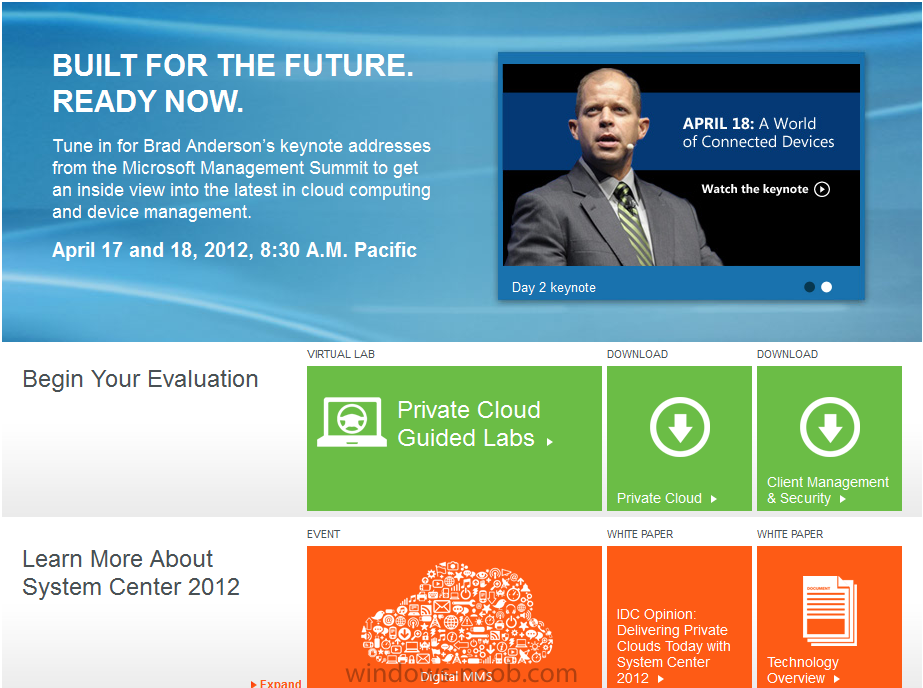
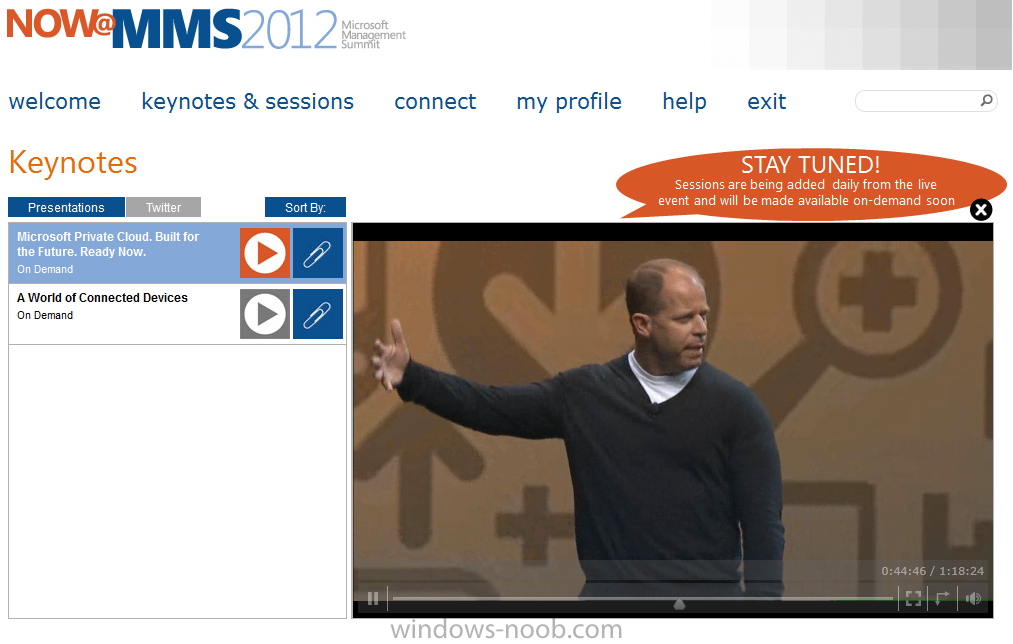
if like me you are not able to attend MMS 2012 in Las Vegas, and you want to see what's going on, you can review the keynotes here. plus you can review many of the sessions as they are added right here. watching these you'll see the Windows Server 8 is renamed to Windows Server 2012 for example ! plenty to see, well worth watching cheers niall

-
if you followed the guide to the letter then just add computers to the collection, and they'll get the client, did you try it yet ?
-
read the below first (from http://technet.microsoft.com/en-us/library/dd560792%28v=ws.10%29.aspx) does it answer your questions above ? User Data This section describes the user data that USMT migrates by default, using the MigUser.xml file. It also defines how to migrate access control lists (ACLs). Folders from each user profile. When you specify the MigUser.xml file, USMT migrates everything in a user’s profiles including the following: My Documents, My Video, My Music, My Pictures, desktop files, Start menu, Quick Launch settings, and Favorites. Folders from the All Users and Public profiles. When you specify the MigUser.xml file, USMT also migrates the following from the All Users profile in Windows® XP, or the Public profile in Windows Vista® or Windows® 7: Shared Documents, Shared Video, Shared Music, Shared desktop files, Shared Pictures, Shared Start menu, and Shared Favorites. File types. When you specify the MigUser.xml file, the ScanState tool searches the fixed drives, collects and migrates files that have any of the following file name extensions: .accdb, .ch3, .csv, .dif, .doc*, .dot*, .dqy, .iqy, .mcw, .mdb*, .mpp, .one*, .oqy, .or6, .pot*, .ppa, .pps*, .ppt*, .pre, .pst, .pub, .qdf, .qel, .qph, .qsd, .rqy, .rtf, .scd, .sh3, .slk, .txt, .vl*, .vsd, .wk*, .wpd, .wps, .wq1, .wri, .xl*, .xla, .xlb, .xls*. Note The asterisk (*) represents zero or more characters. Access control lists. USMT 4.0 migrates access control lists (ACLs) for specified files and folders from computers that are running both Windows® XP and Windows Vista. For example, if you migrate a file that is named File1.txt that is read-only for User1 and read/write for User2, these settings will still apply on the destination computer after the migration. Important To migrate ACLs, you must specify the directory to migrate in the MigUser.xml file. Using file patterns like *.doc will not migrate a directory. The source ACL information is migrated only when you explicitly specify the directory. For example, <pattern type="File">c:\test docs</pattern>. Operating-System Components USMT migrates operating-system components to a destination computer that is running Windows 7 from computers that are running Windows XP, Windows Vista, or Windows 7. Note If you are using USMT 4.0 to migrate a user state to Windows Vista instead of to Windows 7, use the /targetvista option with the ScanState tool. Without the /targetvista command-line option, some operating-system settings can be lost during the migration. For more information, see ScanState Syntax. The following components are migrated by default using the manifest files: Accessibility settings Address book Command-prompt settings *Desktop wallpaper EFS files Favorites Folder options Fonts Group membership. For example, right-click My Computer, and then click Manage. USMT migrates the groups under Local Users and Groups for the users who are included in the migration. *Windows Internet Explorer® settings Microsoft® Open Database Connectivity (ODBC) settings Mouse and keyboard settings Network drive mapping *Network printer mapping *Offline files *Phone and modem options RAS connection and phone book (.pbk) files *Regional settings Remote Access *Taskbar settings Windows Mail. Microsoft Outlook® Express Mail (.dbx) files are migrated from Windows XP. *Windows Media® Player Windows Rights Management * These settings are not available for an offline migration. For more information, see Offline Migration. Important This list may not be complete. There may be additional components that are migrated. Note Some settings, such as fonts, are not applied by the LoadState tool until after the destination computer has been restarted. For this reason, restart the destination computer after you run the LoadState tool. Supported Applications Although it is not required for all applications, it is good practice to install all applications on the destination computer before you restore the user state. This makes sure that migrated settings are preserved. Note The versions of installed applications must match on the source and destination computers. USMT does not support migrating the settings of an earlier version of an application to a later version, except for Microsoft Office. Note USMT migrates only the settings that have been used or modified by the user. If there is an application setting on the source computer that was not touched by the user, the setting may not migrate. When you specify the MigApp.xml file, USMT 4.0 migrates the settings for the following applications: Product Version Adobe Acrobat Reader 9 AOL Instant Messenger 6.8 Apple iTunes 7, 8 Apple QuickTime Player 7 Apple Safari 3.1.2 Google Chrome beta Google Picasa 3 Google Talk beta IBM Lotus 1-2-3 9.8 IBM Lotus Notes 8 IBM Lotus Organizer 9.8 IBM Lotus WordPro 9.8 Intuit Quicken 2009 Money Plus Business 2008 Money Plus Home 2008 Mozilla Firefox 3 Microsoft Office Access® 2003, 2007, 2010* Microsoft Office Excel® 2003, 2007, 2010* Microsoft Office FrontPage® 2003, 2007, 2010* Microsoft Office OneNote® 2003, 2007, 2010* Microsoft Office Outlook® 2003, 2007, 2010* Microsoft Office PowerPoint® 2003, 2007, 2010* Microsoft Office Publisher 2003, 2007, 2010* Microsoft Office Word 2003, 2007, 2010* Opera Software Opera 9.5 Microsoft Outlook Express (only mailbox file) Microsoft Project 2003, 2007 Microsoft Office Visio® 2003, 2007 RealPlayer Basic 11 Sage Peachtree 2009 Skype 3.8 Windows Live® Mail 12, 14 Windows Live Messenger 8.5, 14 Windows Live MovieMaker 14 Windows Live Photo Gallery 12, 14 Windows Live Writer 12, 14 Windows Mail (only shipped with Windows Vista®) Microsoft Works 9 Yahoo Messenger 9 Zune™ 3 * A hotfix is available to support migrating Office 2010 settings. You should install this hotfix before you use USMT, when either the source or destination computer has Office 2010 installed. For more information, see Information about the User State Migration Tool (USMT) 4.0 update. What USMT Does Not Migrate The following is a list of the settings that USMT does not migrate. If you have a problem that is not listed here, see Common Issues. Application Settings <p class="subSection"> USMT 4.0 does not migrate the following application settings: Settings from earlier versions of an application. The versions of each application must match on the source and destination computers. This is because USMT does not support migrating the settings of an earlier version of an application to a later version, except for Microsoft Office, which USMT can migrate from an earlier version to a later version. Application settings and some operating-system settings when a local account is created. For example, if you run /lac to create a local account on the destination computer, USMT will migrate the user data, but only some of the operating-system settings, such as wallpaper and screensaver settings, and no application settings will migrate. Microsoft Project settings, when migrating from Office 2003 to Office 2007 system. ICQ Pro settings, if ICQ Pro is installed in a different location on the destination computer. To successfully migrate the settings of ICQ Pro, you must install ICQ Pro in the same location on the destination computer as it was on the source computer. Otherwise, after you run the LoadState tool, the application will not start. You may encounter problems when: You change the default installation location on 32-bit destination computers. You attempt to migrate from a 32-bit computer to a 64-bit computer. This is because the ICQ Pro default installation directory is different on the two types of computers. When you install ICQ Pro on a 32-bit computer, the default location is "C:\Program Files\...". The ICQ Pro default installation directory on an x64-based computer, however, is “C:\Program Files (x86)\...”. Operating-System Settings USMT 4.0 does not migrate the following operating-system settings. Local printers, hardware-related settings, drivers, passwords, application binary files, synchronization files, DLL files, or other executable files. Permissions for shared folders. After migration, you must manually re-share any folders that were shared on the source computer. Files and settings migrating between operating systems with different languages. The operating system of the source computer must match the language of the operating system on the destination computer. Customized icons for shortcuts may not migrate. Taskbar settings, when the source computer is running Windows XP. The following firewall settings when the source computer is running Windows XP. The Internet Connection Sharing setting is not migrated because it can make the network less secure if it is migrated to the destination computer. The firewall advanced-configuration settings are not migrated because of increased security risks. The Network Connections user interface will not completely refresh until you log off or press F5. Bridge settings are not migrated; for example, bridging a virtual private network to a second network adapter. You should also note the following: You should run USMT from an account that has administrative credentials. Otherwise, some data will not migrate. When running the ScanState and LoadState tools on Windows Vista and Windows 7, you must run the tools in Administrator mode from an account that has administrative credentials. If you do not run USMT in Administrator mode, only the user profile that is logged on will be included in the migration. In addition, you must run the ScanState tool on Windows XP from an account with administrative credentials. Otherwise, some operating-system settings will not migrate. To run in Administrator mode, click Start, click All Programs, click Accessories, right-click Command Prompt, and then click Run as administrator. You can use the /localonly option to exclude the data from removable drives and network drives mapped on the source computer. For more information about what is excluded when you specify /localonly, see ScanState Syntax.
-
using SCCM 2012 in a LAB - Part 1. Installation
anyweb replied to anyweb's topic in Configuration Manager 2012
did you read this post yet ? it tells you how to do it during SQL setup http://www.niallbrady.com/2012/03/13/about-to-install-configuration-manager-2012-check-your-sql-collation-first/ -
Microsoft Deployment Toolkit (MDT) 2012
anyweb posted a question in Microsoft Deployment Toolkit (MDT)
Microsoft Deployment Toolkit (MDT) 2012 is the newest version of Microsoft Deployment Toolkit, a Solution Accelerator for operating system and application deployment. MDT 2012 supports deployment of Windows 7, Office 2010 and 365, and Windows Server 2008 R2 in addition to deployment of Windows Vista, Windows Server 2008, Windows Server 2003, and Windows XP. Overview Deploy Windows 7, Office 2010 and 365, and Windows Server 2008 R2 with the newly released Microsoft Deployment Toolkit 2012. MDT is the recommended process and toolset for automating desktop and server deployment. MDT provides you with the following benefits: Unified tools and processes, including a set of guidance, for deploying desktops and servers in a common deployment console. Reduced deployment time and standardized desktop and server images, along with improved security and ongoing configuration management. Some of the key changes in MDT 2012 are: Comprehensive tools and guidance to efficiently manage large-scale deployments of Windows 7 and Microsoft Office 365. An enhanced user-Driven Installation (UDI) deployment method that utilizes System Center Configuration Manager 2012. UDI lets end users initiate and customize an OS deployment on their PCs—via an easy-to-use wizard. Ease Lite Touch installation through integration with Microsoft Diagnostics and Recovery Toolkit (DaRT). This release provides support for deploying Windows 8 Consumer Preview in a lab environment. Choosing the Right Version MDT is available for x86 and x64 platforms. Select the version that corresponds with your host hardware type. Both versions of MDT 2012 support deployment of x86 and x64 Windows operating systems. The New in MDT 2012 guide and Release Notes are available as separate downloads on this page for those who want to quickly evaluate MDT 2012. The full package of guidance is available in .chm format as part of the toolkit. For those who want it in Word format, a separate download is available in the Files in this Download list. Send questions or feedback about MDT 2012 directly to us viawww.Connect.microsoft.com. Top of page System requirements Supported operating systems: Windows 7, Windows Server 2003 R2 Enterprise Edition (32-Bit x86), Windows Server 2003 R2 Standard Edition (32-bit x86), Windows Server 2008 R2, Windows Server 2008 Service Pack 2, Windows Vista Service Pack 2, Windows XP Service Pack 3 Supported operating systems the MDT can deploy:Windows 7, Windows Server 2008 R2, Windows Vista Service Pack 2, Windows Server 2008 Service Pack 2, Windows Server 2003 R2, Windows XP Service Pack 3. * MDT 2012 can be installed on Windows 8 Consumer Preview or Windows Server "8" Beta, used with the Windows 8 Assessment and Deployment (ADK) Beta. MDT 2012 can deploy Windows 8 Consumer Preview and Windows Server "8" Beta. MMC 3.0 is required to run the Workbench and view the documentation on Windows XP. Note MMC 3.0 is included in Windows Server 2008 R2, Windows Server 2008, Windows Server 2003 R2, Windows 7, and Windows Vista. Microsoft Deployment Toolkit 2012 relies on several Windows deployment tools. After installation of the .msi package and startup of the Deployment Workbench, the user can choose to automatically download and install the following major tools from the Components: Windows Automated Installation Kit Application Compatibility Toolkit MSXML 6.0 [*]Microsoft Office Word or Word Viewer (available as a free download) can be used to view Word documents [*]Microsoft Office Compatibility Pack for Word, Excel, and PowerPoint File Formats (available as a free download) can be used to open, edit, and save documents, workbooks, and presentations in the file formats new to Microsoft Office. Instructions To start the download, select a file from the list of Files in this Download and then click Download. To run the .msi file from its current location, click Run. Accept the Microsoft Software License Terms. Follow the steps in the installation process to complete the installation. To start Deployment Workbench, look in All Programs in the Start menu for Microsoft Deployment Toolkit. Or, to save the .msi file to your computer for later installation, click Save. Save the contents of the .zip file to your computer by clicking Open and then extracting the guidance to the location of your choice. Additional information Solution Accelerators are free, scenario-based guides and automations designed to help IT Professionals who are proactively planning, deploying, and operating IT systems using Microsoft products and technologies. Solution Accelerator scenarios focus on security and compliance, management and infrastructure, and communication and collaboration. Get the Solution Accelerator Notifications Newsletter Subscribe to the Solution Accelerator Notifications newsletter so that you can stay informed about new Solution Accelerator releases and updates. The newsletter covers such areas of interest as Communication & Collaboration Security, Data Protection, & Recovery Deployment Operations & Management You may also receive invitations to participate in accelerator development via beta programs and customer surveys. Solution Accelerator Notifications is currently available in English only. More info and download > http://www.microsoft...s.aspx?id=25175 -
hi guys, i know many people have requested to be able to download the guides here in PDF or Word DOC format so with help from a reader (Brian Thorp) we have just that ! now you can download the entire 18 part guide to using Configuration Manager 2012 in both PDF and WORD format and use whichever you want while on the go, Download the ZIP The windows-noob.com CM12 Guides in PDF and WORD format.zip a big thanks goes to Brian for compiling it all together so that you lot can have it remotely cheers ! niall
- 34 replies
-
- 11
-
-
Automatically join a collection after ts
anyweb replied to xdemafried's topic in Configuration Manager 2007
when you run the script in the task sequence it's running under the local system account which probably is your problem, have you tried specifying a service account with permissions to do this in the step instead ? -
make sure you've more than 1gb of ram in the computer/vm and read the troubleshooting notes here
-
what software did you use to burn the ISO ? have you tried mounting the iso in any virtual machine ? thanks, spread the word !
-
thanks for posting your troubleshooting and resolution, keep it up !
-
thanks and spread the word ! one small observation, why is the Apply network settings step after the apply driver packages, normally it occurs just after apply windows settings aside from that can you post your smsts.log and setupact.log and ccmsetup.log files in full so we can take a look ? do you have anything added in your setup windows and configmgr step ?