anyweb
-
Posts
9278 -
Joined
-
Last visited
-
Days Won
371
Everything posted by anyweb
-
 show me a screenshot of what you are seeing
 -
How to spread the load of software updates with sccm 2012?
anyweb replied to bartb's topic in Configuration Manager 2012
well to spread the load, put your virtual machines on different SANS to increase your IOPS -
smsts.log file should reveal the issue (on the client you are trying to capture)
-
What do you use to write your HTAs?
anyweb replied to slater7607's question in Frontends, HTA's and Web Services
feel free to post some guides for the rest of us , actually when editing my changes live i use notepad in WinPE on the live code then press F5 to refresh the result -
What do you use to write your HTAs?
anyweb replied to slater7607's question in Frontends, HTA's and Web Services
notepad ++ is all you need, and then copy the bits and pieces that you find on the internet and you'll be good to go, what else do you need ? -
Allow HTA to write a line to smsts.log?
anyweb replied to slater7607's question in Frontends, HTA's and Web Services
or incorportate mdt and with ztiutility it will log to whatever your script is called, eg: mycustomscript.log -
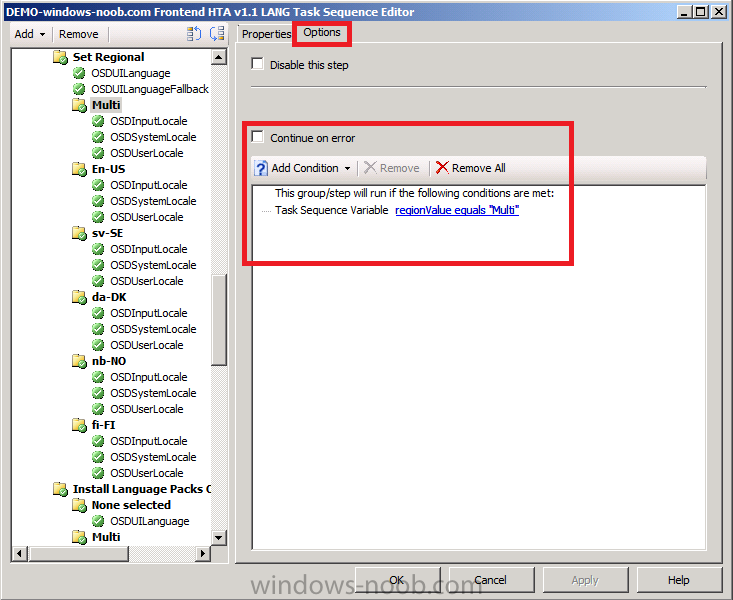
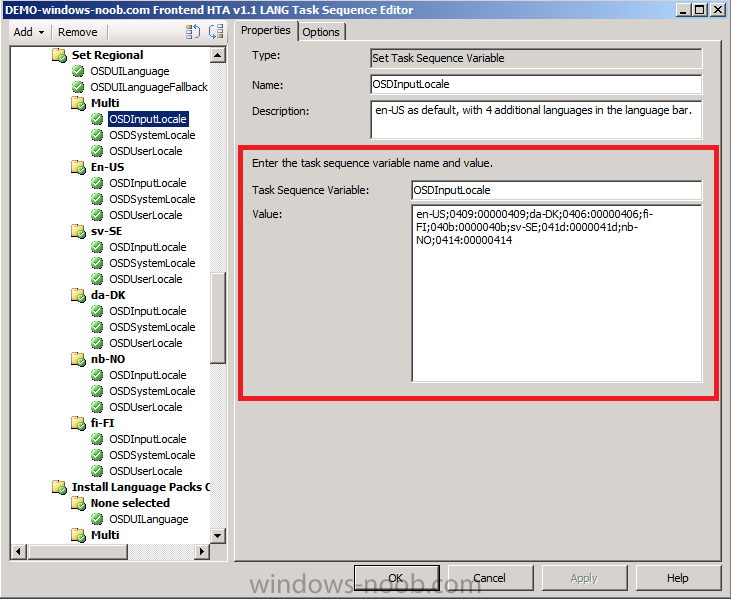
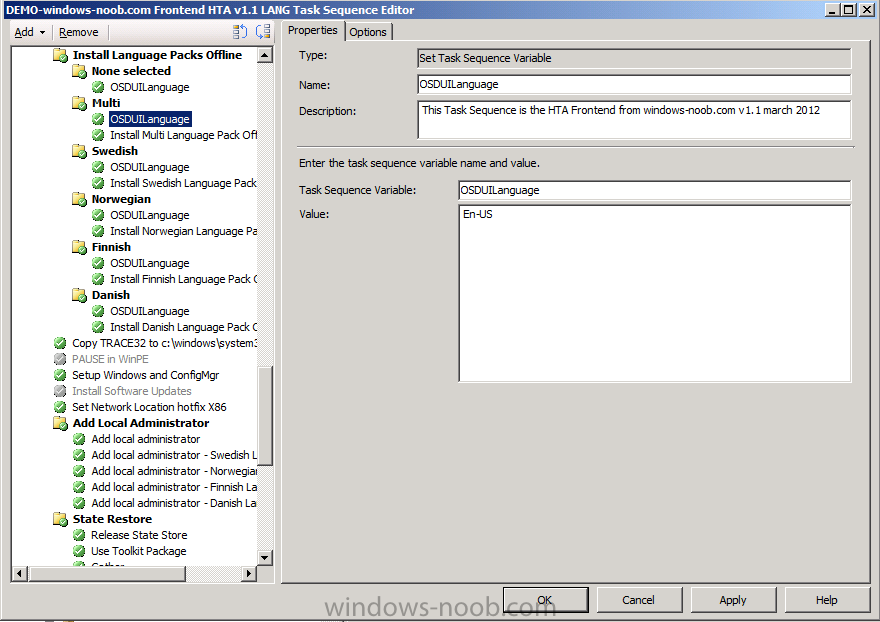
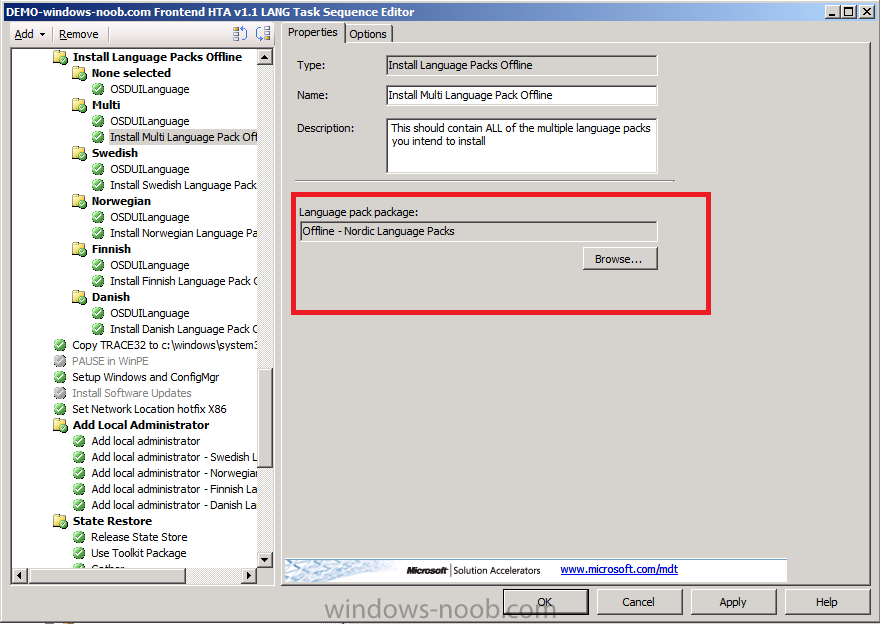
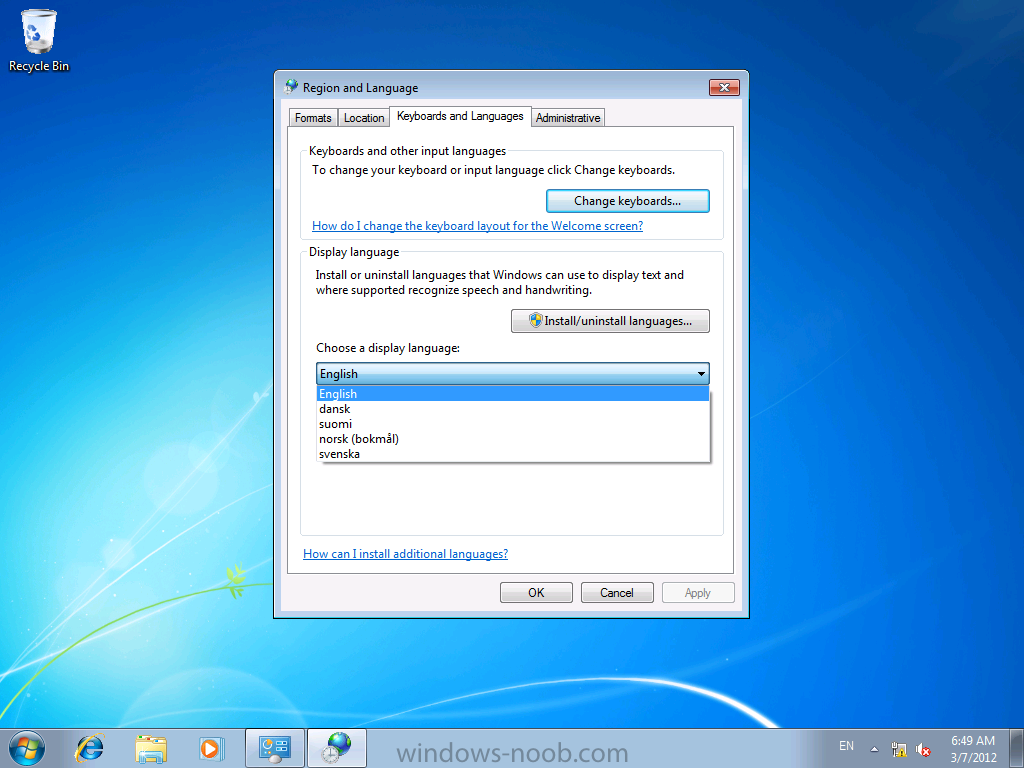
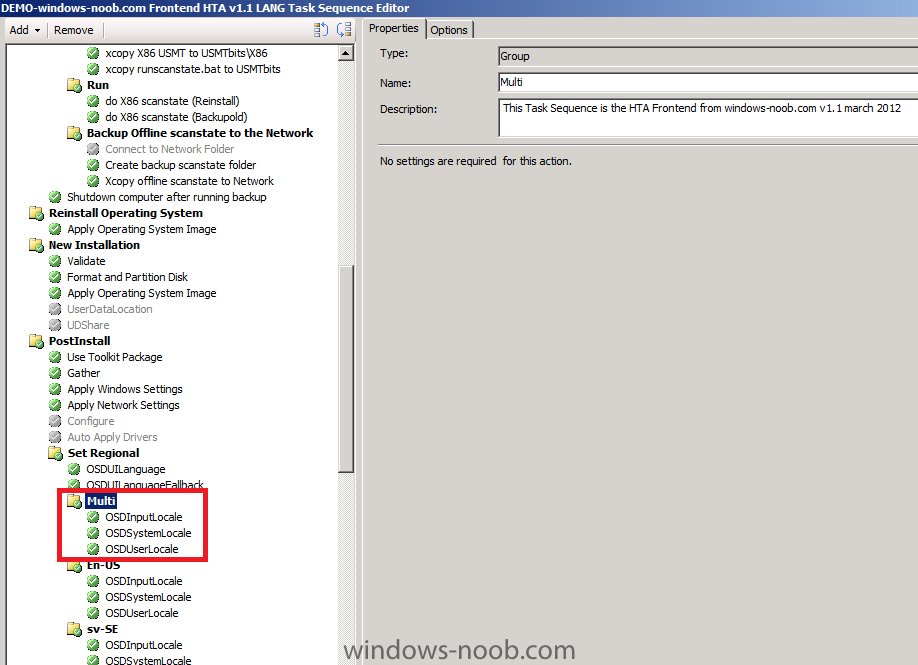
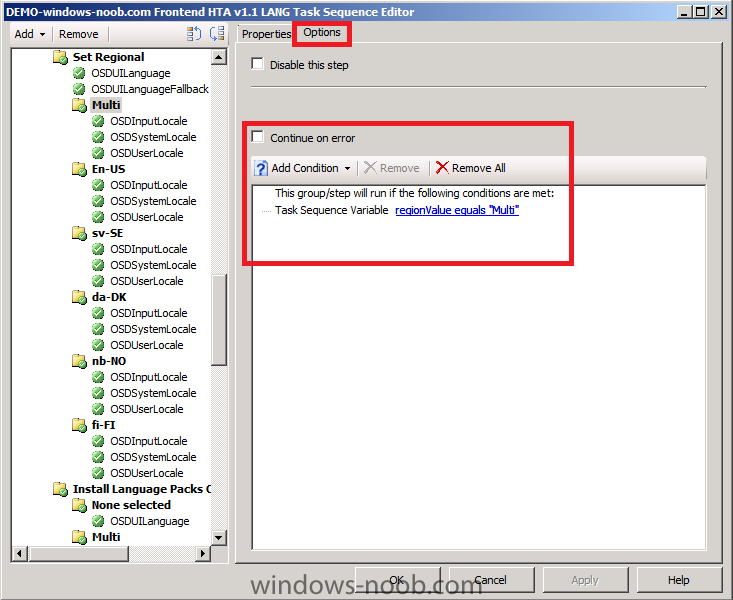
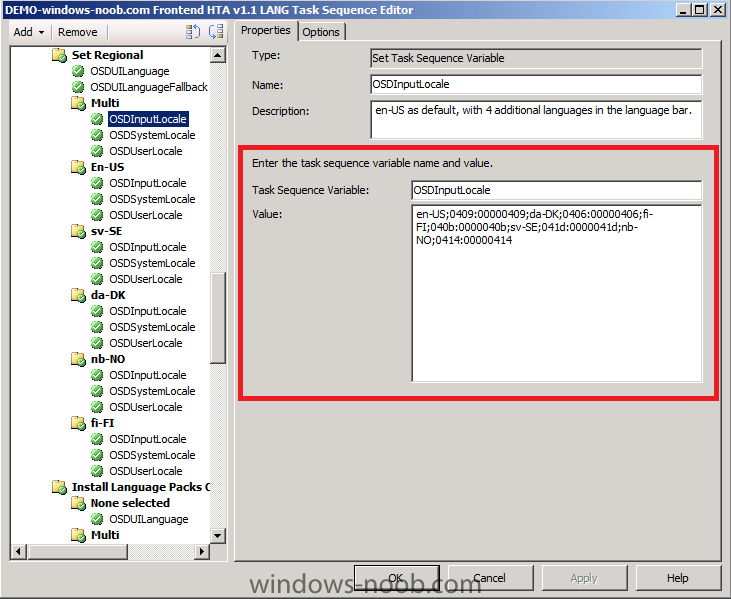
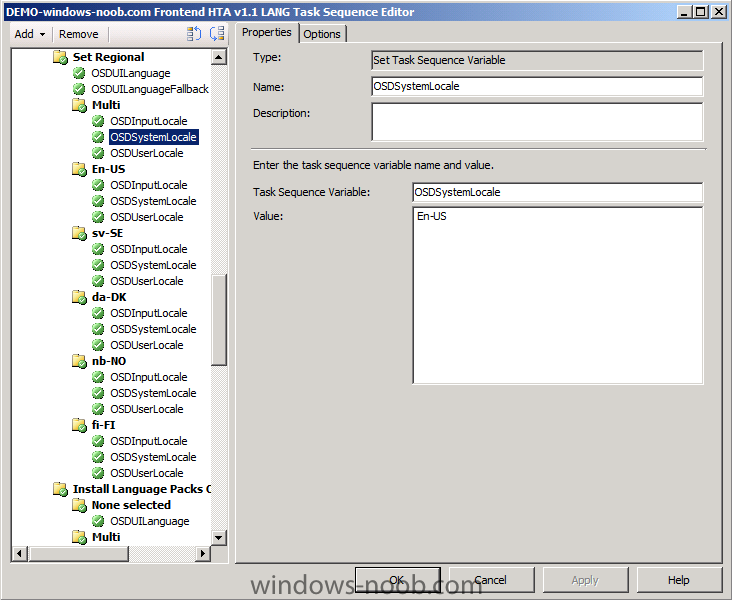
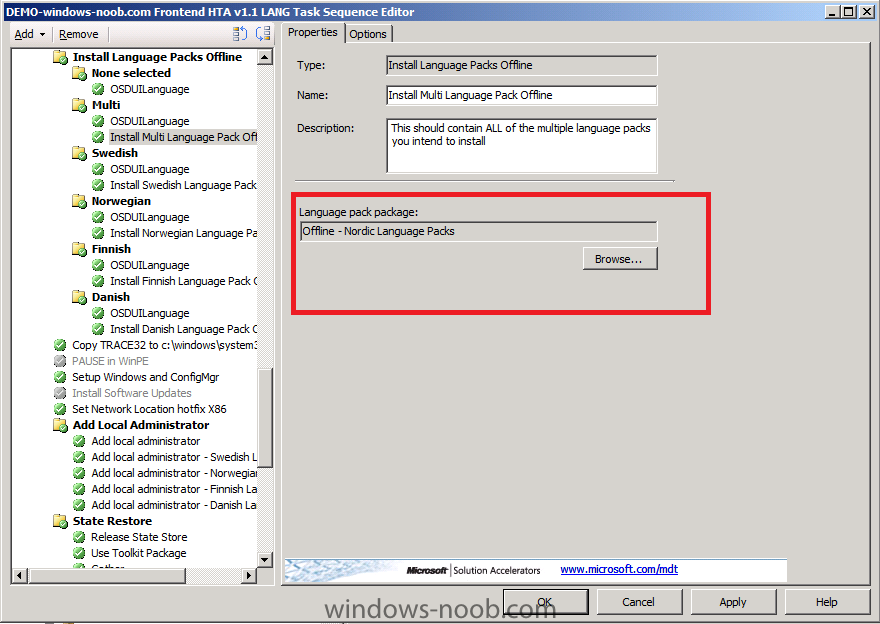
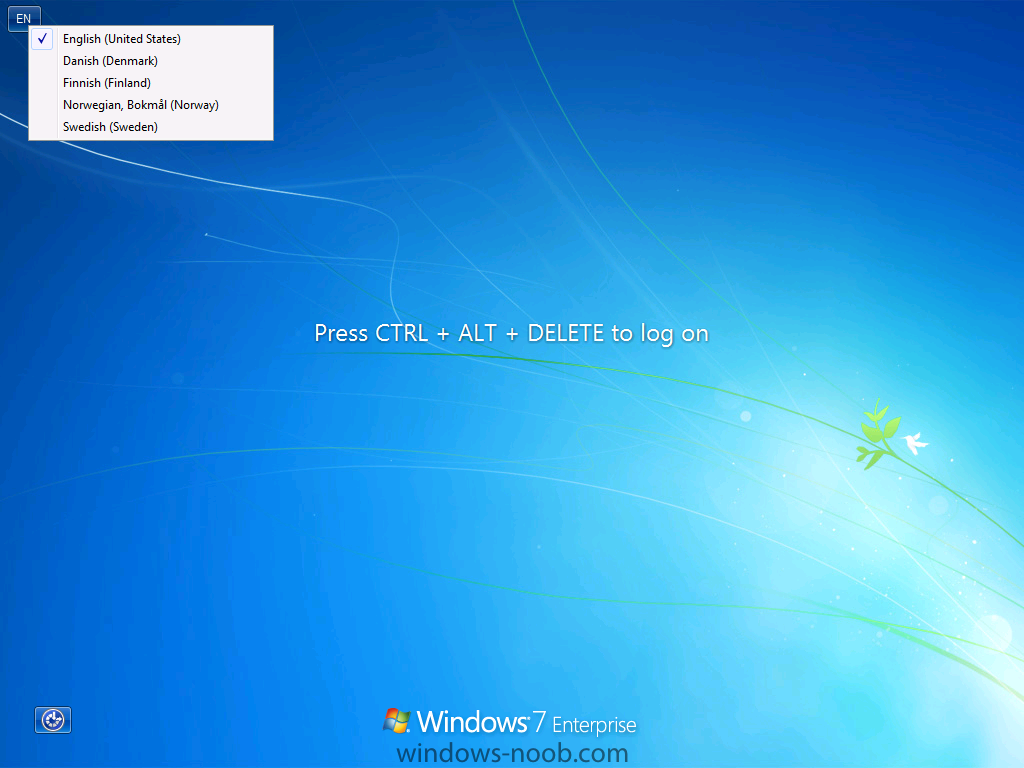
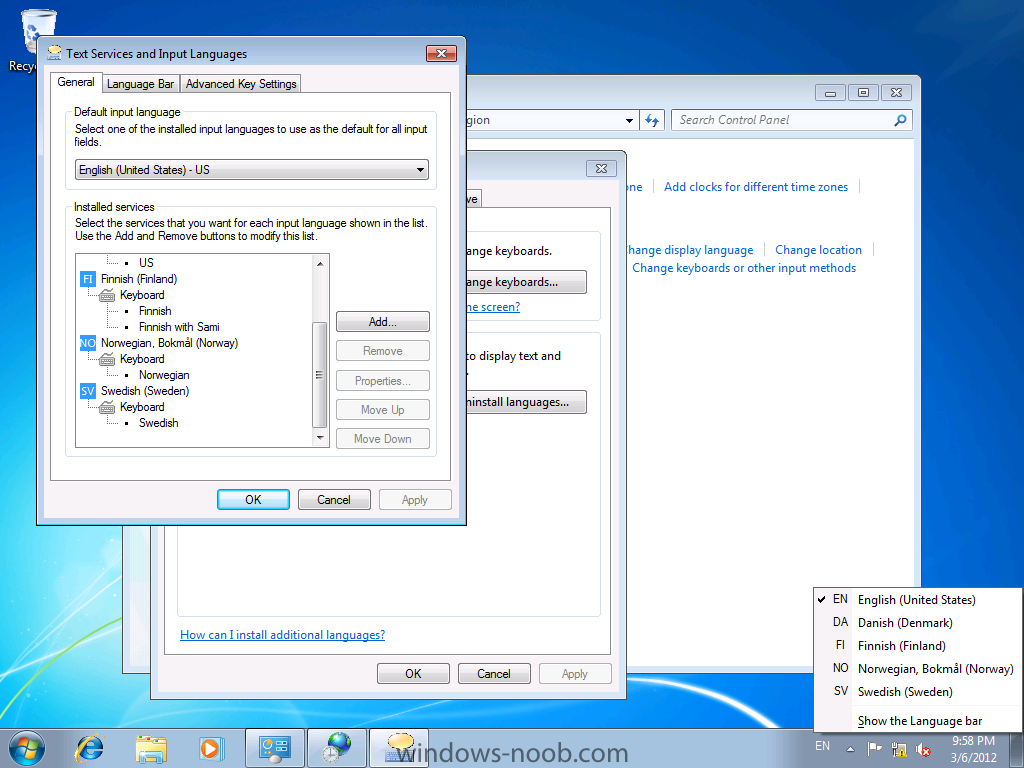
This post is an addition to Part 4 where we installed Language packs on a one-by-one basis (i.e. one language pack selected, one installed, one keyboard layout selected, one installed). What if you want to install multiple Language packs and multiple Keyboard Layouts well this is how to do it...but before we continue, make sure you have successfully completed Part 4 before attempting this. To make this possible I adapted the windows-noob.com Multipurpose FrontEnd HTA so that i could select Multiple languages and Multiple Keyboard Layouts, this change is only a minor one to both the backend script (HTA) and the task sequence itself, so rather than explain all about them i'll post this bits you need to know here. Also, I havn't ported these changes yet *but will soon* into the BitLocker Frontend HTA which I think looks much cooler, so I hope that you check that one out also. So where do we start, with the actual frontend HTA backend code.. aka, the HTA itself. The following section has been changed in the Deploymenu.HTA file, <tr> <td class="taskTableLeftCell" >Regional Settings</td> <td colspan="3" class="taskTableSpanSecondAndThirdCell"> <select name="regionDropDown" id="regionDropDown"> <option value="None">None</option> <option value="Multi">Multi</option> <option value="En-US">En-US</option> <option value="sv-SE">sv-SE</option> <option value="da-DK">da-DK</option> <option value="nb-NO">nb-NO</option> <option value="fi-FI">fi-FI</option> </select> </td> </tr> <tr> <td class="taskTableLeftCell" >Language Settings</td> <td colspan="3" class="taskTableSpanSecondAndThirdCell"> <select name="languageDropDown" id="languageDropDown"> <option value="None">None</option> <option value="Multi">Multi</option> <option value="English">English</option> <option value="Swedish">Swedish</option> <option value="Danish">Danish</option> <option value="Norwegian">Norwegian</option> <option value="Finnish">Finnish</option> </select> </td> </tr> the new bits in both drop down menus (regional/language) are this <option value="None">None</option> <option value="Multi">Multi</option> and they offer us the ability to set nothing (and get the default en-US/English) or to select Multi or to select ONE language or ONE keyboard layout. The MULTI option is special. It simply sets a variable which will run a group of steps to select multiple languages and/or keyboard layouts in the task sequence. The screenshot below shows both Regional (keyboard layout) and Language options have been set to Multi via the drop down menu. Setting the Regional options If we select Multi for Regional options then the following group is run in the task sequence the Options tab is where it detects the RegionValue variable value and if it equals Multi this group is executed the first step of the group sets the OSDInputLocale variable and it sets the Default keyboard layout (the first one listed) and the remaining available keyboards added to windows the values in that step are as follows en-US;0409:00000409;da-DK;0406:00000406;fi-FI;040b:0000040b;sv-SE;041d:0000041d;nb-NO;0414:00000414 Note: You can get a list of these values on MSDN here. the remaining steps of this group simply set OSDSystemLocale and OSDUserLocale to be equal to en-US. Setting the Language options The first step of this group (which only runs if the LanguageValue variable=Multi) is to set the OSDUILanguage, I set it to en-US. The next step installs the Language pack offline. The only magic here is in the language package, it must contain ALL of the language packs you intend to install as part of your Multi Language installation, so in my example I install 4 languages, Swedish Danish Finnish Norwegian and all those language packs are in my Offline Nordic Language Pack. Your multi language pack could contain however many languages you intend to install as a group, but the more you add the longer the install will take. What is the result ? so what do you get when it's all done ? you get the ability to use a drop down keyboard selector on the Windows 7 login screen and you can choose the same keyboard layouts within Windows and the languages are available also jod done, i'd say :-) Download the goodies Here's the updated task sequence and HTA files, you dont have to use a HTA to set the variables you can do that via collection variables or some other method but doing it in a HTA is cool. People will like you more. DeployMenu.zip have fun ! cheers niall


-
Introducing the windows-noob.com FrontEnd HTA ver 1.0
anyweb replied to anyweb's question in Frontends, HTA's and Web Services
if it's not creating the folder then possibly it's skipping the group/steps altogether, did you verify that it's running those steps ? try adding a pause to verify -
you can remove it, wait and then re-add it no problem, no need to do anything with your packages.
-
try a run command line step with the command listed above...
-
not using this method as its unsupported and missing some vital files, in my guide i purposely disable the capture group, you can still capture it with imagex
-
disable the entire Capture group and it'll work just fine.
-
Introducing the windows-noob.com FrontEnd HTA ver 1.0
anyweb replied to anyweb's question in Frontends, HTA's and Web Services
check your bdd_pkgmgr.log.txt what does it say, it will be in c:\_smstasksequence\smsosd\osdlogs\ while the language packs are installing (but not after) -
how did you create your language package ? did you use the sp1 language package or windows 7 lp ? what does your bdd_pkmg.log file reveal ?
-
good questions, 1. not sure yet, will have to find out when that happens but i would assume that the superseded updates will overwrite the old ones. (ie: replace) 2. no unless you remove the configmgr client first as they are different hierarchies and versions.
-
using SCCM 2012 in a LAB - Part 1. Installation
anyweb replied to anyweb's topic in Configuration Manager 2012
that version of SQL is not supported, the supported versions are listed below:- Database Requirements SQL Server 2008 SP2 with CU 7 SQL Server 2008 R2 with SP1 and Cumulative Update 4 SQL Server Express 2008 r2 WITH SP1 and CU 3 is supported only on secondary sites SQL Reporting Services is ONLY reporting solution For Supported Configurations information, visit http://technet.microsoft.com/en-us/library/gg682077.aspx. -
are you applying any network drivers in an apply driver package step ? what hardware is this ? virtual ?
-
what does your smsts.log file say about the error ?
-
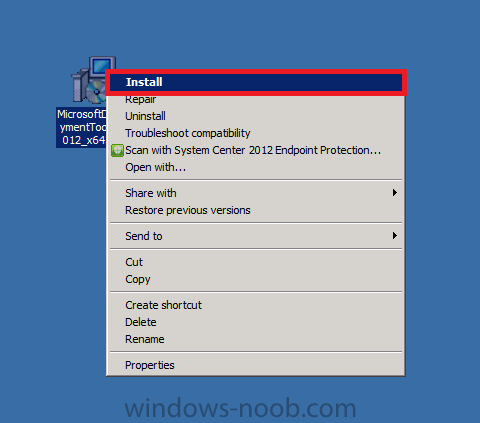
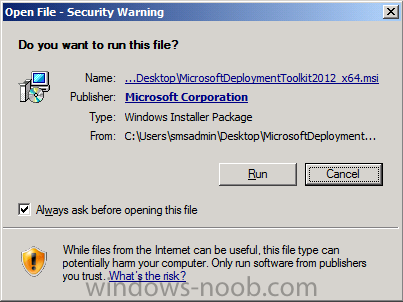
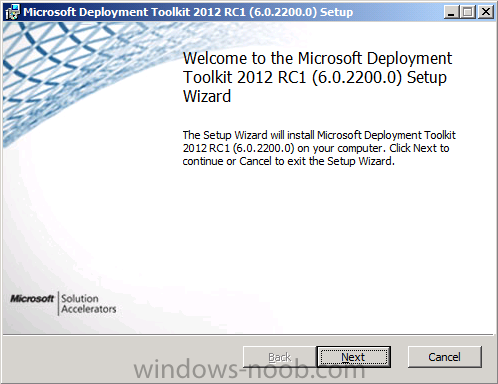
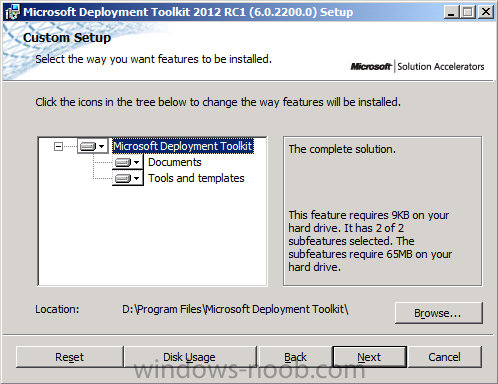
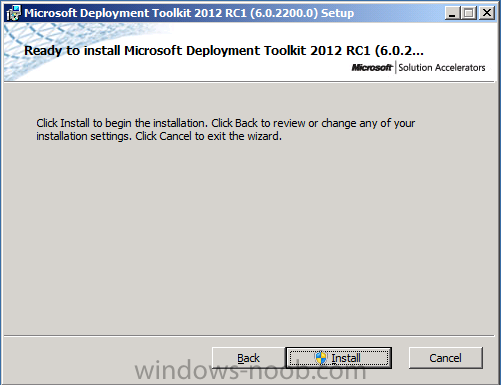
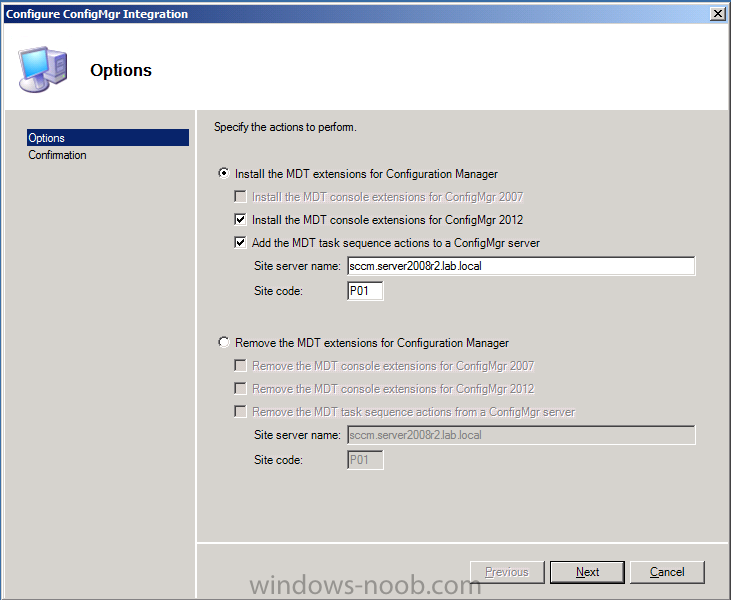
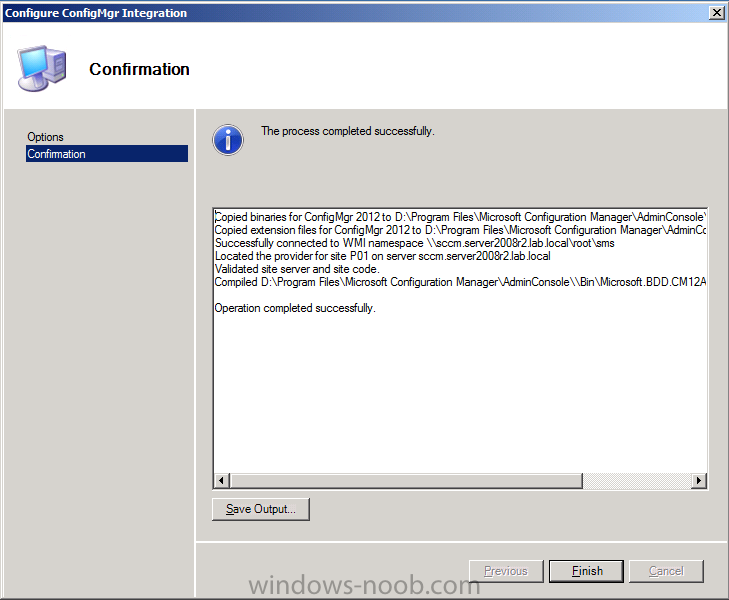
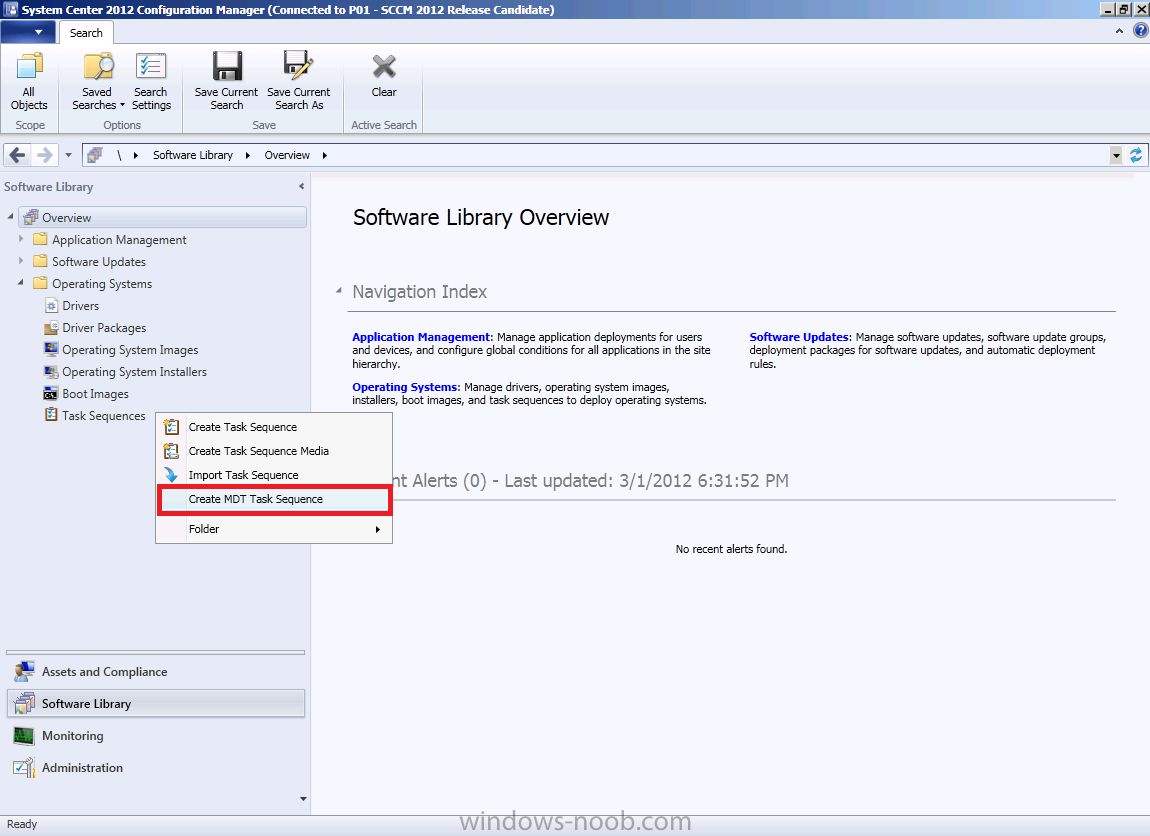
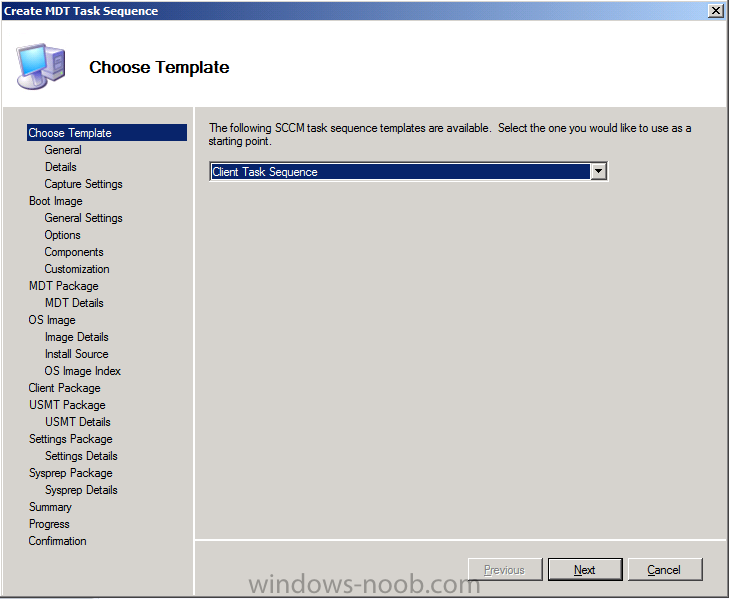
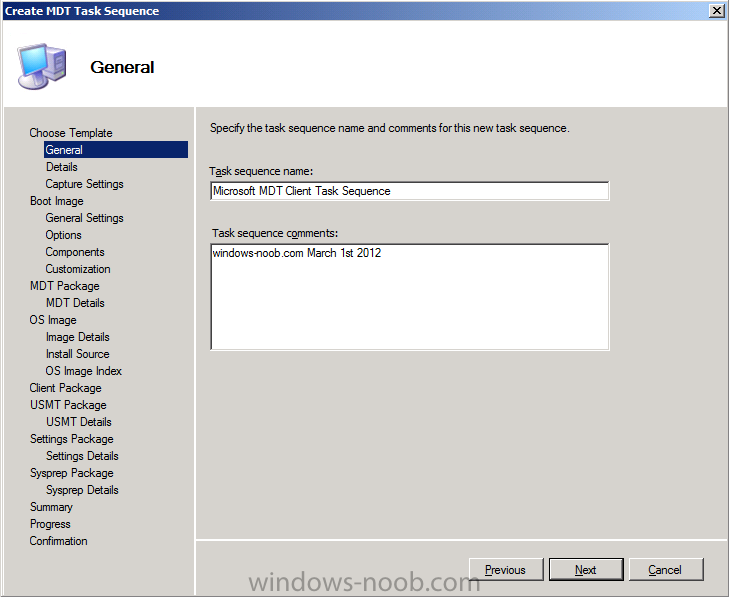
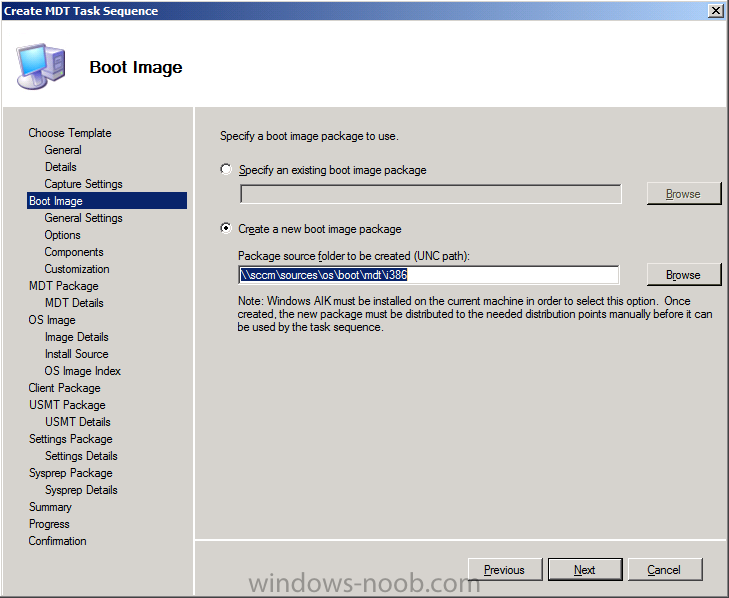
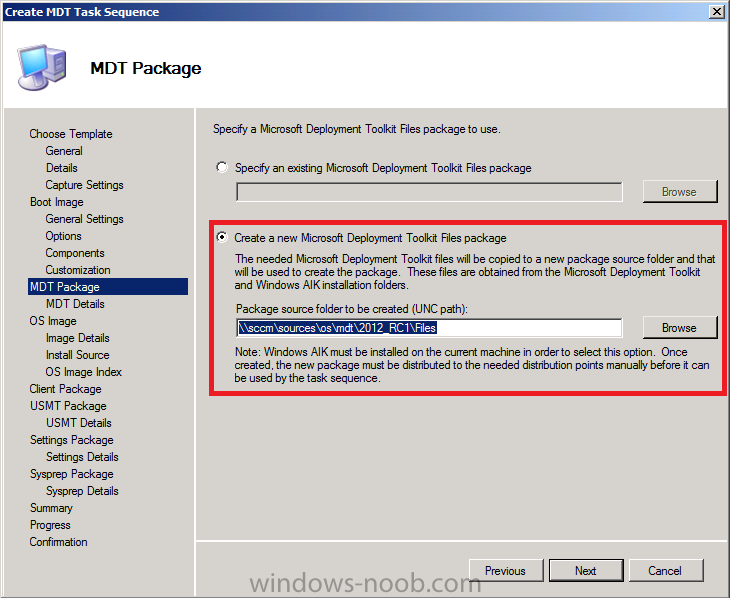
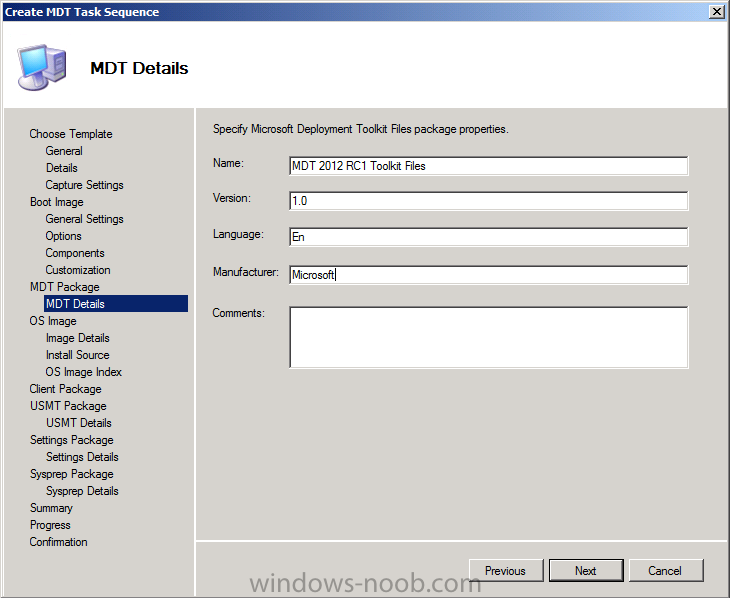
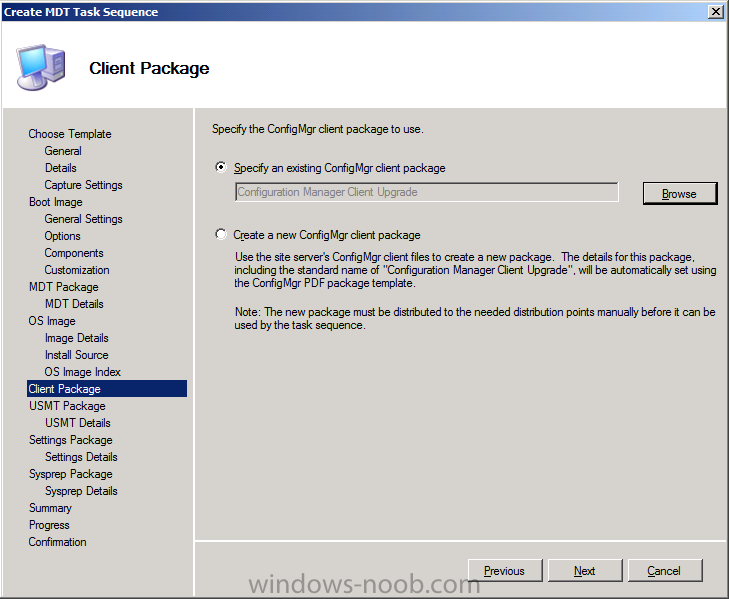
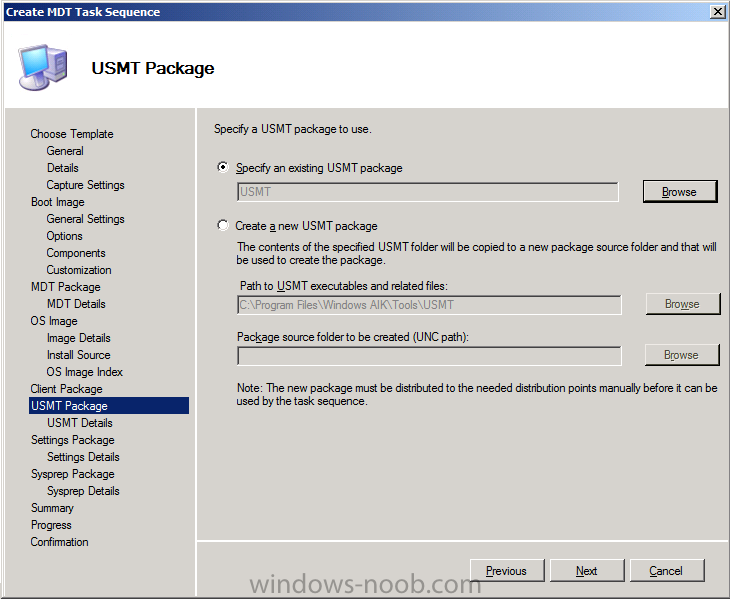
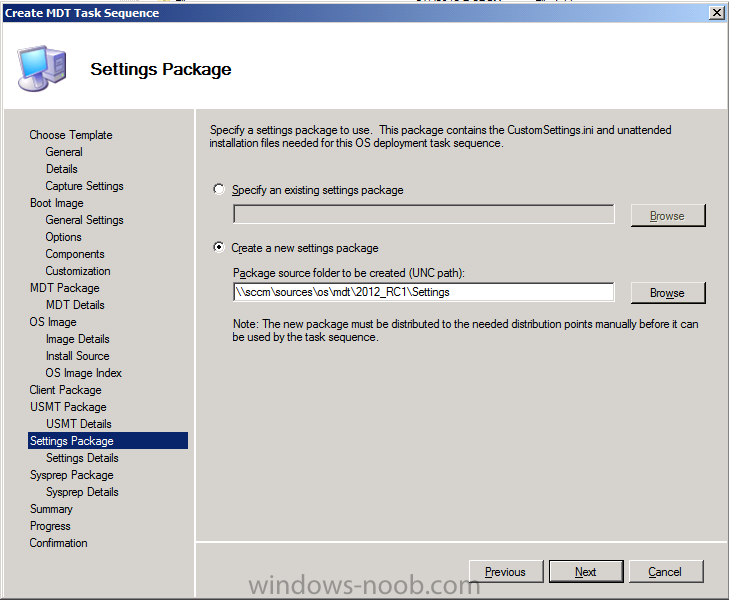
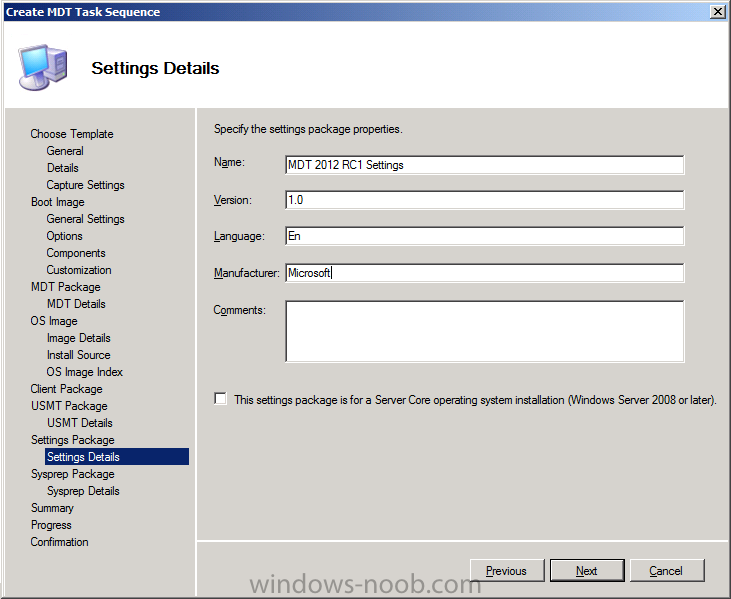
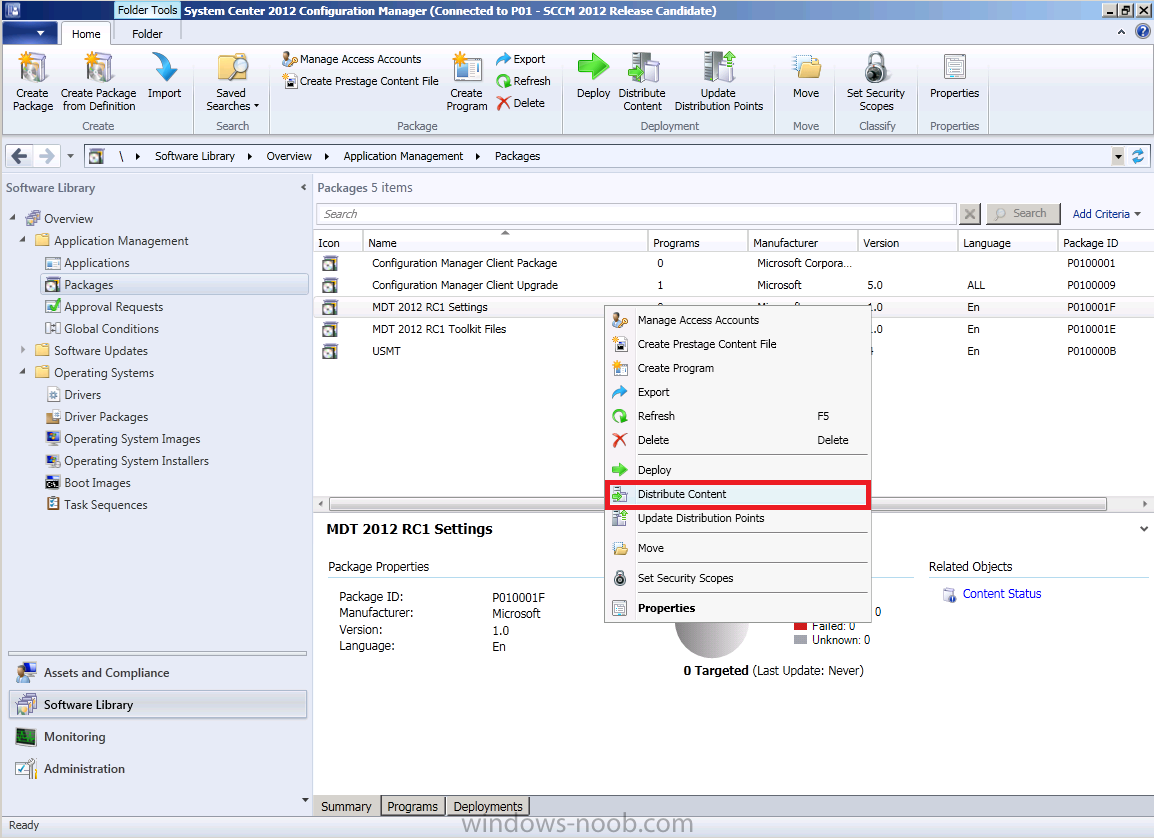
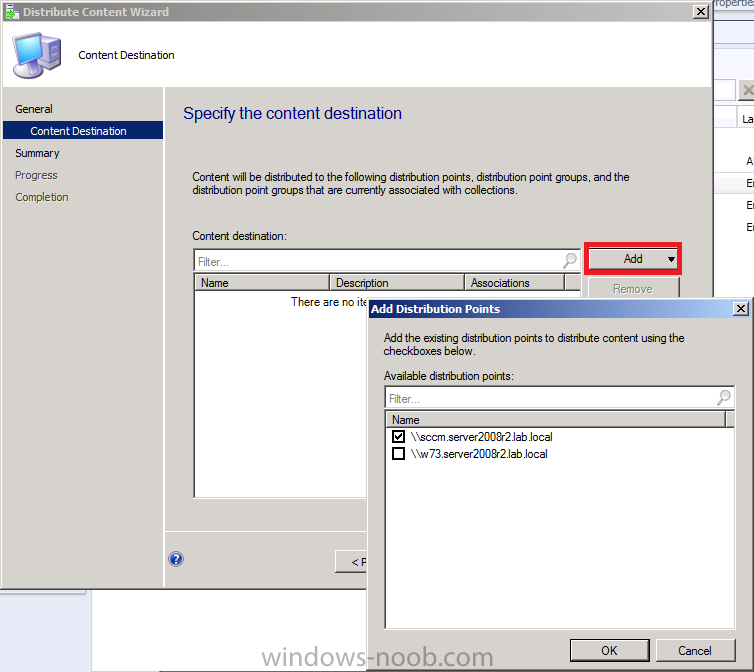
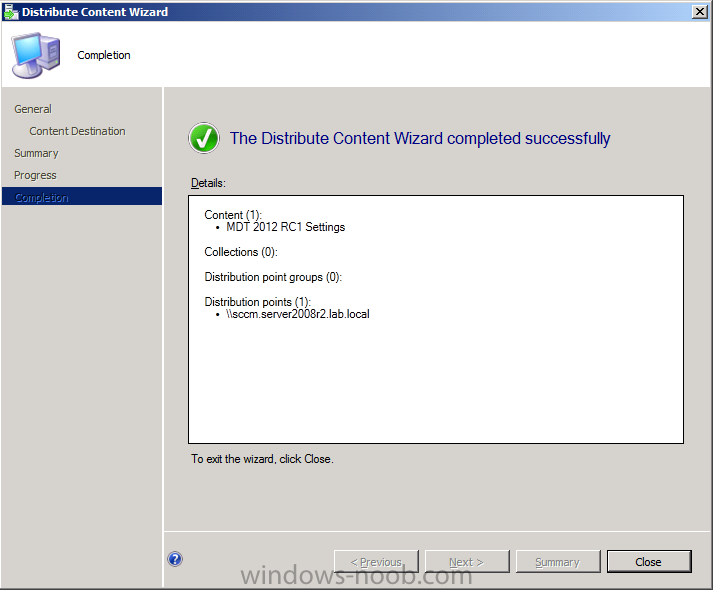
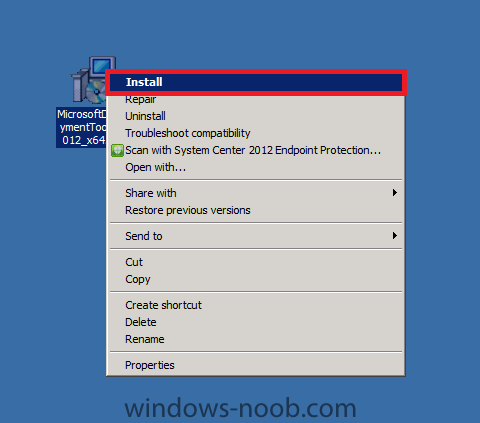
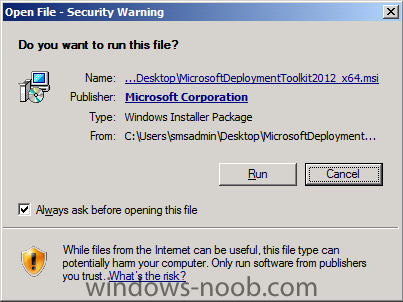
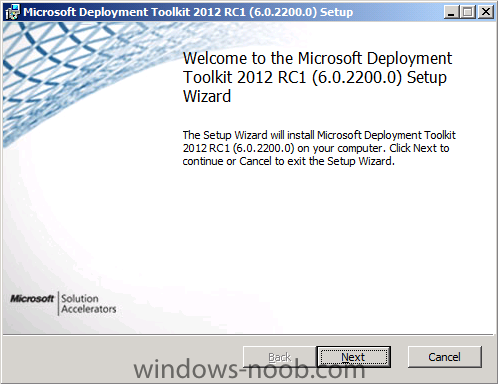
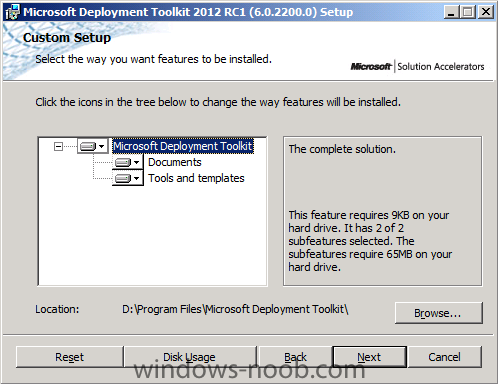
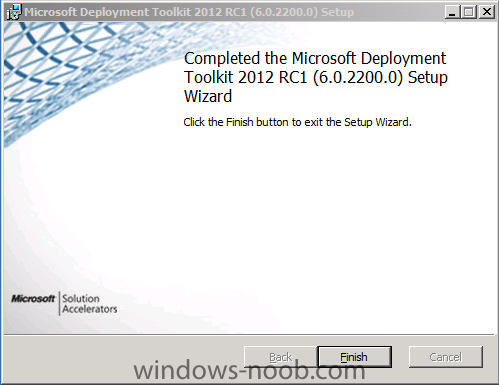
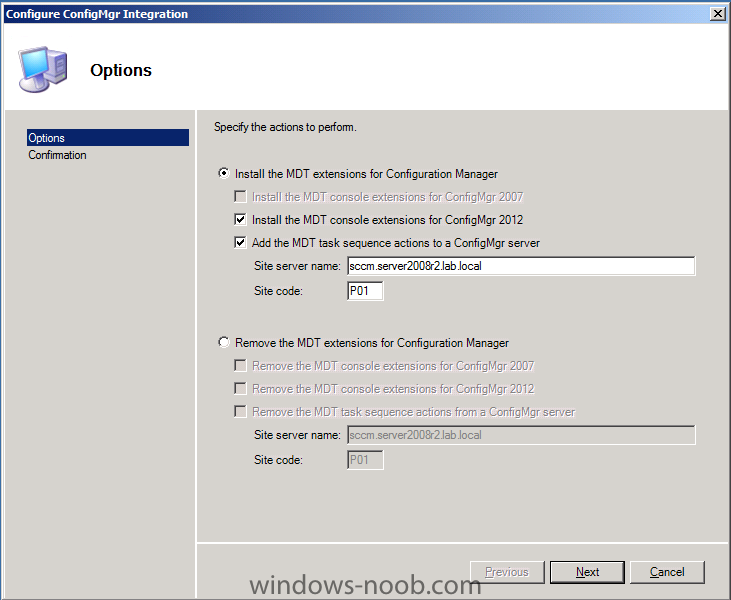
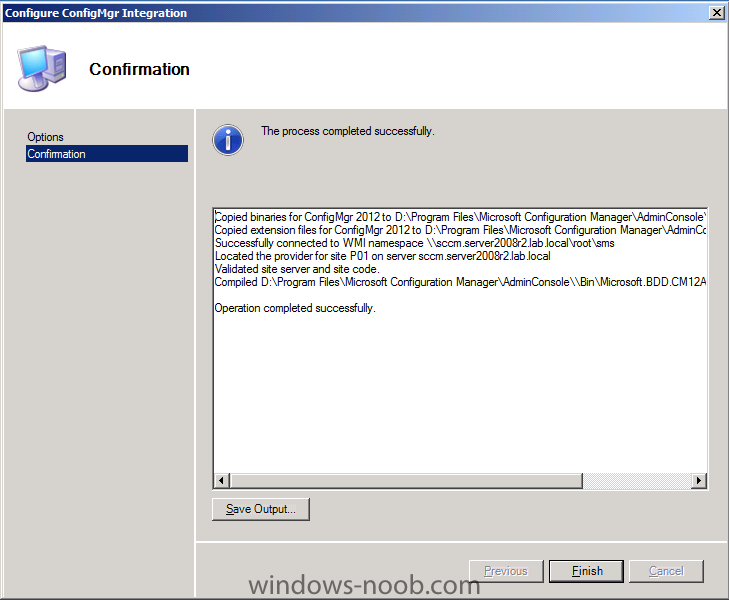
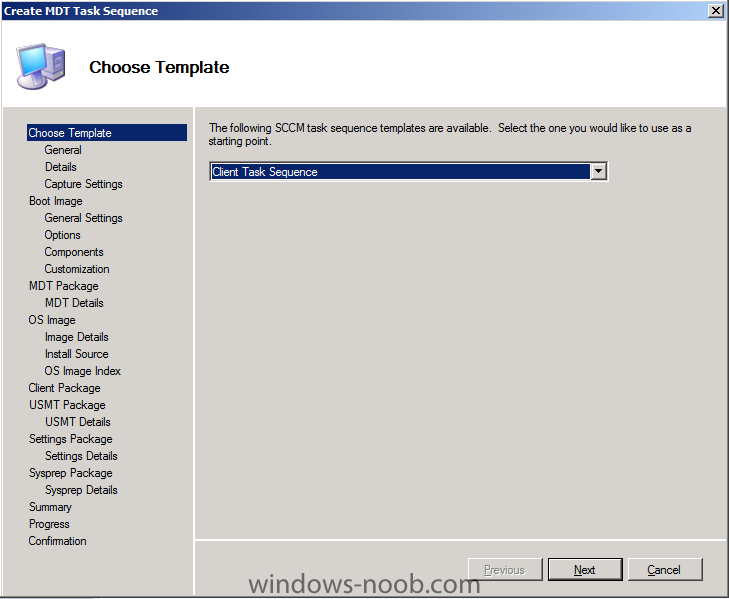
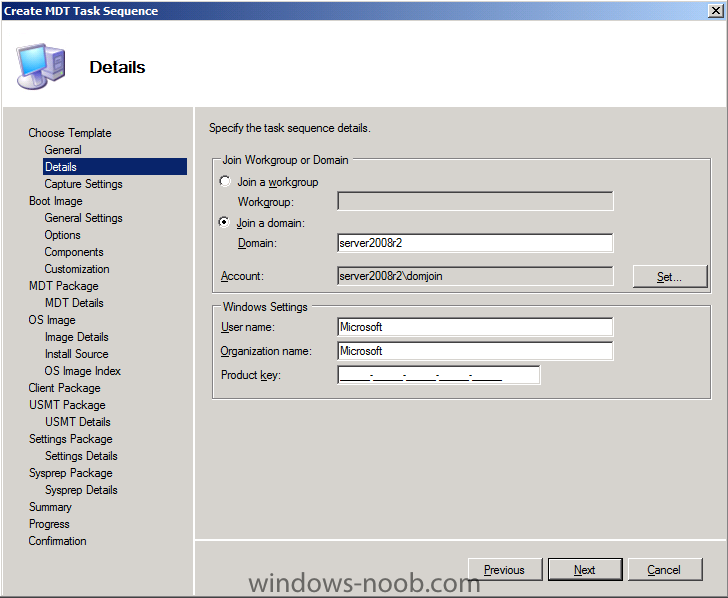
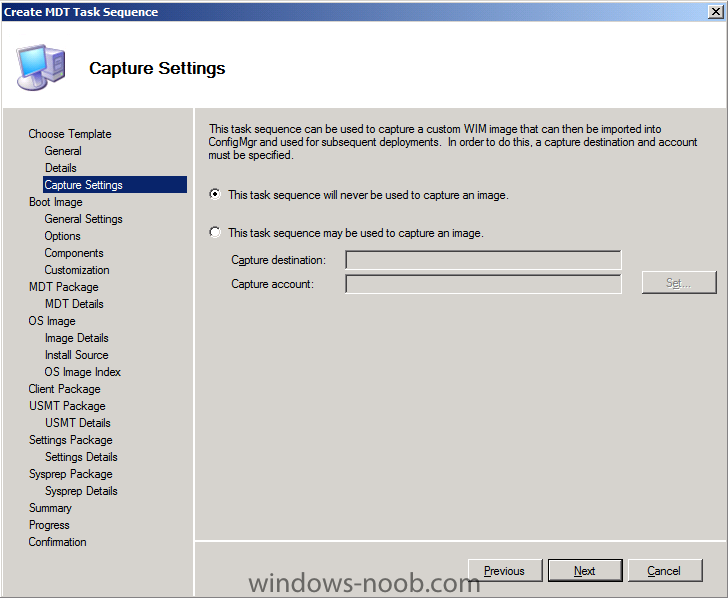
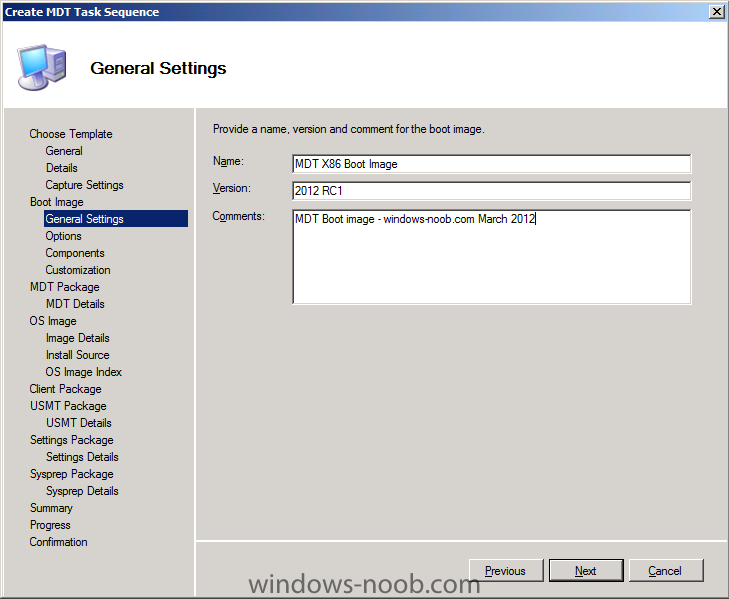
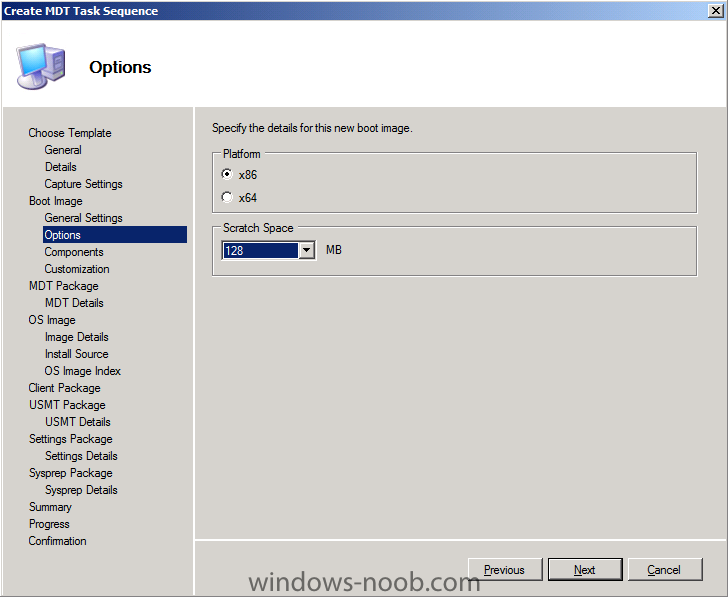
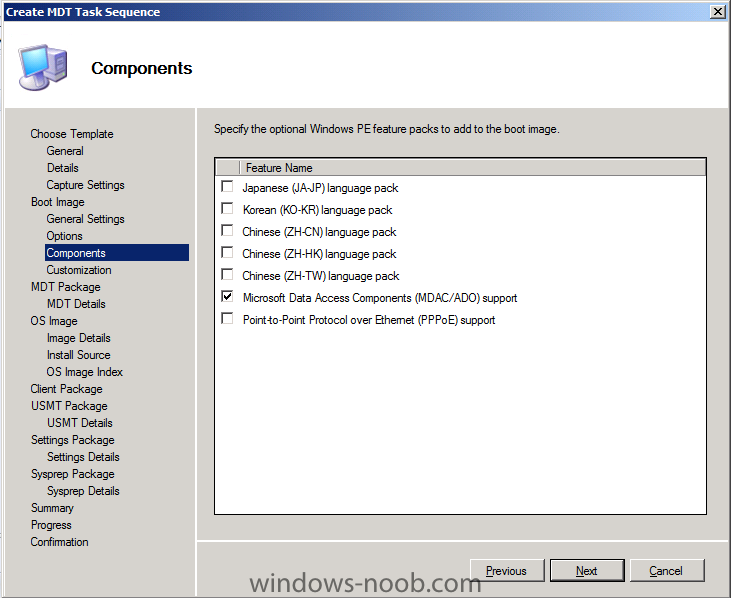
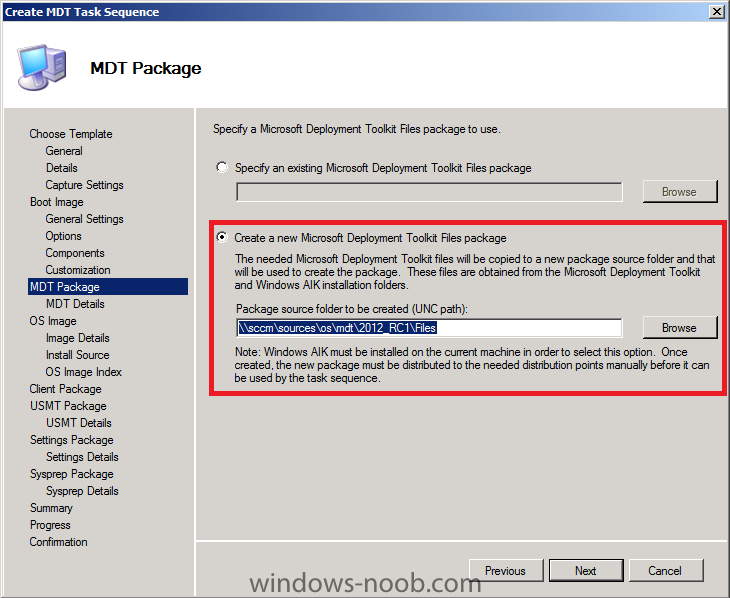
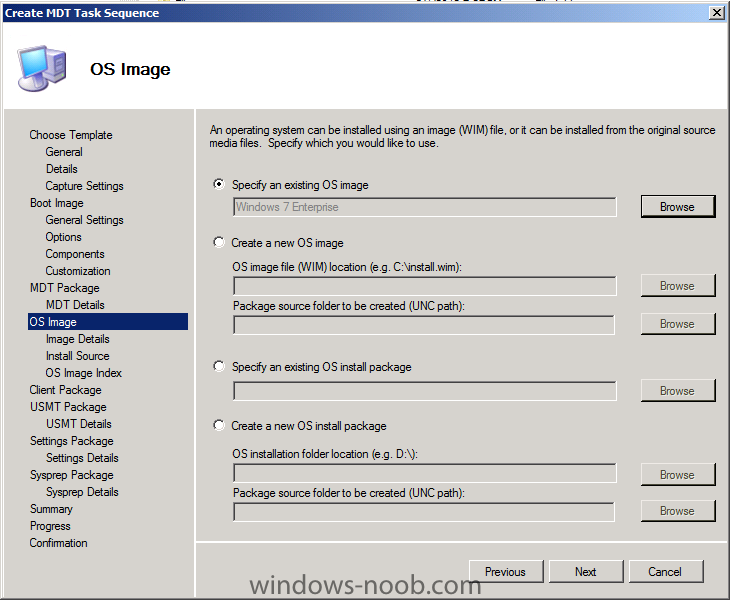
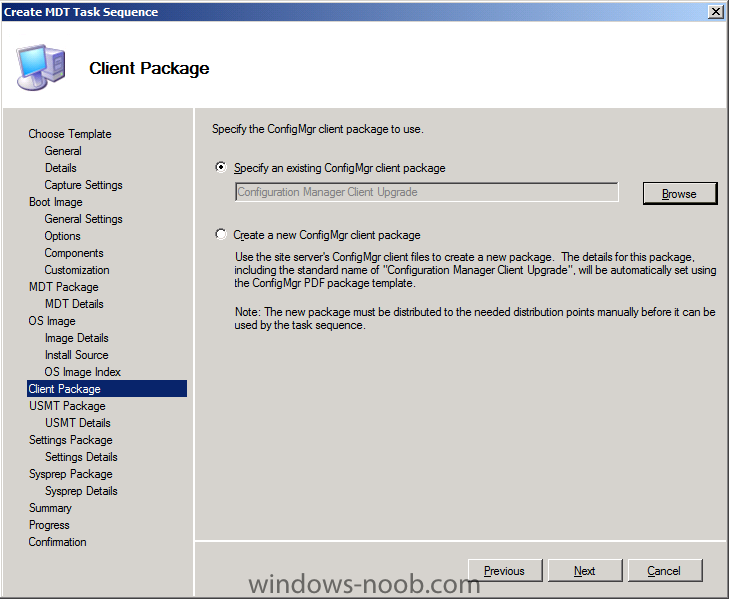
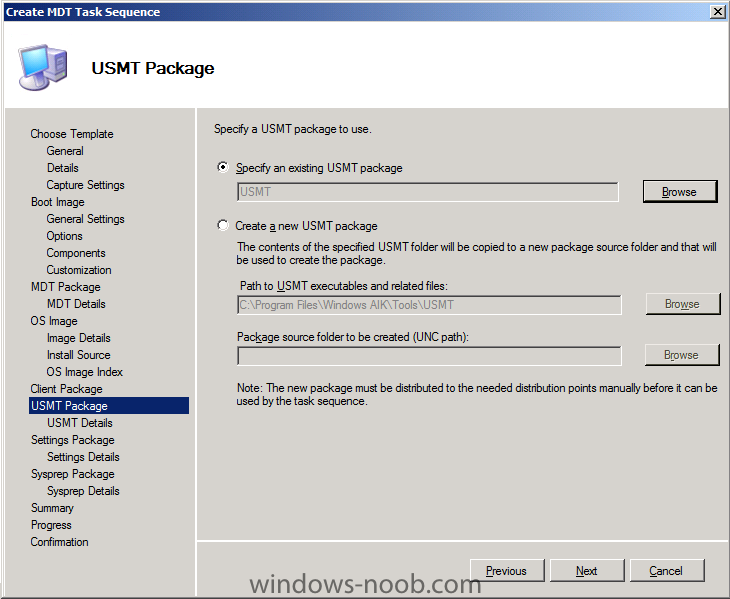
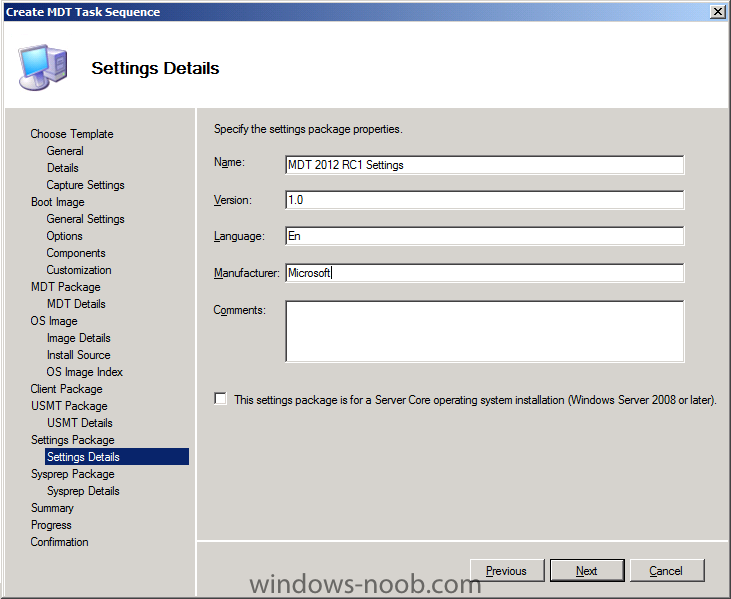
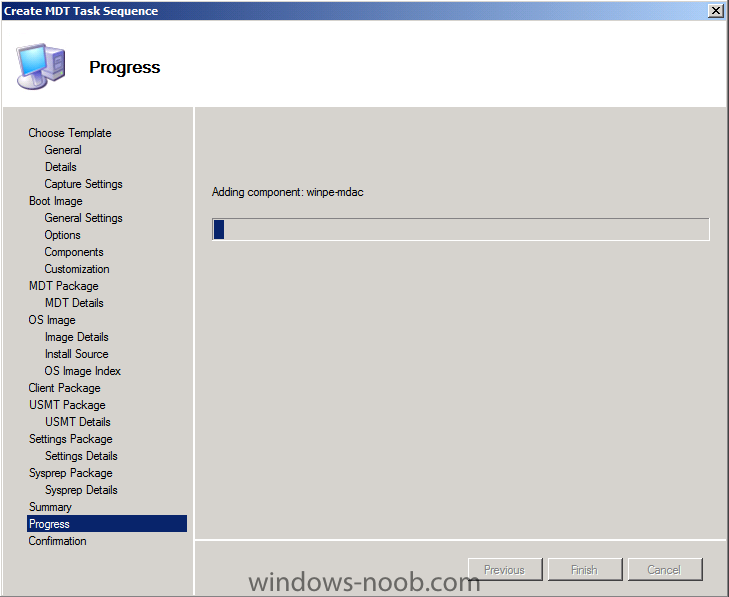
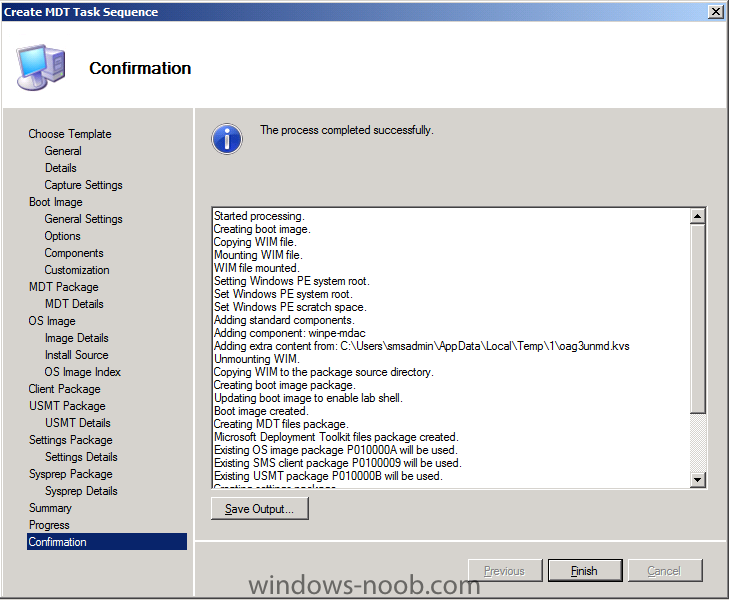
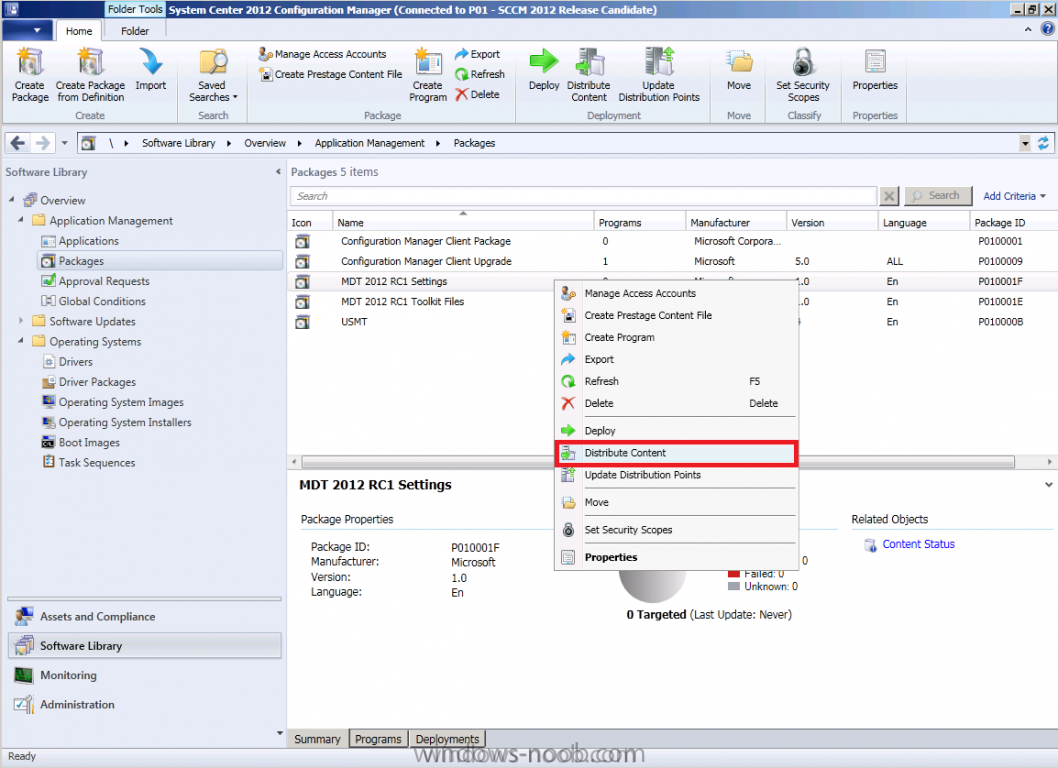
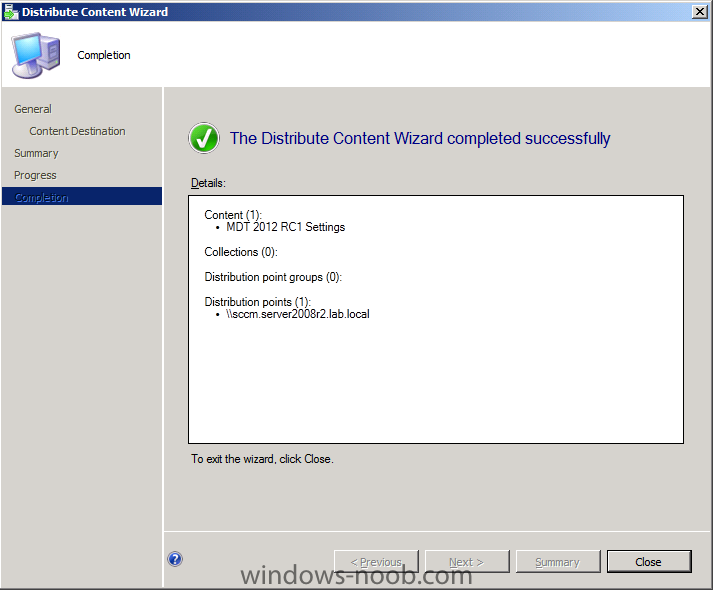
In Part 1 of this series we got our AD and SCCM servers ready, and then we installed System Center 2012 Configuration Manager as a standalone Primary site. In Part 2 we configured the SCCM server further by adding some Windows Server roles necessary for the following Configuration Manager 2012 functionality, Software Update Point (SUP) and Operating System Deployment. In Part 3 we configured the server further by Enabling Discovery methods and creating Boundary's and Boundary Groups. In Part 4 we configured Client Settings, Added roles and Distributed the Configmgr Client to our Computers within the LAB, then in Part 5 we enabled the Endpoint Protection Role and configured Endpoint Protection settings and targeted a collection called All Windows 7 Computers with these settings and policies. In Part 6 we configured our SUP further to Deploy software updates to our All Windows 7 Computers and Build Windows 7 X64 collections. In Part 7 we used the Build and Capture process to create our Base Windows 7 X64 wim image. In Part 8 we created a USMT 4 package to migrate the users data using hardlinking and then we imported the captured image into ConfigMgr and created a Deploy Windows 7 X64 task sequence. We created a Deploy Windows 7 X64 Collection and set some User Device Affinity collection variables. In Part 9 we created an Application, and created a deployment type for that application to only install if the Primary User was True for that device (User Device Affinity), we then copied our Task Sequence (duplicated it), deployed the new Task Sequence, added a computer to the new collection and then PXE booted the computer to the Deployment Menu. In Part 10 we monitored the Deployment process in a lot of detail to how UDA sent state messages and we verified that our application installed on the users Primary Device, in addition we modified our collection variables, and added a prestart command to our boot image to prompt for the SMSTSUdaUsers. In Part 11 we setup the Reporting Services Point Role and verified that reporting was working. In Part 12 we demonstrated a new feature in ConfigMgr which allows us to Patch operating system WIM images using Offline Servicing. This means that you can apply Windows Updates by using Component-Based Servicing (CBS) to update the your previously captured WIM images. In Part 13 we looked at how Role Based Administration is used within ConfigMgr and we created a new custom role to allow a user (or users within a Security Group) to view Software Update Reports. This is useful because you will probably want one team to take care of configuring and deploying software updates, and to grant another (Management etc) the capability of reviewing Compliance Reports. In Part 14 we performed a side-by-side migration from Configuration Manager 2007. In Part 15, we deployed Windows 8 Consumer Preview to see if it was possible, and indeed it was (it's not supported by Microsoft however). Now we will integrate the recently released MDT 2012 RC1 with Configuration Manager to avail of new features (features and enhancements which can help to make large-scale desktop and server deployments smoother than ever) that it provides through MDT Integration. Having MDT integrated with ConfigMgr will give you lots of benefits and abilities so I would definitely recommend you integrate it. Note that in order to download this build of MDT you have to be registered with the MDT program on Connect. Step 1. Download MDT 2013 and Install it. Note: Perform the following on the ConfigMgr 2012 server as SMSadmin MDT 2013 is available from the following location. As we are using Server 2008 R2 (64bit OS) we will download and install the 64 bit version of the software (MicrosoftDeploymentToolkit2013_x64.msi). If your ConfigMgr console is open, close it and then install the MSI by right clicking on the downloaded MSI file and choose Install. when the open file security window appears choose Run the Welcome to MDT wizard appears, click next accept the EULA if you want to continue and click next and next you get to choose where you want to isntall MDT, we will install it on D:\Program Files\Microsoft Deployment Toolkit\ so set your path accordingly click next, and then click Install answer yes to the UAC prompt and finally it's installed by clicking Finish. Step 2. Integrating MDT with Configuration Manager Note: Perform the following on the ConfigMgr 2012 server as SMSadmin Now that you have installed MDT you want to integrate it (Configure ConfigMgr Integration) with ConfigMgr. We do this to gain access to tools and features that MDT provides from within the ConfigMgr console. In the start menu, locate the newly installed Microsoft Deployment Toolkit application and expand it, locate the Configure ConfigMgr Integration shortcut and right click, choose Run as Administrator. click yes when prompted by UAC review the pre-populated options and click next and review the Confirmation, make sure there are no issues reported otherwise your MDT Integration has failed Step 3. Create a MDT Task Sequence in ConfigMgr Note: Perform the following on the ConfigMgr 2012 server as SMSadmin We need the following MDT components to be created: MDT Boot image MDT Toolkit Files MDT Settings To create these MDT components so that we can use them later on, we run a wizard by creating a MDT Task Sequence. The wizard will guide you through creating these packages. The MDT boot image (for example) gives you extra abilities over the standard ConfigMgr boot image such as the ability to display a HTA. Start up the ConfigMgr console and browse to Software Library, Operating Systems, right click on Task Sequences and choose Create MDT Task Sequence. Choose a Template, there are several provided in the drop down menu, we will choose Client Task sequence fill in the Task Sequence name and comments for Details, fill in your Domain Join credentials We are not going to catpure an image with this Task Sequence, as we are only using this Task Sequence to create the needed MDT Files and Settings packages... for boot image, specify a previously created (empty folder) UNC path, eg: \\sccm\sources\os\boot\mdt\i386 fill in some MDT boot image details and for options specify the X86 architecture and set your scratch space (environment for MDT to use in WinPE) to 128MB (to allow drivers etc...) next select your optional WinPE components (language, MDAC/ADO support and PPoE) and fill in your prestart, extrafiles and wallpaper options (all optional), make sure to leave F8 command prompt selected Next we get to create our MDT Toolkit Files package, so select the Create a new Microsoft Deployment Toolkit Files package option, point it to a previously created path such as \\sccm\sources\os\mdt2013\files fill in details about the MDT Toolkit Files package..be descriptive as it's common to have different versions of MDT Files in your lab (in the future) for OS Image, specify an exiting image, select the Windows 7 X64 image we captured in part 7 and then select our previously created Configuration Manager Client Package and our previously created USMT 4 package for the Settings Package, we choose to create a new Microsoft Deployment Toolkit Settings Package, point it to \\sccm\sources\os\mdt2013\settings fill in the Settings Package details choose No Sysprep package and click next through the summary to Confirmation, answer Yes to any UAC prompt that may appear, at this point you can go take a long coffee break as this takes quite some time to mount the WIM image (boot) and create the packages and do it's magic.. and finally it's done ! Step 4. Distribute your new MDT packages and boot image to your distribution points Note: Perform the following on the ConfigMgr 2012 server as SMSadmin At this point, i'm sure we are all aware how to distribute content in ConfigMgr, and now we have some new packages (MDT Files, MDT Settings) and a new MDT boot image to distribute to our dp's. I'll show you how to distribute one of these, you can do the rest. Select the MDT Settings package in Software Library, Packages, right click it and choose Distribute Content select your distribution point(s) and continue through the wizard.. Note: Please don't forget to repeat the above process for the MDT Files, and the MDT boot image. In the next part of this series we'll look at what we can do with MDT within ConfigMgr.


-
How can I make troubleshooting failed deployments easier
anyweb replied to anyweb's question in boot images
if you are using a 64bit boot image (and you should only use that when build and capturing a 64bit os, you can DEPLOY both 32bit and 64bit os's with an x86 or 32 bit boot image) then you need the correct architecture programs, egg: if 64bit boot image, use Trace64.exe -
Microsoft Unveils Its Next-Generation OS, Windows 8
anyweb replied to anyweb's topic in Windows News
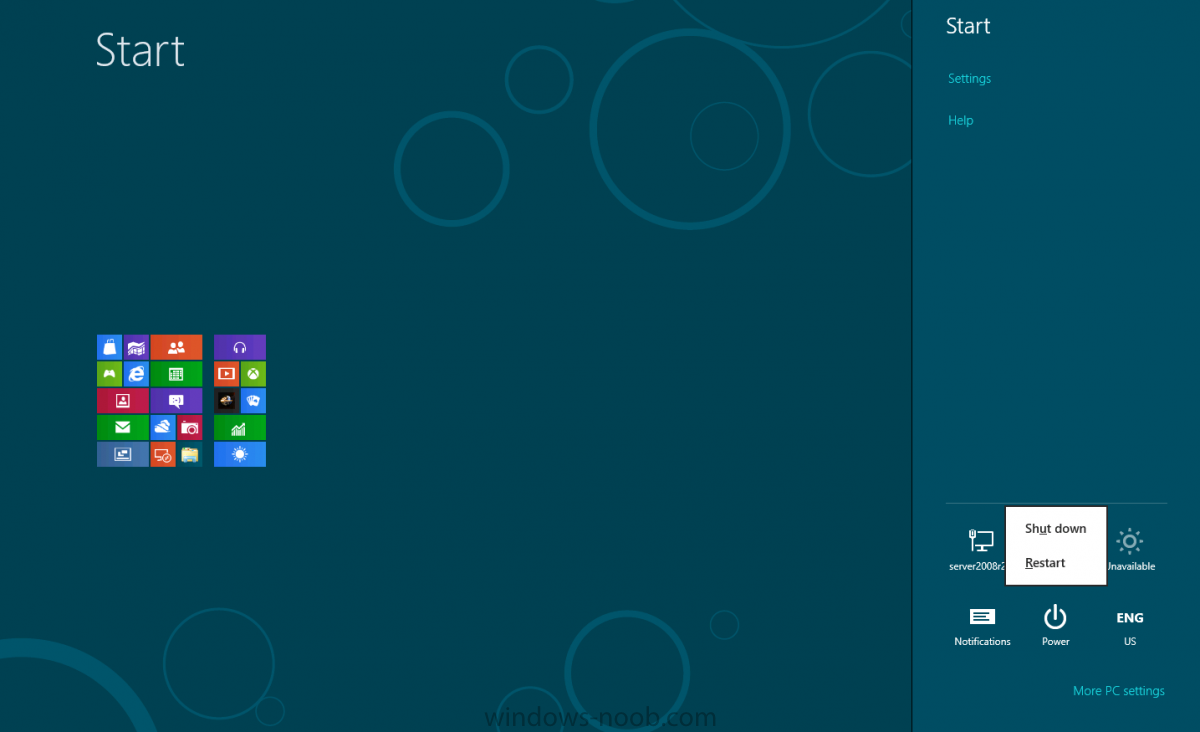
theres even more options for power on the right side of metro (bring your mouse pointer to the bottom right of the screen), click on settings and theres power options, and shutdown is available
-
Microsoft Unveils Its Next-Generation OS, Windows 8
anyweb replied to anyweb's topic in Windows News
you can right-click on the Metro thumbnail and you get an extended menu including power options and the control panel have you looked at any of the options there ?
-
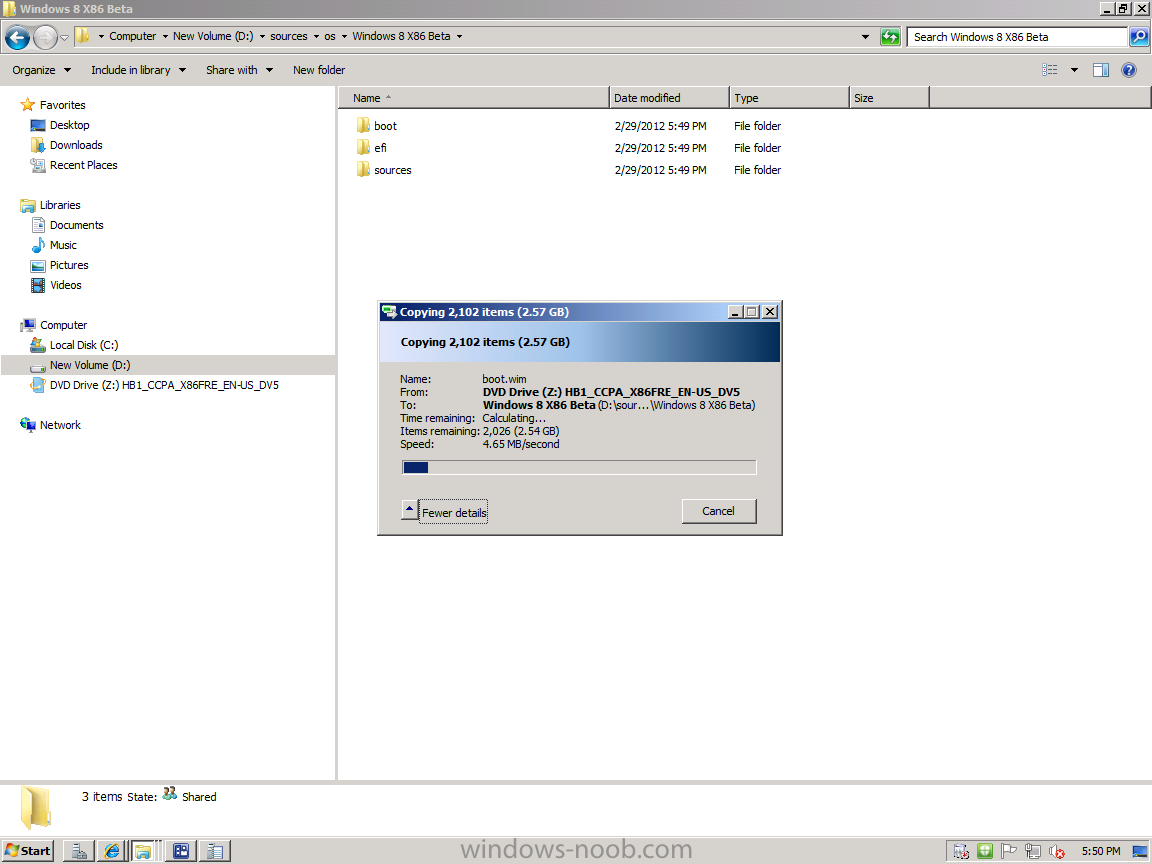
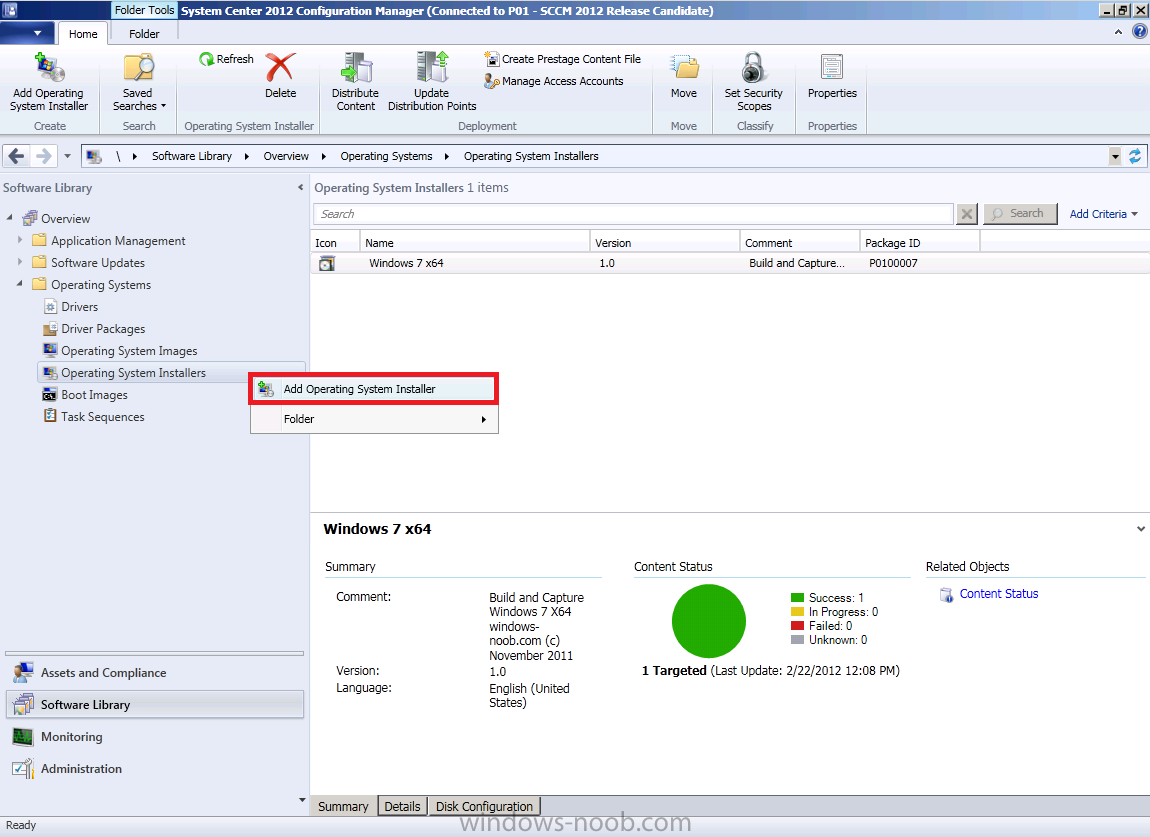
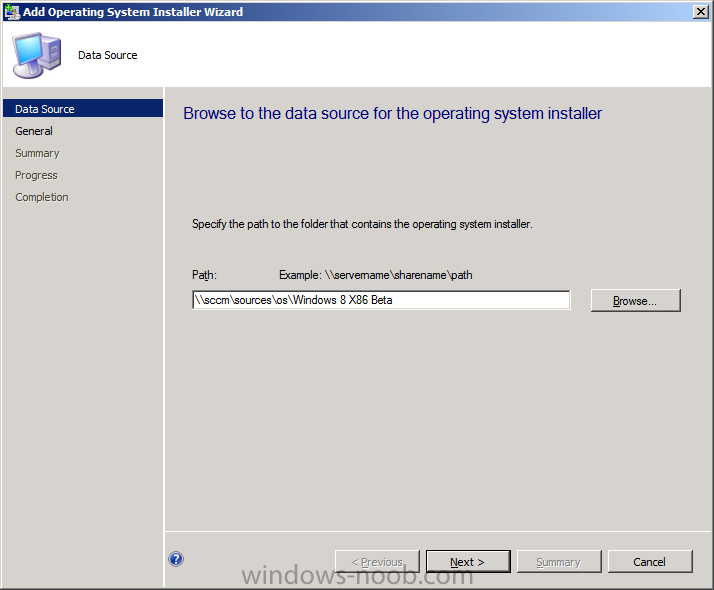
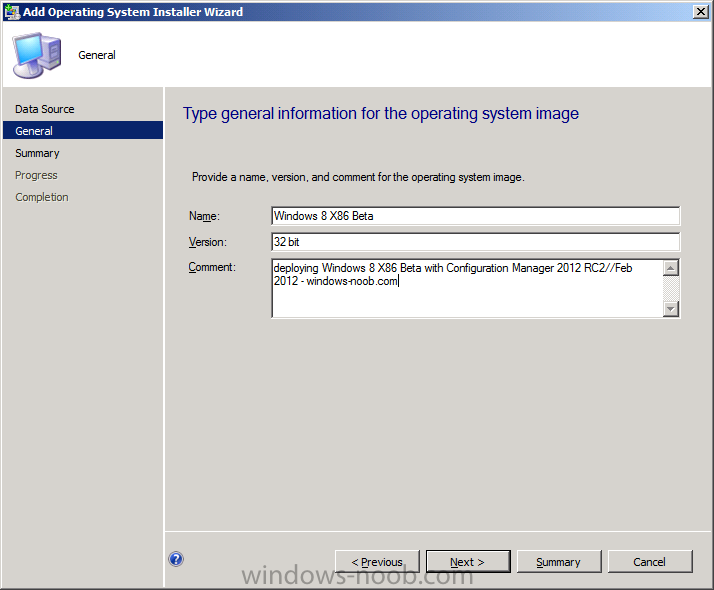
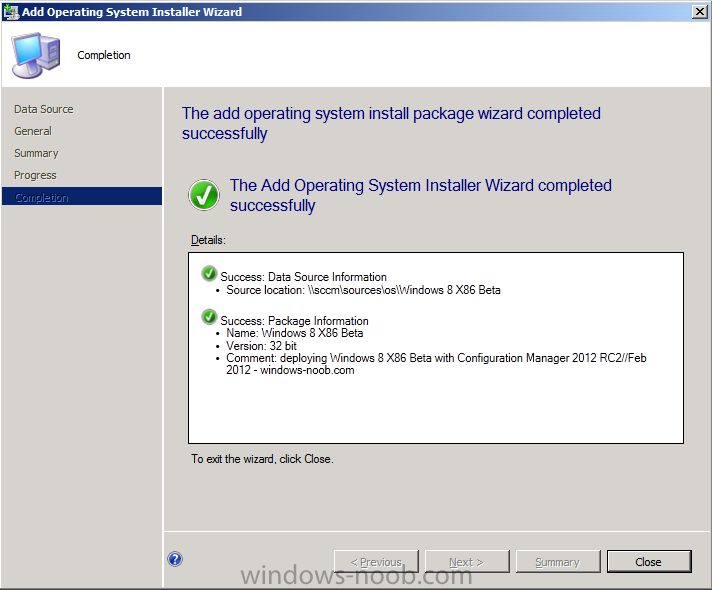
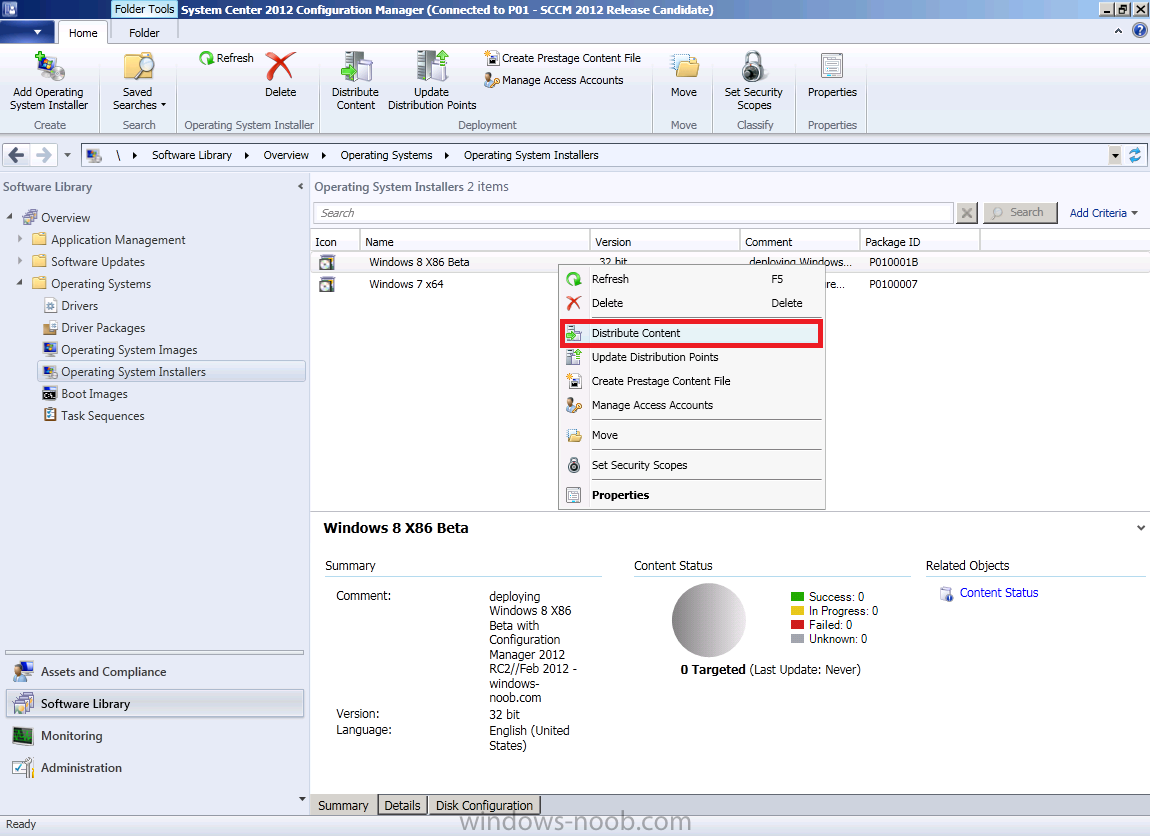
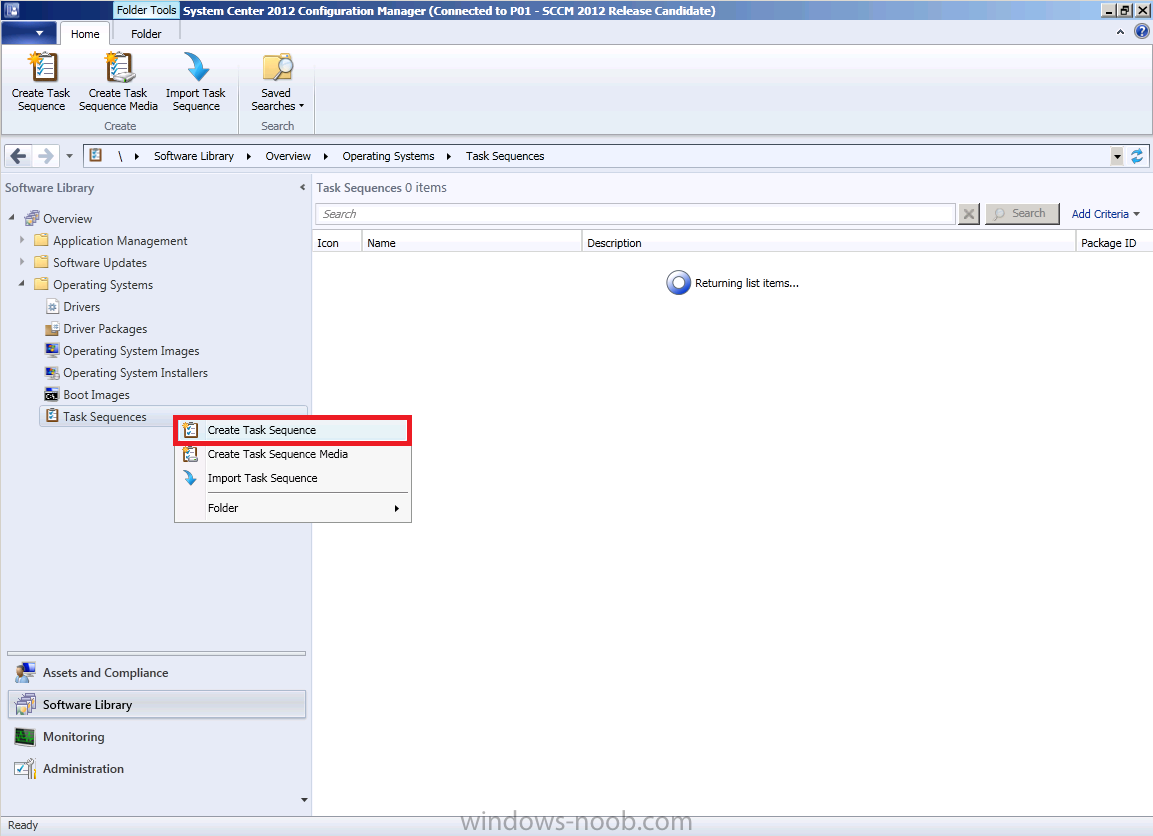
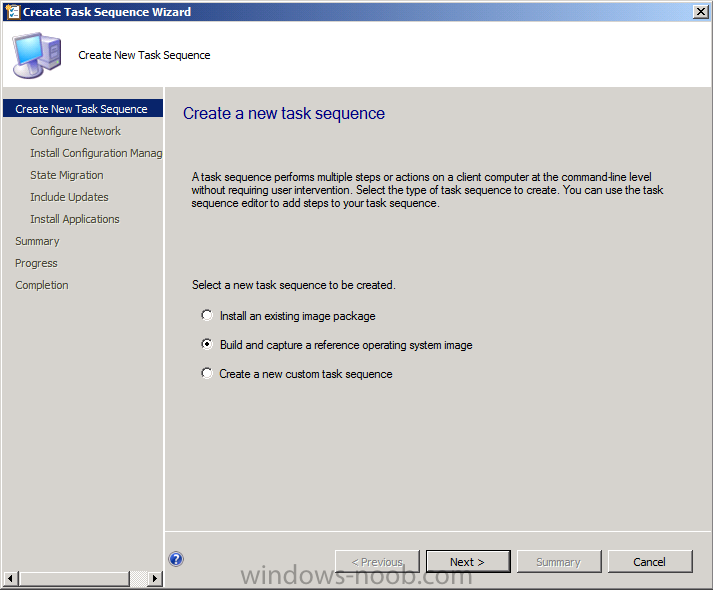
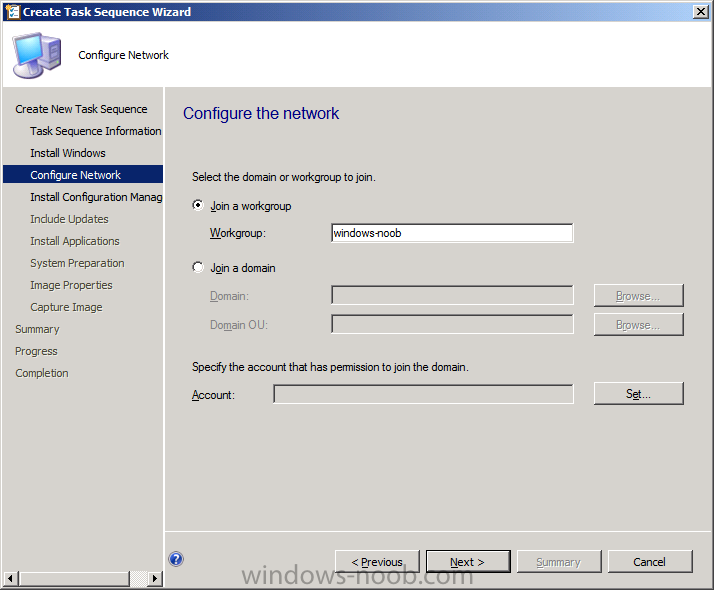
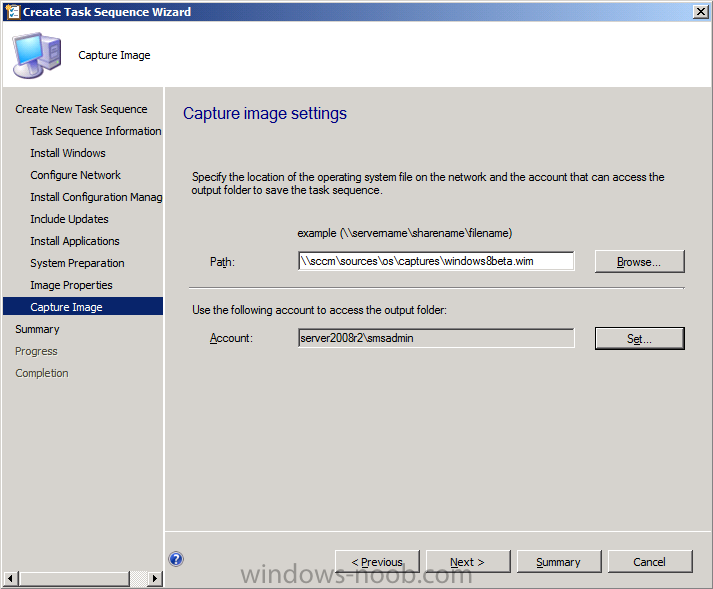
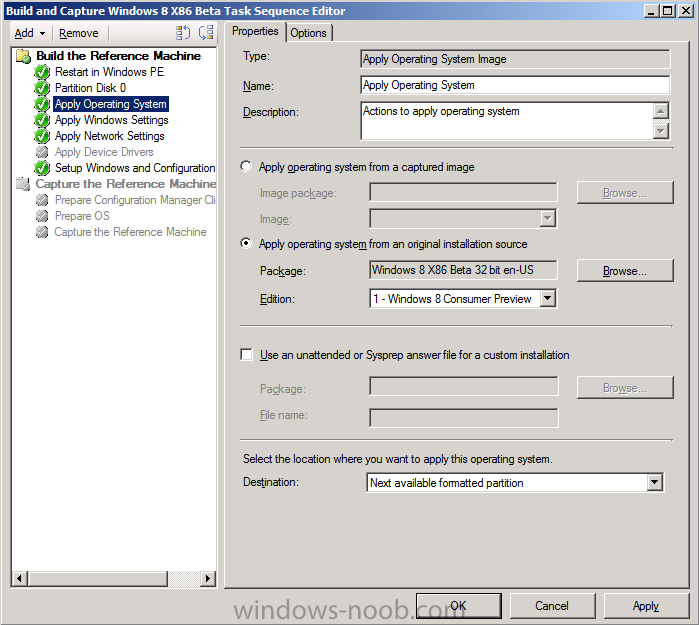
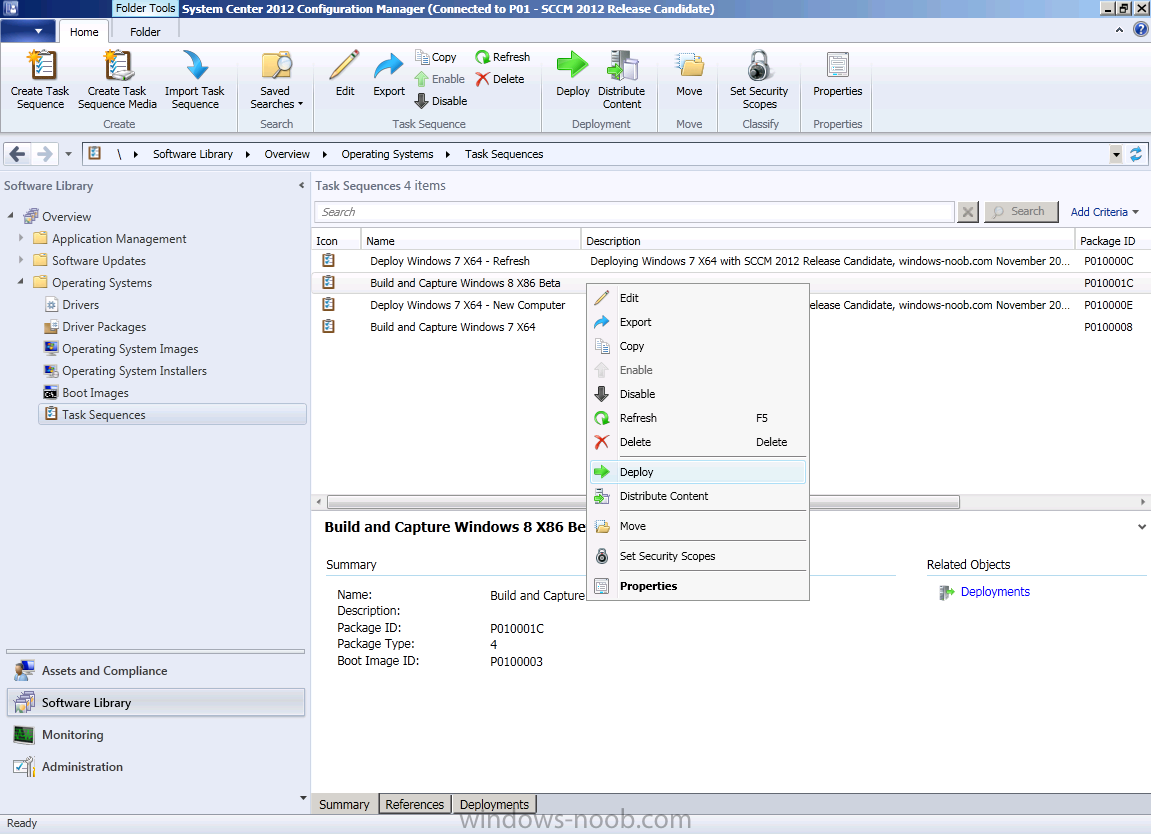
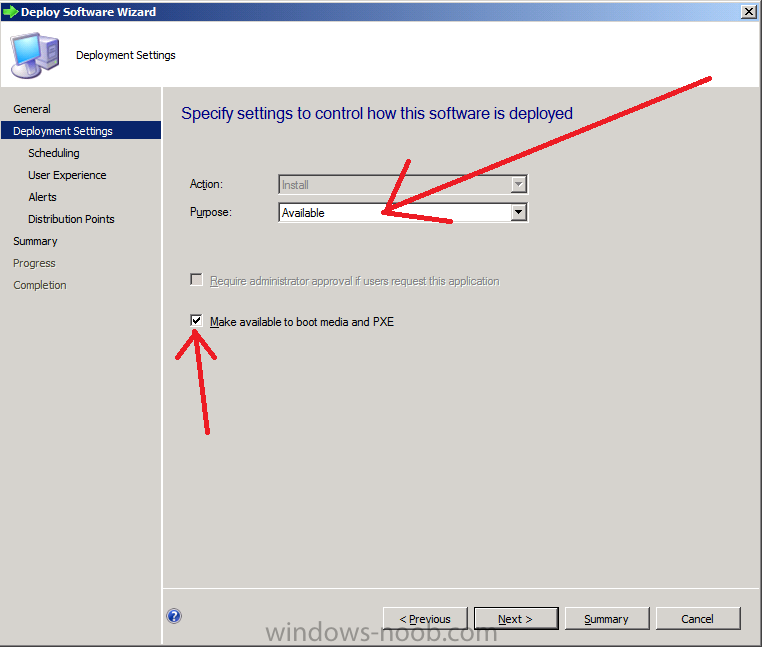
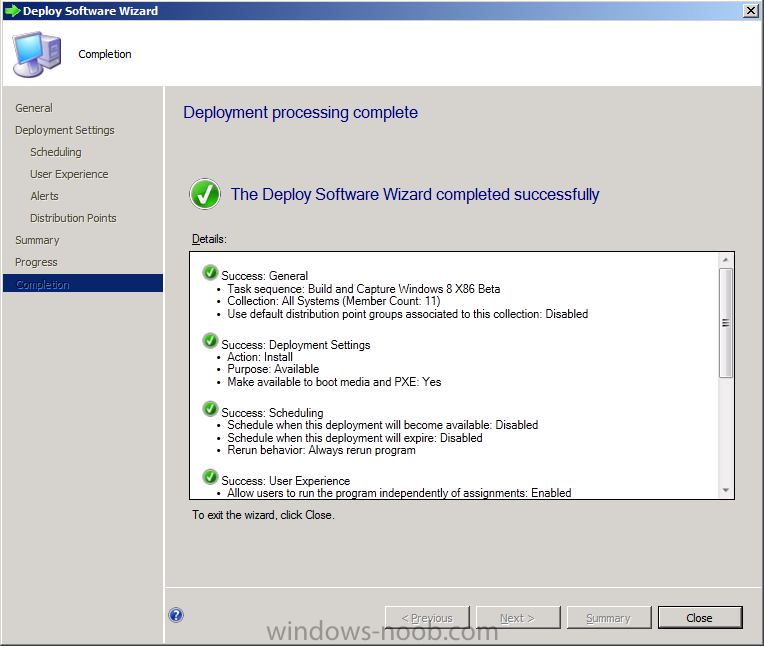
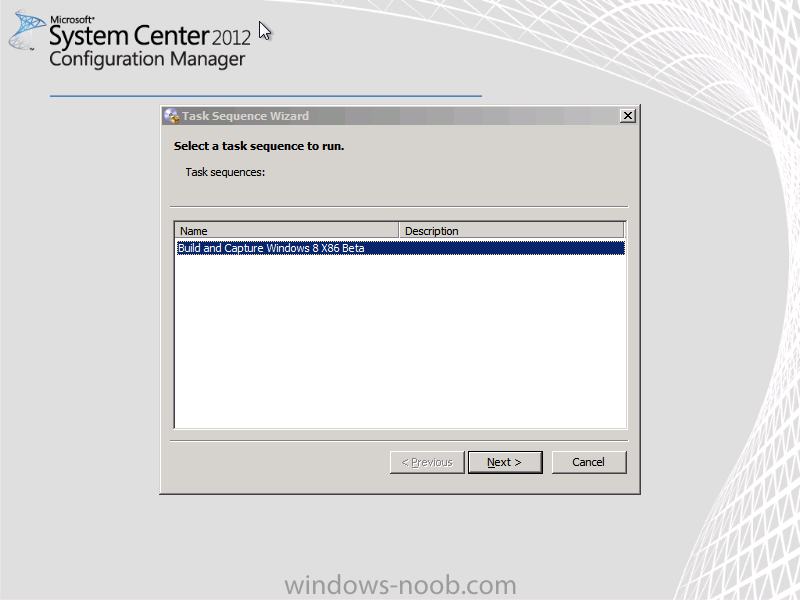
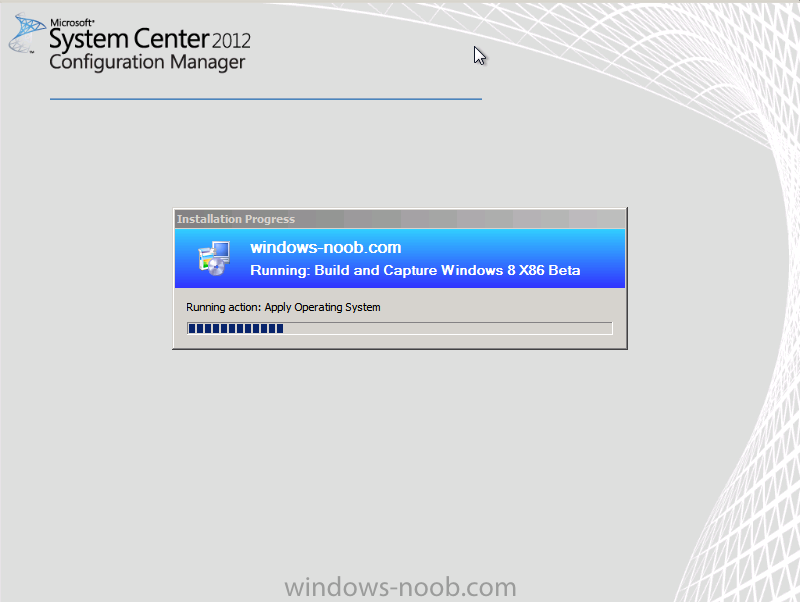
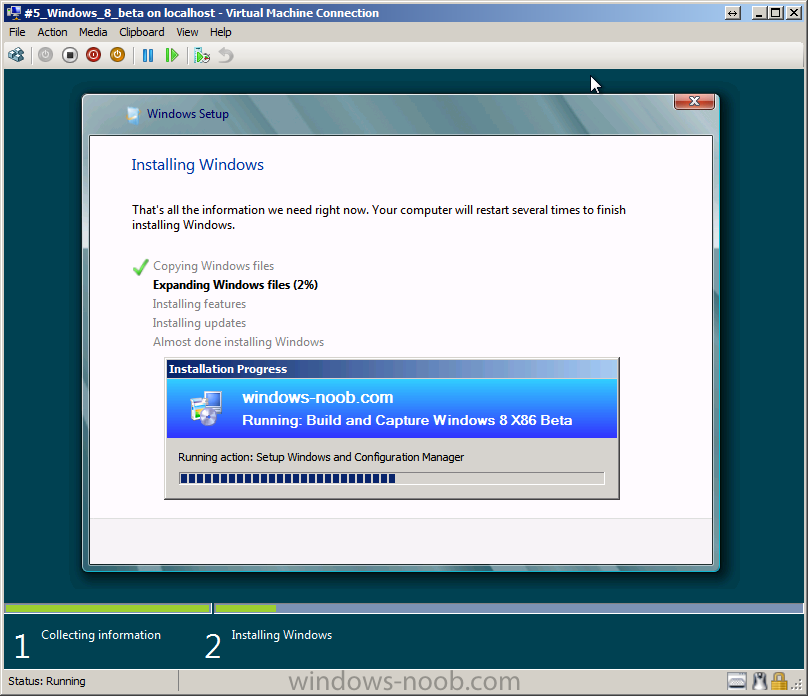
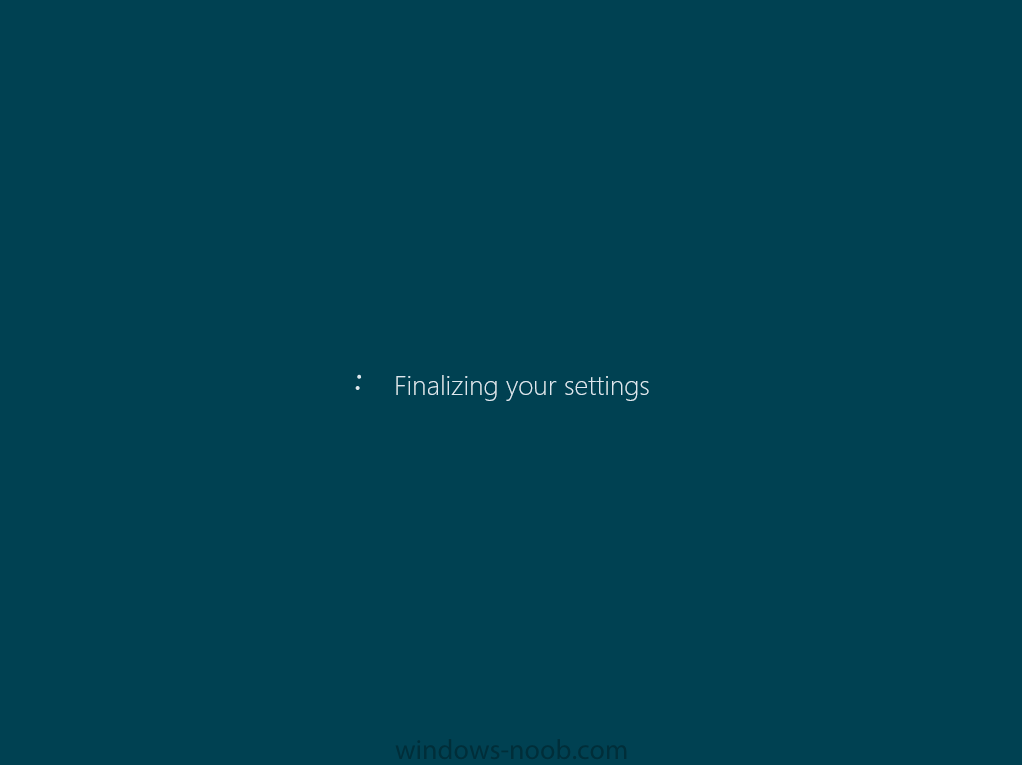
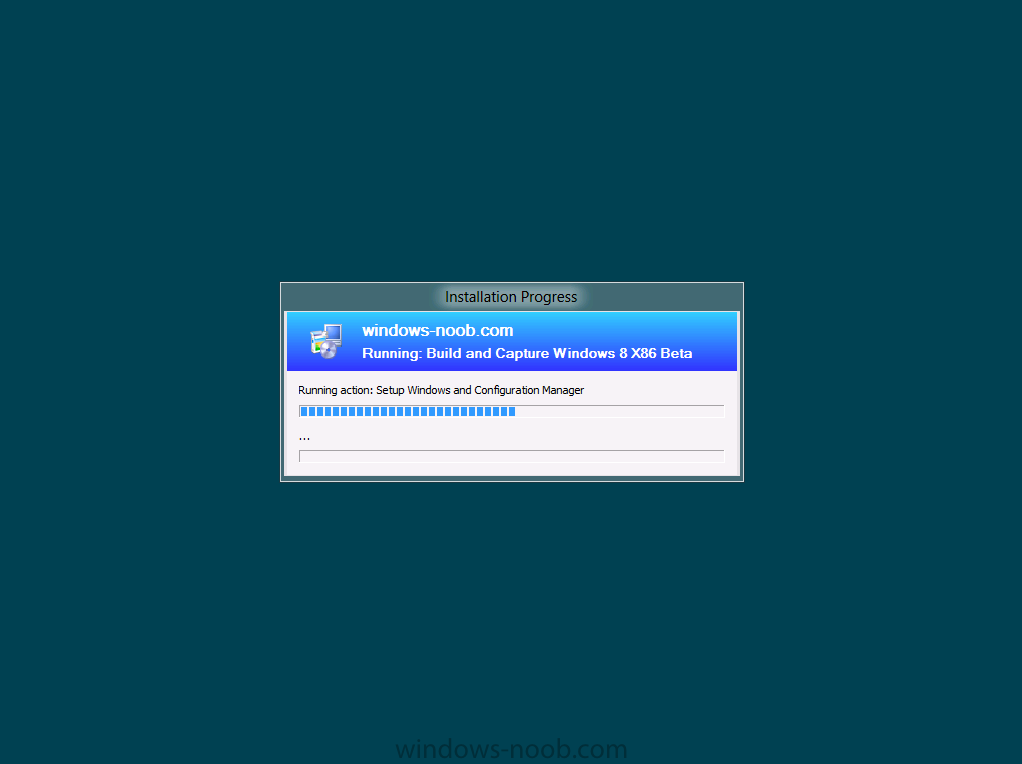
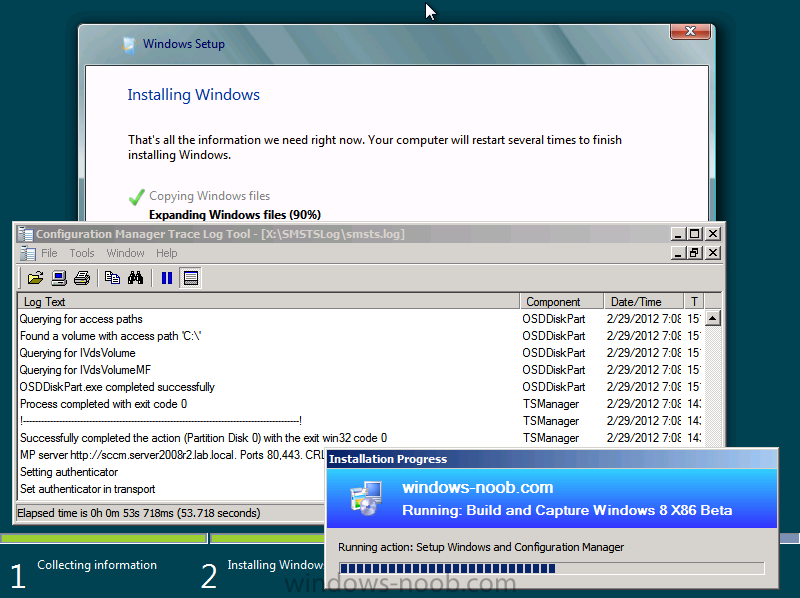
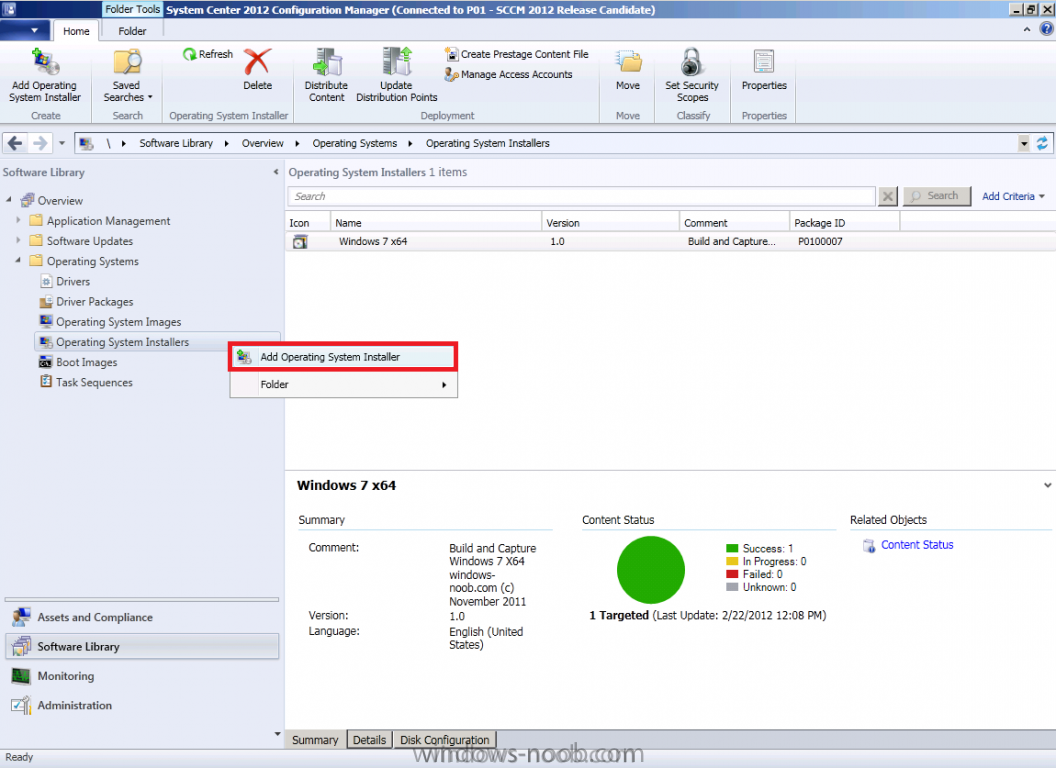
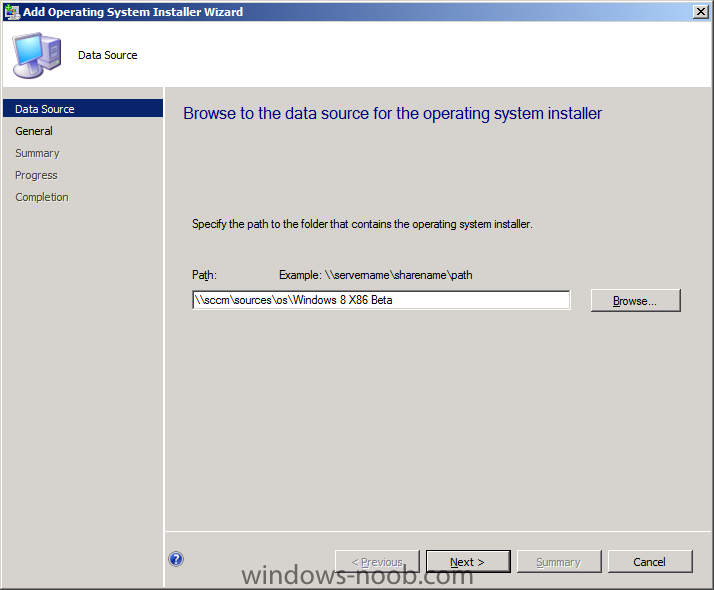
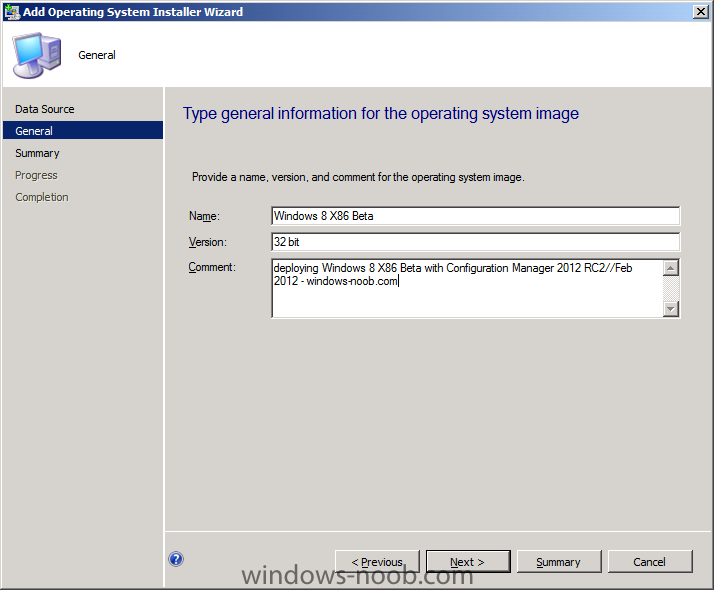
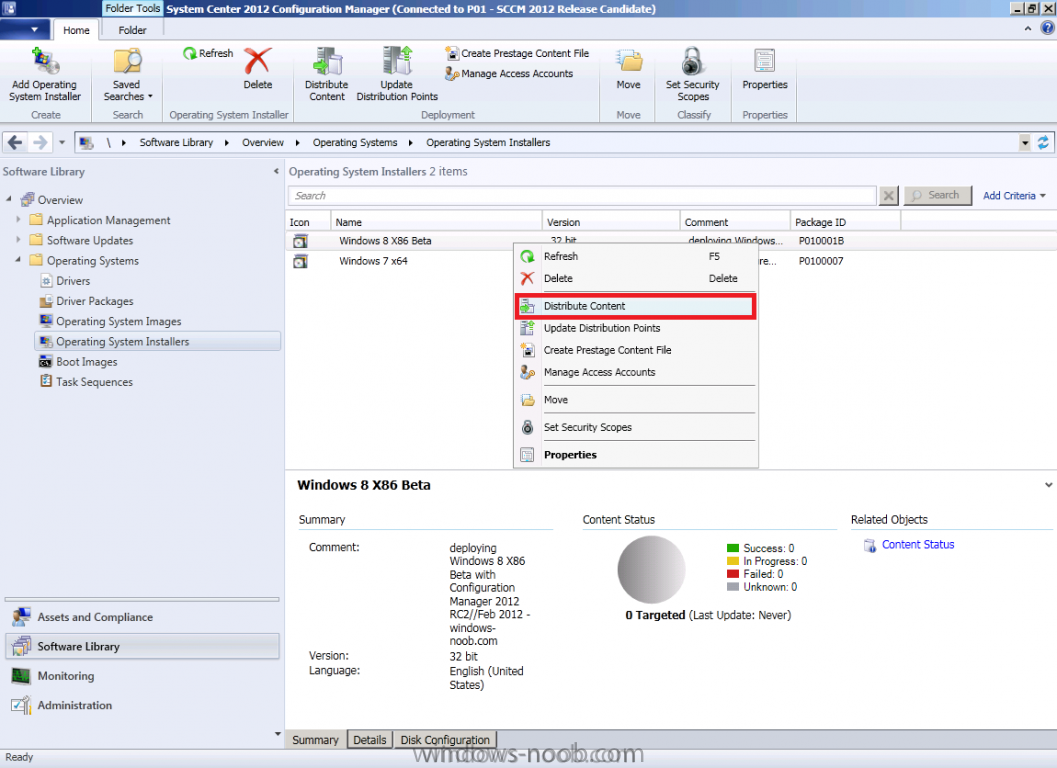
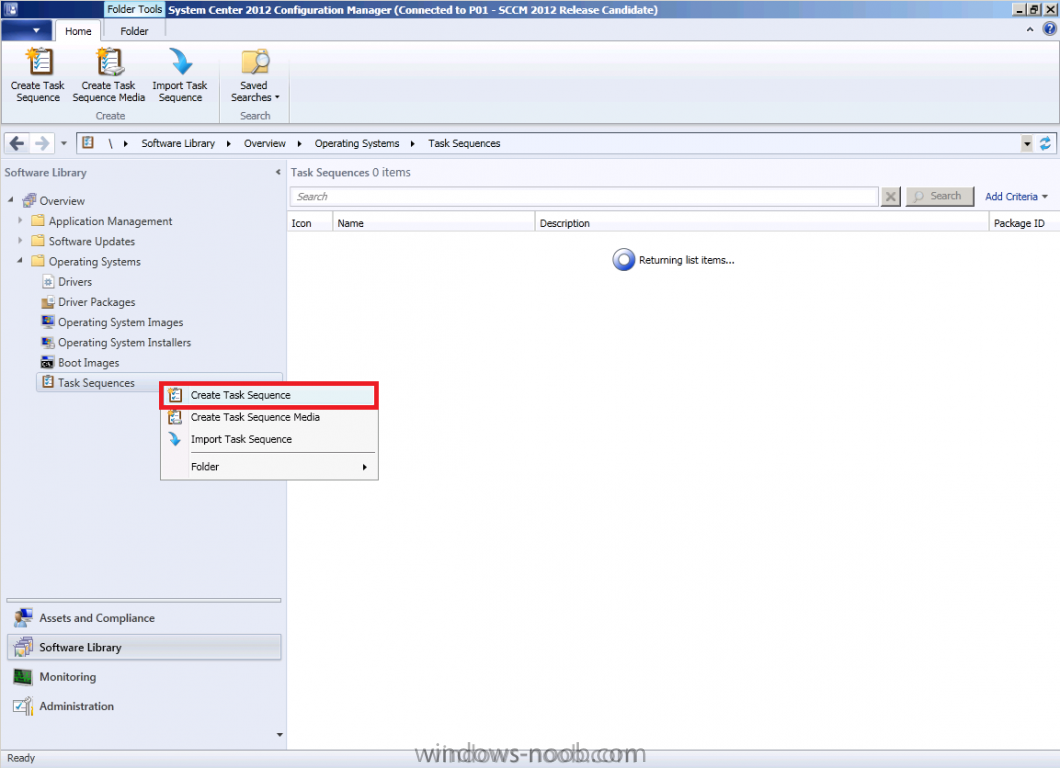
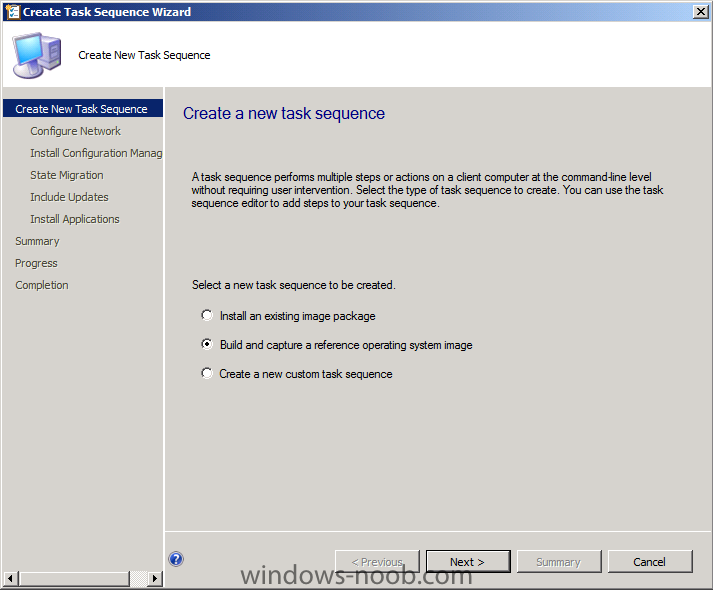
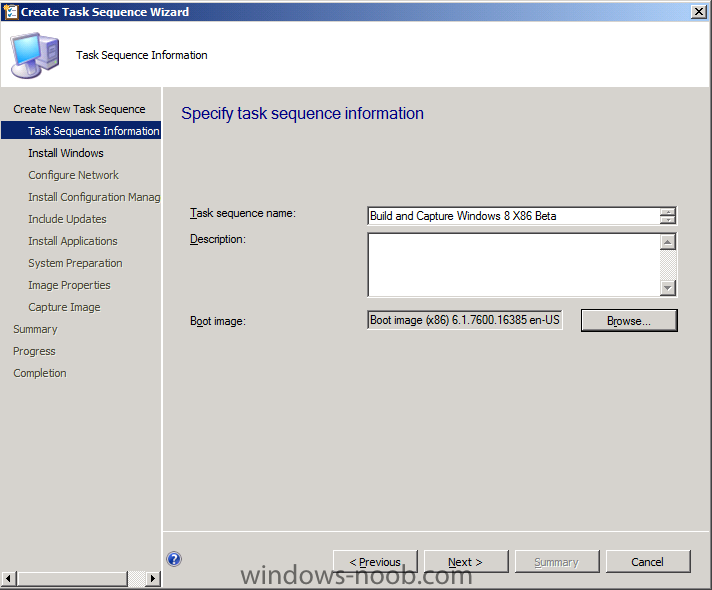
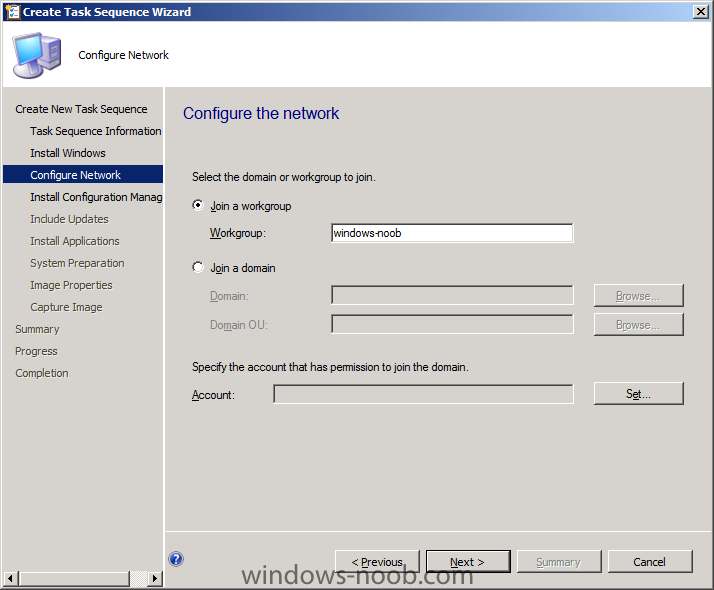
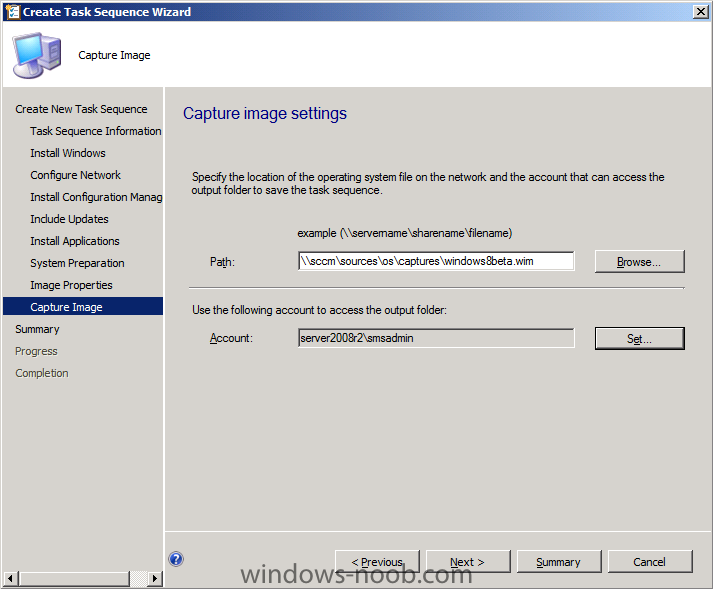
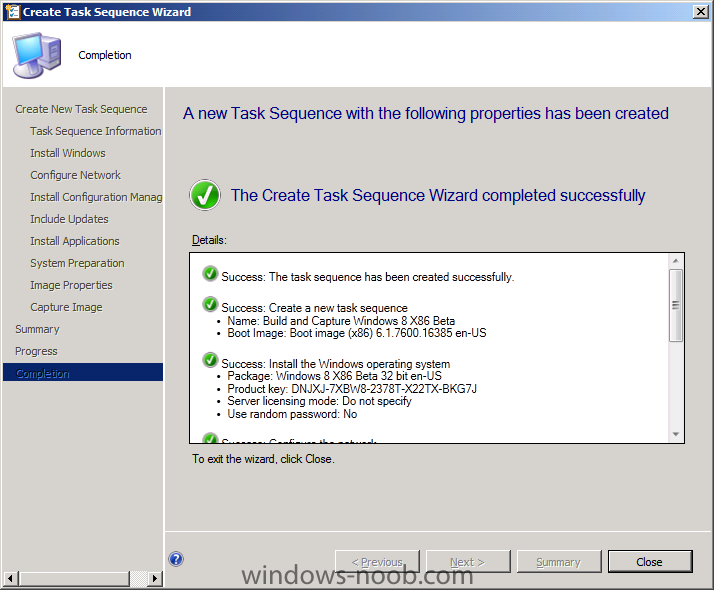
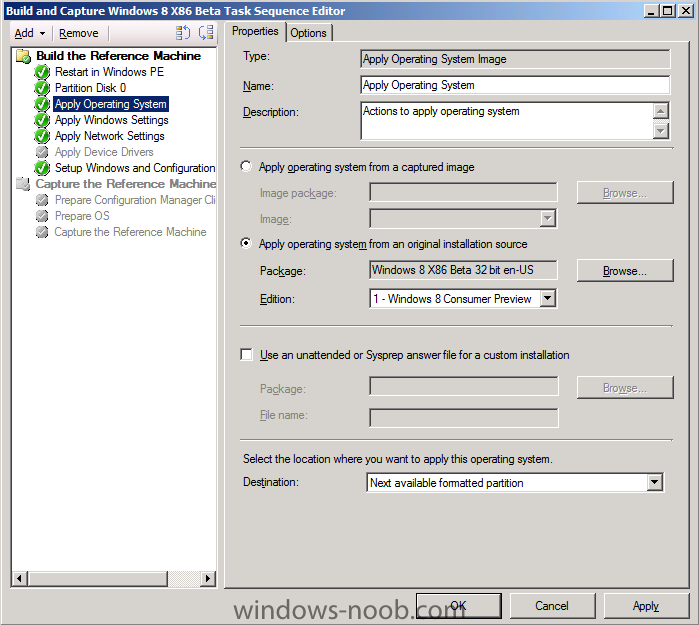
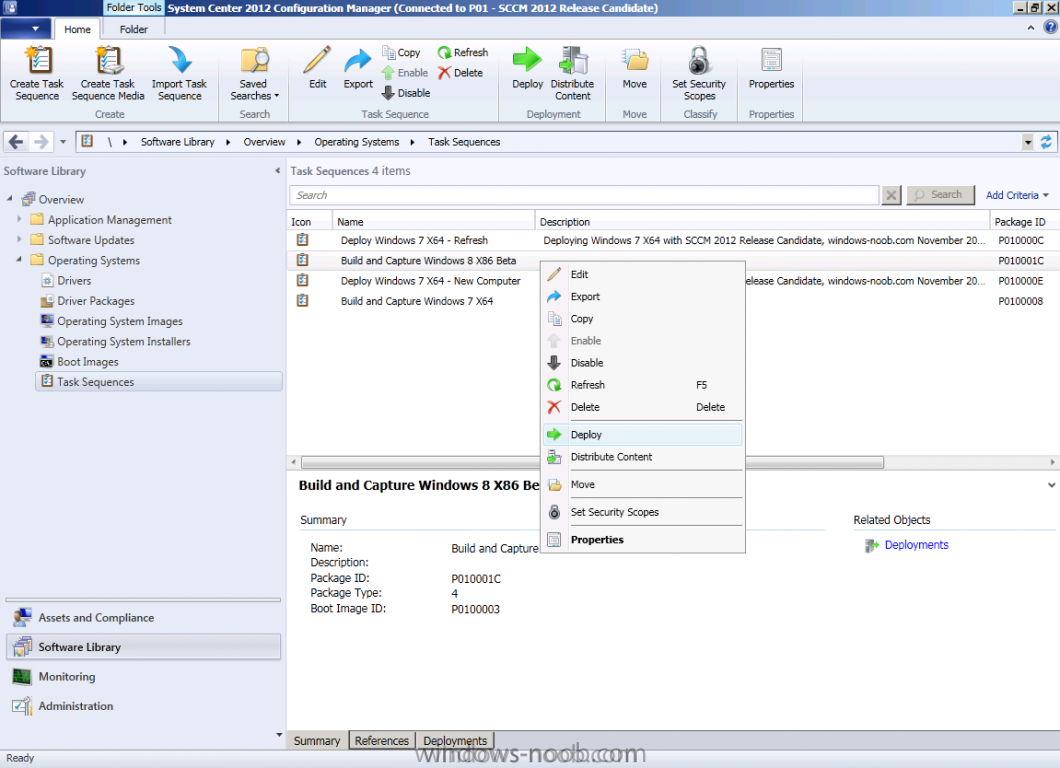
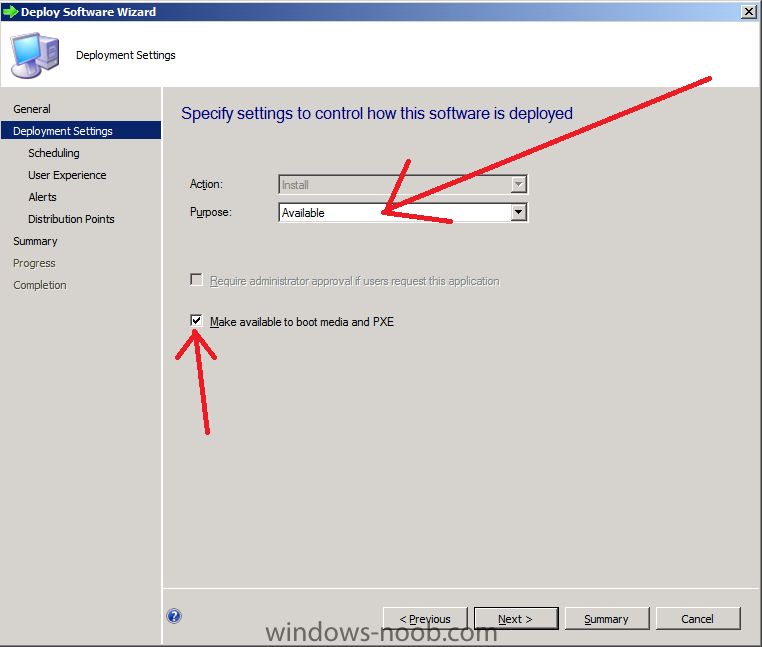
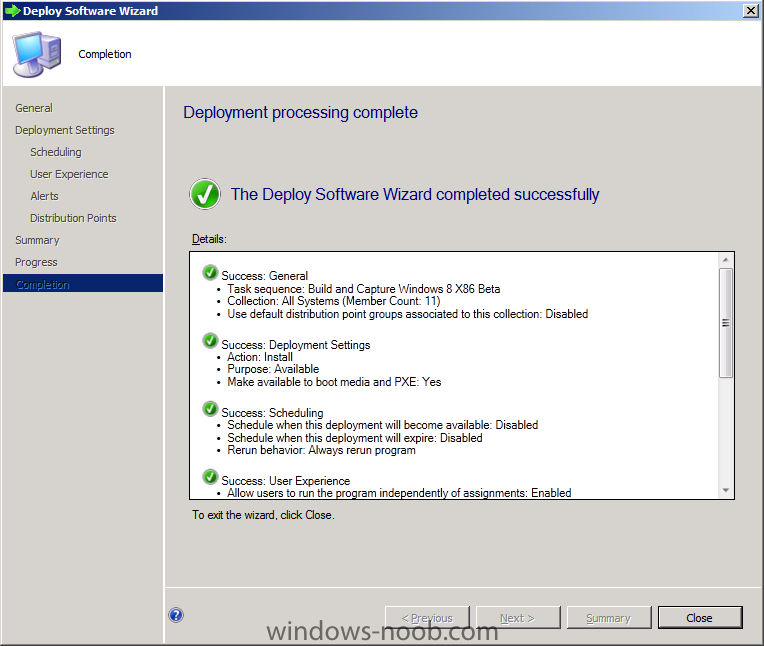
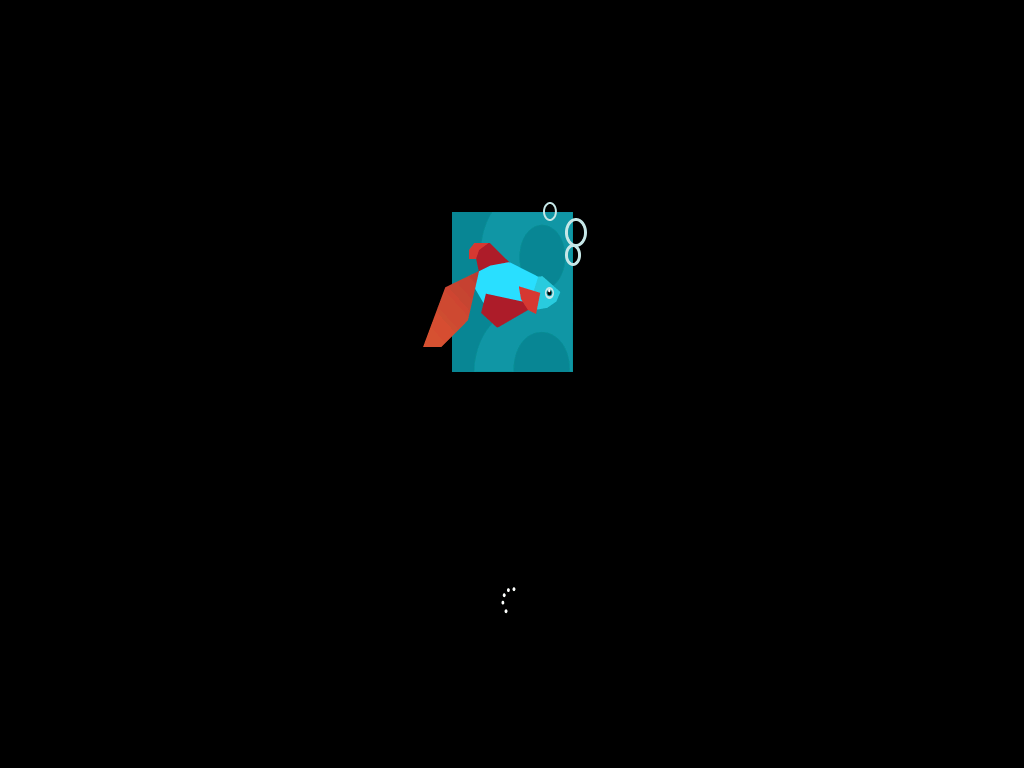
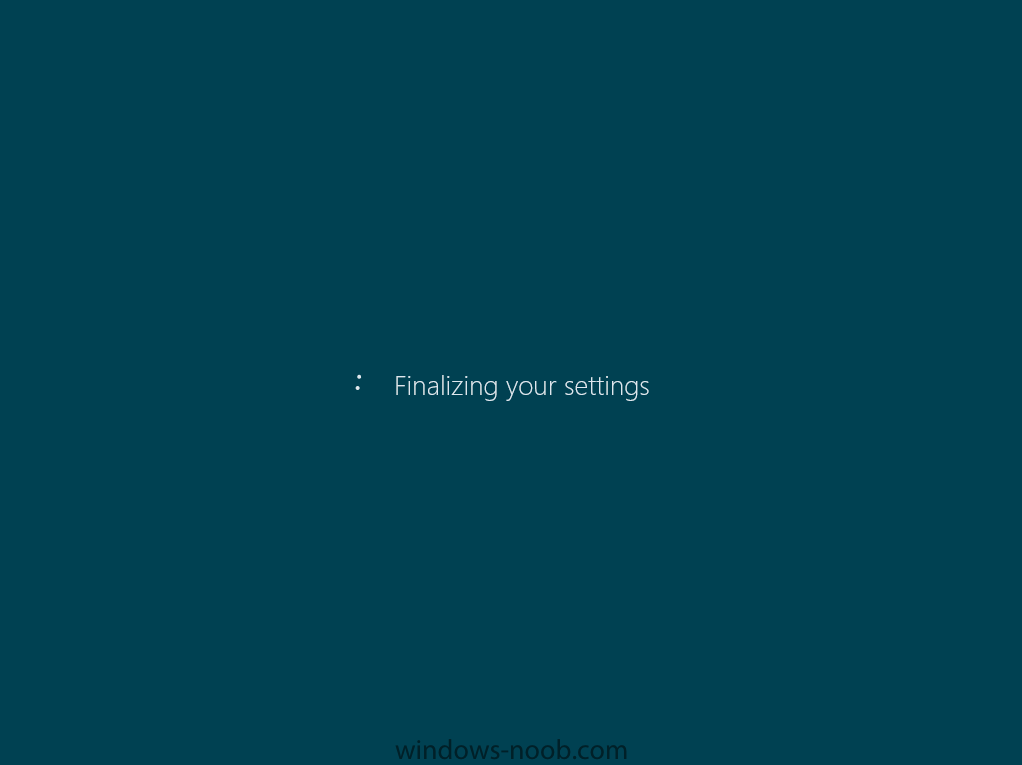
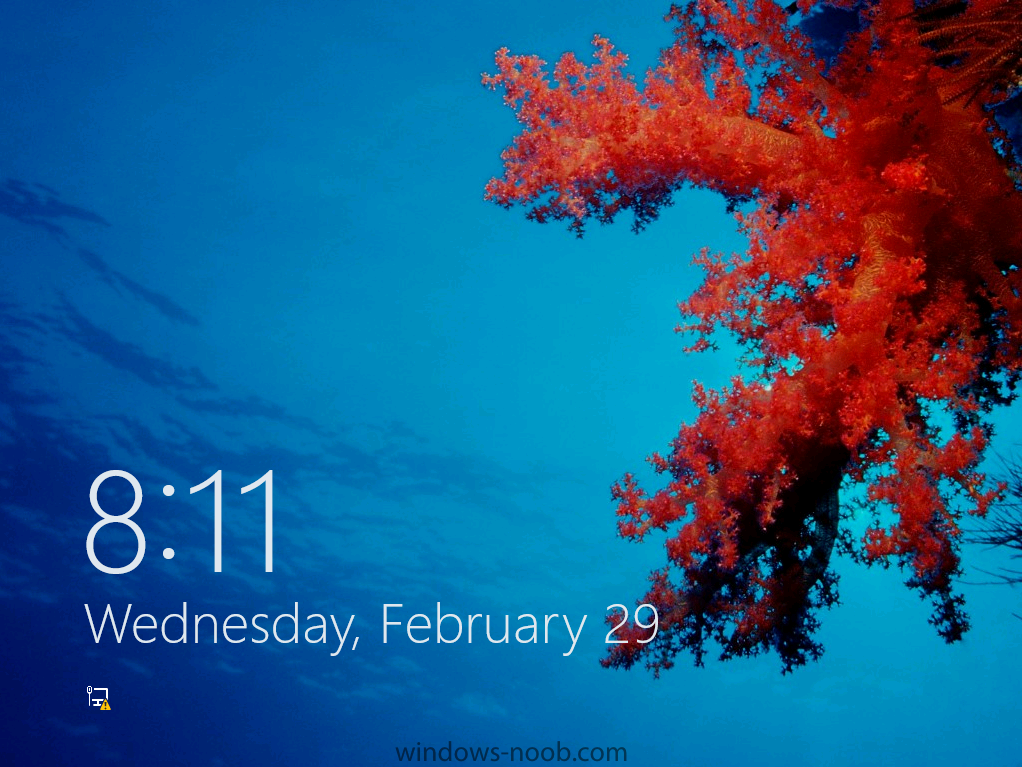
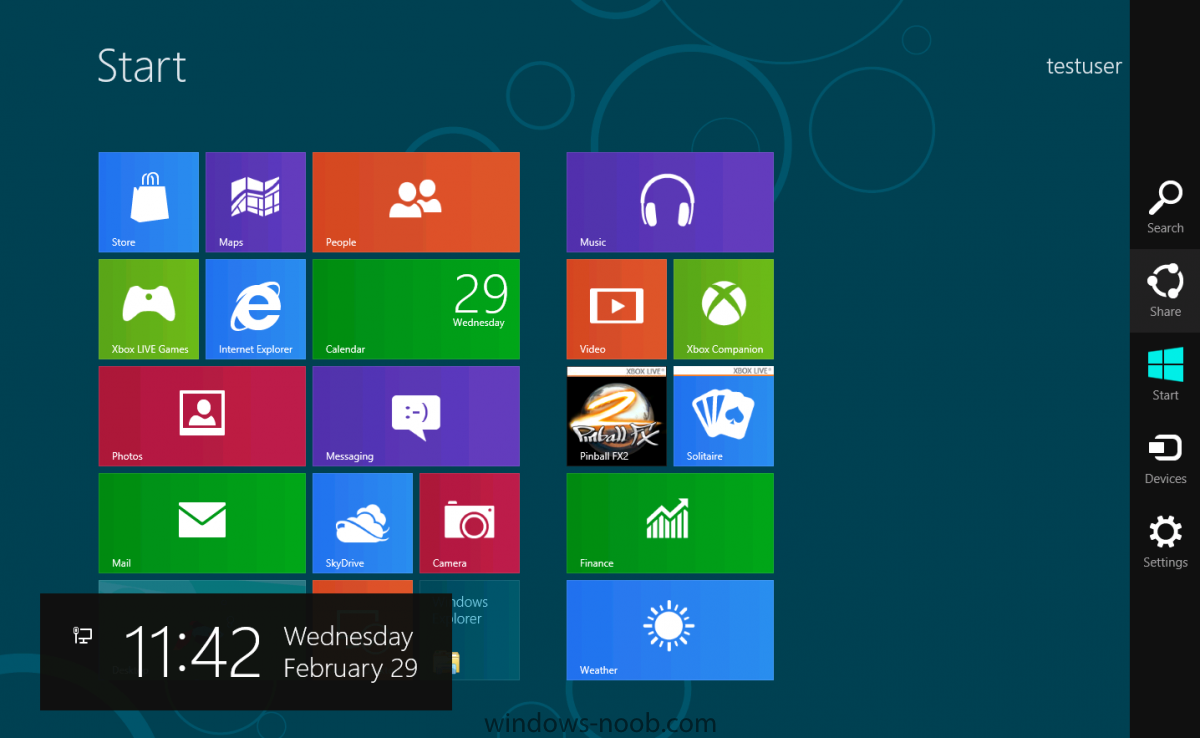
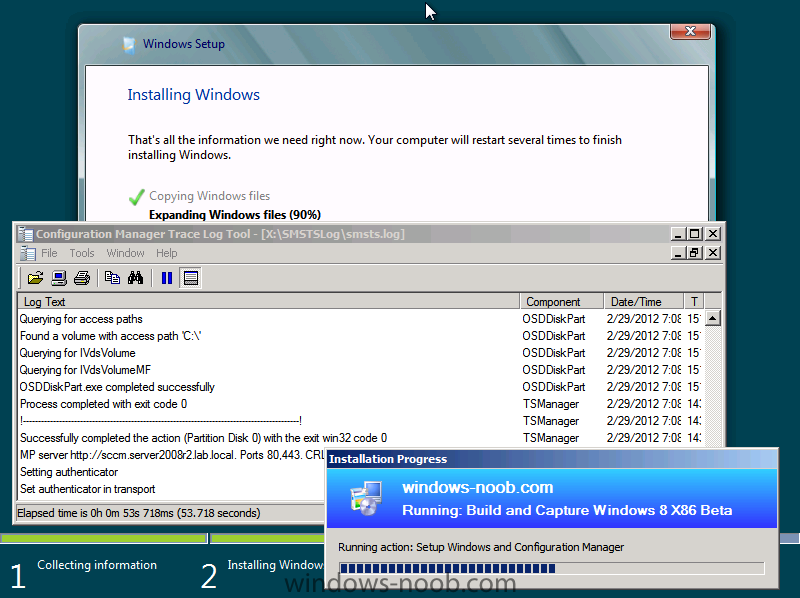
In Part 1 of this series we got our AD and SCCM servers ready, and then we installed System Center 2012 Configuration Manager as a standalone Primary site. In Part 2 we configured the SCCM server further by adding some Windows Server roles necessary for the following Configuration Manager 2012 functionality, Software Update Point (SUP) and Operating System Deployment. In Part 3 we configured the server further by Enabling Discovery methods and creating Boundary's and Boundary Groups. In Part 4 we configured Client Settings, Added roles and Distributed the Configmgr Client to our Computers within the LAB, then in Part 5 we enabled the Endpoint Protection Role and configured Endpoint Protection settings and targeted a collection called All Windows 7 Computers with these settings and policies. In Part 6 we configured our SUP further to Deploy software updates to our All Windows 7 Computers and Build Windows 7 X64 collections. In Part 7 we used the Build and Capture process to create our Base Windows 7 X64 wim image. In Part 8 we created a USMT 4 package to migrate the users data using hardlinking and then we imported the captured image into ConfigMgr and created a Deploy Windows 7 X64 task sequence. We created a Deploy Windows 7 X64 Collection and set some User Device Affinity collection variables. In Part 9 we created an Application, and created a deployment type for that application to only install if the Primary User was True for that device (User Device Affinity), we then copied our Task Sequence (duplicated it), deployed the new Task Sequence, added a computer to the new collection and then PXE booted the computer to the Deployment Menu. In Part 10 we monitored the Deployment process in a lot of detail to how UDA sent state messages and we verified that our application installed on the users Primary Device, in addition we modified our collection variables, and added a prestart command to our boot image to prompt for the SMSTSUdaUsers. In Part 11 we setup the Reporting Services Point Role and verified that reporting was working. In Part 12 we demonstrated a new feature in ConfigMgr which allows us to Patch operating system WIM images using Offline Servicing. This means that you can apply Windows Updates by using Component-Based Servicing (CBS) to update the your previously captured WIM images. In Part 13 we looked at how Role Based Administration is used within ConfigMgr and we created a new custom role to allow a user (or users within a Security Group) to view Software Update Reports. This is useful because you will probably want one team to take care of configuring and deploying software updates, and to grant another (Management etc) the capability of reviewing Compliance Reports. In Part 14 we performed a side-by-side migration from Configuration Manager 2007. Now we will test deploying Windows 8 Consumer Preview. Note: This is a Windows 8 Consumer Preview OS being installed using a release candidate product so your results may vary and of course it's not supported by Microsoft. I'm only doing this because I want to see if it's possible to deploy Windows 8 with the current release of Configuration Manager 2012 and of course it's fun :-) Windows 8 Consumer Preview System Requirements Windows 8 Consumer Preview works great on the same hardware that powers Windows 7: Processor: 1 gigahertz (GHz) or faster RAM: 1 gigabyte (GB) (32-bit) or 2 GB (64-bit) Hard disk space: 16 GB (32-bit) or 20 GB (64-bit) Graphics card: Microsoft DirectX 9 graphics device or higher To use touch, you need a tablet or monitor that supports multitouch To access Windows Store and to download and run apps, you need an active Internet connection and a screen resolution of at least 1024 x 768 To snap apps, you need a screen resolution of at least 1366 x 768 Step 1. Get the ISO and Extract the contents on your Configuration Manager 2012 server Download Windows 8 Consumer Preview from here, I used the X86 ISO (Windows8-ConsumerPreview-32bit-English.iso) for my Guide. I then Mounted that ISO in my Configuration Manager 2012 RC 2 Hyperv virtual Machine and extracted the contents to \\sccm\sources\os\Windows 8 X86 Beta Step 2. Add the Operating System Installer Image and Distribute Content In the Configmgr Console, expand Software Library, Operating Systems, Operating System Installers, right click and choose Add Operating System Installer browse to the path where we extracted it in Step 1 fill in some details about the image and click next through to the summary Once added, distribute the content to your DP's by right clicking the image and choose Distribute Content. and continue through the wizard just like you've done before with Windows 7's installer image. Step 3. Create the Build and Capture Task Sequence In task sequences, right click and choose Create Task Sequence Choose the Build and Capture a reference operating system image option fill in the details and choose a X86 boot image as we are Build and Capturing the X86 Windows 8 image... Note: if you are trying with the X64 image, then use a X64 boot image. for the Install Windows step, select the following options, for Product key, use the key listed here otherwise the Setup Windows and Configmgr step will fail (error 31) later on in the process. for network select to join a workgroup select your Configmgr Client in the next step then next your way through on to the Capture image step, fill in your capture details click next through to summary Now right click the task sequence and choose Edit, Disable the Entire Capture Group (for now) and also disable the apply device drivers step. Step 4. Deploy the Build and Capture Task Sequence Right click on the task sequence and choose Deploy, point it to the All Systems Collection (this is a LAB so this is OK, don't deploy task sequences to All Systems in production please....) make sure it's set to Available and enable PXE click your way through to completion of the wizard.. Step 5. PXE boot a new virtual machine and start the process PXE boot your Virtual Machine (create a new one in hyperV), Press F12 for Network boot then you'll see the now familiar and very nice Configuration Manager 2012 splash screen select your Build and Capture Task sequence and press enter, it starts applying the OS and the Operating System installation starts..notice the color scheme is slightly different to what we are used to, and I like it ! before it reboots it might be an idea to monitor the SMSTS.log file using cmtrace and after the first reboot we get our first look at Windows 8 Consumer Preview setting up :-) and another reboot takes place..before Windows 8 finalizes settings and then Setup Windows and ConfigMgr does it's work.. and we are done ! Conclusion: ConfigMgr rocks, and Windows 8 Consumer Preview rocks !! more screenshots coming soon when bandwidth allows...currently it's worse than 56k dialup !!!


-
BARCELONA — Microsoft showed off the newest version of the company’s operating system, called Windows 8, on Wednesday. Windows 8 is the biggest redesign of the company’s software since Windows 95, said Steve Sinofsky, the president of Windows, who introduced the new operating system during the Mobile World Congress at a poolside event where waiters handed guests glasses of champagne and small tapas and snacks were served. “Windows 8 is a generational change in the Windows operating system in the design, functionality and implementation,” Mr. Sinofsky said. Microsoft has planned two versions of its Windows 8 software. One is designed around a touch interface and will be available on Microsoft tablets, and the other is for PCs and is designed to work with a mouse and keyboard. Both share the same aesthetic and navigation. Mr. Sinofsky said that company worked to make sure that people who were switching between using Windows on a smartphone, tablet and laptop would not be confronted with any break in their use of the software as they cycled between devices. “There are too many hard stops between tablets and devices and smartphones,” he said. “This makes them much more harmonious and seamless.” Julie Larson-Green, the head of design for Windows 8, demonstrated the new software on a specially designed Samsung tablet and said that the company aimed for the interactions with the software to be “fast and fluid.” The new interface, which looks similar to the software used by Microsoft’s new line of smartphones, Windows Phone, takes some cues from the app-centric home screens popularized by Apple and Google. It revolves around animated tiles, called Metro. After users sign in to their Microsoft account, the software populates the tiles on their home screen with information from accounts around the Web, including Facebook, Twitter and Skydrive, Microsoft’s cloud-based storage system. Ms. Larson-Green said that several applications would also come installed on the Windows 8 software, including Xbox Live, Internet Explorer and a custom-built video and music player that lets users purchase and stream albums and movies. For Windows users who prefer the familiar, drag-and-drop desktop-oriented layout of the operating system, there is also a desktop application that whisks away the tiles to reveal the original Windows interface. Although Microsoft demonstrated an earlier version of the Windows 8 software last fall, Mr. Sinofsky said that company had made more than 100,000 changes to the code, based on feedback from developers and designers who tested the early version. The preview is available for download, although Microsoft executives did not provide details about when the software would officially go on sale. During the preview, however, users will be able to download applications from a Windows Store, although the only applications available will be free. The company will add a buying mechanism, most likely before the final version of the software is released. “It’s the only operating system that lets you switch between devices,” Mr. Sinofsky said. “So you can truly pick the form factor that you want to use without compromising.” via > http://bits.blogs.nytimes.com/2012/02/29/microsoft-unveils-its-next-generation-os-windows-8/
-
Windows 8 Consumer Preview ISO images Windows 8 Consumer Preview ISO files (.iso) are provided as an alternative to using Windows 8 Consumer Preview Setup. If you are on a PC running Windows and want to install the consumer preview on another partition, another PC, or a virtual machine, we recommend you download Windows 8 Consumer Preview Setup and use the built-in tools for converting an ISO image into installation media, such as a DVD or USB bootable flash drive. You can find additional information, including a list of supported upgrades, in the FAQ. Note before you download: Windows 8 Consumer Preview is prerelease software that may be substantially modified before it’s commercially released. Microsoft makes no warranties, express or implied, with respect to the information provided here. Some product features and functionality may require additional hardware or software. If you decide to go back to your previous operating system, you'll need to reinstall it from the recovery or installation media that came with your PC. You can download them from here http://windows.micro...S/windows-8/iso