anyweb
-
Posts
9175 -
Joined
-
Last visited
-
Days Won
366
Everything posted by anyweb
-

USB OS deployment - Multiple Images?
anyweb replied to liquidcourage1's question in Deploying Operating Systems
currently you can only deploy one task sequence, so.... thinking like that you can have multiple os's in one task sequence, just make the ts bigger, and have a frontend hta or similar to decide was os you are installing. -
and make sure you've got your site assigned in the boundary group, check Heirarchy Configuration, Boundary Groups, and click on the references tab, is your site assigned ?
-
Minimizing restarts after automatic updating in Windows Update
anyweb posted a topic in Windows News
Before the Internet, updates such as service packs and "patches" were impossibly hard to come by. You ordered upgrade "media" or maybe bought a magazine with a CD in it. Of course, the Internet changed all that. In fact, when ftp.microsoft.com was first set up, among the first services was the ability to get updates for MS-DOS and Windows. With the introduction of Windows Update, we invested heavily in building not just a software delivery service, but a commitment to delivering high quality updates in a timely manner. It took some time to get to the point where customers trust these automatic updates, and we're proud of how far we've come. Today Windows Update is one of the largest services on the Internet by several measures, and of course we're using Windows 8 development as a chance to improve the experience of product updates too. This post was authored by Farzana Rahman, the group program manager of our Windows Update group. –Steven When it comes to Windows Update, one of the most discussed topics is the disruptiveness of restarts in the course of automatic updating. And for good reason—restarts can interrupt you right in the middle of something important. The obvious question to ask first is why does the installation of updates even require a restart at all? Ideally, we would like all update installations to happen seamlessly in the background without a restart. But, in reality, there are situations where the installer is not able to update files because they are in use. In these cases, we need to restart your machine to complete the installation. The automatic updating experience thus needs to be able to handle cases where restarts are required. We know this architectural challenge is one that frustrates administrators and end-users alike, but it does represent the state of the art for Windows. It is important to understand that for many updates, even if you could continue running the existing code that is already in memory, it is that very code that is a security vulnerability (for example), so the risk to the security (or reliability) of the machine would remain until you restart your machine. We'll keep working on this one. In the meantime, applications that support the Windows Restart Manager (introduced in Windows Vista) can return you to precisely where you left off after a restart. In this blog, I want to talk about some of the improvements we are making to the automatic updating experience in Windows 8, which will make restarts a little less annoying. First, some facts about Windows Update Windows Update (or WU, as we like to say within the team) currently updates over 350 million PCs running Windows 7 and over 800 million PCs across all the supported Windows platforms. There are actually many more PCs updated by WU indirectly if you account for our Windows Software Update Server, and for those machines (or customers) that do all updates manually for any number of reasons. Since its genesis over a decade ago, the Windows Update experience has evolved quite a bit to adapt to a changing ecosystem, especially the changing requirements around security. And Windows Update has been quite successful in updating PCs in time to stay ahead of large-scale exploits against Windows. Since the introduction of automatic updating, we have constantly worked to tighten the time it takes to distribute new updates to everyone who uses WU. The chart below (figure 1) shows us how fast downloads and installations occur on Windows 7, from the time of release of an update. The speed of each download is primarily determined by the internet connectivity of the PC, something that WU has no control over, so it is interesting to see below that the majority of update activity occurs in the first three days after release. This three-day number is a key one that I will come back to when we talk about improvements in Windows 8. In one week, 90% of users worldwide who need the update have successfully completed installation, including the restart, with the number of installations pretty much flattening out after that. Figure 1 – Completed download and installation of updates from time of release of update The balance of how broadly and how quickly we can update has proven beneficial to our users to the point where updating is mainly viewed as a background maintenance task (and justly so!) with nearly 90% of users choosing to update automatically on Windows 7. That’s 90% of the total user base telling us to automatically install updates without showing any notifications, or asking for confirmation. Windows 7 Automatically install updates 89.30% Notify me before install 2.38% Notify me before download 3.44% Never check for updates 4.88% Figure 2 – Usage of various modes of automatic updating Automatic updating and restarts on Windows 7 The next logical question to ask is what is the install experience for people who have chosen to automatically install updates? Below, data collected anonymously from WU gives an insight into the various modes of installation for those who have chosen to install automatically. As you see above, there are 3 main categories of automatic update installations. Here is what we learned from analyzing each category. Install-at-shutdown – The majority of automatic update users (39%) are updating when they shut down their systems. For these users, there is no automatic restart because the system can complete all steps of the installation during shutdown. This is the least disruptive experience for users, and so we do want to “hitch a ride” whenever we can on user-initiated shutdowns instead of inconveniencing users with a separate restart. Install-at-scheduled-time - For the 30% who are scheduling automatic updates, their installations start at a scheduled time (the default is 3 AM in the time-zone where the PC is located) or the next time the user logs in (if we miss the 3 AM window). WU automatically completes any restarts necessary to finish the installation. To ensure that you get the chance to save any important files and data before the restart, we show you a 15-minute countdown timer before the restart. A fifteen-minute countdown timer warns you of the restart Allowing restarts to occur without user interaction has helped us to rapidly update a major portion of the Windows ecosystem with critical updates. On average, within a week of releasing a critical update, 90% of PCs have installed the update (see Figure1). On the other hand, this behavior of automatic restarts has some unintended consequences for the user. Restarts can occur without notice, and might occur monthly or even more often if there is an out-of-band update. This unpredictability can potentially result in loss of user data. Most of our automatic installs and the subsequent restarts happen at 3 AM, when users are not around to save any important work. We have heard a lot of painful stories of users coming back to their PCs in the morning to find that a restart occurred, and that some important data was lost. In other cases, the user doesn’t lose data, but needs to restart a job that they were in the middle of (for example, a long copy job). Interactive install - We were surprised to see 31% of users interactively installing updates; of these 31%, approximately 20% have selected to automatically install, but they manually intervene anyway. WU provides a pop-up notification telling you when updates are available if you have selected to automatically install. The notifications are clearly capturing people’s attention, so they click on the notification and interactively install the updates. But this is actually reinforcing an unintended behavior. If you signed up to get automatic updates, you really shouldn’t need to bother interactively installing an update every time one is available. Most installs should occur silently in the background, and WU should notify you only for critical actions (for example, a pending restart). This also matches feedback from customers, who tell us they find the constant notifications to be distracting. Their expectation when they choose automatic updating is that updating will occur automatically. This seems to be a case where making sure people are in control of their PC experience actually resulted in too much information, and ultimately the price of being in control was a feeling of a loss of control. With these lessons learned, we set about defining a better automatic updating and restart experience for Windows 8. Solving the challenge around updating and restarts The question for us on the WU team is always “What is the best way to quickly update the PC while not being intrusive to the user?” Turns out, this is a hard question to answer, and there is no one simple answer. The challenge we faced was to find the balance between updating with speed and giving notice to the user for upcoming restarts. Clearly, updating and securing the PC before vulnerabilities can be exploited is just as important as it ever was. However, we also want to deliver a better experience around handling restarts and avoiding data loss without compromising our goal of timely updating. To this end, the guiding principles we used to design the experience were The automatic updating experience is not intrusive to users but keeps them aware of critical actions Minimize restarts and make them more predictable Continue to keep the PC and the ecosystem up-to-date and secure in a timely manner Windows Update and handling restarts on Windows 8 Based on these principles, we made the following improvements to the Windows 8 updating experience. more > http://blogs.msdn.com/b/b8/archive/2011/11/14/minimizing-restarts-after-automatic-updating-in-windows-update.aspx -
SCCM 2012 vs Windows Embedded Devices
anyweb replied to bandis's topic in Configuration Manager 2012
i don't have any so cannot test them, feel free to send some my way and i'll test them -
that part is already done, what i meant was it was the next part (after the one you had just read) in the series - check it out here
-
the next part of this series covers this in detail
-
using SCCM 2012 RC in a LAB - Part 8. Deploying Windows 7 X64
anyweb replied to anyweb's topic in Configuration Manager 2012
up to you, normally i'd recommend you keep FAT applications in your build and capture, and deploy everything else in the Deploy Task sequence, but this is just a lab so do whatver you want ! -
using SCCM 2012 RC in a LAB - Part 8. Deploying Windows 7 X64
anyweb replied to anyweb's topic in Configuration Manager 2012
the UDA variables are used to set who the Primary User(s) are for this device, useful for targetting software to computers later... USMT is for migrating users data, we'll come back to that later -
cancel out of the wizard, then try again, if it's still not working, reboot the server then try again
-
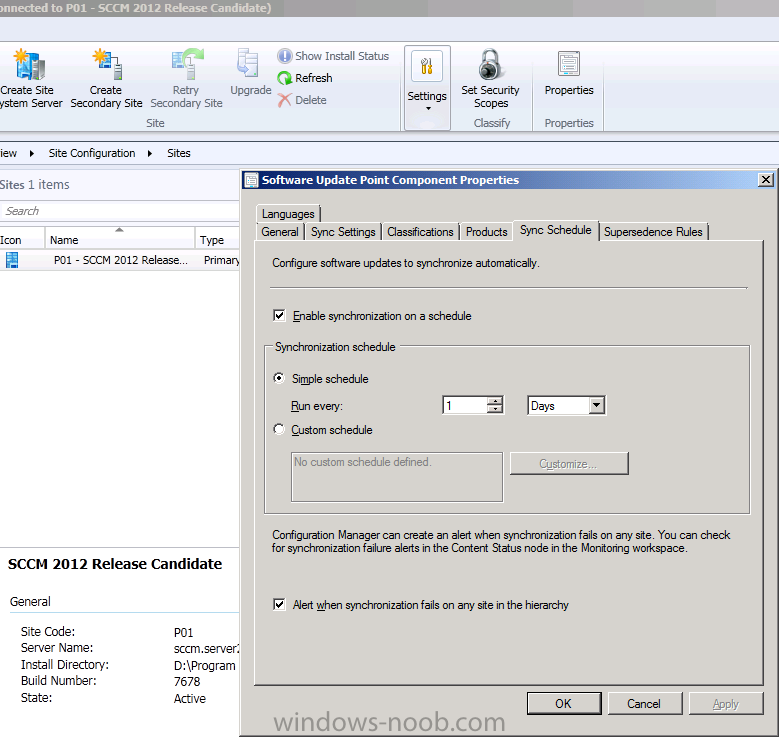
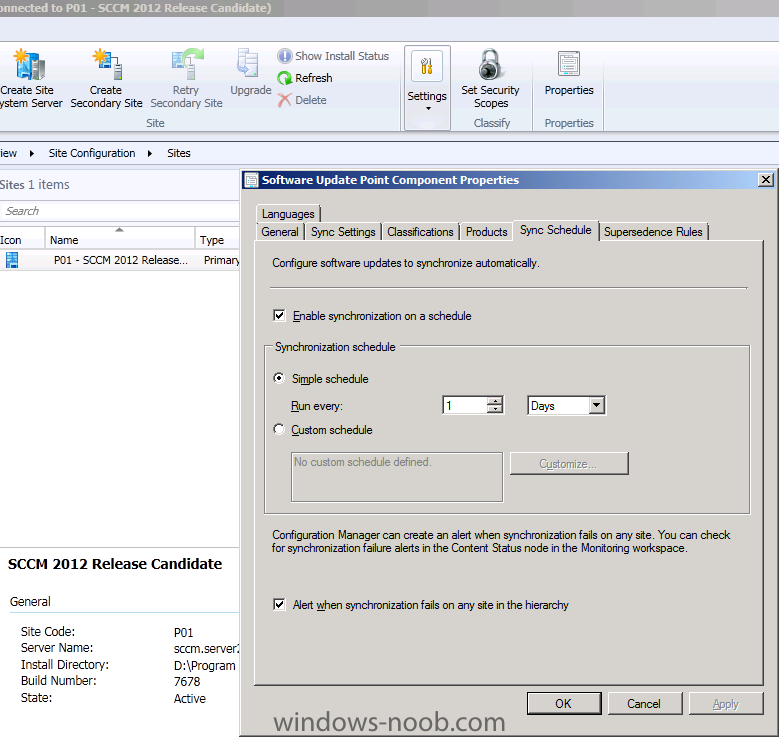
software update syncs are carried out by the schedule (check software update point in component services), check the Sync Schedule tab, however that is out of scope of THIS part, so please post those questions separately or on the relevant part, cheers !
-
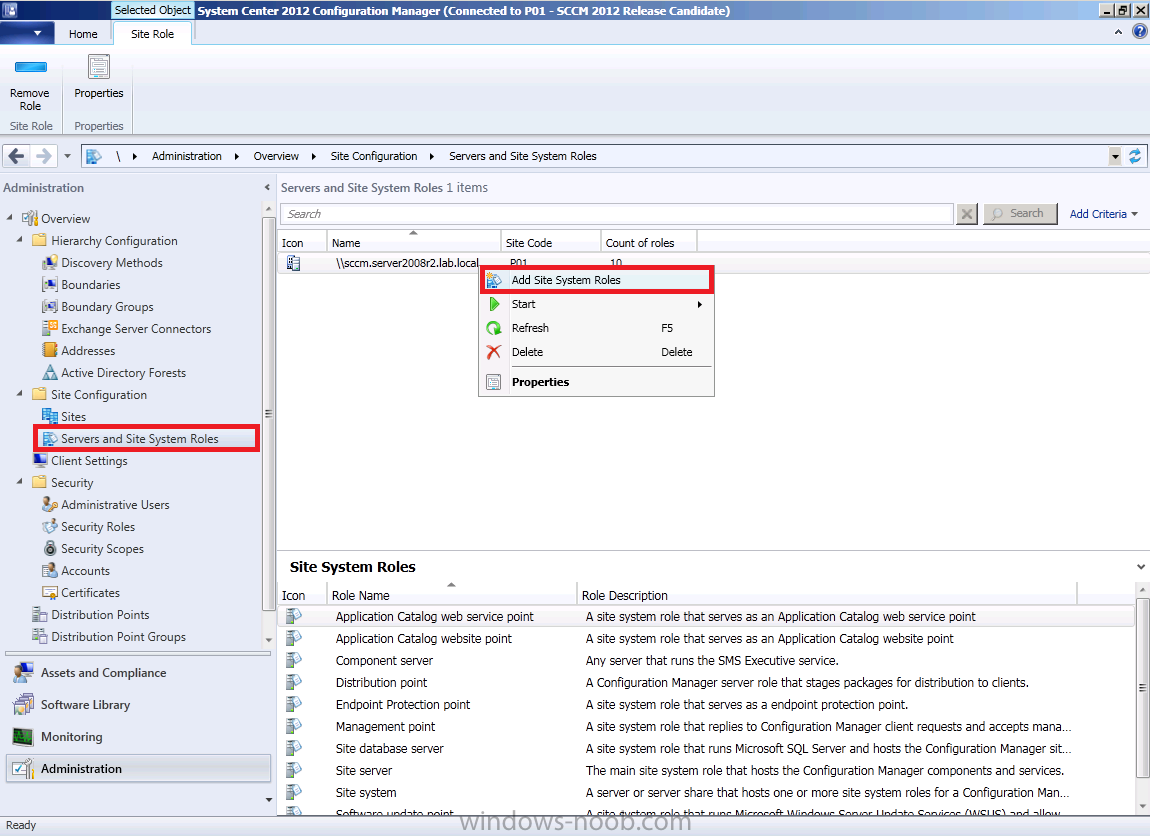
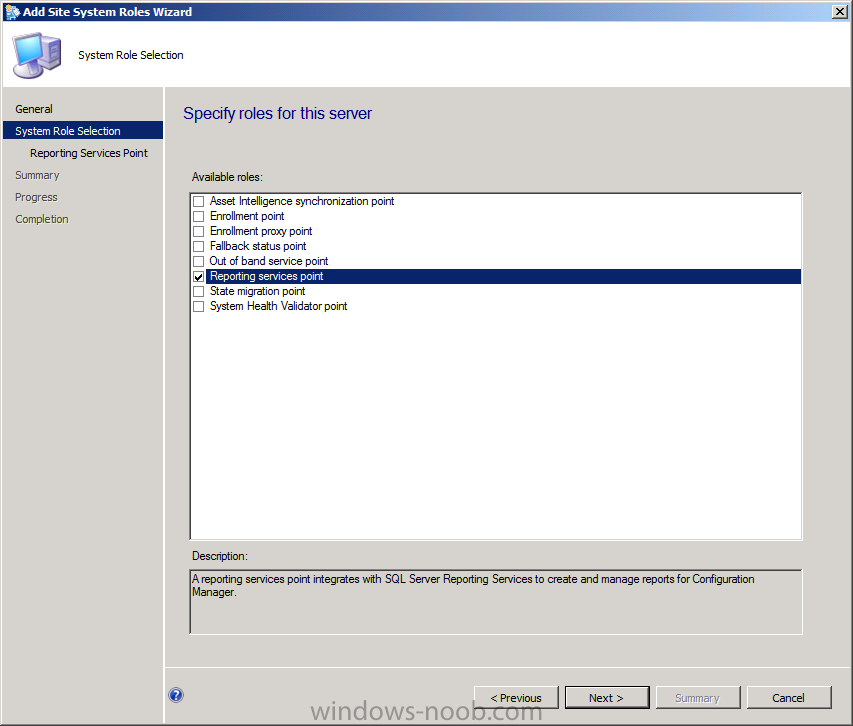
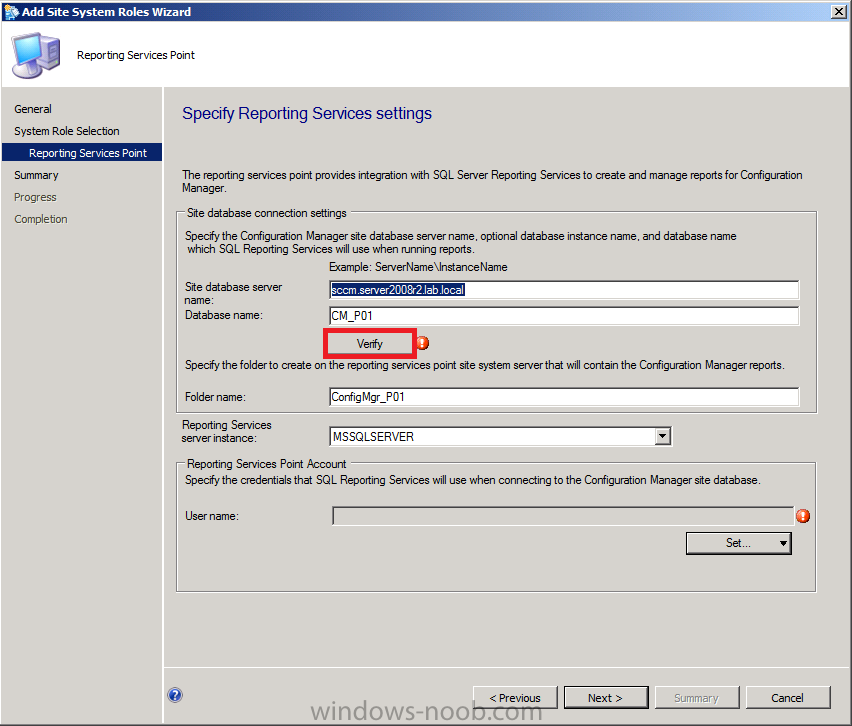
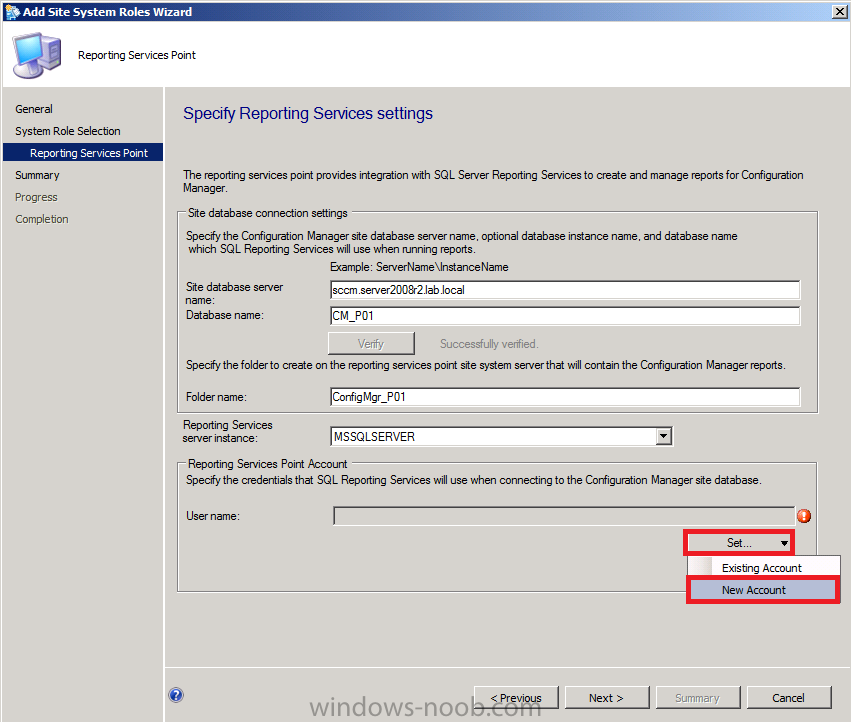
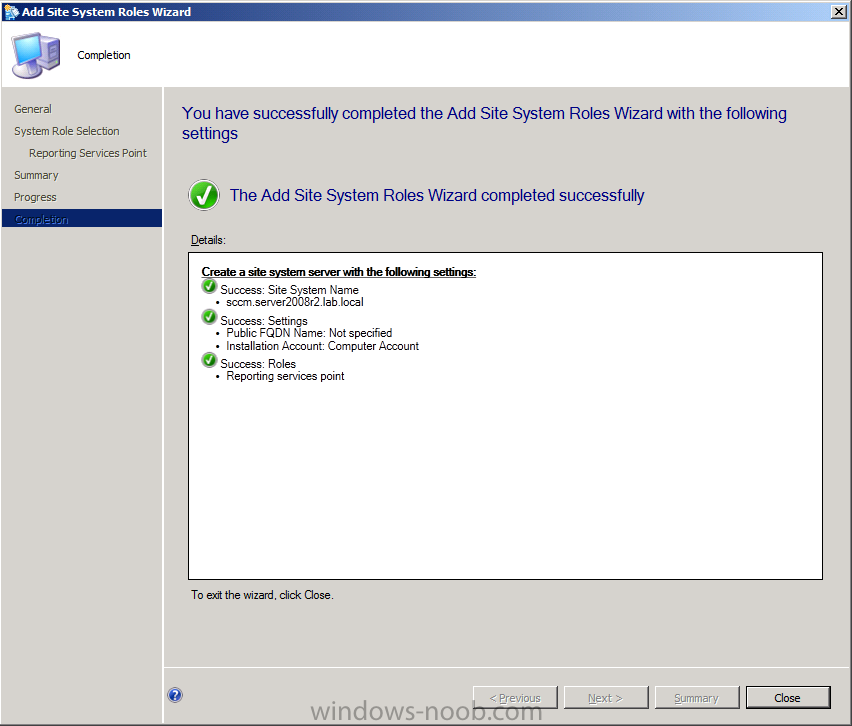
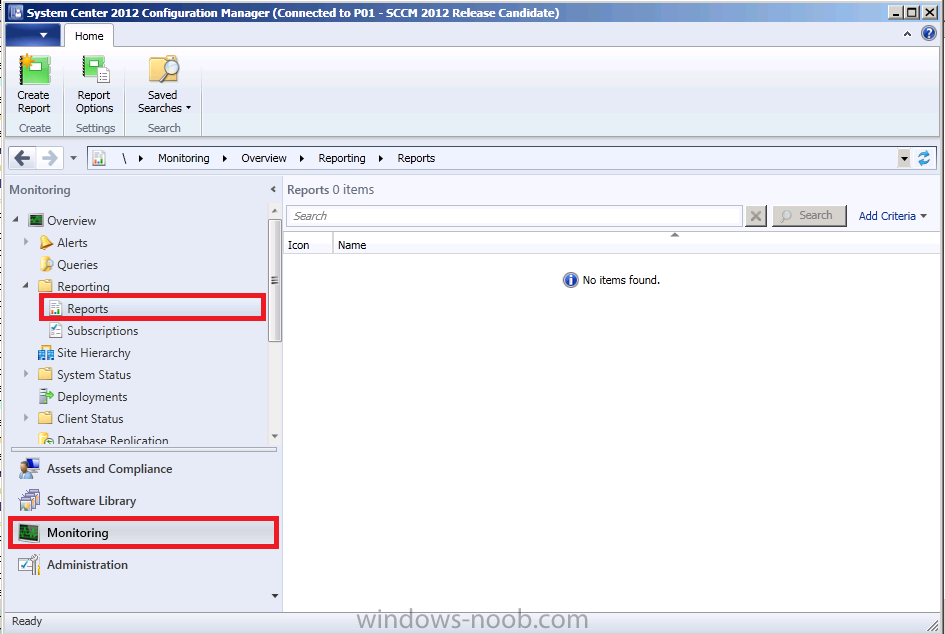
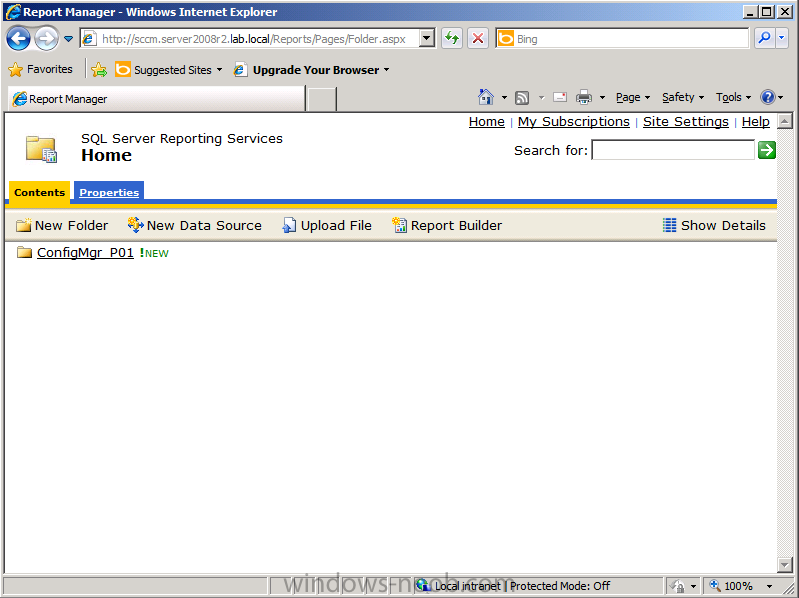
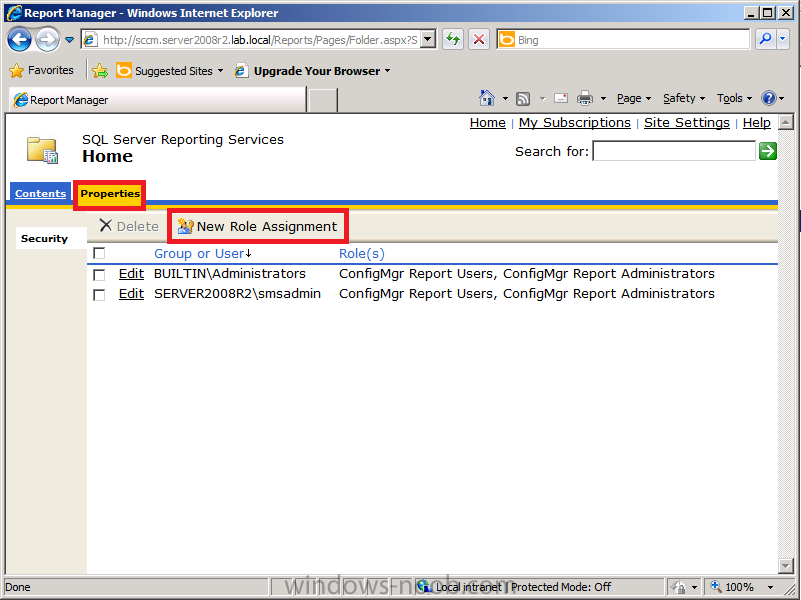
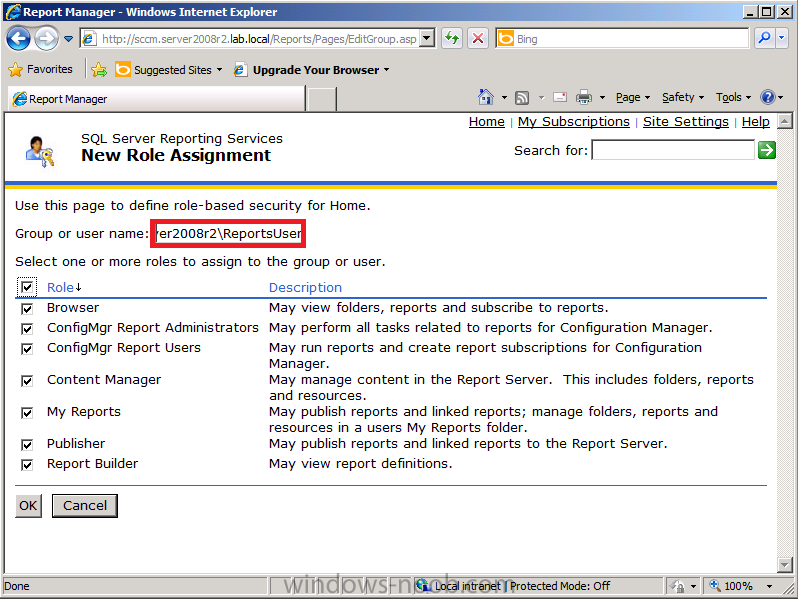
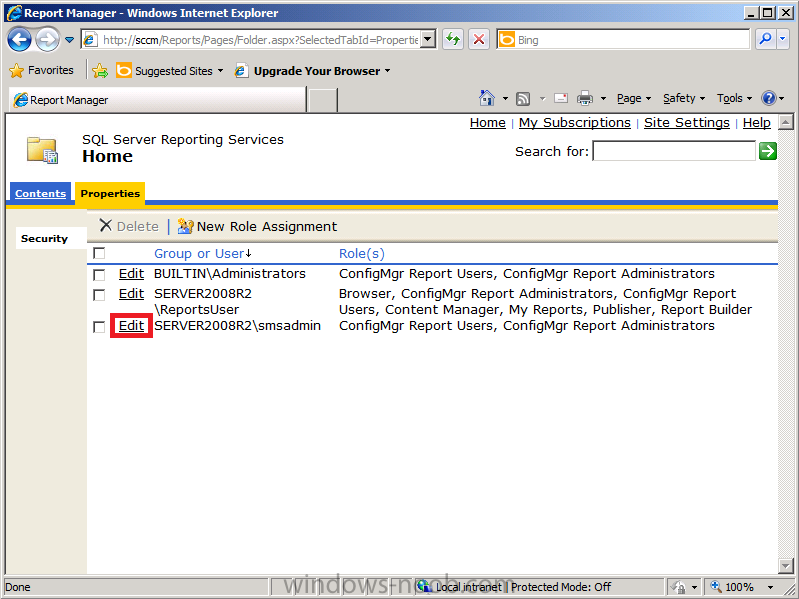
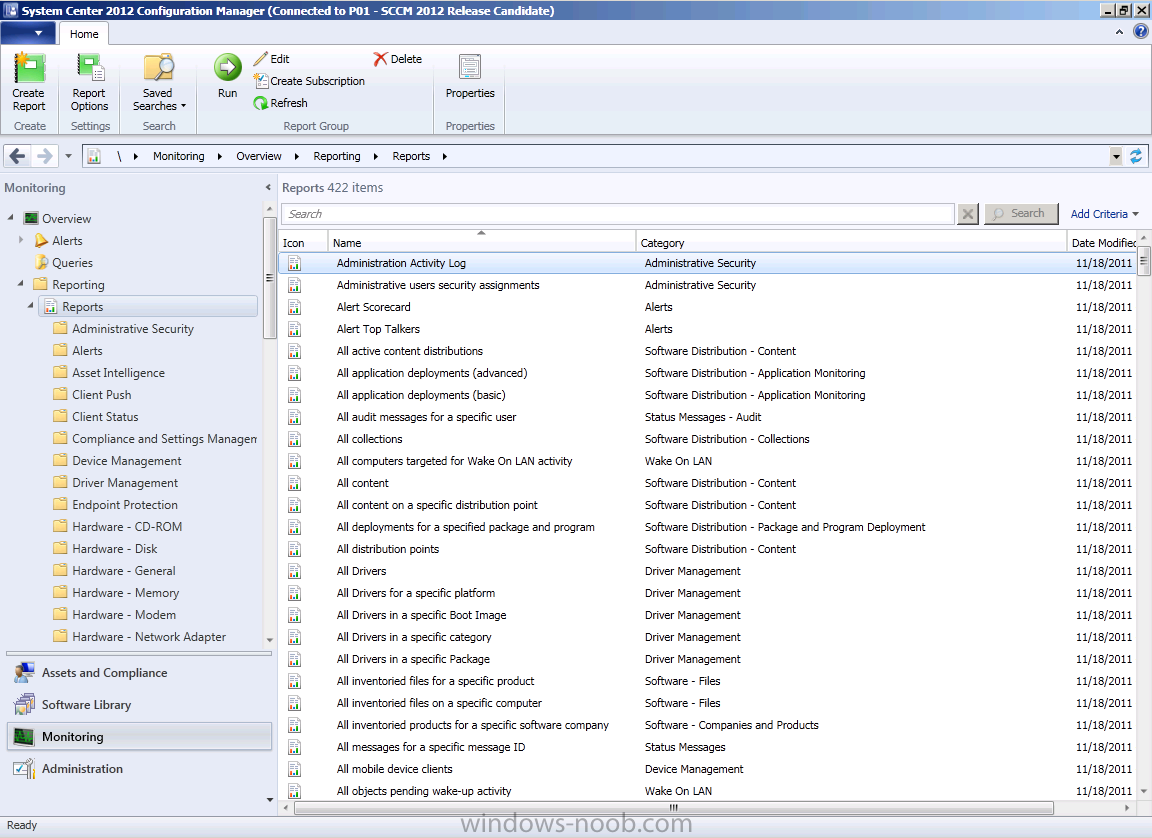
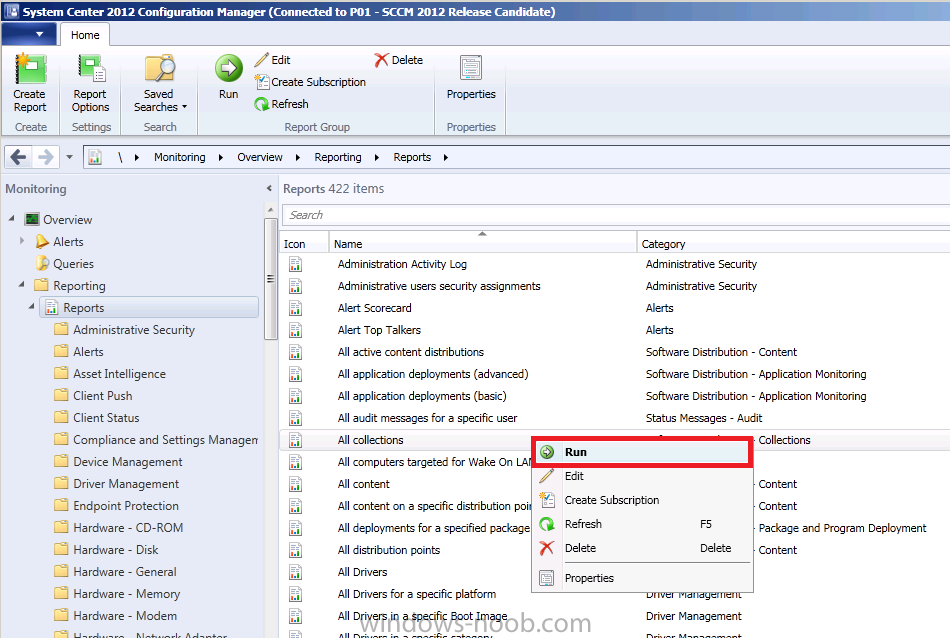
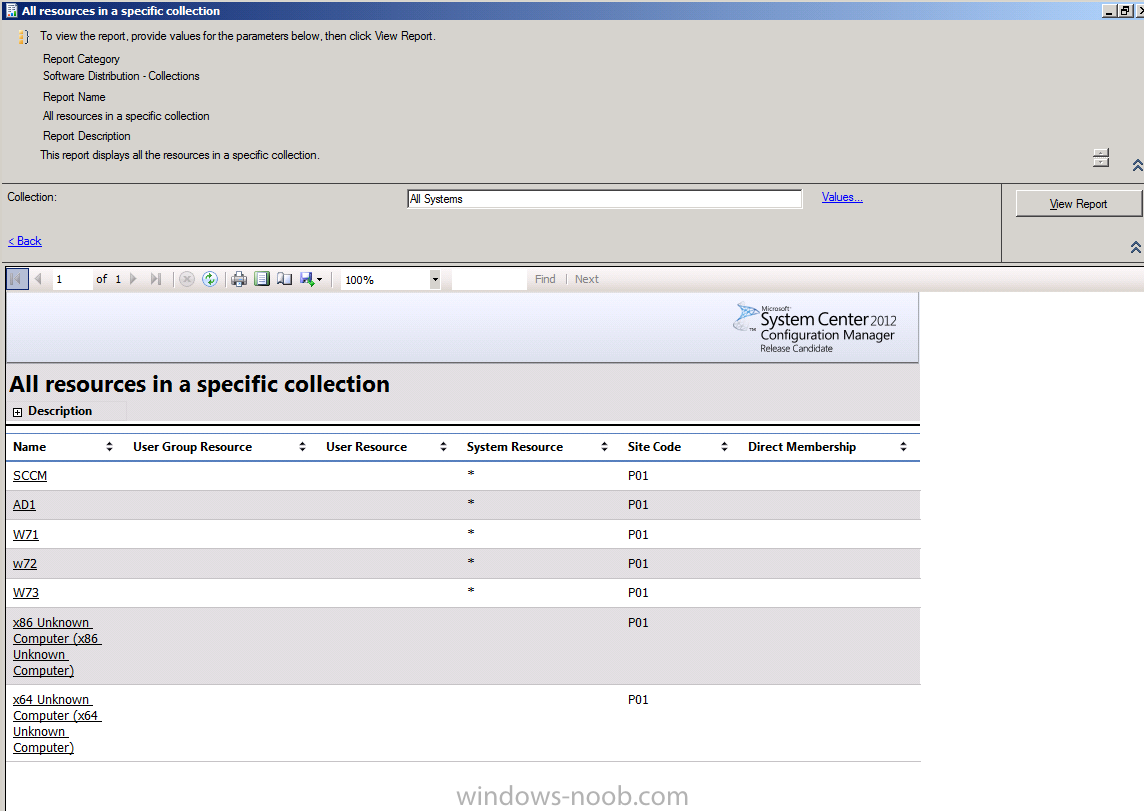
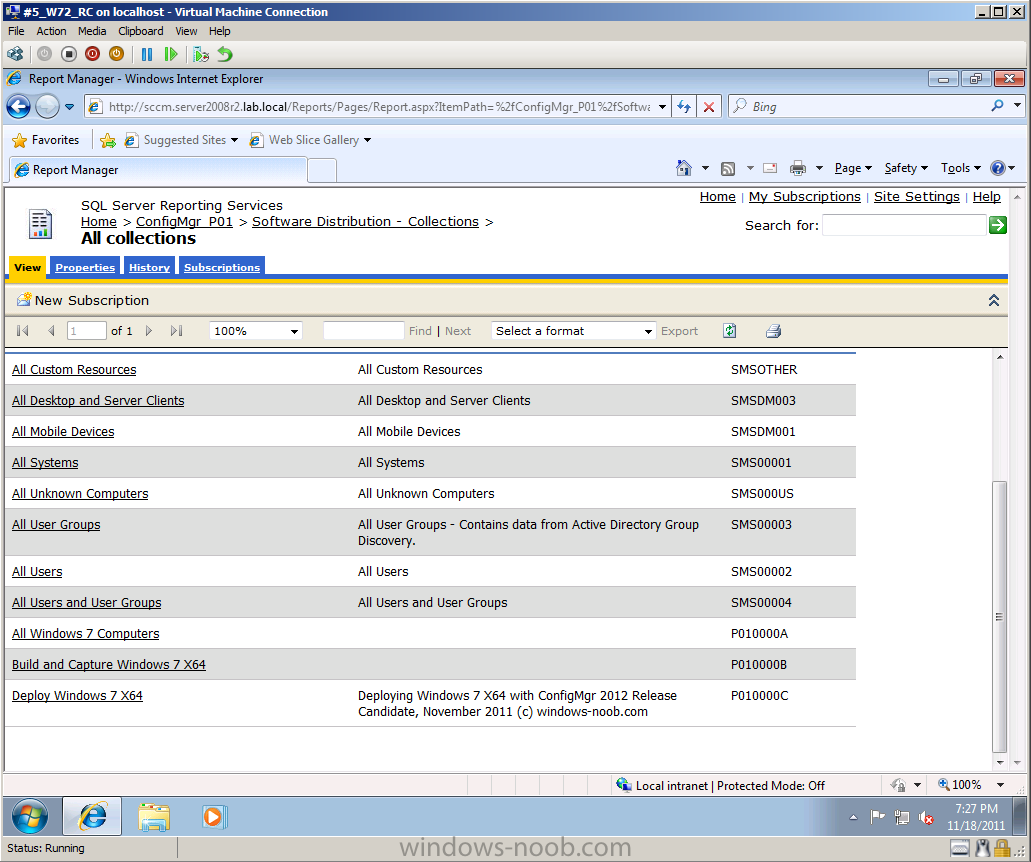
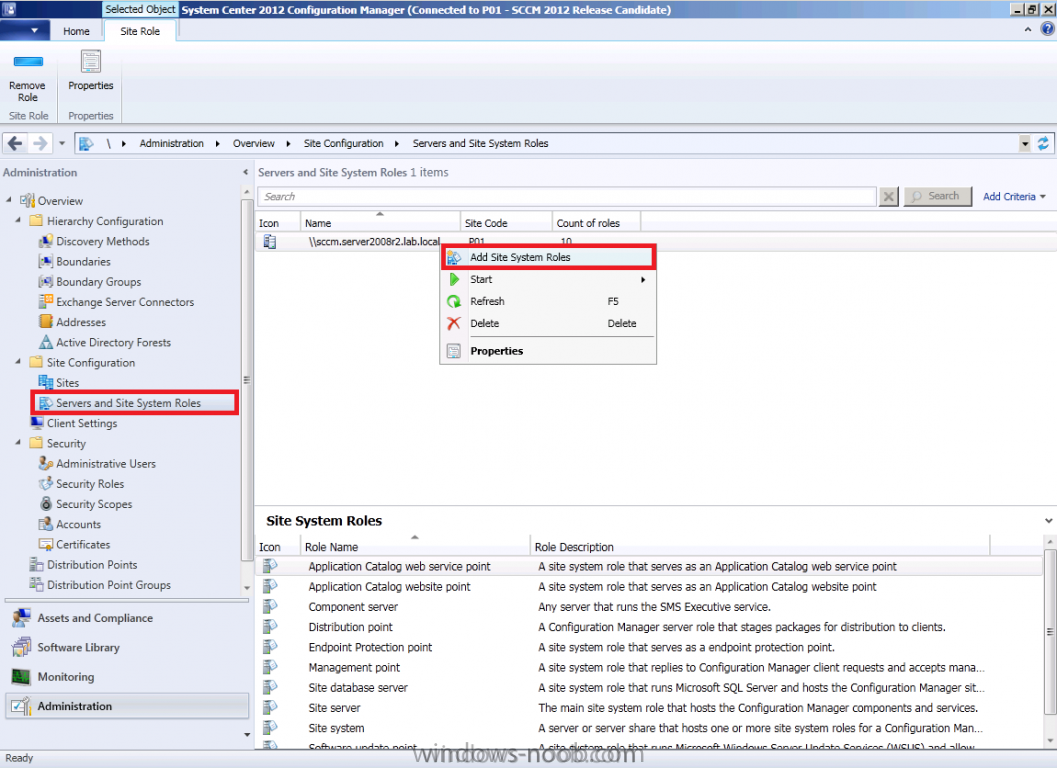
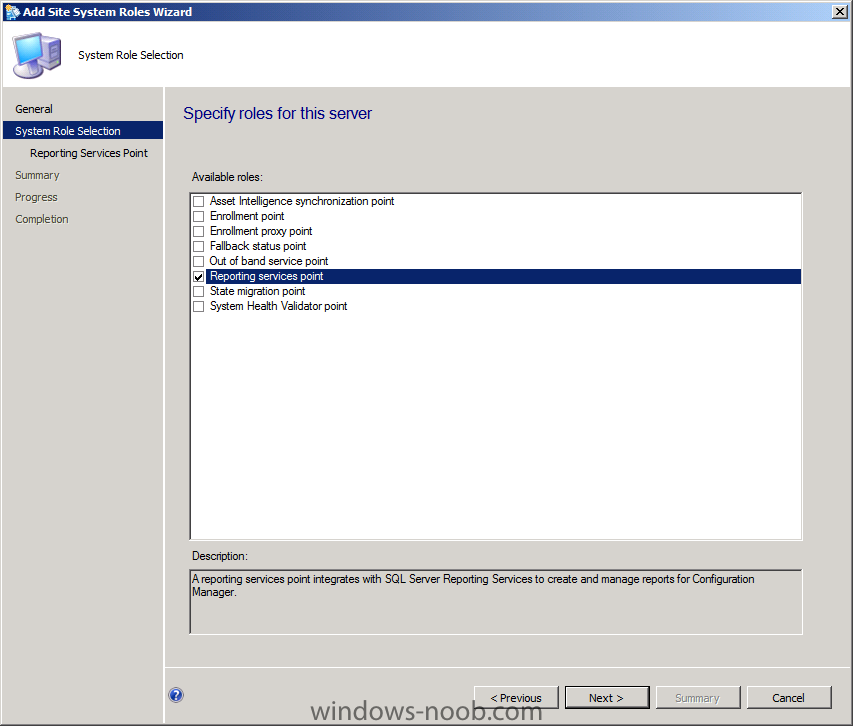
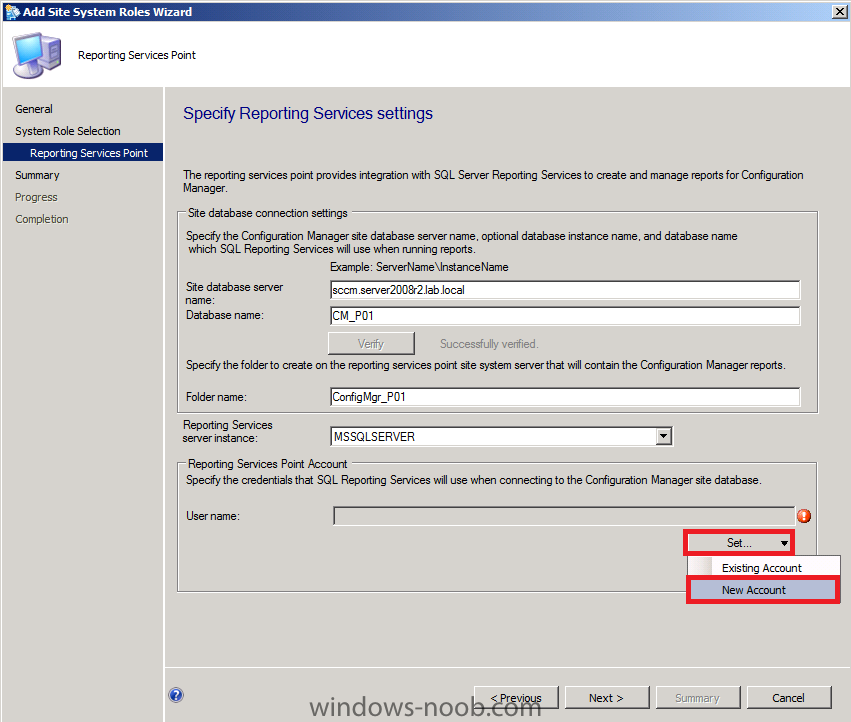
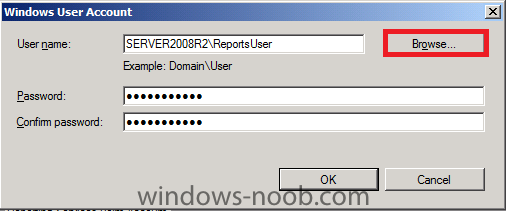
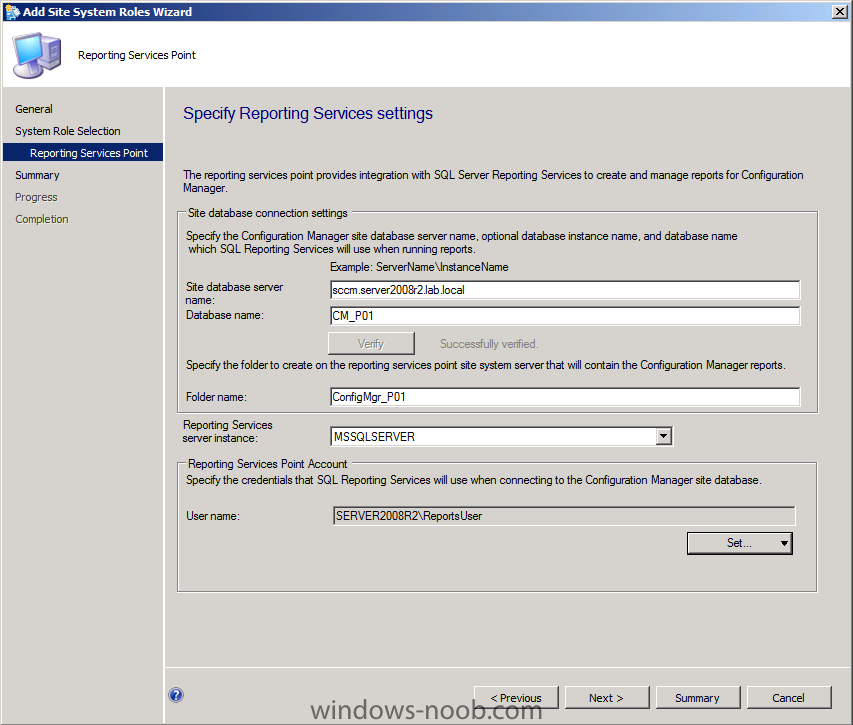
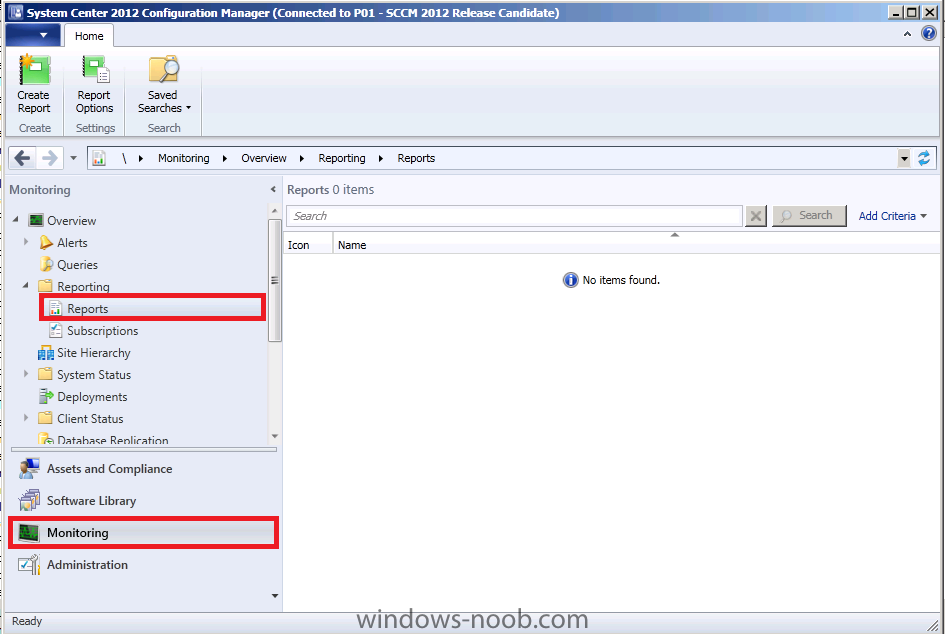
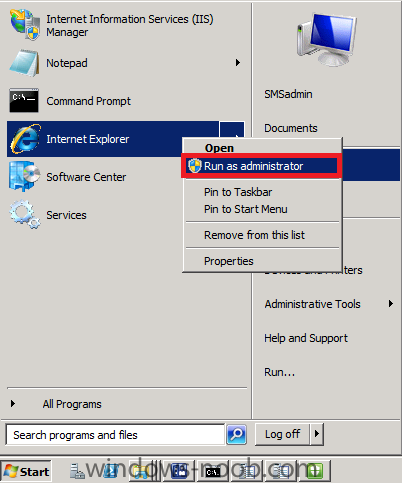
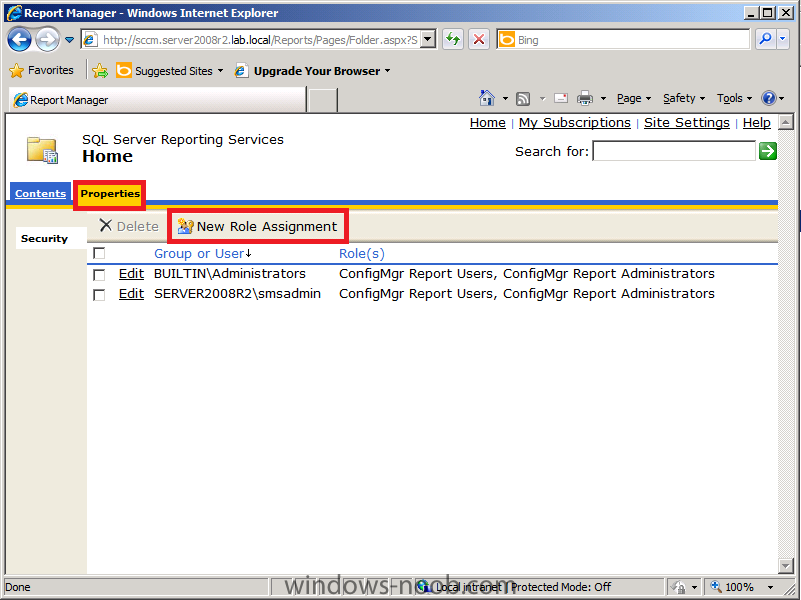
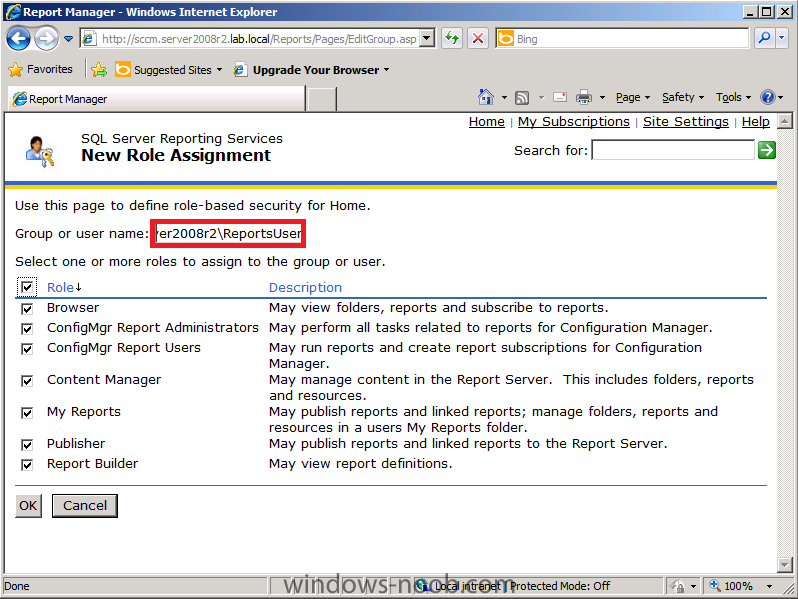
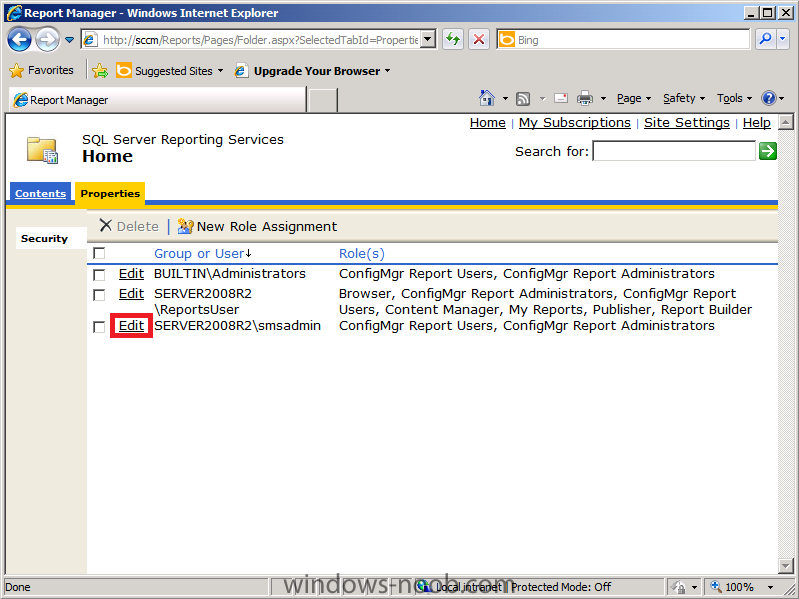
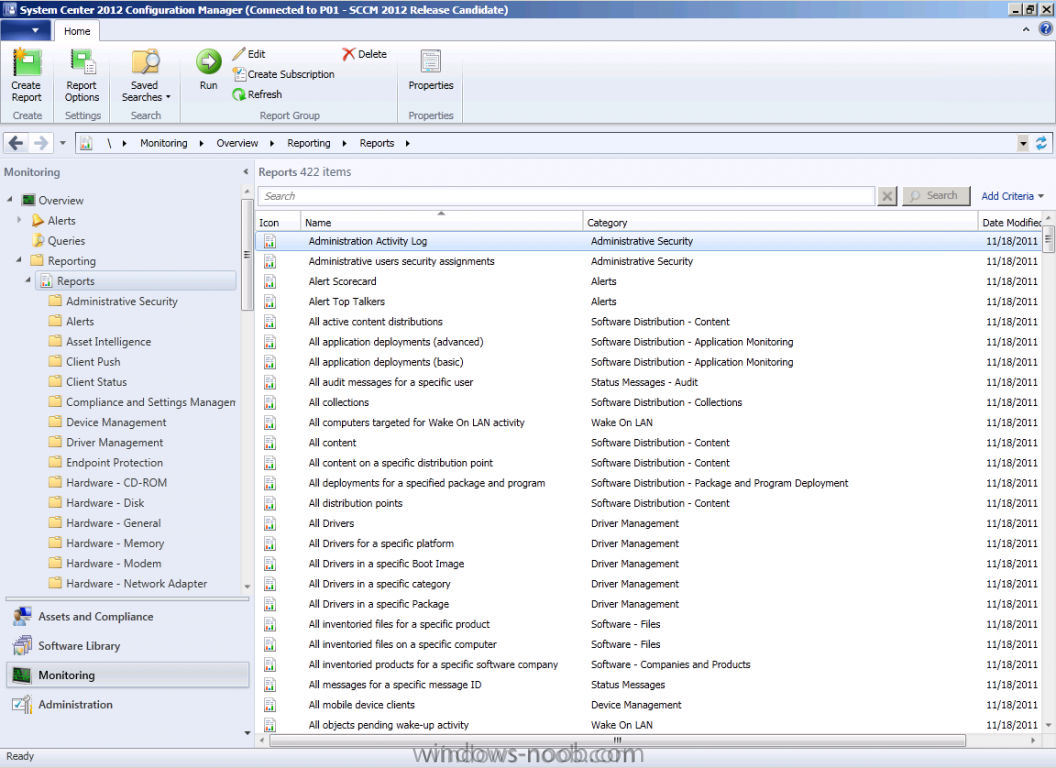
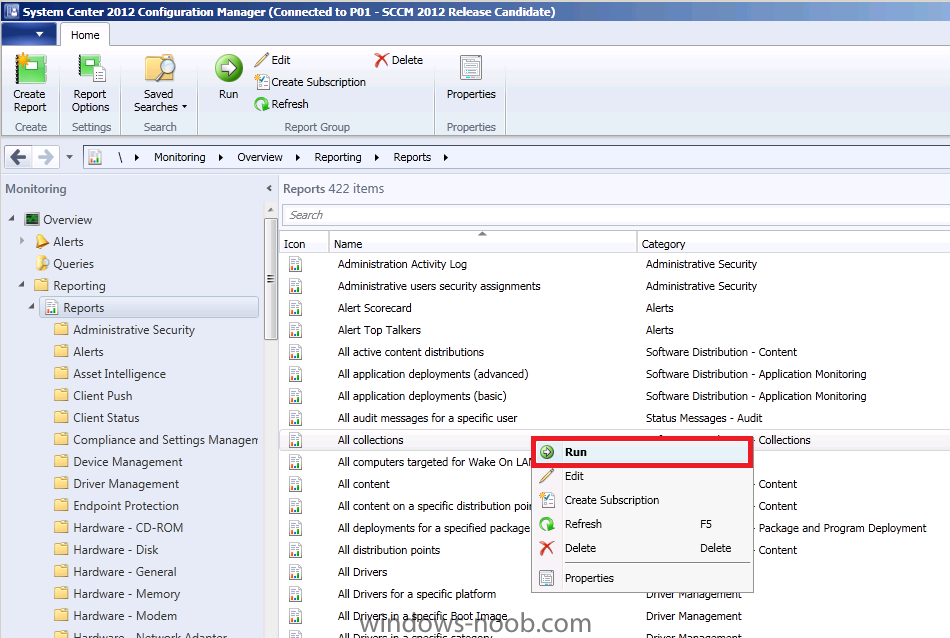
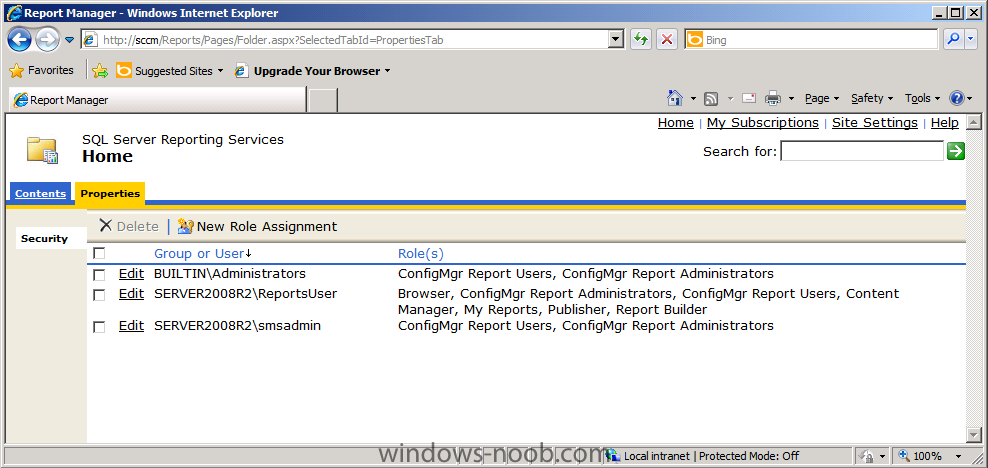
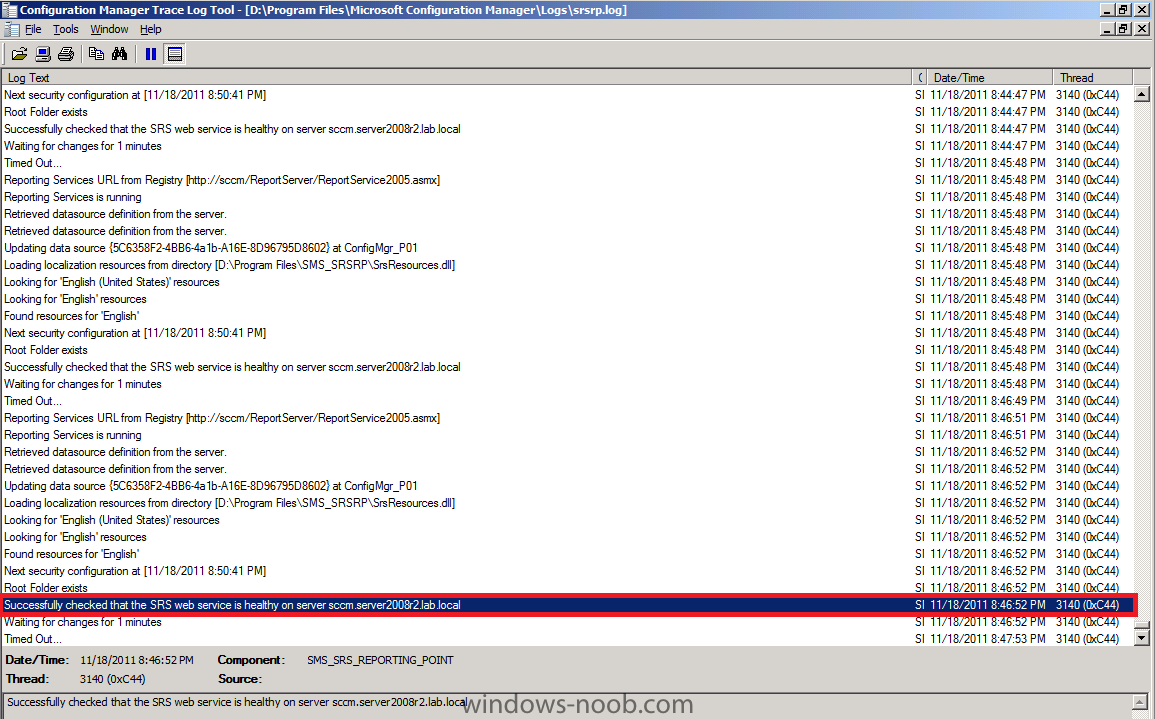
In Part 1 of this series we got our AD and SCCM servers ready, and then we installed System Center 2012 Configuration Manager as a standalone Primary site. In Part 2 we configured the SCCM server further by adding some Windows Server roles necessary for the following Configuration Manager 2012 functionality, Software Update Point (SUP) and Operating System Deployment. In Part 3 we configured the server further by Enabling Discovery methods and creating Boundary's and Boundary Groups. In Part 4 we configured Client Settings, Added roles and Distributed the Configmgr Client to our Computers within the LAB, then in Part 5 we enabled the Endpoint Protection Role and configured Endpoint Protection settings and targeted a collection called All Windows 7 Computers with these settings and policies. In Part 6 we configured our SUP further to Deploy software updates to our All Windows 7 Computers and Build Windows 7 X64 collections. In Part 7 we used the Build and Capture process to create our Base Windows 7 X64 wim image. In Part 8 we created a USMT 4 package to migrate the users data using hardlinking and then we imported the captured image into ConfigMgr and created a Deploy Windows 7 X64 task sequence. We created a Deploy Windows 7 X64 Collection and set some User Device Affinity collection variables. In Part 9 we created an Application, and created a deployment type for that application to only install if the Primary User was True for that device (User Device Affinity), we then copied our Task Sequence (duplicated it), deployed the new Task Sequence, added a computer to the new collection and then PXE booted the computer to the Deployment Menu. In Part 10 we monitored the Deployment process in a lot of detail to how UDA sent state messages and we verified that our application installed on the users Primary Device, in addition we modified our collection variables, and added a prestart command to our boot image to prompt for the SMSTSUdaUsers. Now we will setup the Reporting Services Point Role and verify that reporting is working. Reporting in Configuration Manager:- The following reporting features are new or have changed in System Center 2012 Configuration Manager. The reporting point has been deprecated The Reporting Services point is the only site system role used for reporting in System Center 2012 Configuration Manager. For more information about the Reporting Services point, see the Reporting Services Point section later in this topic. Full integration of the Configuration Manager 2007 R2 SQL Server Reporting Services solution In addition to standard report management, Configuration Manager 2007 R2 introduced support for SQL Server Reporting Services reporting. System Center 2012 Configuration Manager has integrated the Reporting Services solution, added new functionality, and removed standard report management as a reporting solution. For more information about Reporting Services, see the SQL Server Reporting Services section later in this topic. Report Builder 2.0 integration System Center 2012 Configuration Manager uses Microsoft SQL Server 2008 SP1 Reporting Services Report Builder 2.0 as the exclusive authoring and editing tool for both Model and SQL-based reports. Report Builder 2.0 is automatically installed when you create or modify a report for the first time. For more information about Report Builder, see the Report Builder section later in this topic. Subscription management Report subscriptions in SQL Reporting Services enable you to configure the automatic delivery of specified reports by e-mail or to a file share at scheduled intervals. Running reports You can run System Center 2012 Configuration Manager reports in the Configuration Manager console by using Report Viewer or you can run reports from a browser by using Report Manager. Each method for running reports provides a similar experience. Localized reporting Reports in System Center 2012 Configuration Manager are rendered in the locale of the installed Configuration Manager console. Subscriptions are rendered in the locale that SQL Server Reporting Services is installed. When you author a report, you can specify the assembly and expression. Reporting in System Center 2012 Configuration Manager provides a set of tools and resources that help you use the advanced reporting capabilities of SQL Server Reporting Services and the rich authoring experience that Microsoft SQL Server 2008 with Service Pack 1 (SP1) Reporting Services Report Builder 2.0 provides. Reporting helps you to gather, organize, and present information about users, hardware and software inventory, software updates, applications, site status, and other Configuration Manager operations in your organization. Reporting provides you with a number of predefined reports that you can use as is or that you can modify to meet your needs, or you can create custom reports. The following topics on Technet help you to manage reporting in System Center 2012 Configuration Manager: Introduction to Reporting in Configuration Manager Planning for Reporting in Configuration Manager Configuring Reporting in Configuration Manager Operations and Maintenance for Reporting in Configuration Manager Security and Privacy for Reporting in Configuration Manager Technical Reference for Reporting in Configuration Manager Step 1. Install the Reporting Services Point Role Perform the following on your SCCM 2012 server as SMSadmin. In the ConfigMgr console, click on Administration, Site Configuration, Servers and Site System Roles, right click on our server and choose Add Site System Roles when the Add site system roles wizard appears click next and select Reporting Services Point from the list of available choices you'll be asked to specify some Reporting Services settings, click on Verify beside database name if all goes well it will be listed as Successfully Verified, now we need to configure a Reporting Services Point Account, and we will use the Active Directory User (called ReportsUser) which we created in Part 1 of this series in Active Directory Users and Computers. * ReportsUser, a domain user for reporting services. so for User Name click on the Set drop down menu and select New Account when prompted for Windows User Account, enter the credentials of your ReportsUser account, you can use Browse to easily find the user in Active Directory. The specified Windows user account and password is encrypted and stored in the Reporting Services database. Note: Reporting Services retrieves the data for reports from the site database using this account and password. Tip: When installing the Reporting Service Point role, you do not have the ability to 'verify' the Reports user you specify, so the user may not even exist in AD. Therefore, you should browse AD when searching for the user. click next to install Reporting Services click next at the summary and review the completion screen. Tip: you can verify that the role installs successfully by monitoring the SMS_SRS_REPORTING_POINT log in Component Status, Monitoring. Look for Message ID 1015 which indicates that the Reporting Services point was successfully installed. In addition you can verify by checking the following Log on your server, SRSRP.LOG located in D:\Program Files\Microsoft Configuration Manager\Logs, look for a line which reads You should also inspect the SRSRPSetup.log file for the following line, Installation was Successful. Step 2. Configure Reporting Perform the following on your SCCM 2012 server as SMSadmin. Now that the Reporting Services Point role is installed we need to do some configuration before we can view reports. In the Monitoring Space of ConfigMgr console click on Reports it will list 0 items. On your ConfigMgr server, click on the start menu and right click on Internet Explorer, choose Run As Administrator, answer Yes to the UAC prompt. enter the following URL http://sccm.server20...b.local/Reports obviously replace your server FQDN in the URL. click on the Properties Tab followed by New Role Assignment In Group or Username enter Server2008R2ReportsUser and give the user the permissions you want now we can see that the ReportsUser has all reporting roles, and as this is a LAB we should verify that SMSadmin has the rights to do everything, select the SMSadmin user and choose Edit, click the Role checkbox so that we get all roles, and then click Apply, after editing both users we want them to have all permissions for Reporting services, Tip: This is a LAB so it's ok to configure Reporting this way, in production you would want to be more specific about what permissions users are granted. exit from Internet Explorer, and browse Reports within ConfigMgr again, the Reports are listed and ready to be used, note that they are sorted by Category (and also below Reports are Category Folders) Step 3. Viewing some Reports Perform the following on your SCCM 2012 server as SMSadmin. In the ConfigMgr console, expand reports, Select the All Collections report, right click it, choose Run, a list of collections appears in the Report Viewer, you can drill down further into the report by clicking on All Systems on one of your Windows 7 Client Computers, login as ReportsUser and start Internet Explorer, browse to http:\sccm.server2008r2.lab.localreports and select a report from the ConfigMgr_P01 database Tip: if the ConfigMgr_P01 database doesn't appear as a temporary measure you can add the ReportsUser to the Local Administrators group on your SCCM server, that's ok in a LAB, in production you'll want to configure your security accordingly and create Groups for Report Readers and Report Administrators. Thats it ! Reporting Services Point is installed and in our next part we will look at our Endpoint Protection reports and monitor it real time both on the Server and Clients.


-
WDS, SCCM, PXE Issue
anyweb replied to borngunners's question in Troubleshooting, Tools, Hints and Tips
can you post the SMSPXE.log please -
well what issues are you having specifically ? if you think in terms of refresh the only barrier is the encrypted drive, if you unlock the drive and suspend encryption on it then the rest of the refresh is as per normal (hardlinking and so on), the challenge is do you 1. disable the encryption in Windows (most people do this prior to rebooting into WinPE and doing the remaining tasks) 2. disable it if found in WinPE - this is where you have to get creative as the task sequence wants to write to the largest available NTFS drive at boot time... we did solve is though with some clever diskpart commands to reassign the drives followed by a reboot.
-
because you want your computer(s) installed with applications dynamically as part of the operating system installation, or your just want a task sequence to dynamically install a list of applications in a set order on computers,
-
unisntall the DP role uninstall WDS, reboot do NOT install or Configure WDS install the DP role, monitor the Distrmgr.log does that help ?
-
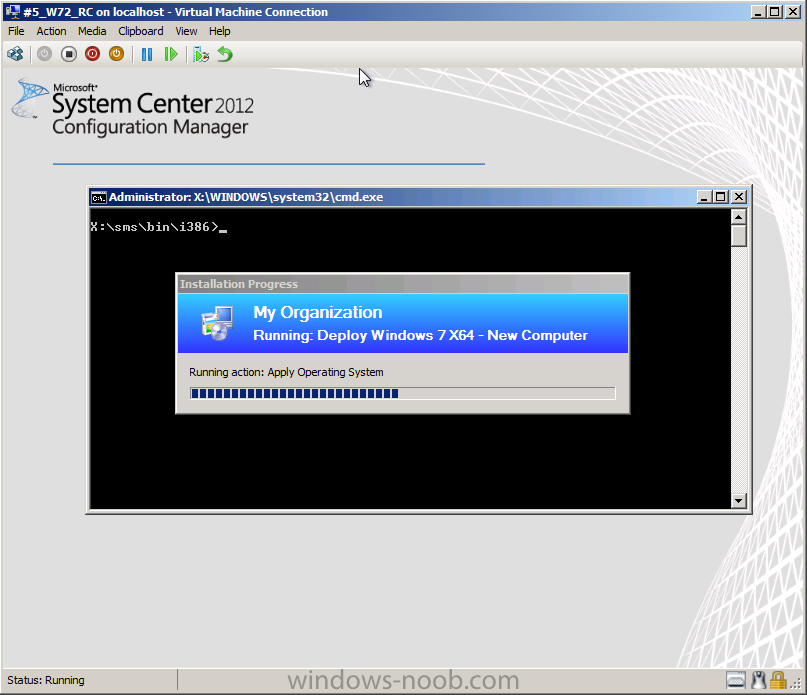
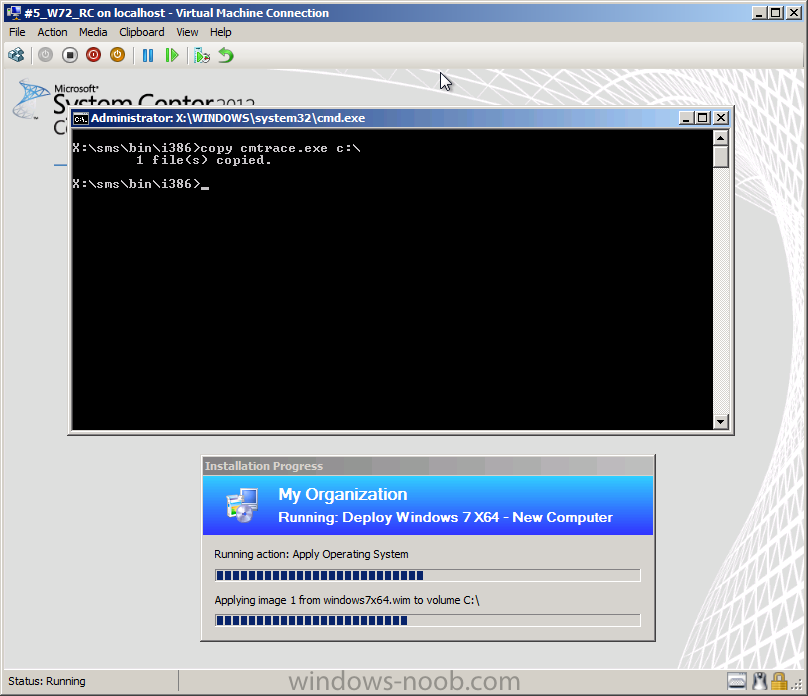
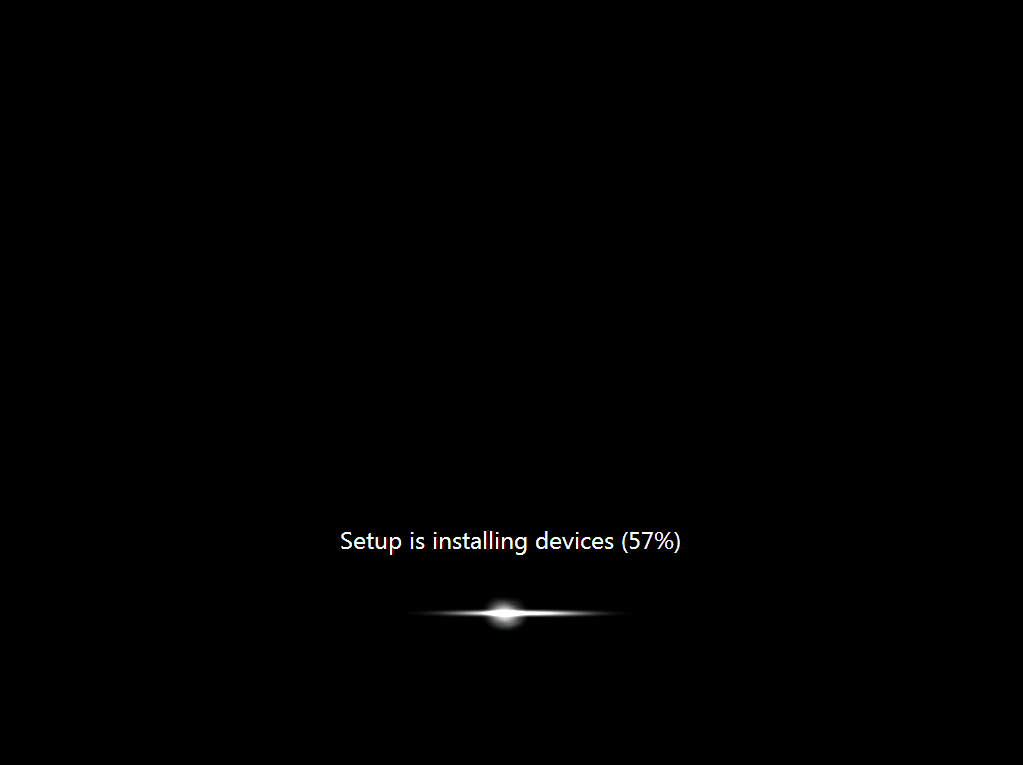
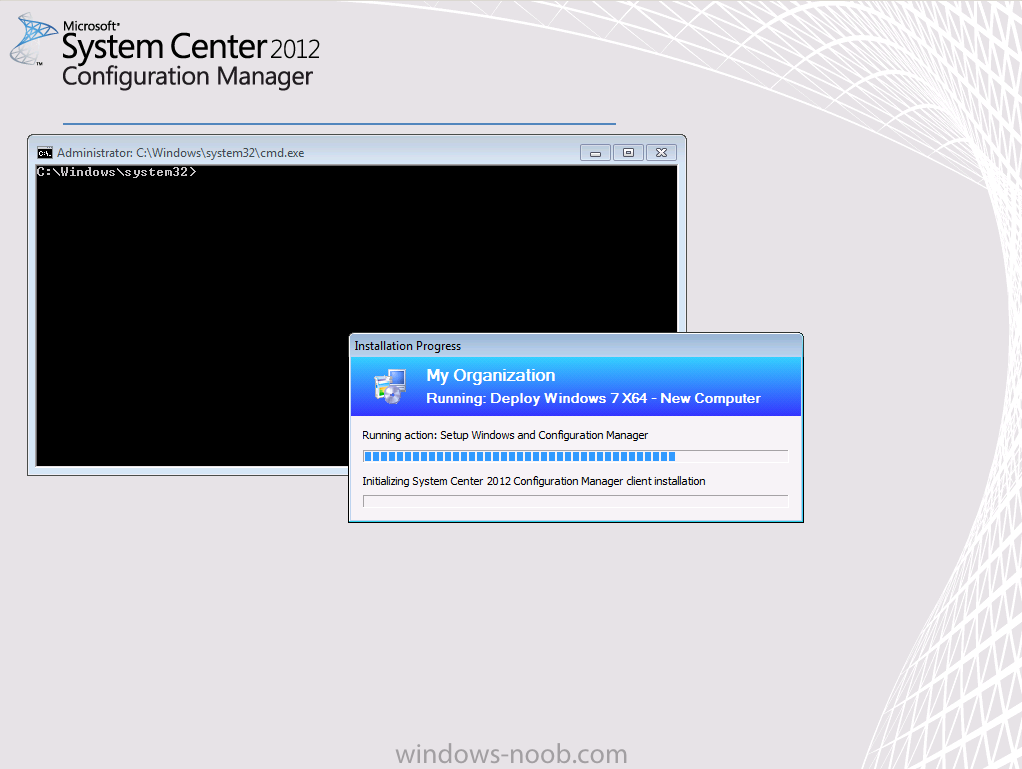
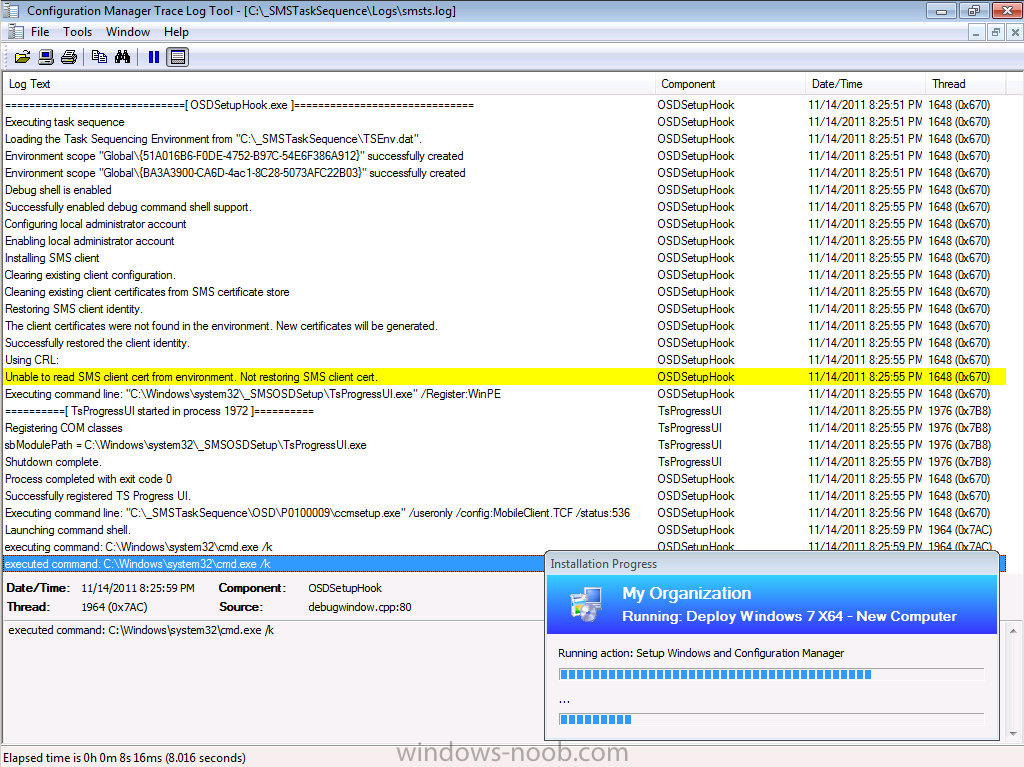
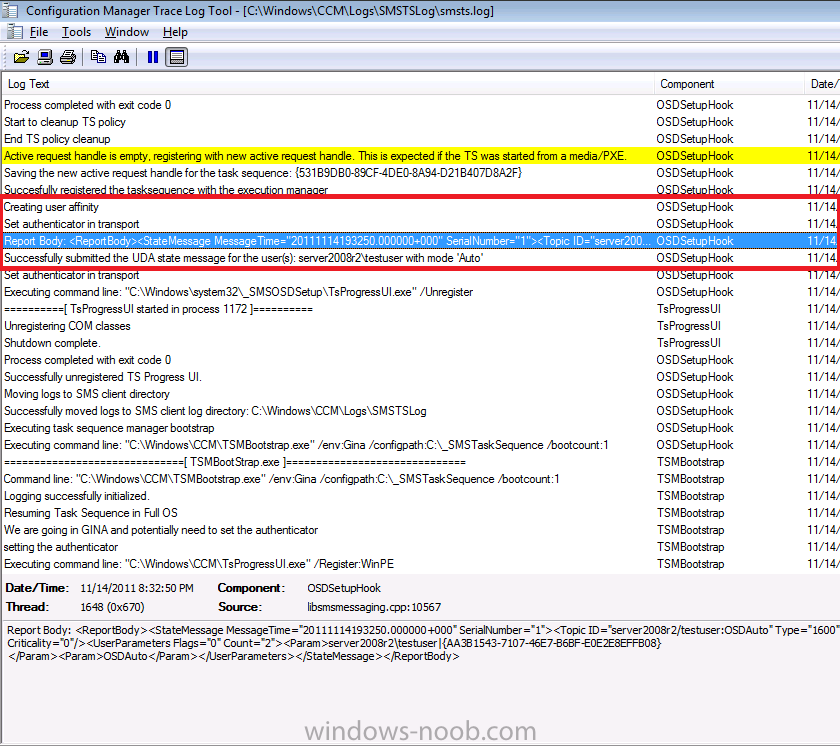
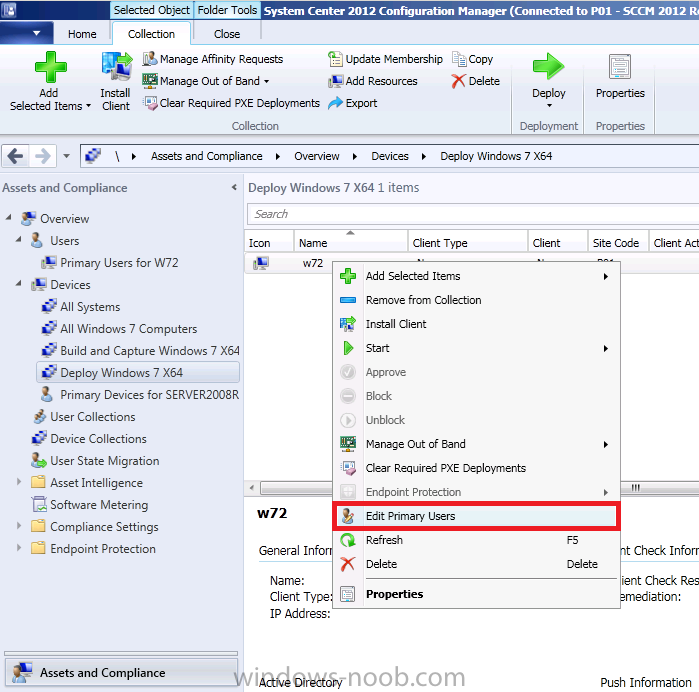
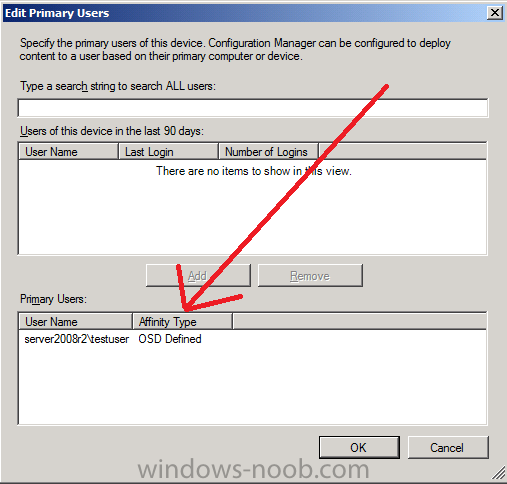
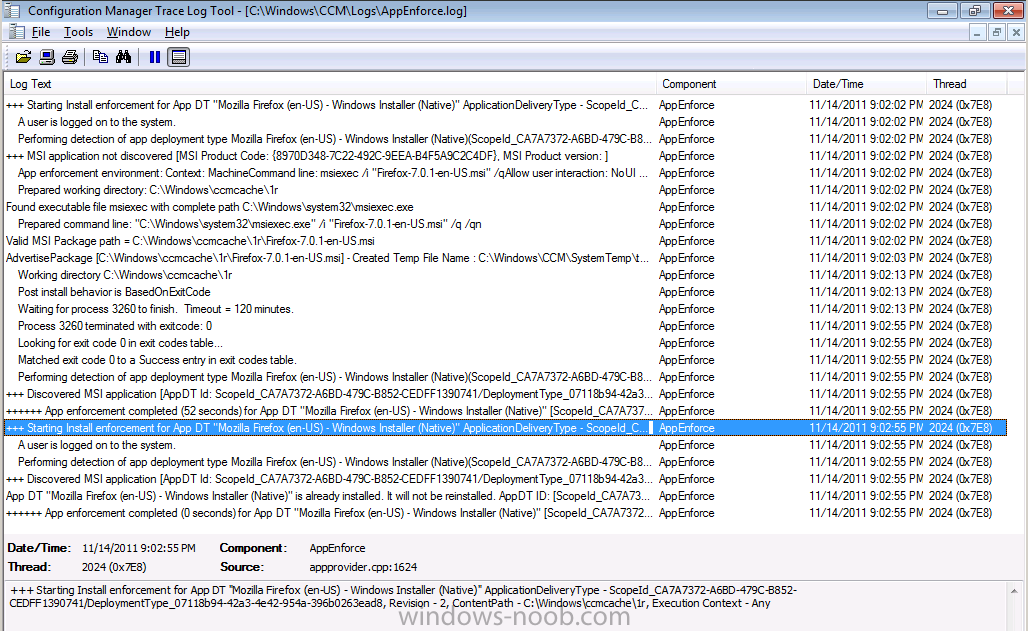
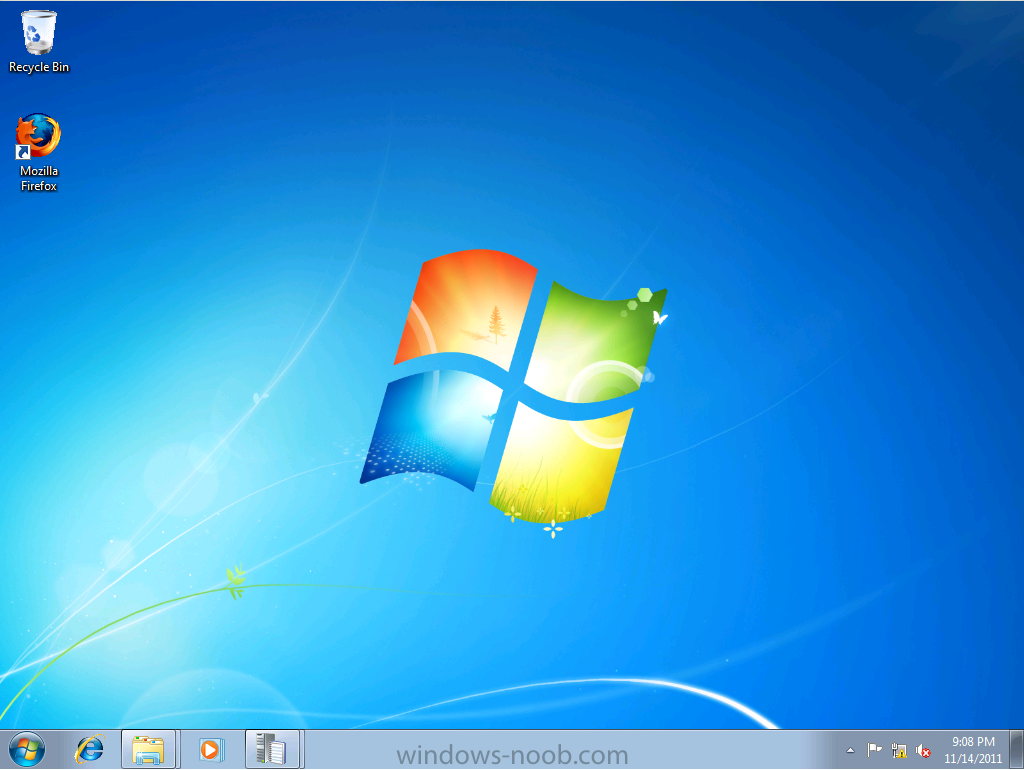
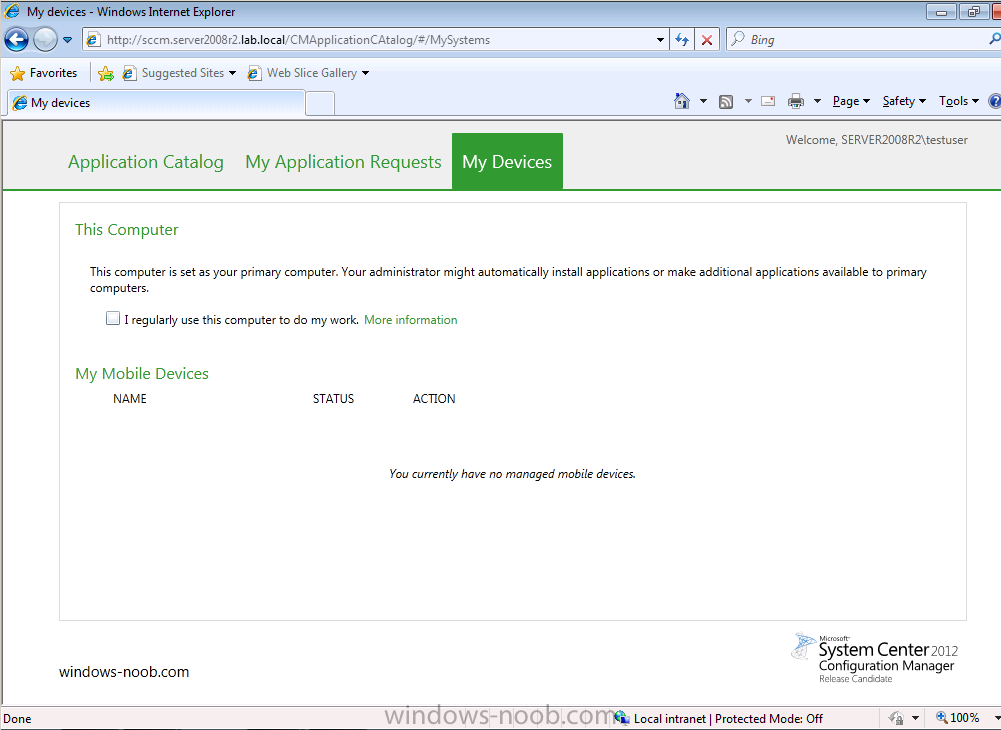
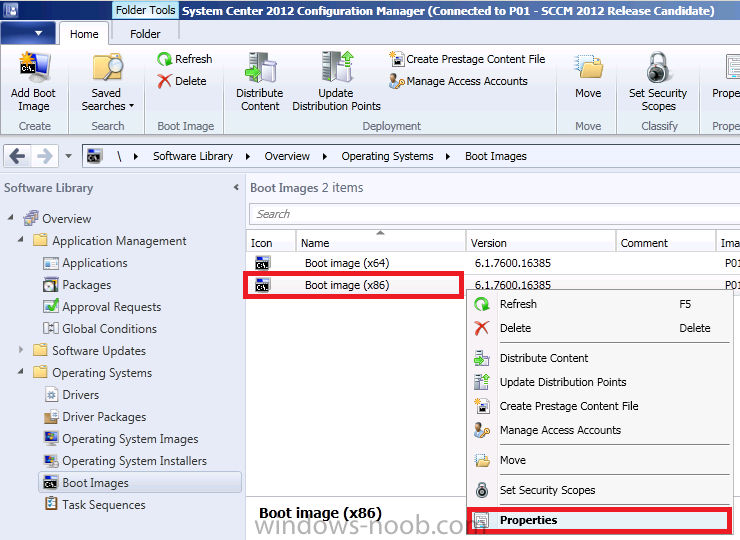
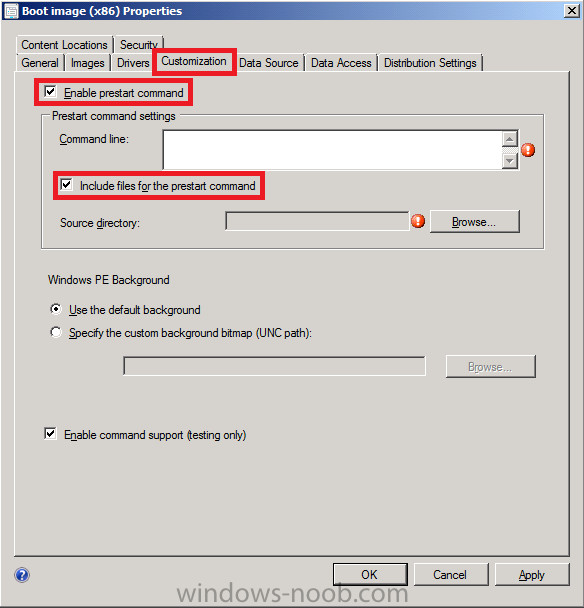
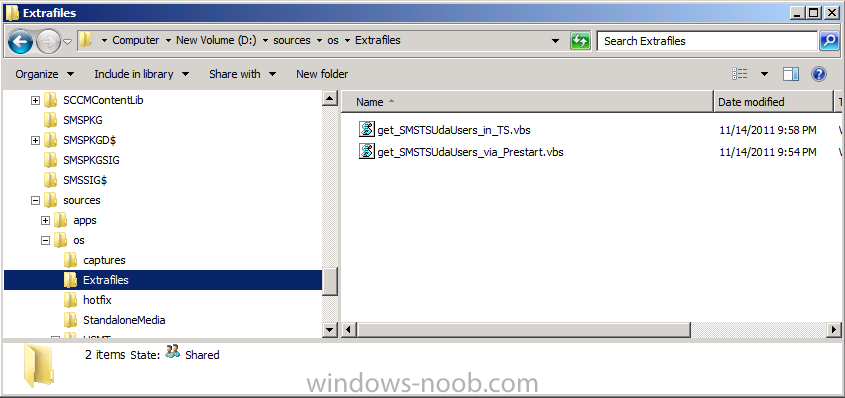
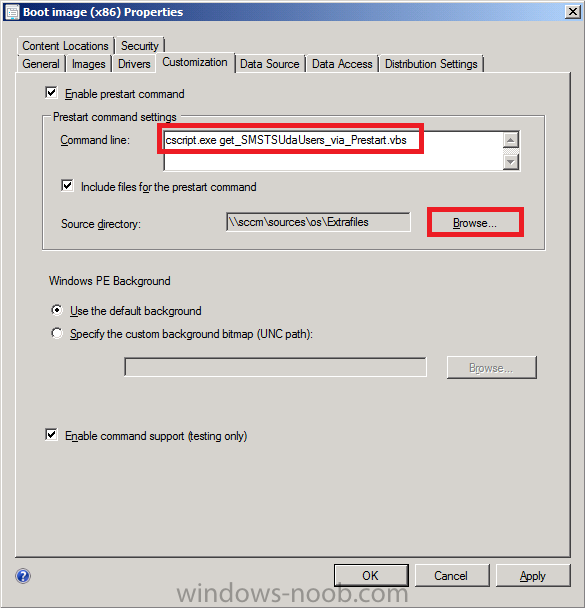
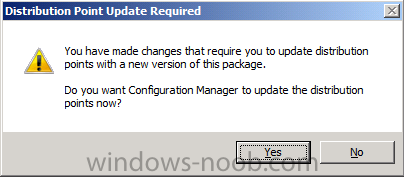
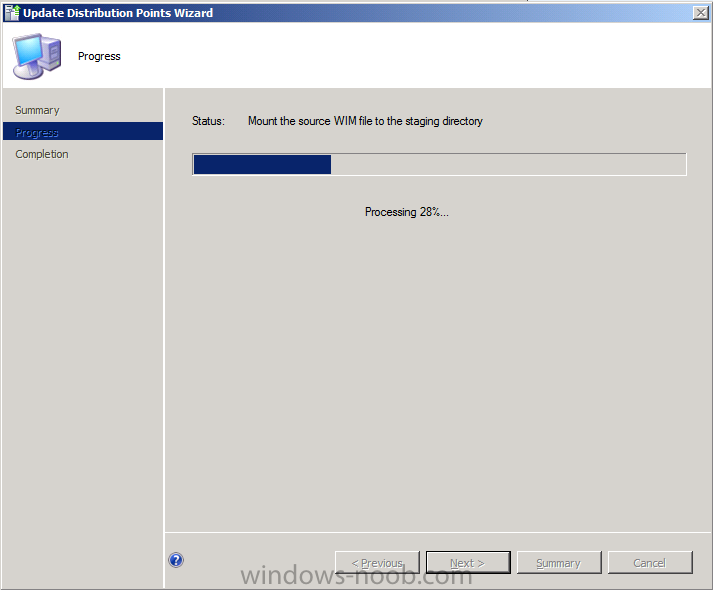
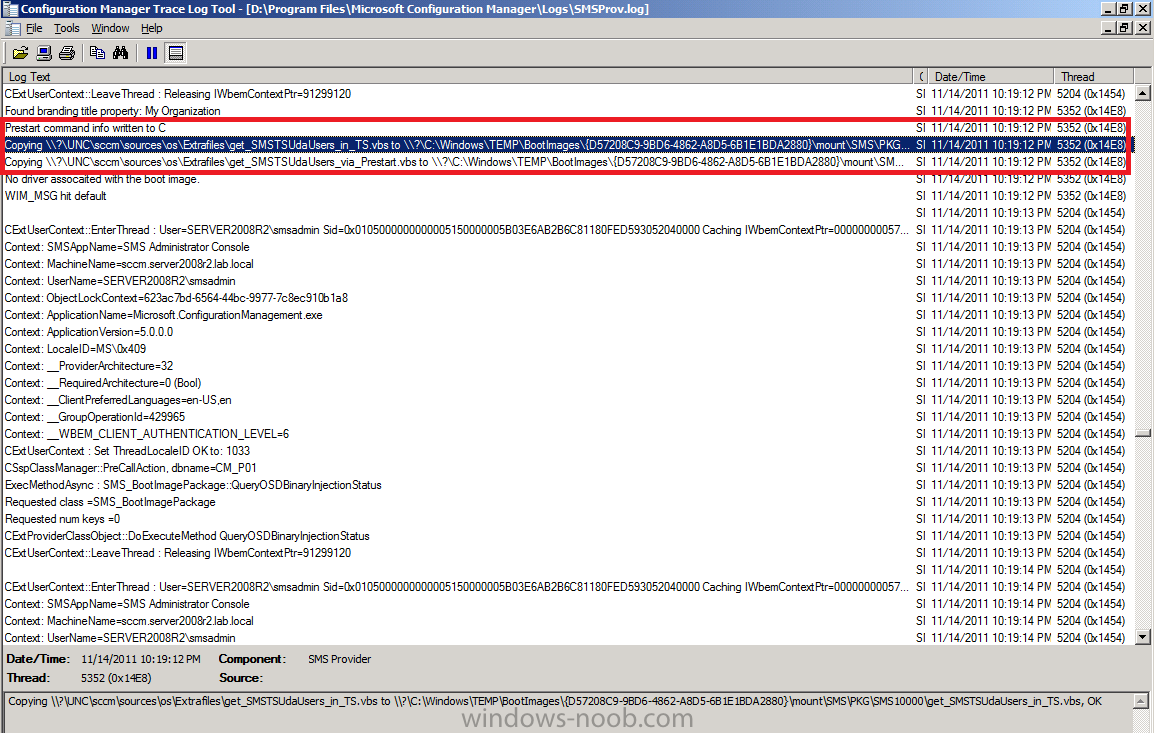
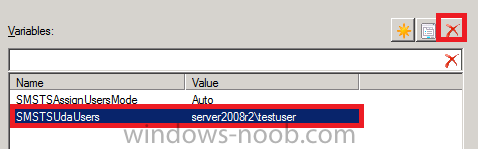
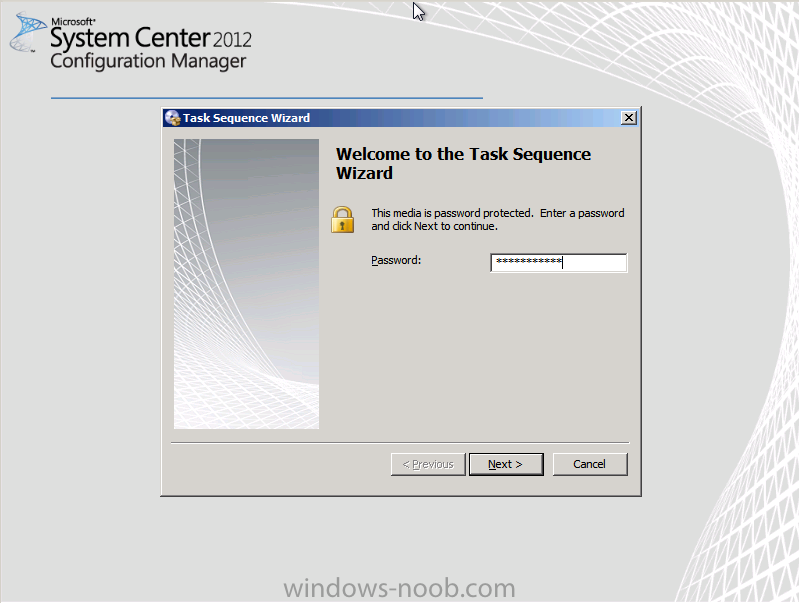
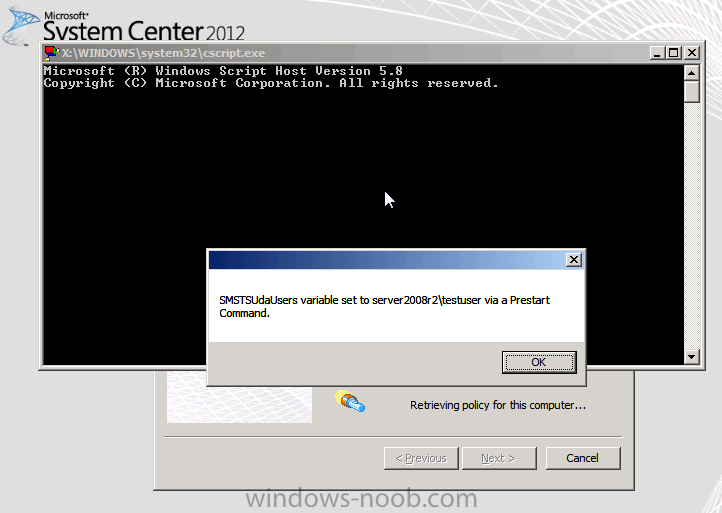
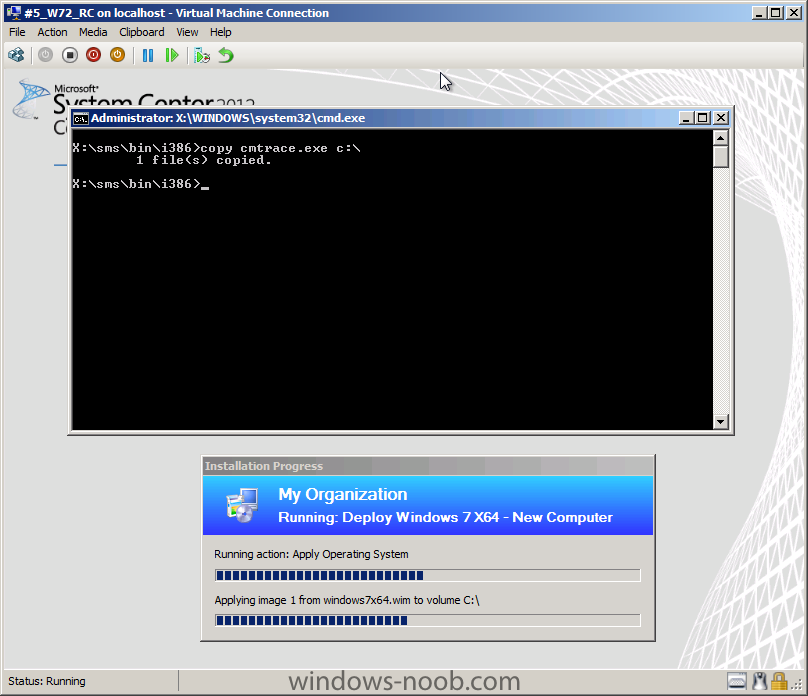
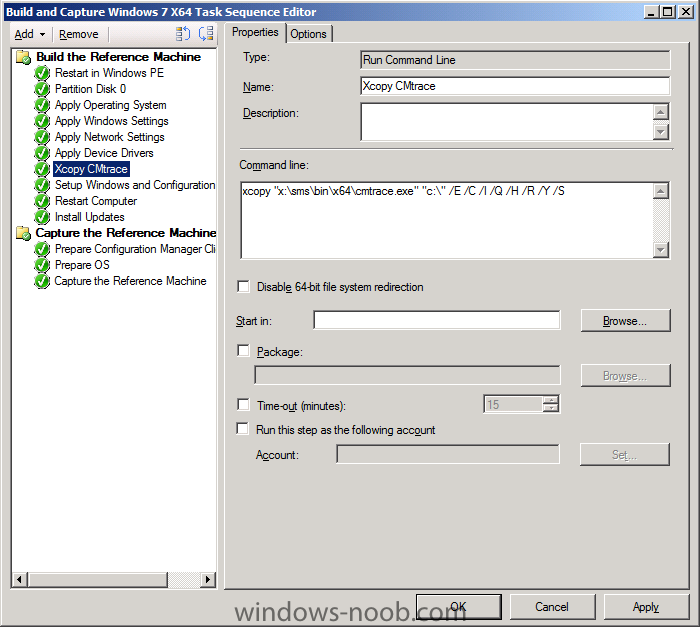
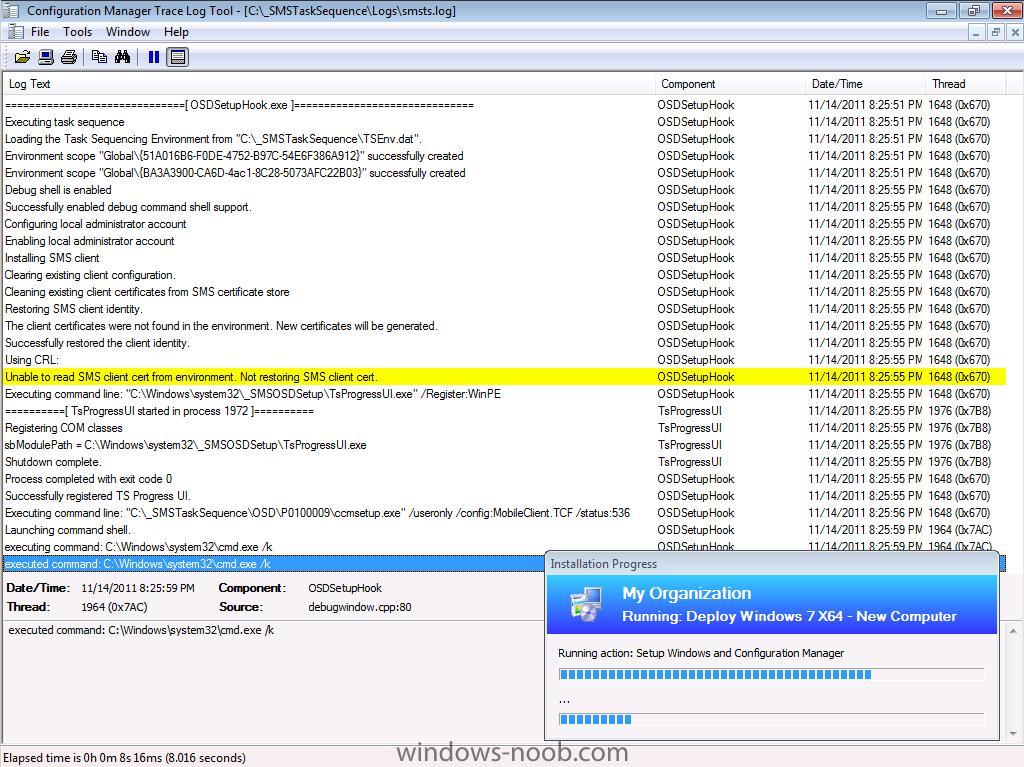
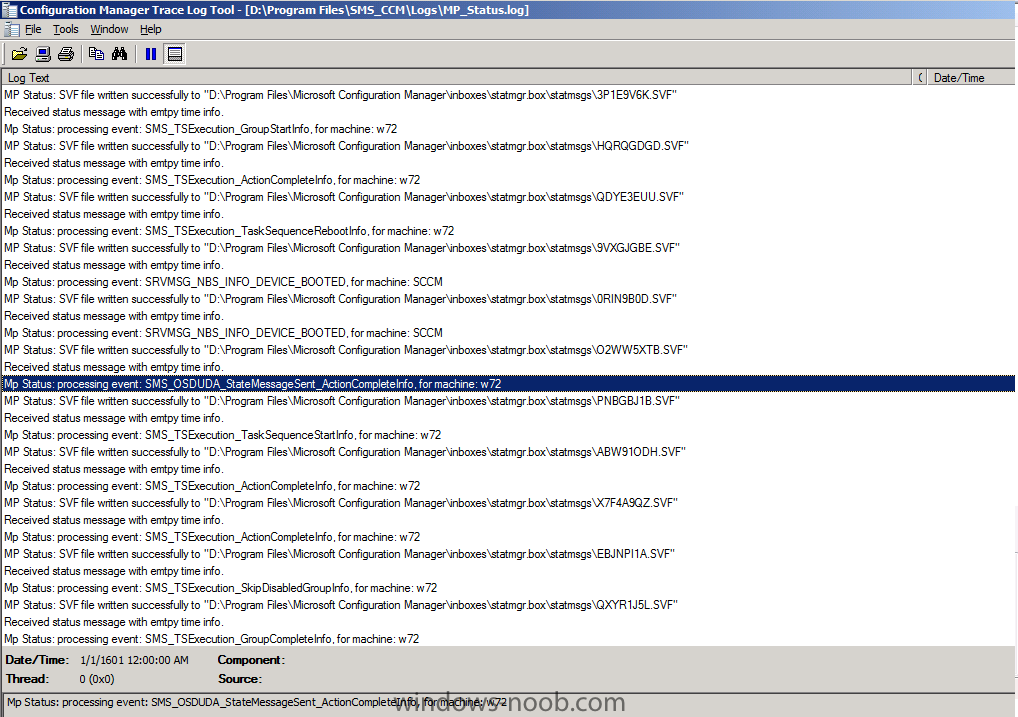
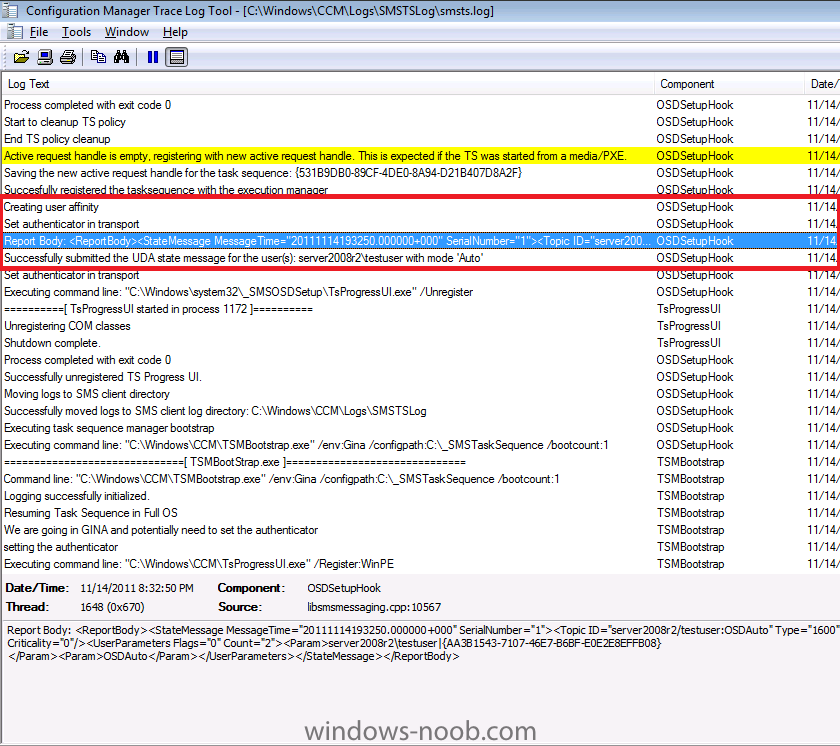
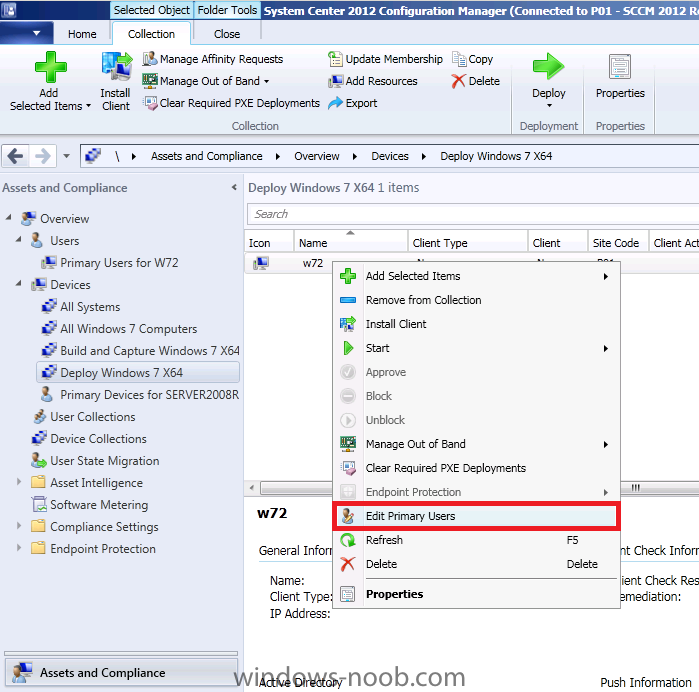
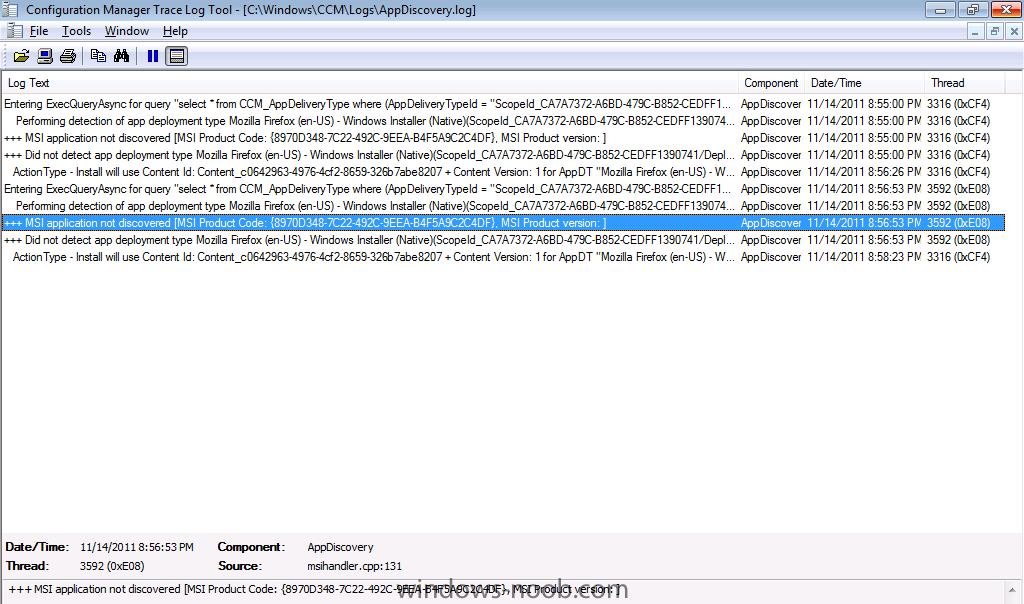
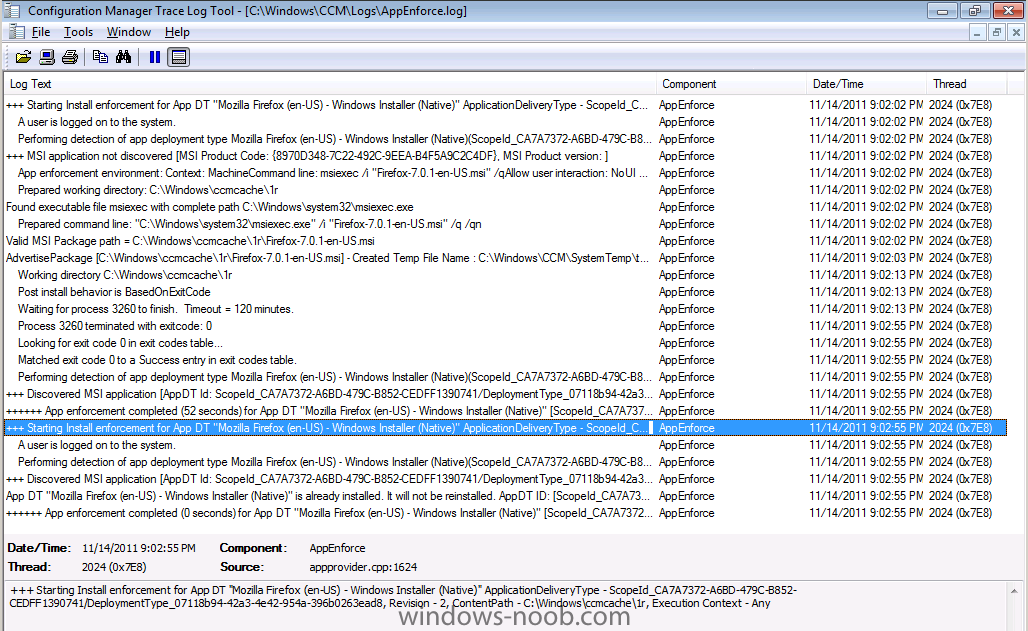
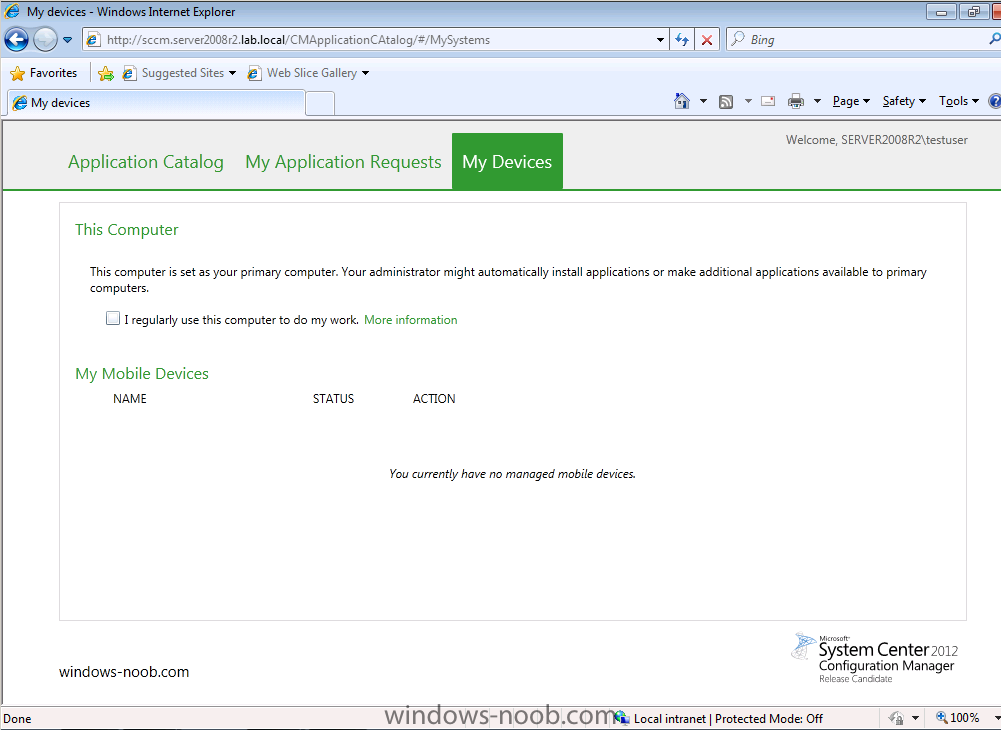
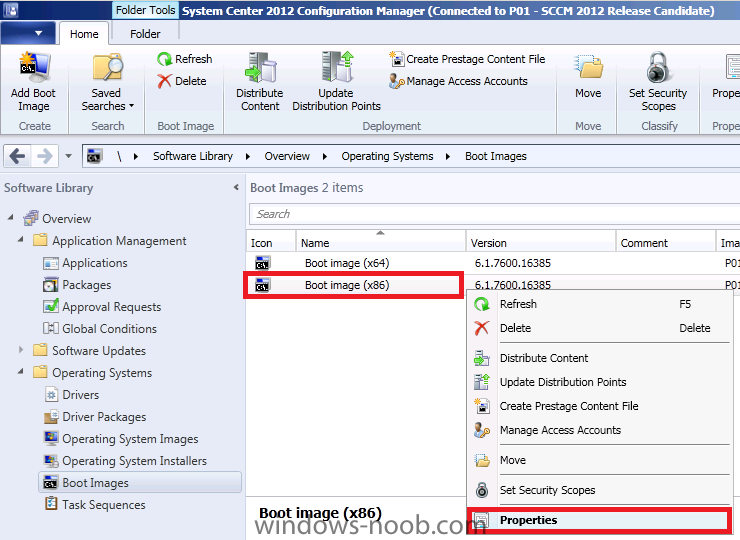
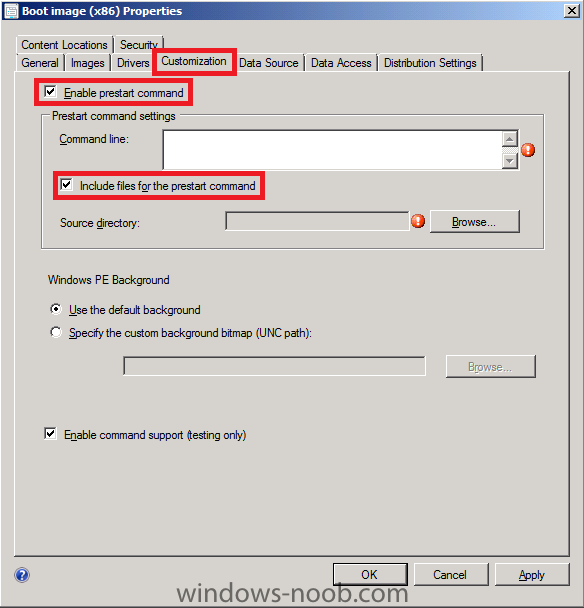
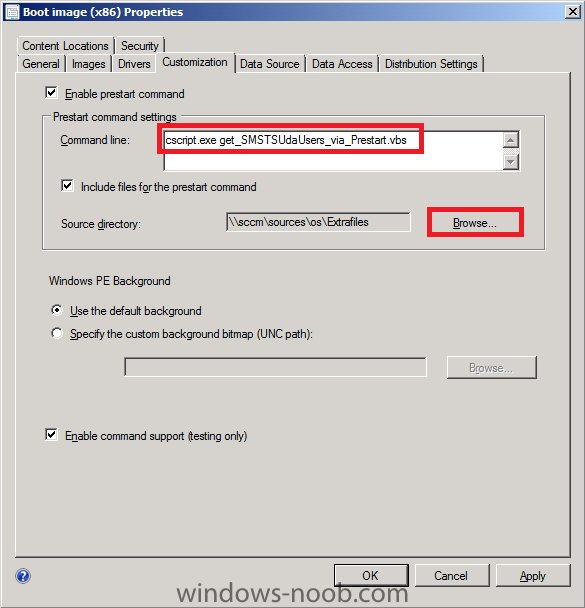
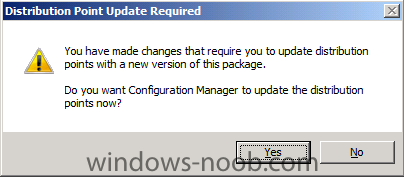
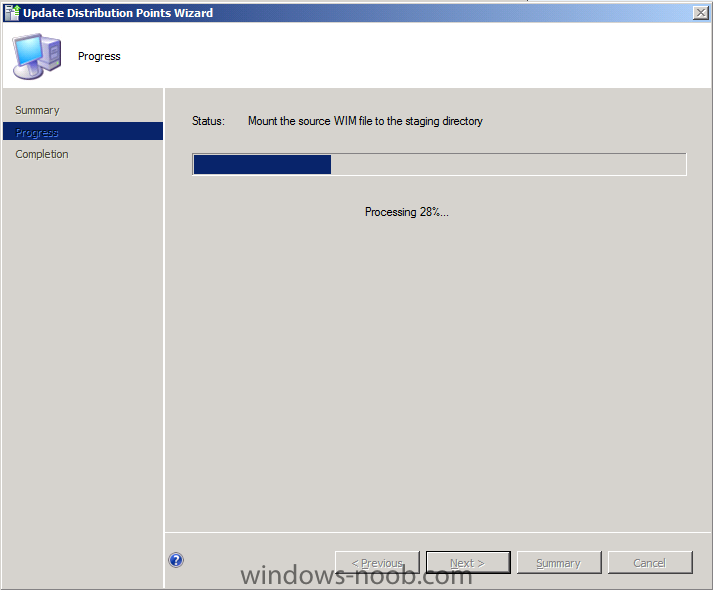
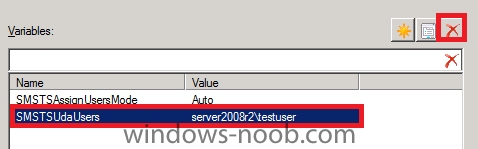
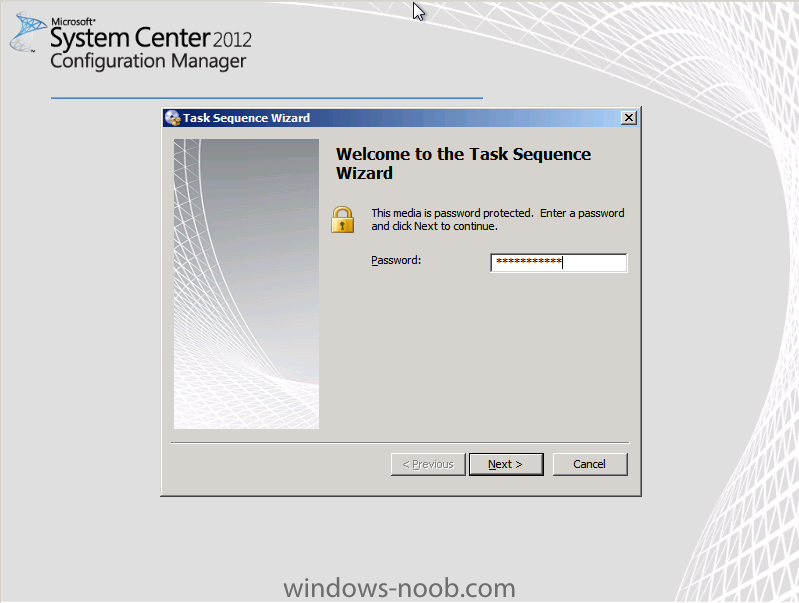
In Part 1 of this series we got our AD and SCCM servers ready, and then we installed System Center 2012 Configuration Manager as a standalone Primary site. In Part 2 we configured the SCCM server further by adding some Windows Server roles necessary for the following Configuration Manager 2012 functionality, Software Update Point (SUP) and Operating System Deployment. In Part 3 we configured the server further by Enabling Discovery methods and creating Boundary's and Boundary Groups. In Part 4 we configured Client Settings, Added roles and Distributed the Configmgr Client to our Computers within the LAB, then in Part 5 we enabled the Endpoint Protection Role and configured Endpoint Protection settings and targeted a collection called All Windows 7 Computers with these settings and policies. In Part 6 we configured our SUP further to Deploy software updates to our All Windows 7 Computers and Build Windows 7 X64 collections. In Part 7 we used the Build and Capture process to create our Base Windows 7 X64 wim image. In Part 8 we created a USMT 4 package to migrate the users data using hardlinking and then we imported the captured image into ConfigMgr and created a Deploy Windows 7 X64 task sequence. We created a Deploy Windows 7 X64 Collection and set some User Device Affinity collection variables. In Part 9 we created an Application, and created a deployment type for that application to only install if the Primary User was True for that device (User Device Affinity), we then copied our Task Sequence (duplicated it), deployed the new Task Sequence, added a computer to the new collection and then PXE booted the computer to the Deployment Menu. Now we will monitor the Deployment process in a lot of detail to see what happens with UDA and more. Step 1. Deploy Windows 7 X64 and monitor the progress Perform the following on your SCCM 2012 server as SMSadmin. Recap: After PXE booting our W72 virtual machine, we entered the PXE password and then we selected the Deploy Windows 7 X64 - New Computer and it formatted the disc and then started applying the Operating System, at this point I want you to pay close attention to the Deployment progress so that you can see when it sets the UDA relationship, if your image is already deployed don't worry, you can delete the computer in SCCM, reimport it to the Deploy collection and PXE boot again. What we want to do here is to view the SMSTS.log file around the time that Setup Windows and Configmgr step is running, to do this we will press F8 at the right time, so press F8 now during the Apply Operating System phase while the image is being applied to c:\ you may as well copy over our troubleshooting tool, CMtrace.exe to the root of c:\ x:\sms\bin\i386\copy cmtrace.exe c:\ Tip: As the CMTrace tool is now embedded in our boot images, you can automate the above by adding a step to your Build and Capture Task Sequence (or even your Deploy Task Sequence) as long as it occurs before the Setup Windows and ConfigMgr step, the code is xcopy "x:\sms\bin\x64\cmtrace.exe" "c:\" /E /C /I /Q /H /R /Y /S. Note: the path will change depending on what architecture boot image you are using ! after the image is applied the Virtual Machine wants to reboot, so type Exit in your console and the vm will reboot into Windows and then Setup is installing devices and applying system settings followed by another reboot, and then Setup is preparing your computer for first use, and this is where you need to be awake if you want to witness this part of the process, when you see the blue windows screen press F8 again and it's now at the Setup Windows and ConfigMgr step type c:\cmtrace.exe and answer yes to make it the default logging tool, open the following file C:\_SMSTaskSequence\Logs\smsts.log meanwhile on your SCCM server, open the following log file in CMTrace.exe, D:\Program Files\SMS_CCM\Logs\MP_Status.log and look for the following line:- that is the UDA state message being sent meanwhile on the client we can see the UDA actions in in our SMSTS.log file (you may have to change the location of the SMSTS.log file to C:\Windows\CCM\Logs\SMSTSLog\smsts.log) Meanwhile.. back in the ConfigMgr console, click on Assets and Devices, and select our Deploy Windows 7 X64 collection, in there you'll see our W72 computer, right click it and choose Edit Primary Users you should see the following, Affinity Type=OSD Defined. ok, now that you've seen what happens, close the CMtrace tool and the command prompt in your Deploy Windows 7 X64 session and let it finish it's job (it'll jump to the login screen very quickly) so login and we can review some new logs ! Step 2. Review the Deployed Windows 7 X64 computer Perform the following on your Windows 7 client as testuser. Login to the desktop and start Internet Explorer and browse to the Application Catalog , review the My Devices tab, it should say:- Next, using Windows Explorer, start up CMTrace.exe (located in C:\) and browse to C:\Windows\CCM\Logs, open the AppDiscovery.log file, as we can see it's logging about detecting whether Mozilla FireFox is installed or not and it reports msi application not discovered next open C:\Windows\CCM\Logs\AppEnforce.log, you should see it referencing whether or not a user is logged on (we are logged on now, but if we had waited 30 minutes or so and then logged on it would have reported things differently), and how it tries to Enforce installing the app cool stuff indeed, oh and if we minimise CMTrace what do we see ? yup the Firefox icon on the desktop, installed using User Device Affinity variables and by configuring our Deployment Type rules, cool huh ? Step 3. Modify the boot wim to include prestart and Extrafiles Perform the following on your SCCM 2012 server as SMSadmin. Now that we've proven that we can use UDA to install apps for our Primary User, let's edit the task sequence to prompt us for a Primary User instead of forcing it via a collection variable. To do this we need to edit our boot.wim files first of all. We need a few files, so please download the following zip file Extrafiles.zip and uncompress it to D:\Sources\OS\Extrafiles In the ConfigMgr console, locate our Boot image (X86) and right click it, choose Properties click on the Customization tab and place a checkmark in Enable Prestart Command, place another checkmark in Include files for the prestart command click browse and browse to the UNC path of our Extrafiles eg: \\sccm\sources\os\Extrafiles in the command line type the following cscript.exe get_SMSTSUdaUsers_via_Prestart.vbs click apply and answer yes when prompted about distribution point update required it starts to inject the changes Tip: you can open the SMSProv.log to monitor the files being injected into your boot.wim files. Step 4. Modify our Collection Variables Perform the following on your SCCM 2012 server as SMSadmin. In the ConfigMgr console, click on Assets and Compliance and locate our Deploy Windows 7 X64 collection, right click, choose properties, select the Collection Variables tab remove the SMSTSUdaUsers variable we set earlier by highlighting it and clicking on the red X, answer yes when prompted. Step 5. PXE boot and test the prestart command Add a new virtual machine to our Deploy Windows 7 X64 collection (or delete the one we used previously, and then import it back again, verify it's in the collection after the import before pxe booting). PXE boot and you'll get to the Task Sequence password screen.. press next and Voila, you get to see your Prestart command in action ! so enter the primary user name and click ok and our SMSTSUdaUsers variable is now set via a Prestart command, in a later part of this series, we will see how we can set this via the task sequence itself and also look at setting the Task Sequence Deployment ID via a variable to override what's targetted to our computer.


-
but it's still not supported, way better to start fresh and know that you are doing so
-
"It doesn't appear to install the updates." what does your windowsupdate.log file say on the client
-
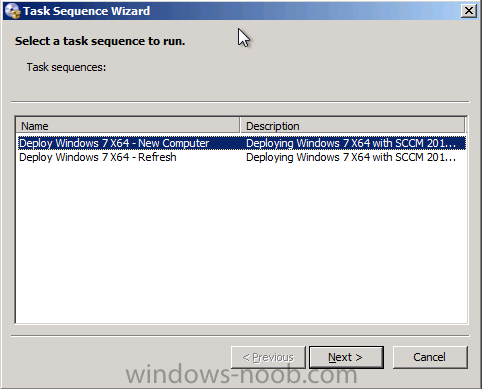
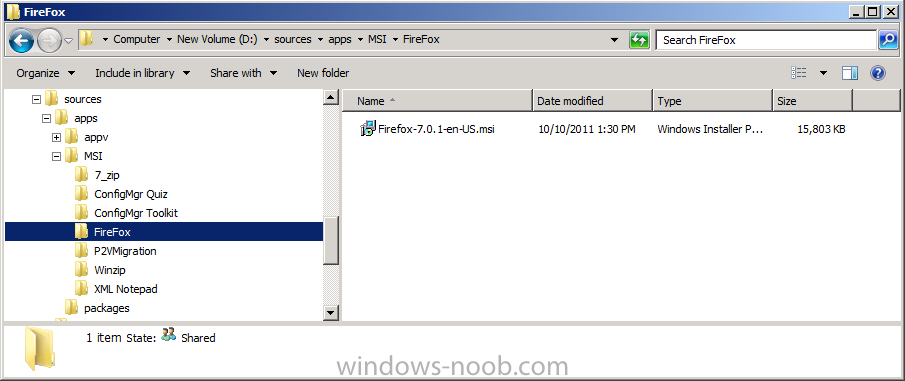
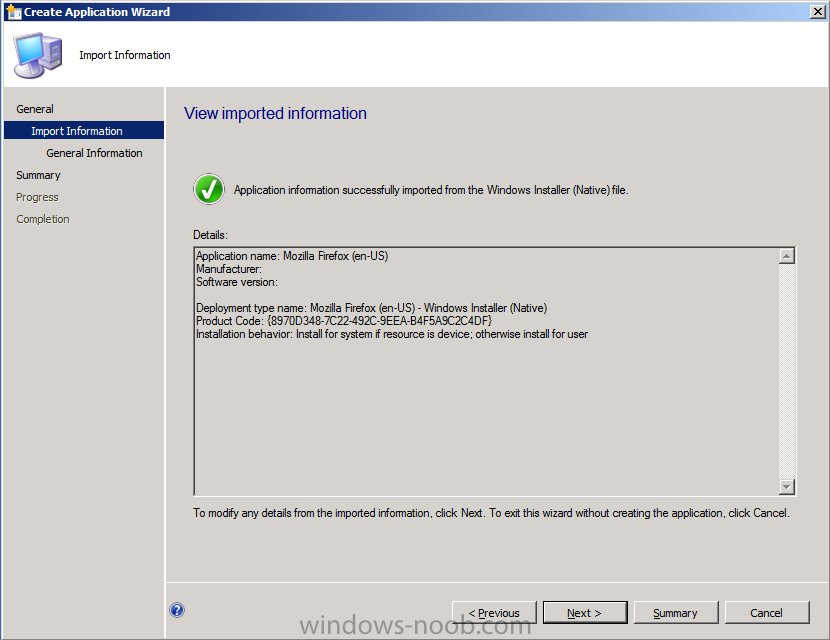
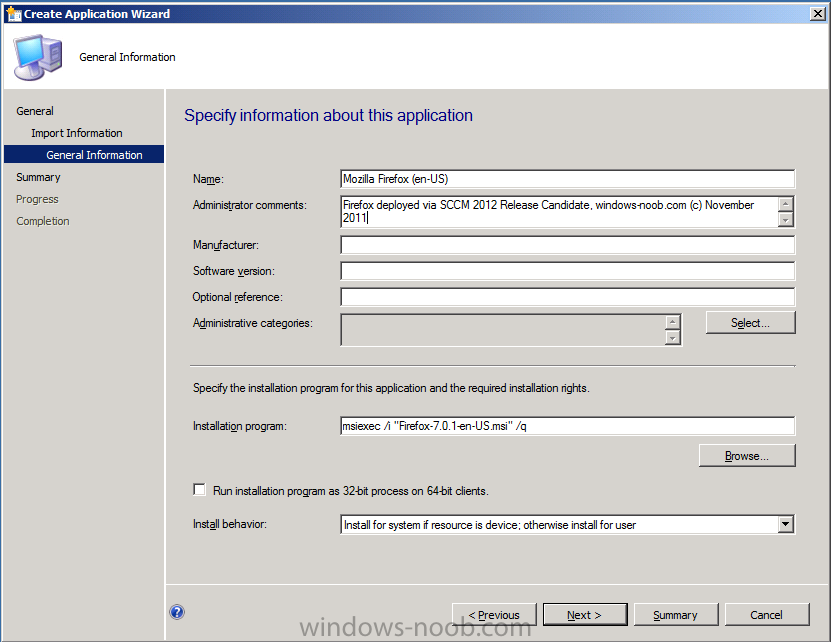
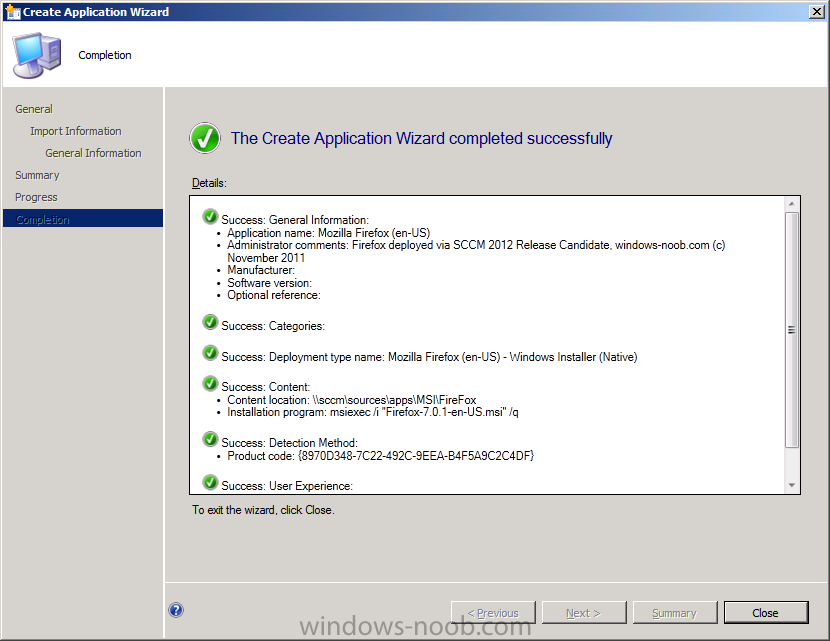
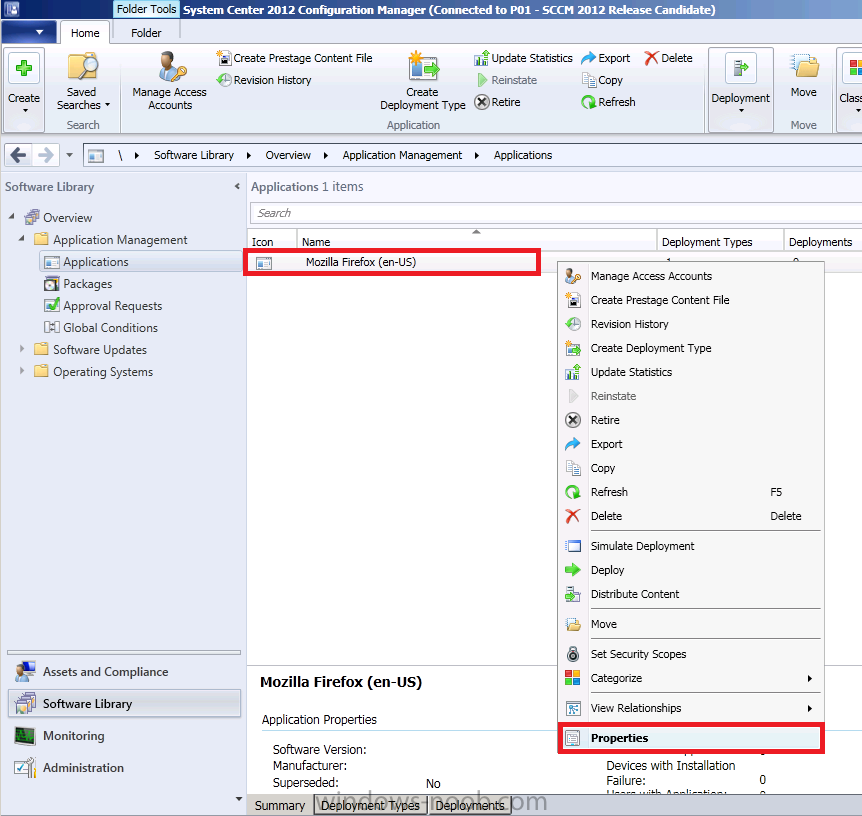
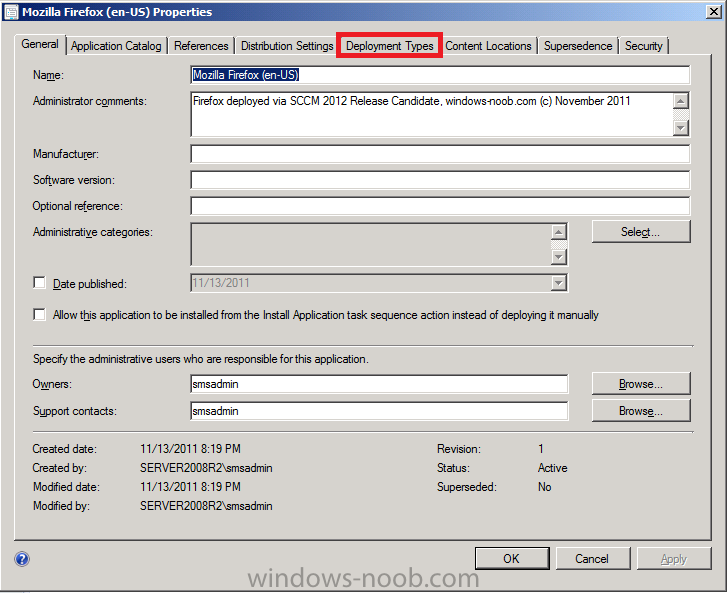
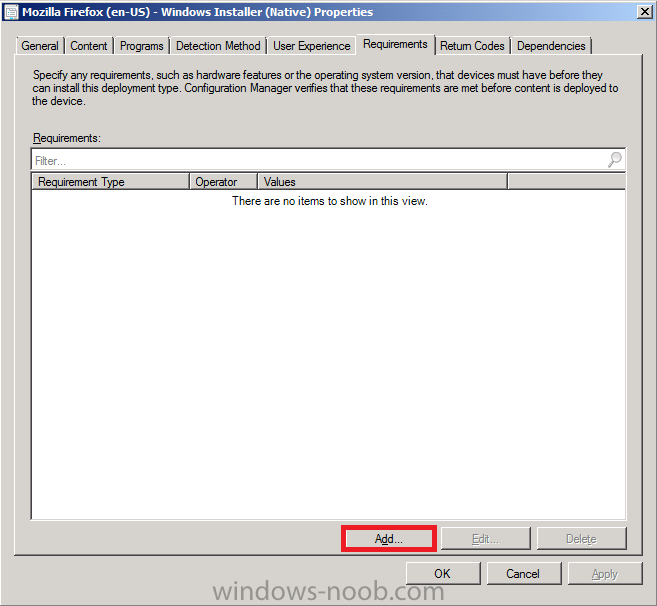
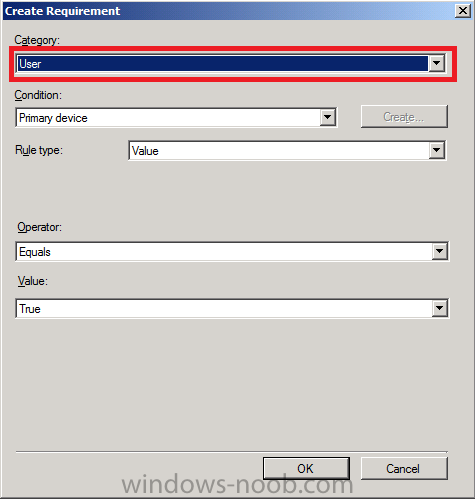
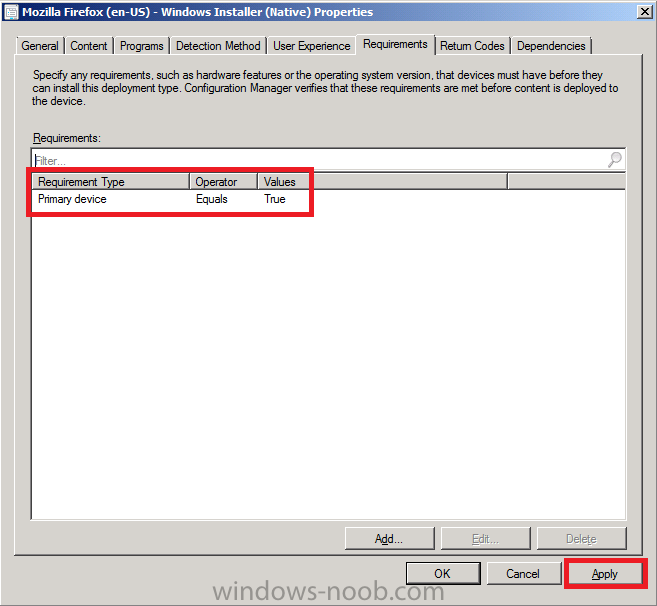
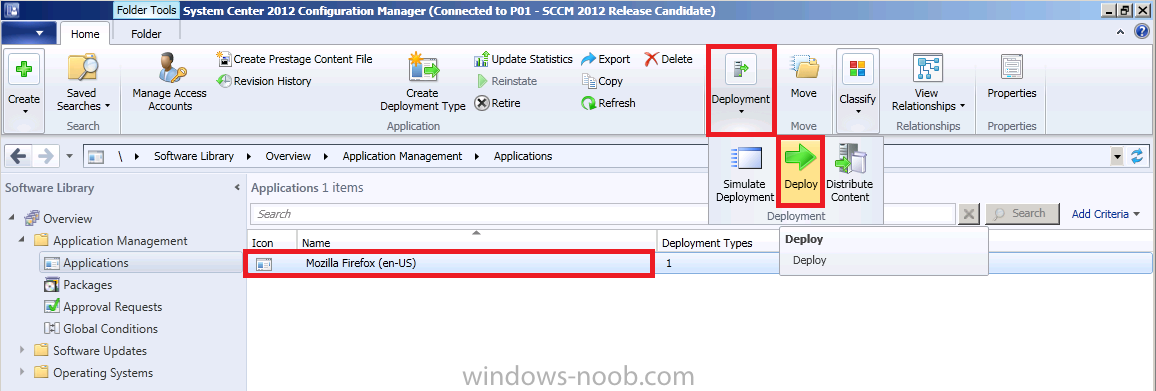
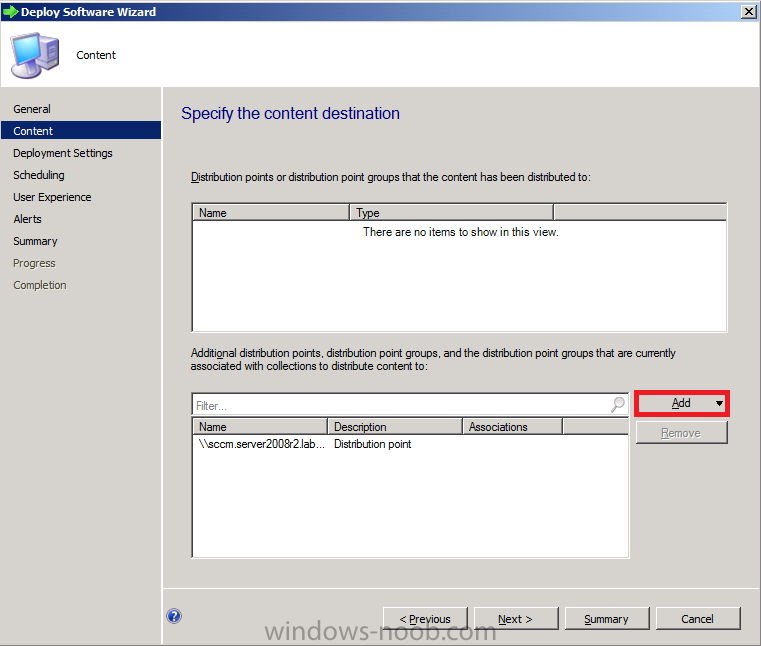
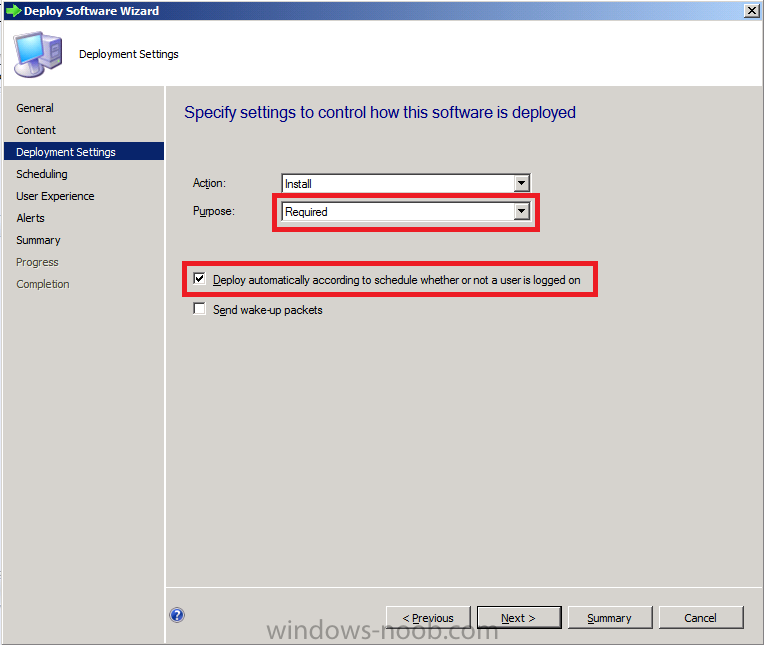
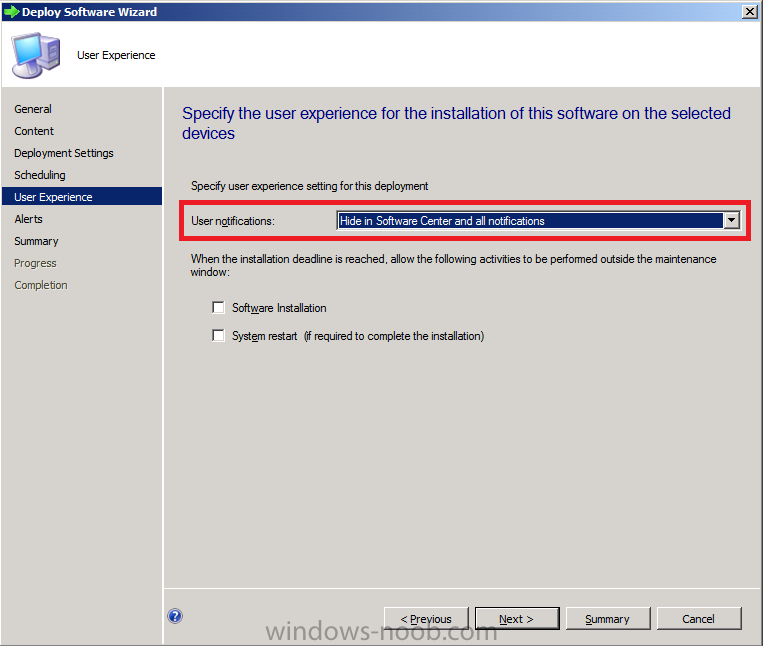
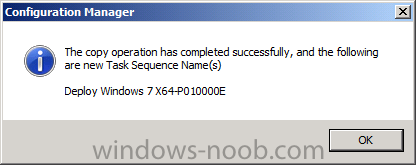
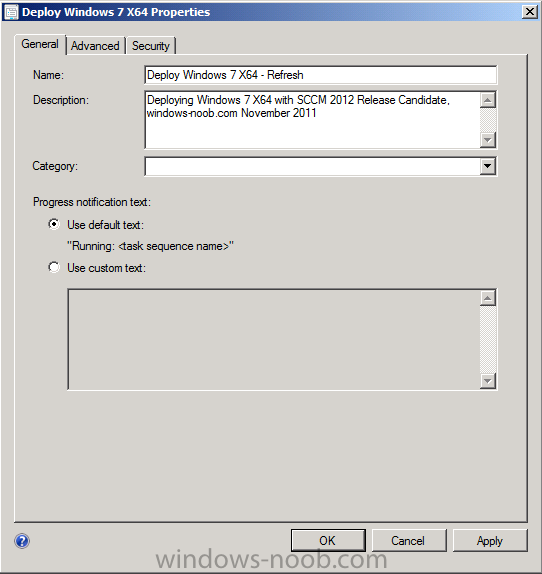
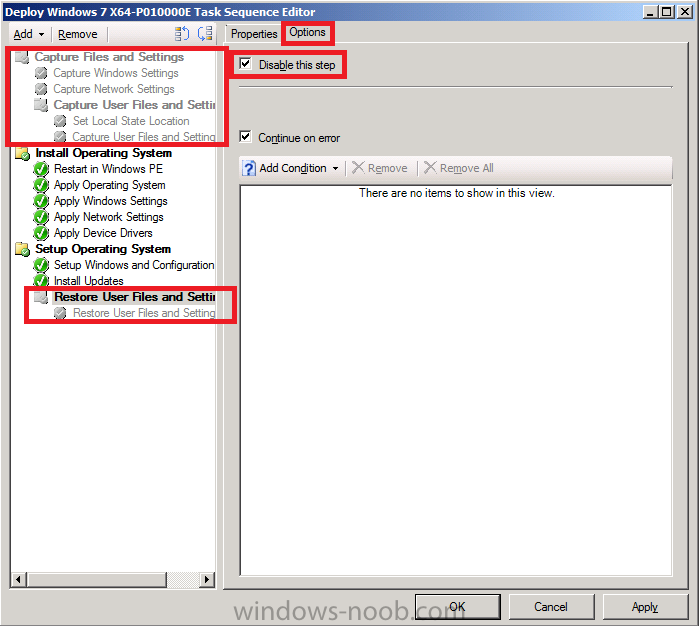
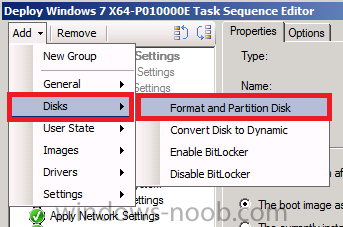
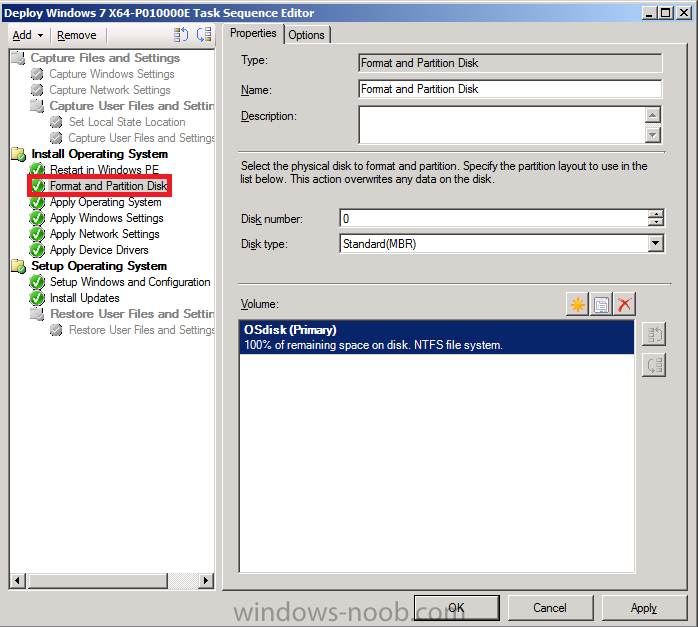
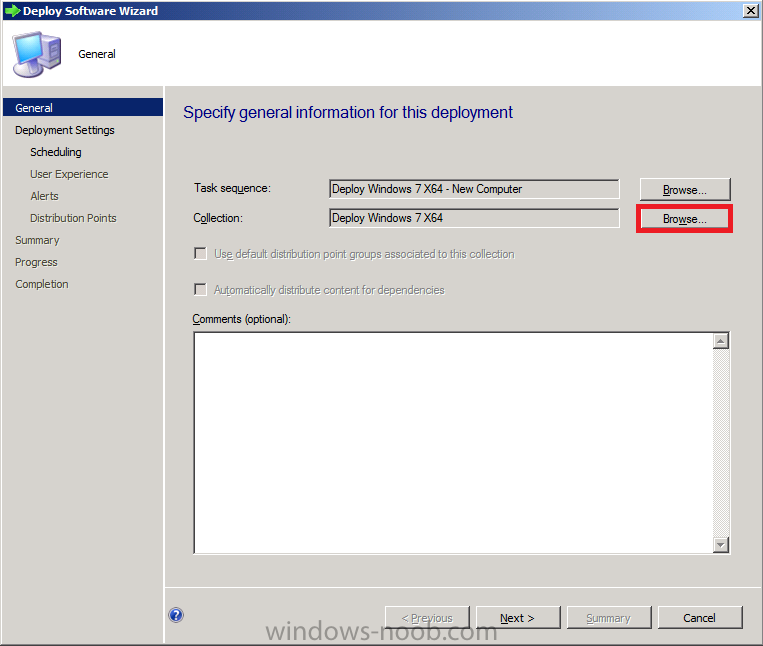
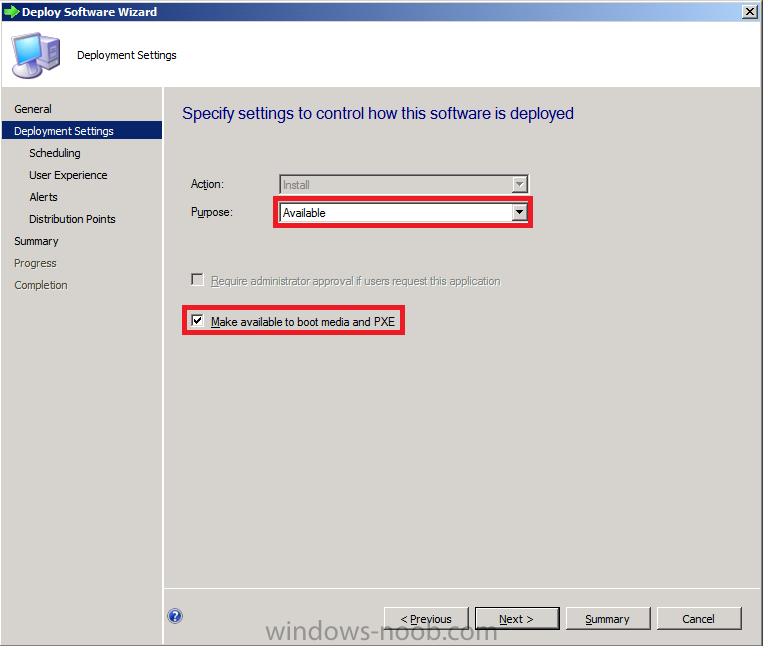
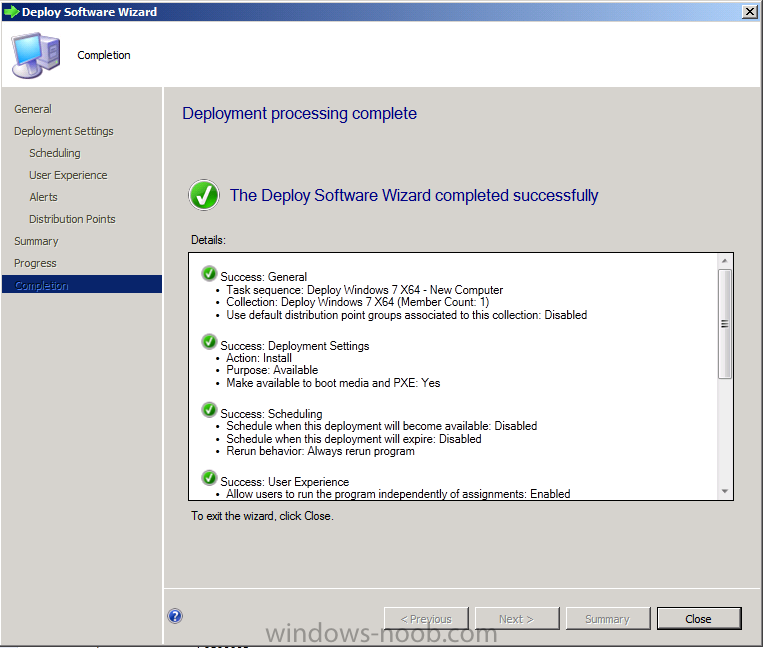
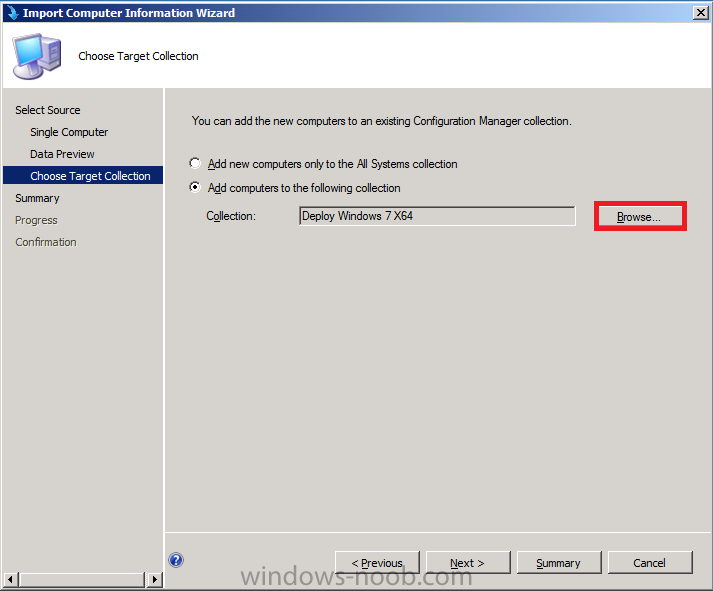
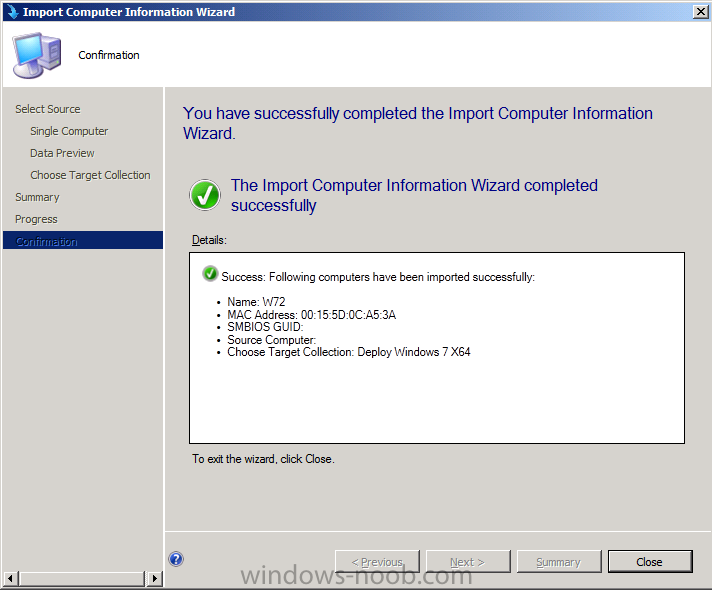
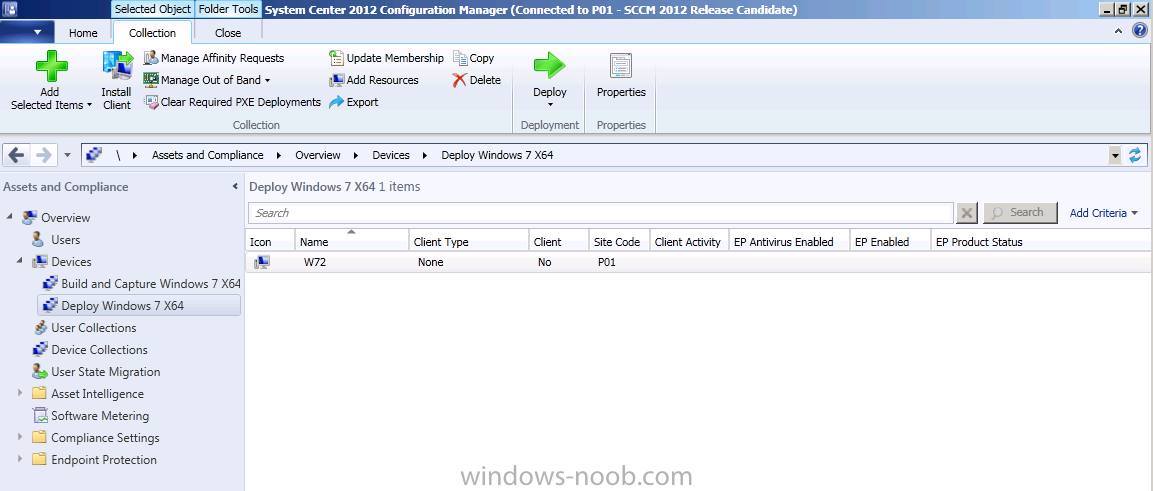
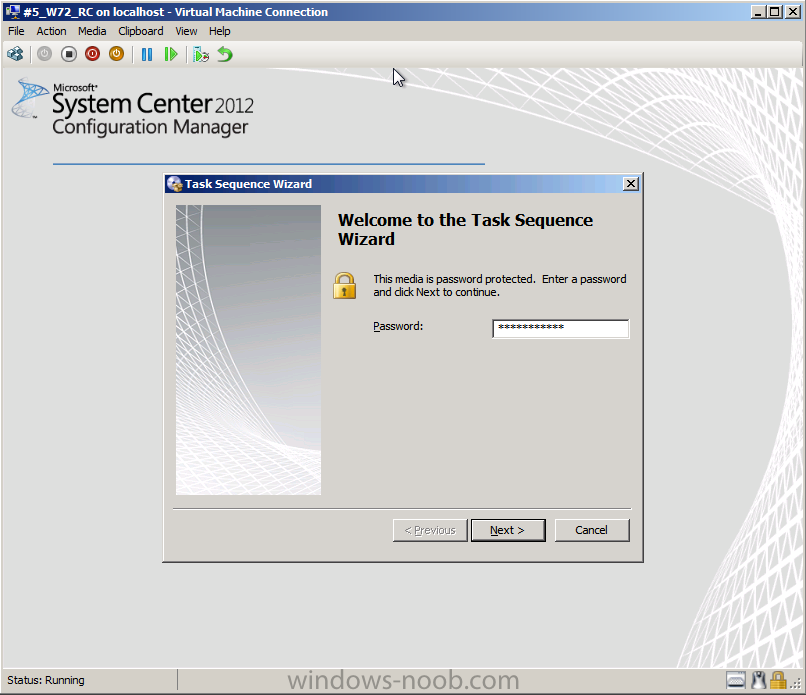
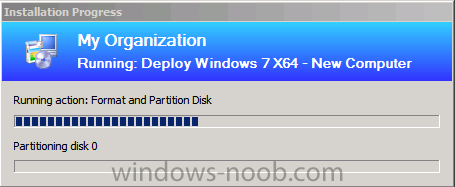
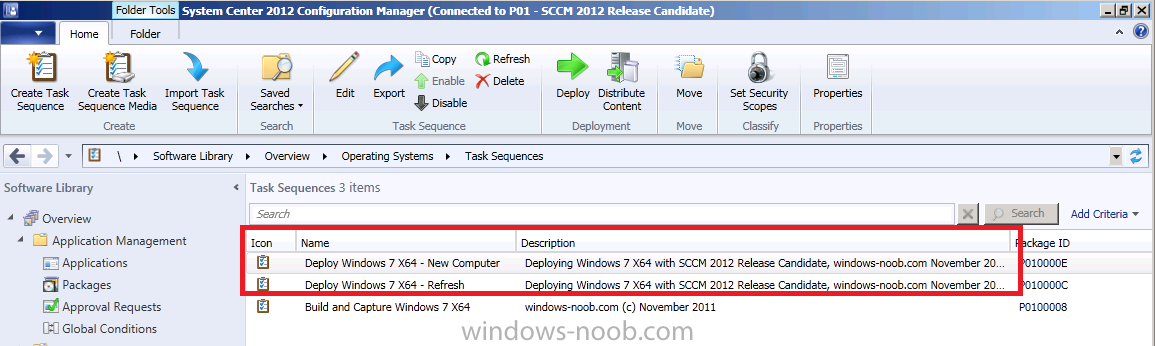
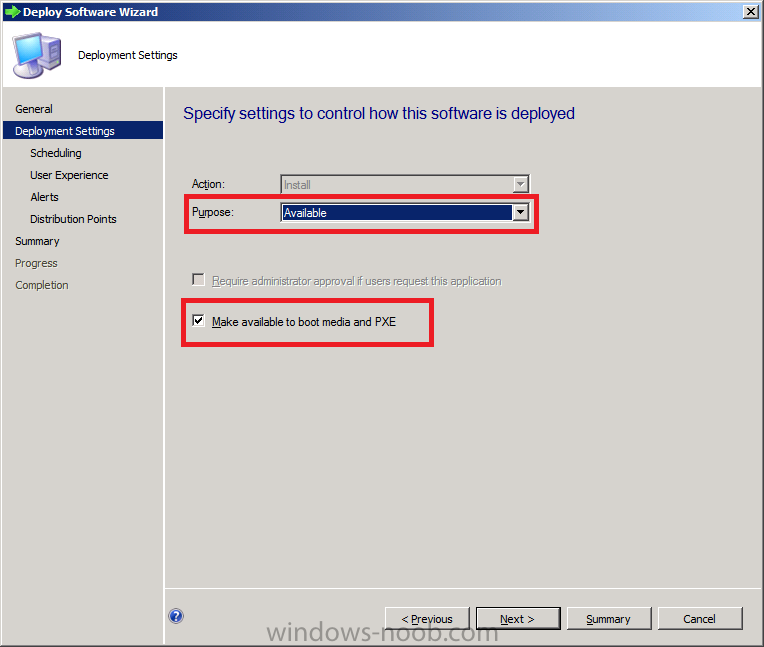
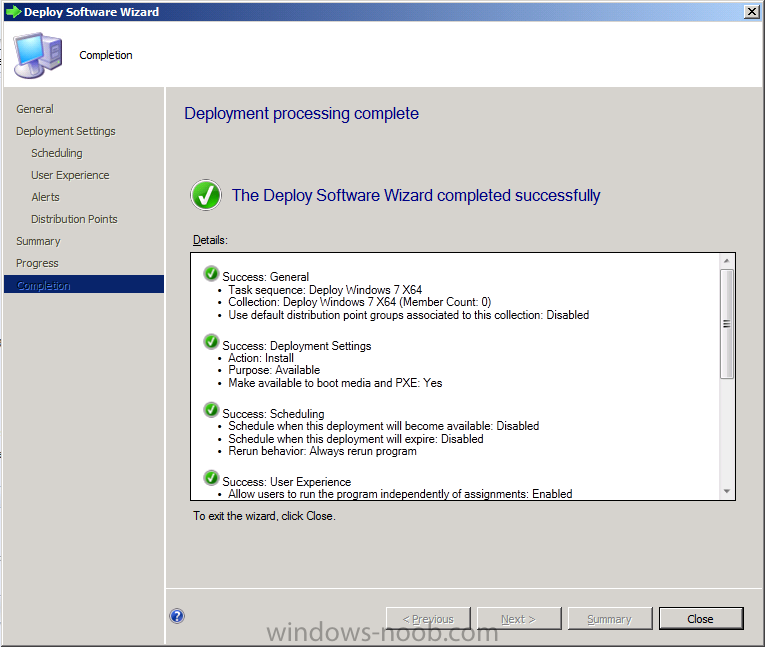
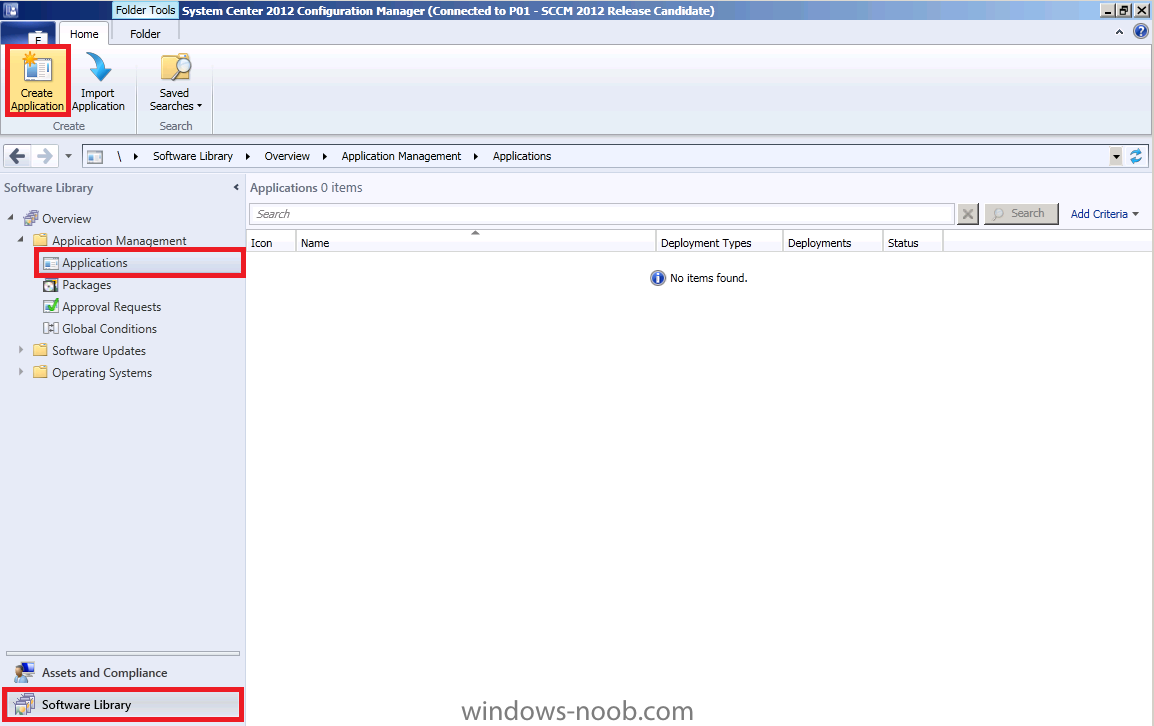
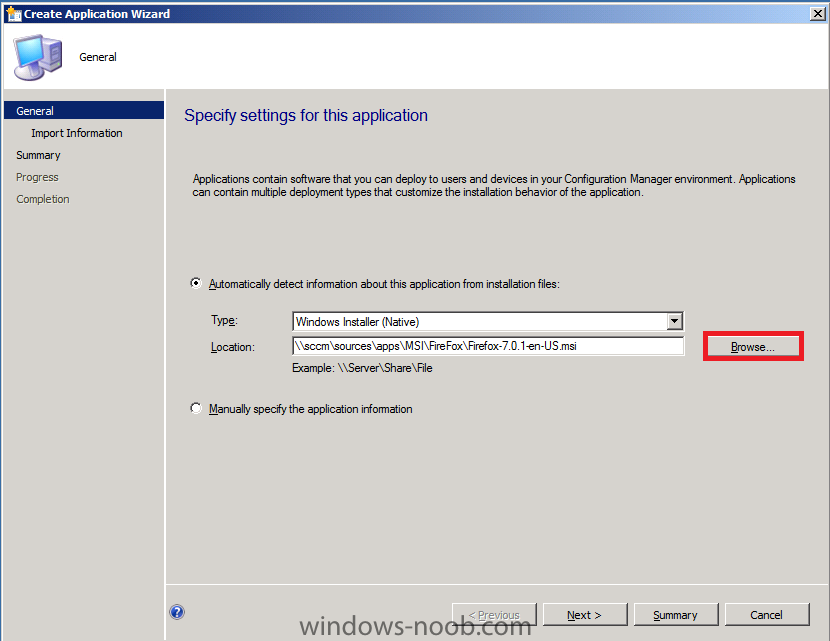
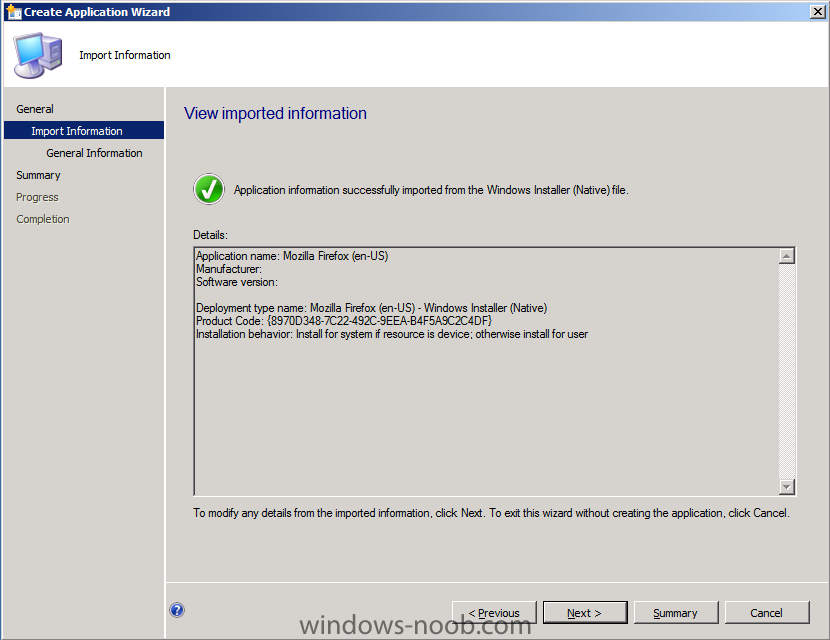
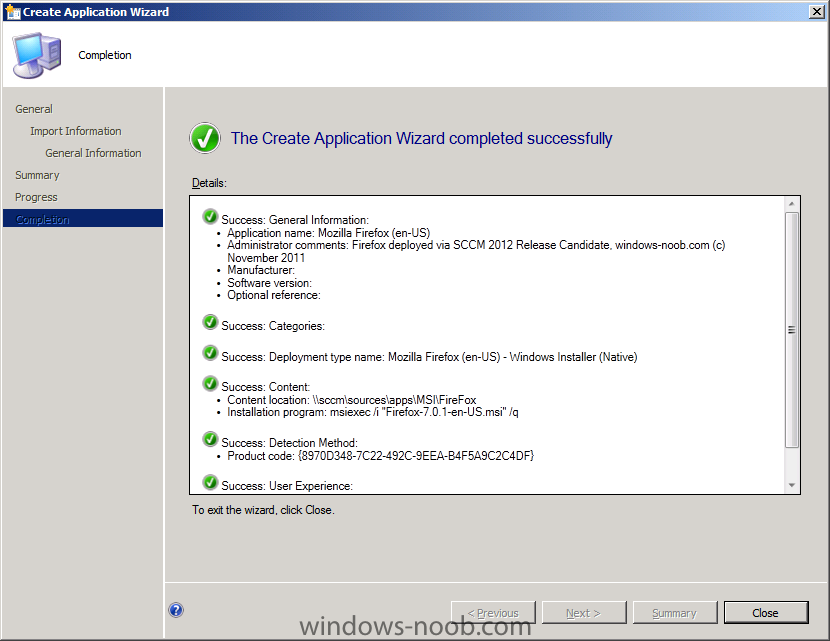
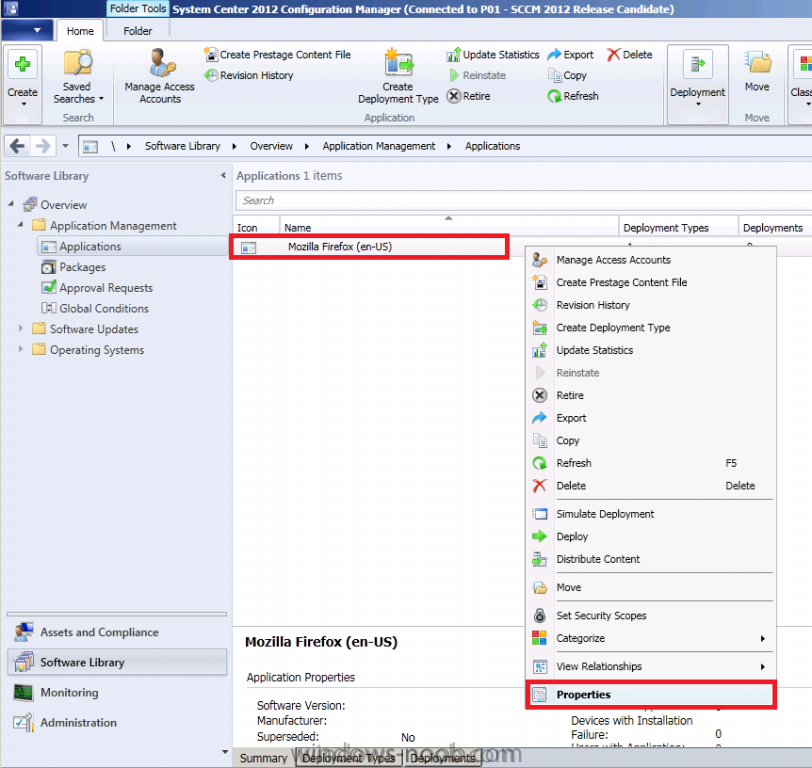
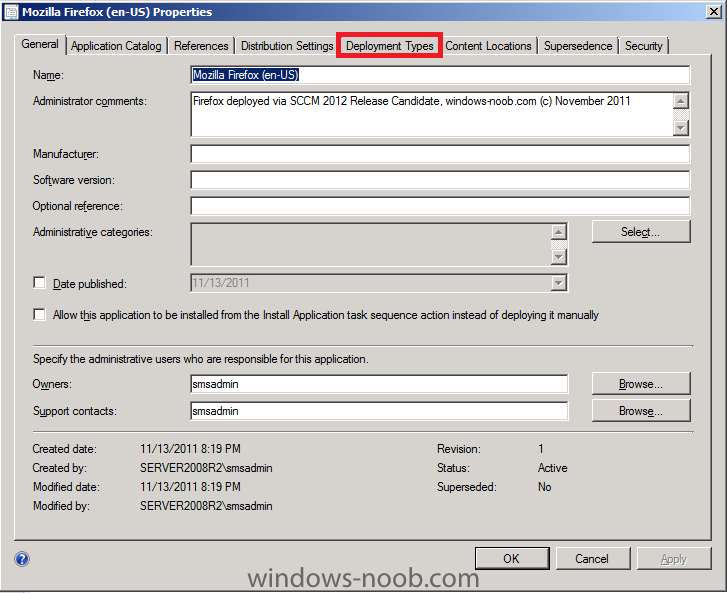
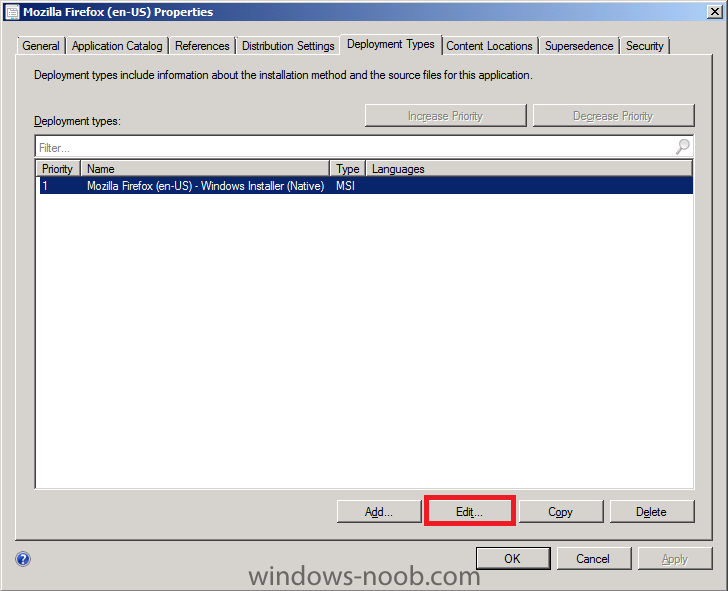
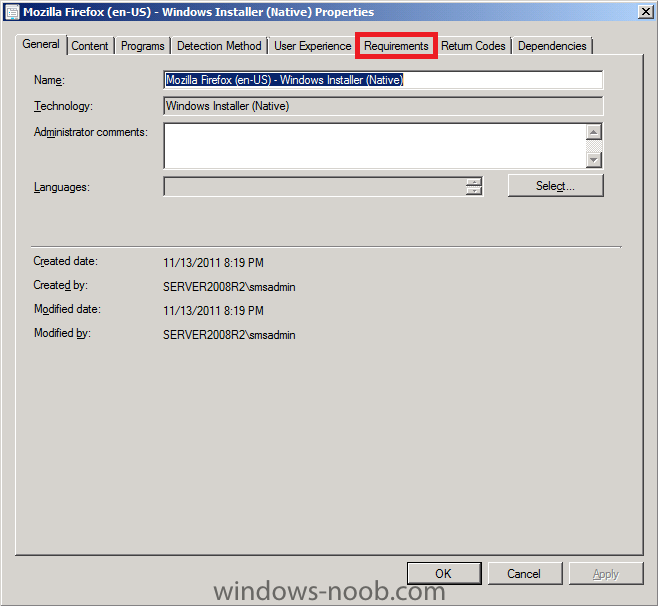
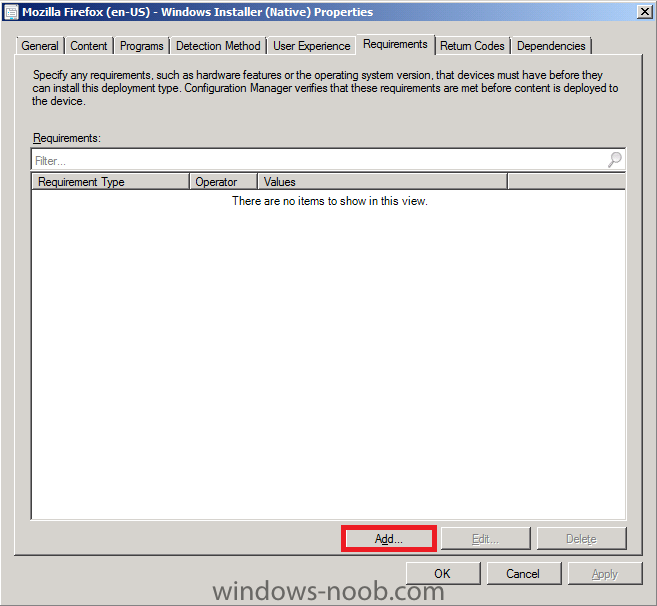
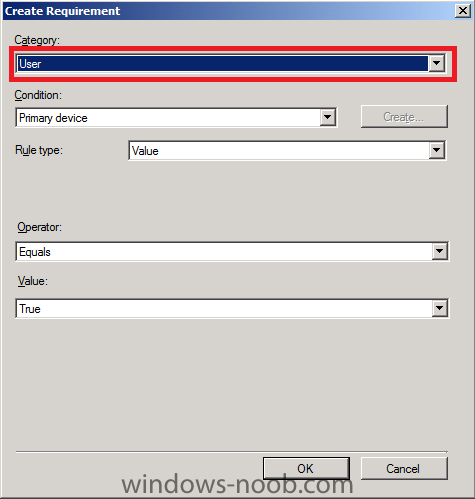
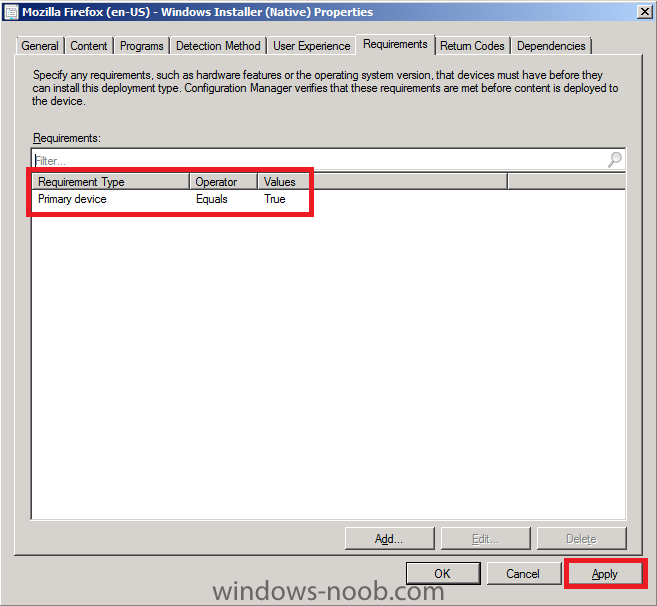
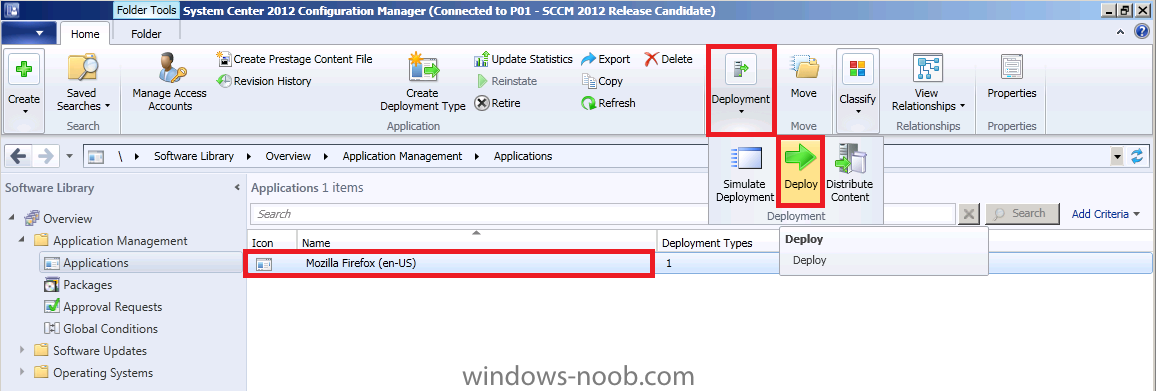
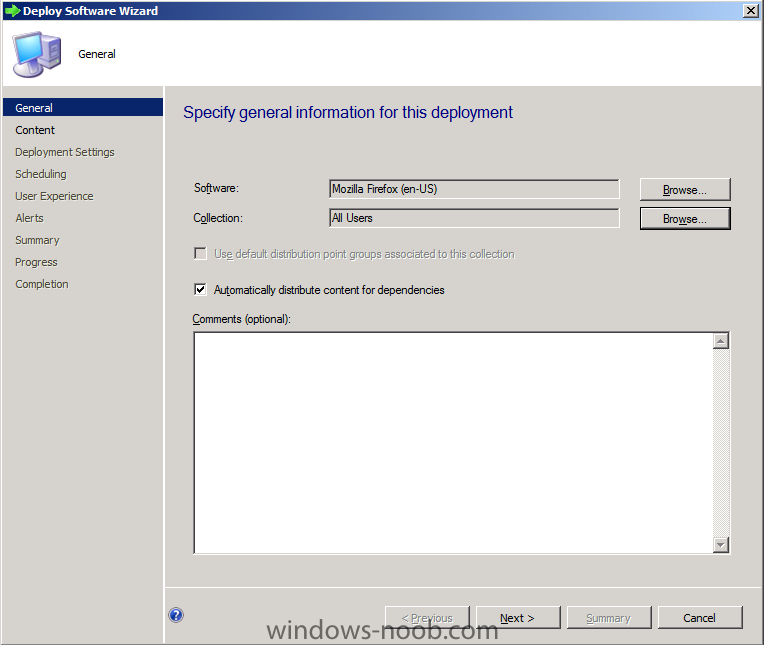
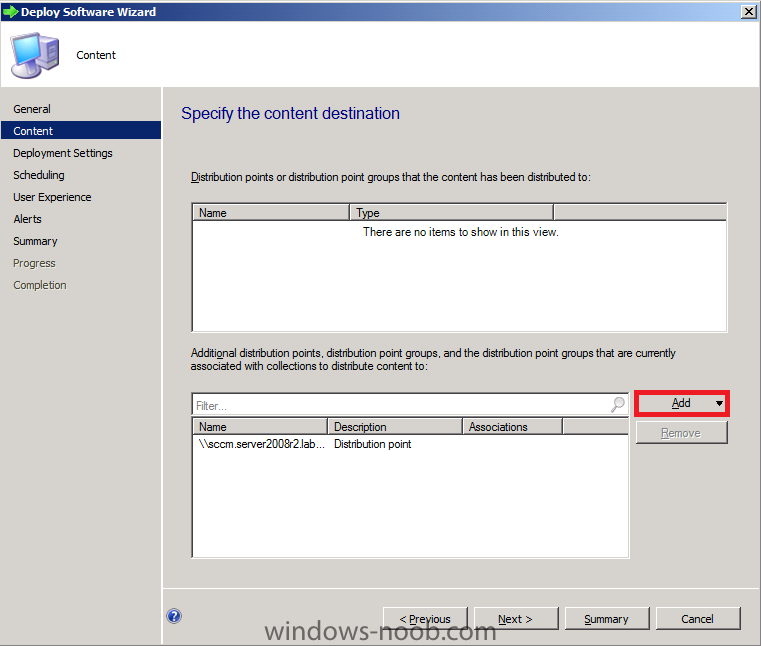
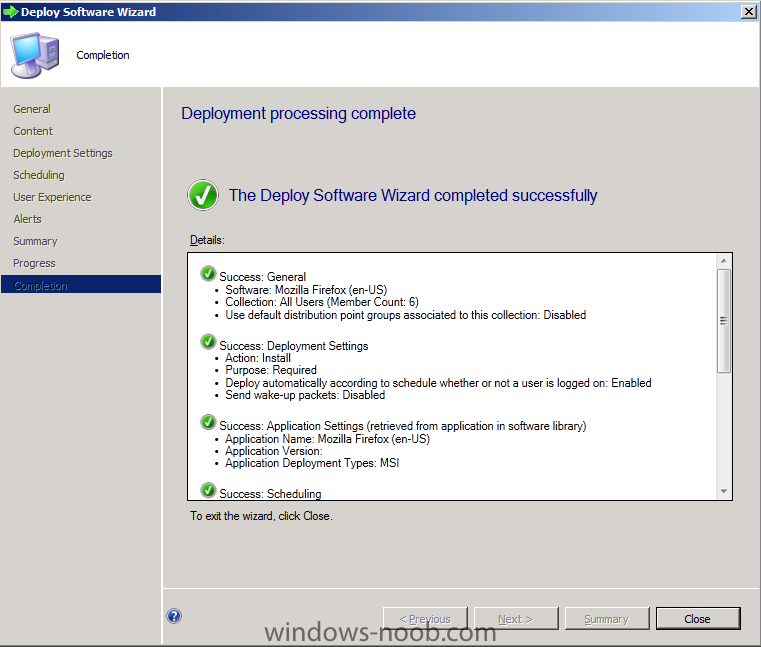
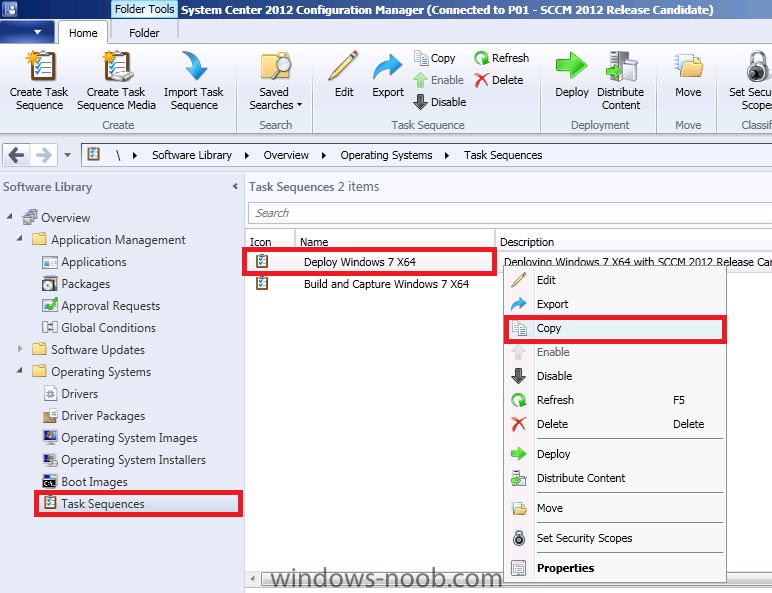
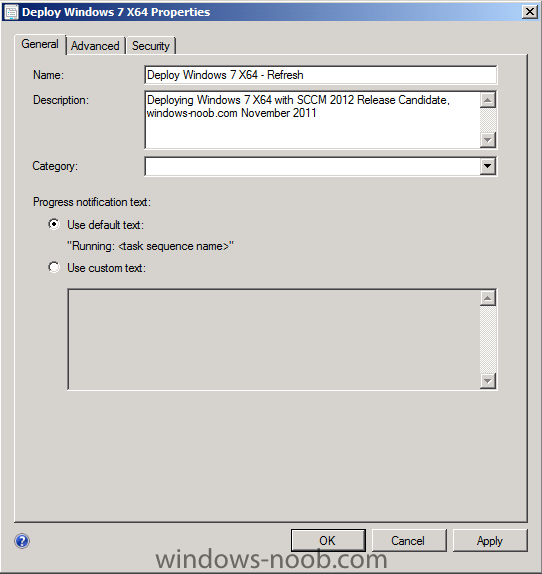
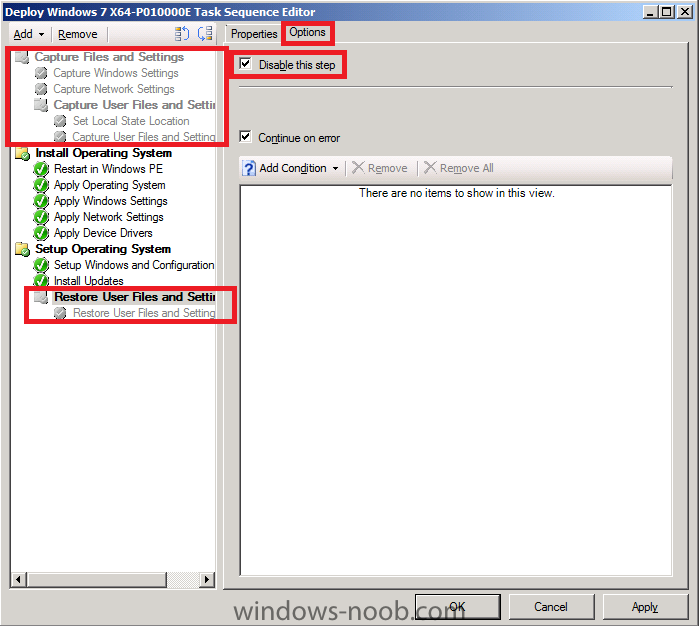
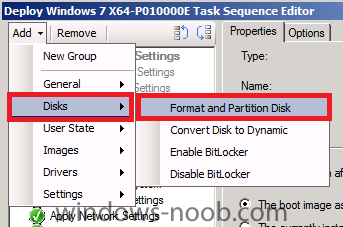
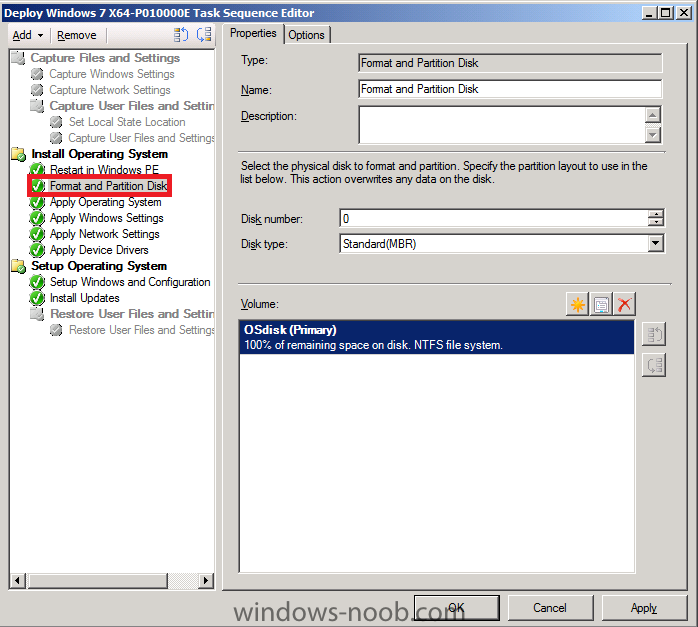
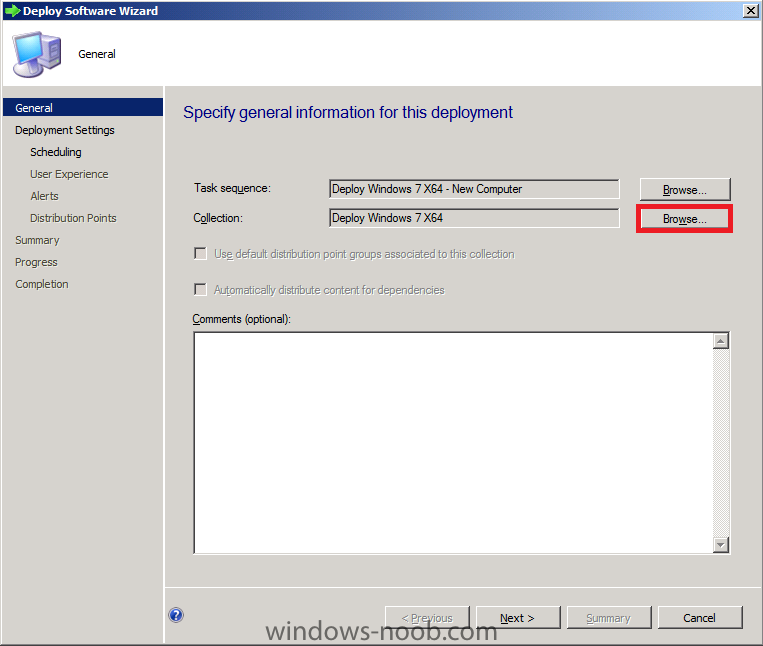
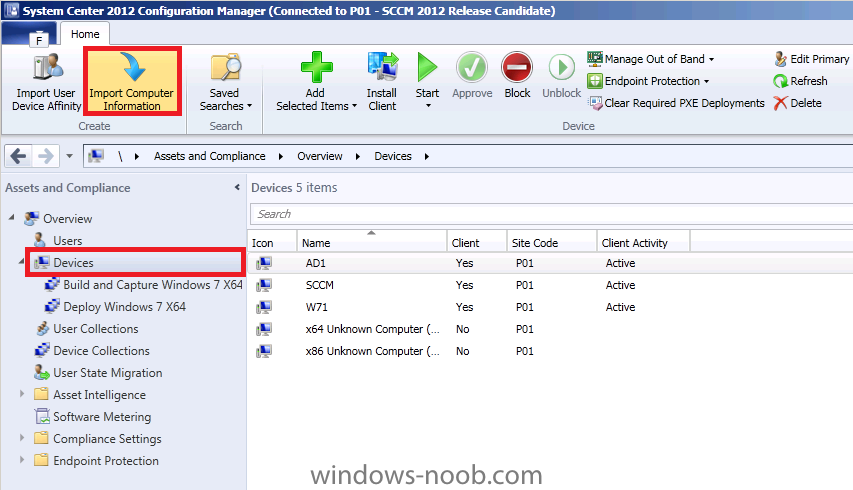
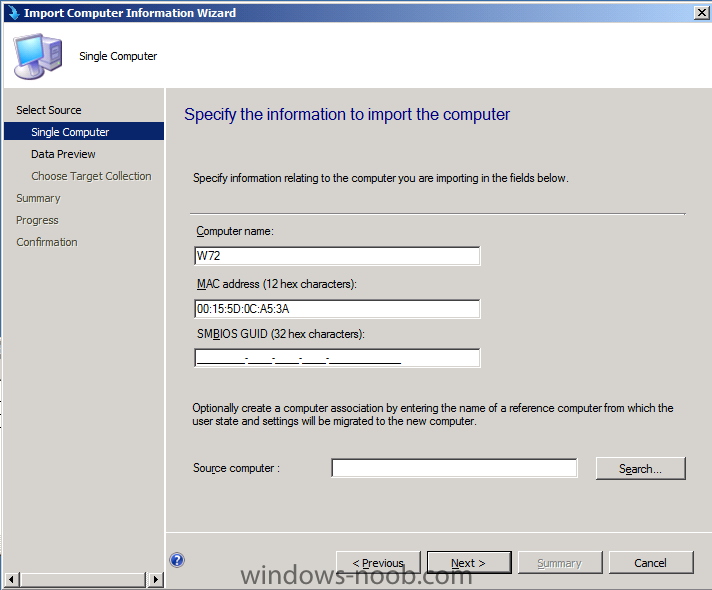
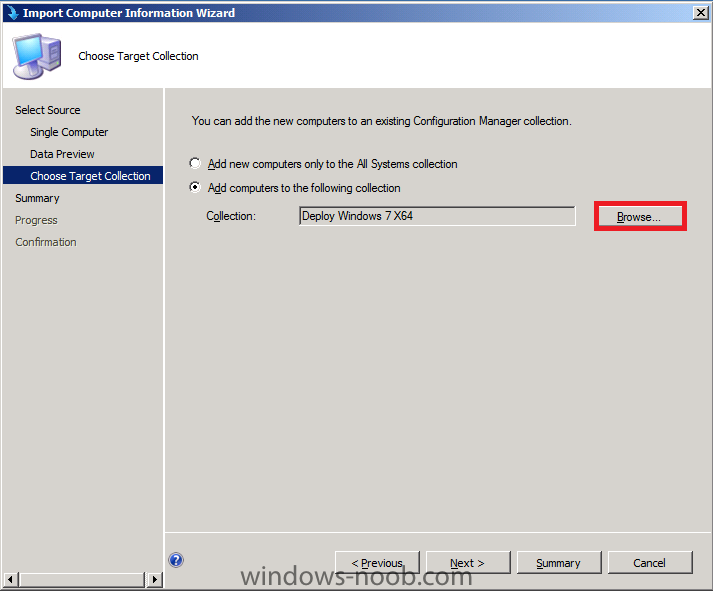
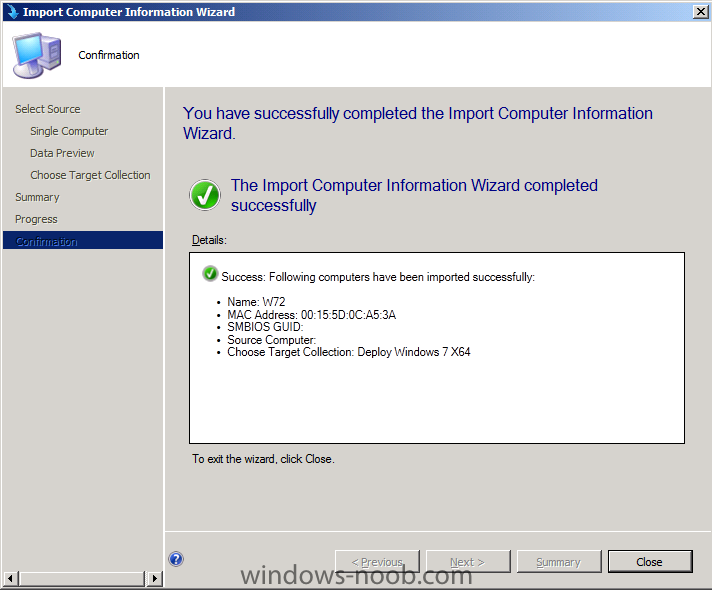
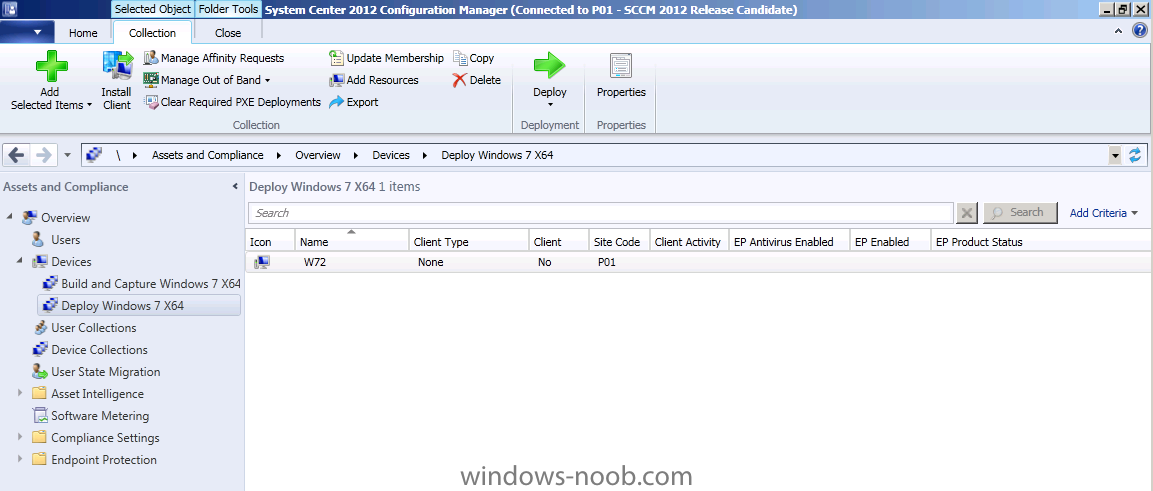
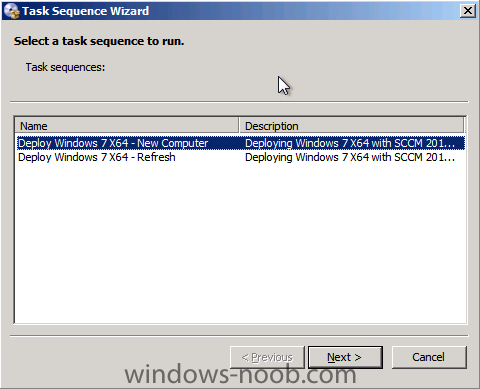
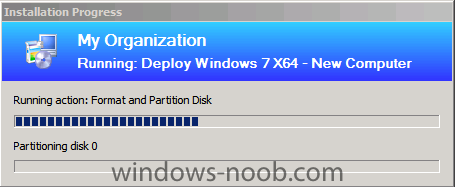
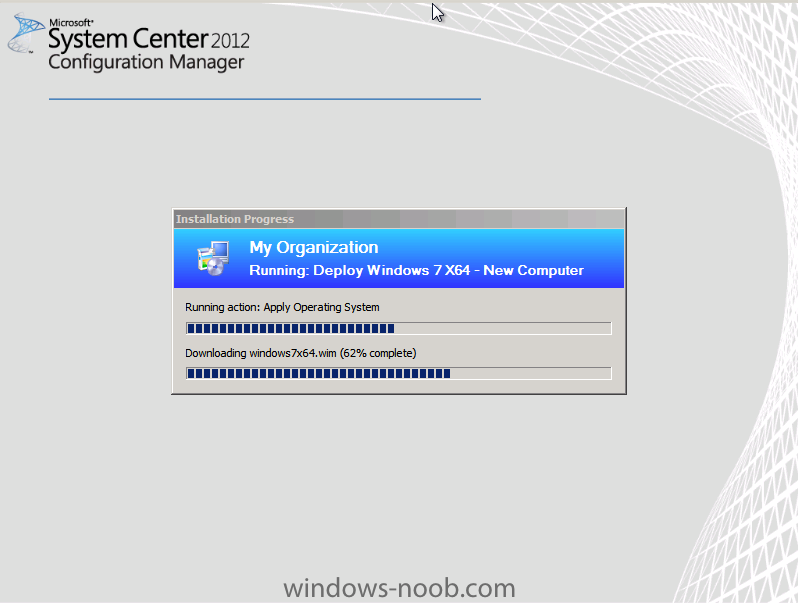
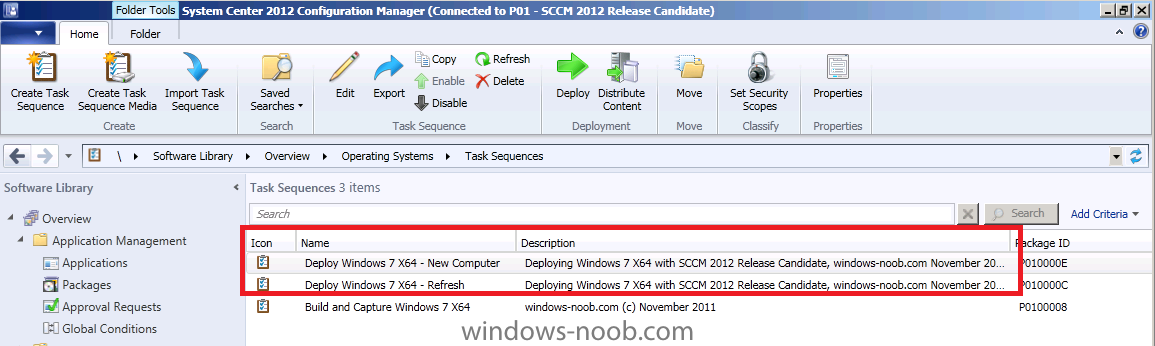
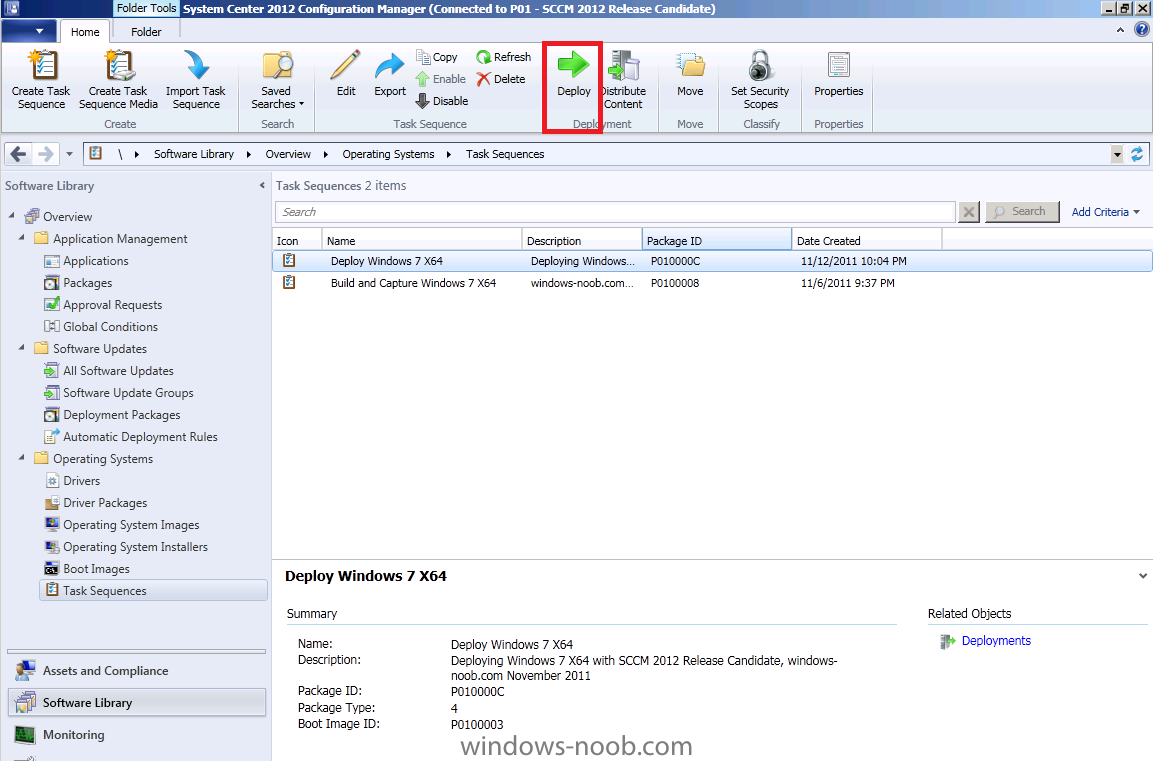
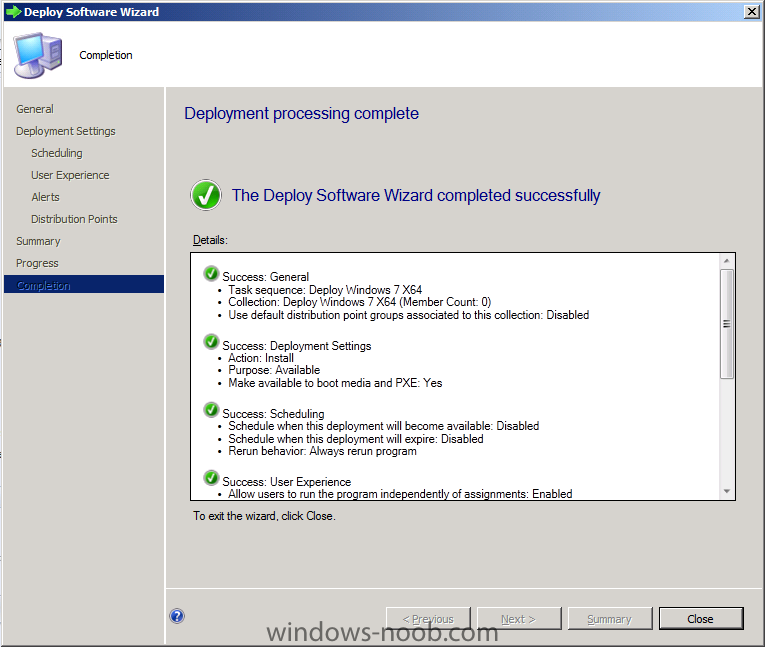
This Post has been superseded by the following Configuration Manager 2012 RTM post. In Part 1 of this series we got our AD and SCCM servers ready, and then we installed System Center 2012 Configuration Manager as a standalone Primary site. In Part 2 we configured the SCCM server further by adding some Windows Server roles necessary for the following Configuration Manager 2012 functionality, Software Update Point (SUP) and Operating System Deployment. In Part 3 we configured the server further by Enabling Discovery methods and creating Boundary's and Boundary Groups. In Part 4 we configured Client Settings, Added roles and Distributed the Configmgr Client to our Computers within the LAB, then in Part 5 we enabled the Endpoint Protection Role and configured Endpoint Protection settings and targeted a collection called All Windows 7 Computers with these settings and policies. In Part 6 we configured our SUP further to Deploy software updates to our All Windows 7 Computers and Build Windows 7 X64 collections. In Part 7 we used the Build and Capture process to create our Base Windows 7 X64 wim image. In Part 8 we created a USMT 4 package to migrate the users data using hardlinking and then we imported the captured image into ConfigMgr and created a Deploy Windows 7 X64 task sequence. We created a Deploy Windows 7 X64 Collection and set some User Device Affinity collection variables. In this part we will create an Application, and create a deployment type for that application to only install if the Primary User is True for that device (User Device Affinity), we will then copy our Task Sequence (duplicate it), deploy the new Task Sequence, add a computer to the new collection and then PXE boot the computer to the Deployment Menu. Applications are new in System Center 2012 Configuration Manager and have the following characteristics: Applications contain the files and information necessary to deploy a software package to a computer or a mobile device. Applications contain multiple deployment types that contain the files and commands necessary to install the software. For example, an application could contain deployment types for a local installation of a software package, a virtual application package or a version of the application for mobile devices. Requirement rules define conditions that specify how an application is deployed to client devices. For example, you can specify that the application should not be installed if the destination computer has less than 2GB RAM or you could specify that a virtual application deployment type is installed when the destination computer is not the primary device of the user. Global conditions are similar to requirement rules but can be reused with any deployment type. User device affinity allows you to associate a user with specified devices. This allows you to deploy software to a user rather than a device. For example, you could deploy an application so that it only installs on the primary device of the user. On devices that are not the primary device of the user, you could deploy a virtual application that is removed when the user logs out. Deployments are used to distribute applications. A deployment can have an action which specifies whether to install or uninstall the application and a purpose which specifies whether the application must be installed or whether the user can choose to install it. System Center 2012 Configuration Manager can use detection methods to determine if a deployment type has already been installed on a device by using product information, or a script. Application management supports the new monitoring features in System Center 2012 Configuration Manager. The status of an application deployment can be monitored directly in the Configuration Manager console. Packages and programs from Configuration Manager 2007 are supported in System Center 2012 Configuration Manager and can use some of the new deployment and monitoring features. You can now deploy a task sequence on the Internet, as a method to deploy a script, for example, prior to installing a package and program. It is still not supported to deploy an operating system over the Internet. Software Center is a new client interface that allows users to request and install applications, control some client functionality, and to access the Application Catalog, which contains details about all available applications. Step 1. Create an Application Perform the following on your SCCM 2012 server as SMSadmin. Now we will create an application in this case FireFox, you can download an MSI of it from here (The files contained in this MSI are the official binaries with no modifications). Save the application in your package sources share (I have shared a root folder on D:\ called Sources with sub folders within, one is called Apps). Copy the downloaded FireFox MSI to a subdirectory of your sources\apps\msi share just like I have done in the screenshot below. In the Configmgr Console, click on Software Library, Applications, in the ribbon click on Create Application When the Create Application wizard appears click on browse then point it to the UNC of where the MSI is stored eg: \\sccm\sources\apps\msi\firefox\Firefox-7.0.1-en-US.msi click next and you'll get to the Imported Information screen, click next again to enter General Information about this application, verify that the installation switches are ok and click next click next at the summary through to completion Step 2. Edit the Deployment Type Perform the following on your SCCM 2012 server as SMSadmin. As we have selected the default values during the wizard, a Deployment Type has already been setup but we want to edit it so that this application only installs if a primary user has been associated with the device (UDA), so right click on the Application and choose Properties the Applications properties are revealed, click on the Deployment Types Tab select the Deployment type and click on Edit the Deployment Type properties are revealed, click on the Requirements Tab there are no requirements listed, click on Add on the Create Requirement screen, select the Category drop down menu and select User, verify that it's set as below (primary device equals true) click Apply and click ok, then click apply and ok again to exit from the Deployment Type menu Step 3. Create a Deployment for our Application Perform the following on your SCCM 2012 server as SMSadmin. Select the Firefox application and in the ribbon click on Deployment and select Deploy from the menu when the Deploy Software wizard appears, browse to All Users for collection for Content, click on Add and select our Distribution Point next change the Purpose from Available to Required and place a checkmark in Deploy Automatically according to schedule whether or not a user is logged on for User Experience set it to hide in software center and all notifications click next through the rest of the wizard to completion (no other changes) Step 4. Copy our Task Sequence Perform the following on your SCCM 2012 server as SMSadmin. We want to be able to both Refresh our computers (reinstall and migrate data) and do a New Computer installation, to do this we need another task sequence, so lets copy (duplicate) the one we have as we've already created one Deploy Windows 7 X64 task sequence, so select it right click and choose Copy you'll be notified of the copy completion Rename the First task sequence to Deploy Window 7 X64 - Refresh by right clicking on it, properties, edit the name Now we need to edit the second Task sequence, right click it and choose edit As this is a New Computer Task Sequence, we don't need to migrate data, so Disable the Capture Files and Settings group and the Restore User files and settings Group, click on the Options tab for each group and place a checkmark in Disable, click Apply. Now we need to add a new step in the Install Operating system group just after Restart in Windows PE step, so select that step and choose Add from the drop down menu select Disks, Format and Paritition Disk so that it looks like so Apply the changes and rename this task sequence to Deploy Windows 7 X64 - New Computer, so now we have two Deploy Task Sequences Step 5. Deploy our new Task Sequence to the Deploy Windows 7 X64 collection Perform the following on your SCCM 2012 server as SMSadmin. To make the task sequence available to computers we need to Deploy it. In Software Library, select our Deploy Windows 7 X64 - New Computer task sequence and choose Deploy, point the wizard collection to Deploy Windows 7 X64 change purpose to Available, place a checkmark in Make available to boot media and PXE click next through to completion Step 6. Import a computer into the Deploy Windows 7 X64 collection Perform the following on your SCCM 2012 server as SMSadmin. We need a new Virtual Machine to be imported into ConfigMgr's database to add it to our Deploy Windows 7 X64 collection. In the ConfigMgr console, click on Assets and Compliance, Devices, and in the Ribbon click on Import Computer Information. If you havn't already created a Virtual Machine do so now, we need one with 1 gig of Virtual Ram and we need to know it's MAC address. choose import single computer, filll in the computername and mac address (if you want to import multiple comptuers using a file follow this guide) add it to our Deploy Windows 7 X64 collection done Verify it's in the collection (right click and choose Update Membership) and after a few minutes there it is Step 7. PXE boot the New Computer Perform the following on your SCCM 2012 server as SMSadmin. PXE boot the new Virtual Machine, and you should get to the familiar password prompt and two new task sequences are ready for us, select Deploy Windows 7 X64 - New Computer and there's that Format and Partition disk step in action and our captured OS get's applied In the Next Part we will review how Firefox get's deployed automatically to this computer based on the UDA variables we set, and we will review the logs involved and we'll edit our boot image to support prestart and add some extrafiles, these will be some VBS scripts to prompt for the UDA user instead of setting the variable on the collection as we really don't want all computers that get deployed to have one user as the primary user.


-
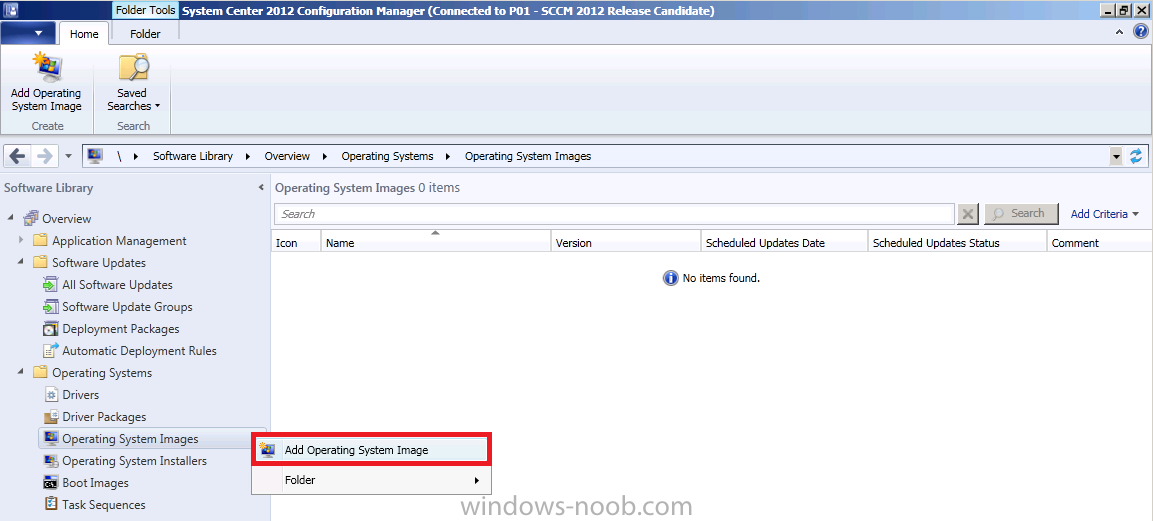
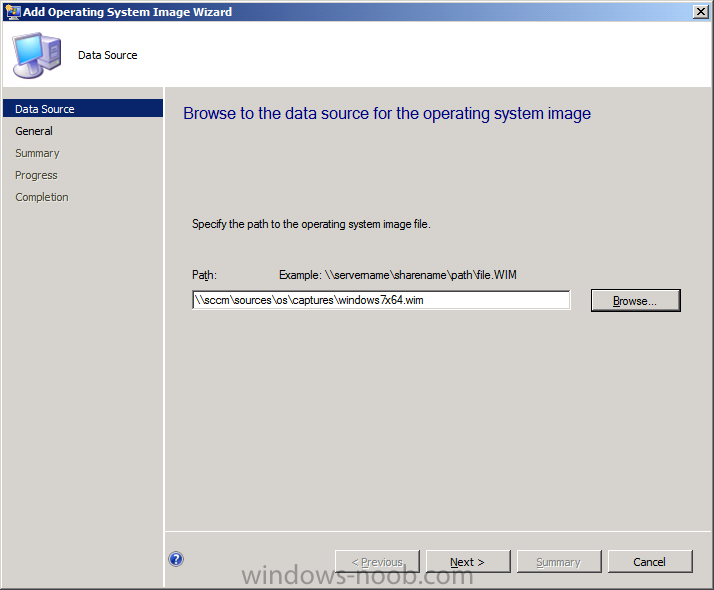
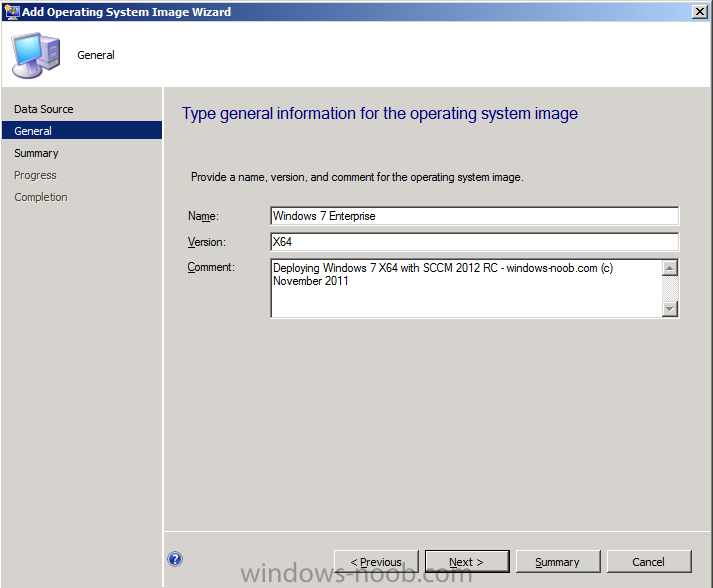
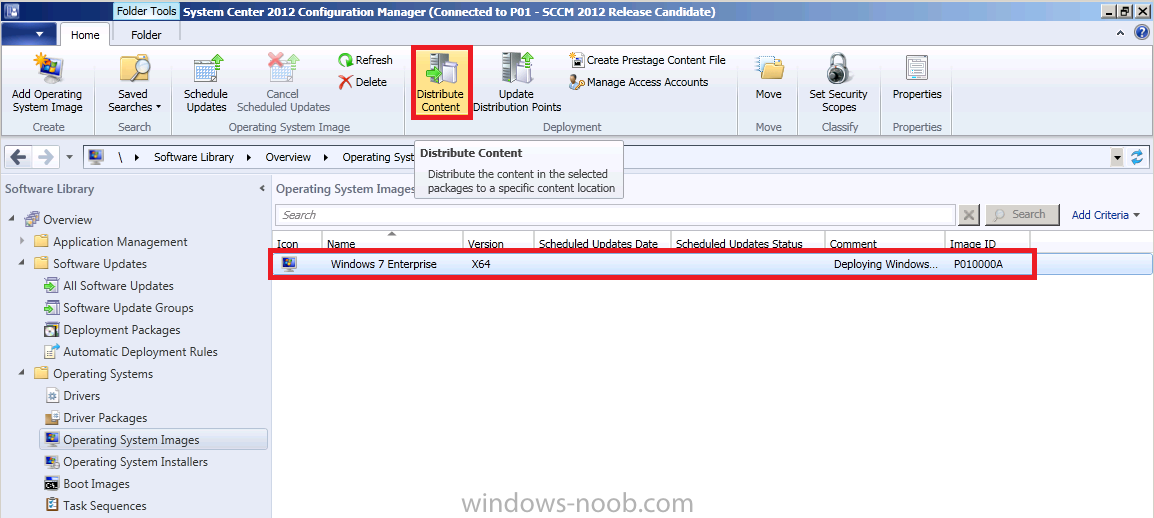
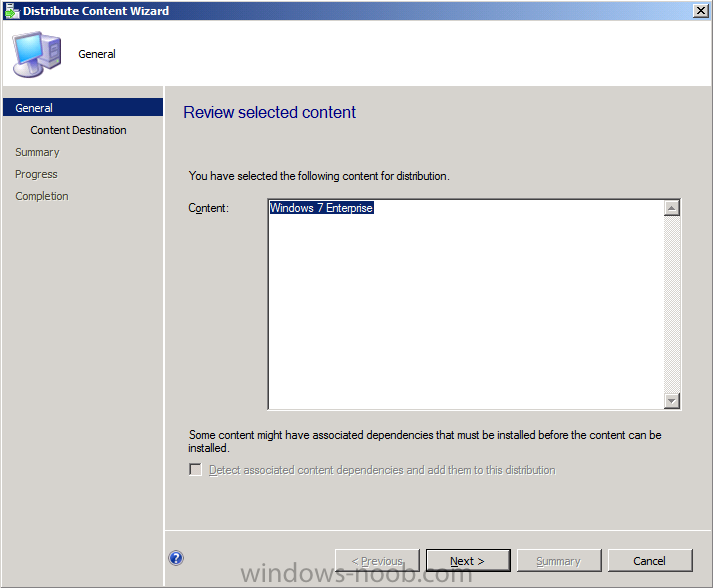
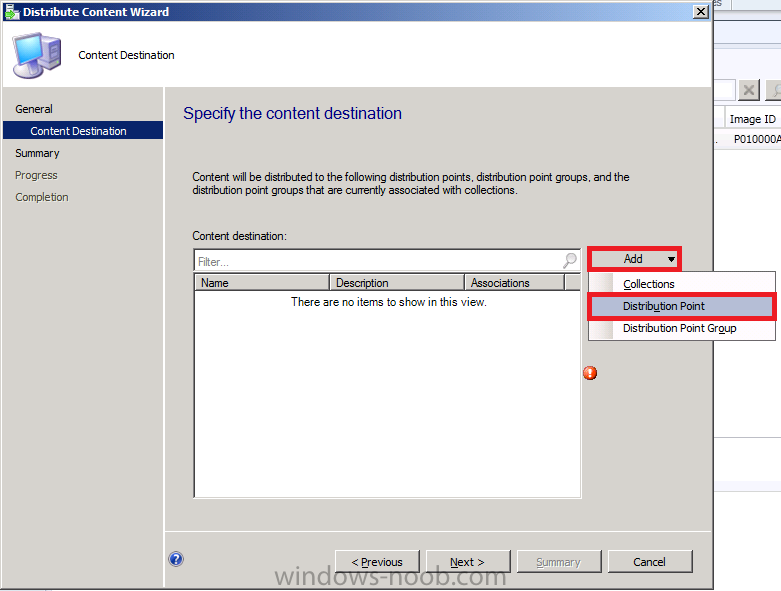
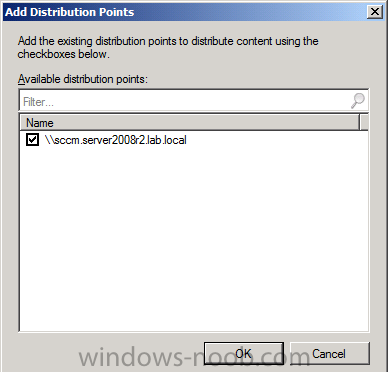
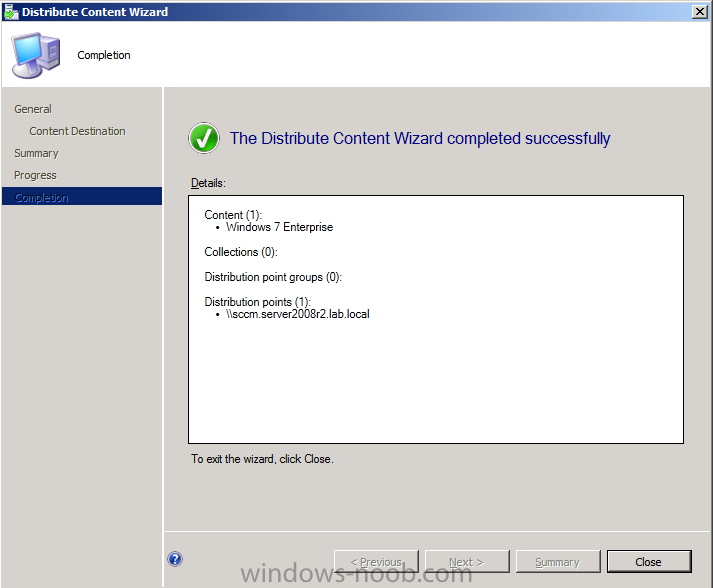
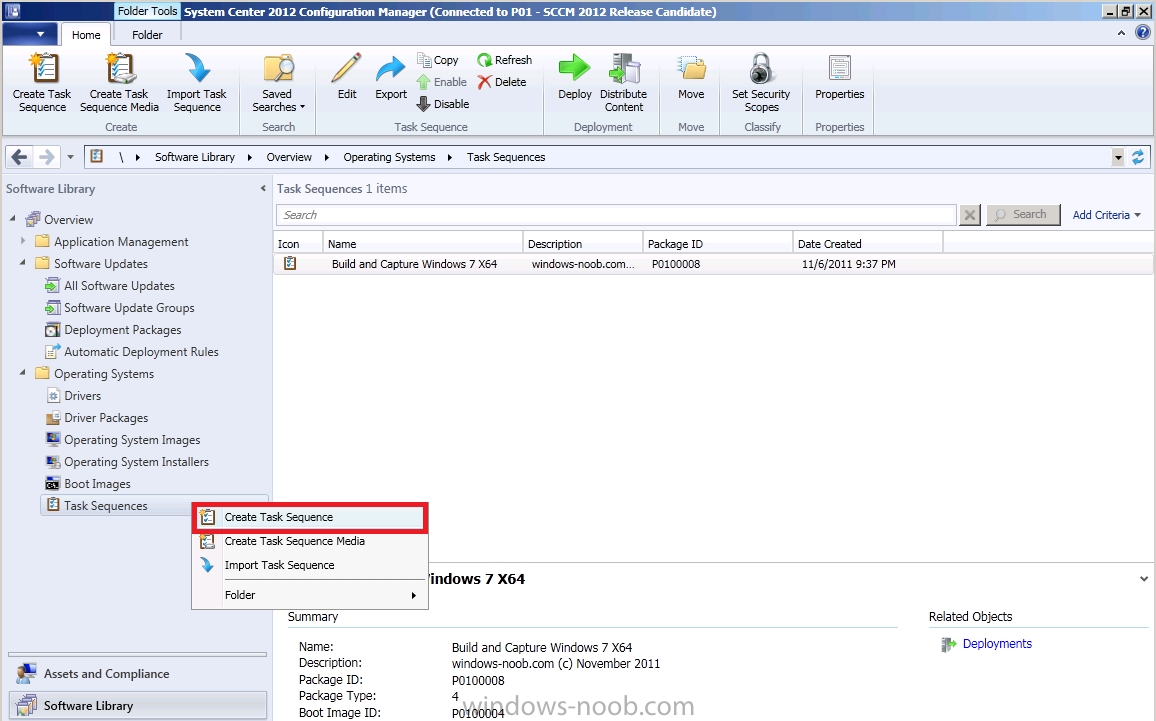
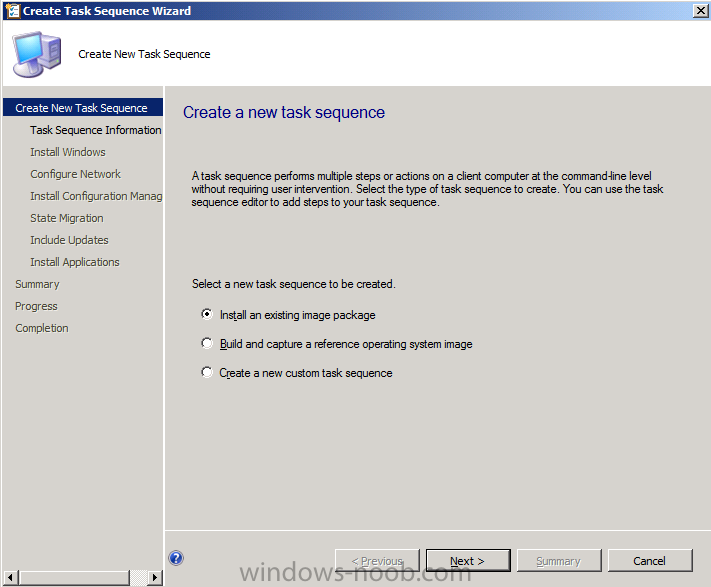
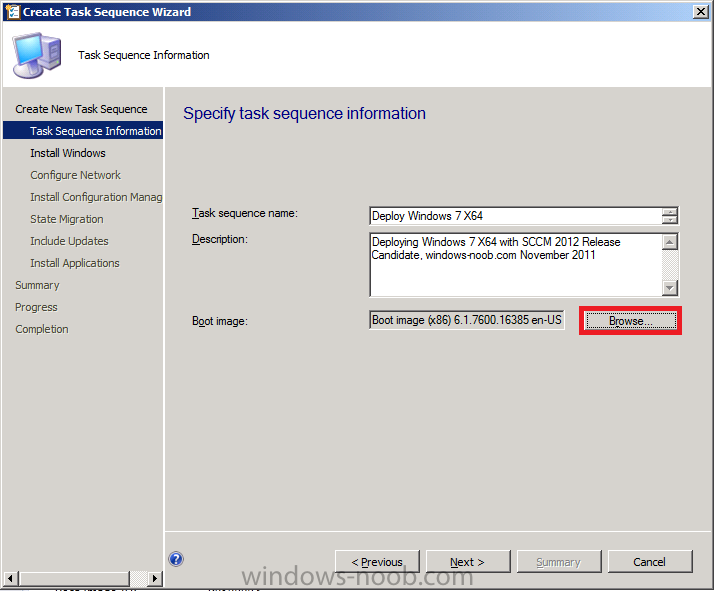
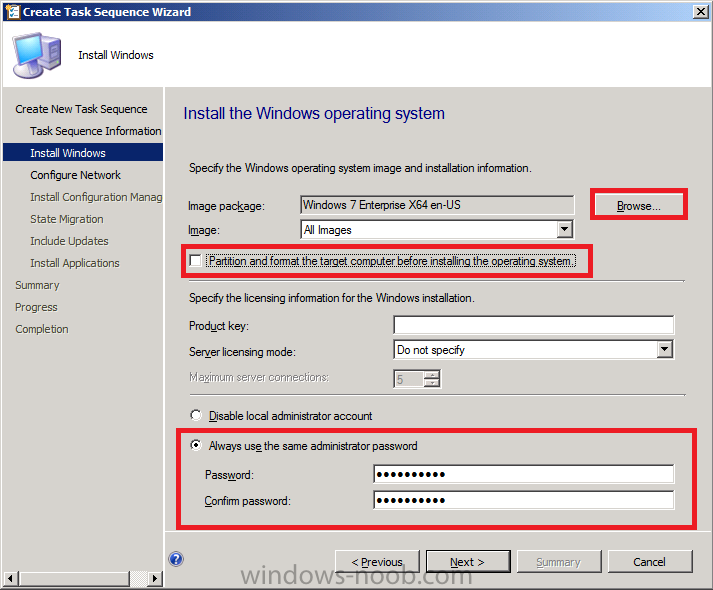
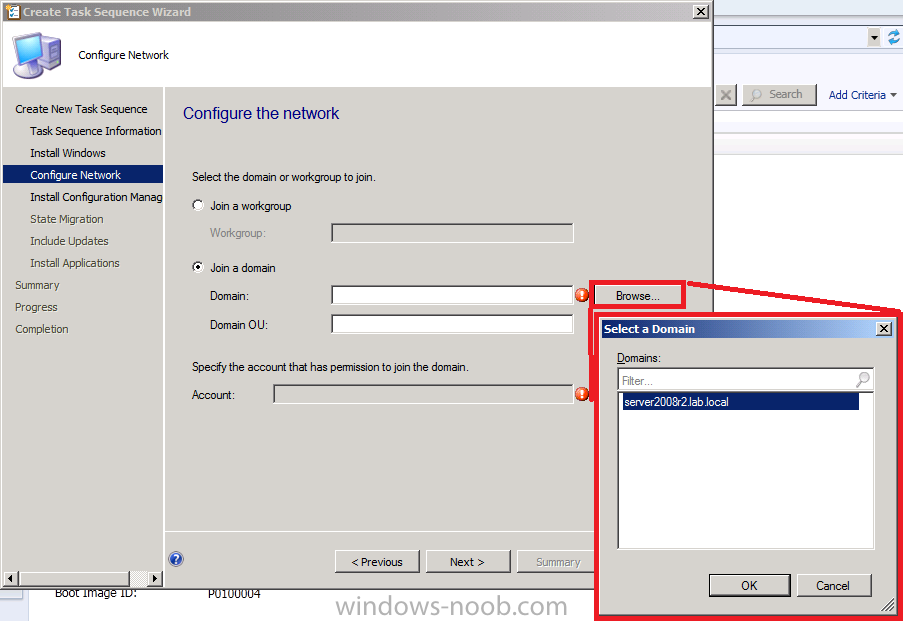
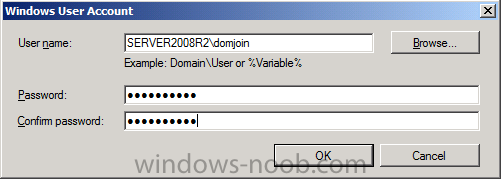
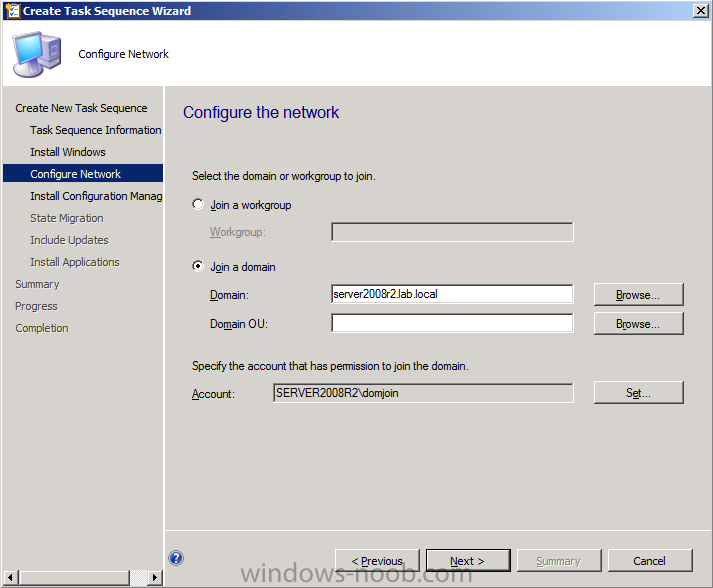
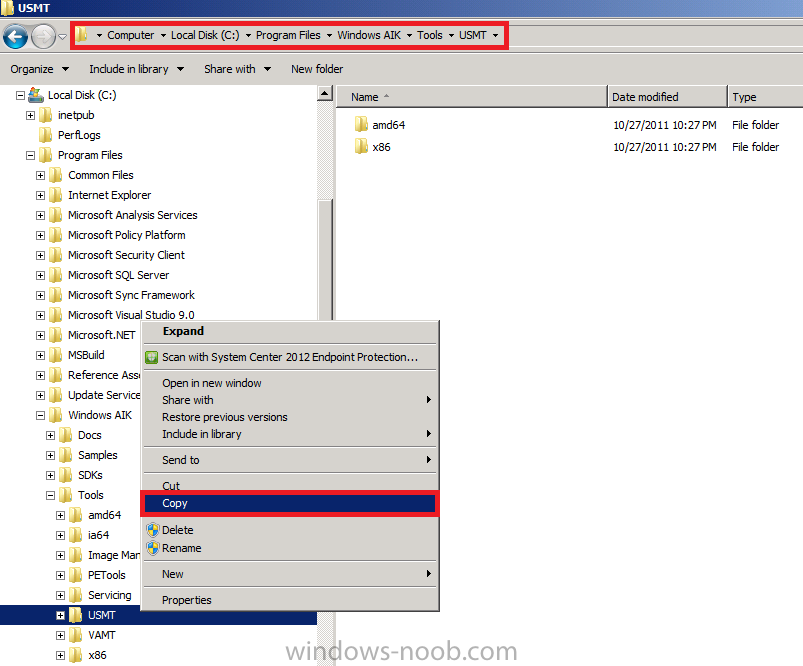
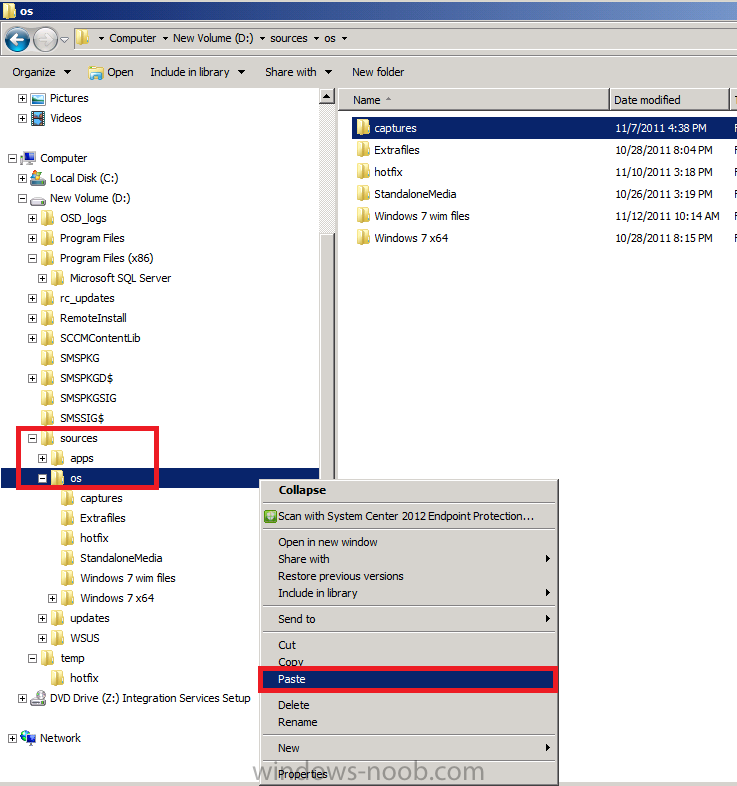
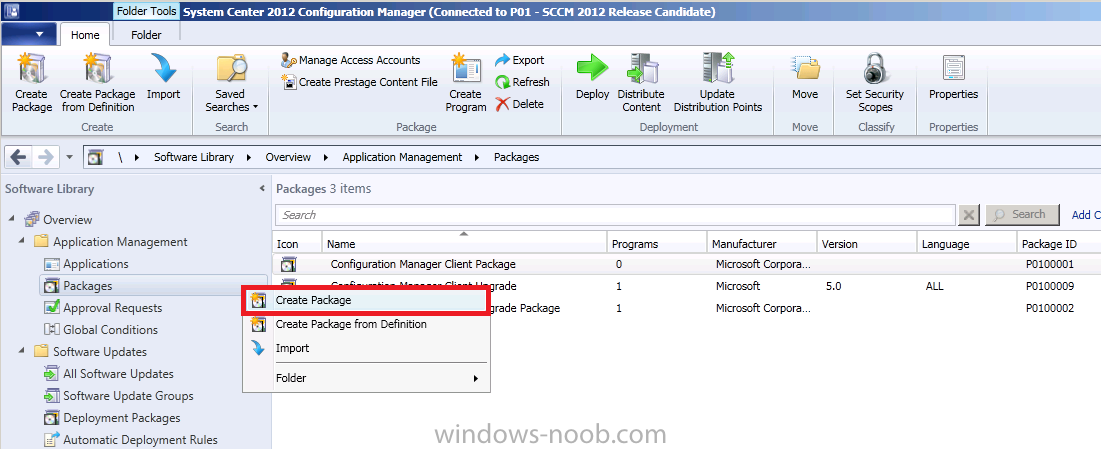
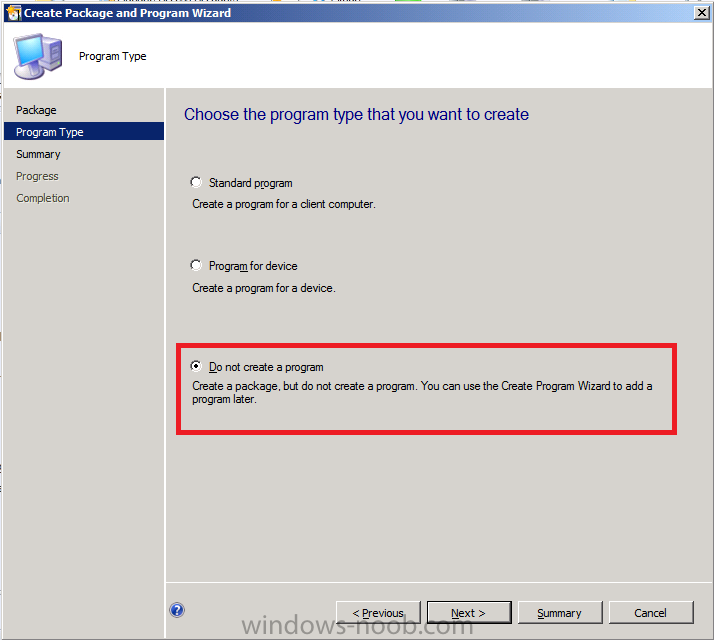
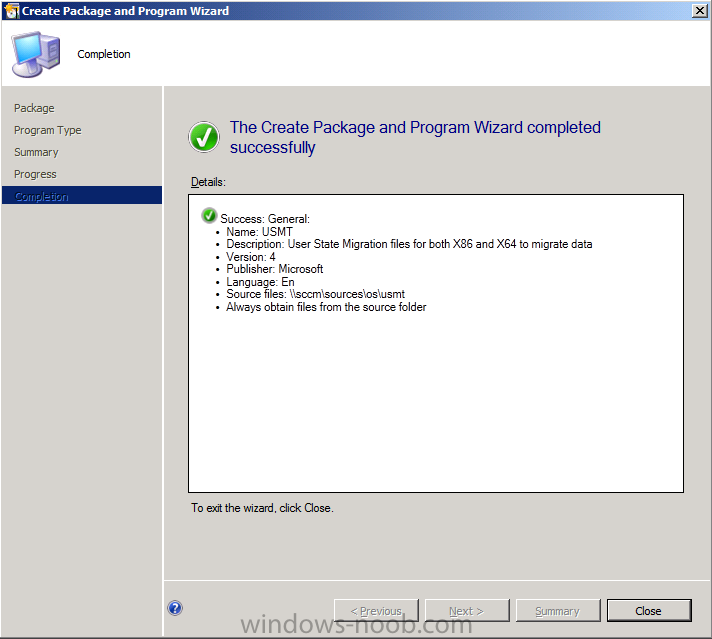
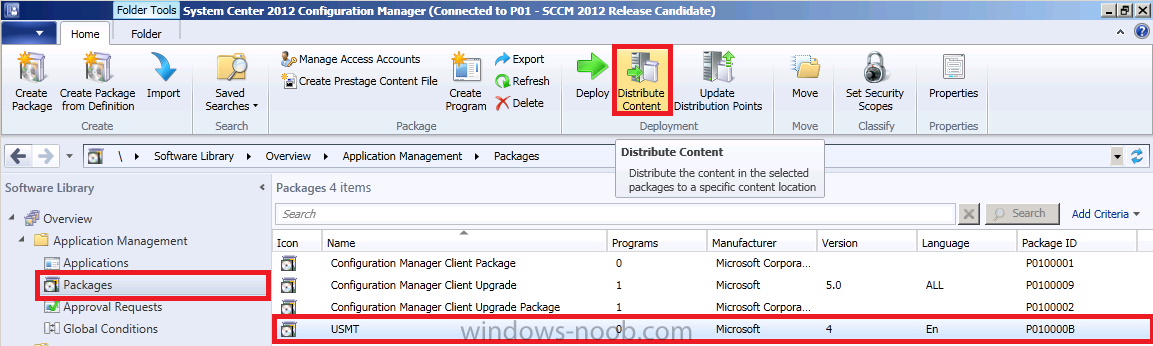
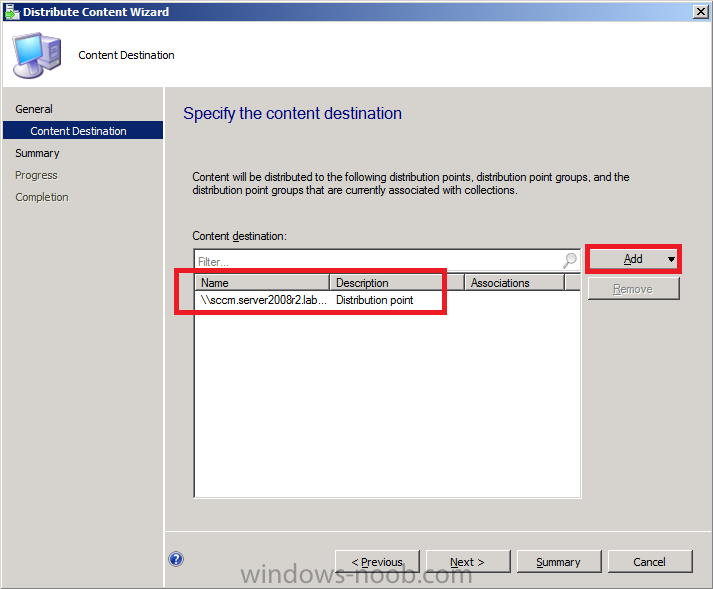
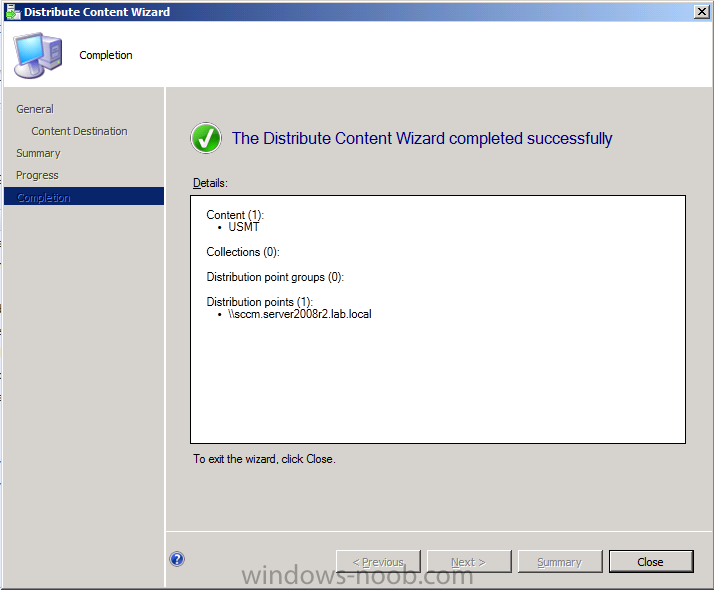
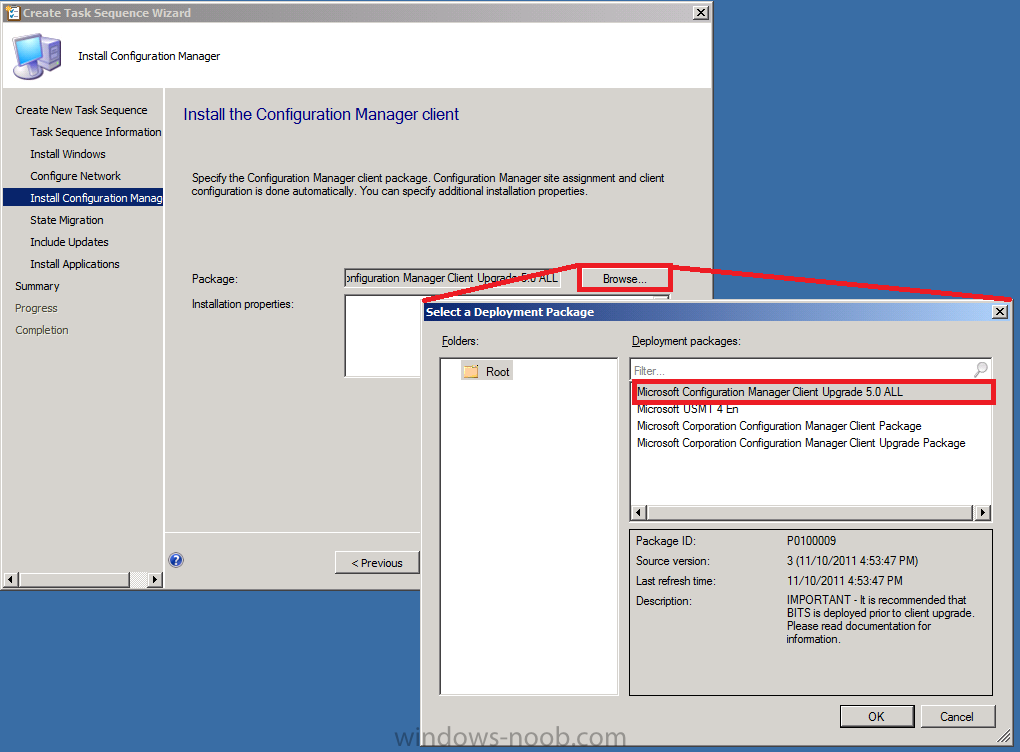
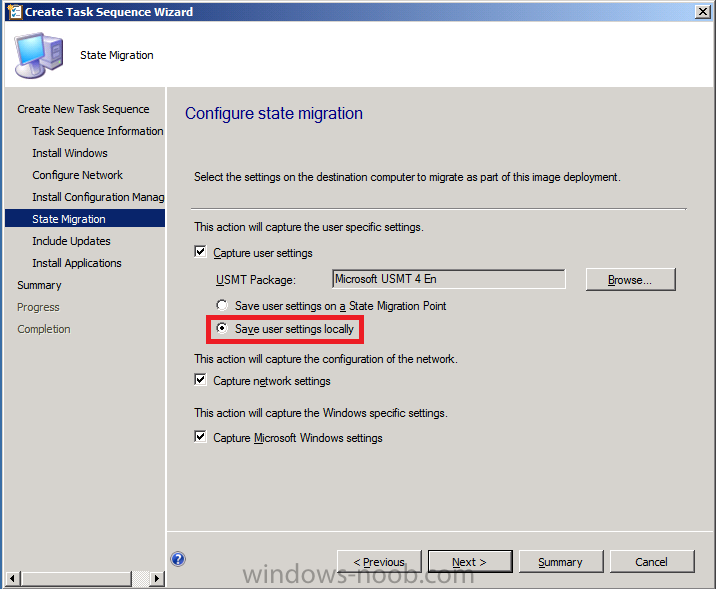
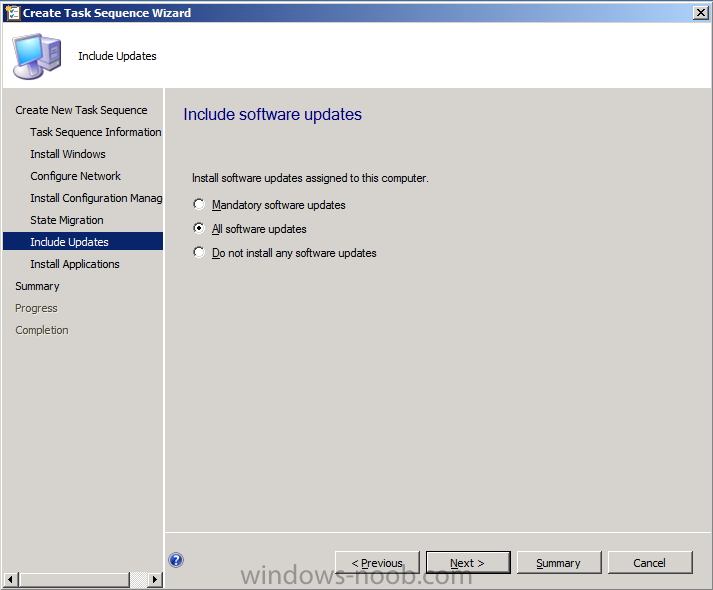
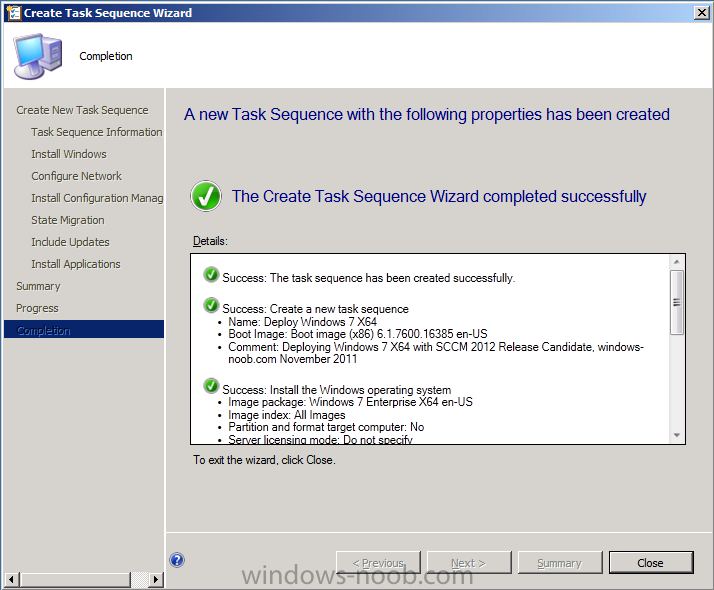
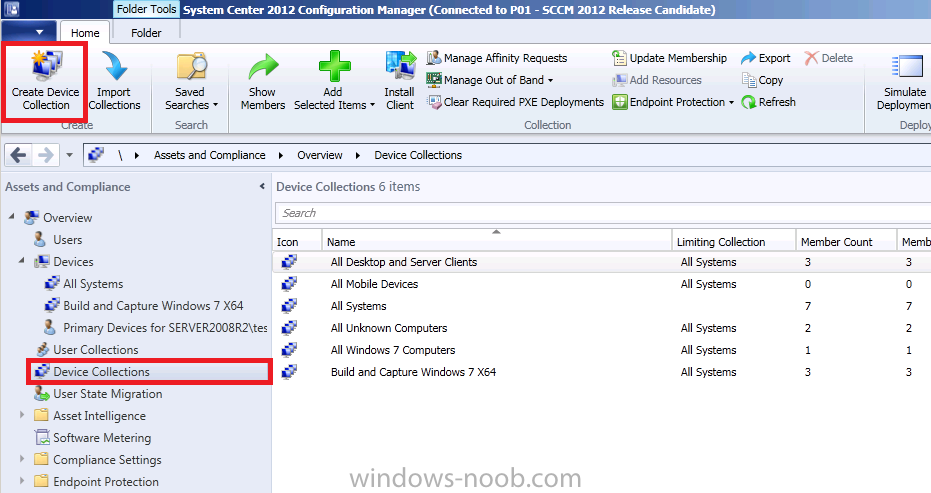
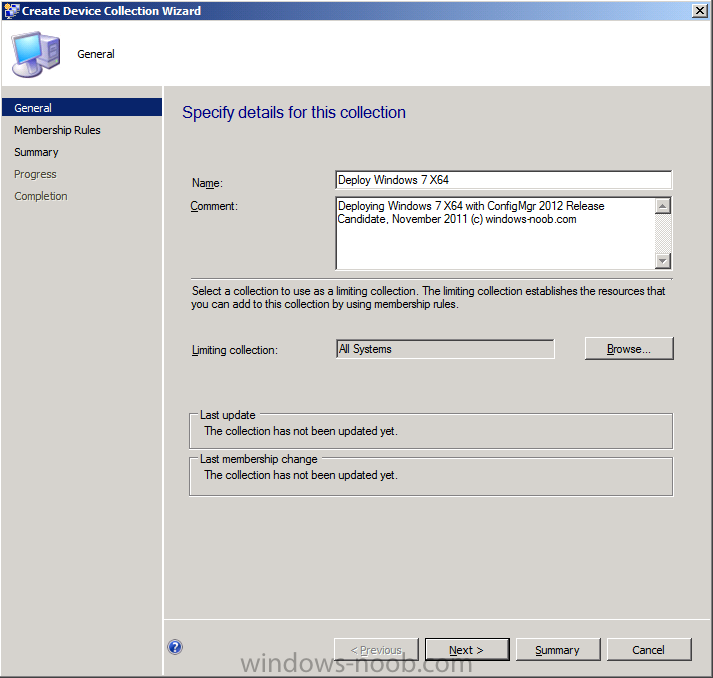
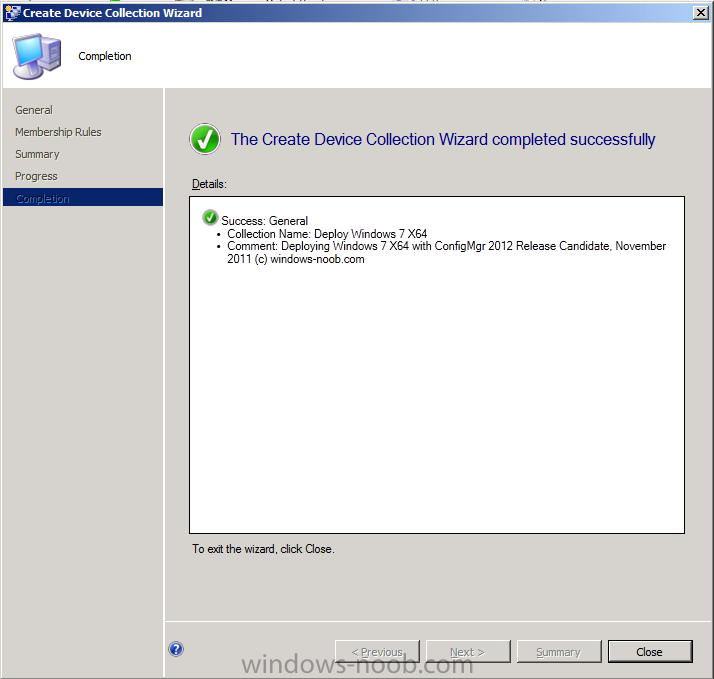
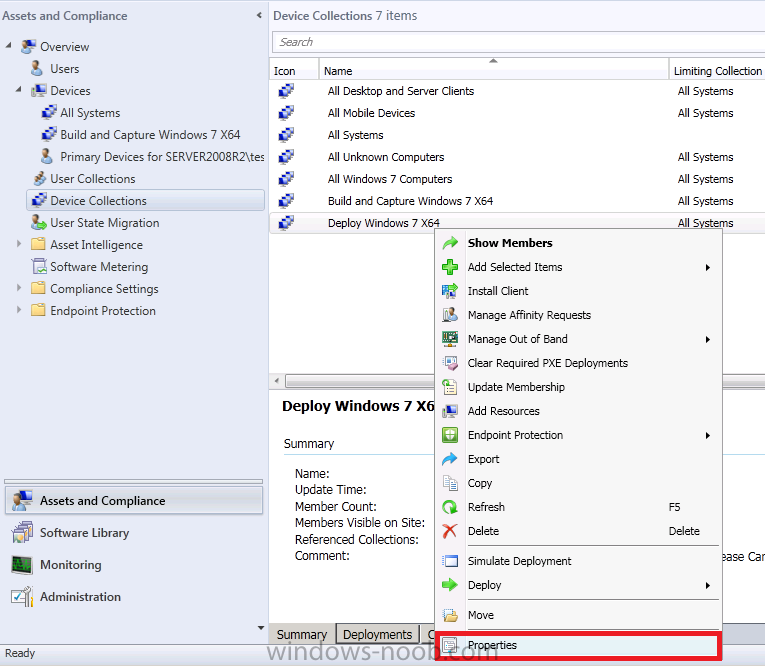
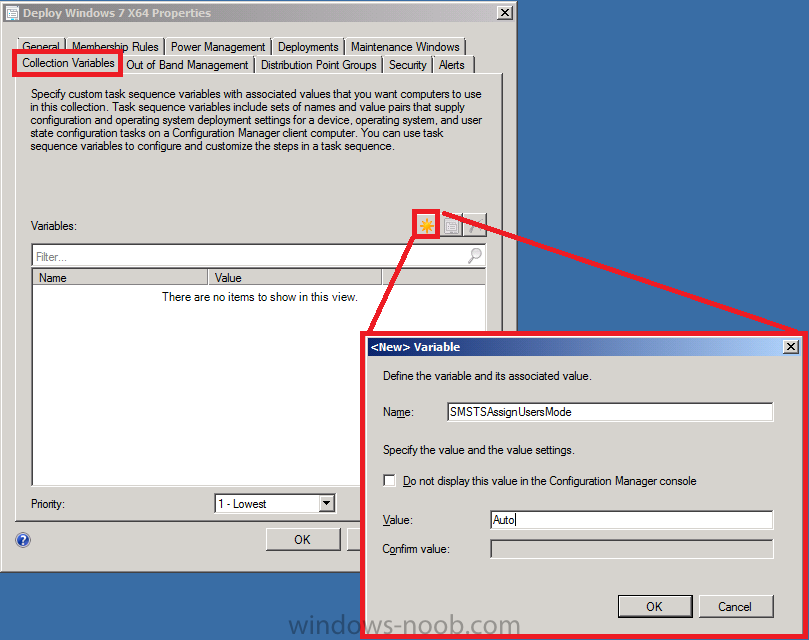
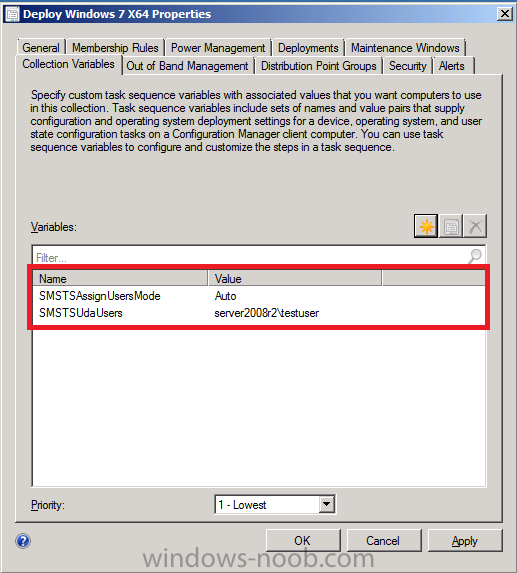
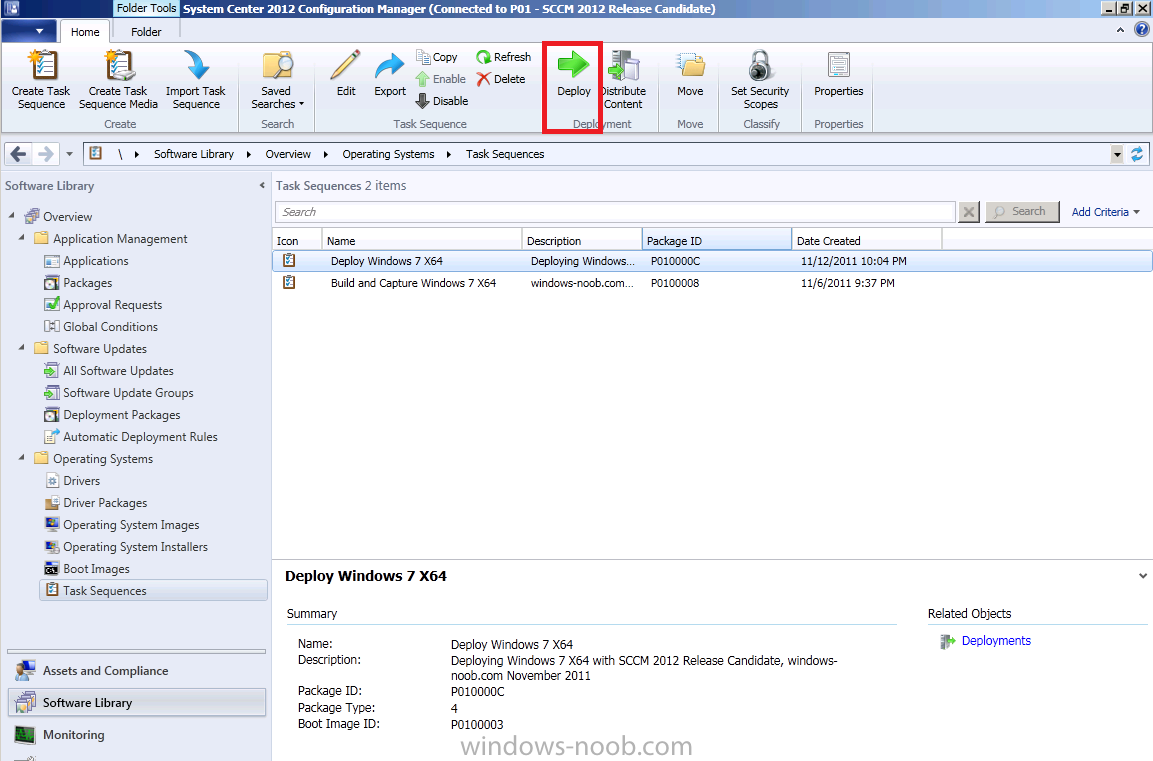
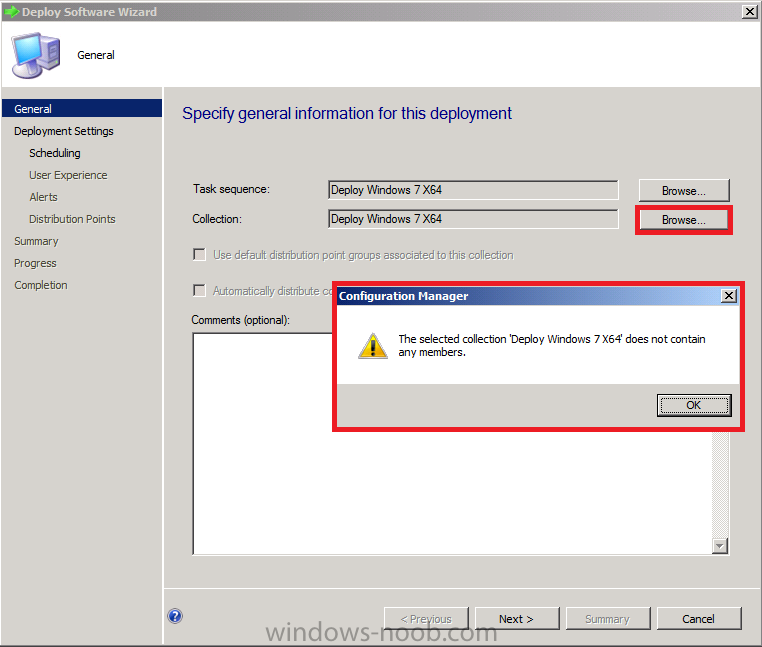
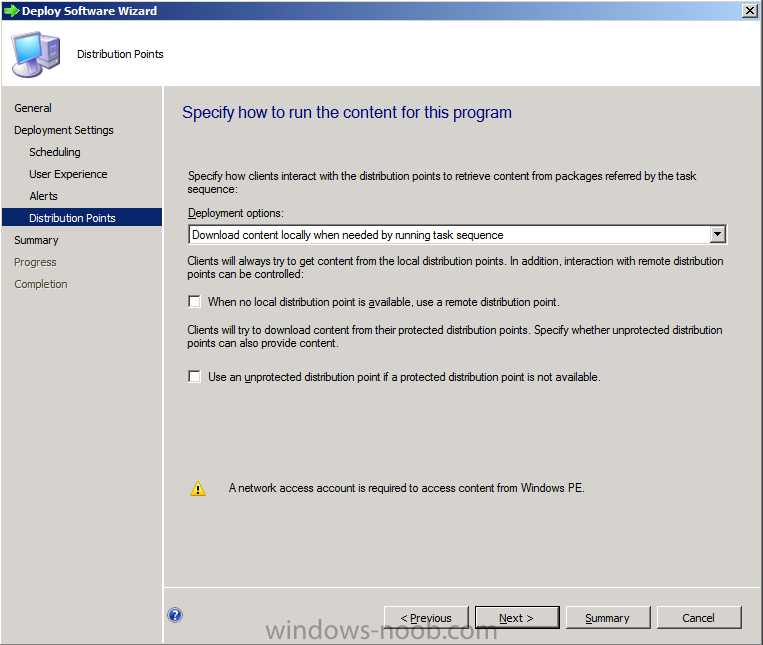
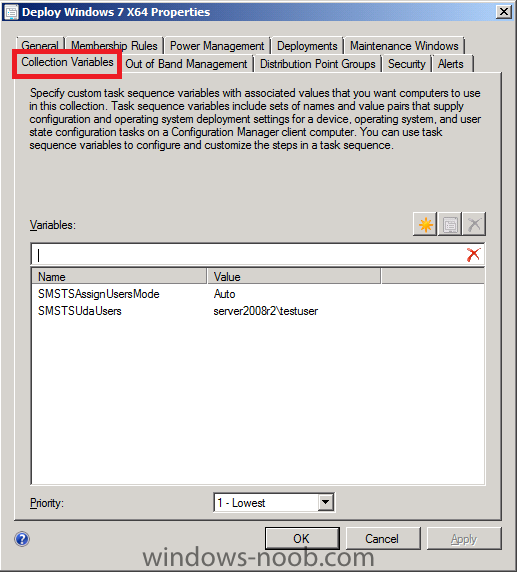
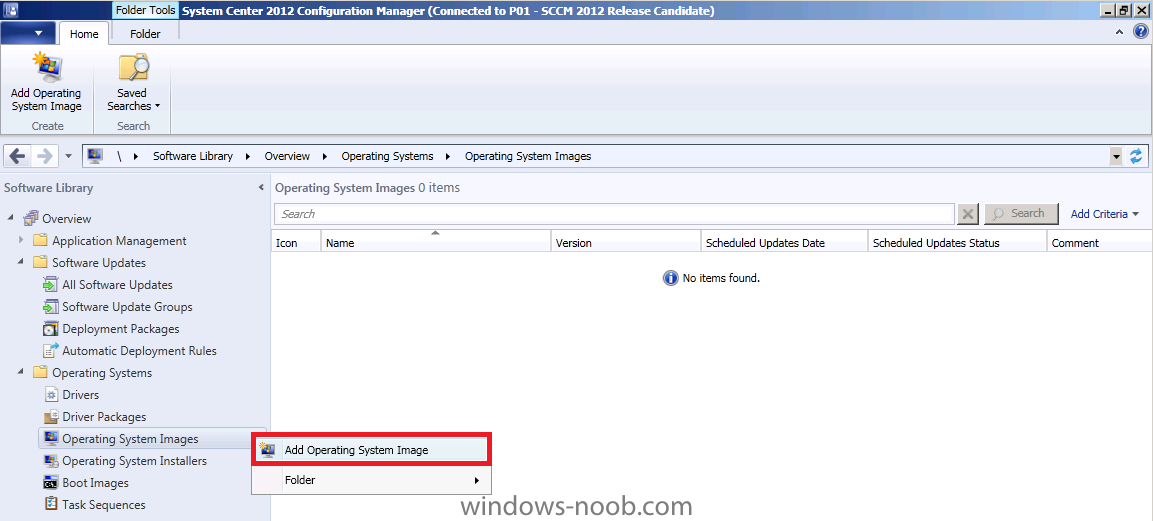
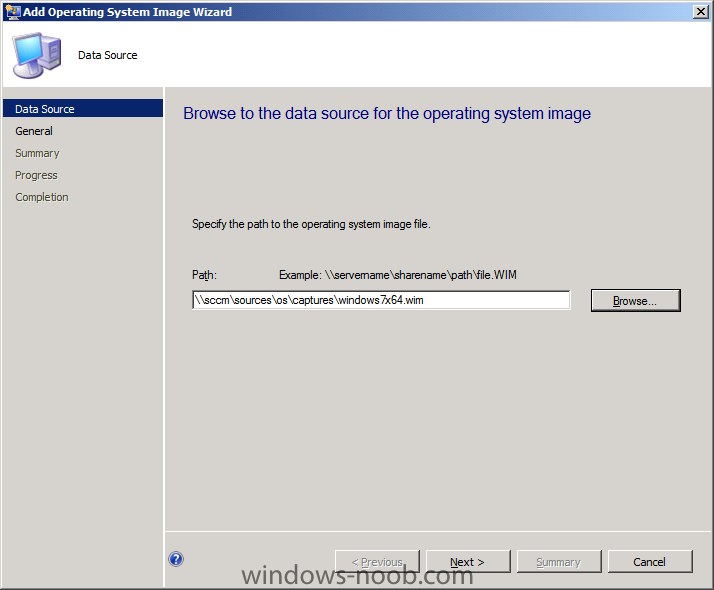
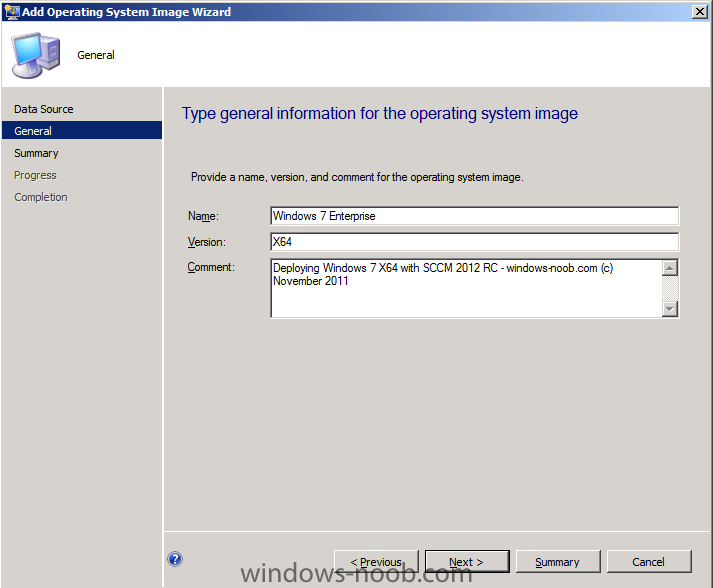
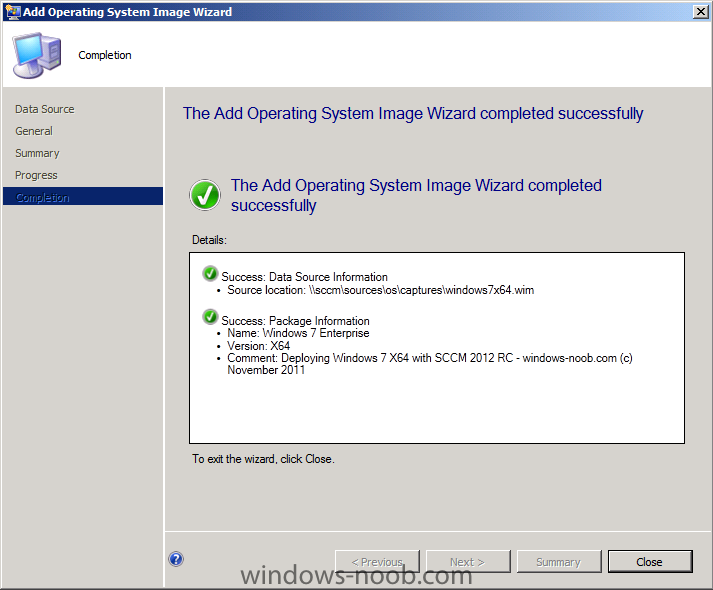
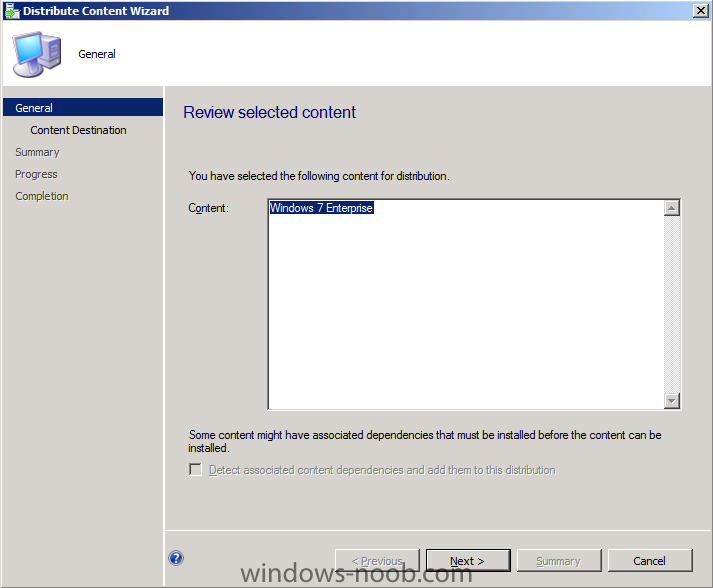
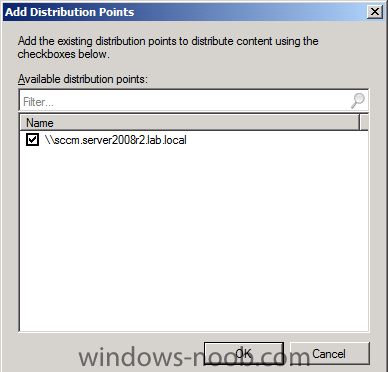
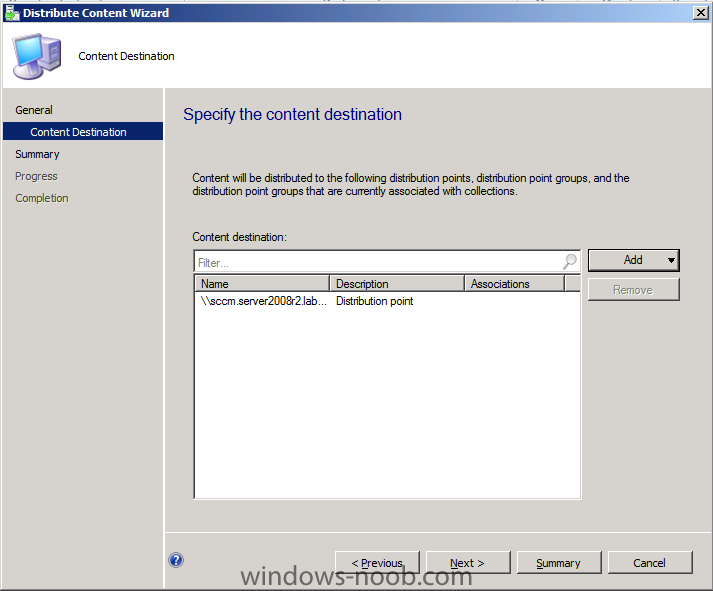
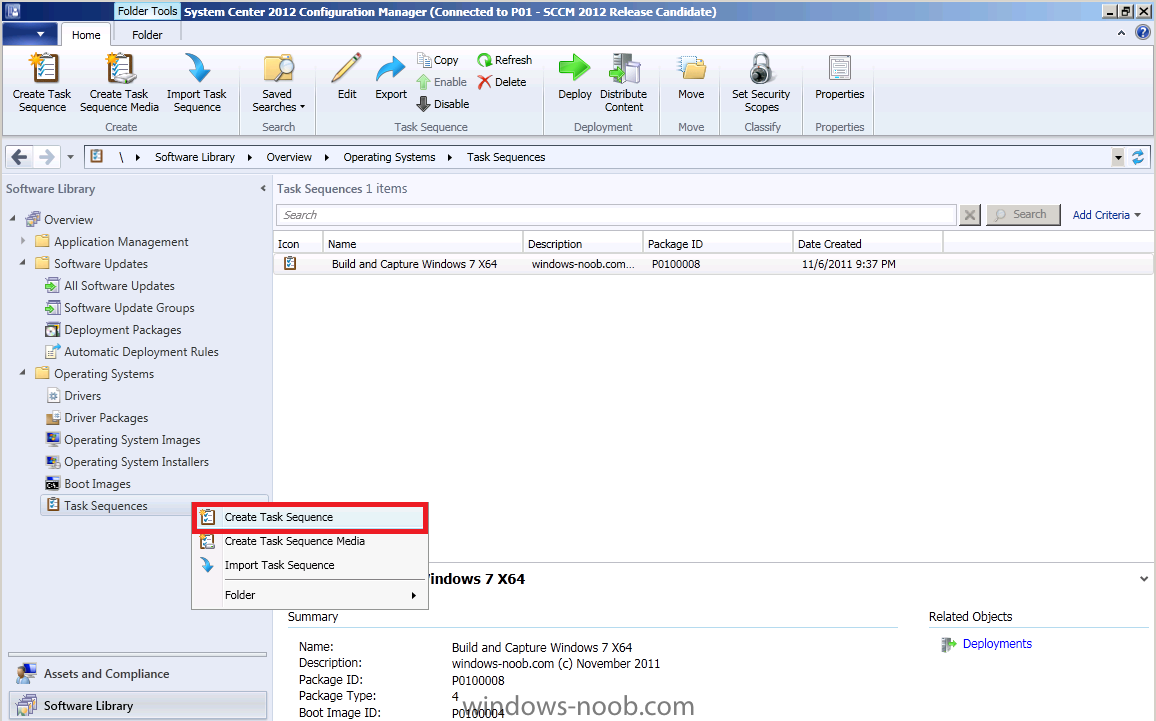
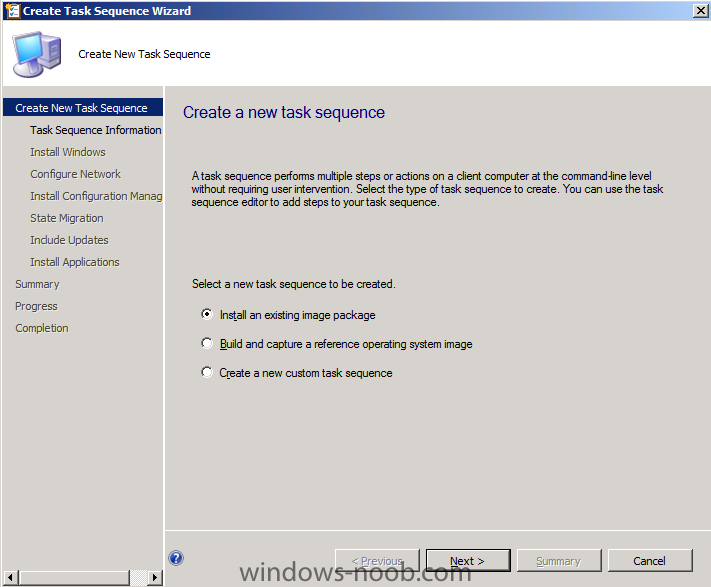
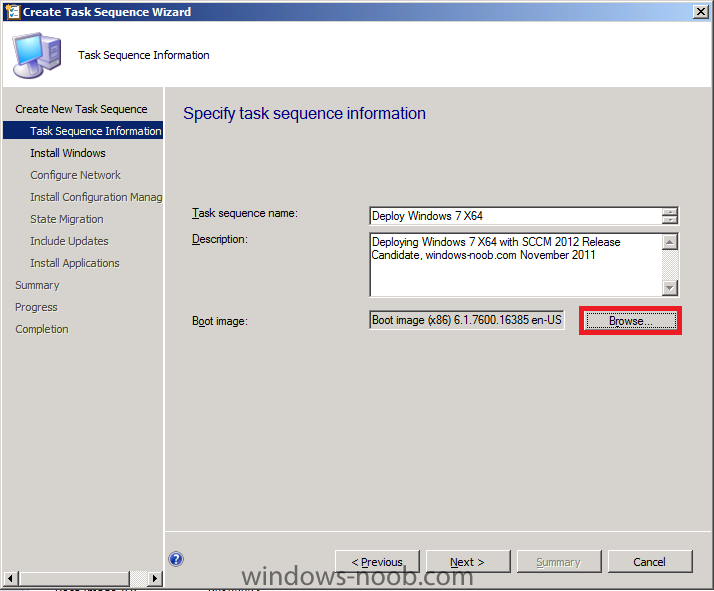
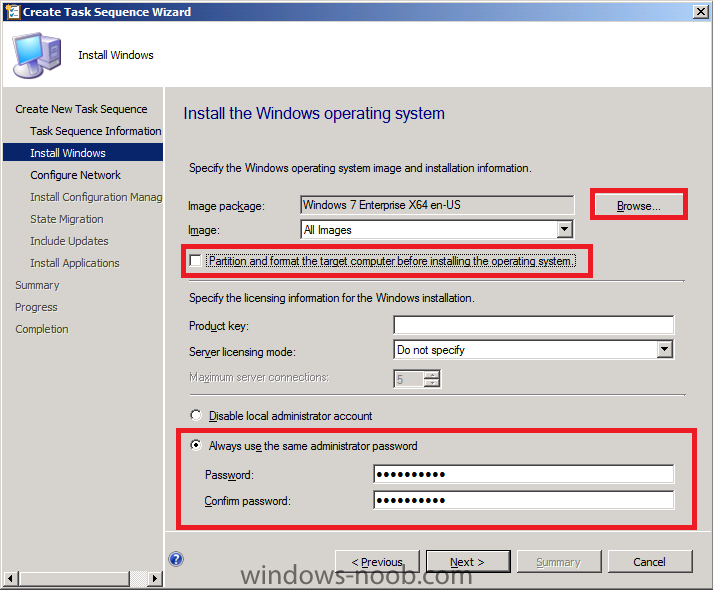
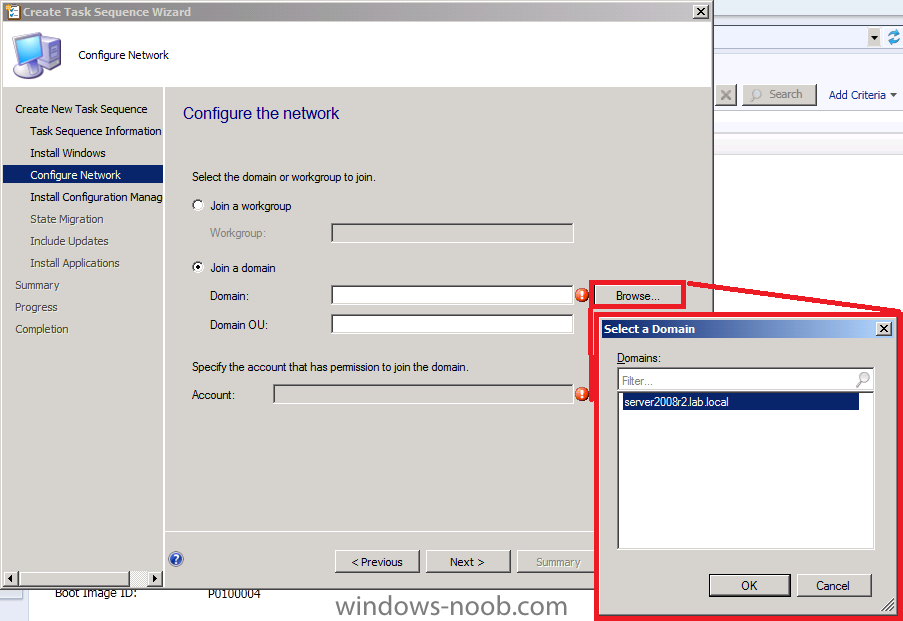
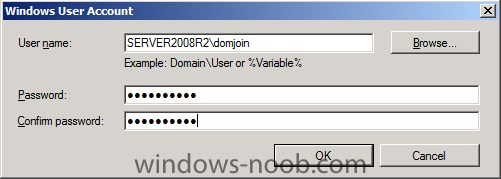
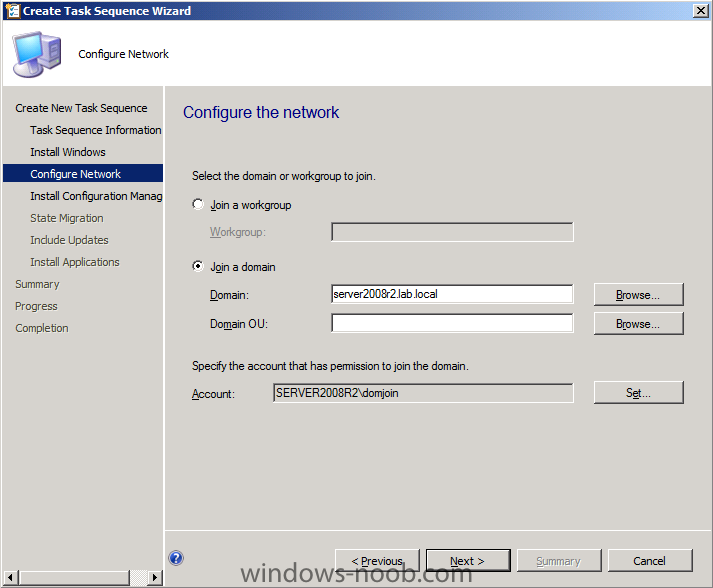
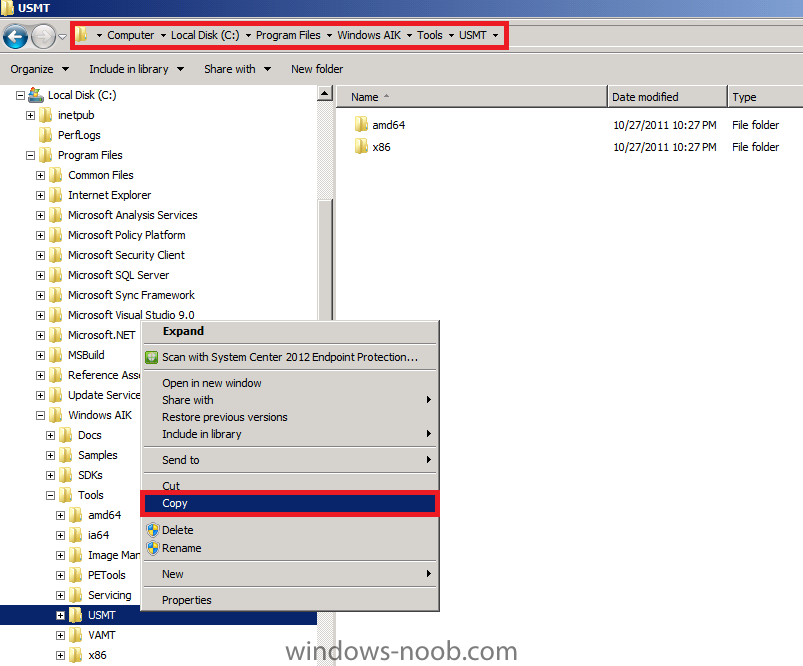
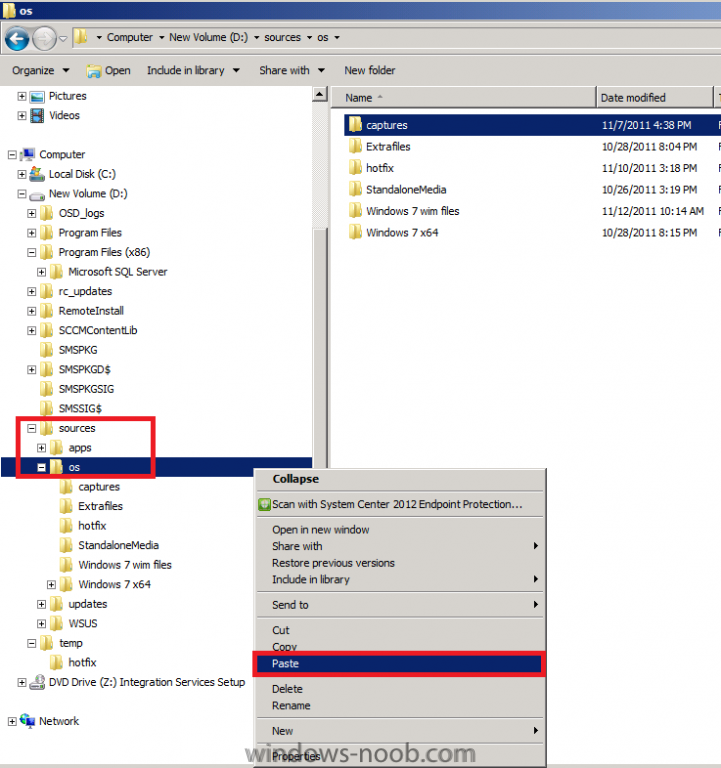
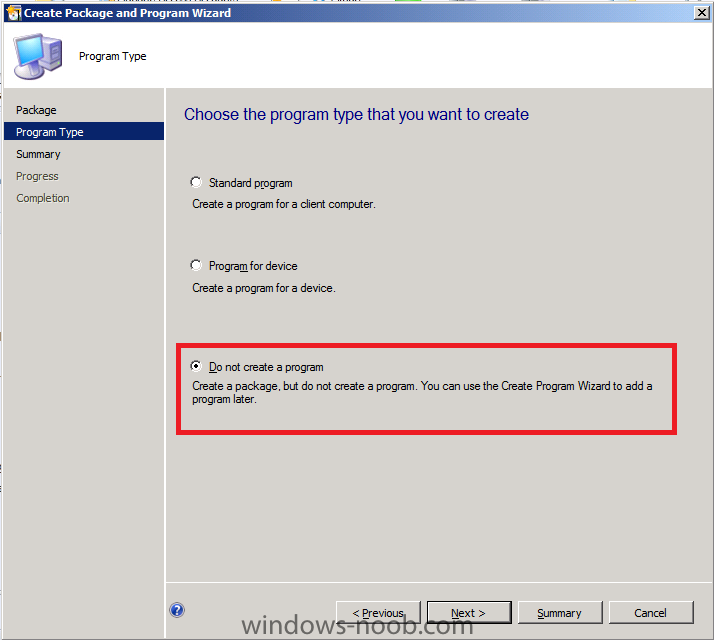
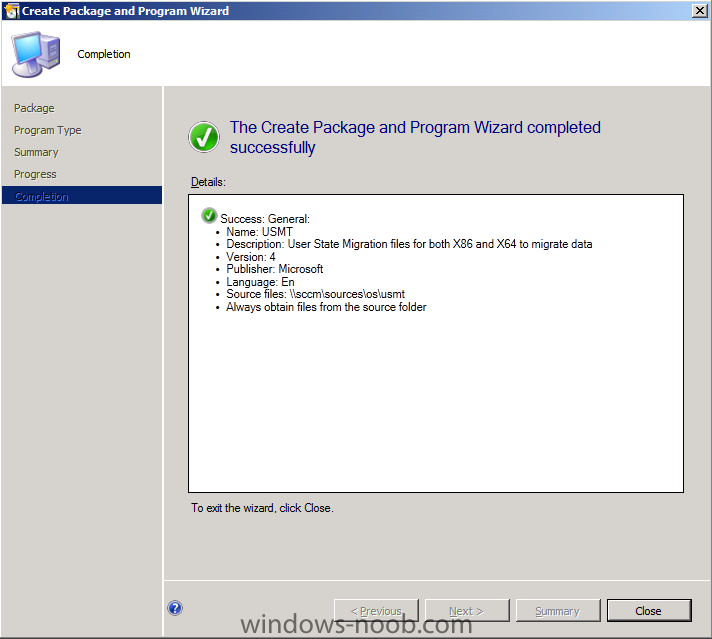
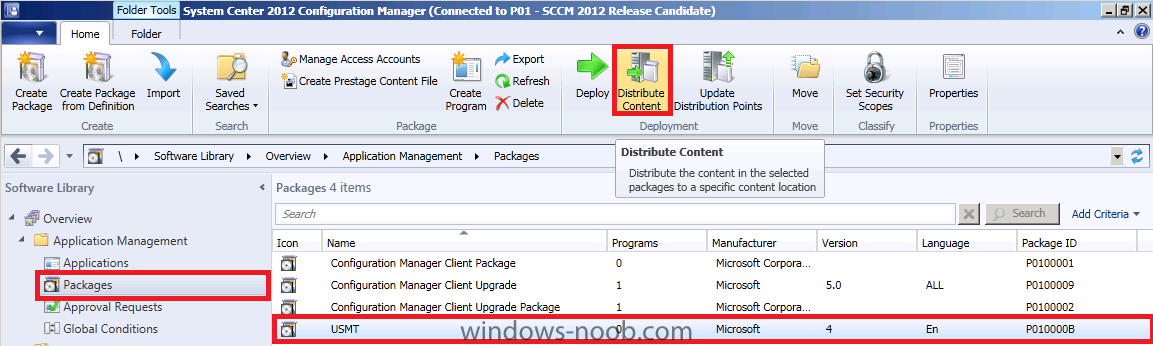
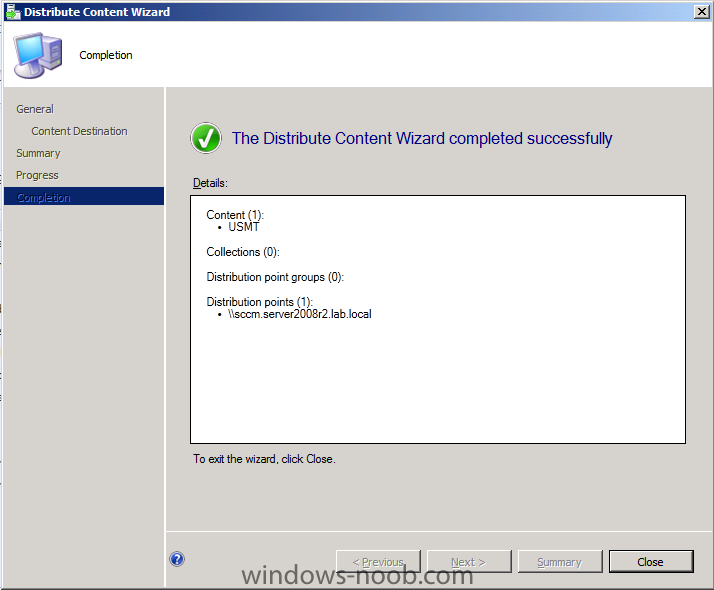
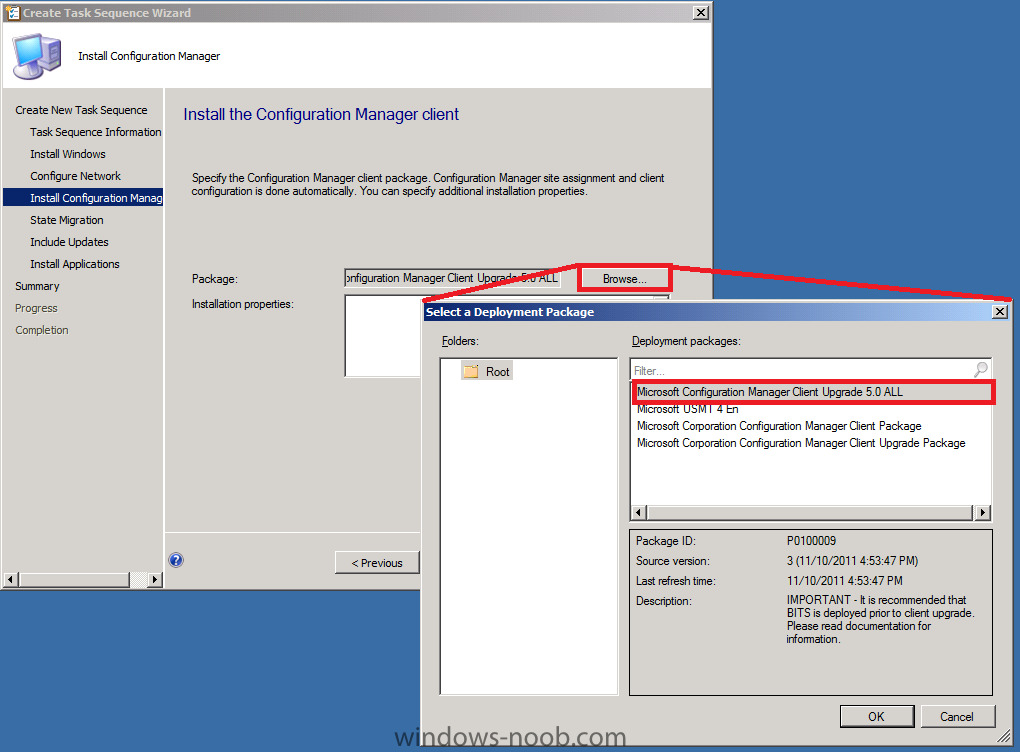
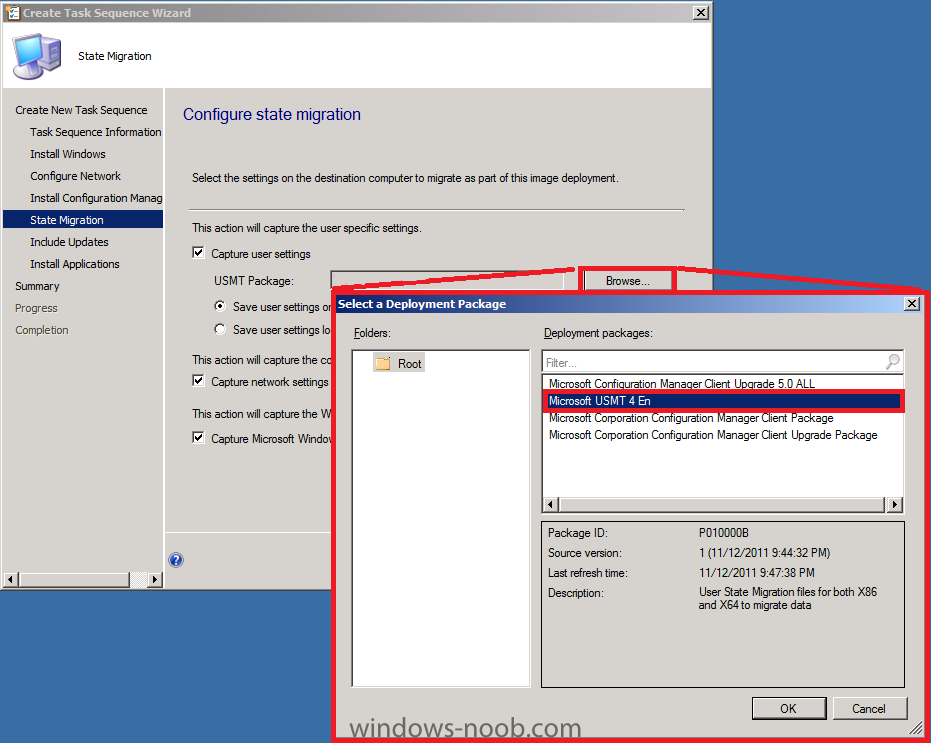
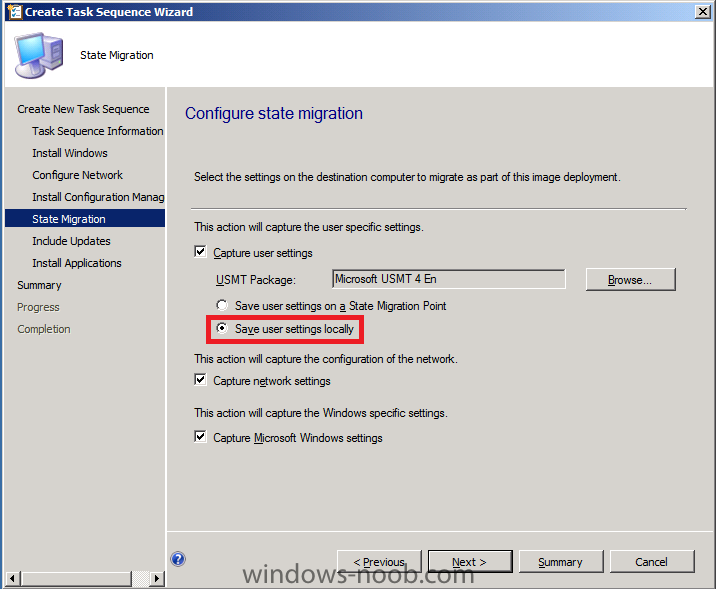
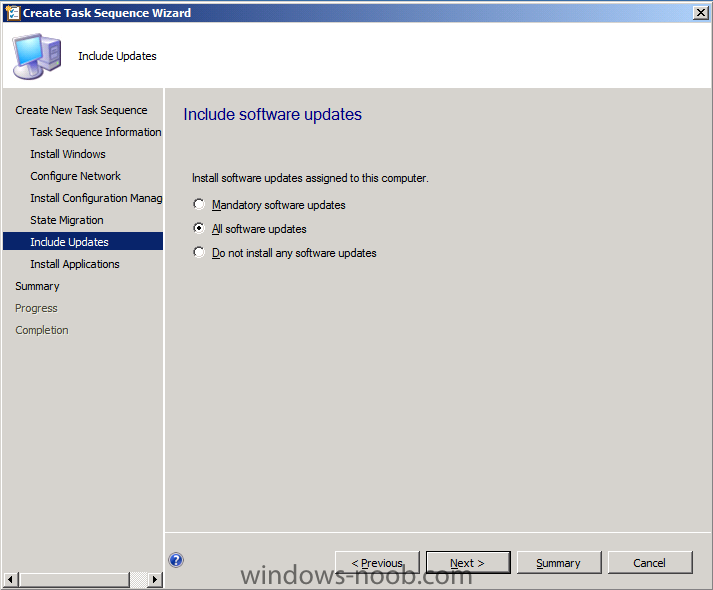
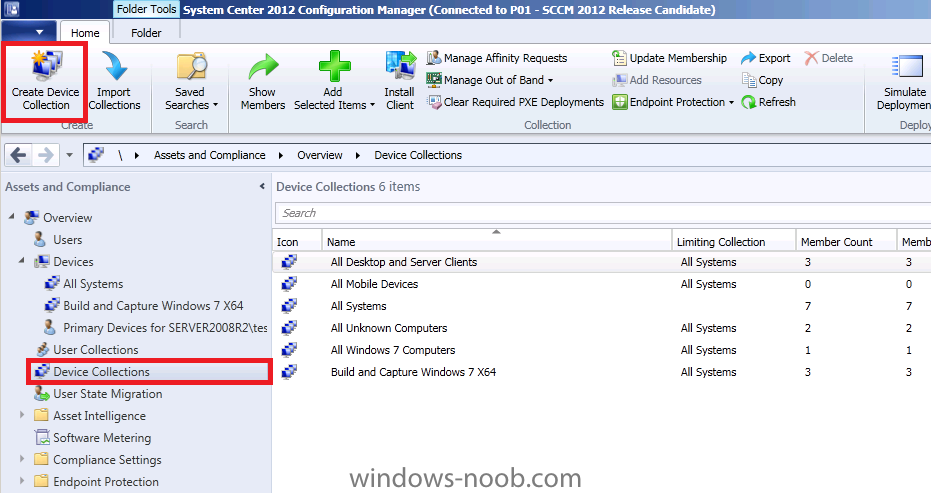
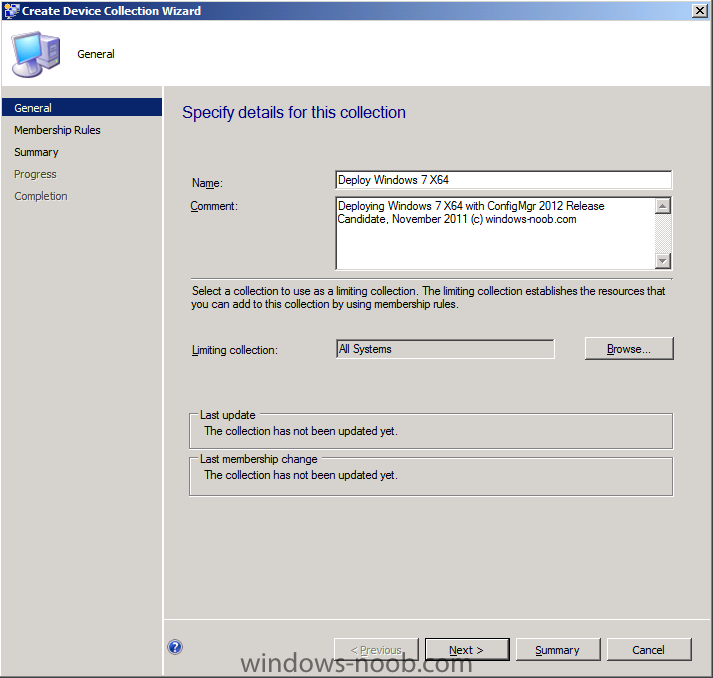
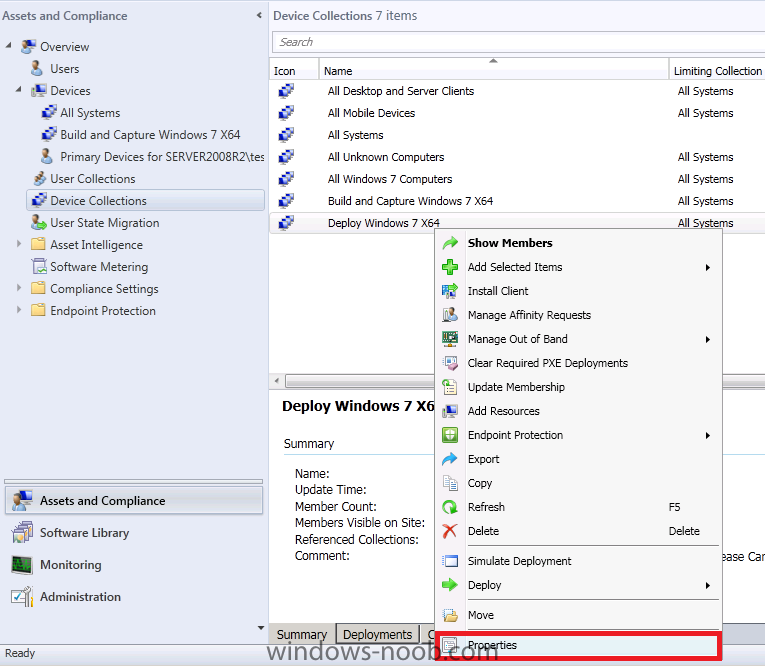
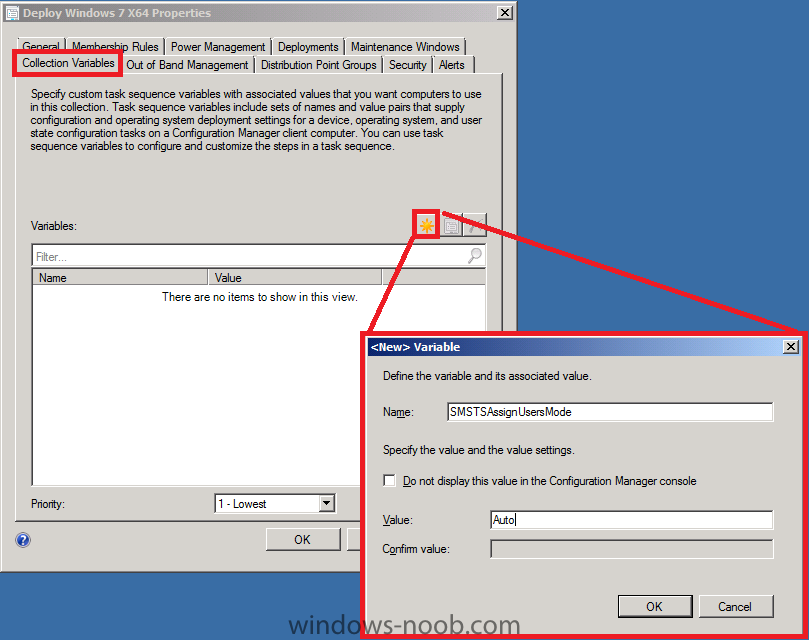
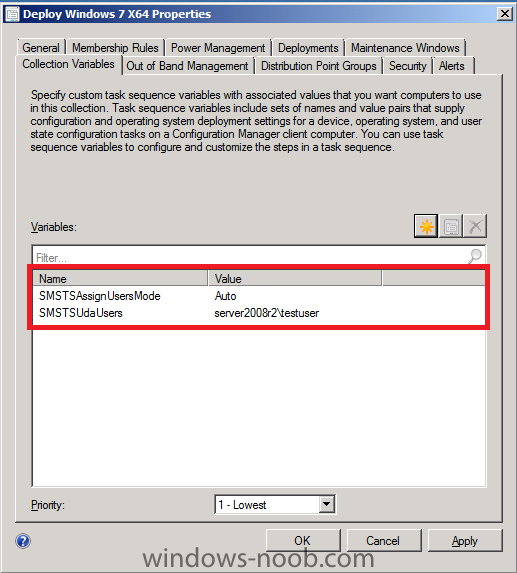
In Part 1 of this series we got our AD and SCCM servers ready, and then we installed System Center 2012 Configuration Manager as a standalone Primary site. In Part 2 we configured the SCCM server further by adding some Windows Server roles necessary for the following Configuration Manager 2012 functionality, Software Update Point (SUP) and Operating System Deployment. In Part 3 we configured the server further by Enabling Discovery methods and creating Boundary's and Boundary Groups. In Part 4 we configured Client Settings, Added roles and Distributed the Configmgr Client to our Computers within the LAB, then in Part 5 we enabled the Endpoint Protection Role and configured Endpoint Protection settings and targeted a collection called All Windows 7 Computers with these settings and policies. In Part 6 we configured our SUP further to Deploy software updates to our All Windows 7 Computers and Build Windows 7 X64 collections. In Part 7 we used the Build and Capture process to create our Base Windows 7 X64 wim image. In this part we'll use the captured image in our Deploy Windows 7 X64 task sequence and we'll set some User Device Affinity collection variables and use a USMT 4 package to migrate the users data using hardlinking. Step 1. Create the USMT 4 package Perform the following on your SCCM 2012 server as SMSadmin. If you want to migrate data in a Deploy Task Sequence you'll need to have the USMT 4 package ready, so let's create it now so that we can access the necessary migration files in our Deploy Windows 7 X64 task sequence. On your SCCM server in Windows Explorer, browse to C:\Program Files\Windows AIK\Tools\ Right click on the USMT folder and choose Copy, select your sources folder (mine is on D:\) and paste the USMT folder in sources\os so that it's path is sources\os\usmt In the ConfigMgr Console, select Software Library, Application Management, Packages, right click and choose Create Package. fill in the details about the package, call it USMT version 4 and point to the UNC path of our newly copied files, \\sccm\sources\os\usmt for Program Type select Do not create a program Complete the Wizard Step 2. Distribute the USMT package to our Distribution Points Select the USMT package and click on Distribute Content in the Ribbon for Content Destination, click on Add, select Distribution point, select our DP, click through the rest of the wizard Step 3. Import the captured Windows 7 X64 wim file Perform the following on your SCCM 2012 server as SMSadmin. In the Software Library, Operating Systems section of the Configmgr console, click on Operating System Images, you'll note that it is empty because we havn't imported any images yet. Right click and choose Add Operating System Image browse to the UNC of where we captured the image in Part 7 and select the captured wim file eg: \\sccm\sources\os\captures\windows7x64.wim fill in some details about the image click through the summary, progress to completion Step 4. Distribute the image to the Distribution points Perform the following on your SCCM 2012 server as SMSadmin. We now need to distribute our imported image to our distribution points. Select Our Windows 7 Enterprise X64 image and in the ribbon above click on Home and then Distribute Content when the Distribute Content Wizard appears, click next to specify the destination, click on add and select distribution point select our Distribution Point from the list the DP appears selected click next through summary/progress to completion Step 5. Create the Deploy Task Sequence Perform the following on your SCCM 2012 server as SMSadmin. Now that we have added our captured operating system image to Configmgr, and distributed it to our dp's we want to create a Deploy Task sequence to Deploy the image. In Task Sequences, right click and choose Create Task Sequence. choose to Install an existing image package fill in some details about the image and click browse and select the X86 boot image, click next to proceed now select the Windows 7 image by clicking on browse and set an administrator password, uncheck Partition and format the target computer before installing the operating system if you want to use hardlinking for User state migration, otherwise files cannot be stored locally for the Configure the Network step, we want to join the domain so click on browse beside join a domain and now we need to specify the user that has permissions to join the domain, i use the DomJoin user just or this task (create the user and delegate them enough permissions to add computers to the domain) I'm not specifying an OU in this step, you can, but don't select the Computers Container if you do... for the Install the Configuration Manager client step click on browse and select the client package from defintion we created in the last part click next and for State Migration, select our USMT 4 package change the setting to Save user settings Locally (this will mean we can use Hard Links) for Include Updates select All Software Updates and click next through to completion (we are not installing any applications at this point). Step 6. Create a Deploy Windows 7 X64 collection Perform the following on your SCCM 2012 server as SMSadmin. In the ConfigMgr console, click on Assets and Compliance, select Device Collections, click on Create Device Collection in the Ribbon fill in the collection details, call it Deploy Windows 7 X64, limit it to All Systems click next through the wizard, we will not add any computers to it yet, and we will not create any queries. Step 7. Create Collection variables Perform the following on your SCCM 2012 server as SMSadmin. We want to set UDA variables on our collection, so that a UDA user gets assigned as the primary user of computers deployed in this collection. We are doing this to show you that you can set a primary user to a device based on Collection Variables. We could do this in other ways, for example using task sequence steps to set the variables or prestart commands or a frontend HTA, I will come back to this subject later, but for now, let's just see it in action by specifying the two variables below. Right click on the Deploy Windows 7 X64 Collection and choose Properties click on the Collection Variables tab, click on the yellow startburst and add a new variable called SMSTSAssignUsersMode, set the value to Auto and remove the checkmark from Do not display this value in the Configuration Manager console do the same again for another variable called SMSTSUdaUsers, specify the user as domain\user Step 8. Deploy our Task Sequence Perform the following on your SCCM 2012 server as SMSadmin. To make the task sequence available to computers we need to Deploy it. In Software Library, select our Deploy Windows 7 X64 task sequence and choose Deploy select our Deploy Windows 7 X64 collection and click ok to the warning change purpose to Available (this keeps it optional, Required is Mandatory ! and dangerous as a result), place a checkmark in Make available to boot media and PXE click next through the task sequence, until distribution points, by Default it will be set to Download content locally when needed by running task sequence, you can get this to change to Access content directly by editing each package referenced in the task sequence and setting the Data Access tab for each package, place a checkmark in Copy the content in this package to a package share on Distribution points click next through the wizard to completion. In our next part we will create an Application, and create a deployment type for that application to only install if the Primary User is True for that device (User Device Affinity), we will then add a computer to the new collection, PXE boot it and watch the process from start to finish.


-
can you post your SMSTS.log file please ?
-
here's a presentation I did at Best of MMS in Stockholm, Sweden called Reducing Complexity in OSD with Configuration Manager 2012, I'll attach the scripts used in the demo's shortly. Reducing Complexity in OSD with Configuration Manager 2012.pptx Niall Brady Niall Brady is an MVP in System Center Configuration Manager, Enfo Zipper. Niall Brady is an Irish man living in Sweden, he’s been working with computers since the early 90’s and is an MVP in System Center Configuration Manager. Niall has a strong passion for deploying Operating Systems and can be found online helping others on the Technet forums or blogging about his experiences at MyITForum. Niall run’s a forum dedicated to ConfigMgr called windows-noob.com Reducing Complexity in OSD with Configuration Manager 2012 Talare: Niall Brady, System Center Configuration Manager MVP, Enfo Zipper. Produkt: System Center Configuration Manager 2012 This session will focus on how OSD in Configuration Manager 2012 reduces your workload by reducing complexity and serviceability with user targetted applications, reducing vulnerabilities of the OS image and reducing deployment time with Offline servicing, and the simple things to make administrators life easy.


-
pm me the link, it obviously includes a word that i've marked as spam, so it's not working.
-
just delete the computer object from All Systems collection, once done, re-import it (computername+mac address) into the build and capture collection and try again.