anyweb
-
Posts
9277 -
Joined
-
Last visited
-
Days Won
371
Everything posted by anyweb
-
 how did you install sql ? that's where the sql accounts) are defined...
 -
Folder SMSTSLog in C:\ drive
anyweb replied to as400ssw's question in Deploying Windows 10, Windows 8.1, Windows 7 and more...
no problem, I've reminded them that people are seeing it so hopefully a bug fix will come soon -
Folder SMSTSLog in C:\ drive
anyweb replied to as400ssw's question in Deploying Windows 10, Windows 8.1, Windows 7 and more...
it's a bug, the microsoft product group are aware of it, it doesn't happen for everyone, just some people cheers niall -
so again, what is causing it to be critical, what do the status messages say ?
-
I don't understand what you are saying...
-
and what is it complaining about ?
-
warnings are just that, warnings. They are not errors. It looks ok to me...if you look at the actual status of the individual components that have warnings, how do they look ?
-
ok back to the basics, are you upgrading the site using the inbuilt upgrade ability, or what are you trying to do exactly
-
restart the server and see is your problem solved
-
you said and i quote... you need to configure your antivirus exclusions in THAT product if it's the product that is doing antivirus on your configmgr server... is it ?
-
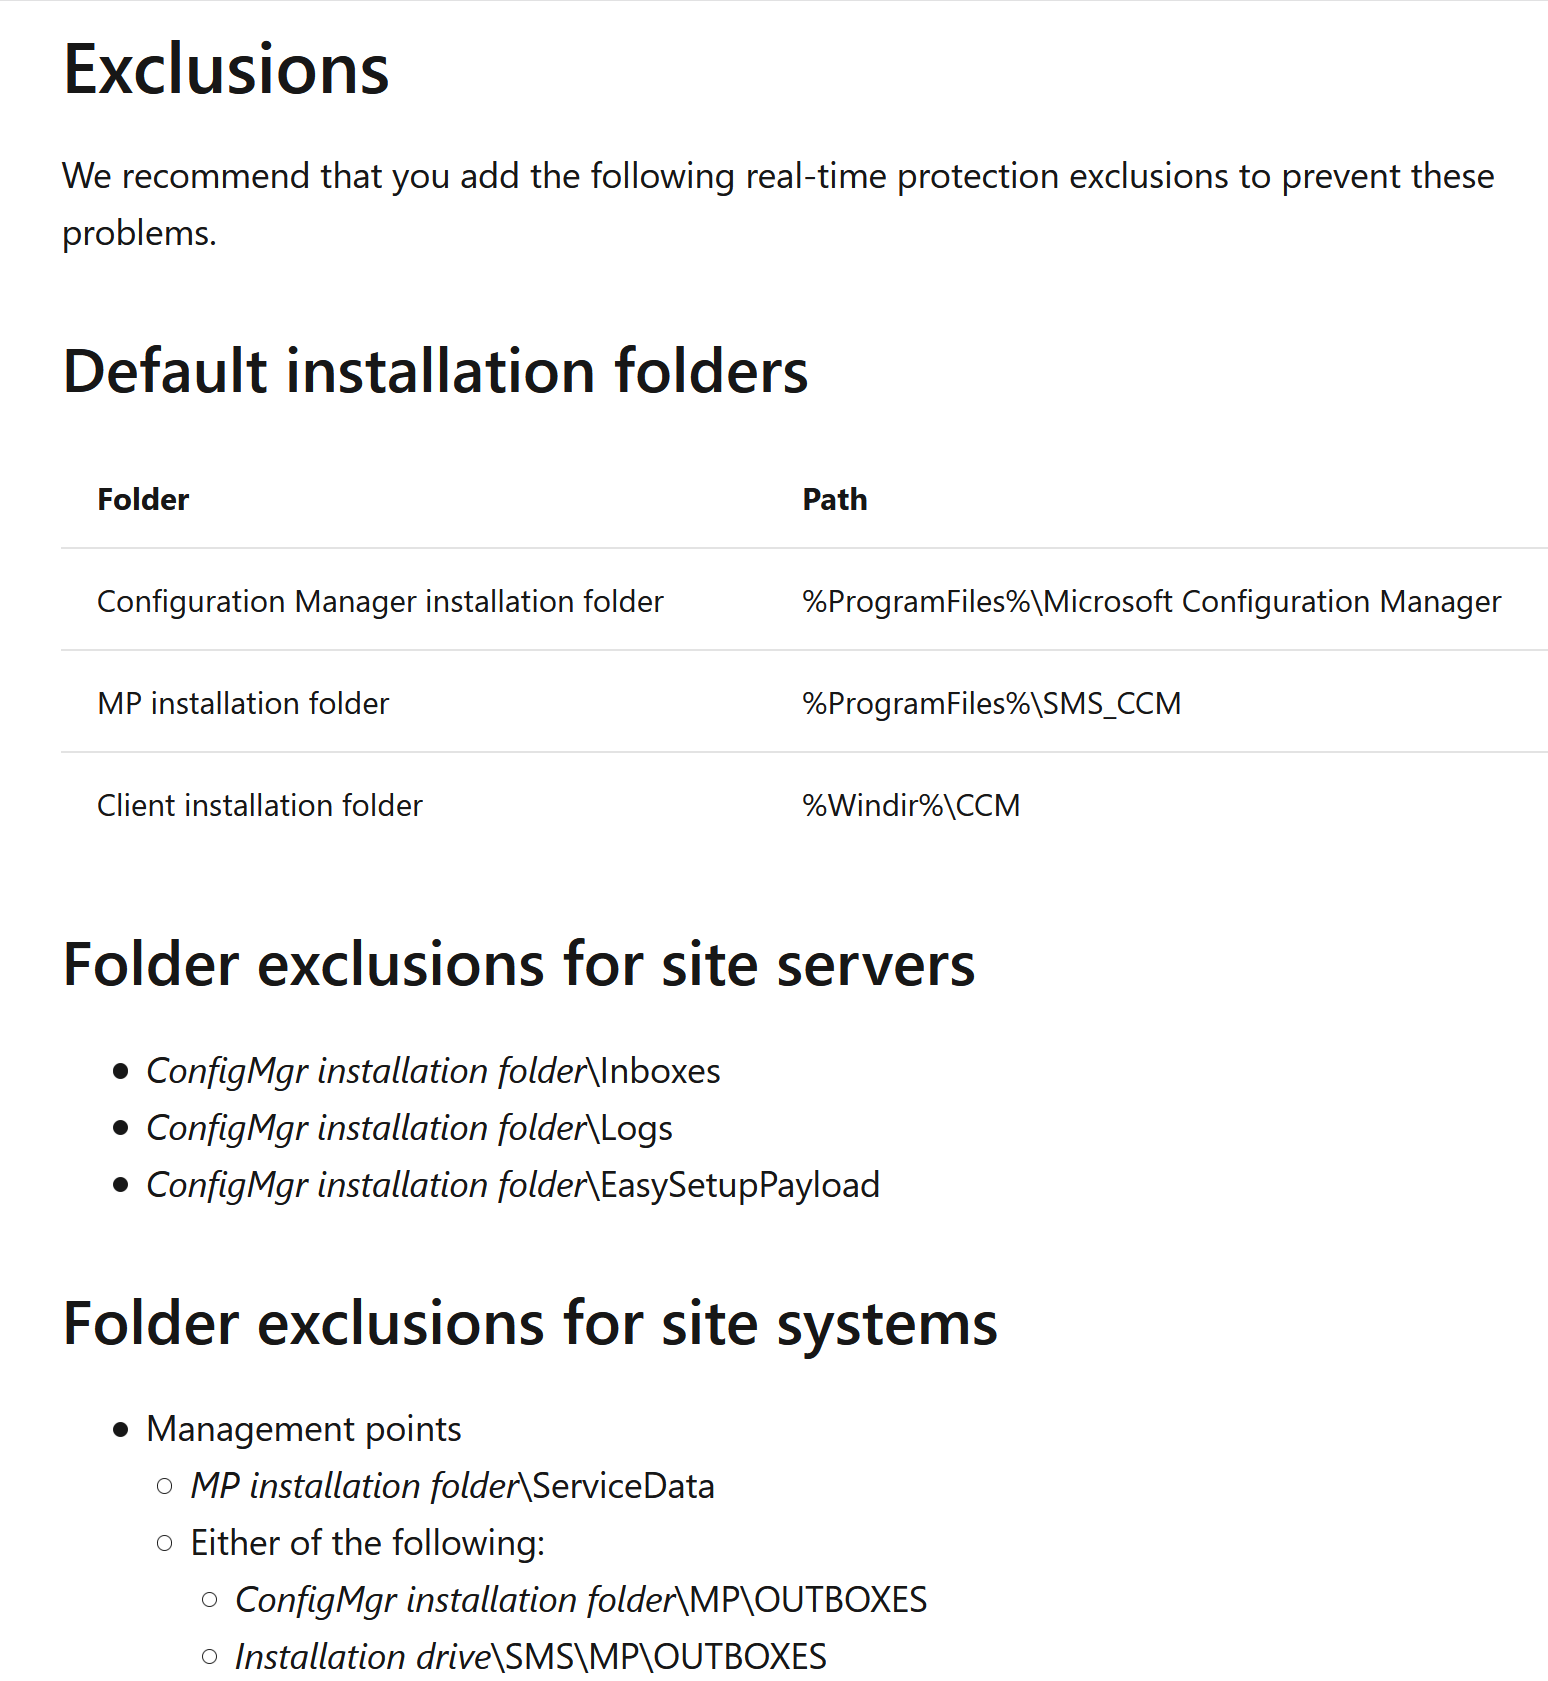
here you go https://docs.microsoft.com/en-us/troubleshoot/mem/configmgr/recommended-antivirus-exclusions
-
can you uninstall the antivirus software, reboot the server and try again, or if you cannot uninstall it, create exclusions for SMS related files and folders
-
what version of configmgr is it ? and do you use 3rd party antivirus ?
-
also, have you seen this post from Eswar, he's not using PKI either but it's working for him http://eskonr.com/2021/01/certificate-error-while-deploying-an-os-over-cmg-using-bootable-media/
-
how are you deploying the feature update ? what does the windowsupdate.log tell you ?
-
so I got this back from the very knowledgeable Jason in the PG "The problem here appears to be that the cert on the CMG is issued by an internal CA and thus not trusted by the WinPE environment. Using a cert from a public PKI is the only way I know of to get past this (or using a pre-start script to add the issuing PKI as trusted before the TS engine launches)."
-
I haven't tested it in non-pki environments and a quick look at the documentation only states this " For version 2010 early update ring, if you use a PKI-based certificate for the boot media, configure it for SHA256 with the Microsoft Enhanced RSA and AES provider. For later releases, including globally available version 2010, this certificate configuration is recommended but not required. The certificate can be a v3 (CNG) certificate. " In other words, it doesn't call out non-PKI environments or token based auth in this scenario, i'll ping the product group and ask if it's actually supported cheers niall
-
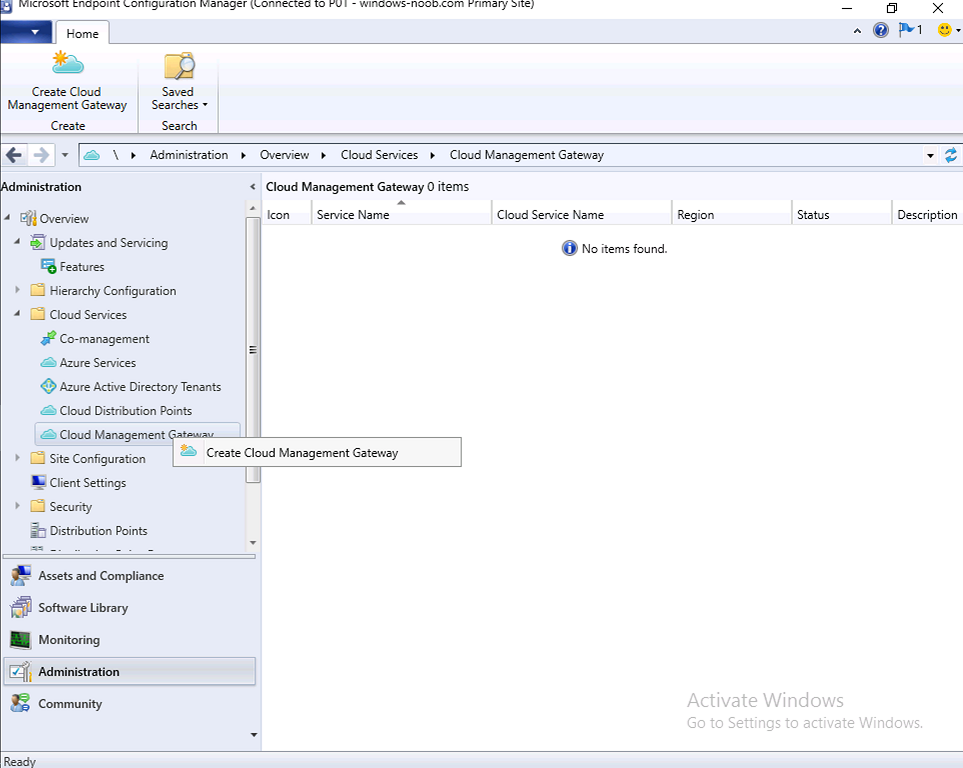
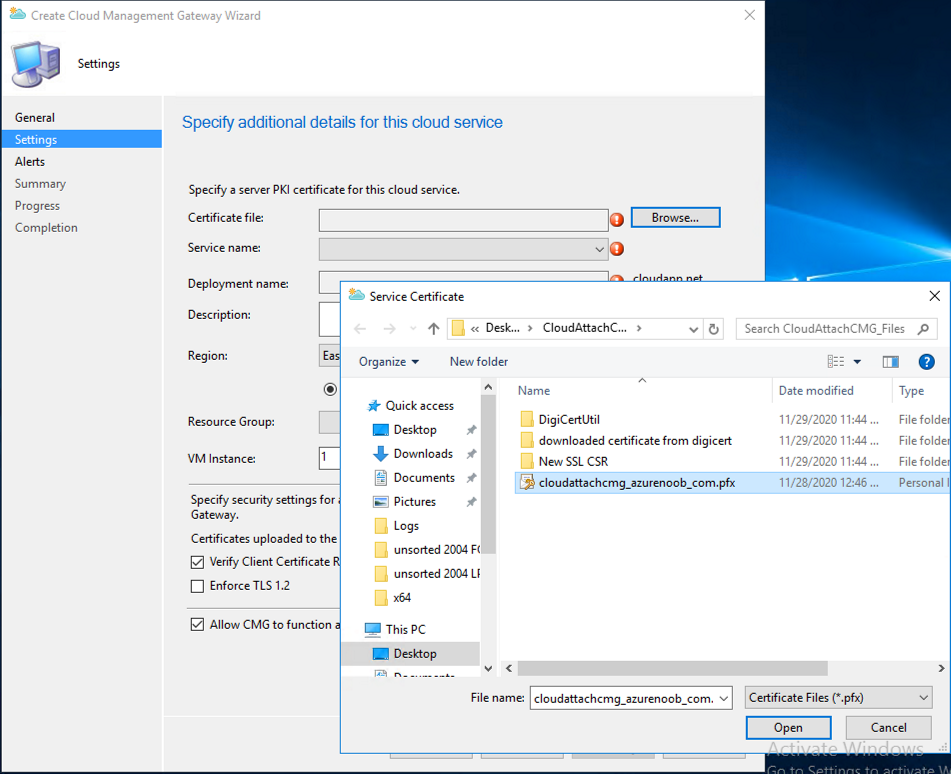
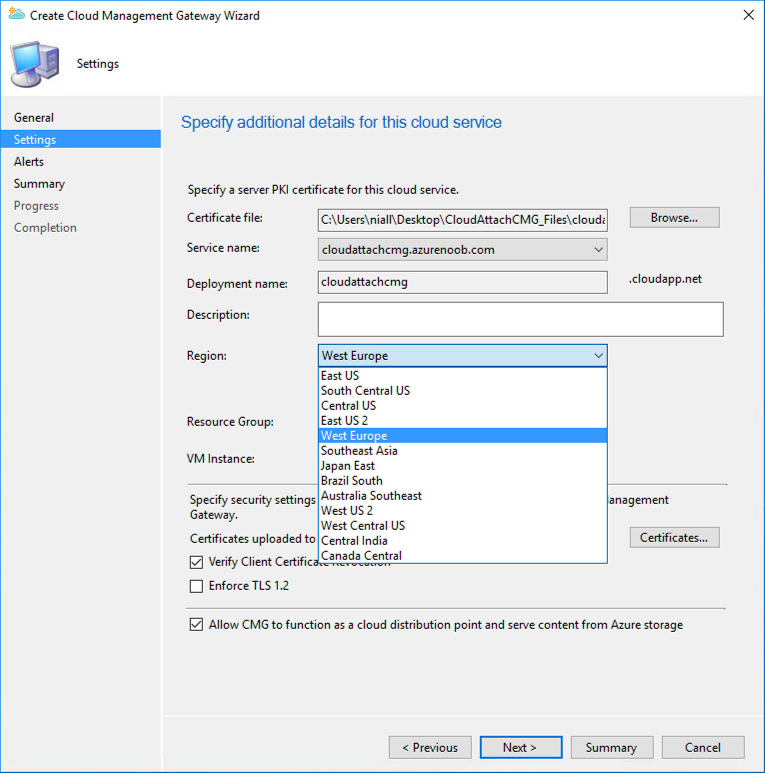
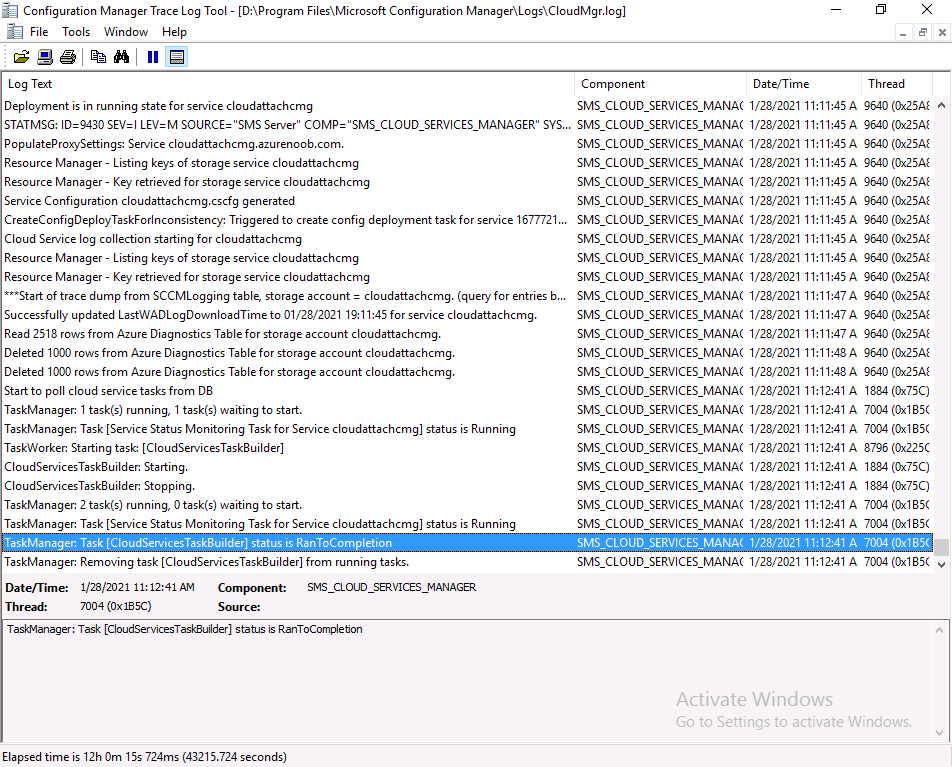
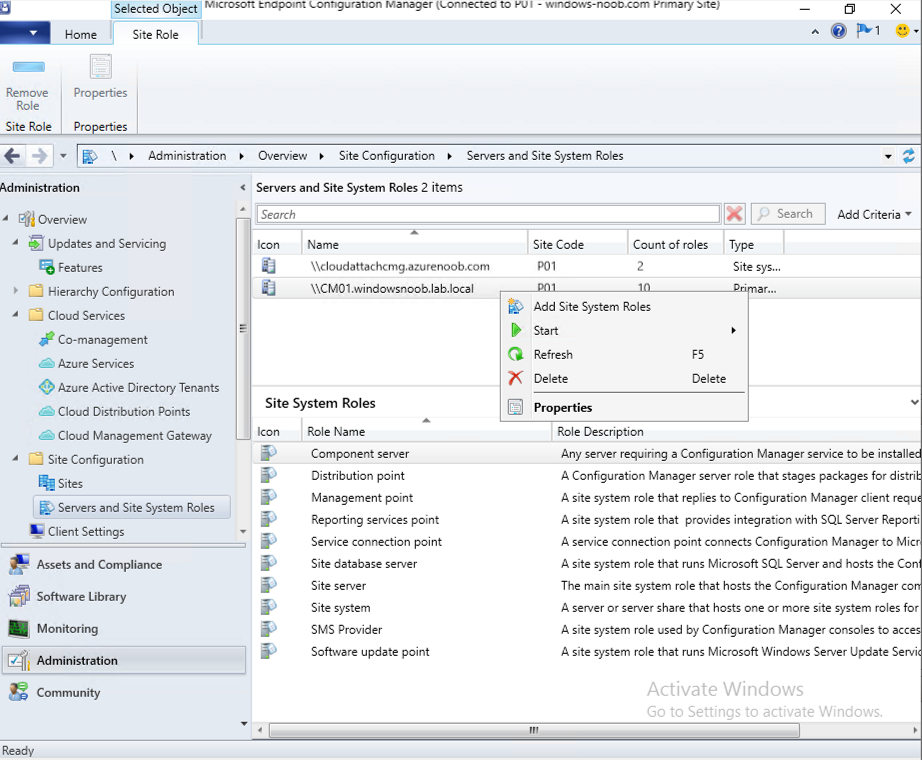
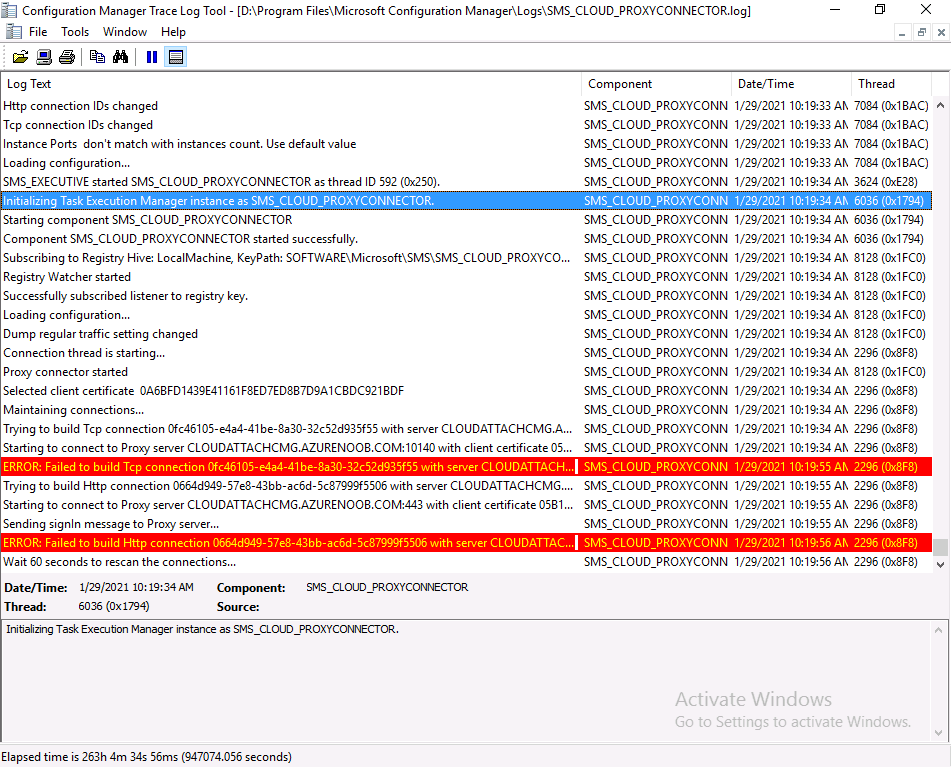
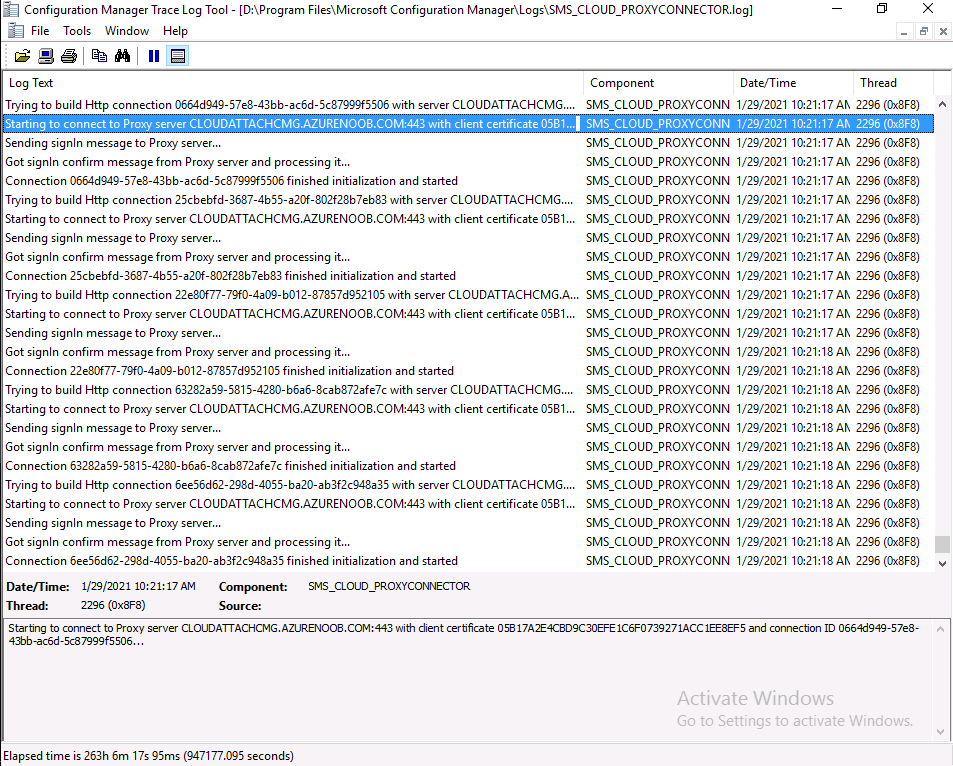
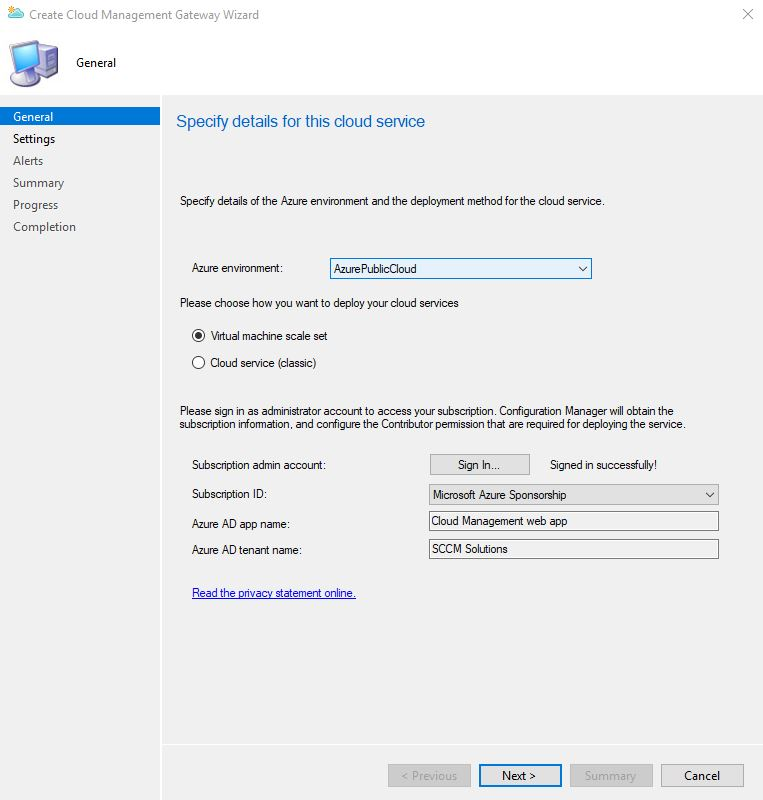
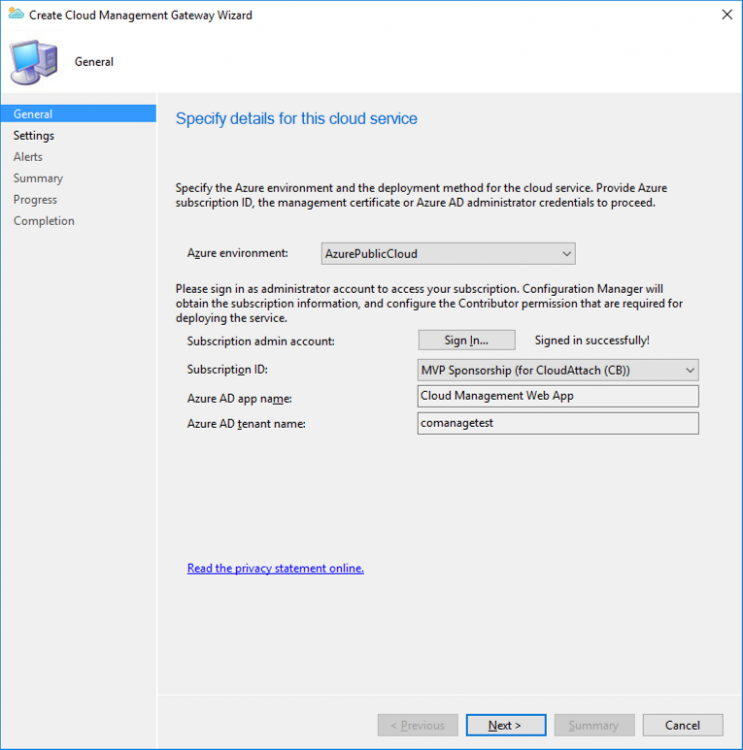
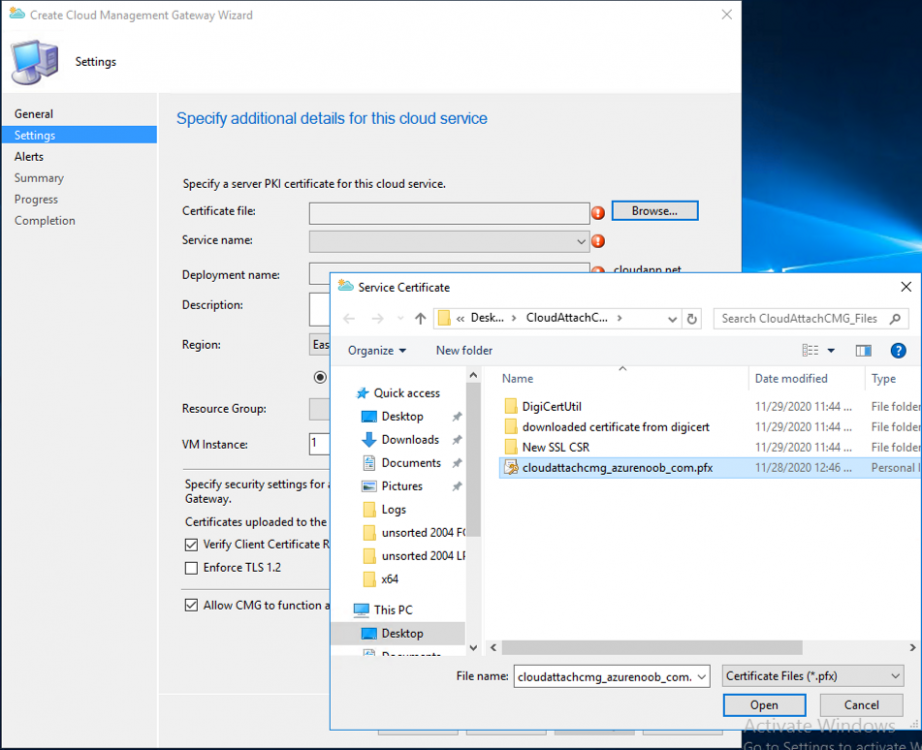
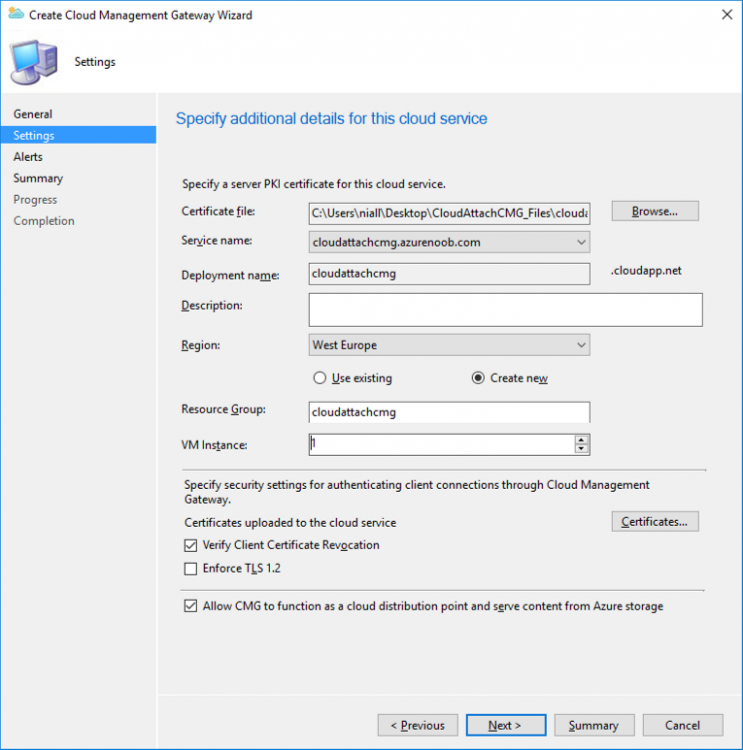
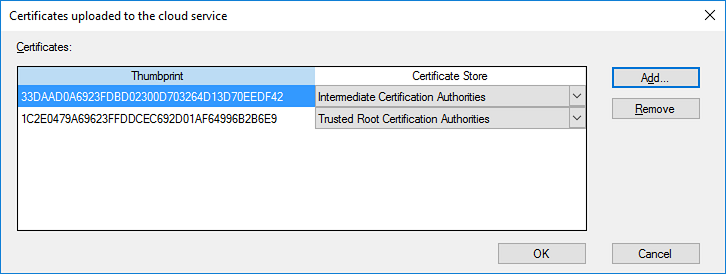
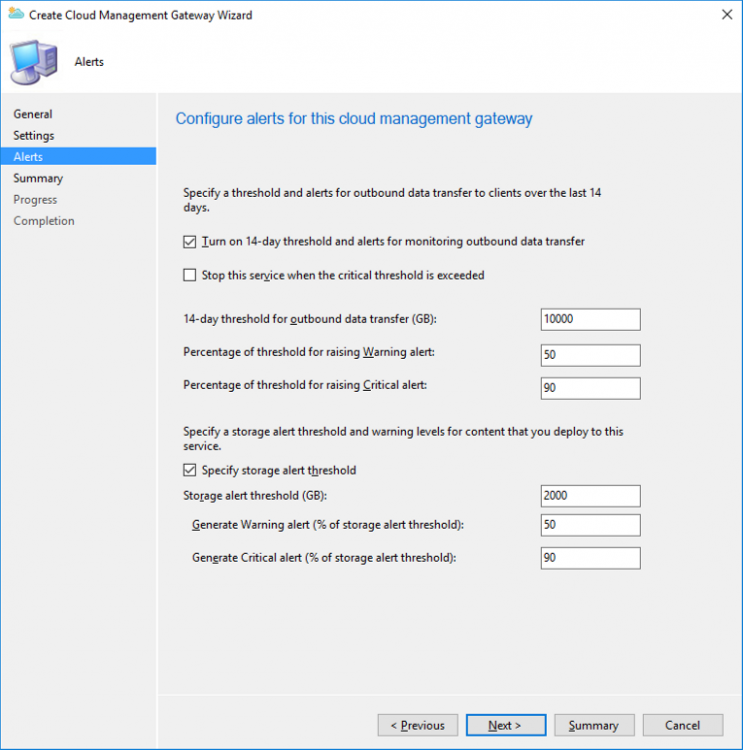
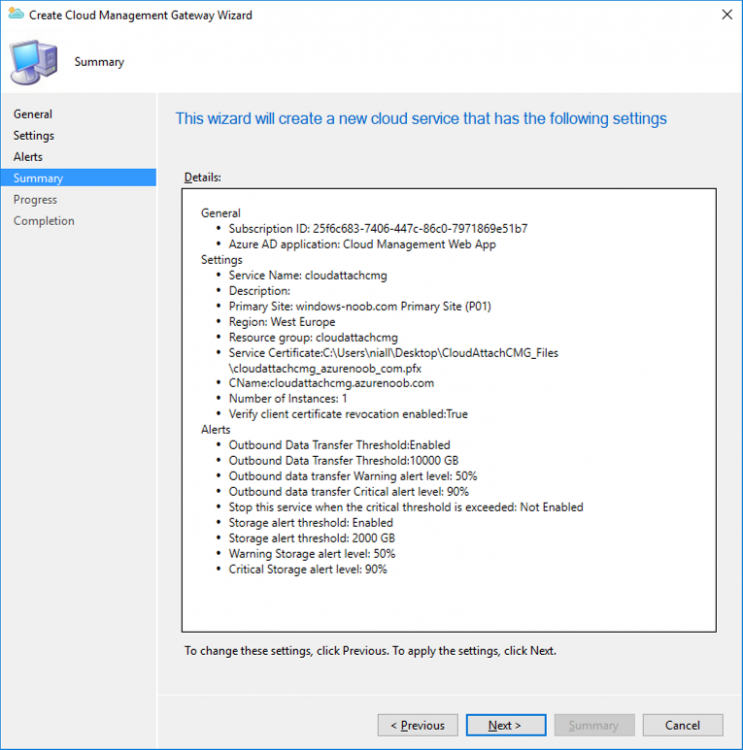
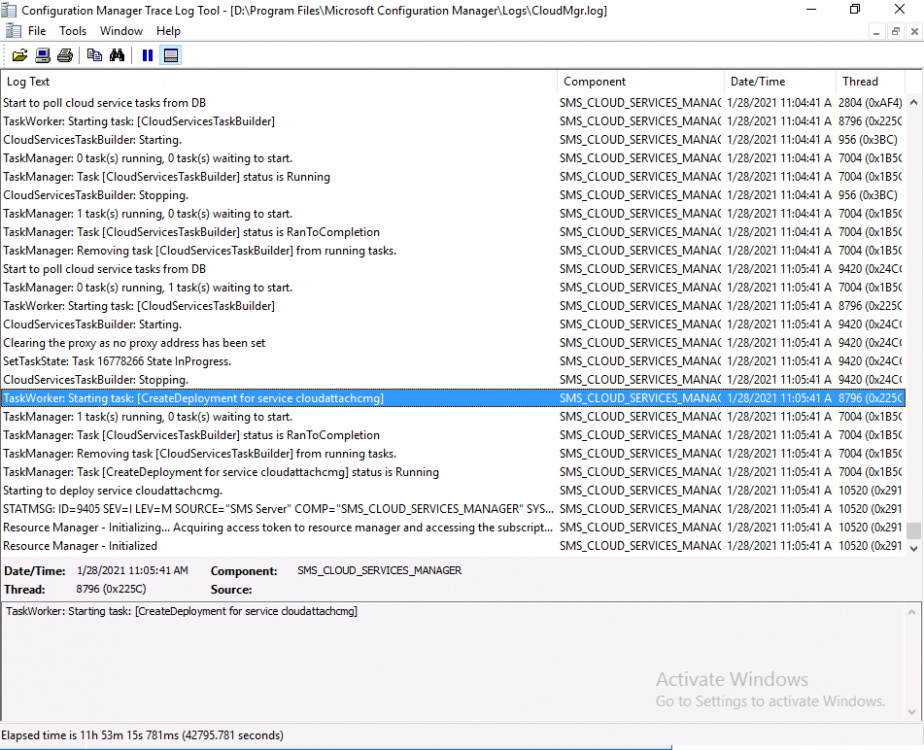
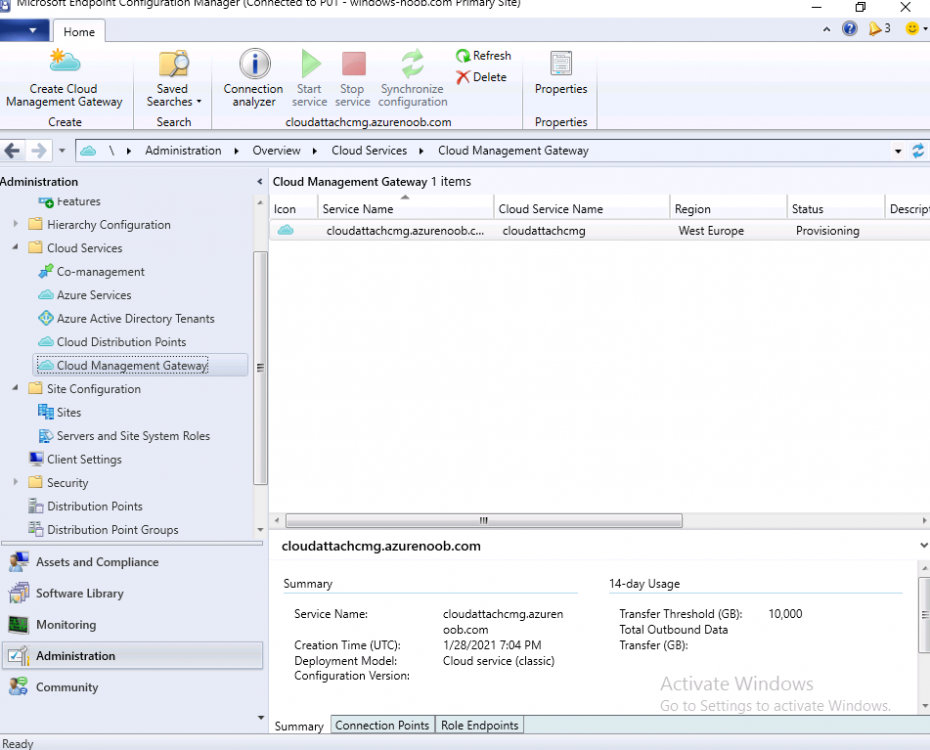
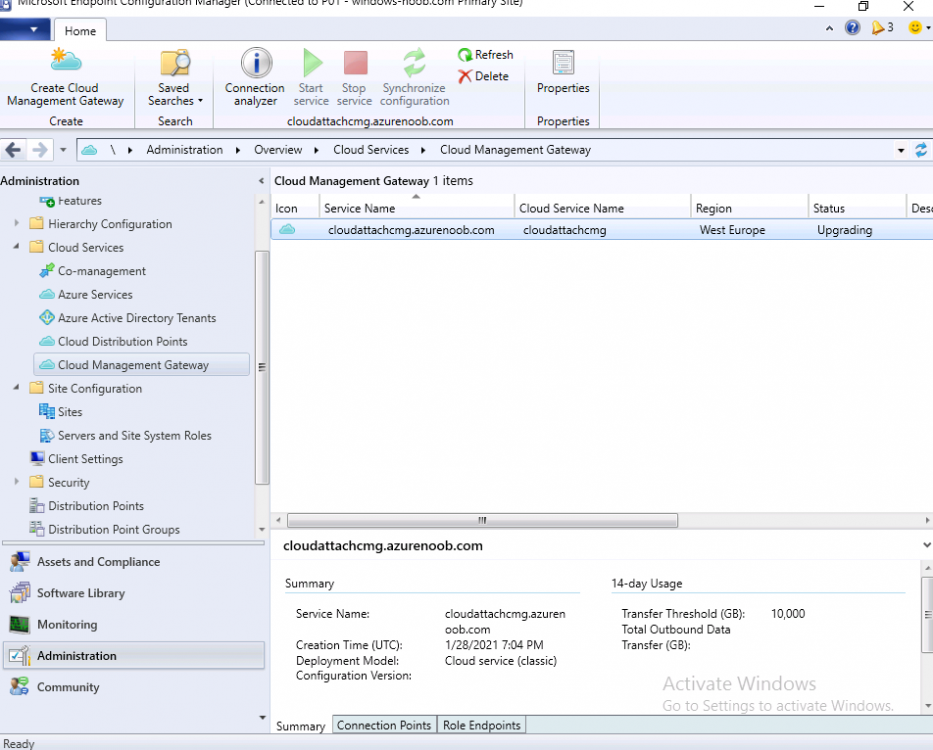
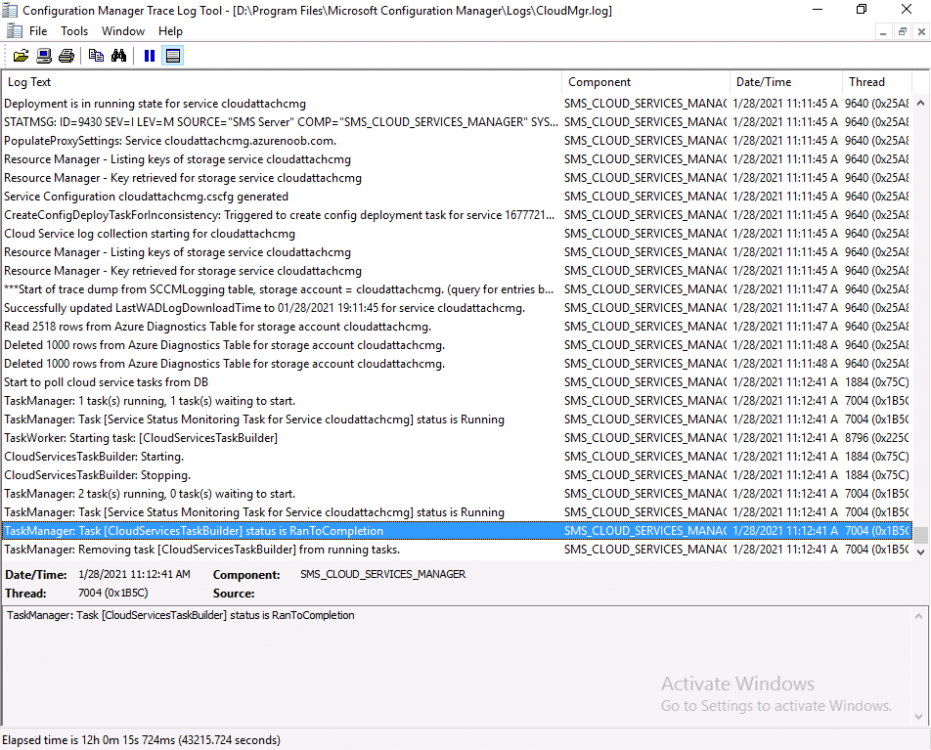
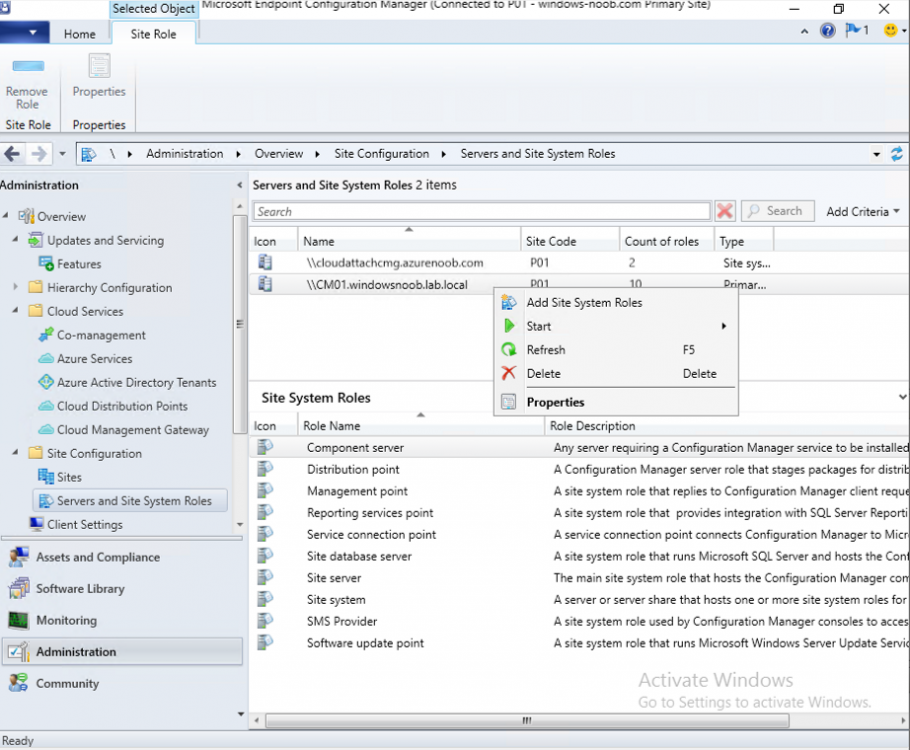
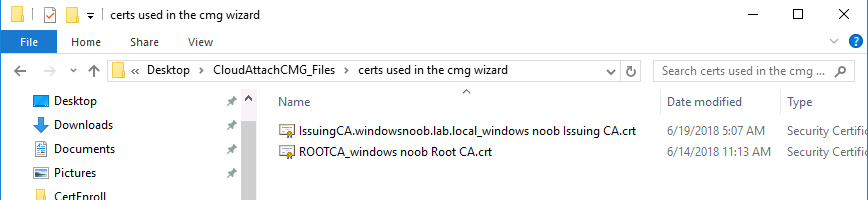
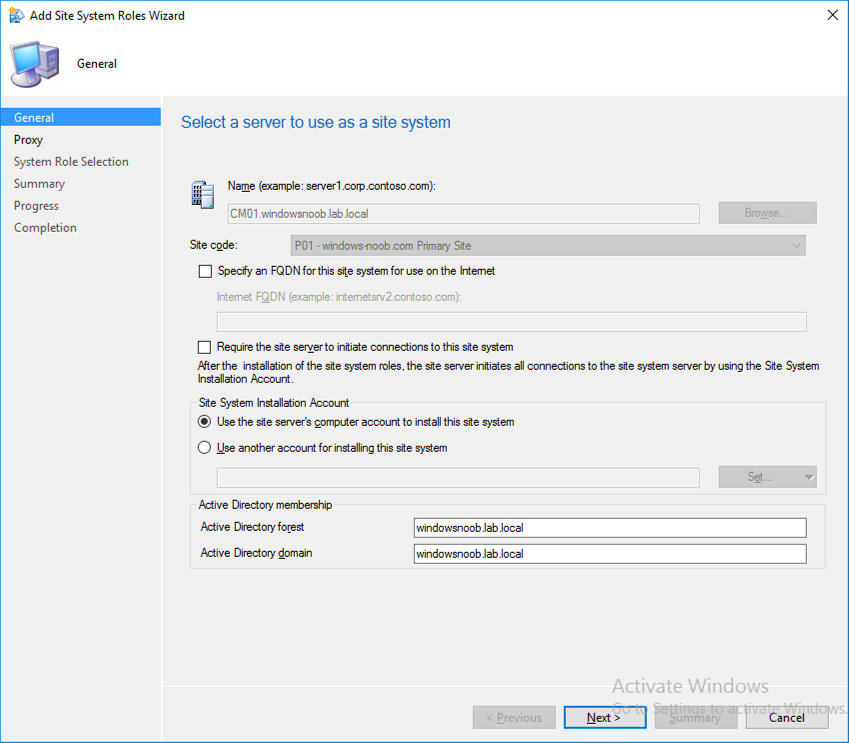
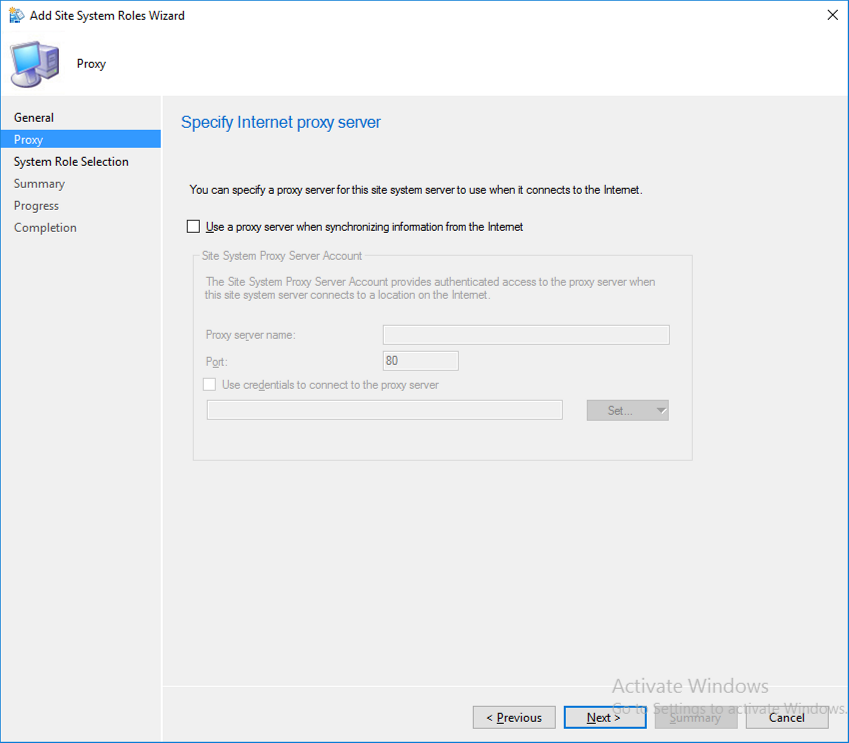
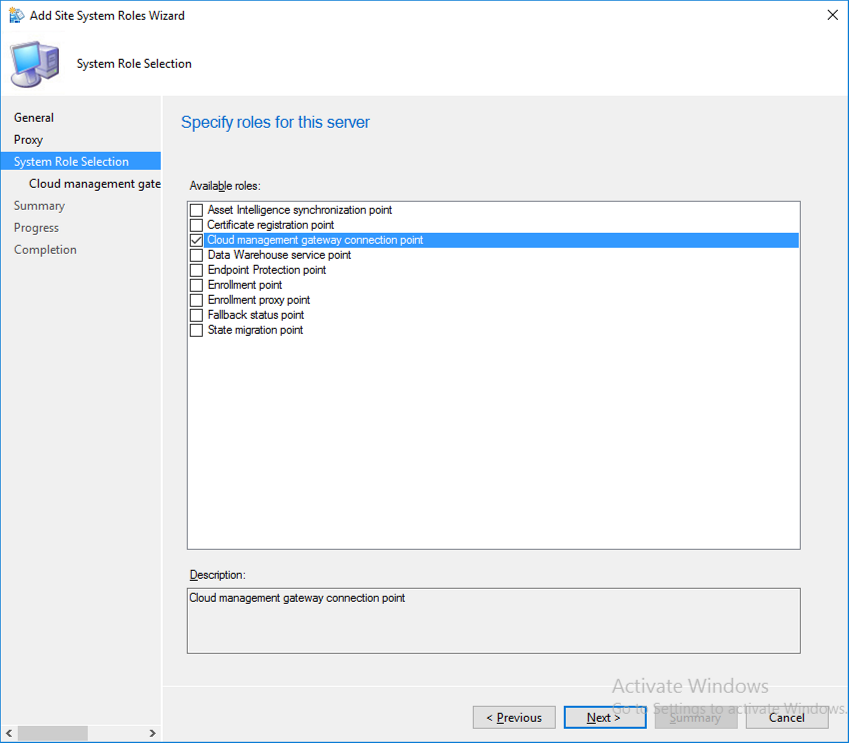
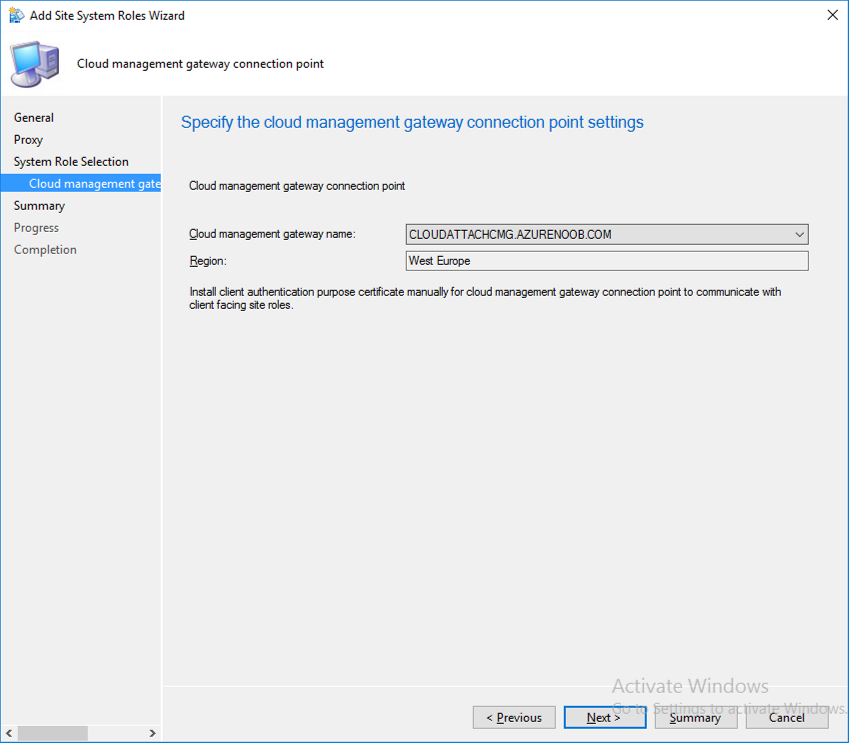
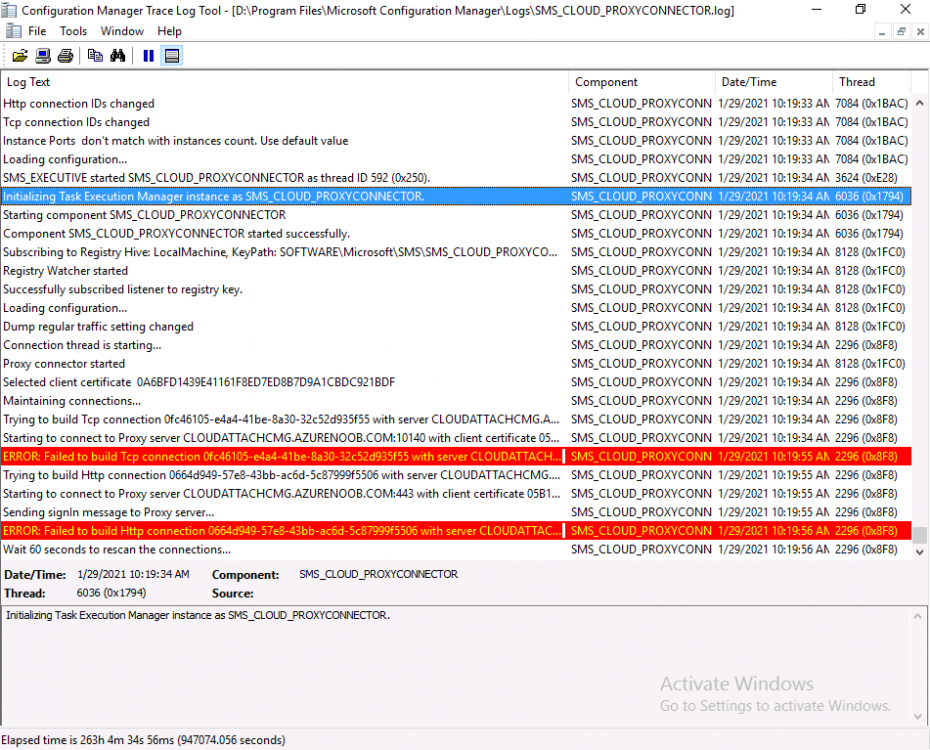
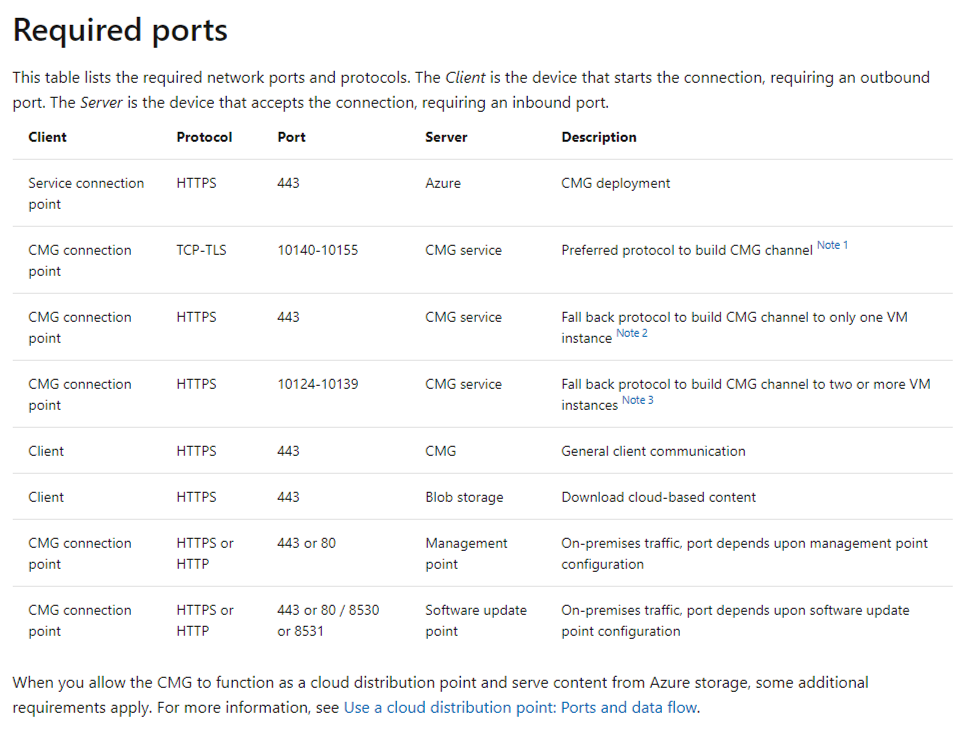
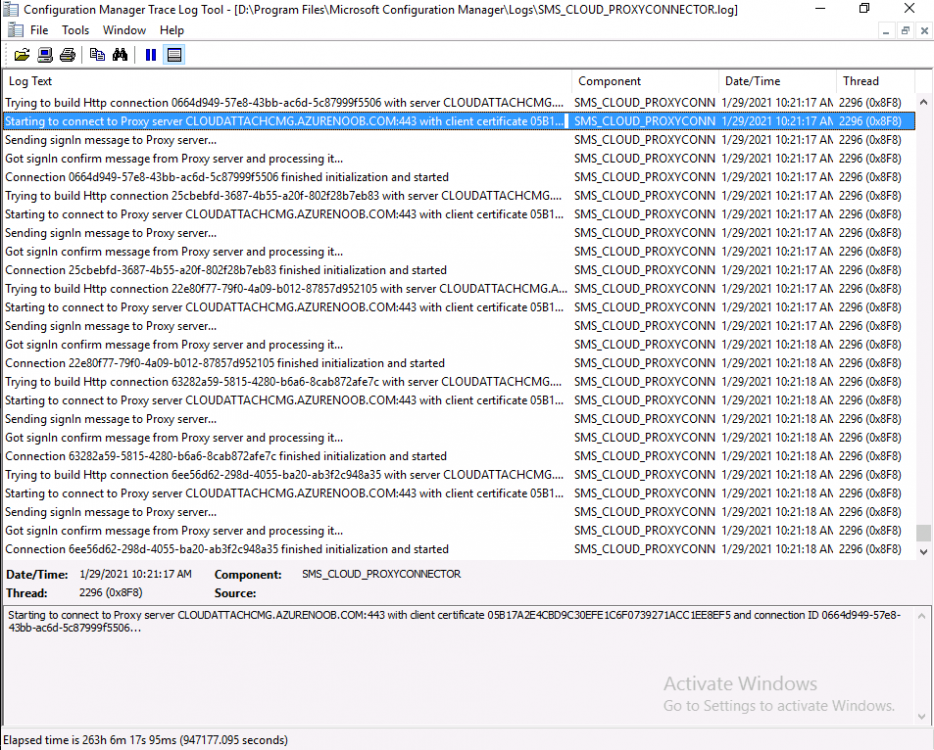
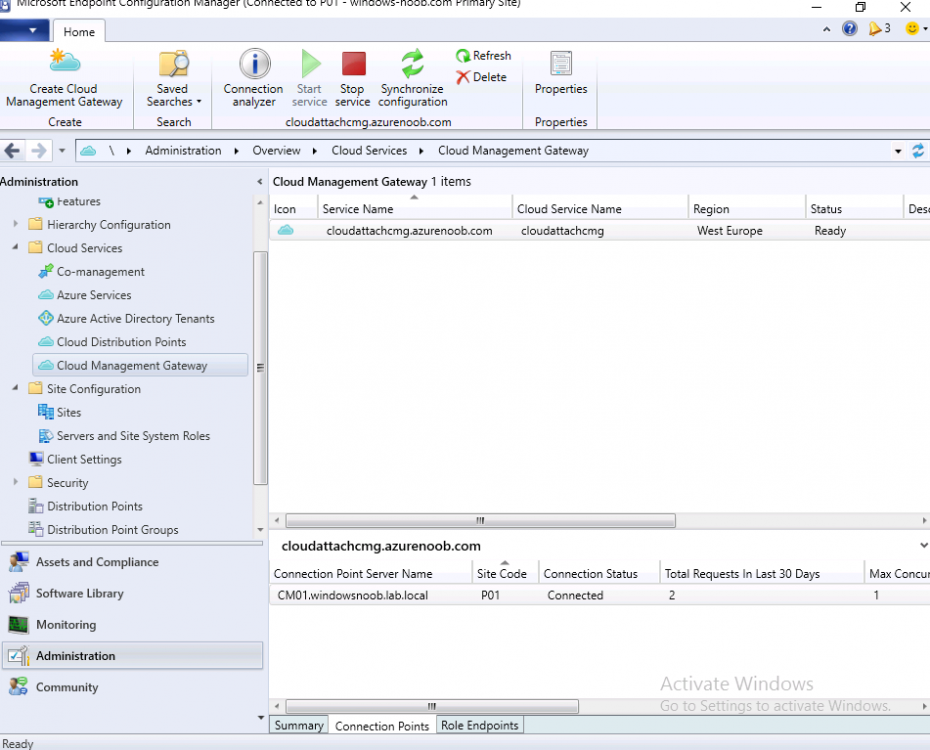
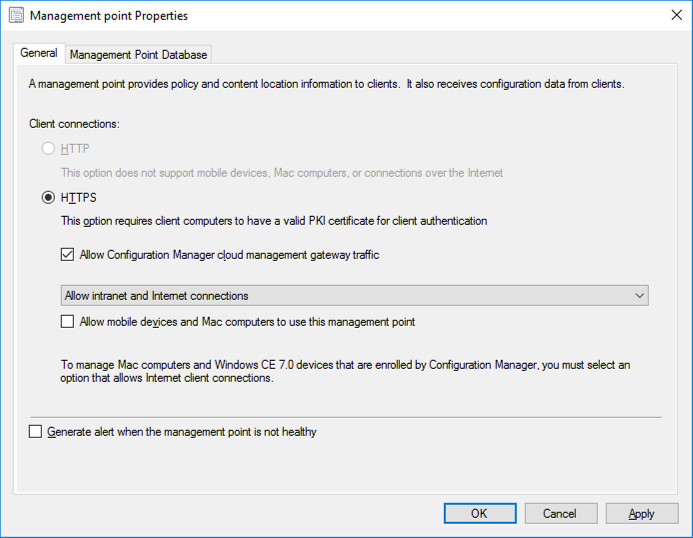
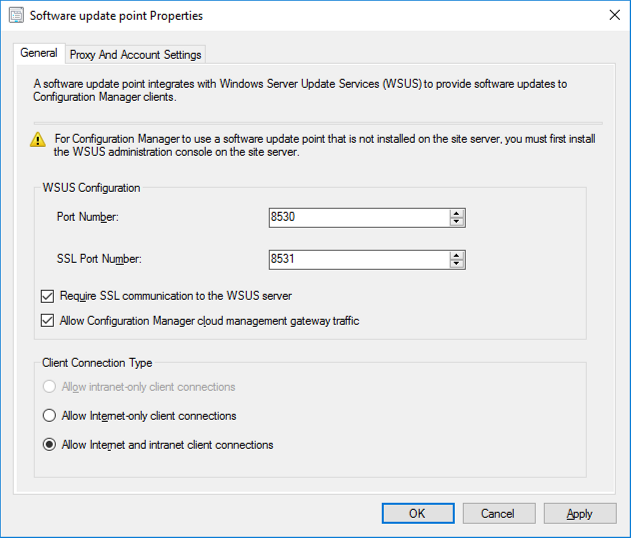
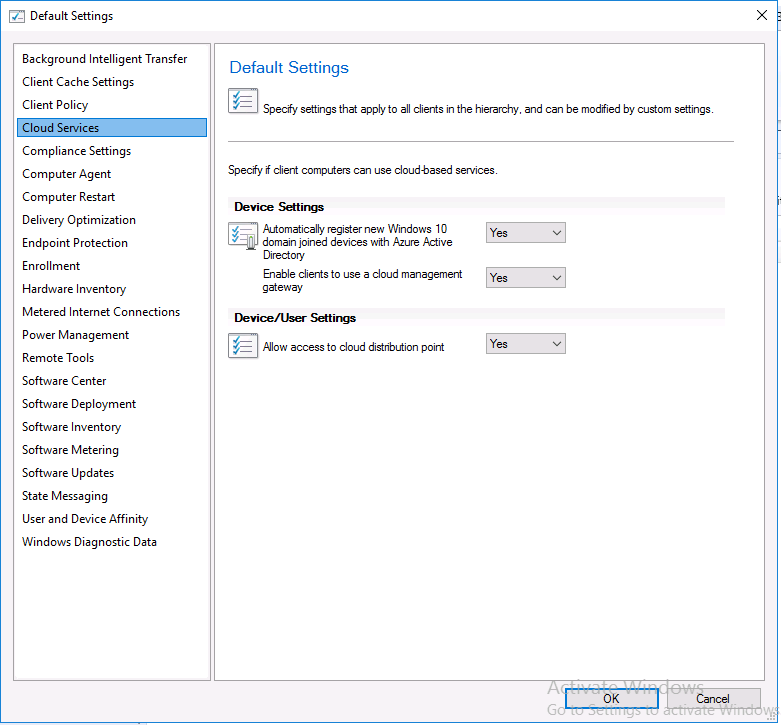
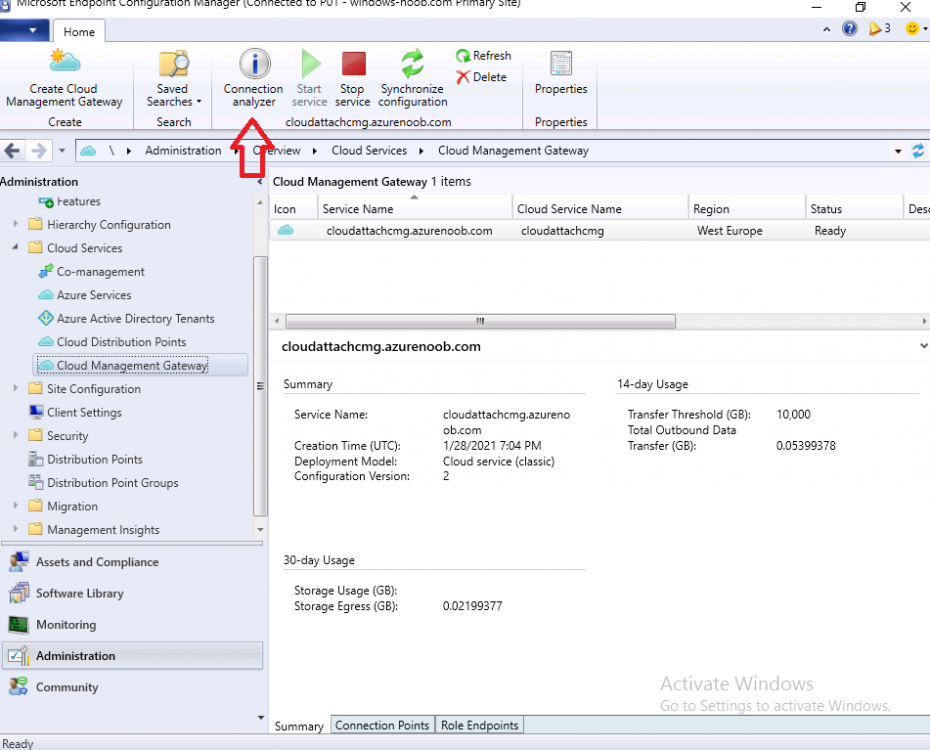
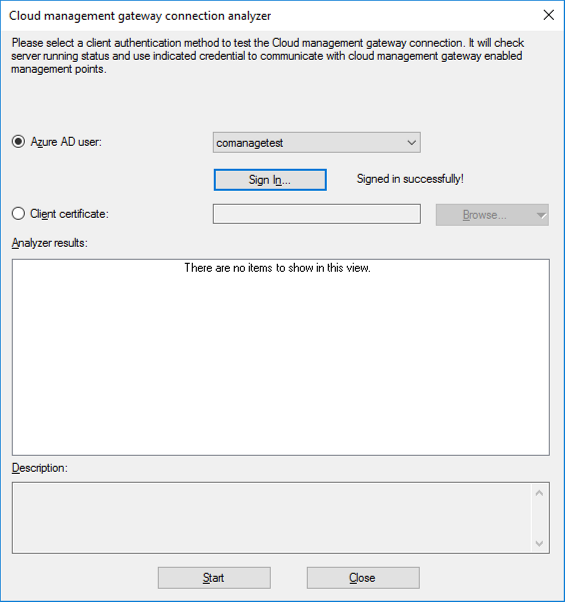
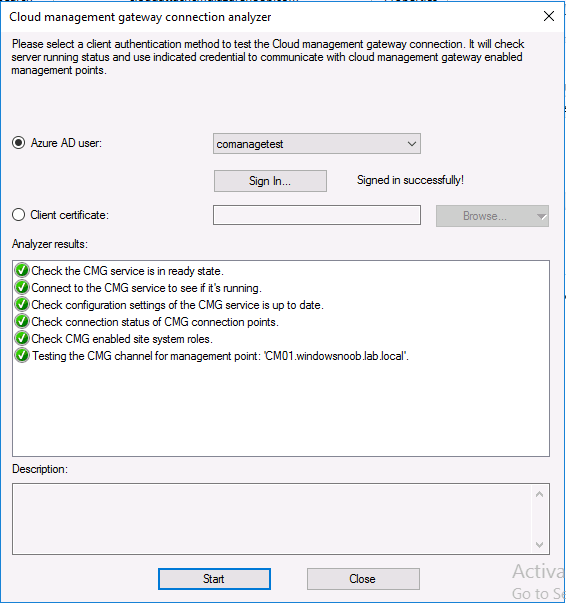
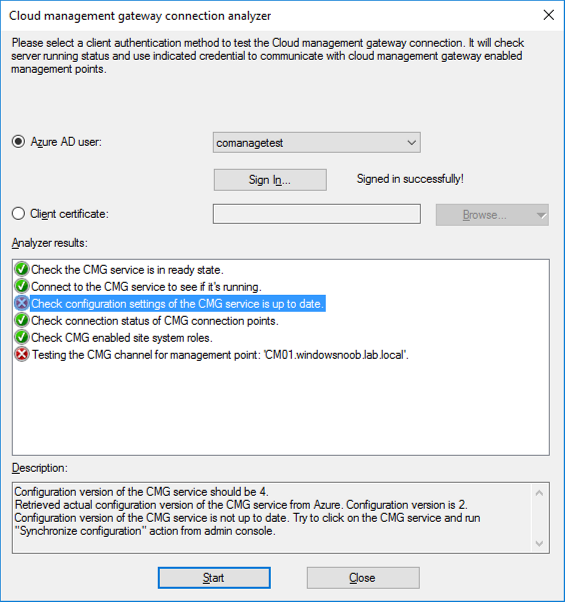
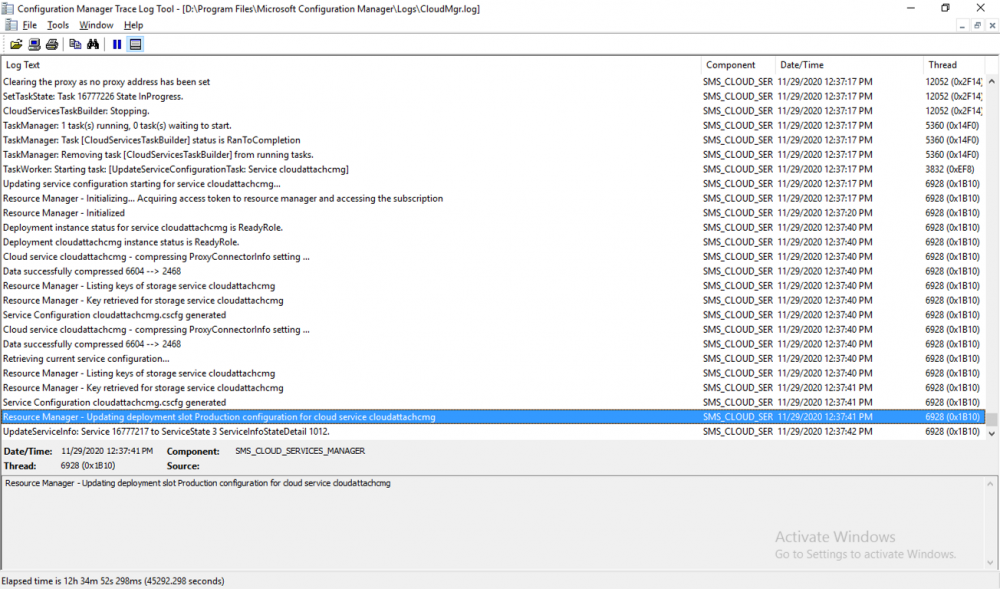
Introduction This is part 3 in a series of guides about cloud attach in Microsoft Endpoint Manager, with the aim of getting you up and running with all things cloud attach. This part will focus on creating a Cloud Management Gateway (CMG). This series is co-written by Niall & Paul, both of whom are Enterprise Mobility MVP’s with broad experience in the area of modern management. Paul is 4 times Enterprise Mobility MVP based in the UK and Niall is 10 times Enterprise Mobility MVP based in Sweden. In part 1 we configured Azure AD connect to sync accounts from the on premise infrastructure to the cloud. In part 2, we prepared Azure resources for the Cloud Management Gateway, in this part we'll create the cloud management gateway and verify everything is running smoothly. A Cloud Management Gateway gives you a whole bunch of new abilities for managing, imaging computers, escrowing BitLocker keys and delivering software, updates and policy to remote based internet enabled clients. Below you can find all parts in this series. Cloud attach - Endpoint Managers silver lining - part 1 Configuring Azure AD connect Cloud attach - Endpoint Managers silver lining - part 2 Prepare for a Cloud Management Gateway Cloud attach - Endpoint Managers silver lining - part 3 Creating a Cloud Management Gateway <- you are here Cloud attach - Endpoint Managers silver lining - part 4 Enabling co-management Cloud attach - Endpoint Managers silver lining - part 5 Enabling compliance policies workload Cloud attach - Endpoint Managers silver lining - part 6 Enabling conditional access Cloud attach - Endpoint Managers silver lining - part 7 Co-managing Azure AD devices Cloud attach - Endpoint Managers silver lining - part 8 Enabling tenant attach Cloud attach - Endpoint Managers silver lining - part 9 Renewing expiring certificates Cloud attach - Endpoint Managers silver lining - part 10 Using apps with tenant attach Step 1. Create Cloud Management Gateway Note: The screenshots here were taken in Configuration Manager version 2010 so some features such as Virtual Machine Scale Set available in later releases may not be visible. In the Configuration Manager console, go to the Administration workspace, expand Cloud Services, and select Cloud Management Gateway. Right click and choose Create Cloud Management Gateway. Click on Sign in and when prompted, use the credentials of an Azure subscription administrator account. The wizard will auto-populate the remaining fields from the information stored during the Azure AD integration prerequisite. If you own more than one subscription, select the Subscription ID of the desired subscription using the drop down menu. Specify the Azure environment for this CMG. The options in the drop-down list may vary depending upon the deployment method. The screenshot below was taken from ConfigMgr version 2010 which we used at the time of writing this lab. And the screenshot below shows the new option to decide how you want to deploy your cloud services. Virtual Machine Scale Set which is available as a production feature in ConfigMgr version 2107 and later versions, prior to that verion is was available as a pre-release feature. For details of the difference in choosing Virtual Machine Scale Set versus Cloud service (classic) see Paul's post here. To change the size of your Virtual Machine Scale Set see this post. On the Settings page of the wizard, click Browse and choose the .pfx file you created in step 5 of this blog post for the Cloud Management Gateway server authentication certificate. The name from this certificate populates the required Service FQDN and Service name fields. Enter the password when prompted Next, click the Region drop-down menu to choose the Azure region for your Cloud Management Gateway. For the Resource Group, if you choose Use existing, then select an existing resource group from the drop-down list. The selected resource group must already exist in the region you selected above. If you choose Create new, then enter the new resource group name. In the VM Instance field, enter the number of VMs for this service. The default is one, but you can scale up to 16 VMs per CMG. Note: If you select an existing resource group and it is in a different region than the previously selected region, the Cloud Management Gateway will fail to provision. Click on Certificates to add client trusted root certificates. Add all of the certificates in the trust chain, so for example if you have certificates from an Issuing CA (Intermediate CA) and Offline Root CA (Trusted Root CA) then include both certificates. An example of that PKI setup is here. Here were the certificates we used (Trusted Root and Issuing). Start with the Trusted Root first. If you need to use an Intermediate certificate from an Issuing CA then you will get a popup stating that it's not a valid root, it is safe to ignore that popup as long as you do include the trusted root. Here are our certs listed after adding them, you may have more (or less) depending on your PKI setup. Note: By default, the wizard enables the option to Verify Client Certificate Revocation. A certificate revocation list (CRL) must be publicly published for this verification to work. That would be handled by the webserver in my PKI guide. Configure your desired Alerts Review the summary and if you need to make changes click Previous, otherwise it's time to start monitoring logs. Complete the wizard, close it and you should see the CMG is in a state of Provisioning. And open the CloudMgr.log, below you can see it's starting the task of creating the CMG. After a while the status changes to Upgrading (click Refresh to see the change). And when the log file reads RanToCompletion, you can assume it's ready. As reflected in the console. Step 2. Add the CMG connection point role The CMG connection point is the site system role for communicating with the CMG. In Servers and Site System Roles, right click on your on-premise site server and choose Add Site System Roles. If you need to use a Proxy to communicate with the CMG then configure it here. On the System Role Selection page of the Add Site System Roles Wizard, select Cloud management gateway connection point. Then select the Cloud management gateway name to which this server connects. The wizard shows the region for the selected CMG. Continue through the wizard until completion, and then close the wizard. Next, open the SMS_Cloud_ProxyConnector.log to review things. You might see some connection issues listed, fear not, it will retry in 60 seconds. If the lines in red don't go away you might want to take a glance at the required ports for the CMG connection point. Note: For the service connection point the Server: Azure entry relates to management.azure.com. The CMG connection point ports 10140-10155 and 10124-10139 are incremental per VM that you assign when creating the CMG. So, if you build 2 VM instances, you will use ports 10140, 10141 and 10124, 10125. You need to assign the rule to name of the CMG to which your clients resolve, so we would enter cloudattachcmg.azurenoob.com in our rule. For the blob storage rule, you need to enter the prefix of the CMG name plus .blob.core.windows.net in your rule. So we would enter cloudattachcmg.blob.core.windows.net in our firewall rule. Once the connection is made you'll see the following in the log file "Starting to connect to Proxy server cloudattachcmg..." And when the connection is complete you can see it reflected in the console in the Connection Points tab of the CMG, it should have a Connection status of Connected. Step 3. Configure client-facing roles for CMG traffic Next we need to configure the management point and software update point site systems to accept CMG traffic. You should perform this procedure on the primary site, for all management points and software update points that service internet-based clients. In the Configuration Manager console, go to the Administration workspace, expand Site Configuration, and select the Servers and Site System Roles node. Select Management point from the list. In the Management point properties sheet under Client Connections, check the box next to Allow Configuration Manager cloud management gateway traffic. Apply the changes and close the Management Point properties. Next, open the Software Update Point role properties. Check the box next to Allow Configuration Manager cloud management gateway traffic in WSUS Configuration. Step 4. Configure client settings In the Administration node of the console, select Client Settings, select Default client settings, and configure the Cloud settings. Verify that Enable clients to use a cloud management gateway is set to Yes. If you don't want this to apply to all of your clients in the hierarchy, create a custom client device settings instead and deploy it to a device collection containing the clients you want enabled. Step 5. Verify by running the connection analyzer Now that you've configured the cloud management gateway, it's time to verify that everything is OK. In the Administration node of ConfigMgr, select Cloud Services, then select Cloud Management Gateway. Click on Connection Analyzer in the ribbon. At the Cloud management gateway connection analyzer screen, click Sign in and use the azure credentials you used to set this up. Once done, click on Start. If everything went according to plan it should look like this. If you had a problem, it might look like this...If it does, highlight the red x to see more details of the issue. and in this particular case we had to upgrade the cmg (timing issue perhaps ?) by clicking on Synchronize configuration in the ribbon. Notice how it says Upgrading. You can also refer to the CloudMgr.log to see it upgrading the configuration in such a scenario. That's it for this part, you now have a CMG in place and are ready for our next part of our cloud attach series. Related reading CMG FAQ - https://docs.microsoft.com/en-us/mem/configmgr/core/clients/manage/cmg/cloud-management-gateway-faq Data flow for CMG - https://docs.microsoft.com/en-us/mem/configmgr/core/clients/manage/cmg/data-flow Managing remote clients with a CMG - https://techcommunity.microsoft.com/t5/configuration-manager-blog/managing-remote-machines-with-cloud-management-gateway-in/ba-p/1233895


-
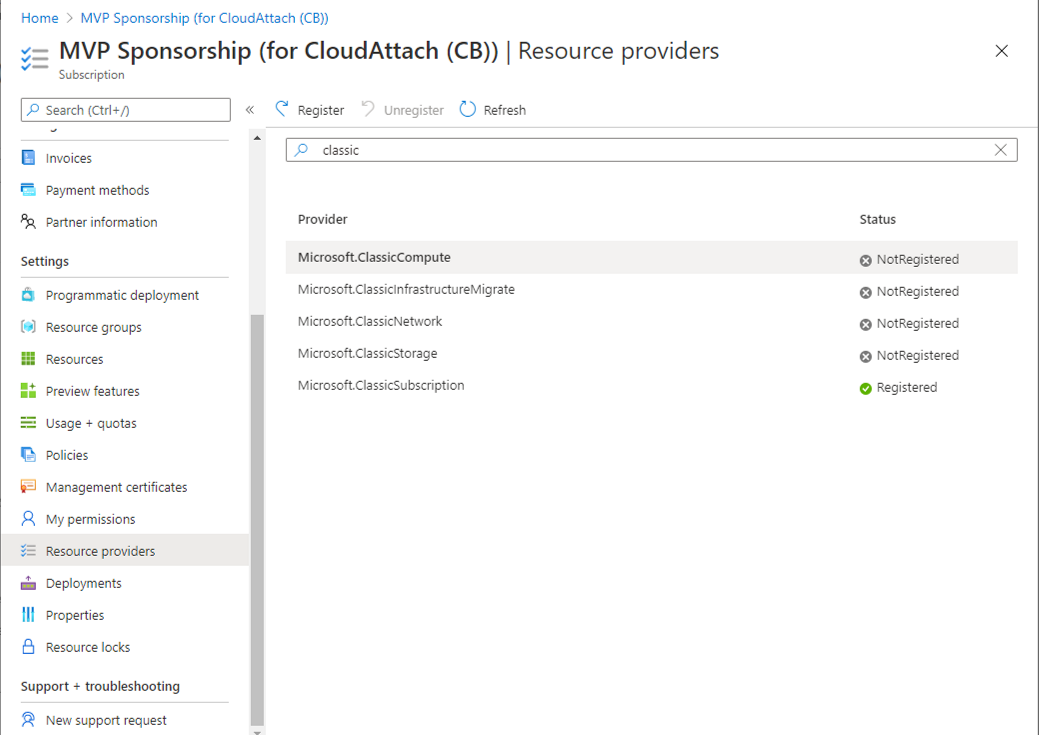
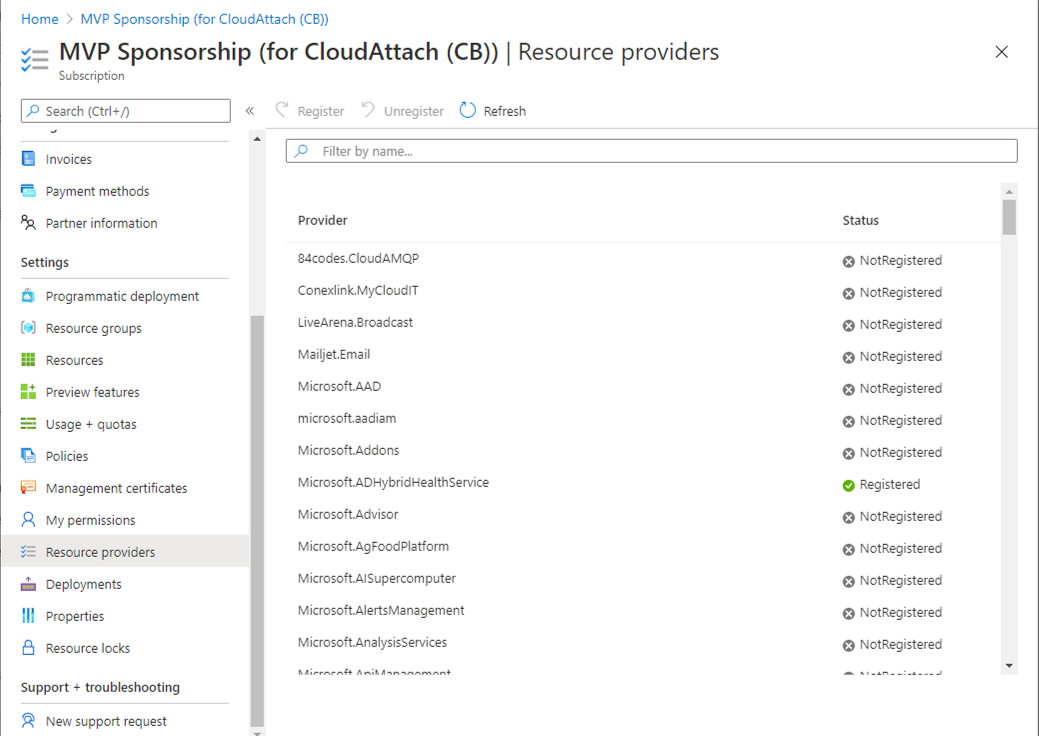
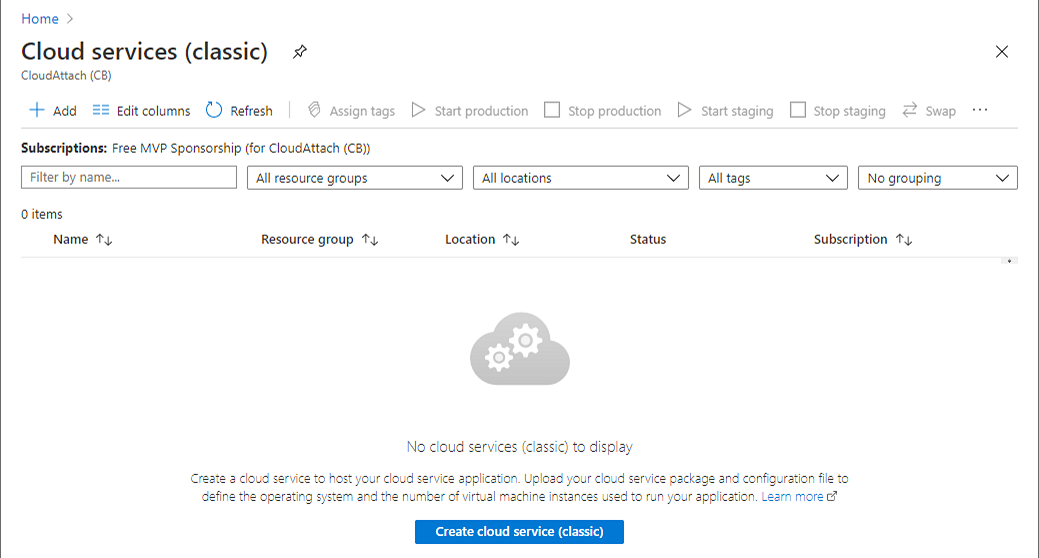
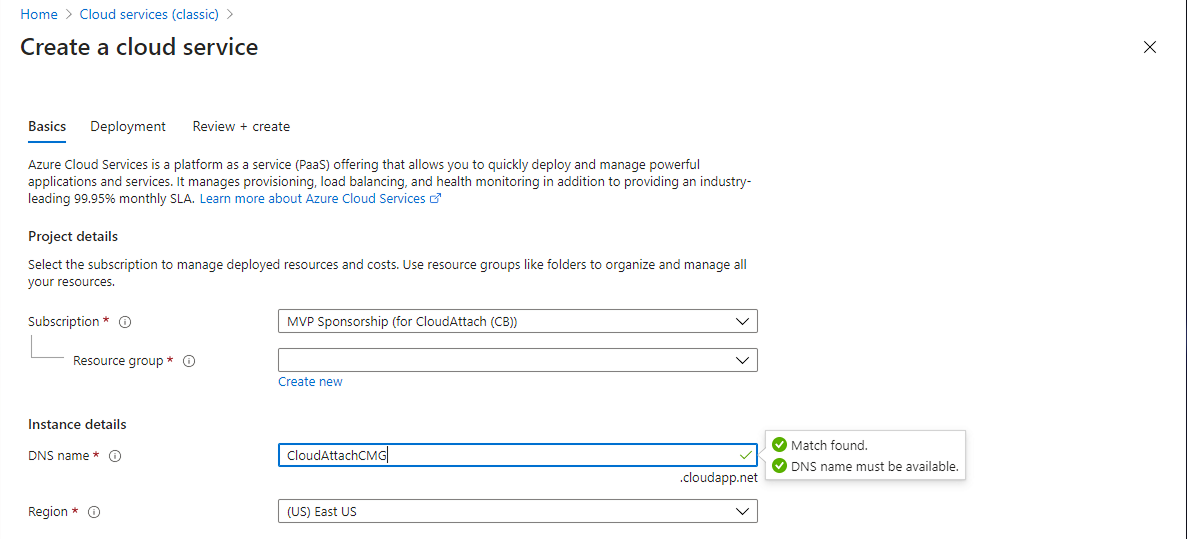
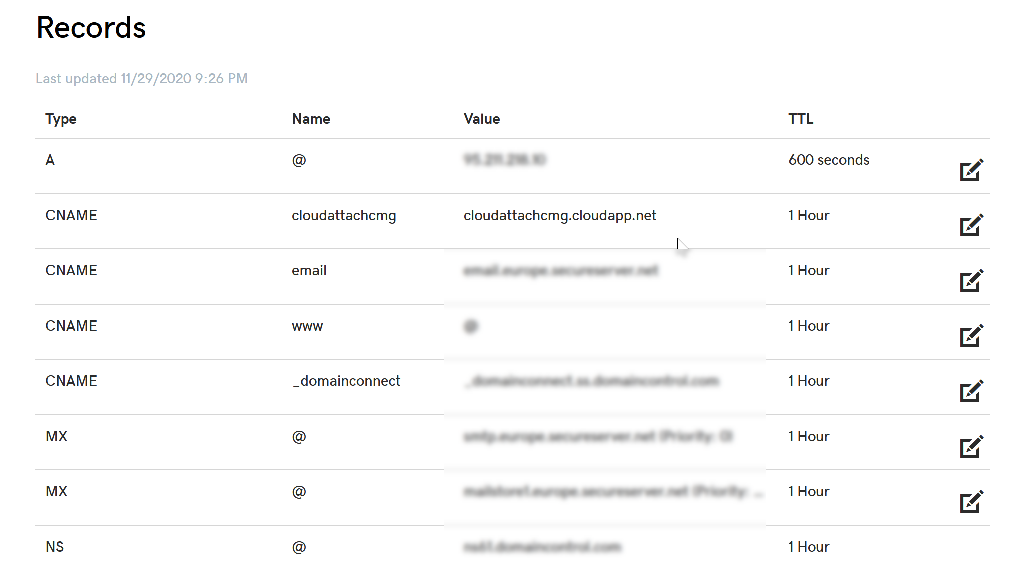
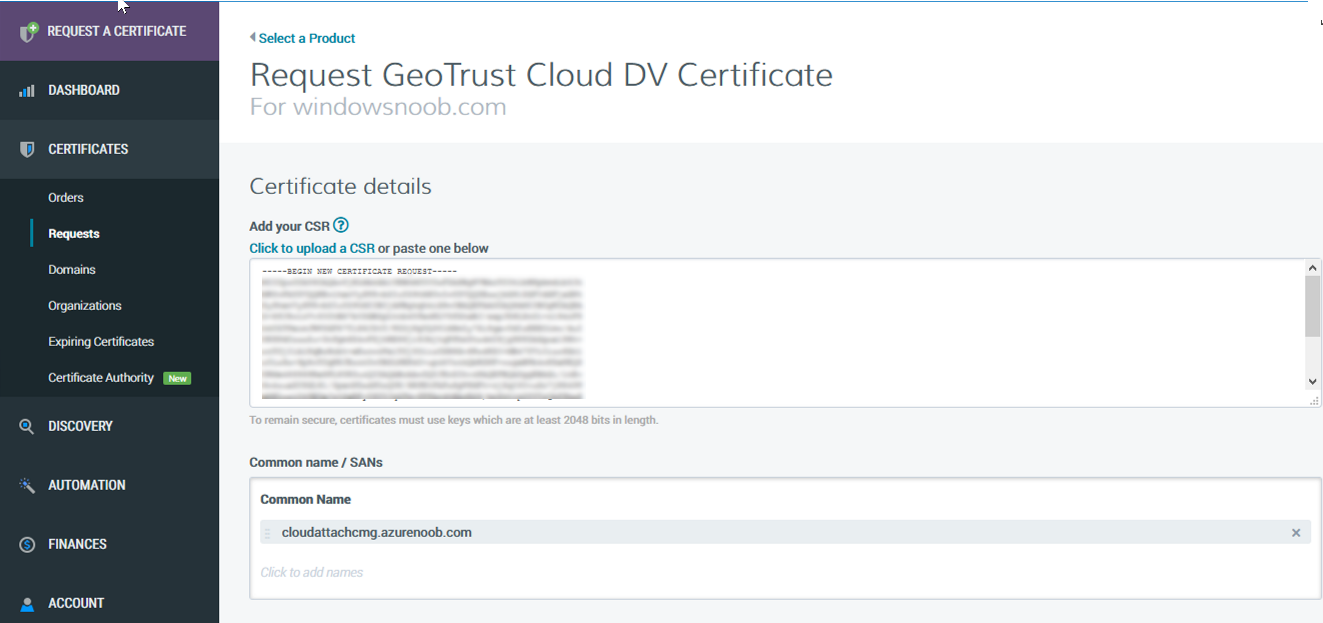
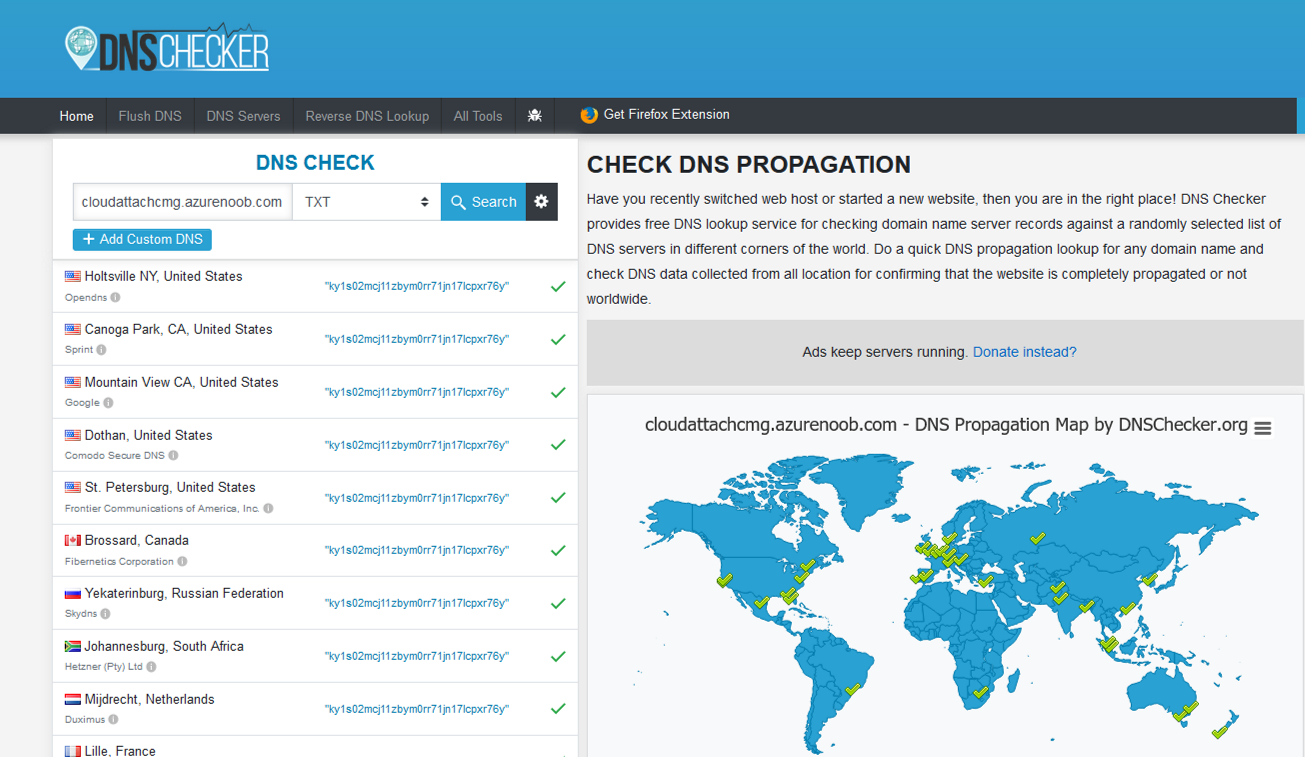
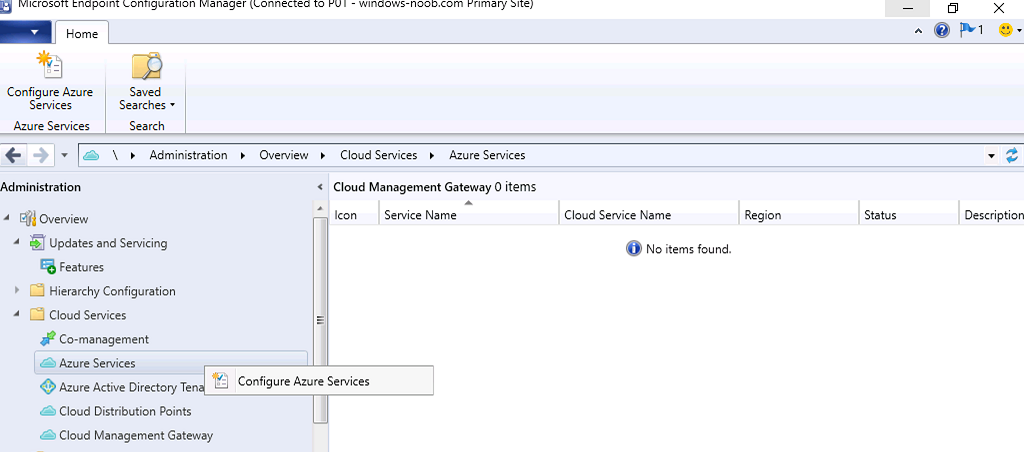
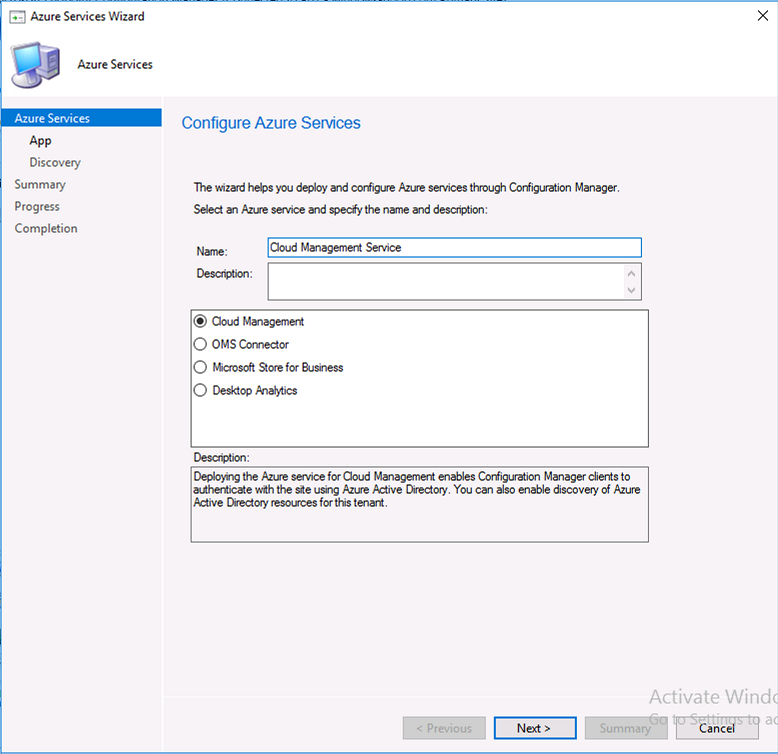
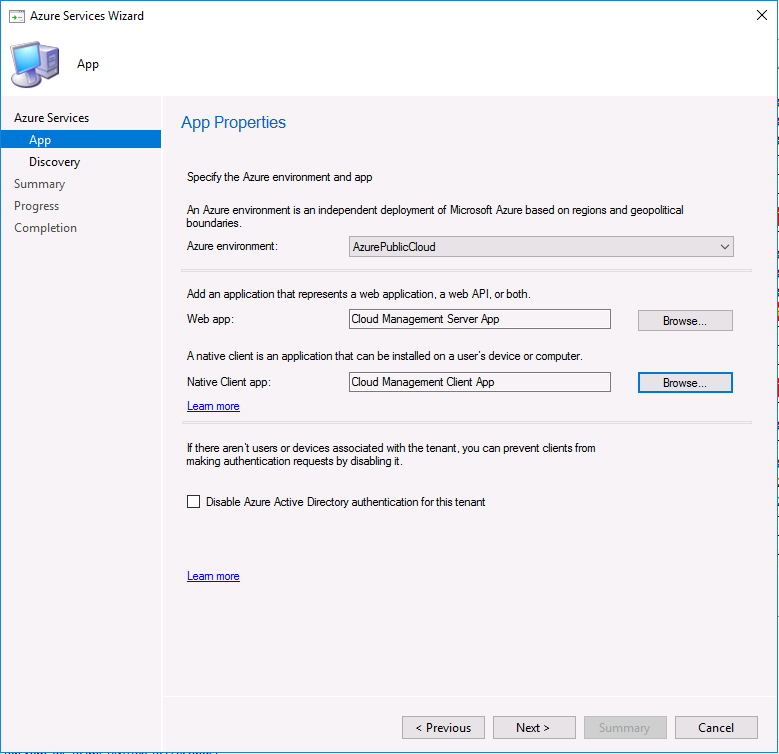
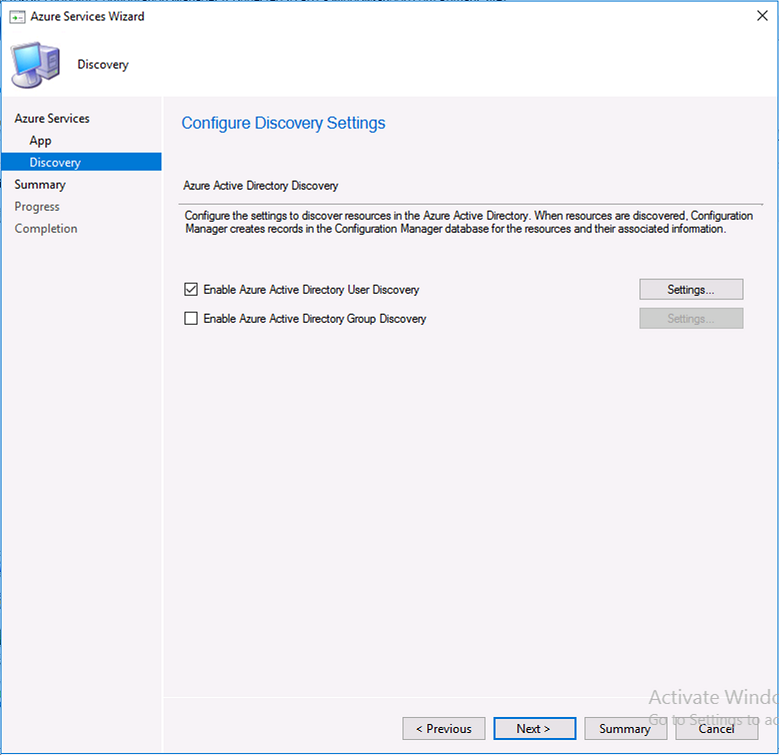
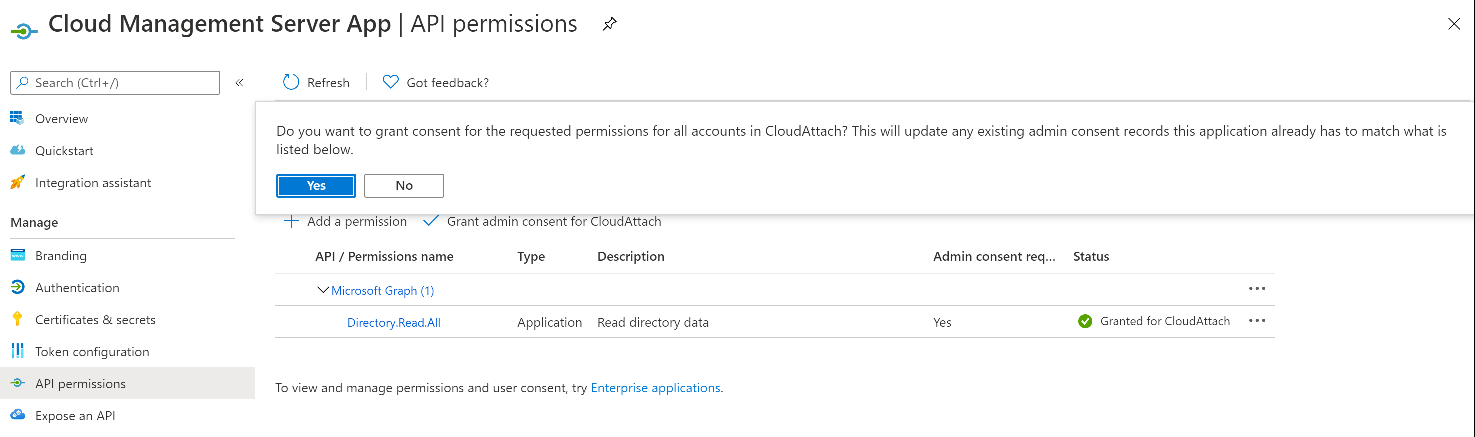
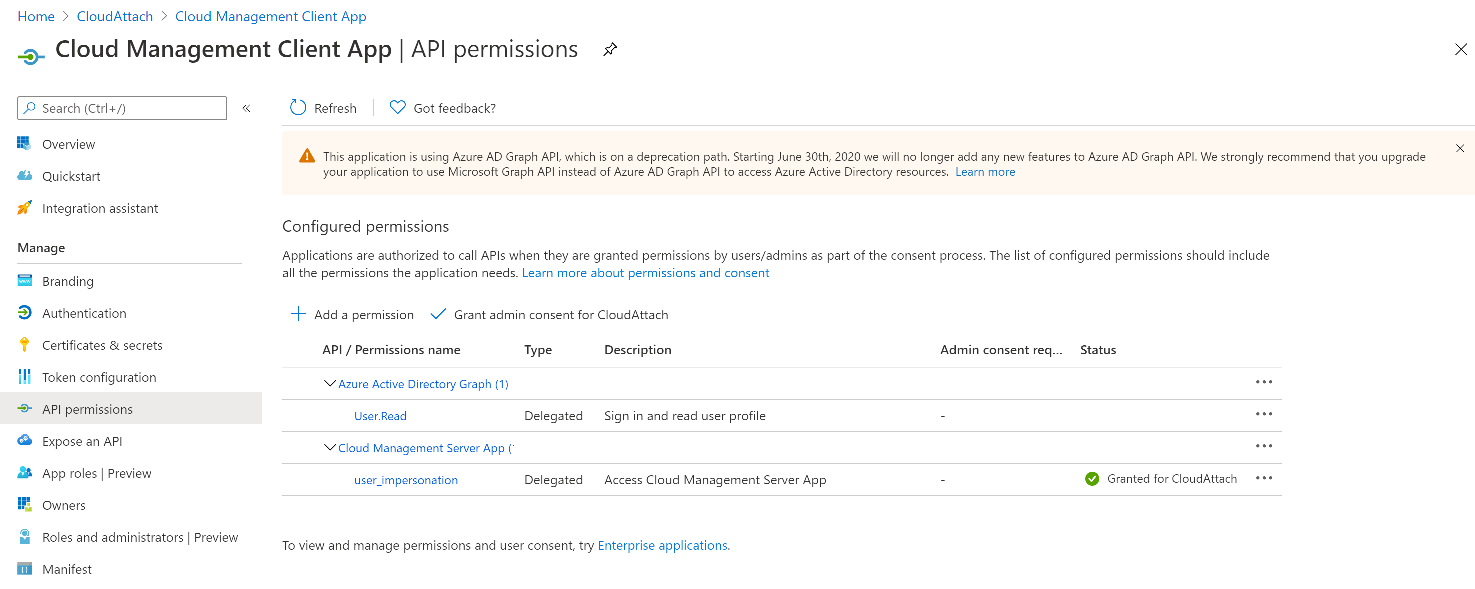
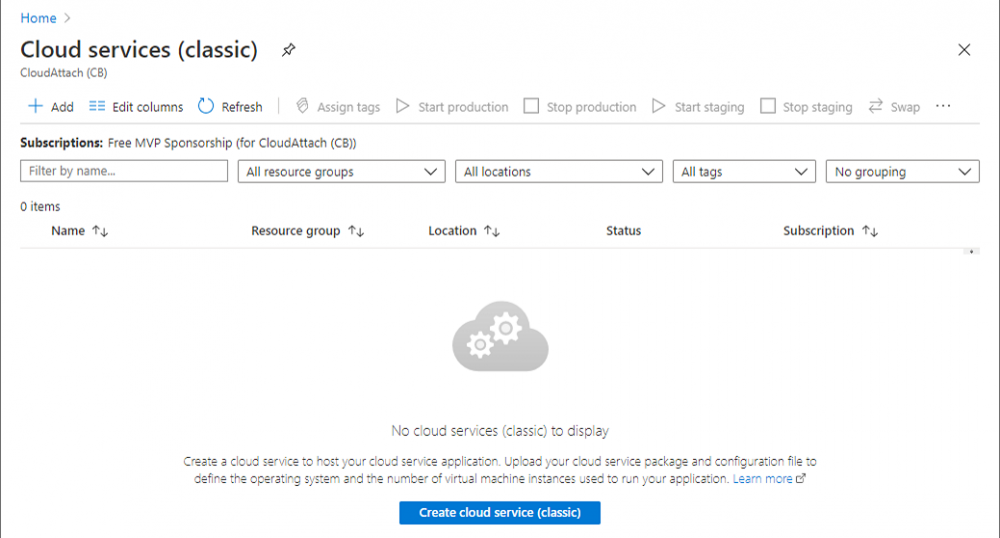
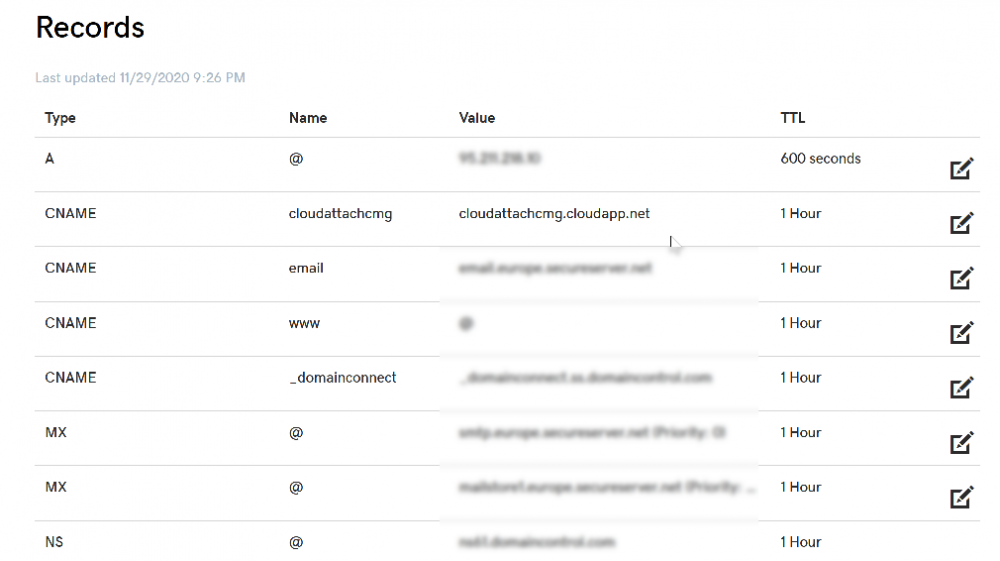
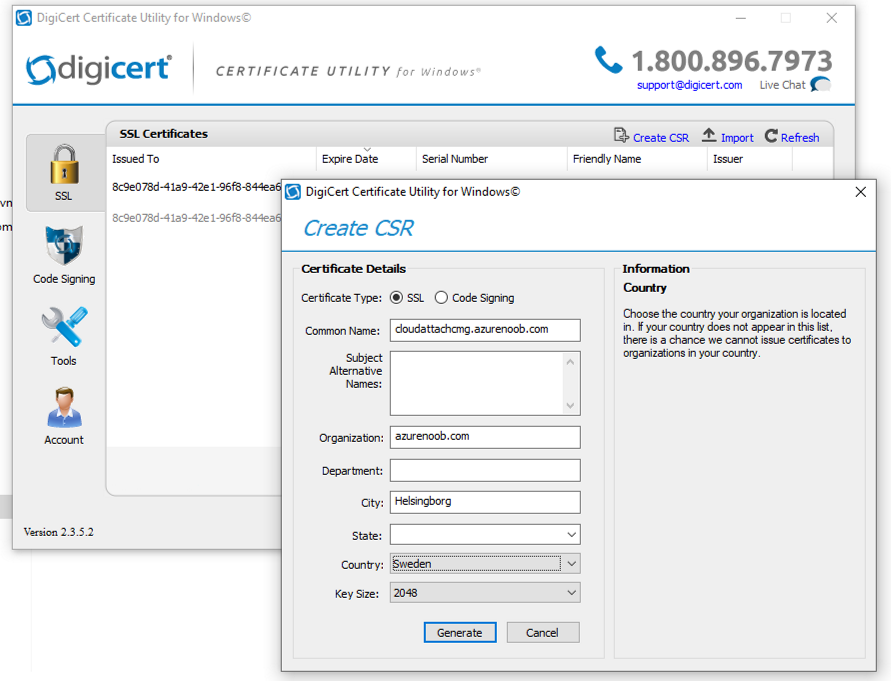
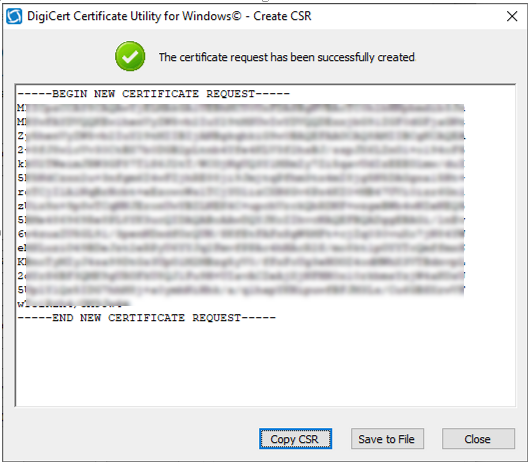
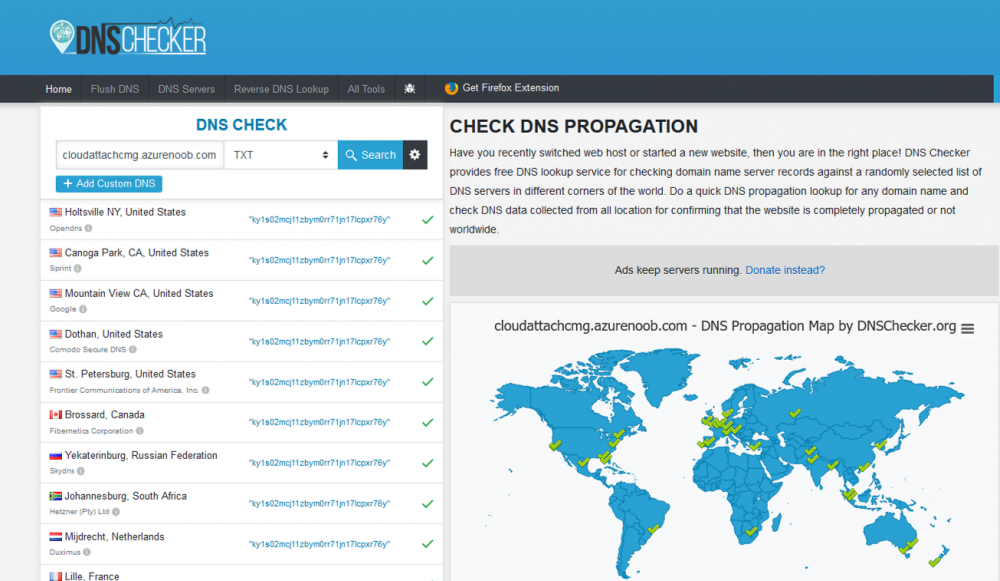
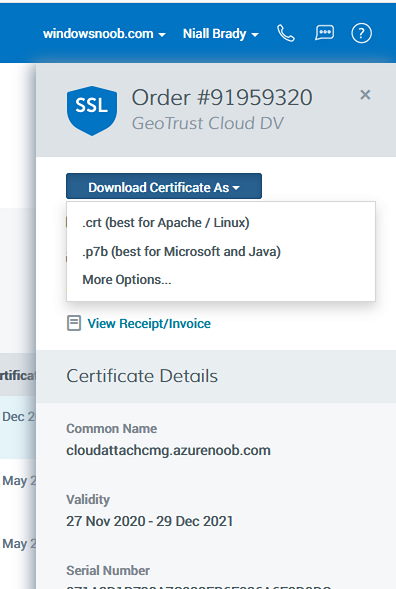
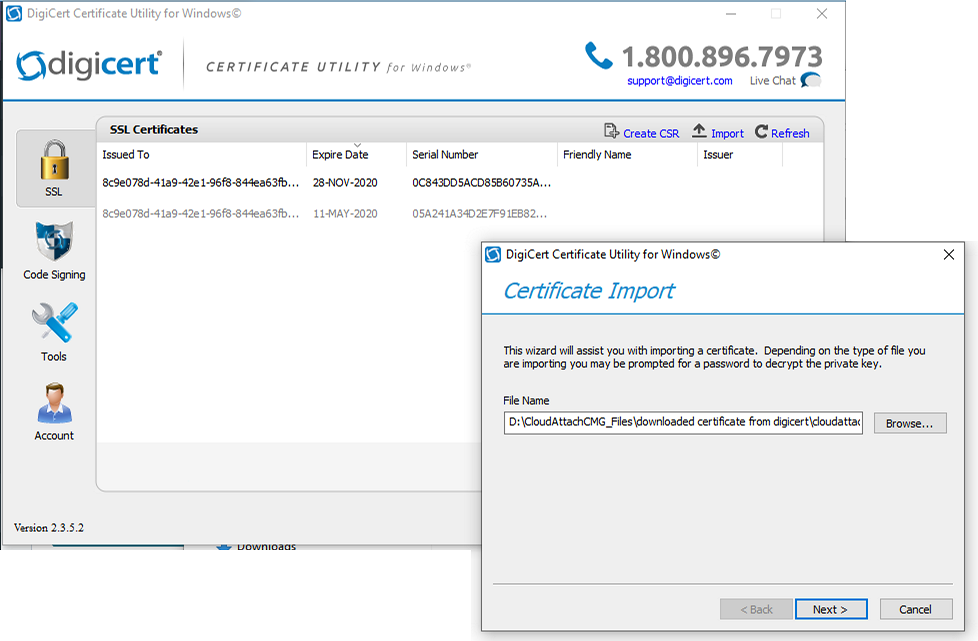
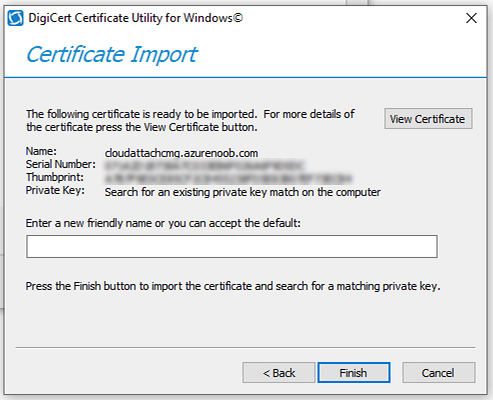
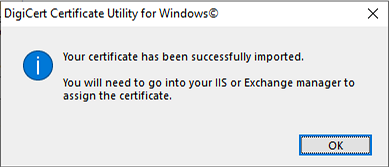
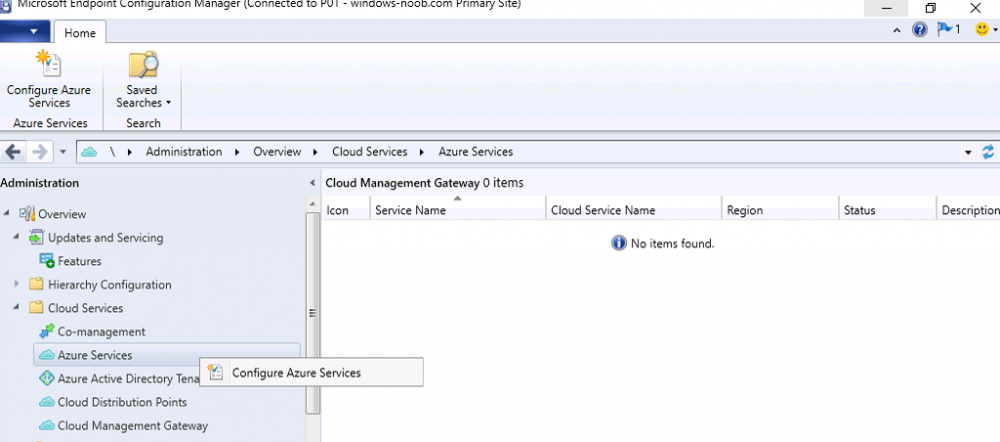
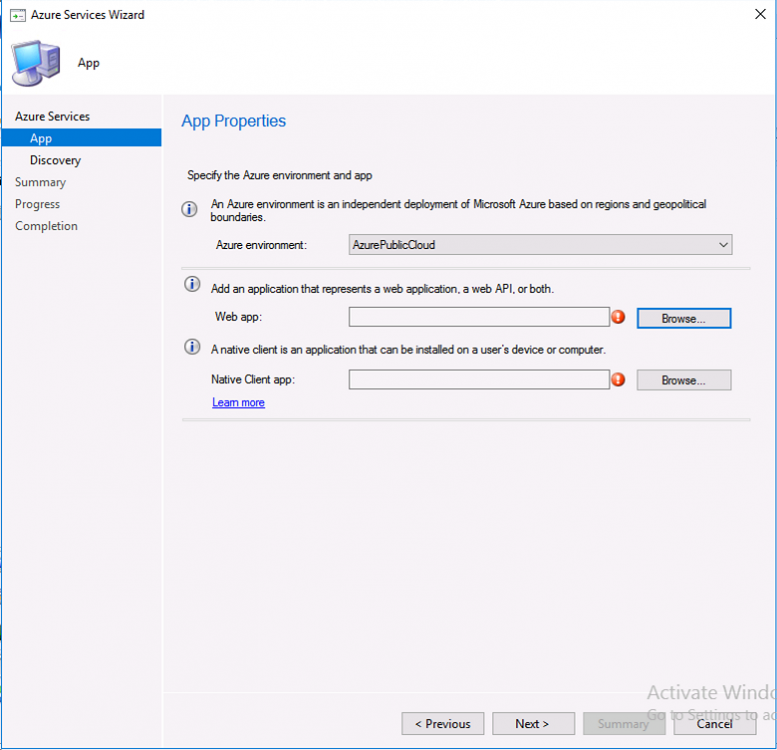
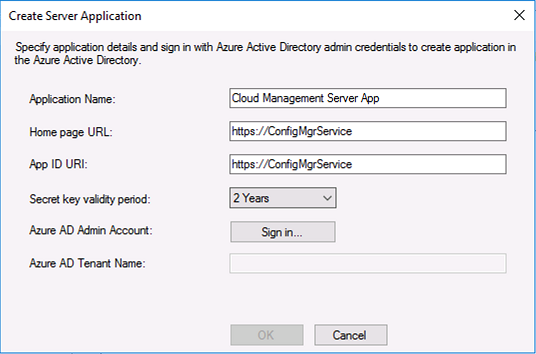
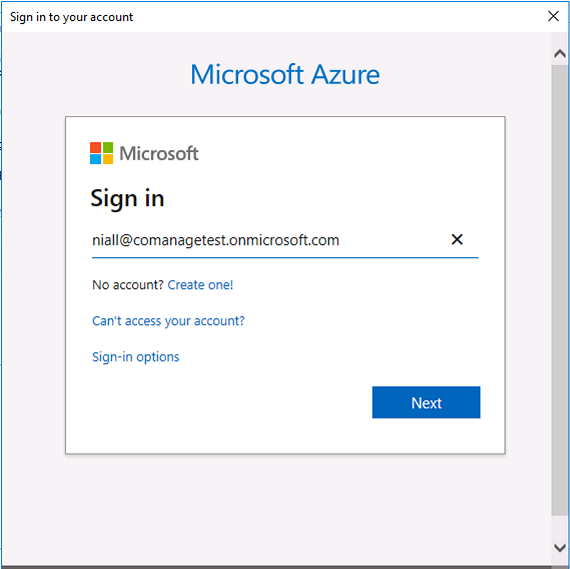
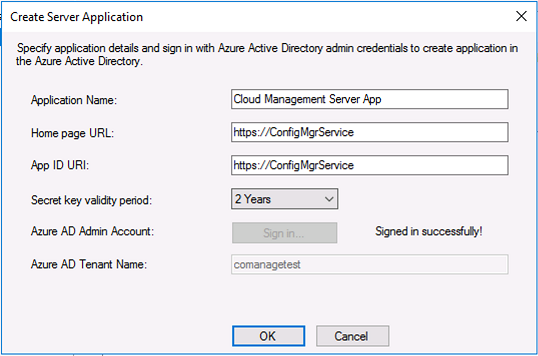
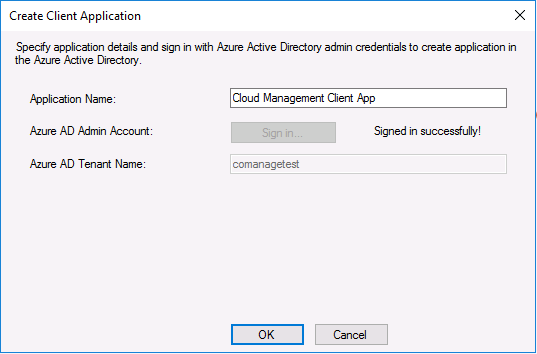
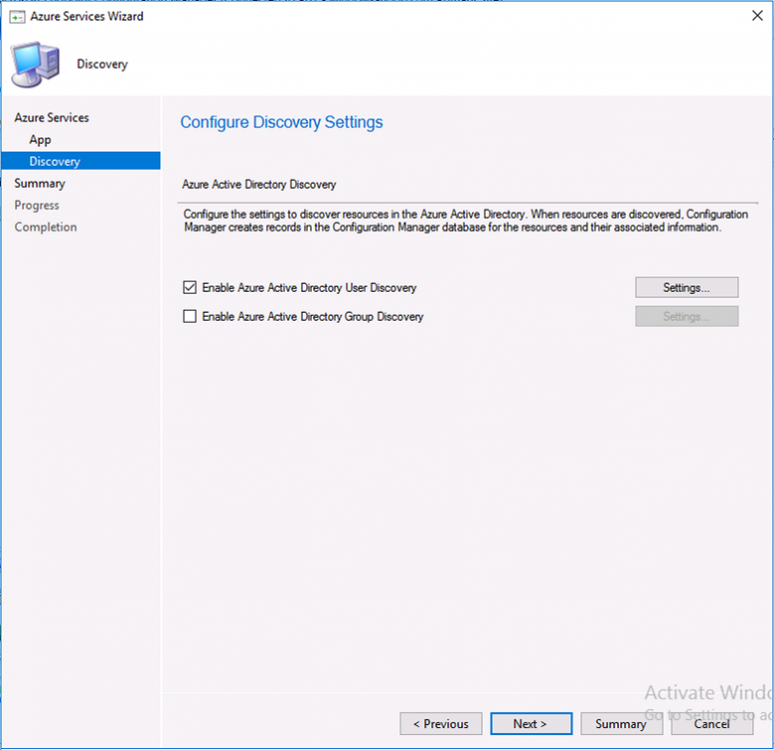
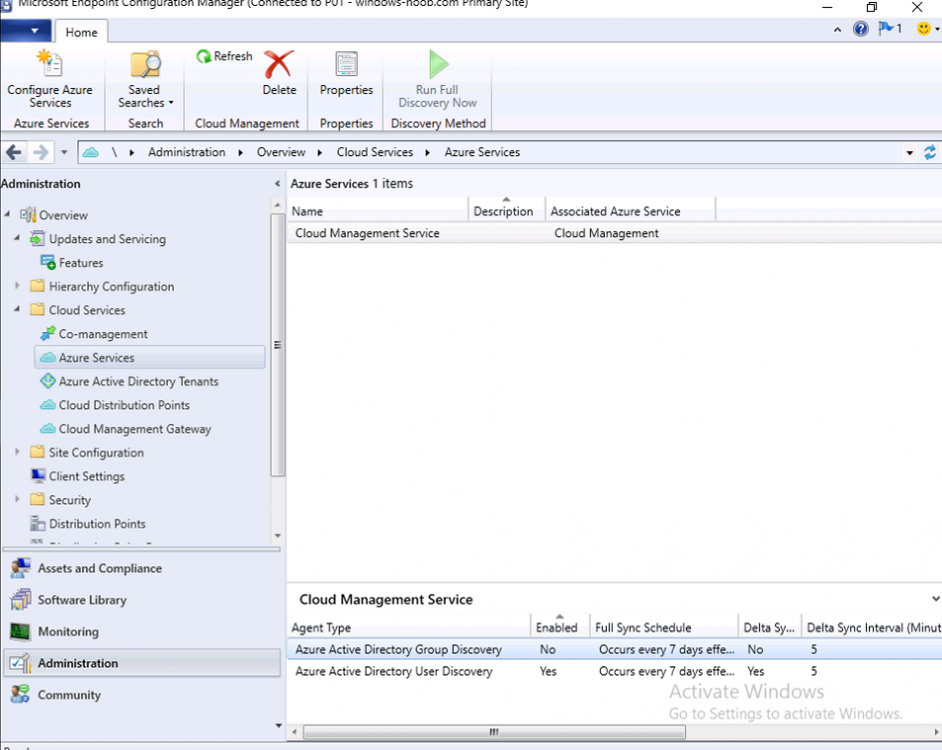
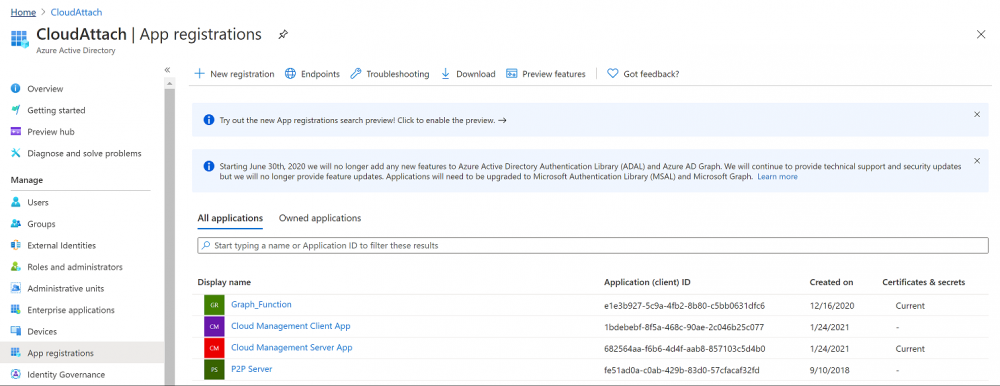
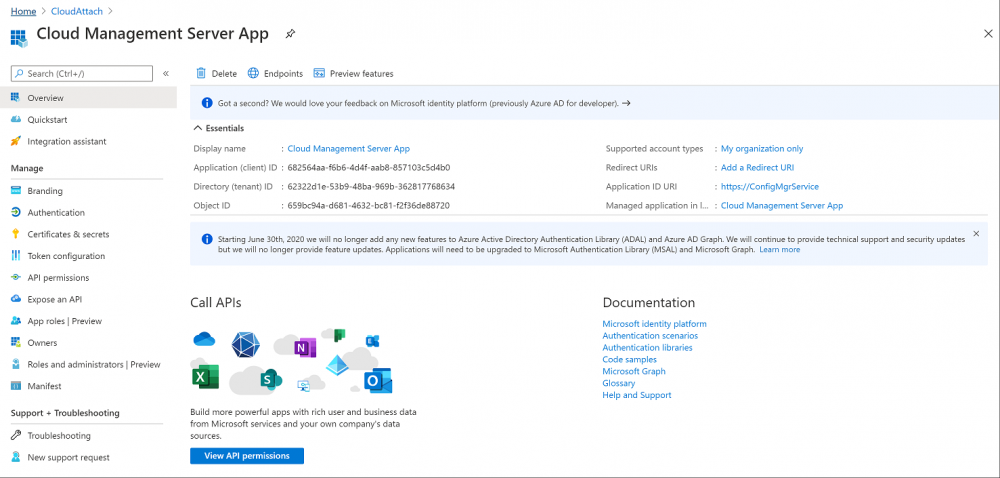
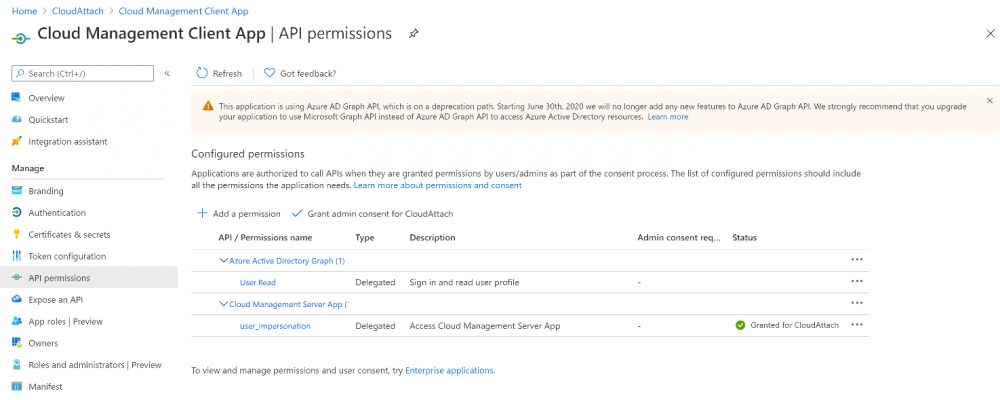
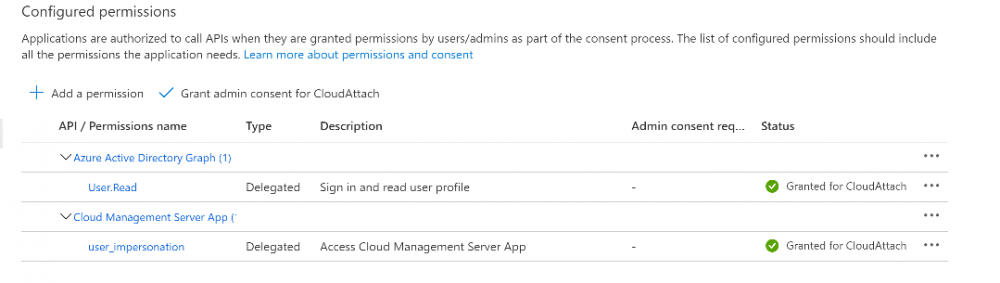
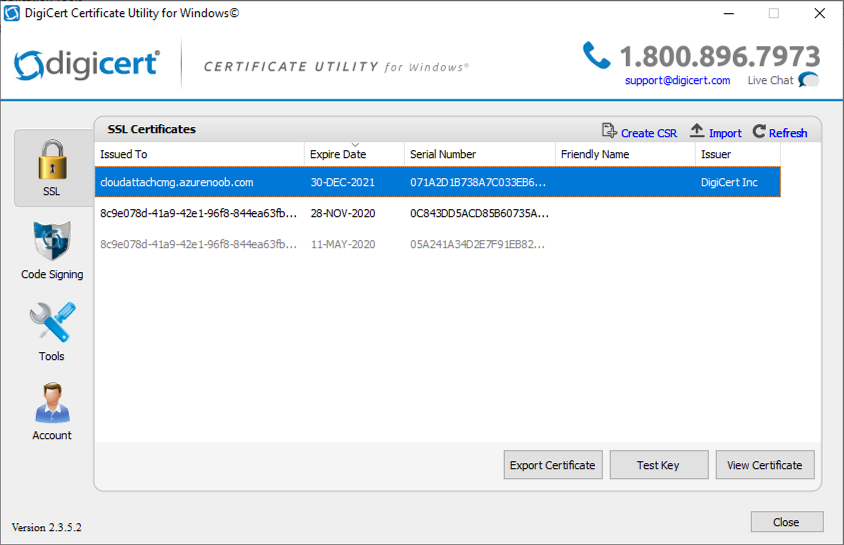
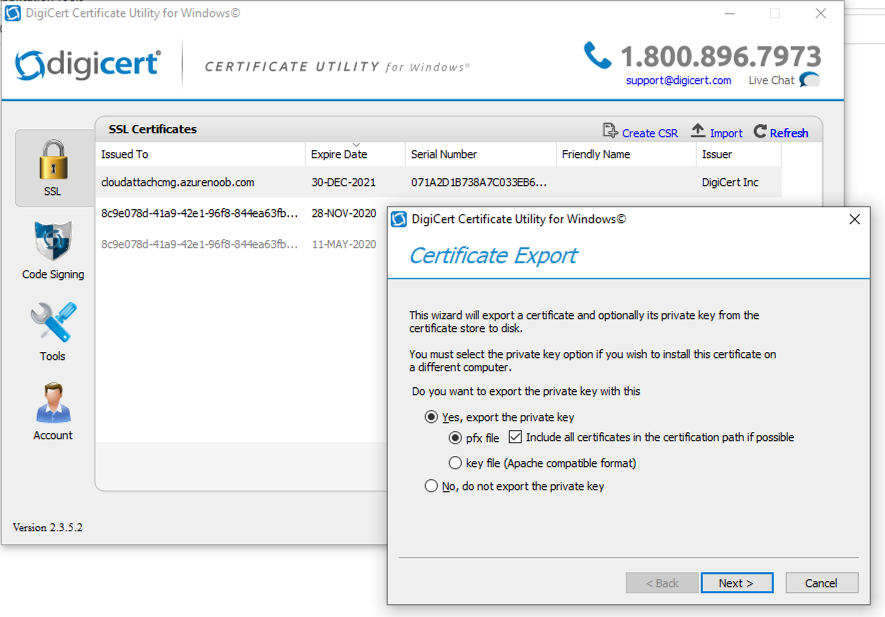
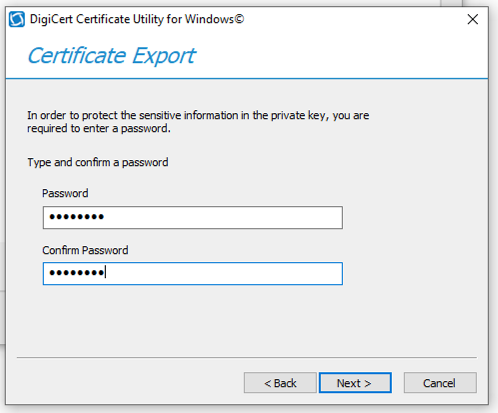
Introduction This is part 2 in a series of guides about cloud attach in Microsoft Endpoint Manager, with the aim of getting you up and running with all things cloud attach. This part will focus on preparing your environment for a Cloud Management Gateway (CMG). This series is co-written by Niall & Paul, both of whom are Enterprise Mobility MVP’s with broad experience in the area of modern management. Paul is 4 times Enterprise Mobility MVP based in the UK and Niall is 10 times Enterprise Mobility MVP based in Sweden. In part 1 we configured Azure AD connect to sync accounts from the on premise infrastructure to the cloud. In this part we'll prepare your environment for a Cloud Management Gateway. A Cloud Management Gateway gives you a whole bunch of new abilities for managing, imaging computers, escrowing BitLocker keys and delivering software, updates and policy to remote based internet enabled clients. Below you can find all parts in this series. Cloud attach - Endpoint Managers silver lining - part 1 Configuring Azure AD connect Cloud attach - Endpoint Managers silver lining - part 2 Prepare for a Cloud Management Gateway <- you are here Cloud attach - Endpoint Managers silver lining - part 3 Creating a Cloud Management Gateway Cloud attach - Endpoint Managers silver lining - part 4 Enabling co-management Cloud attach - Endpoint Managers silver lining - part 5 Enabling compliance policies workload Cloud attach - Endpoint Managers silver lining - part 6 Enabling conditional access Cloud attach - Endpoint Managers silver lining - part 7 Co-managing Azure AD devices Cloud attach - Endpoint Managers silver lining - part 8 Enabling tenant attach Cloud attach - Endpoint Managers silver lining - part 9 Renewing expiring certificates Cloud attach - Endpoint Managers silver lining - part 10 Using apps with tenant attach Prerequisites Azure: Intune Tenant already created Azure Subscription (free trial) Licenses applied, you can grab a free trial of Enterprise Mobility plus Security which includes Intune and Azure AD Premium P2 here (free trial). Intune is configured to auto-enroll devices (guide) Configuration Manager: PKI enabled (guide) Configuration Manager current branch, version 1810 or later. The MDM authority must be set to Intune Permissions: The following permissions are required to be able to set up the Cloud Management Gateway: An account that is a global administrator for Azure Active Directory An account that is a domain admin on your on-premises infrastructure An account that is a full administrator for all scopes in Configuration Manager Update: At the time of writing Virtual Machine Scale Set was not an option., and now it's the default, it requires different settings such as registering the following services Microsoft.compute Microsoft.network Microsoft.keyvault change your cname to the new format cname cloudattachcmg cloudattachcmg.<REGION>.cloudapp.azure.com where <REGION> corresponds to the region of your resource group, eg: westeurope cname cloudattachcmg cloudattachcmg.westeurope.cloudapp.azure.com for more details, see Pauls blog post here Step 1. Add Classic Compute and Storage In order to setup the Cloud Management Gateway, you will need to register a couple of the resource providers in Azure (Microsoft.ClassicCompute & Microsoft.Storage). These resource providers may already be registered in your tenant, but you should check to ensure that they are and if not, act accordingly. Launch the Azure port at https://portal.azure.com, go to Subscriptions, select your subscription, and choose Resource Providers in the Settings section. Search for Microsoft.Classic.Compute, select it and if it is listed with a status of NotRegistered then click Register. It will register the provider. After a few moments the provider should appear as registered. Repeat the above process for Microsoft.Storage so that both providers are listed as Registered. Step 2. Check for a unique name of your CMG instance Verify in Azure that you have a unique name for your CMG, this is a unique name using Microsoft’s cloudapp.net namespace. You cannot reserve this name, only check for its availability. To do this, search for Cloud Service in the Azure portal and go to the Cloud service (classic) page. Click Add link. In the DNS name field, search for the name you want to use. Note that this name will not be visible to anyone on the outside world, so can be any available name you want. For our DNS name, we searched for CloudAttachCMG and as a result you want to see green ticks on both Match Found and DNS name. Both conditions must be met, if not you will get a red cross and you will need to search for another name. Note the .cloudapp.net entry next to the DNS name field, the full name associated with the cloud management gateway VMs will be DNSName.cloudapp.net – so our CMG VM’s will be cloudattachcmg.cloudapp.net. Do not save anything here, as mentioned you are just checking for availability. Step 3. Create a CNAME record You are going to request an external PKI certificate to secure communication to the CMG, but prior to that you need to reate a CNAME record at your external DNS provider. We cannot run through that process, as each provider is different, but you need to create a CNAME record to map to your chosen DNSName.cloudapp.net address. We have mapped cloudattachcmg to cloudattachcmg.cloudapp.net. A couple of things to note here: If you have an existing TXT record in your DNS you may need to delete this for the new CNAME to work, we saw issues in two tenants that would not properly create the CNAME record until we removed the previously created TXT record. You will need to add in a CNAME to your internal DNS servers if your internal DNS namespace is identical to your external namespace. Below you can see the created CNAME record in the DNS provider of the custom domain name we added in part 1. Tip: You can use dnschecker.org to see that your CNAME has propagated successfully. Step 4. Create an External PKI cert for the external address Note: you can run this tool on any computer, it's only needed to generate the files needed in the remaining parts. We downloaded a digital certificate utility from DigiCert for creating a Certificate Signing Request (CSR) but you can do this process on an IIS server see here. A CSR is a block of encoded text that is given to a Certificate Authority when applying for an SSL Certificate. It is usually generated on the server where the certificate will be installed and contains information that will be included in the certificate such as the organization name, common name (domain name), locality, and country. Source Using the tool above (from Digicert, our external SSL certificate provider, there are many to choose from), click on Generate to create the CSR. After generating the CSR, save it to a file. Next, go to your certificate provider and request a new SSL certificate based on the CSR you just created. The screenshot below is from our certificate provider, DigiCert, your provider will most likely look different. When creating the SSL certificate, you'll probably have to prove control over the domain, we chose the option to use a DNS TXT Record (recommended). Be sure to enter the cloudattachcmg prefix (yours will be different obviously) into the record for the TXT DNS validation otherwise it might have problems finding the TXT record. After creating the TXT record you can verify it with dnschecker, as shown here, this is helpful in troubleshooting whether your DNS record (TXT, CNAME etc...) is valid or not. After verifying that you own the domain, you'll be able to download the created CRT (certificate). Next, import the downloaded CRT back into the Digicert tool. Click Finish to complete the CRT import process. and you should see a notification about the success of the import. Step 5. Export the pfx Select the Imported certificate. Click on Export Certificate choose the option to export pfx You'll be prompted for a password and you'll be informed of the successful export. Step 6. Configure Azure services To configure Azure services from within the Configuration Manager console, use the Configure Azure Services wizard to create two Azure Active Directory (Azure AD) apps. Server app – a Web app in Azure AD Client app – a Native Client app in Azure AD On the primary site server, open the Configuration Manager console and go to Administration > Cloud Services > Azure Services, and select Configure Azure Services. On the Configure Azure Service page, specify a friendly name for the cloud management service you're configuring, for example Cloud Management Service. Then select Cloud Management from the options and then select Next. On the App Properties page, for Web app, select Browse to open the Create Server Application dialog, configure the following fields: Application Name: Cloud Management Server App Home page URL: https://ConfigMgrService App ID URI: https://ConfigMgrService Secret key validity period: 2 years Next, select Sign in, and specify an Azure AD Global Administrator account. These credentials aren't saved by Configuration Manager. This persona doesn't require permissions in Configuration Manager and doesn't need to be the same account that runs the Azure Services Wizard. After you sign in, the results display. Select OK to close the Create Server Application dialog and return to the App Properties page. Next, select Browse to the right of the Native Client App section, the Create Client Application dialog, and then configure the following fields: Application Name: Cloud Management Client App And sign in. Click OK and click OK again, both apps will now be listed. On the Configure Discovery Settings page, check the box for Enable Azure Active Directory User Discovery, select Next, and then complete configuration of the Discovery dialogs for your environment. Click through to the end of that wizard and close the wizard. Your cloud management service that you just configured will be listed in the console. Step 7. Set API permissions on the server and client apps Open a browser and sign in to the Azure portal. Select All services > Azure Active Directory > App registrations, then click All Applications. Select the Cloud Management Server App you created. Go to API permissions or select View API permissions Click the Grant admin consent link Click Yes when prompted. You'll be informed of the success. Repeat this process for the Cloud Management Client App. Pay attention to the fact that it doesn't have the same permissions listed before you grant consent. and here is the same app after the api permissions are applied. That's it for this part ! Please join us in part 3 where we'll configure the Cloud Management Gateway. Useful links Plan for Cloud Management Gateway - https://docs.microsoft.com/en-us/mem/configmgr/core/clients/manage/cmg/plan-cloud-management-gateway#hierarchy-design Certificates needed for CMG - https://docs.microsoft.com/en-us/mem/configmgr/core/clients/manage/cmg/certificates-for-cloud-management-gateway Cloud attach and Microsoft Endpoint Manager - https://techcommunity.microsoft.com/t5/business-continuity-and-disaster/cloud-attach-and-microsoft-endpoint-manager/m-p/1498577 Download Azure AD Connect - Download Microsoft Azure Active Directory Connect from Official Microsoft Download Center Azure AD connect prerequisites - https://docs.microsoft.com/en-us/azure/active-directory/hybrid/how-to-connect-install-prerequisites How to setup Azure AD Connect using express settings - https://docs.microsoft.com/en-us/azure/active-directory/hybrid/how-to-connect-install-express


-
- 1
-

-
see the above two posts...
-
@Richard F you can only download files when logged in as a member of windows-noob.com (which you now are), so please try again.
-
Surface Go 2 PXE Issues
anyweb replied to Damo's topic in System Center Configuration Manager (Current Branch)
it's probably sitting like that because it's a shared network dongle, you can try the advice here https://systemcenterdudes.com/sccm-duplicate-hardware-identifiers/ -
@wudevr please update us with how you get on and any challenges faced, I've updated my reply above with some more info...
-
ok and you are sure that the computer(s) are in the collection where this policy is targeted ? did you upgrade configmgr recently ?