anyweb
-
Posts
9277 -
Joined
-
Last visited
-
Days Won
371
Everything posted by anyweb
-
interesting, can you go into more detail of how you are doing this, we might go this route (maybe), but for now are forcing the version via the suite method.
-

task sequence [Help] - Powershell script SMSTSPostAction
anyweb replied to Deilson Oliveira's question in scripting
ok first things first, the SMSTSPostAction variable is for use in operating system deployment task sequences to do an action after the task sequence has completed, are you planning on installing SEP as part of a task sequence ? if so use an Install Application step instead of Install Package if that's easier, or even run PowerShell script... but first, if you really want to install the app just using a powershell script then test the script on a virtual machine standalone, outside of a task sequence- 6 replies
-
- 1
-

-
- powershell
- scripting
- (and 1 more)
-
task sequence [Help] - Powershell script SMSTSPostAction
anyweb replied to Deilson Oliveira's question in scripting
I'd suggest you test Powershell Application Deployment Toolkit, it's what most Enterprises use to install apps in ConfigMgr today -
Yup, i've just tested the update function within Smoothwall, it works and the updates are right up to this year, if you get any complaint from the Smoothwall about not being able to update then reboot the Smoothwall and try again
-
interesting, it also seems that Microsoft is recommending the Monthly Enterprise Channel for office (while at the same time recommending Current Channel, see above...), which of course solves the problem but lacks features, another approach is to pay HP more money to ship devices without Office in the Corporate Image, that works too
-
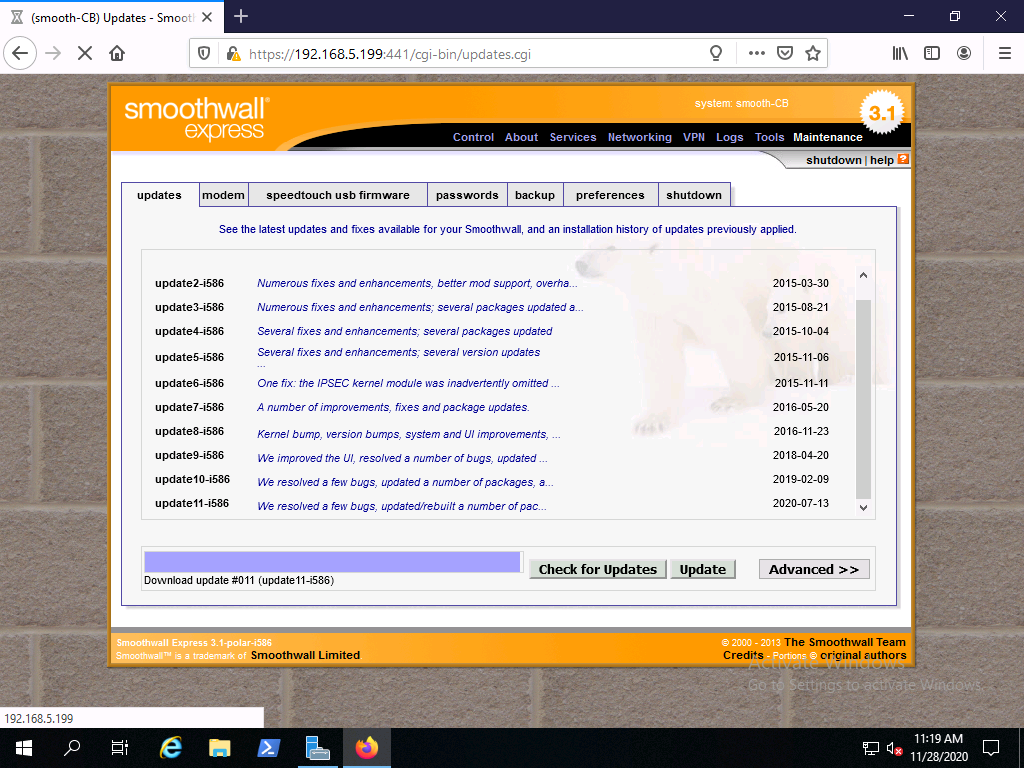
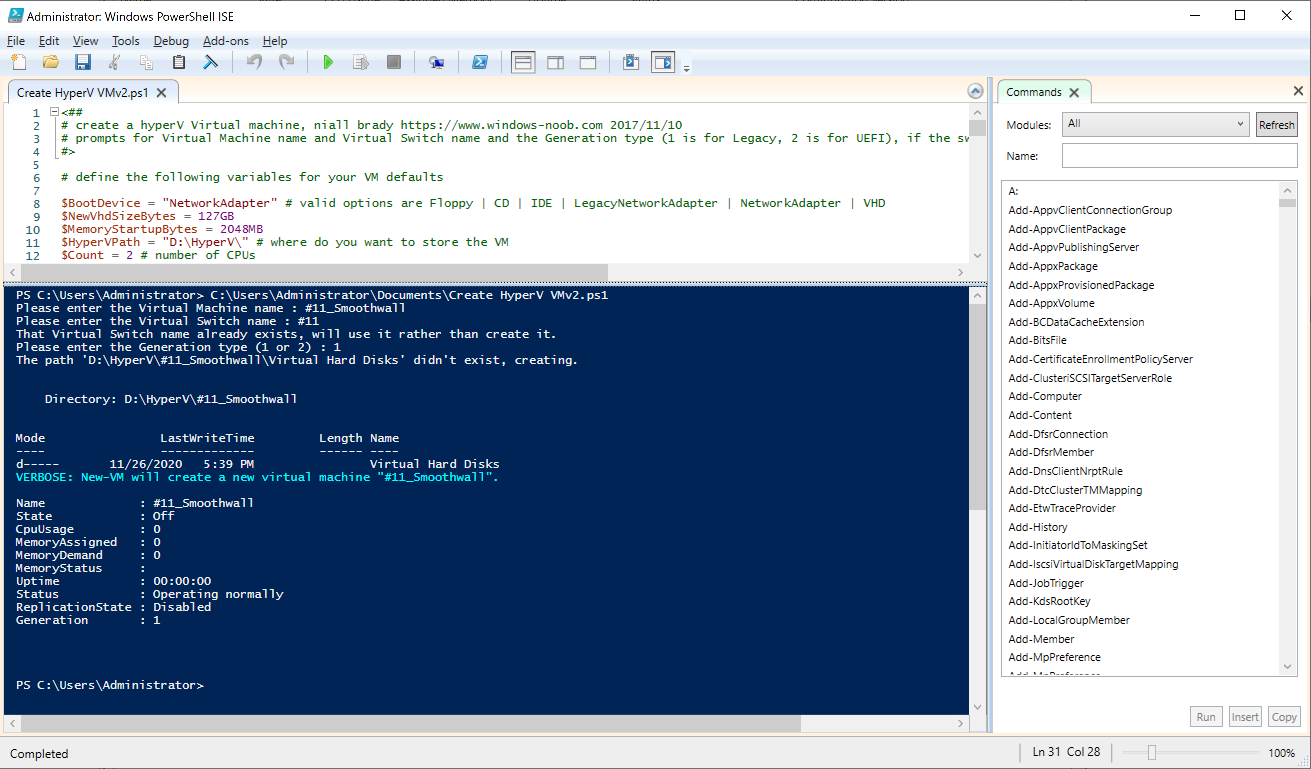
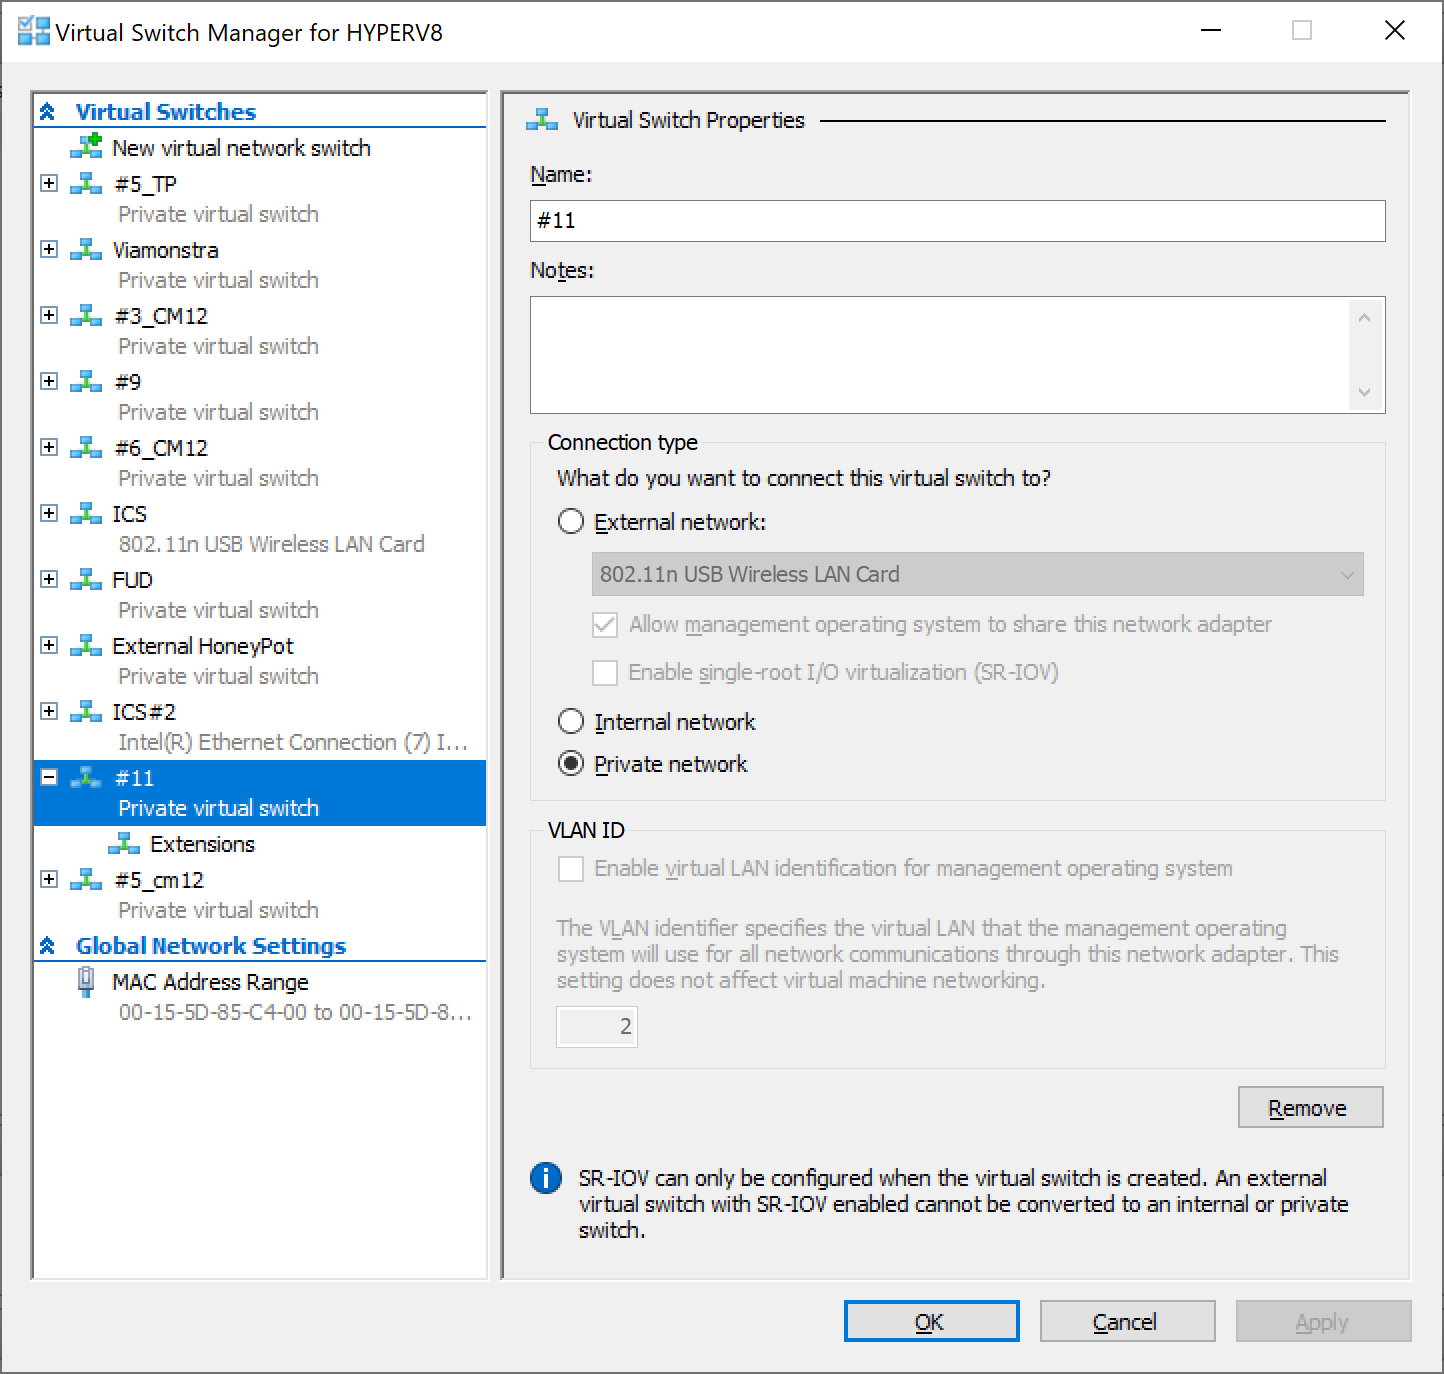
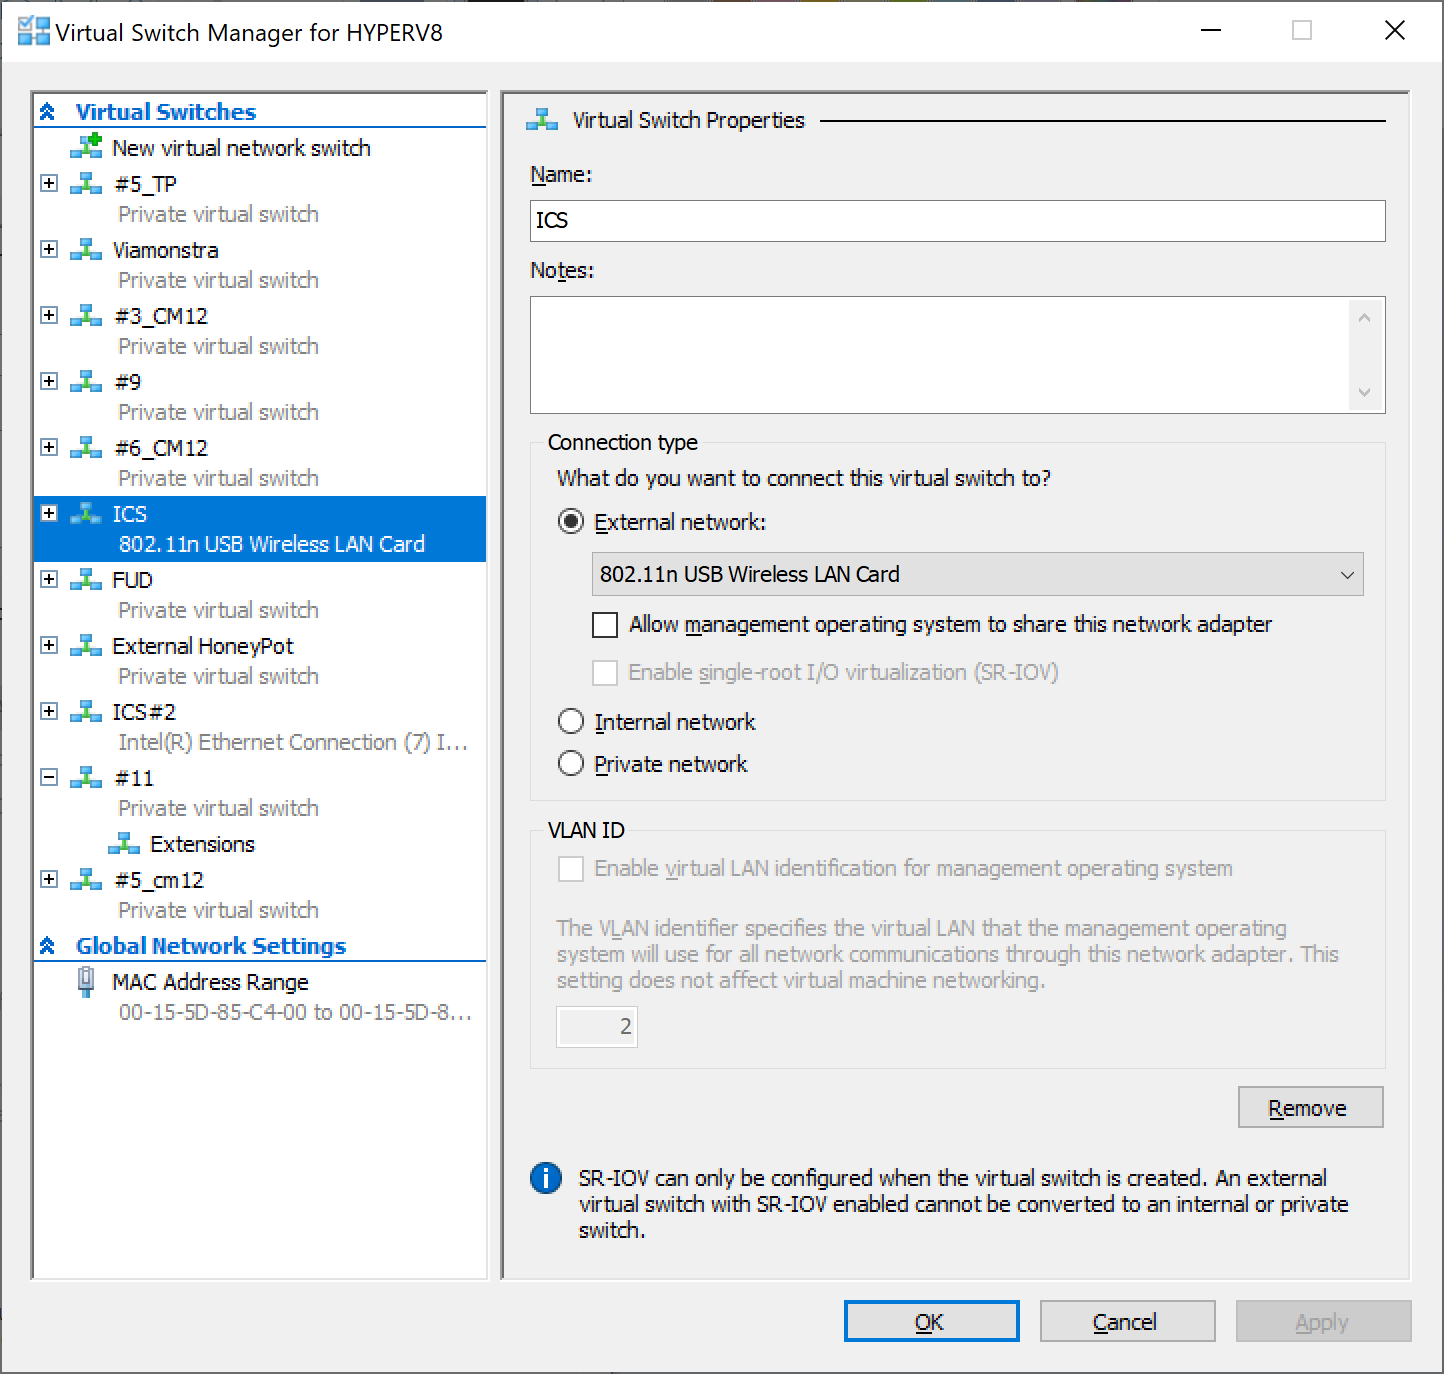
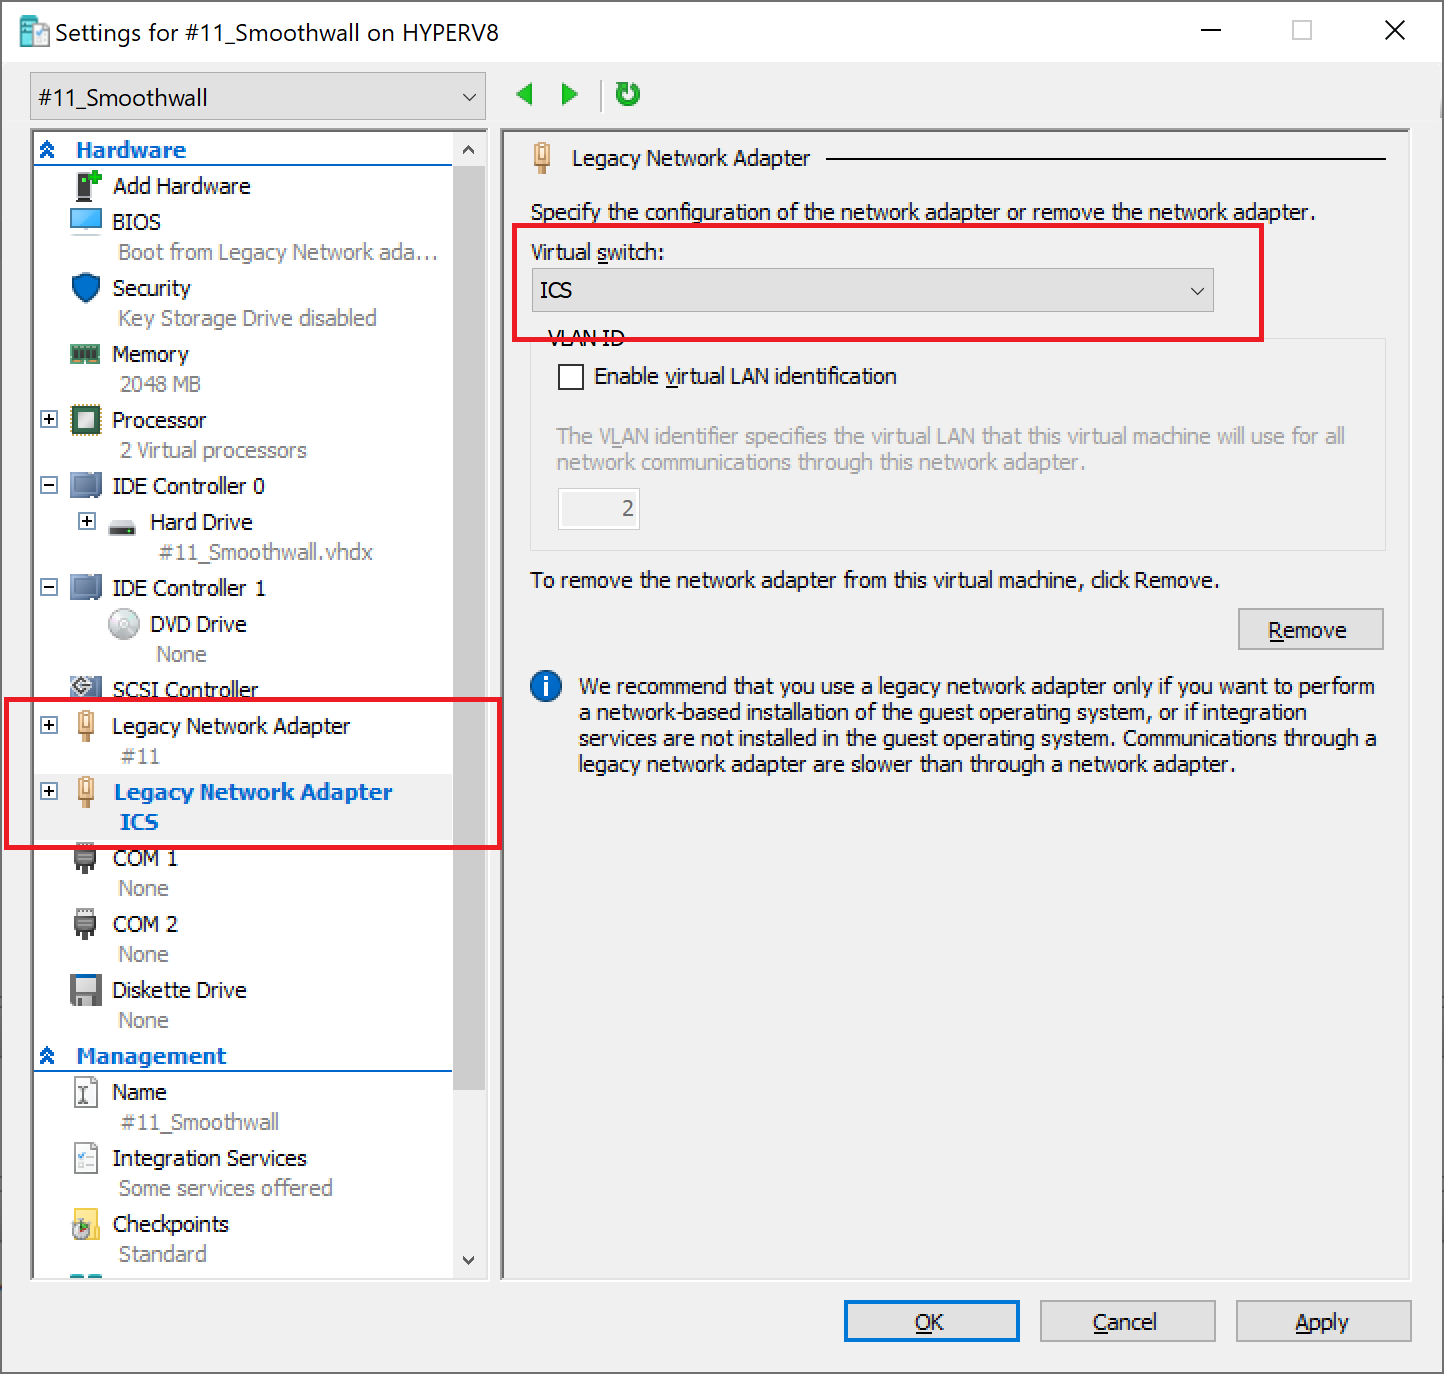
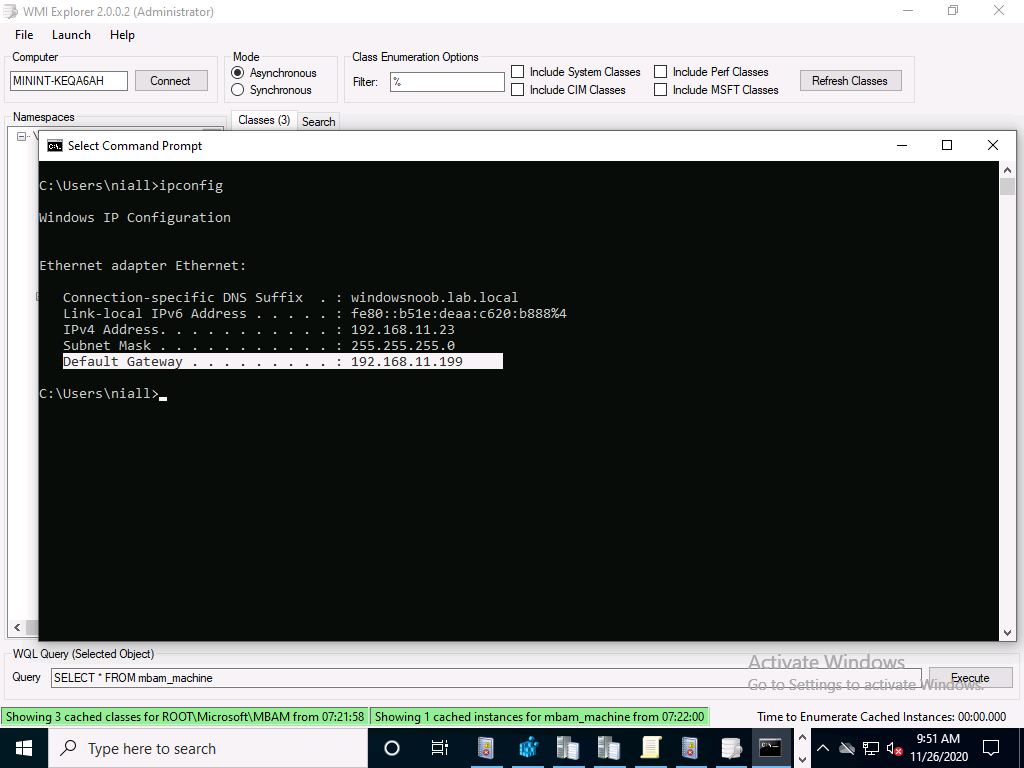
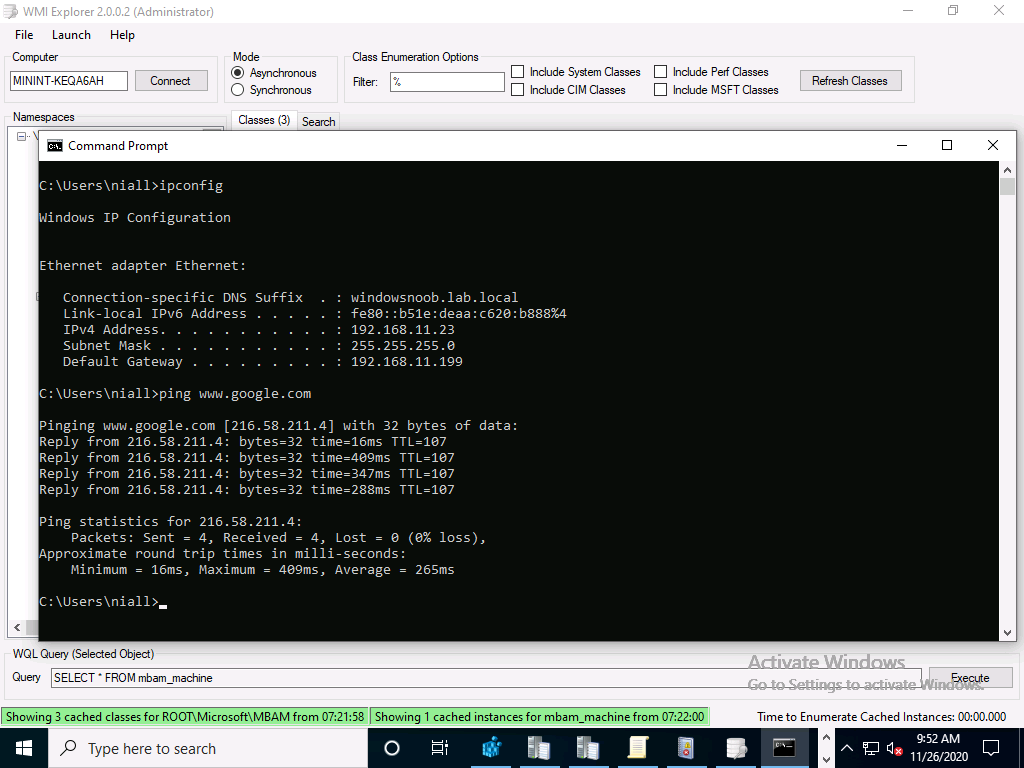
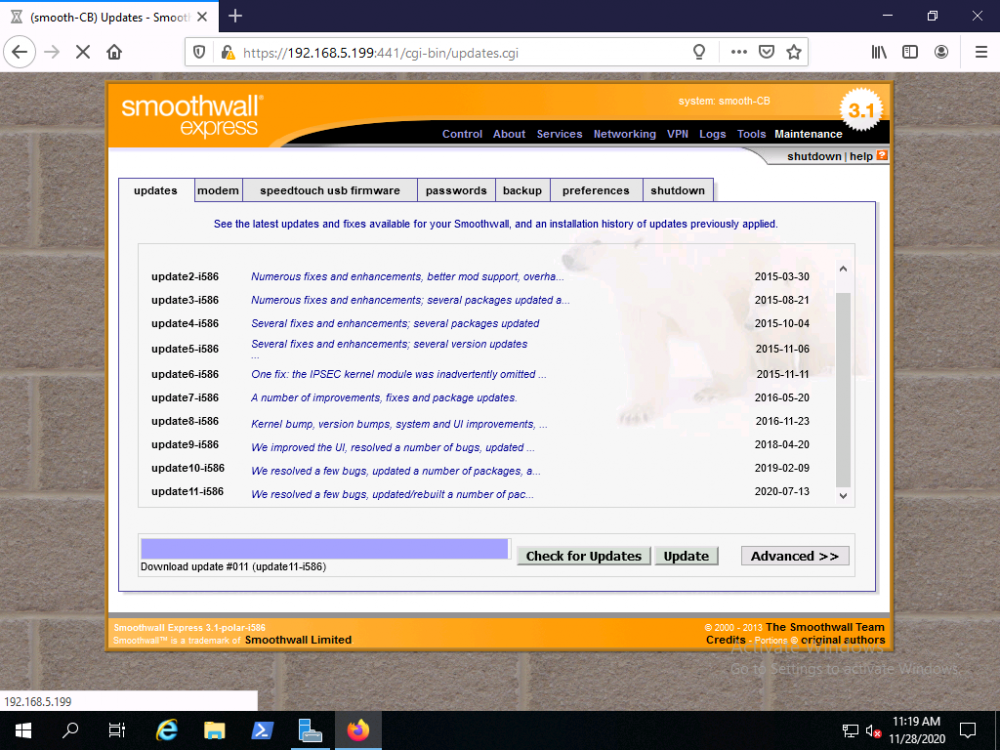
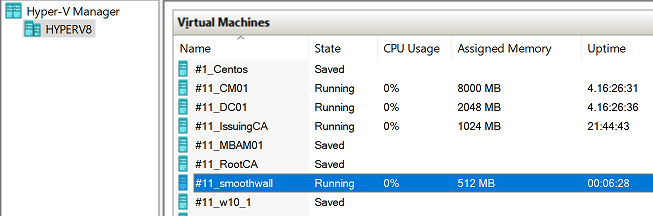
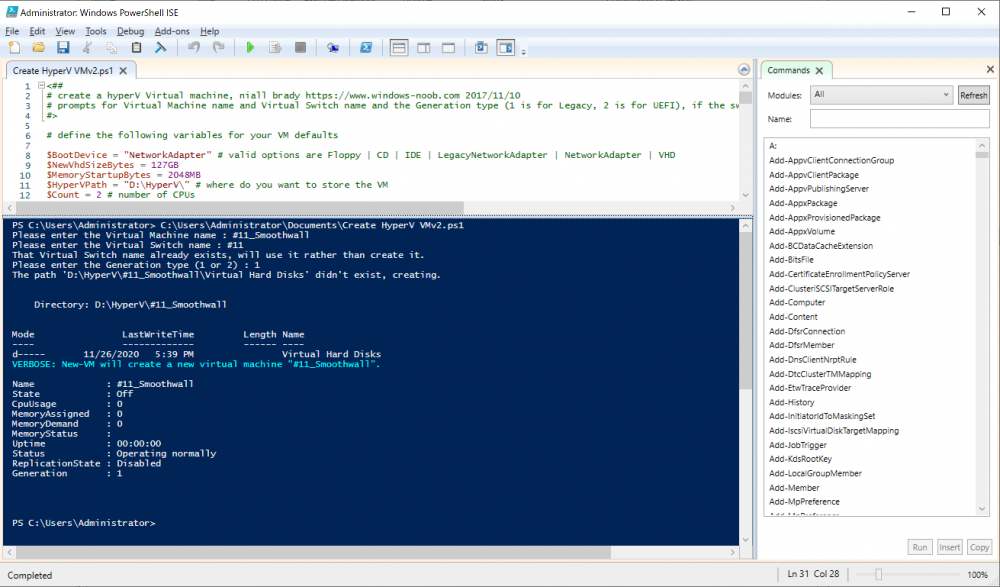
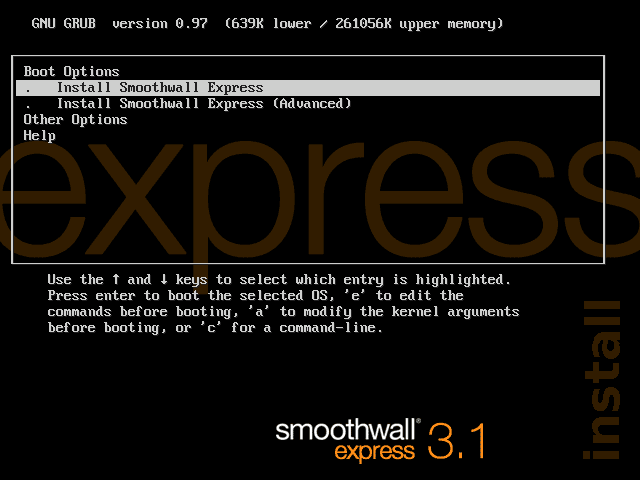
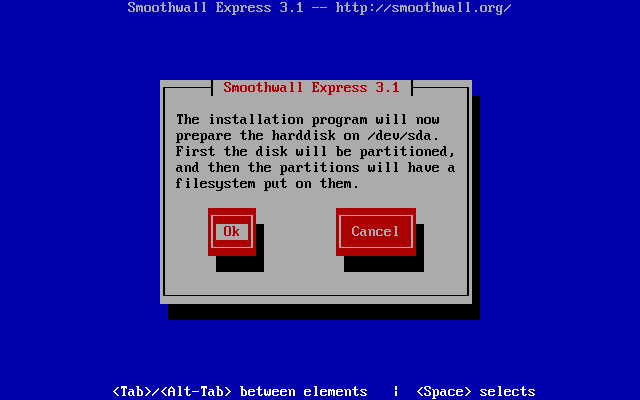
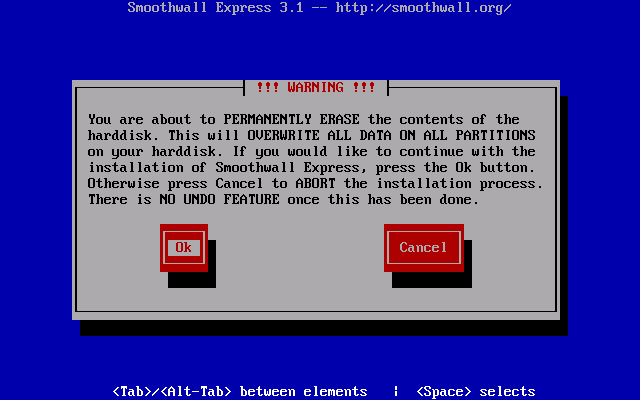
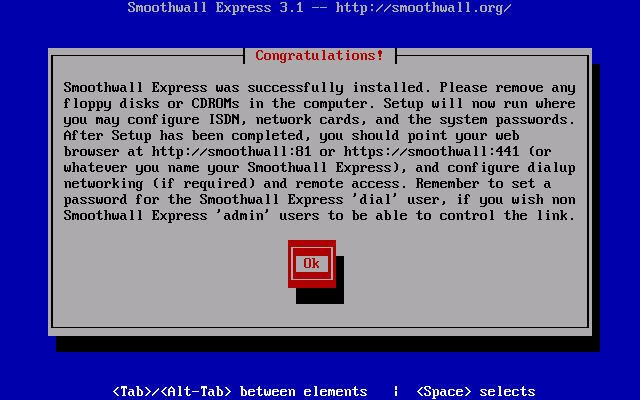
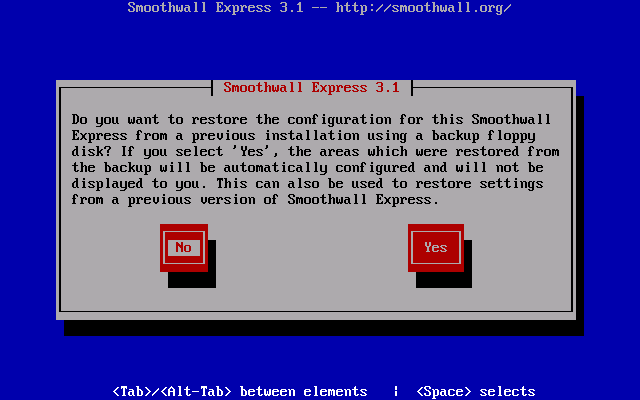
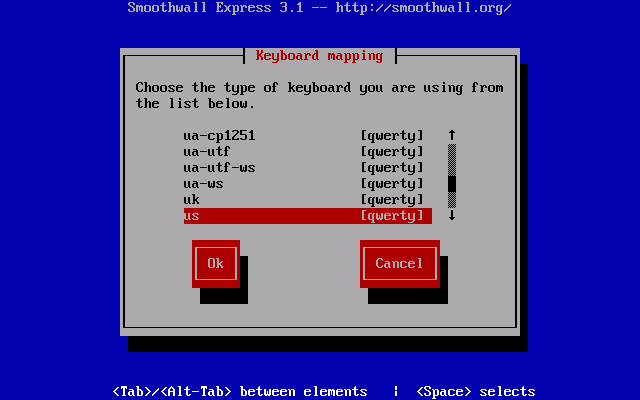
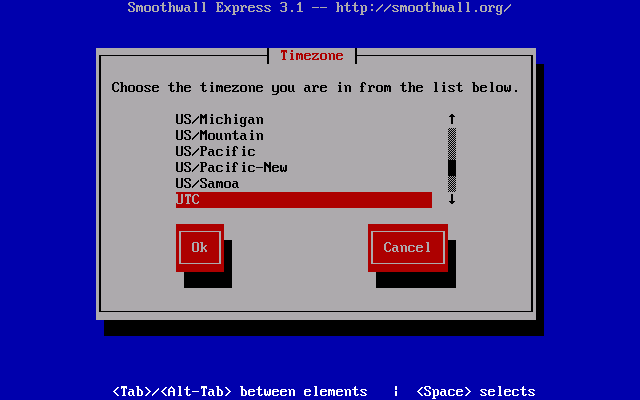
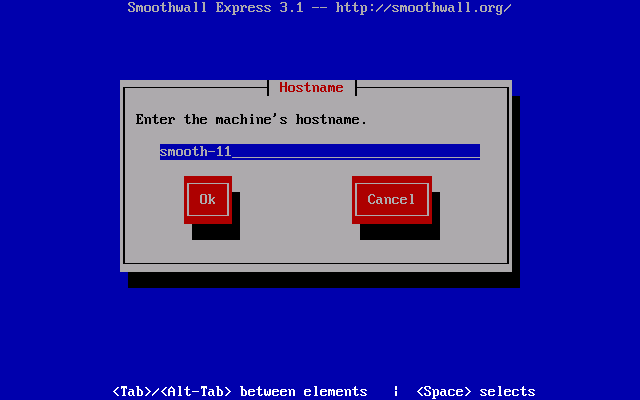
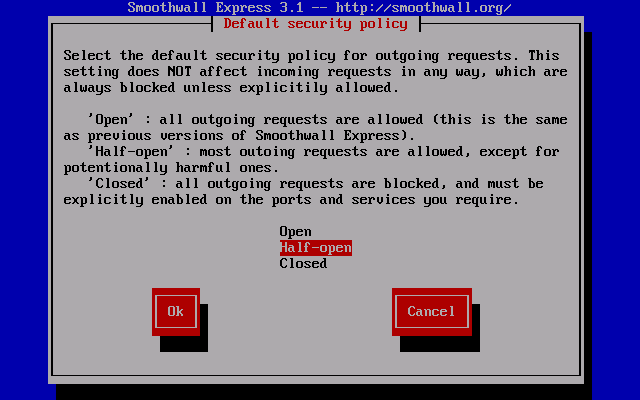
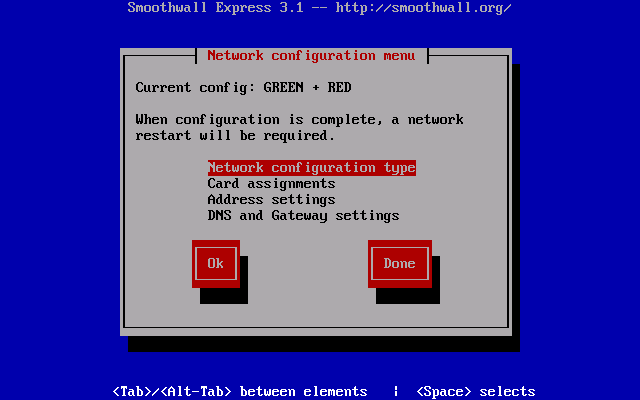
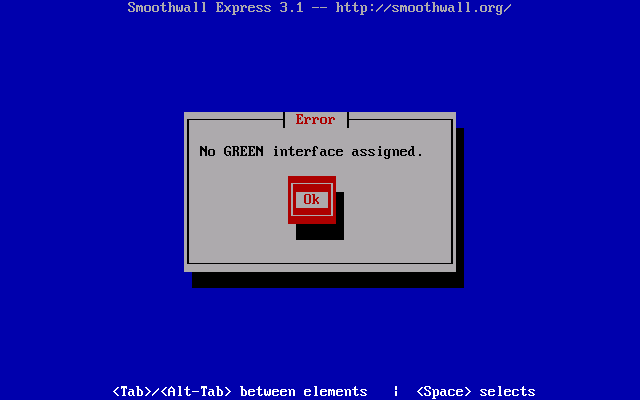
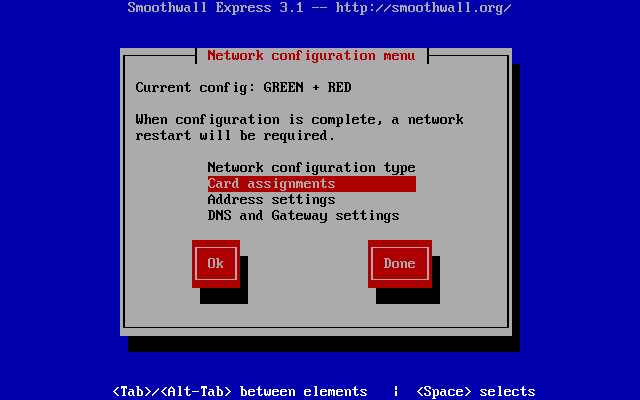
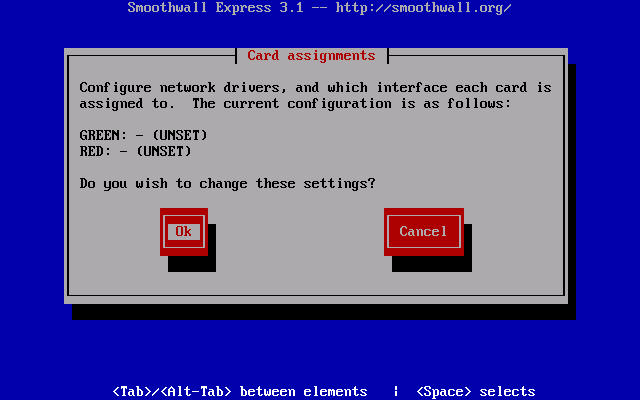
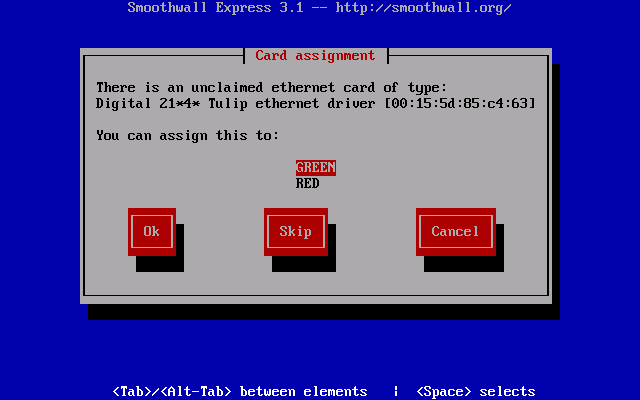
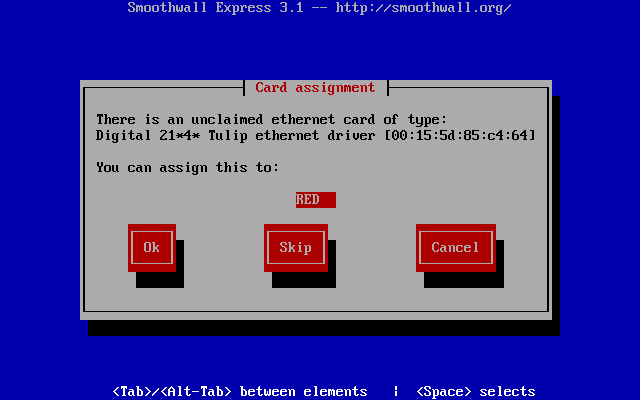
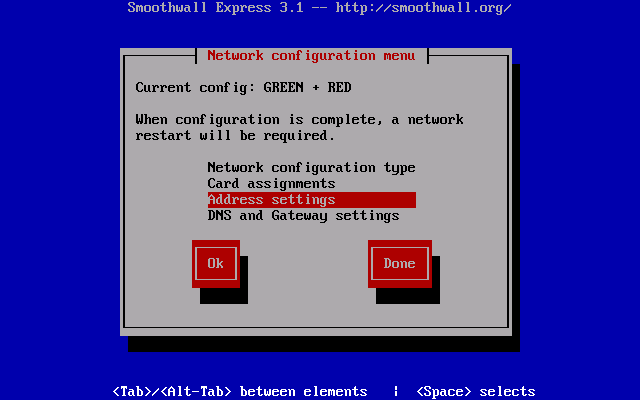
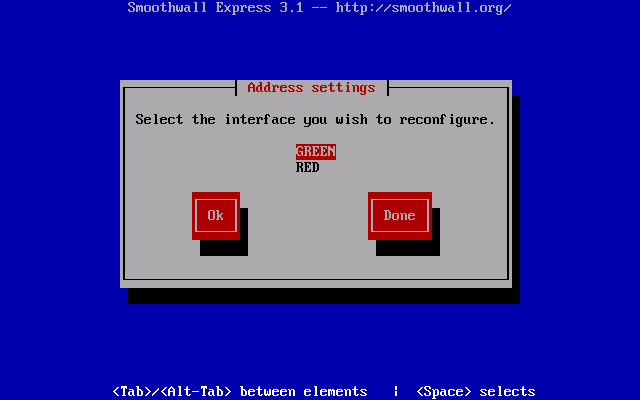
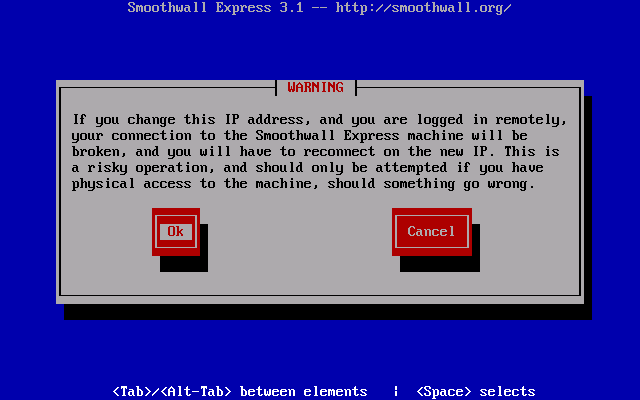
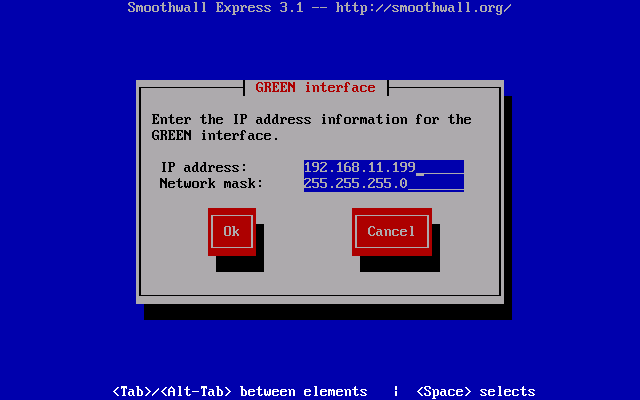
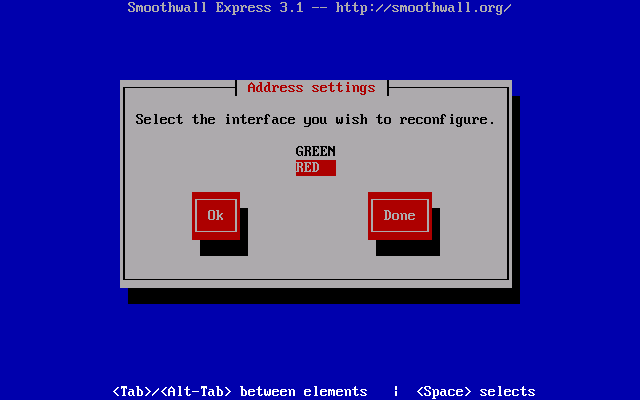
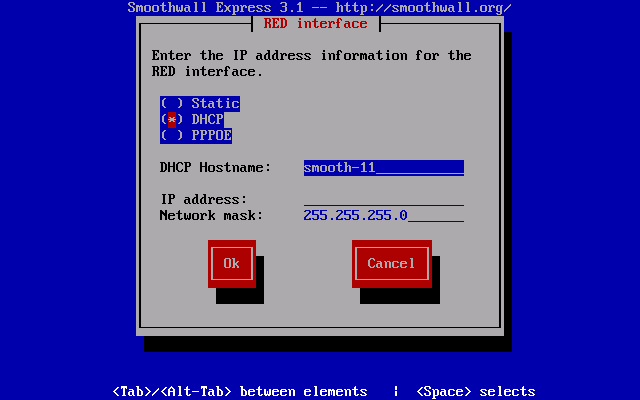
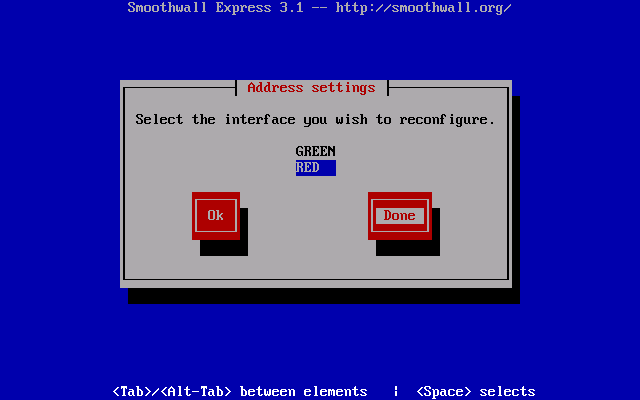
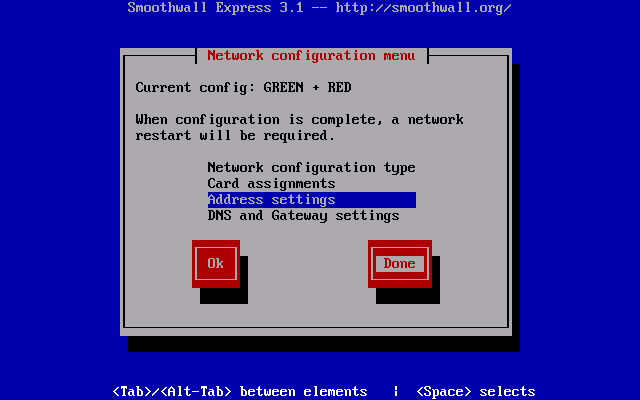
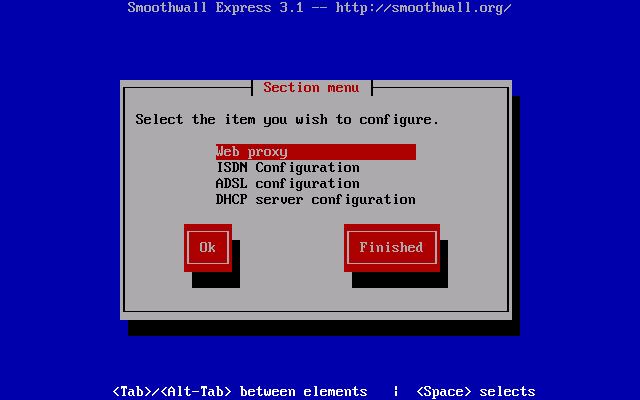
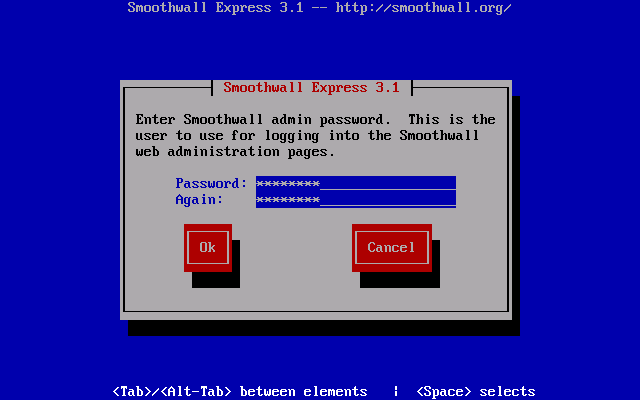
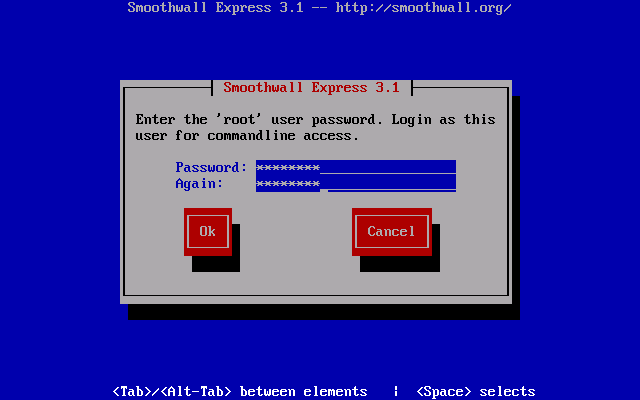
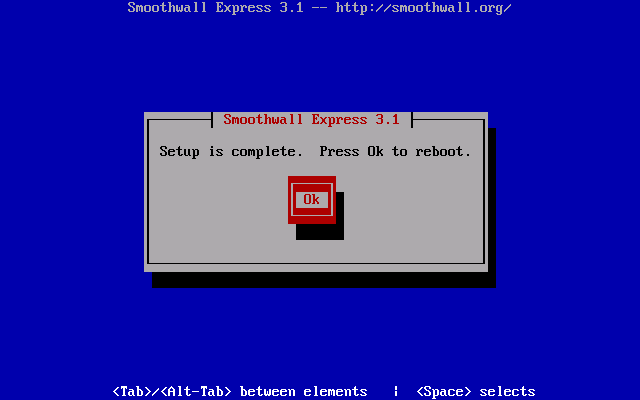
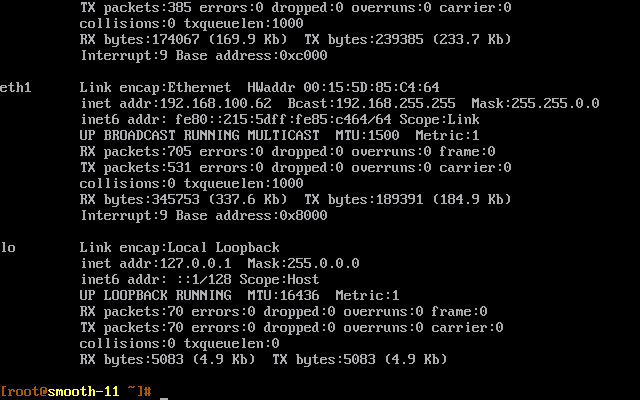
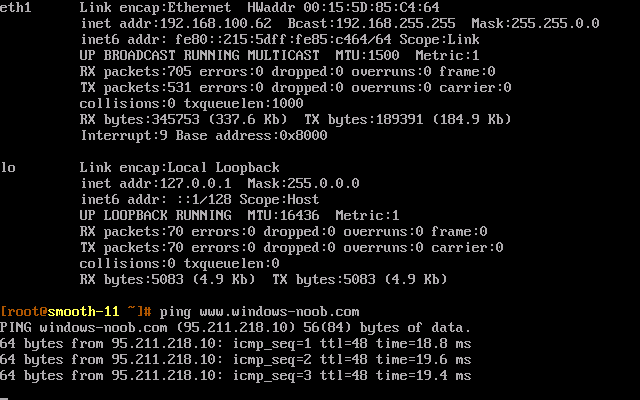
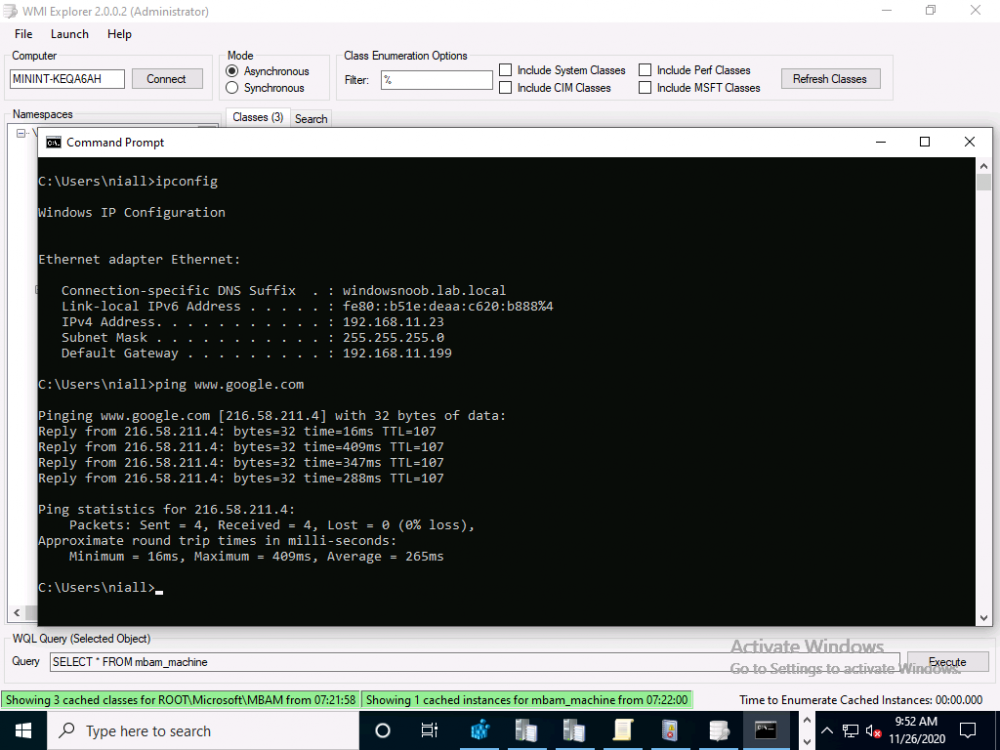
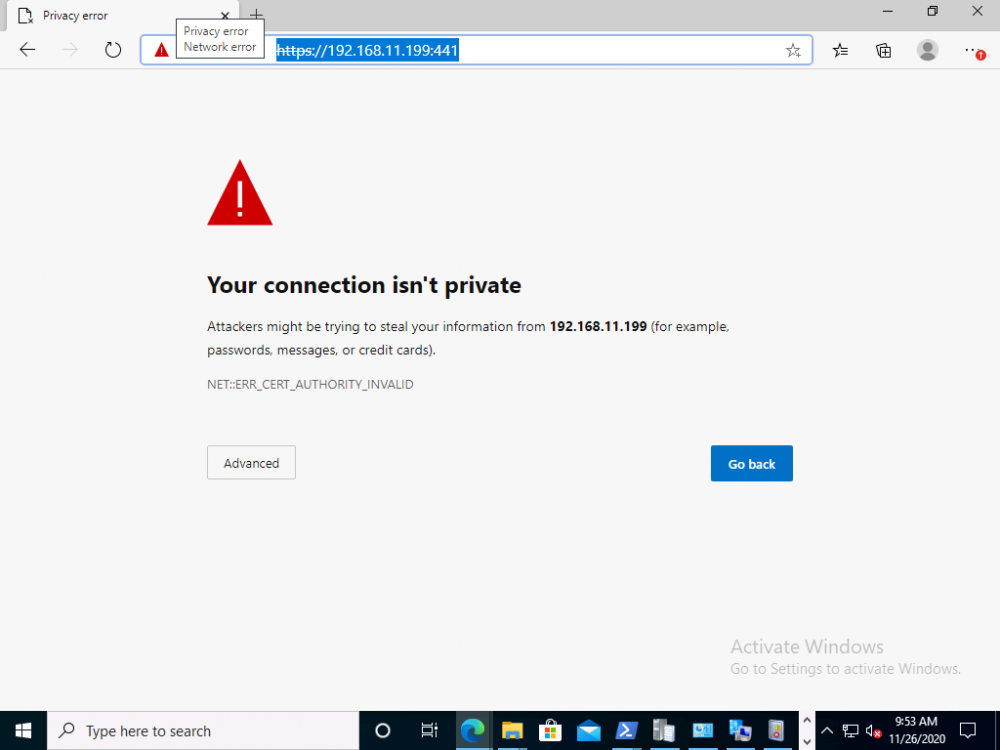
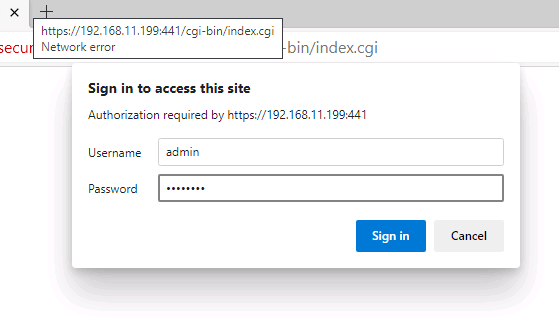
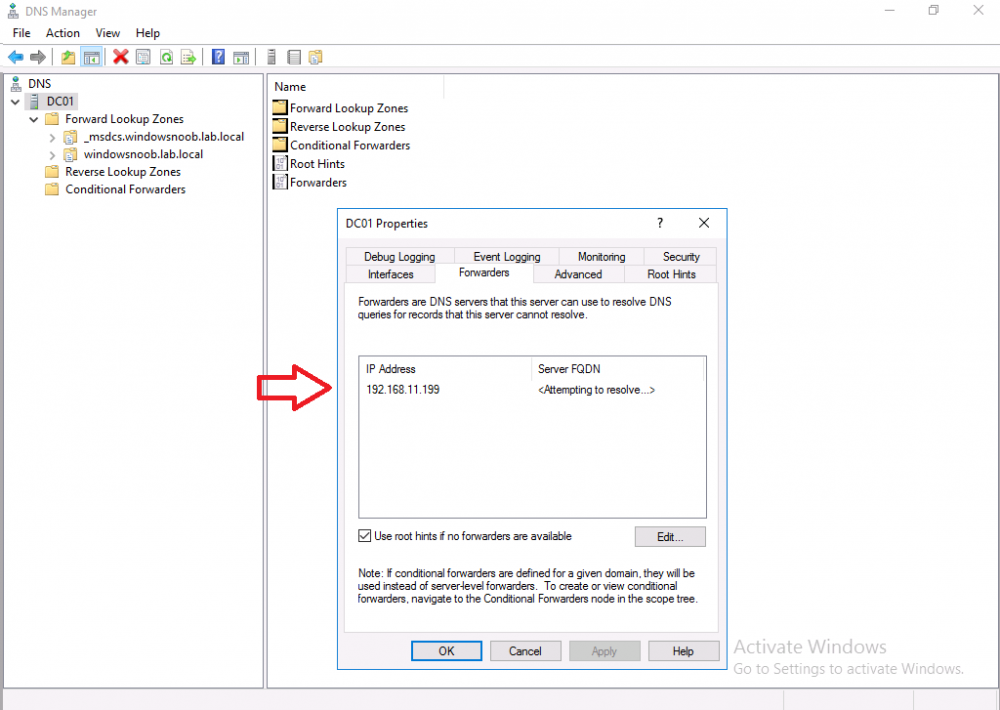
Introduction This blog post is long over due and I've been asked to do it many times, today, I finally got around to writing it. Sorry for the delay. Using Hyper-v labs to test all the new Endpoint Manager releases that Microsoft produces means you probably want to have multiple labs on the go at any time, one for Current Branch, one for Technical Preview, and another for testing out PKI or some other functionality. Having internet access in those labs is also usually a requirement, and keeping them separate from each other is also important. Using a Smoothwall to control internet into (and out of) each hyper v lab gives you control over when that lab gets access to the internet or not. I've used a Linux based firewall solution called Smoothwall, and it works great, so much so that I have one Smoothwall virtual machine for each lab. The Smoothwall allows me to configure individual ports to virtual machines within each lab and lots more functionality. Some Linux experience helps, but it's really easy to use. I've been asked several times over the years how I setup my Smoothwall and never got around to creating a guide for it, so here goes. Are there other ways of doing this, of course, but this is the way I do it. Step 1. Get the ISO Download the Smoothwall Express-3.1-x86_64.iso from here. https://sourceforge.net/projects/smoothwall/files/SmoothWall/3.1/Express-3.1-x86_64.iso/download Step 2. Create network switches In hyper-v manager, create 2 network switches, one Private Network Switch for your lab (we'll name it #11 in this example) and one switch connected to a physical network card (either WI-Fi based or Ethernet) to share the internet into the lab, we'll call that ICS for Internet Connection Sharing. Below is the LAB network switch, it's private so computers within this individual lab can talk to each other but cannot talk to other labs on my host. Below is the ICS switch, note that I do not allow the management operating system to share this network adapter. That can cause all sorts of problems in the host operating system, so don't select it. Also, this is a WI-Fi nic but it could be an Ethernet adapter, as long as it has internet in, it's good to go. Step 3. Create a new virtual machine In this step I'll use a PowerShell script to create a new virtual machine to host Smoothwall, the important thing to remember is that the virtual machine must be Legacy (type 1) and the network card must also be a Legacy Network Adapter. Here's an example for my lab #11. Note: You only need 256 MB of ram for this virtual machine so either change the script or modify the virtual machine settings later. Step 4. Add additional Legacy Network Adapter In the virtual machine just created, add a new Legacy network adapter and point it to the ICS virtual switch. Note: You CAN use regular network adapters in the Smoothwall (100/100mbit) however every time you reboot/restart the smoothwall you have to enter the root password and confirm the network cards to continue. So if you don't want that behavior, choose the legacy network adapters (10/10 mbit). Step 5. Install Smoothwall Attach the ISO to the CD rom drive in the Smoothwall virtual machine, change the boot order to CD and boot. Choose to install Smoothwall Express. click Ok to the welcome and click OK to the file system preparation. Click OK to erase. and it's done. When prompted to restore the configuration choose No. Select your keyboard layout, Select timezone Give it a hostname half open is fine... for Network Configuration Type choose GREEN + RED as shown below Use TAB to move to Done, think of the two colours as follows: GREEN: Lan RED: Internet then click OK to no green interface assigned, and next, select Assign network cards by clicking on Card Assignments Click ok when prompted to set them you'll be shown the 2 nics identified by MAC address in the following screens, so you can see which nic is assigned to which colour. after that you'll be informed that all cards are successfully allocated, move to Address settings... As Green is the lab IP of our smoothwall, I normally follow the ip address settings within each lab as follows 192.168.X.1 where X is the number of my lab, so this is lab #11 therefore I always use the following for each lab, the only thing that changes is the number replacing X DC01=DNS/DHCP/Domain Controller = 192.168.11.1 CM01 = Endpoint Manager = 192.168.11.2 Smoothwall = Linux firewall = 192.168.11.199 click ok and here I configure the IP address to match the ip address range shown above for my #11 lab. click ok, select the RED interface I normally use DHCP on RED and get a separate IP from my home network click ok, then Done when complete. and tab again to Done (or configure DNS if needed) Click Finished for Web Proxy Next set the Admin password set the root password click ok when done ! Step 6. verify after the reboot, login as root, it is case sensitive so at the prompt below type root and enter the password when prompted. after logging in, type the following to list the ip addresses assigned to your smoothwall. ifconfig you will see output something like so...it probably scrolled off screen, that's ok. In the example above: eth1 is the smoothwall RED interface and has my local network ip (from my Wi-Fi router), eth0 is the smoothwall GREEN interface and has the ip address I manually assigned it namely 192.168.11.199 You can issue the following commands: ifconfig eth0 ifconfig eth1 to list each nic individually. Next, try pinging some address: control +c to cancel, it works ! On a Windows virtual machine in the lab you are providing internet access (and routing) to, your network settings should be configured like so...pointing your Gateway to the smoothwall and DNS to the Domain Controller, this can be configured via DHCP server settings on the DC. a quick ping to verify internet works Step 7. Optionally configure port forwarding On a Windows machine, open a web browser and browse to the ip address of your Smoothwall and include port 441 like so https://192.168.11.199:441 you'll probably get a warning, it's safe to ignore Click Advanced to continue...for username and password use the Admin user you created for web configuration In this example I'm forwarding port 80 from my external internet connection to my internal lab, specifically the web server in lab #11. Step 8. Configure things in AD On your domain controller, configure the DHCP scope options to point 003 Router to the internal ip address (in this case 192.168.11.199) your new smoothwall so that all computers that get an ip, know how to use the smoothwall. Point your forwarder in DNS on the DC to the smoothwall local ip address finally, restart DNS and DHCP services. I hope you found this useful ! If you'd prefer to watch a video of this then see here cheers niall


-
we've seen the issue is back today, so we've switched to the following version, it works.
-
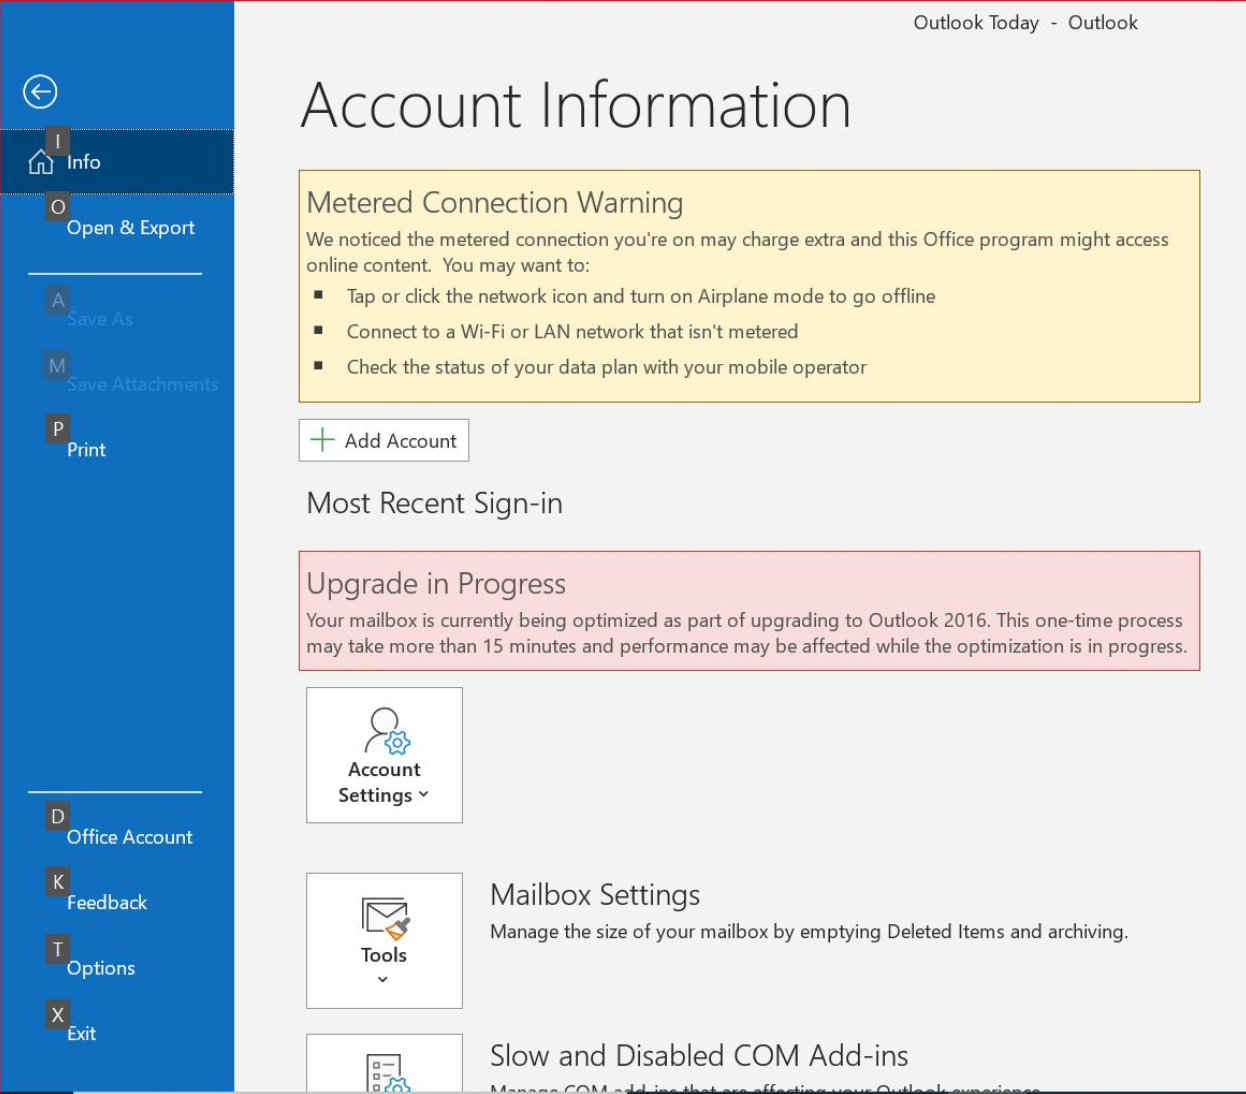
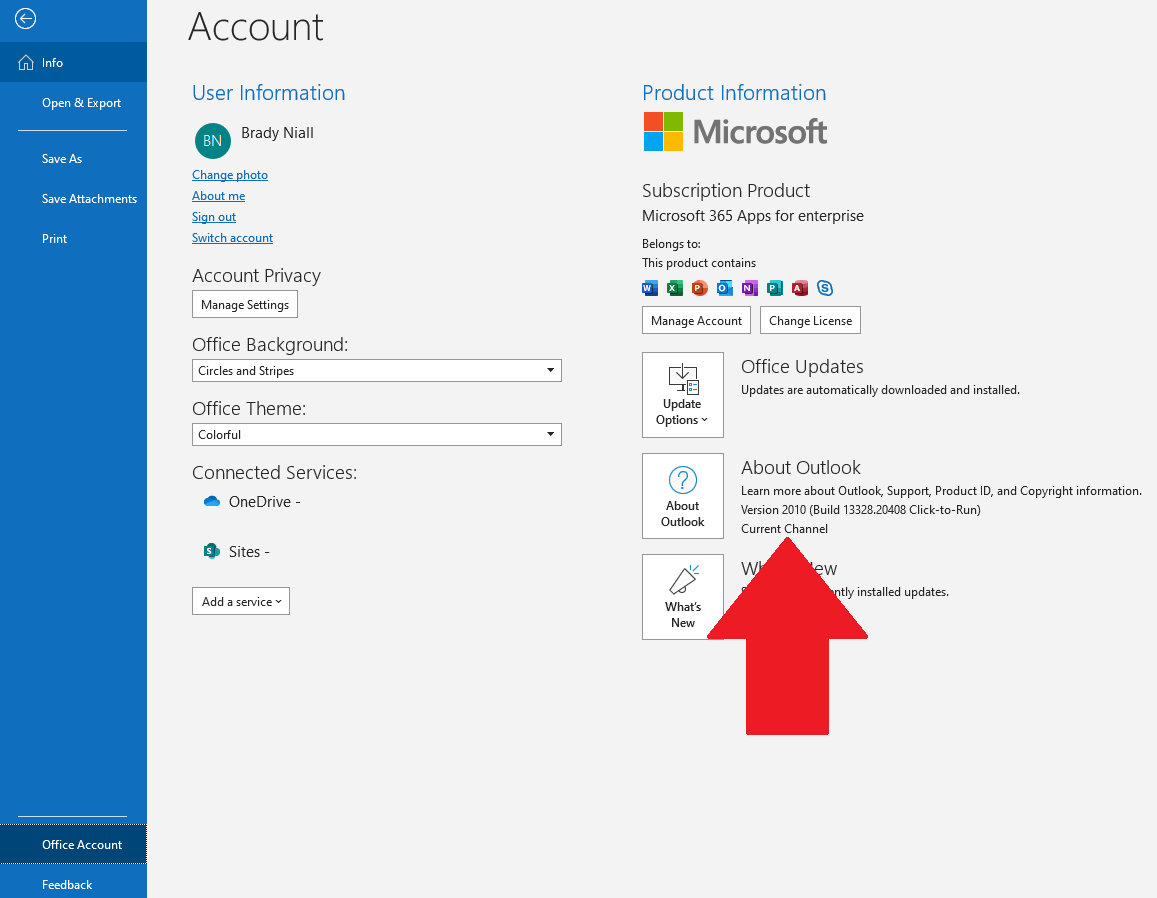
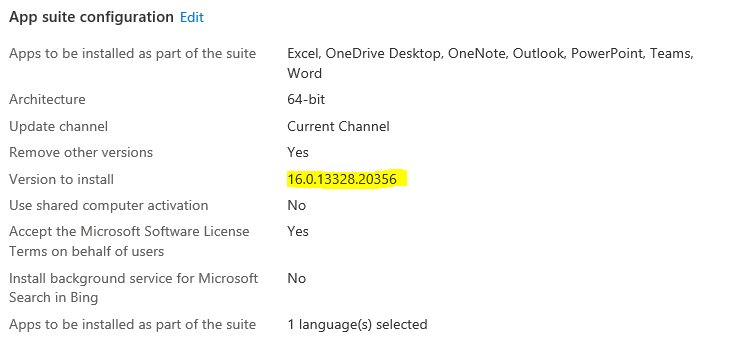
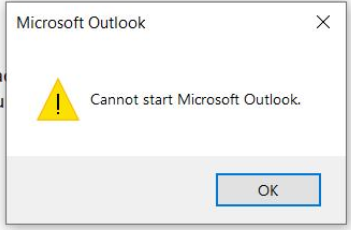
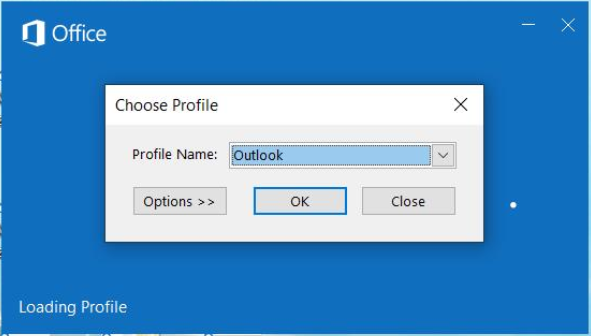
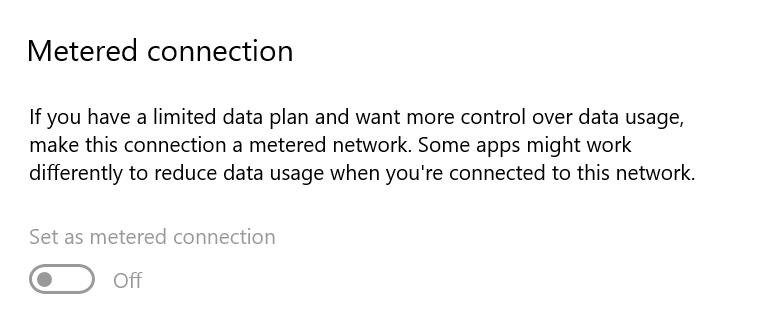
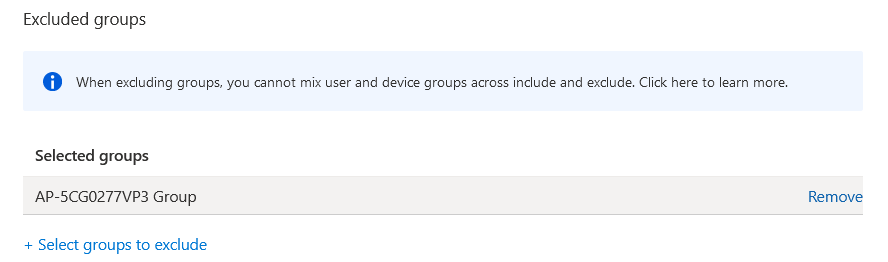
Introduction I'm writing this post to catalog problems I recently faced while doing Windows Autopilot installations, we use a very slim enrollment Status Page (ESP) configuration with only one app marked as required (Microsoft Edge Chromium). The remaining applications are a mix of Win32 apps and the all important Microsoft Office 365 suite. This suite was configured with the following apps. Excel, OneDrive Desktop, OneNote, Outlook, PowerPoint, Teams, Word This worked well since about mid-February 2020. However, starting week 46, I started noticing the following error on newly delivered HP computers with Windows 10 version 1909 (and some office components preinstalled) after clicking the Microsoft Outlook icon soon after Windows Autopilot had completed. It looks ominous. Clicking OK and trying again, the problem looked even worse, you'd see something like this, outlook prompting you to choose a Profile. followed by a Script error, stating Class not registered on Line 278. Choose Yes or No had pretty much the same effect, Outlook was well and truly broken. If you clicked on the Account Information in Outlook you'd see something like this. A Metered connection warning followed by a Upgrade in Progress warning. The first is definitely a red-herring as the Network card was not in a state that was metered. When checking the version of office installed on affected machines I could see it was as shown below, Office version 2011. The interesting thing to note is that Computers that had a clean image of Windows 10 version 1909 with no Office installed previously did not exhibit this problem, it only affected factory image(s) of HP computers with Windows 10 version 1909 factory image and those images come with a version of Microsoft Office installed (in the Nordics), namely Microsoft Office 365 ProPlus version 1908 (Build 11929.20394). Troubleshooting Based on the above I knew that clean installs of Windows 10 1909 did not have the issue (even though they subsequently got the Office 2011 version installed before the user logged on). I initially suspected that security software or a device configuration profile were to blame, and went through the time consuming task of excluding a computer from each profile, and then resetting it to verify the behavior. Excluding a device from an assignment takes precedence over including a device so it was a good way of testing Windows Autopilot without certain settings or configurations, to rule them out. Below you can see I've excluded a group (containing my test device) from a Device Configuration profile, to verify if that was the issue. trying this didn't help, but it at least ruled out the following from being part of the problem. Device Configuration Profiles Win32 based Security based apps (such as Azure Information protection, Crowdstrike, Symantec DLP) Armed with that knowledge I recreated the Office Suite settings in my own test tenant, and ran a Windows Autopilot build, to my surprise the HP failed starting outlook the exact same way as in Production, so that completely ruled out everything other than the version of Office installed on the HP. Next I turned to logging options within Office/Outlook to see if that would help, but in reality it just generated .ETL files that I'm still analyzing in order to root-cause this issue. The breakthrough came when looking at the settings of the Office suite in Endpoint Manager. The version of Office that gets installed is based on your settings in the Office Suite, and we had been using these settings without problem since February 2020. The really important bit was the update channel, shown below. The update channel we were using was Current Channel (Preview). You can get details of the update channels here. According to Microsoft: ... three primary update channels: Current Channel Monthly Enterprise Channel Semi-Annual Enterprise Channel We recommend Current Channel, because it provides your users with the newest Office features as soon as they are ready. But what is the difference between Current Channel and Current Channel (Preview). According to Microsoft: To become familiar with the new features coming in the next feature release of Current Channel, we recommend that you use Current Channel (Preview). There isn’t a set release schedule for Current Channel (Preview). In general, a new version of Current Channel (Preview) with new features is released at least a week or more before that new version is released to Current Channel. There might be several releases of Current Channel (Preview), with non-security updates, before that version is released to Current Channel. You should deploy Current Channel (Preview) to a small, representative sample of users in your organization. This can help you identify any possible issues for your organization before those new features are released more broadly to your users that have Current Channel. We also encourage you to use Current Channel (Preview) so that you can identify any possible issues that you want us to fix before that version is released to Current Channel. This can help reduce the number of non-security updates that are needed for Current Channel. And this pretty much matched what we were doing, so now that we had this knowledge, but still had no root-cause for the Outlook (and Word/Excel issues). The Resolution I decided to change the Update Channel from Current Channel (Preview) to Current Channel. This decision was based on the fact that the Preview channel may contain changes that are incompatible with our image in some way, which is odd because we are using the factory installed HP image. Once I made the change, and re-tested Windows Autopilot the difference was clear. Now Outlook worked as expected without issue (and Word/Excel issues disappeared also), however the version of Office installed was Version 2010 instead of Version 2011 that we got in the Current Channel (Preview). This didn't matter too much but of course it meant that some cool new cloud friendly features in Version 2011 were now no longer available on newly installed Windows Autopilot machines. The versioning used by Microsoft for Office is somewhat confusing, in the Office Account screen you'll see the version info, here you can see it's listed as Current Channel, Version 2010 (the version without the problem). So version 2010 relates to year 20, month 10, or the October release of Office 365. That would of course mean that version 2011 is the November release. Note: we've noticed that HP's corporate ready image includes an office version that is released before the OS version was released, so for example if you get Windows 10 version 1909, then you'll get the Office version released approximately one month before that (Office version 1908). Likewise if you got Windows 10 version 2004, you should get Office version 2003. Summary Sometimes living on the edge means you will fall over. I know that changing from Current Channel (Preview) to Current Channel might only delay the problem until the Current Channel update channel migrates to the new version of office next month, so we may actually encounter this problem again, and soon. So to conclude, if any of you have come across this exact issue (I have searched and found similar problems with "Library not registered", but the advice within them didn't apply here), then please get in touch with me. In the meantime I will look through the gathered ETL traces to see if they provide any clue as to why Office was so broken on these new devices in order to root-cause the problem. Links used in this blog post Github script, Metered - https://gist.github.com/nijave/d657fb4cdb518286942f6c2dd933b472 Update Channels - https://docs.microsoft.com/en-us/deployoffice/overview-update-channels Office Versions - https://docs.microsoft.com/en-us/officeupdates/current-channel


-
get-windowsupdatelog on the machine in question will allow you to see where the updates is being downloaded from
-
hi Scott and welcome the first thing i'd suggest you do is grab the smsts*.log files on one of the affected computers and zip them up and upload here so we can take a look, that will hopefully reveal what went wrong any additional info you can add, such as hardware that was affected and whether or not there's any changes to BIOS/UEFI setup in the task sequence ?
-
yup that should improve things try it however are you sure your computers are only getting updates from ConfigMgr and not somewhere else ?
-
have you configured anything in Client Settings for notifications ?
-
are you referring to the TPM hash ? if so read here TPM password hash Previous MBAM clients don't upload the TPM password hash to Configuration Manager. The client only uploads the TPM password hash once. If you need to migrate this information to the Configuration Manager recovery service, clear the TPM on the device. After it restarts, it will upload the new TPM password hash to the recovery service. Uploading of the TPM password hash mainly pertains to versions of Windows prior to Windows 10. Windows 10 by default does not save the TPM password hash so therefore does not normally upload the TPM password hash. For more information, see About the TPM owner password.
-
Deployment Report help
anyweb replied to drizz343's topic in System Center Configuration Manager (Current Branch)
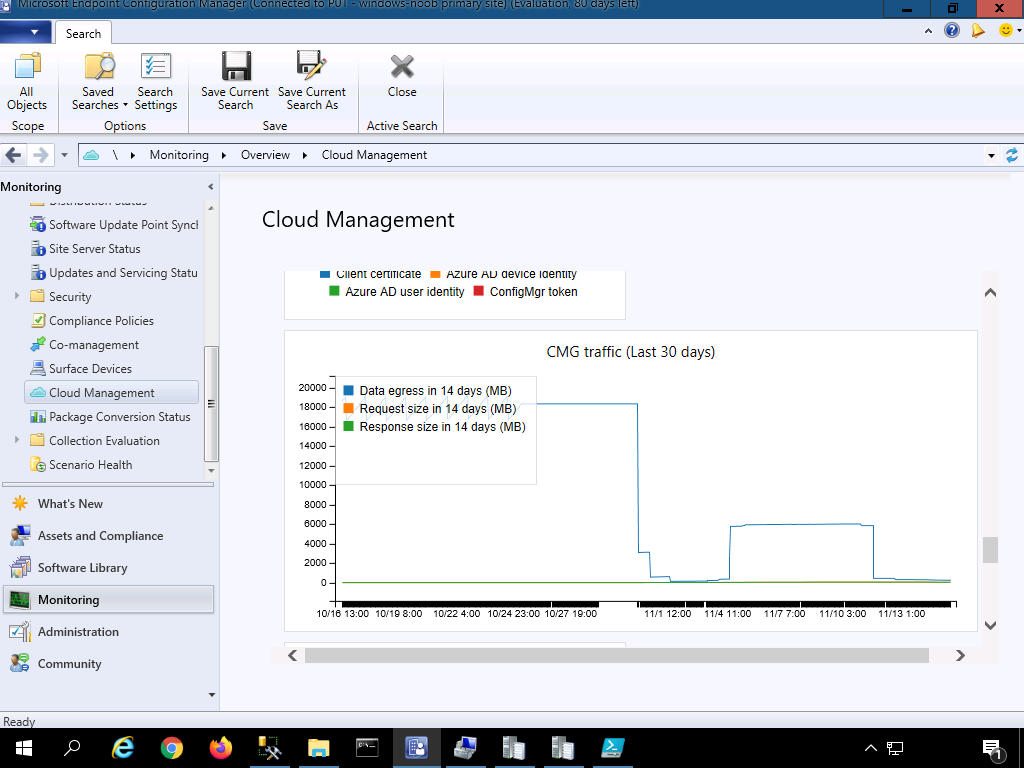
while it's not a report, have you looked at the Cloud Management overview in the ConfigMgr console ? for more details about monitoring the clients to your CMG and and traffic involved see https://docs.microsoft.com/en-us/mem/configmgr/core/clients/manage/cmg/monitor-clients-cloud-management-gateway to figure out how much it costs see
-
ah ok, well it's out of support and you'll need to ugprade it to a supported build before you decide to do anything with it, that would be your first task, to setup a plan for the upgrade, it's easy, and you'll gain access to lots of new features by doing so (as well as remain supported) cheers niall
-
hi and welcome, before we talk about distribution points can you please tell us what SCCM version you currently have and how many clients would it be managing approx ?
-
yeah that sounds good ping me then (pm)
-
ok i've you are using the latest version of ConfigMgr, and you still see the issue then please raise a case with Microsoft
-
did you verify your registry settings, is it pointing to the correct recovery service there ? if you have teamviewer i could remote in and take a look or Microsoft Quick Assist
-
thanks for the thanks ! I appreciate it however the links are not broken, you can only download scripts if you are a logged on member of windows-noob.com please retry the download now that you are a logged on member cheers niall
-
start by looking at my guide for troubleshooting on the client, does it look like you are missing something ?
-
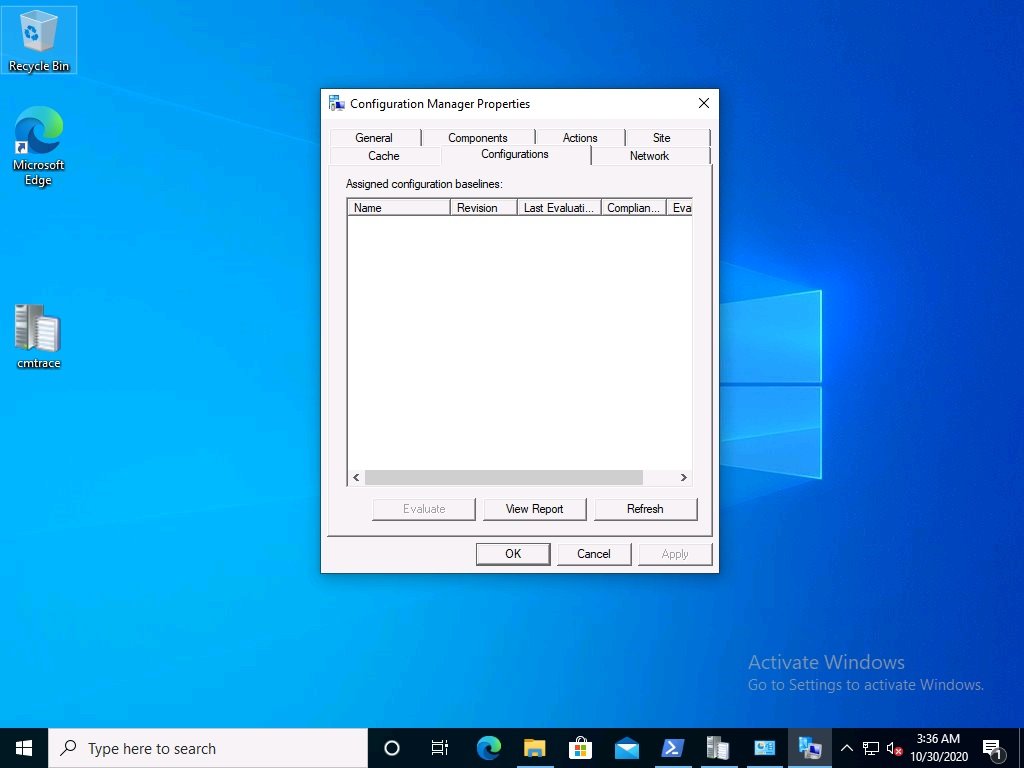
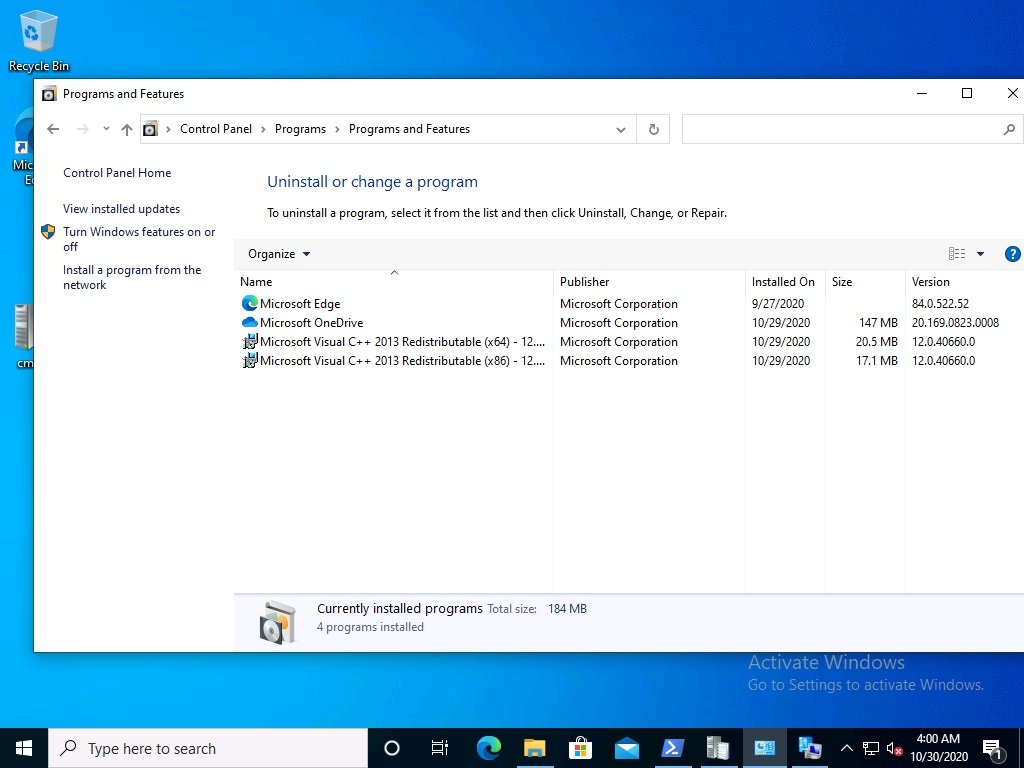
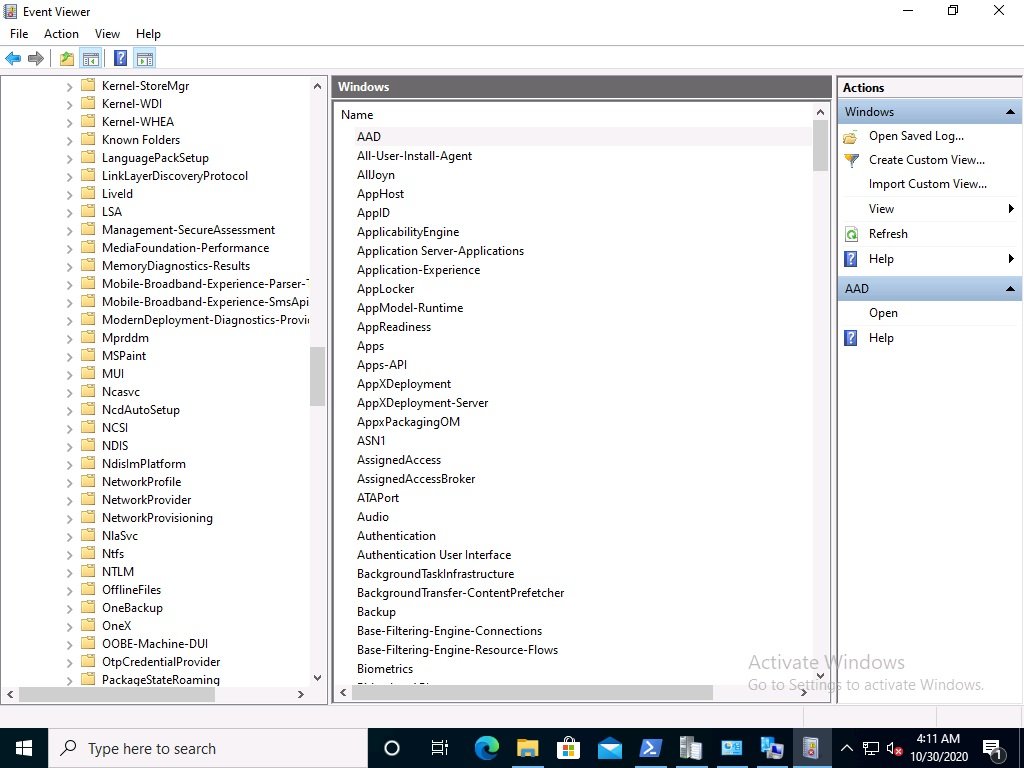
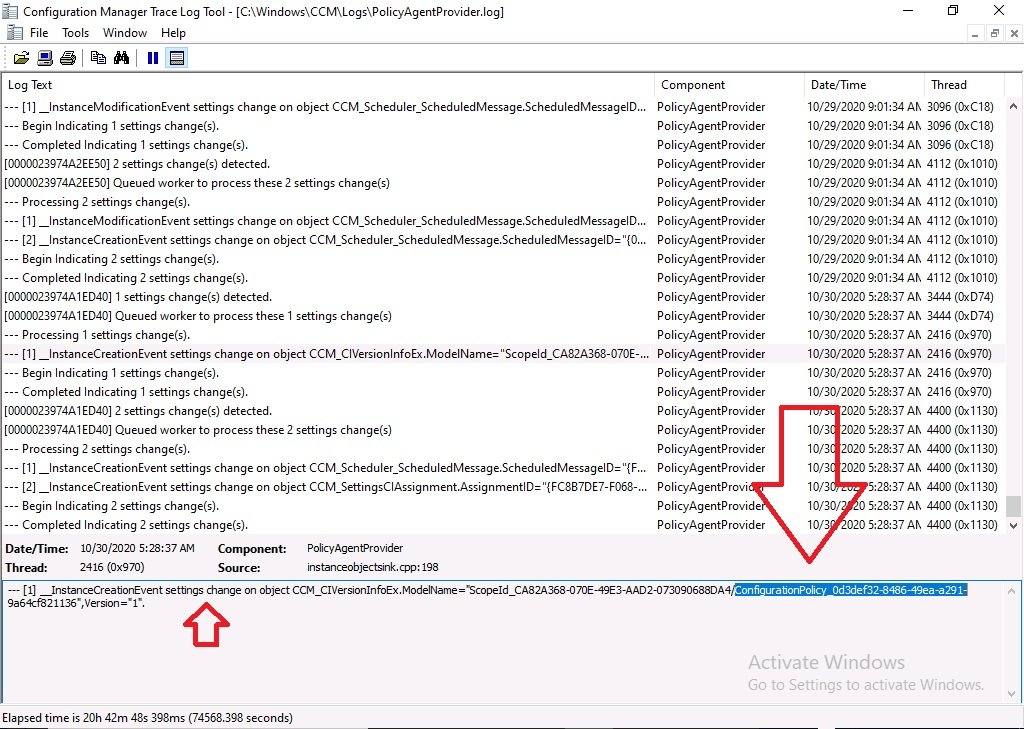
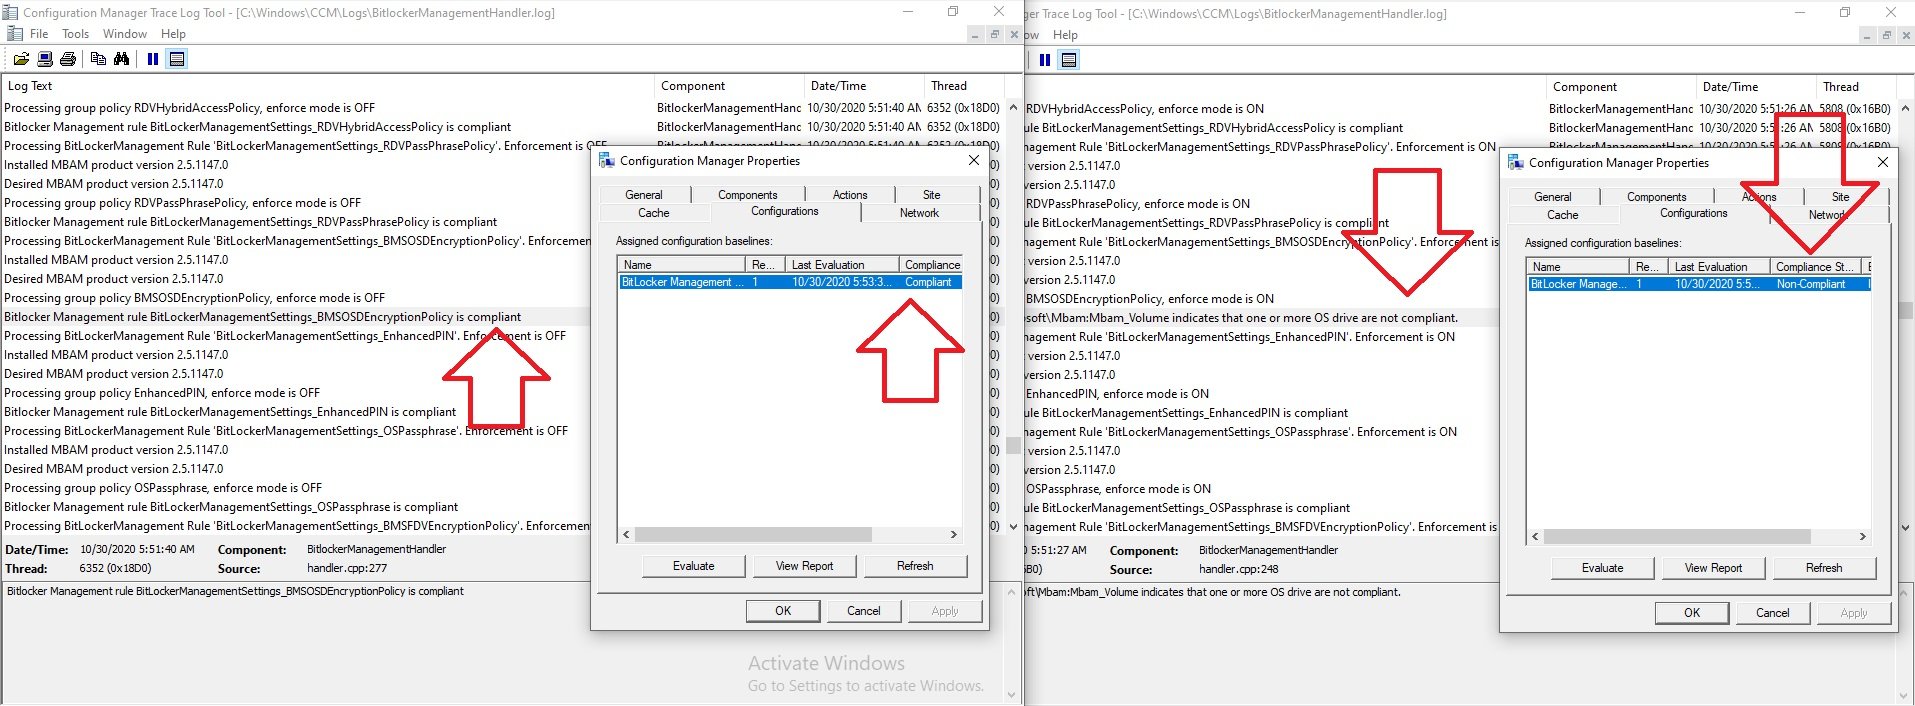
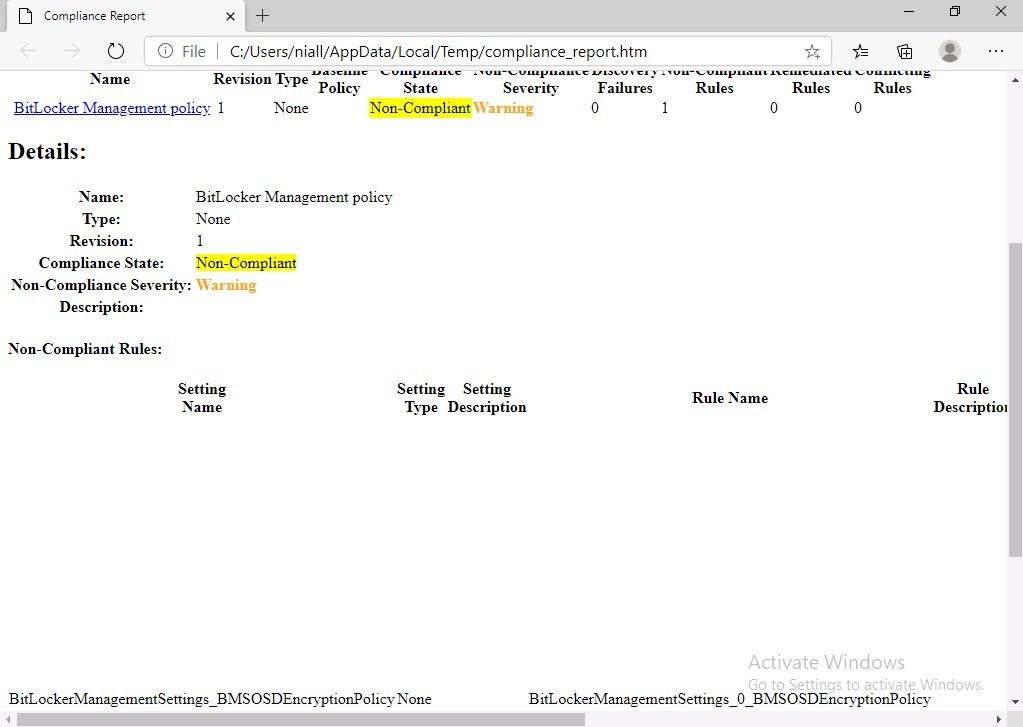
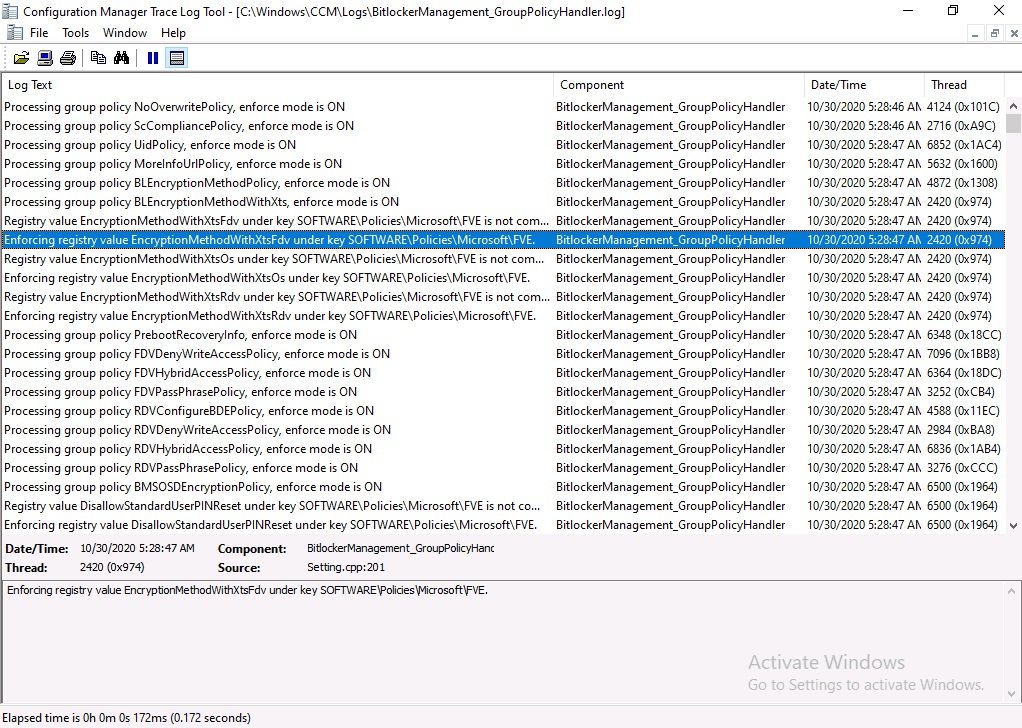
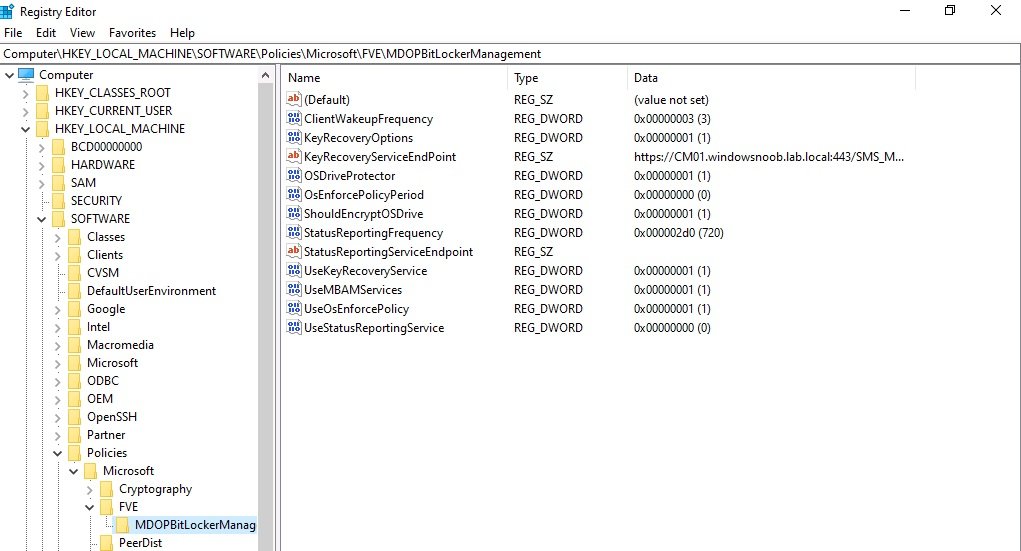
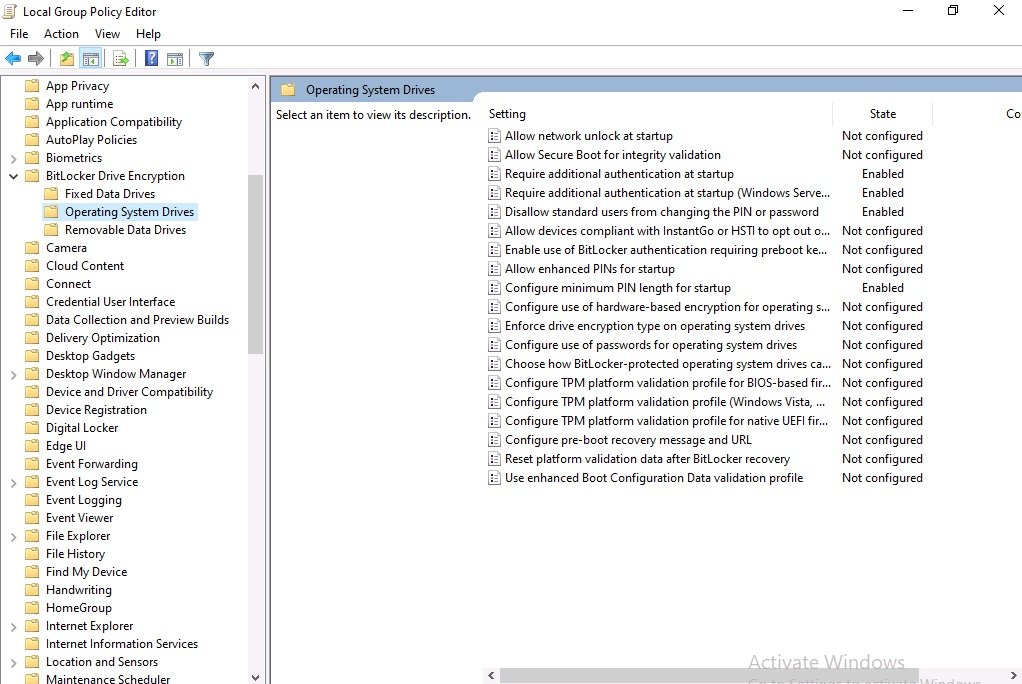
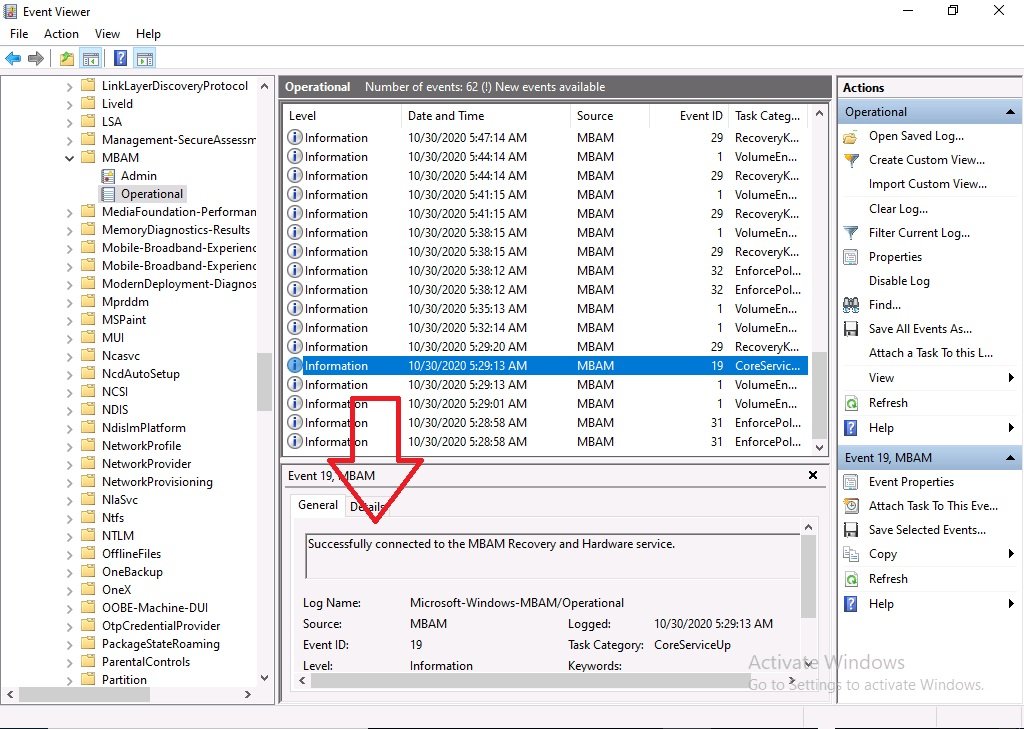
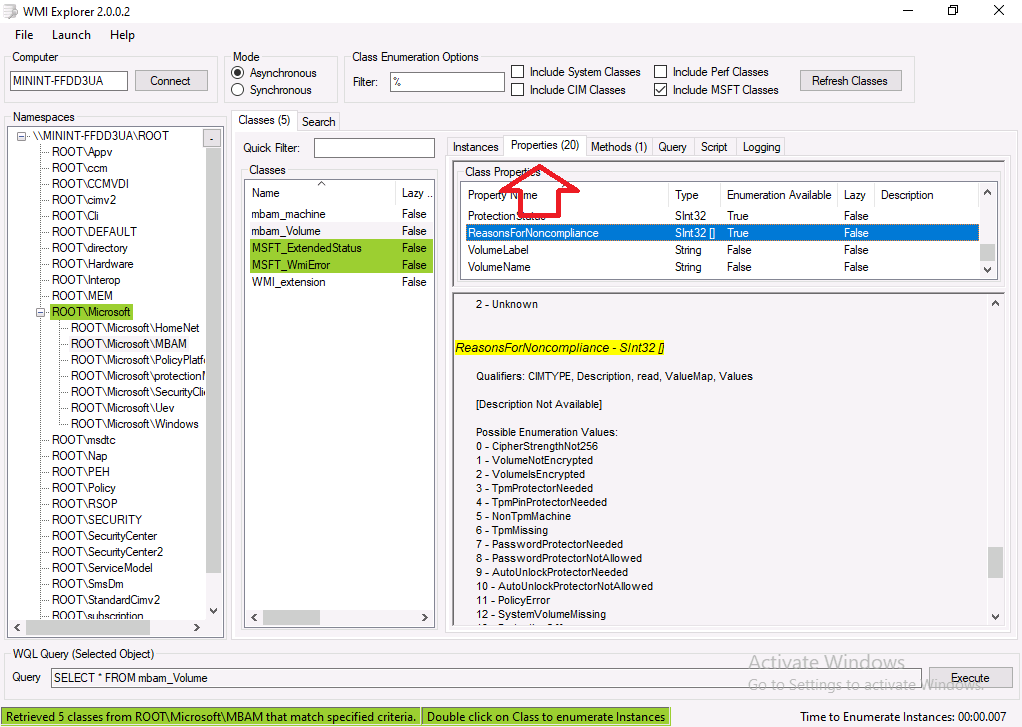
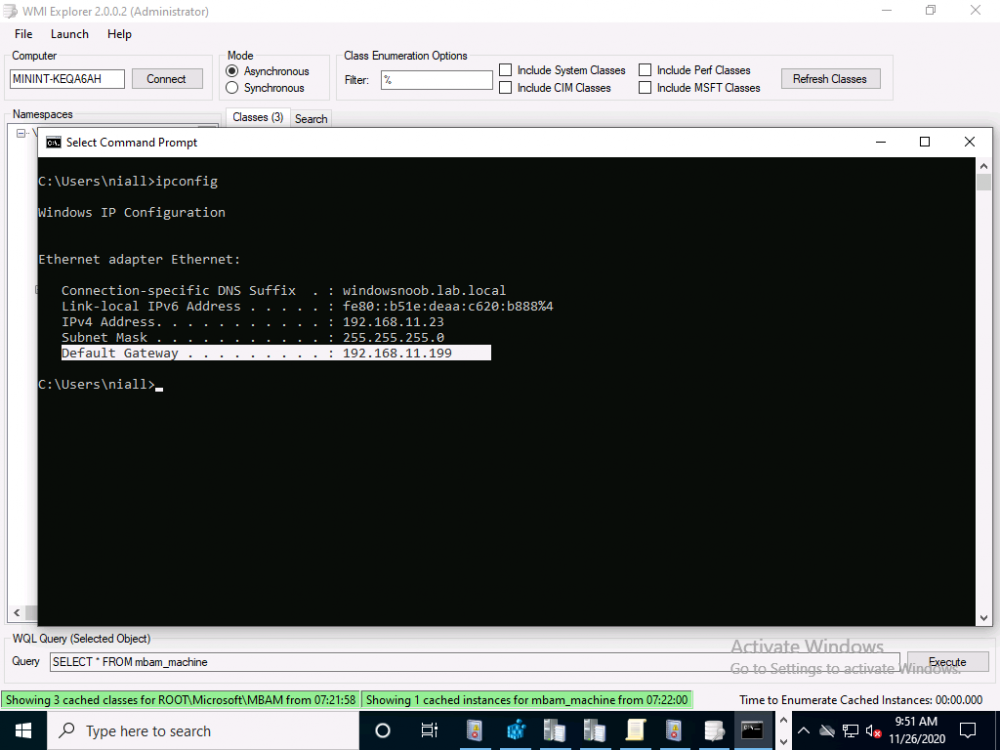
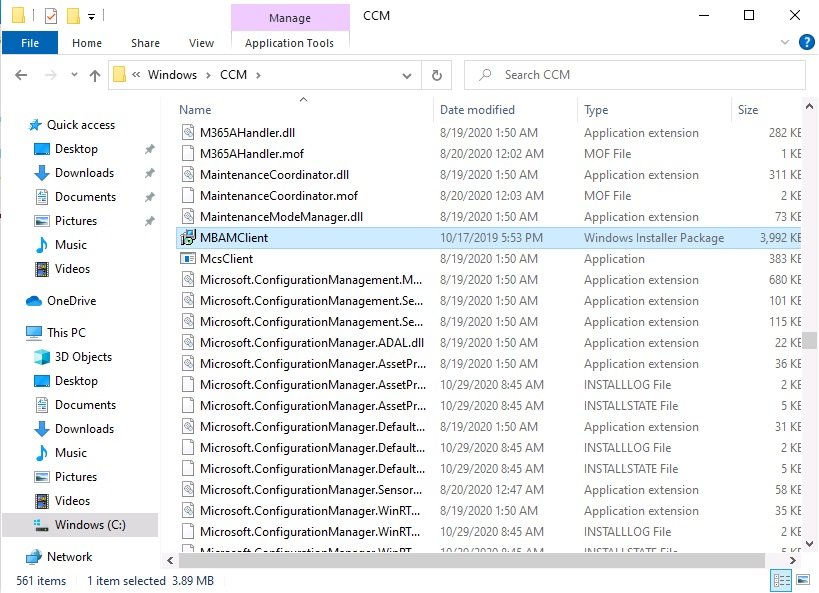
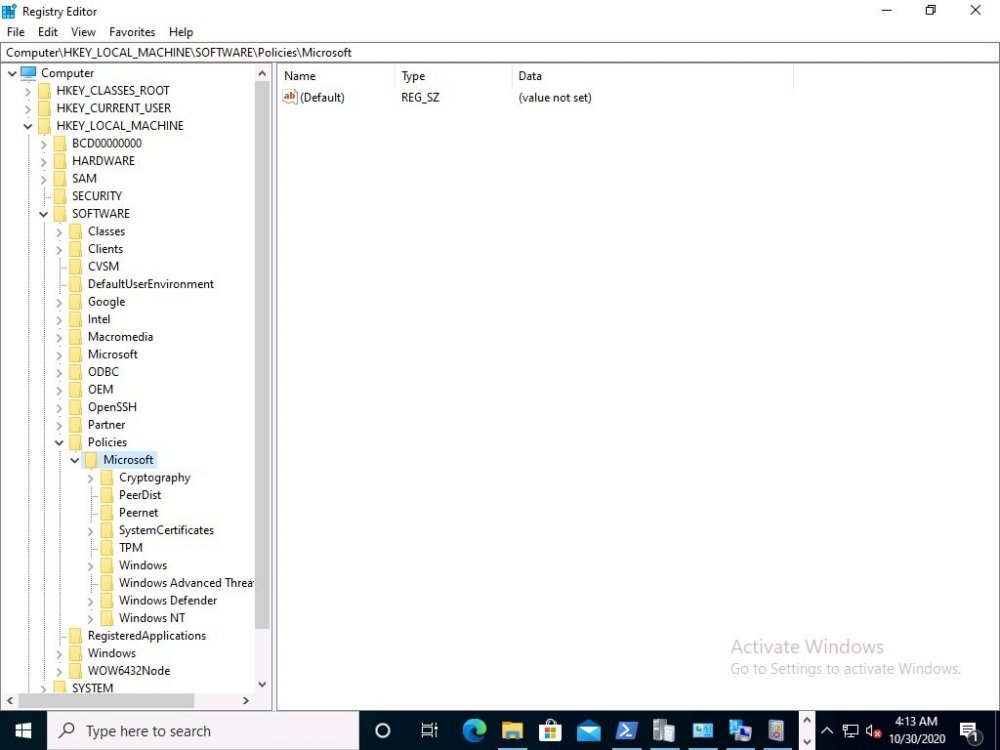
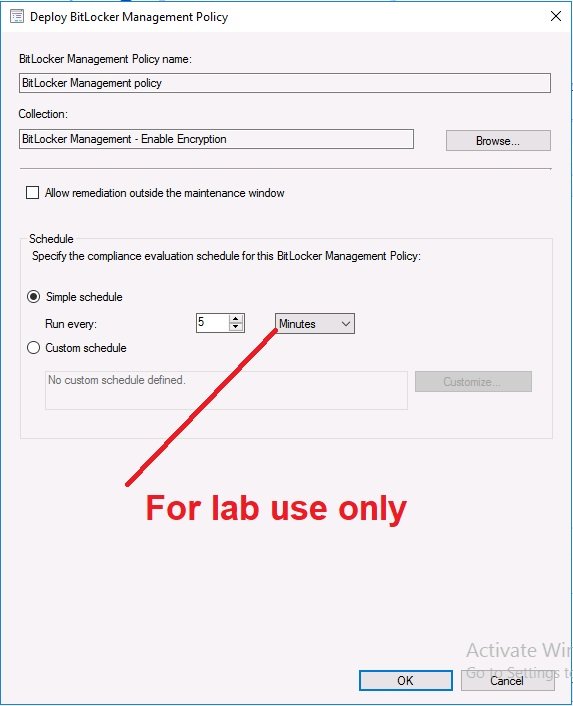
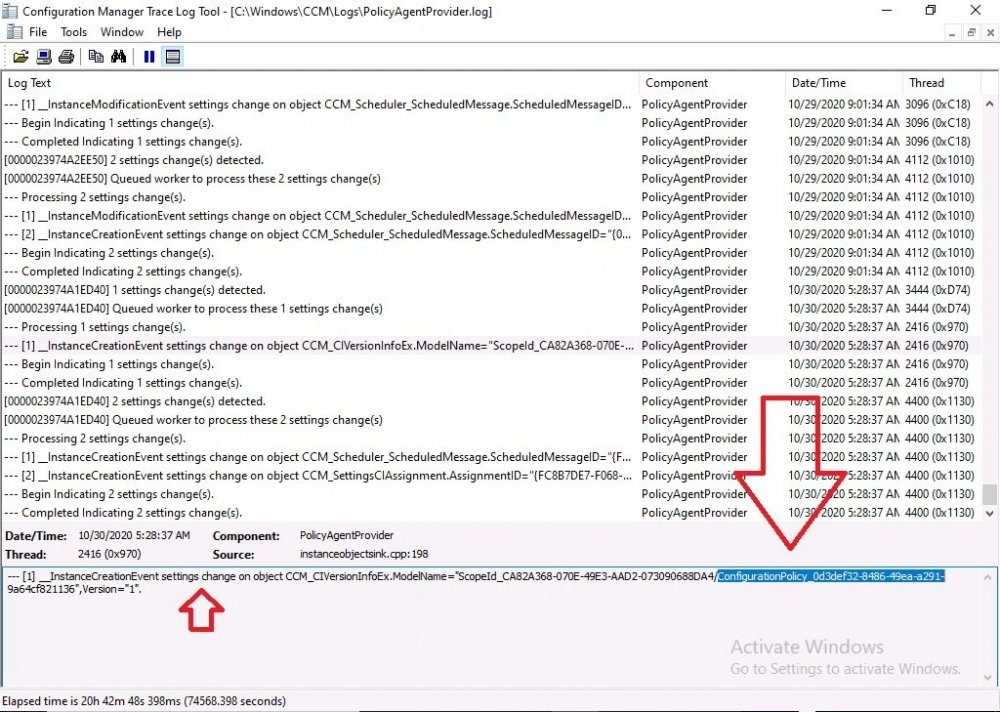
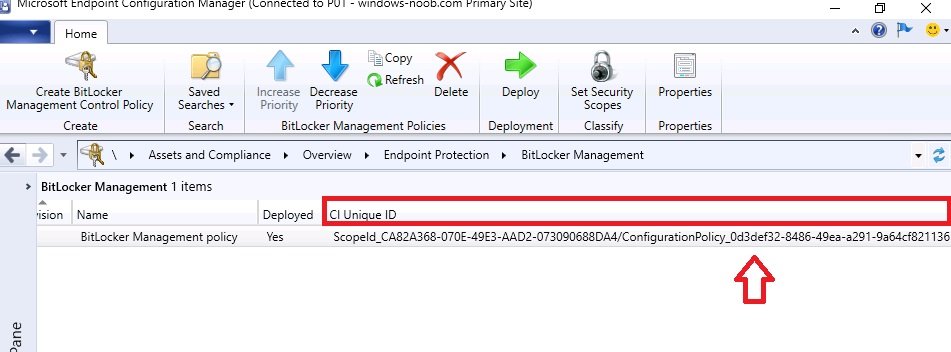
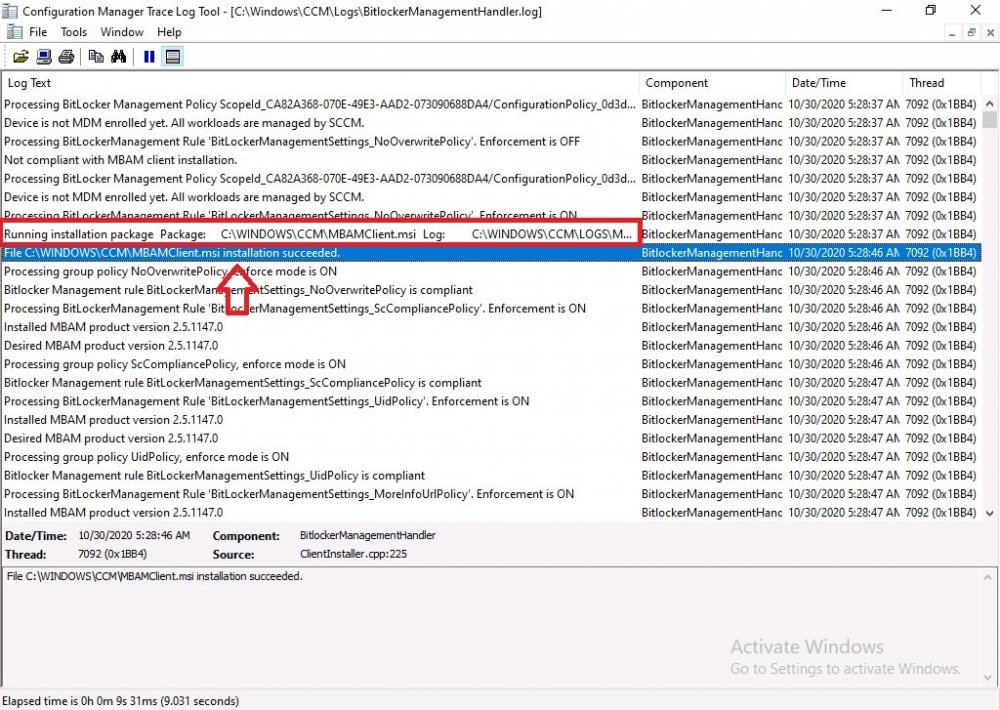
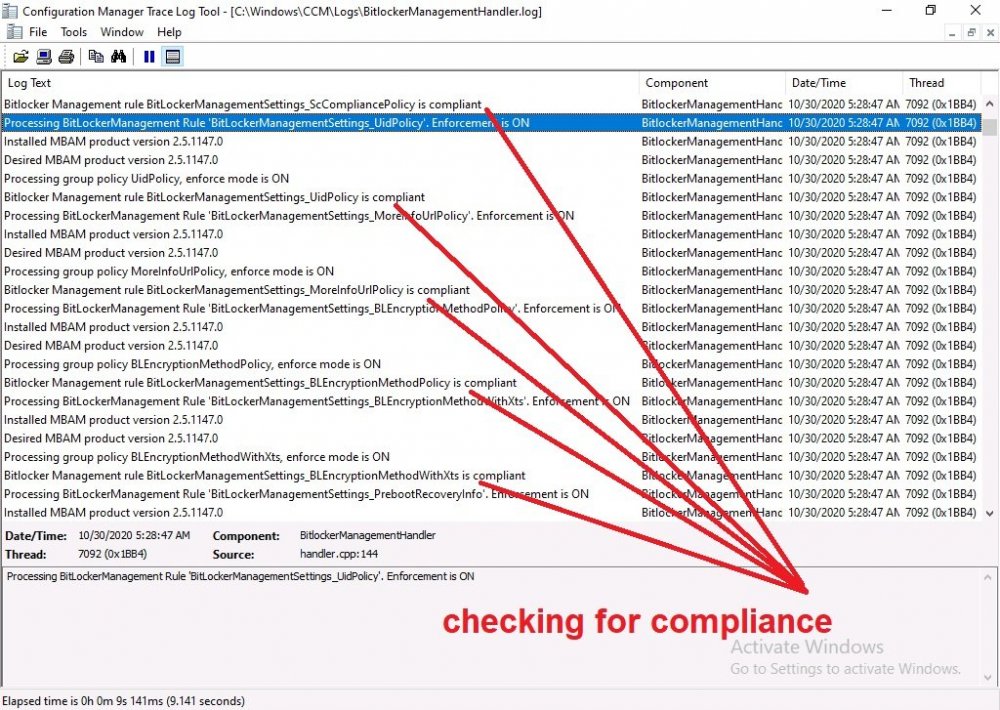
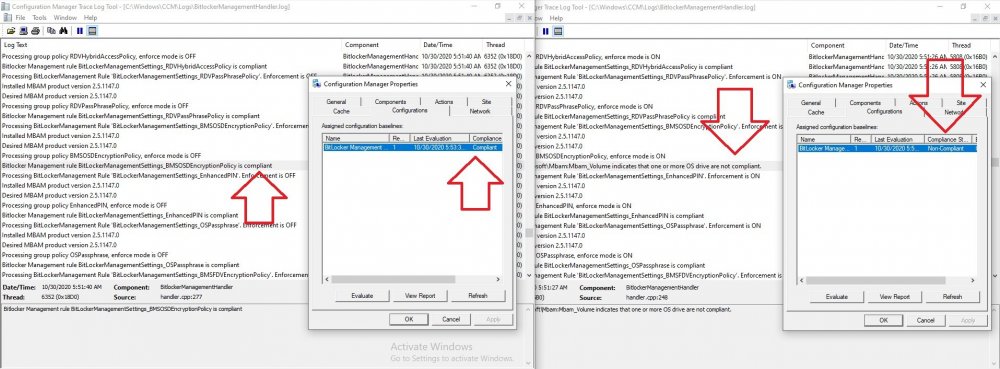
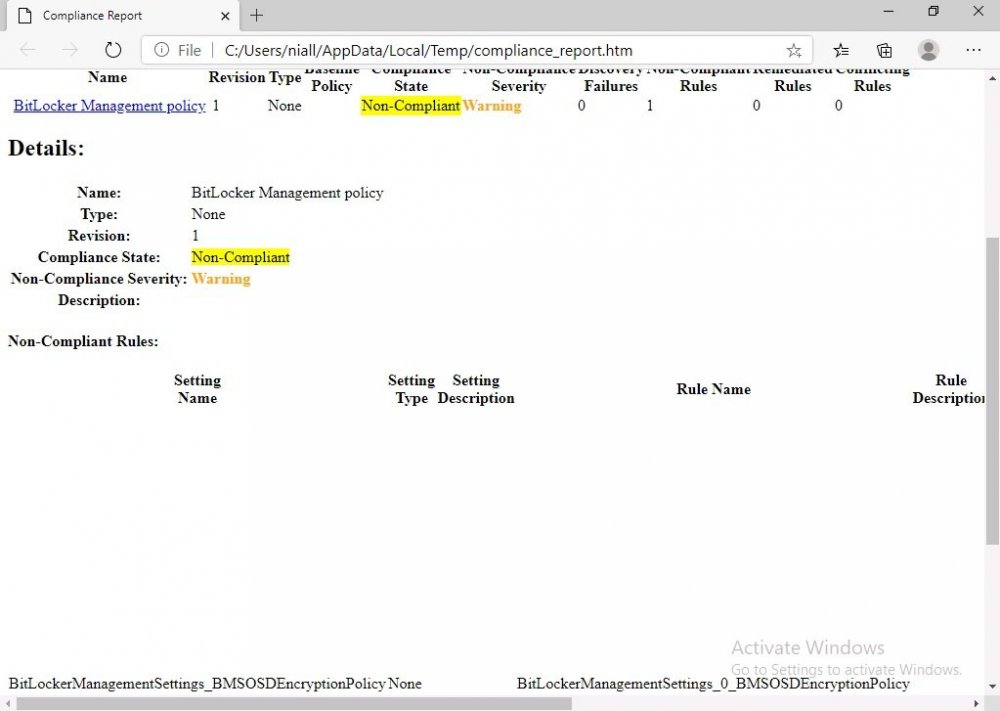
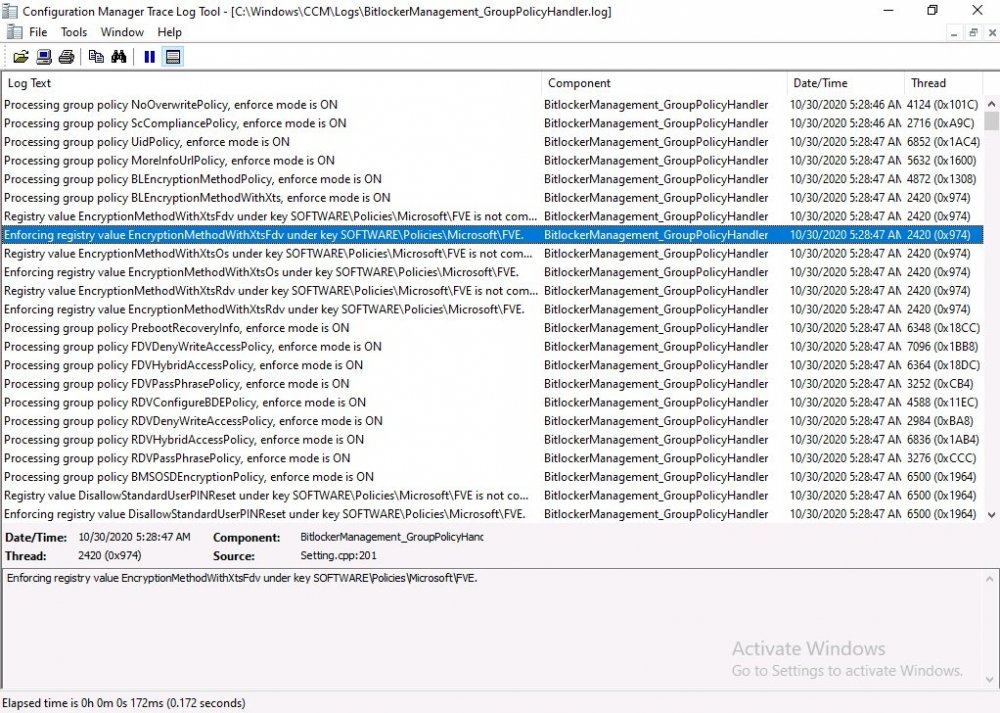
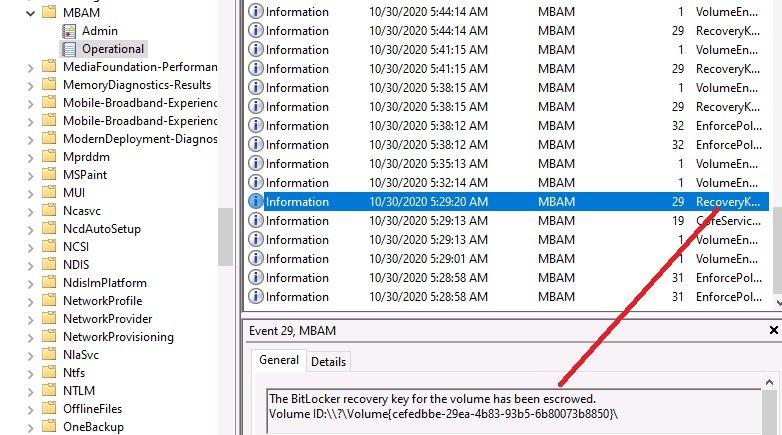
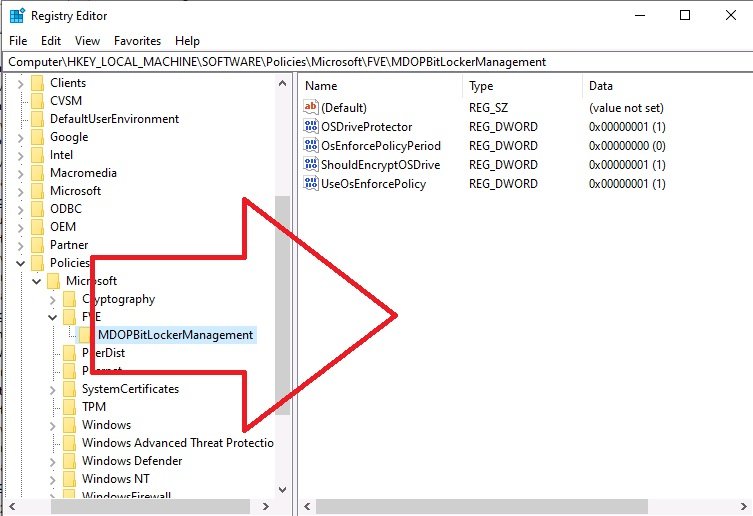
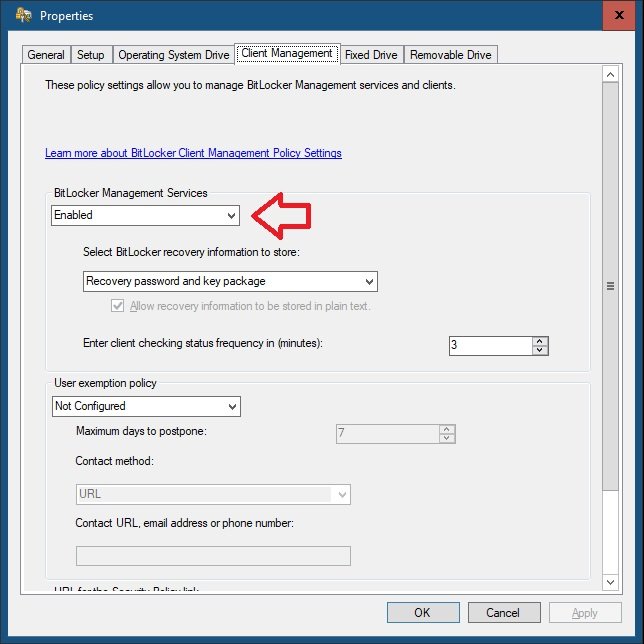
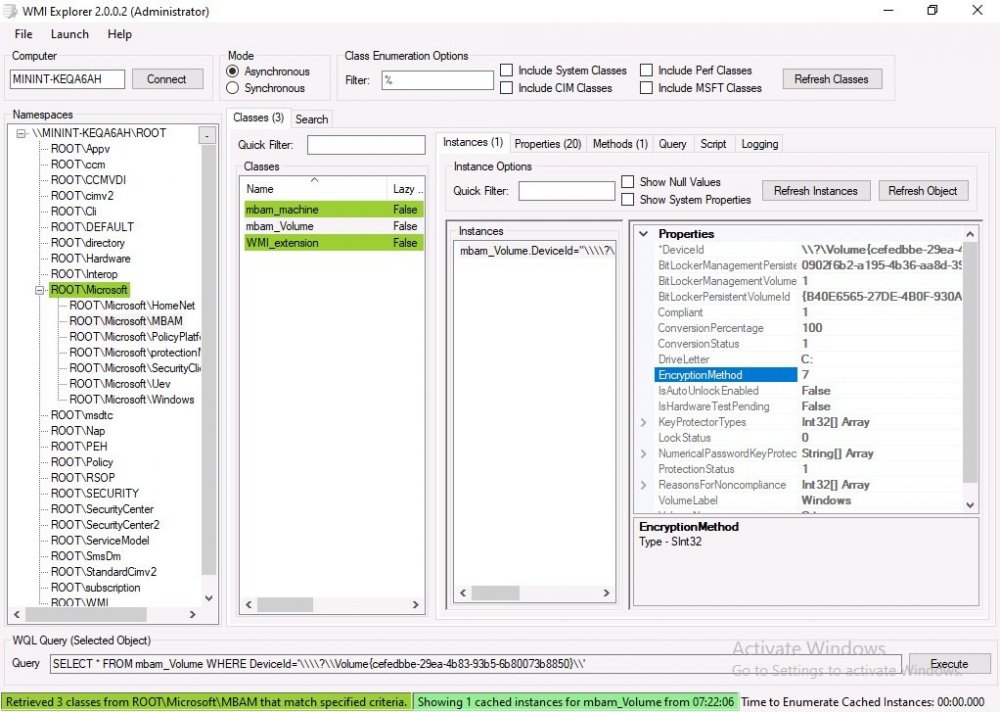
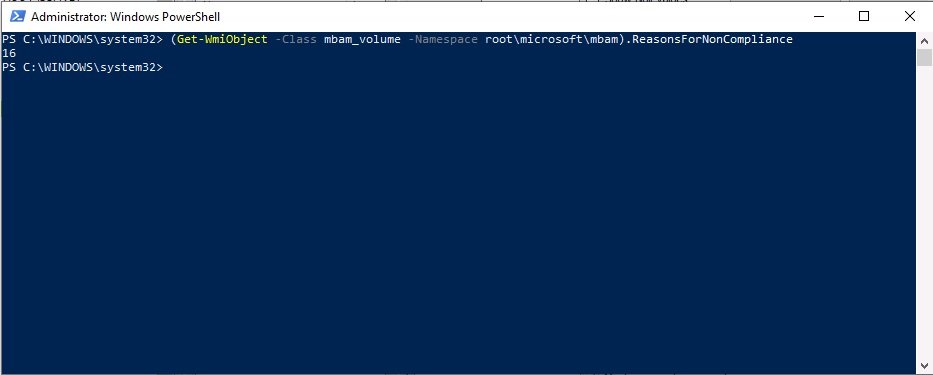
Introduction Microsoft blogged about Bitlocker Management capabilities back in May, 2019. They detailed how that would impact and evolve on the following three platforms. Cloud-based BitLocker management using Microsoft Intune On-premises BitLocker management using System Center Configuration Manager Microsoft BitLocker Administration and Monitoring (MBAM) And recently they've posted an updated blog post here where they go into detail about how BitLocker Management in Microsoft Endpoint Manager has evolved (both in Intune and ConfigMgr). This purpose of this mini series is to help you troubleshoot problems related to the installation, configuration and usage of the new BitLocker Management capabilities in ConfigMgr and will be broken down into the following 3 parts. Troubleshooting BitLocker Management in ConfigMgr - Part 1. Server side Troubleshooting BitLocker Management in ConfigMgr - Part 2. Client side (this part) Troubleshooting BitLocker Management in ConfigMgr - Part 3. Common issues In the previous part we created a BitLocker Management policy, but we did not deploy it. This was enough to start the flow of how things work on the server side. But let's focus on the client side for now and in this blog post we will look at a Windows 10 20H2 client. As Windows 10 20H2 is a newly released operating system, we need to use ConfigMgr 2006 to remain supported. Let's take a look at some client computers both before and after they receive BitLocker Management policy from ConfigMgr. Before BitLocker Management policy Before a client receives BitLocker Management policy, it can be in one of 2 states with regards to encryption, namely fully encrypted or fully decrypted. If the computer has not been targeted with BitLocker policy and is for whatever reason decrypted, then the hard disc drives data will be readable at rest (not protected). I've prepared 2 virtual machines running Windows 10 20H2 and neither virtual machine has received our previously configured BitLocker Management policy yet, however one vm is encrypted using a different encryption algorithm than the one we created in the previous blog post, this is so that we can see what occurs when it receives that policy. Both are running Windows 10 version 20H2 with the ConfigMgr client agent version 5.00.9012.1020. Note: I manually encrypted one of the two virtual machines with XTS-AES 128 using the following: cmd /c reg.exe add HKLM\SOFTWARE\Policies\Microsoft\FVE /v EncryptionMethod /t REG_DWORD /d 6 /f & manage-bde -on c: Opening Windows File Explorer on both vm's show's that clearly the vm on the right is encrypted, while the vm on the left is not. Using manage-bde -status reveals details about the encryption (or decryption) on both vm's. Neither VM contains BitLocker Management policy based logs in C:\Windows\CCM\Logs and we can see that there is no BitLocker Management related policy shown in the ConfigMgr client agent on either of the two virtual machines A quick check of programs installed, reveals that the MDOP MBAM client Agent is not installed on either Virtual Machine. This agent is responsible for interpreting the BitLocker Mangement policy settings and acting accordingly. This MDOP MBAM client agent installation file (MSI) is present in the ConfigMgr client agent files path (C:\Windows\CCM\MBAMCLIENT.MSI) even when the no BitLocker Management policy is deployed to the client. There will be no MBAM related events (or folders) in the Event Viewer at the following path Applications and services logs\Microsoft\Windows\ And there will be no FVE\MDOPBitLockerManagement registry entries in Computer\HKEY_LOCAL_MACHINE\SOFTWARE\Policies\Microsoft After BitLocker Management policy So now that we've seen what client computers look like when not targeted with BitLocker Management policy, let's go ahead and deploy policy the previously created policy to them. And once done, we can see things happening on the two clients. The first indication that there's a change comes from the PolicyAgentProvider.log on the client, where it see's the new policy and refers to it via it's ScopeID. You can confirm that this is indeed the policy by enabling the CI_Unique_ID column in the Configuration Manager console for your respective BitLocker Management policy. very shortly after the client receives and interprets the policy, the following two logs are created on the client in the following order. BitlockerManagementHandler.log BitlockerManagement_GroupPolicyHandler.log The BitlockerManagementHandler.log records details about BitLocker management policies, the installation of the MBAMClient.msi (MDOP MBAM client agent) and whether the configured policy is compliant or not. Below you can see the BitlockerManagementHandler.log showing the installation of the MBAMClient.msi. Below you can see the BitlockerManagementHandler.log showing that it's checking for compliance and after the MDOP MBAM agent is done enforcing policy the computer will be marked Compliant or Non-Compliant. On this vm everything was compliant so the configuration baseline was marked as compliant. If you remember in the start of this blog post we had two virtual machines, one had no encryption configured (vm1) while the second had XTS-AES 128 configured, and that does NOT match our BitLocker Management policy of XTS-AES 256 therefore it is marked as non compliant even though it is encrypted. You can also look at the built in report for the Configuration Baseline by clicking on View report to see why it's not compliant, it's not that clear but if you see at the bottom of this report it's referring to the BMSOSDEncryptionPolicy and that's because the algorithm is different to the policy. After checking for compliance the log reports on whether or not it can reach the BitLocker Management recovery service. Below you can see a successful connection to the recovery service. The BitlockerManagement_GroupPolicyHandler.log records information about the presence of Local Group Policy settings which are written to the registry and if appropriate, enforces them. Below you can see the registry settings are now populated. if it looks like there are several registry keys missing (such as in the example below) then double-check that you've configured and enabled the BitLocker Management Settings in the Client Management setting of the configured BitLocker Management policy Once the registry keys are populated correctly, they'll be reflected in Local Group Policy settings on the clients. Lastly, the MDOP MBAM agent logs the success or failure of it's actions to the event viewer and includes information about whether or not it can reach the Recovery Service as you can see in the example below: and it will also log the escrowing of recovery keys. Reviewing Policy using WMI Explorer You can also use WMI Explorer 2.0 to take a closer look at policy on the client computers, browse to ROOT\Microsoft\MBAM as shown here (ran as Local Administrator). and below you can see the two virtual machines side by side showing compliant versus non-compliant in WMI Explorer Using PowerShell to determine non-compliance You can use Powershell to determine non compliance, for example: (Get-WMIObject -Class mbam_Volume -NameSpace root\microsoft\mbam).ReasonsForNonCompliance and the results returned (16) match what was seen in WMI Explorer on the already encrypted client. To get a list of these Reasons For Non Compliance see here https://docs.microsoft.com/en-us/microsoft-desktop-optimization-pack/mbam-v25/determining-why-a-device-receives-a-noncompliance-message 0 Cipher strength not AES 256. 1 MBAM Policy requires this volume to be encrypted but it is not. 2 MBAM Policy requires this volume to NOT be encrypted, but it is. 3 MBAM Policy requires this volume use a TPM protector, but it does not. 4 MBAM Policy requires this volume use a TPM+PIN protector, but it does not. 5 MBAM Policy does not allow non TPM machines to report as compliant. 6 Volume has a TPM protector but the TPM is not visible (booted with recover key after disabling TPM in BIOS?). 7 MBAM Policy requires this volume use a password protector, but it does not have one. 8 MBAM Policy requires this volume NOT use a password protector, but it has one. 9 MBAM Policy requires this volume use an auto-unlock protector, but it does not have one. 10 MBAM Policy requires this volume NOT use an auto-unlock protector, but it has one. 11 Policy conflict detected preventing MBAM from reporting this volume as compliant. 12 A system volume is needed to encrypt the OS volume but it is not present. 13 Protection is suspended for the volume. 14 AutoUnlock unsafe unless the OS volume is encrypted. 15 Policy requires minimum cypher strength is XTS-AES-128 bit, actual cypher strength is weaker than that. 16 Policy requires minimum cypher strength is XTS-AES-256 bit, actual cypher strength is weaker than that. or simply click on the Properties tab in WMI Explorer, and look what it reveals for that Property. Recommended reading https://docs.microsoft.com/en-us/mem/configmgr/protect/deploy-use/bitlocker/deploy-management-agent https://docs.microsoft.com/en-us/mem/configmgr/protect/tech-ref/bitlocker/about-event-logs Well that's it for this part, join me in the next part where we'll look at some common problems seen in BitLocker Management and how to resolve them. cheers niall.


-
well it can't access the vcredist_x86.exe file so have you distributed the package P0100028 to your distribution points ? and have you defined boundaries ? and a network access account ?