anyweb
-
Posts
9277 -
Joined
-
Last visited
-
Days Won
371
Everything posted by anyweb
-
on the client, can you do an nslookup ?
-
ok cool now what forum did you attempt to post this question in ? please try this one
-
we need to take your problems one at a time, so are you saying that your AD is or is NOT extended for SCCM ?
-
it shouldn't, where are you trying to post a topic ?
-
if you extended it you would know here's how http://www.windows-noob.com/forums/index.php?showtopic=488 cheers
-

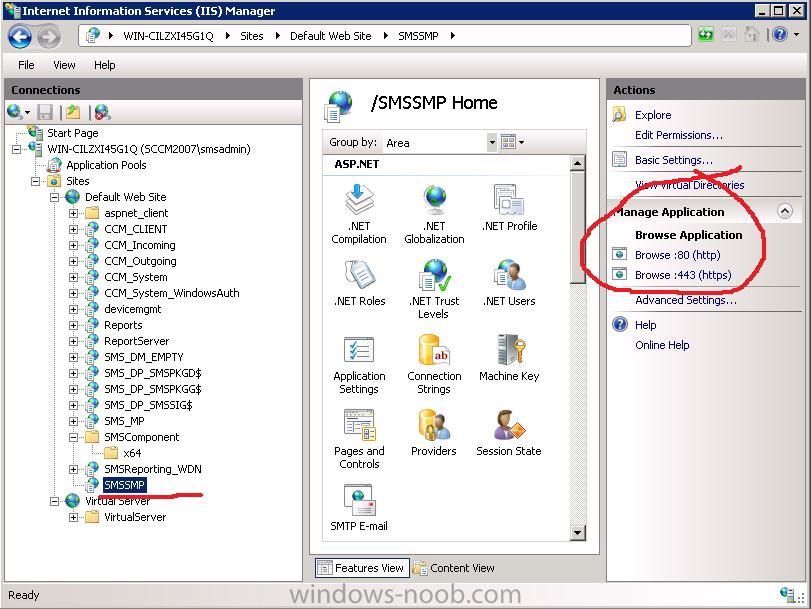
State Migration Point not working
anyweb replied to carlux's question in Troubleshooting, Tools, Hints and Tips
well on my lab server it looks like this (SMSSMP)
-
State Migration Point not working
anyweb replied to carlux's question in Troubleshooting, Tools, Hints and Tips
IIS is a requirement for SMP, so check the server the the SMP is installed on and verify what port(s) IIS is configured to listen on cheers anyweb -
please read this post and see does it apply to you......... http://www.windows-noob.com/forums/index.p...post&p=1370
-
Despite the generally positive reception of Windows 7 so far, there will still be many people who will want to stick to Windows XP. For these people, downgrade rights are particularly important, and Microsoft has confirmed the rules of the game to El Reg. via http://www.osnews.com/story/21698/Microsof...owngrade_Rights
-
try setting SMSSITECODE=AUTO
-
you need to add the Windows Vista network drivers for your computer to the BOOT.WIM file that you created in this post you can use imageX to do that
-
yes thats right, you don't HAVE to do anything with WDS other than install it, however you CAN configure it if you wish but, for OSD you MUST install WDS otherwise it just wont work, configured or not. cheers anyweb
-
State Migration Point not working
anyweb replied to carlux's question in Troubleshooting, Tools, Hints and Tips
is the port 80 listed in the log the correct one that iis is listening on ? have you tried uninstalling the SMP and reinstalling it ? some info from Technet on USMT SMP http://technet.microsoft.com/en-us/library/bb693655.aspx -
"Microsoft today officially announced Microsoft Security Essentials, its free, real-time consumer antimalware solution for fighting viruses, spyware, rootkits, and trojans. Currently being tested by Microsoft employees and a select few testers, MSE is Microsoft's latest offering intended to help users fight the threats that plague Windows PCs. Microsoft notes that the threat ecosystem has expanded to include rogue security software, auto-run malware, fake or pirated software and content, as well as banking malware, and the company is aiming to help the users who are not well protected. A beta of MSE will be available in English and Brazilian Portuguese for public download on June 23, 2009 for the first 75,000 users. This is a target number, but Microsoft is willing to increase it if necessary." via > http://www.osnews.com/story/21696/Microsof...ted_Public_Beta
-
thanks ! I've put a lot of work into it, wds is required for OSD and if you want to deploy server 2008 or get any 'cool' features in your task sequences then you'll need the MDT integration my advice to you is to follow the Deploy Vista guide from start to finish, it covers the MDT integration stuff and more, for the roles and features of Server 2008 just follow this guide but bare in mind that it is for a LAB environment where AD and DHCP, WDS are all on the same box, in production you'd want to separate AD and SCCM/WDS/SQL
-
the capture WDS should function just as stated in the guide, have you tried it yet ? what problems did you see ?
-
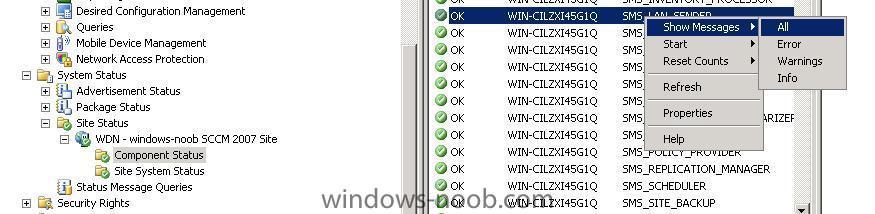
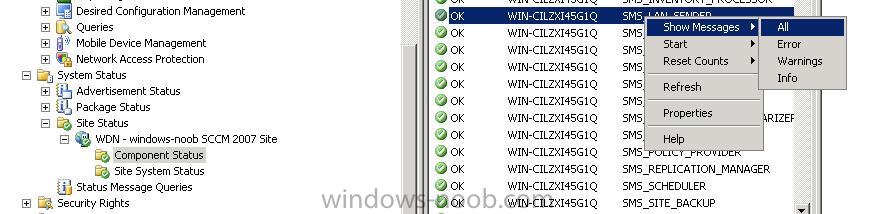
Unknown status for MP Control Manager and Management Point
anyweb replied to Torpedo's question in Troubleshooting, Tools, Hints and Tips
you'll need a client to test delivering packages such as firefox the firefox test in my guide will prove to you that it all works so good luck -
Unknown status for MP Control Manager and Management Point
anyweb replied to Torpedo's question in Troubleshooting, Tools, Hints and Tips
the icons in control panel are on the sccm CLIENTS, what type of clients are you installing on ? -
well then right click on it and choose Install Client, then wait a few minutes and see does ccmsetup.exe start on the client
-
does the pc show up under All Systems Collection as Client=Yes or Client=No ?
-
Unknown status for MP Control Manager and Management Point
anyweb replied to Torpedo's question in Troubleshooting, Tools, Hints and Tips
look in that section of the logs and see do you see a statement which reads something along the lines of 'installed component successfully' if so, then continue with the guide... -
have you correctly set the boundary(s) in configmgr ? if the client cannot discover the sccm server then something is wrong, did you follow the configuration guide from start to finish ?
-
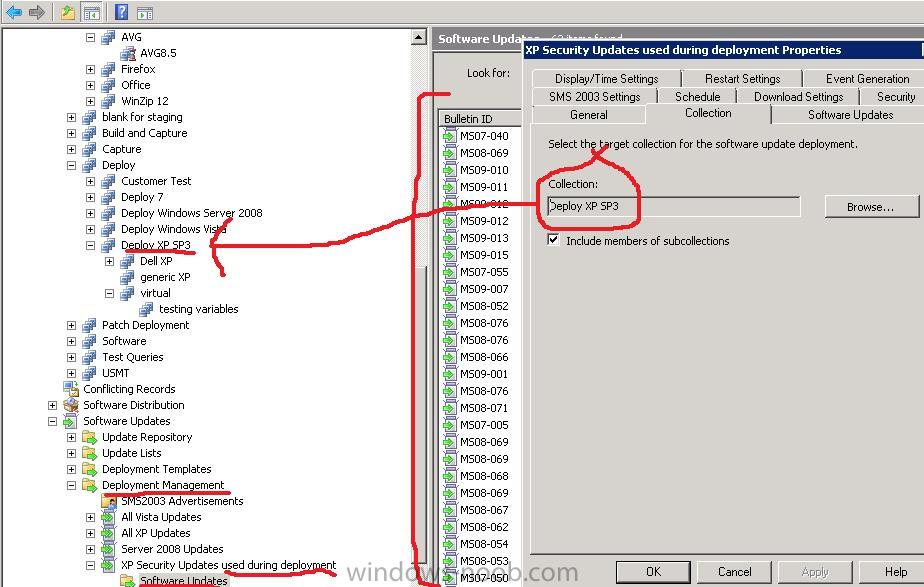
Configuring Software Update Point within SCCM
anyweb replied to anyweb's question in Software Update Point
it's up to you i just update my deployment packages and deployment management tasks and the change the schedule and thats it do it monthly as thats when the patches come out (second tuesday of the month)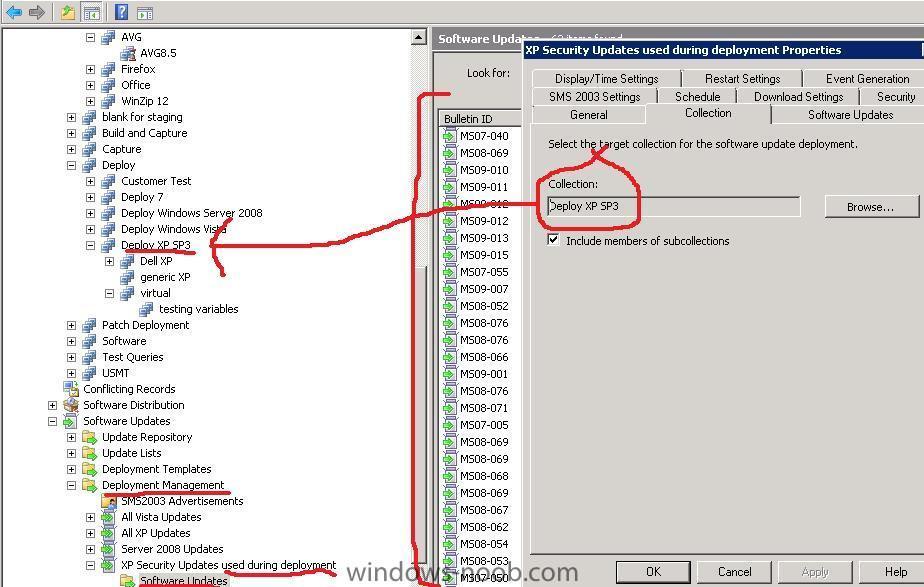
-
Unknown status for MP Control Manager and Management Point
anyweb replied to Torpedo's question in Troubleshooting, Tools, Hints and Tips
thats your problem and it's covered in part 2 of the SCCM setup guide, so you can ignore it for now as long as you follow the entire guide cheers anyweb -
Unknown status for MP Control Manager and Management Point
anyweb replied to Torpedo's question in Troubleshooting, Tools, Hints and Tips
look here