anyweb
-
Posts
9273 -
Joined
-
Last visited
-
Days Won
371
Everything posted by anyweb
-
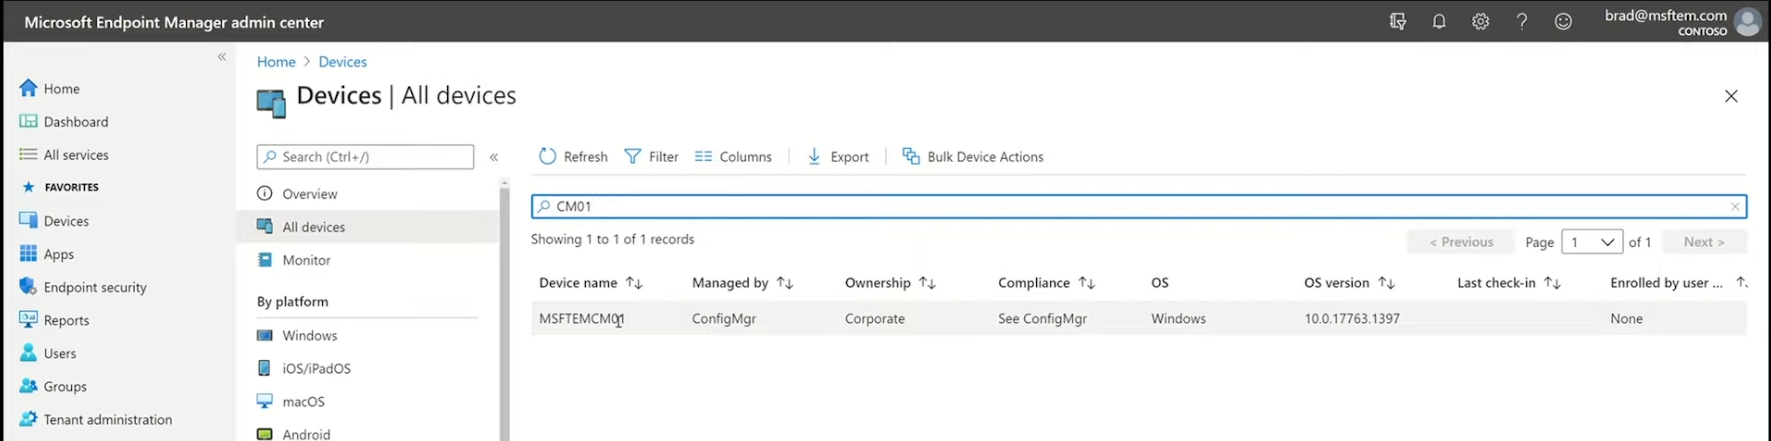
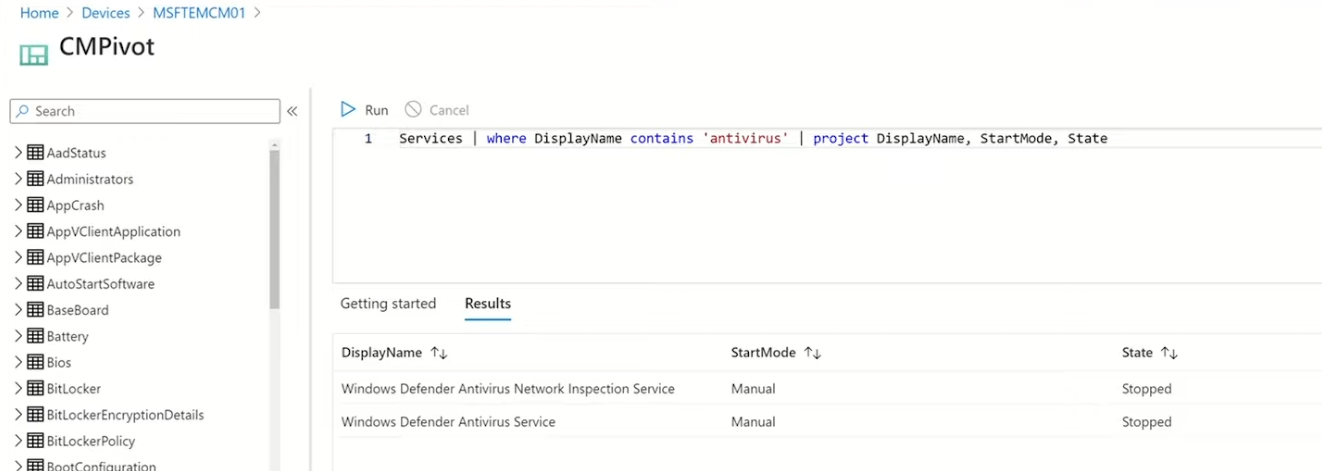
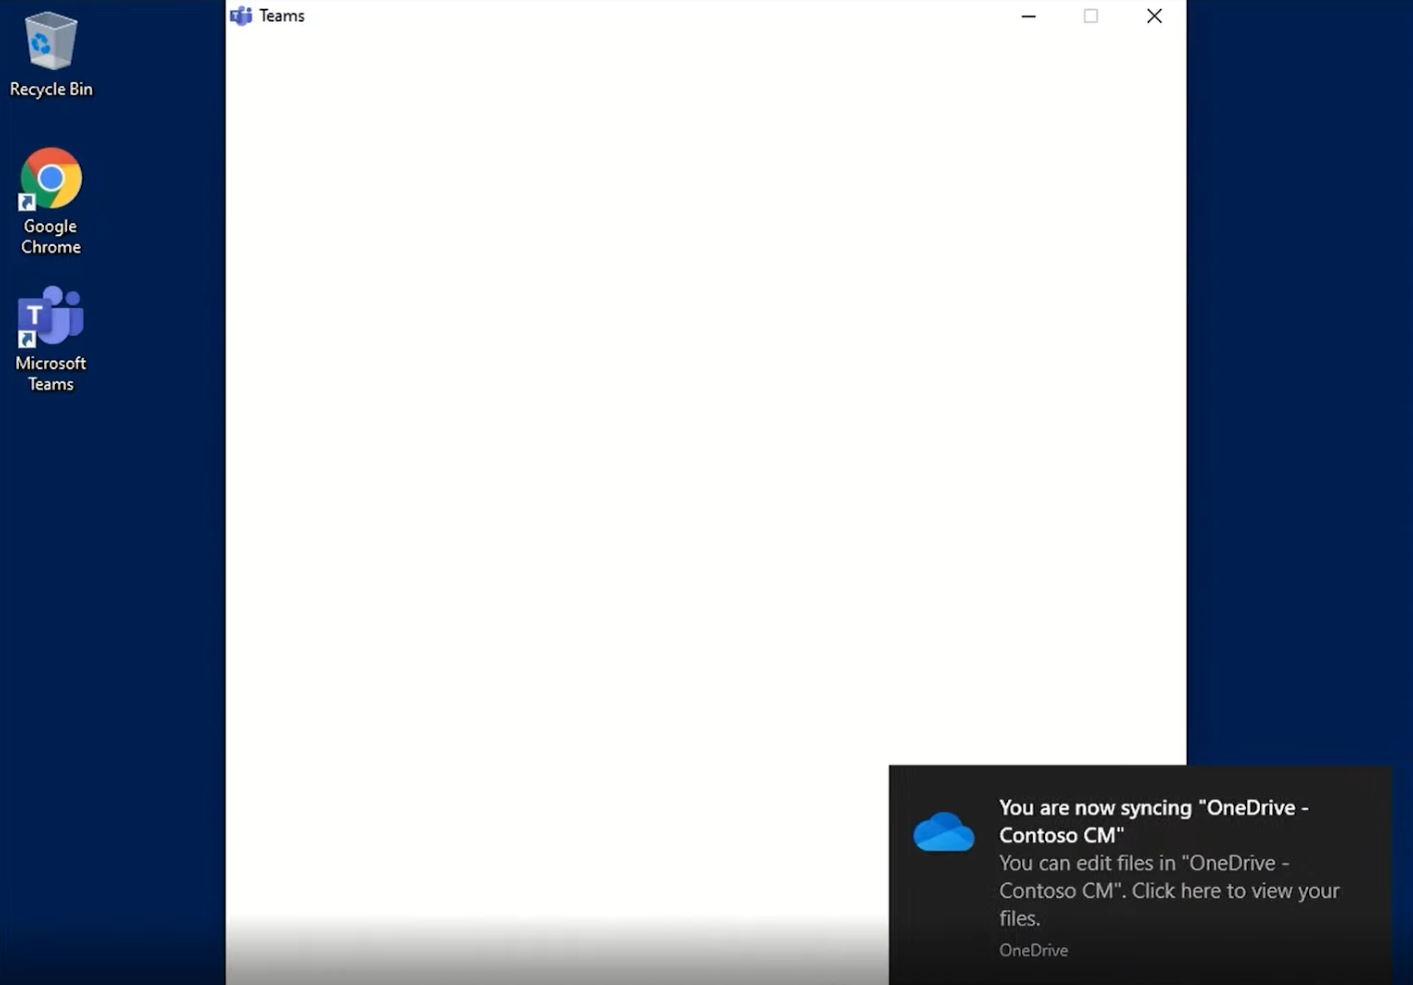
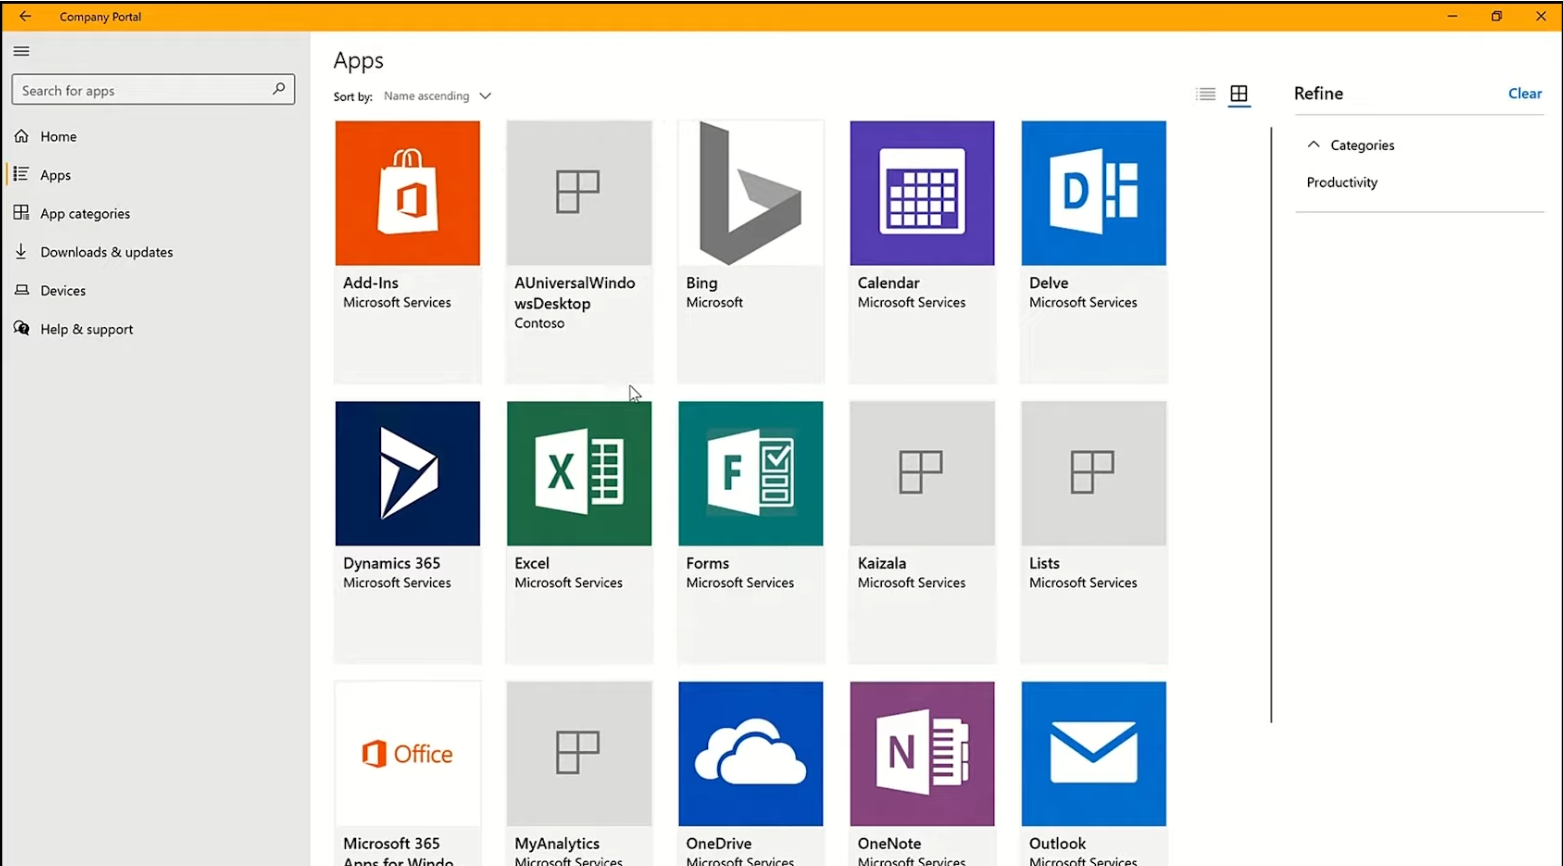
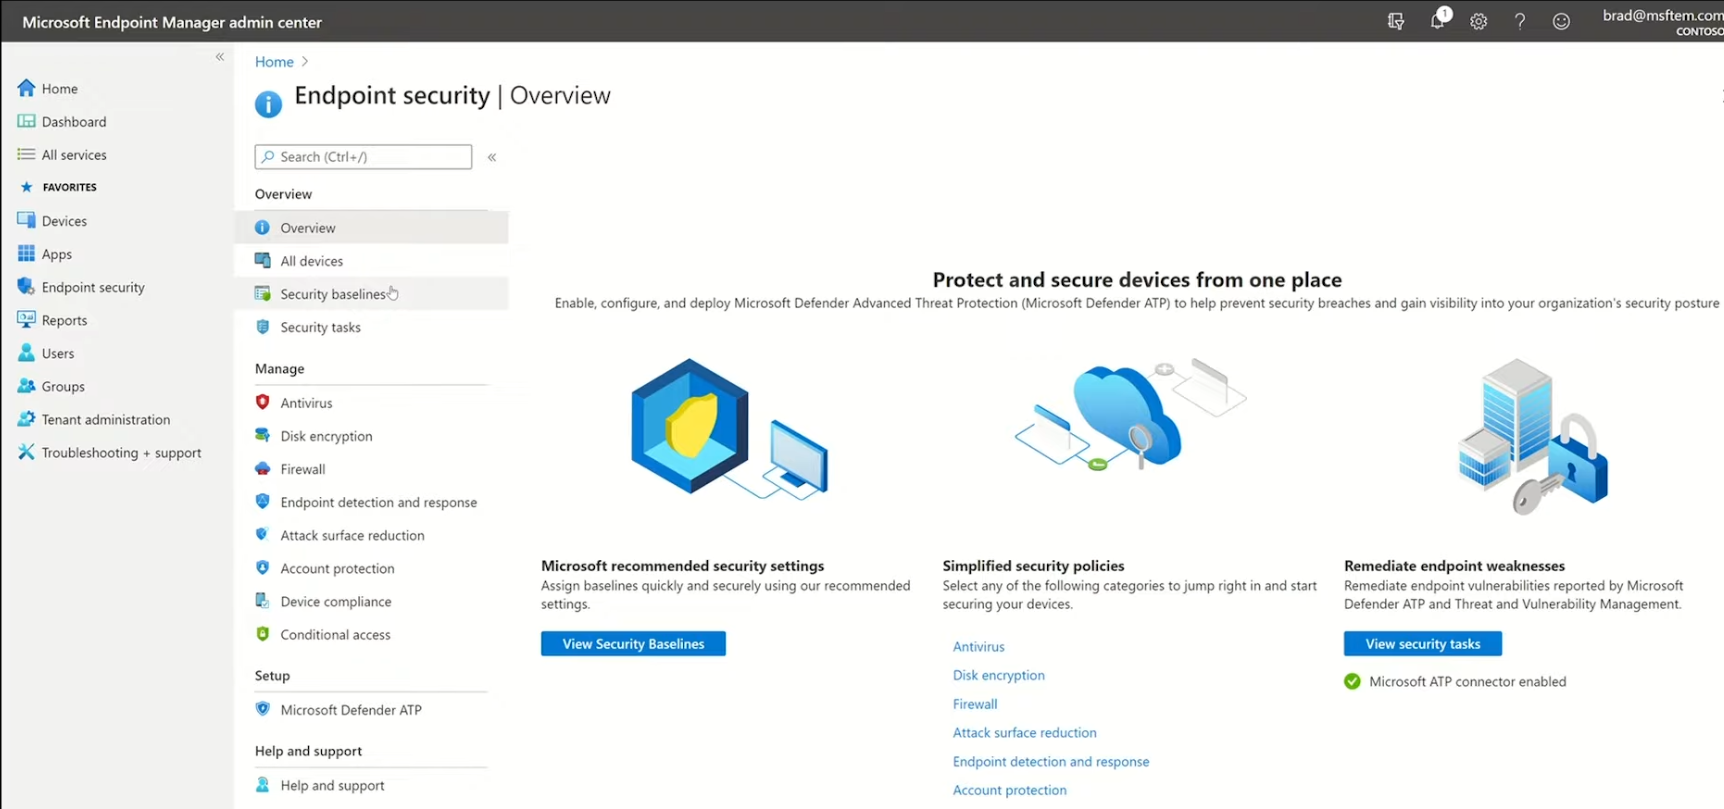
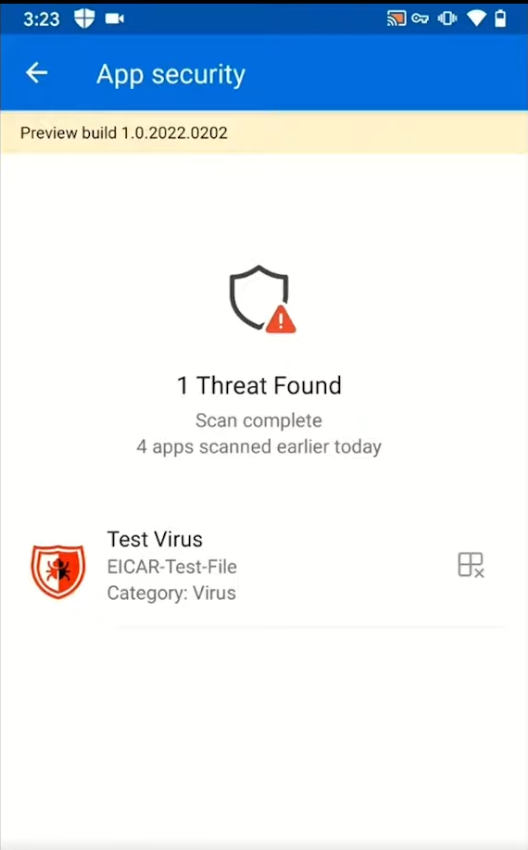
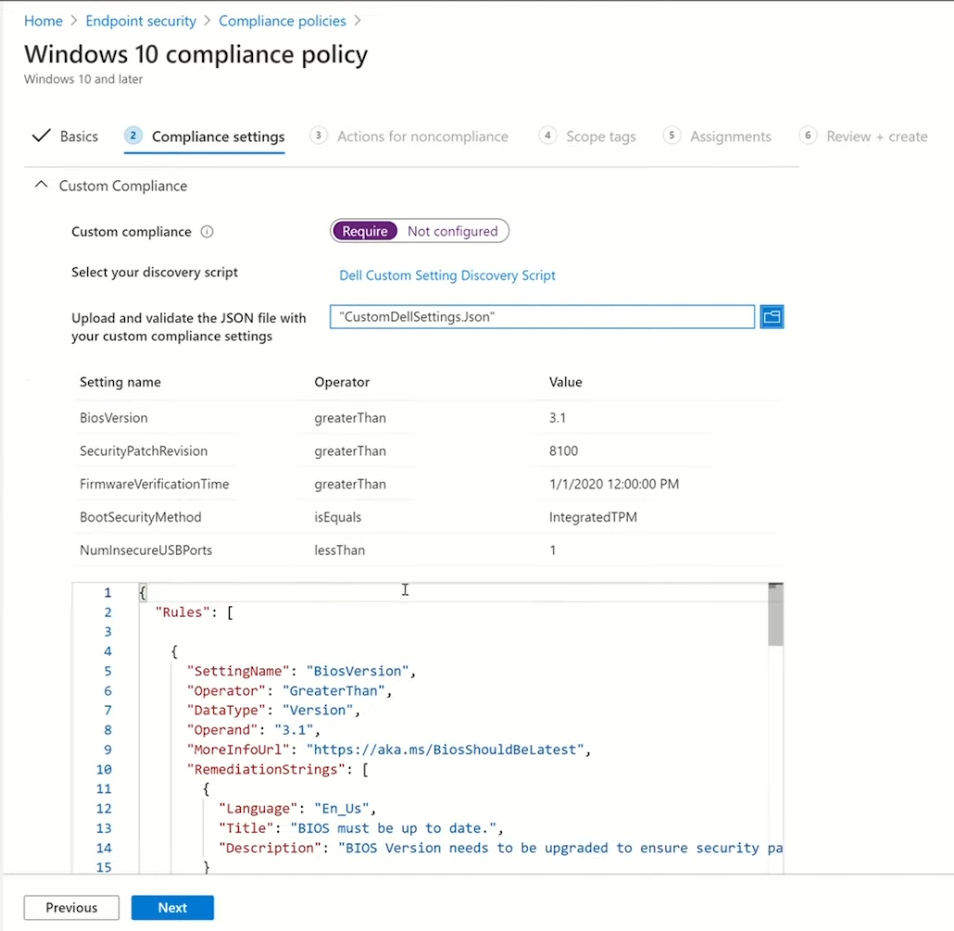
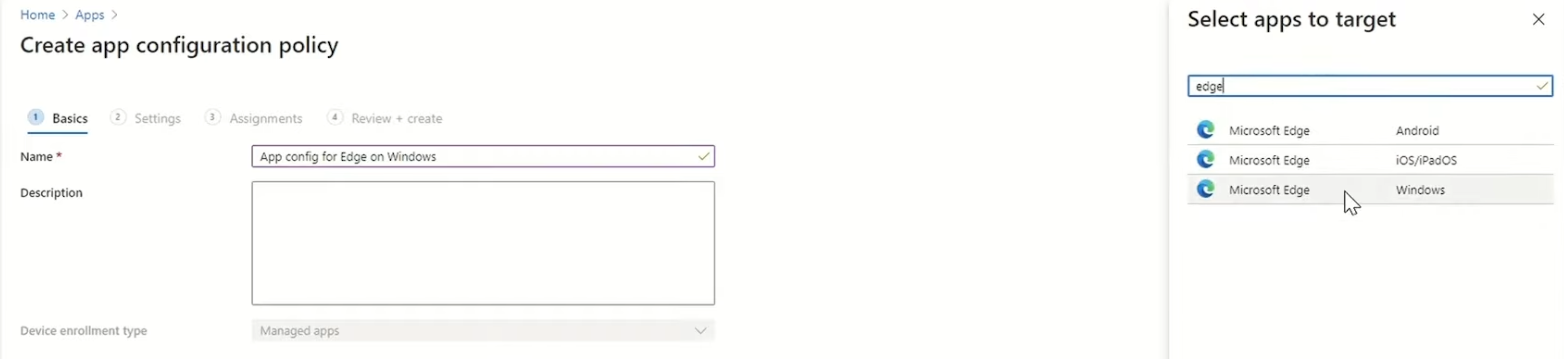
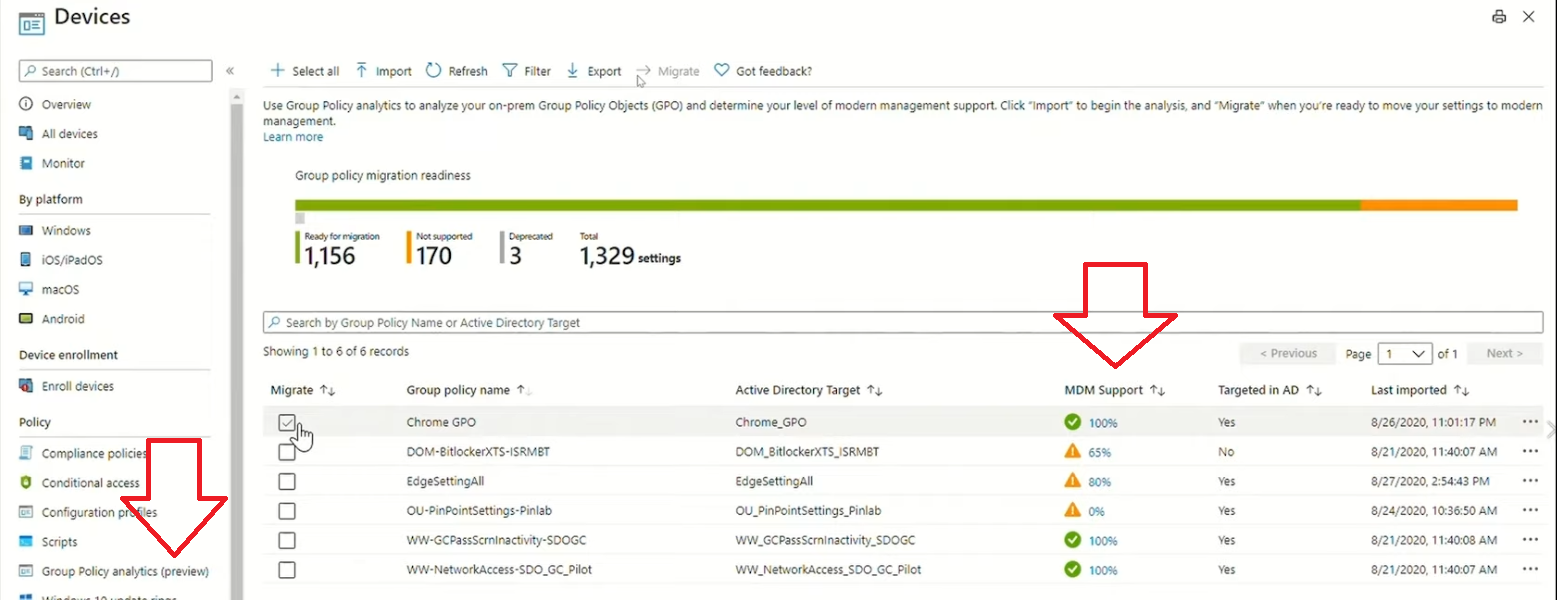
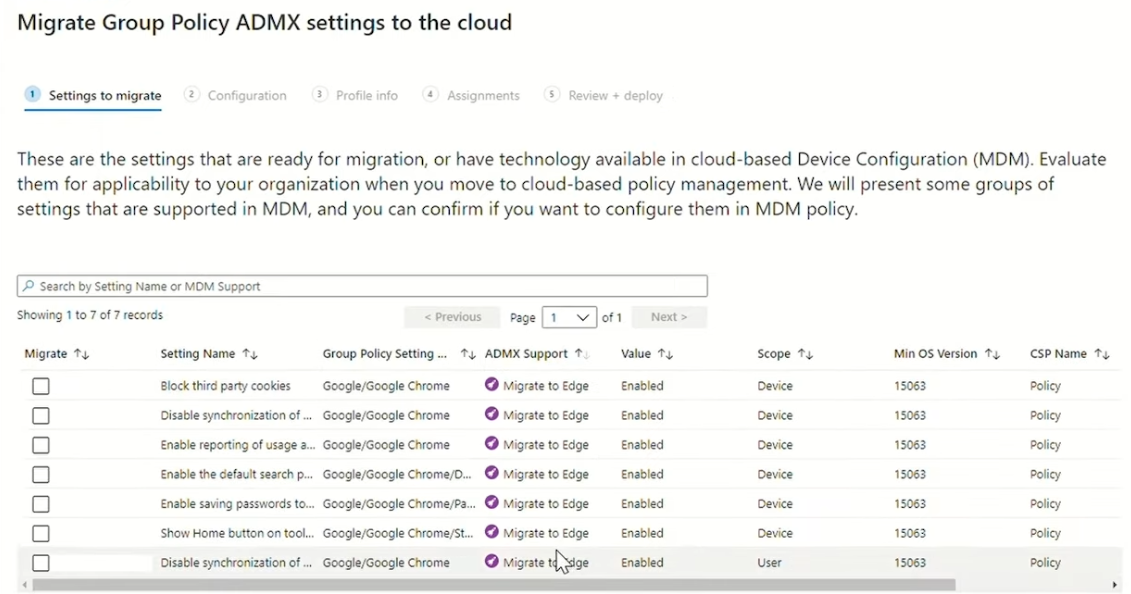
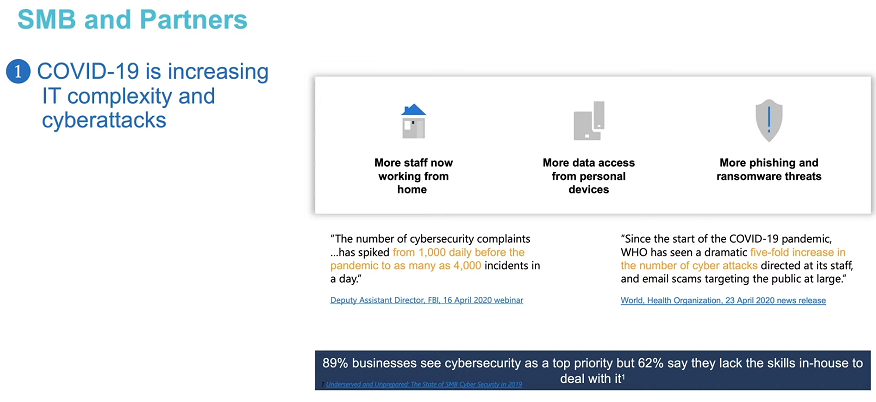
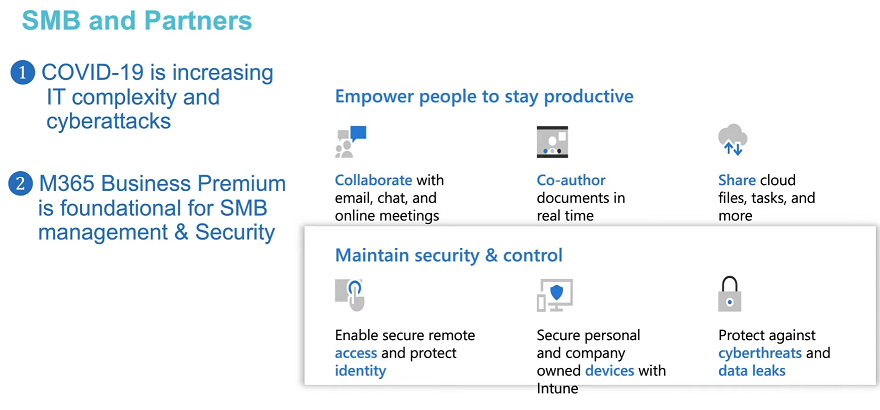
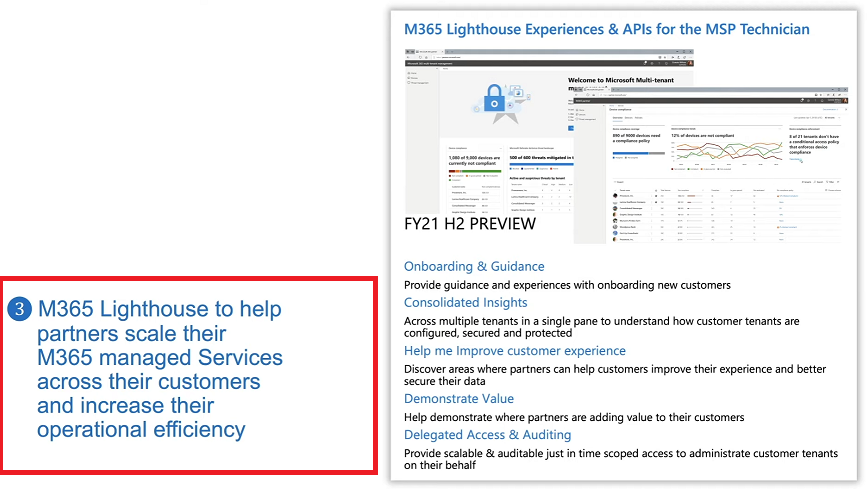
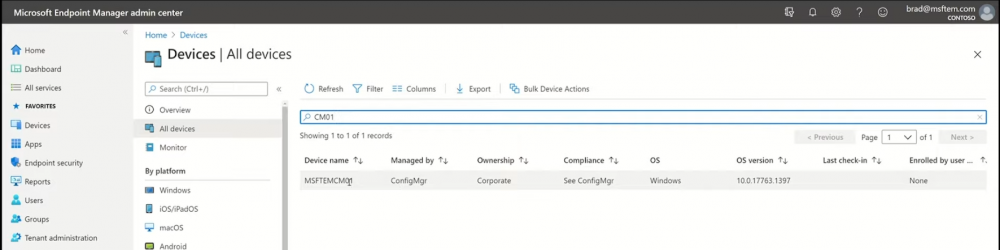
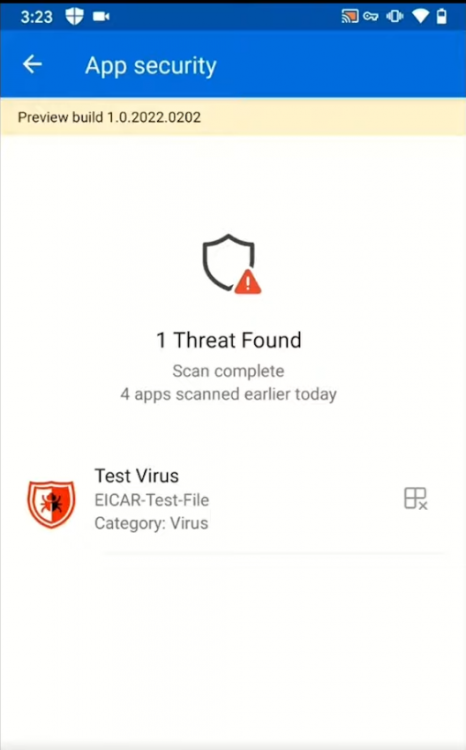
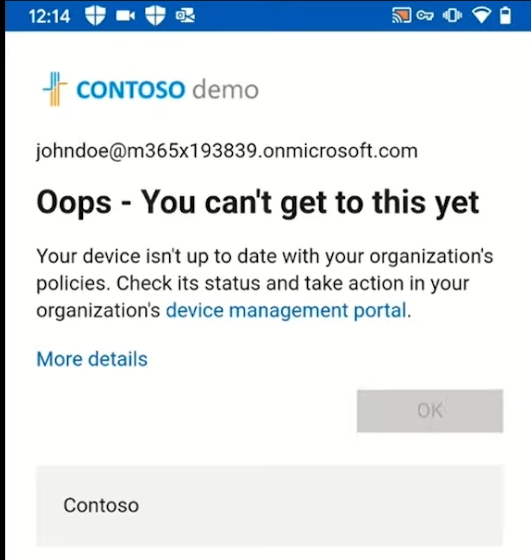
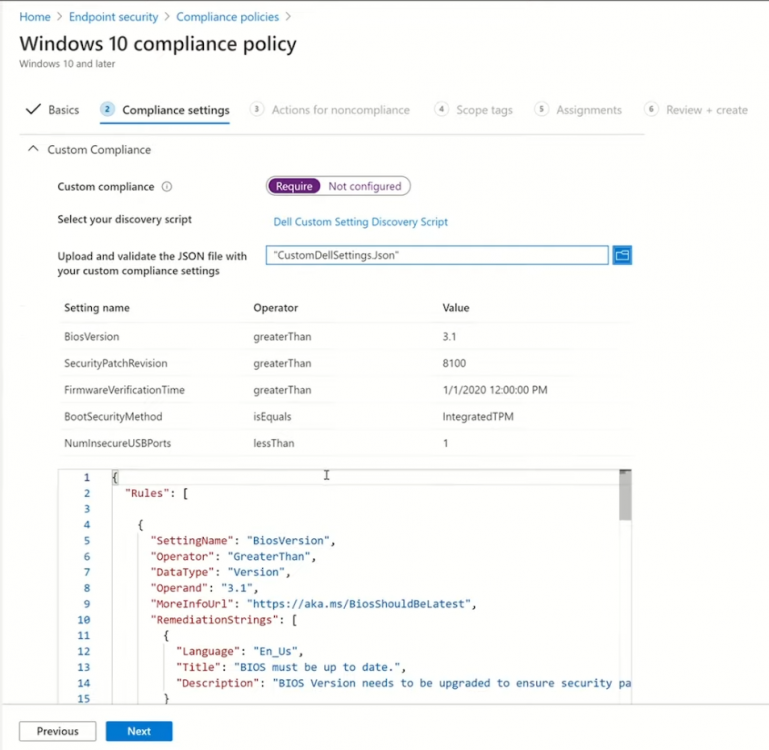
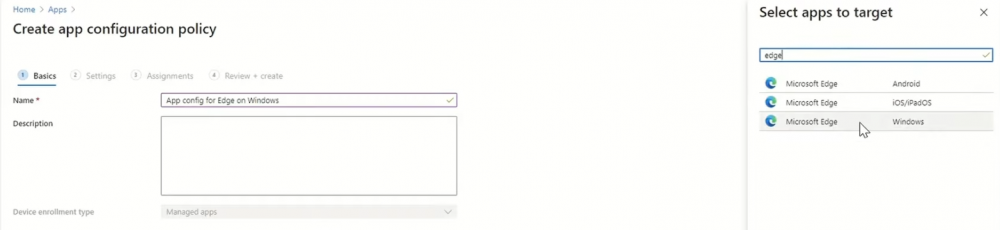
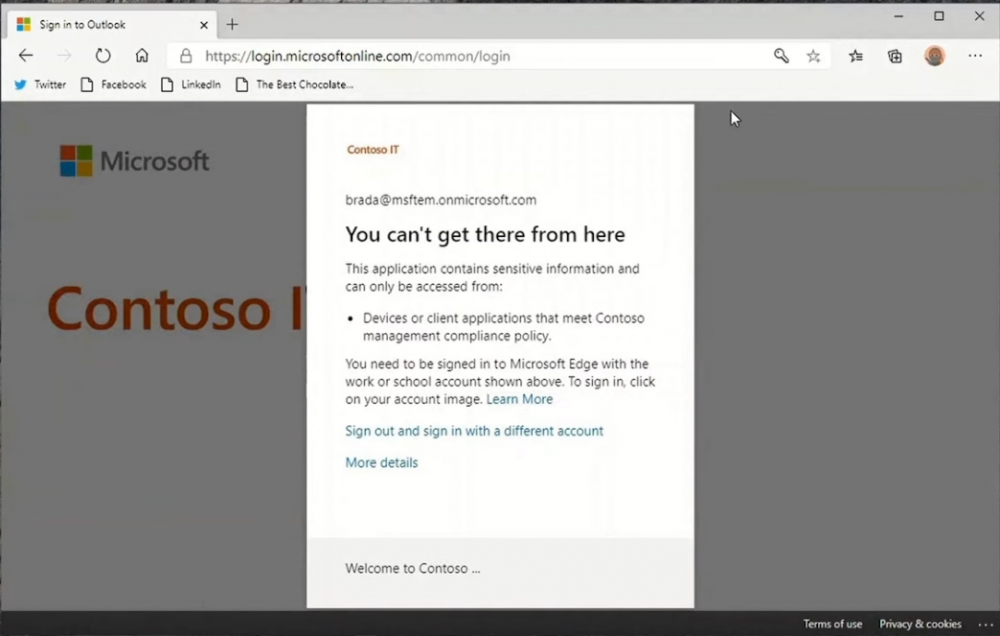
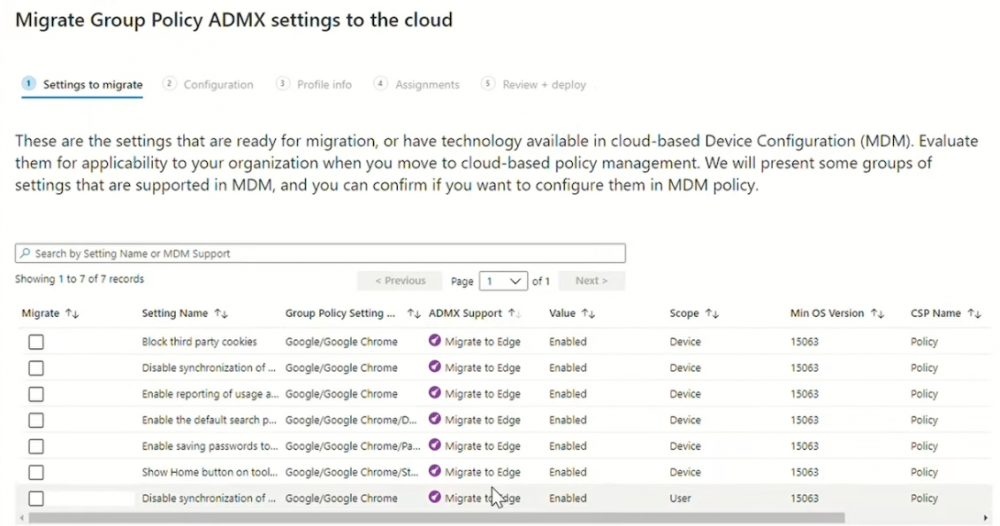
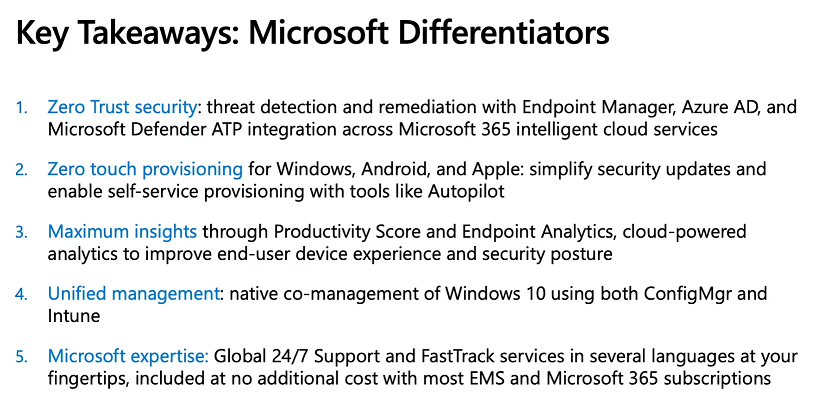
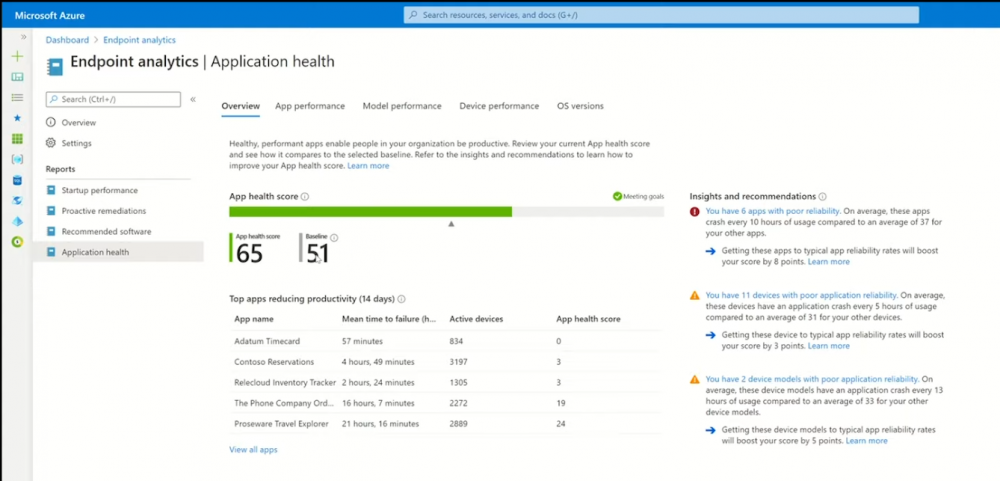
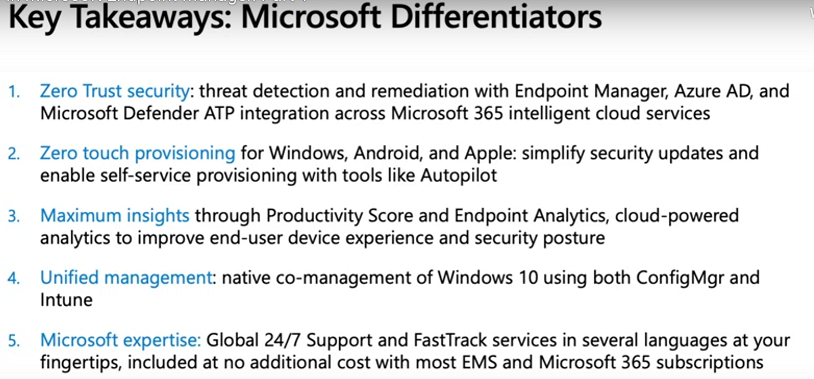
 Introduction These are my notes from a session @ Microsoft Ignite 2020, the session was hosted by Steve Dispensa (Director of Program Management at Microsoft Endpoint Manager) and Ramya Chitrakar (Director of Engineering at Microsoft Endpoint Manager). For the last couple of years at Ignite I blog my notes for sessions I'm interested in as I always find it nice to later refer to this reading material and punctuate it with content I've covered, and sometimes the videos just flow by too fast and you miss out on important points. Where appropriate I'll link to content that I've covered that is referred to in the video. This is part 2 of a two part series: What's new in Microsoft Endpoint Manager - part 1 What's new in Microsoft Endpoint Manager - part 2 (this part) As a reminder, Microsoft Endpoint Manager let's you manage your entire endpoint estate whether cloud native or on premise. On your cloud management journey if you've just started out or you've deployed co-management or you are completely in the cloud Microsoft Endpoint Manager is truly your hub to unify security, apps, access,compliance and end user experience across your entire technology estate. MEM delivers analytics and data to keep you ahead of change so you can keep your cost down, no matter what change brings. Focus on Security With Covid, almost all businesses in the world are dealing with remote productivity, where users are working from home and other remote locations and that means it's never been more important to ensure uniform security policy. MEM provides a rich portfolio of capabilities to assist you with keeping your organization safe and sound. "Start with Security Baselines to ensure your organization is following best practices and to ensure you have uniform application policy across your organization." You can start with Security Baselines to ensure your organization is following best practices and to ensure you have uniform application policy across your organization. You can manage a host of security specific policies across devices including platform specific capabilities like encryption and firewall rules and advanced threat protection from Microsoft Defender ATP. Then you can move on to risk-based access control where MEM can monitor the compliance of devices real time and that can be fed into Azure AD Conditional Access (powerful access control system). Additional you can deploy app control policies to provide compliance without fully managing a device, for example with BYOD devices. With users working from so many locations organizations need to deploy consistent policy either inside or outside corporate firewalls, is the foundation of Zero Trust. MEM can ensure that your Zero Trust policy is deployed to all your devices. Cyber threats and phising attacks are increasing between 3 and 5 times and in a recent survey 89% of businesses see cyber security as a top priority yet 62% say they lack the in-house skills to deal with it. "In a recent survey 89% of businesses see cyber security as a top priority yet 62% say they lack the in-house skills to deal with it." The rapid shift to secure remote work presents a huge opportunity for partners and SMB's. Covid19 is increasing IT Complexity and cyberattacks. Microsoft 365 Business Premium is a foundation for SMB management and security and contains everything from Teams, Conditional Access, to Azure AD to Intune and it can provide you a roadmap to maintain managed services for your customers as you light up new services for them every 6 months. Microsoft 365 Lighthouse will provide guidance and experiences with onboarding new customers, offer consolidated insights across multiple tenants in a single pane to understand how customer tenants are configured and secured, and help improve customer experience and demonstrate value. Demo Configuring Microsoft Defender policy on servers managed by Configuration Manager Below is a server managed by Config Manager, and using Tenant Attach it shows up in Microsoft Endpoint Manager. Using CMPivot, you can run queries on devices in MEM, in this example Ramya queries to see what antivirus service(s) are running on this server. Notice how the two instances found are both in a stopped state. Note: I showed you how you can run CMPivot queries in MEM here. You can now deploy Defender AV policies for devices managed by ConfigMgr in the MEM console. To do that go to the Endpoint Security node and select Antivirus, then Create Policy. Windows Autopilot Autopilot provides cloud value by simplifying the provisioning and management of Windows 10 devices. There is now a new ability in Windows Autopilot to work with co-managed devices that have the ConfigMgr client agent installed during the enrollment status page (ESP) and invoke a provisioning task sequence created in ConfigMgr. In the example the task sequence was a non-osd task sequence, it was responsible for restoring files and settings for the user. Company Portal changes Company Portal is going to be the one place IT users go for everything related to enterprise IT services. Company Portal now supports Apps from Configuration Manager, web apps from Azure ad and office.com. When you install and application you can monitor it's progress in the Downloads & Updates tab. The PowerBI app here can be opened in a Browser as it is a SAAS Azure AD app. "This shows you how Microsoft Endpoint Manager is providing you with unified experiences across the spectrum from IT Pros to End Users." Microsoft 365 is uniquely positioned to bring together the power of management and security. The Endpoint Security node in Microsoft Endpoint Manager is your one stop shop for managing security across your enterprise. In there you can configure Antivirus, Firewall, Disk Encryption (BitLocker) policies and settings, but you can also configure Security Baselines. When Defender ATP is connected to MEM you'll see additional tasks listed such as Security tasks as well as device risk based compliance. As Defender ATP was released recently for Android, you can now take actions on that in MEM. In this example, you can create a compliance policy in Endpoint Security to enable conditional access based on the Android risk score detected by Defender ATP. You can see this in action using the Eicar test virus on an Android device with Defender ATP enabled. After this happens when the user launches Outlook, you can see Conditional Access kicking in. After the user uninstalls the test virus from their phone they are once again able to access email successfully. Custom Compliance Policy In this demo you can see how to create a custom compliance policy using a Powershell script and a JSON file to manage Dell computers. "BIOS must be up to date" And using this new custom compliance policy you can use it to block access using conditional access if for example the BIOS is not up to date. Those settings are configurable in the JSON file. Security Settings for Micorsoft Edge Now you can use the Managed App settings in MEM to configure policy for Microsoft Edge on Windows devices. You can configure the home page and other settings for Edge. And on a remote users device you can see conditional access informing the user in Edge that they cannot access corporate email while signed in with their private credentials, they must use their office account. Using GPO Analytics to seamlessly migrate GPO's to the cloud. For more info see > https://docs.microsoft.com/en-us/mem/intune/configuration/group-policy-analytics Once you've selected your GPO, click on Migrate to migrate group policy admx to the cloud There will also be a possibility of doing this via Powershell and this is will all be released as part of overall GPO to MDM capability. Key Takeaways Recommended reading Working from home - the new reality Introducing Microsoft Tunnel Microsoft Productivity Score https://adoption.microsoft.com/productivity-score/ Endpoint Analytics https://docs.microsoft.com/en-us/mem/analytics/overview Microsoft Endpoint Manager https://endpoint.microsoft.com
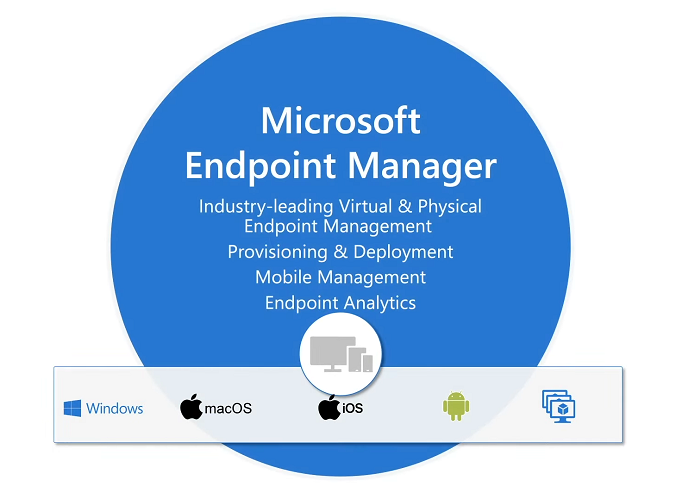


-
Trouble deploying Windows 8 using UEFI to HP Laptop
anyweb replied to DavidK's topic in Configuration Manager 2012
can you tell me a bit about the hardware you are using here and what operating system are you trying to install ? also, a screenshot of your task sequence would help -
If you are one of the many, many IT admins who were asked to effectively transition a whole workforce to remote working overnight due to impact of COVID-19, you will no doubt also have been concerned about the security implications of doing so. One of the most powerful and effective means IT admins have of ensuring tight security with a remote workforce is through identity management and authentication. Azure Active Directory does exactly that and this upcoming webinar from Altaro on October 7 will teach you how to use Azure Active Directory in your business. As always Altaro will present this webinar live twice to allow as many people in different time zones to attend, ask questions and receive instant feedback from the presenters: IT security expert Paul Schnackenburg and Microsoft MVP Andy Syrewicze. This event will include a live demo of Azure Active Directory showing you how to use the tools being discussed which include: Microsoft Cloud App Security, Password Protection, Multi Factor Authentication (MFA), Windows Hello for Business, Privileged Identity Management (PIM), and Identity Protection & Conditional Access. Azure Active Directory is simply an essential tool for IT admins managing remote users. Save your seat for this valuable event and find out how you can optimize its use in your infrastructure. Save your seat!

-
i blogged it already here > https://www.windows-noob.com/forums/topic/21430-how-can-i-dynamically-install-windows-10-language-packs-and-associated-features-on-demand-in-an-offline-environment/
-
Nice catch even if I'm not using those settings, thanks ! I'll update those two steps and re-offer the download, thanks @Aleksandra
-
they key to getting this to work in your environment is to read my blog post, it reveals how i solved it, and you can adapt that to your environment.
-
Trouble deploying Windows 8 using UEFI to HP Laptop
anyweb replied to DavidK's topic in Configuration Manager 2012
yes, but i want to see what steps it is taking before the error, can you attach the log ? -
Trouble deploying Windows 8 using UEFI to HP Laptop
anyweb replied to DavidK's topic in Configuration Manager 2012
can you attach your smsts.log so i can see what it is doing ? -
@lalajee I've blogged it now take a look
-
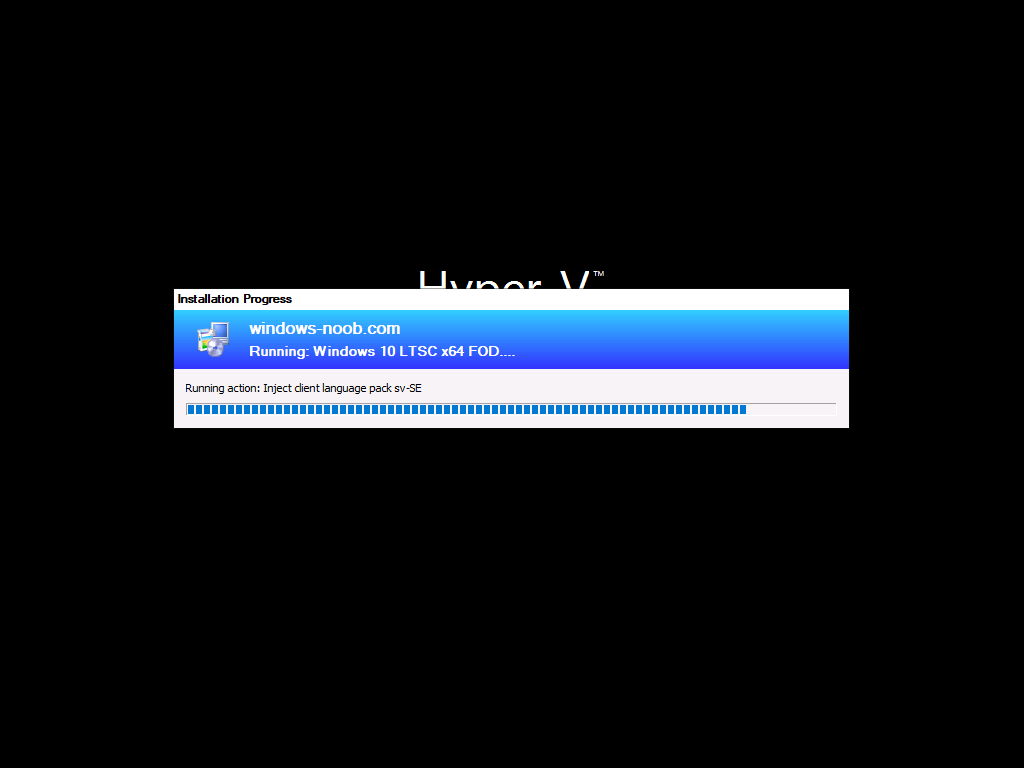
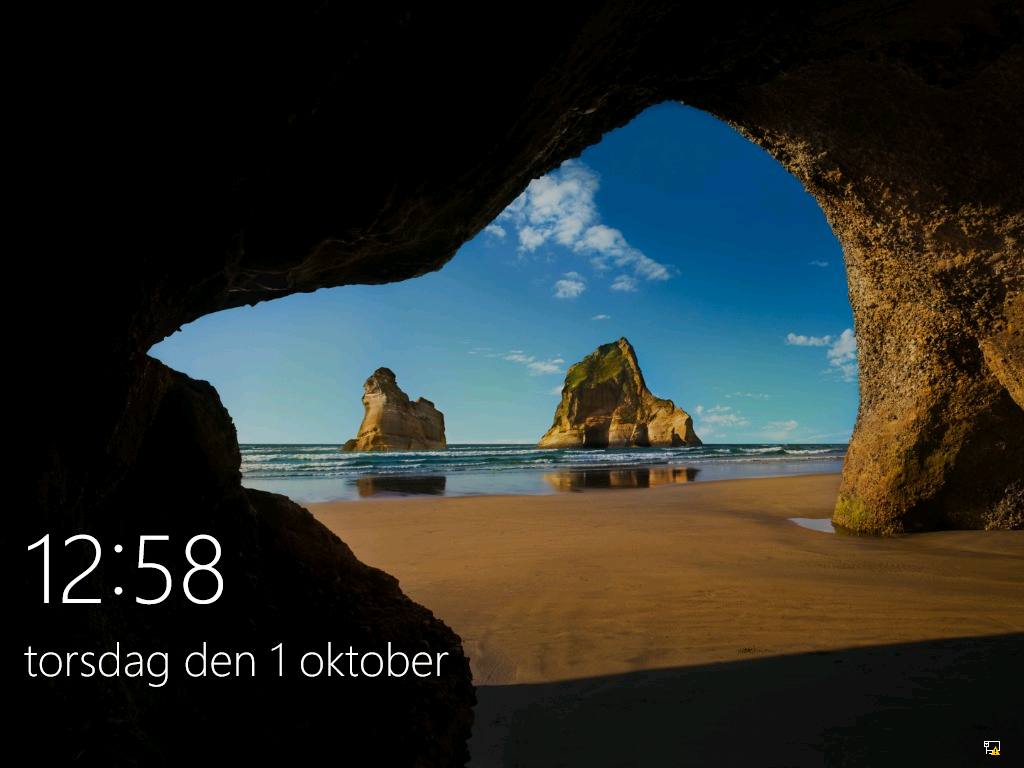
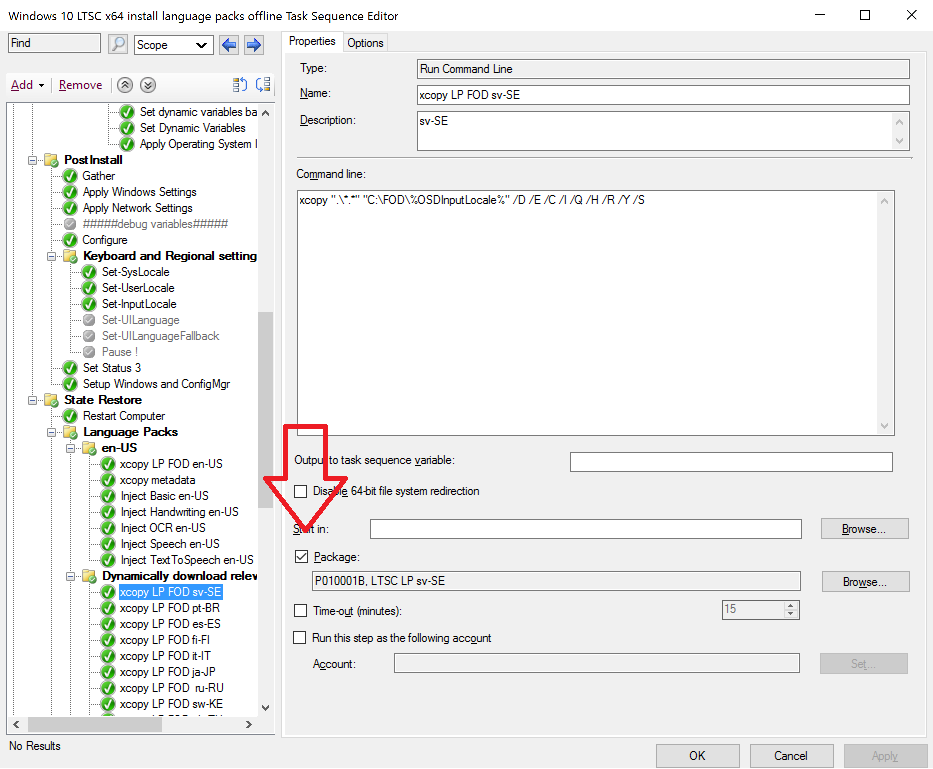
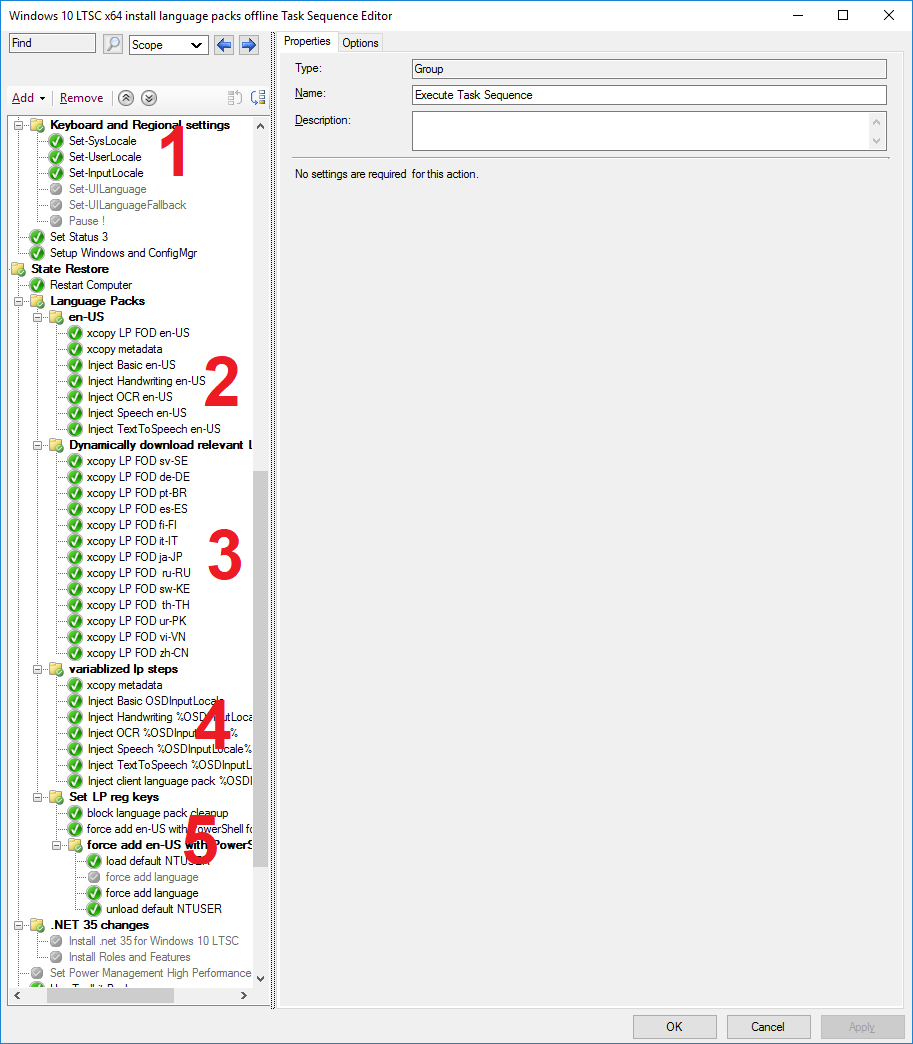
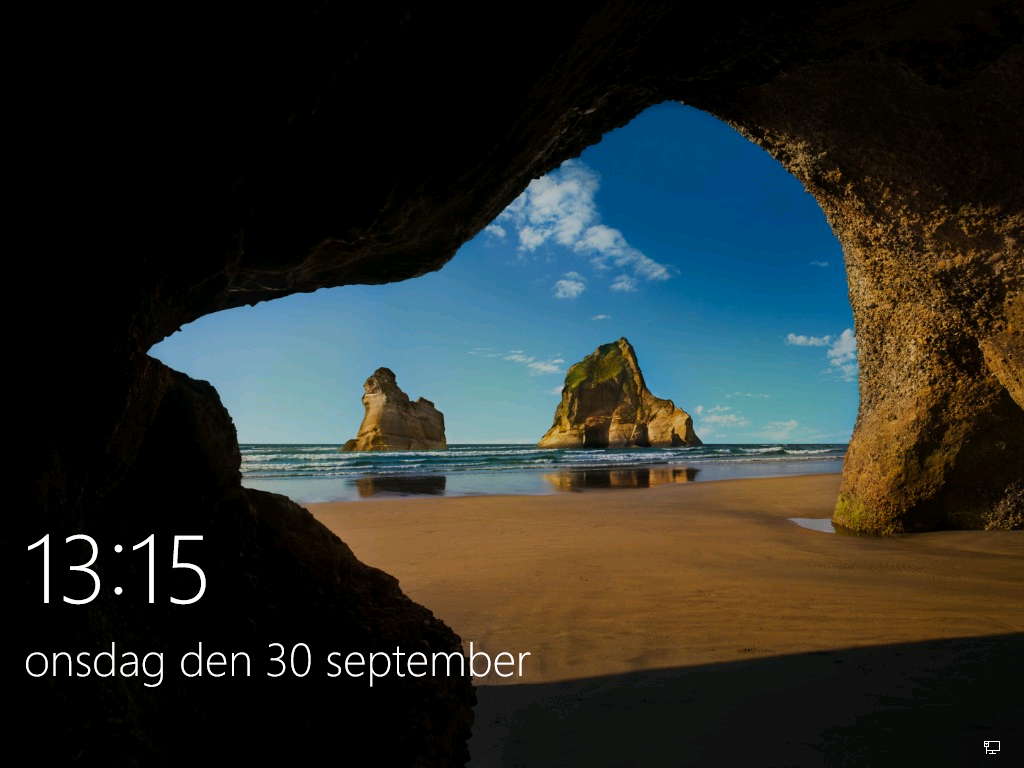
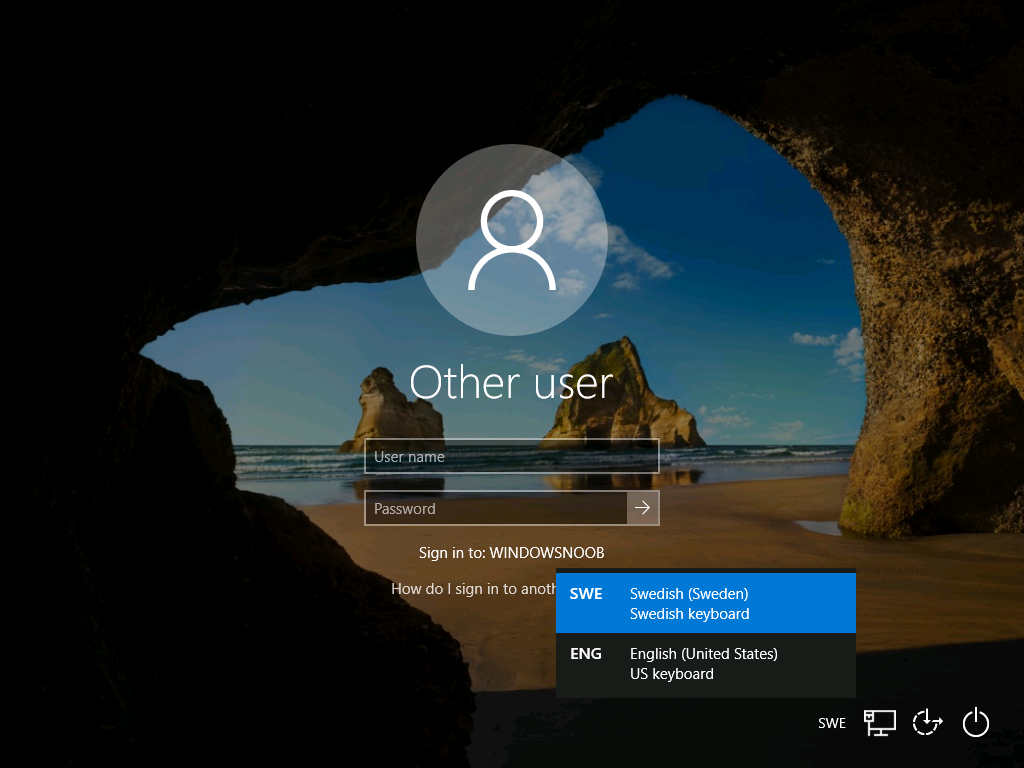
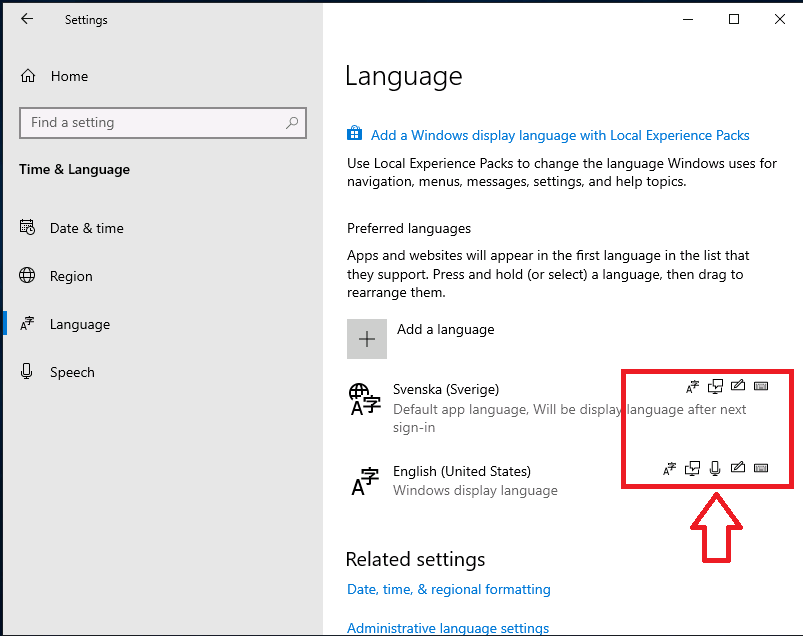
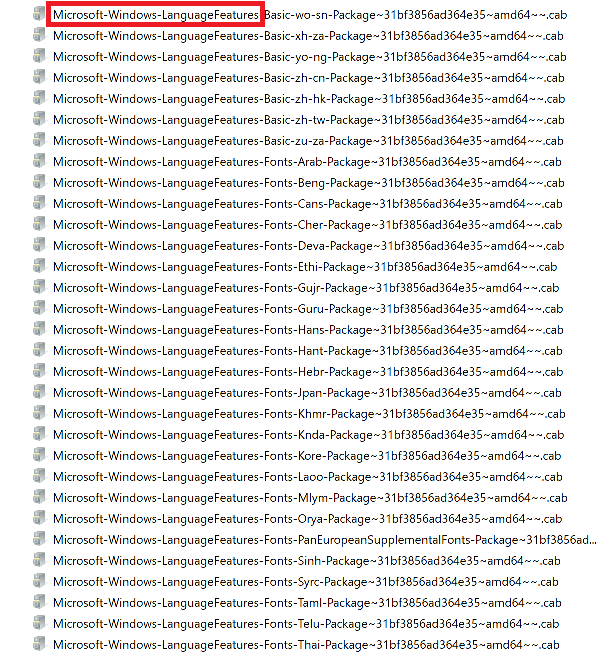
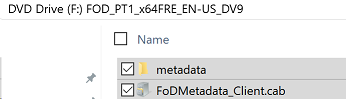
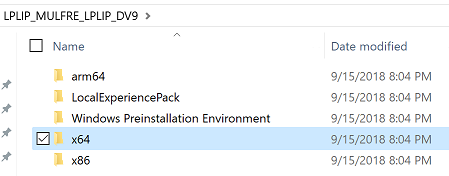
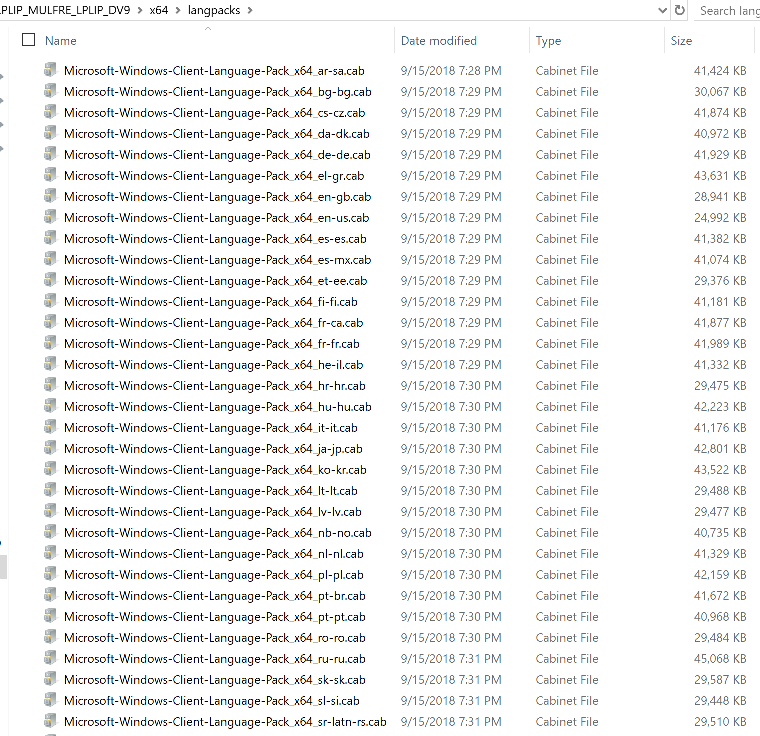
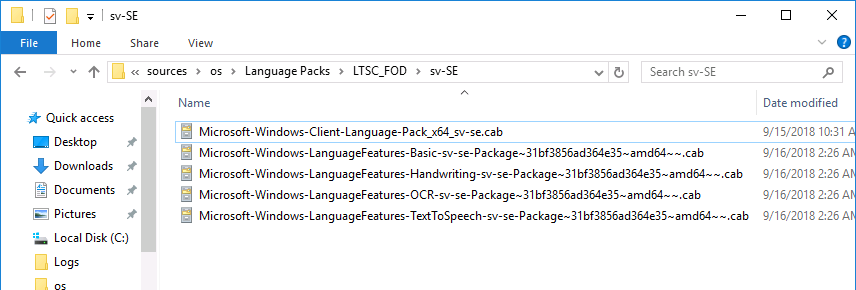
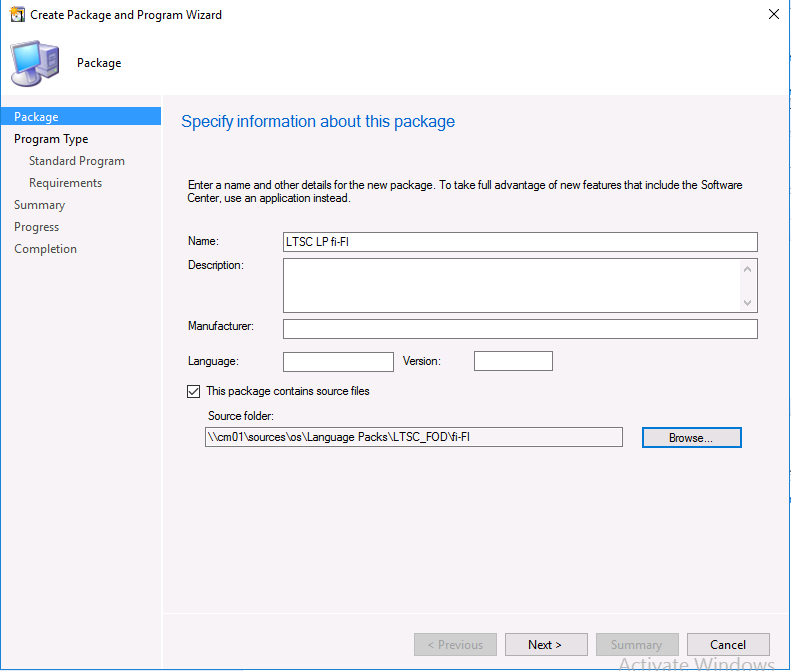
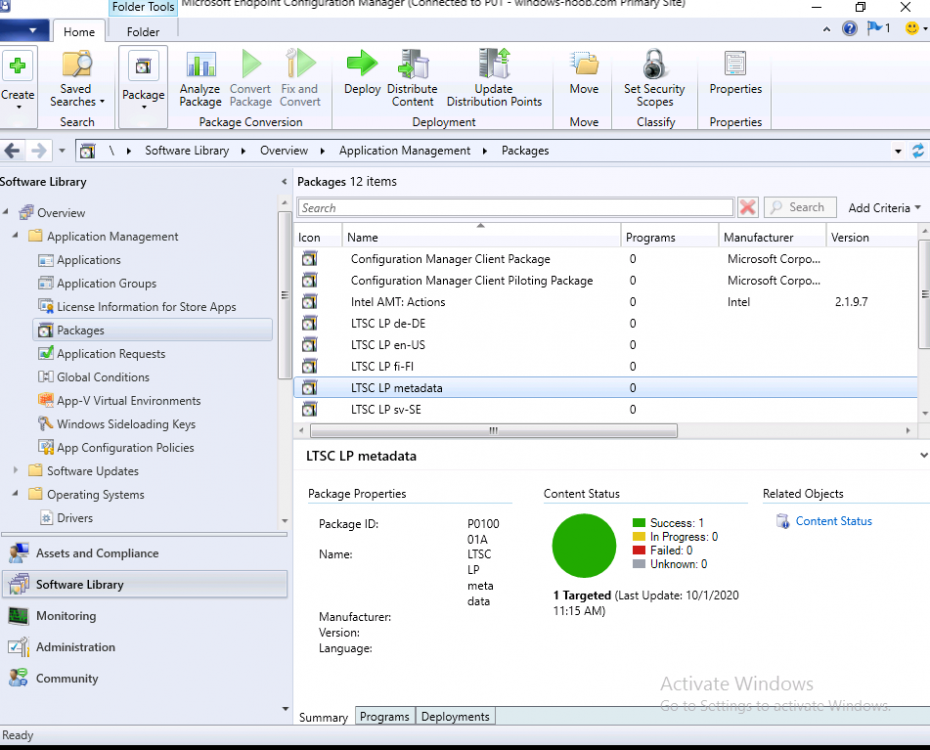
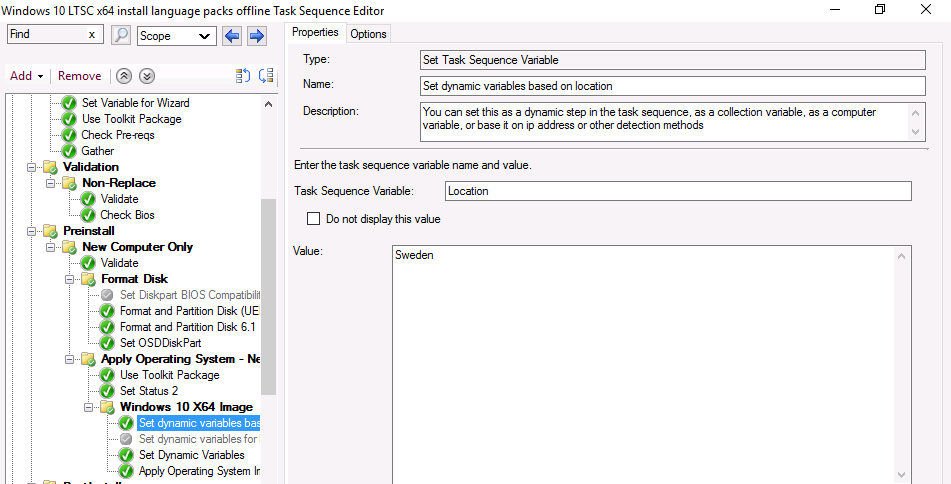
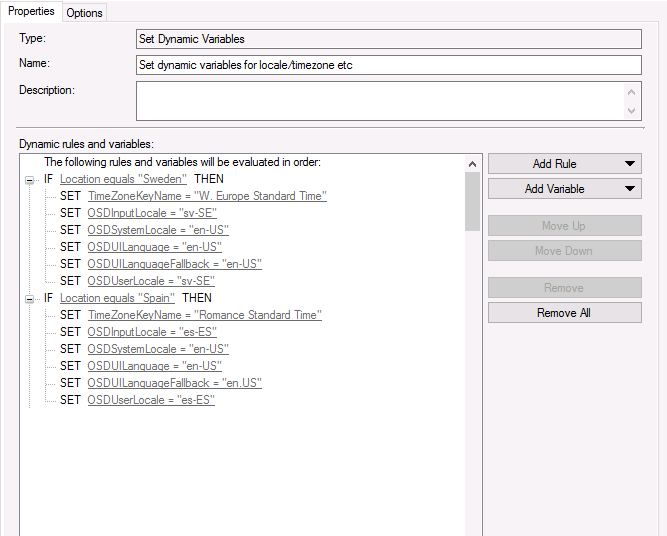
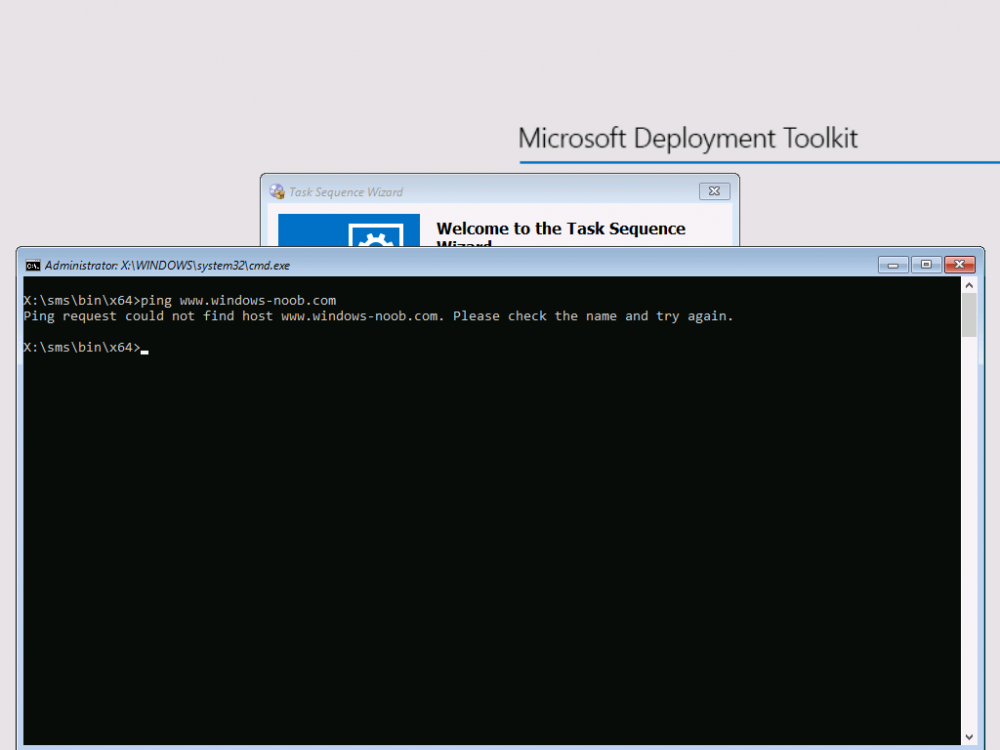
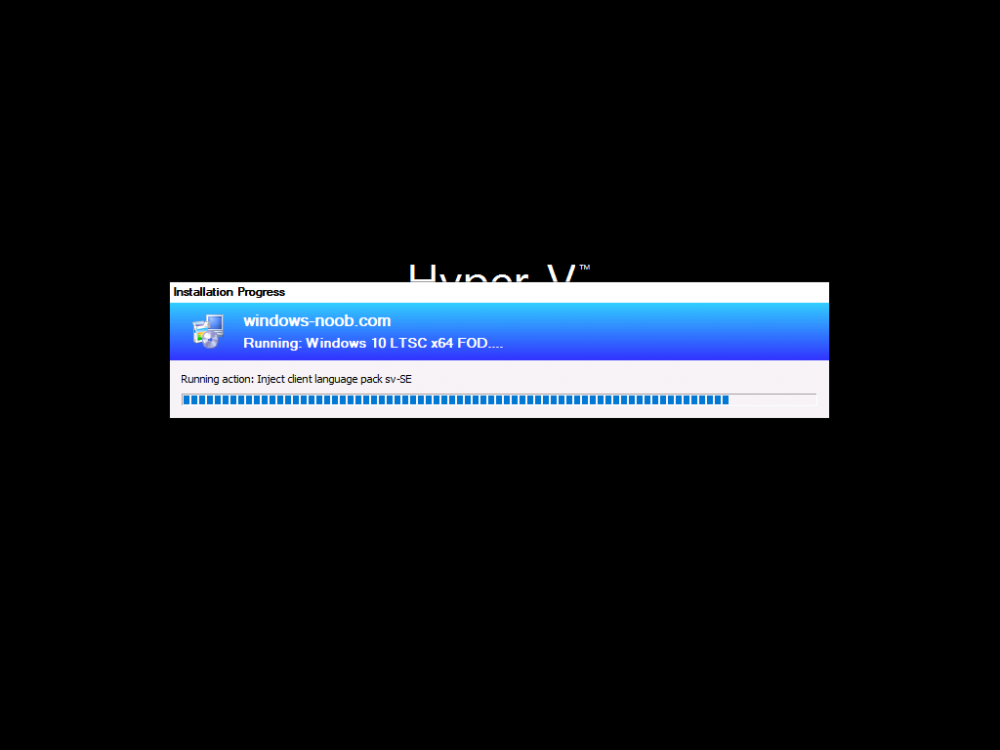
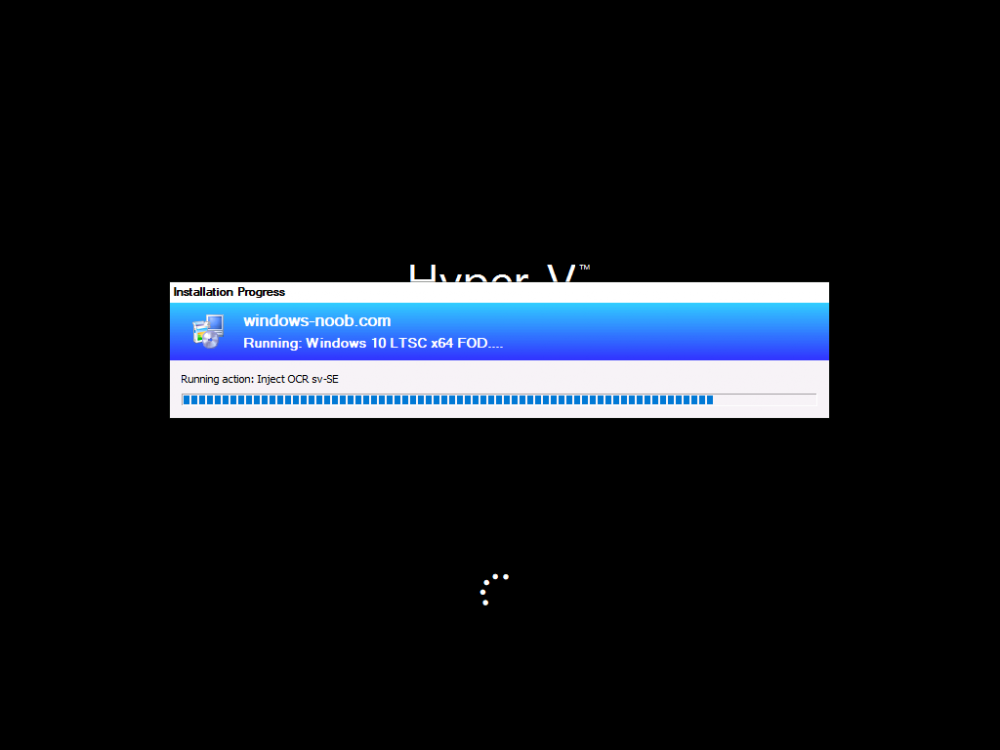
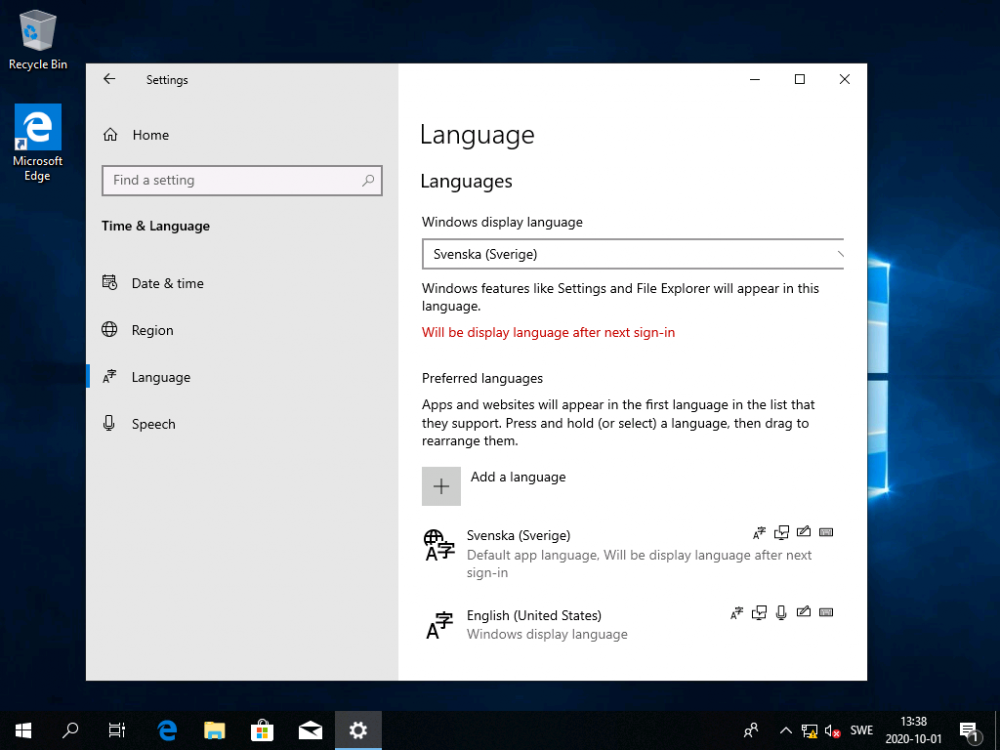
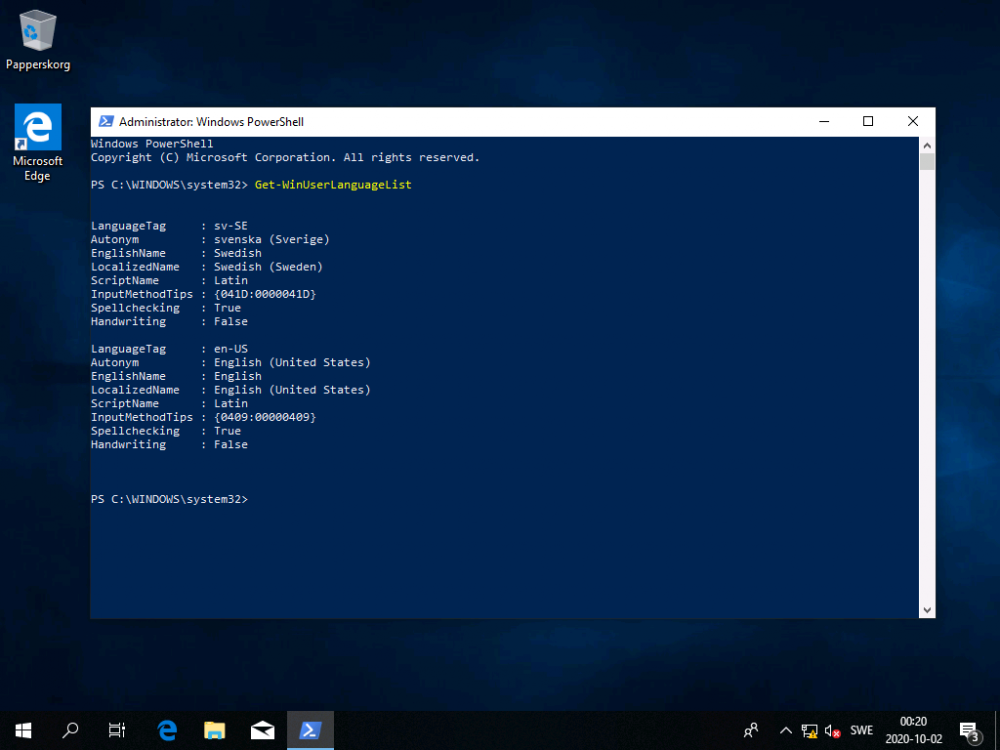
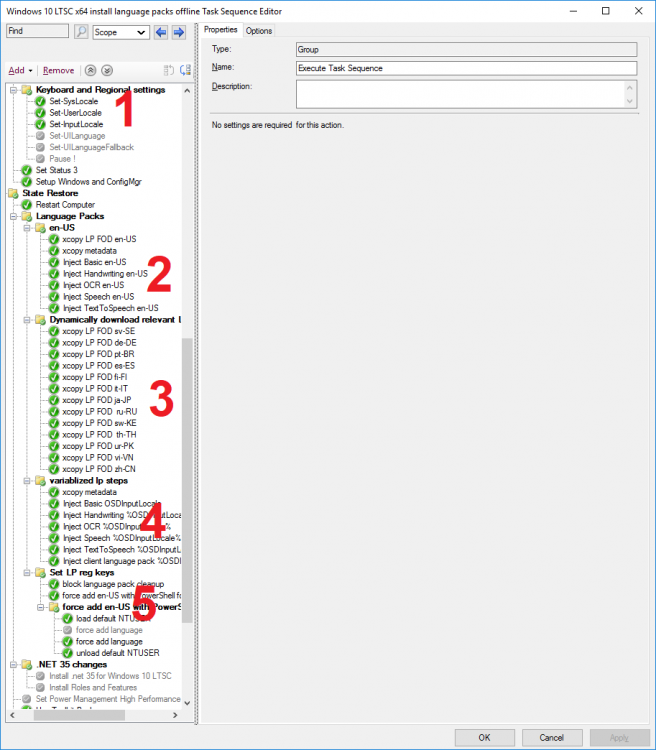
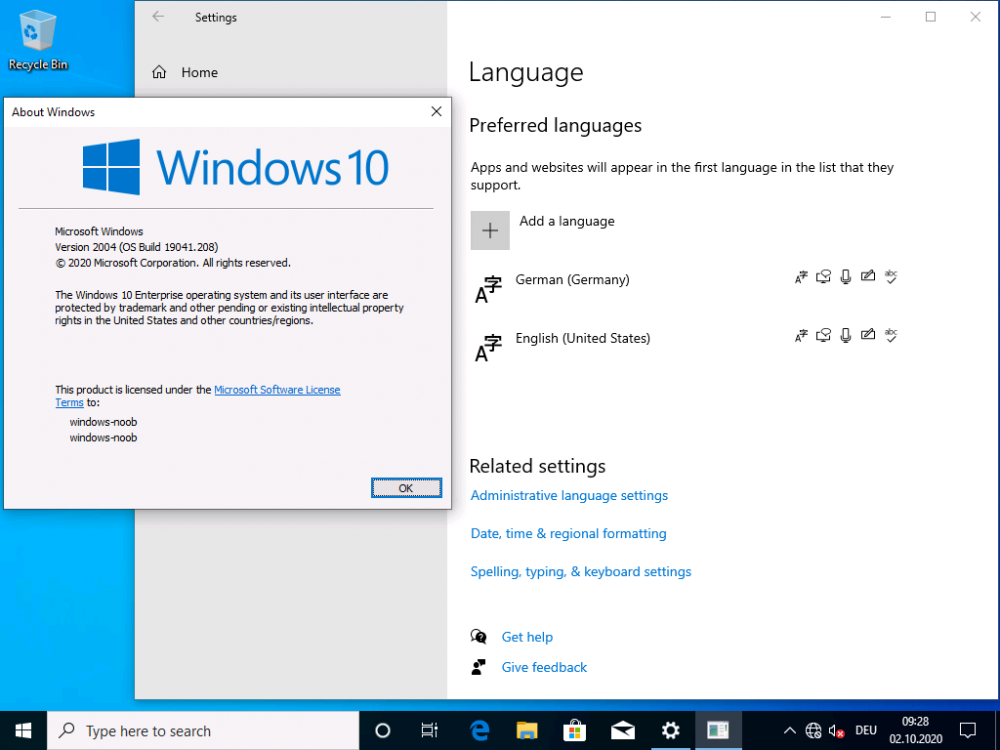
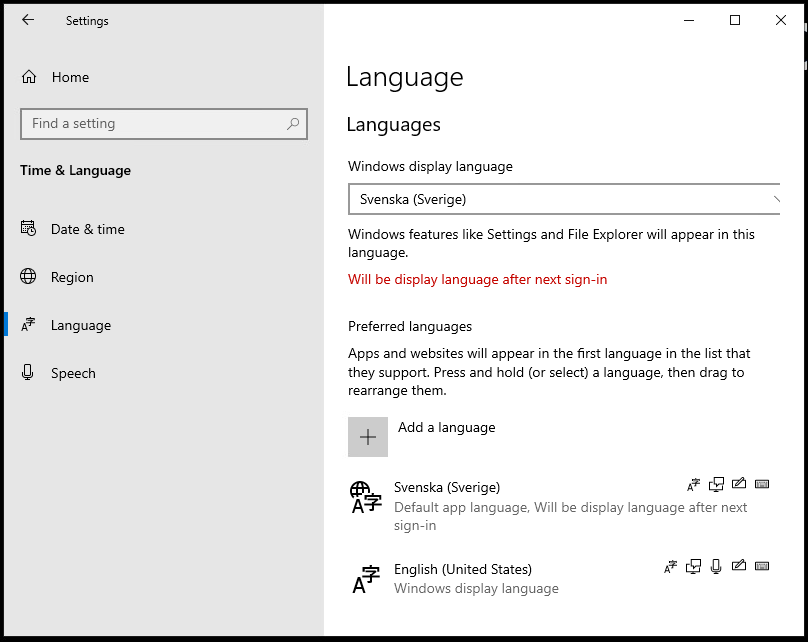
Introduction Sometimes you need to install Windows features that normally need internet access (to install other components), language packs installed today are done in a modular and different format from previous years. In previous times you could simply install a language pack for the associate language and all was good, now there are additional components that also need to be installed otherwise Windows will attempt to download them from the internet (and notify you via the notification center if it cannot). I needed to install Windows 10 LTSC version 2019 in an offline environment (with no internet access) and I also needed to configure language pack settings and configure keyboard layout. I came up with a solution that works for me and I thought I'd share it. You might know of a simpler or better way, if so feel free to comment. Note: The LTSC (Long Term Servicing Channel) version of Windows 10 is suited for special environments, and environments without Internet certainly are special. I've even verified that the equivalent version of Windows 10 (aka Windows 10 version 1809) behaves the same way, in fact the screenshots used here are from Windows 10 1809, I didn't import LTSC into my lab yet. I've also tested this method with Windows 10 version 2004 (and the associated version 2004 LP and FOD files and it works perfectly ! Step 1. Get the feature on demand packages Normally if you install a language pack on a Windows 10 computer with valid internet, it will automatically download the associated features on demand for that language and those can include: Display language Text-to-speech Handwriting Speech recognition Typing You can see these additional items listed in the screenshot below. Depending on the language pack capabilities, some will have all of these and some will have only a few. Most of these components (features on demand or FOD packages) can be found on the features on demand ISO for the respective operating system and you can download those ISOs from the Volume License Servicing Center (VLSC) website or go to Visual Studio downloads (formally MSDN). Below you can see some of the FOD packages listed on the mounted ISO. There are FOD packages for different types of function within Windows and the packages I was most interested in were any related to language (specifically). You may find that you want to install additional FODs for your particular solution. If you scroll down the long list of FOD packages you'll see some that begin with Microsoft-Windows-LanguageFeatures, and they are sorted by country code (where applicable) into the following sections. Microsoft-Windows-LanguageFeatures-Basic Microsoft-Windows-LanguageFeatures-Fonts Microsoft-Windows-LanguageFeatures-Handwriting Microsoft-Windows-LanguageFeatures-OCR Microsoft-Windows-LanguageFeatures-Speech Microsoft-Windows-LanguageFeatures-TextToSpeech such as below. This was my first clue to solve this. I decided to copy all the LanguageFeatures FOD packages from the ISO to somewhere local. The next thing I found on the ISO was Metadata, so I copied that also. Step 2. Get the Language packs Finally, there are also Language Pack ISOs available for download for your respective version of Windows 10, and on that ISO are larger cab files containing the client language pack for each language that is available. You can find the language packs in the architecture folder on this ISO. They'll look something like this. Step 3. Sort the downloads by country code Now that you've got the necessary files, you need to decide which languages you are going to support during OSD and sort them into their own respective folders. I copied language specific FOD packages and the client language pack for each language I was interested in into it's own separate folder like below (sv-SE for Sweden), and then copied those folders onto my package sources folder on the ConfigMgr server. Note that some languages may have more (or less) FOD packages available than others, so copy all that are available on the ISO and you should be good to go. The first cab file listed below is the Client Language Pack from the Language Pack ISO and the remaining 4 cabs are from the FOD ISO. Next create another folder with the Metadata files within it. Step 4. Create packages In ConfigMgr, create a separate package for each language you intend to add support for and point it to the folder containing the Client Language Pack and FOD packages. Once you've created all the language pack packages, don't forget to create the Metadata package. Distribute the packages to your distribution points. Step 5. Import the task sequence To save you a lot of effort all you need to do is import my task sequence and then modify the package references to suit your environment. Note: This is an MDT integrated task sequence so if you want to use it please integrate MDT with ConfigMgr. You will get messages about missing content during the import, choose 'ignore dependancies' and it will import the task sequence steps anyway. However, you must then step through each step in the task sequence that references a package, and point it to the equivalent package on your ConfigMgr environment. After importing the task sequence, make sure to add your language packages (and metadata) to the appropriate steps that reference them otherwise this won't work, pretty much all of the xcopy steps will need a package attached to them. Download the following, and import into ConfigMgr. Windows 10 LTSC language packs without internet.zip Step 6. A quick look at the task sequence logic The task sequence works by first setting a variable, called Location. You can set this as a step in the task sequence dynamically based on various inputs (such as DHCP IP address, gateway, computer variable, collection variable). That I leave up to you, I've forced this example to use Sweden as the location. Next, it dynamically sets Language specific variables based on the Location set previously. You need to add one of these dynamic groups for each language you intend to support. The below screenshot shows two languages configured but you could have multiple. Next (1) it injects the system, user, locale specific settings based on the dynamic variables set above. SysLocale UserLocale InputLocale Thee next group (2) copies the en-US language pack+FOD packages, and metadata. This is needed if you want to be able to switch languages via the input switch in the task tray (language bar). Next, it dynamically downloads (3) the FOD package containing the needed files to add features on demand plus the language pack for the language you are adding support for. It then uses a bunch of DISM commands (4) to inject the necessary FOD packages. After that it sets some reg-keys (5) to deal with known issues relating to language packs cleanup before adding some more steps to allow both languages (en-US and sv-SE in this example) to display on the login screen using the input methods switch. Step 7. Viewing the result After all that hard work you'll want to see the end result. In this lab I've disabled internet access by simply powering off my Smoothwall (which controls internet to the lab). We can see in WinPE that there is no internet. After selecting the task sequence it downloads the Operating System, applies it and then starts injecting the cab files and other dism operations. Below you can see it inject one of the FOD packages And below it's injecting the Client Language Pack, all of this is dynamic based on the Location variable. After installation is complete the login screen shows no internet in the LAN connection, but the language is in Swedish. When you attempt to login you'll see the language bar, awesome. And after logging in, you will see that your chosen language pack is installed along with the necessary FOD packages, automatically and dynamically even without internet ! Awesome or what ! And of course you can use PowerShell to verify the installation of your language pack with Get-WinUserLanguageList. Windows 10 version 2004 What about Windows 10 version 2004 ? it works perfectly using this exact same method, just switch out the Operating System wim file with the 2004 version and replace the FOD and LP packages with the correct version, see below. Recommended reading Add language packs to Windows - https://docs.microsoft.com/en-us/windows-hardware/manufacture/desktop/add-language-packs-to-windows Known issues - https://docs.microsoft.com/en-us/windows-hardware/manufacture/desktop/language-packs-known-issue Available languages - https://docs.microsoft.com/en-us/windows-hardware/manufacture/desktop/available-language-packs-for-windows Language and region feature on demand - https://docs.microsoft.com/en-us/windows-hardware/manufacture/desktop/features-on-demand-language-fod https://docs.microsoft.com/en-us/powershell/module/international/get-winuserlanguagelist?view=win10-ps


-
SCCM BitLocker in MDT Task Sequence
anyweb replied to ace_ventura's question in Microsoft Deployment Toolkit (MDT)
then as long as the computer get's the configmgr client agent, and BitLocker Management policy, then they will get encrypted as per your policy, do you want to encrypt during OSD ? if so please review If you can't use pre-prov during an MDT task sequence then use you'll have to use the Enable BitLocker step in MDT to encrypt your devices. -
looks like I have it working in my lab now, blog post coming soon ? Swedish Language pack installed (and all the other bits needed) Swedish regional settings set


-
I'm not doing a feature upgrade, i'm installing an os fresh and including 2 language packs+regional settings as part of that, and it's that part you are interested in right ?
-
SCCM BitLocker in MDT Task Sequence
anyweb replied to ace_ventura's question in Microsoft Deployment Toolkit (MDT)
For this to work you'll need the configmgr client agent installed on the computers, will it be ? -
i'm building this in my lab at the moment, i will get it all working there before i blog it, so hopefully within a day or two.
-
the way I implemented it was based on detection of location via a dynamic variables in the task sequence, you could base it on many things such as dhcp ip address, collection variable, computer variable(s) etc, then in the task sequence apply both the english lp+fods + the additional language pack+fods, it took quite a bit of work but i have it running smoothly now, i'll implement it in my lab over the next day or so and blog it.
-
i'll blog it as soon as i can then you'll have the info
-
I've done it (via a task sequence), and have it working perfectly both for language packs and the associated keyboard settings, I was planning on blogging it, thanks for reminding me
-
welcome to the forums !
-
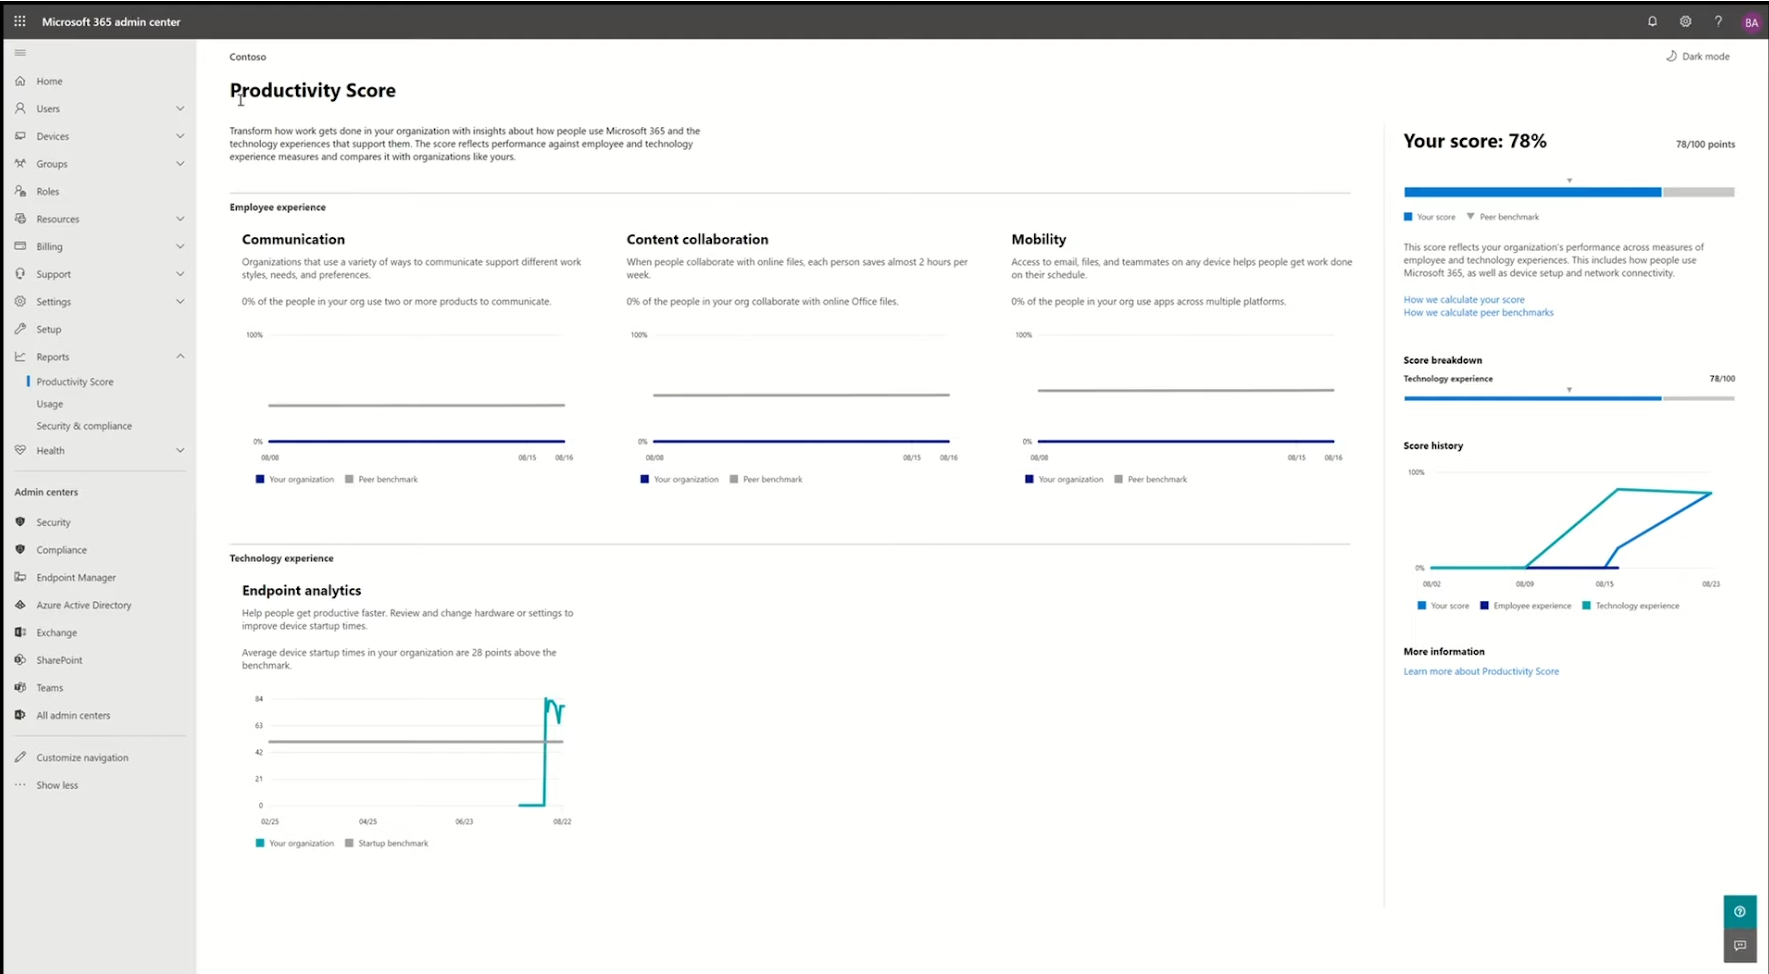
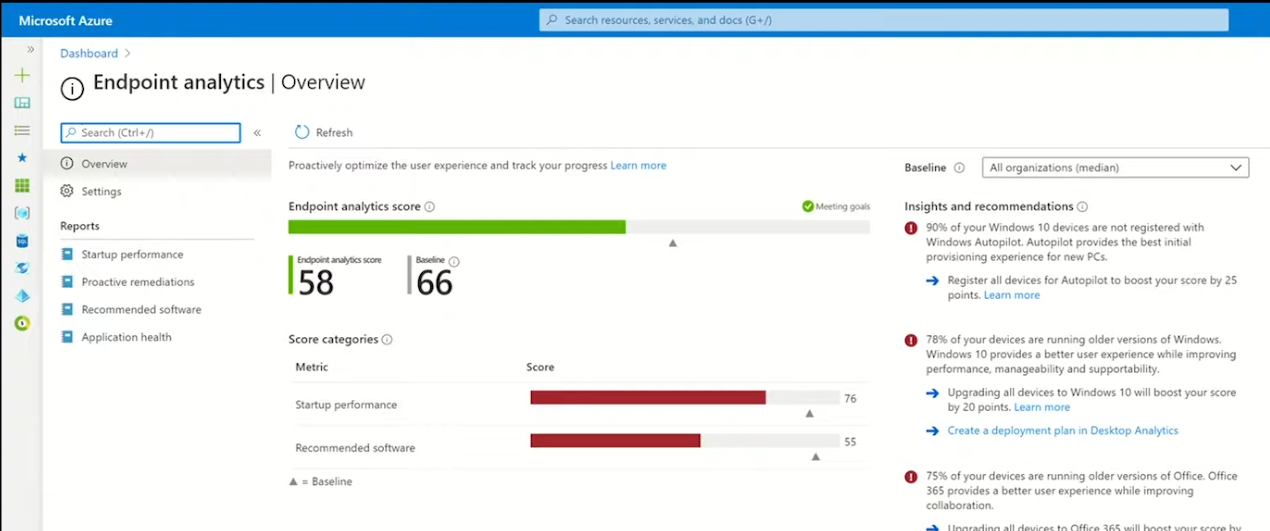
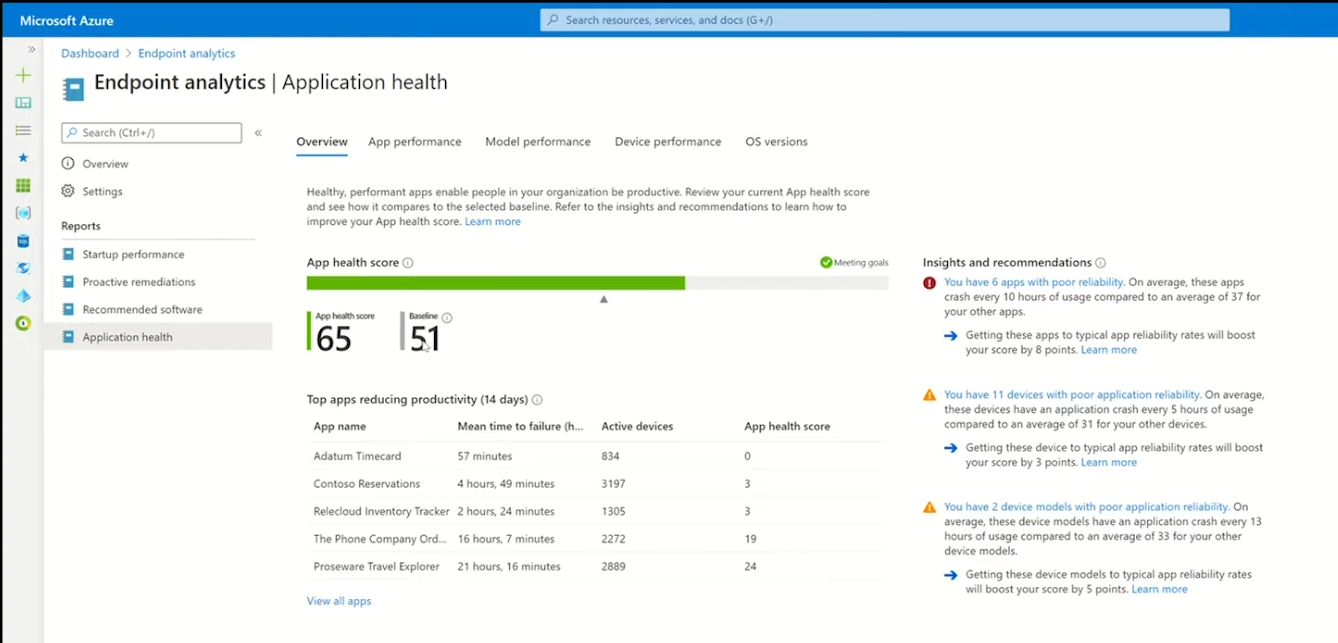
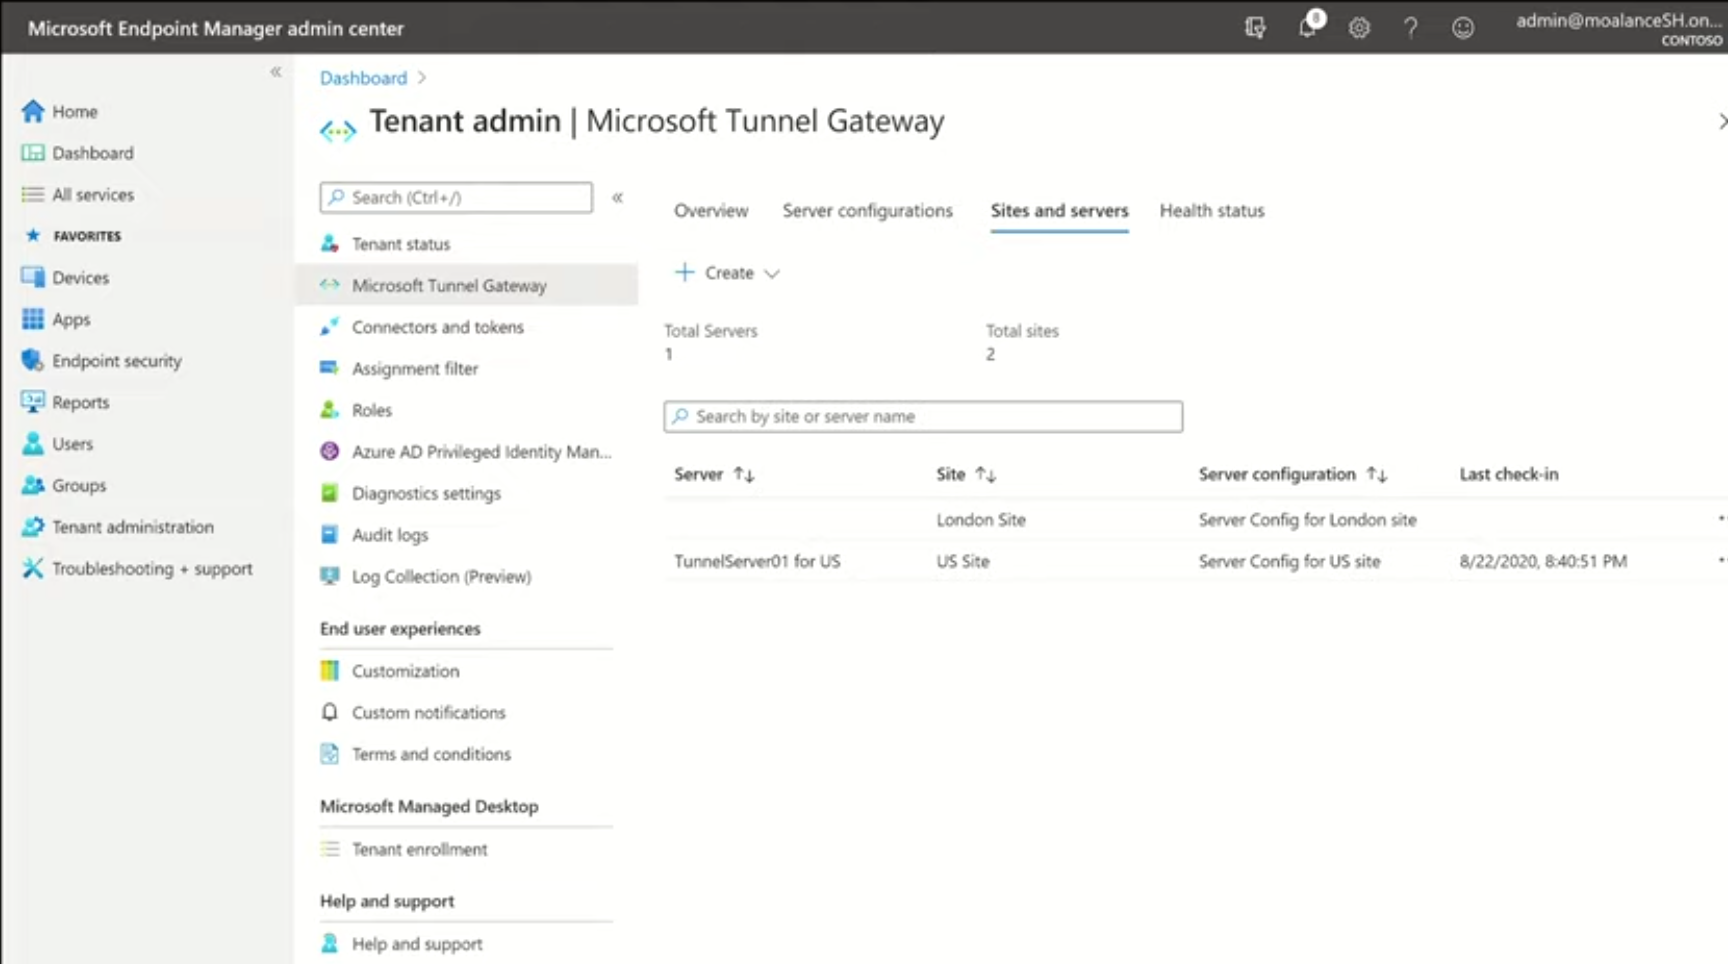
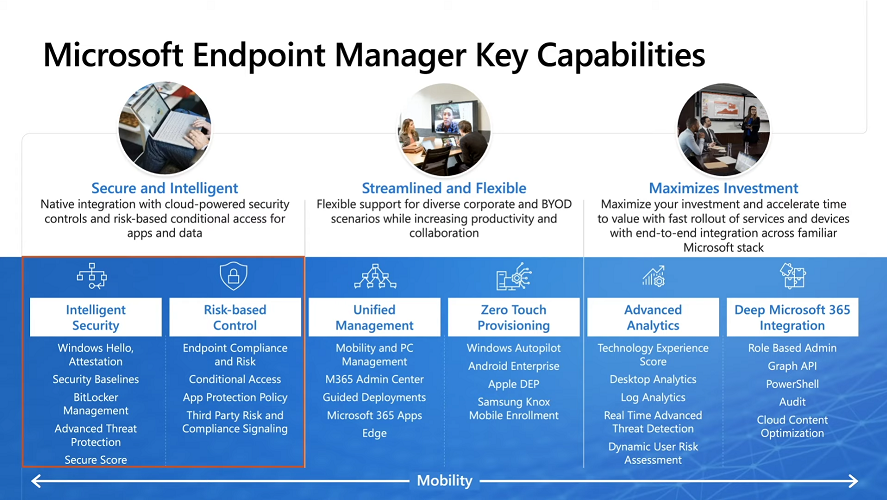
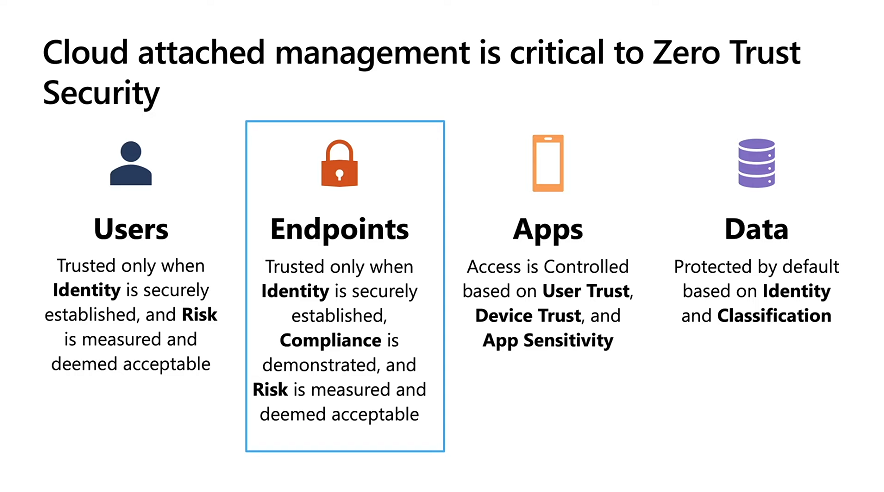
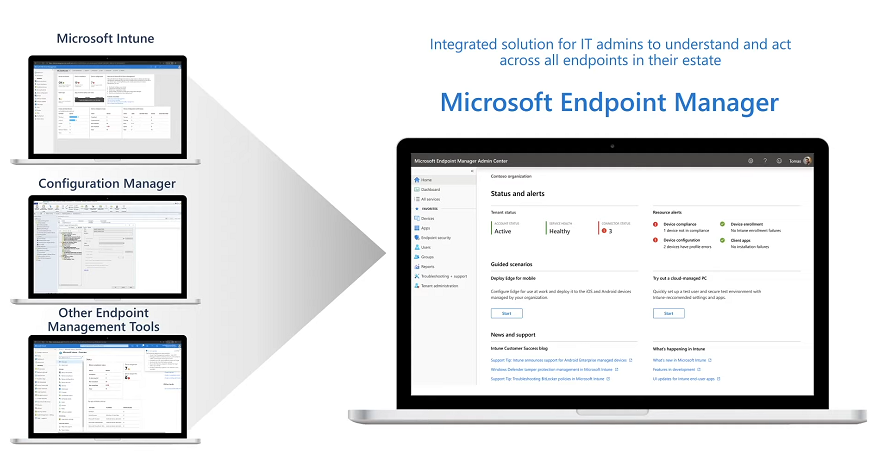
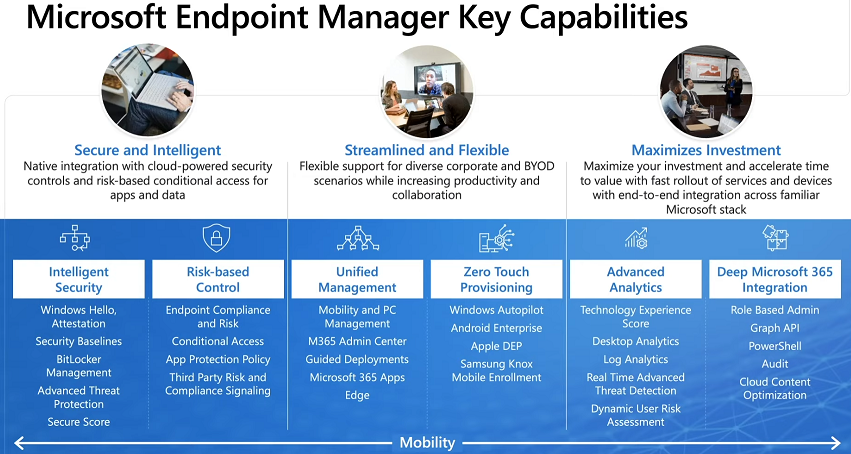
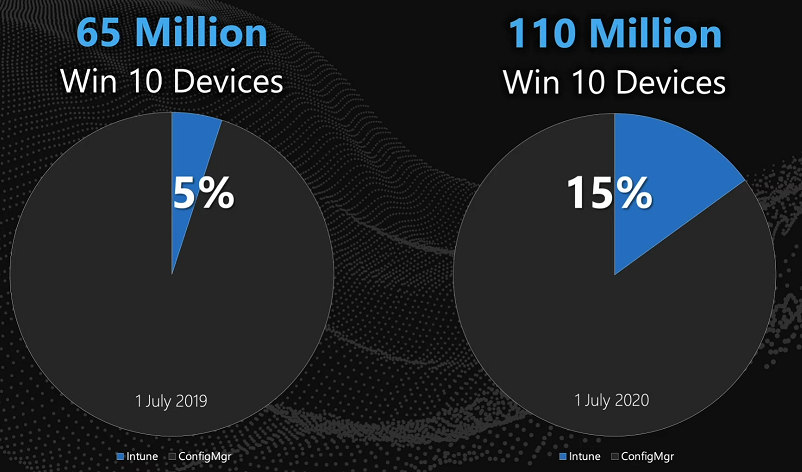
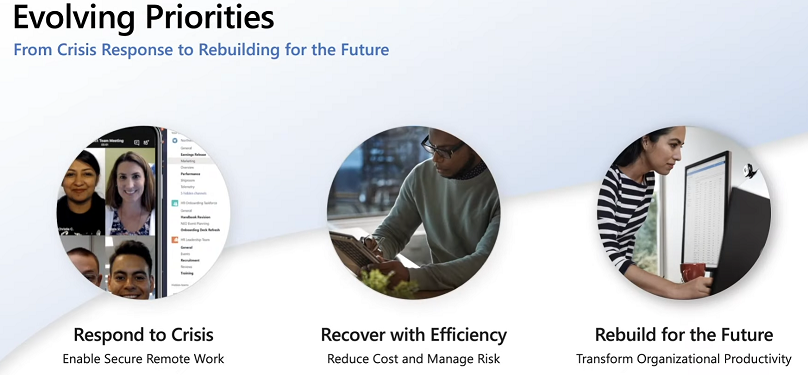
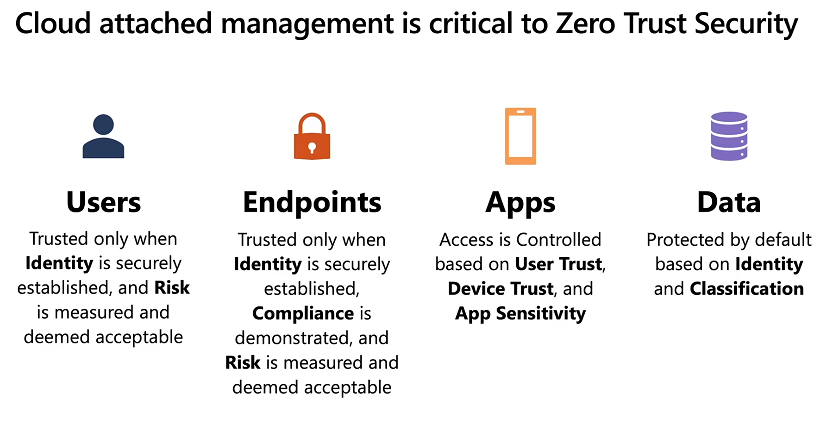
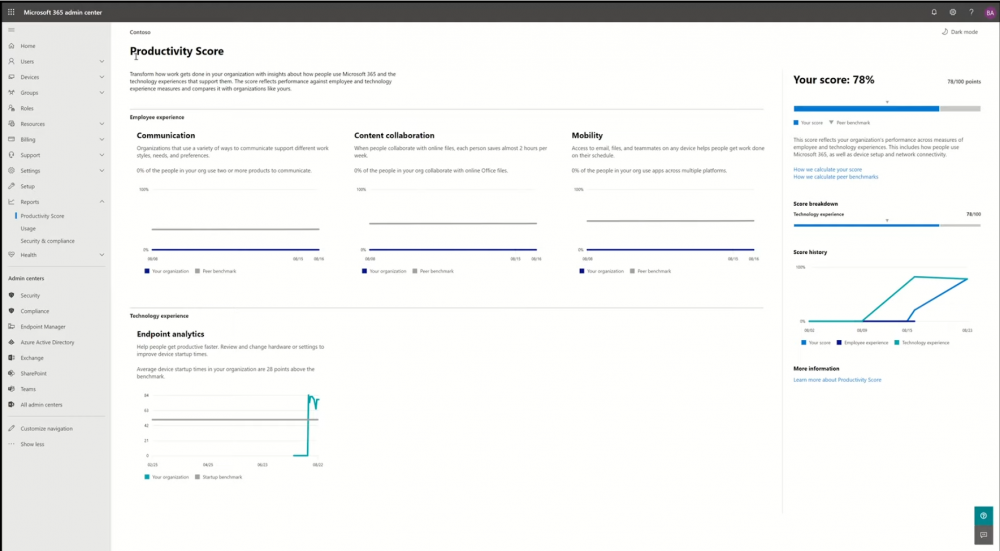
Introduction These are my notes from a session shown today @ Microsoft Ignite 2020, the session was hosted by Steve Dispensa (Director of Program Management at Microsoft Endpoint Manager) and Ramya Chitrakar (Director of Engineering at Microsoft Endpoint Manager). For the last couple of years at Ignite I blog my notes for sessions I'm interested in as I always find it nice to later refer to this reading material and punctuate it with content I've covered, and sometimes the videos just flow by too fast and you miss out on important points. Where appropriate I'll link to content that I've covered that is referred to in the video. This is part 1 of a two part series: What's new in Microsoft Endpoint Manager - part 1 (this part) What's new in Microsoft Endpoint Manager - part 2 Agenda MEM and the new normal What's new in Microsoft Endpoint Manager Demos Takeaways and next steps MEM and the new normal A year ago we all started our day in the usual way, grabbing coffee, going to the office, and interacting directly with our fellow colleagues but Covid 19 changed that very quickly as businesses shut their doors all around the world. I know this myself as I've been working from home since mid-March this year and as a direct result of that I upgraded my home office to make the work environment more appealing. Now many of us are working from home either full time or most of the time, and that involves changes in how we access and use company resources. We are working across more devices, more scenarios and often without the traditional safety net of onsite support or help desks that you can visit directly for assistance. This rapid change has guaranteed one thing, all businesses must have a remote working plan that lets employees work with 100% productivity from home. "Businesses need users to be fully effective when working remotely and need to be able to switch between remote work and office work without missing a beat" Last year at Ignite Microsoft released Microsoft Endpoint Manager, the integrated solution between all the endpoints in your estate. MEM brings together Intune (intelligent cloud) for all of your cloud attached endpoints, Configuration Manager (Intelligent Edge) for all your on-premises endpoints and other endpoint management tools suchs as Windows Autopilot, Desktop Analytics and Proactive Remediations to bring the power of the cloud to your whole enterprise. Microsoft have seen exponential growth in cloud attachment in the last year. "Massive customer adoption" MEM brings together the most comprehensive set of endpoint management capabilities in the industry. Starting with security it integrates with the most sophisticated solutions in the market and lets you establish baselines and implement policy for your users and devices. Risk based controls like Conditional Access lets you make sure that your endpoints are secure and compliant before gaining access to sensitive company resources. Unified management has deep integration with Microsoft 365 apps and the new Microsoft Edge. Zero touch provisioning works across different platforms to deliver unprecedented efficiency for IT Pros. And of course there is advanced analytics with Desktop Analytics, Log Analytics, real time advanced threat detection and more, and of course it's all deeply integrated with Microsoft 365 and can utilize RBAC (role based access control), Microsoft Graph (to automate tasks), PowerShell, auditing and cloud content optimization. So how does it all fit together ? "Tenant attach" Microsoft's goal is to bring the power of the cloud to your whole enterprise. Microsoft released tenant attach which allows you to have an easy and low risk path to cloud attached Configuration Manager to start gaining cloud benefits. I blogged about tenant attach when it was first released in Endpoint Manager technical preview below: Enabling tenant attach Utilizing tenant attach Organizations can also use co-management to manage Windows 10 using both Config Manager and Intune at the same time, this capability is unique in the industry. New customers can go directly to the cloud with Intune or migrate over time with co-management of Config Manager and Intune. Below you can see the increase in numbers of Windows 10 devices managed in the cloud (Intune) in the last year. The target for next year is 35% managed by Intune and by 2022 they are forecasting 50% of Windows 10 devices will be cloud attached. Nobody had it easy through this crisis, but customers that had modern management definitely had a smoother run. The pandemic drove permanent changes in the way modern workplaces worked, customers deployed CMG's, VPN usage went crazy. At this point however most customers have made it through the initial problems and are focusing on rebuilding for the future. So let's focus on the new capabilities in Microsoft Endpoint Manager. What's new MEM will support virtual endpoints so you can support Windows Virtual Desktop and later this year, third party VDI right alongside your physical pc's. They will preview this capability later in the year. Customers want to manage all their endpoints with MEM and Microsoft have a first class management experience of MacOS. New capabilities there as well including the ability to deploy scripts to devices, new enrollment experiences that utilize Single Sign-on improvements across applications and new managed life-cycle features. Shared iPad for Business support. Will let customers deploy shared iPads to users, login with their Azure AD work accounts in separate partitions on the device including having each user having a separate device passcode on the device. Introducing Microsoft Tunnel. Customers have been asking for this literally for years. Tunnel allows you to connect your users on iOS and Android to apps and services. Full device and per app VPN with split tunneling. Natively integrated with Microsoft 365 and Conditional Access so you can protect your sensitive company resources. This is now available in preview to a broad audience over the next couple of days. Please check it out. "Zero Trust" Cloud attached management is critical to Zero Trust Security and Endpoints are trusted only when identity is securely established. MEM si growing fast, and it also offers the following areas of investment in new classes of shared devices. Today Microsoft will announce the general availability of Endpoint Analytics which is one of the fastest growing new capabilities in MEM. Every cloud attachment is unique and there are several different on-ramps to cloud management and (according to Microsoft) it's just a couple of clicks, but in reality you do have to satisfy prerequisites and those take some time to setup prior to those clicks. Demos As Steve already mentioned there's been a massive shift towards remote work and a strong indication that this trend will continue even in the long term. Ensuring business continuity and resilience is going to be key for IT. Microsoft Productivity score and Endpoint Analytics enable the IT Pro to understand how organizations are working, how technology is supporting them and how productive their end users are. "Microsoft Productivity score and Endpoint Analytics enable the IT Pro to understand how organizations are working, how technology is supporting them and how productive their end users are." Analytics really makes the IT Pro the hero. Endpoint Analytics is release to general availability at Ignite, Microsoft Productivity Score will be released in October. Below you can see the productivity score and how it displays employee experience and technology experience. Endpoint analytics is part of Technology experience, last year Microsoft announced some cool new features in that area to measure startup performance. It also offers Proactive remediations, recommended software and application health reports. Application health (new) is based on the 0-100 paradigm. Shows you top applications that affect your performance over the last 14 days. Overlays crash data over the usage of each app and the number of devices that are using this app. This let's you focus on the top applications that are impacting productivity. Conditional access Conditional access enables zero trust access control where identity is the parameter and all endpoints are treated equally regardless of the network that they attach to. Customers are telling Microsoft that they have some legacy applications that are simply not ready for modern authentication and conditional access. "Microsoft Tunnel is a mobile access gateway. Microsoft Tunnel is a vpn gateway to allow your iOS and Android users to access apps and on premise resources using modern authentication, single sign-on (sso) and conditional access." Microsoft Tunnel is a mobile access gateway to take care of this. Microsoft Tunnel is a vpn gateway to allow your iOS and Android users to access apps and on premise resources using modern authentication, single sign-on (sso) and conditional access. This is setup by the IT admin. There are three main steps. Configure the gateway Deploy VPN profile for Tunnel Deploy Edge and Tunnel apps for these devices You can find this new functionality under Tenant Administration in the Endpoint Manager console. Key takeaways Recommended reading Working from home - the new reality Introducing Microsoft Tunnel Microsoft Productivity Score https://adoption.microsoft.com/productivity-score/ Endpoint Analytics https://docs.microsoft.com/en-us/mem/analytics/overview Microsoft Endpoint Manager https://endpoint.microsoft.com


-
ok i've connected to your lab just now and fixed the internal issues, basically to summarize your internal lab was not following my lab setup, and you had DNS configured incorrectly, so your srv0001 server (dc01) was 192.168.3.1 or something, when it should have been 192.168.11.101 and so on, so when i pinged from the sccm server to the dc it replied back with 192.168.3.1 (or whatever ip it was, i forget), in addition, your webserver had ip address of 192.168.11.100 so it was not going to work, ive fixed dns by deleting the stale entries, and manually configuring the ip on the dc and on the sccm server and lastly disabled ipv6 on all 3 servers, rebooted them, and verified all could ping each other, that's the first thing you need to have working before trying anything else, don't reuse labs from something else, they will break, always build labs from scratch as per the offered guide, then it will work 100% lastly, i confirmed that your smoothwall was configured correctly, it looked ok, then i checked port 80 on your internet ip address with canyouseeme.org and it didn't work, that means that more than likely your internet provider or router/adsl/whatever is blocking port 80, so please check that
-
ok well if you can zip up all logs starting with app*.log in your c:\windows\ccm\logs folder and attach them here i can take a look
-
the difference (based on what you said) is that one of those two installations may have been in user context, as in the user clicked and ran the installer, so is your software dependent on a user being logged on ?
-
what does the *wrapper.log tell you ?