anyweb
-
Posts
9195 -
Joined
-
Last visited
-
Days Won
367
Everything posted by anyweb
-
and here's some info on Unknown computer Support in the R2 release
-
Clinic 5935 - Introducing Hyper-V in Windows Server 2008 This 2-hour online clinic provides IT Professionals experienced in Windows 2000 Server or Windows Server 2003 with the knowledge and skills to implement and manage Hyper-V in an IT environment. Topics covered in the clinic include: Features of Hyper-V Features of server consolidation Hyper-V implementation Creation of virtual machines Dynamic datacenters Clustering in virtual environments Access it online at http://www.microsoft.com/learning/elearning/course/5935.mspx Clinic 6334: Exploring Microsoft System Center Virtual Machine Manager 2008 This 2-hour online clinic provides IT Professionals experienced in Windows 2000 Server or Windows Server 2003 with the knowledge to implement and manage Microsoft System Center Virtual Machine Manager 2008. Topics covered in the clinic include: Features and functionalities of VMM Implementation and management of VMM Management of VMM library Management of hosts by using VMM Implementation of virtual machine Self-Services Access it online at http://www.microsoft.com/learning/elearning/course/6334.mspx Please note you will need to sign-in with a Live ID before accessing.
-

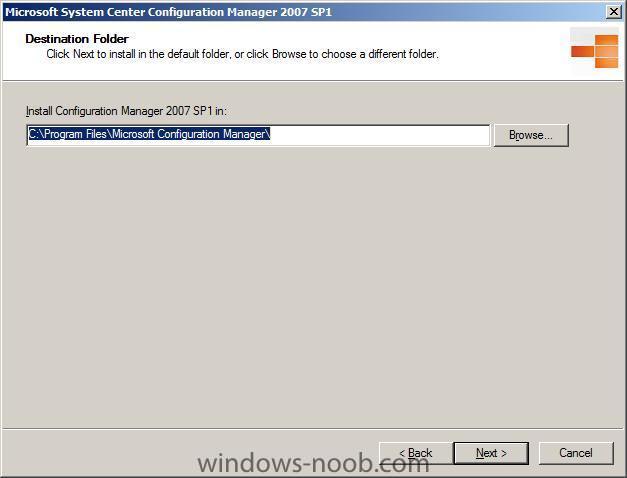
how can I deploy Windows Server 2008 using SCCM 2007 sp1
anyweb replied to anyweb's question in Deploy Server 2008
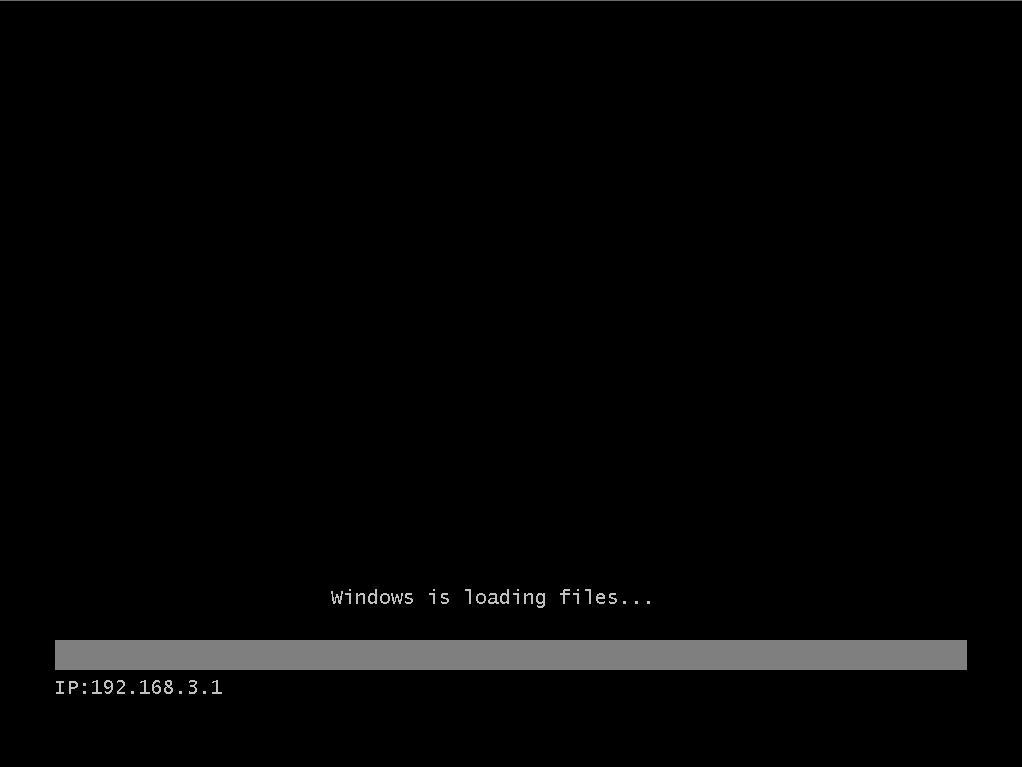
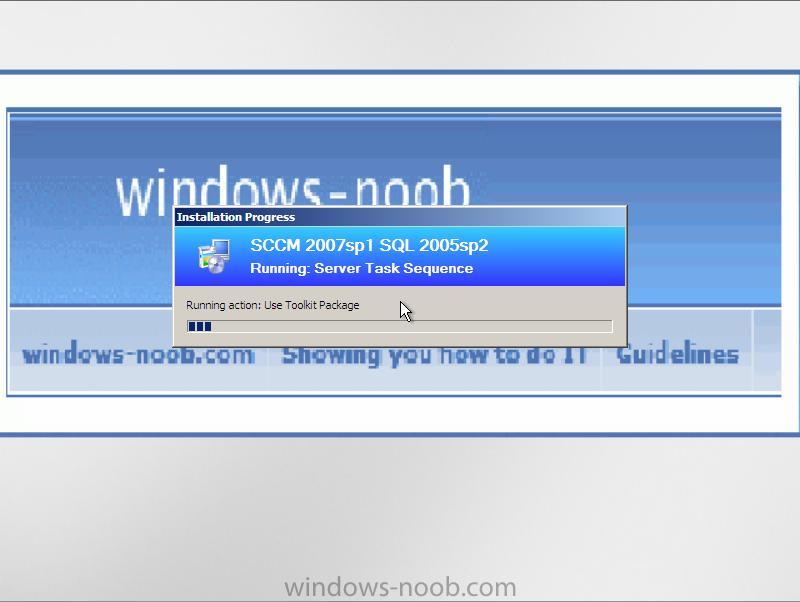
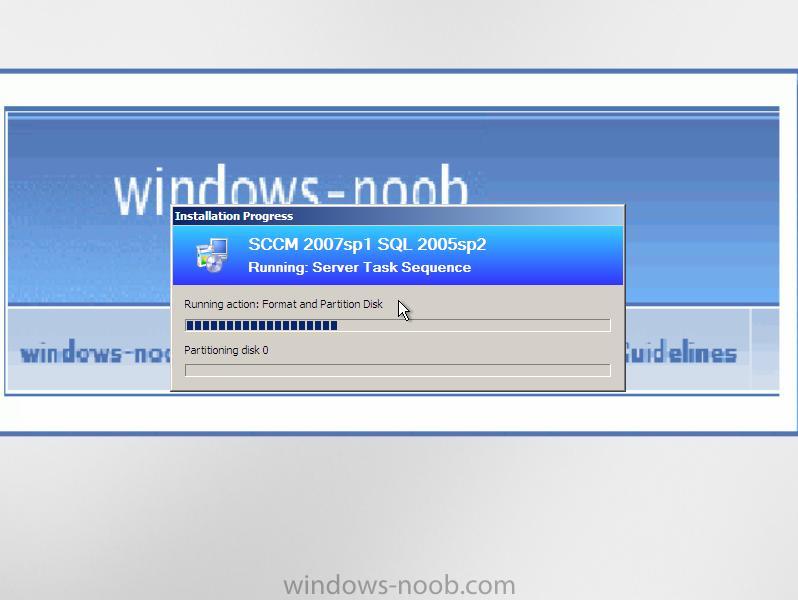
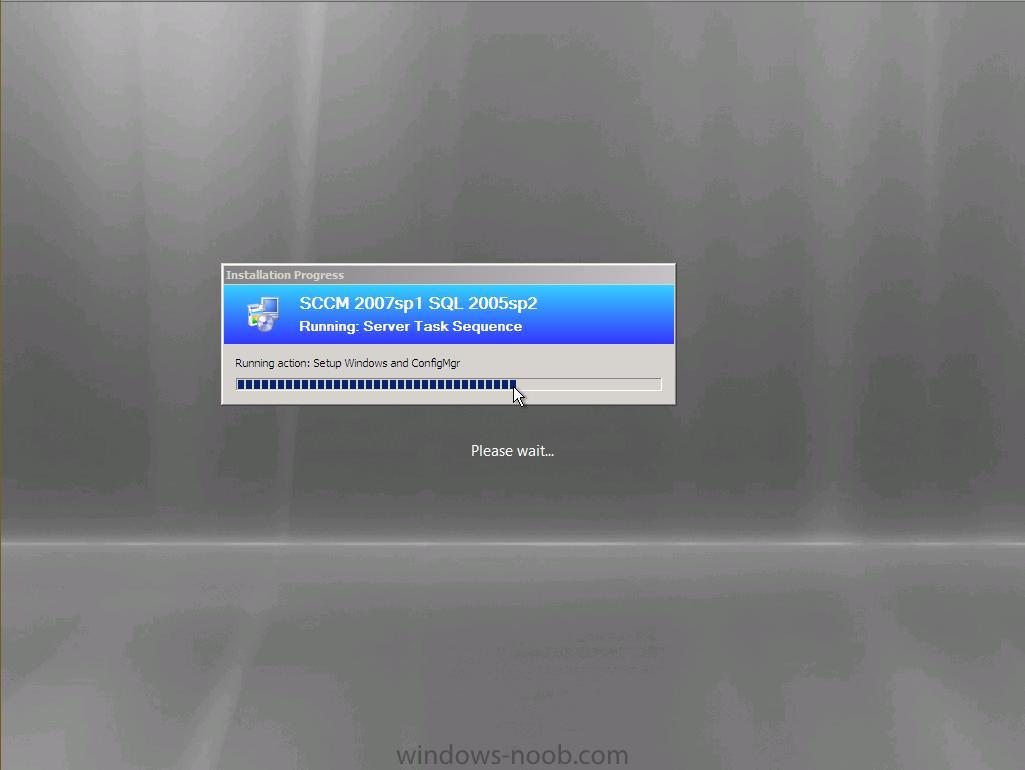
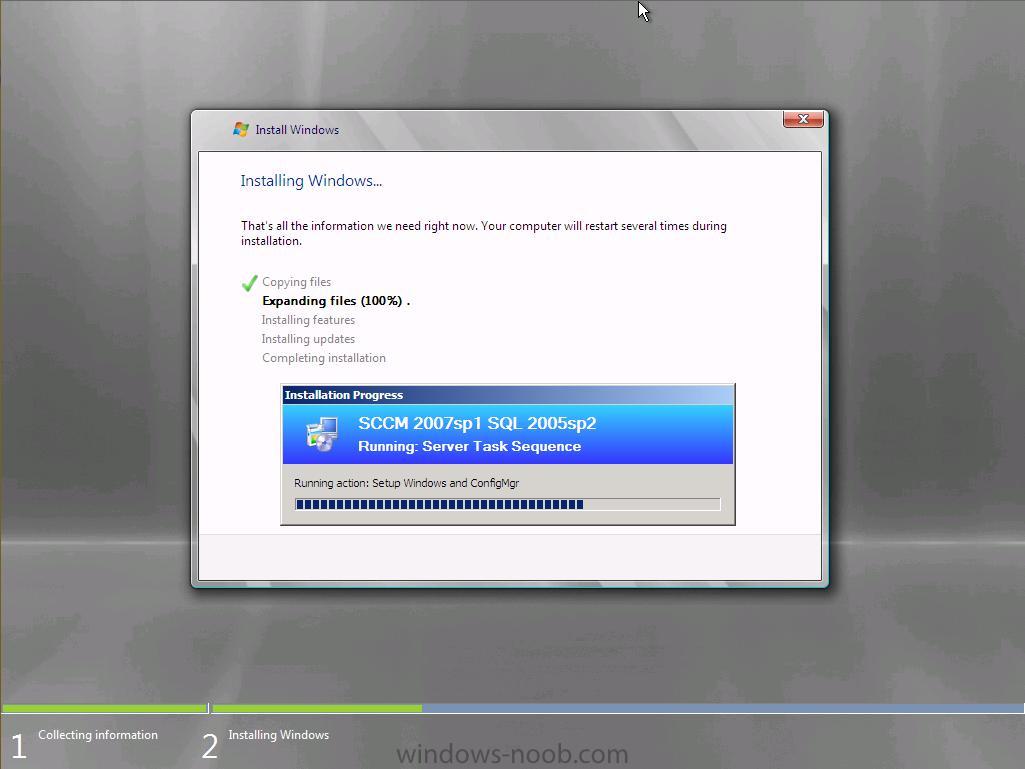
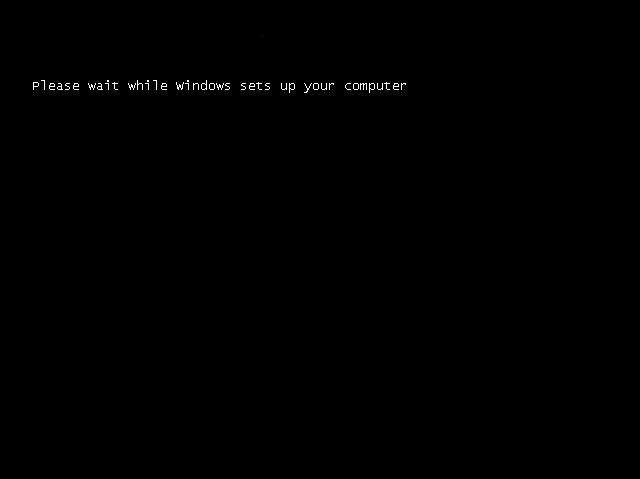
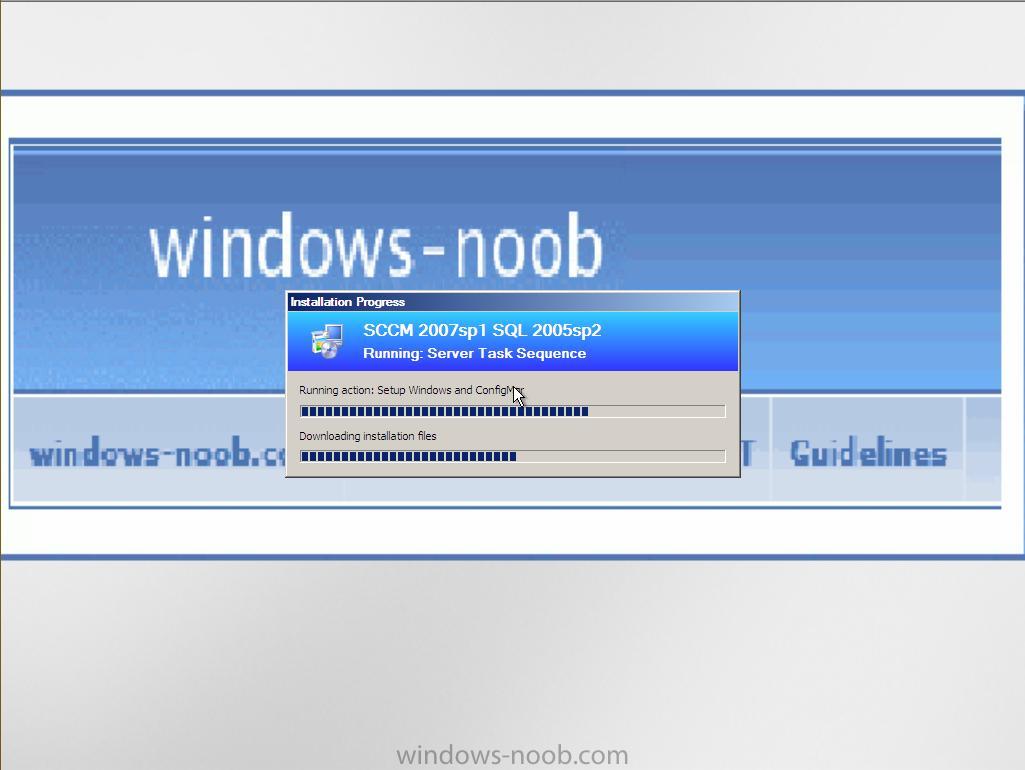
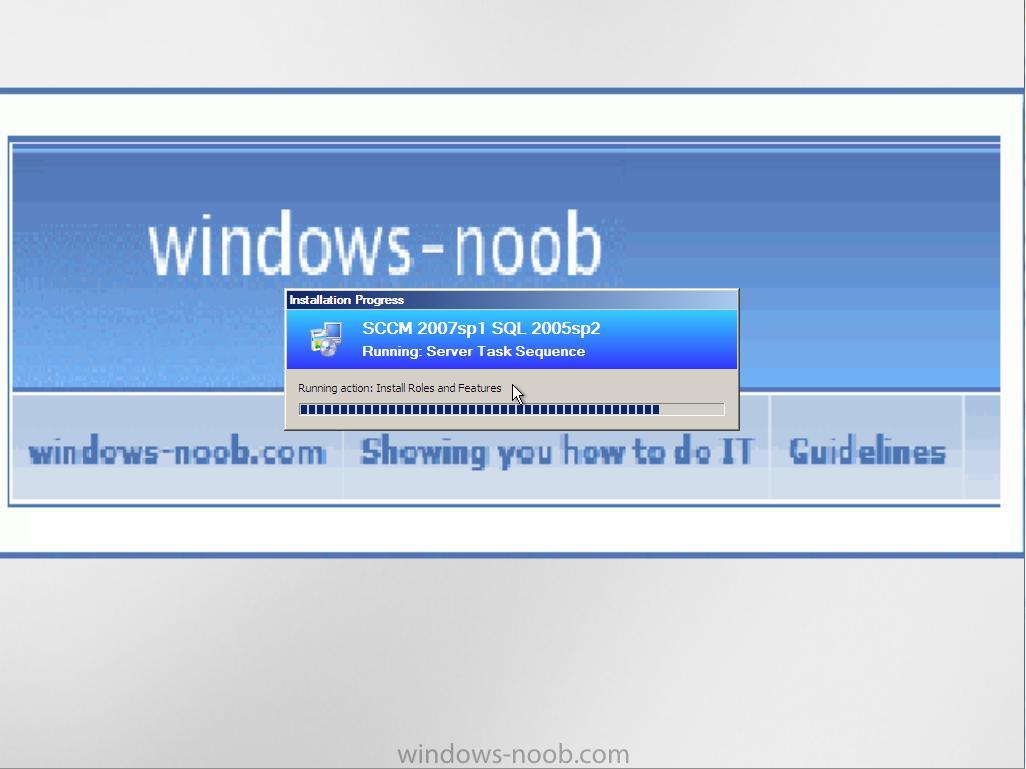
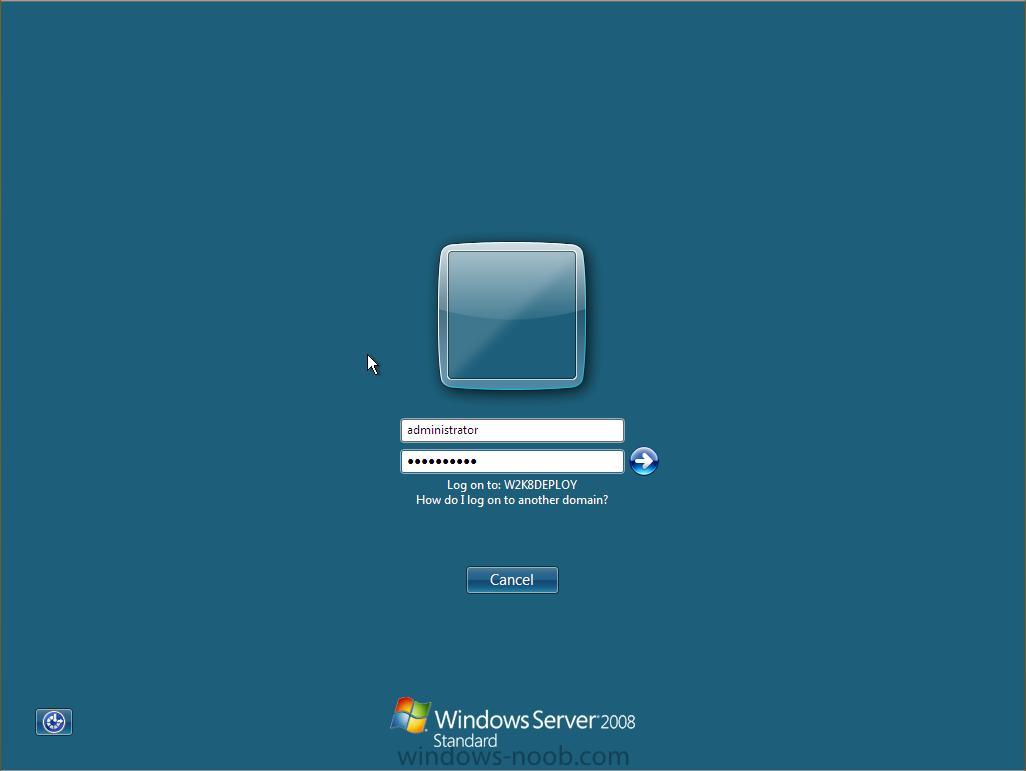
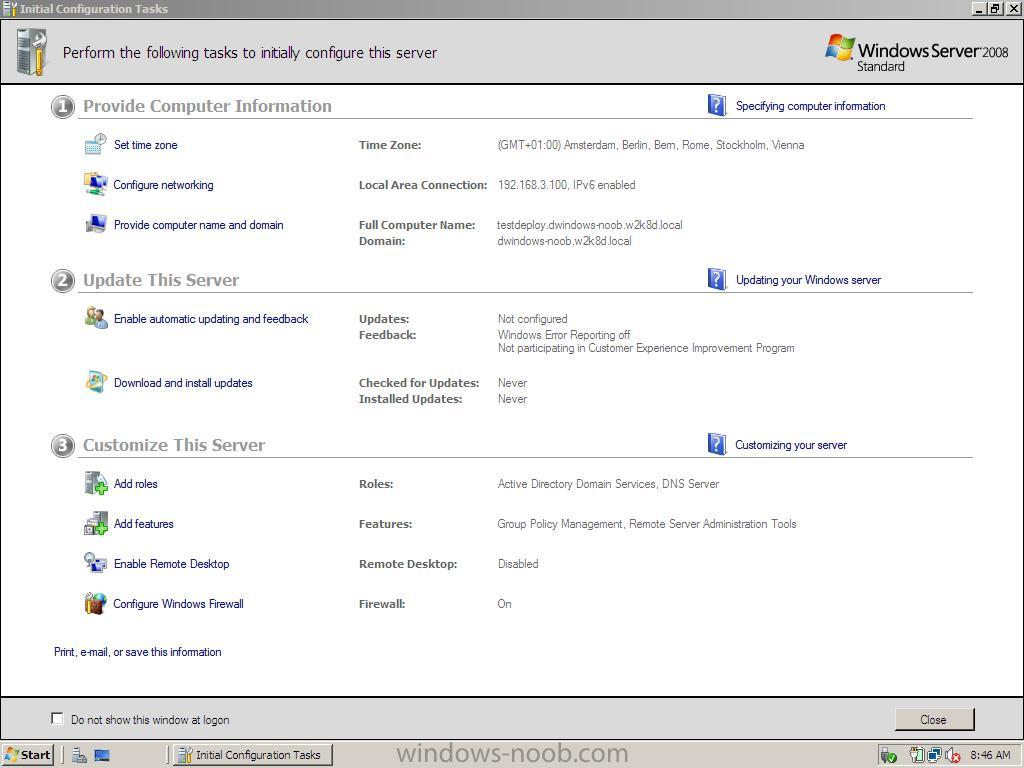
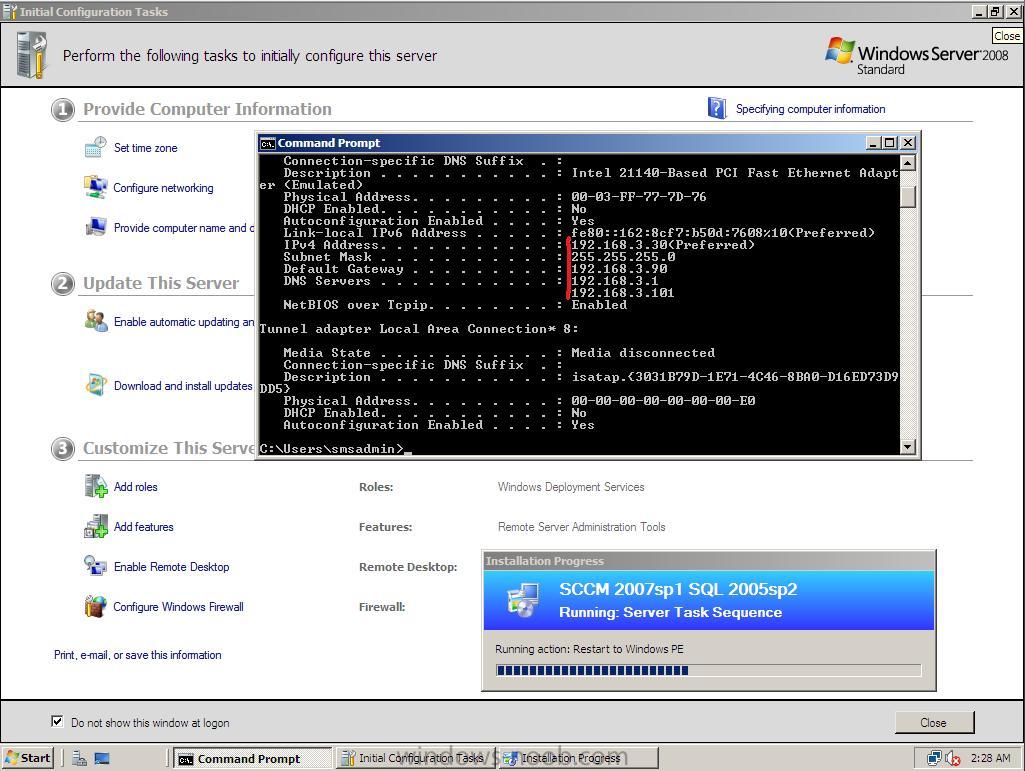
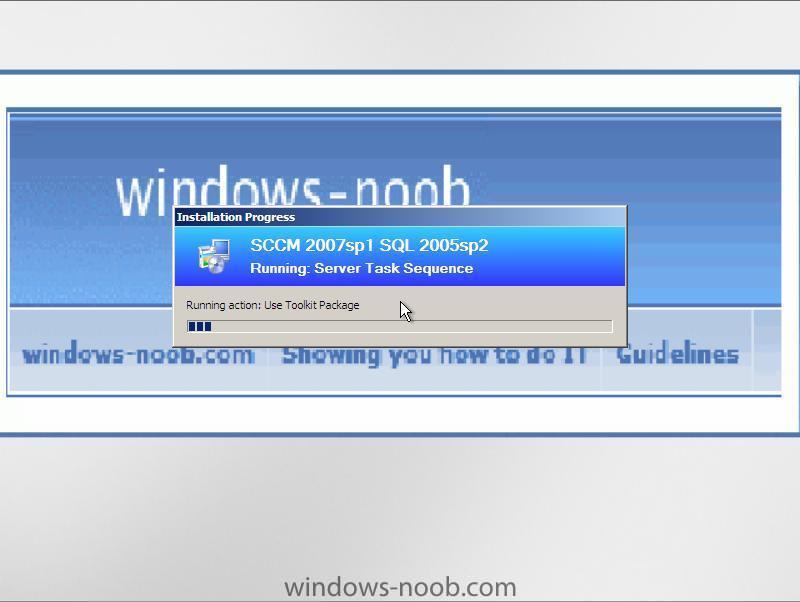
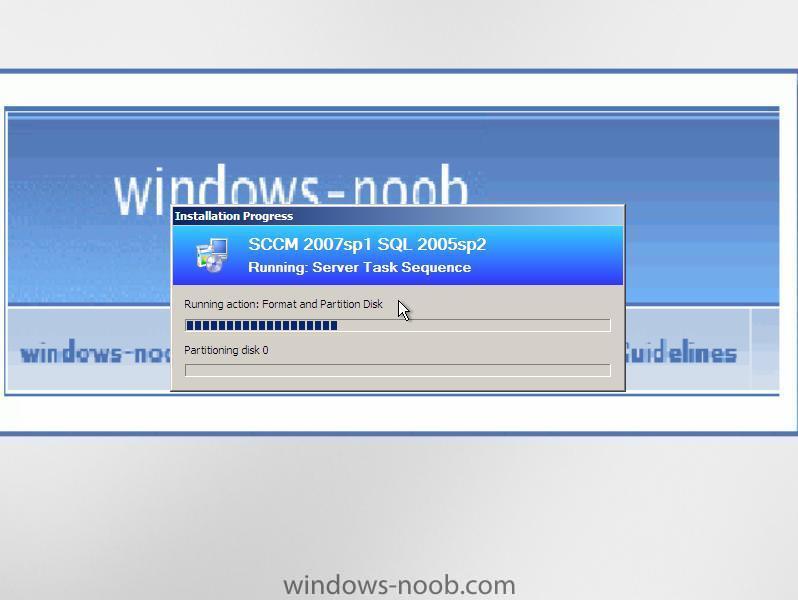
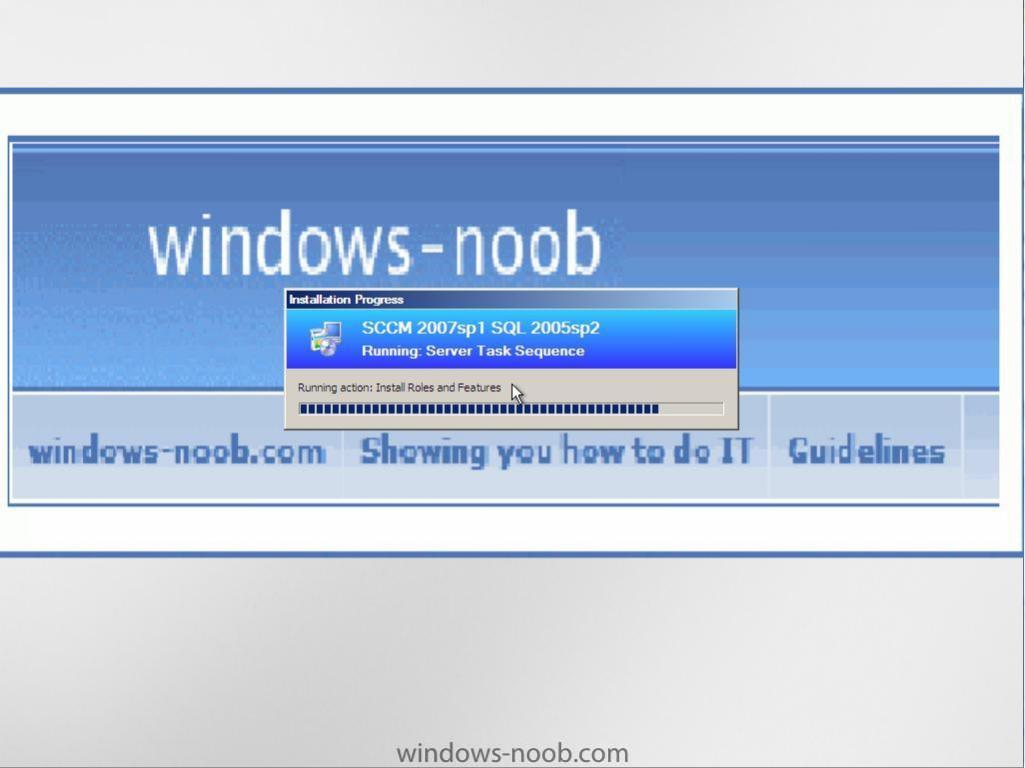
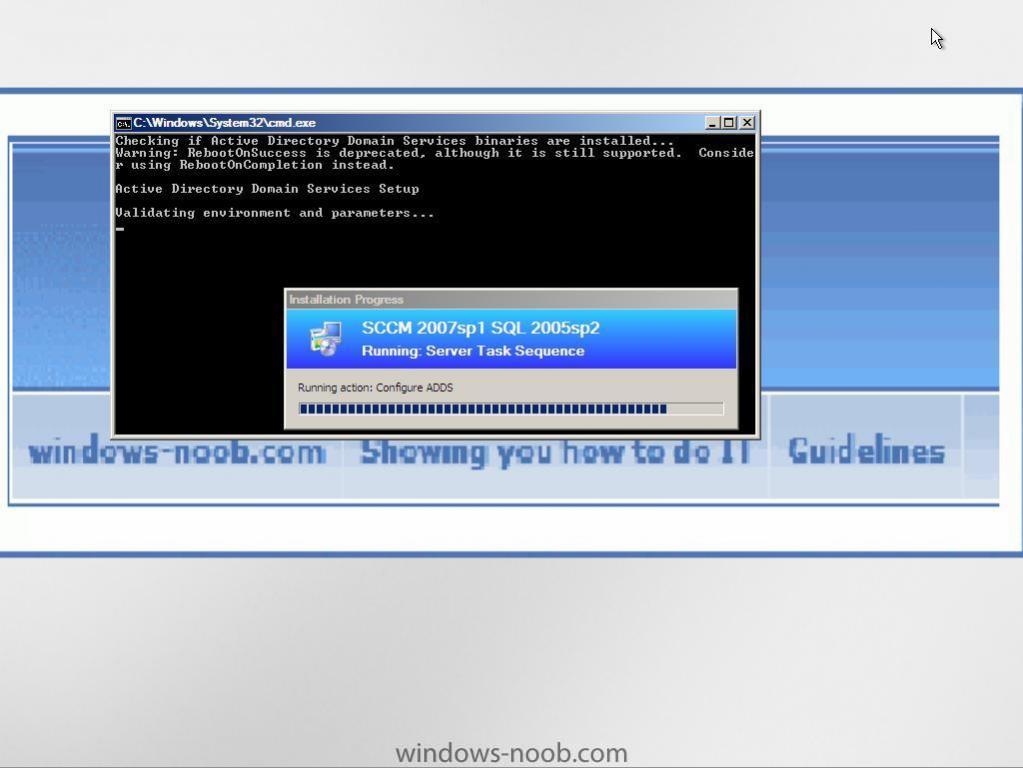
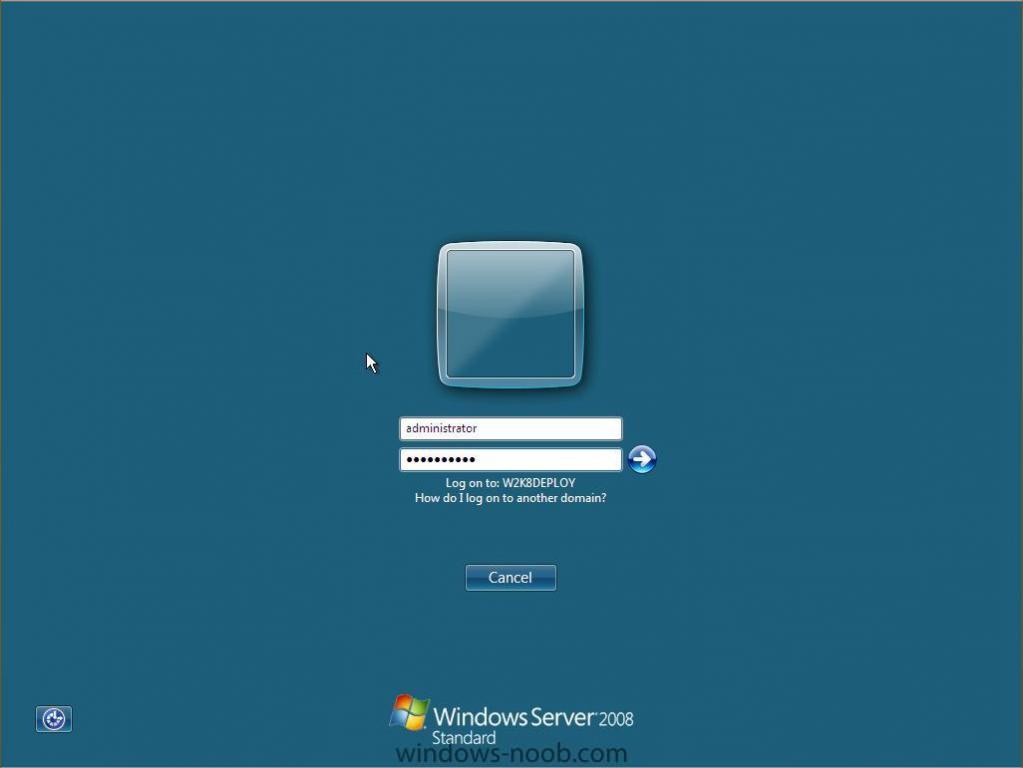
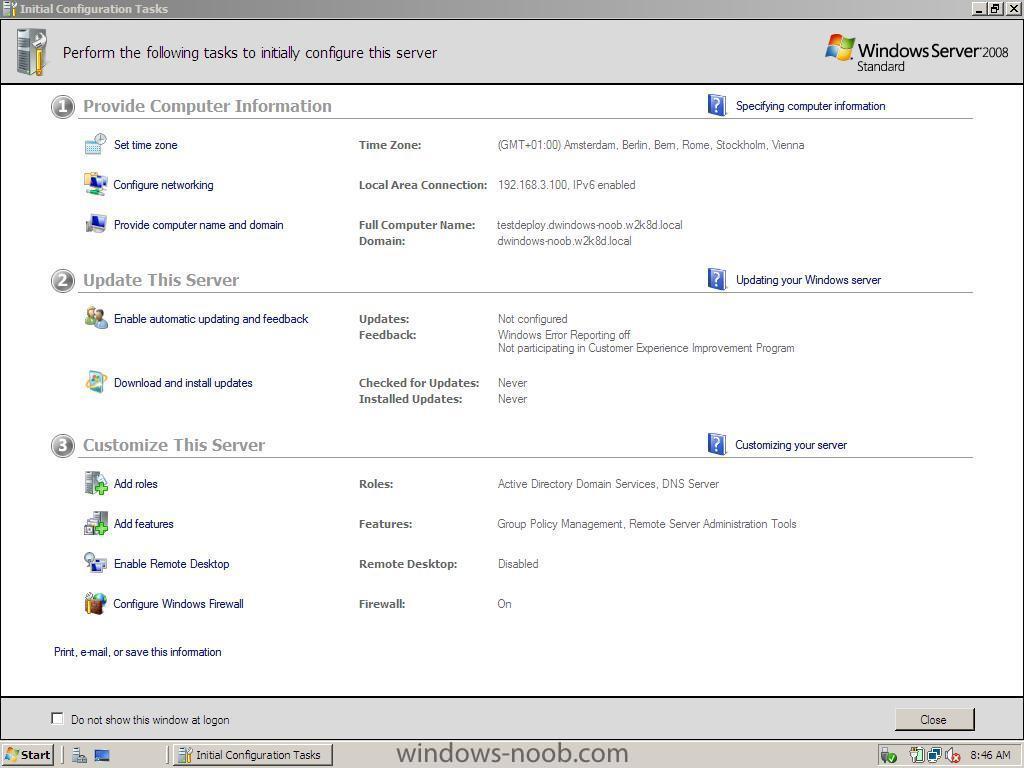
The Deployment Ok we have now got everything in place to deploy the Windows Server 2008 machine, so boot it up and let PXE boot take over Pxe booting the Server.... Windows PE starting.. Note: If PXE boot is not working as planned you may need to do some PXE troubleshooting. customised LOGO in the background :-) here it's starting the Task Sequence.... formatting and partitioning the hard disk... Windows Server 2008 Setup starting... copying and then expanding files.. (this takes a LONG time, especially if you are doing it virtually) a restart followed by... completing installation then another reboot and it starts the next part which is Installing the Configuration Manager client.. once that is installed, another reboot, then....initializing the Configuration Manager client followed by Install Roles and Features ... and here we can see ADDS is being run, configured and setup, as will DNS, and more.. and finally the Windows Server 2008 login Screen and once logged in, here it is, the end result (you have to reboot one more time to see the roles and features installed). if you do an ipconfig /all at this point you'll see that our w2k8deploy server now has the ip address/subnet/gateway settings we specified earlier as variables, however it lists it's DNS settings as localhost instead of the ones we specified, why is this ? because if you setup a server to host it's own AD then it will as part of the AD setup define DNS to point to itself if it is the only DC in a Domain or forest, to test that, simply create a new Task Sequence and instead of making a new Domain Controller, just create a standard server with some feature added. The result will look like this (please note that in this screenshot that another Task Sequence has kicked in and that the server has only one Role installed, namely Windows Deployment Services). If you appreciate the effort that went into helping you Deploy Windows Server 2008, then please Digg this.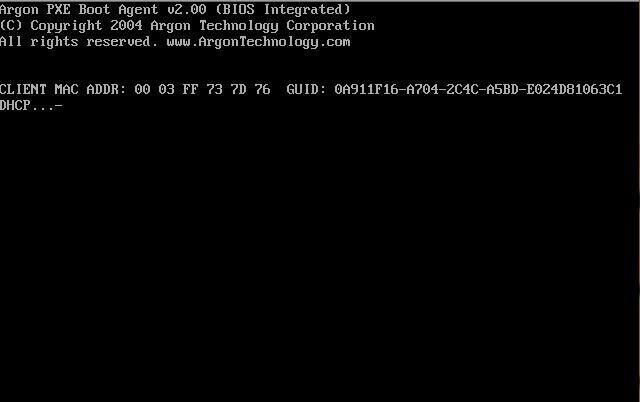


-
and to start the ball rolling here's a blog worth looking at with a video of NAP in action http://blogs.technet.com/systemcenter/arch...on-arrives.aspx cheers anyweb
-
how can I troubleshoot Windows PE booting in SCCM
anyweb replied to anyweb's question in Troubleshooting, Tools, Hints and Tips
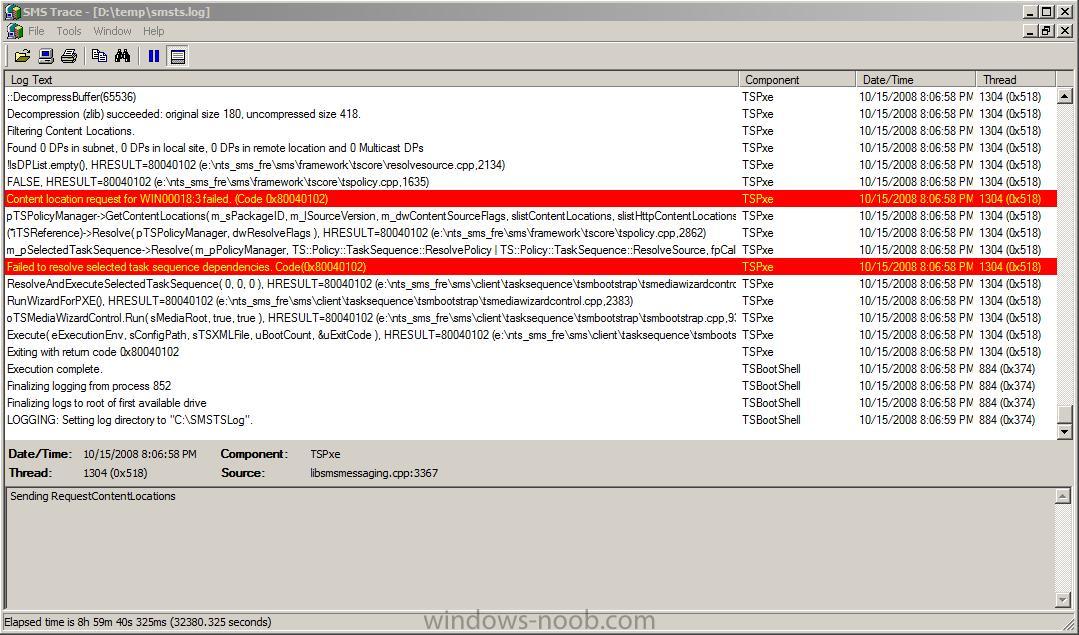
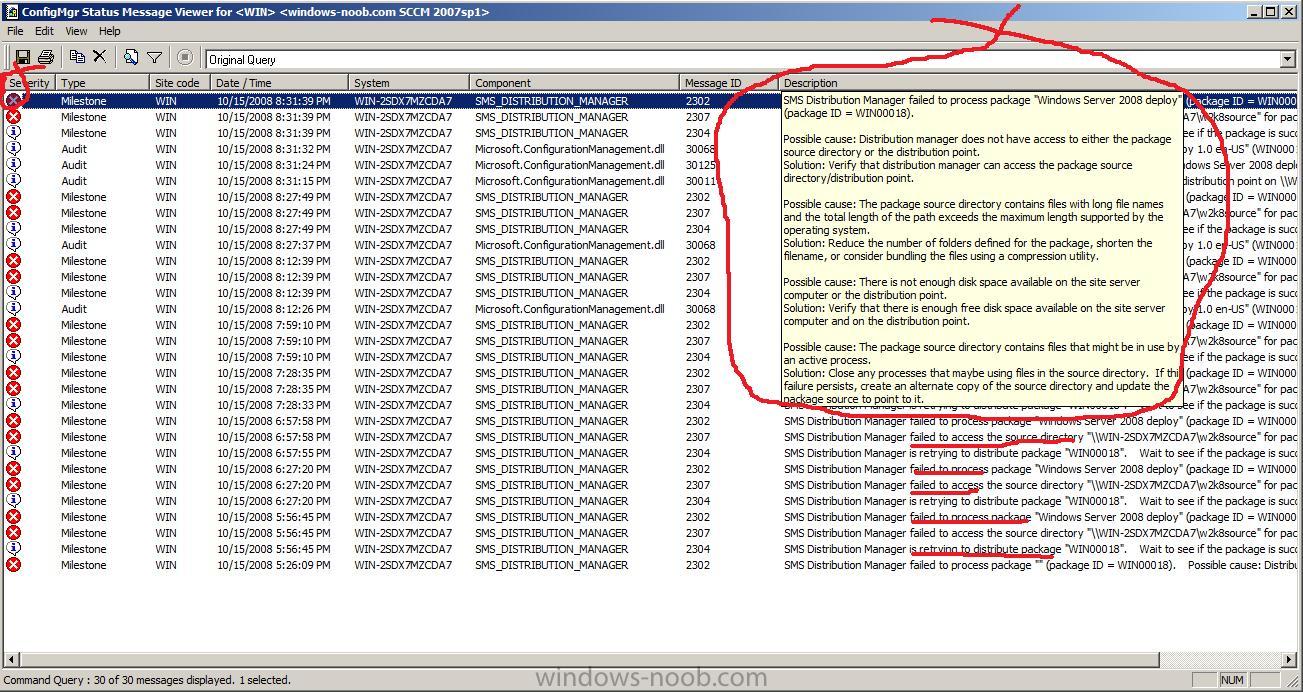
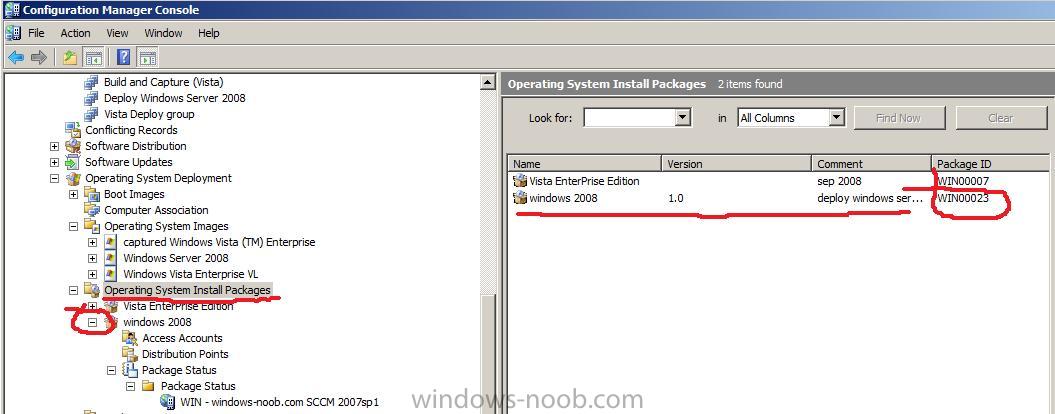
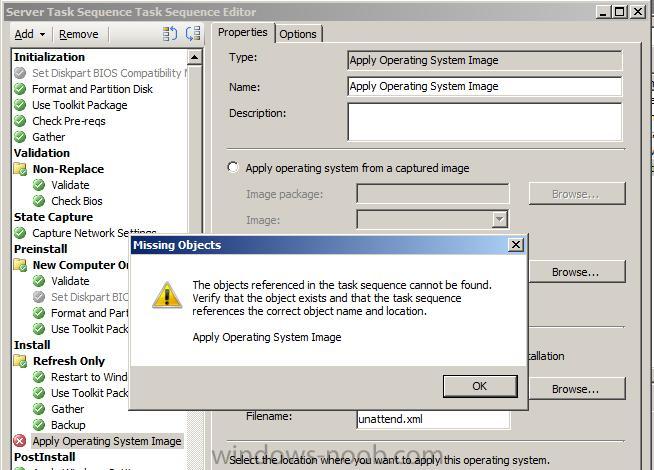
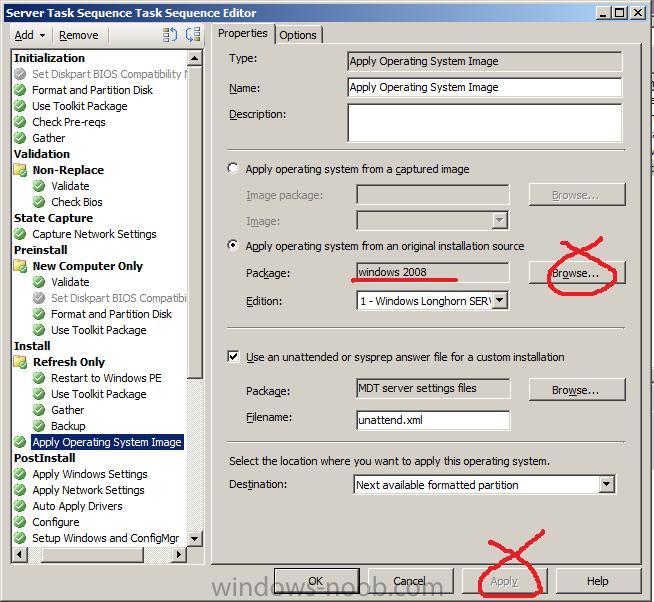
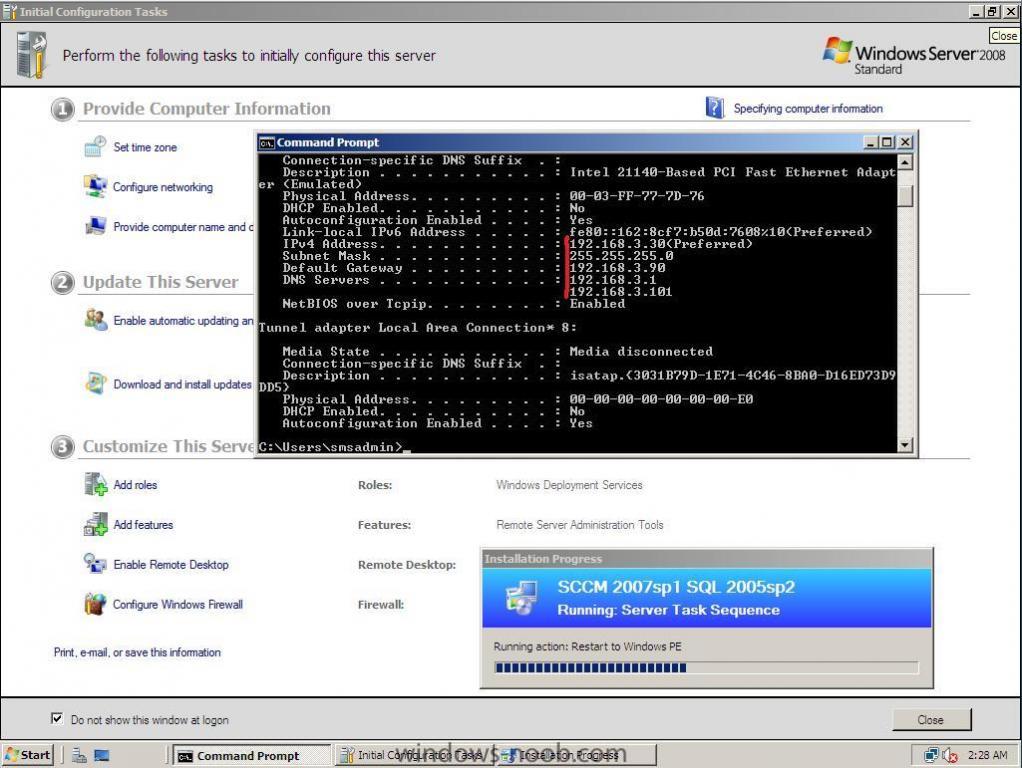
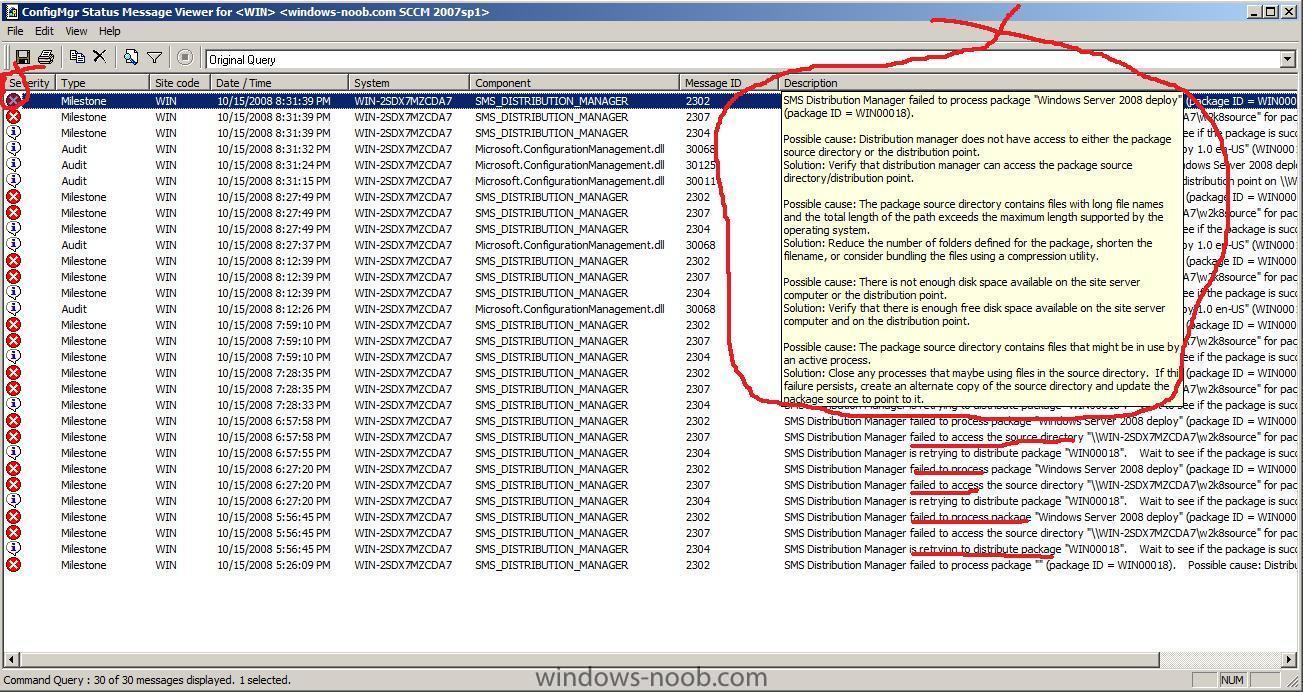
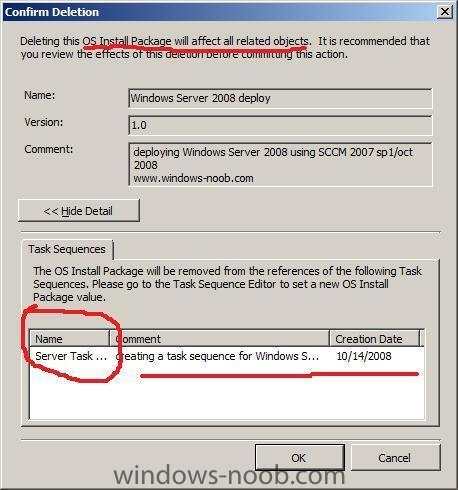
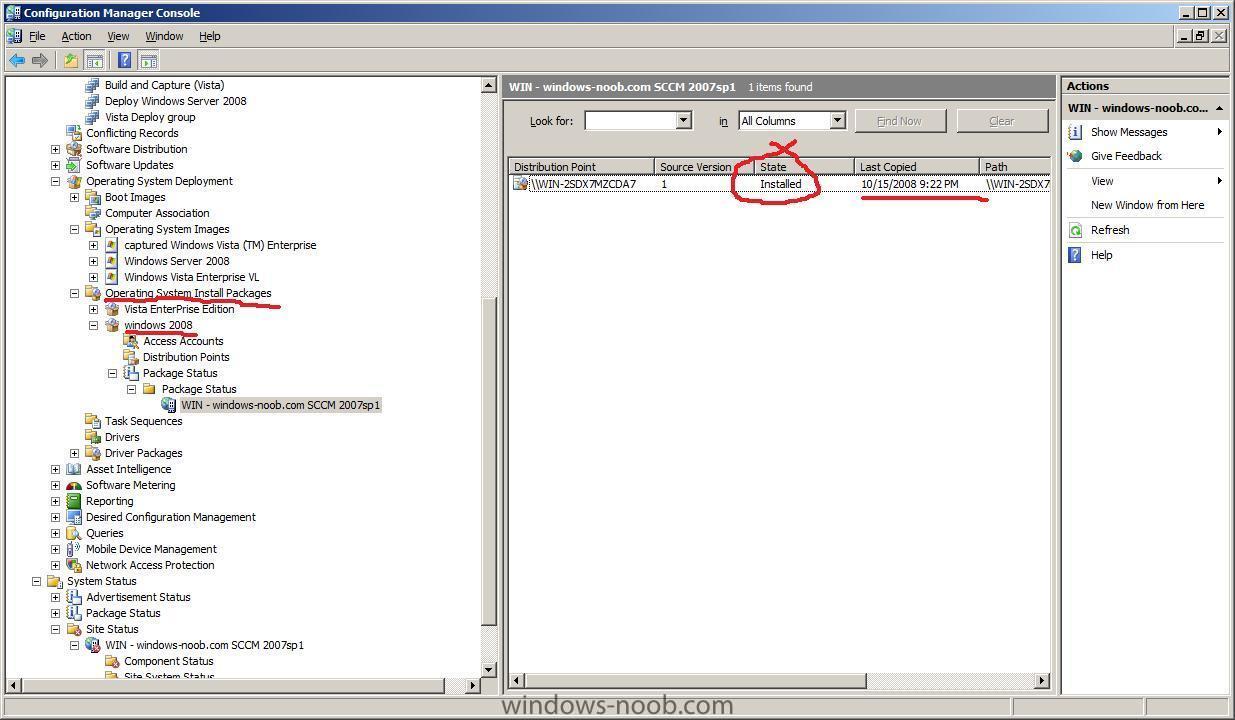
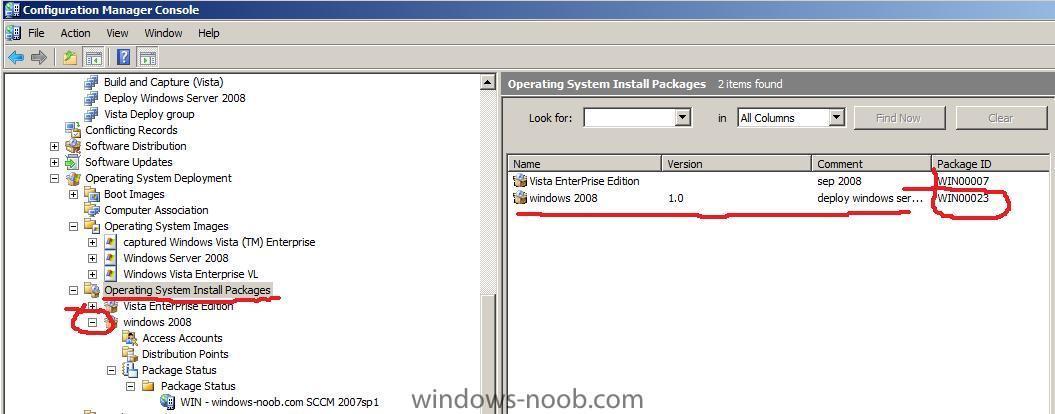
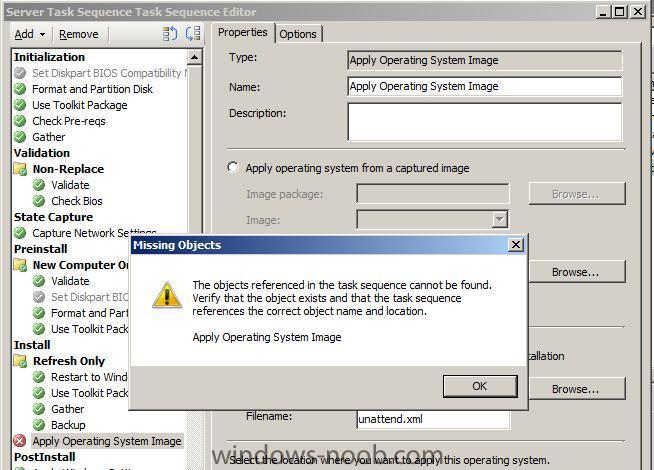
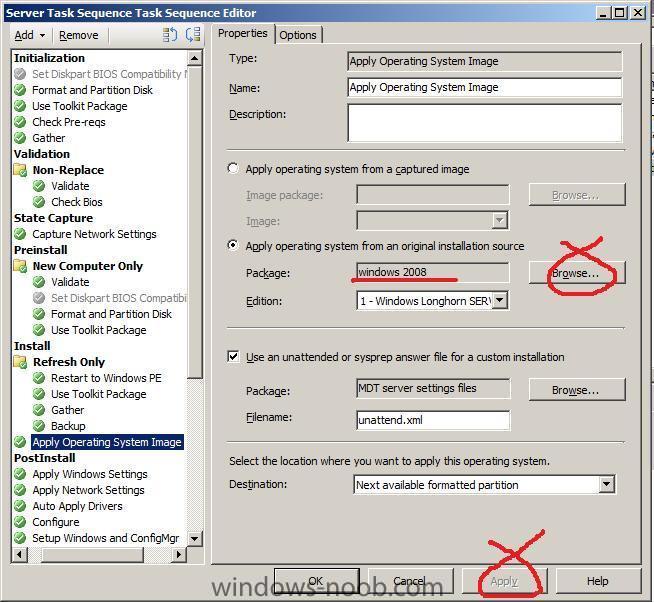
PXE Client Reboots After Booting In WinPE make sure the Operating System Installation Package is distributed to the distribution point This time I checked the SMSTS.log and found a new error followed by I checked ConfigMgr and found that the package was the Windows Server 2008 Deploy Operating System Installation Package, I checked that it had been distributed (it had) and updated (it had) it still rebooted Windows PE, so I checked ConfigMgr's package status loads of failed to access errors workaround delete the package and recreate it, then redistribute it, then verify that it's status in SCCM ConfigMGr (package status) is ok, get it's package ID then go back into Task Sequencer *it will alert you of the fact that it's missing anyway, as it's pointing to the old now deleted package ID* and point it to the new Operating System Install Package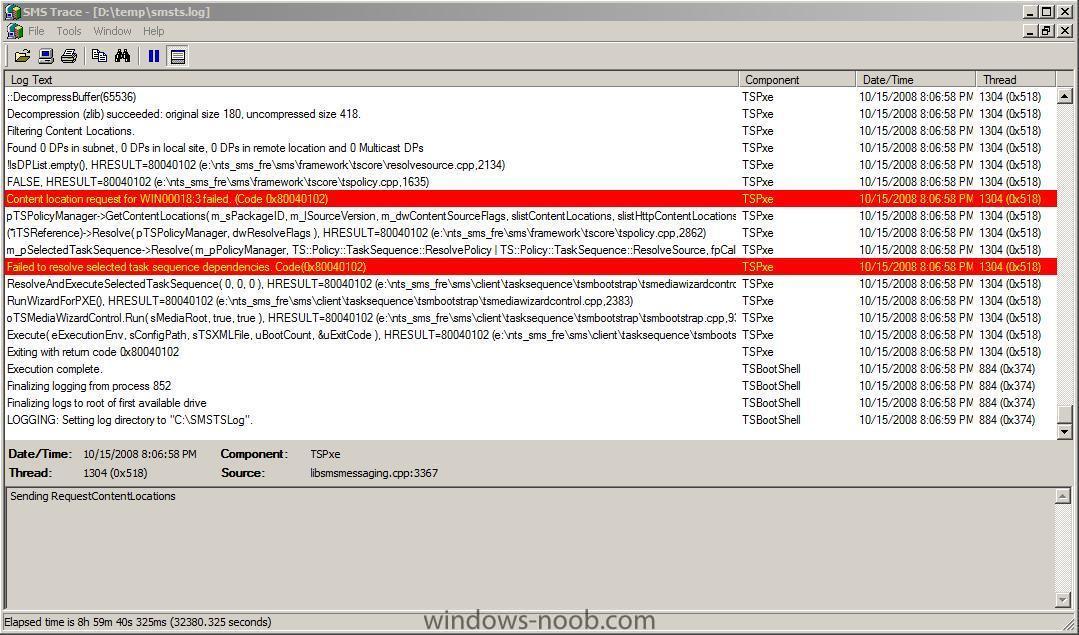
-
http://technet.microsoft.com/en-us/library/bb680753.aspx DHCP server with an active scope. WDS will utilize PXE which requires a DHCP server. Whether you plan to co-host WDS and DHCP on the same server or use two different servers you must configure WDS to listen on a specific port. DHCP and WDS both require port number 67. If you have co-hosted WDS and DHCP you can move DHCP or the PXE site role to a separate server or use the procedure below to configure the WDS server to listen on a different port. Modify the following registry key: HKEY_LOCAL_MACHINE\SYSTEM\CurrentControlSet\Services\WDSServer\Providers\WDSPXE Set the registry value to: UseDHCPPorts = 0 For the new configuration to take effect run the following command on the co-located DHCP and WDS server: WDSUTIL /Set-Server /UseDHCPPorts:No /DHCPOption60:Yes
-
SQL 2008 is now supported as Site Server Database. The driver issue can be resolved with this Hotfix http://support.microsoft.com/kb/955262 (SP1) http://support.microsoft.com/kb/955229 (RTM) guide to installing SQL 2008 is here
-
how can I troubleshoot Windows PE booting in SCCM
anyweb replied to anyweb's question in Troubleshooting, Tools, Hints and Tips
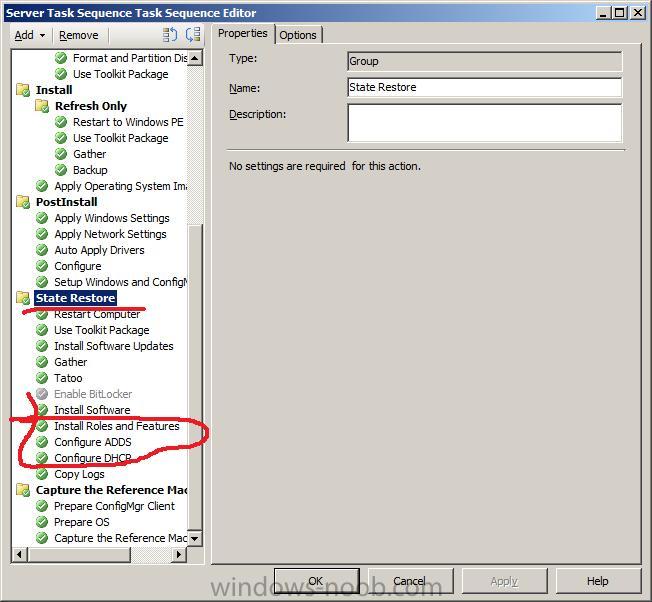
The below troubleshooting errors are for my own documentation purposes only, your results may vary:- reason: I had configured ADDS in the wrong section of the Task Sequencer, moved it down to the correct location which is StateRestore heading after the Install Software section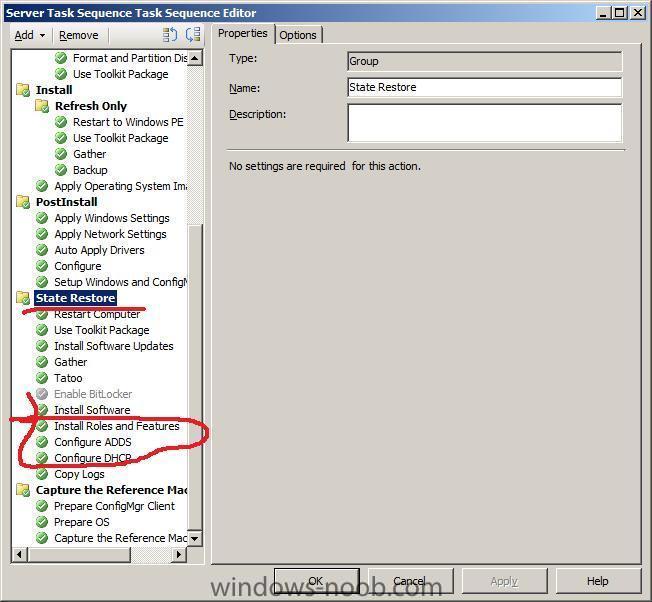
-
how can I deploy Windows Server 2008 using SCCM 2007 sp1
anyweb replied to anyweb's question in Deploy Server 2008
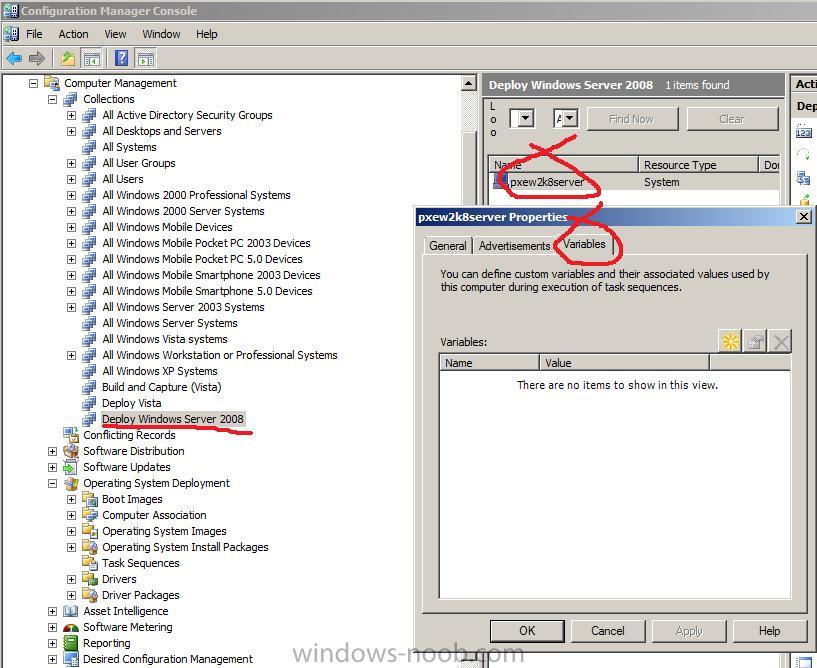
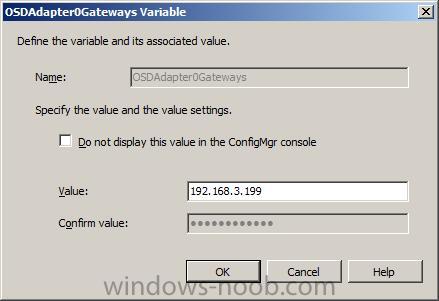
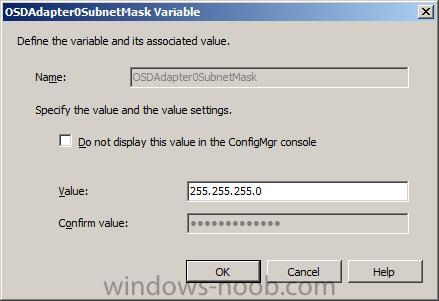
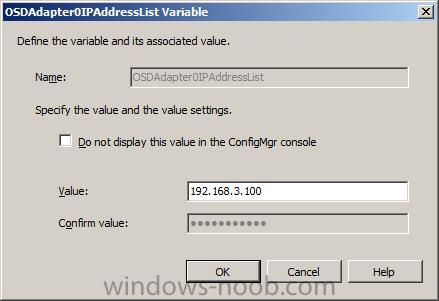
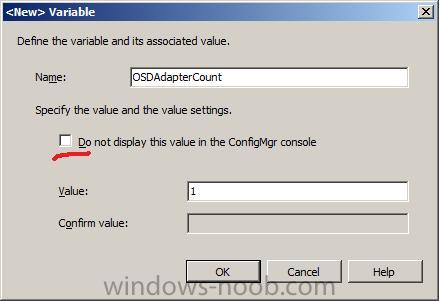
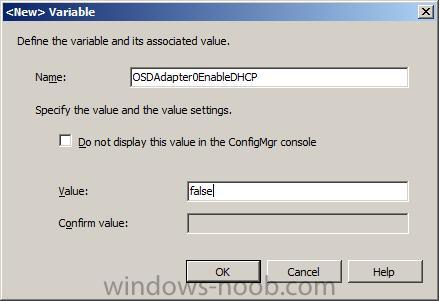
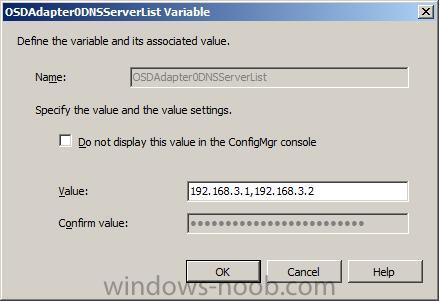
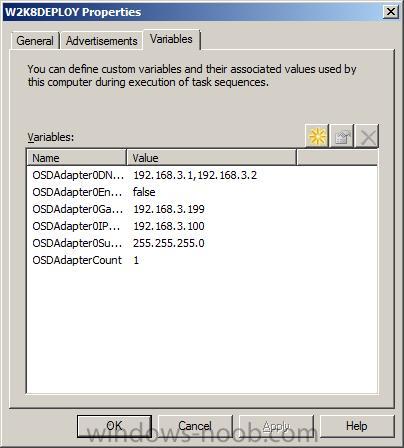
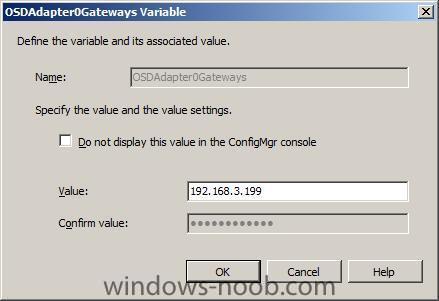
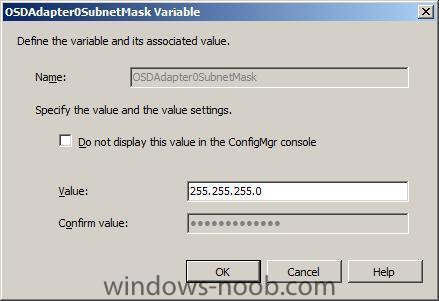
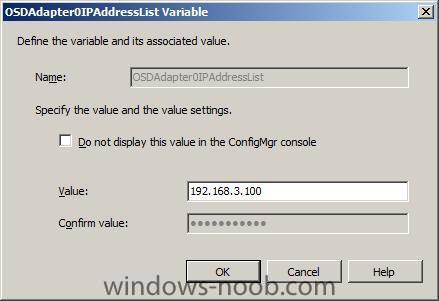
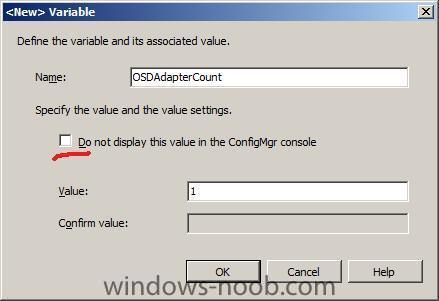
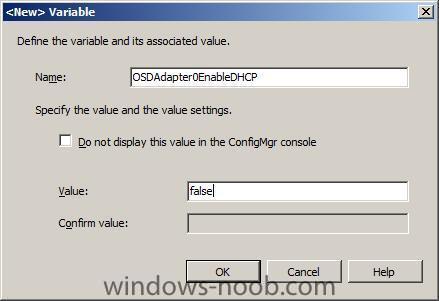
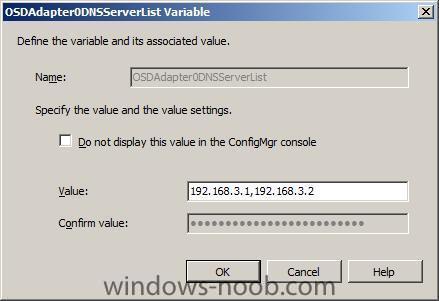
Set the IP address as a variable we are now going to define the IP address of the server, to do so, select the Collection we've just added it to and locate the computer, right click on it and choose properties and then click on the variables tab click on the yellow star to define a new variable... For a static IP address, we need to add the following variables: You can get a full list of available variables here here's a sample of values for the above variables so starting with the OSDAdapterCount variable, let's remove the checkmark from do not display this value and enter a value.... now we shall disable the ability to get an IP from a DHCP server For the OSDAdapter0IPAddressList variable, enter the IP address next we add the subnet gateway and DNS servers (keep in mind that the DNS ip address(s) must still allow contact back to our SCCM server or the Task Sequence will fail just after applying the network settings to the network card. until our IP address variables look like this

-
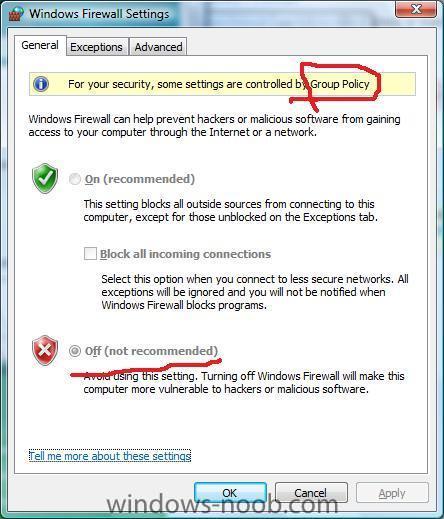
look at the bottom of this post for the answer (Configuring Vistas Firewall)
-
how can I deploy Windows Server 2008 using SCCM 2007 sp1
anyweb replied to anyweb's question in Deploy Server 2008
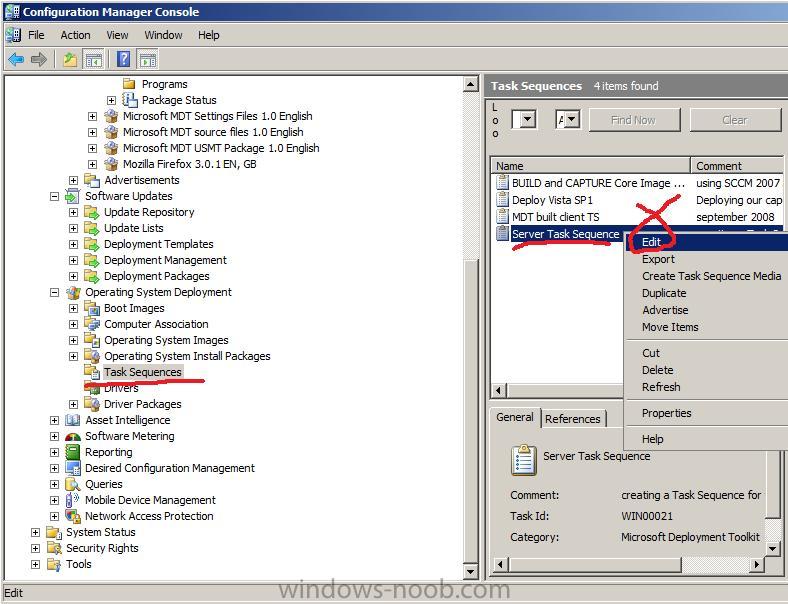
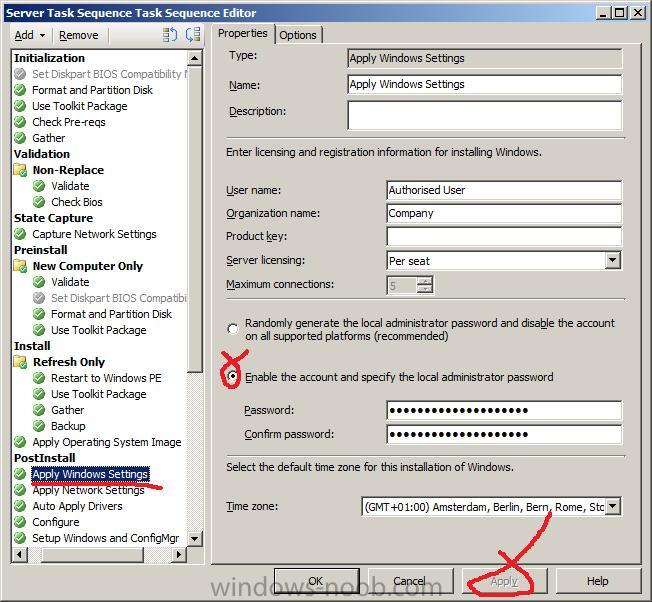
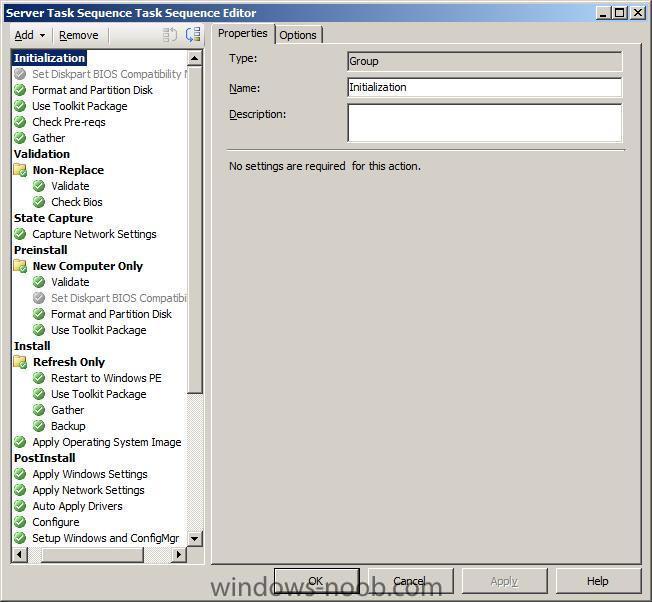
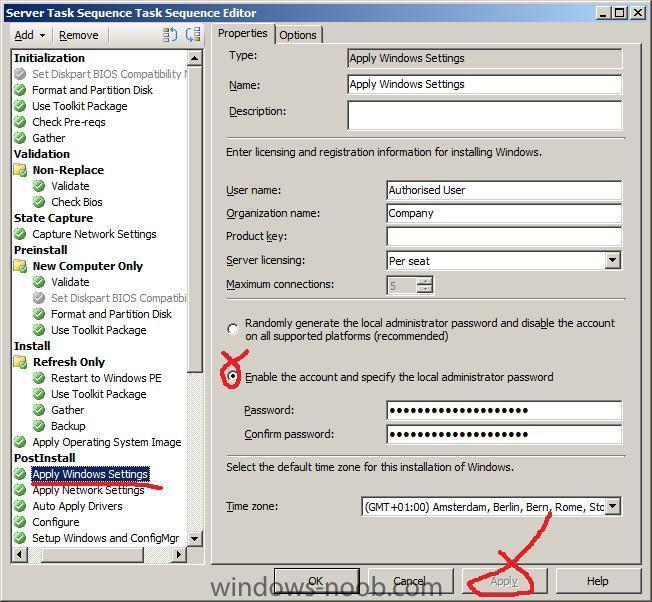
Editing the Task Sequence The Task Sequence is like a list of instructions telling our installer how to install the OS (in this case Windows Server 2008), you will probably want to customise several of the actions in the default task sequence. To modify the task sequence, right click the Server Task Sequence we created in Part 1 and choose edit The task sequence will then be displayed We could choose any of the categories on the left side and view the appropriate options tab on the right pane, Set the Administrator Password In the left pane of the Task Sequence click on the Post Install heading, and select Apply Windows Settings, select Enable the account and specify the local administrator password, enter a strong password and click apply. If you don't do this then you won't be able to logon to the server if something goes wrong.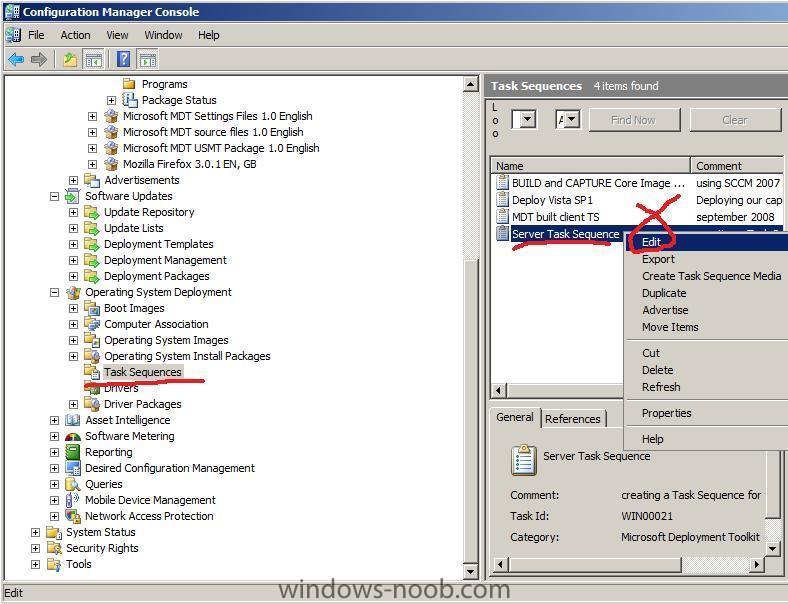
-
how can I deploy Windows Server 2008 using SCCM 2007 sp1
anyweb replied to anyweb's question in Deploy Server 2008
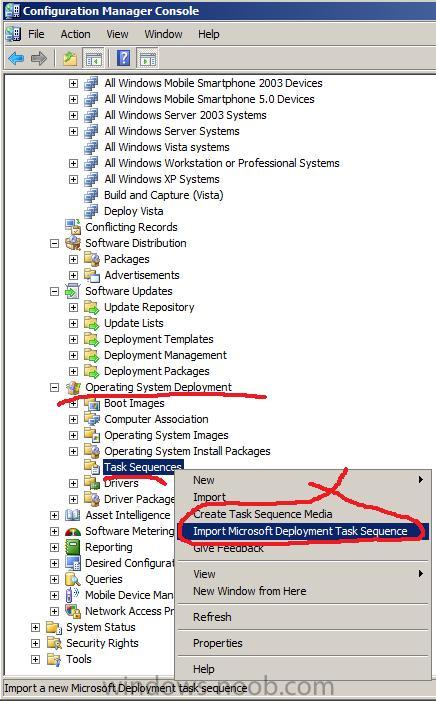
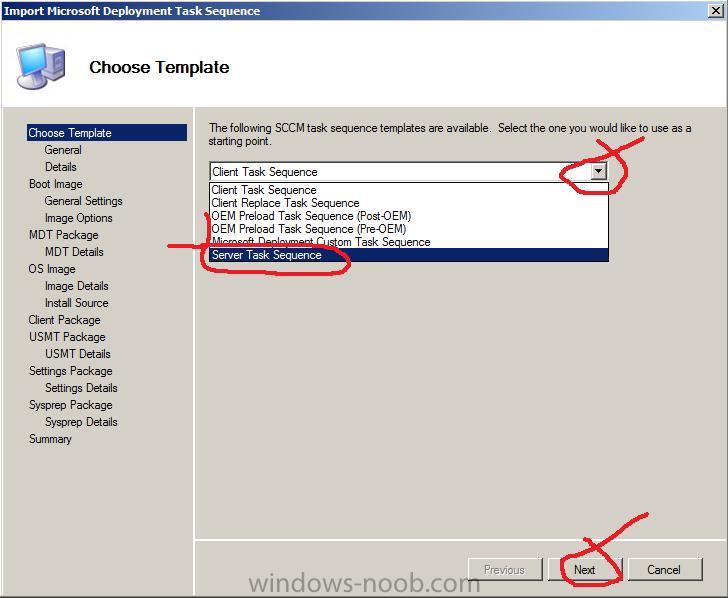
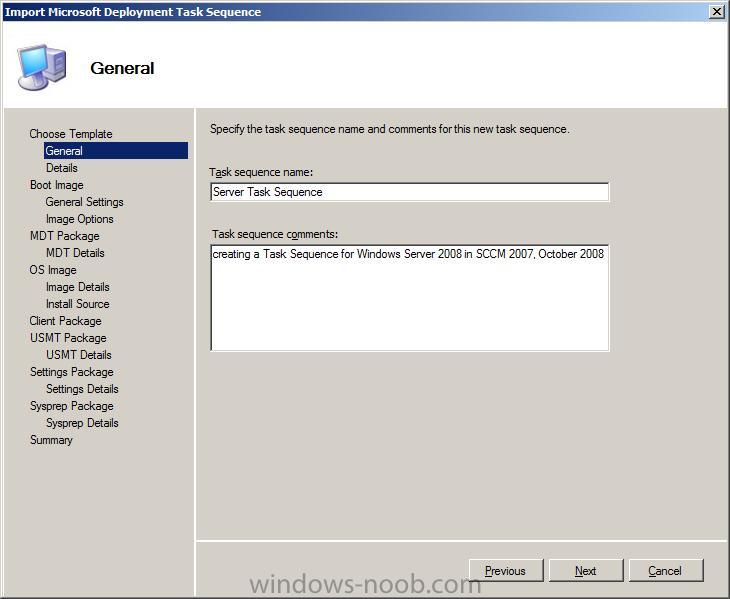
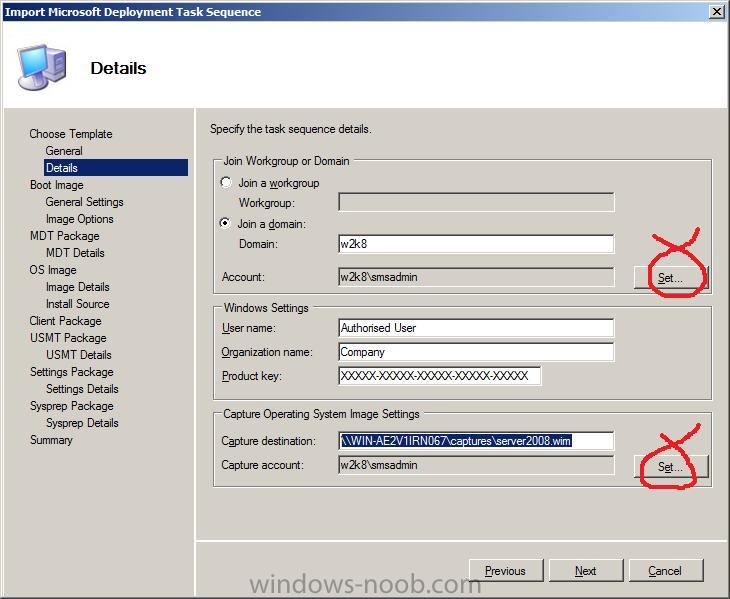
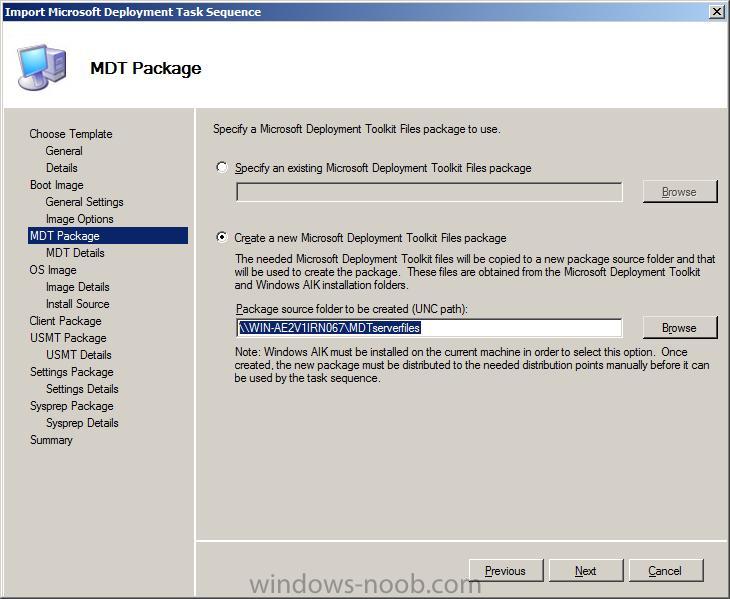
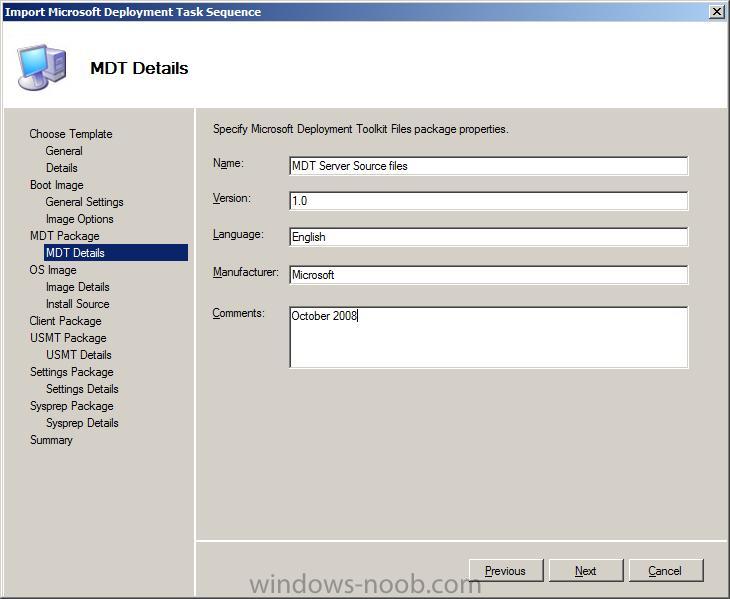
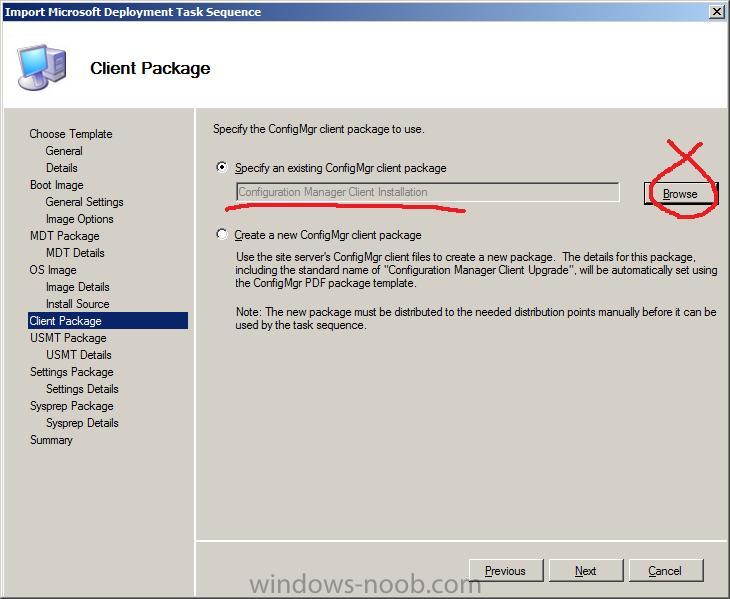
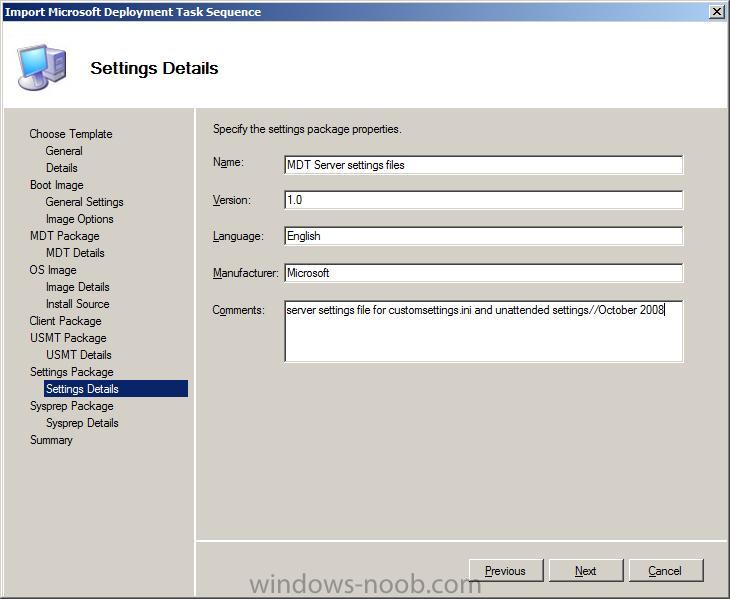
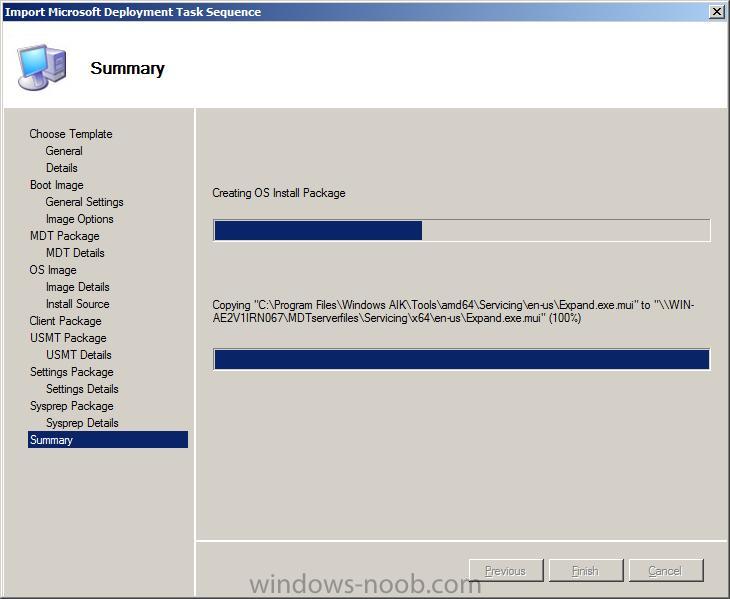
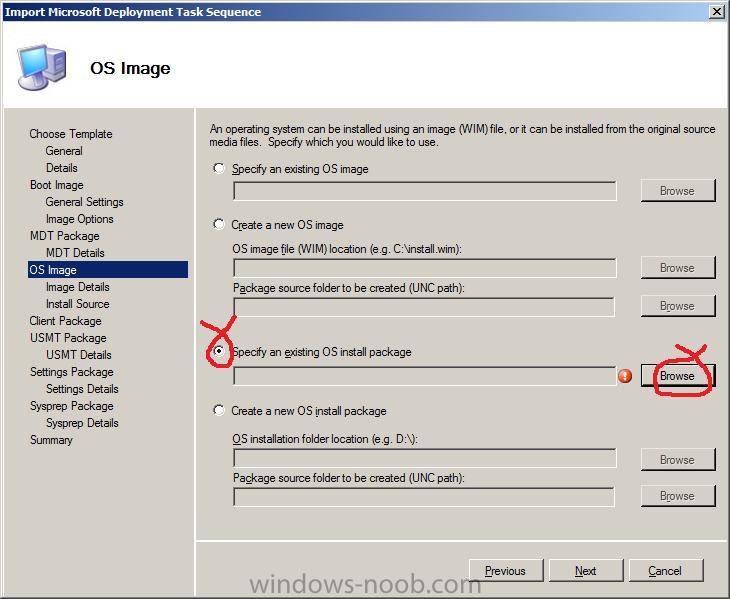
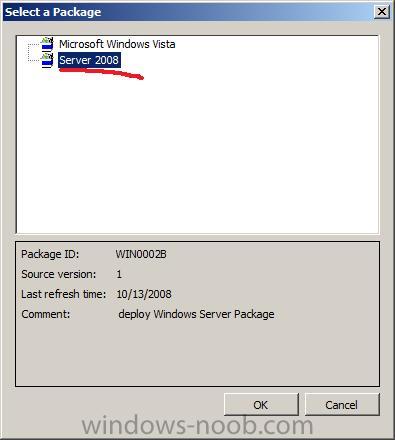
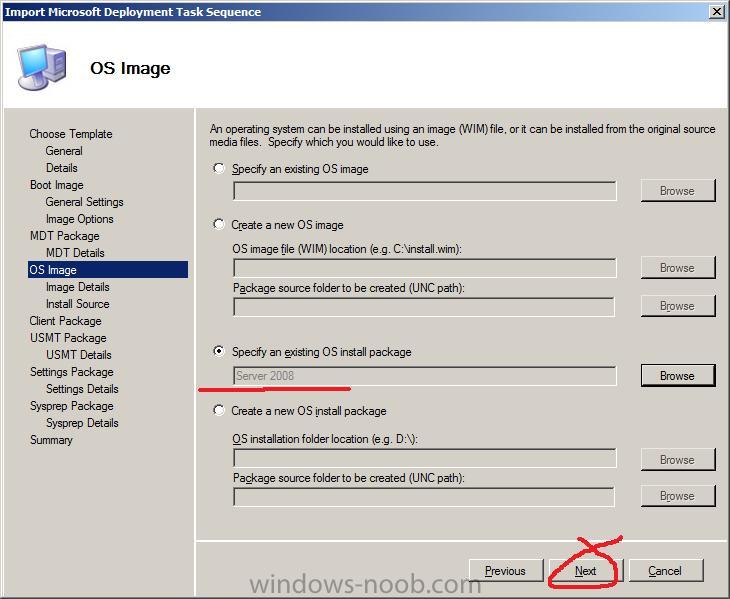
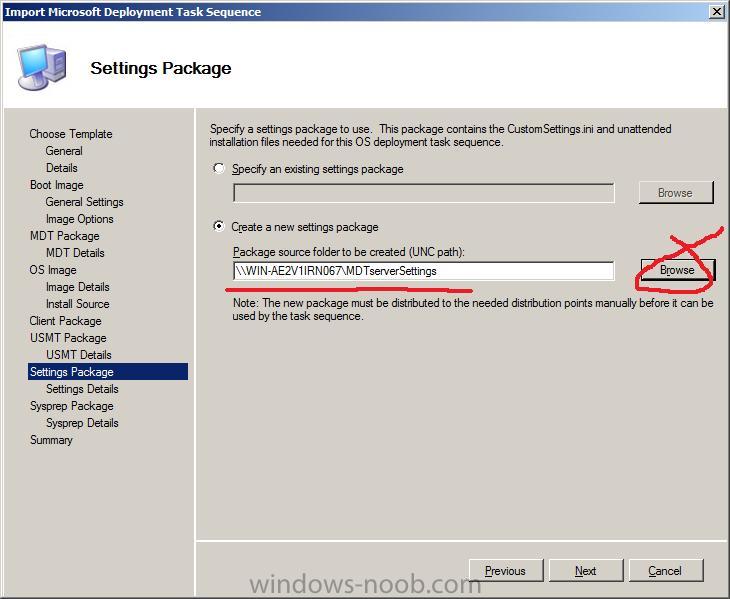
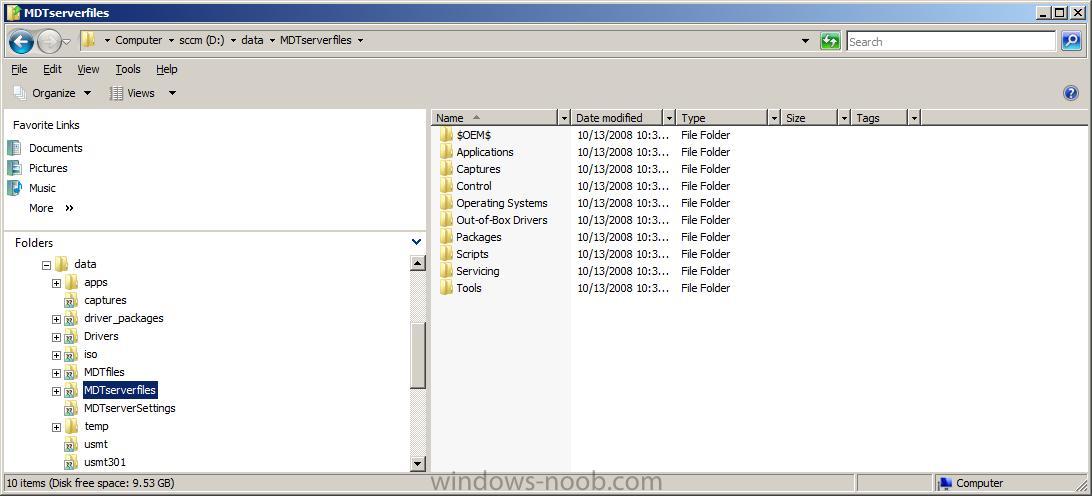
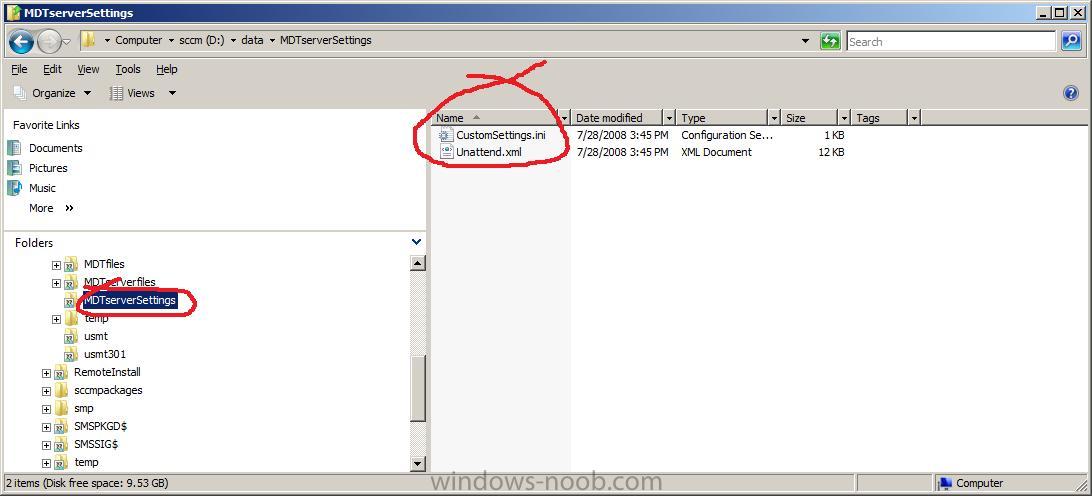
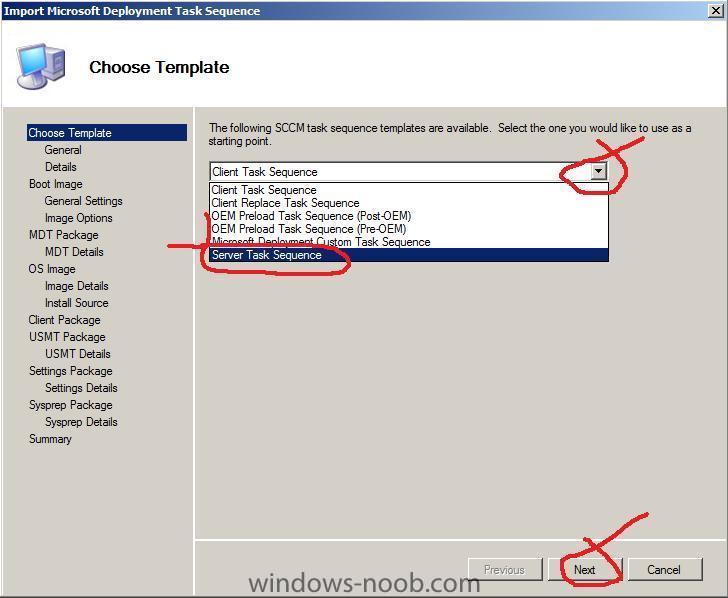
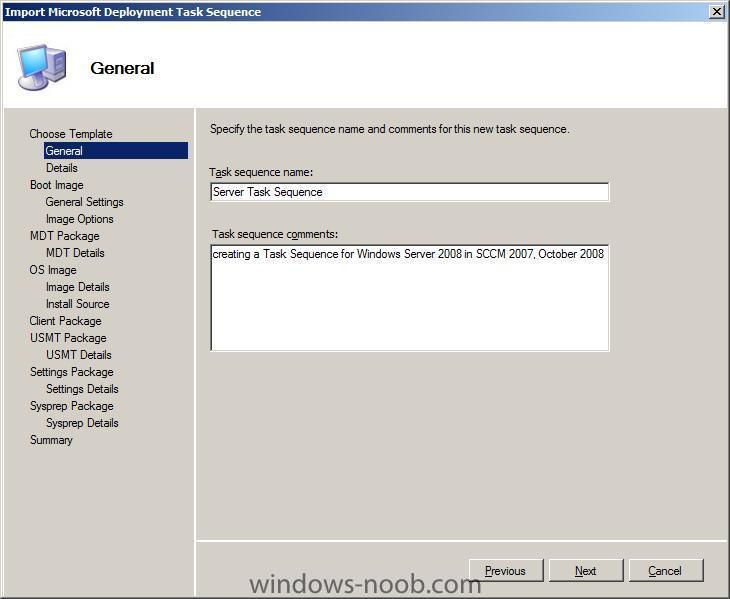
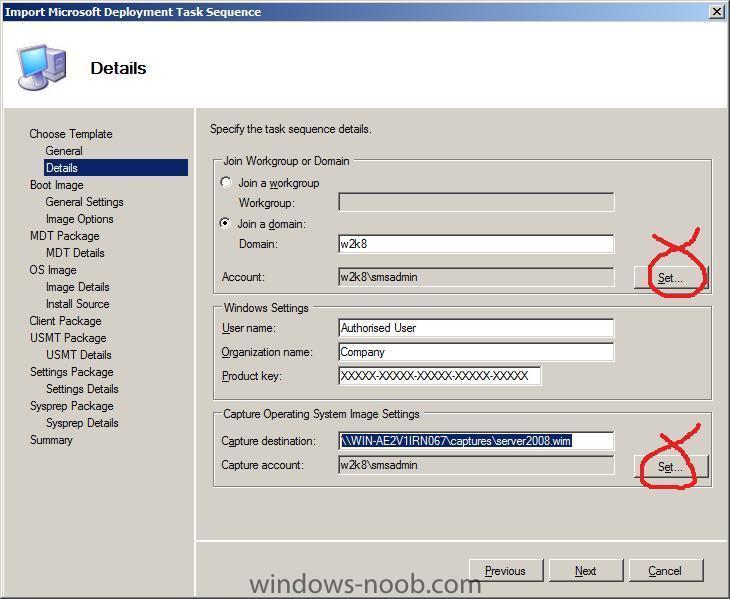
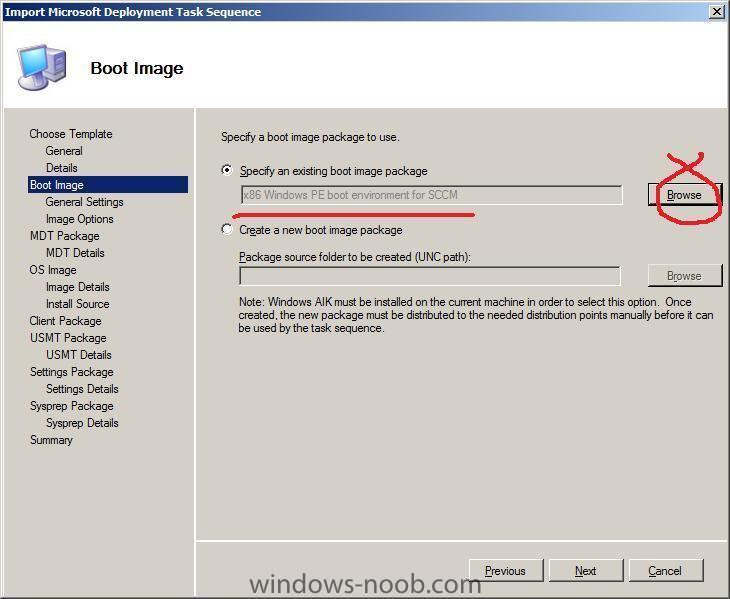
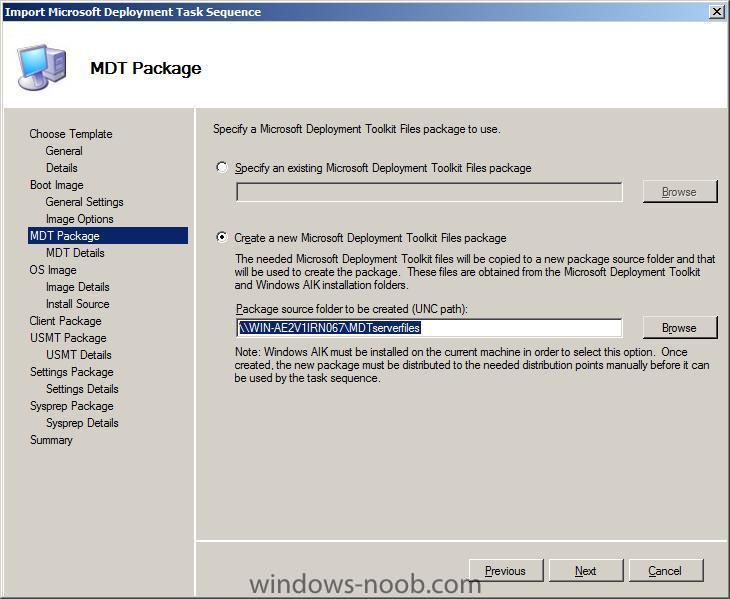
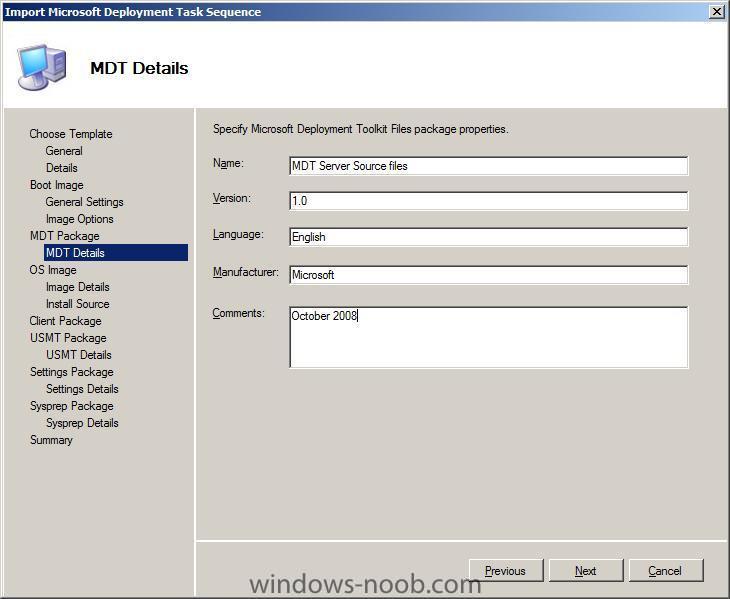
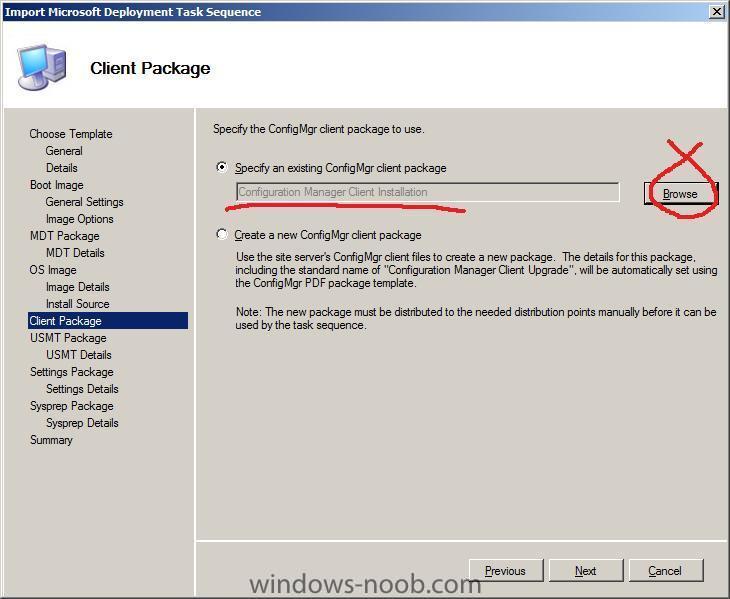
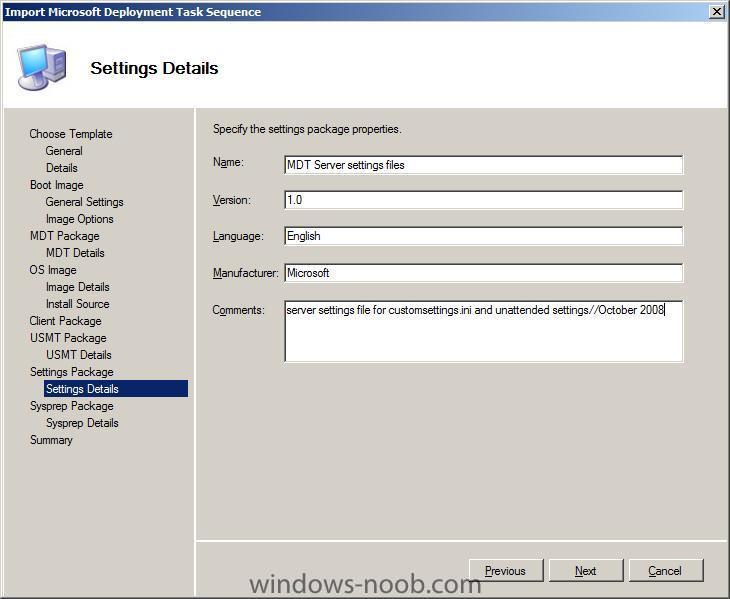
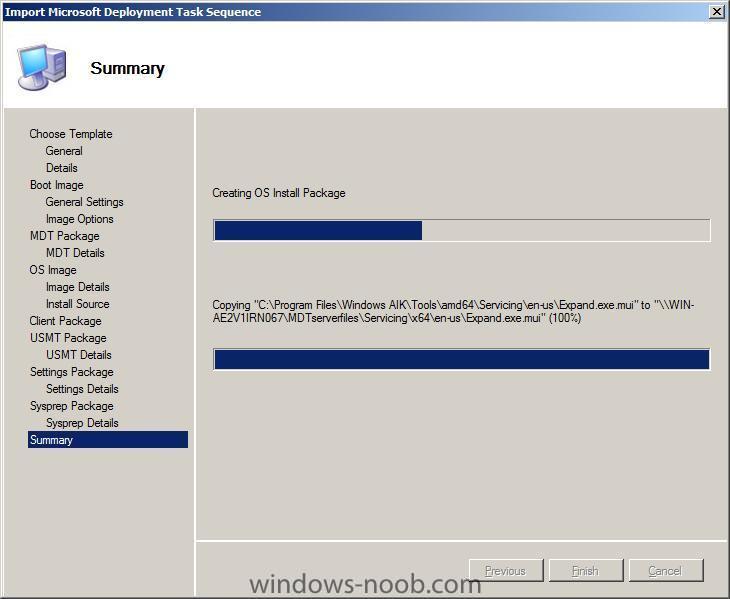
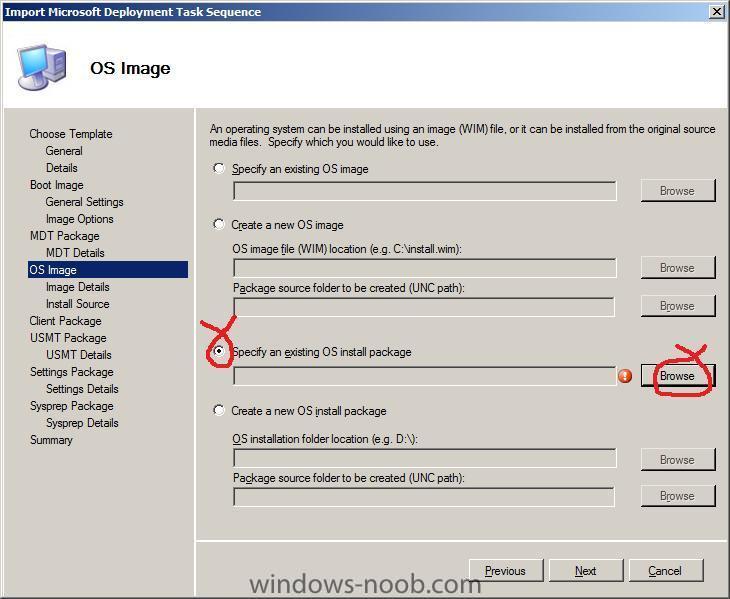
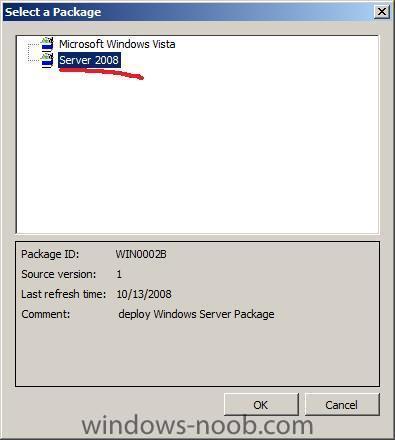
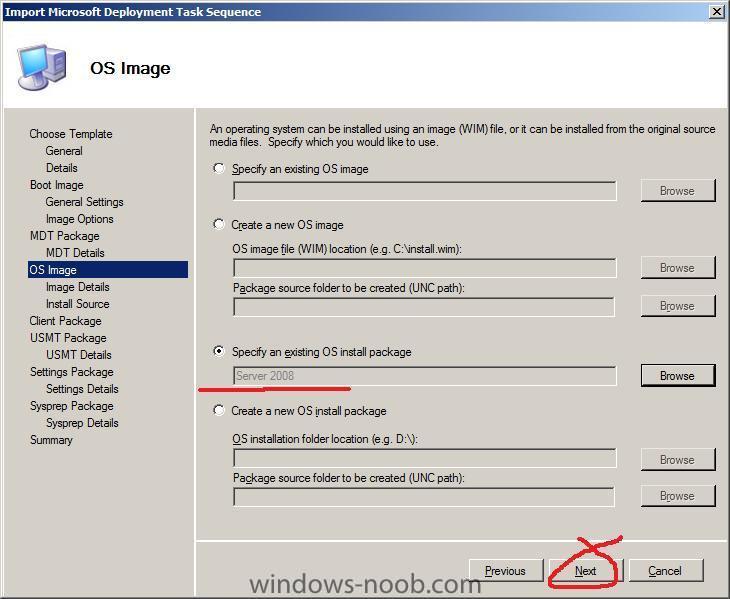
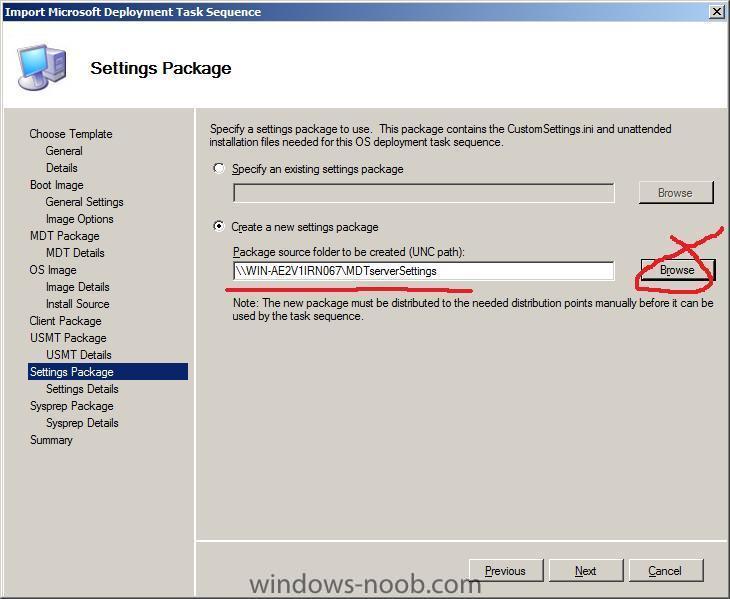
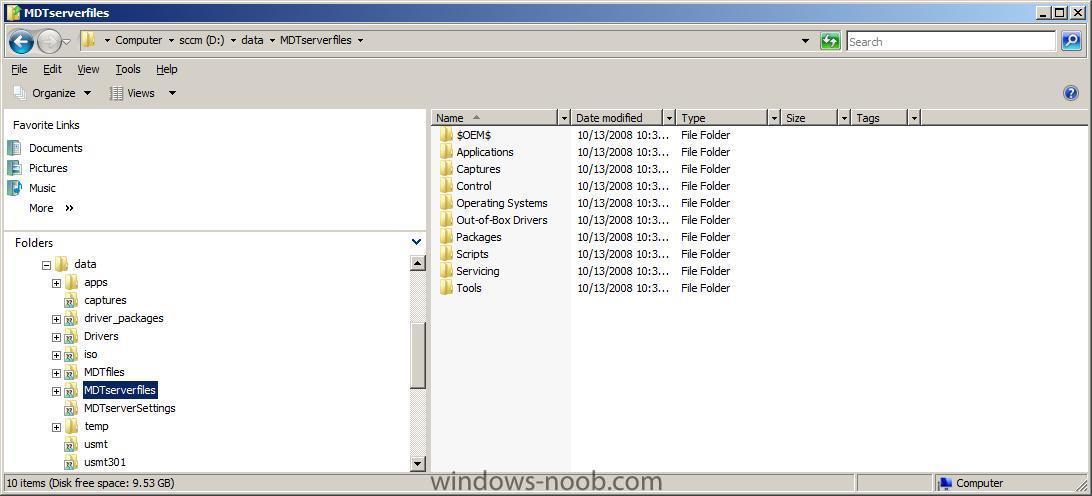
Import new Task Sequence In the Operating System Deployment node of ConfigMgr, select Task Sequence, right-click and choose Import Microsoft Deployment Task Sequence from the options Note: This guide was written when MDT 2008 was the current version, since then MDT 2010 has been released and Microsoft has reworded Import Microsoft Deployment Task Sequence to Create Microsoft Deployment Task Sequence. when the wizard appears select Server task sequence from the drop down menu and click next, fill in the general details, click next... on the next screen you need to fill in the workgroup or domain joining details (I chose to join the w2k8 domain), plus provide details of a user with that permission, and enter your product key, in addition you must specify the UNC path of where to store the captured WIM file which we will call server2008.wim. eg: \\WIN-AE2V1IRN067\captures\server2008.wim for boot image you can specify which one you require by clicking on the Browse button and selecting the boot.wim file that we created earlier (32 bit boot.wim), Next we will create the MDT server source files package (which will contain all of the scripts and supporting files needed for the Microsoft Deployment Toolkit). In explorer, create an empty folder called MDTserverfiles and share it. fill in the details... on the OS Image screen, choose to Specify an existing OS install package click on the Browse button and select the Server 2008 installation Package we created earlier click next when ready for the client package we can specify the one we created earlier from a predefined package Settings Package next we will create the Settings package (Contains the unattend.xml file used for an automated installation of Windows Server 2008 as well as the customsettings.ini file used with the Microsoft Deployment Toolkit), so create a folder in explorer called MDTserverSettings and share it as MDTserverSettings click on create a new settings package and browse to our network share eg: \\WIN-AE2V1IRN067\MDTserverSettings fill in the descriptive details For the Sysprep Package, choose No Sysprep Files required, and click Next, at this point it will create/update all package and settings we specified. when copying is complete, you can now browse the MDT Server files and MDT Server Settings folders we created and then shared, they are now populated with files and here is where our customisations will be stored... continue to >> Part 2

-
it's a really strange error you are getting, are you getting the same error for all xp versions you listed in the previous post ? what was different between your test setup and the production server ? cheers anyweb
-
Do you want a free hypervisor – Now you can download Microsoft Hyper-V Server 2008. Licensing Microsoft Hyper-V Server 2008 Microsoft Hyper-V Server 2008 is a stand-alone product that will be available via the Microsoft Download Center free of charge. Microsoft Hyper-V Server 2008 does not require CALs for the product itself. CALs will be required for all Windows Server virtualized operating systems which are hosted on Microsoft Hyper-V Server 2008. Microsoft Hyper-V Server 2008 will be available in the following languages: English (EN-US) German (DE-DE) Japanese (JA-JP) French (FR-FR) Spanish (ES-ES) Chinese Hong-Kong (ZH-HK) Chinese Simplified (ZH-CN) Korean (KO-KR) Portuguese (Brazil) (PT-BR) Chinese Traditional (ZH-TW) Italian (IT-IT) Russian (RU-RU) When to Use Hyper-V Server 2008 Microsoft Hyper-V Server 2008 is a great choice for customers who want a basic and simplified virtualization solution for consolidating servers as well as for development and test environments. Hyper-V Server 2008 only offers the most basic of virtualization features, making it ideal for: Test and Development Basic Server Consolidation Branch Office Consolidation Hosted Desktop Virtualization (VDI) Customers who require richer and more robust virtualization features, such as Quick Migration, multi-site clustering, large memory support (greater than 32 GB of RAM), and more than four processors on the host server, should use Windows Server 2008. Windows Server 2008 provides business continuity, disaster recovery, greater scalability for consolidating large workloads, and flexible and cost-effective virtualization rights (one free virtual instance for Standard Edition, four free virtual instances for Enterprise Editions, and unlimited virtual instances for Datacenter Edition with the purchase of a license of Windows Server 2008).
-
User Interface: Managing Windows windows We’ve booted the machine, displayed stuff on the screen, launched programs, so next up we’re going to look at a pretty complex topic that sort of gets to the core role of the graphical user interface—managing windows. Dave Matthews is program manager on the core user experience team who will provide some of the data and insights that are going into engineering Windows 7. --Steven The namesake of the Windows product line is the simple “window” – the UI concept that keeps related pieces information and controls organized on screen. We’ll use this post to share some of the background thinking and “pm philosophy” behind planning an update to this well established UI feature. full story > http://blogs.msdn.com/e7/archive/2008/10/0...ws-windows.aspx
-
Windows Deployment Toolkit and Workbench
anyweb replied to CrownRoyal's question in Windows Deployment Services (WDS)
which boot.wim are you using in WDS ? it is the boot.wim file that you need to be adding network drivers to, if you havn't done that then it will not be able to contact the server.... -
how much ram have you got in the client you are trying to install ? can you give any more details of where the failure occurs please cheers anyweb
-
Windows Deployment Toolkit and Workbench
anyweb replied to CrownRoyal's question in Windows Deployment Services (WDS)
this sounds like you dont have correct network driver support for your model in windows PE (needed to install vista) so...... what computer make and model are you working with here and have you checked any of the deployment logs at all ) what network drivers are you currently using ? -
1. to decide where the programs go you'll have to modify the program installer directly, usually you'll need to supply some switches to the installer to tell it to install the program somewhere else, checkout this Adobe Reader silent install howto 2. as above read that link as he has some script (install.bat) for deleting the icons that adobe reader places in the AllUsers profile... cheers anyweb
-
only way to do it is to reinstall and decide the path here what applications are leaving 2 icons ? is it Windows Media Player ?
-
download and install the Release Candidate for Openoffice 3 then download and install the plugin that’s it now start OpenOffice Draw and edit or create PDF’s, cool ! cheers anyweb
-
here's a start http://blogs.technet.com/deploymentguys/ar...alkthrough.aspx google is your friend cheers anyweb
-
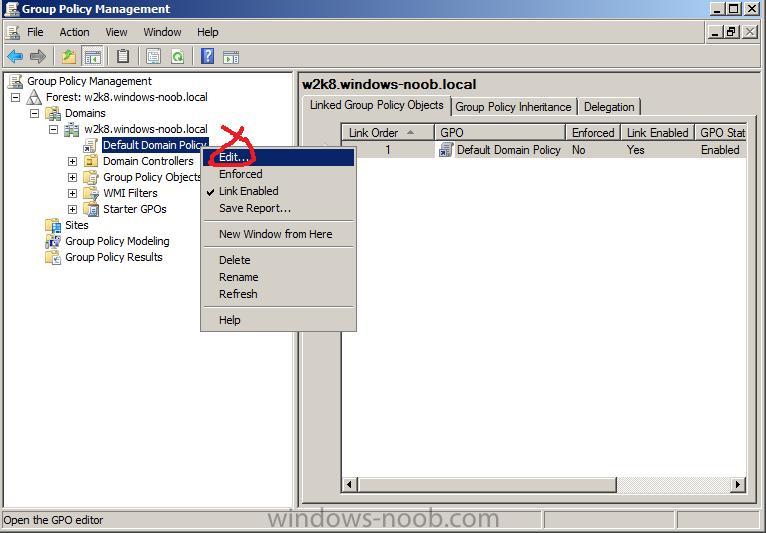
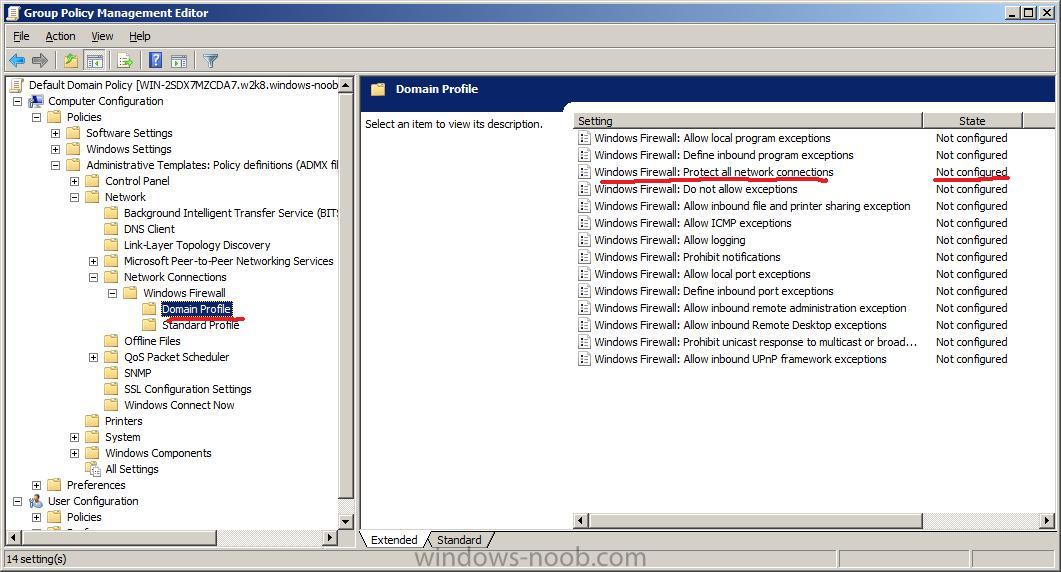
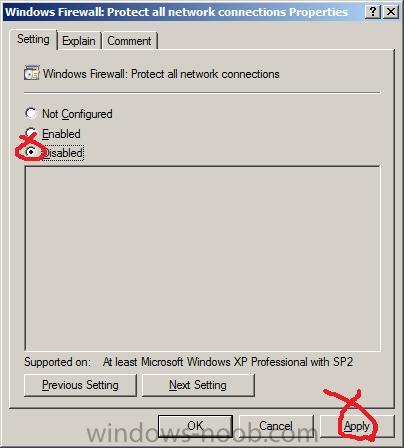
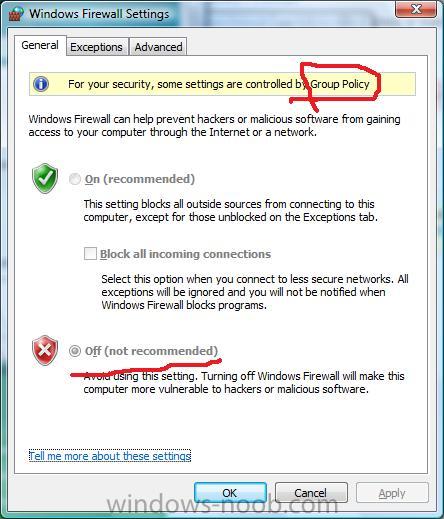
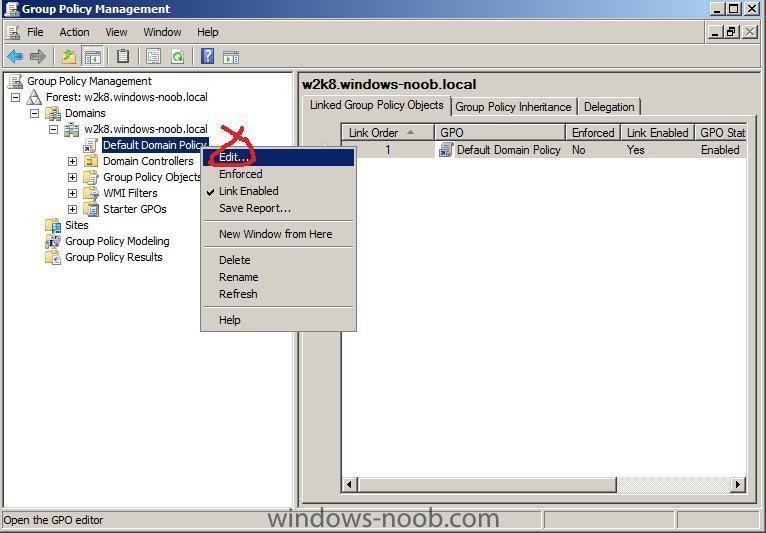
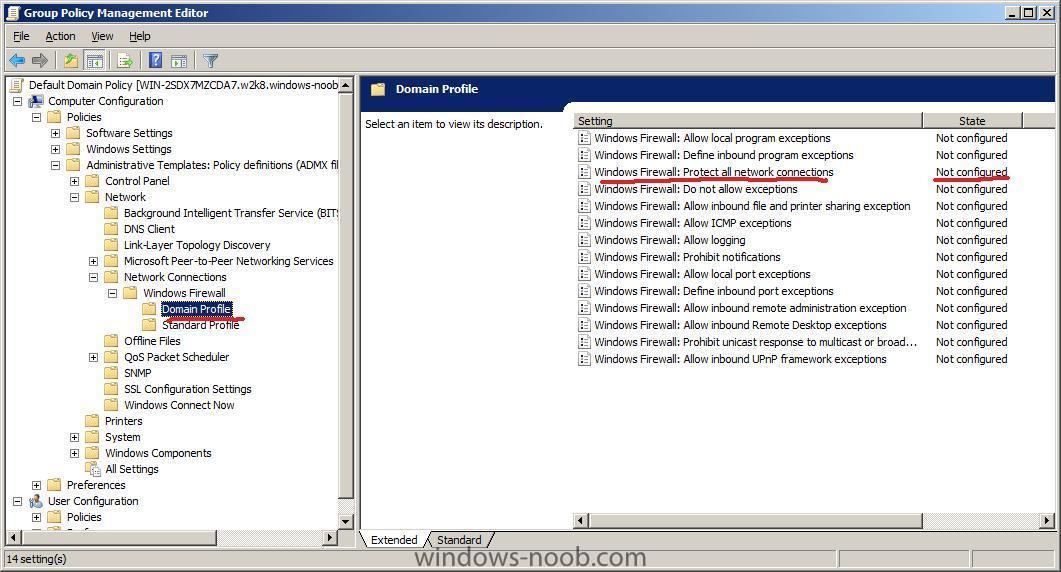
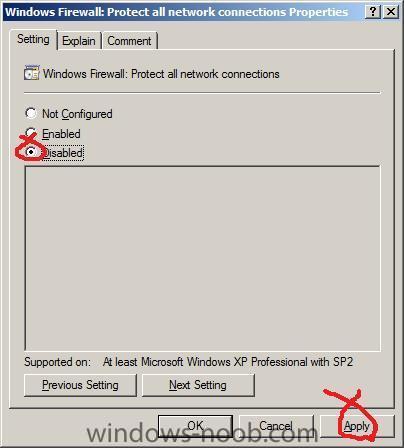
start up the Group Policy Management console (GPMC.MSC) and expand the Default Domain policy, right click and choose Edit. when the Group Policy Management Editor appears, expand Computer Configuration/Policies/Administrative templates/Network/Network Connections/Windows Firewall/Domain Profile in the Right pane, double click on the policy called Windows Firewall: Protect all network connections set it to disabled done ! you can now check your domain clients and verify that the policy has taken effect (if you want to speed up things open a cmd prompt on the client and issue gpupdate /force )
-
you are not making yourself very clear here, what exactly do you want to do ?
-
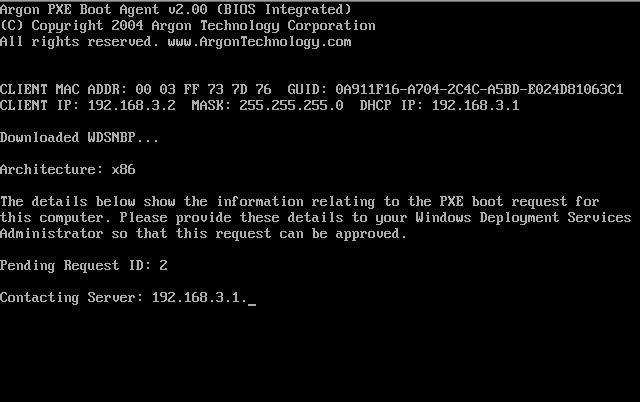
how can I PRESTAGE a computer for WDS ?
anyweb posted a question in Windows Deployment Services (WDS)
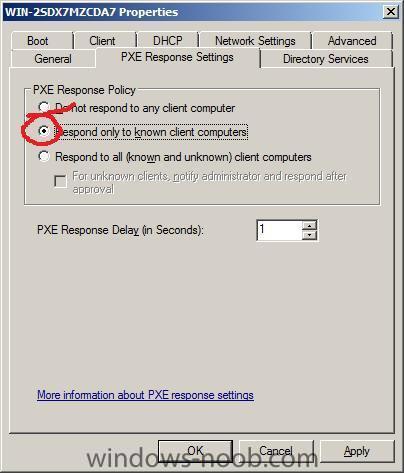
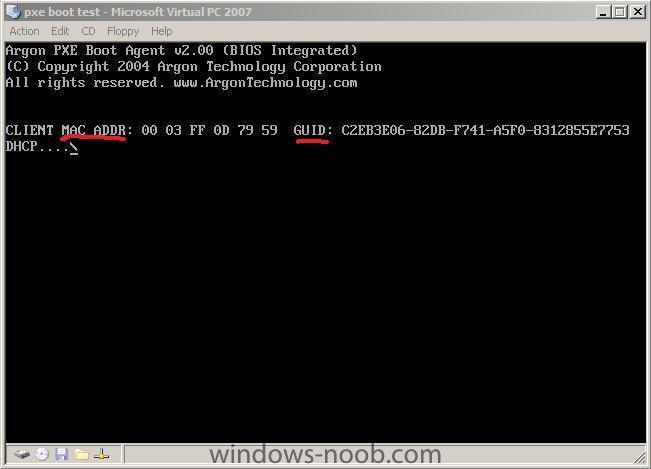
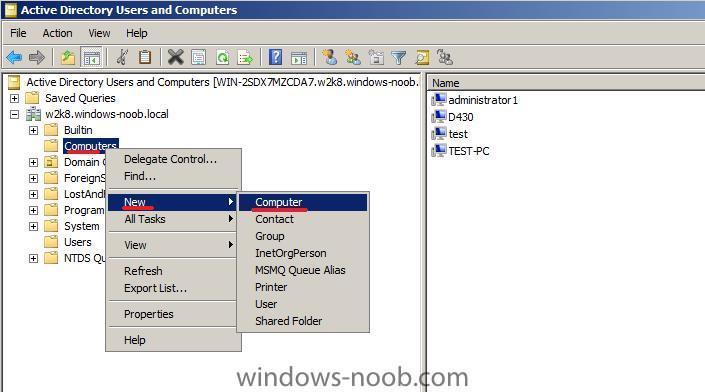
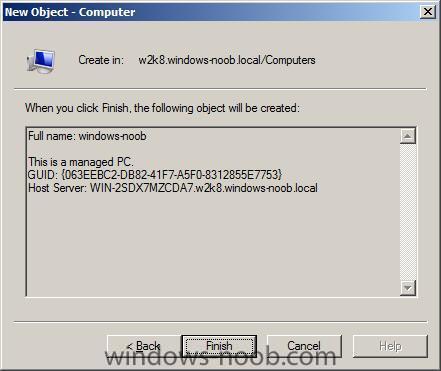
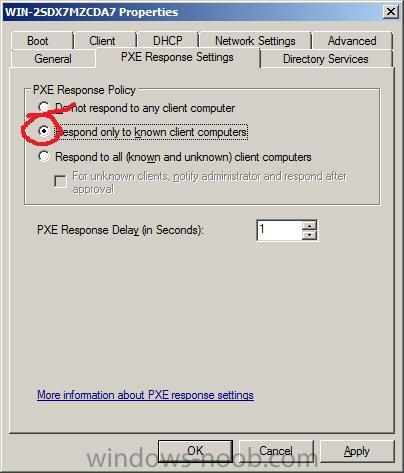
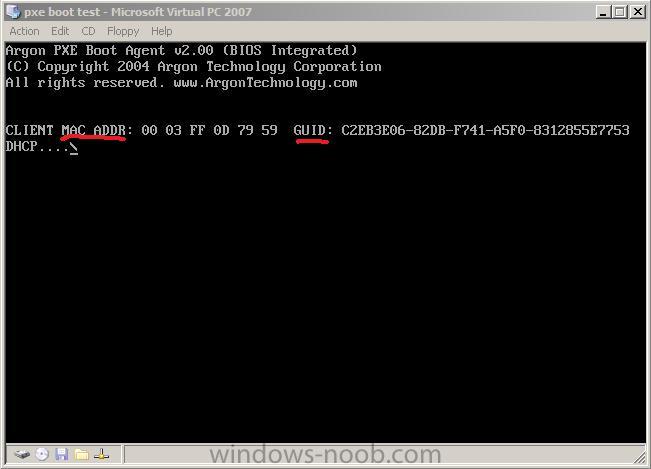
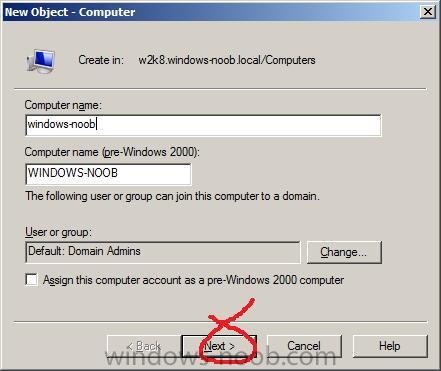
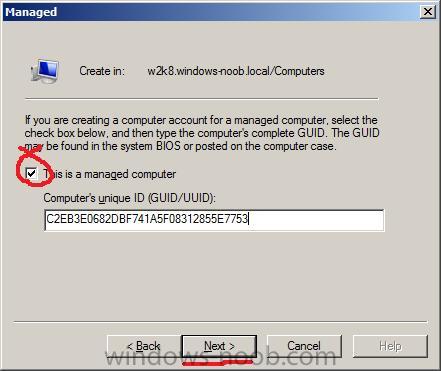
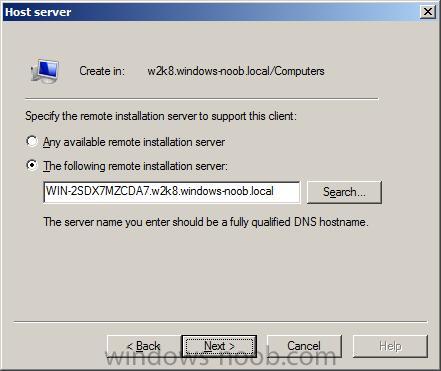
You can use Windows Deployment Services to link physical computers to computer account objects in Active Directory Domain Servers (AD DS). This is called prestaging the client. Prestaged clients are also called known computers. If you have set WDS to only respond to known computers then you'll need to prestage the computers otherwise the PXE boot will fail. To prestage a computer for WDS deployment you'll need to know the mac address or GUID of it, you can get that info in a variety of ways, the easiest (for one computer) is to simply press the PAUSE button on your client pc when it is PXE booting to the server, you'll see both the MAC address and GUID listed. If you want to use scripts to get these values then download the following from Microsoft (Sample_RIS_Scripts.zip), this bunch of scripts can collect GUIDs and more... ok, now that we have the GUID lets start Active Directory Users and Computers, click on Computers and right click, choose New, Computer. give the computer a name click next and make sure to select This is a managed computer Input the GUID or MAC address with no - eg: if the GUID reported in the bios pxe boot screen is then remove the dashes so it reads the Next button below will remain Greyed out (inactive) until you input the GUID (or mac address) correctly select your Remote Installation server (the WDS server....) click next and review the summary, click finish and you have now prestaged your computer in Active Directory. at this point you can PXE boot the client and WDS will treat it as a 'known' computer and you can deploy as per normal. more info about prestaging with WDS from Microsoft here >