anyweb
-
Posts
9277 -
Joined
-
Last visited
-
Days Won
371
Everything posted by anyweb
-
download and install the Release Candidate for Openoffice 3 then download and install the plugin that’s it now start OpenOffice Draw and edit or create PDF’s, cool ! cheers anyweb
-
here's a start http://blogs.technet.com/deploymentguys/ar...alkthrough.aspx google is your friend cheers anyweb
-
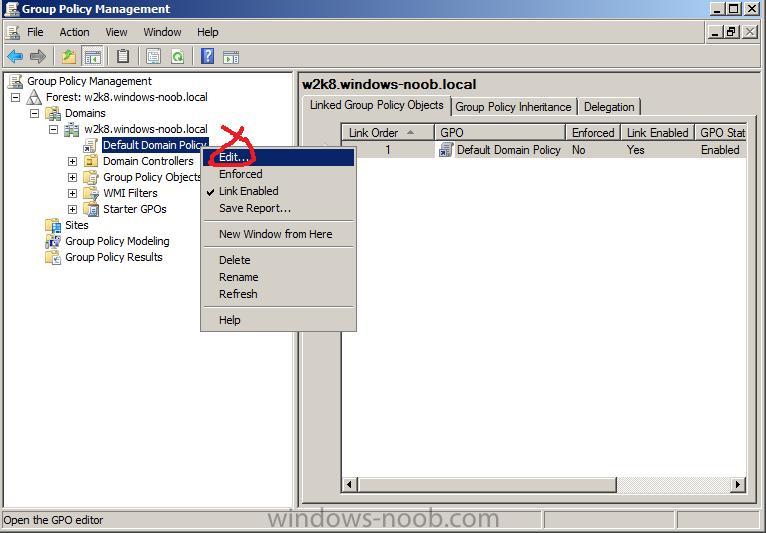
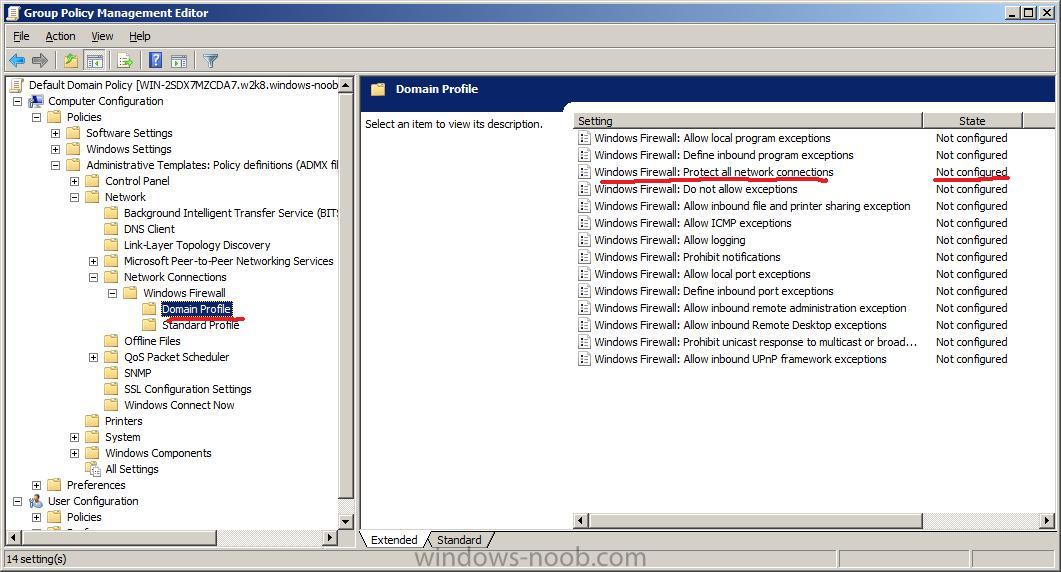
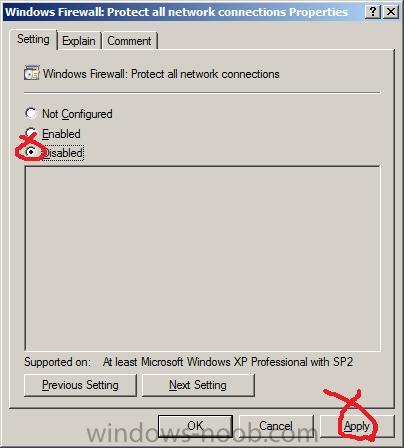
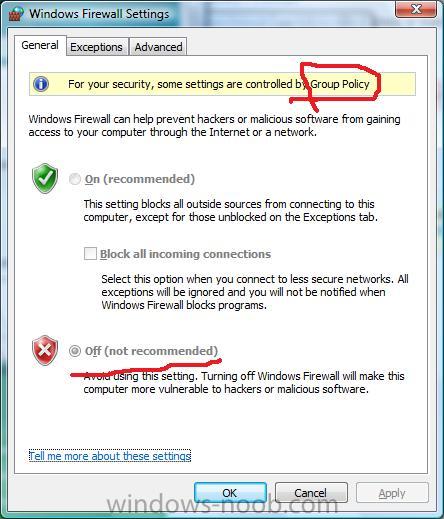
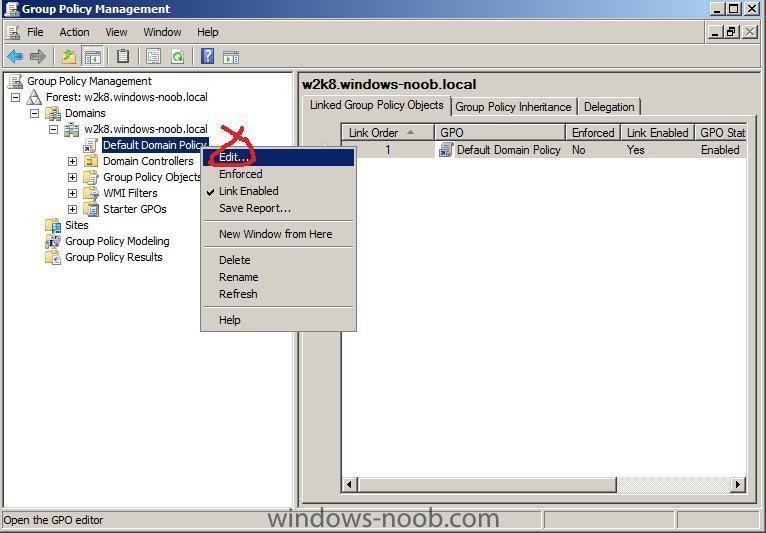
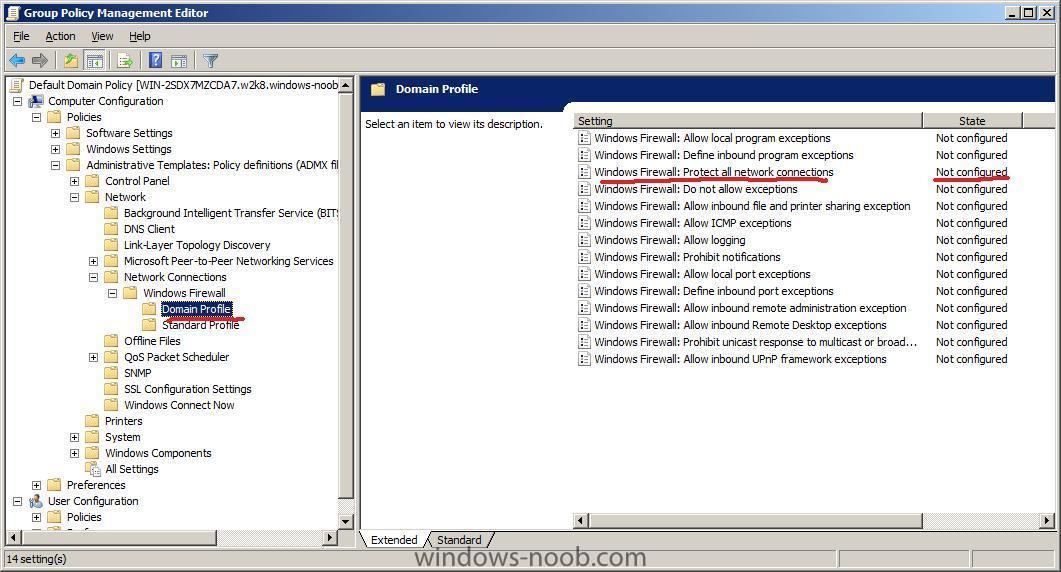
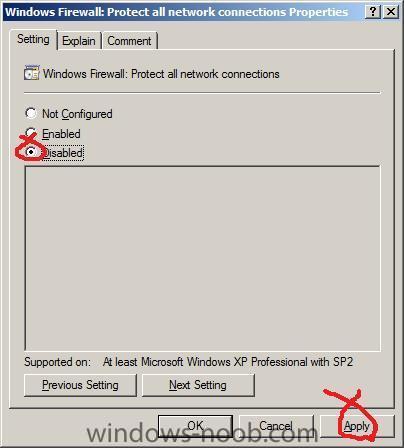
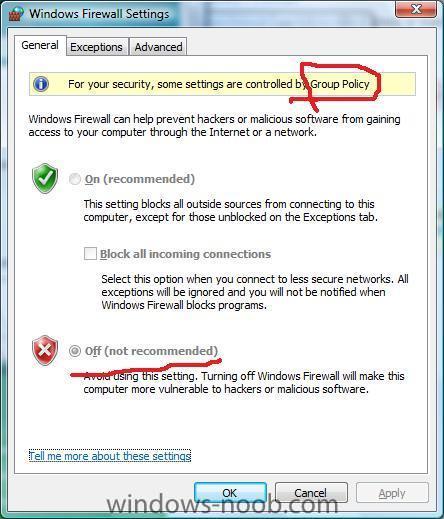
start up the Group Policy Management console (GPMC.MSC) and expand the Default Domain policy, right click and choose Edit. when the Group Policy Management Editor appears, expand Computer Configuration/Policies/Administrative templates/Network/Network Connections/Windows Firewall/Domain Profile in the Right pane, double click on the policy called Windows Firewall: Protect all network connections set it to disabled done ! you can now check your domain clients and verify that the policy has taken effect (if you want to speed up things open a cmd prompt on the client and issue gpupdate /force )
-
you are not making yourself very clear here, what exactly do you want to do ?
-

how can I PRESTAGE a computer for WDS ?
anyweb posted a question in Windows Deployment Services (WDS)
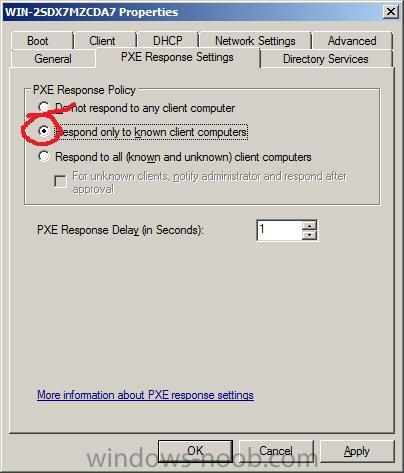
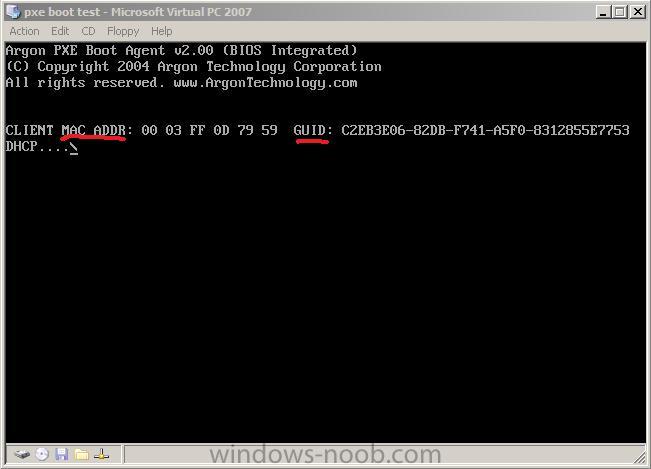
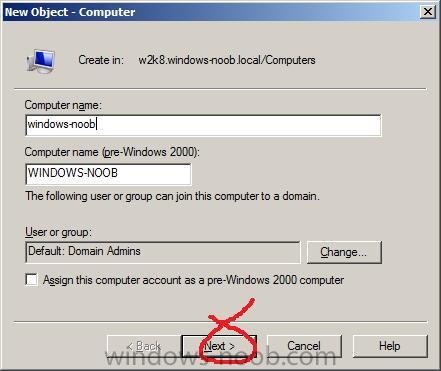
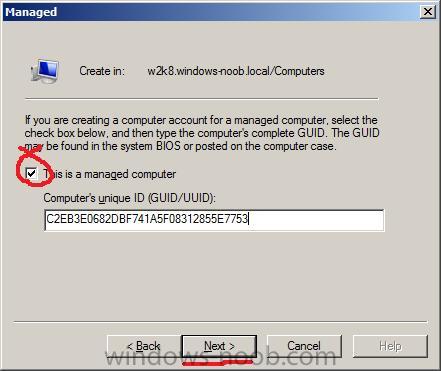
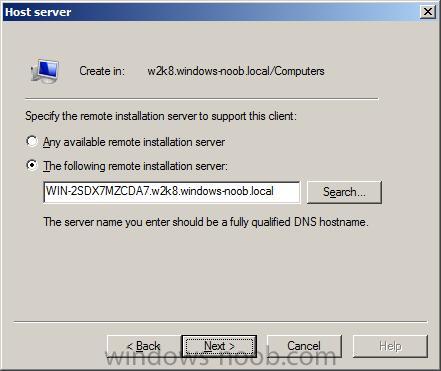
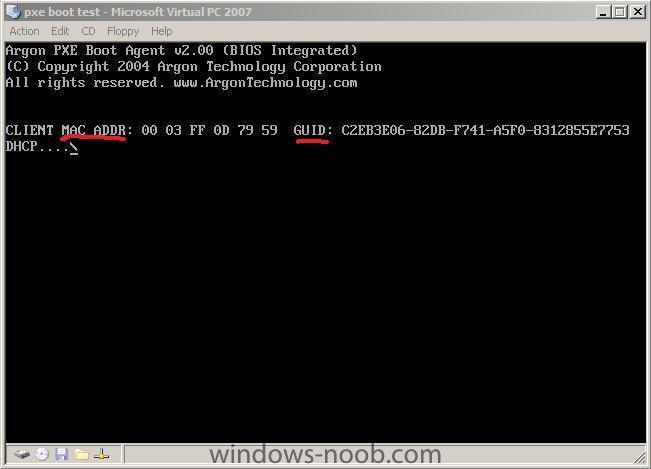
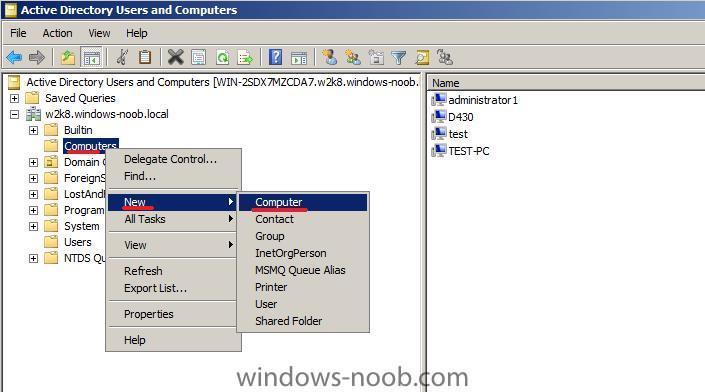
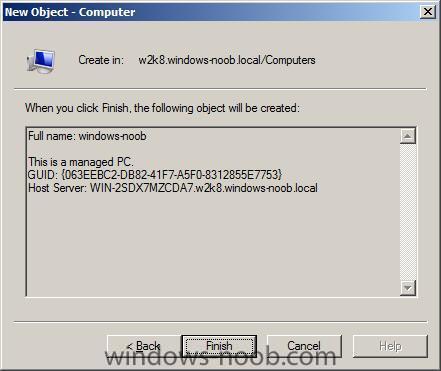
You can use Windows Deployment Services to link physical computers to computer account objects in Active Directory Domain Servers (AD DS). This is called prestaging the client. Prestaged clients are also called known computers. If you have set WDS to only respond to known computers then you'll need to prestage the computers otherwise the PXE boot will fail. To prestage a computer for WDS deployment you'll need to know the mac address or GUID of it, you can get that info in a variety of ways, the easiest (for one computer) is to simply press the PAUSE button on your client pc when it is PXE booting to the server, you'll see both the MAC address and GUID listed. If you want to use scripts to get these values then download the following from Microsoft (Sample_RIS_Scripts.zip), this bunch of scripts can collect GUIDs and more... ok, now that we have the GUID lets start Active Directory Users and Computers, click on Computers and right click, choose New, Computer. give the computer a name click next and make sure to select This is a managed computer Input the GUID or MAC address with no - eg: if the GUID reported in the bios pxe boot screen is then remove the dashes so it reads the Next button below will remain Greyed out (inactive) until you input the GUID (or mac address) correctly select your Remote Installation server (the WDS server....) click next and review the summary, click finish and you have now prestaged your computer in Active Directory. at this point you can PXE boot the client and WDS will treat it as a 'known' computer and you can deploy as per normal. more info about prestaging with WDS from Microsoft here >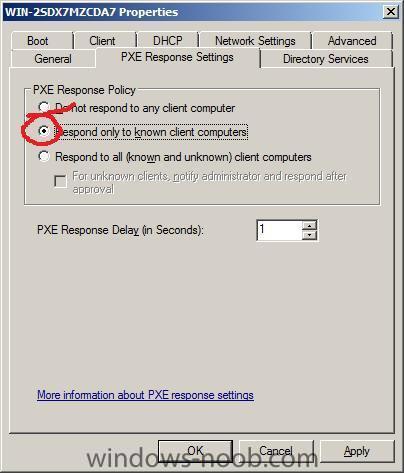


-
it's in the sources folder
-
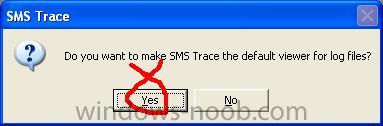
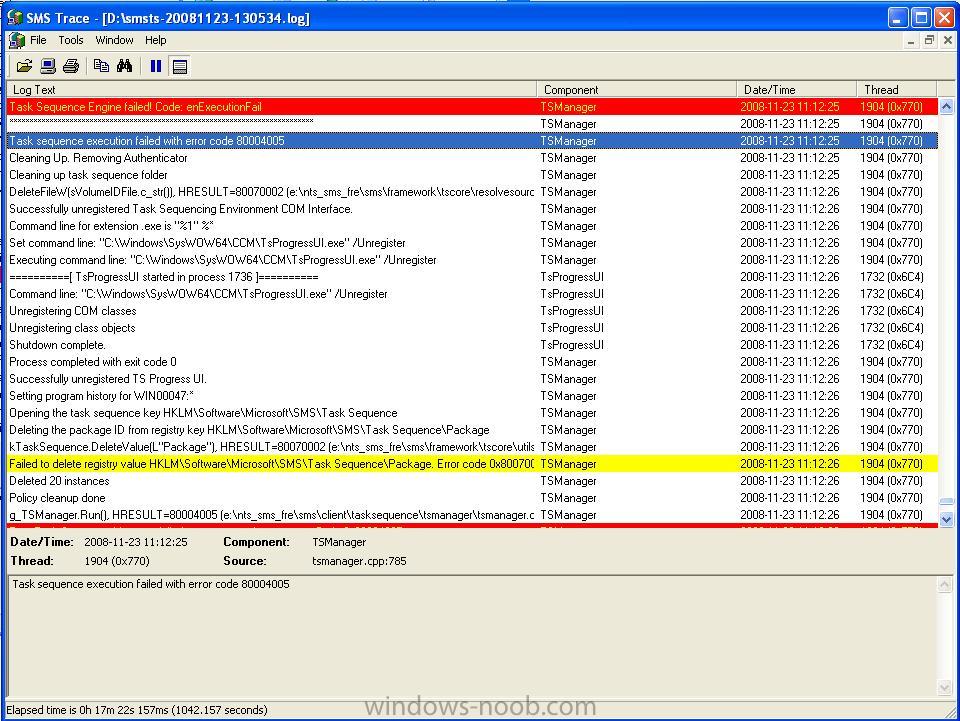
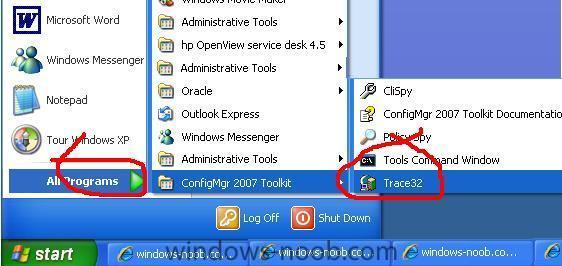
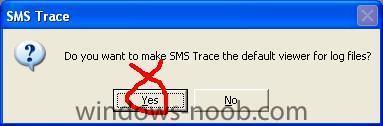
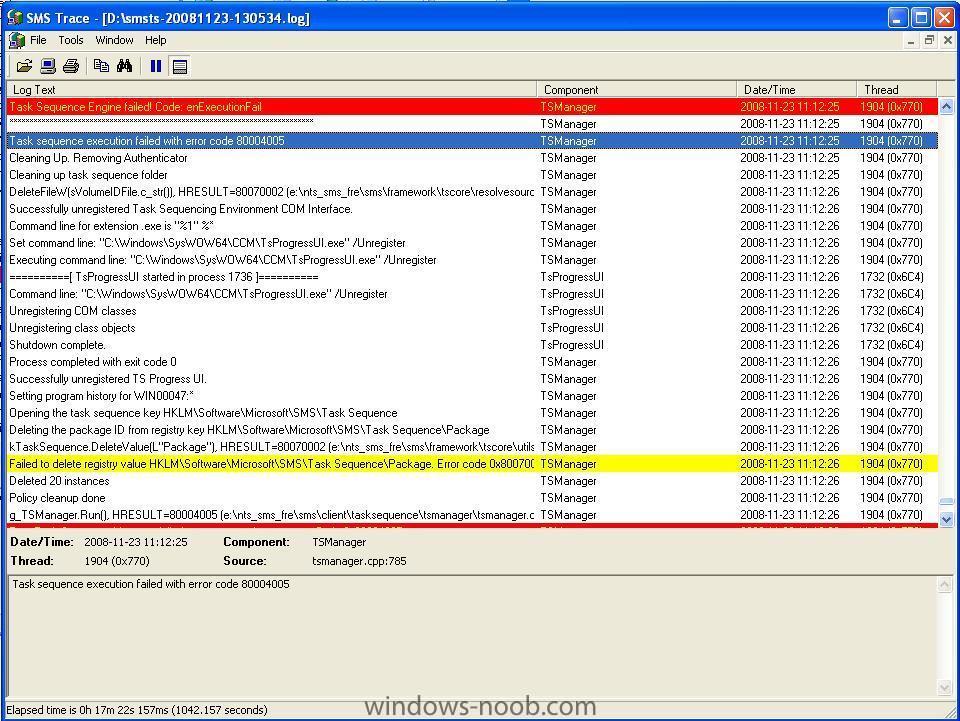
if you want to troubleshoot problems in SCCM 2007, you should install this toolkit to make reading/understanding logs easier once installed run Trace32 from the start menu answer yes when prompted Now open a SCCM LOG file (by double clicking on it) and notice how errors appear highlighted in RED
-
why are you using the autounattend.xml file ? what do you want it to do ? i wonder if the problem you are having is becuase you are using the Dell version, if you remove the PID.TXT file from the dvd do things work ? cheers anyweb
-
get it here System Requirements: System Center Configuration Manager 2007 SP1 Evaluation (you cannot install this version on a Volume License or MSDN installation).
-
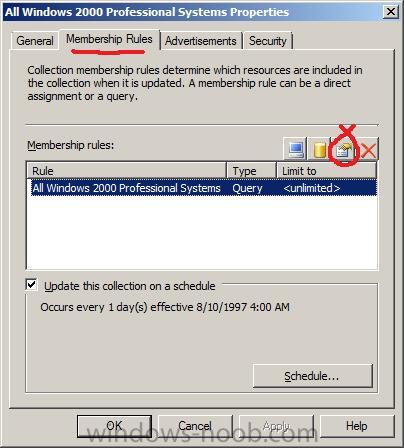
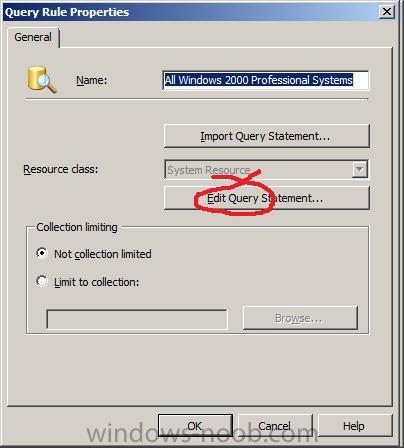
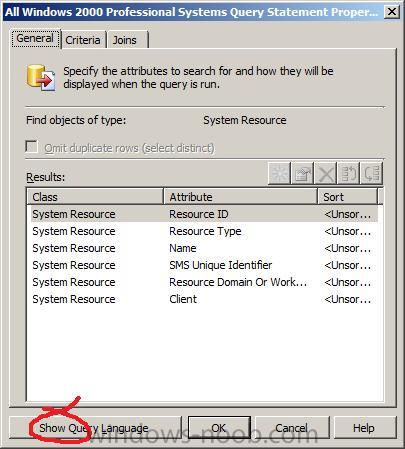
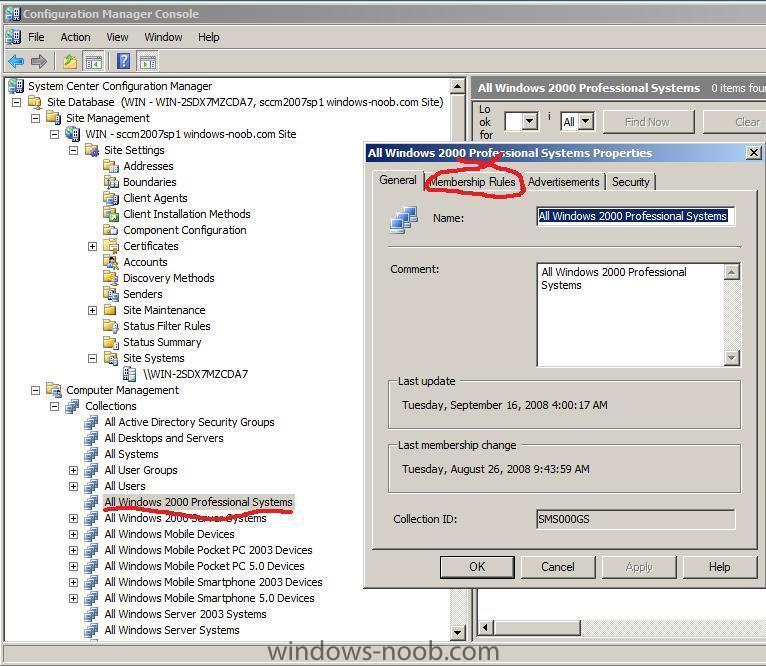
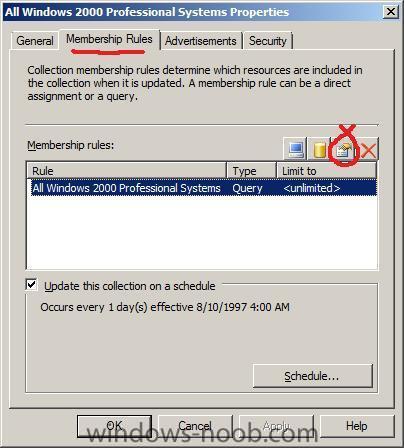
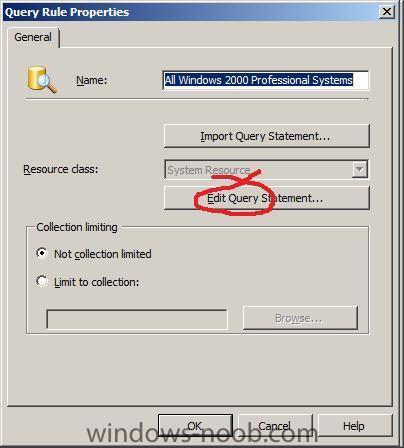
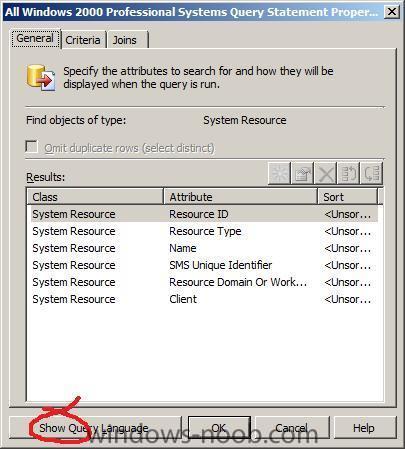
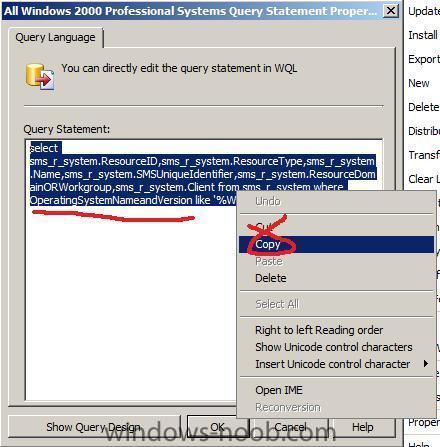
In SCCM 2007 we have a number of pre-defined Collections such as All Systems, All Users, All Windows XP Systems and so on, however we want to create a new collection to manage our Windows Vista systems. To do this we'll copy an WQL query from a pre-defined collection (All Windows 2000 Professional Systems) and edit it so that it does what we need, start up SCCM configuration Manager console, expand Collections under Computer Management, and select the All Windows 2000 Professional Systems collection, right click on it and choose properties and click on the Membership Rules tab. click the Edit Query Statement icon (looks like a hand holding a document) click on Edit Query Statement and when you are presented with a results screen click on Show Query Language This will display the query, mark it choose Copy. click ok, cancel, cancel.
-
to keep your Windows Vista activation read this post please
-
let me get this straight, are you saying that your only problems are 1. that you loose AERO after deployment and 2. that you have to re-activate Vista is this correct ? is this a Dell version of Vista ? cheers anyweb
-
yes you can do this but take it one step at a time build your vista image (so that you are happy with it) then install the WAIK (on another pc if you wish) and use imageX to make a WIM copy of it once done you can then start to experiment with your autounattend.xml file.. windows SIM (contained in the WAIK) will allow you to build/design the xml file. Microsoft have a detailed guide to doing all of this here cheers anyweb
-
welcome to the forums !
-
how can I deploy an application in SCCM 2007
anyweb replied to anyweb's question in Deploy software, applications and drivers
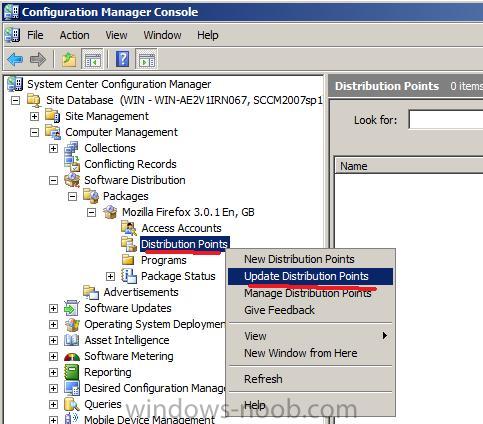
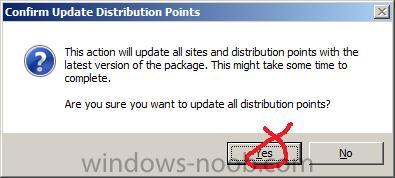
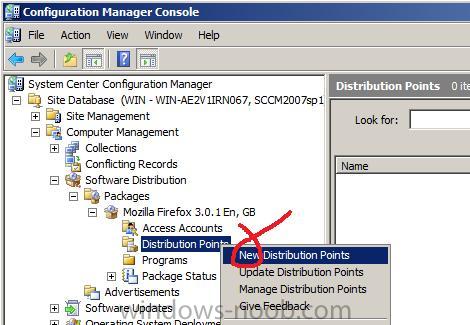
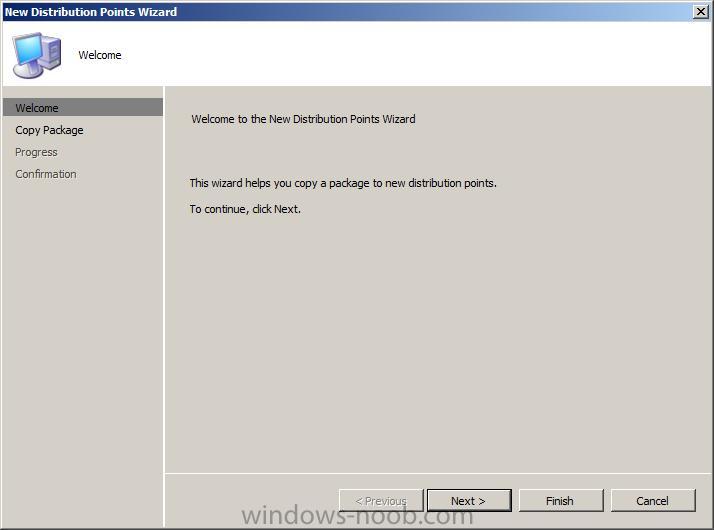
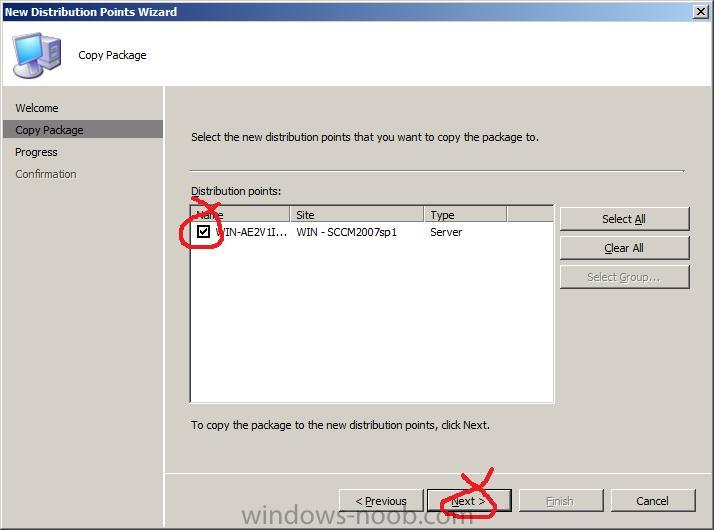
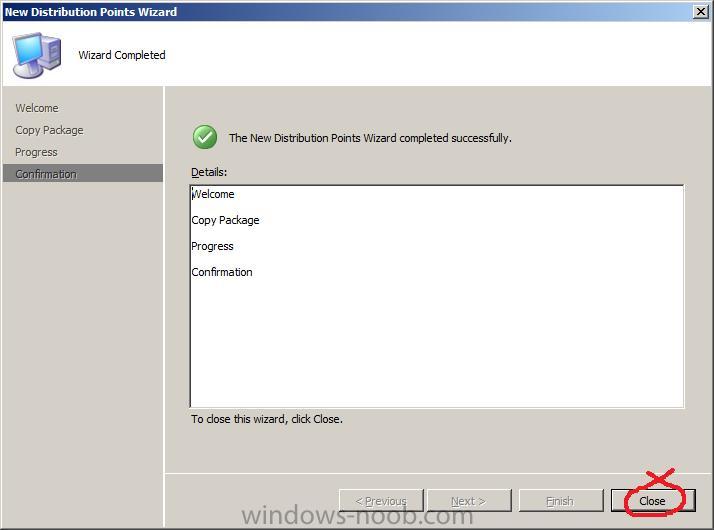
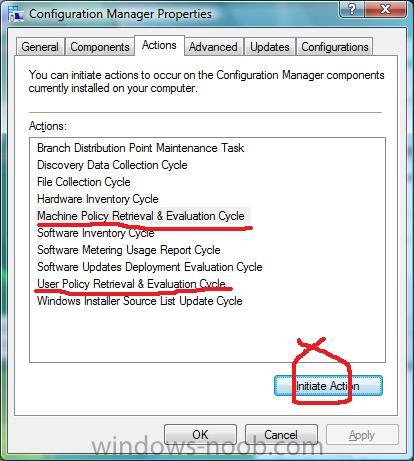
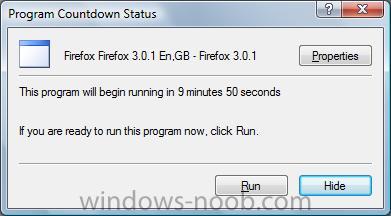
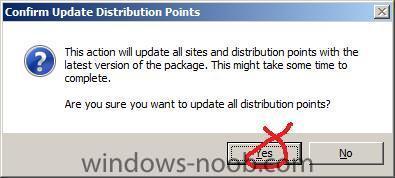
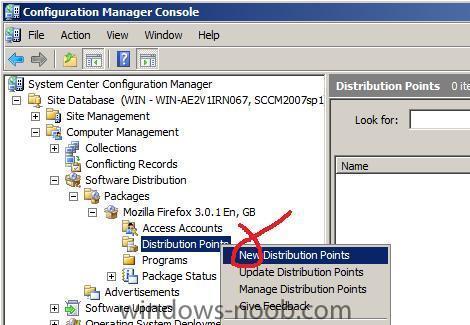
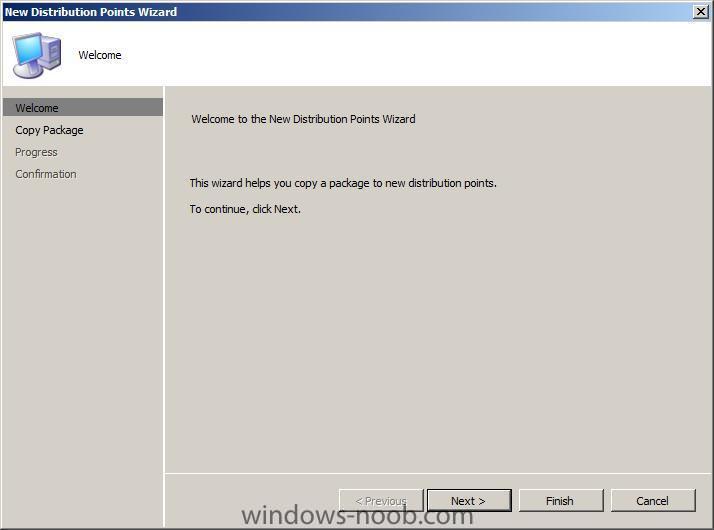
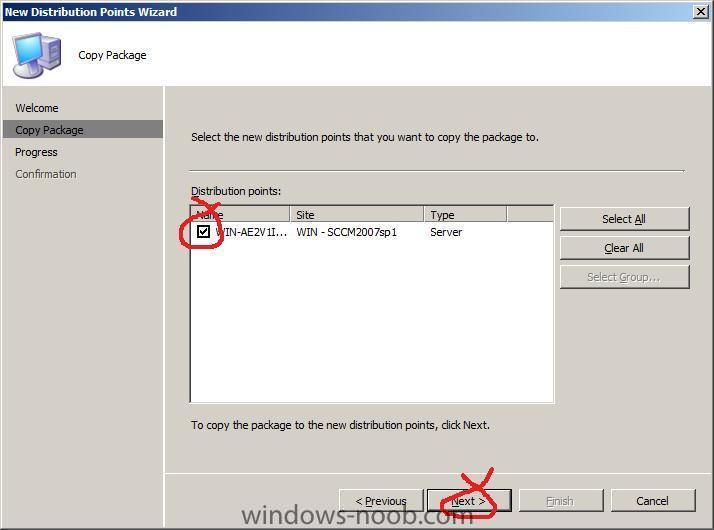
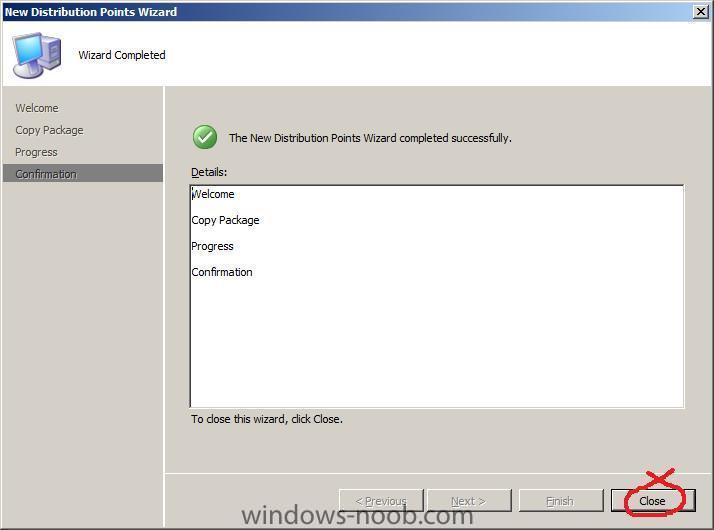
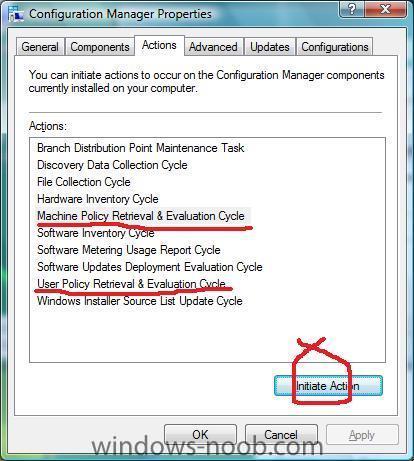
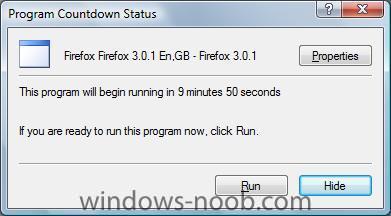
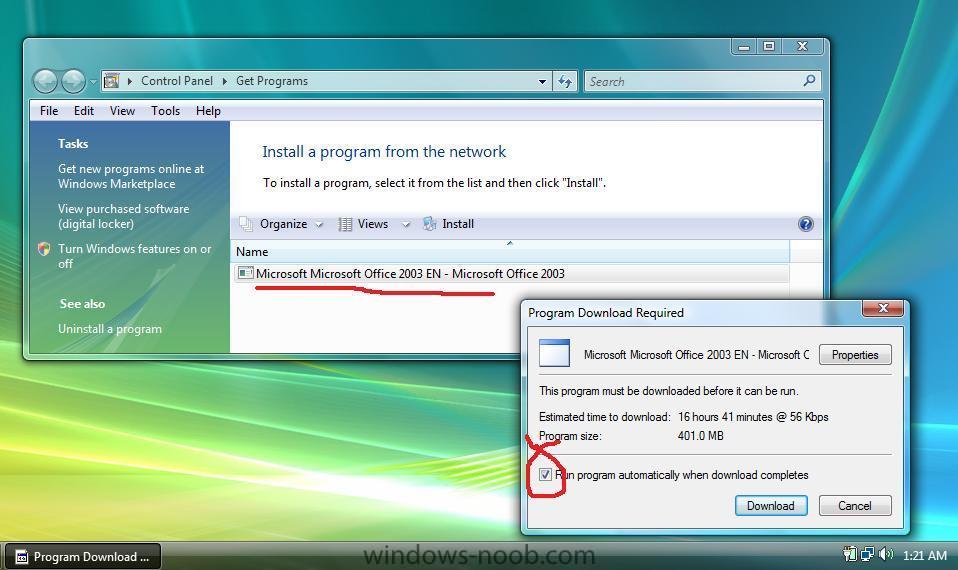
Step 4. Create and Update Distribution point In SCCM Configuration Manager console, highlight the package we created in Step 1 and right click on it, choose Distribution Points/New Distribution Point. when the welcome to New Distribution Points wizard appears click Next Select your SCCM server from the list and click next review the summary and click close Now we need to Update the distribution point we've just created with our advertisement package so right click on distribution points and choose update distribution points answer yes when prompted To speed up distribution of the Advertisements you may want to initiate the User Policy Retrieval & Evaluation Cycle and the Machine Policy Retrieval & Evaluation Cycle which are in the Actions tab of the Configuration Manager properties in control panel (on your client computers....) Below are some screenshots of Firefox and Office packages being deployed to the sccm client computer New Program Ready (Office) Assigned (firefox) Firefox Next steps How can I target an application to an Active Directory Security Group using SCCM 2007 SP1 ? How can I target an application to specific hardware using SCCM 2007 SP1 ? how can I deploy Windows Vista SP1 using SCCM 2007 SP1 ? how can I deploy Windows XP SP3 using SCCM 2007 SP1 ? how can I deploy Windows Server 2008 using SCCM 2007 SP1 ?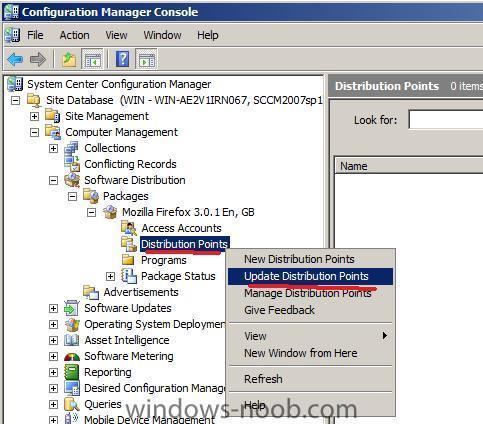


-
how can I deploy an application in SCCM 2007
anyweb replied to anyweb's question in Deploy software, applications and drivers
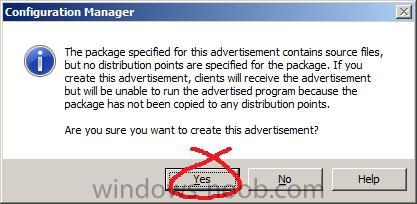
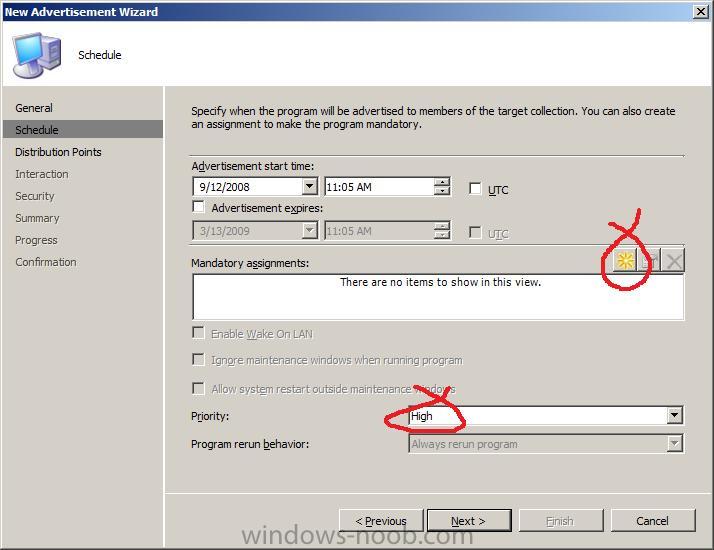
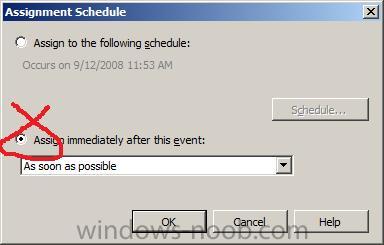
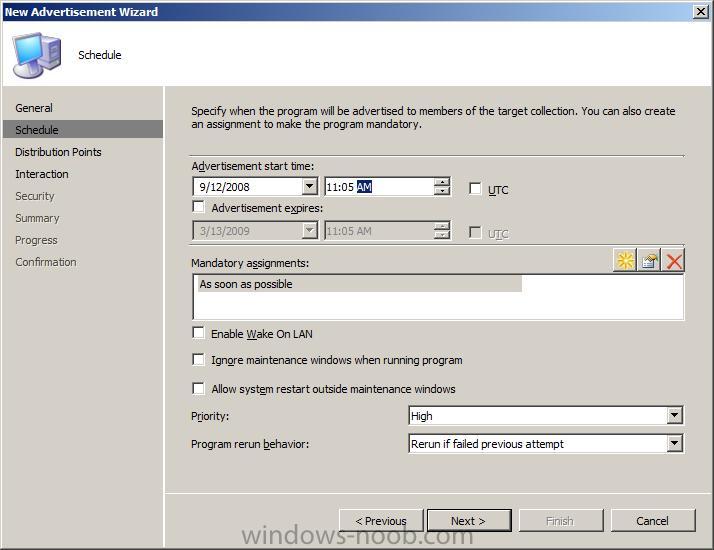
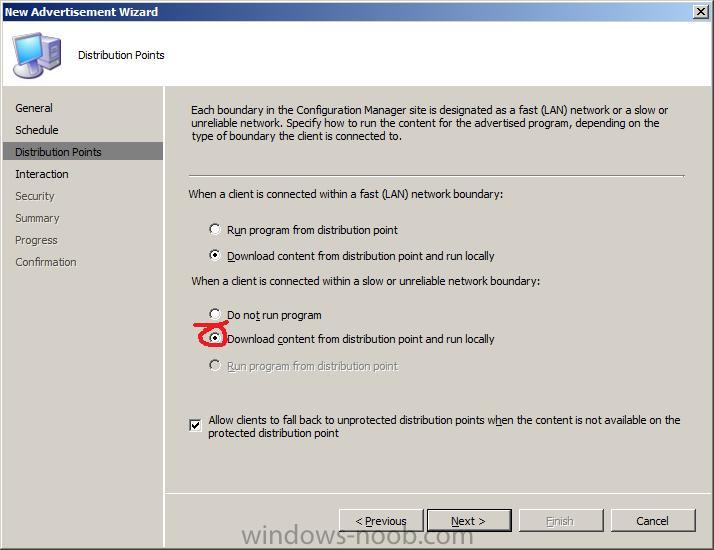
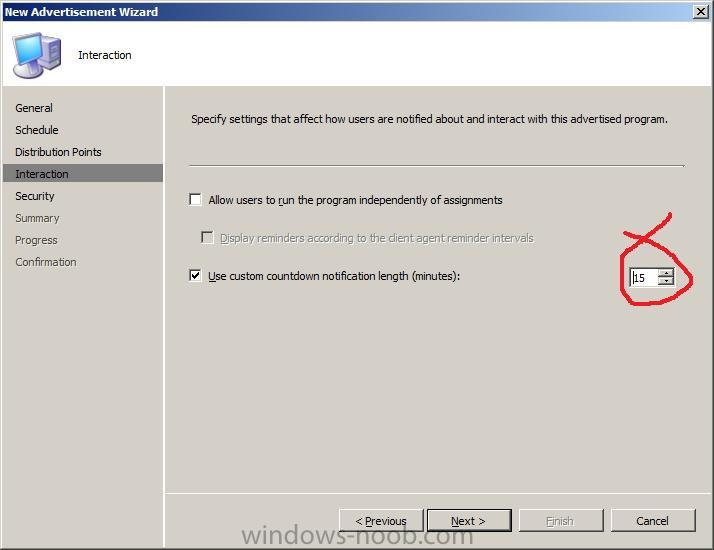
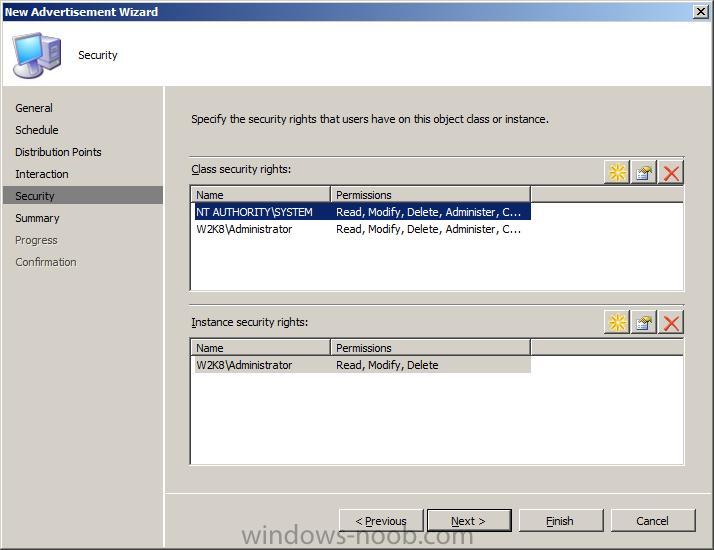
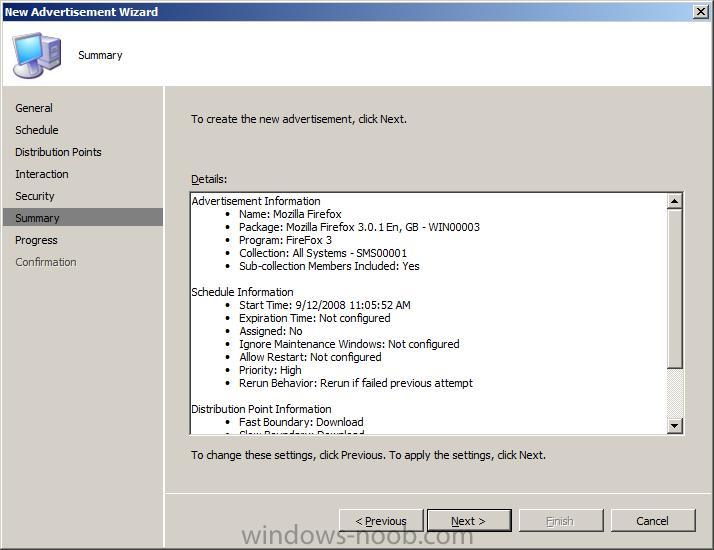
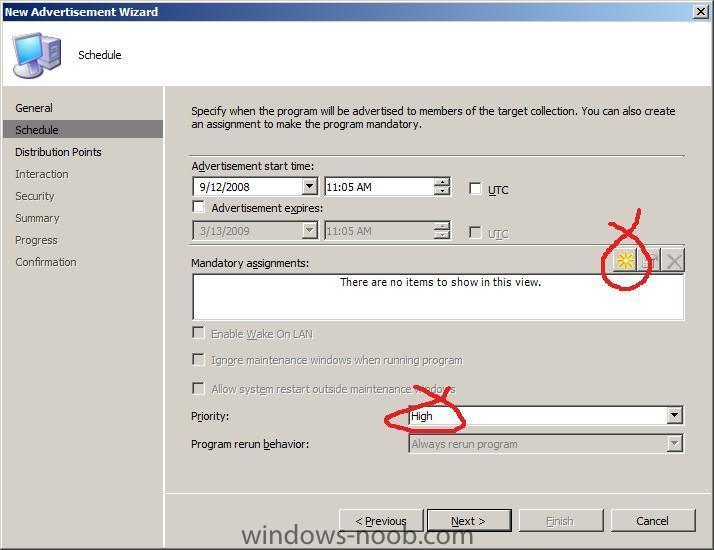
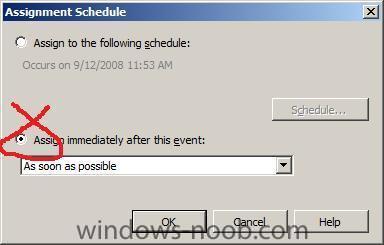
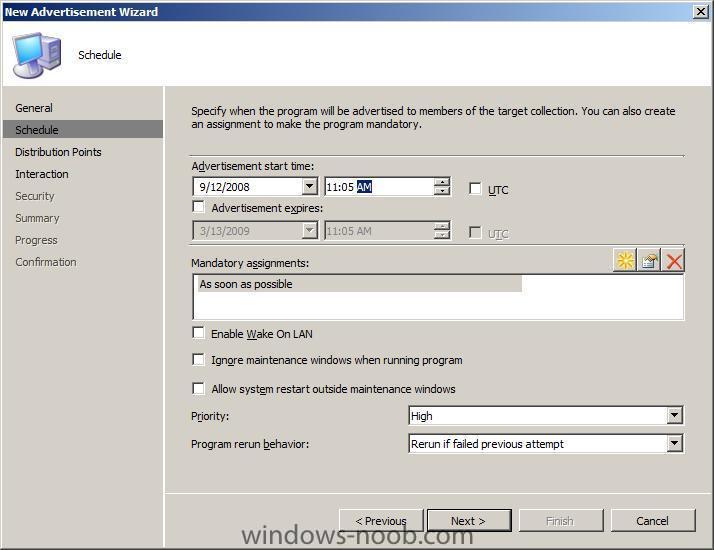
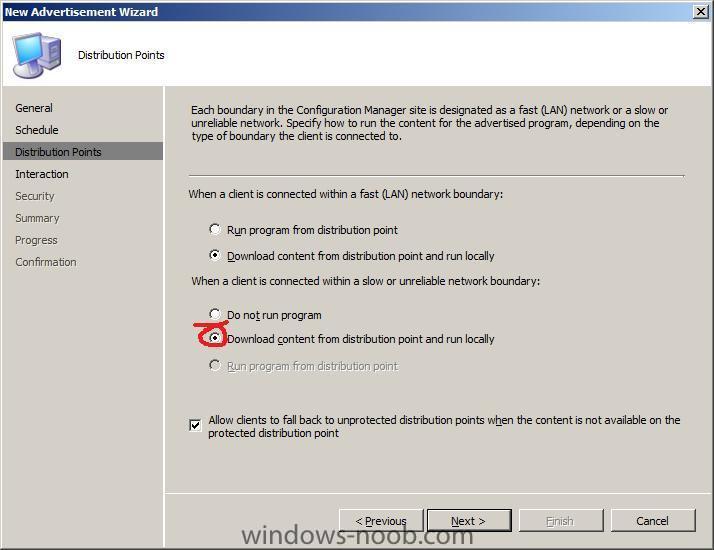
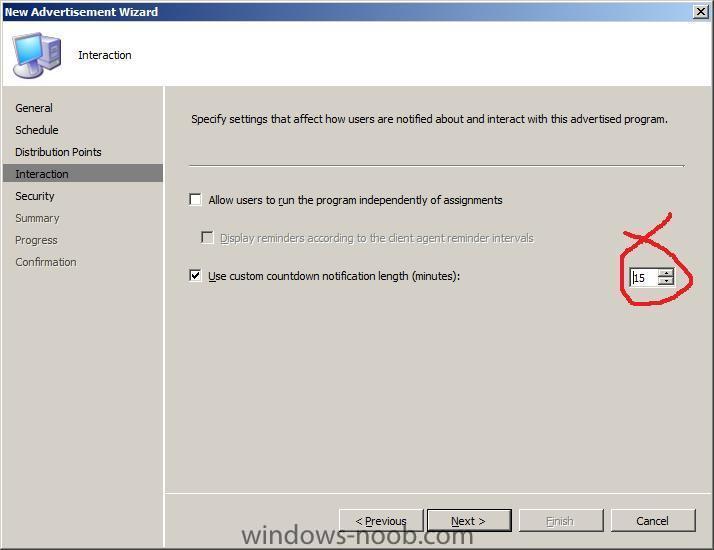
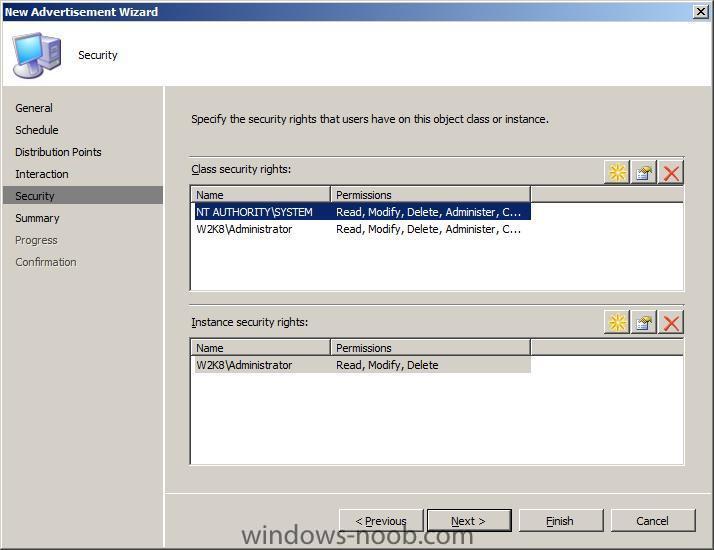
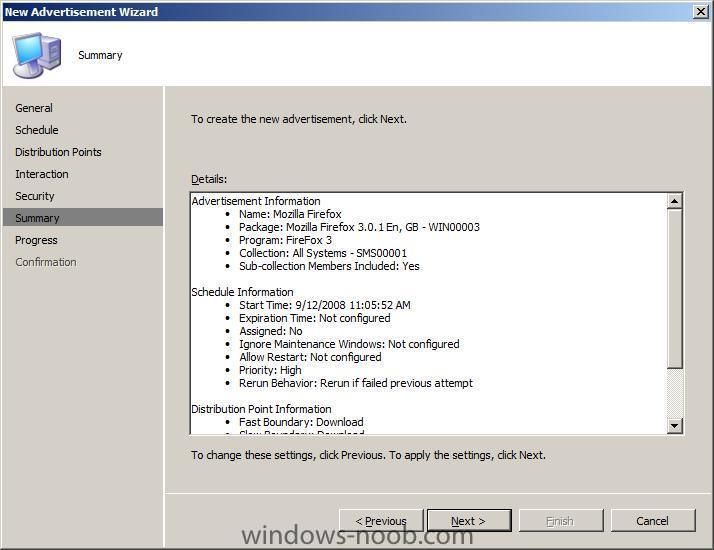
Step 3. Advertise the Package Once a software distribution package has been created, along with programs to tell client computers what to do with the package, you need to advertise the program that you want the clients to run. Advertising the program makes a program available to a specified collection of clients. In the Configuration Manager console, navigate to System Center Configuration Manager / Site Database / Computer Management / Software Distribution / Advertisements, right click on Advertisements and choose New Advertisement. fill in your details for the advertisemet and click on the browse buttons to choose the package/program/collection as nescessary: Note: In the screenshot below, the Firefox Application is going to be Advertised to the All Systems collection and all sub collections, in a LAB environment that is ok but in a production environment you would want to carefully plan what computers (or users) would get the software, you can do that by using this method (recommended). when prompted about distribution points, click yes (we will update the distribution point later) set the advertisement schedule and click on the yellow star to set mandatory settings review the changes review your distribution point settings on a fast or slow lan... customise the interaction by setting the time interval to 15 minutes review the security instance/class rights we will get an Advertisement summary, click on next to finish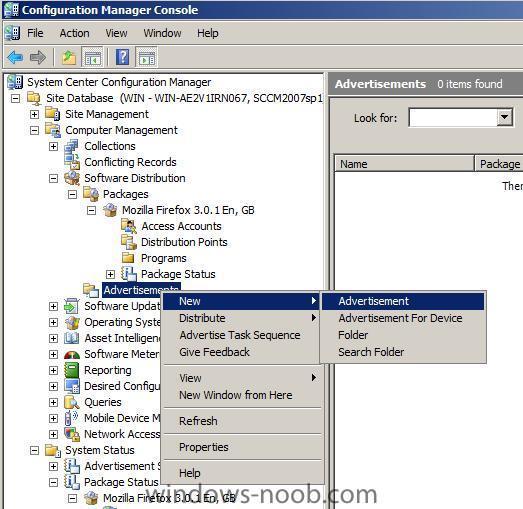


-
how can I deploy an application in SCCM 2007
anyweb replied to anyweb's question in Deploy software, applications and drivers
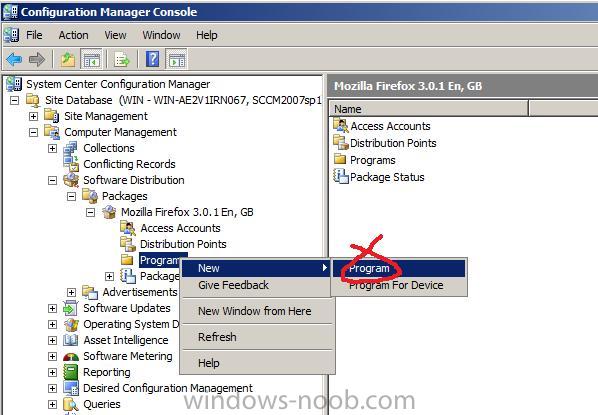
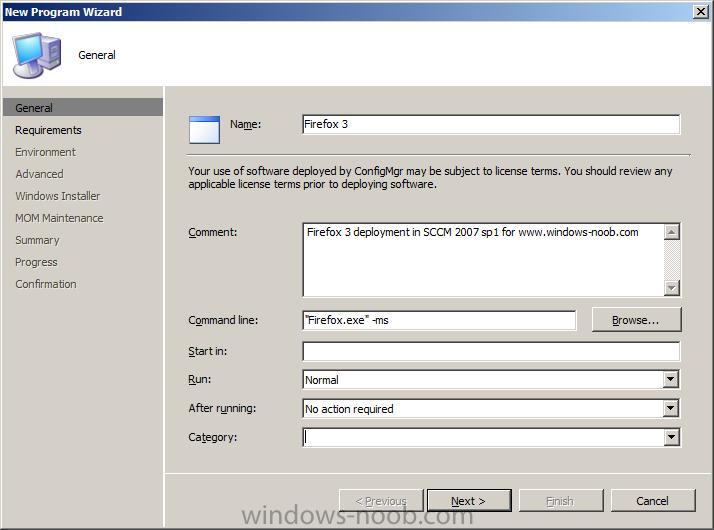
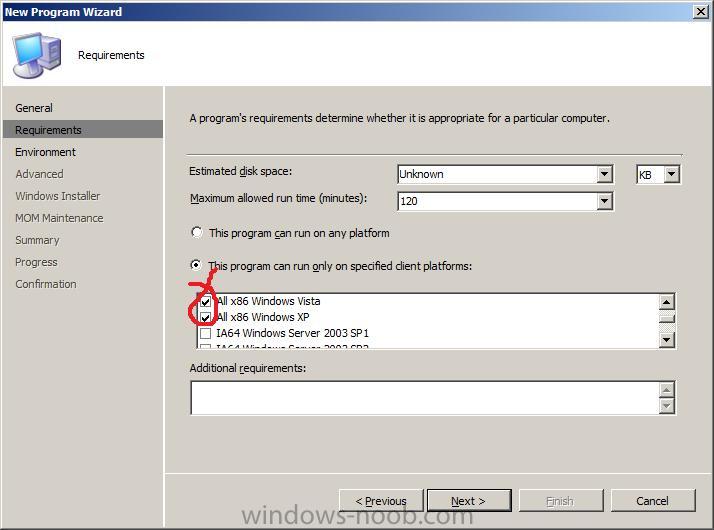
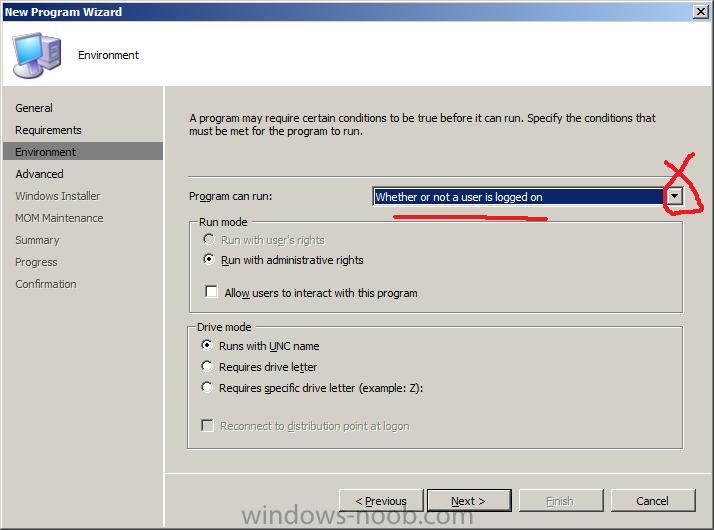
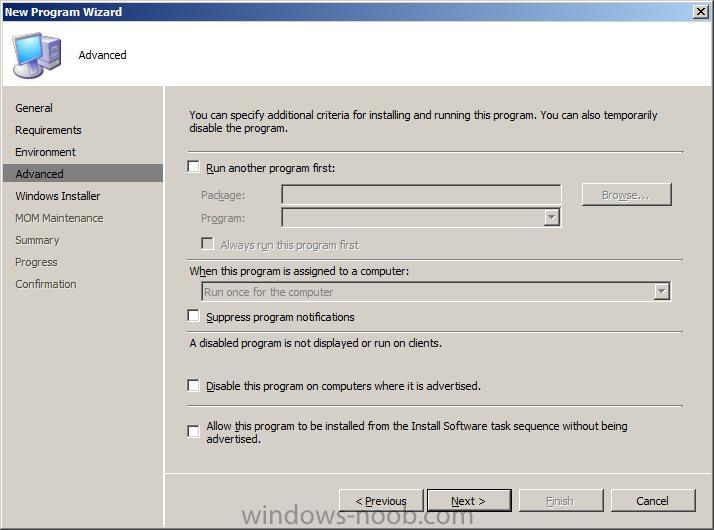
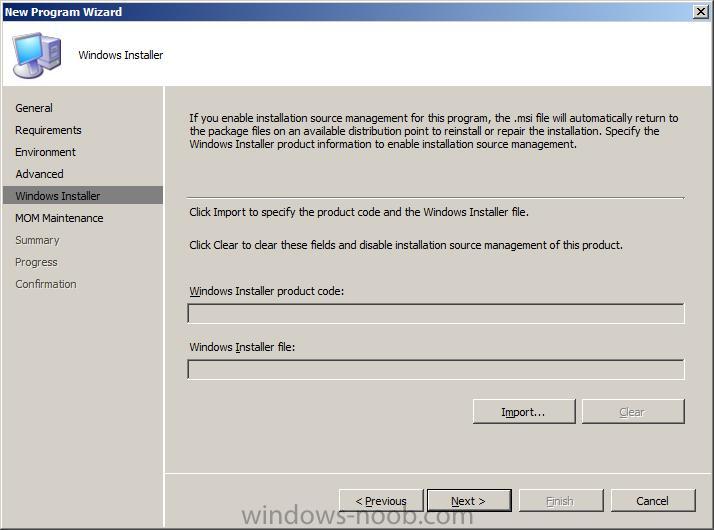
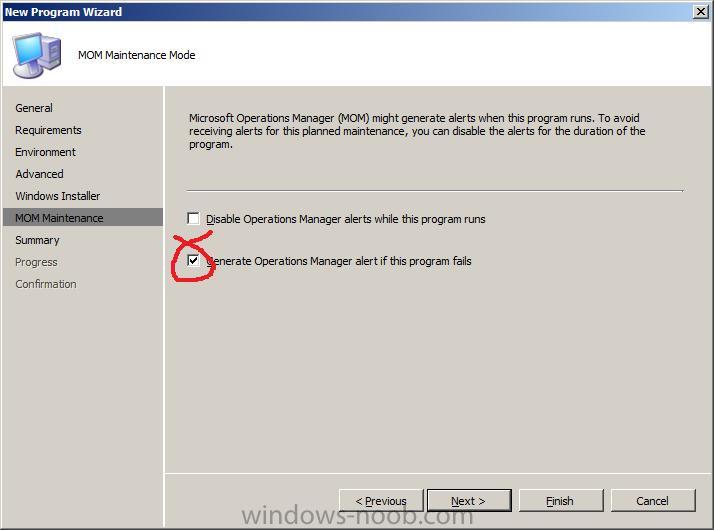
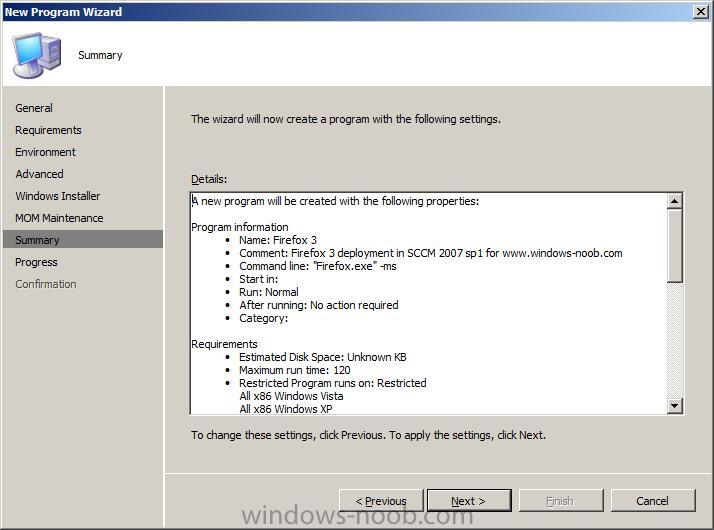
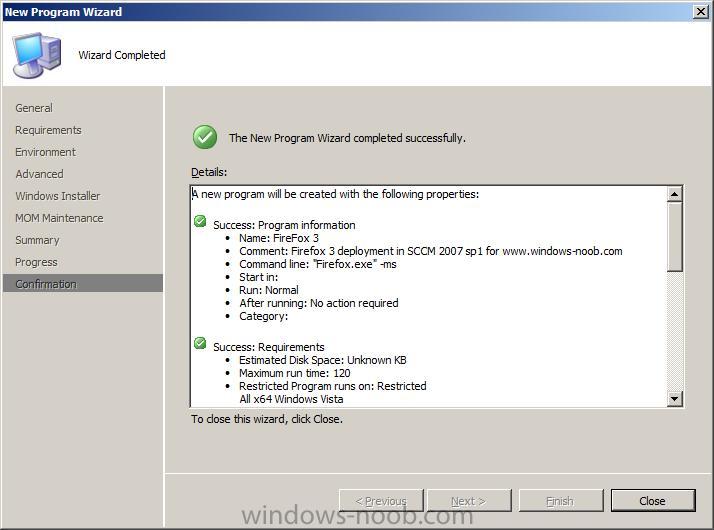
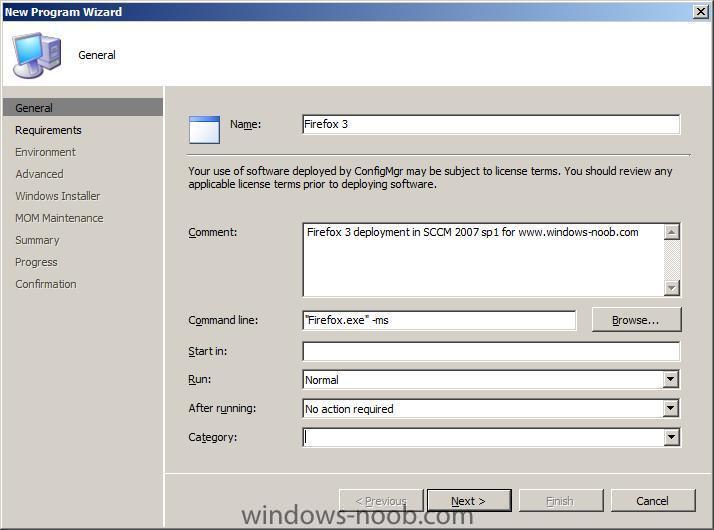
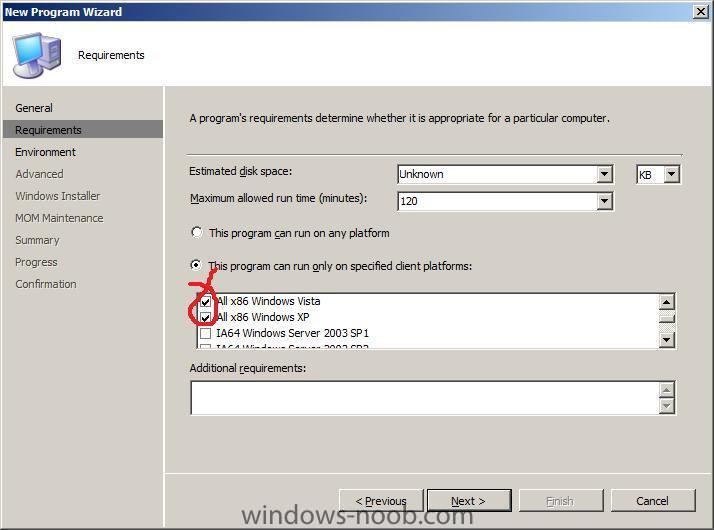
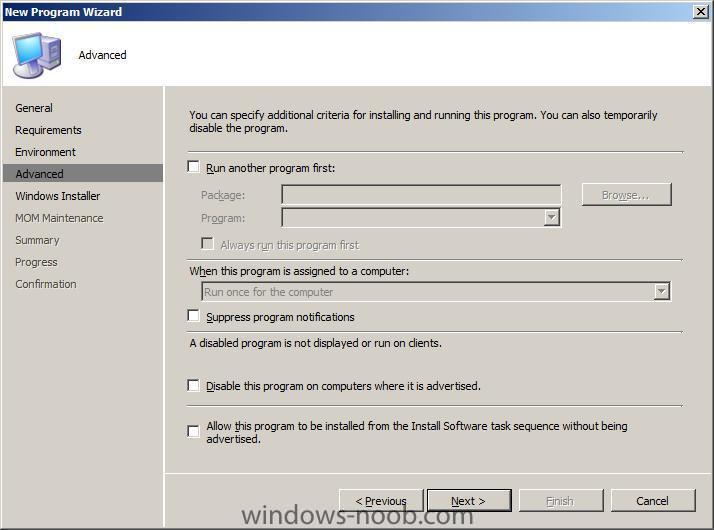
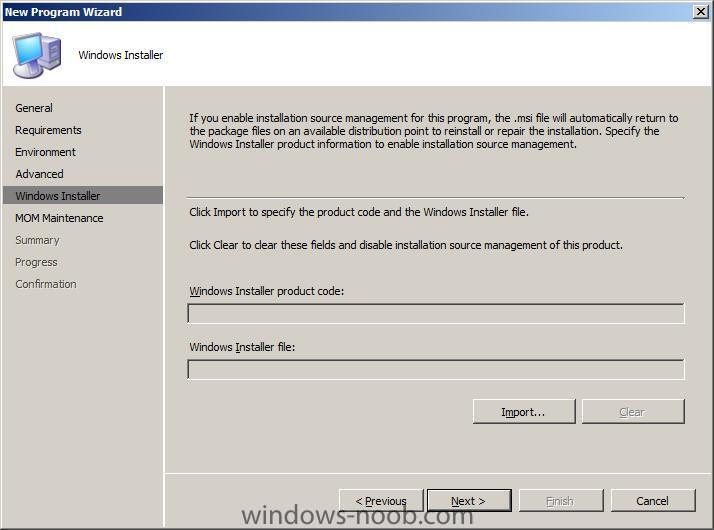
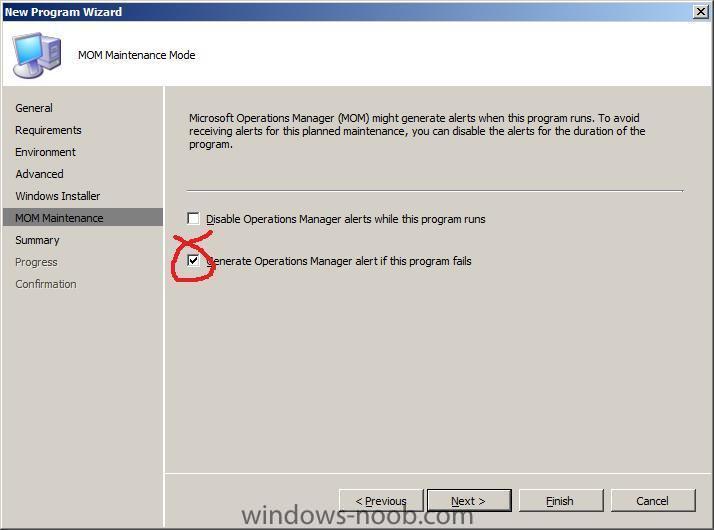
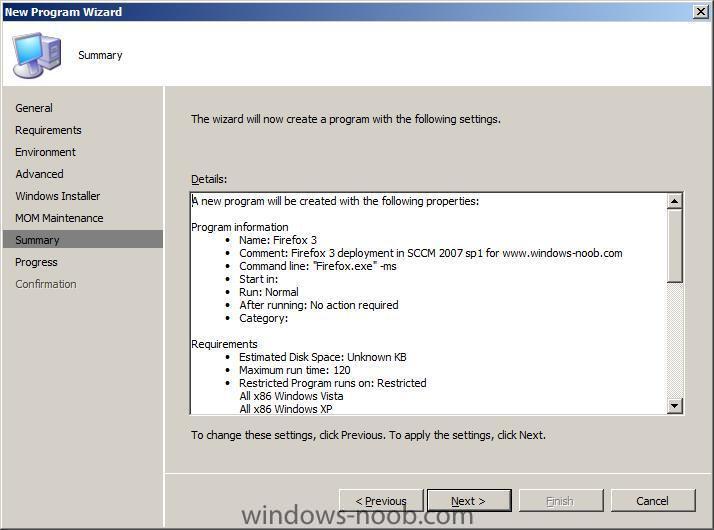
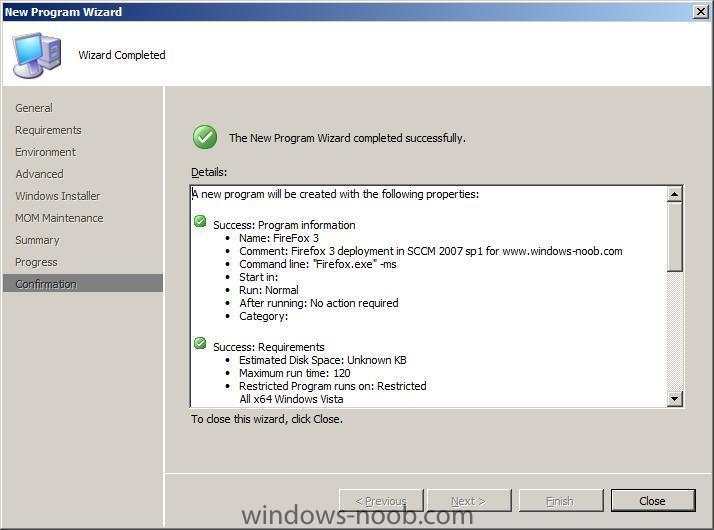
Step 2. Create a Program for the package In Configuration Manager console, expand our newly added Mozilla Firefox package and right click on Program, choose New from the list of options fill in the program details (we are using the -ms switch for installing firefox silently, for a list of application silent switches please see this page on MSFN.org choose All X86 Windows Vista and All X86 Windows XP for the program requirements set the environment variables (choose Program can run whether or not the user is logged on) leave the advanced settings as they are our package is not a Windows Installer package so we can ignore this page also place a checkmark in the MOM alert option if the program fails review the program summary and click next to proceed click Close to finish.

-
how can I deploy an application in SCCM 2007
anyweb posted a question in Deploy software, applications and drivers
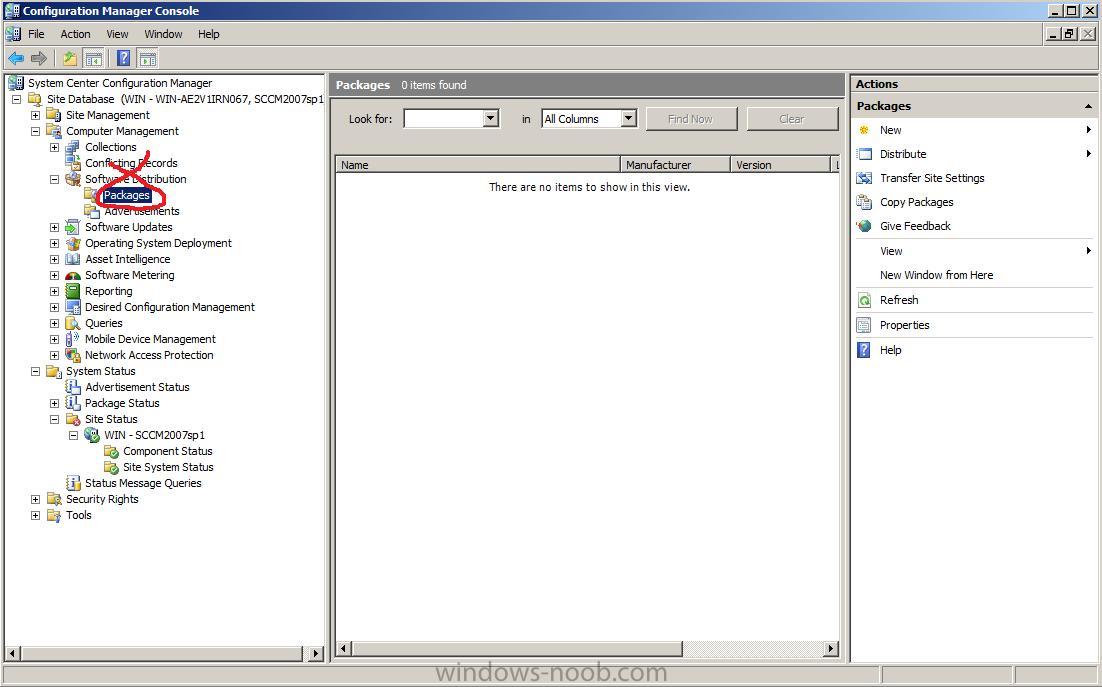
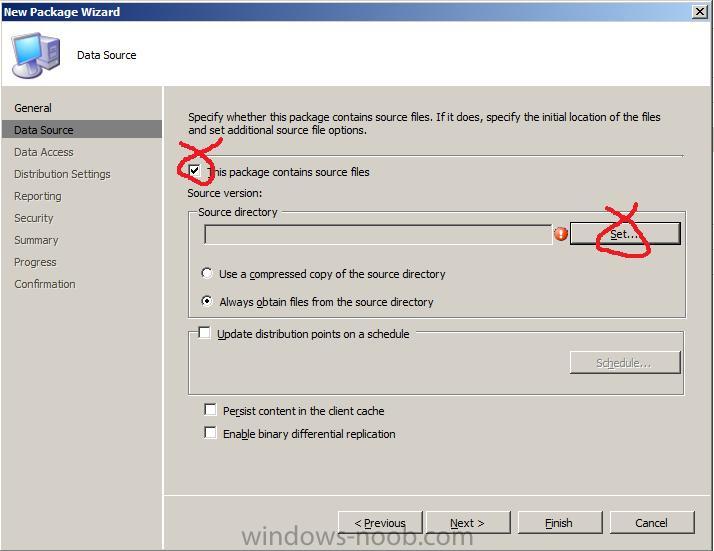
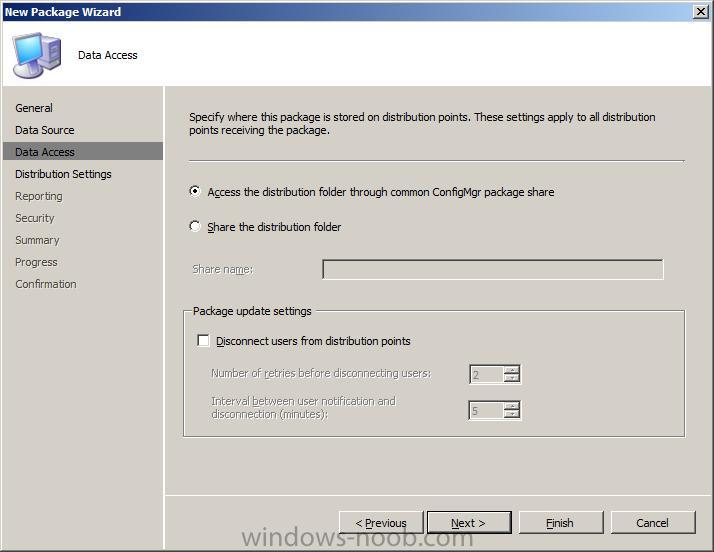
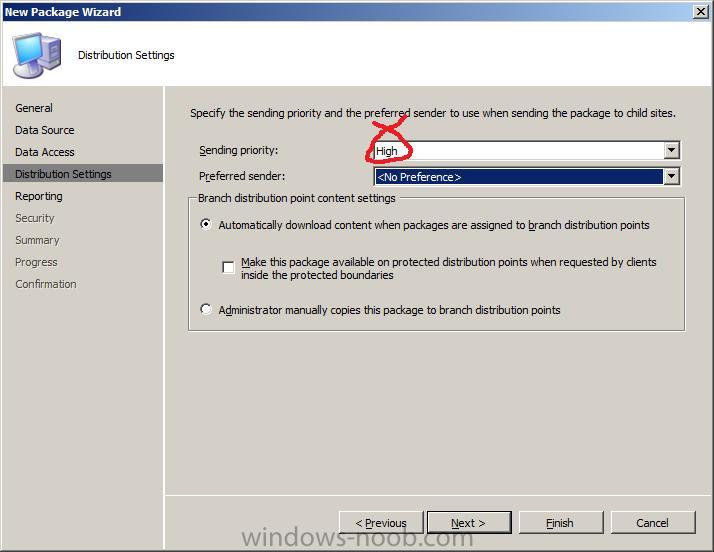
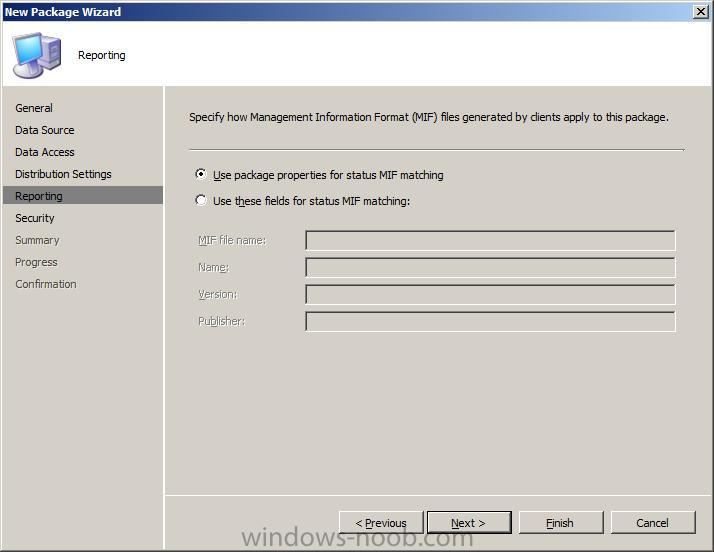
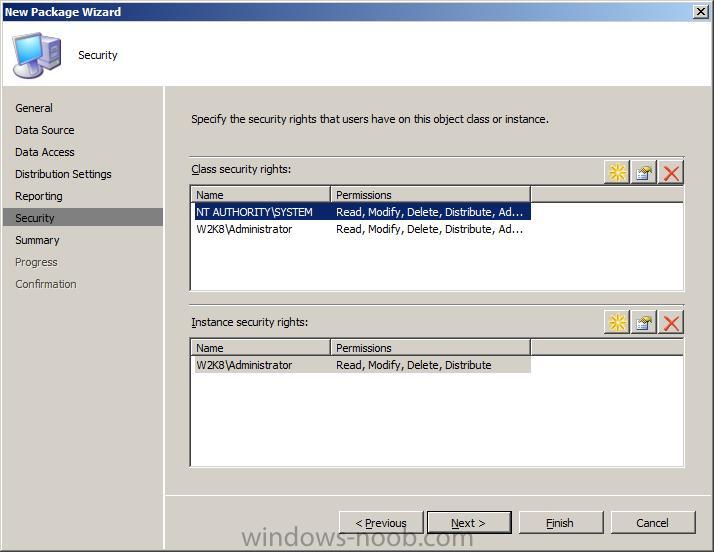
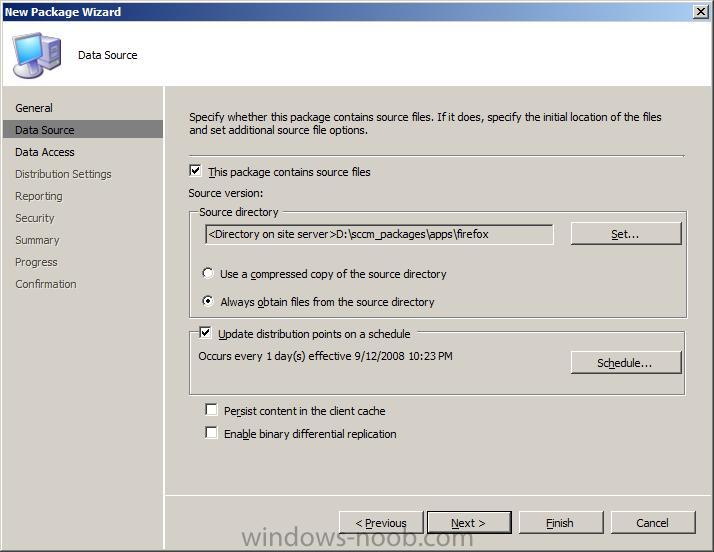
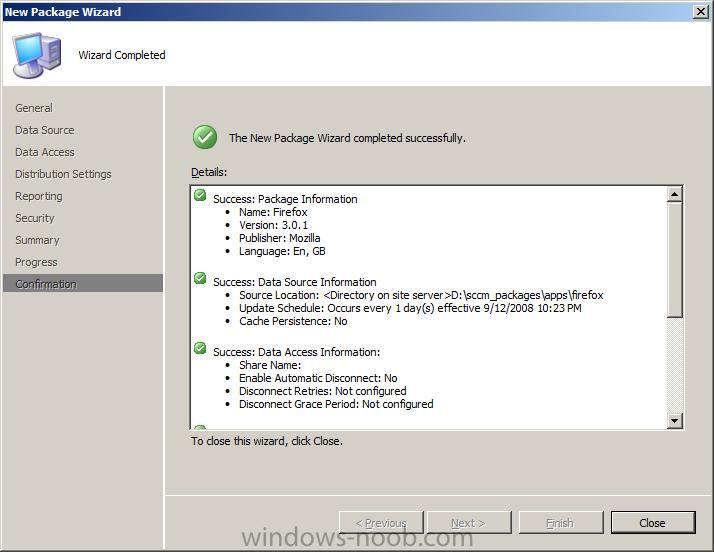
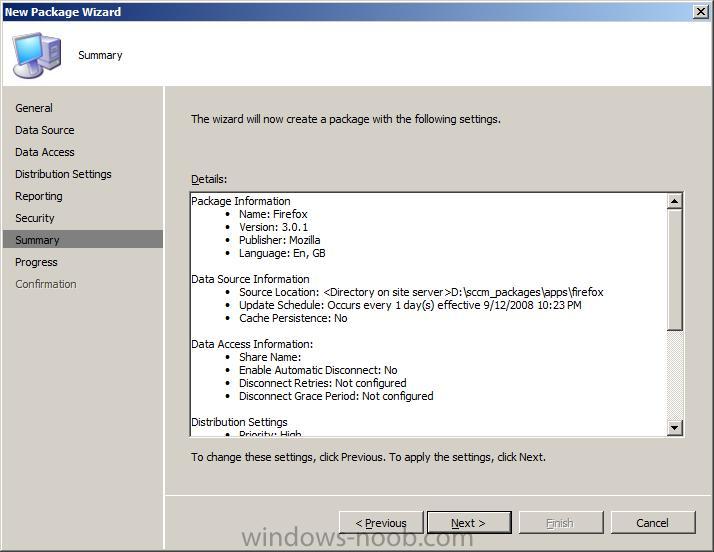
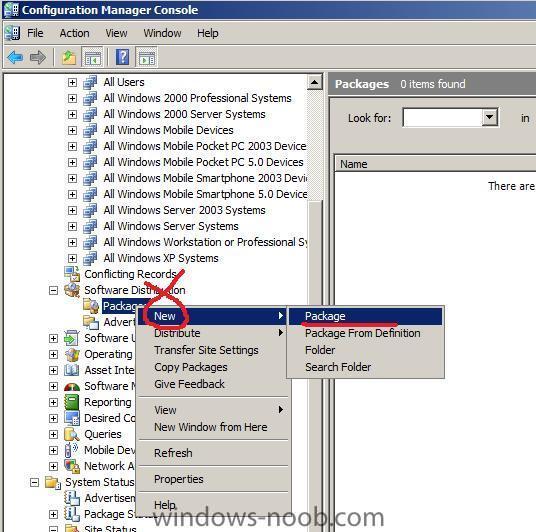
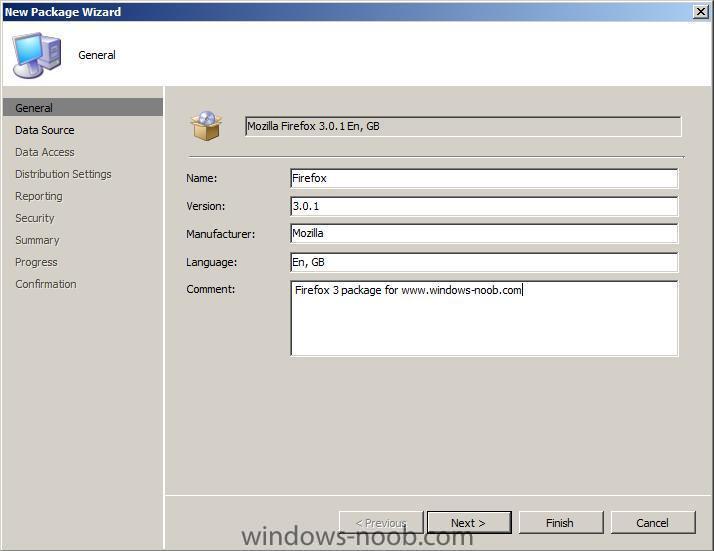
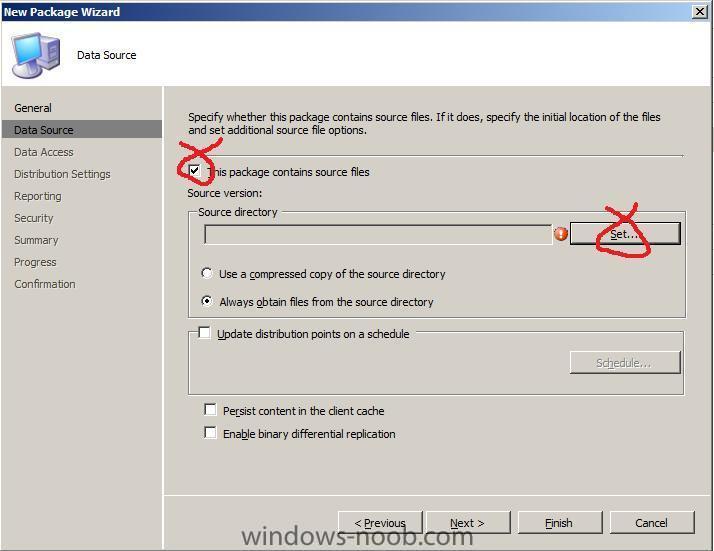
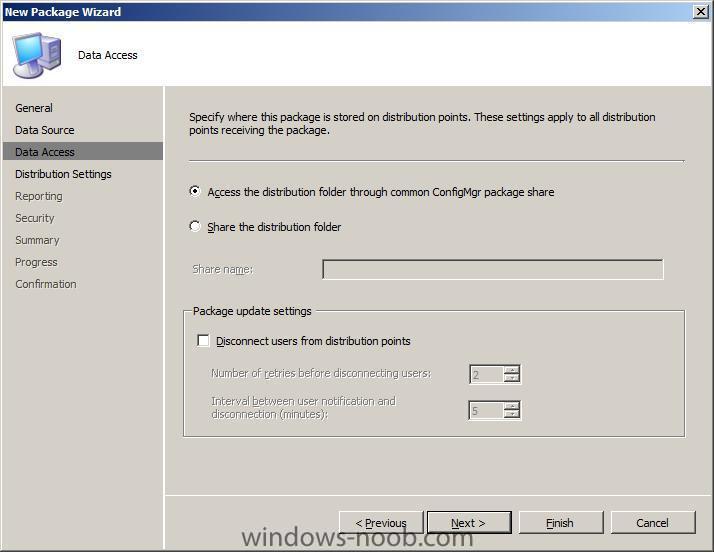
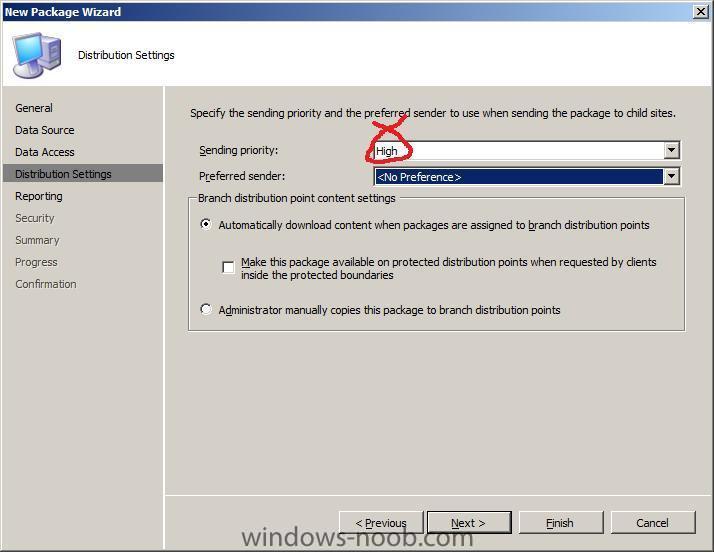
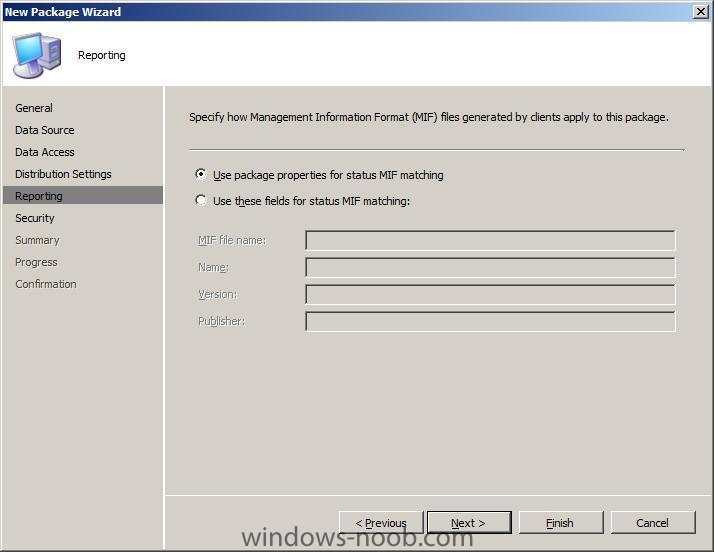
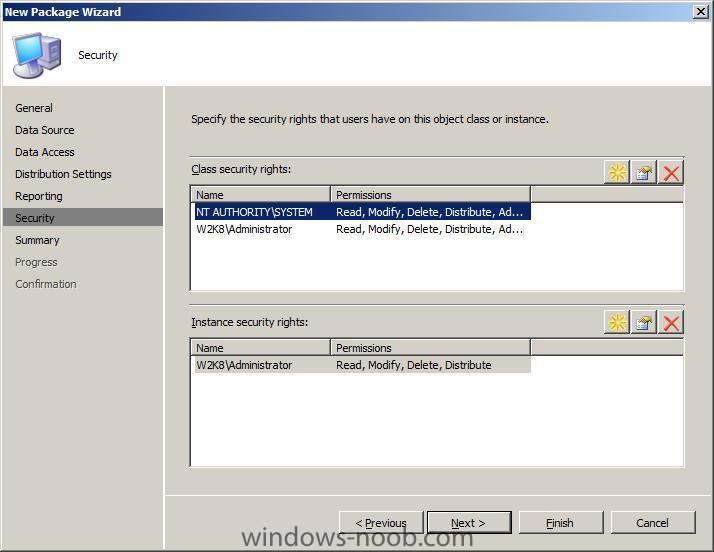
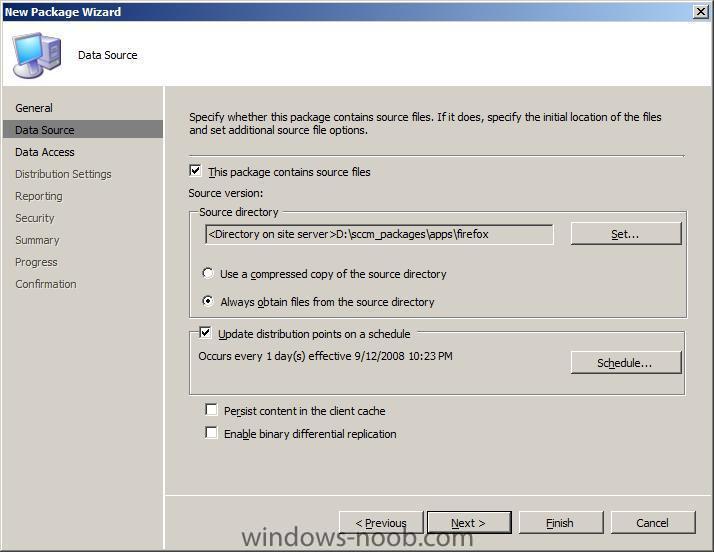
This guide assumes you have installed SCCM 2007 and then configured it as outlined here in Part 1 you must then do the additional configuration outlined in Part 2, and you must have completed the final configuration tasks in Part 3. Step 1. Create the Package In this example we are going to deploy Firefox (Firefox Setup 3.0.1.exe). To make updating versions of Firefox easier (this will be covered later in this guide) we will rename the file from Firefox Setup 3.0.1.exe to Firefox.exe. We then copy that file to d:\sccm_packages\apps\firefox (your path may vary). Startup your Configuration Manager console (gui) and click on Site Database/Computer Management/Software Distribution and then select Packages in the left pane. right click on packages and choose New/package a wizard will begin fill in the package properties as you wish in General For Data Source, place a check in This package contains source files and click on Set to specify the source of the sccm package change the source directory location to Local drive on site server and browse to the path of your Firefox package next click ok and then set the schedule to update the distribution points set your Data Access options (I left them as default) don't make any changes to the packages priority unless you think you really need it to have a higher priority, if that is the case then you could set the priority for the package in distribution settings to high keep the MIF properties as default set the Security rights for the package class and instance rights review the summary of choices you made and click next to install the package, you'll then see a confirmation that it's installed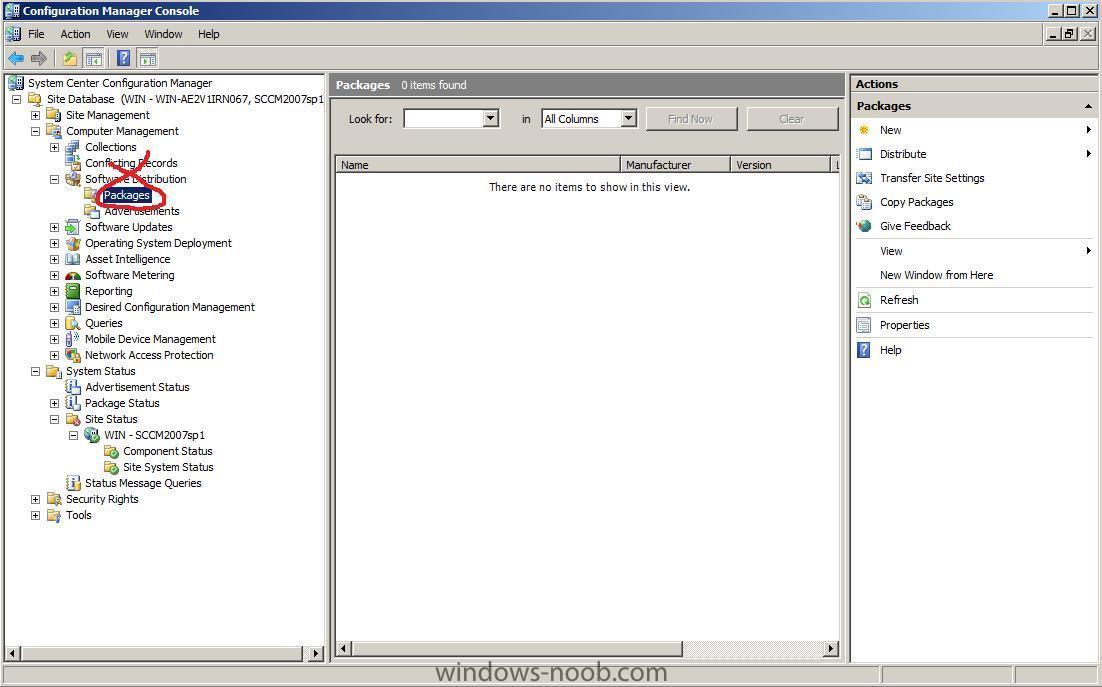


-
3rd party raid drivers in BDD 2007
anyweb replied to tward's question in Deploying Windows 10, Windows 8.1, Windows 7 and more...
hi again, please read this post first to get an idea of whether your values above are correct or not, the post references a different precision model, that does not matter, use the logic in the post ! when you try the bdd install apart from not seeing your raid array do you get any specific error ? from looking at your provided files i think you may have specified the wrong file name or should be remming stuff out as before read this first to get an idea of how to determine the best way forward -
3rd party raid drivers in BDD 2007
anyweb replied to tward's question in Deploying Windows 10, Windows 8.1, Windows 7 and more...
hi and welcome what model computer are you attempting to install XP on ? cheers anyweb -
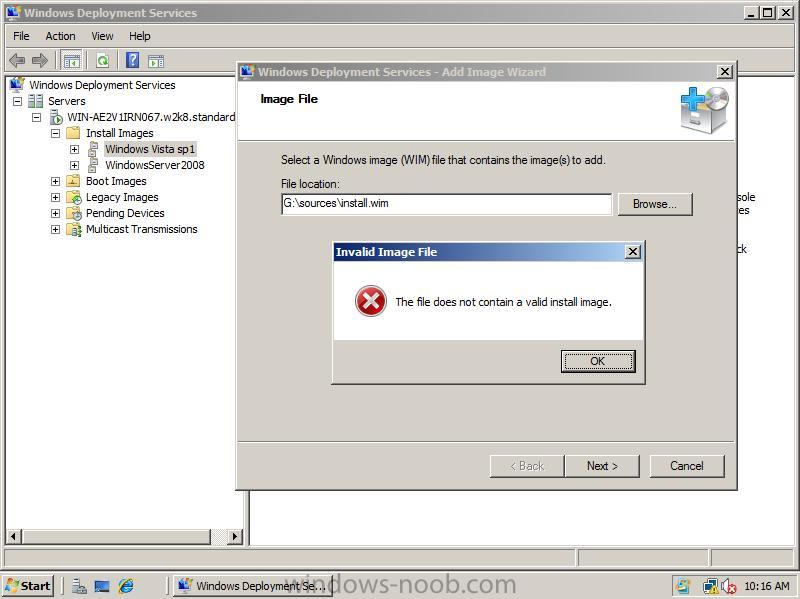
Windows Deployment Services Add Image Wizard error
anyweb posted a question in Windows Deployment Services (WDS)
If you are using a virtual pc environment (eg Microsoft Virtual PC 2007) and try to add an install image in WDS you may see the following error Verify if you have mounted the ISO (the Vista Installation DVD) in daemon tools, if so this may be the cause of your problem. Workaround 1. To resolve this error, simply copy the Install.wim file stored in your sources folder on the DVD (or mounted ISO) to a local directory on your virtual pc and retry the WDS add new image wizard and this time substitute the local path for the install.wim file in the wizard instead of the mounted ISO path. Workaround 2. Unmount the ISO in Daemon tolls, and then mount the iso in Microsoft Virtual PC directly by clicking on CD, then Capture ISO image This appears to be something to do with the way Microsoft queries cdrom.sys (in relation to Daemon tools at least....). cheers anyweb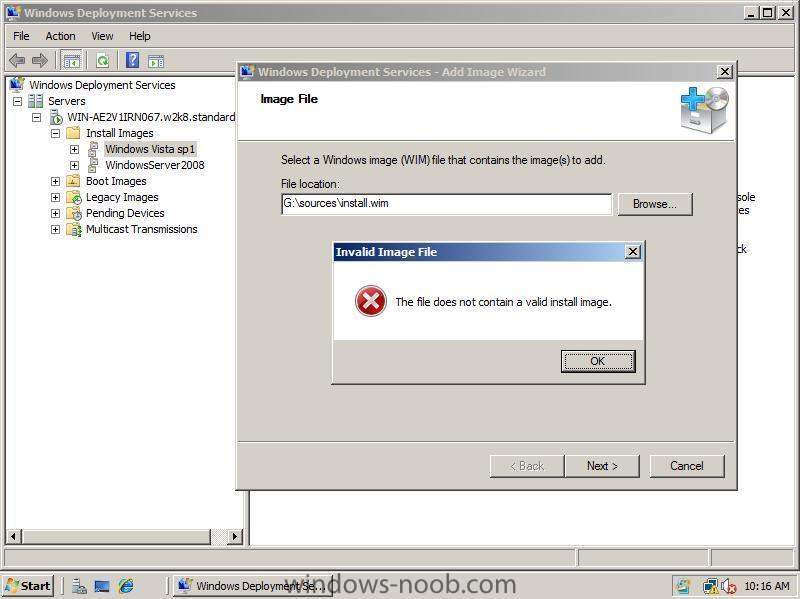
-
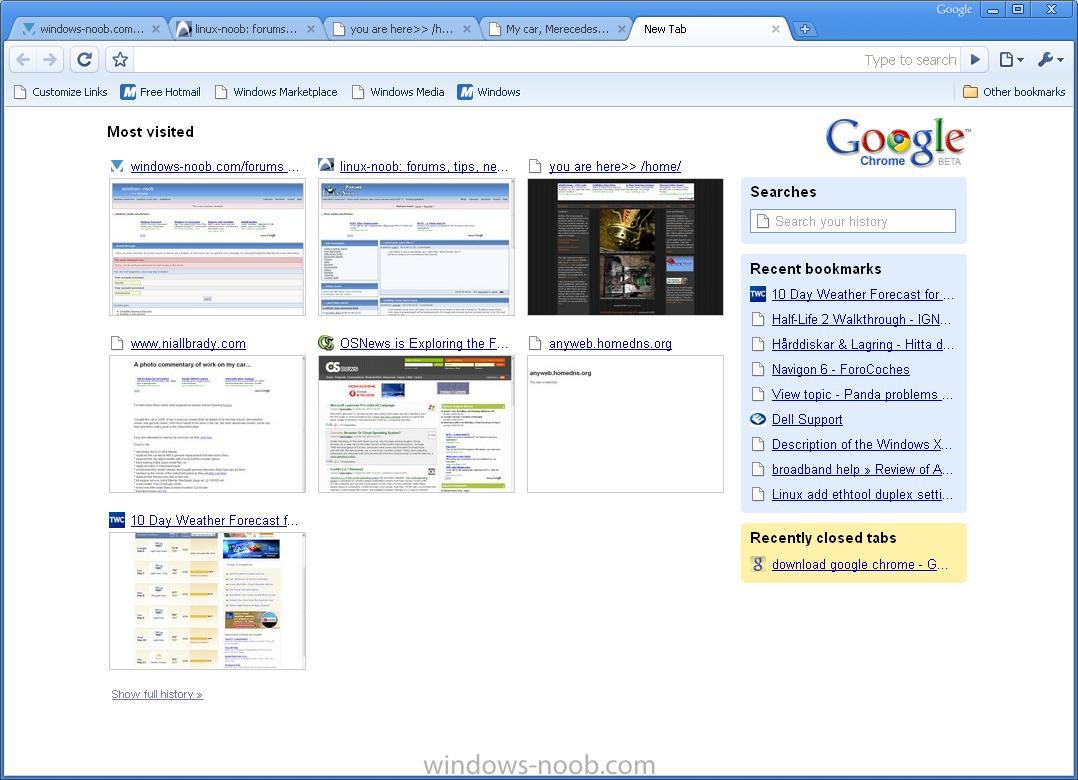
if you havn't tried it yet, then get downloading Google chrome really is cool, with plenty of new features to keep you using it the recently accessed websites graphical thumbnails alone is really cool cheers anyweb

-
The IE team at Microsoft has released the 2nd beta Internet Explorer 8. Contrary to the first beta, which was aimed at developers, this one one is aimed at normal people like you and me. The list of new features and changes is decent, all focused around three themes (marketing alert): "We focused our work around three themes: everyday browsing (the things that real people do all the time), safety (the term most people use for what we've called 'trustworthy' in previous posts), and the platform (the focus of Beta 1, how developers around the world will build the next billion web pages and the next waves of great services)." Go get it. via osnews.com
-
hi all, quick FAQ 1. what is this ? it's a gmail account with a difference, instead of yourname@gmail.com you'll get yourname@windows-noob.com 2. how do I sign up ? contact admin@windows-noob.com with the following info desired username= firstname= lastname= 3. how do I access it ? Once you have been provided with the temporary password to login, please go to http://mail.windows-noob.com and login ! feel free to test this by emailing ME with your new email account and the subject 'testing email@windows-noob.com' cheers anyweb
-
- 1
-

-
Will Sysprep mess with Office activation?
anyweb replied to chinnp's question in Deploying Windows 10, Windows 8.1, Windows 7 and more...
hi and welcome take a look at this i'm still trying to find out about how sysprep reacts with office 2007 though.....