anyweb
-
Posts
9271 -
Joined
-
Last visited
-
Days Won
371
Everything posted by anyweb
-
-
here's a sample with Domain joining. [Unattended] DriverSigningPolicy=Ignore OemSkipEula = Yes OemPreinstall = Yes InstallFilesPath = C:\Sysprep\I386 [GuiUnattended] AdminPassword=windowsnoob OEMSkipWelcome = 1 OEMSkipRegional = 0 [UserData] FullName=Someuser OrgName=Windows-Noob ComputerName=Somepc ProductID=xxxxx-xxxxx-xxxxx-xxxxx-xxxxx [Identification] JoinDomain=mydomain DomainAdmin=dom_adder DomainAdminPassword=somethingl33t [Networking] InstallDefaultComponents=Yes [Display] BitsPerPel = _BPP_ Vrefresh = _HRTZ_ Xresolution = _XRES_ Yresolution = _YRES_ [SysprepCleanup] Service = intelide Service = intelide Service = intelide Service = intelide Service = intelide Service = intelide Service = intelide Service = intelide Service = intelide Service = intelide Service = aic78xx Service = aic78xx Service = aic78xx Service = aic78xx Service = aic78u2 Service = aic78u2 Service = adpu160m Service = adpu160m Service = adpu160m Service = a320raid Service = a320raid Service = a320raid Service = a320raid Service = a320raid Service = a320raid Service = a320raid Service = a320raid Service = a320raid Service = a320raid Service = a320raid Service = a320raid Service = a320raid Service = a320raid Service = aac Service = fasttx2k Service = fasttx2k Service = fasttx2k Service = fasttx2k Service = fasttx2k Service = fasttx2k Service = symmpi Service = symmpi Service = symmpi Service = symmpi Service = symmpi Service = symmpi Service = iastor Service = iaahci Service = aarich Service = aarich Service = aarich Service = vmscsi Service = vmscsi Service = vmscsi
-
you can edit a batch file (shutdown.bat) and paste the following into it shutdown.exe -s -f -t 5 -c "shutting down the computer now" save the file and you can 'call' it either using Windows Task Manager (start/control panael, scheduled tasks, add scheduled task) the -s in the code above tells shutdown.exe to shut the system down, if you want to reboot the machine change it to -r the -f switch forces running applications to close without warning and the -c displays a comment box to warn the user of the coming shutdown, in addition it adds this info the the eventviewer. the 5 after -t is the number of seconds before the machine is shutdown. cheers anyweb
-
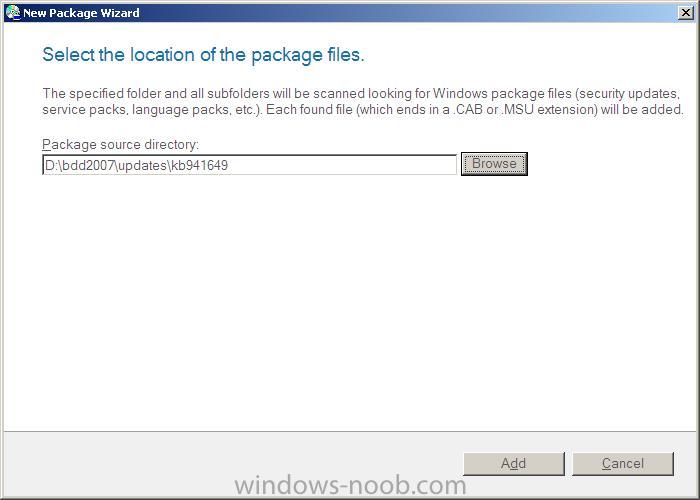
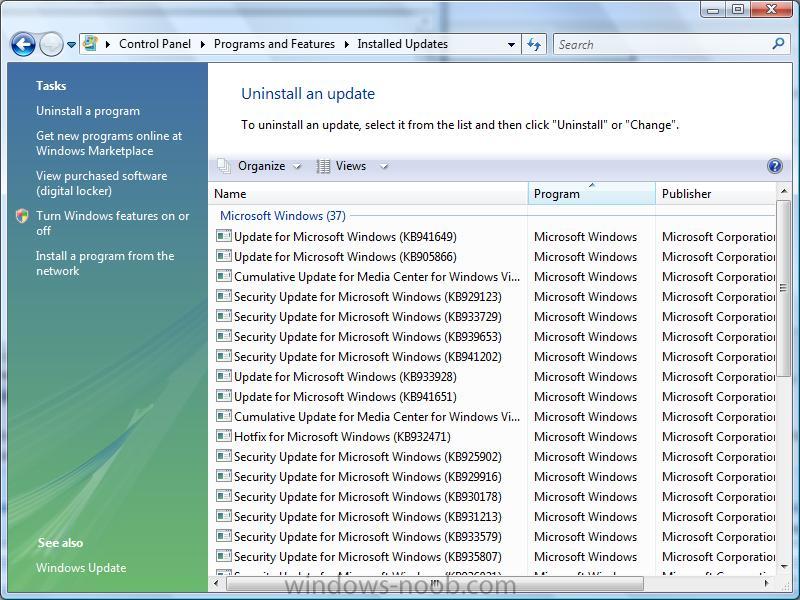
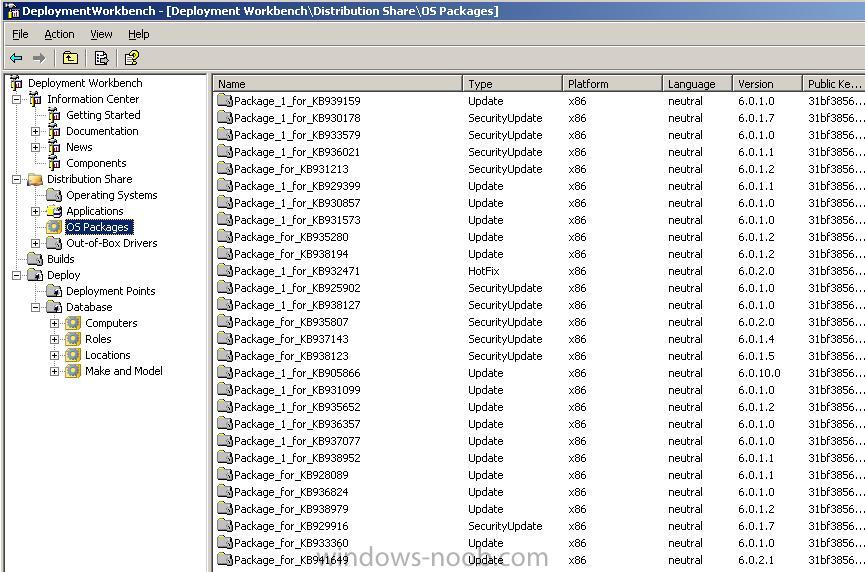
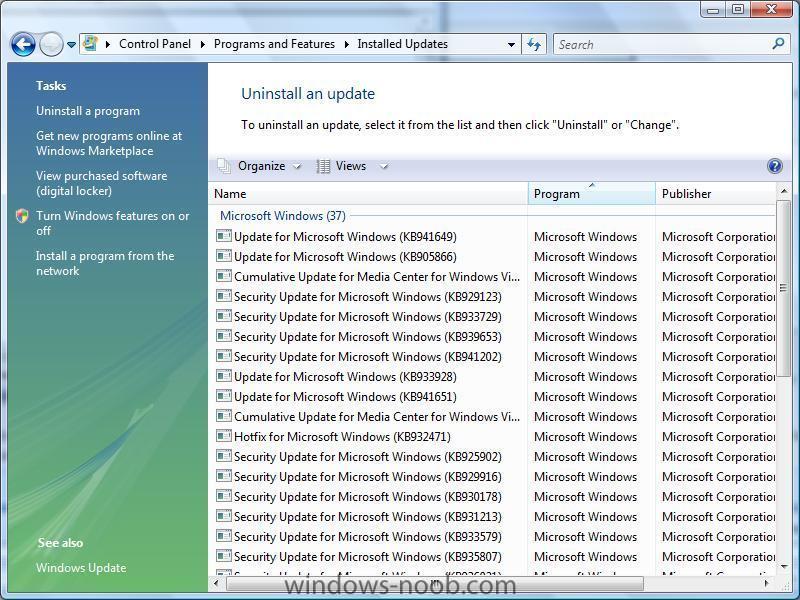
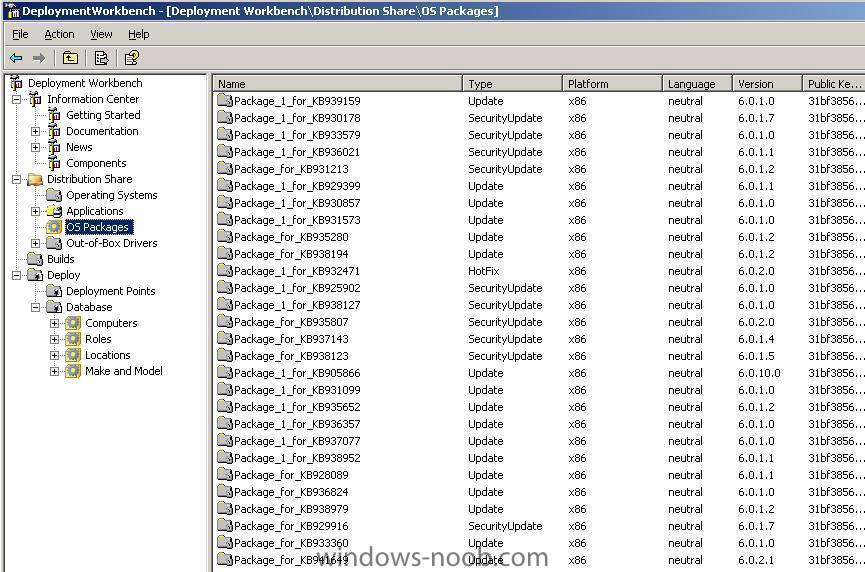
 This article assumes you have setup BDD 2007 already and configured it to do a Lite Touch Installation of Windows Vista. Step 1. Do a Lite Touch installation of Windows Vista on a client, once done, update Windows using Windows Update (requires an internet connection), reboot when prompted and continue until all available updates are applied. Step 2. Open up control panel and click on Programs and Features. In the left pane, click on View Installed Updates. In the right pane, you will see all the Security/hotfix and other updates that Windows update has applied to the computer, and now you must individually write down the KB (knowledgebase number) of each update, for example Update for Microsoft Windows (KB941649). Step 3. Using google (or your favorite search engine) search online for the knowledgebase article number plus MSU. EG: google for KB941649 msu You will get pages of hits, with one of the first 5 at least having the correct link to download the MSU file. We need to download the MSU file as that is required by BDD 2007. Clicking on the first link in our search results from google brings us to Microsofts download page for the KB941649 msu file (validation required). Download the file and save it on your desktop. Step 4. Copy the MSU file (Windows6.0-KB941649-v2-x86.msu) you saved in Step 3 to your BDD server, then open up the BSS 2007 DeploymentWorkbench and click on Distribution Share in the left pane, followed by OS Packages. Right-click on OS Packages and choose New, enter the location of your MSU file (preferable copy it to it's OWN folder eg:- Click Add when ready and the msu file package will be added to your OS packages in BDD 2007 if you wish to verify this you can browse your distribution folder as listed below and you'll see that BDD has already created subfolders where the KB files now reside. Step 5. repeat the process from Step 2 to Step 4 until there are no more Windows Updates (msu files) to download and add to your BDD server from the list of applied updates. Step 6. Deploy Windows Vista to a client and once done open up control panel/Programs and Features and click on 'view installed updates'. You will see all the updates that you previously applied to your BDD 2007 OS Packages are now installed.
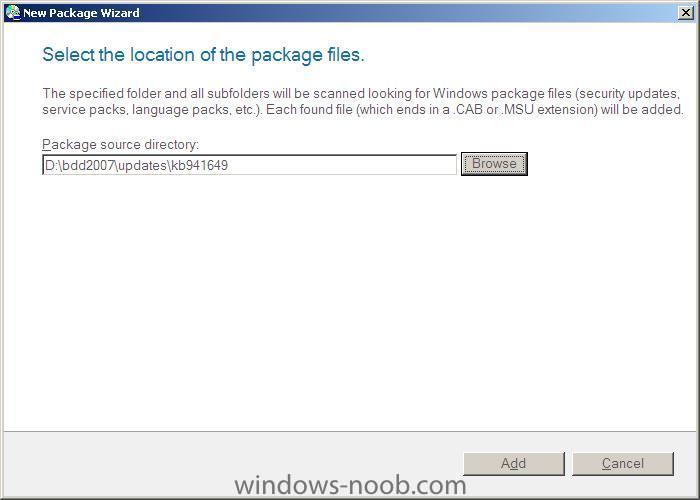
-
don't lose hope, because there are lots of ways to recover your important data, first of all do NOT use your hard disc anymore until you are ready to start recovering data, it would be a good idea to connect the drive as a SLAVE device in your computer (with another drive as MASTER), of course if it's a laptop then you will need to use other options, such as connecting the drive in a modular bay or connecting it externally via USB. So how do we recover the data then ? Well if the disc is still readable and you only accidently formatted it or re-partitioned it then you can buy the following software GetDataBack NTFS Simply install the software on a working computer running windows XP (or 2000) and as I said earlier mount the drive that you accidently formatted as a slave drive, then using the getdataback NTFS software, highlight the drive/directories you want to recover and you'll get the chance to copy all the data FROM the slave drive TO the master drive (so obviously, you'll need lots of free space on the MASTER drive). Once done, you can re-format, re-partition the SLAVE drive and copy the data back. Ok, what about if the drive itself is giving errors (bad sectors, read/write failures, clicking), well if it is then all hope is still not lost, get over to Knoppix.net and download the LiveCD. You can then boot your computer (change bios to boot to CD first) from the LiveCD and once it is booted, you should see your drive partitions listed on the Desktop. At this point you can mark the data you want to recover and copy it to your MASTER drive OR to an external USB hard disc. The advantage here is that as Knoppix is linux based it won't abort the file copy process like Windows does, it will prompt you to retry again and again, and if it fails to copy a file, you can skip and it'll continue onto the next file. Finally if both of the above don't help as the drive is too damaged or unreadable consider using SpinRite 6, this software from GRC will do extensive bit read/write/sector analysis and can recover bad/unreadable sectors, but be warned the process can take HOURS if not days (depending on the hard drive size and damage to the files/sectors/heads.) hope this helps cheers anyweb
-
more info > http://www.pcmag.com/article2/0,2704,2200774,00.asp and > http://neosmart.net/blog/2007/windows-xp-s...lysis-included/ What's new in SP3 ? more info > http://www.pcmag.com/article2/0,2704,2200799,00.asp
-
how can I setup Zero Touch Installation ?
anyweb posted a question in Zero Touch/ZTI, Lite Touch/LTi
The most up to date version of this Guide will always be here. Reproduction of this guide is allowed as long as it links back to here Verify that you have the correct infrastructure in place Zero Touch Installation (ZTI) requires the following products to be installed in your network infrastructure:- * Microsoft SQL Server 2000 (or later) - detailed setup guide here * SMS 2003 - detailed setup guide here * SMS 2003 OSD Feature Pack Update * Windows Deployment Services in Windows Server 2003 Note: If you want a Microsoft checklist of the steps required to get ZTI working, see this page on Technet. Prepare the deployment environment. For the purpose of this article, I'm assuming that you have already installed and configured SMS 2003 and SQL. In addition this has been tested and verified to be working for Windows Vista RTM (i.e.: I have not tested it with Vista SP1 yet). Install BDD 2007 and then install USMT either manually by downloading the msi package or by installing it using the Components section of DeploymentWorkbench (the MMC console for BDD 2007). USMT captures desktop, and application settings, as well as user accounts and user files, and then migrates them to a new Windows installation. Next, install the SMS 2003 OSD Feature Pack. Click here to download and install the SMS 2003 OSD Feature Pack Update, once downloaded, double click the exe to extract it somewhere, I extracted it to c:\sms and then ran the OSDeployment_Setup.EXE file from within that folder to install the OSD Feature Pack. Once the feature pack is installed, it's safe to delete the setup folder (c:\sms if you did the same as me). Once installed, you can start up the SMS Administrator Console and you'll see a new setting in the left pane called Image Packages. You are now ready to setup Zero Touch using the 18 Step guide below. Zero Touch in 18 Steps Create an OSD capture CD. Capture a Vista image (wim). Note: To use separate computernames then read this post. Import the captured Vista WIM image into BDD. Import WinPE2004/2005 & required OS files into BDD. Create a new build in BDD for the captured WIM image. Create and update the BDD Deployment point (OSD/ZTI). Update SMS WinPE from the BDD/ZTi deployment point. Import the captured Vista WIM image into SMS. Create an OS deploy program. Update the distribution point for the OS deploy program. The following four steps in the process are not specific to Zero Touch Installation, but make the distribution of resources easier and more scalable in an enterprise environment. Copy driver resources for SMS packaging. Create a package from the driver resources. Add the driver resources to a distribution point. Update the SMS distribution point. Update customsettings.ini and bootstrap.ini in BDD. Update each OSD phase with BDD ZTI files and scripts. Copy osdshell.lab.exe to osdshell.exe. Create an install CD. That's it, you are done ! If you liked this guide and would like to see more FREE guides like it then please help me by Digging it. -
Microsoft Deployment is the next version of Business Desktop Deployment (BDD) 2007. It is the recommended process and toolset to automate desktop and server deployment. Microsoft Deployment provides detailed guidance and job aids for every organizational role involved with large-scale deployment projects.
-
how can I DEPLOY an image captured using WDS ?
anyweb replied to anyweb's question in Windows Deployment Services (WDS)
Part 3 - PXE boot to the WDS server Step 1. Make sure the Network card is set to 'on w/PXE' in your bios and that you control the boot order so that it boots to PXE before anything else Step 2. When you get the Windows Boot Manager screen after PXE booting to the WDS server, select the 'Windows Vista Setup-Deploy' option (may be labelled differently, but this label was defined in Part 1, step 7 of this post) Step 3. After Windows PE boots you'll be presented with a Install Windows wizard, select your chosen Locale and Keyboard or input method and click next. Step 4. When prompted enter your domain username and password, enter them and click ok to continue. eg: Username= ris2\administrator Password= xxxxxxxxxx Step 5. Select the operating system you want to install from the ones in the list, in this example it is Windows Vista Ultimate Capture en-US X86. Click Next to continue. Step 6. Where do you want to install windows? highlight the drive/partition and click next to continue or click advanced drive options if you want to format the drive, and then click on format and ok (otherwise the previous Windows installation will be renamed to Windows.old). Step 7. Click next to continue, Windows setup will start the installation process (copying files, expanding files, installing features, installing updates, completing installation). Congratulations, you have now successfully deployed a previously captured image using WDS. If you found this article useful then please digg it. -
how can I DEPLOY an image captured using WDS ?
anyweb replied to anyweb's question in Windows Deployment Services (WDS)
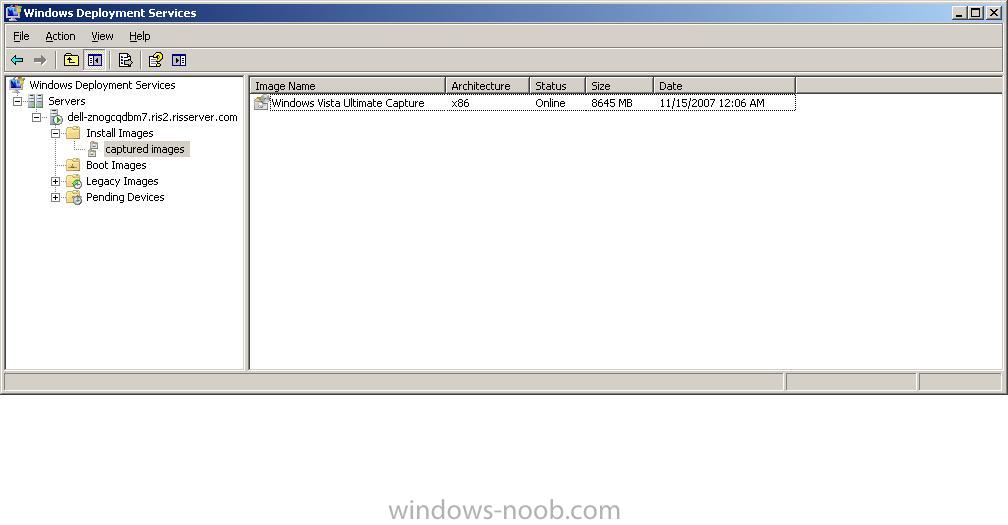
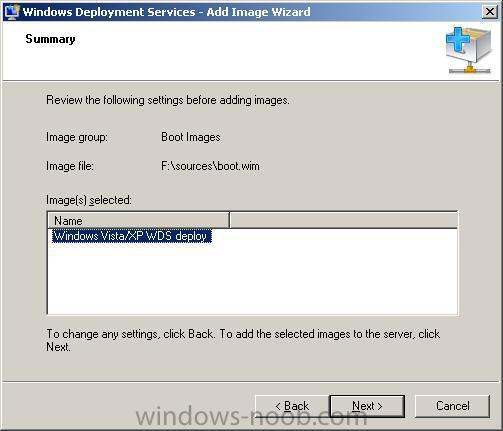
Part 2. Add a captured image to WDS Step 1. Open WDS and on the left pane select Install Images. Step 2. Select Captured Images below this and in the right pane, right-click and select Add Install Image Step 3. Choose browse, and browse to the folder that contains the image you captured previously usually found in RemoteInstall\Images\captured images if you followed the previous guide. Highlight the wim file and choose open. Step 4. Click next to see the list of available captured images, select the one(s) you want to add and click next. Review the choices you made and click next again. After a few moments you'll be told the selected images were added to the server, click Finish to end the wizard. The captued image will now be listed in the WDS Install images/captured images pane on the right hand side (see screenshot).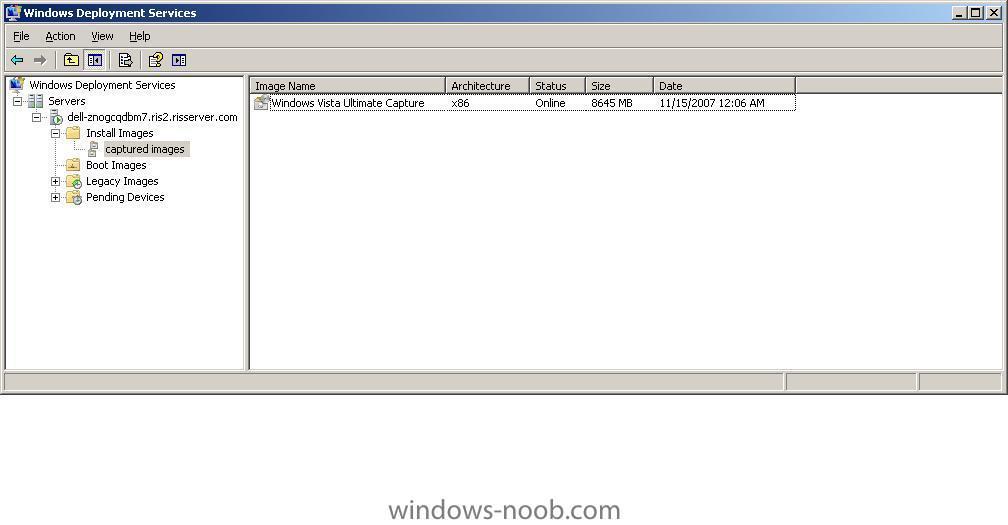
-
how can I DEPLOY an image captured using WDS ?
anyweb posted a question in Windows Deployment Services (WDS)
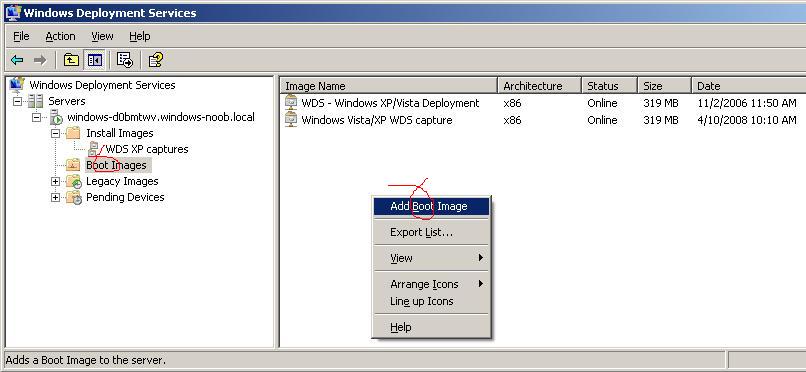
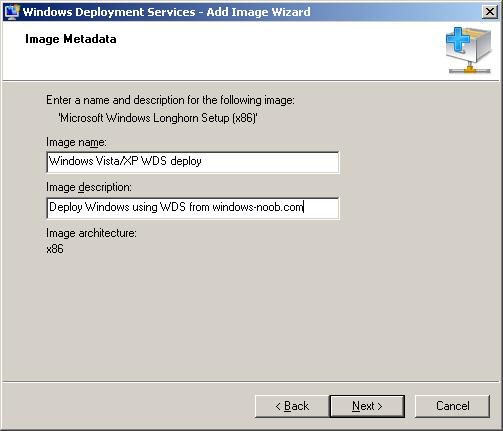
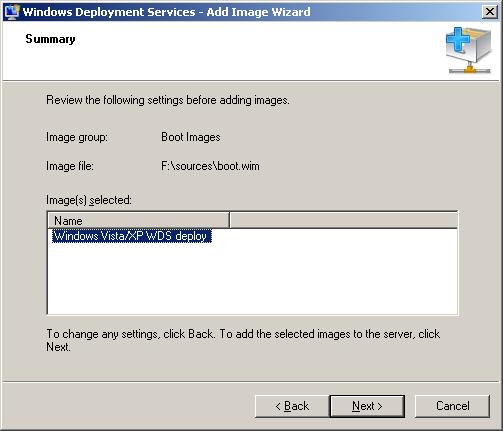
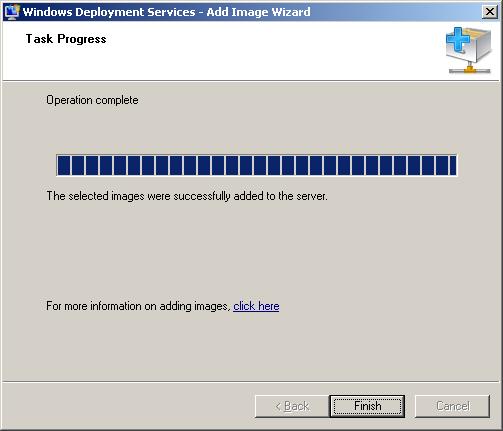
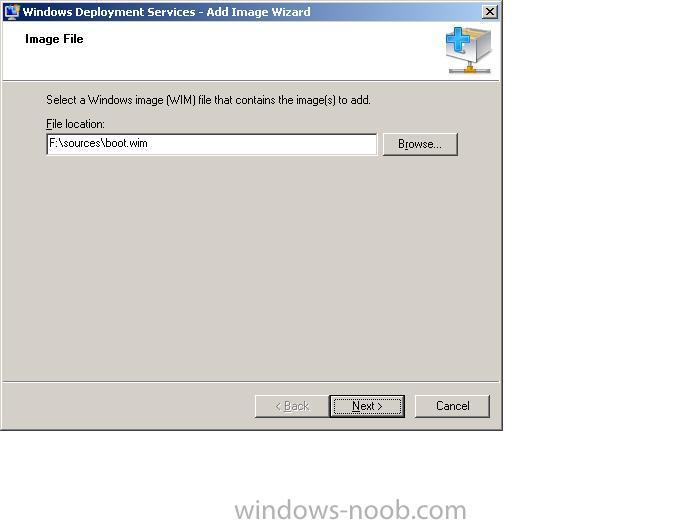
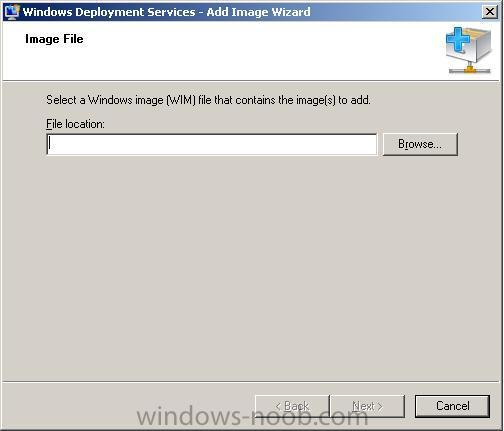
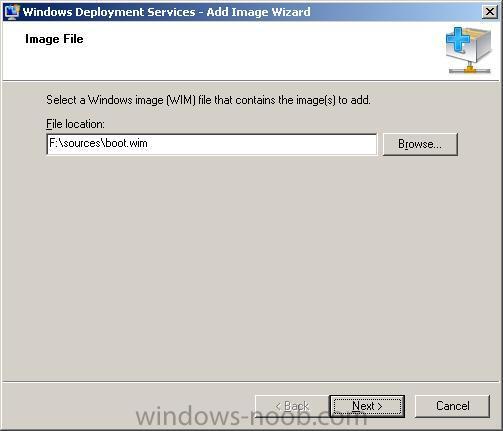
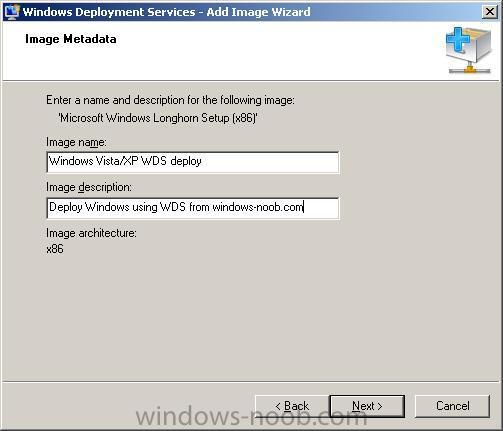
Note: this article assumes that you have previously captured an image using WDS as outlined in the following post: how can I capture an Image using WDS Part 1 - add boot.wim to WDS Step 1. Get your Windows Vista DVD ready. Step 2. Insert the DVD and start WDS (windows deployment services) gui. Step 3. In the Left Pane of WDS, select boot images Step 4. In the Right Pane, right click the mouse and choose 'Add Boot Image'. Step 5. In the Add Image Wizard, click the Browse button and browse to the Sources folder on your Vista DVD that you inserted in Step 2. Step 6. Highlight the file called boot.wim and click Open, once done Click Next Step 7. In the next window, set the Image name from "Microsoft Windows Longhorn Setup (x86)" to 'Windows Vista/XP WDS deploy' Step 8. Change the image description to 'Deploy Windows using WDS from windows-noob.com' Step 9. Click next to review the settings, and next again to proceed. Step 10. After the file copying is complete click on Finish.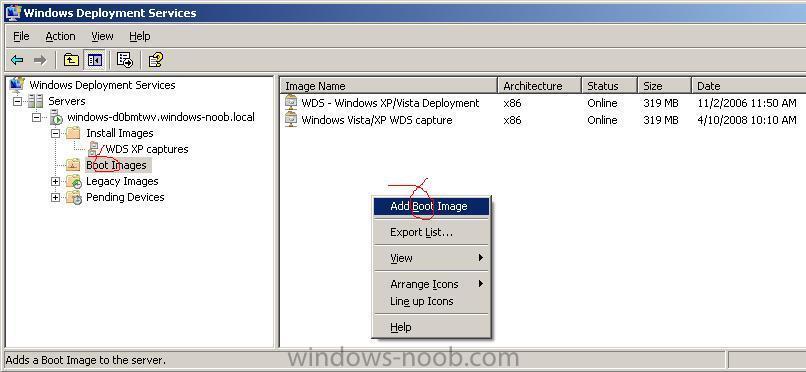

-
how can I CAPTURE an Image using WDS
anyweb replied to anyweb's question in Windows Deployment Services (WDS)
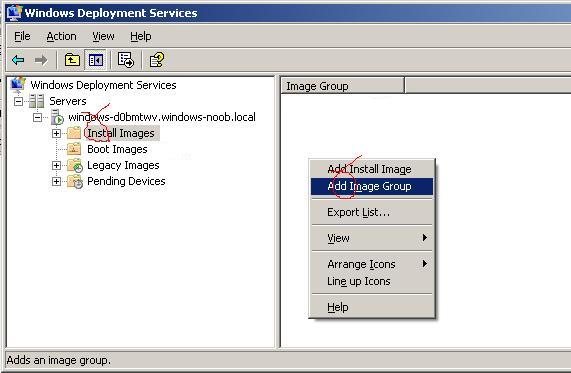
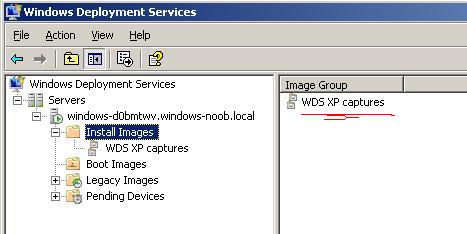
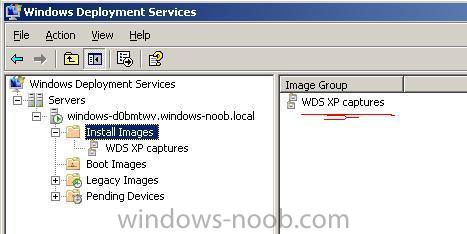
Part 3 - PXE boot target computer and capture image Step 1. Ensure that PXE boot is enabled in boot sequence, and PXE boot (using your onboard NIC) to the WDS server. Press F12 when prompted for Network Service boot. Step 2. In the Windows Boot Manager Menu, select Windows Vista/XP WDS Capture from the available options. Step 3. After Windows PE has booted, you should see a welcome screen which says Click next to begin. If you do not see this welcome screen (for example if you see an Install Windows wizard with keyboard layout options) then power off the computer and re-attempt step 1. Step 4. Image capture source: There are three options here, Volume to capture, Image name, and image description. Note:-If the Volume to Capture drop down menu appears blank (ie: you can't select anything) then verify that you have Sysprepped the image you are trying to capture. In addition, You must sysprep using the generalize switch (Vista ONLY). After sysprepping with the /generalize switch it will show up. For XP, simply regenerate the SID and choose RESEAL. If you need to sysprep the machine then read this guide and return to part 3 when ready. If volume to capture still doesnt show up after sysprepping with the /generalize switch then perhaps WinPE may need storage drivers (SATA). To verify this, once you're in WinPE, press Shift+F10 and see if you can see the hard drive. For Volume to Capture, select C:\ from the drop down menu (will not be present unless you have SYSPREPPED) For Image Name call it 'Windows Vista Ultimate Capture' (if you are capturing Windows XP, change accordingly) For Image Description, enter 'WDS - Windows (vista/xp) captured image for windows-noob.com' Step 5. Image Capture Destination: Here you have the possibility of storing the image on a drive (local) by choosing Name and Location, and clicking Browse and giving the image a filename, the wizard will auto-append .wim to the file name eg: c:\test_capture.wim. Next you want to upload the image directly to your WDS server by putting a check mark in the 'Upload Image to WDS server' option, you will have to provide the servername (or use the ip address eg: 192.168.3.1) and then click on the connect button. After some moments you'll be prompted with a username/password prompt for connecting to the server. I entered Administrator as the user and entered the correct password and selected 'remember my password', followed by 'ok'. If you do not get prompted for username/password and it complains about not finding the server then read here. Once you have successfully connected to the server you may get an error which states:- If you do not get this error, skip to Step 6. To resolve this error simply go back into the WDS management gui, and select 'Install Images' in the left pane. In the right pane that opens, right-click your mouse and choose 'Add Image Group'. Give this group the name 'WDS XP captures' and retry the above step (5). Obviously if you are capturing Windows Vista, change the group name accordingly. Once you've added the image group it will appear in the WDS gui like the below screenshot Step 6. you will now see the 'Image Group Name' option on the Windows Deployment Services Image Capture Wizard allows you to drop down the menu, and from here you can select the captured images group you created above. Step 7. Click Finish to continue (and capture the image). The image capture wizard will start capturing the image and you'll see a 'Percent Complete: x%' dialogue box. Step 8. After a fairly long while of file copying, Click Close to conclude the image capture process, congratulations you've captured an image using WDS ! Please note, that at this point Windows PE will exit and the computer will reboot, if you don't want it to boot into sysprep then you'll have to be quick and turn it off at the bios screen. If everything went well as above, the captured image will have been copied to D:\RemoteInstall\Images\captured images (change the drive letter to match your RemoteInstall drive and obviously the last folder name will change if you use a different image group name), in addition it will be stored locally on the computer you captured the image on (c:\test_capture.wim) Here are the contents of my captured images folder:- At this point you will probably want to Deploy the captured image, to find out how you can do that read this post.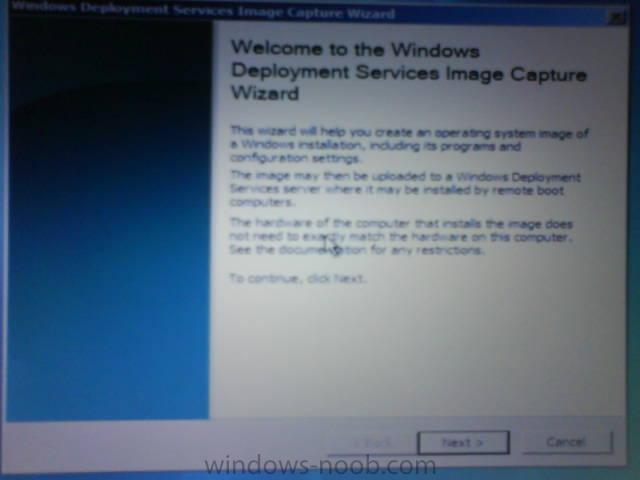

-
how can I CAPTURE an Image using WDS
anyweb replied to anyweb's question in Windows Deployment Services (WDS)
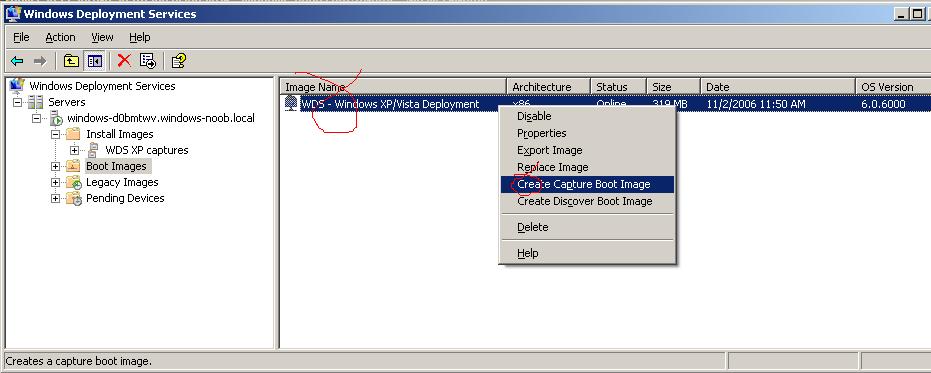
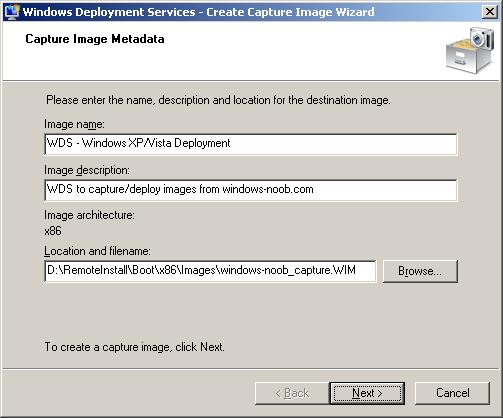
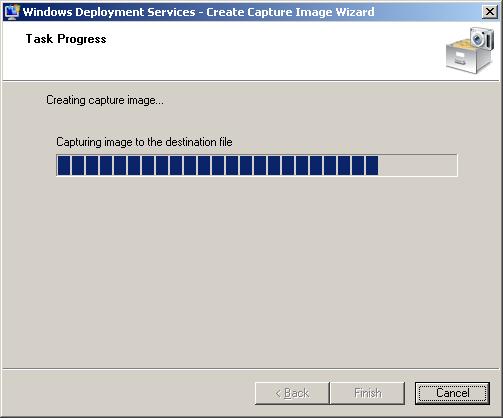
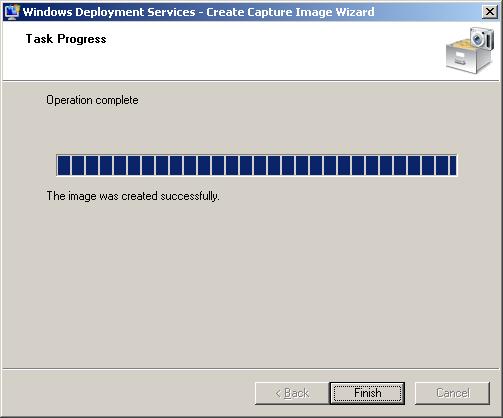
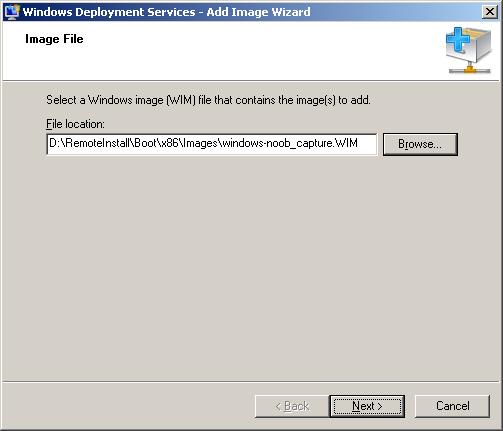
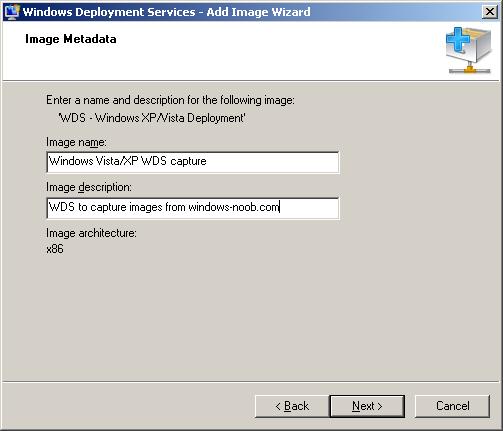
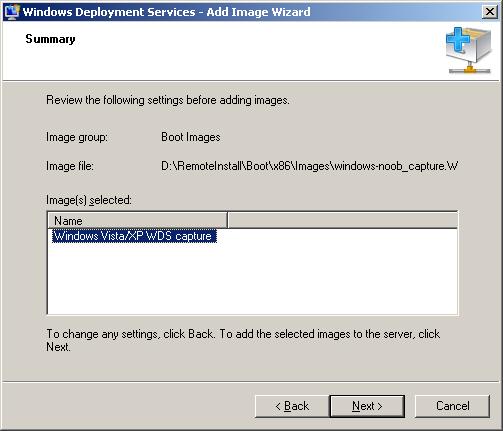
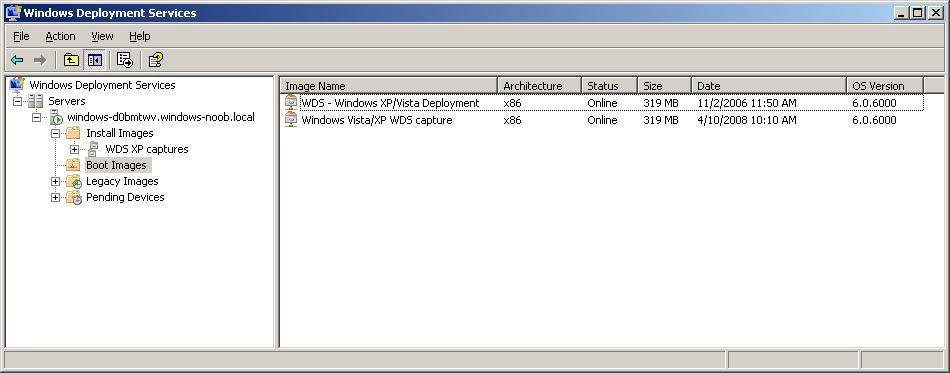
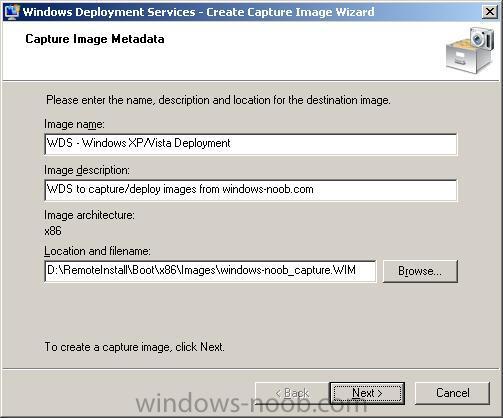
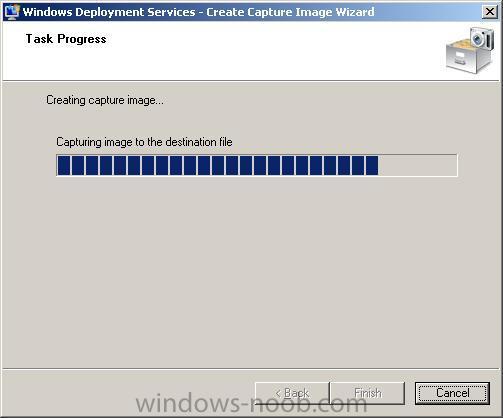
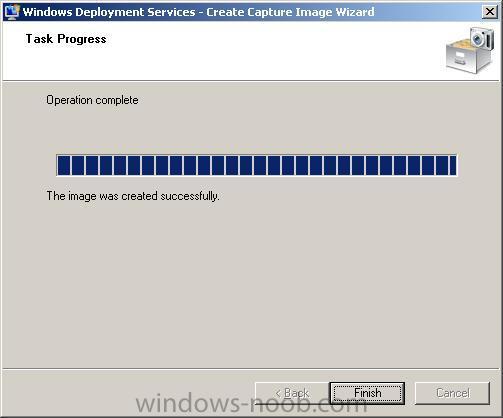
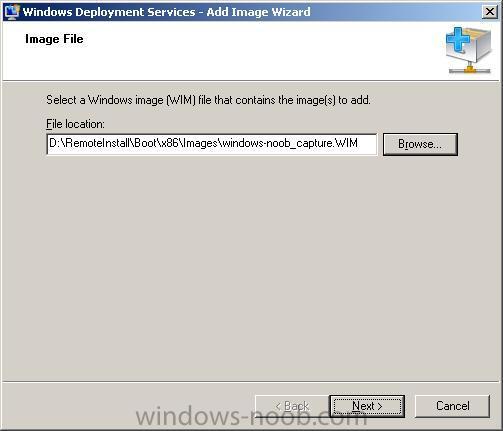
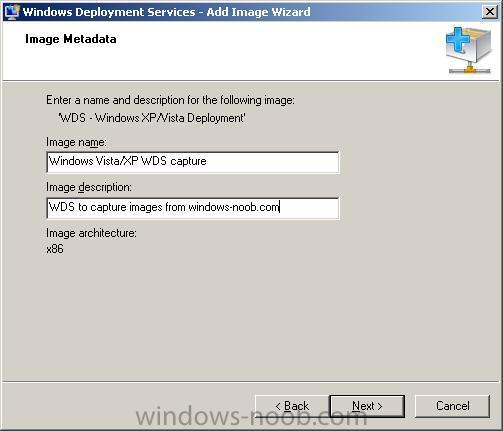
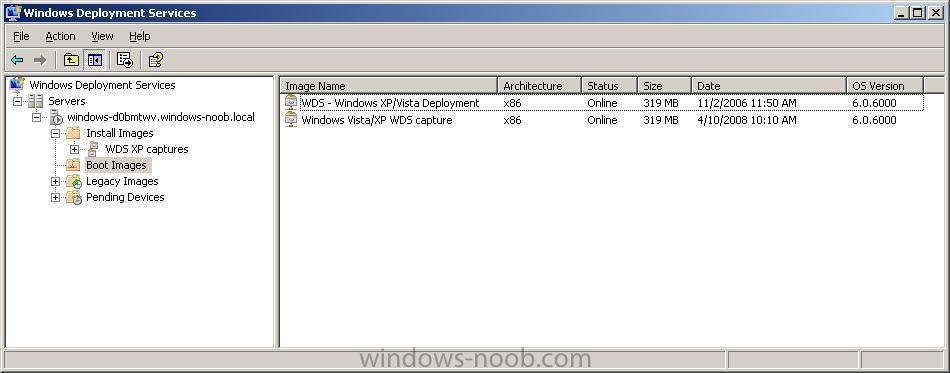
Part 2 - create Capture file Step 1. Highlight the 'WDS - Windows XP/Vista Deployment' image name in the right pane of the WDS gui (this is the image you just created in Part 1 above). Step 2. Right-click on it, and choose Create Capture Boot Image Step 3. In the next Windows (capture image metadata) leave the Image Name and Image Descriptions alone, and click on the Browse button. Step 4. Browse to the RemoteInstall\Boot\X86\Images folder (or X64 if using X64), this folder is part of the original WDS setup. Step 5. Give the filename you are about to create a name eg: RemoteInstall\Boot\X86\Images\windows-noob_capture and click open, then click next, the wizard will auto append .WIM to the filename. Step 6. The wizard will now start to extract the image from the source image file. Once it is complete, click Finish. Part 2a - add Capture file to WDS Step 1. In WDS, select Boot Images in the left pane. Step 2. in the Right Pane (in an empty area) right-click and choose Add Boot Image Step 3. In the add image file window, browse to RemoteInstall\Boot\X86\Images and select the capture file you created above, click open and then next. Step 4. set the Image name to 'Windows Vista/XP WDS capture' and the Image description to 'WDS to capture images from windows-noob.com', click next. Step 5. Review the choices and click next to add this capture boot image. once done WDS will look like this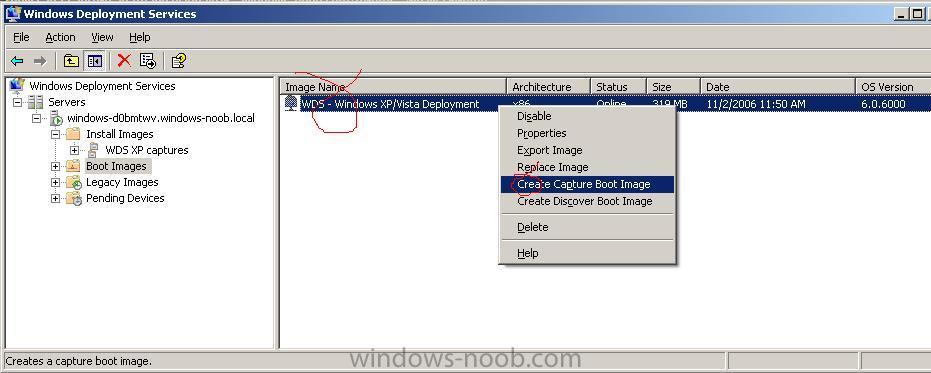

-
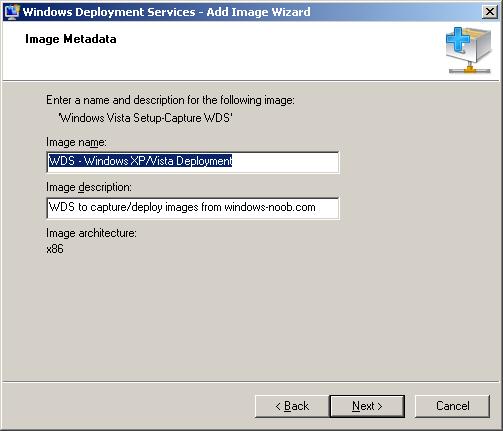
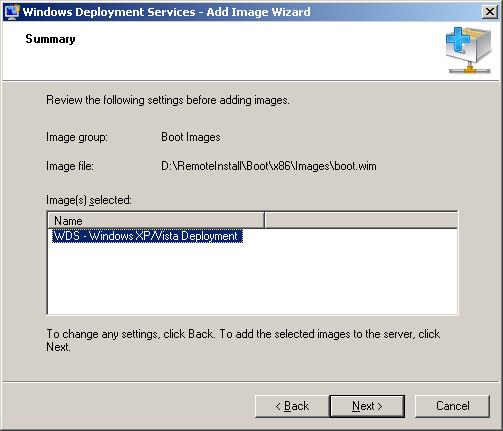
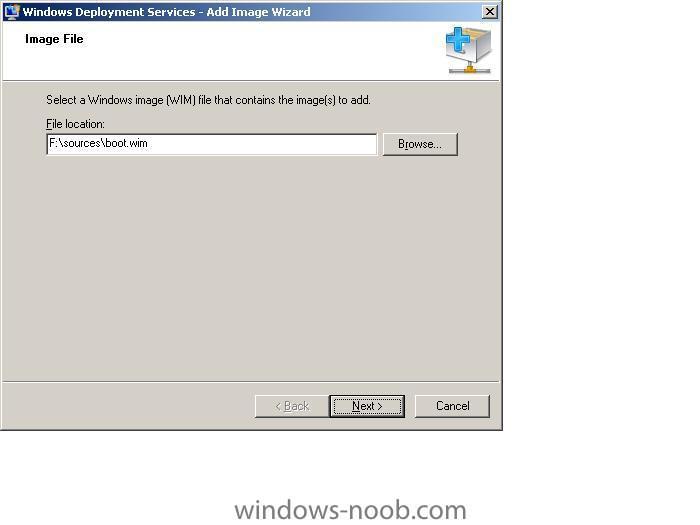
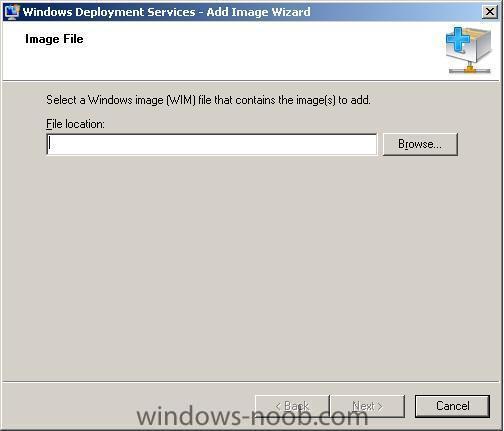
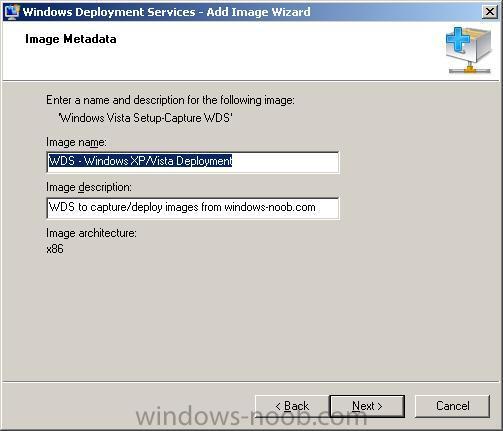
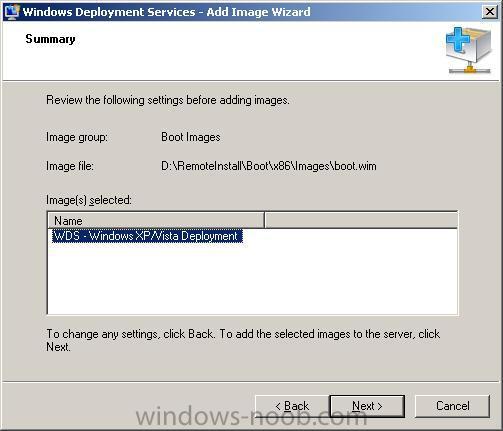
This guide assumes you have already setup WDS as described here Part 1 - add boot.wim to WDS Step 1. Get your Windows Vista DVD ready. Step 2. Insert the DVD and start WDS (windows deployment services) gui. Step 3. In the Left Pane of WDS, select boot images Step 4. In the Right Pane, right click the mouse and choose 'Add Boot Image'. Step 5. In the Add Image Wizard, click the Browse button and browse to the Sources folder on your Vista DVD that you inserted in Step 2. Step 6. Highlight the file called boot.wim and click Open, once done Click Next Step 7. In the next window, change the Image name from "Microsoft Windows Longhorn Setup (x86)" to 'WDS - Windows XP/Vista Deployment' Step 8. Change the image description to 'WDS to capture/deploy images from windows-noob.com' Step 9. Click next to review the settings, and next again to proceed. Step 10. After the file copying is complete click on Finish.

-
go here http://www.microsoft.com/windowsserver2008/audsel.mspx cheers
-
Microsoft has apologized for a Windows Server update that automatically installed the Windows Desktop Search tool on users' desktops without approval. The mistake happened because Microsoft reused the same update package for when WDS was first published in February as an optional update that was only applicable to systems with the search tool previously installed. via osnews.com
-
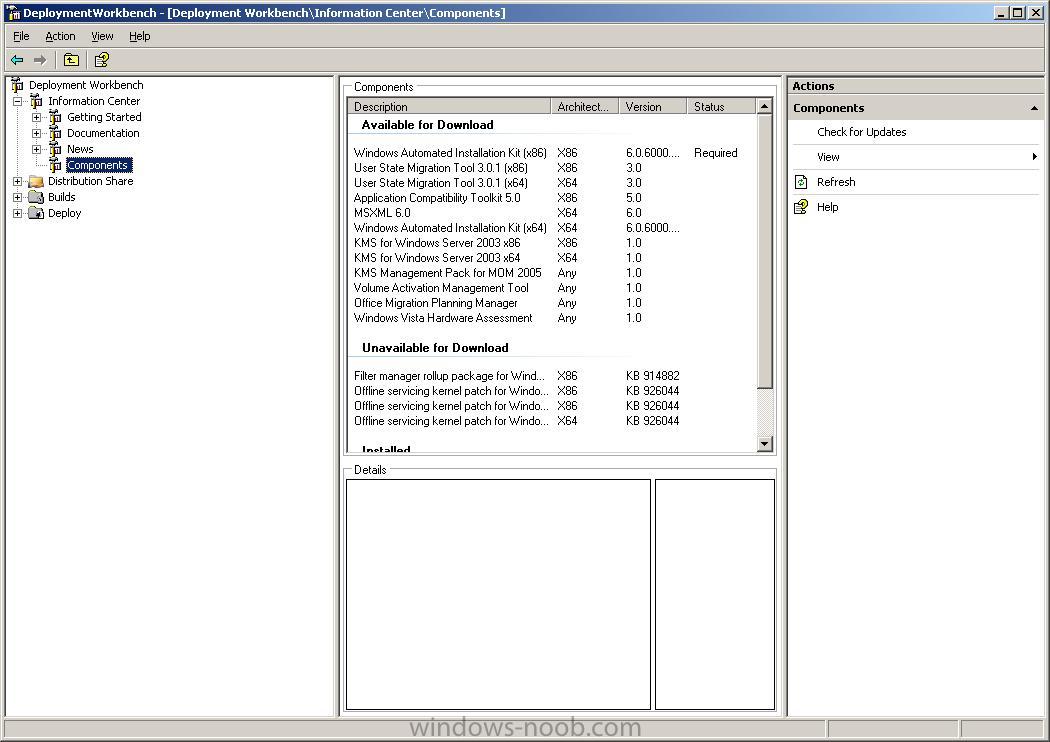
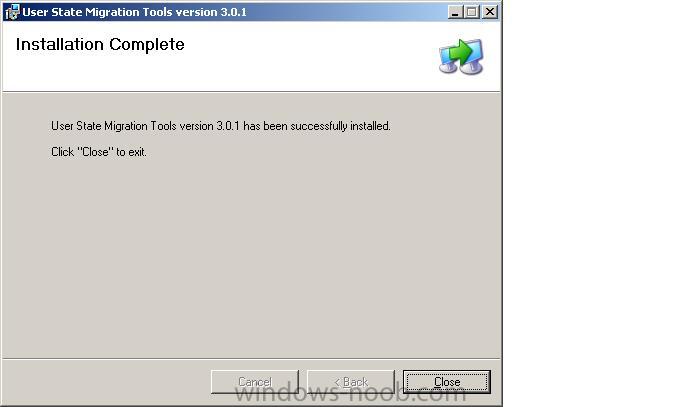
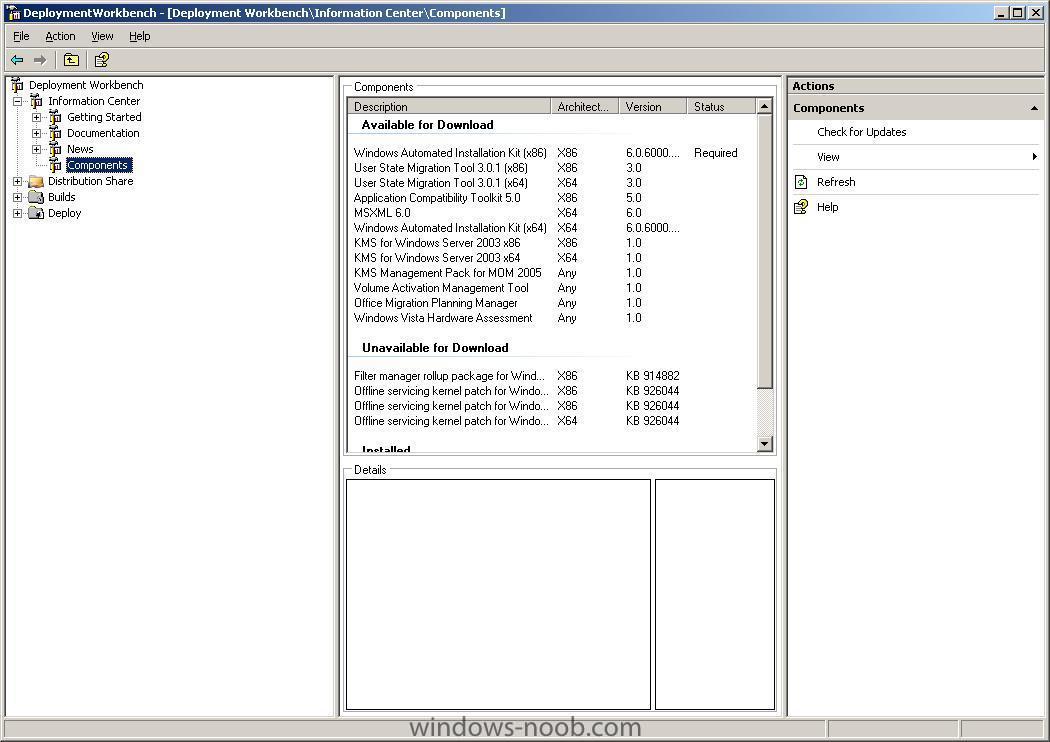
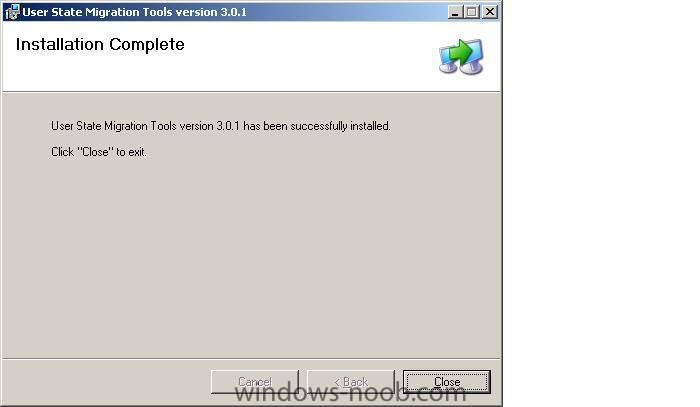
Microsoft® Windows® User State Migration Tool (USMT) version 3.0.1 migrates user files and settings during deployments of Microsoft Windows XP and Windows Vista™. USMT captures files and settings from the source computer and then migrates them to a new Windows installation. If you are only upgrading your operating system, USMT is not needed. This tool includes two command-line tools named ScanState and LoadState. ScanState creates an intermediate store that contains the user files and settings from the source computer. (backup) LoadState restores these files and settings to the destination computer. (restore) USMT 3.0.1 also has three default migration rule (.xml) files named MigApp.xml, MigUser.xml, and MigSys.xml. You can alter the default .xml files and you can also create customized .xml files. Depending on what you want to migrate, you can specify all or none of the default .xml files on the command line. The entire migration process is controlled by the .xml rules, which you can modify, and logic that is built into the tool. When using USMT for automated migration, in almost all cases, you should modify the migration .xml files for your unique situation. USMT 3.0.1 contains the following updates to USMT 3.0: 1. You can now install this tool on computers that are running non-English versions of Windows Vista. 2. In USMT 3.0, some settings for local accounts were not being migrated. This has been fixed in USMT 3.0.1. Where can I download it from ? From here In addition, you can use the download features elements in BDD 2007 (or MDT 2008) to download it, to do this, select the Information Center, then click on the Components Section. Highlight the USMT version (x86 or x64) that you want, and download it. Where can I get a detailed User guide for USMT ? From here Where can I see a list of USMT Error codes ? From the Deployment Guys Where can I read the USMT Team Blog ? From here Can I install USMT on Windows Server 2008 ? No, and for more details see here When should I use USMT? USMT is best used in automated deployment scenarios where a user is being migrated from one install of Windows to another (on the same computer) or when a user is being migrated from one computer to another (two different computers). USMT 3.0.1 currently supports migrating to and from the following operating systems: Windows 2000 to Windows XP, Windows Vista Windows XP to Windows XP, Windows Vista Windows Vista to Windows Vista cheers anyweb
-
The first officially-released build of Windows XP SP3 has surfaced, with 1073 patches/hotfixes and several new features. This build has been made available to testers as a part of the Windows Vista SP1 and Windows Server 2008 beta program and is available in English, German, and Japanese. vis osnews.com
-
"Responding to feedback from customers and third parties, Microsoft has extended the availability of Windows XP to both original equipment manufacturers and retail channels through to June 30, 2008. Originally slated to be pulled from retail shelves and OEMs on January 30, 2008 - only a year after Windows Vista's debut - customers requested more time to prepare for the upgrade to Vista." more info > http://arstechnica.com/news.ars/post/20070...-execution.html via osnews.com
-
Microsoft has lost its appeal against a record 497m euro (£343m; $690m) fine imposed by the European Commission in a long-running competition dispute. full story > http://news.bbc.co.uk/2/hi/business/6998272.stm
-
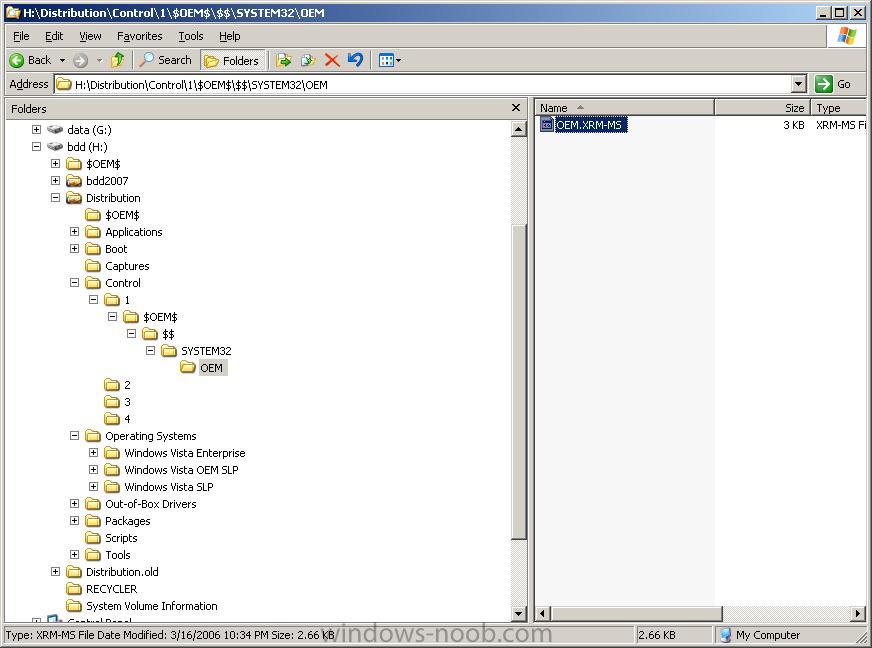
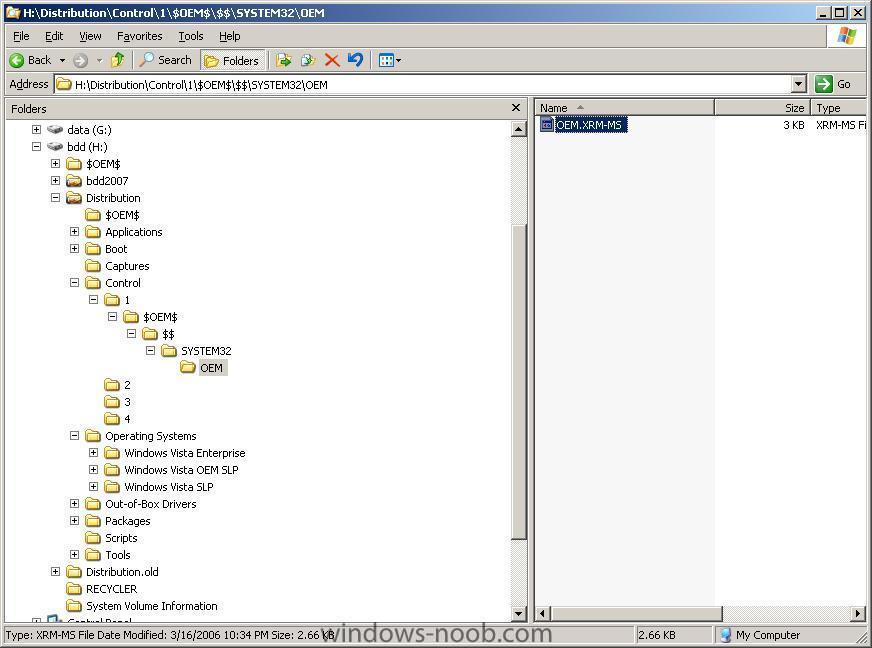
If you are deploying Windows Vista using SLP Media (from your OEM provider) then your OEM Vista capable pc's (SLIC table must be present in the bios), you can preactivate your Vista deployments by doing as follows:- using the deployment workbench create a new build and use the OEM Vista DVD you got with your OEM pc as the operating system source, Once all copying is complete, use windows explorer to navigate to your Distribution$ share and find the operating systems folder eg: H:\Distribution\Operating Systems\ in there, you'll have the os you just copied eg: H:\Distribution\Operating Systems\Windows Vista OEM SLP browse the contents of that folder and locate the $OEM$ folder (within the Sources directory) move this directory and all files in it outside of the Distribution$ share, and locate the OEM Vista certificate usually found in the following folder $OEM$\$$\SYSTEM32\OEM the file will have a name such as OEM.XRM-MS, where OEM is your Original Equipment Manufacturer. Copy ONLY that file plus it's folder structure to the build ID that you just specified in deployment workbench eg: copy to> H:\Distribution\Control\1 see screenshot now test a BDD deployment of this os, it should be pre-activated cheers anyweb
-
"Microsoft today released to the web Silverlight 1.0, a cross-browser, cross-platform plug-in for delivering richer user experiences on the Web. In addition, Microsoft will work with Novell to deliver Silverlight support for Linux, called Moonlight, and based on the project started on mono-project.com." via osnews.com
-
could not start remote installation service on local computer
anyweb replied to anyweb's question in Remote Installation Services (RIS)
what os are you installing on these computers ? more details please in order to determine the issue cheers niall -
could not start remote installation service on local computer
anyweb replied to anyweb's question in Remote Installation Services (RIS)
you cannot restart the RIS (remote installation service) service once you have got the WDS service installed, the WDS service REPLACES the RIS service, so you must disable the RIS service and enable the WDS service, once you have started the WDS service instead of the RIS service, all your normal RIS fucntions will work again, have you tested PXE booting to the ris server ? -
to find out what versions of Windows Vista are on your Vista DVD, simply insert it into your dvdrom drive and browse to the /sources/ folder, in there, locate the .CLG (catalog) files such as below from the above, we can determine that the DVD supports the installation (based on the product key) of Windows Vista Business, Business N, HomeBasic, HomeBasic N, HomePremium, Starter and Ultimate editions. cheers anyweb