anyweb
-
Posts
9277 -
Joined
-
Last visited
-
Days Won
371
Everything posted by anyweb
-
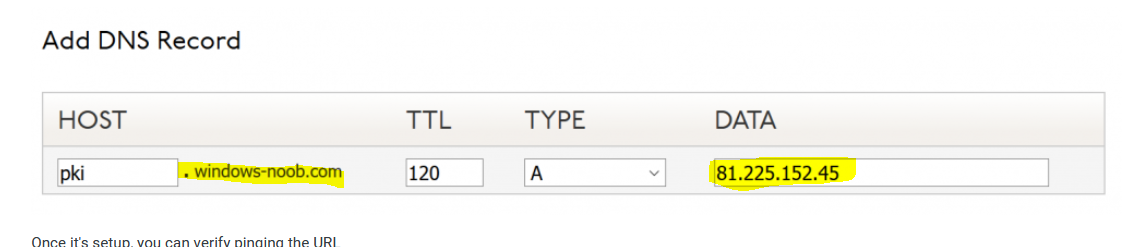
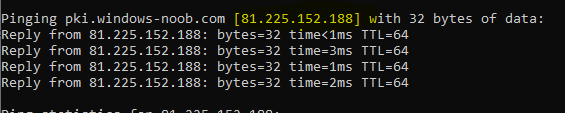
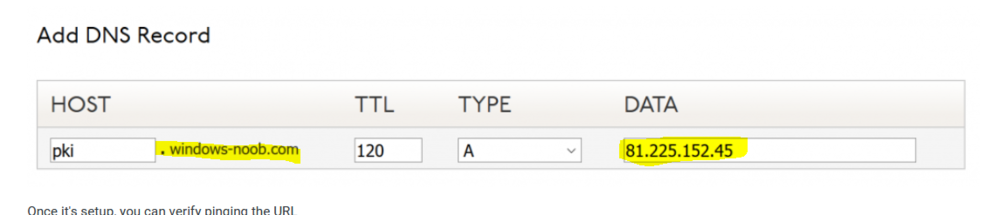
then you may have issues with godaddy, because the ip address (in yellow) is returned from the DNS provider, if it returns no ip address then it is not resolving the url to an ip. use https://dnschecker.org/ to verify what your configured url is telling you
-
so are you saying the you don't see any ip address like I have higlighted in yellow below ?
-
you are not answering my question, if you ping your pki.yourdomain.com it should return the IP address you configured in godaddy, does it ? and does that ip address also correspond to the internet ip address which www.whatismyipaddress.com revealed on the webserver ?
-
after you ping the url pki.whatever.com it should list the correct INTERNET based ip address which you are sharing internet from in your pki lab, does it ?
-
well it could be your firewall solution that's blocking it, i don't know, I use smoothwall and it works just fine. when you ping the url, it should return the correct ip address, does it ?
-
I am not able to ping nor browse from mobile/laptop/desktop. what do you mean you are not able to ping ? what ip address does it resolve to ?
-
hi Muray, this does not look like my setup, but then again DNS providers have different views of the same thing, obviously you need to use your own domain name (eg: pki.mydomain.com) and your own internet ip address once you've made the change in your DNS provider, you can test if it works by pinging the url and see what ip address it returns, or try and browse the url from your phone (external network) for example you can ping or browse http://pki.windows-noob.com it should respond as the lab is online now.
-
hi Muyar, the 192.168.x.x address at godaddy will never work, as that's a local lab ip range, it must instead point to the actual internet ip address you have in your lab (use www.whatismyipaddress.com to find out)
-

Reference computer image capture
anyweb replied to fj40ratt's topic in System Center Configuration Manager (Current Branch)
ok, if you really want to use the capture method (and i recommend against it), then you can capture the wim of the OS partition only, and deploy that in your deploy operating system task sequence https://docs.microsoft.com/en-us/windows-hardware/manufacture/desktop/capture-and-apply-windows-system-and-recovery-partitions but really, don't do that, instead, use default Operating System wim files from microsoft (they are updated monthly now), and add the customizations in your task sequence instead. -
Hi Muyar, thanks, so you configured the DNS cname in your DNS provider but it's not redirecting to your webserver, is that correct ? did you also configure smoothwall ?
-
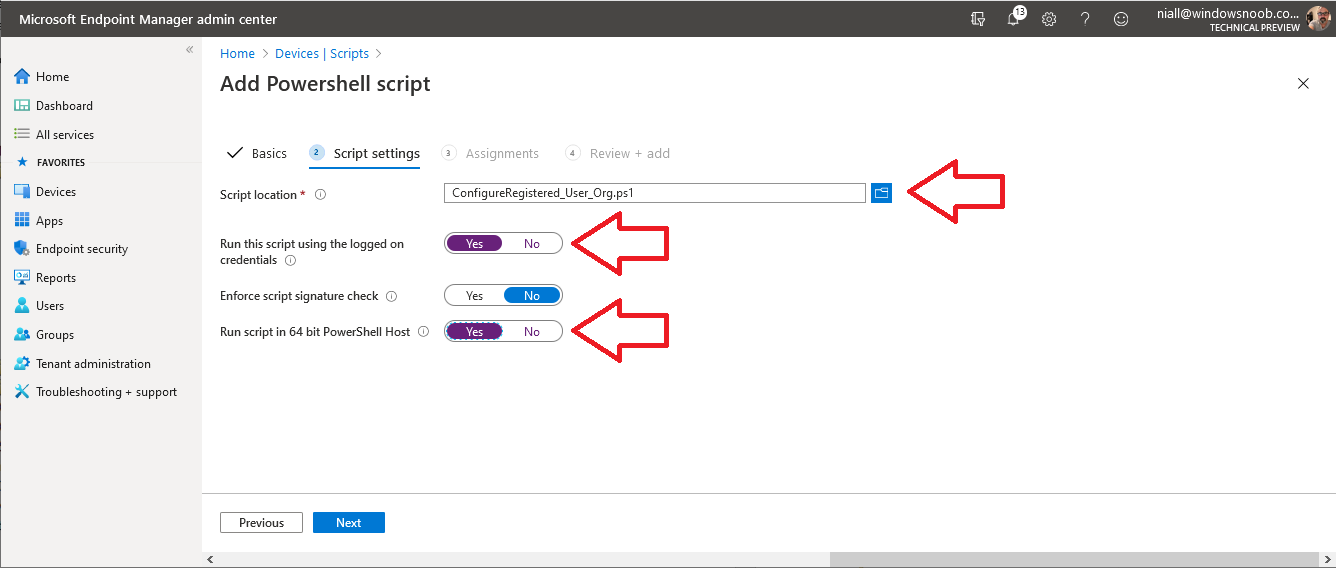
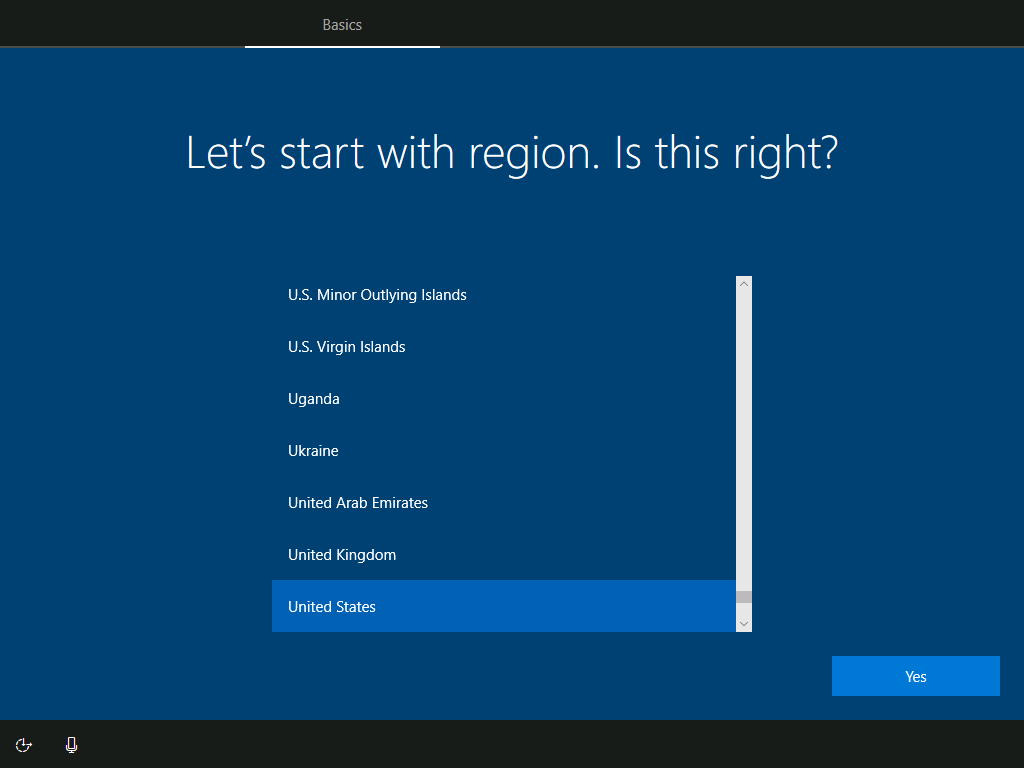
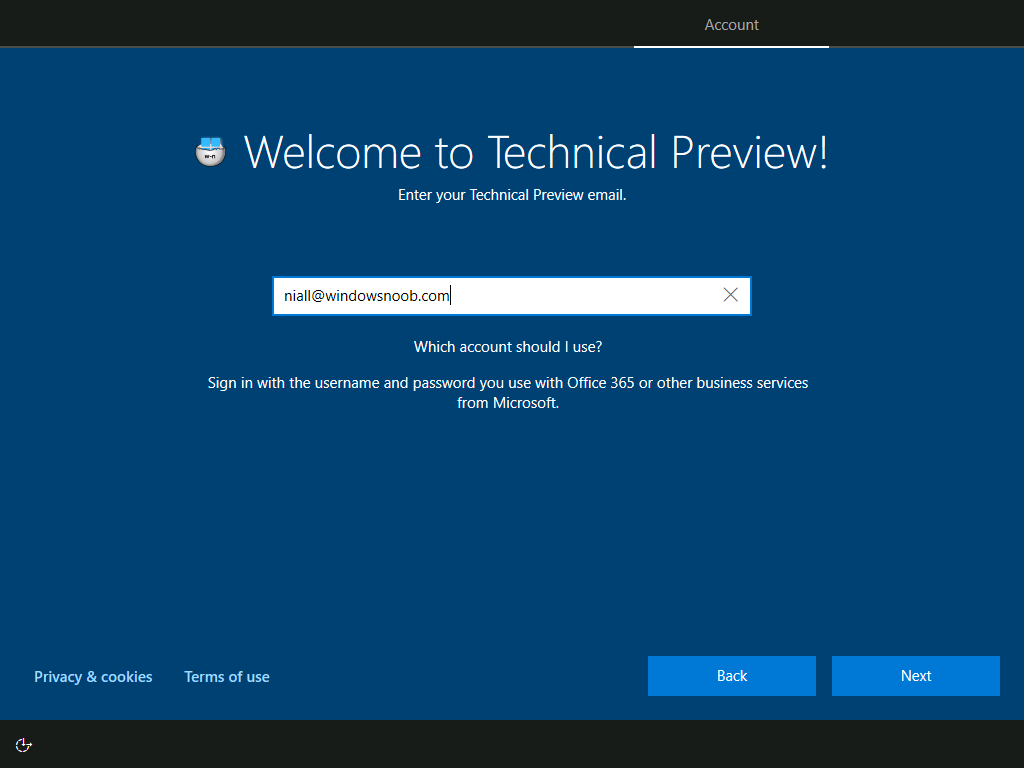
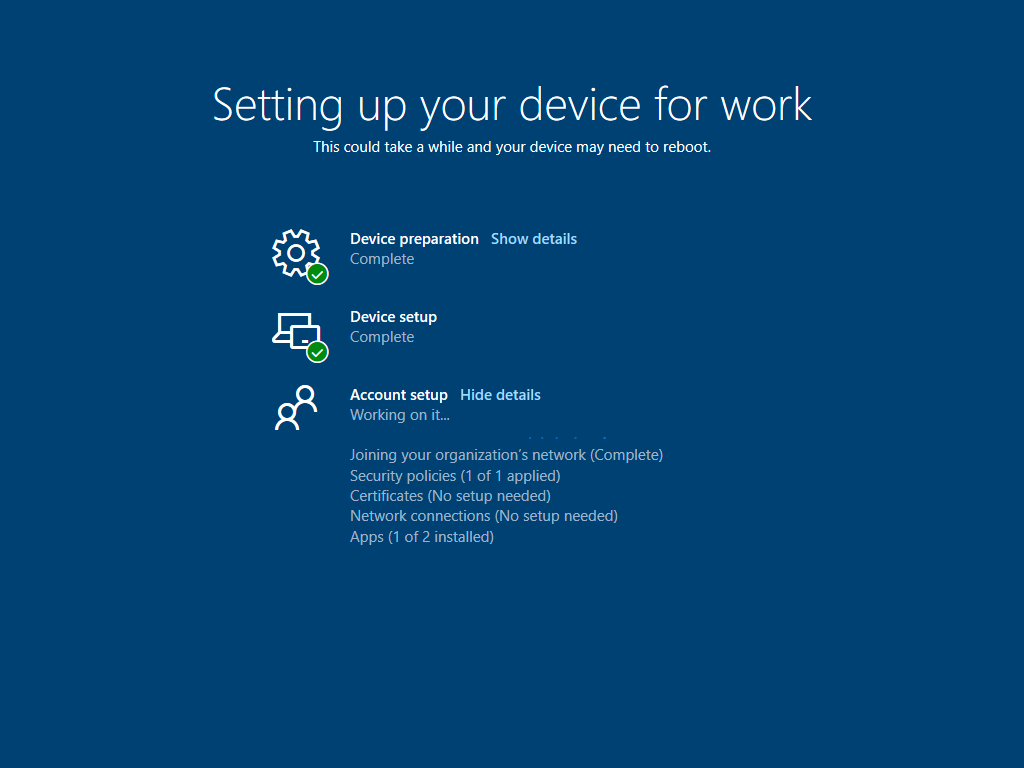
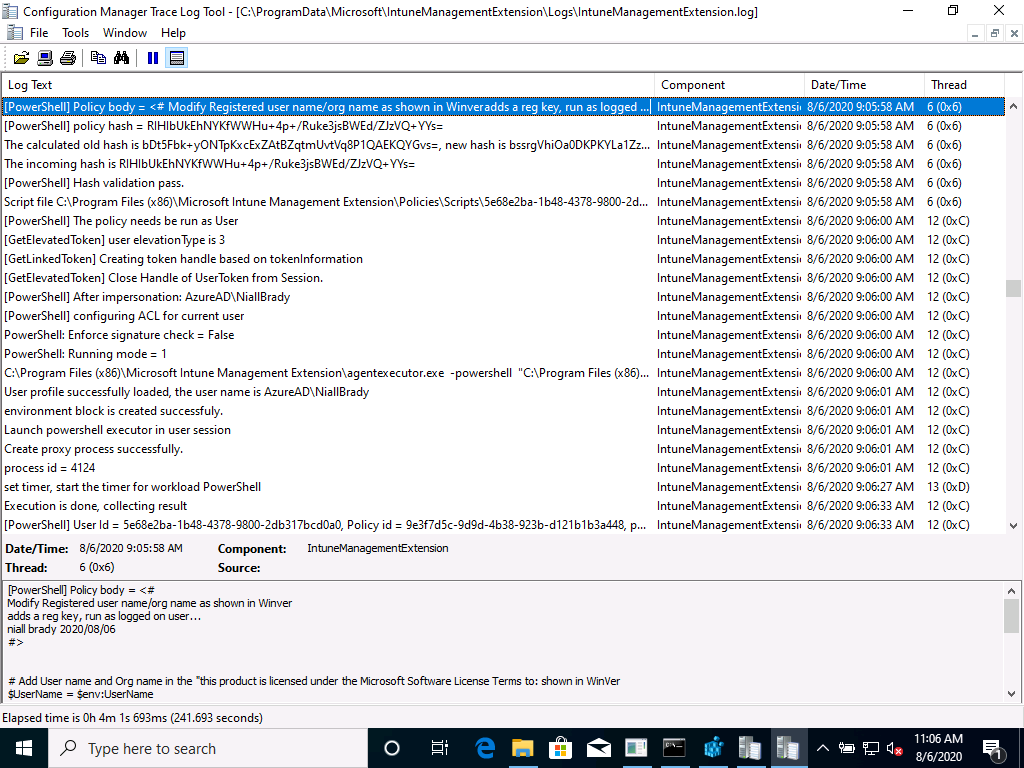
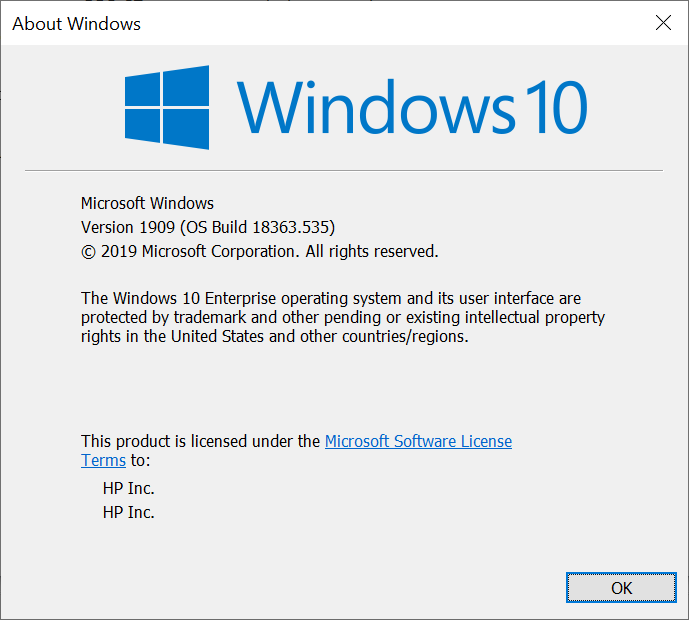
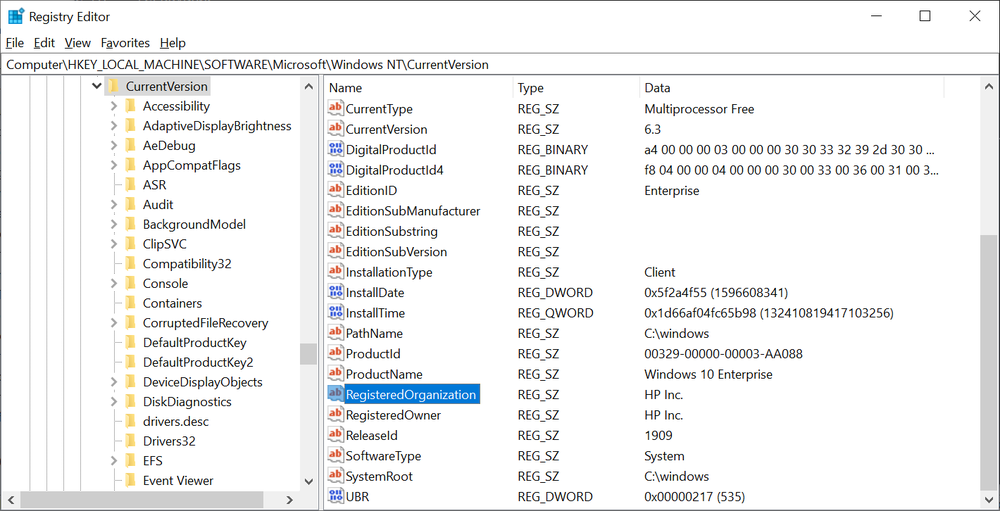
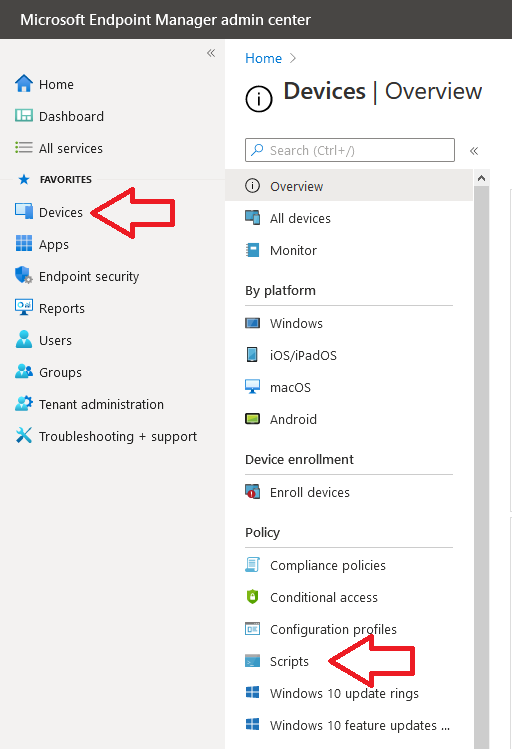
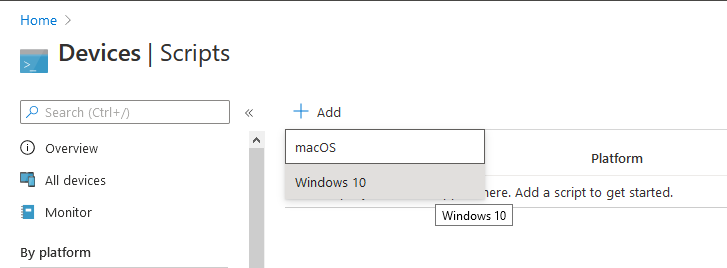
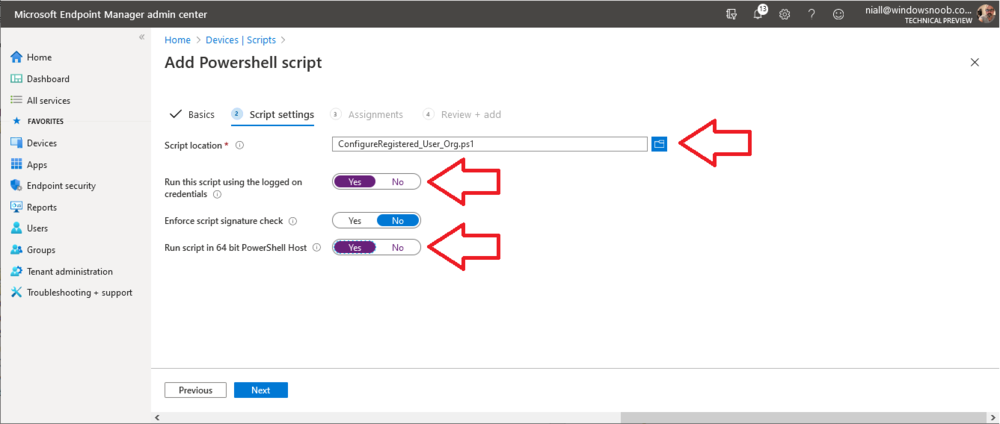
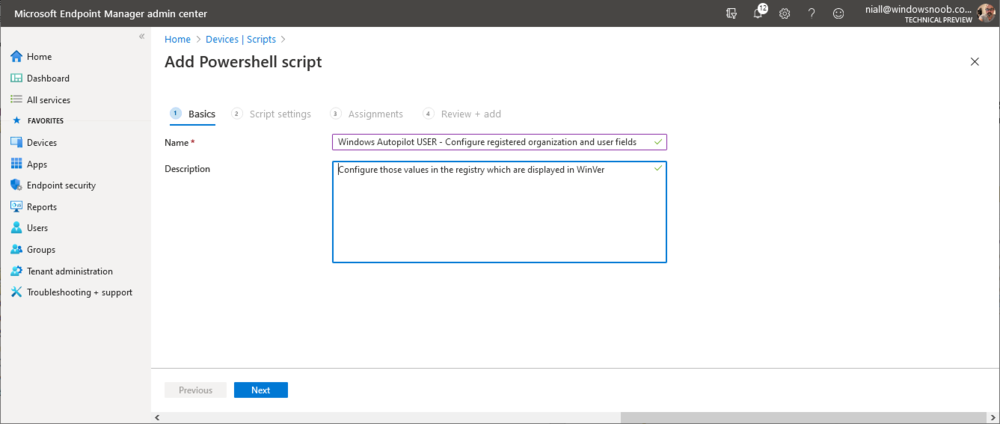
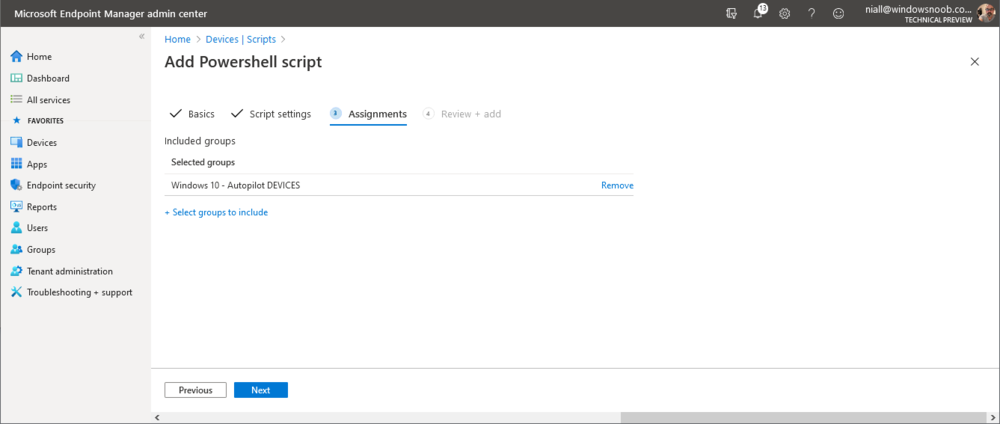
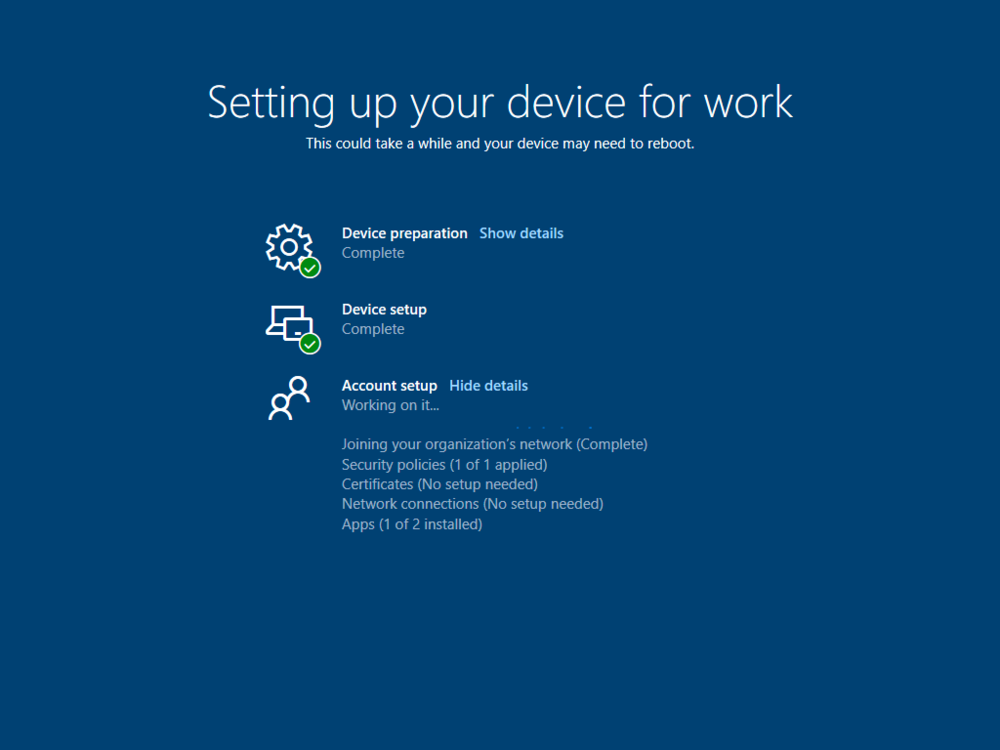
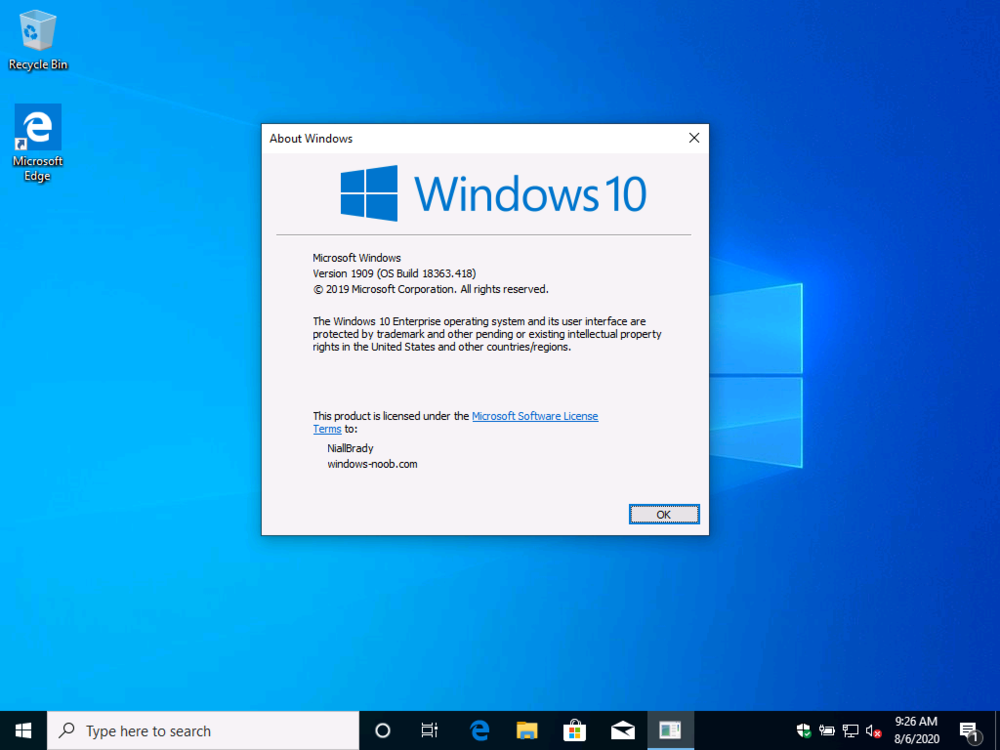
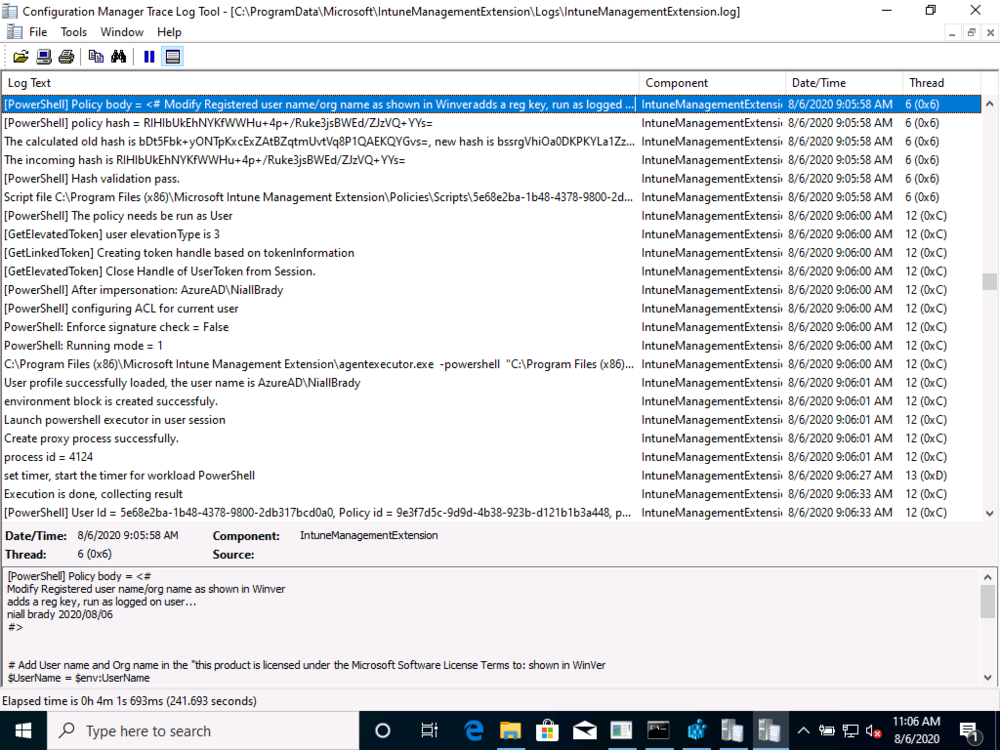
Introduction I received a brand new HP Laptop (HP EliteBook 830 G6) to verify our current Autopilot setup, and I went through OOBE. All seemed well and I was curious about the version of Windows shipped so I ran WinVer. The following screen appeared. Notice how the registered owner and registered organization fields are automatically populated with HP's default settings, this was a Windows Autopilot enrolled HP delivered with HP's business clean image (no bloatware). The following registry key reveals where those values are set. HKLM\SOFTWARE\Microsoft\Windows NT\CurrentVersion if the following REG_SZ keys are missing: RegisteredOrganization RegisteredOwner You'd see the following instead. So now that I knew why I was seeing those values I decided to fix it. Step 1 - Add a PowerShell script to Endpoint Manager In Microsoft Endpoint Manager select Devices and then select Scripts as shown here (alternatively, choose Devices, Windows, PowerShell Scripts...) Click on Add and select Windows 10 as the operating system. Fill in the Name of the script and a description, note that the Name does not have to match the actual name of the script. Note: you must be a logged in member of windows-noob.com to download this script. Next, point it to the PowerShell script which you can download here and select to Run this script using the logged on credentials. Next select the Groups you want to assign it to, I selected my Windows 10 Autopilot DEVICES group Step 2. Test an Autopilot device Start OOBE (out of box experience) on an Autopilot enrolled device. move through the screens and you'll have to enter your credentials at the welcome to your Tenant name screen after signing in successfully the Enrollment Status Page will appear (if configured to do so) Step 3. Verify changes If everything went according to plan, after a while Windows Autopilot will be completed and you'll be logged on to the desktop, you can now verify the changes by typing WinVer. Troubleshooting If things didn't go as planned take a look at the IntuneManagementExtension.log with CMTrace. It's found in the C:\ProgramData\Microsoft\IntuneManagementExtention\Logs folder and confirm that the script ran successfully and that it ran in User context (user was a local admin in this case). If you need to run it as SYSTEM then change the variable for RegisteredOwner in the script to something else. job done ! Downloads Here's the PowerShell script used above ConfigureRegistered_User_Org.ps1


-
hi, which Powershell script are you using exactly ? and have you verified that the computer is in a collection with the policy targeted to it during OSD ?
-
Reference computer image capture
anyweb replied to fj40ratt's topic in System Center Configuration Manager (Current Branch)
Why oh why do this, please explain ? most people nowadays deploy a clean WIM and add apps/settings during the task sequence or use Windows Autopilot -
SysAdmin Day has arrived, and with it, gratitude for all the unsung heroes that 2020 has needed. Your hard work has made it possible for all of us to keep going, despite all challenges thrown our way. Now it is Altaro’s turn to thank YOU. If you are an Office 365, Hyper-V or VMware user, celebrate with Altaro. Just sign up for a 30-day free trial of either Altaro VM Backup or Altaro Office 365 Backup – it's your choice! What can you win? Receive a €/£/$20 Amazon voucher when you use your trial of Altaro Office 365 Backup or AltaroVM Backup Get the chance to also win one of their Grand Prizes by sharing your greatest 2020 victory with Altaro in an up to 60-seconds video. What are you waiting for? Sign up now!
-
welcome to the forums Sunny
-
hi Mniceguy81, i'm fine, working in my back garden keeping myself busy before my vacation ends and back to work... for your questions. 1. as long as the account is a local administrator of the computer that is fine, doesn't need to be the built in local admin account 2. it's up to you, to keep it simple create a new lab, and later add pki to it, that's the way i do it, in other words, i create a SCCM lab first (http) then go through the PKI labs (8 parts) then convert sccm to https (2 parts), you'll find it all here > good luck !
-
what have you tried exactly ? and what didn't work ?
-
Why are you using SCCM 2012 R2 it's been replaced by the much more feature rich Microsoft Endpoint Manager 2002, as regards capturing domain joined computers, not a good idea as there will be things left behind from the act of being domain joined on that machine, however, if you are determined to do this (and I wouldn't) then take a look at this blog post.
-
i presume the collection is setup using a query, can you share the query so we can see what you are looking for... also, have you checked that the computer is actually present in that specific OU prior to ending up in the collection ?
-
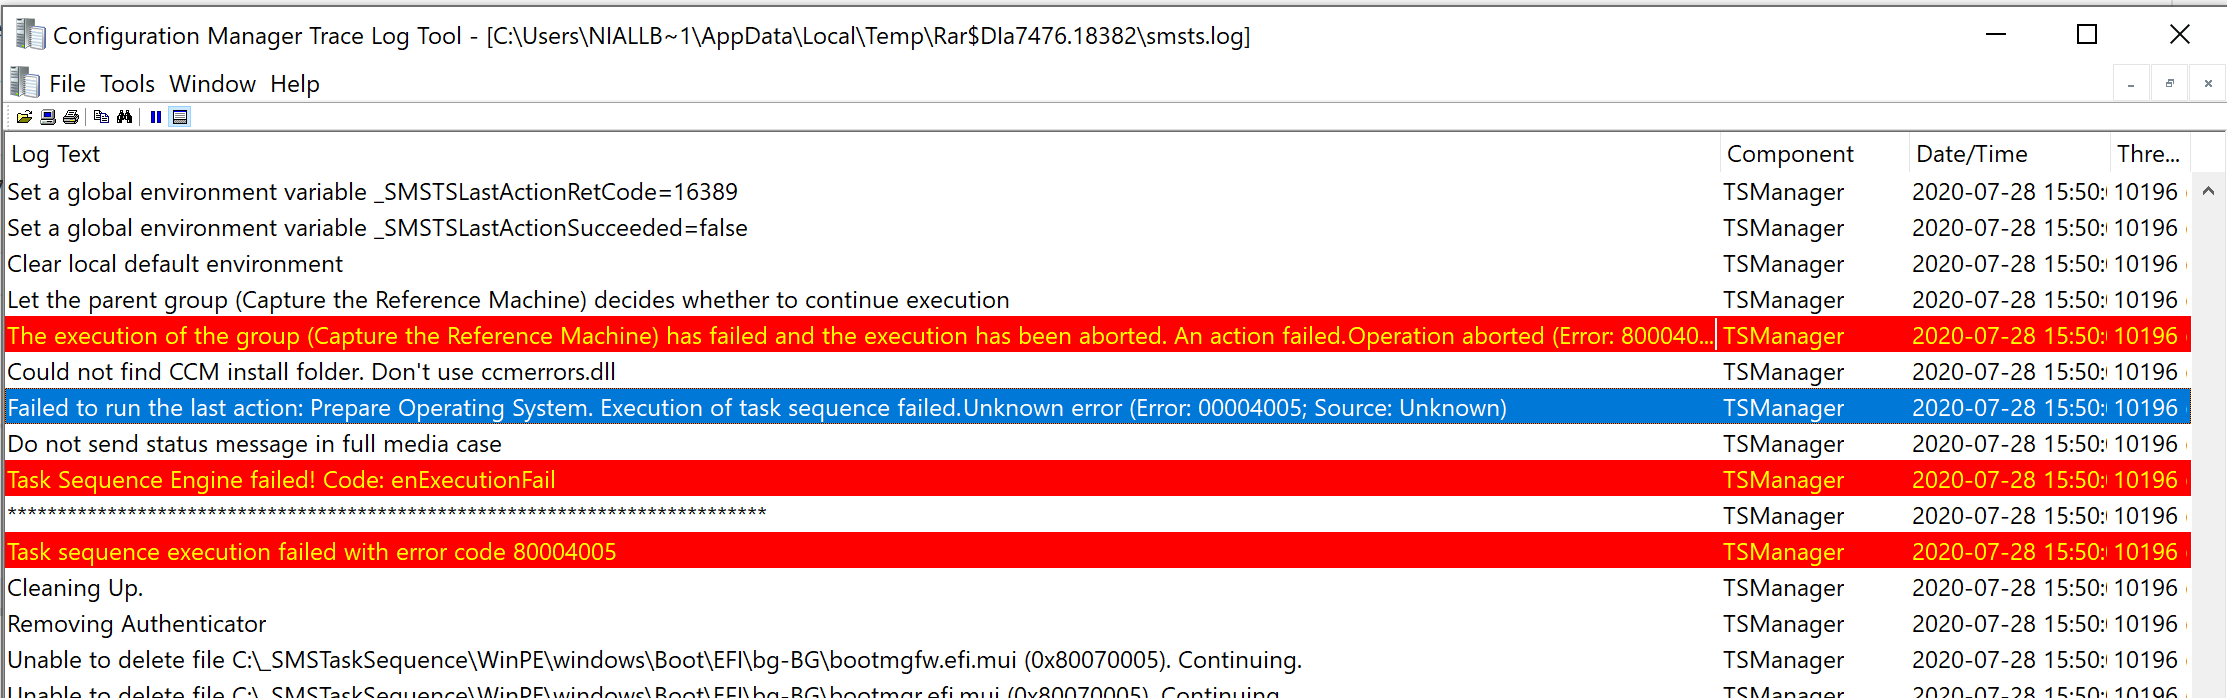
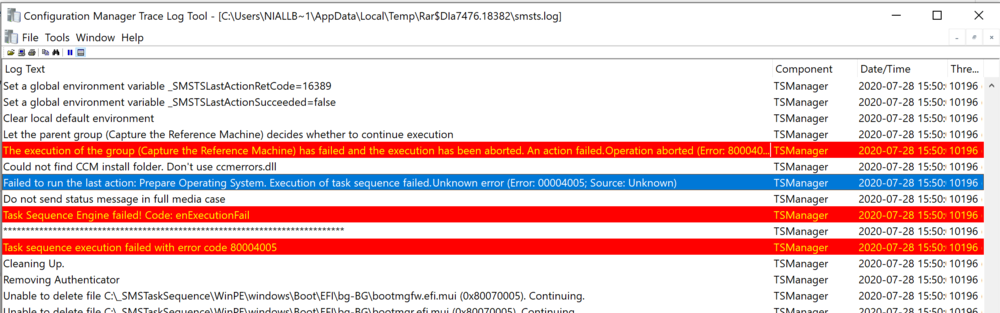
how are you trying to capture this image exactly ? what method are you using and what operating system is it ? secondly, if you are using ConfigMgr what version is it ? here's your actual error
-
Install drivers via task sequence
anyweb replied to kesh's topic in System Center Configuration Manager (Current Branch)
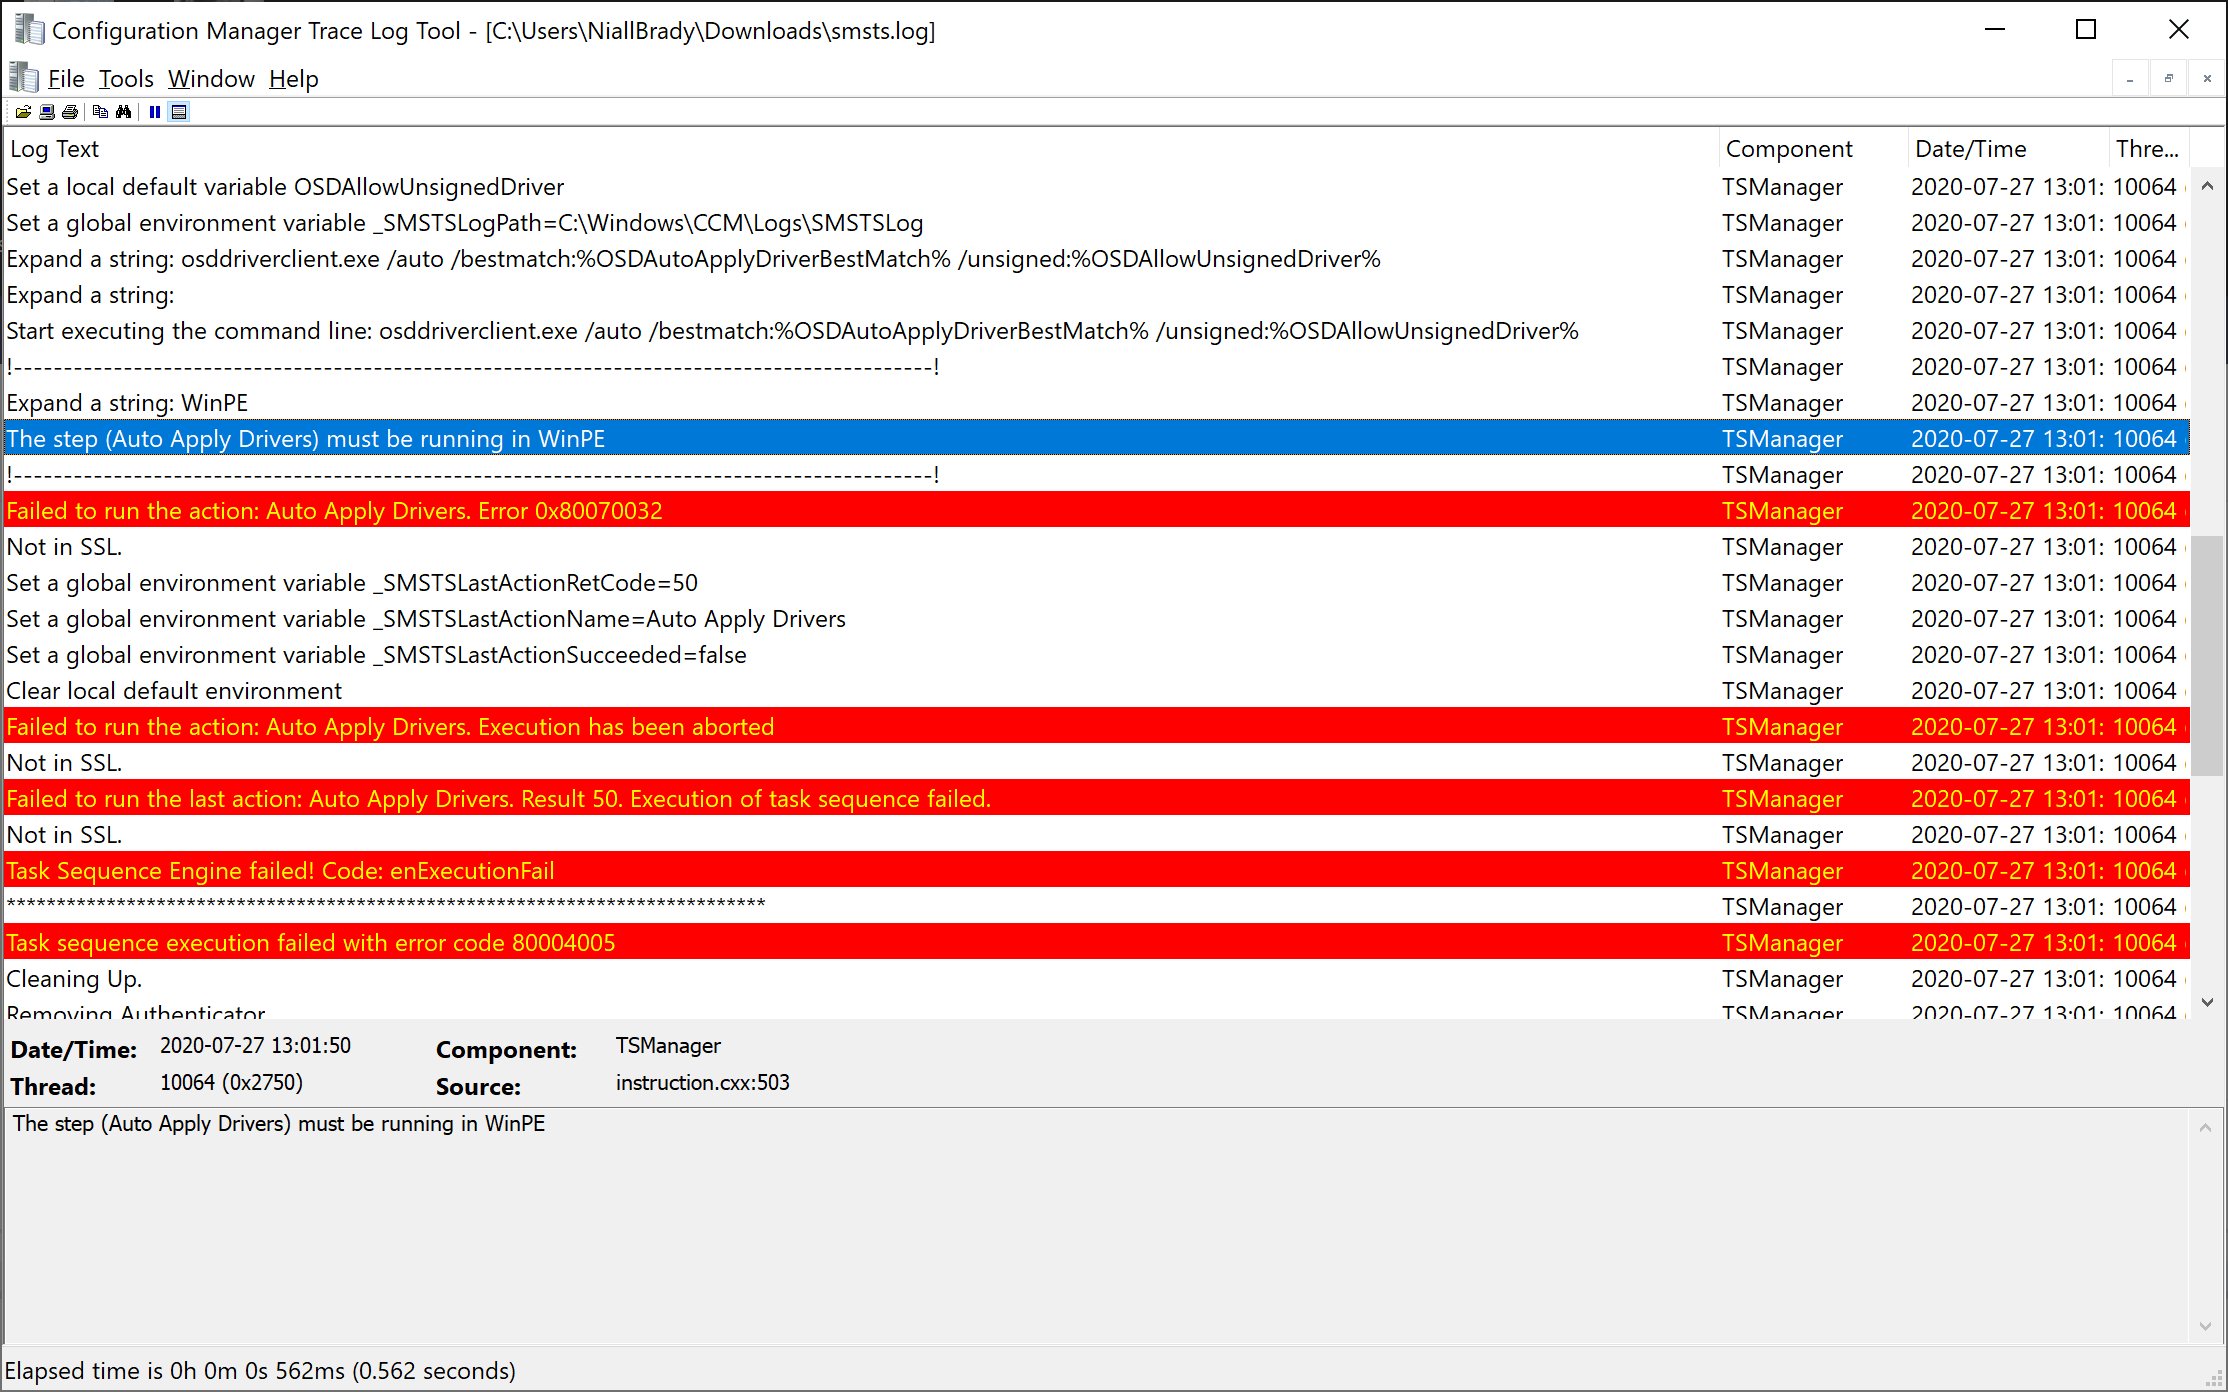
the 00000032 error translates to The process cannot access the file because it is being used by another process. Source: Windows ----- but the true error 80070032 from your smsts.log is The request is not supported. Source: Windows ----- and the real reason for that is revealed in the text above that, you are trying to install these drivers in Windows and it needs to do it in the WinPE phase you should probably convert the driver packages to apps and deploy them as applications to the affected computers (in Windows)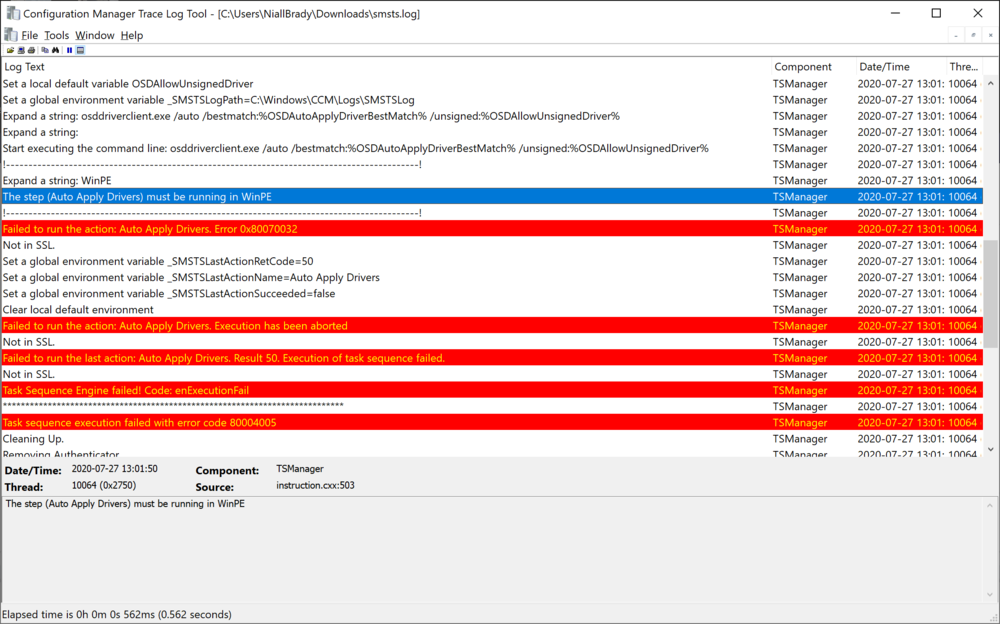
-
Hi Suki, thank you, i presume it would as it's the exact same one that's been in use by MBAM for the last number of years, however Windows 7 itself is EOL.
-
did you follow the guide 100% as it works every time I've tried it, and I've implemented multiple labs successfully with this, I'd double check what you've entered and take a look at this blog post to see if it gives you some ideas of where you may have gone wrong.
-
that error translates to " Operation did not complete because there is no logged-on interactive user. Source: Windows Update Agent ----- "
-
I will do up a guide for installing the smoothwall VM soon, and thanks for the thanks, as regards the scripts, all of them are available for download for any logged in member of windows-noob.com if you encounter any missing script please point me to it and i'll fix it cheers niall