anyweb
-
Posts
9182 -
Joined
-
Last visited
-
Days Won
366
Everything posted by anyweb
-

Downloads During PXE
anyweb replied to Joe13's topic in System Center Configuration Manager (Current Branch)
it's slow to download the boot image because it's using old technology to download the winpe.wim file, aka tftp (trivial ftp), you might be able to tweak registry settings on the server hosting WDS to get it to go faster, but it might also break pxe boot capability. -
First things first. the BitLocker capability I blogged about above is not yet released, it's still in technical preview as of todays date, however it's coming soon. Secondly, you state you want to export the keys, what keys exactly ? are you referring to Sophos disk encryption ?
-
SCCM 1902 Imaging
anyweb replied to Hardik's topic in System Center Configuration Manager (Current Branch)
where did you make that change ? on the dp ? -
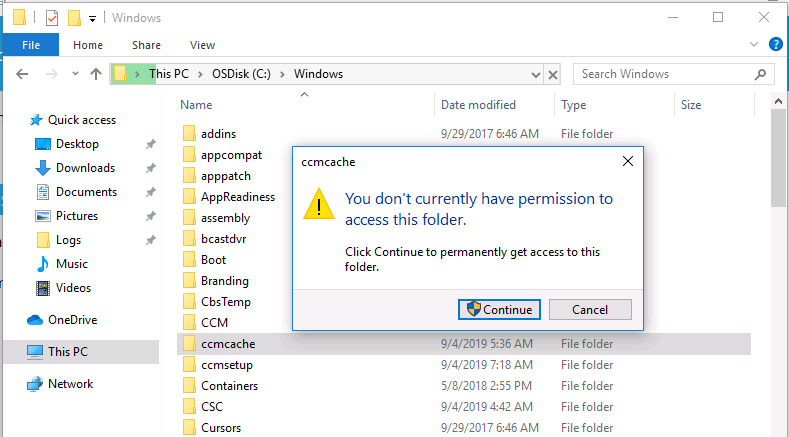
hi Christian, i'm not using any prestage TS, so yes that might be part of your problem. my user also doesn't have access to the ccmcache but as i said, it's working just fine for me
-
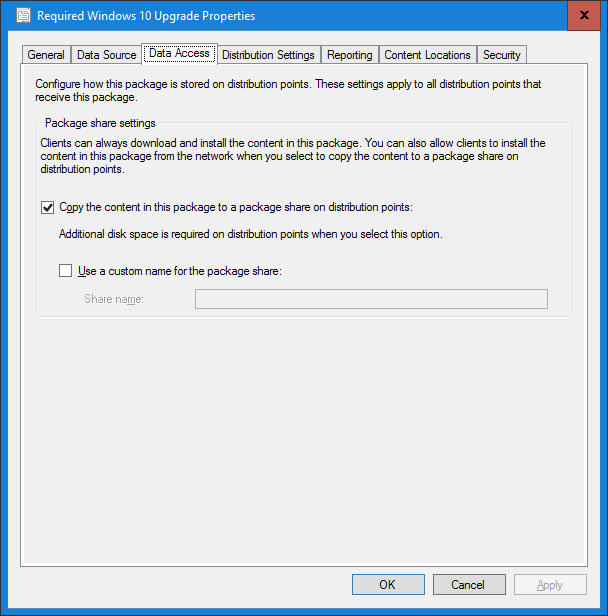
i suspect this is why it's failing for you verify this tab on your package
-
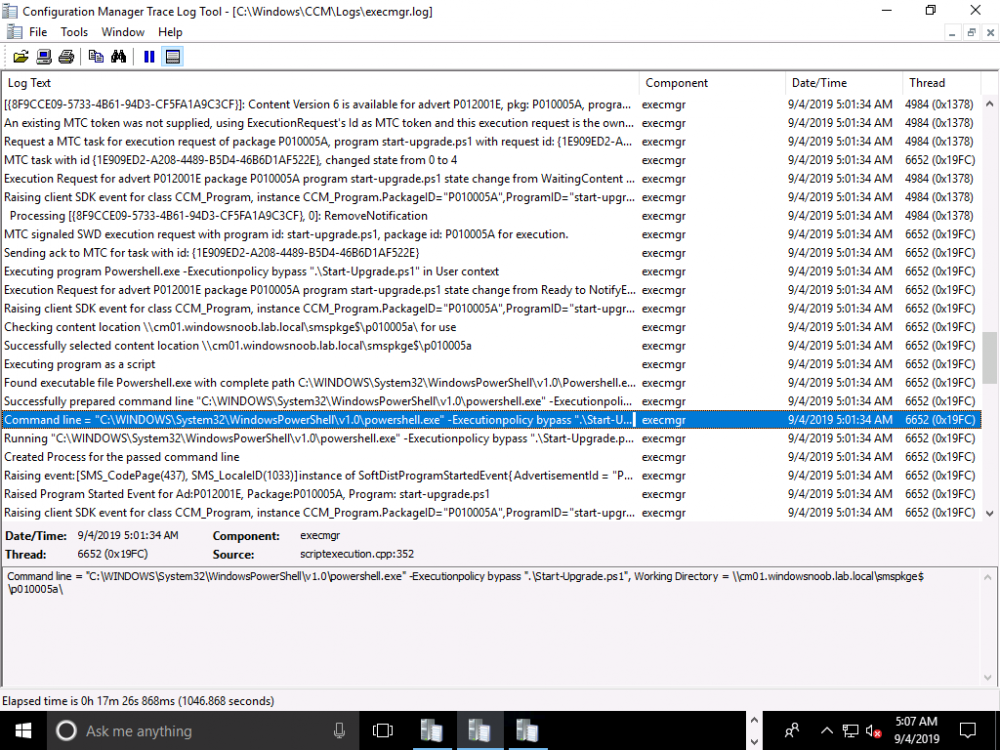
ok just tested it in my lab with a user that is a standard user, and it starts the powershell wrapper no problem at all. so something else must be different in your environment, double check your settings pls

-
hi Christian, I'll double check in my lab and come back to you shortly, thanks for your patience cheers niall
-
SMS_MP_CONTROL_MANAGER STATUS CRITICAL
anyweb replied to dj3094's topic in Configuration Manager 2012
have you tried right clicking it to view what the actual errors are ? those errors will give you an indication of what is actually wrong with it. -
SCCM 1902 Imaging
anyweb replied to Hardik's topic in System Center Configuration Manager (Current Branch)
pls attach your entire smsts.log file, the error above is not relevant to your issue. -
can you do a teamviewer session so i can take a look ?
-
the other method is only for creating bootable media, did you update your boot images to your distribution points as a matter of interest after you enabled HTTPS ?
-
did you do step 4 here ? and step 5 here that is how the boot image gets the certificate, the other method for getting the cert into the boot image is documented here
-
hi, i've fired up one of my HTTPS configmgr labs and verified that all the certs are working, then i pxe booted and compared my smsts.log to yours, have a look here, it looks like you are missing certificates in the boot image as suspected. You log to the left, my working vm on the right. I'd double check you've done everything in my converting sccm from http to https guides again.

-
if you are not getting the screen press f8 as soon as you can, grab the smsts.log and attach it here i'll take a look
-
the central server is just a Primary server, avoid a CAS if at all possible, it will only cause grief, you can have DP's at your 3 locations no problem, if you want to get certified then take training with Kent Agerlund or Johan Arwidmark, both offer training via their companies, i would also try and get trained up on Microsoft Intune as that is where a lot of focus (and companies) are moving towards, on-premise management is via SCCM cloud management=Intune mix of both=SCCM co managed with Intune cheers niall
-
To get PXE working with HTTPS read my guide here (two parts, here's part 1.) You are more than likely missing the osd certs. but to answer your question, is there a new PXE type, yes, ConfigMgr can manage PXE boot using it's own service instead of the Windows Server Service called Windows Deployment Services Service. Also, I'd recommend that you don't configure DHCP scope options, and use IP Helpers instead.
-
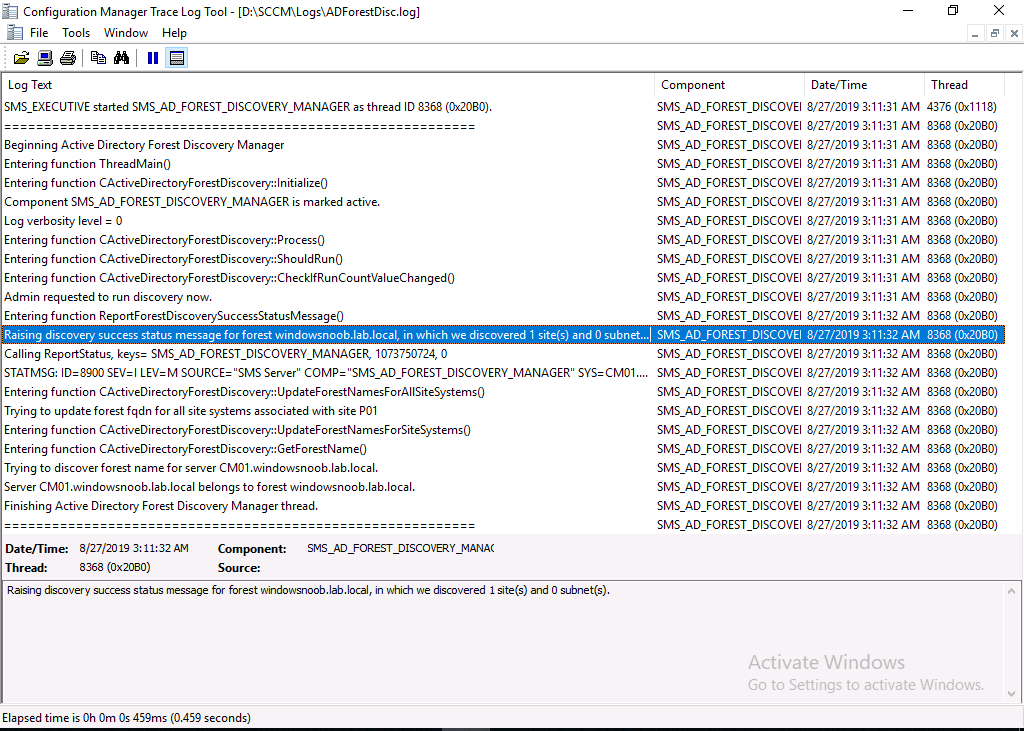
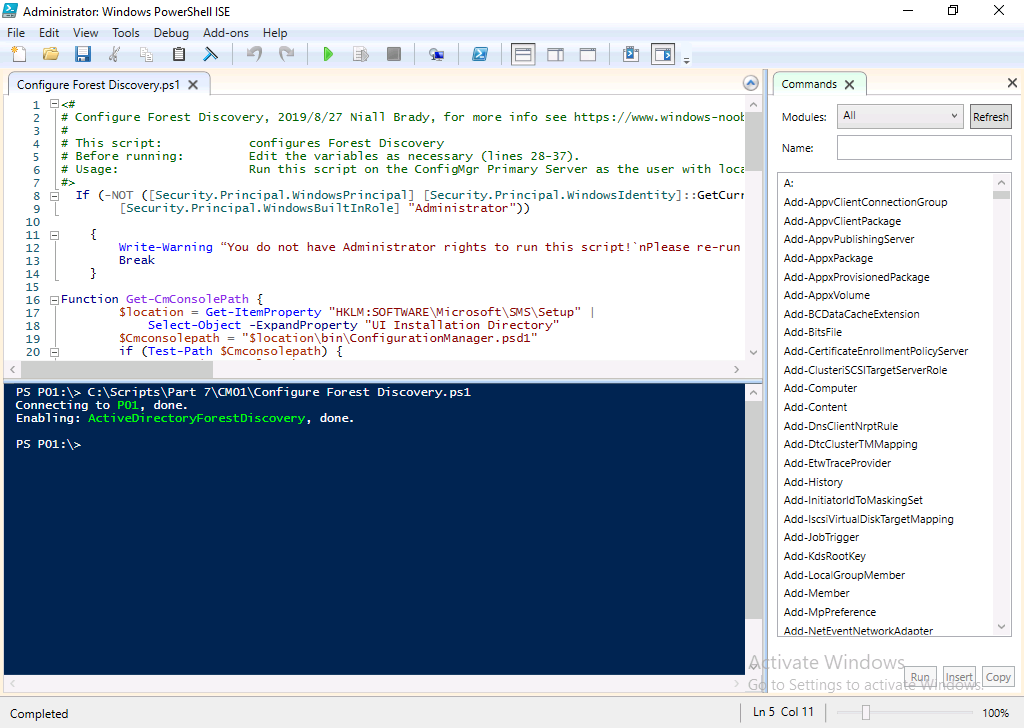
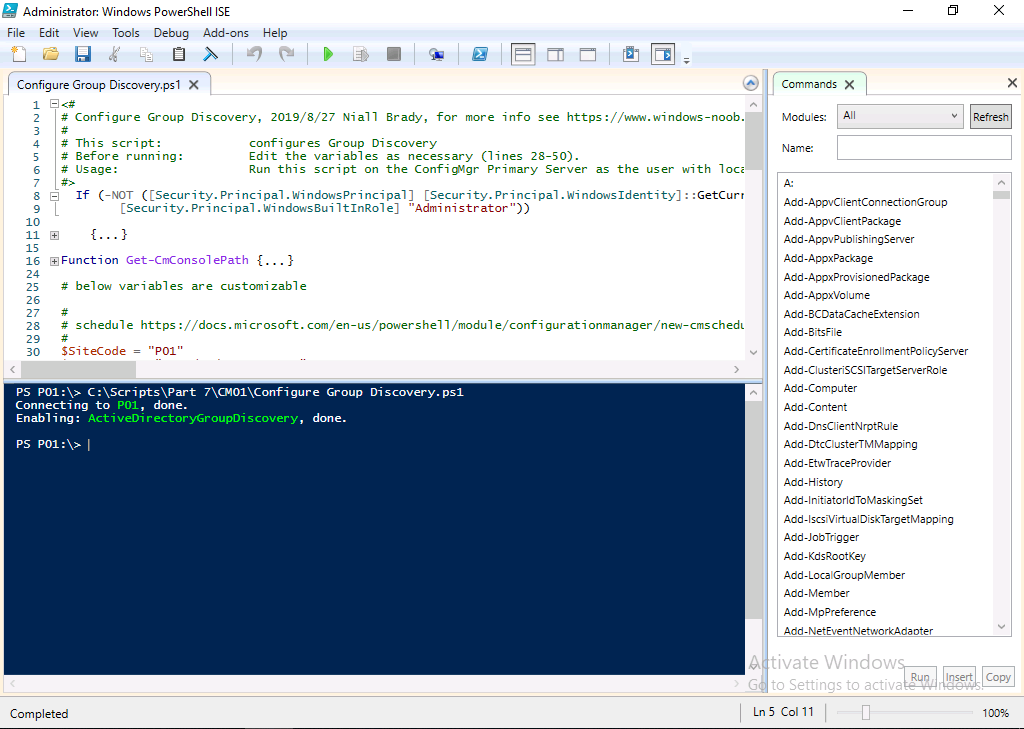
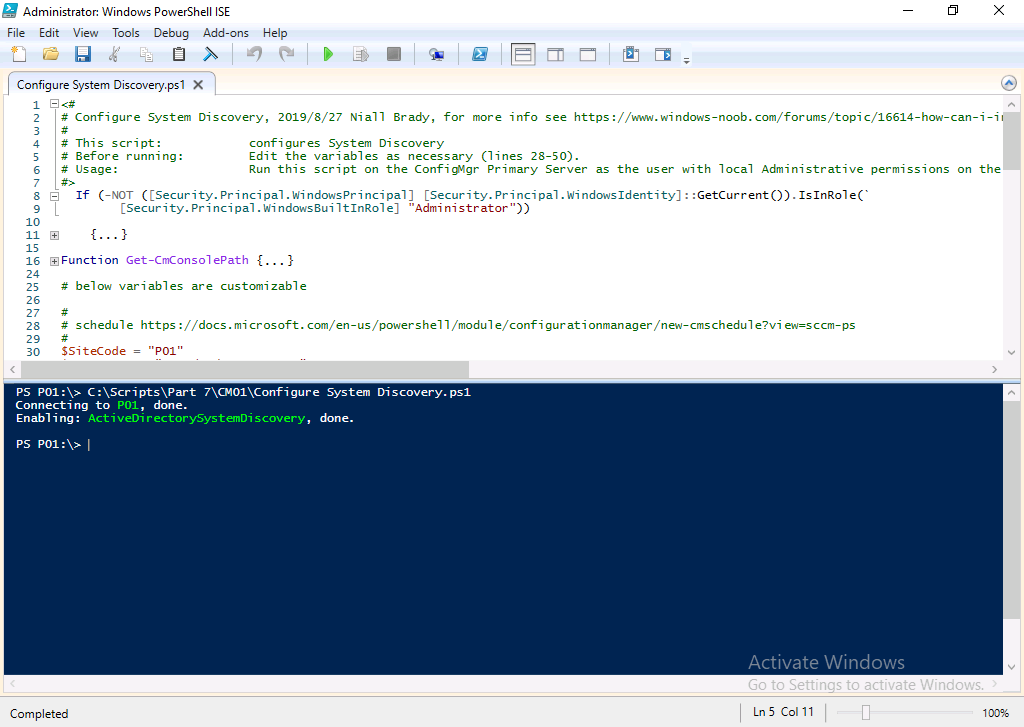
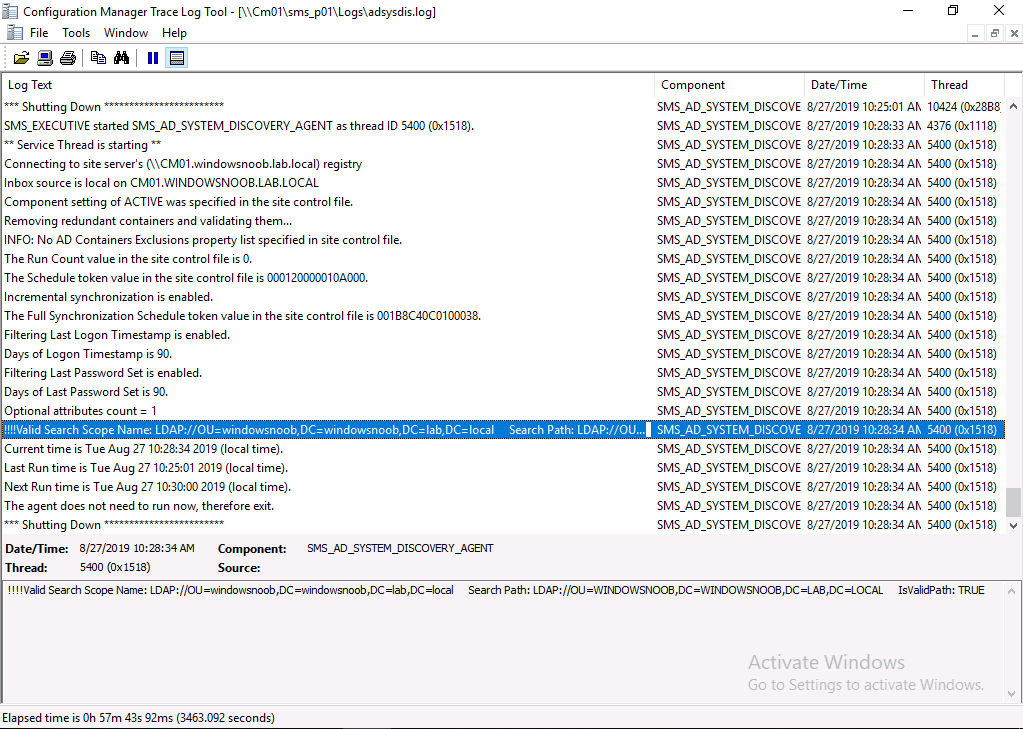
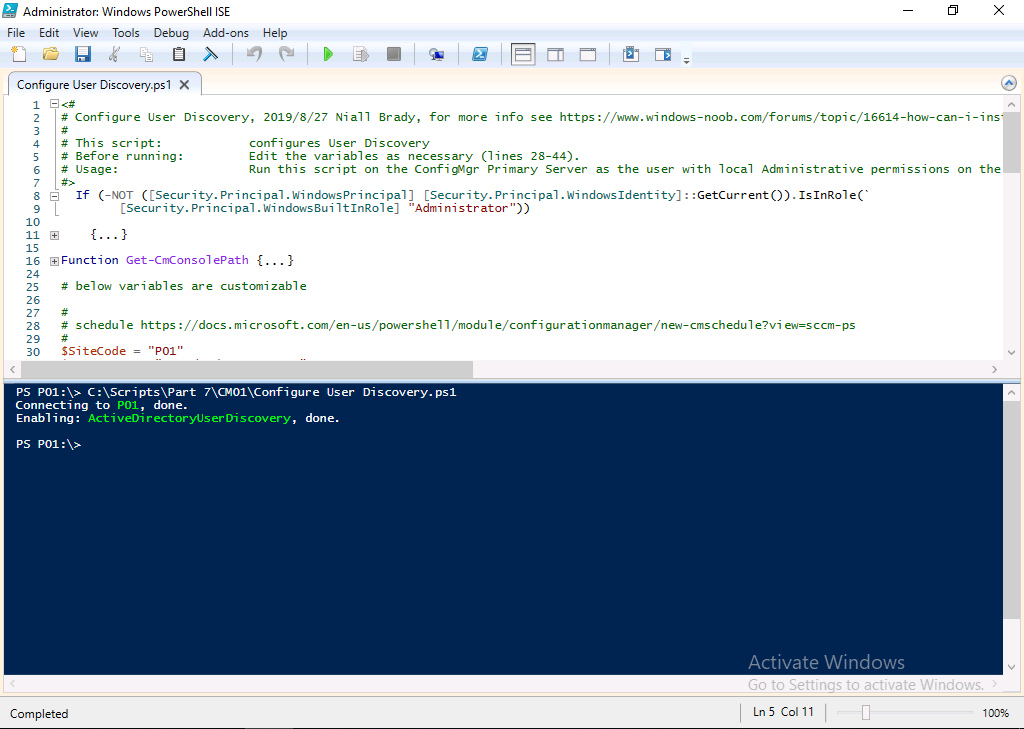
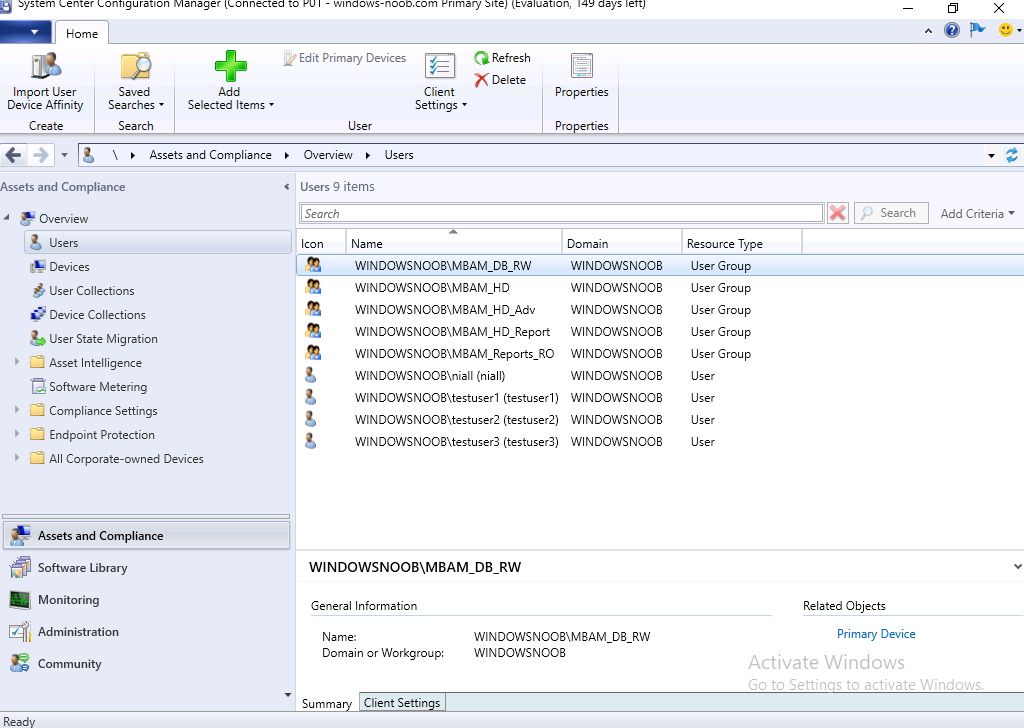
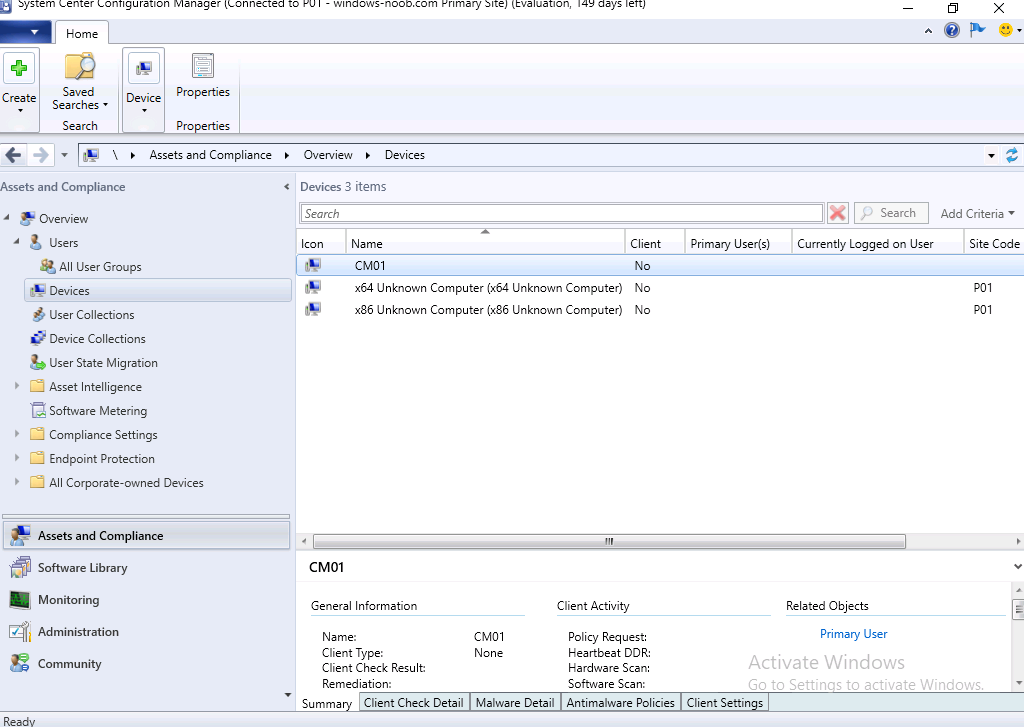
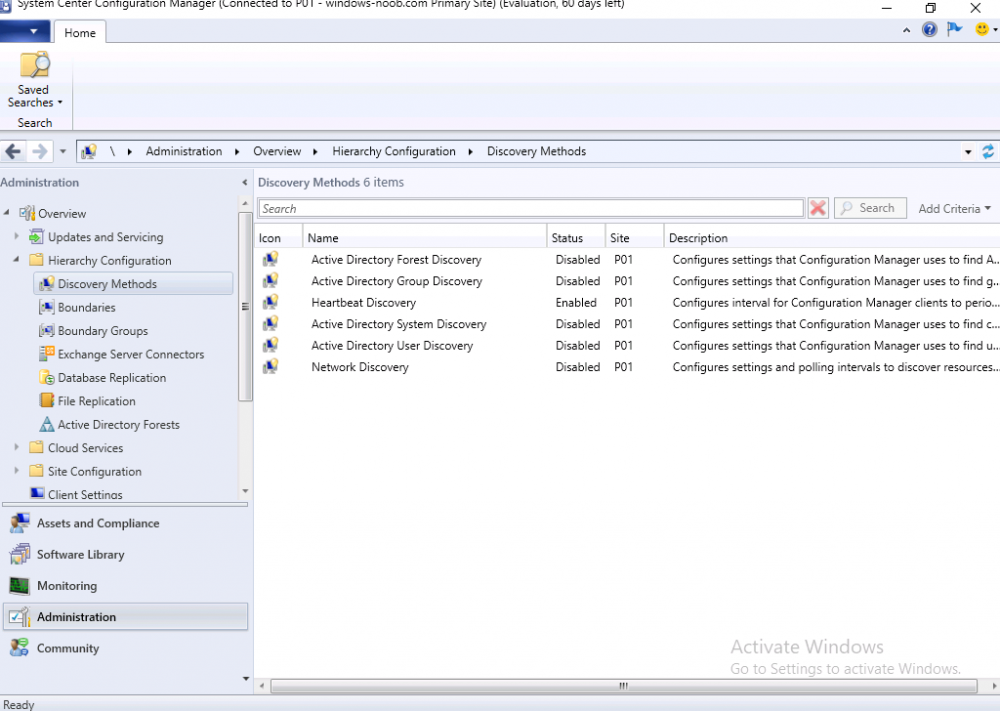
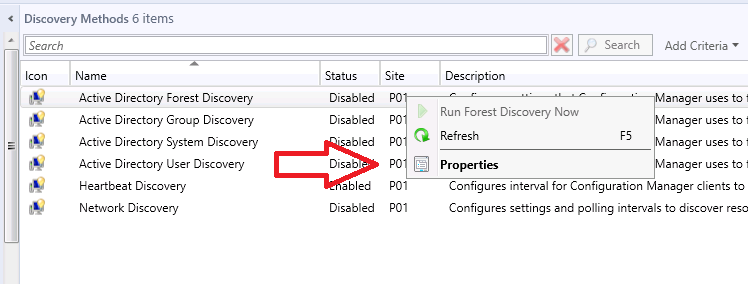
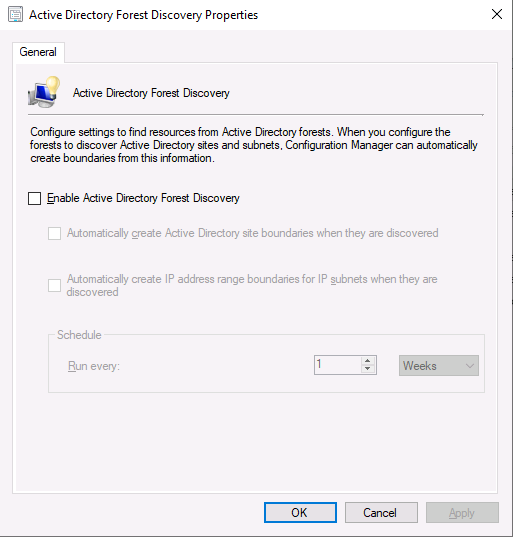
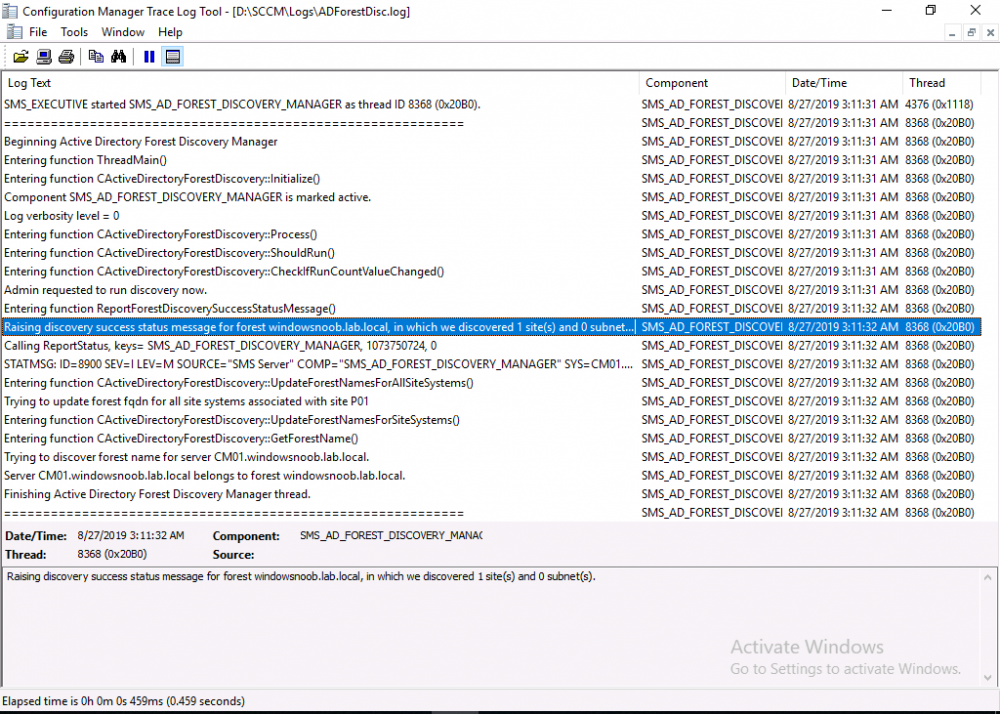
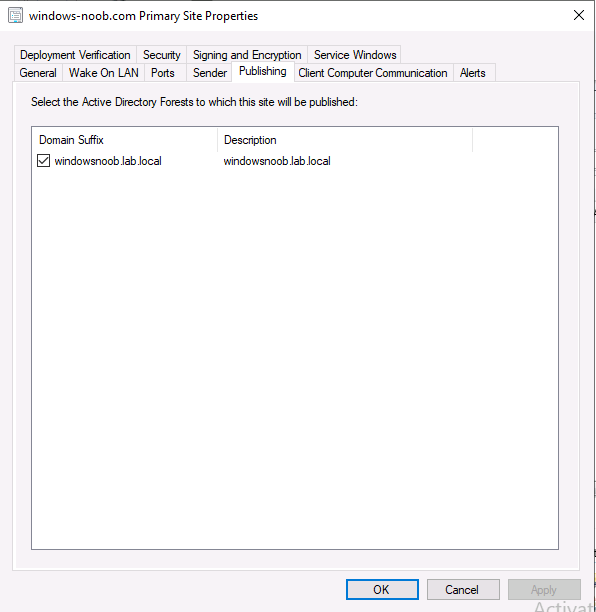
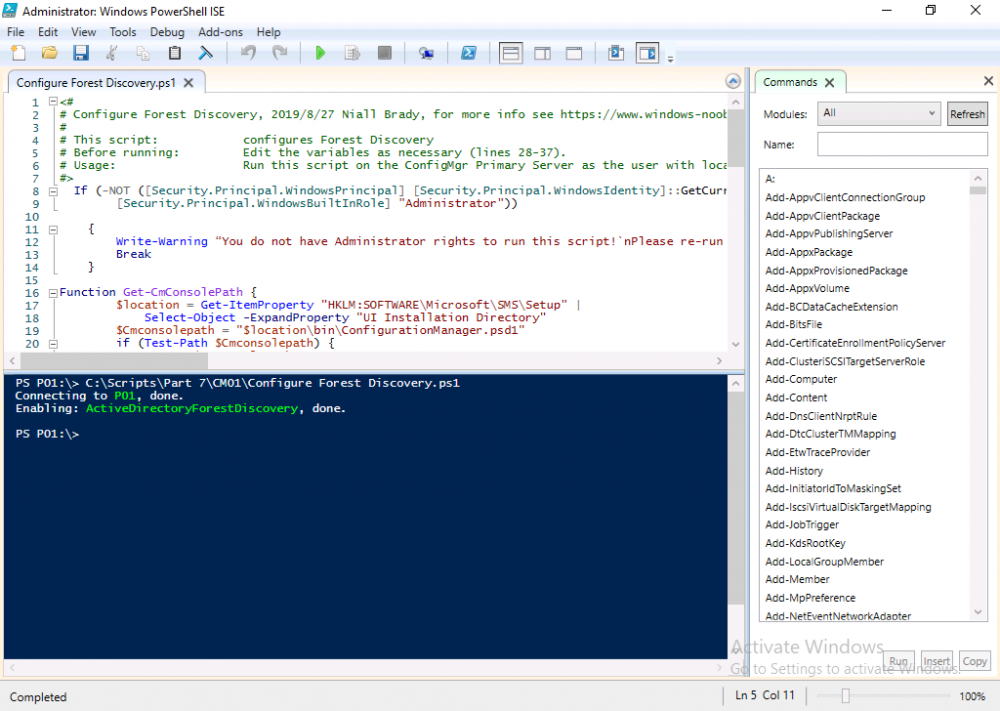
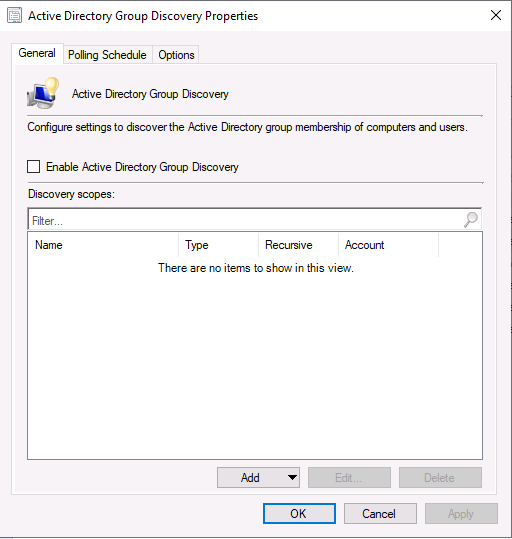
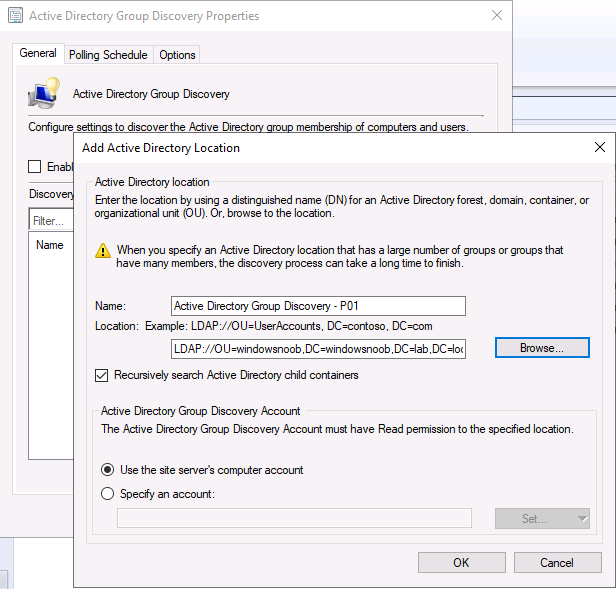
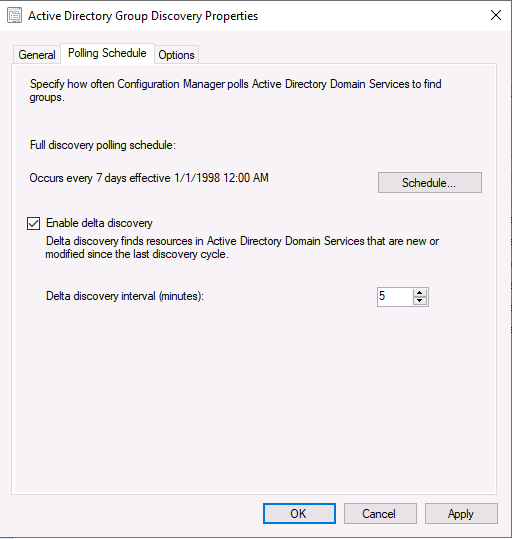
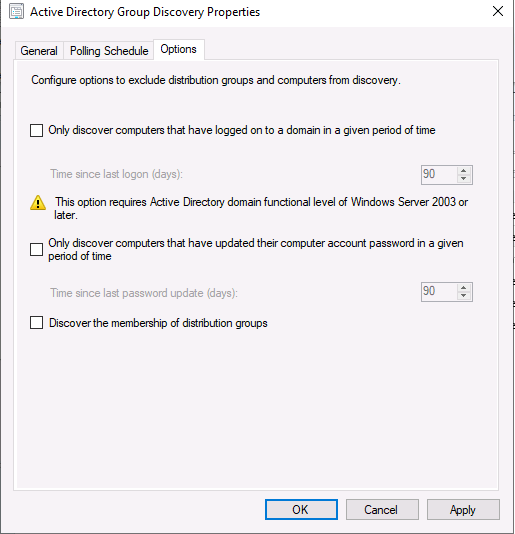
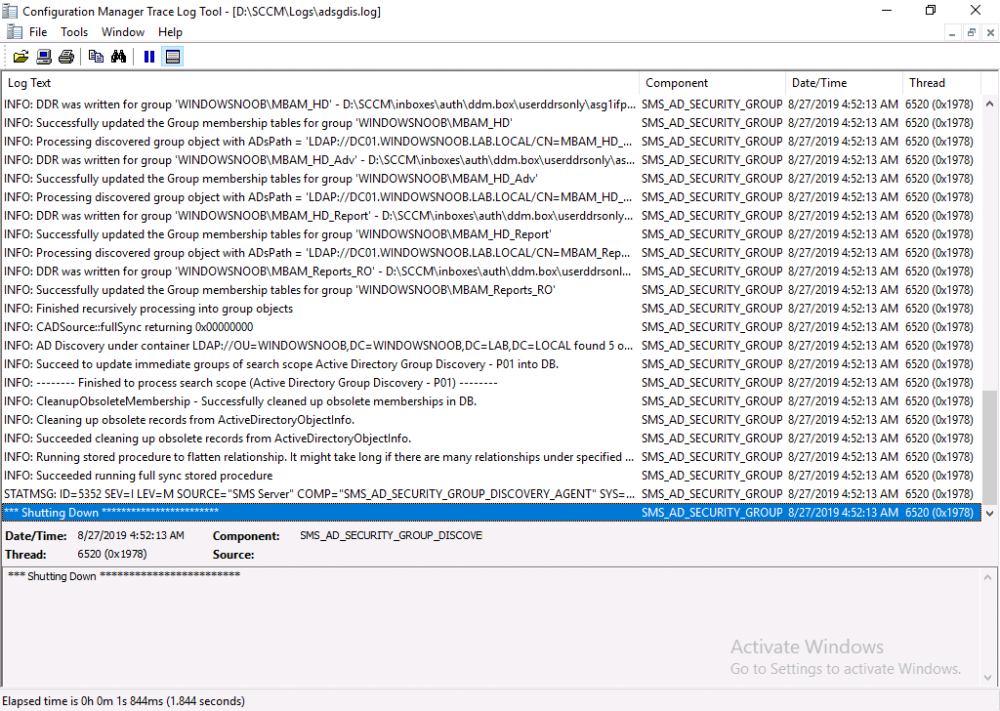
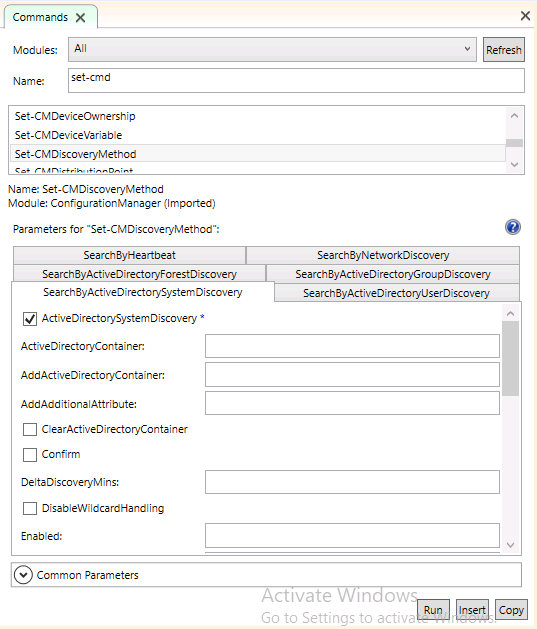
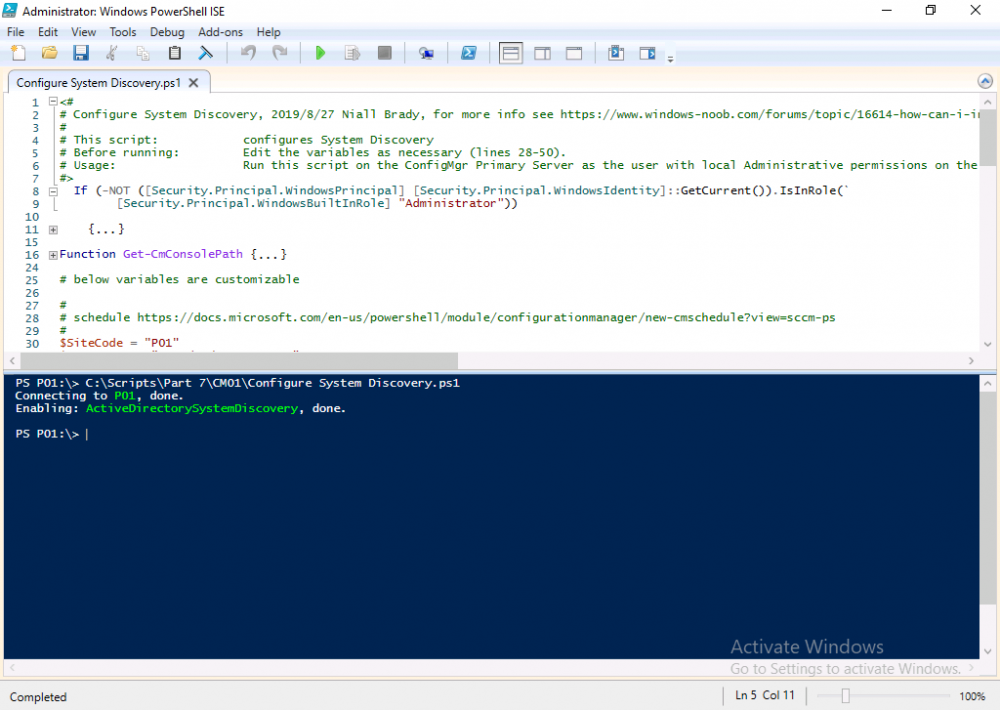
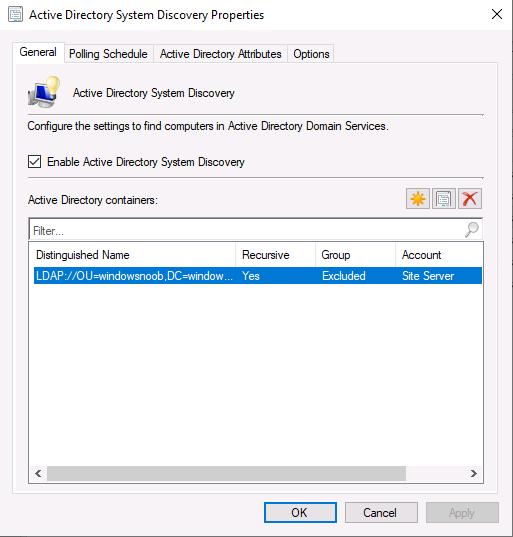
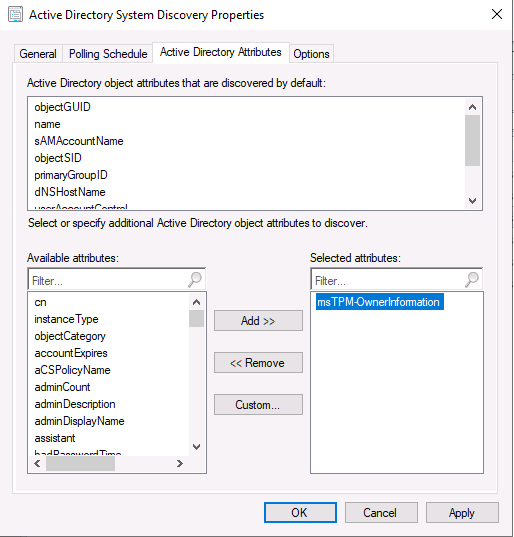
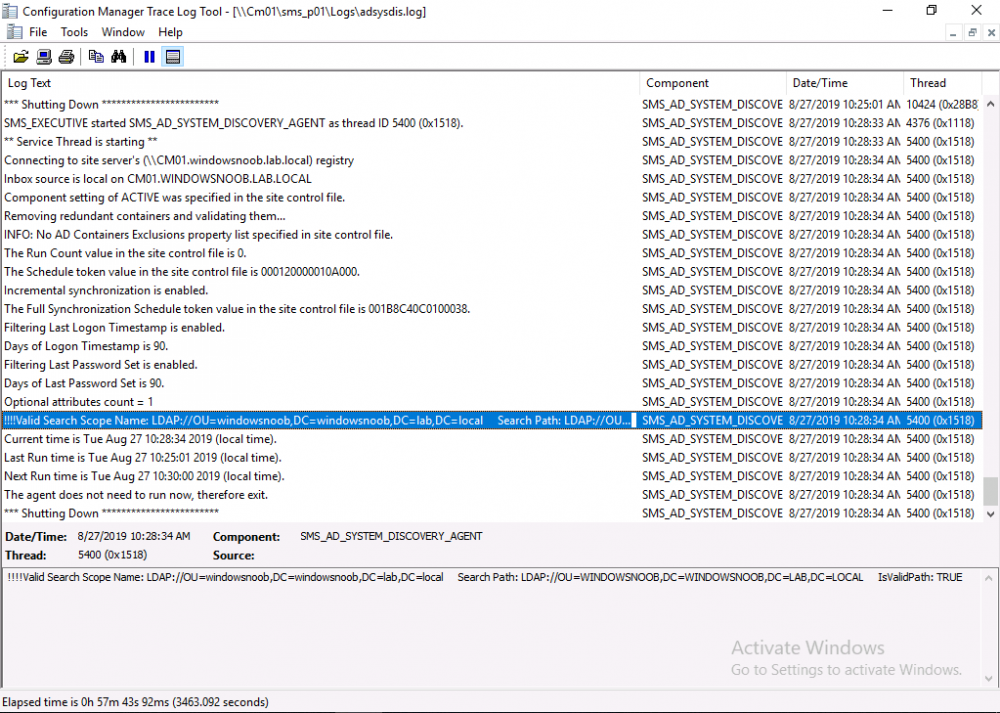
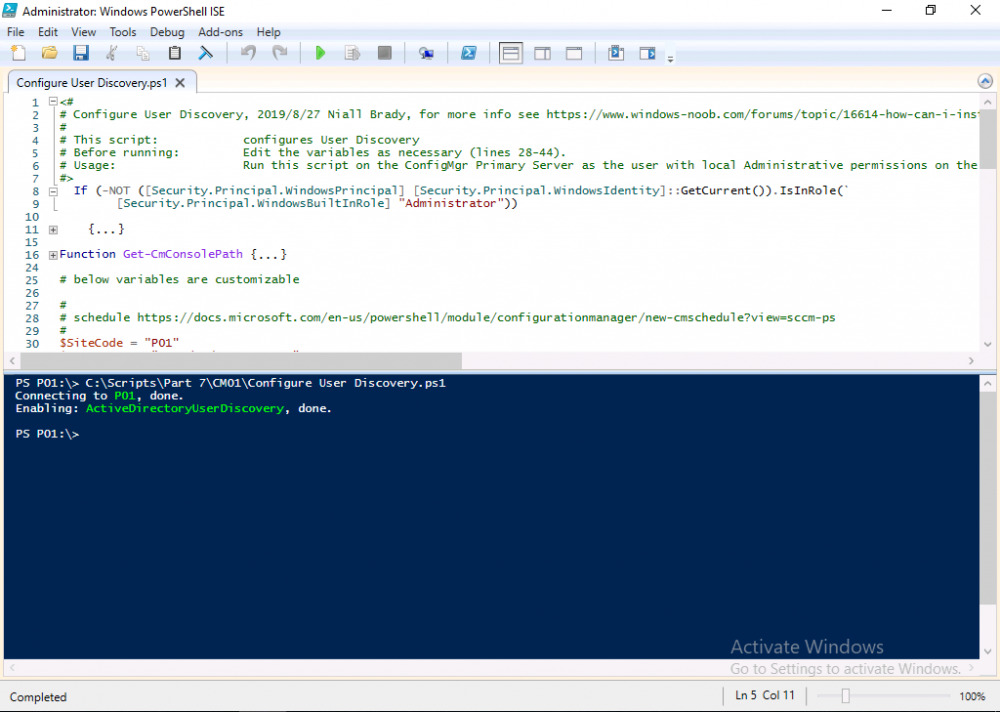
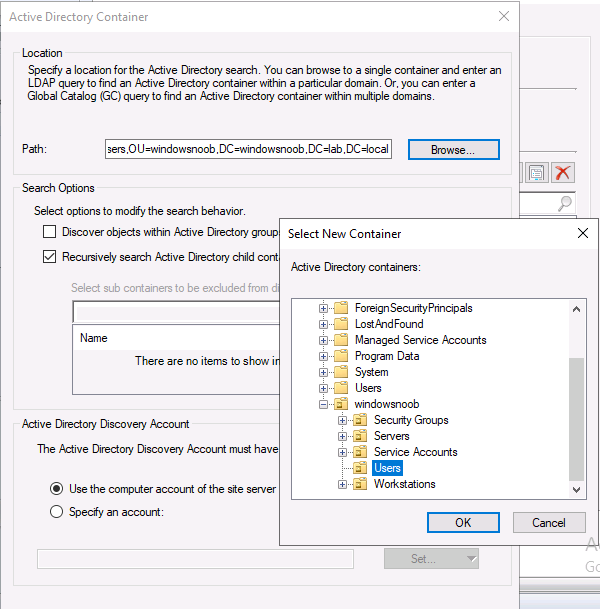
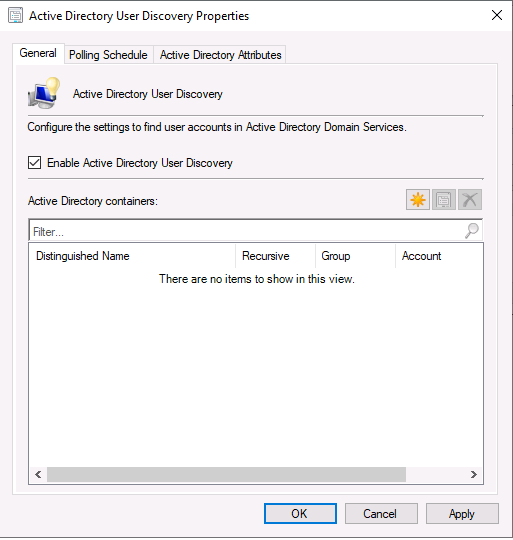
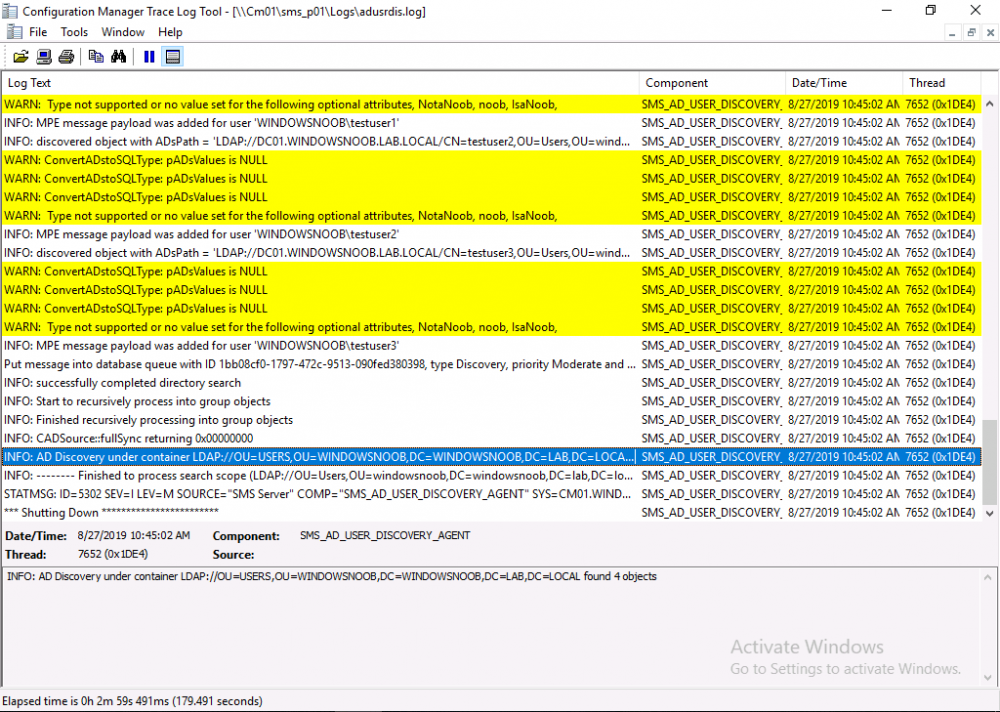
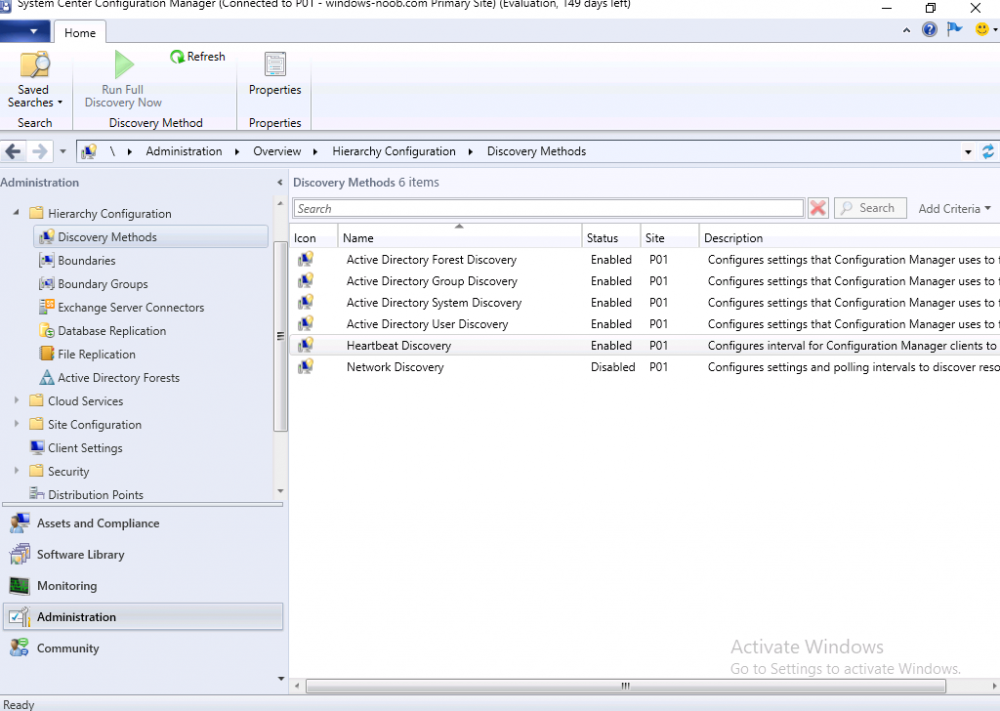
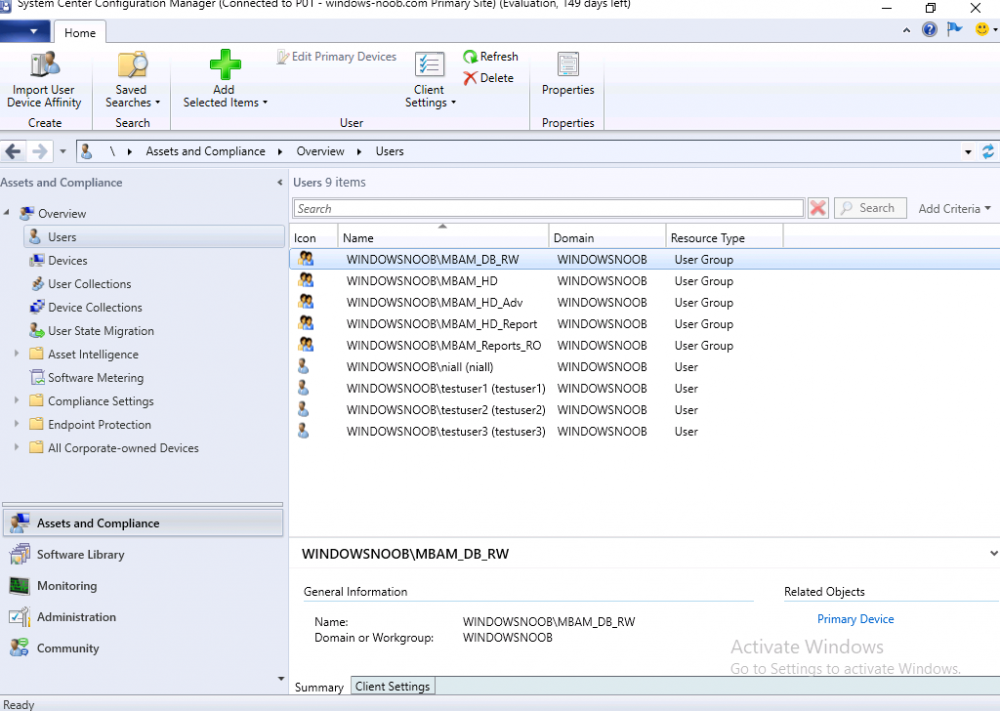
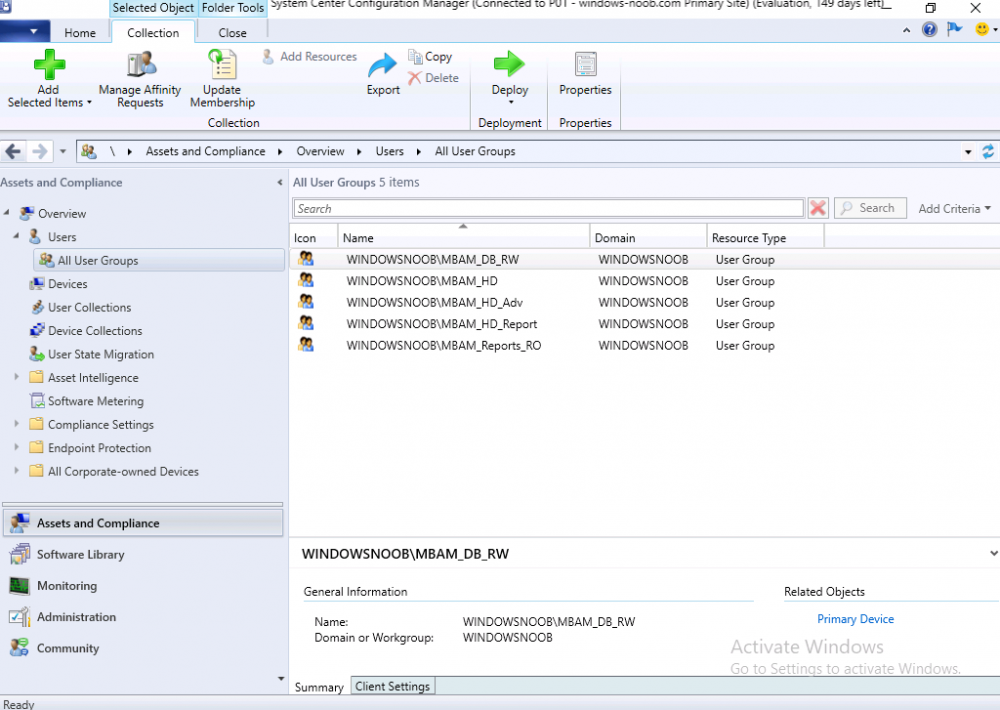
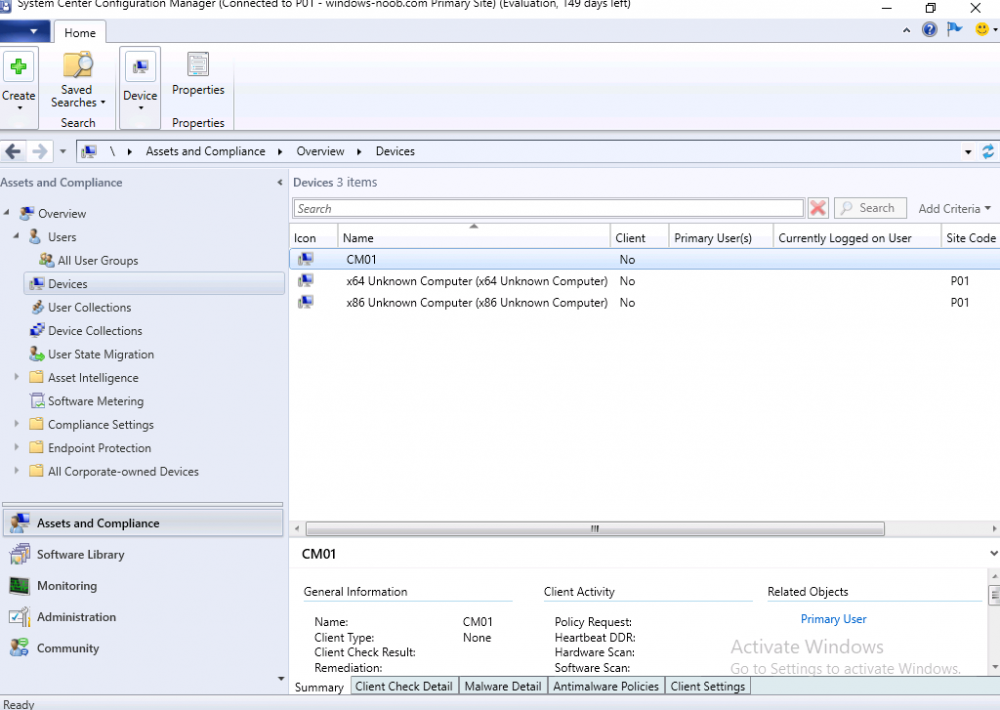
Introduction This multi-part guide will show you how to install the latest baseline version of Configuration Manager from Microsoft. The latest available baseline version is System Center Configuration Manager (Current Branch) version 1902 as of April the 10th 2019. I blogged how to upgrade to 1902 here. This guide is aimed a new installations of SCCM. Baseline media is used to install new ConfigMgr sites or to upgrade from supported versions, for more information about baseline media please see my blog post here. This series is broken down into the following parts:- Part 1 - Get the lab ready, configure ADDS Part 2 - Join CM01 to Domain, add users, create the Systems Management container, delegate permission Part 3 - Role and Feature installation, installation of WDS and ADK Part 4 - Configure and install SQL Server 2017 Part 5 - Configure and install SCCM 1902 Current Branch Part 6 - Create device collections Part 7 - Configuring discovery (This part) Part 8 - Configuring boundaries You can use this multi-part guide to get a hierarchy up and running on Windows Server 2019 using SQL Server 2017. The driving concept behind this series of guides is to help you through all the steps necessary to get a working Configuration Manager Primary site installed (for lab use) using manual methods or automated using PowerShell. This gives you the power to automate the bits that you want to automate, while allowing you to manually do other tasks when needed. You decide which path to take. PowerShell knowledge is desired and dare I say required if you are in any way serious about Configuration Manager. I will show you how to do most steps via two methods shown below, it's up to you to choose which method suits you best but I highly recommend automating everything that you can, using PowerShell. Method #1 - Do it manually Method #2 - Automate it with PowerShell When testing your scripts using PowerShell you can actually use PowerShell ISE help to figure out what commands a cmdlet accepts and build your script that way, here's an example. In this post you will learn about configuring discovery. Planning for discovery in ConfigMgr is an important step while configuring your sites and hierarchies. You need to discover objects in locations that you select and these discovered resources are what you want to manage (can be devices and/or users). These discovered resources can be targeted with software and/or get the ConfigMgr client agent installed via Client Push functionality. Discovery within System Center Configuration Manager (Current Branch) has 7 different discovery methods listed below, the first 6 of which are user configurable, the last method, Server Discovery is not user configurable. Active Directory Forest Discovery Active Directory Group Discovery Active Directory System Discovery Active Directory User Discovery Heartbeat Discovery Network Discovery Server Discovery When a discovery method successfully finds a new resource, discovery puts information about that resource into a file that is called a discovery data record (DDR), which is processed by a primary or central administration site. Processing of a DDR creates a new record in the site database for newly discovered resources, or updates existing records with the DDRs new information. [source: doc.microsoft.com] Downloads Note: in order to download these scripts you must be a logged on member of windows-noob.com. The scripts used in this part of the guide are available for download here. Unzip to C:\Scripts. The scripts are placed in the corresponding folder (Part 1, Part 2 etc) and sorted into which server you should run the script on (DC01 or CM01). Scripts.zip Step 1. Enable Active Directory Forest Discovery Note: Perform the following on the Configuration Manager server (CM01) as a Local Administrator Unlike other Active Directory discovery methods, Active Directory Forest Discovery does not discover resources that you can manage. Instead, this method discovers network locations that are configured in Active Directory. It can convert those locations into boundaries for use throughout your hierarchy. When this method runs, it searches the local Active Directory forest, each trusted forest, and each additional forest that you configure in the Active Directory Forests node of the Configuration Manager console. You can use Active Directory Forest Discovery to: Discover Active Directory sites and subnets, and then create Configuration Manager boundaries based on those network locations. Identify supernets that are assigned to an Active Directory site. Convert each supernet into an IP address range boundary. Publish to Active Directory Domain Services (AD DS) in a forest when publishing to that forest is enabled. The specified Active Directory Forest Account must have permissions to that forest. Method #1 – Do it manually In the Configuration Manager console, click on Administration and select Hierarchy Configuration, click on Discovery Methods. The first discovery method listed is Active Directory Forest Discovery. To discover Active Directory network locations and convert those locations into boundaries right click Active Directory Forest Discovery for the primary site and right click, choose Properties. The General window appears with one option, Enable Active Directory Forest Discovery. Enable that option and two more choices are revealed: Automatically create active directory site boundaries when they are discovered Automatically create IP address range boundaries for IP subnets when they are discovered. Tip: Selecting both options above is fine in a LAB. In Production however, you should consider only selecting to discover IP address ranges. For clarification about this point please review this post from Jason Sandys (Enterprise Mobility MVP) about why IP Subnet Boundaries are EVIL Select the second option (Automatically create IP address range boundaries for IP subnets when they are discovered) and leave the default schedule for every 1 weeks. Click Apply, you'll be prompted if you want to run a discovery as soon as possible, answer Yes. Tip: If you want to review the discovery of objects via this discovery method, you can use CMTrace to open the ADForestDisc.log file. The log file will be located in in the <InstallationPath>\LOGS folder. Note that the log file will not appear immediately after enabling this discovery method, it can take a few minutes before it appears. When publishing is enabled for a forest and that forests schema is extended for Configuration Manager, the following information is published for each site that is enabled to publish to that Active Directory forest: SMS-Site-<site code> SMS-MP-<site code>-<site system server name> SMS-<site code>-<Active Directory site name or subnet> To verify that you've enabled publishing browse to Administration, Site Configuration, Sites, and check the properties of your Primary site server. Click on the Publishing tab. Method #2 - Automate it with PowerShell To enable Active Directory Forest Discovery automatically, use the Configure Forest Discovery.ps1 PowerShell script. 1. Copy the script to C:\Scripts on CM01 2. Edit the variables (lines 28-37) as desired before running. 3. Start Windows PowerShell ISE as Administrator and run the script by clicking on the green triangle. Step 2. Enable Active Directory Group Discovery Note: Perform the following on your ConfigMgr server as a user with Full Administrator permissions in the ConfigMgr console. You can use Active Directory Group Discovery to search Active Directory Domain Services (AD DS) to identify the group memberships of computers and users. This discovery method searches a discovery scope that you configure, and then identifies the group memberships of resources in that discovery scope. By default, only security groups are discovered. However, you can discover the membership of distribution groups when you select the checkbox for the option Discover the membership of distribution groups on the Option tab in the Active Directory Group Discovery Properties dialog box. When you discover a group, you can also discover limited information about its members. Note: This does not replace Active Directory System Discovery or Active Directory User Discovery and is usually insufficient to build complex queries/collections or to serve as the bases of a client push installation. Active Directory Group Discovery can discover the following information: Groups Membership of Groups Limited information about a groups member computers and users, even when those computers and users have not previously been discovered by another discovery method Tip: This step assumes you want to discover resources recursively in the windowsnoob OU. Therefore, it may be necessary to move servers into their respective OU which is a child OU under the windowsnoob OU created in this guide otherwise they will not be discovered by this discovery method. You can do that via Active Directory Users and Computers on DC01. Method #1 – Do it manually In the ConfigMgr console, in the Administration workspace, select Hierarchy Configuration, then select Discovery Methods and right click Active Directory Group Discovery and choose properties. The Active Directory Group Discovery Properties window appears. Select the option to Enable Active Directory Group Discovery and click on Add to see two more choices, Groups and Location. These options are explained below: Groups: Use groups if you want to search one or more specific Active Directory groups. You can configure the Active Directory Domain to use the default domain and forest, or limit the search to an individual domain controller. Additionally, you can specify one or more groups to search. If you do not specify at least one group, all groups found in the specified Active Directory Domain location are searched. Location: Use a location if you want to search one or more Active Directory containers. This scope option supports a recursive search of the specified Active Directory containers that also searches each child container under the container you specify. This process continues until no more child containers are found. Note: When you configure a discovery scope, select only the groups that you must discover. This is because Active Directory Group Discovery attempts to discover each member of each group in the discovery scope. Discovery of large groups can require extensive use of bandwidth and Active Directory resources. Select Location from the drop down menu. Give it a name like Active Directory Group Discovery - P01 and select browse to decide where to recursively search. In this example I select the previously created windowsnoob Organizational Unit (OU) which will contain your servers, users, computers and devices. Click OK to accept the Add Active Directory Location screen changes, next, click on the Polling schedule tab and decide what is appropriate for your setup, the default for full discovery is 7 days and you can enable Delta Discovery (enabled by default). This discovery method finds resources in Active Directory Domain services that are new or modified since the last discovery cycle in the time interval specified (default is 5 minutes). Next, you can review the three options on the Options tab and click Apply when ready and answer Yes to running the full discovery when prompted. Tip: If you want to review the discovery of objects via this discovery method, you can use CMTrace to open the adsgdis.log file. The log file will be located in in the <InstallationPath>\LOGS folder. Method #2 - Automate it with PowerShell To enable Active Directory Forest Discovery automatically, use the Configure Group Discovery.ps1 PowerShell script. 1. Copy the script to C:\Scripts on CM01 2. Edit the variables (lines 28-50) as desired before running. 3. Start Windows PowerShell ISE as Administrator and run the script by clicking on the green triangle. Step 3. Enable Active Directory System Discovery Note: Perform the following on your ConfigMgr server as a user with Full Administrator permissions in the ConfigMgr console. You can use Active Directory System Discovery to search the specified Active Directory Domain Services (AD DS) locations for computer resources that can be used to create collections and queries. You can then install the client to discovered computers by using client push installation. To successfully create a discovery data record (DDR) for a computer, Active Directory System Discovery must be able to identify the computer account and then successfully resolve the computer name to an IP address. By default, Active Directory System Discovery discovers basic information about the computer including the following: Computer name Operating system and version Active Directory container name IP address Active Directory site Last Logon Timestamp Method #1 – Do it manually In the ConfigMgr console, in the Administration workspace, select Hierarchy Configuration, then select Discovery Methods and right click Active Directory System Discovery and choose Properties, place a check mark in Enable Active Directory System Discovery. Click on the yellow starburst to add some Active Directory containers. For path click on browse and browse to the location you want to discover systems in. Tip: You can add several locations by repeating this process and selecting different locations, but only add the locations you need to add as you don't want to generate unnecessary network and CPU bandwidth. On the Polling schedule tab, stick to the defaults and then select the Active Directory Attributes tab, if you want to add an attribute to discover select one from the list and choose Add >> in the example below you are adding an Active Directory attribute called msTPM-ownerinformation. There are many attributes to choose from, use only the ones you need to get your job done. Once you are happy, click Apply and Ok and answer Yes to run a full discovery as soon as possible. Tip: If you want to review the discovery of objects via this discovery method, you can use CMTrace to open the adsysdis.log file. The log file will be located in in the <InstallationPath>\LOGS folder. Method #2 - Automate it with PowerShell To enable Active Directory System Discovery automatically, use the Configure System Discovery.ps1 PowerShell script. 1. Copy the script to C:\Scripts on CM01 2. Edit the variables (lines 28-50) as desired before running. 3. Start Windows PowerShell ISE as Administrator and run the script by clicking on the green triangle. Step 4. Enable Active Directory User Discovery Note: Perform the following on your ConfigMgr server as a user with Full Administrator permissions in the ConfigMgr console. Use Configuration Manager Active Directory User Discovery to search Active Directory Domain Services (AD DS) to identify user accounts and associated attributes. You can view the default list of object attributes returned by Active Directory User Discovery, and configure additional attributes to be discovered in the Active Directory User Discovery Properties dialog box on the Active Directory Attributes tab. By default, Active Directory User Discovery discovers basic information about the user account including the following: User name Unique user name (includes domain name) Domain Active Directory container names Method #1 – Do it manually In the ConfigMgr console, in the Administration workspace, select Hierarchy Configuration, then select Discovery Methods and right click Active Directory User Discovery and choose Properties. Place a checkmark in Enable Active Directory User Discovery as shown below. Next, click on the yellow starburst to add some active directory locations to discover users. You can configure the Polling tab and Active Directory Attributes tab settings if you wish, then click Apply and answer Yes to Run a Full Discovery now. Tip: If you want to review the discovery of objects via this discovery method, you can use CMTrace to open the adusrdis.log file. The log file will be located in in the <InstallationPath>\LOGS folder. The observant amongst you might notice the yellow warnings, they are nothing to worry about, it's simply informing you that it cannot find the 3 optional attributes on these users that were defined (using the PowerShell script below). Method #2 - Automate it with PowerShell To enable Active Directory User Discovery automatically, use the Configure User Discovery.ps1 PowerShell script. 1. Copy the script to C:\Scripts on CM01 2. Edit the variables (lines 28-44) as desired before running. 3. Start Windows PowerShell ISE as Administrator and run the script by clicking on the green triangle. Step 5. Review discovered resources in the console Note: Perform the following on your ConfigMgr server as a user with Full Administrator permissions in the ConfigMgr console. At this point you can refresh the view in Discovery Methods to see which methods are enabled. You did not enable Network discovery as it can impact network bandwidth, read more about that method here. Next, let's see what has been discovered. In the ConfigMgr console, in the Assets and Compliance workspace, select Users, the discovered Users should appear. In the Assets and Compliance workspace, select User Collections, and double click on All User Groups, the discovered User Groups should appear. In the ConfigMgr console, in the Assets and Compliance workspace, select Devices, then select All Systems, the discovered Systems should appear. If any that you expected do not appear, adjust your search criteria in the discovery methods and try again. Note: If you are wondering why DC01 does not appear it is because that server is placed under the Domain Controllers container in Active Directory and that container path was not added to any system discovery method. Recommended reading Set-CMDiscoveryMethod https://docs.microsoft.com/en-us/powershell/module/configurationmanager/set-cmdiscoverymethod?view=sccm-ps Discovery methods - https://docs.microsoft.com/en-us/sccm/core/servers/deploy/configure/about-discovery-methods Summary In this guide you configured Discovery methods in System Center Configuration Manager (Current Branch) to discover resources that you want to manage. You did this either manually or in an automated fashion using PowerShell. In the next part of this new series you will configure Boundaries


-
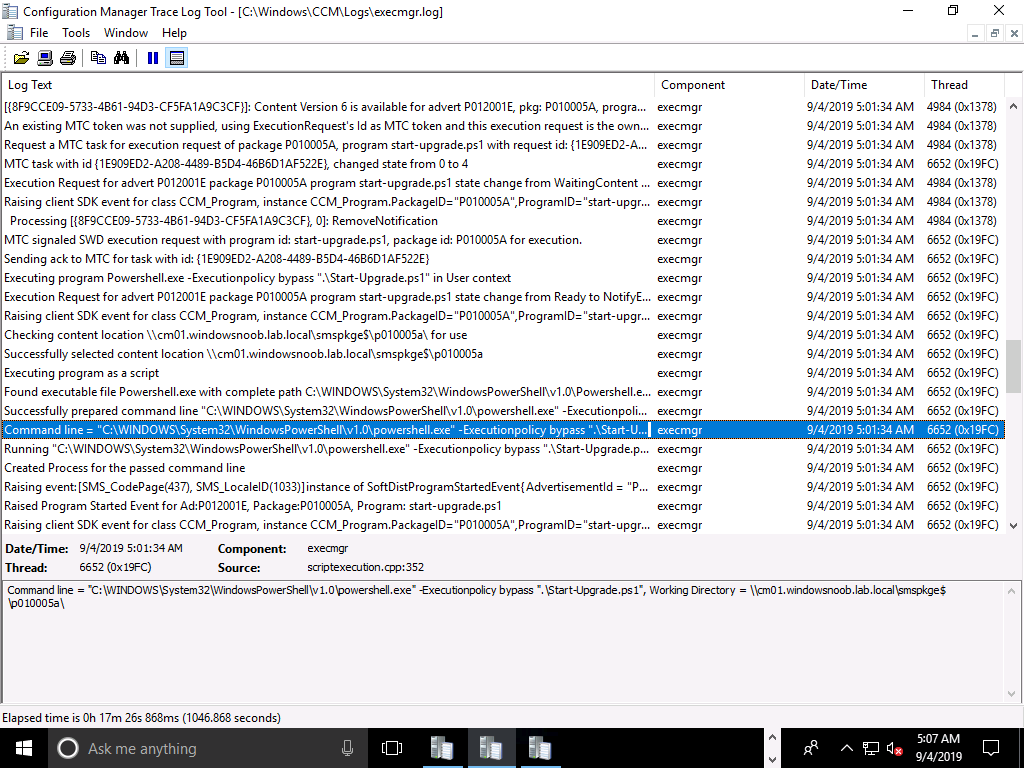
make sure to test test test if you do go that route though. Remember, if 'no user' is logged on, then no one will see any popup and it will just upgrade once the 5 deferrals are gone.
-
you can change how it's deployed, currently you deploy it 'when a user is logged on'. if you change that to whether a user is logged on or off you'll also need to update some of the logic, i think you need to re-read the original blog post, i mention it there i'm sure.
-
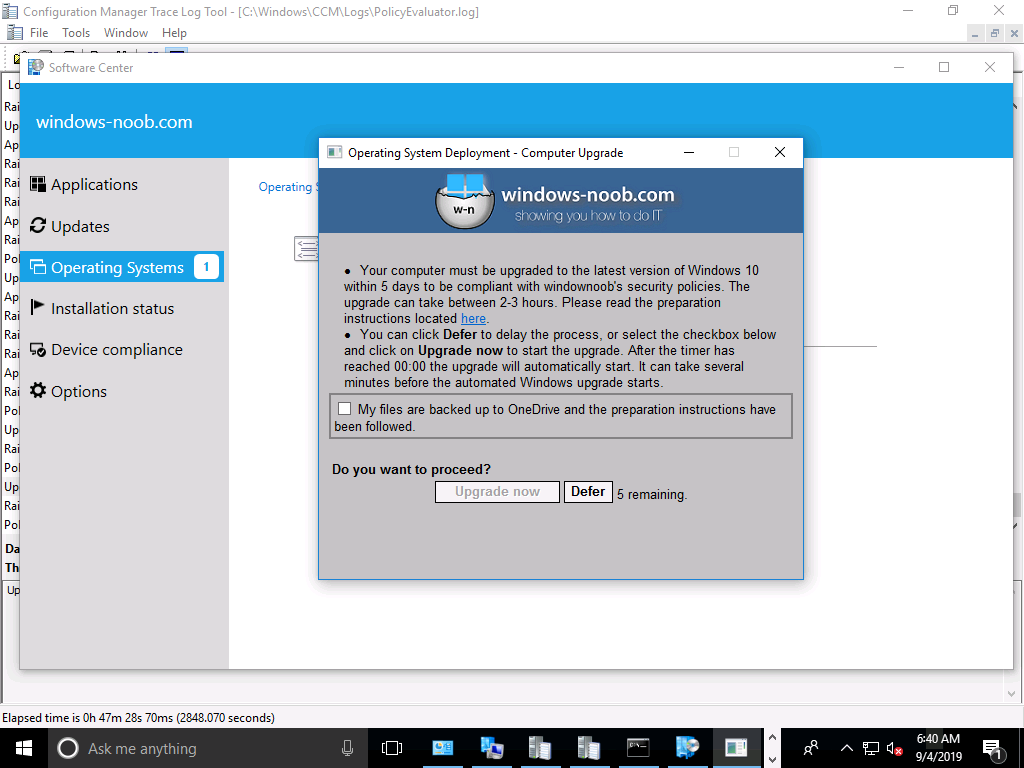
it will automatically time out if the user does nothing after 8 hours and will remove one deferral, if none are left the upgrade will start (if applicable), that's adjustable of course (in the HTA). Currently this is done in such a way that a user must be logged on, but you can change that behaviour if you wish (however, you might get some unhappy users...)
-
Computer is unknown after deployment
anyweb replied to Kevin79's question in Deploying Operating Systems
attach your logs here so I can see.. -
No network drivers are needed for hyperv virtual machines and osd.... Can you do me a favor and please create a new topic with your issue and details, and i'll respond there, this topic is all about installing SCCM, thanks
-
thanks for letting others know how to get them, also, be aware that there's a newer version of this guide here >
-
good work dave, if i ever have time to test this and/or the original method i'll verify this, thanks for posting your info.