anyweb
-
Posts
9182 -
Joined
-
Last visited
-
Days Won
366
Everything posted by anyweb
-
check this out https://social.technet.microsoft.com/wiki/contents/articles/3081.ad-cs-error-the-directory-name-is-invalid-0x8007010b-win32http-267.aspx
-
also, can you guys post screenshots of your issue(s) so we can try and figure out what the issue really is
-
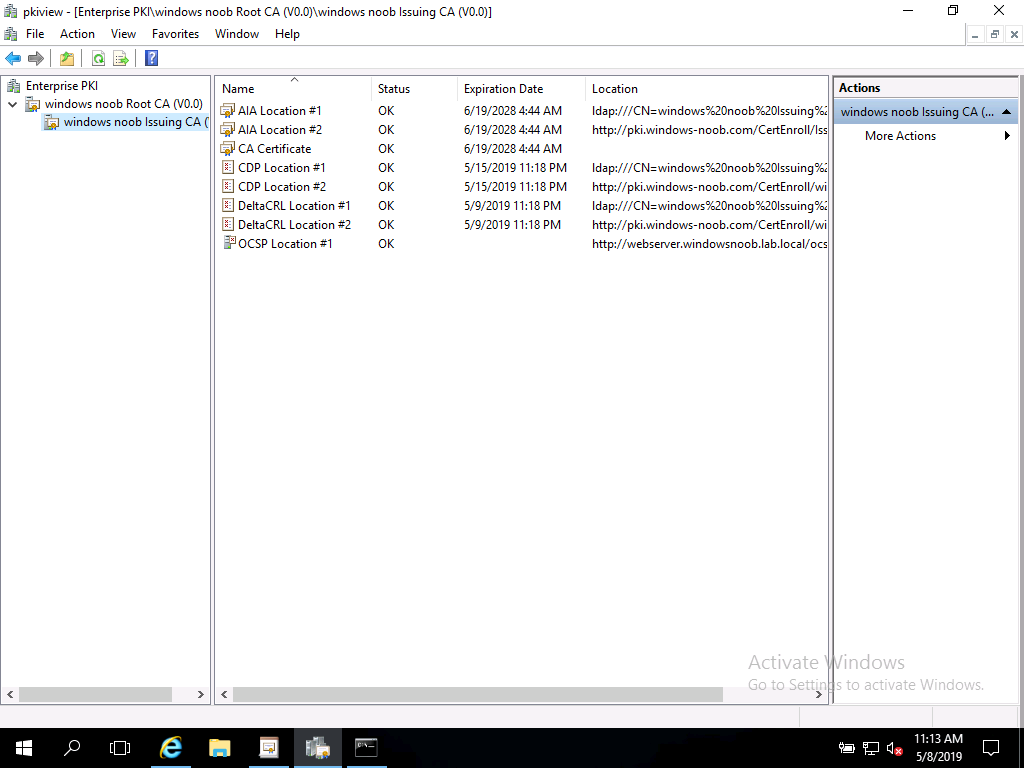
odd, i've just checked my current PKI lab and although my certs were expired (it's a lab and was shut down since march), using certutil -crl on the IssuingCA republished my certs and all is ok now. I've tested the PKI lab guides 3 separate times (I built 3 completely unique labs based on my own guides, eg: Lab #9, Lab #10, Lab #11) and all suceeded 100% as you can see below in my #11 lab... I would suggest you guys try again and verify each and every step as you go, also, take checkpoints (snapshots) between each part so that you can always go back if you make a mistake, lastly, the pki.windows-noob.com webserver URL, will of course be your 'own' url, and it must be reachable by the issuing CA and others or pkiview.msc will list a bunch of errors/failures. Troubleshooting Tip: in PKIview.msc, highlight an entry and click on the Refresh button in the ribbon, it should re-verify the highlighted item.

-
 they do but you still need to know if it's win7 or win10.... if you get time over teamviewer later i'd like to spend ten minutes with this to have a look
 -
can you please attach your cmupdate.log and configmgrprereq.log
-
hi, are you doing a clean install of SCCM 1902 or are you upgrading to 1902 ?
-
How can I customize the start menu in Windows 10 using Intune
anyweb replied to anyweb's topic in Microsoft Intune
great to hear it, thanks for the feedback- 20 replies
-
- 1
-

-
- windows 10 fall creators update
- intune
- (and 3 more)
-
if you get a chance to try my edit i'd be grateful, as regards the OOBE, you shouldn't have to answer questions at first login, those can be customized using an unattend.xml file
-
hmm i wish you'd use the edit i did above as that would confirm if it works on French Windows, what happens when you try with the code i added above ?. can i see what it outputs ?
-
the vbs version had some issues and it was vbs, so it's definitely better to use the PowerShell version, i've seen your issue before, I think the French spelling for Enterprise is Entreprise, correct me if i'm wrong, the line you need to edit is this one, number 360 If ($OperatingSystem -eq "Microsoft Windows 10 Enterprise") if you change it to this, it should work in your environment, please test and give me feedback if (($OperatingSystem -eq "Microsoft Windows 10 Enterprise") -or ($OperatingSystem -eq "Microsoft Windows 10 Entreprise")) cheers niall
-
i wouldn't advise you to start learning with old technology that is soon to be unsupported, instead use the Current Branch version of SCCM with SQL Server 2017. Here's a very detailed step-by-step guide to help you install it.
-
can you paste a screenshot of your failure please, also are you running it on the Standalone Offline Root CA
-
make sure you download the latest version of my script(s), there was a bug with a previous version where it wasn't getting reset. The PowerShell wrapper should reset the delete the values entirely prior to launching the task sequence. Below is the section of the wrapper.ps1 that does this fyi. # clean out registry settings for the next upgrade attempt. LogWrite "Starting: remove the UpgradeComputer reg keys so that the next upgrade cycle can start fresh." $regpath = "HKCU:\Software\$CompanyName\" $regkey = "UpgradeComputer" DeleteRegKey $regpath $regkey $regpath = "HKCU:\Software\$CompanyName\" $regkey = "NumberOfUpgradeDefers" DeleteRegKey $regpath $regkey $regpath = "HKCU:\Software\$CompanyName\" $regkey = "Timer" DeleteRegKey $regpath $regkey LogWrite "Starting: Exiting wrapper with exit code 0 and about to start the task sequence now."
-
Altaro has published a new e-book which focuses on Windows Admin Center - a versatile, free management tool from Microsoft. It’s written by Eric Siron and full of informative information on a superb free tool from Microsoft. Get your copy here.
-
i wonder could this be related https://support.microsoft.com/en-us/help/4500232/management-points-fail-to-reinstall-in-configuration-manager
-
SCCM 1806 To Manage Third Party Updates
anyweb replied to Sourabh's topic in Configuration Manager 2012
id recommend you look at Patch My PC, here's a guide I wrote -
good luck with the book, but next time, do ask first...
-
yes it's possible but you'll probably have issues with data transfer from the laptop as laptops are not exactly fast, unless of course it's using NVME discs...
-
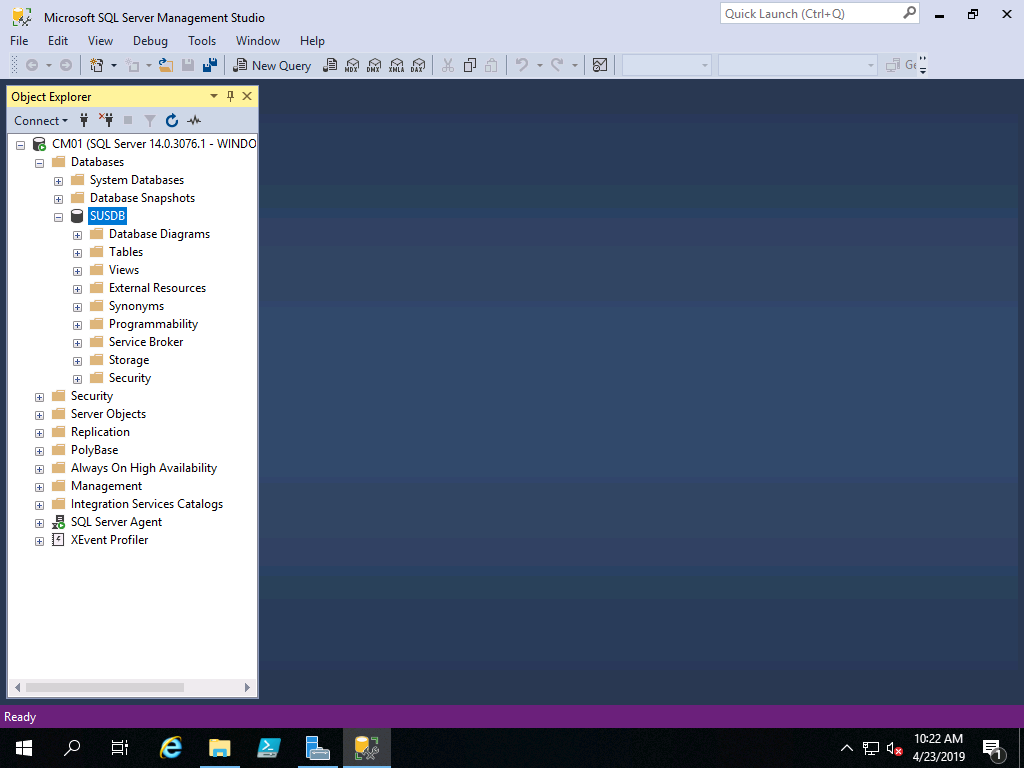
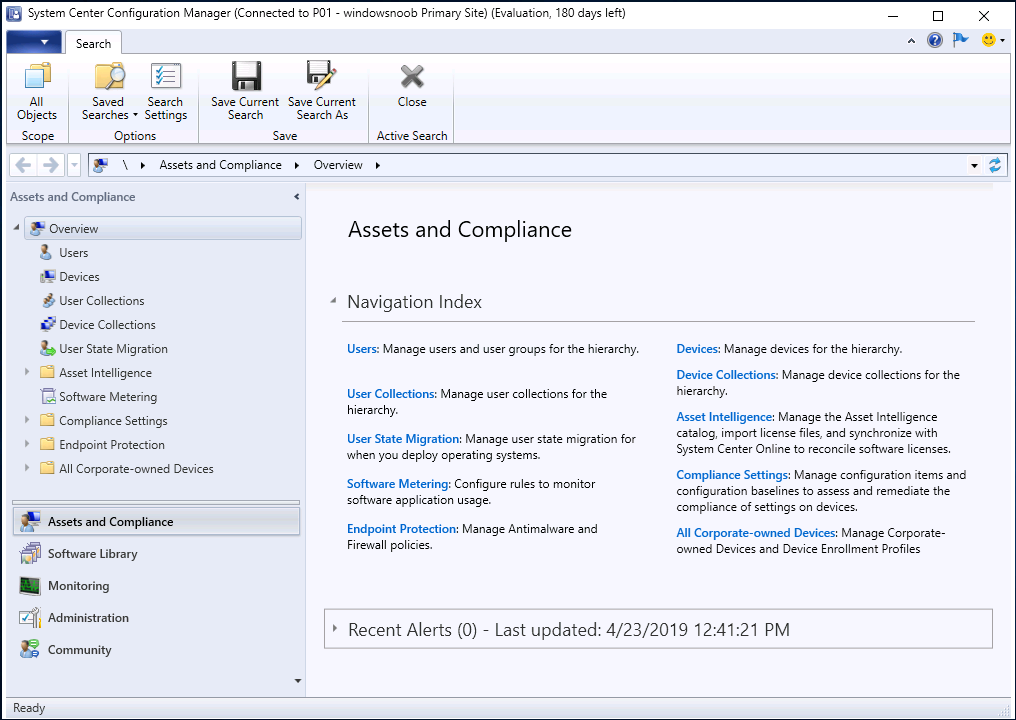
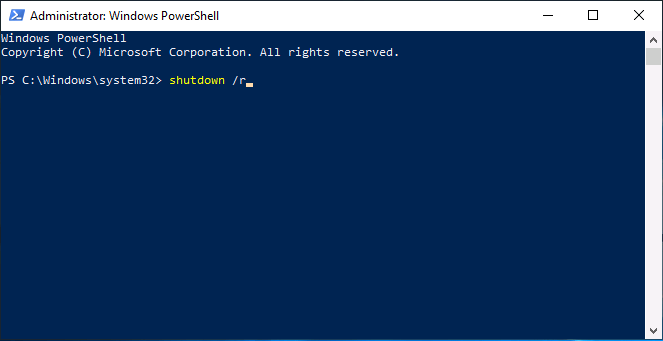
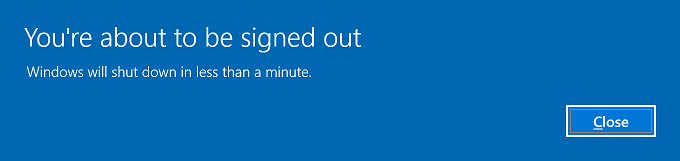
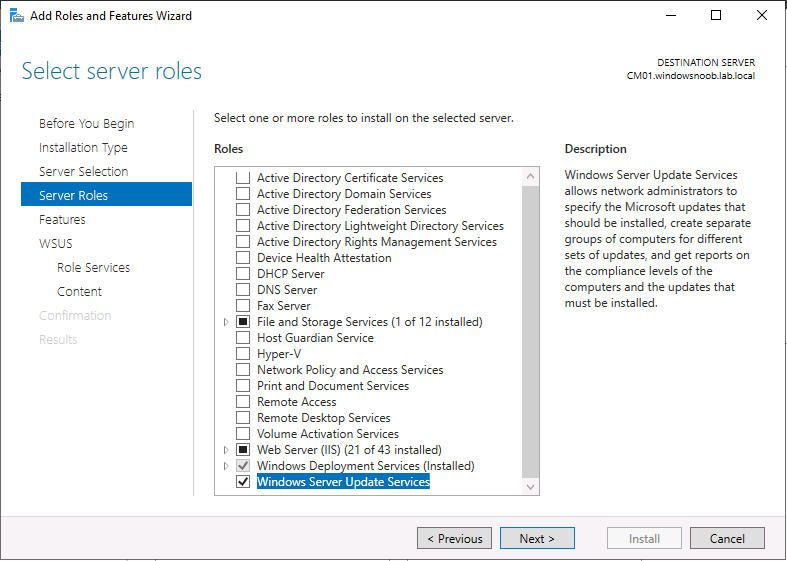
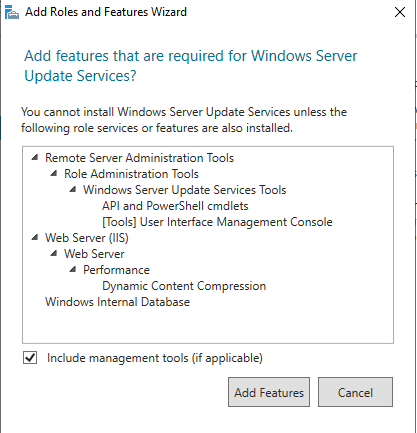
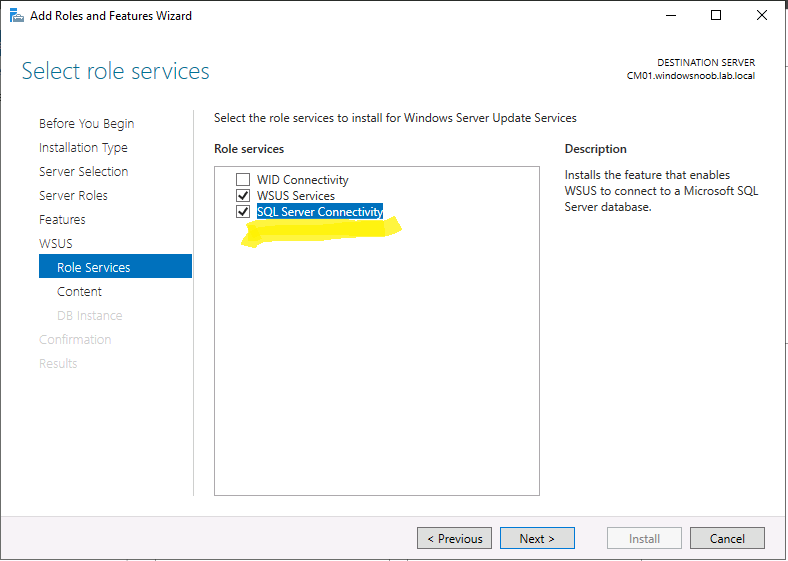
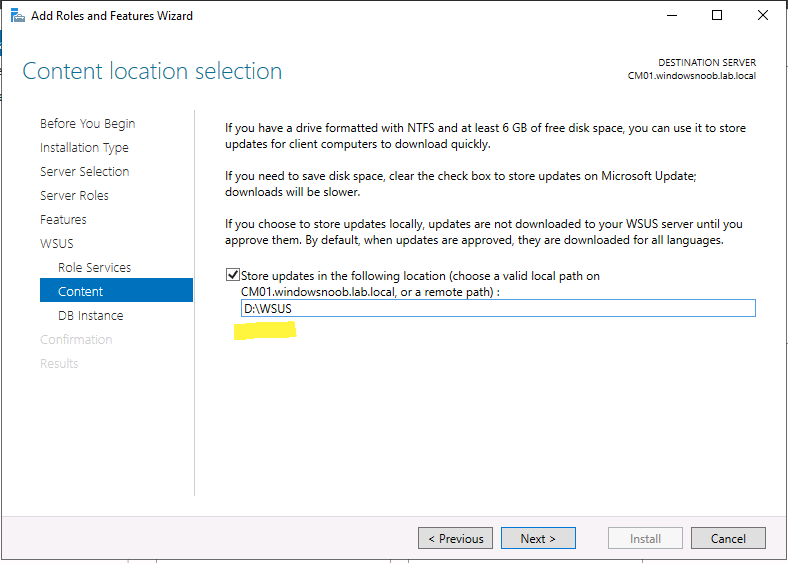
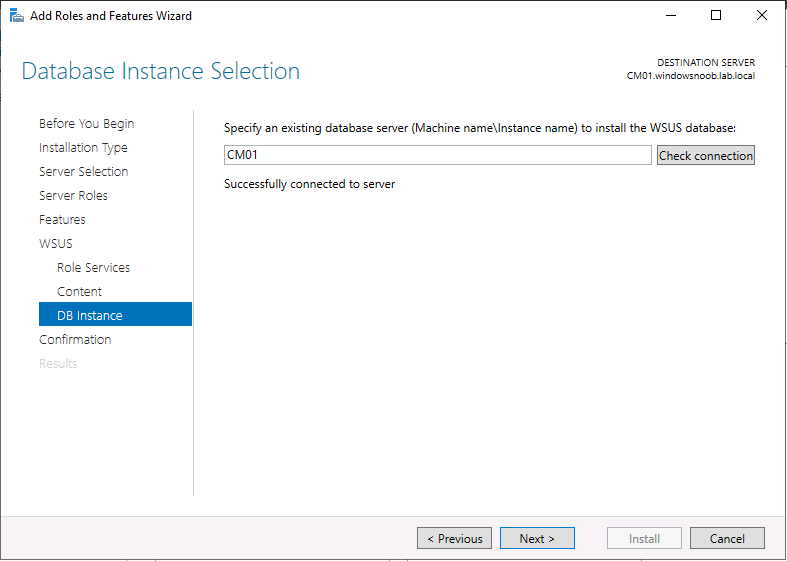
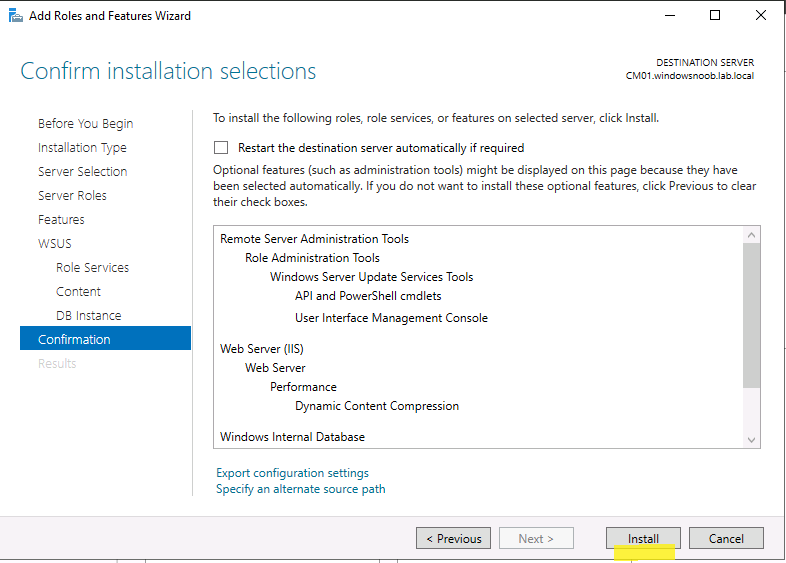
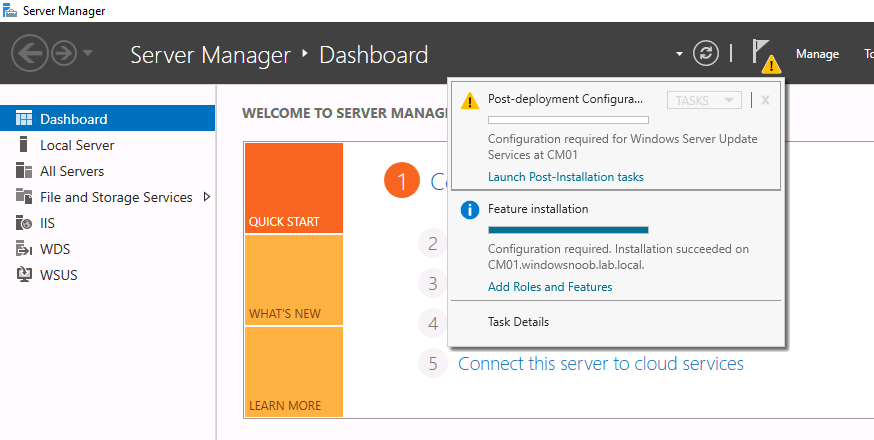
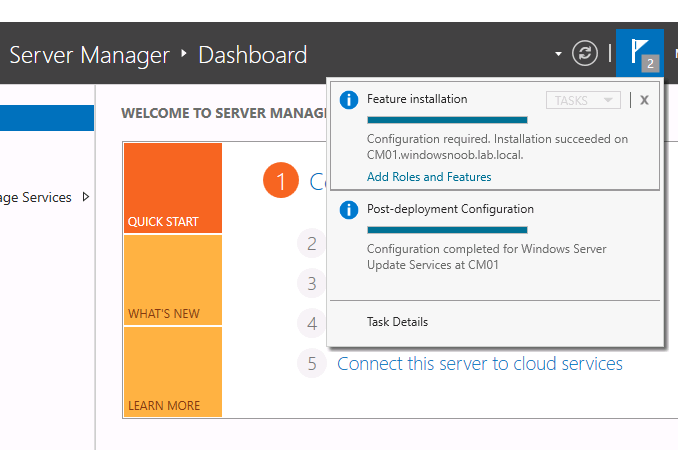
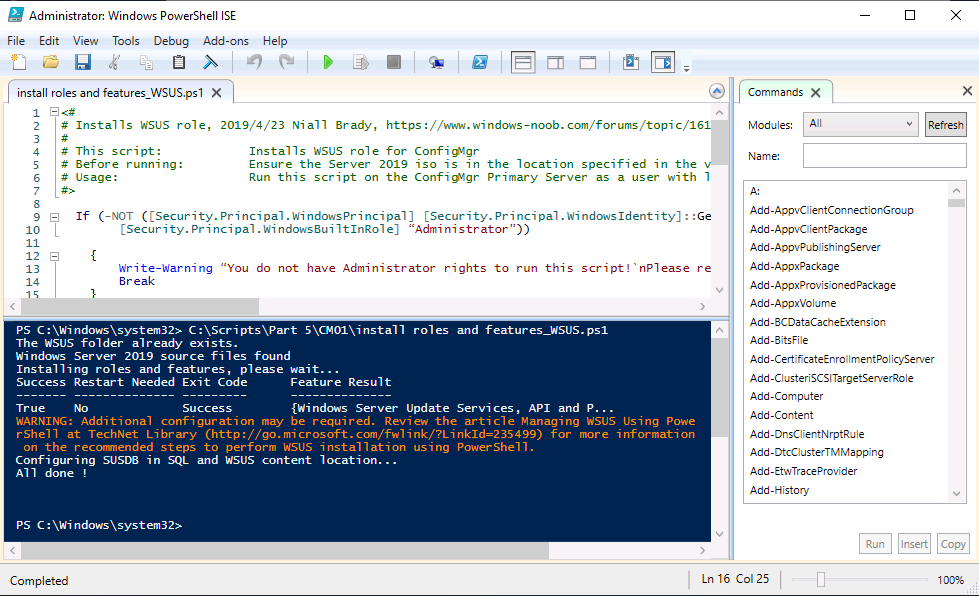
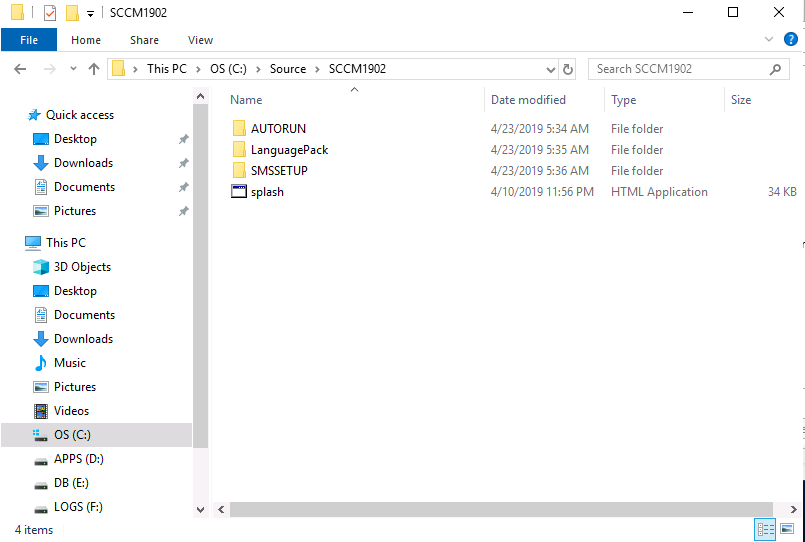
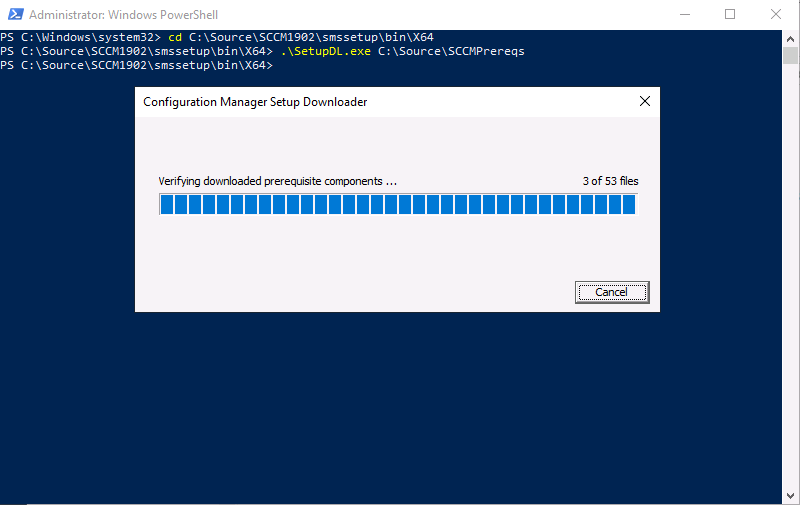
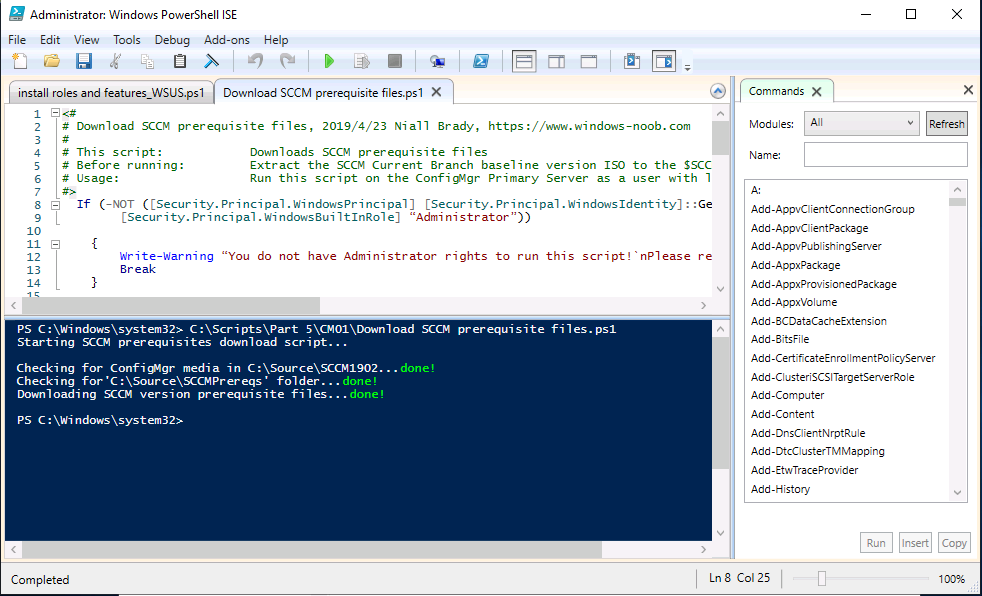
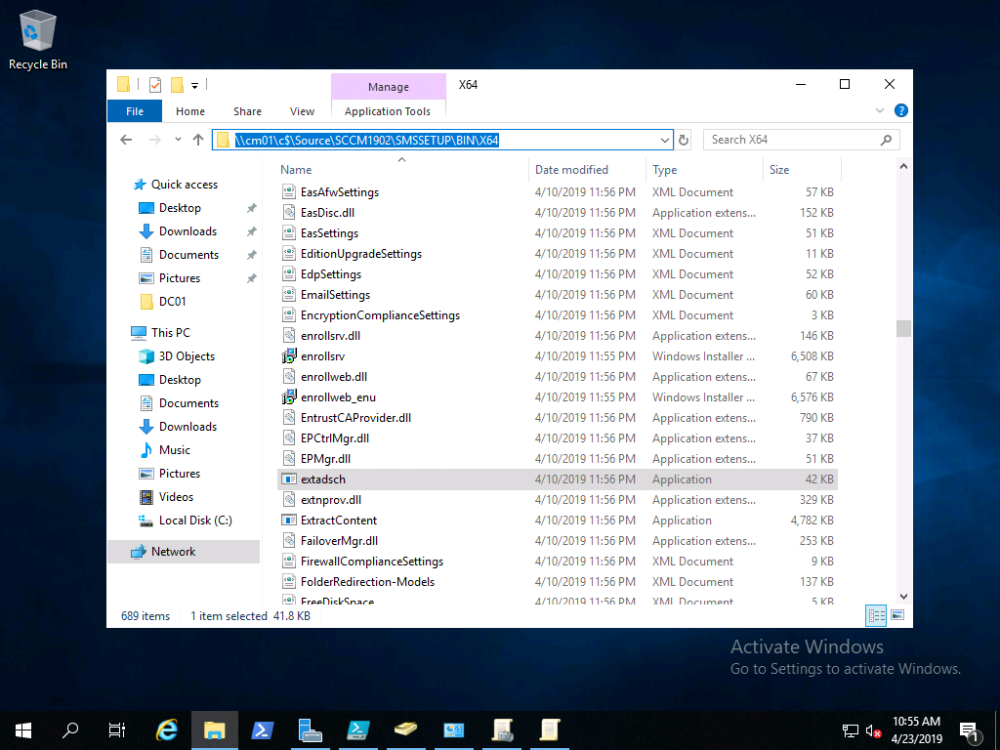
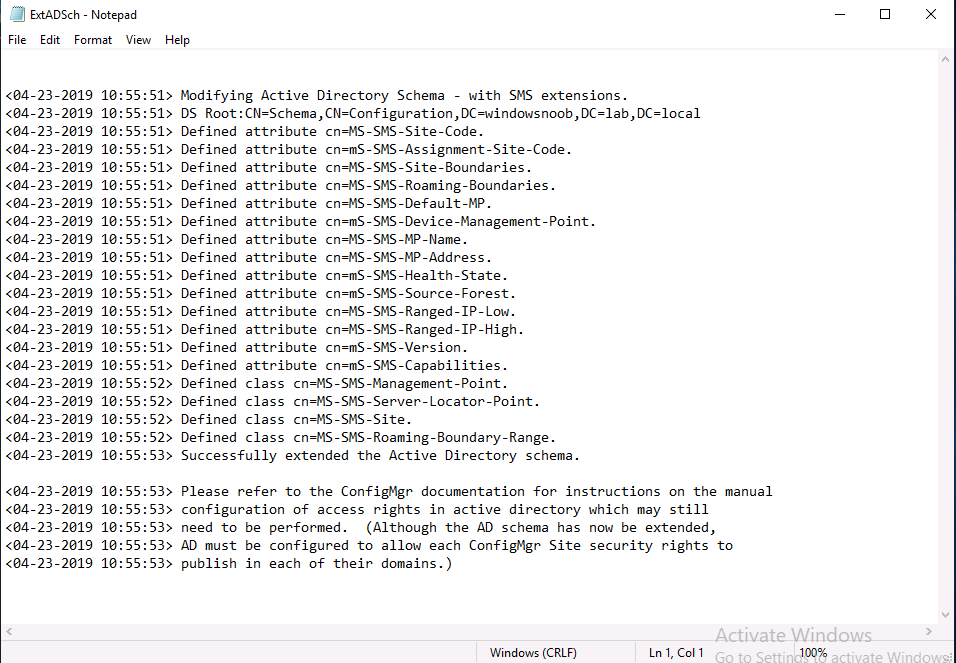
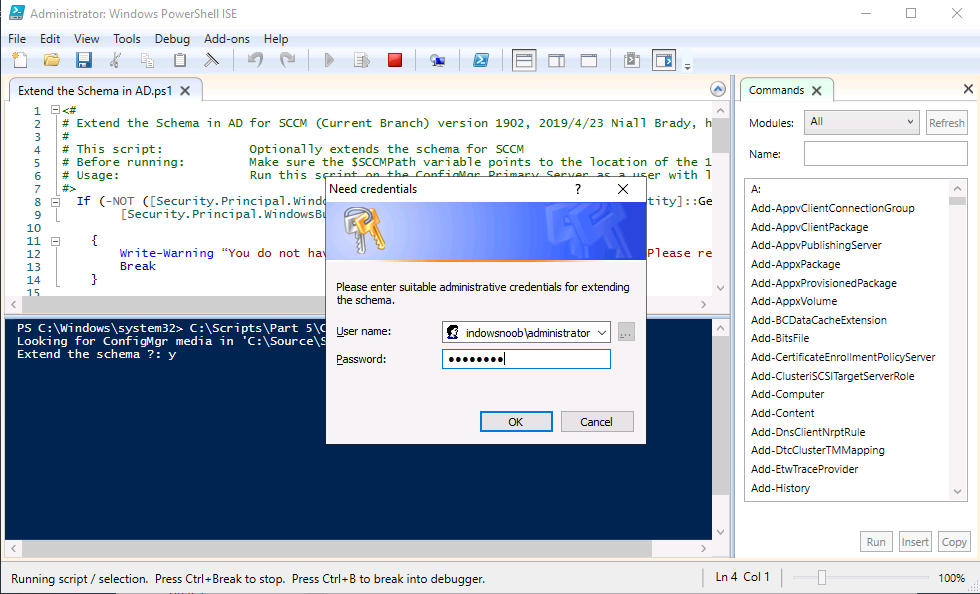
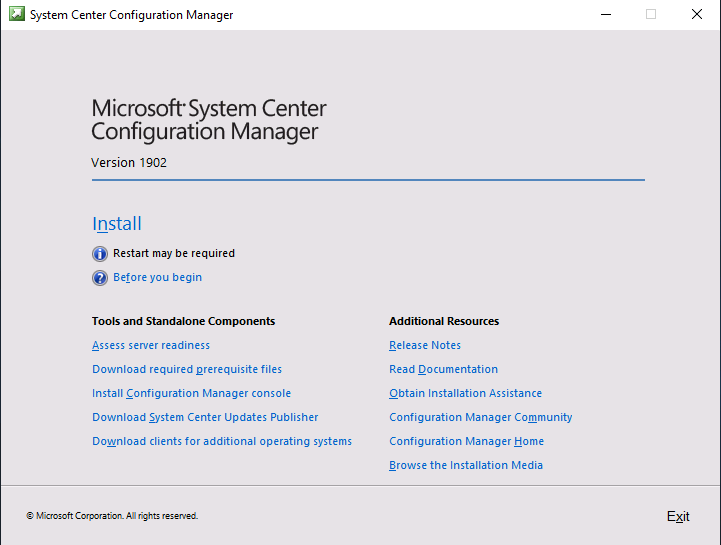
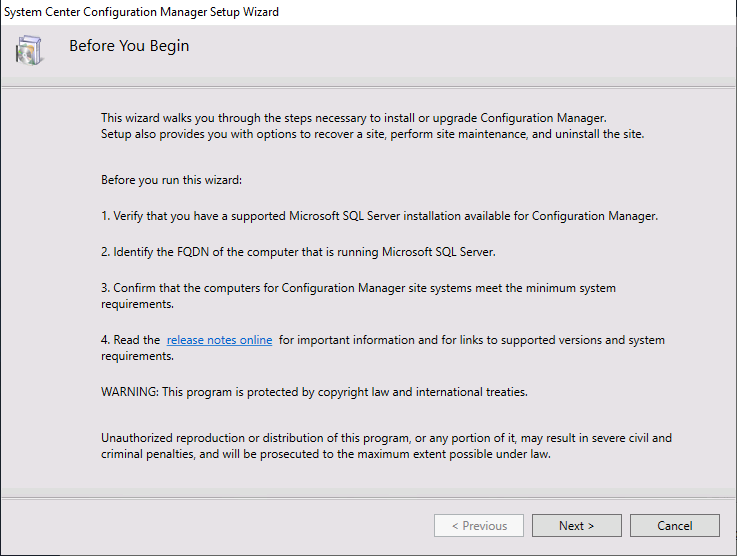
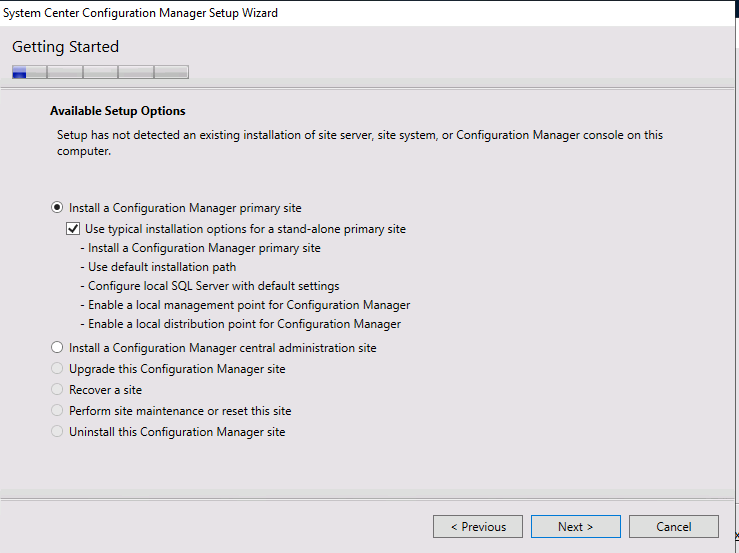
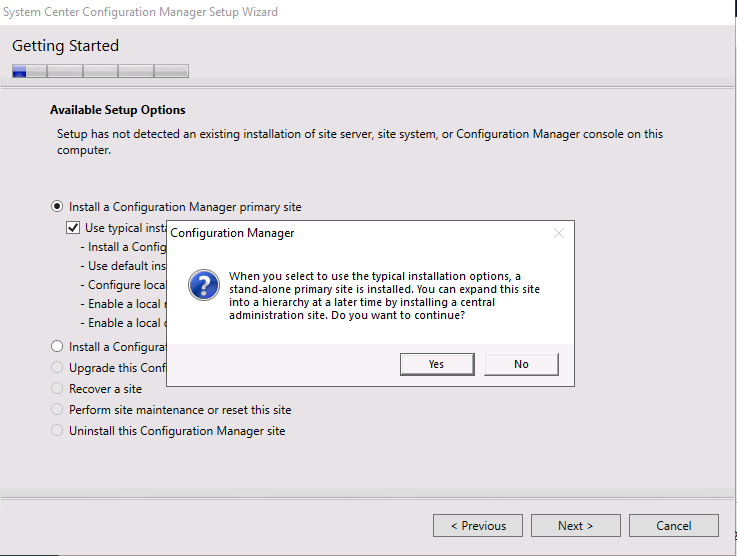
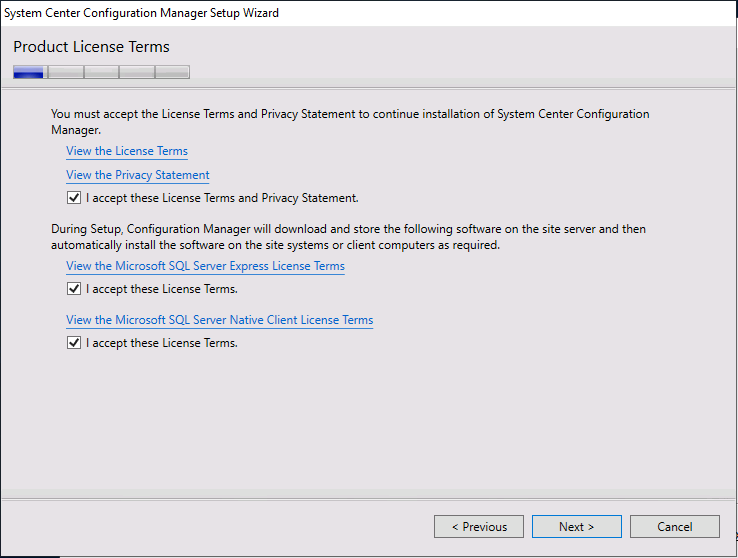
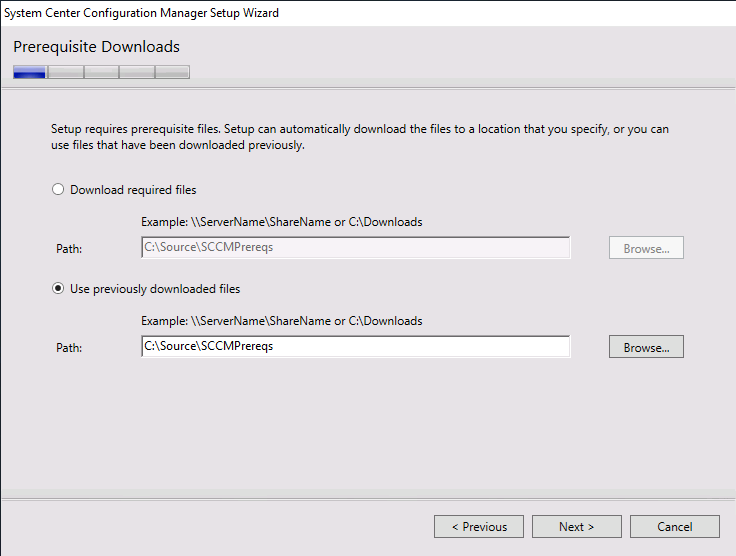
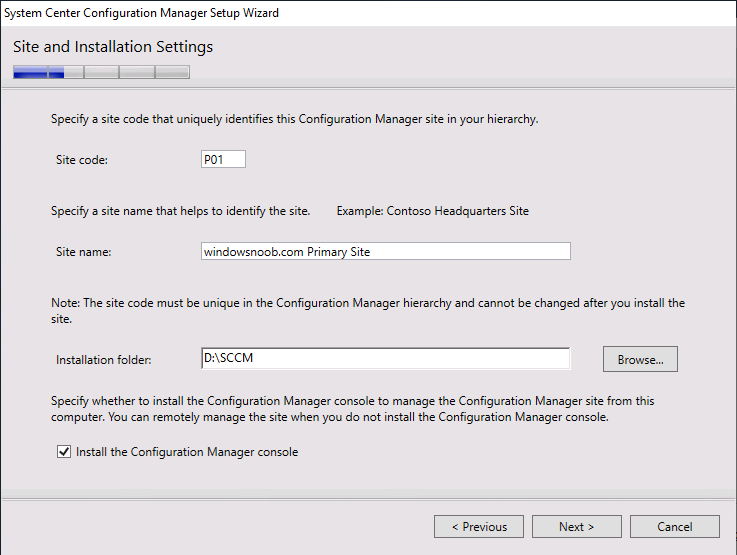
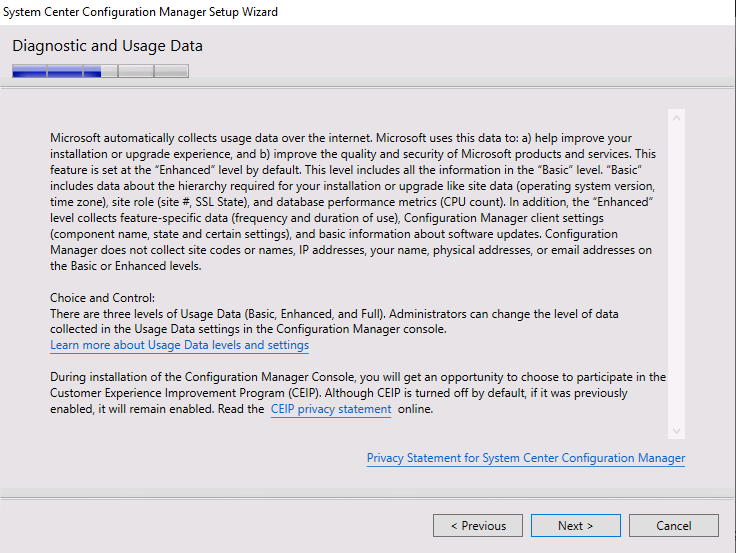
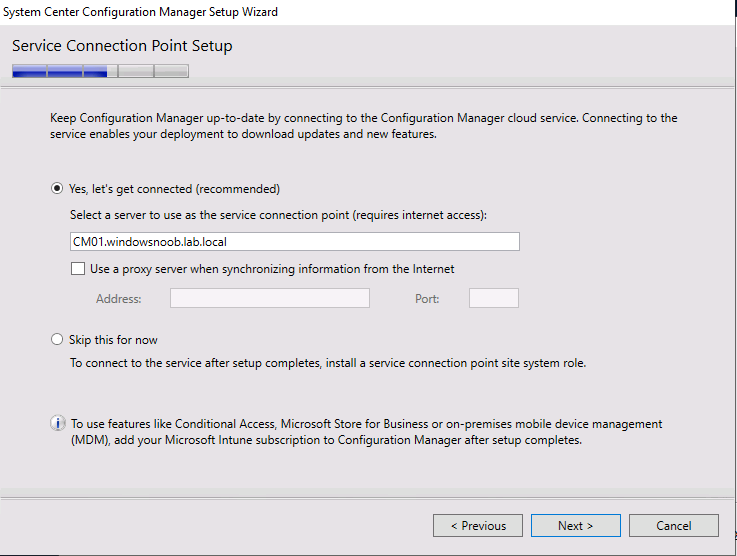
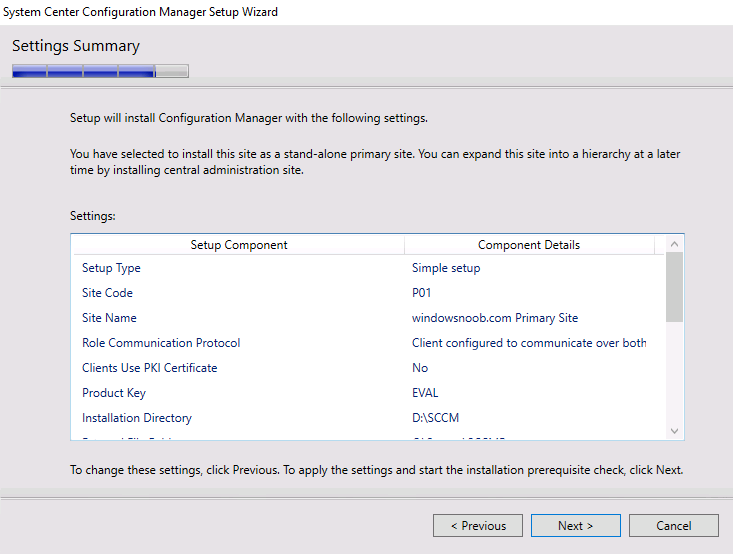
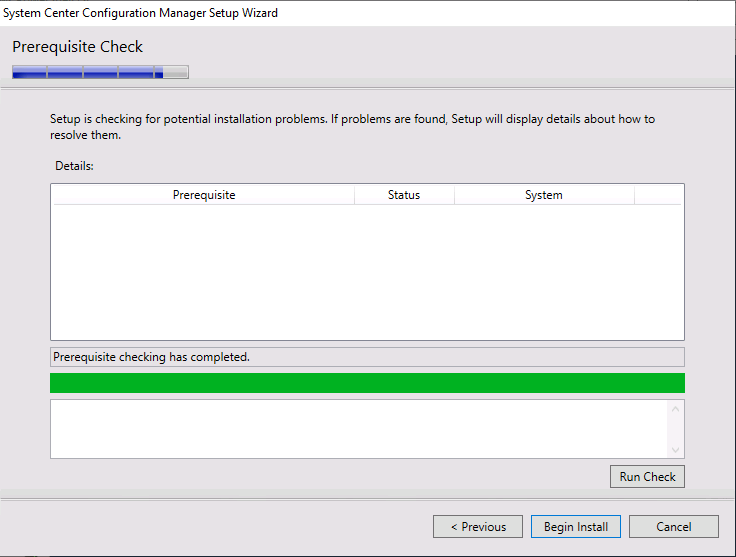
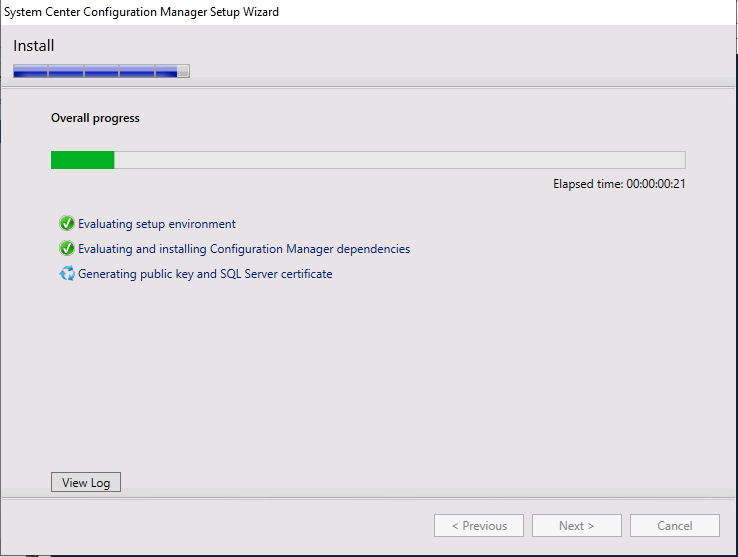
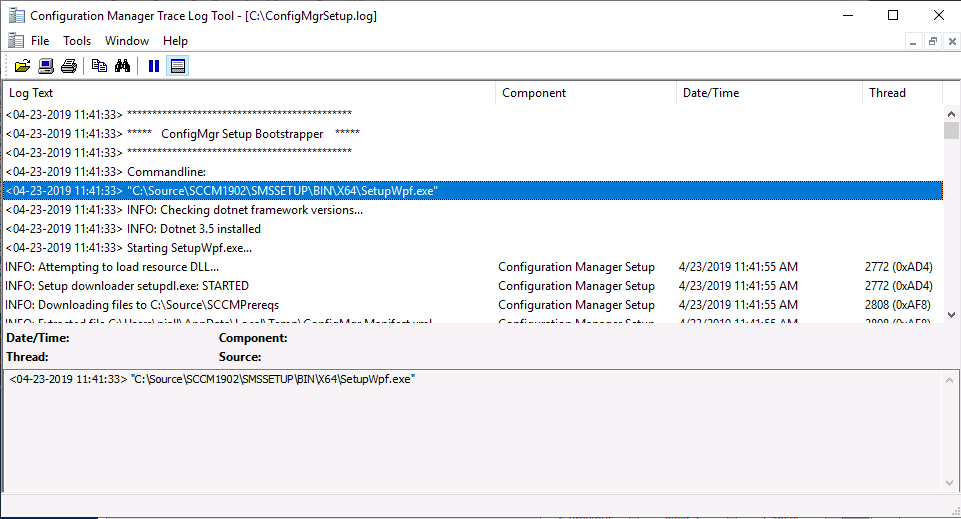
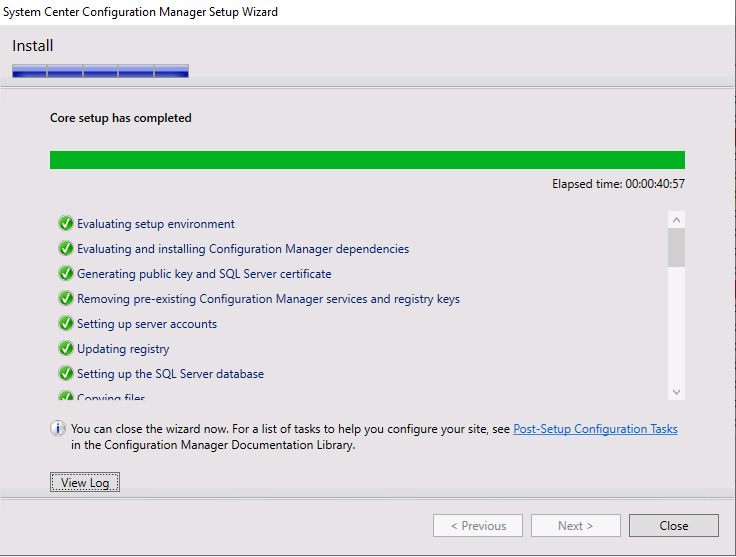
Introduction This multi-part guide will show you how to install the latest baseline version of Configuration Manager from Microsoft. The latest available baseline version is System Center Configuration Manager (Current Branch) version 1902 as of April the 10th 2019. I blogged how to upgrade to 1902 here. This guide is aimed a new installations of SCCM. Baseline media is used to install new ConfigMgr sites or to upgrade from supported versions, for more information about baseline media please see my blog post here. This series is broken down into the following parts:- Part 1 - Get the lab ready, configure ADDS Part 2 - Join CM01 to Domain, add users, create the Systems Management container, delegate permission Part 3 - Role and Feature installation, installation of WDS and ADK Part 4 - Configure and install SQL Server 2017 Part 5 - Configure and install SCCM 1902 Current Branch (This part) Part 6 - Create device collections Part 7 - Configuring discovery Part 8 - Configuring boundaries You can use this multi-part guide to get a hierarchy up and running on Windows Server 2019 using SQL Server 2017. The concept behind this is to guide you through all the steps necessary to get a working Configuration Manager Primary site installed (for lab use) using manual methods or automated using PowerShell. This gives you the power to automate the bits that you want to automate, while allowing you to manually do other tasks when needed. You decide which path to take. PowerShell knowledge is desired and dare I say required if you are in any way serious about Configuration Manager. I will show you how to do most steps via two methods shown below, it's up to you to choose which method suits you best but I highly recommend automating everything that you can, using PowerShell. Method #1 - Do it manually Method #2 - Automate it with PowerShell Downloads The scripts used in this part of the guide are available for download here. Unzip to C:\Scripts. The scripts are placed in the corresponding folder (Part 1, Part 2 etc) and sorted into which server you should run the script on (DC01 or CM01). Scripts.zip Step 1. Restart the Configuration Manager Primary Server Note: Perform the following on the Configuration Manager server (CM01) as a Local Administrator Open an administrative command prompt and issue the following command: shutdown /r This will restart the server, which is a good idea after having just installed SQL Server 2017. Step 2. Install the WSUS role Note: Perform the following on the Configuration Manager server (CM01) as a Local Administrator Now that SQL server is installed (and the server is rebooted, you did reboot it didn't you ?), you can utilize that SQL Server installation for the Windows Server Update Services (WSUS) database instead of the default WID (Windows Internal Database). To install WSUS and configure it to use the SQL server database instead of the Windows Internal Database, do as follows: Method #1 - Do it manually Using Roles and Features in Server Manager, add the Windows Server Update Services role. When prompted to add features for the WSUS role, click on Add features. When prompted for the Role Services, remove WID Connectivity by unchecking that box, and add SQL Server Connectivity instead. When prompted for Content location, enter a valid path When prompted for Database Instance Selection, enter the server name and click on Check Connection On the Confirm Installation Selections screen, click on Install. and finally click Close. After installing the WSUS role, in Server Manager, click on the yellow exclamation mark and choose Launch Post Installation Tasks. When the tasks are completed The WSUS database (SUSDB) can now be observed using SQL Server SSMS. Method #2 - Automate it with PowerShell Browse to the location where you extracted the scripts, C:\scripts. Start Windows PowerShell ISE as administrator, open the Install roles and features_WSUS.ps1 script, edit the $servername variable and replace CM01 with the ServerName your are installing ConfigMgr on (SQL server). Note: Make sure to have your Windows Server 2019 media in the path referred to by $Sourcefiles. 1. Extract the scripts to C:\Scripts on CM01 and load the Install roles and features_WSUS.ps1 script located in C:\Scripts\Part 5\CM01 2. Edit the variables [lines 22-25] as desired before running. 3. Start Windows PowerShell ISE as Administrator and run the script by clicking on the green triangle. Step 3. Download and extract the ConfigMgr content Before installing System Center Configuration Manager version 1902 you'll need to download the content as it is a baseline version. Normally you should download baseline versions of the ConfigMgr media from Microsoft's Volume licensing Service Center (VLSC) site for use in production or from MSDN (or the Microsoft Evaluation site) for use in a lab. Note: The SCCM 1902 Current Branch media is not yet available on MSDN or VLSC. When the new baseline media is released I'll update this note. In the meantime you can download the baseline media ISO from the Microsoft evaluation site here. This will be the same media that will make it's way to MSDN and VLSC. Once downloaded, extract the media to C:\Source\SCCM1902. Step 4. Download the ConfigMgr Prerequisites Note: Perform the following on the Configuration Manager server (CM01) as a Local Administrator You can download the prerequisites during ConfigMgr setup or in advance. As you'll probably want to install more than one copy of ConfigMgr (one lab, one production) it's nice to have the prerequisites downloaded in advance. Method #1 – Do it manually To do that, open an administrative PowerShell command prompt and navigate to the following folder: cd C:\Source\SCCM1902\smssetup\bin\X64 Run the following line .\SetupDL.exe C:\Source\SCCMPrereqs Note: You can find the CMTrace executable in the SMSSetup Tools folder in the location that you extracted the ConfigMgr media, eg: C:\Source\SCCM1902\SMSSETUP\TOOLS. Method #2 – Automate it with PowerShell To automate the download of the prerequisites simply follow the instructions and run the Install SCCM.ps1 Powershell script in Step 4 or use the Download SCCM prerequisite files.ps1. Step 5. Extend the Schema Note: Perform the following on the Domain controller server (DC01) as Administrator. You do not have to extend the Active Directory schema if it was already extended for Configuration Manager previously. Method #1 – Do it manually To do that, on the Active Directory domain controller (DC01), open Windows File Explorer and browse to the network path of the ConfigMgr server where you've copied the SCCM source, eg: \\cm01\c$\Source\SCCM1902\SMSSETUP\BIN\X64 In that folder, locate extadsch.exe and right click, choose Run as Administrator. After the schema has been extended for SCCM, you can open C:\ExtAdsch.log on the root of C:\ on the server you are performing this on, and review the success or failure of that action. Method #2 – Automate it with PowerShell To automate extending the schema, use the Extend the Schema in AD.ps1 PowerShell script. Run the script on the CM01 server using credentials that have the ability to extend the schema. Step 6. Install SCCM Current Branch (version 1902) Note: Perform the following on the ConfigMgr server (CM01) as Administrator. Method #1 – Do it manually Note: Please restart the server before beginning the installation. Open an administrative command prompt and issue the following command: shutdown /r After restarting the Configuration Manager server (CM01), open Windows File Explorer and browse to the network path of the ConfigMgr server where you've copied the SCCM source, eg: C:\Source\SCCM1902\ In that folder, double click on splash.hta. The Installer appears, click on Install. At the Before You Begin screen click Next. In the Available Setup Options screen, place a checkbox in "Use typical Installation options for a stand alone primary site" When prompted if you want to continue click Yes. On the Product Key screen enter your Key (or choose the eval option), and set the Software Assurance Date (optional), if you want to change from Eval to Licensed later see this post. On the Product License Terms screen, select the 3 available options and click Next. On the Prerequisite Downloads screen, select the first option and specify C:\Source\SCCMPrereqs as the folder to download the prerequisite files. Click Next to start the download. On the Site and Installation Settings screen, enter your chosen site code (eg: P01), your site name and the path where you want to install ConfigMgr. On the Diagnostics and Usage data screen, click Next. On the Service Connection Point Setup screen, enter your choices and click Next. On the Settings Summary, review your choices and when happy with them click Next. On the Prerequisite Check screen click Begin Install when ready or review any warnings/errors as appropriate. Note: If you get an warning about TLS 1.2 see this blogpost and verify you've downloaded the latest version of my Install SQL Server 2017.ps1 PowerShell script dated 2019/4/28. If you also see a warning about the site server not being able to publish to the System Management container, you can safely ignore that as long as you did indeed delegate permissions and create the system management container. I think it's a bug and I'm getting verification from the Product Group. The installation starts... During the installation, click on View Log (opens C:\ConfigmgrSetup.log) to review the installation progress (Tip: associate logs file with CMTrace to review the installation details live) and when the installation is done, click Close. Method #2 – Automate it with PowerShell Open an administrative command prompt and issue the following command: shutdown /r This will restart the server (which is a good idea as you might get red-herring messages about SQL server settings otherwise). To automate the installation of SCCM 1902 (including all the previous steps above), simply run the Install SCCM.ps1 PowerShell script. Run the script on the CM01 server and when prompted to extend the schema, enter your choice (yes or no) and if you choose to extend the schema, provide suitable credentials when prompted (Domain Administrator will do). Once done with the schema extension, the installation will continue (as shown below). and once installed you can launch the console. Success ! Please join me in Part 6 where you'll create some device collections for Windows 10 OSD and Windows As A Service.


-
hi there, please use the below guide for the SCCM 1902 installation, you can find it and many other guides I've done here cheers niall
-
good work, thanks for the updates and the fix for that scenario !
-
MBAM on SCCM Server
anyweb replied to nhottinger's topic in System Center Configuration Manager (Current Branch)
i don't think so, but if you are in doubt ask your Microsoft TAM for advice. and lastly... The recommended configuration is to install the Administration and Monitoring features on one or more Microsoft BitLocker Administration and Monitoring servers, and install Microsoft System Center Configuration Manager 2007 or Microsoft System Center 2012 Configuration Manager on a separate server. from https://docs.microsoft.com/en-us/microsoft-desktop-optimization-pack/mbam-v2/deploying-mbam-with-configuration-manager-mbam2 -
MBAM on SCCM Server
anyweb replied to nhottinger's topic in System Center Configuration Manager (Current Branch)
depends on the size of the organization, but yes of course it can be installed on the same server, if you have a large number of clients though it's recommended you separate it onto it's own server -
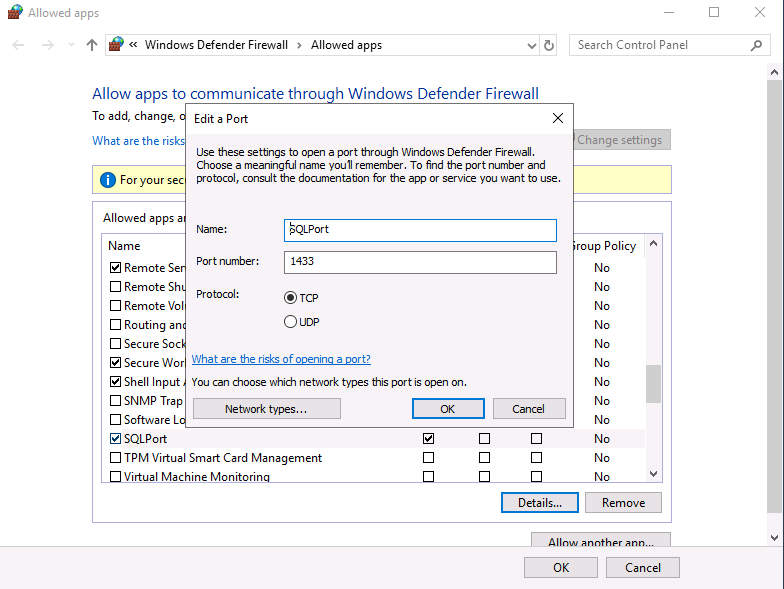
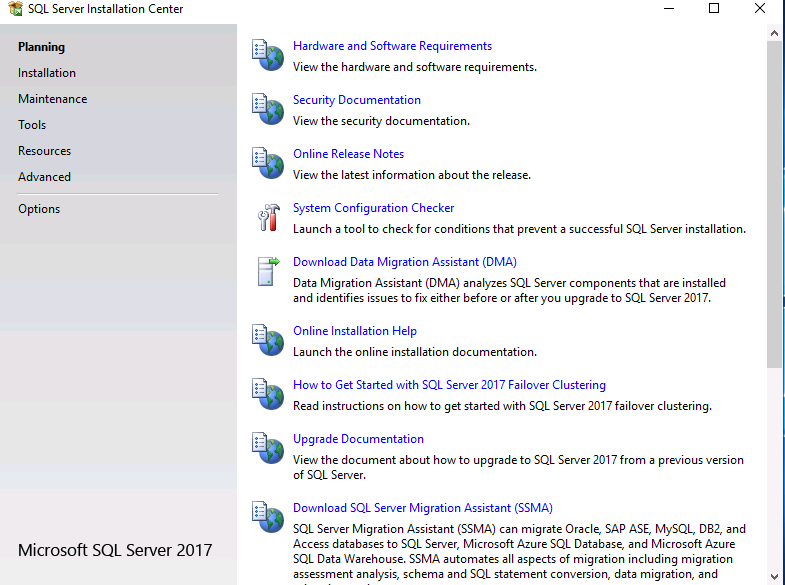
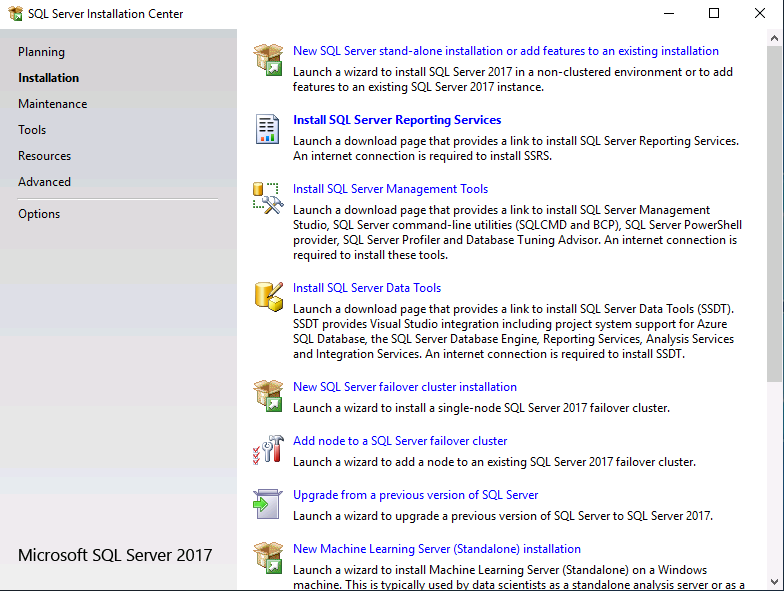
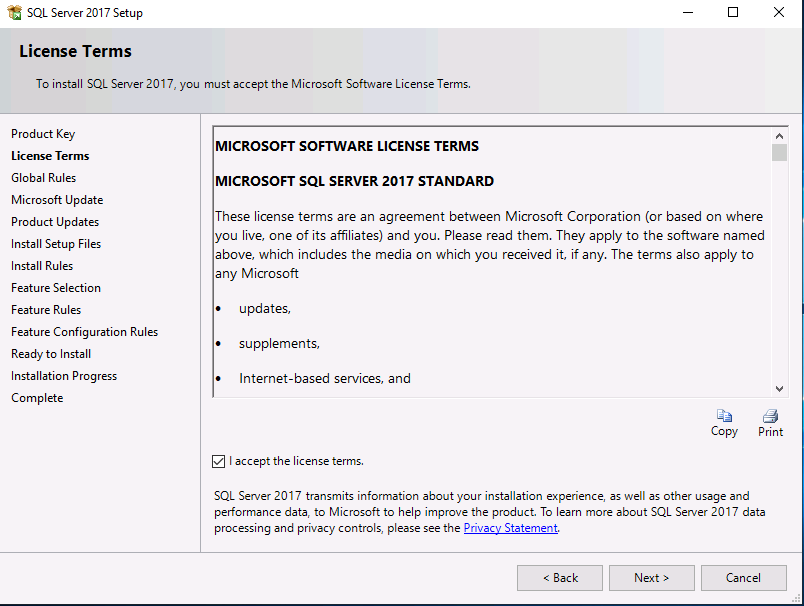
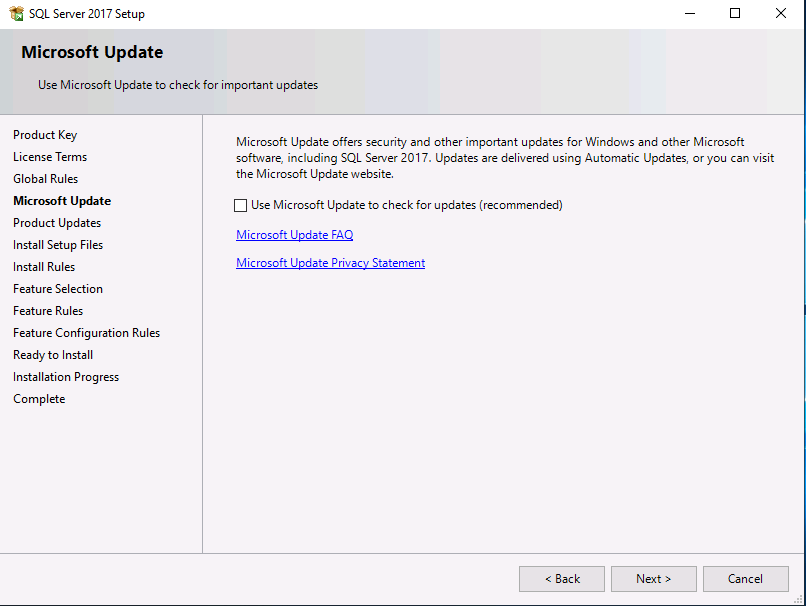
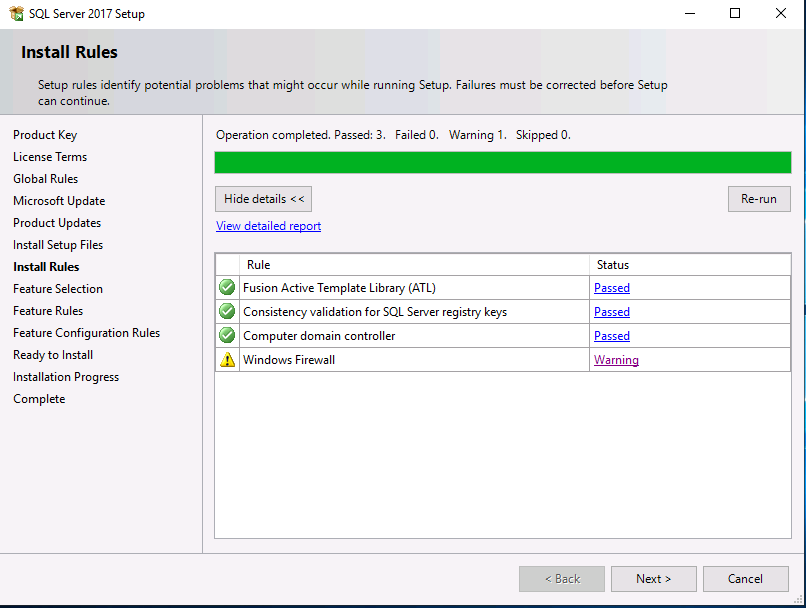
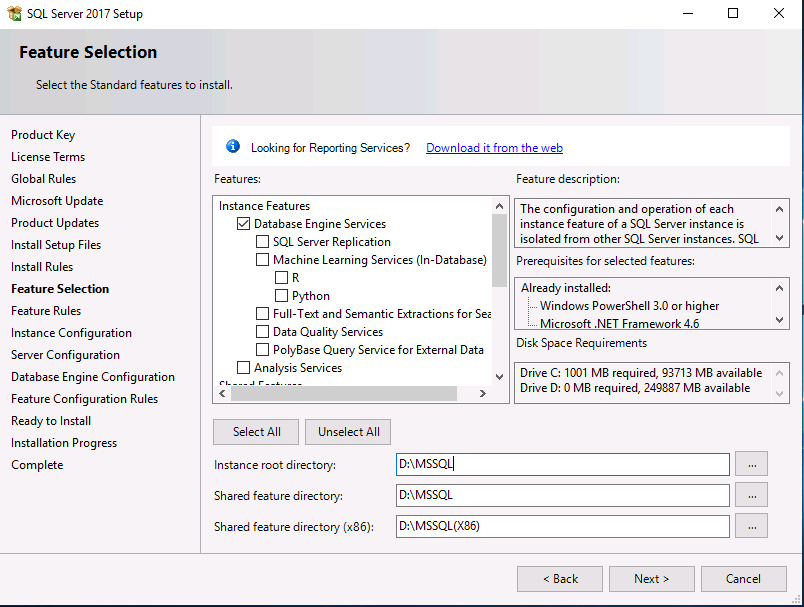
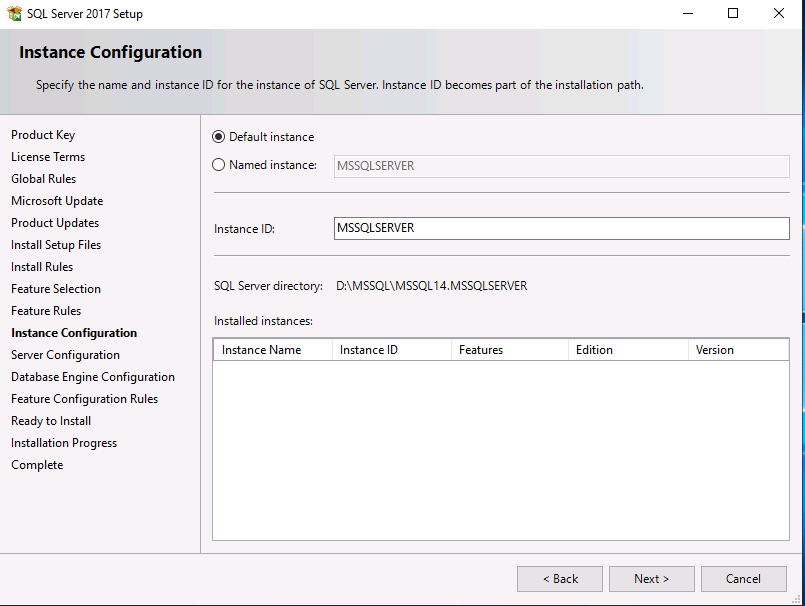
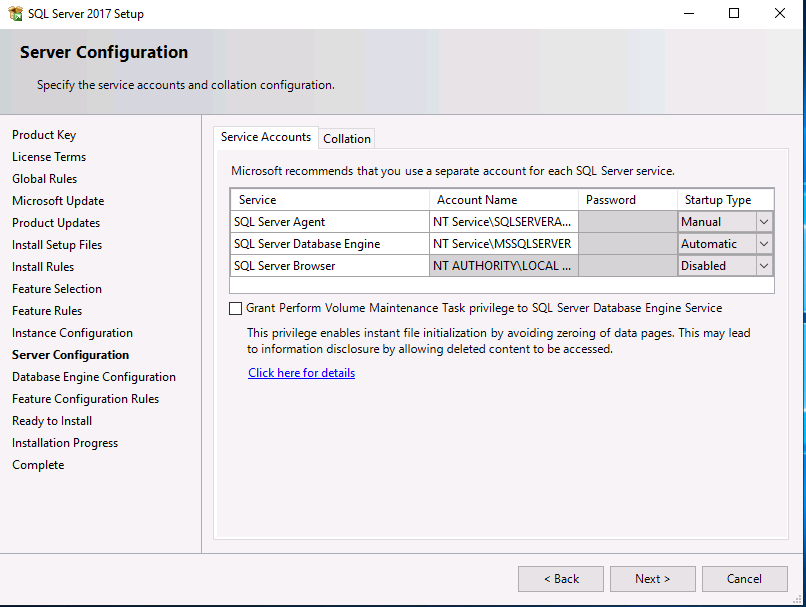
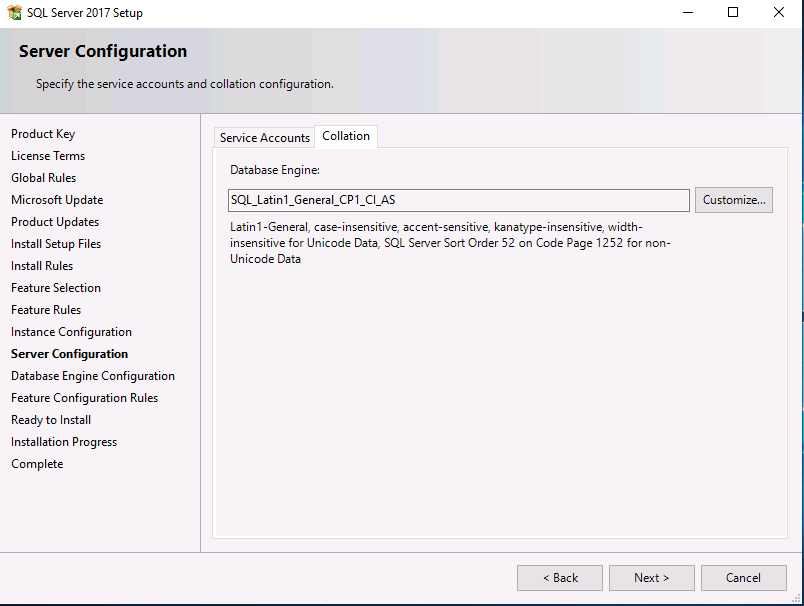
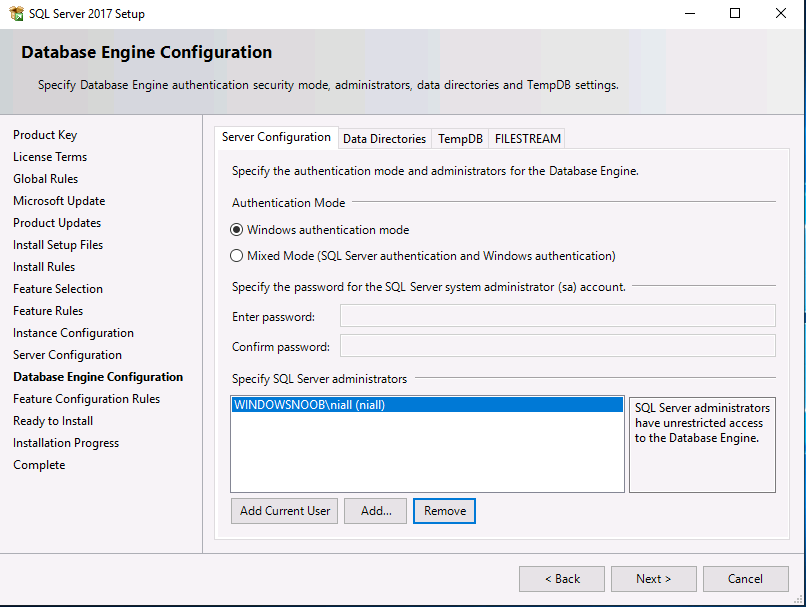
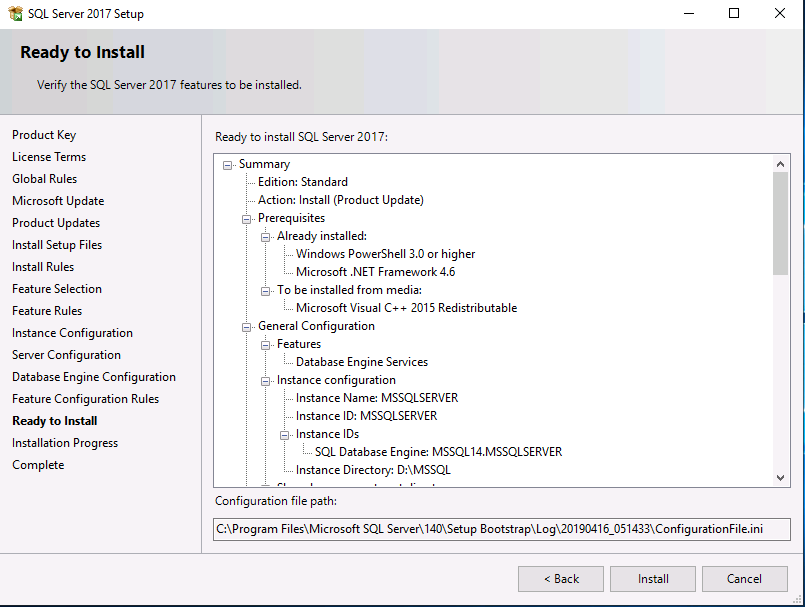
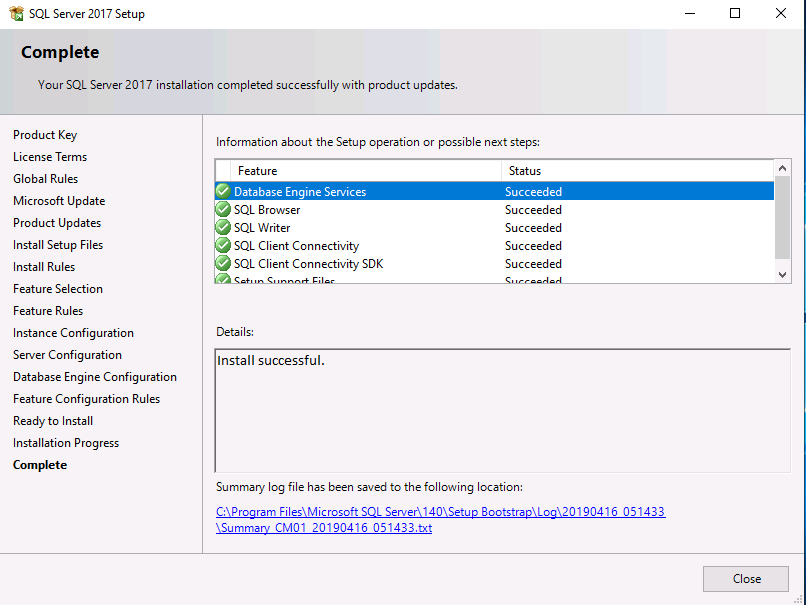
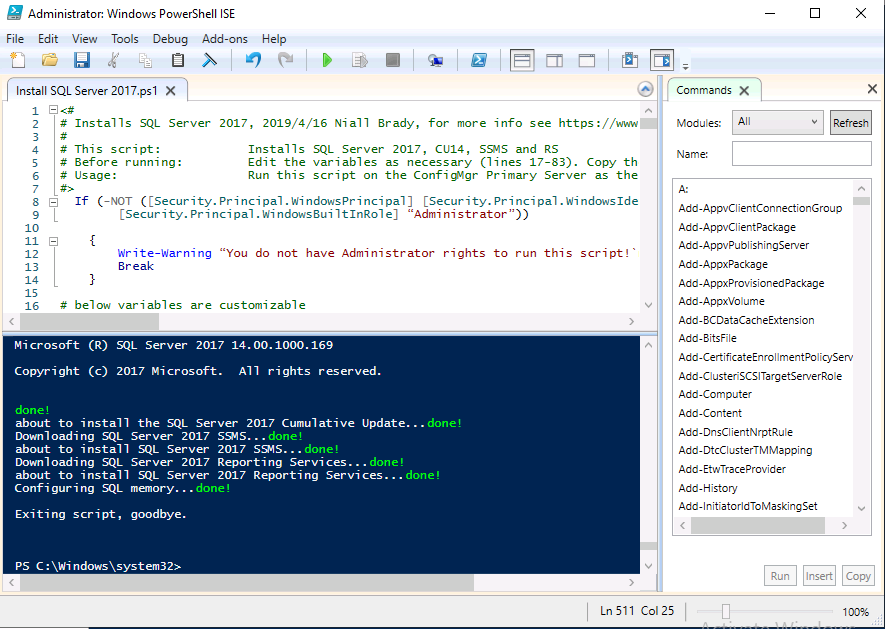
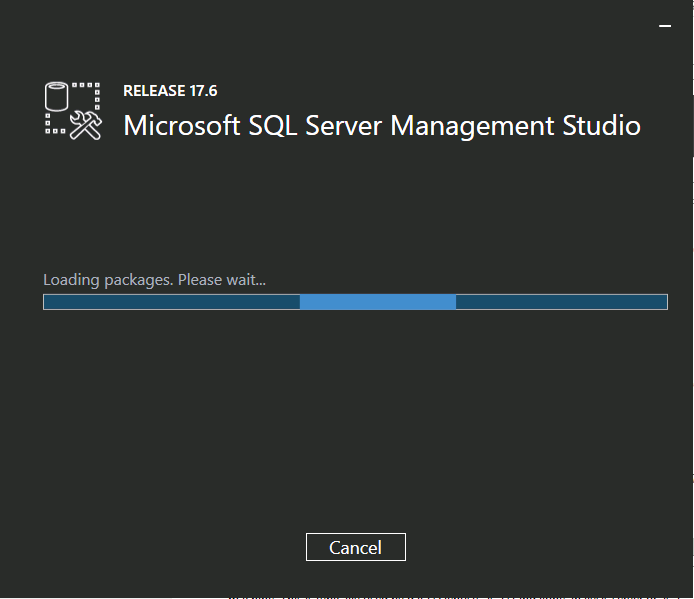
Introduction This multi-part guide will show you how to install the latest baseline version of Configuration Manager from Microsoft. The latest available baseline version is System Center Configuration Manager (Current Branch) version 1902 as of April the 10th 2019. I blogged how to upgrade to 1902 here. This guide is aimed a new installations of SCCM. Baseline media is used to install new ConfigMgr sites or to upgrade from supported versions, for more information about baseline media please see my blog post here. Note: The SCCM 1902 Current Branch media is not yet available on MSDN or VLSC. When the new baseline media is released I'll update this note. This series is broken down into the following parts:- Part 1 - Get the lab ready, configure ADDS Part 2 - Join CM01 to Domain, add users, create the Systems Management container, delegate permission Part 3 - Role and Feature installation, installation of WDS and ADK Part 4 - Configure and install SQL Server 2017 (This part) Part 5 - Configure and install SCCM 1902 Current Branch Part 6 - Post configuration You can use this multi-part guide to get a hierarchy up and running on Windows Server 2019 using SQL Server 2017. The concept behind this is to guide you through all the steps necessary to get a working Configuration Manager Primary site installed (for lab use) using manual methods or automated using PowerShell. This gives you the power to automate the bits that you want to automate, while allowing you to manually do other tasks when needed. You decide which path to take. PowerShell knowledge is desired and dare I say required if you are in any way serious about Configuration Manager. I will show you how to do most steps via two methods shown below, it's up to you to choose which method suits you best but I highly recommend automating everything that you can, using PowerShell. Method #1 - Do it manually Method #2 - Automate it with PowerShell Downloads The scripts used in this part of the guide are available for download here. Unzip to C:\Scripts. The scripts are placed in the corresponding folder (Part 1, Part 2 etc) and sorted into which server you should run the script on (DC01 or CM01). Scripts.zip Step 1. Install SQL Server 2017 Note: Perform the following on the Configuration Manager server (CM01) as a Local Administrator, I'd suggest you logon as the username matching your name. Method #1 - Do it manually In this section you will install SQL Server 2017 CU14 which is the latest supported version of SQL Server that is compatible with SCCM 1902 Current Branch as of 2019/4/16. For details about which versions of SQL Server are supported with different site systems in ConfigMgr, please see this page. Before starting, please configure the firewall as described in https://go.microsoft.com/fwlink/?linkid=94001 to allow access to SQL Server through the firewall. You can do this by executing the following command as local administrator on the CM01 (ConfigMgr) server. netsh advfirewall firewall add rule name = SQLPort dir = in protocol = tcp action = allow localport = 1433 remoteip = localsubnet profile = DOMAIN After configuring the firewall, browse to the drive where the SQL Server 2017 media is, and run setup.exe. The SQL Server Installation Center wizard will appear. Click on Installation and then choose New SQL Server standalone installation or add features to an existing installation. Enter the Product Key or use the evaluation version if that's what you want to use. Note: The product key will be automatically filled in for licensed media downloaded from Microsoft Volume Licensing Service Center. Accept the EULA Make your Microsoft Update choices and review your Install rules, as long as you've opened the correct port for SQL you'll be ok and can safely ignore the Warning about the Firewall. select the SQL server instance features you need (at least Database Engine Services) and if necessary change the drive letter where you intend to install it And configure the Instance Configuration or just leave it as default Verify the Service Accounts settings and for Collation (click on the Collation tab in Server Configuration), make sure the collation is set to SQL_Latin1_General_CP1_CI_AS For Database Engine Configuration, click on Add Current User After configuring Data Directories, TempDB and Filestream settings you are ready to install Click on Install to start the installation of SQL Server 2017, and once it's completed, click Close. Next download and install the following: SQL Server 2017 Cumulative Update 14. SQL Server 2017 SSMS here. SQL Server 2017 Reporting Services. Method #2 - Automate it with PowerShell Note: Make sure your SQL Server 2017 media is in the drive specified in the script or edit the script to point to the new location of the media. The script set's the installation path pointing at D:\MSSQL if you want to install SQL somewhere else please change the variables as appropriate. To install SQL Server 2017 use the Install SQL Server 2017.ps1 script. The script will create a ConfigurationFile.ini used to automate the installation of SQL Server 2017, and after it's installed the script will download the SSMS executable (Management Studio) and install it. Then it will download Reporting Services and install it. If either of the EXE's are in the download folder, it will skip the download and just install. SQL Server no longer comes with the Management Studio or Reporting Services built in, and they are offered as separate downloads, don't worry though, my PowerShell script takes care of that for you. 1. Extract the scripts to C:\Scripts on CM01 and load the Install SQL Server 2017.ps1 script located in C:\Scripts\Part 4\CM01 2. Edit the variables [lines 17-81] as desired before running. 3. Logon as the user specified in line 20. 4. Start Windows PowerShell ISE as Administrator and run the script by clicking on the green triangle. Done ! That's it for this part, please join me in Part 5 where we Configure and Install System Center Configuration Manager 1902.


-
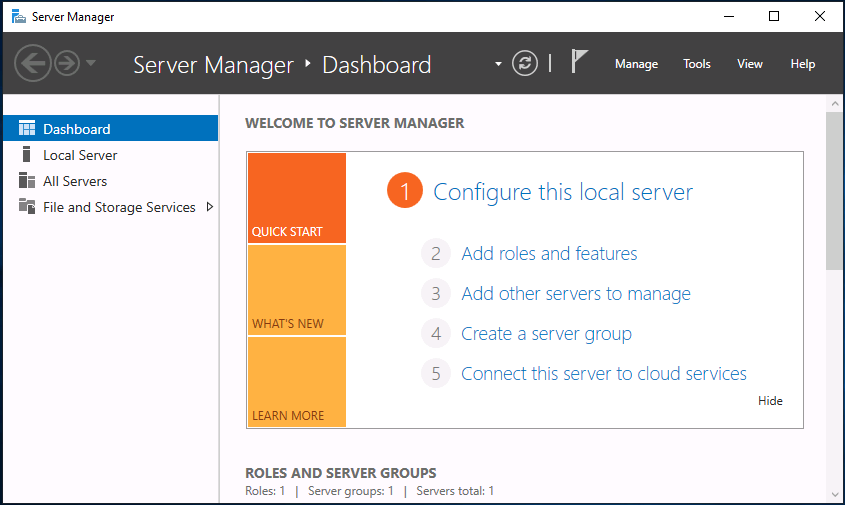
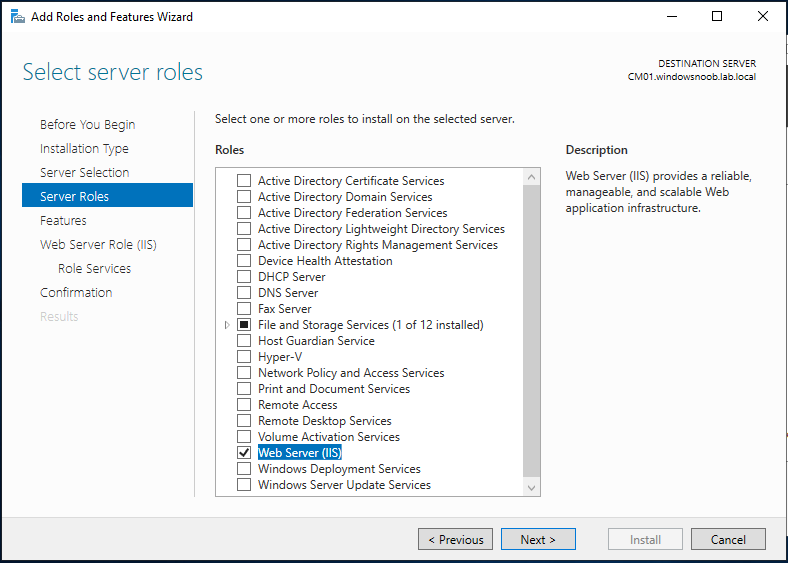
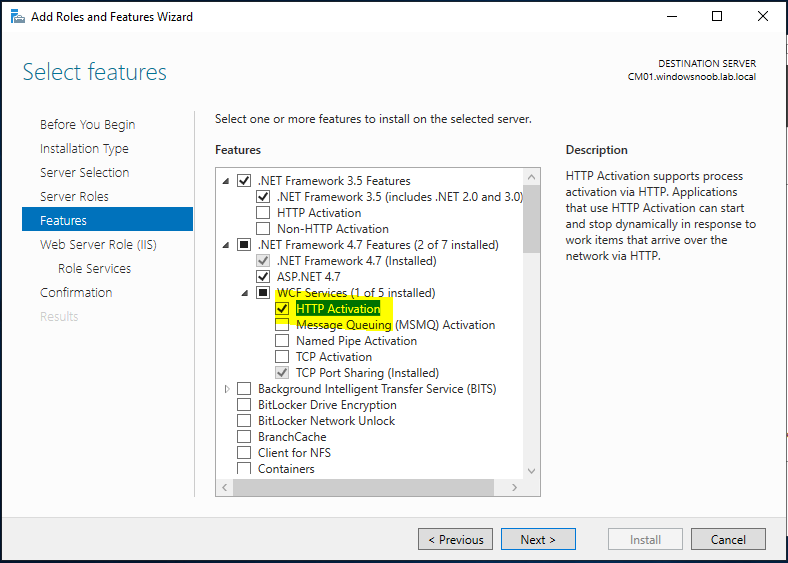
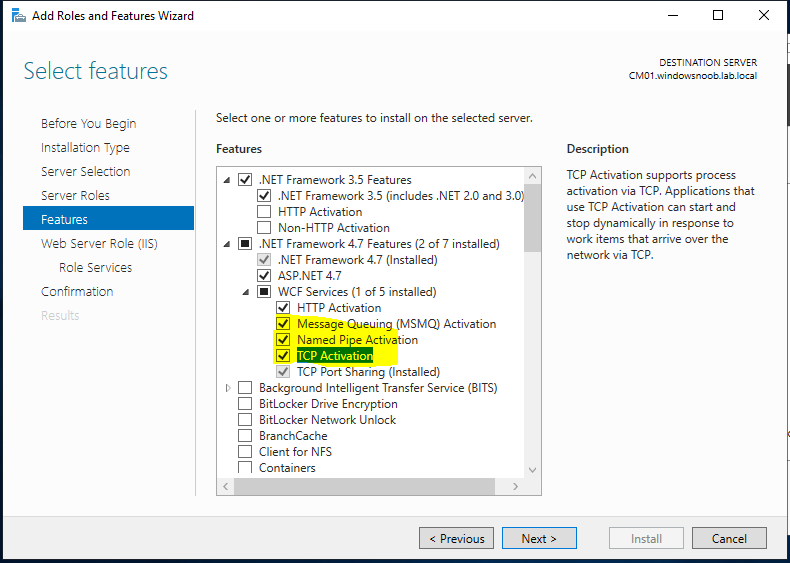
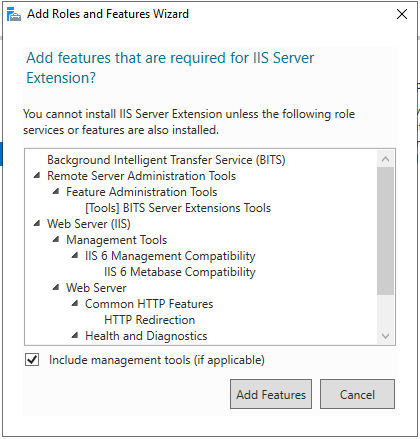
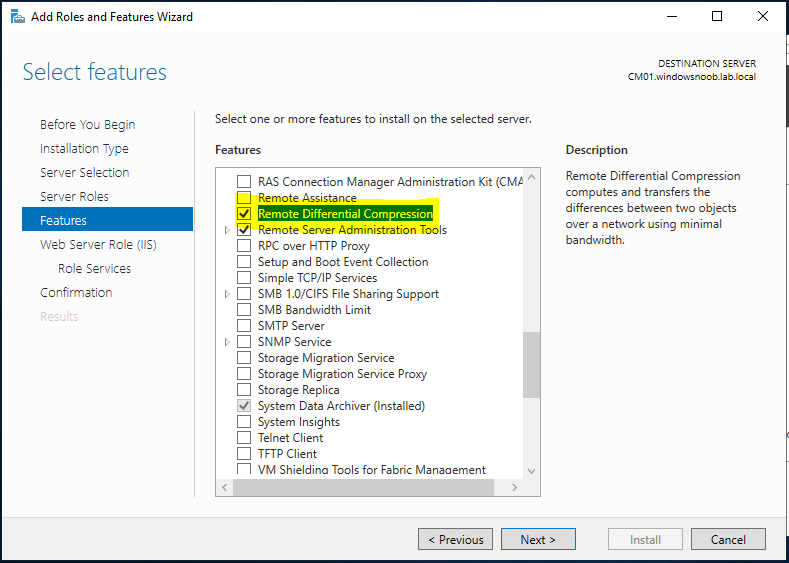
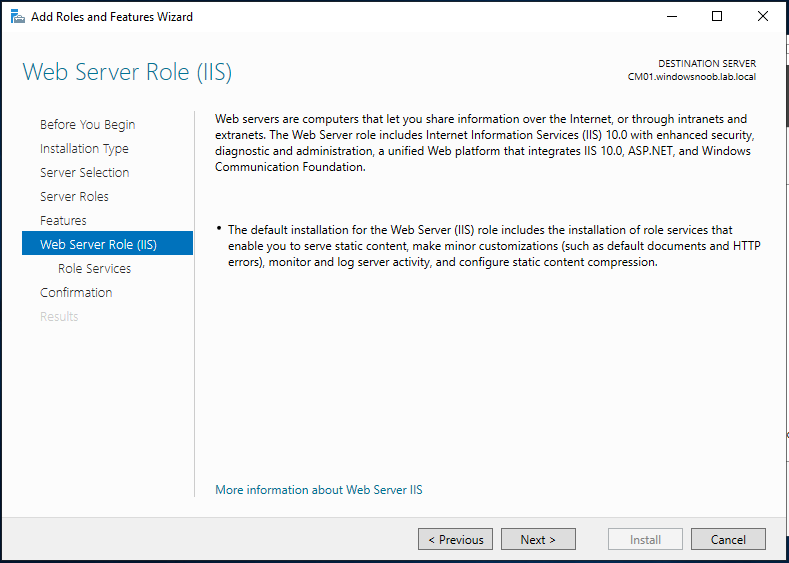
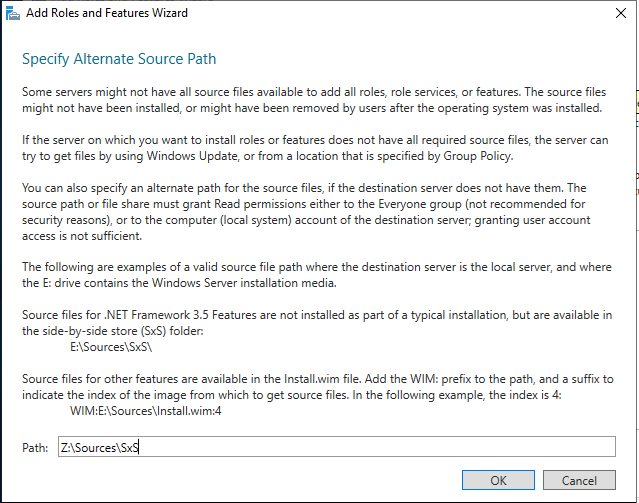
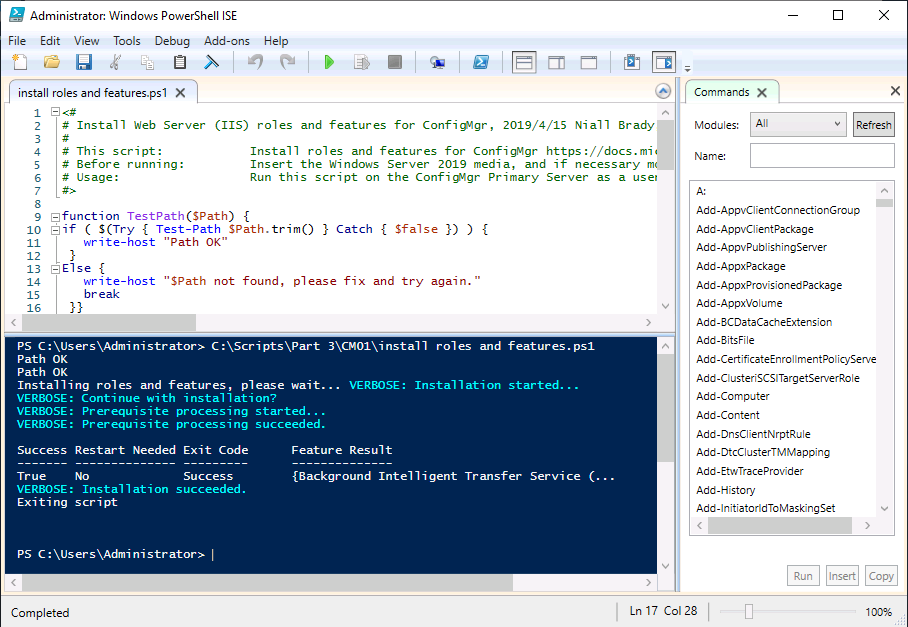
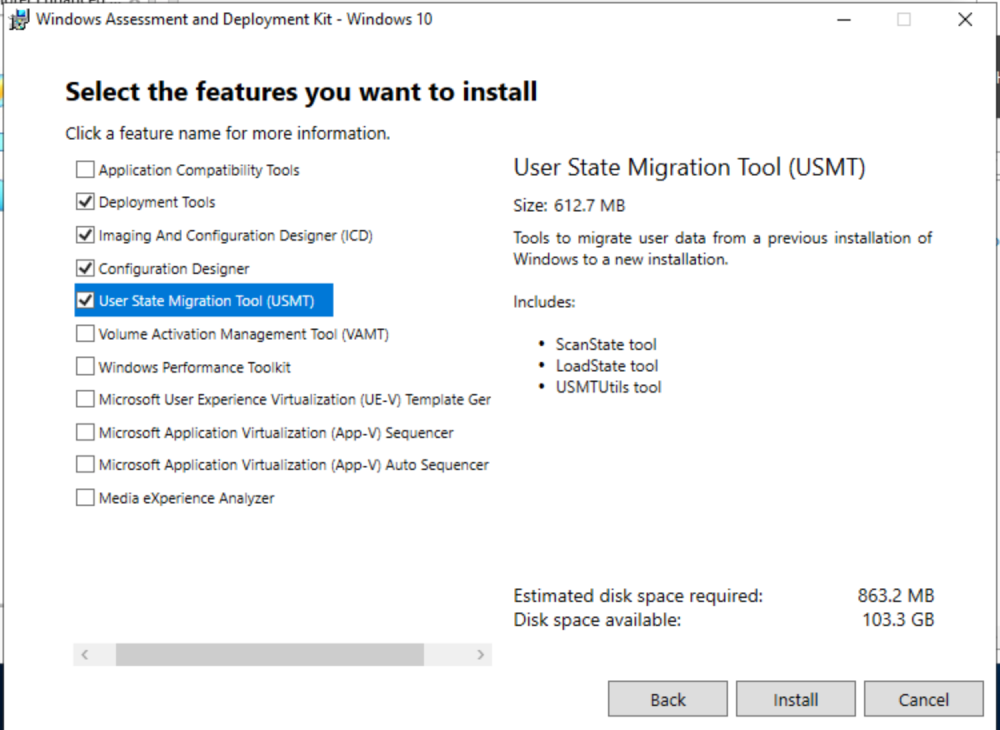
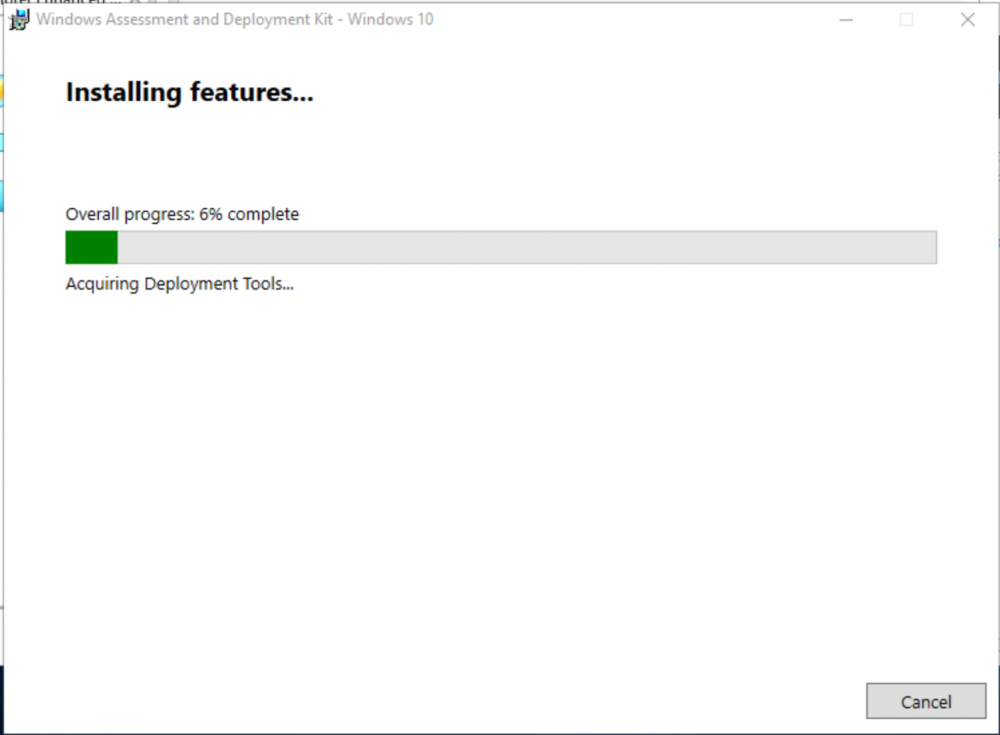
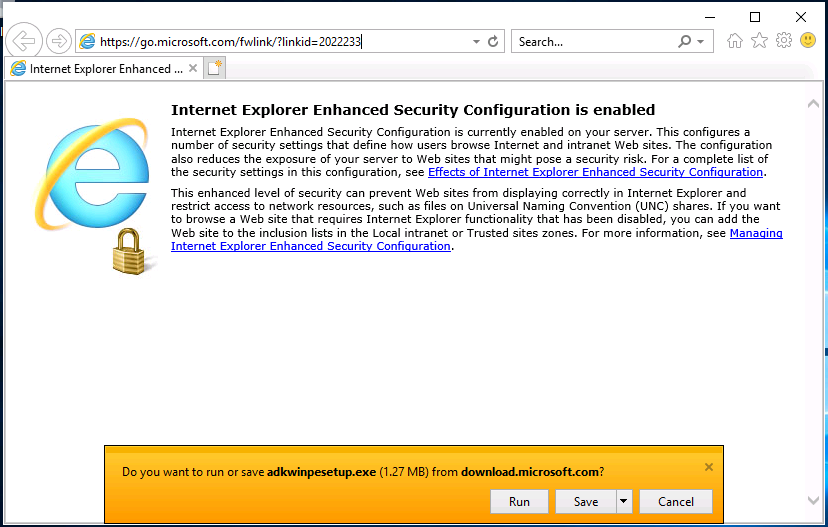
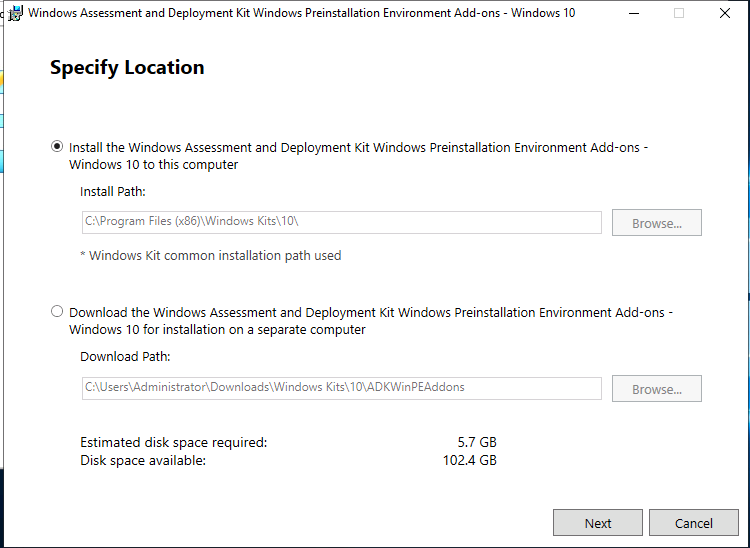
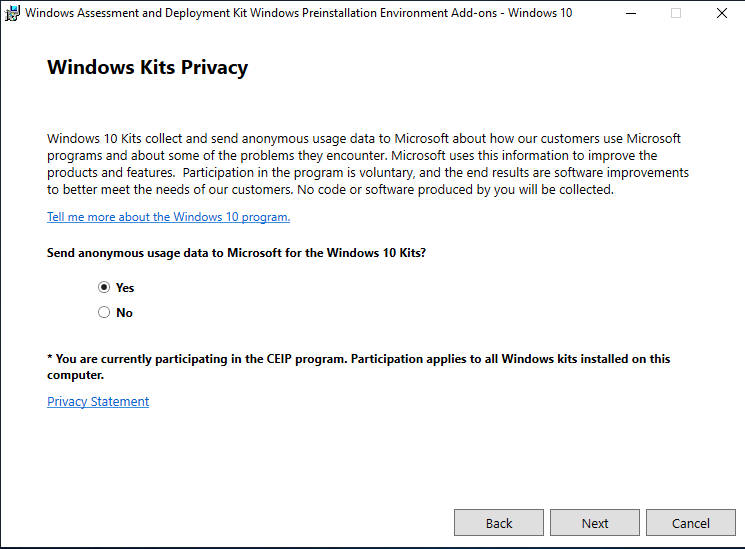
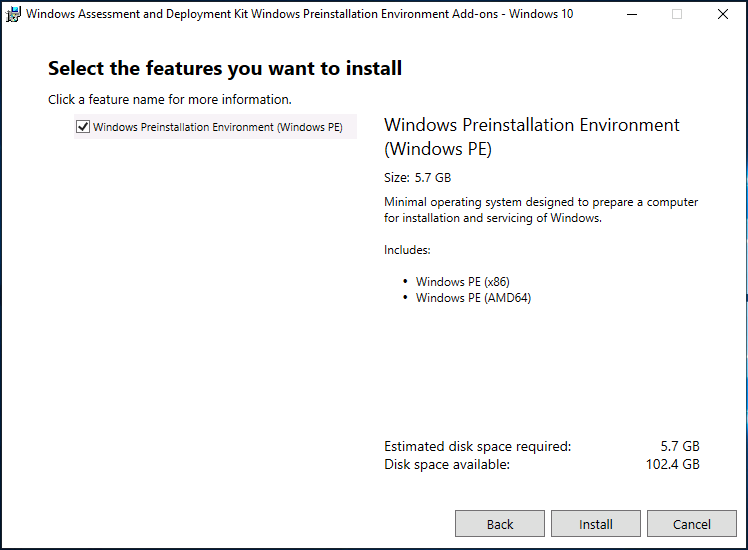
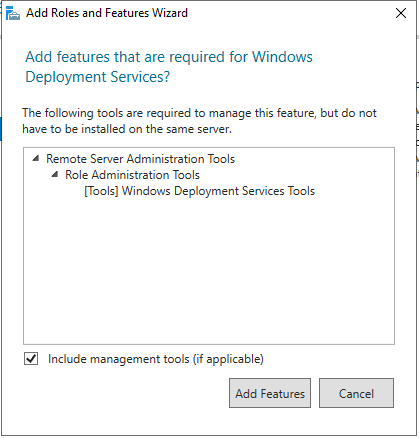
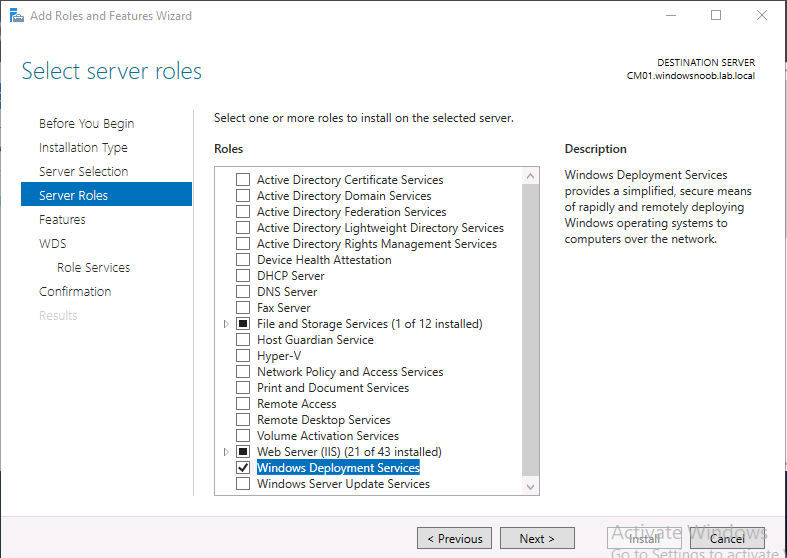
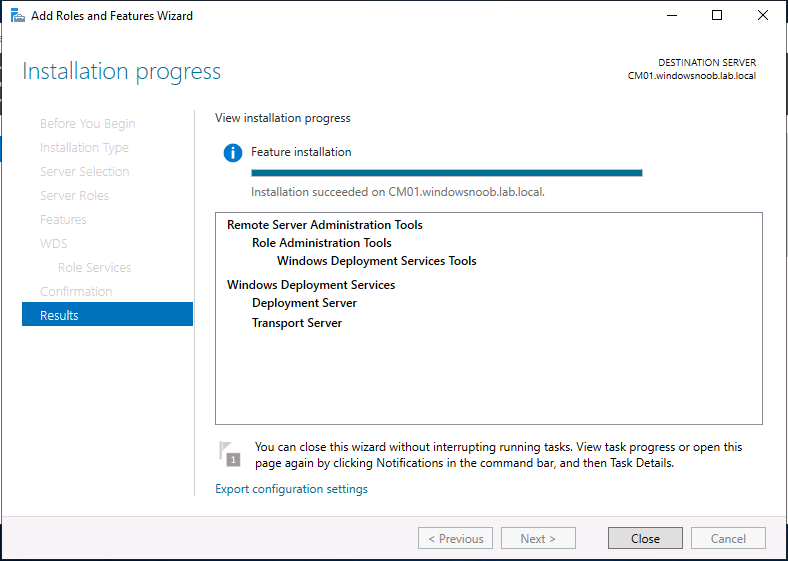
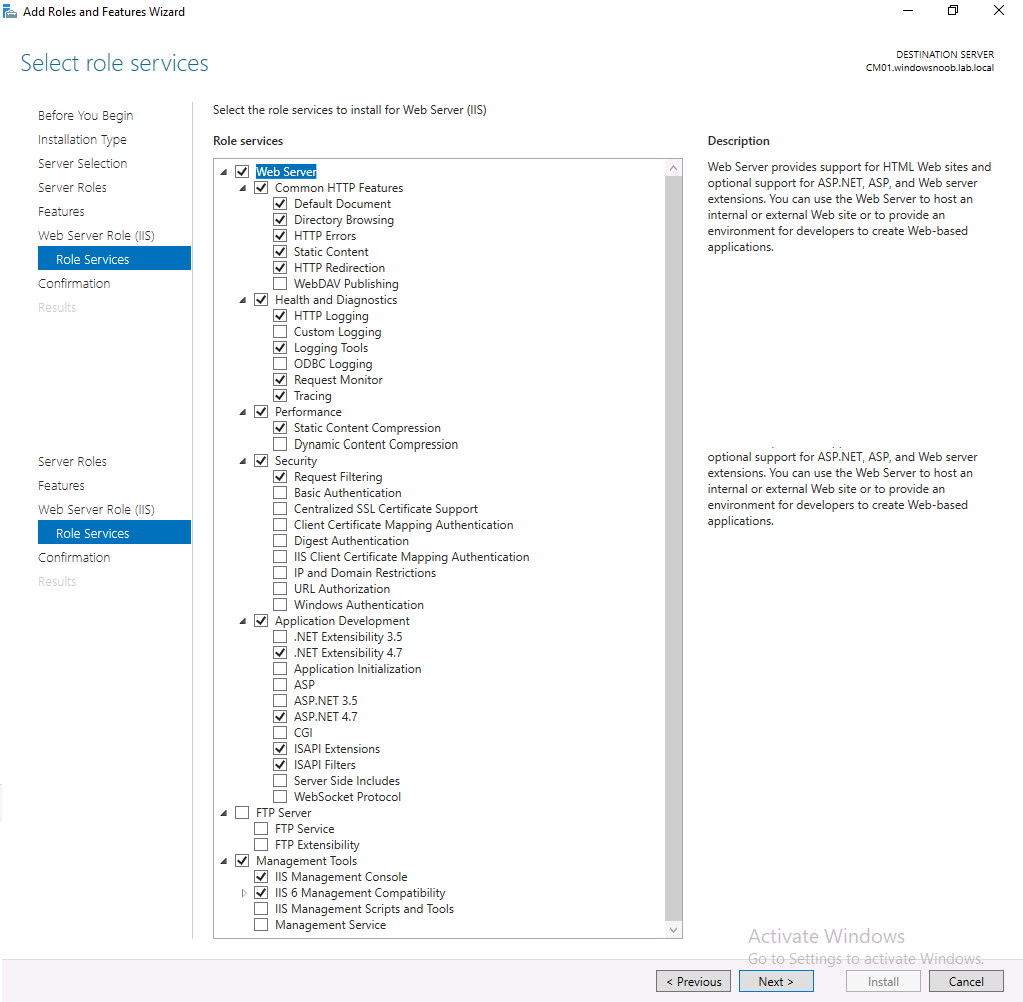
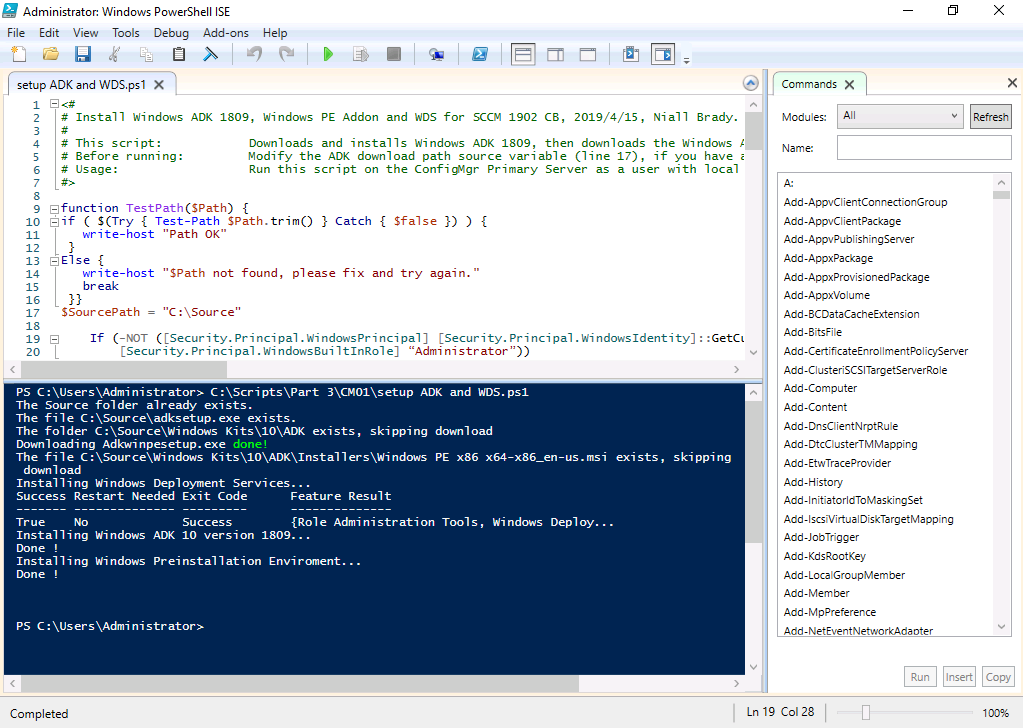
Introduction This multi-part guide will show you how to install the latest baseline version of Configuration Manager from Microsoft. The latest available baseline version is System Center Configuration Manager (Current Branch) version 1902 as of April the 10th 2019. SCCM 1902 is the latest baseline version and contains many bugfixes (and quality fixes) as detailed here. I blogged how to upgrade to 1902 here. Baseline media is used to install new ConfigMgr sites or to upgrade from supported versions. For more information about what baseline versions are and why you need them, I'd recommend you read my blog post here. This guide is aimed a new installations of SCCM. This lab is one of many hosted on my new hyper-v host, which is a very nice Lenovo P1 running Windows Server 2019 with data deduplication to make storage amazing. This series is broken down into the following parts:- Part 1 - Get the lab ready, configure ADDS Part 2 - Join CM01 to Domain, add users, create the Systems Management container, delegate permission Part 3 - Role and Feature installation, installation of WDS and ADK (this part) Part 4 - Configure and install SQL Server 2017 Part 5 - Configure and install SCCM 1902 Current Branch Part 6 - Create device collections Part 7 - Configuring discovery Part 8 - Configuring boundaries You can use this multi-part guide to get a hierarchy up and running on Windows Server 2019 using SQL Server 2017. The concept behind this is to guide you through all the steps necessary to get a working Configuration Manager Primary site installed (for lab use) using manual methods or automated using PowerShell. This gives you the power to automate the bits that you want to automate, while allowing you to manually do other tasks when needed. You decide which path to take. PowerShell knowledge is desired and dare I say required if you are in any way serious about Configuration Manager. I will show you how to do most steps via two methods shown below, it's up to you to choose which method suits you best but I highly recommend automating everything that you can, using PowerShell. Method #1 - Do it manually Method #2 - Automate it with PowerShell Downloads The scripts used in this part of the guide are available for download here. Unzip them to C:\Scripts. The scripts are placed in the corresponding folder (Part 1, Part 2 etc) and sorted into which server you should run the script on (DC01 or CM01). Scripts.zip Step 1. Install Roles and Features Note: Perform the following on the Configuration Manager server (CM01) as a Local Administrator To support various features in System Center Configuration Manager, the setup wizard requires some server roles and features preinstalled. On CM01, login as the username you added to the Local Administrators group and start Server Manager. Method #1 - Do it manually The role and feature requirements for ConfigMgr are listed here https://docs.microsoft.com/en-us/sccm/core/plan-design/configs/site-and-site-system-prerequisites. On CM01, login as a user with administrative permissions on the server. Start Server Manager. Click on Add roles and features, on the Before you begin page click Next. Choose Role-based or feature-based installation In the Server Selection screen verify your ConfigMgr server is selected and click Next On the Server Roles screen select Web Service (IIS) and when prompted to add features for Web Server (IIS) click on Add Features Click Next and on the Features screen select the .NET Framework 3.5 (includes .NET 2.0 and 3.0) feature Expand the .NET Framework 4.7 Features and select HTTP Activation under WCF Services, click on Add Features when prompted. Select Message Queuing (MSMQ) Activation and when prompted select Add Features, then select Named Pipe Activation and TCP Activation and under Background Intelligent Transfer Service (BITS) select Background Intelligent Transfer Service (BITS) and then select IIS Server Extension when prompted to add features click on Add Features Scroll down and select Remote Differential Compression Click Next and on the Web Server Role (IIS) screen click Next on the Select Role Services verify that the following are selected Click Next and point to the Installation Source by clicking on Specify an alternate source path Enter the path to the media eg: Z:\Sources\SxS Click Install when ready, at this point you could export configuration settings for later automation Click on Close when the feature installation has succeeded. Method #2 - Automate it with PowerShell Note: Make sure your Server 2019 media is in the drive specified in the script or edit the script to point to the new location of the media. To install the roles and features needed, start Windows Powershell ISE as a user with administrative permissions on the server, edit the variables as appropriate and run the install roles and features.ps1 script. The script will automatically stop and prompt you to correct things, if it cannot find the XML file or the Windows Server 2019 installation media. 1. Extract the scripts to C:\Scripts on the ConfigMgr server, CM01 and load the install roles and features.ps1script located in C:\Scripts\Part 3\CM01 2. Edit the variables (lines 18-20) as desired before running. 3. Start Windows PowerShell ISE as Administrator and run the script by clicking on the green triangle. Tip: If the script appears to hang at 24% while installing roles and features, and if you are sure you pointed to the media path correctly then simply reboot the server and try again, chances are a pending update or another operation is blocking the installation. Step 2. Download and install Windows ADK and install WDS Note: Perform the following on the Configuration Manager server (CM01) as a Local Administrator When you deploy operating systems with Configuration Manager, the Windows ADK is an external dependency that is required. The ConfigMgr prerequisite checker will check for various things, including ADK components such as USMT and Windows Preinstallation Environment (among others), therefore you need to install Windows ADK on your server. System Center Configuration Manager version 1902 supports Windows ADK 1809 as I've explained here. Update. Windows ADK 1903 was released shortly after I wrote this blogpost but it has issues with Window SIM in ADK 1903 on 64bit Windows, the workaround is to use 32bit Windows (not going to happen) when generating them or use windows SIM from ADK 1809. Note: Since SCCM 1806, Microsoft has provided their own PXE Provider which means you can host a PXE provider on a client operating system without the need for a Server operating system (as WDS requires Windows Server). However, for the purposes of this guide, you will use Windows Deployment Services. Method #1 - Do it manually Go to this link and download Windows ADK 1809 or go to this link for ADK 1903 (see the note above). You'll be prompted to save or run ADKSETUP.EXE, select Run. Alternatively use ADK 1903 and see the Windows Sim comment above. When prompted for the path, accept the defaults...(or change it to something else if you wish) Select your privacy settings Accept the ADK EULA Make sure to have selected at least the following ADK features, you will need to download the Windows Preinstallation Environment (Windows PE) separately as it's no longer included with ADK 1809 and later. Deployment Tools User State Migration tool (USMT) and optionally these Imaging and Configuration Designer (ICD) Configuration Designer and click Install to start the download and Installation of the Windows ADK, version 1809. Once the ADK installation is complete, click Close. To install the Windows Preinstallation Environment (Windows PE) click here, click on Run. click Next at the Specify Location screen. click next at the Privacy settings Click Next at the License agreement and click Install when prompted. Click Close when done (this will take a while to download...). To install Windows Deployment Services (WDS), open Server Manager, select Add roles and features and select the Windows Deployment Services role. When prompted click on Add Features to include management tools. and click through the wizard until completion, close the wizard when done. Method #2 - Automate it with PowerShell To download and then install Windows ADK 10 version 1809 with the components needed for ConfigMgr, start Windows Powershell ISE as Administrator and run the setup ADK and WDS.ps1 script. This script not only downloads and installs ADK 1809 and the Windows PE Addon but it installs the Windows Deployment Services role also. Note: After I wrote this guide Microsoft released ADK 1903, but it has issues with Windows SIM on 64bit Windows. So this script still uses ADK 1809, if you want to use ADK 1903 modify the download URL accordingly. Tip: If you've already downloaded ADK 1809 and the Windows PE Addon and want to save yourself some time, or if you are installing a server offline, copy the contents of a previously downloaded ADK1809+Windows PE Addon Windows Kits folder and all files/folders within to the source folder (eg: C:\Source\Windows Kits) and the script will skip the download. 1. Extract the scripts to C:\Scripts on CM01 and load the setup ADK and WDS.ps1 script located in C:\Scripts\Part 3\CM01 2. Edit the variable (line 17) as desired before running. 3. Start Windows PowerShell ISE as Administrator and run the script by clicking on the green triangle. Done ! And that's it for this part, please join me in Part 4 where you'll start configuring and installing SQL Server 2017.