anyweb
-
Posts
9182 -
Joined
-
Last visited
-
Days Won
366
Everything posted by anyweb
-
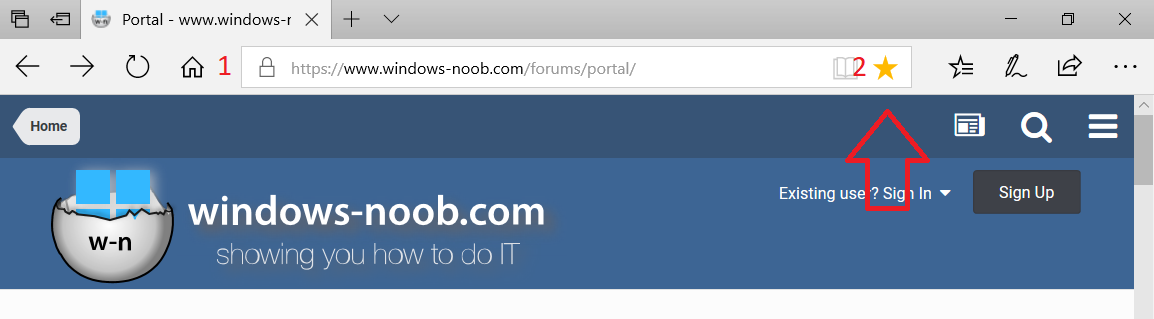
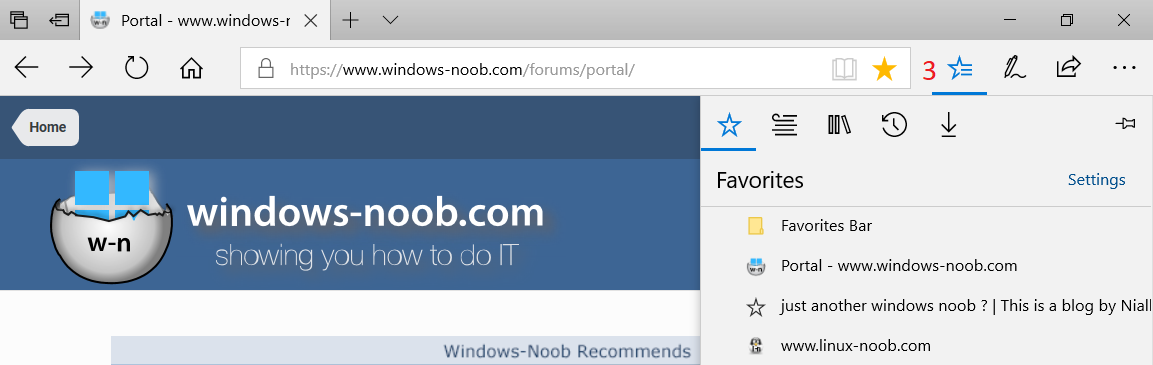
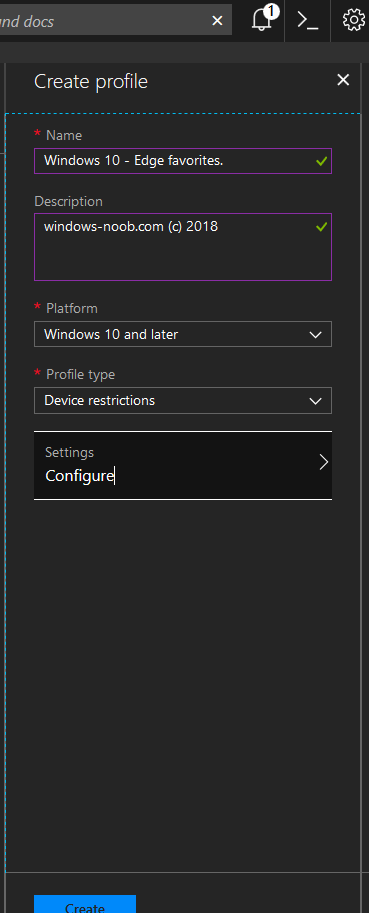
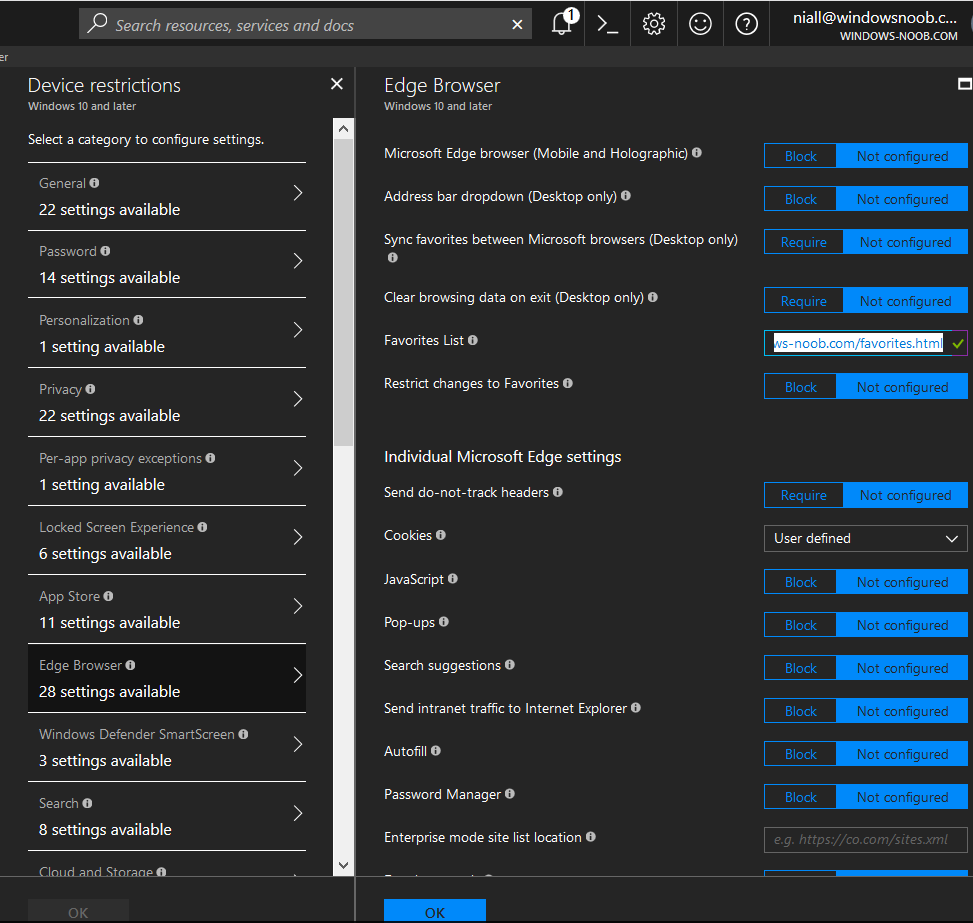
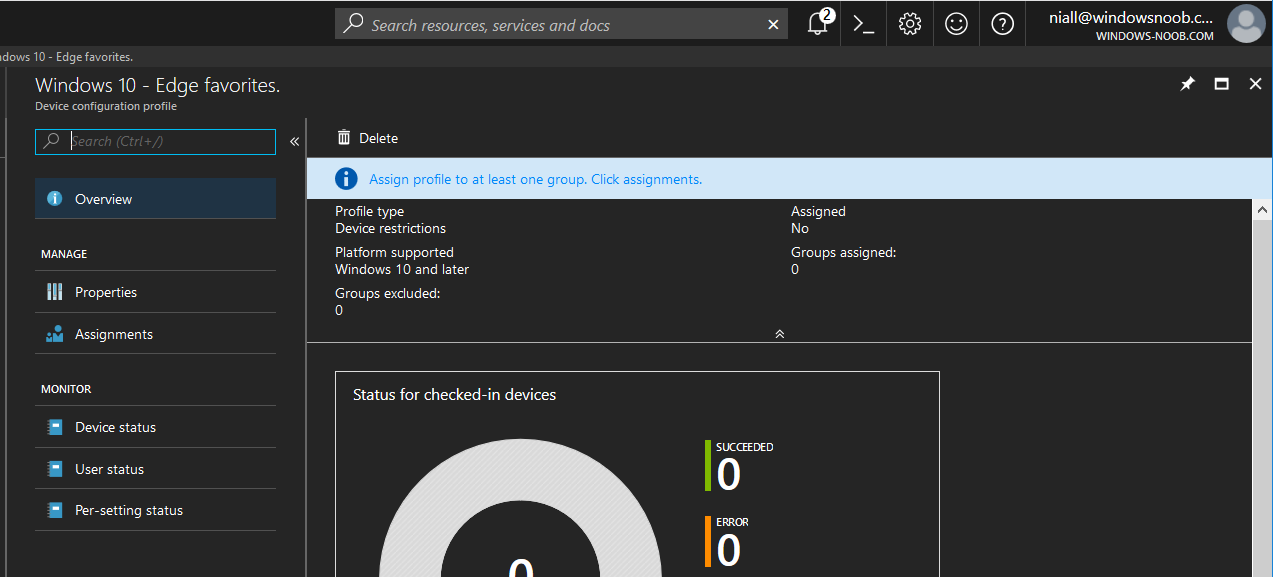
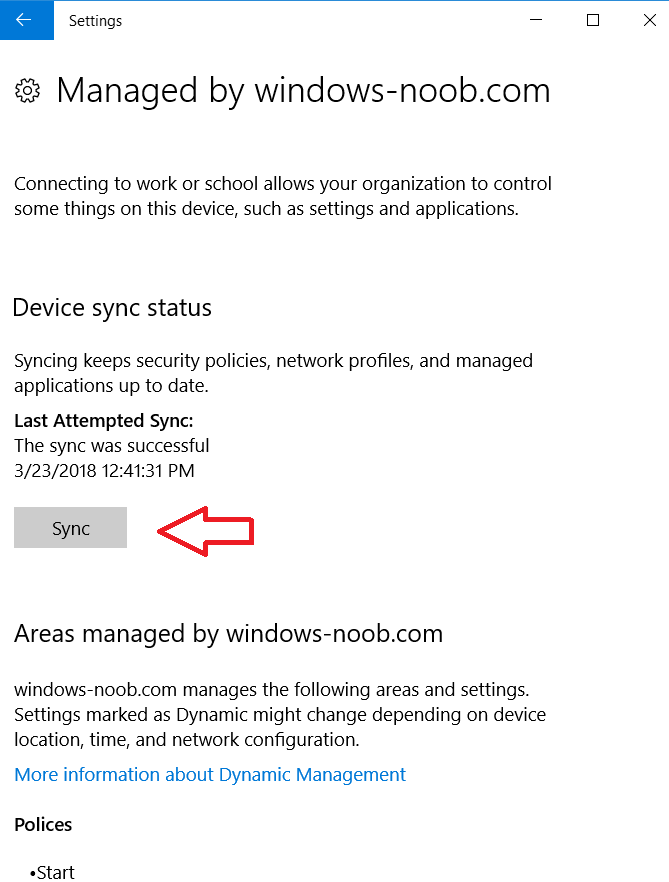
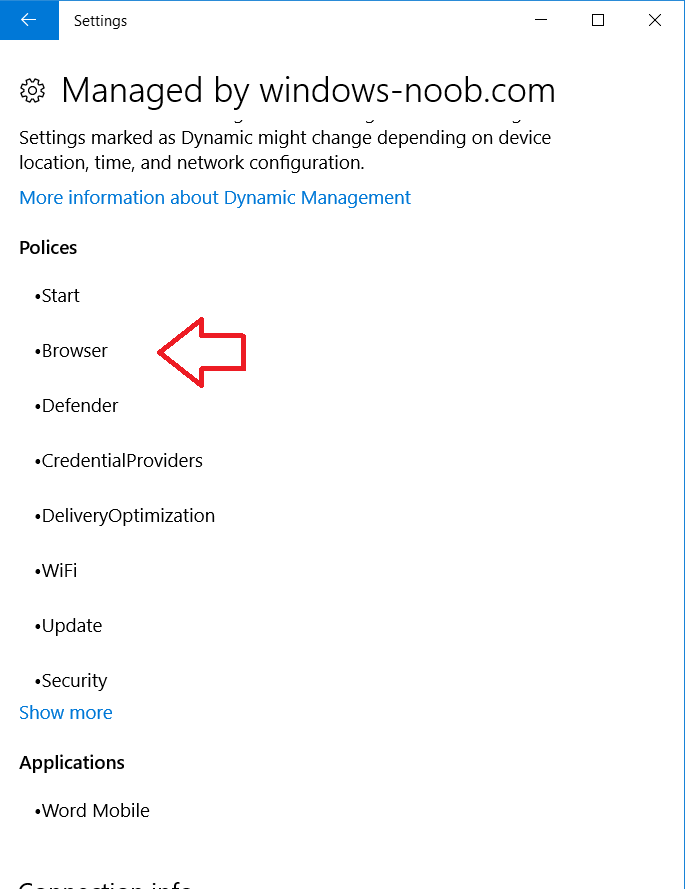
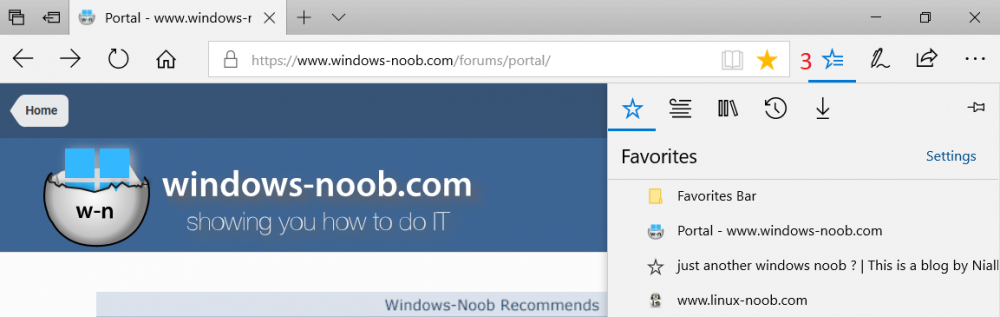
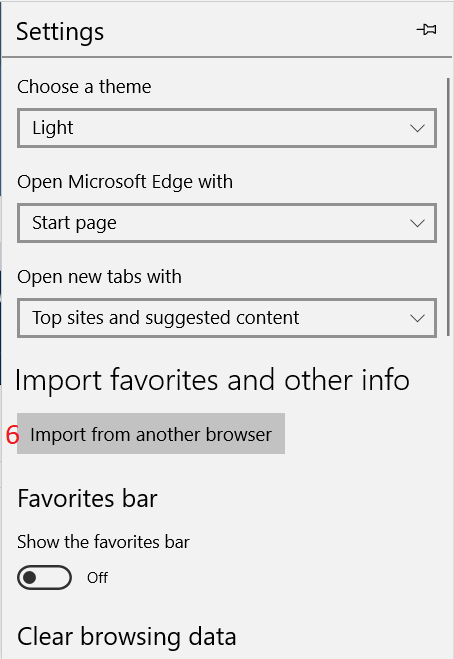
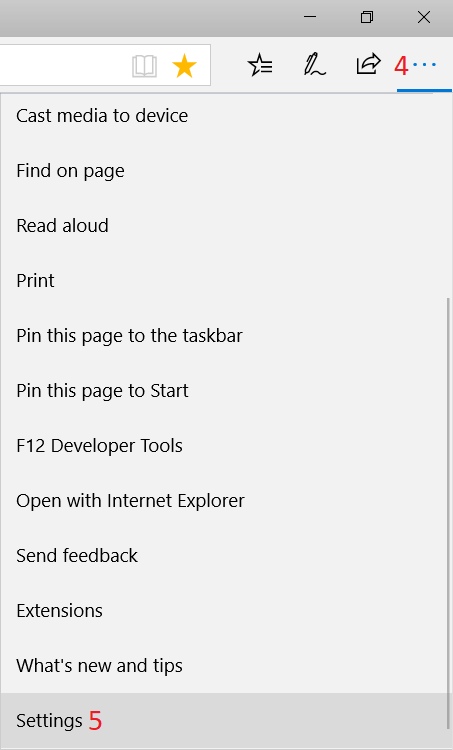
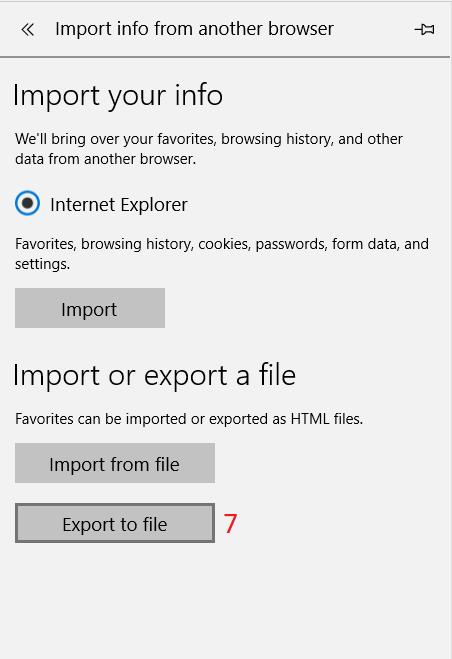
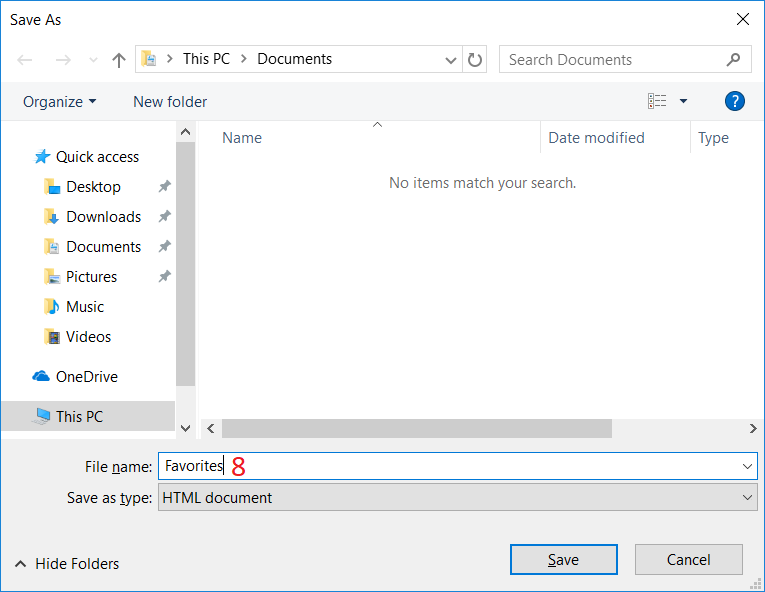
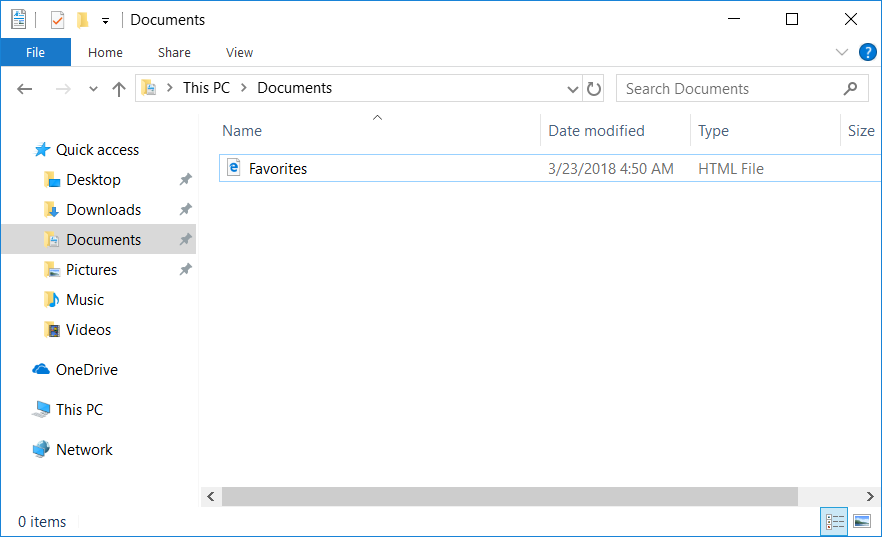
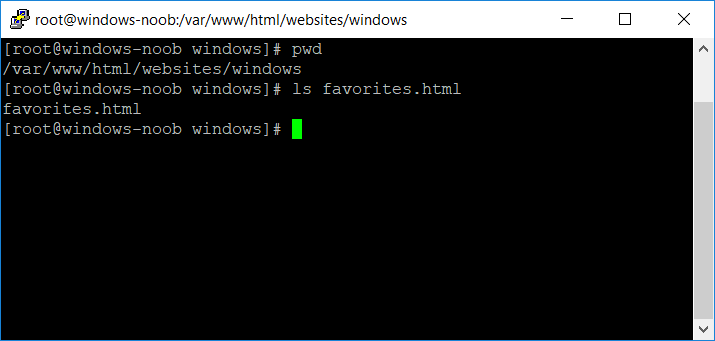
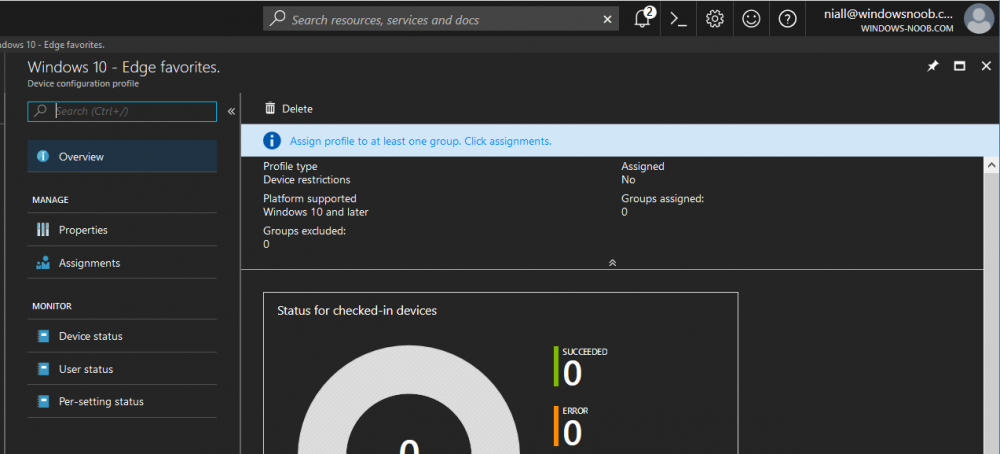
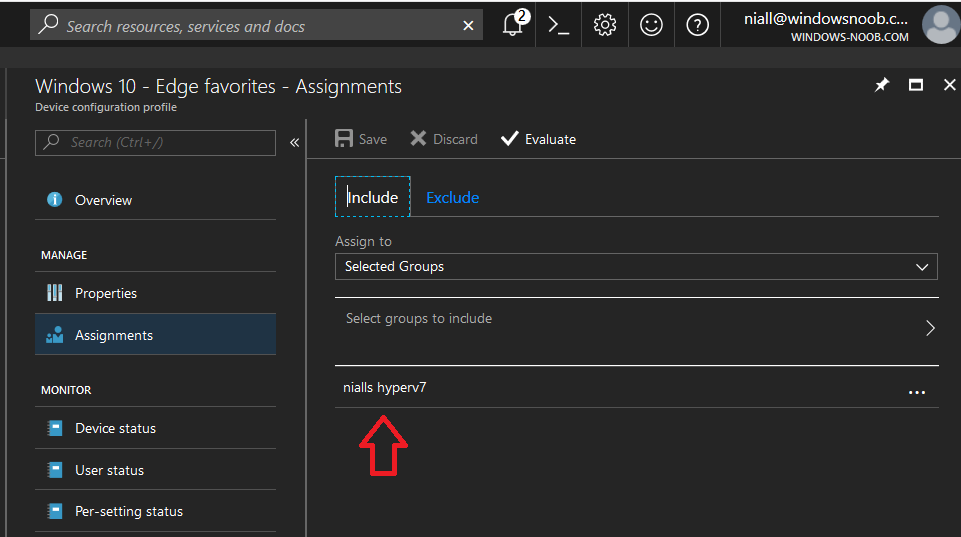
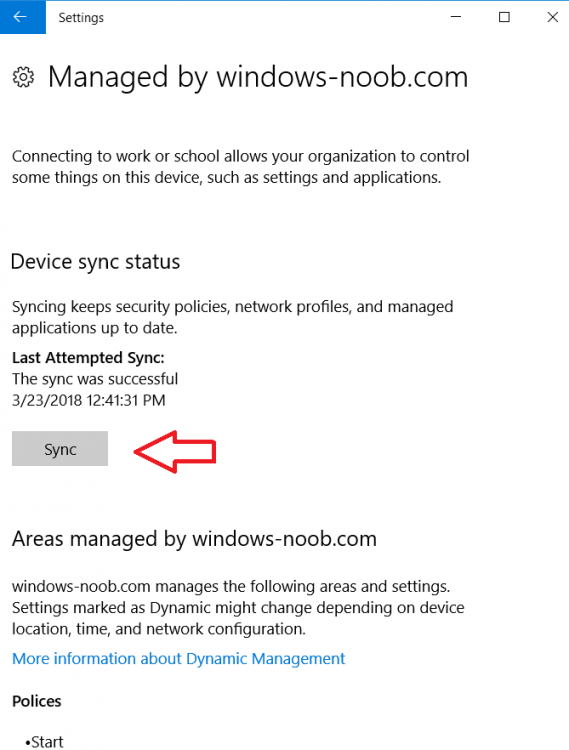
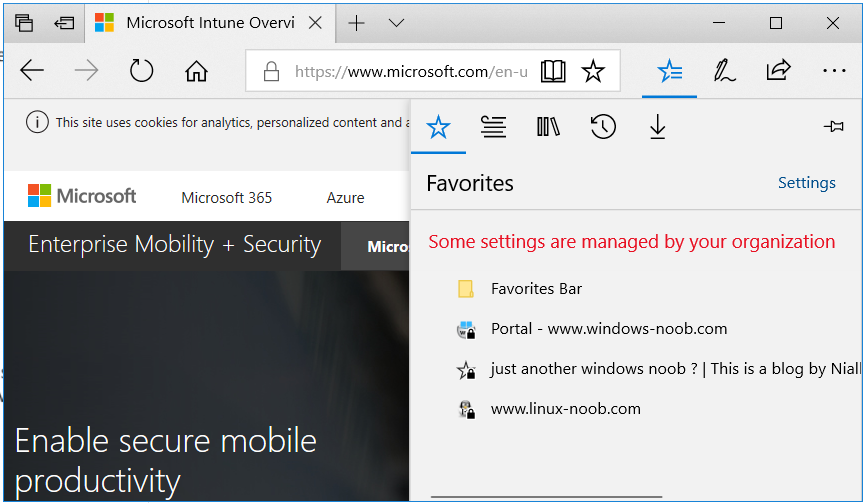
 Introduction Managing Windows 10 computers using Microsoft Intune is getting easier and easier. To customize the experience for your Windows 10 users so that they have favorites pre-loaded in Microsoft Edge, you can configure favorites in Edge using Microsoft Intune, and here's how to do it step-by-step. Step 1. Configure some favorites On a Windows 10 virtual machine (don't have one ? create one with this PowerShell script), start up Microsoft Edge, browse to a website (1) by entering it's URL in the address field and then add it as a favorite (2) by clicking on the star. Repeat for as many site's as you want in your favorites. After you've added some favorites you can review the list of saved favorites by clicking on the favorites icon (3) Step 2. Export the custom favorites On the Windows 10 virtual machine, click on the Settings elipse in Microsoft Edge (4) and scroll down to Settings (5) Choose Import from another browser (6) and choose Export to file (7) change the name from Microsoft_Edge_03_23_2018 (the current date) to Favorites (8) The exported favorites are saved as Favorites.html in the Documents folder on the virtual machine. Step 3. Copy the Favorites file to your web server Using whatever method you choose, copy the Favorites.html file to your intranet (or extranet) web server, in the example below I've copied the file to my webserver which hosts this web site, and it just happens to be running on Linux. The file must be readable by the devices you intend to deploy it to, for example my favorites.html file is publicly readable at the following address https://www.windows-noob.com/favorites.html Step 4. Create a Configuration Profile in Intune In Microsoft Intune (in Azure), click on Device Configuration, select Profiles, then create a new profile by clicking on Create Profile. Fill in the following details: Name: Windows 10 - Edge favorites Description: windows-noob.com (c) 2018 Platform: Windows 10 and later Profile type: Device restrictions For Settings, select Edge Browser on the right and for Favorites List enter the URL that you verified above which contains your favorites.html file eg: https://www.windows-noob.com/favorites.html Click on OK when done, and OK again and finally click on Create to create the Configuration Profile. Finally, Assign the profile to a Device group containing Windows 10 devices that you want to target with this policy. Here you can see the profile is assigned to a Group which I've previously created and populated with a Windows 10 device Step 5. Verify the policy on the target device(s) Using a licensed Intune user, logon to one of the devices targeted with the policy and trigger a policy sync (optional, you could just wait an hour or so....) After the device has synced, you should see Browser under Policies. open Microsoft Edge and click on the Favorites icon. It should state "Some settings are managed by your organization" and your previously defined favorites should be listed. Success ! The favorites you defined will have a lock symbol on them so cannot be changed by the user, however the user can add/remove additional favorites of their own and those favorites will not have a lock symbol on them. Related reading How to configure device restriction settings in Microsoft Intune - https://docs.microsoft.com/en-us/intune/device-restrictions-configure Device restrictions Windows 10 - https://docs.microsoft.com/en-us/intune/device-restrictions-windows-10 Summary So there you have it, with Microsoft Intune, you can easily customize Microsoft Edge favorites and deploy them to your Windows 10 devices. cheers niall


-
There is this what's new page, but i'm not sure about the bug fixes, what issues did you have exactly ?
-
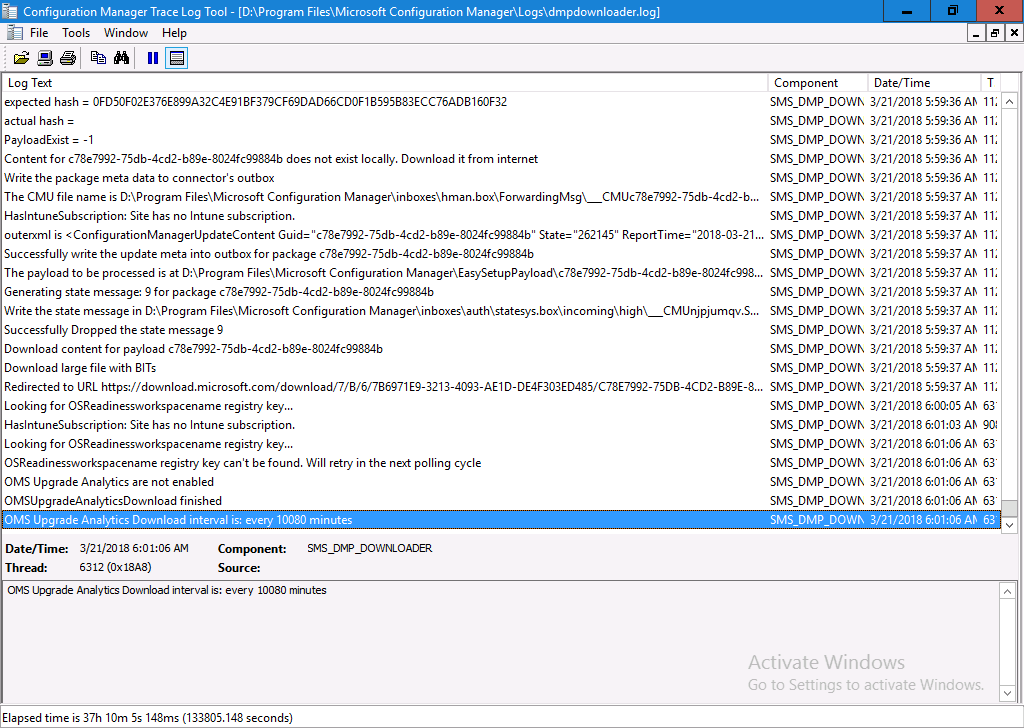
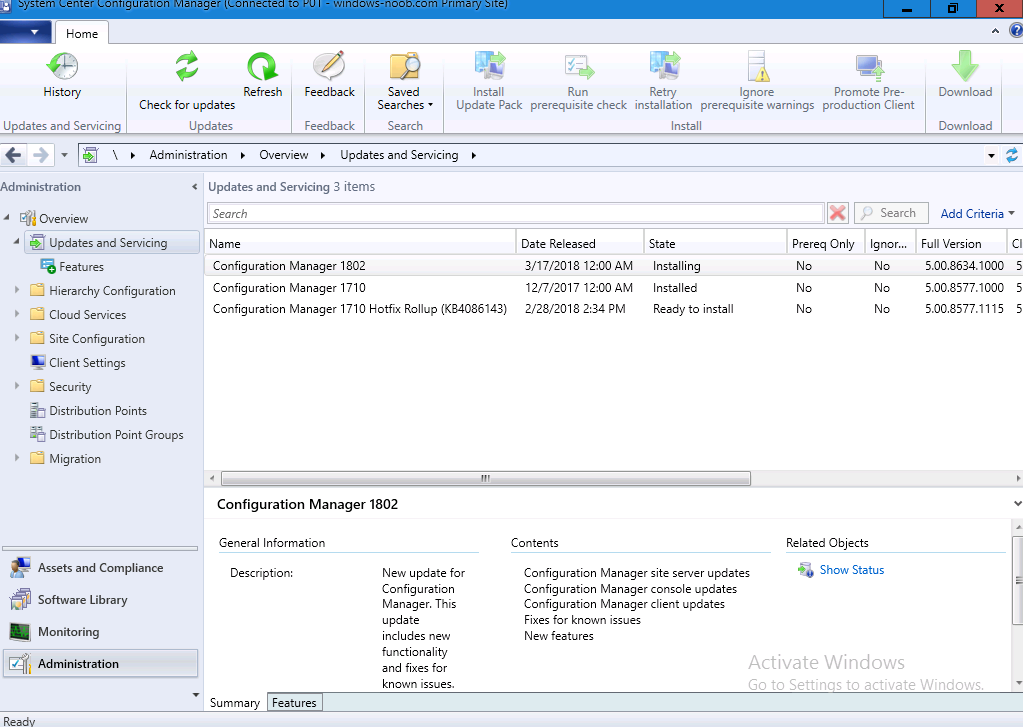
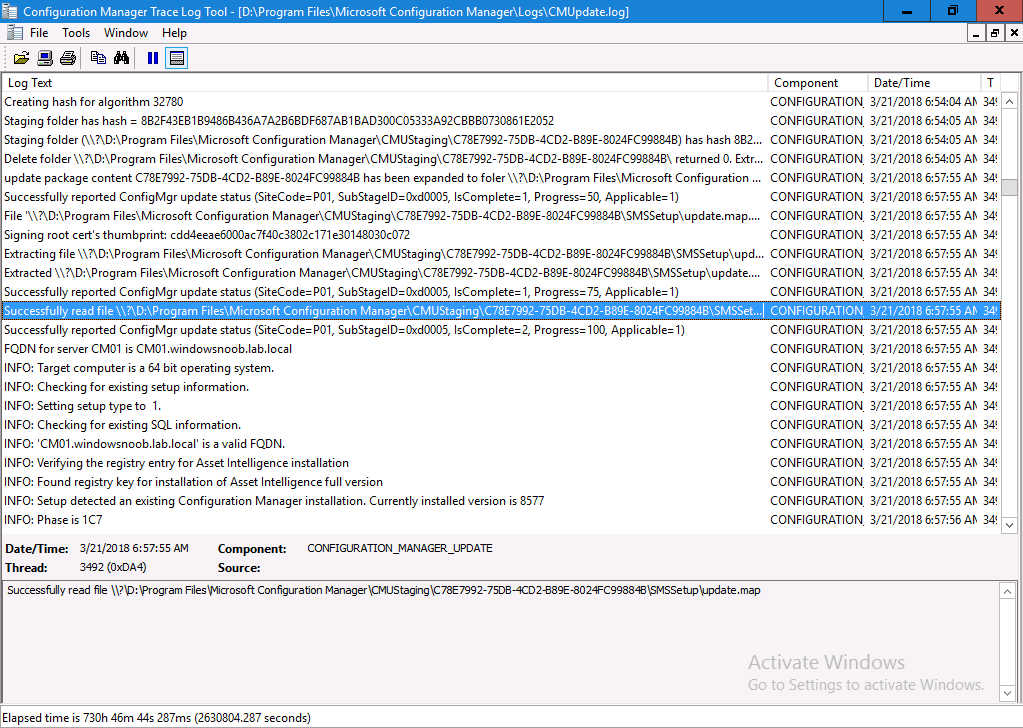
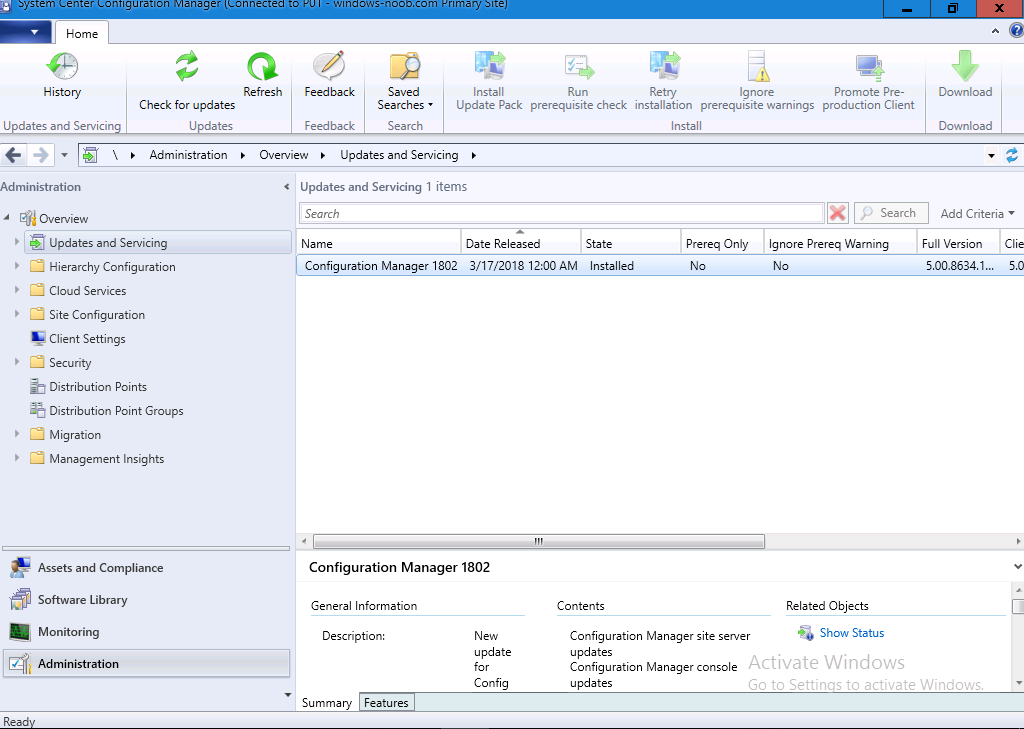
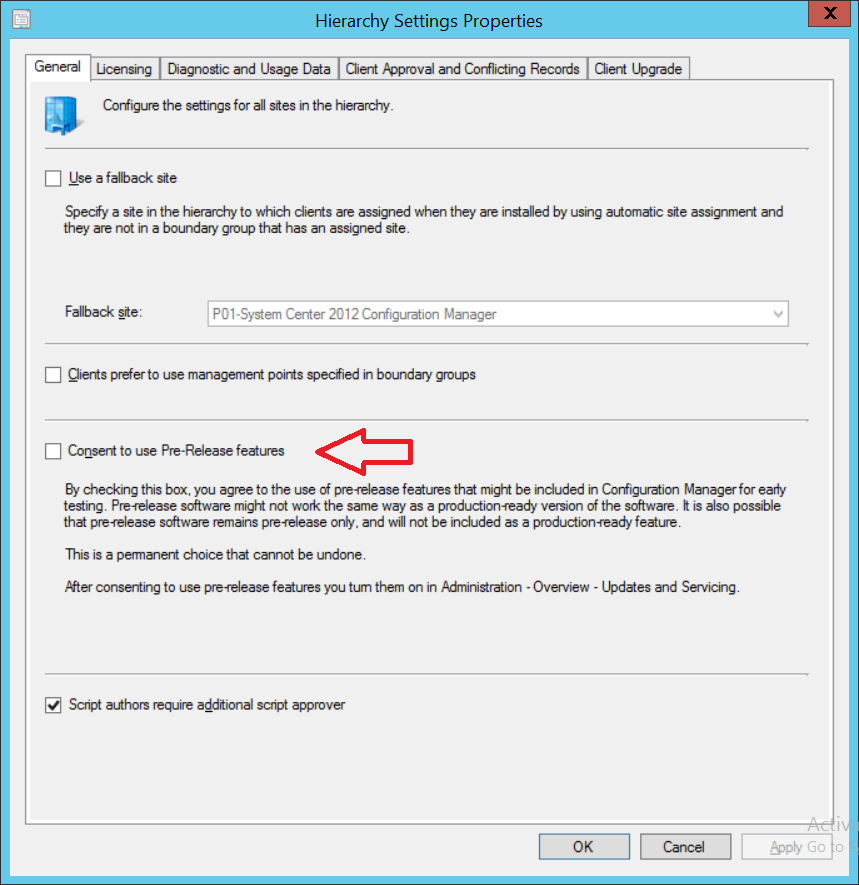
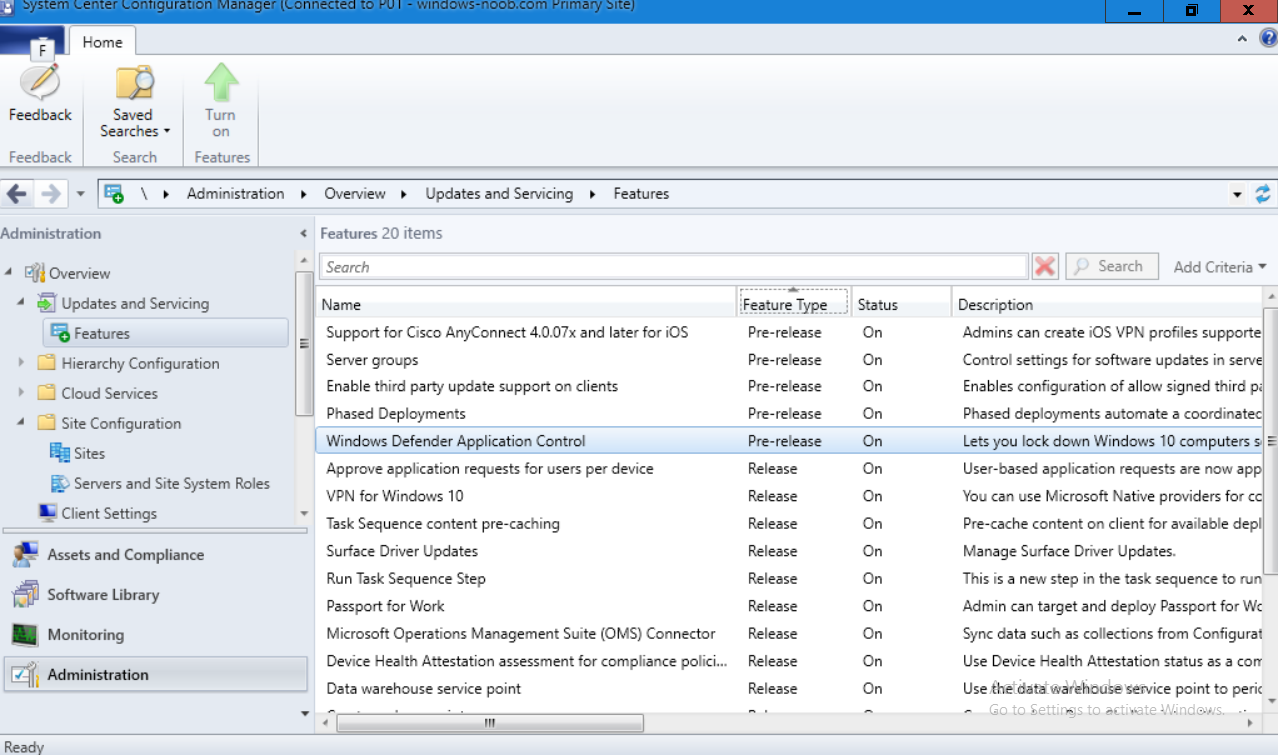
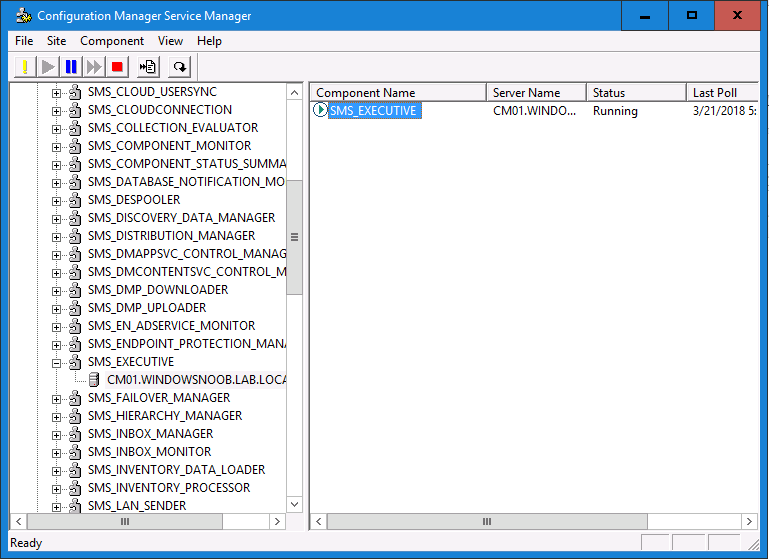
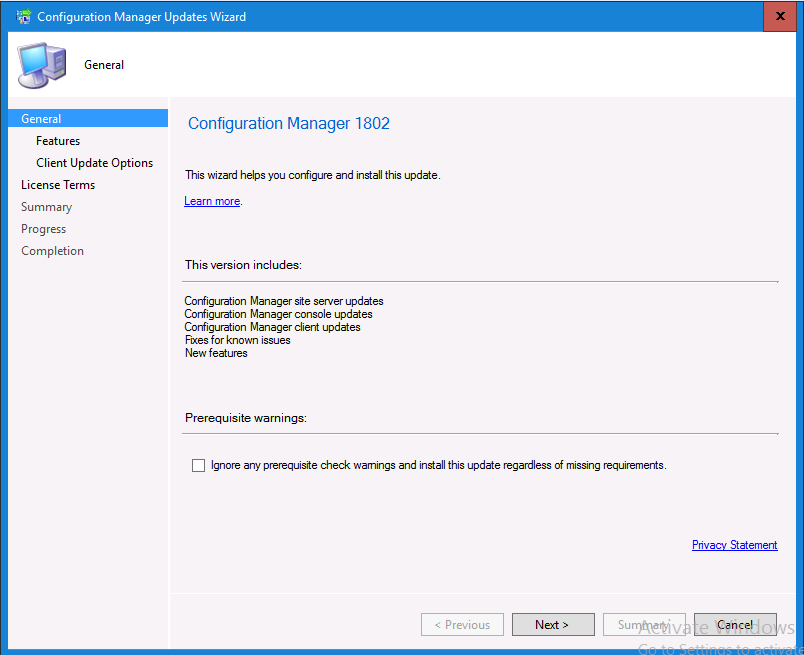
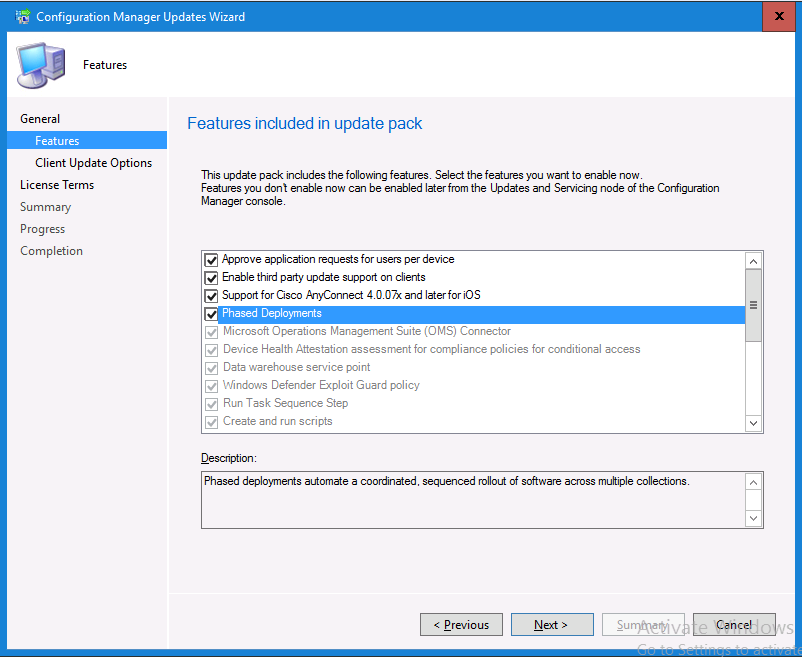
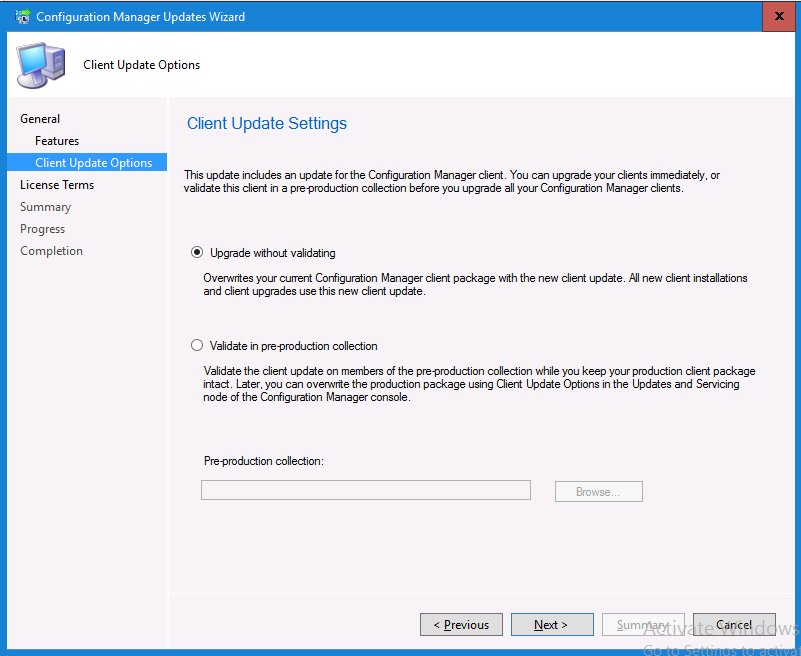
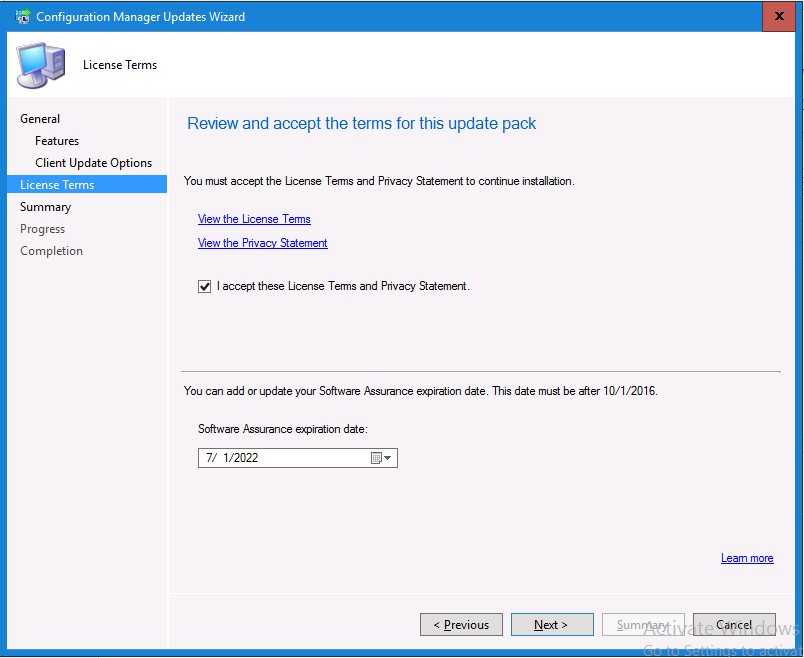
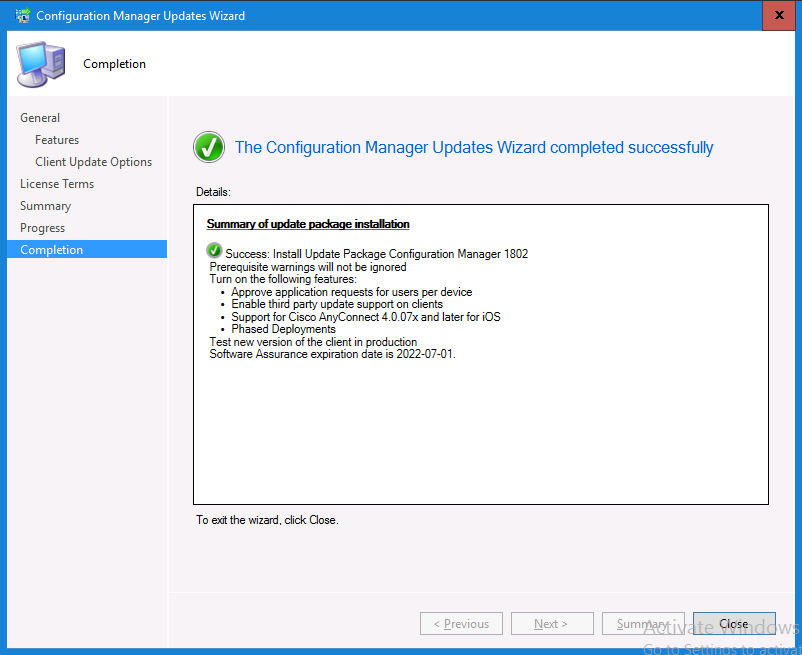
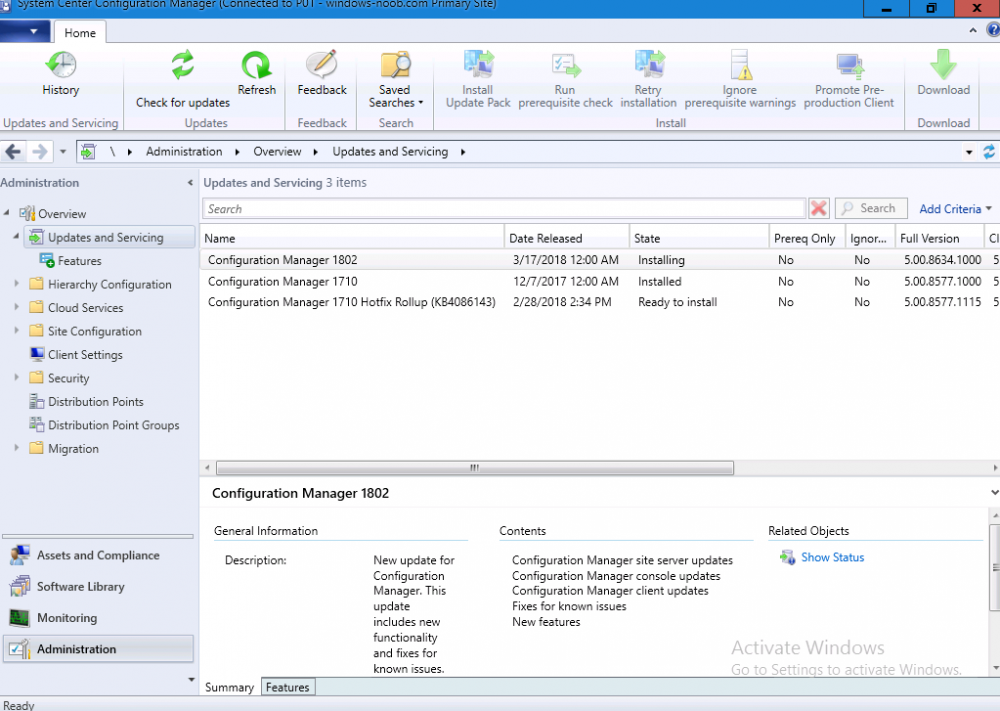
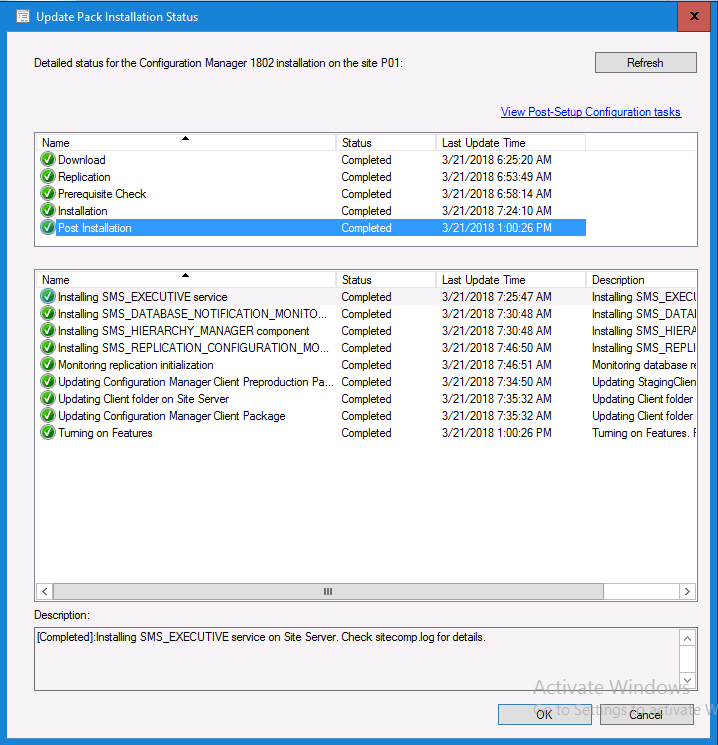
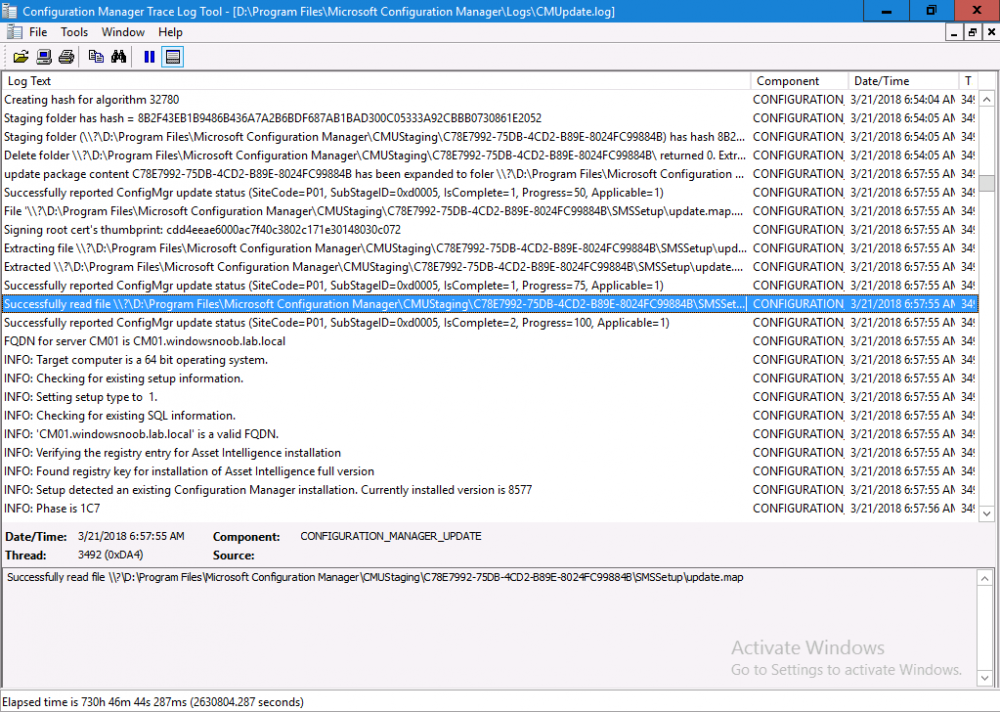
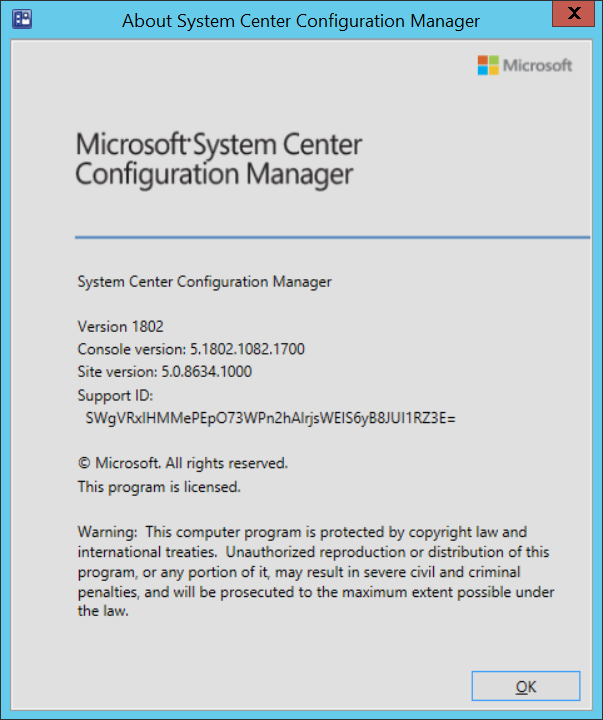
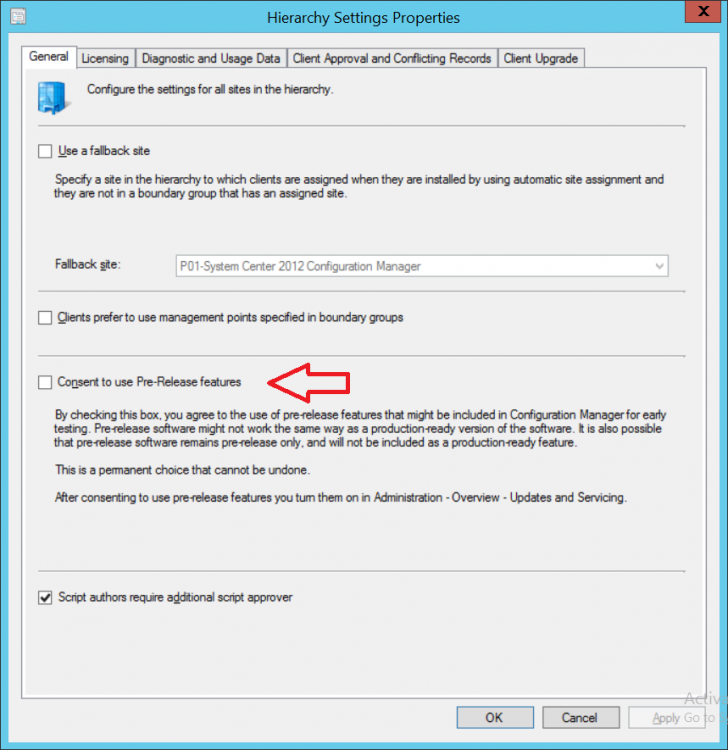
Introduction Today (in Seattle WA) Thursday the 22nd of March, 2018, System Center Configuration Manager (Current Branch) version 1802 was released. You can read the official announcement here and for a detailed list of what's new, please see the following blog post. The white elephant above is based upon an original graphic which I found here, thanks Djam ! Understanding the different SCCM releases There are two main branches of Configuration Manager currently available, Current Branch and Technical Preview. System Center Configuration Manager (Current Branch) is designed for use in production environments, for managing anything from relatively small to very very large Enterprises, whereas System Center Configuration Manager (Technical Preview) is for lab testing environments only and is limited to 10 clients. The Technical Preview releases are released monthly, and contain the latest and greatest features that are being trialed in the product, and usually these new features are the result of feedback from uservoice. Current Branch releases on the other hand are released only a few times per year and contain stable, tested features that are mature enough to release into production environments. Note: You cannot upgrade from a Current Branch to Technical Preview or vice versa, they are two distinct different branches. The following versions have been previously released since Microsoft moved to the Current Branch release cadence for Configuration Manager: Source Microsoft. A note about Baseline versions Baseline versions are versions of Configuration Manager that you can use to perform a clean install of Configuration Manager or when upgrading a supported version of System Center Configuration Manager 2012 hierarchy to Current Branch. Baseline versions are available for download in the Microsoft Volume License Service Center. As System Center Configuration Manager (Current Branch) version 1802 is now the new Baseline, you should it for all new installs (or applicable upgrades) until the next Baseline version is released. Note: Even though 1802 is listed as a baseline version here, it is not yet available for download on MVLS (as of 2018/3/25). Usually it takes a few weeks to get the new build media in place, so until that happens you can continue to use the 1702 baseline media for new installs and supported upgrades. Upgrading to 1802 Current Branch In a previous post you used PowerShell scripts to install System Center Configuration Manager (Current Branch) version 1702. This post will focus on upgrading from one current branch version to version 1802. This post assumes you are running a minimum version of 1702 of System Center Configuration Manager (Current Branch). If you have a hierarchy containing a CAS and one or more Primaries, then you must upgrade the CAS first before upgrading the Primary site servers. Note: Before upgrading, please review the following checklist to verify you are ready for the update. Fast ring versus Slow ring Do you want it now or later ? If you want it right now then you have the choice of getting the release immediately using a method called the fast ring. The fast ring method uses a PowerShell script which you download from Microsoft. After running the PowerShell script, the upgrade will show up in the ConfigMgr console. Note: The fast ring method is usually only available for the first 2 weeks after a Current Branch release is released. If however you decide to wait a couple of weeks after the release is publicly available, then the upgrade will be released to the slow ring and at that point it will show up in the ConfigMgr console for all Current Branch hierarchies without the need for running any PowerShell script. If you want to use the Fast Ring, download the PowerShell script and run it to self-extract to FastRingScript_1802. Once extracted, start an Administrative PowerShell command prompt in that folder and from there use the following command (where CM01 is the <SiteServer_Name | SiteServer_IP> of your CAS or standalone Primary site server). .\EnableFastUpdateRing1802.ps1 CM01 Next, open the ConfigMgr console and find Updates and servicing in the Administration node. Click on Check for Updates in the ribbon, followed by Refresh. After a few minutes you should see that Configuration Manager 1802 is listed with a state of Available to download as shown below. Note: If the upgrade does not show up in the console even after refreshing the view, you can restart the SMS_Executive component in Configuration Manager Service Manager in the Monitoring node of the console or alternatively restart the Configuration Manager server. After some time the update will automatically start downloading at which point you can open the dmpdownloader.log using CMtrace to keep track of things. Once it has completed downloading, the update pack will be listed in the ConfigMgr console with a state of Ready to Install. You may need to click refresh in the ConfigMgr console to update the view. Installing the Update pack Right click on the update and choose Install Update Pack. when the Wizard appears, make your choice for pre-requisites and click next. review the features included in this update pack , and make selections if you wish, you can always add them later in the Console. Note: You'll also notice lots of Pre-Release features that are greyed out, to turn them on see the steps after upgrading the console the bottom of this guide. Before clicking next at the Client update settings please see this post accept the EULA and configure the software assurance expiration date and continue through until the wizard is complete. Monitoring the update In the console, the update pack state will change to Installing (refresh the console view to see this). Clicking on Show Status will give you detailed info about the state the Installation is in, there are 5 distinct phases in the top pane: Download Replication Prerequisite Check Installation Post Installation Selecting a phase will highlight what state the update is in, including what (if any) problems it has. Logs, logs and more logs. During the upgrade you should monitor the following log files available in <drvletter>:\Program Files\Microsoft Configuration Manager\Logs, you can use CMTrace to do so. CMUpdate.log Hman.log These logs will detail the installation of the update pack. you should also pay close attention to the following log files present in the root of C:\. CompMgrProv.Log ConfigMgrPrereq.log ConfigMgrSetup.log After the update is complete, click Refresh in the console and you'll be reminded to update the ConfigMgr Console via a popup, the new version is 5.1802.1082.1700. Make sure to update your console as you cannot use the new features until you do. The observant among you will notice a change to the Console versioning. The new console version is 5.1802.1082.1700 versus the old console version (in my lab) which was 5.00.8577.1100. The new Console versioning works as follows: Major Minor Build Revision So that translates to... Major = 5 Minor = 1802 Build = 1082 Revision = 1700 Click OK to upgrade your ConfigMgr console, and after all is done you’ll see the 1802 version listed in the console. and clicking on about shows you Enabling Pre-release features If you want to use the Pre-Release features, then select the Administration node, select Site Configuration, Sites, Hierarchy Settings, and place a check mark in Consent to use Pre-Release features. After that, select Updates and Servicing, click on the Update Pack, select Features and in the right pane of the ConfigMgr console you'll be able to turn pre-release features on or off by right clicking and choosing Turn on or Turn off. Summary This release is packed with great features and new functionality and proves that the SCCM as a Service (SAAS) model is working. Not only is it working but quick adoption by Enterprises large and small is proof indeed that they like and trust the direction that ConfigMgr is evolving towards. If you are not on Twitter yet then get on it, and Tweet a thank you to David James (@Djammmer) and his Team for the amazing work they do. Recommended reading System Center: Configuration Manager - https://blogs.technet.microsoft.com/configurationmgr/ Checklist for updating to SCCM 1802 - https://docs.microsoft.com/en-us/sccm/core/servers/manage/checklist-for-installing-update-1802 What's new In System Center Configuration Manager (Current Branch) 1802 - https://docs.microsoft.com/en-us/sccm/core/plan-design/changes/whats-new-in-version-1802 Co-Management for Windows 10 devices - https://docs.microsoft.com/en-us/sccm/core/clients/manage/co-management-overview Log files in System Center Configuration Manager - https://docs.microsoft.com/en-us/sccm/core/plan-design/hierarchy/log-files


-
Importing Customized Start Menu
anyweb replied to xerxes2985's topic in System Center Configuration Manager (Current Branch)
@xerxes2985thanks for letting me know ! p.s. CopyProfile is evil -
thanks for posting this update !
-
you can start off by searching the smsts.log file for the related Apply Driver Package step, and look at what DISM is doing.....via the DISM.LOG
-
Well at this point I would raise a case with Microsoft Premier Support, can you do that ?
-
Configuration Manager 1702 Update failed
anyweb replied to Prashantv's topic in Configuration Manager 2012
please zip up and attach your CMUpdate.log -
so it could be that CU ( 10586.1478 ) that is causing problems, you can always uninstall it on one machine, and do an upgrade as a test
-
do the windows 10 1511 machines have the latest CU installed prior to the upgrade ?
-
to be clear what os are you ugprading from here ? Windows 7 or Windows 10 ? if it's Windows 7 then install the KB2952664 hotfix and reboot and try again
-
these guides for are for hybrid scenarios and that is not the same thing as co-management, i havn't published much on co-management other than this How can I enable co-management in System Center Configuration Manager ?
-
in the logs you attached can you tell me where you are seeing it hanging, i looked at one setupact.log and it's reporting the time as 7:41 throughout the entire log, which doesn't show any hanging...
-
what ADK version are you using and why are you not using SCCM 1710 CB ?
-
can you zip up and attach your logs so we can see what's going on
-
try re-distributing the content that it's failing the hash on, if that doesn't help, then redeploy the task sequence and try again
-
hi Doug glad you found the bug as it saved me from re-testing the code to verify that i hadn't added a bug cheers niall
-
hi Doug thanks ! from your smsts.log it's not allowing the task sequence to proceed because it does not see the file 'upgrade_forced.txt' file, that file SHOULD be created in the following scenarios User clicks upgrade now HTA times out and there are no deferrals left so can you tell me how you are getting to the actual task sequence running, is this after the user has clicked upgrade now ? did you verify that the file existed there or not before the task sequence runs ? can you share your Windows10RequiredUpgradeWrapper.log file as well please so i can see what it says cheers niall
-
hi here are my replies 1. always use virtual machines to build and then capture your master image. That keeps the image driver agnostic. 2.the following guide shows you the process from beginning to end, https://docs.microsoft.com/en-us/windows/deployment/deploy-windows-mdt/create-a-windows-10-reference-image, 3. see above 4.see above
-
no that's only one of the two logs, there should always be a smsts.log and sometimes one or more smstsxxxxxxxxx.log files basically, your log did not show any issues related to it not upgrading
-
take a look at these MDT specific posts https://www.windows-noob.com/forums/topic/15841-how-can-i-automate-the-deployment-of-windows-10-version-1709-fall-creators-update-using-mdt-and-powershell/
-
i didn't see the smsts.log in that zip couldn't you find it ?
-
First, thank you very much for this thread and your site. I am a new member, but I have been browsing this board for months. Excellent work. A gold mine for admins. thanks for the kind words ! and welcome to windows-noob :-) as regards your issue it's hard to tell without seeing the logs, so can you please zip up and attach your smsts*.log file from c:\windows\ccm\logs\SMSTSLOG here
-
you could modify Eswar's script here to detect/verify that there are no updates pending, and if so allow it to continue http://eskonr.com/2016/11/sccm-configmgr-powershell-script-to-install-software-updates-on-remote-clients/ cheers niall
-
ok i understand your scenario, i guess the wrapper would have to be modified to do an additional check for that, i'll see if it's possible and update the thread if i can