anyweb
-
Posts
9182 -
Joined
-
Last visited
-
Days Won
366
Everything posted by anyweb
-

Configuring BitLocker in Intune - Part 2. Automating Encryption
anyweb replied to anyweb's topic in Microsoft Intune
can you do a teamviewer session with me so i can troubleshoot it ? -
Configuring BitLocker in Intune - Part 2. Automating Encryption
anyweb replied to anyweb's topic in Microsoft Intune
it worked for me ! and according to your log it worked for you too, how did you test it exactly ? I tested using a windows autopilot enrolled device that had regular user permissions (not local admin) did you modify the script in any way ? -
Preparing for 1710 upgrade
anyweb replied to simulacra75's topic in System Center Configuration Manager (Current Branch)
it wont be overwritten, it'll still be there, but you won't be able to service it in the console, instead you can use dism to add remove drivers etc to it. -
you can modify it to protect in Windows also using ServiceUI.exe from the MDT toolkit
-
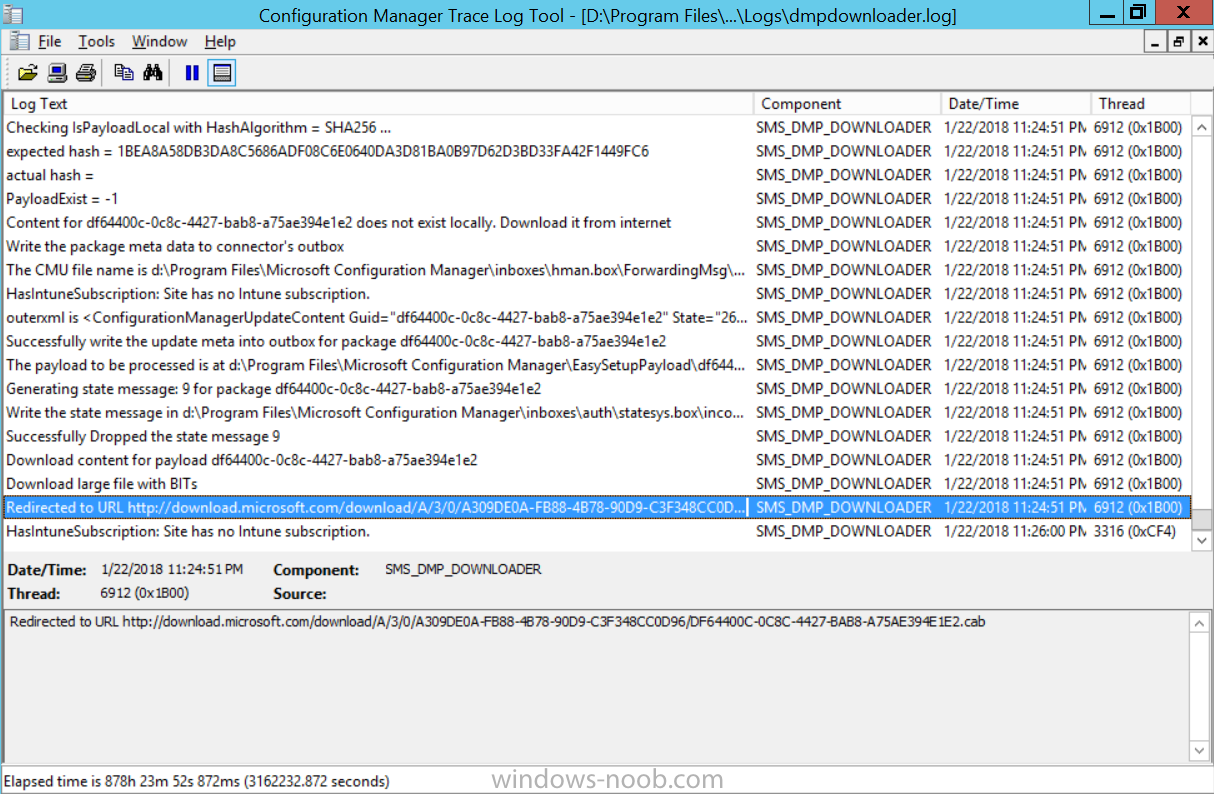
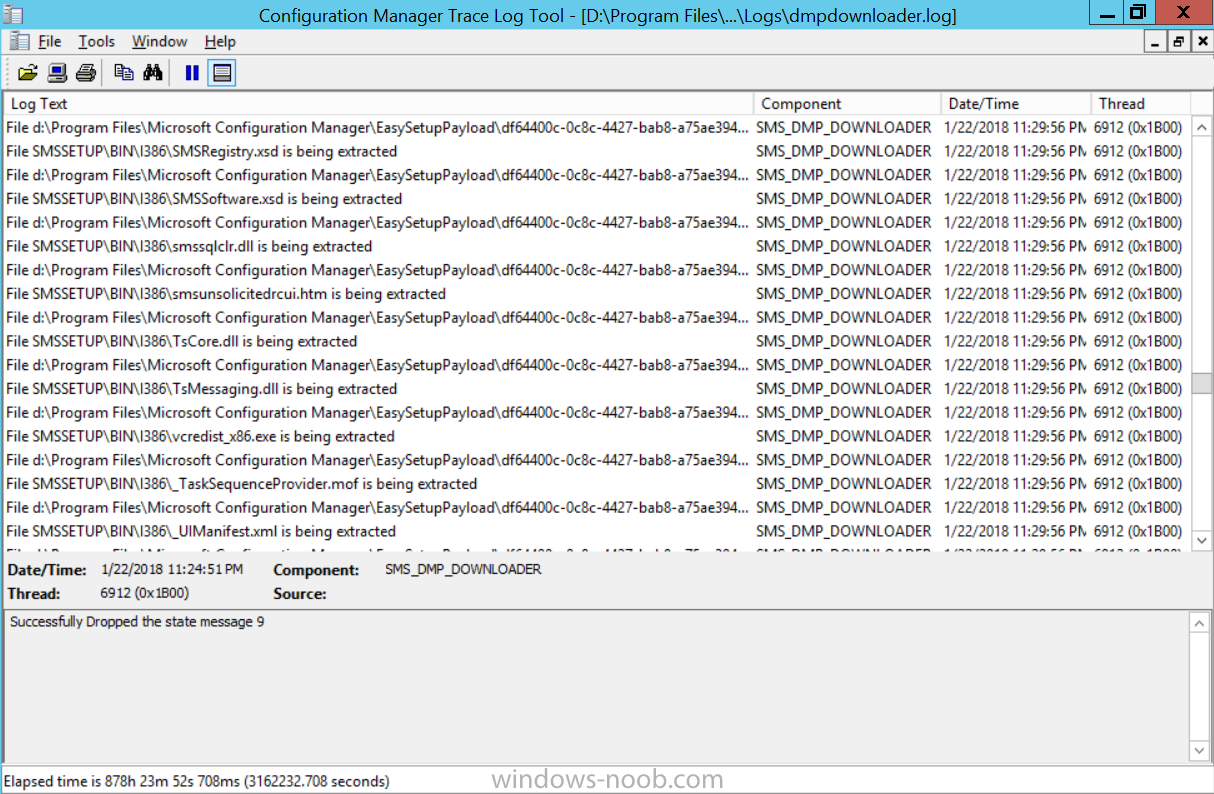
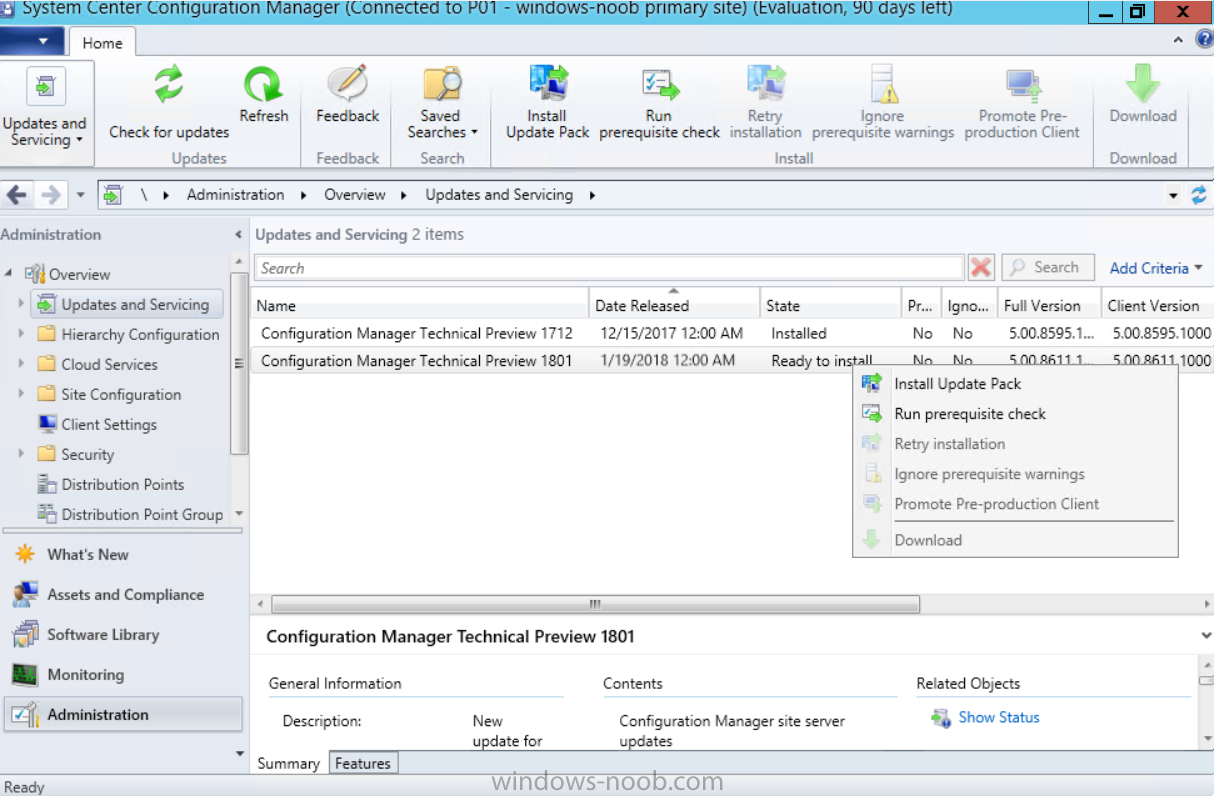
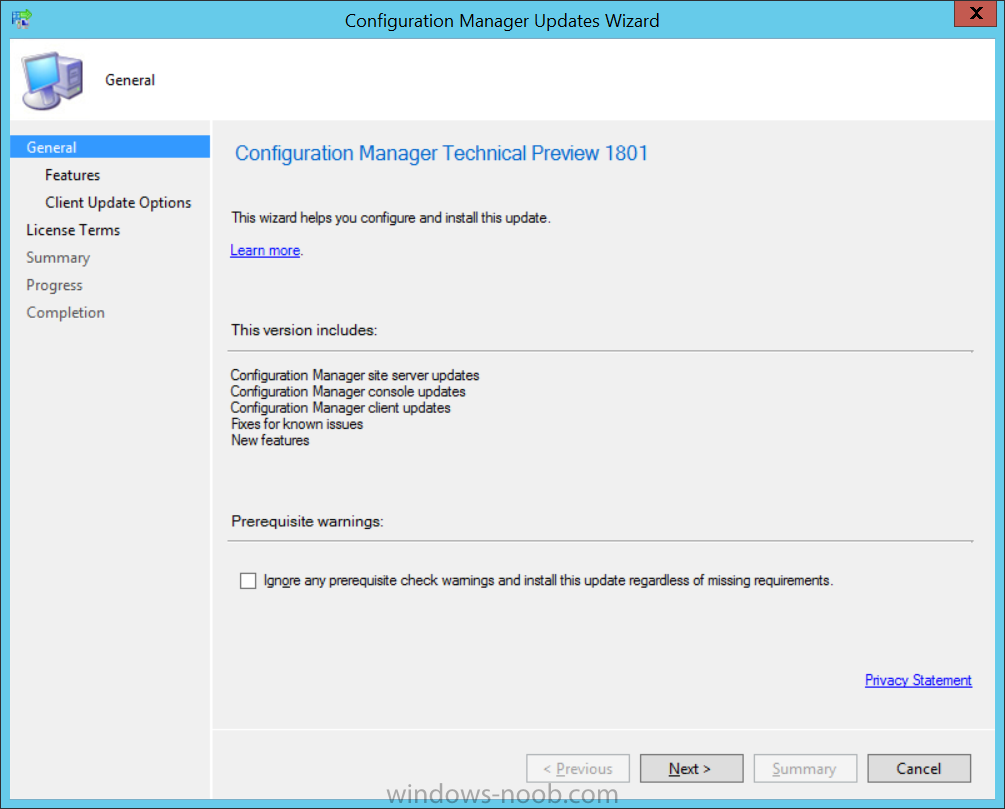
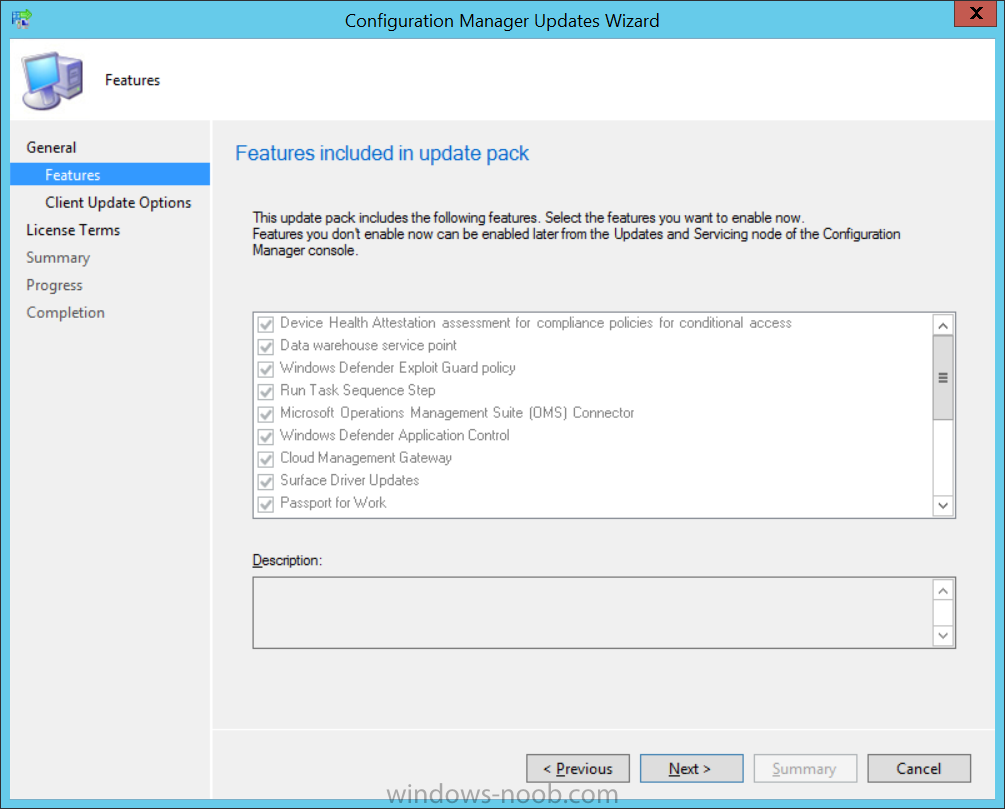
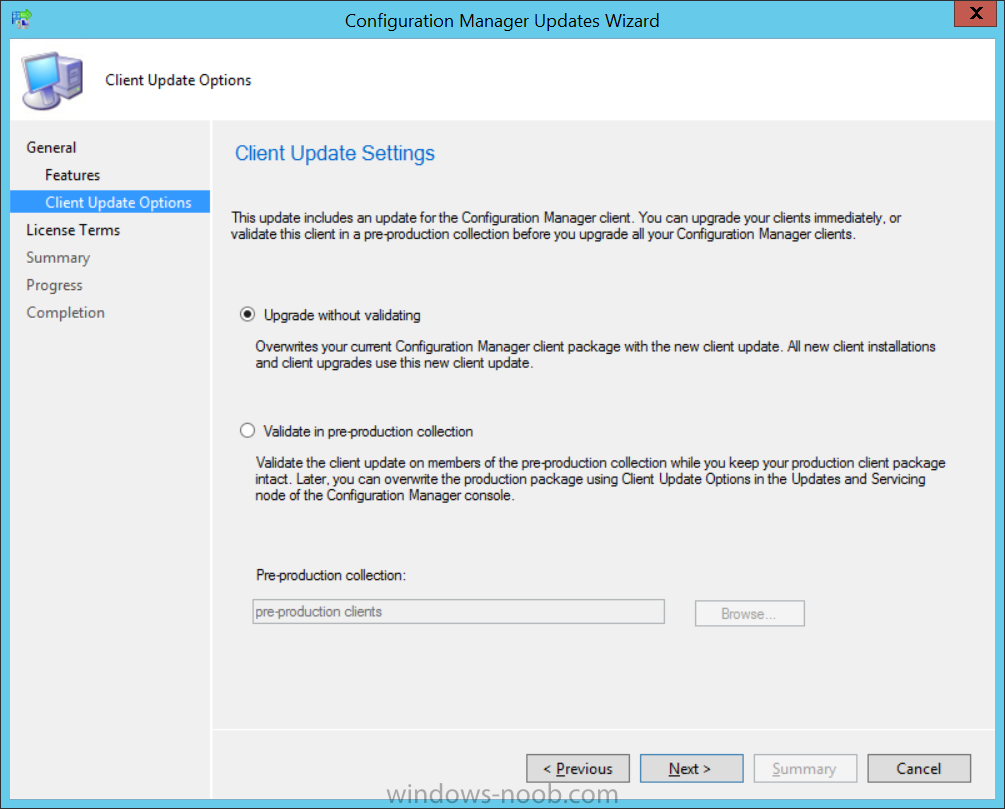
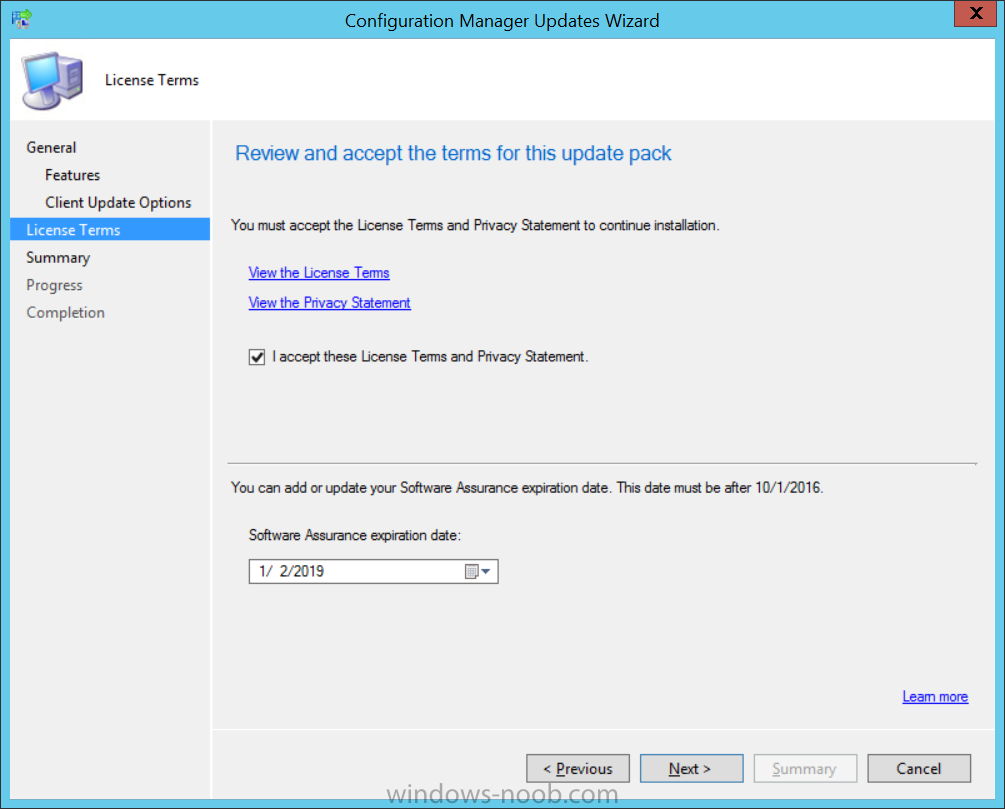
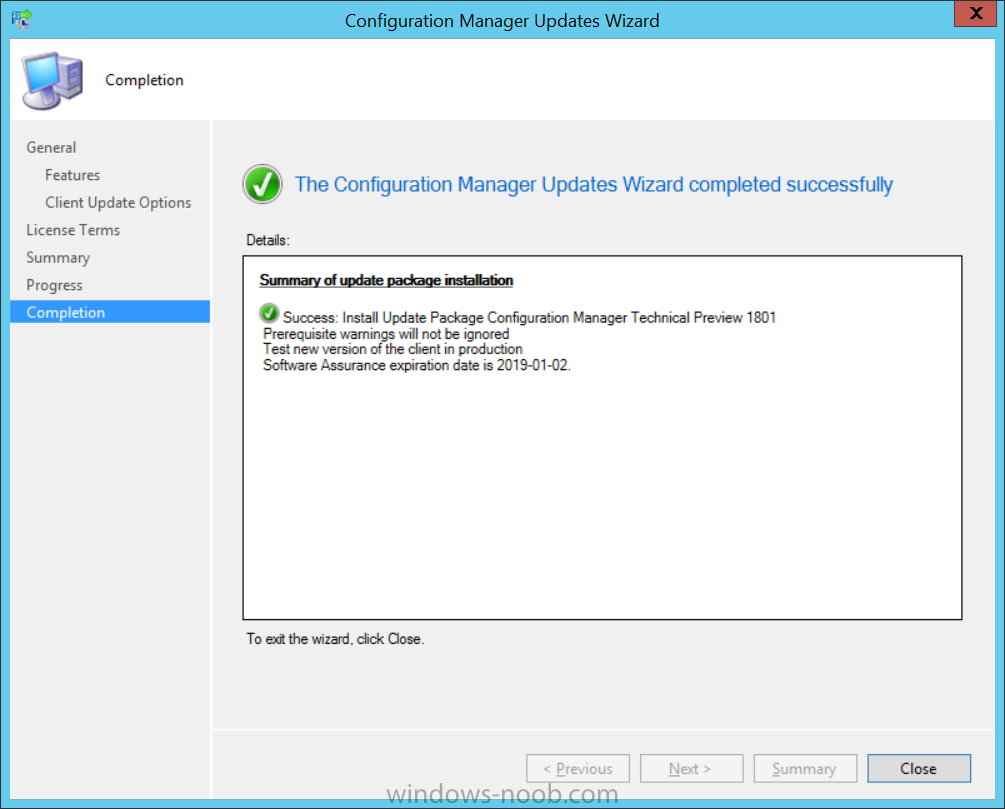
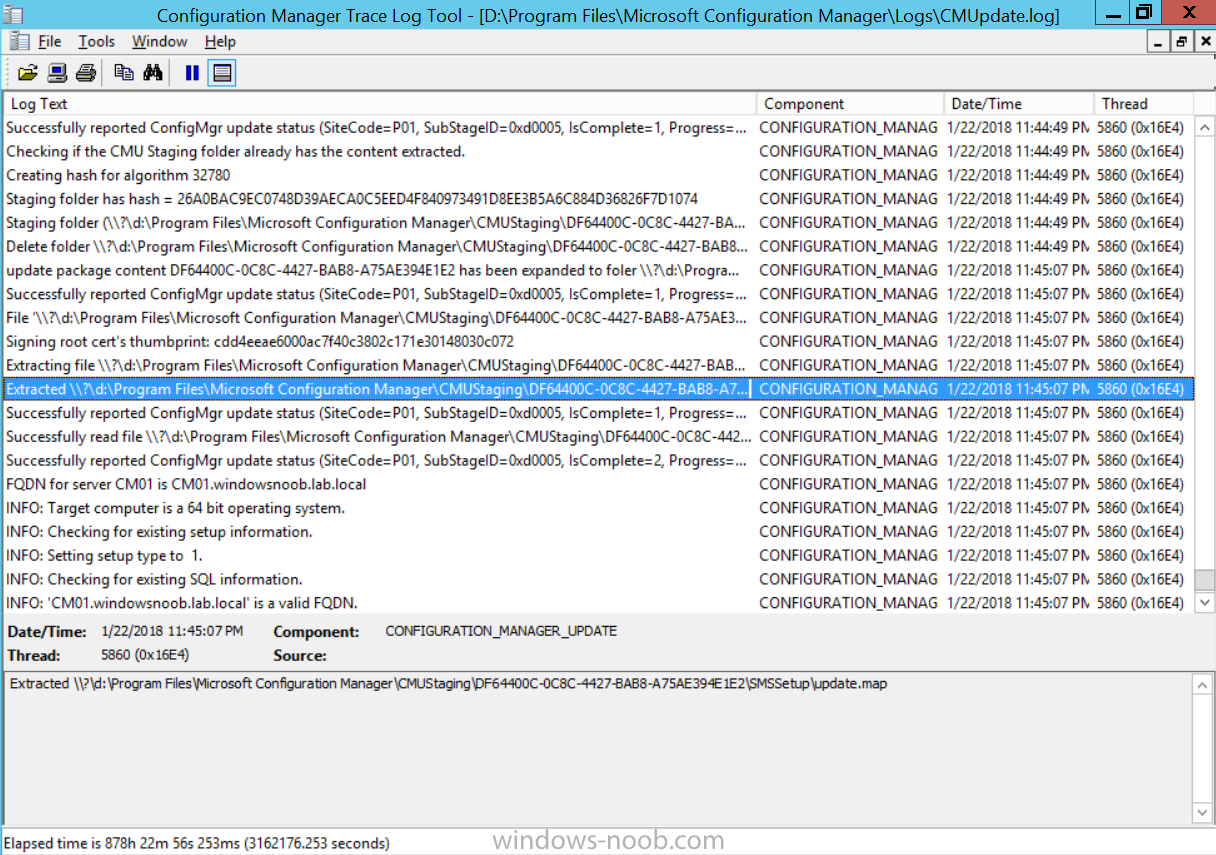
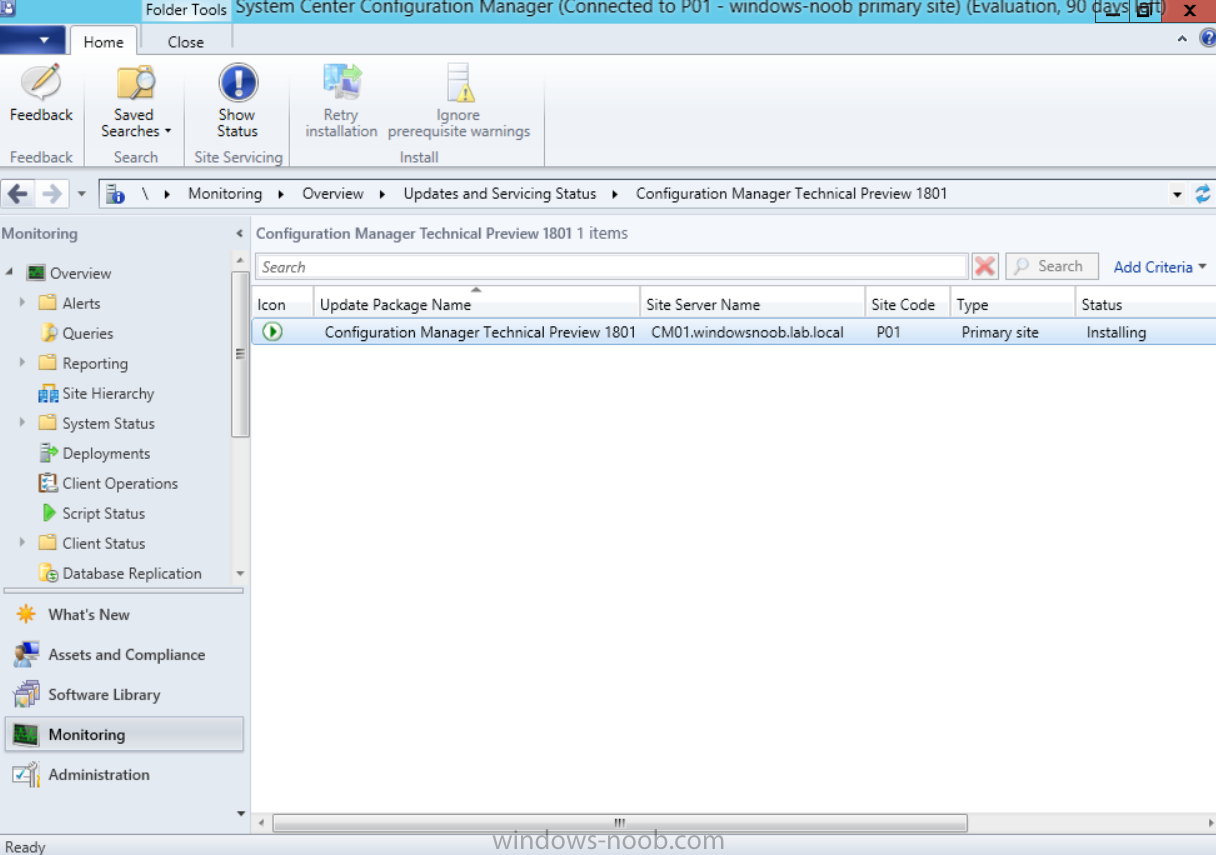
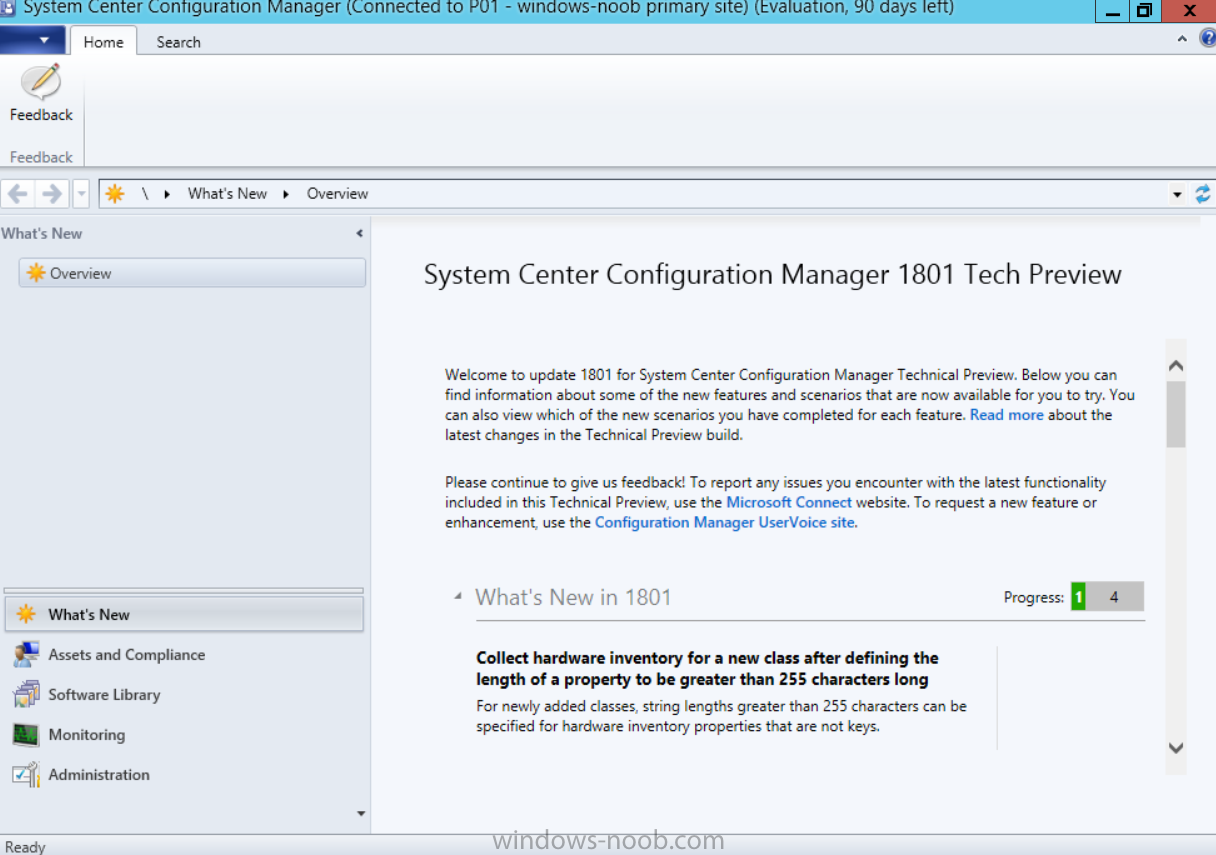
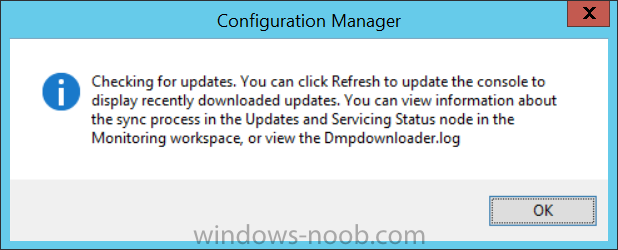
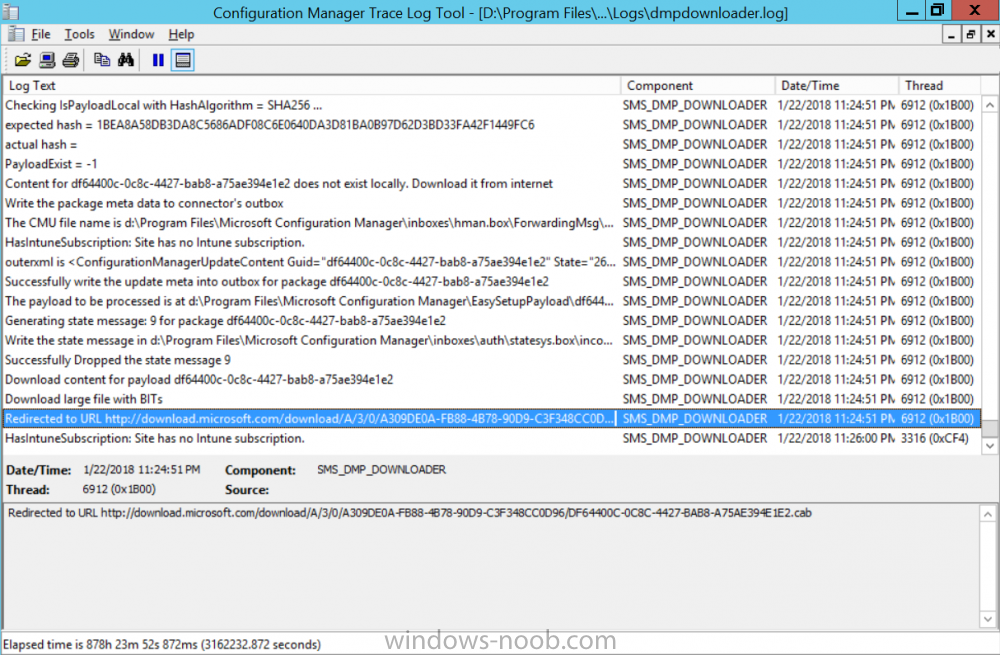
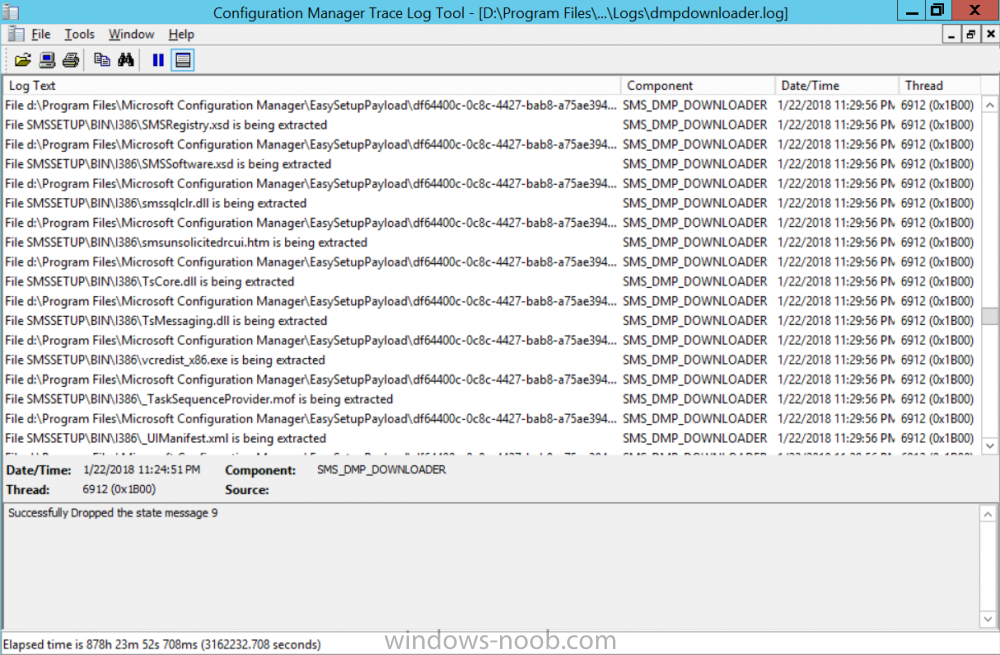
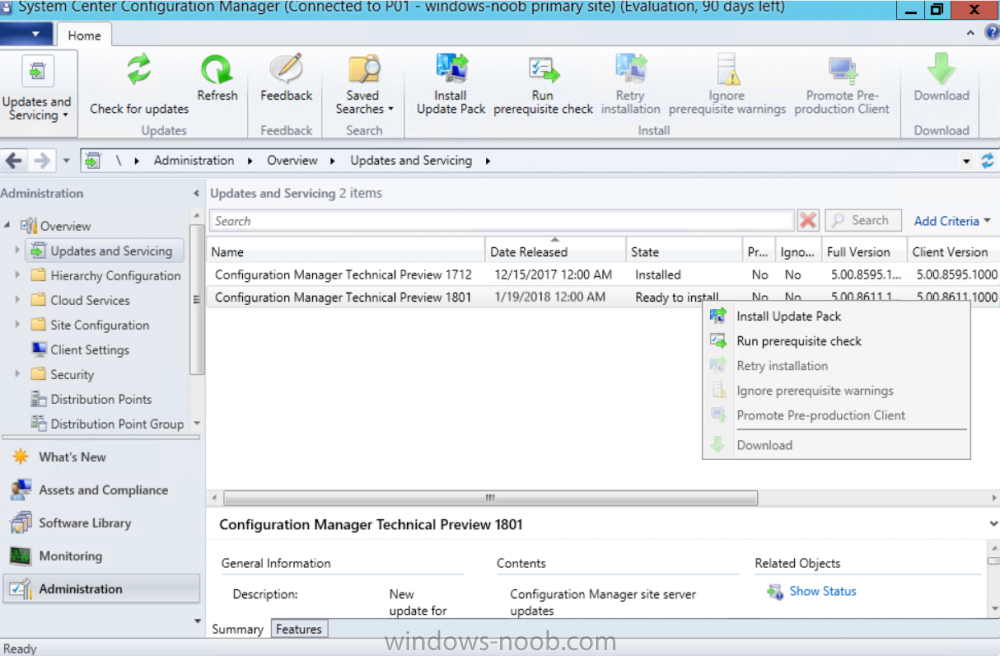
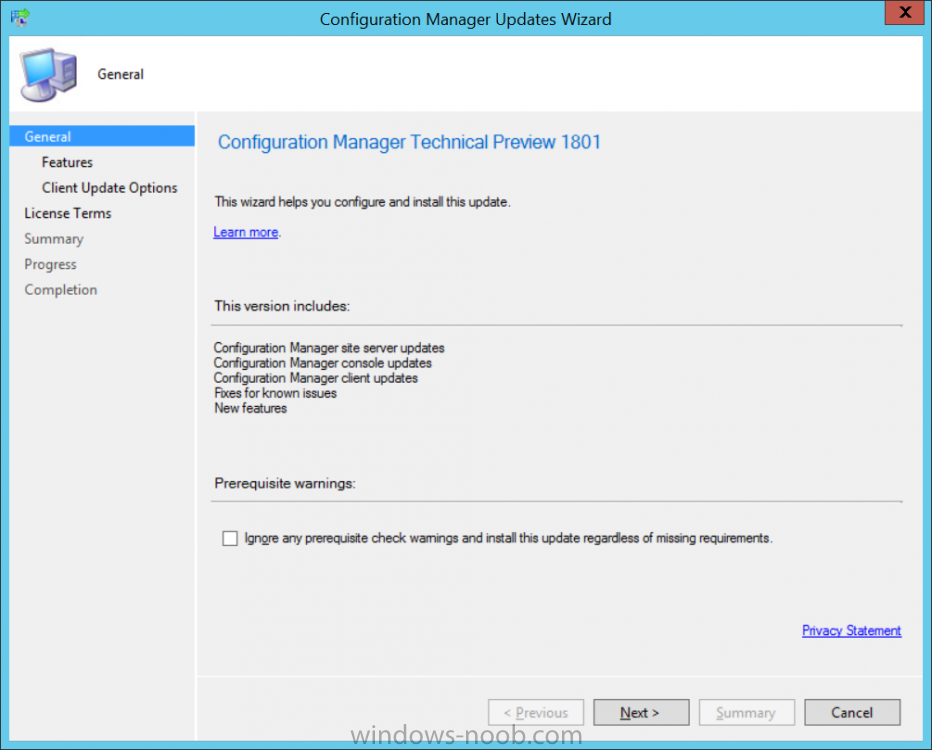
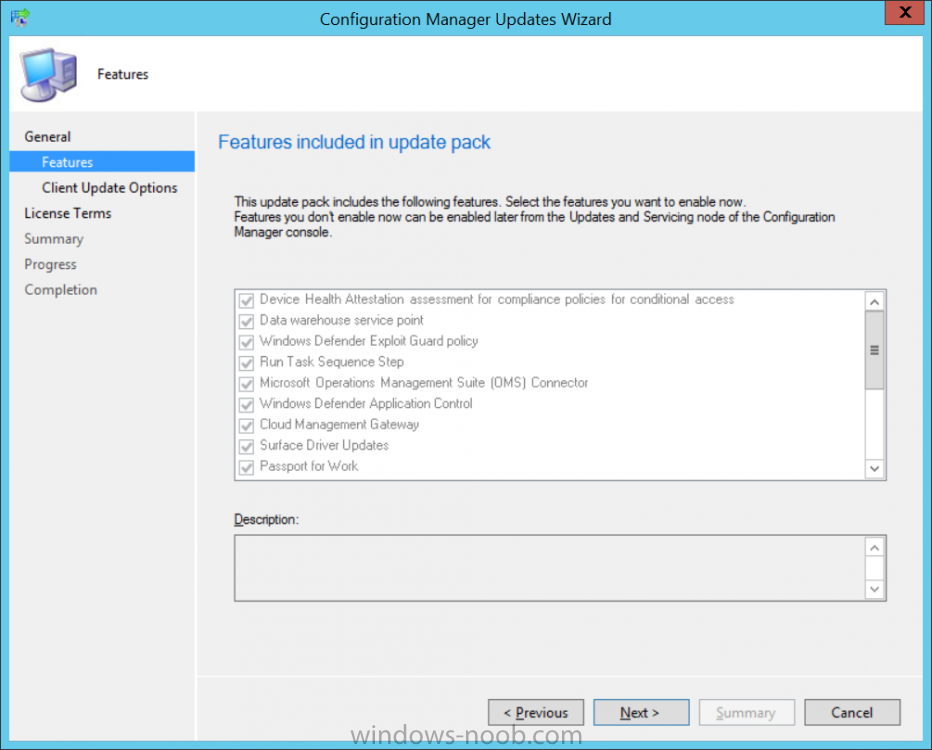
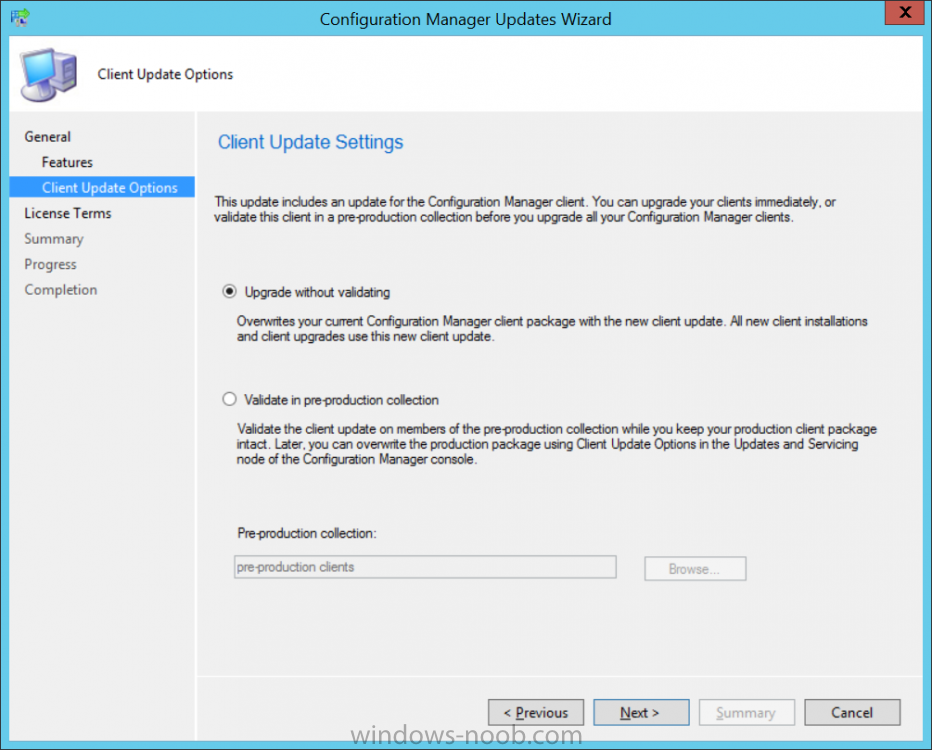
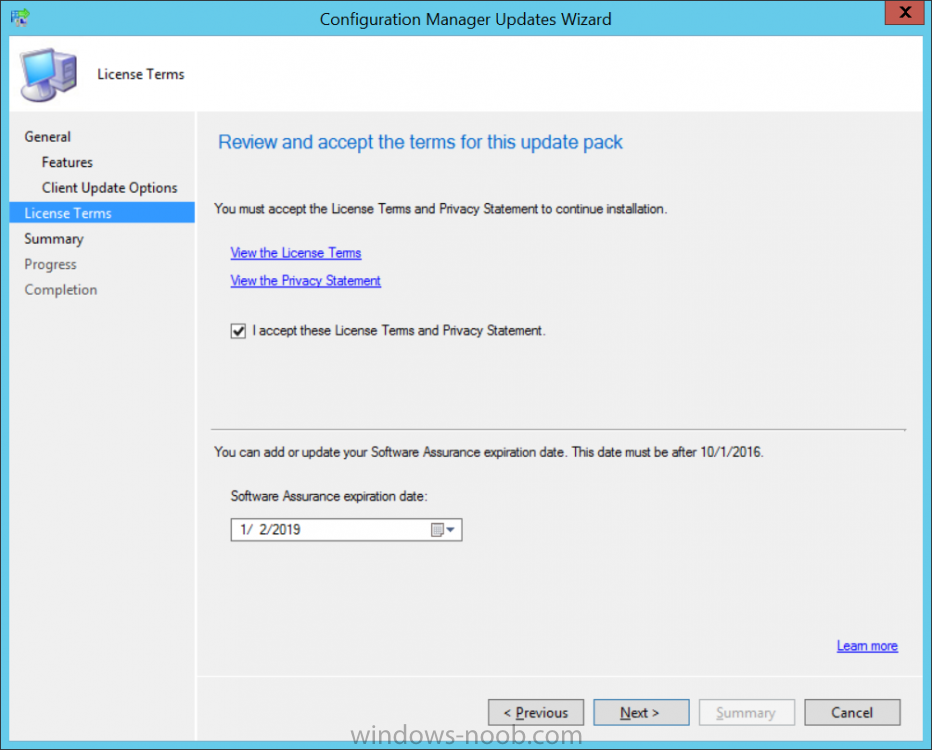
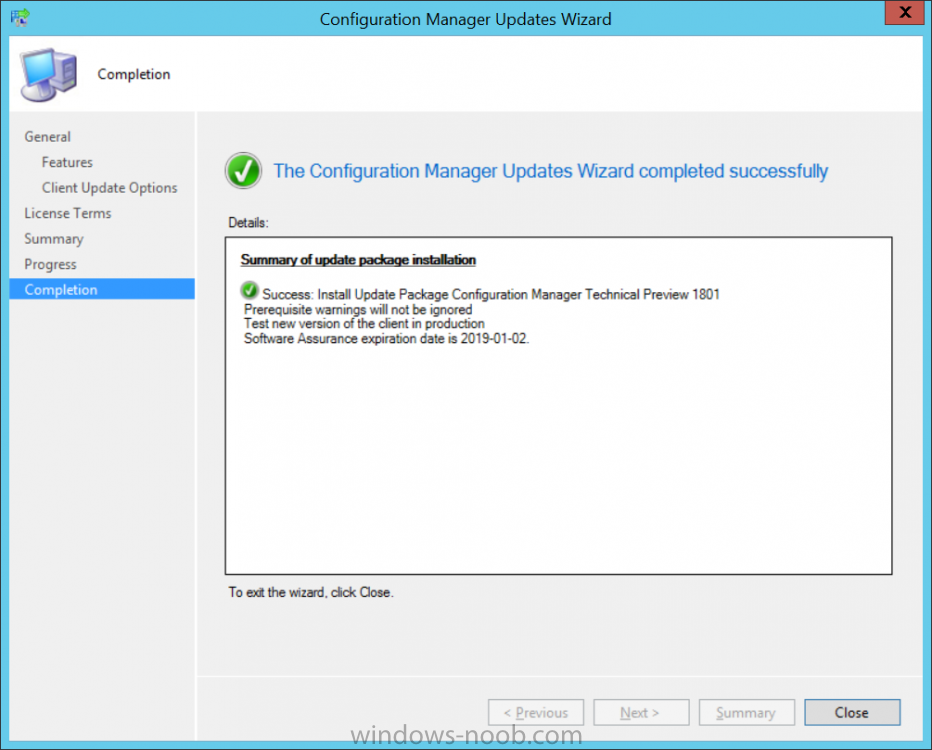
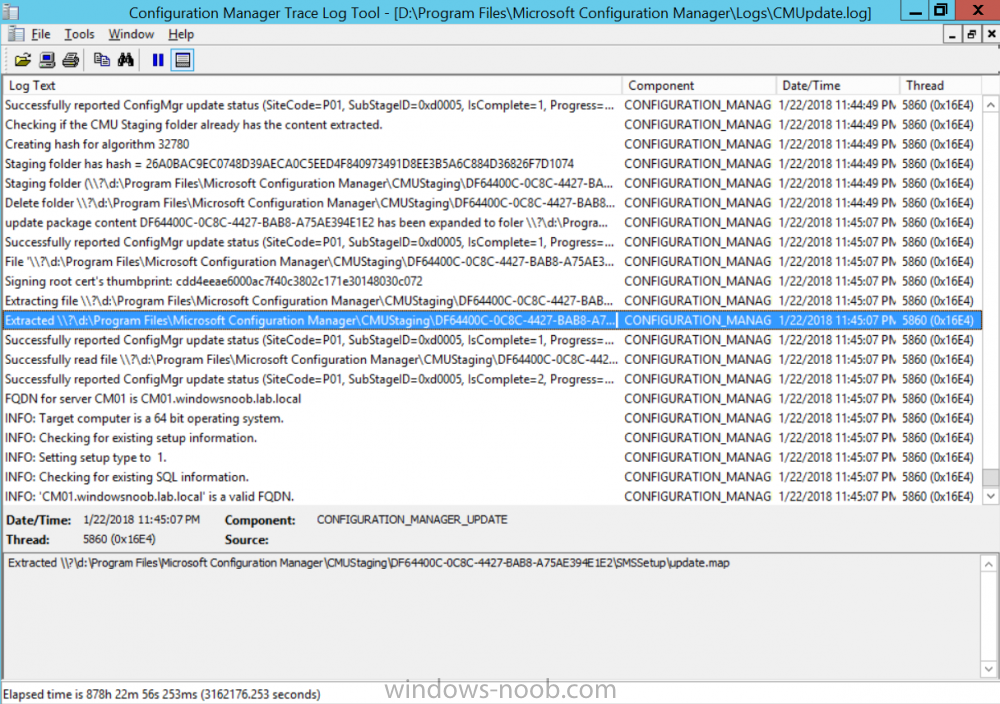
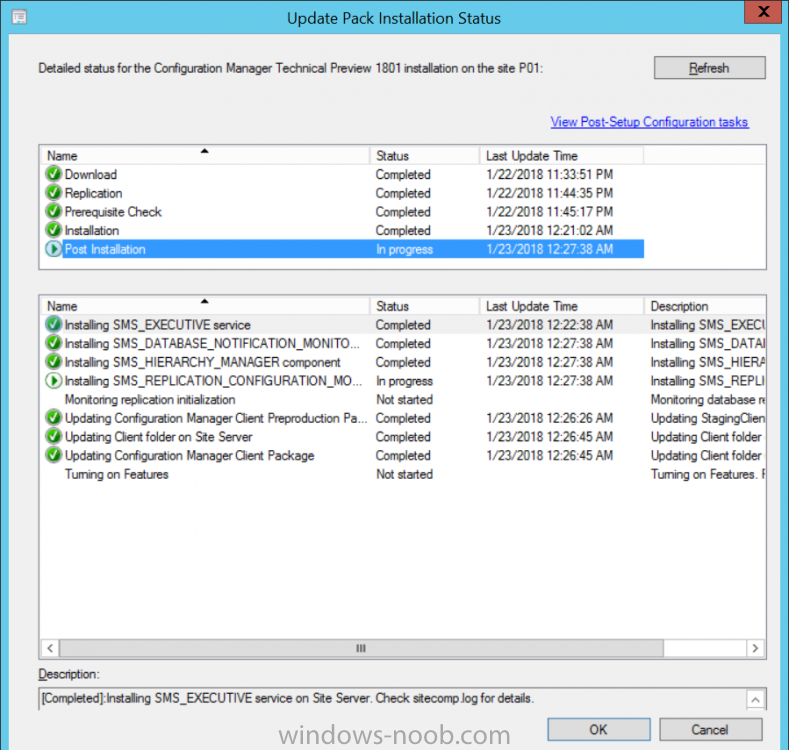
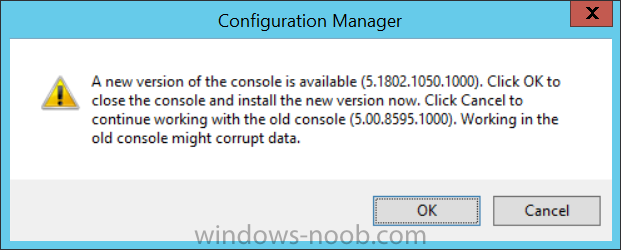
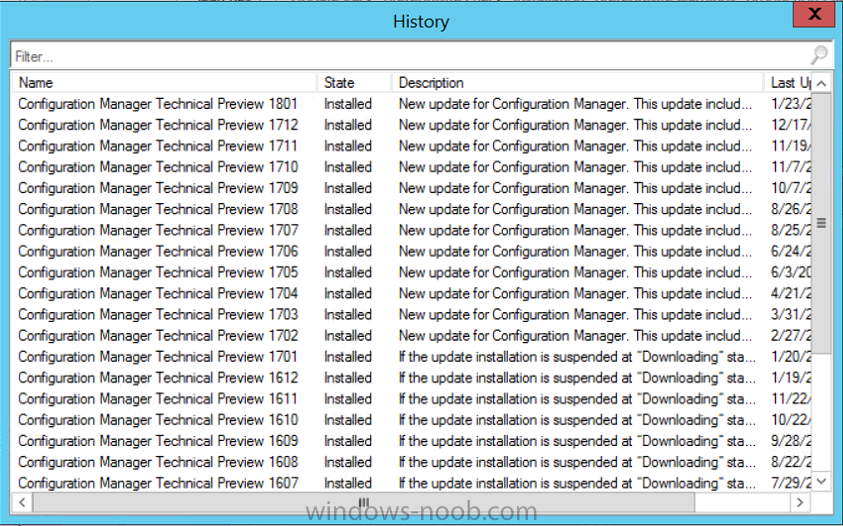
Introduction Microsoft have released the latest Technical Preview release of System Center Configuration Manager namely System Center Configuration Manager Technical Preview 1801. There are two main versions (of Configuration Manager) available: System Center Configuration Manager (Current Branch) System Center Configuration Manager (Technical Preview) System Center Configuration Manager (Current Branch) is designed for use in production, for managing anything from small to very large Enterprises whereas System Center Configuration Manager (Technical Preview) is for lab environments only and is limited to 10 clients. The Technical Preview releases are released monthly, and contain the latest and greatest features being trialed in the product, and usually these new features are the result of feedback from uservoice. Current Branch releases on the other hand are released only a few times per year and contain stable, tested features that are mature enough to release into production environments. System Center Configuration Manager Technical Preview 1801 is now available. This release offers the following new features: Run Scripts – You can now import and run signed scripts and monitor the script results. Moving Distribution Points between sites – You can now move an eligible distribution point from one primary site to another primary site or from under a secondary site to a primary site . For information about requirements for moving a distribution point see “Reassign Distribution Point”. Improvements to client settings for Software Center – Client settings for Software Center now has a customize button where you can preview your customizations before deploying them to machines. You can also hide unapproved applications in Software Center. New settings for Windows Defender Application Guard – For Windows 10 version 1709 and later devices, there are two new host interaction settings for Windows Defender Application Guard. Websites can be given access to the host’s virtual graphics processor and files downloaded inside the container can be persisted on the host. Co-management reporting – You can now view a dashboard with information about co-management in your environment. Phased Deployments – You can use phased deployments to automate a coordinated, sequenced rollout of software without creating multiple deployments. Support for hardware inventory strings greater than 255 characters in length – For newly added classes, you can specify string lengths greater than 255 characters for hardware inventory properties that are not keys. This release also includes the following improvements based on your feedback from UserVoice: Improvements to Automatic Deployment Rule evaluation schedule – You can now schedule Automatic Deployment Rule evaluation to be offset from a base day. Update 1801 for Technical Preview Branch is available in the Configuration Manager Technical Preview console. For new installations please use the recently updated 1711 baseline version of Configuration Manager Technical Preview Branch available on TechNet Evaluation Center. We would love to hear your thoughts about the latest Technical Preview! We’re now enabling Configuration Manager feedback through the Feedback Hub app built-in to Windows 10. When you Add new feedback be sure to select the Enterprise Management category and then choose from one of the following subcategories: Configuration Manager Client Configuration Manager Console Configuration Manager OS Deployment Configuration Manager Server Installing this release So how do you get Technical Preview installed ? There are two methods: Upgrade from a previous installation of Technical Preview (as shown in this guide). Do a clean install of Technical Preview 1703 (the latest TP baseline) by using the following guide and replace the base version in that guide with the TP1703 release and then upgrade. Upgrading to this release Once you have a Technical Preview release installed, in the Configuration Manager console browse to Administration, Overview, Updates and Servicing as shown below. Click on Check for Updates (in the ribbon) Next, click on the OK button. After refreshing the console, you can see the update is available, then start downloading, and once it is downloaded the state will change to Ready to Install. As instructed, if you want more details about what’s happening, you can read the DMPDownloader.log available in <drvletter>:\Program Files\Microsoft Configuration Manager\Logs, you can use CMTrace to do so. Once downloaded, the content will be extracted to the EasySetupFolder. Installing the update Right click the update and choose Install update pack. A wizard appears. Click Next. the Features included in the update pack will be listed. Select your client update settings and click Next accept the EULA and configure the software assurance expiration date and click through to the completion Monitoring the Upgrade At this point you should monitor the CMUpdate.log available in <drvletter>:\Program Files\Microsoft Configuration Manager\Logs, you can use CMTrace to do so. This log will detail the installation of the update pack. You should also pay attention to the following log files present in the root of C:\. CompMgrProv.Log ConfigMgrPrereq.log ConfigMgrSetup.log and after refreshing the console, the state of the update pack will change to Installing. Clicking on Show Status will give you detailed info about the state the Installation is in, it is broken down into 5 distinct phases in the top pane: Download Replication Prerequisite Check Installation Post Installation Selecting a phase will highlight what state the update is in, including what (if any) problems it has. And after a while it should progress through to the Post Installation phase, And after refreshing the console you’ll be informed that a new version is available namely version 5.1802.1050.1000. and after a while the new console is installed. After Installing this version, you can check your Upgrade history by navigating to the Updates and Servicing node, and clicking on History in the ribbon. Recommended reading Capabilities in Technical Preview 1801 for System Center Configuration Manager – https://docs.microsoft.com/en-us/sccm/core/get-started/capabilities-in-technical-preview-1712 Update 1801 for Configuration Manager Technical Preview Branch – Available Now! – https://cloudblogs.microsoft.com/enterprisemobility/2018/01/22/update-1801-for-configuration-manager-technical-preview-branch-available-now/


-
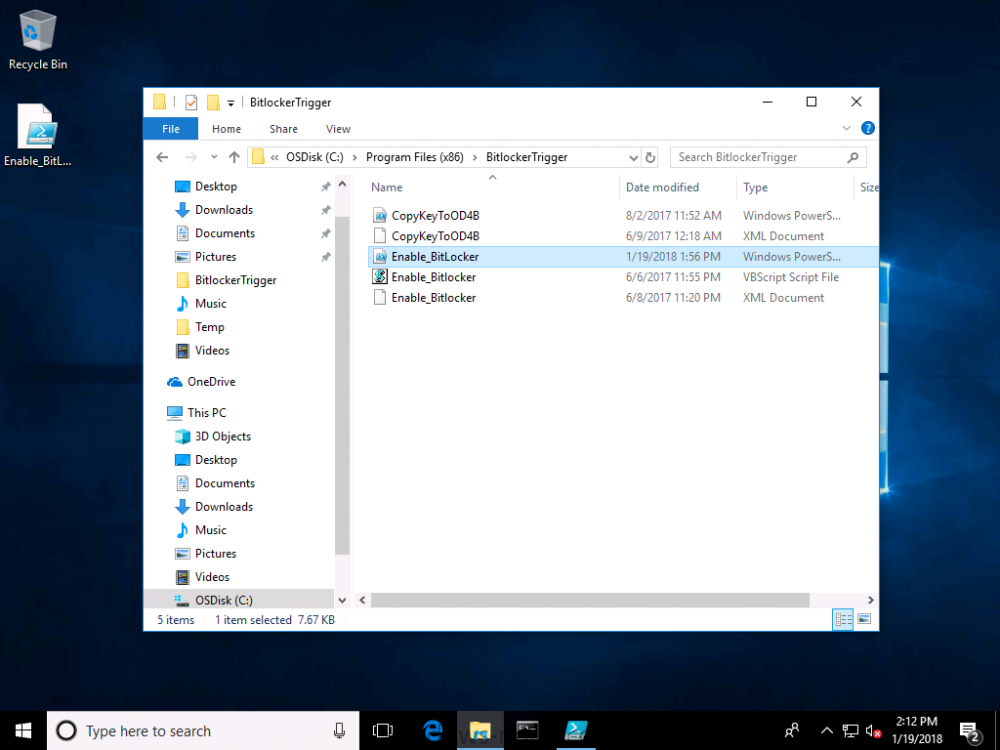
You may have already seen Part 2 of this series where you can automate BitLocker encryption in Intune using supplied MSI's, which contain logging, reboot prompt and other features. I've put together this video to show you how you can test the PowerShell scripts contained within the two MSI's here. This allows you to test the scripts outside of Intune, and when you are happy with the results you can re-package them and deploy the MSI via Intune. The video shows you how to use Psexec to start a process (in this example it's CMD.EXE) as SYSTEM. psexec.exe /s /i cmd.exe After starting the cmd prompt as SYSTEM, you can launch powershell. Next, browse to the folder where the scripts are, by default it's C:\Program Files (x86)\BitLockerTrigger and launch Enable_BitLocker.ps1. After the TriggerBitlocker msi is installed by Intune on a Windows AutoPilot enrolled device, the PowerShell script will run via the Scheduled Task as SYSTEM, so this method of testing is a valid way to verify any changes you add to the PowerShell script before repackaging it as an MSI. To see the video click below, have a look and happy troubleshooting. cheers niall
-
Configuring BitLocker in Intune - Part 2. Automating Encryption
anyweb replied to anyweb's topic in Microsoft Intune
it's working now, and i've added the updated USER msi to the original blogpost, please download and test, it works fine for me you can see a video of how to test it yourself outside of Intune, here cheers niall -
Introduction Yesterday I needed to deploy a new Windows 10 version 1709 Virtual Machine using Windows AutoPilot, with a user that did not have Administrative permissions on that Virtual Machine, so I created the profile in Windows AutoPilot in the Microsoft Store for Business and reset my virtual machine. After working my way through the Windows AutoPilot OOBE (out of box experience) screens, I was presented with a “Something went wrong” error shown below. This error can occur just after entering your password and should be the point where the device is setup and auto enrolled into MDM (if you have that option enabled and have Azure AD Premium). I decided to document the things I needed to check in order to resolve the issue to help others with the same problem. Thanks go to Per Larsen for pointing me in the right direction. Step 1. Check that the user has the correct license requirements For Auto-enrollment into MDM you need an Azure Ad Premium license, so I wanted to verify that the user in question was licensed appropriately. To do so, open https://portal.azure.com and open the Intune service, click on Users and select the username you wish to verify. The username used for this blog post was wipuser@windowsnoob.com. Next, click on Licenses in the left column. The Licenses available to the user are shown on the right blade along with a count of Enabled services. To drill down further, click on the Enterprise Mobility + Security E5 license. Details of the services enabled within that license are shown. So based on the above, you can see that the user is licensed for Azure AD Premium and Intune A direct so this is not a licensing issue. Step 2. Check the Device limit setting in Azure AD Note: Azure AD maximum devices controls Azure AD device registration, not MDM enrollment. Azure AD registration and MDM enrollment are two separate features controlled by two separate products. Not every MDM enrollment requires Azure AD registration and vice-versa. That said Windows AutoPilot does require Azure AD join, so it's a good idea to verify this setting prior to continuing your troubleshooting. You can set a limit on the number of devices users can enroll, to verify the current setting open the Azure Active Directory service and click on Devices then click on Device Settings. Look at the value stored in Maximum number of devices per user. The value is 20 which is an adequate number of devices that the user can have in Azure. Step 3. Check the number of devices the user has already enrolled Next, you should verify the number of devices the user in question has enrolled already. To do so, in the Intune service click on Users, select the username and then click on Devices. As you can see the user has already enrolled one device, and it’s well below the 20 max limit so you can determine that is not the issue. Step 4. Check if the user is in scope for MDM Next, verify that the user is actually in scope for MDM. To do so, in Azure Active Directory click on Mobility (MDM and MAM), select Microsoft Intune. In this example you can see that the MDM scope is set to Some, and that includes the following User Group All Windows Device Users. So next you need to verify that the user is in that User Group. And to do that in the Intune service click on Groups, then All Groups, select the group in question and search or locate your user in that group. And the user is present in the group so that is not the issue. Step 5. Check if the user is in scope for Azure AD Join To verify that the user can join devices into Azure AD, open the Azure Active Directory service and click on Devices then click on Device Settings. Look at the value stored in Users may join devices to Azure AD, it can be one of the following three options All Selected None In this example it is Selected and the User Group in question can be viewed by clicking on 1 member selected. The user group in this example is called Allowed Azure Ad Join. By clicking on the user group and then clicking on Members you can see what users are in that user group. From the above you can see that the user is NOT in this user group. To resolve the ‘something went wrong’ error, click on +Add members and select the user in question, then click on Try again on the Windows device. Step 6. Check for Enrollment restrictions In the Intune service click on Device Enrollment, then enrollment Restrictions and look at the settings for Device Limit Restrictions. In this case it's 15 which is more than the user has listed under their Devices. You can also review the Device Type restrictions however the Windows operating system is not listed as of 2017/1/16. Summary Sometimes when things go wrong and you get a message that tells you what the problem is, requires you to do some digging and verification in order to resolve. There may be other things that can generate the above error, if so let me know and I’ll add them.
-
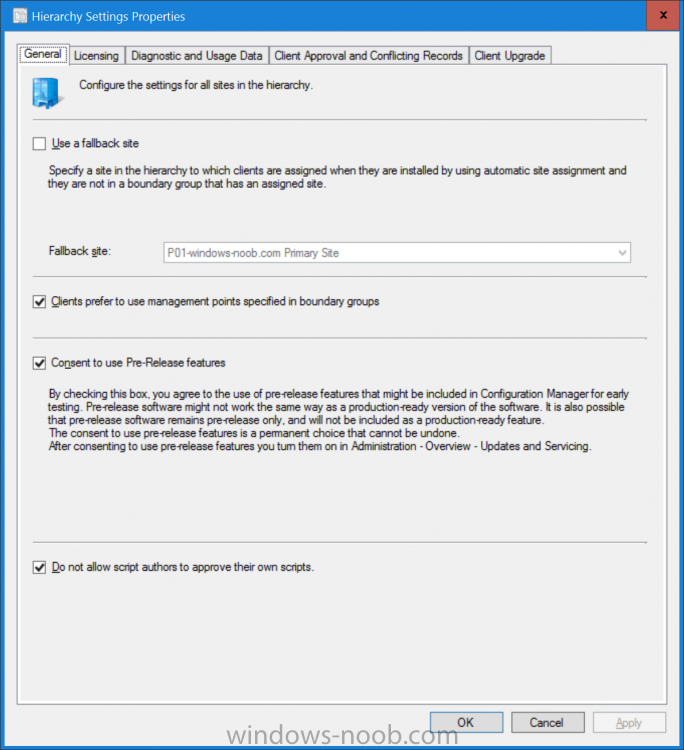
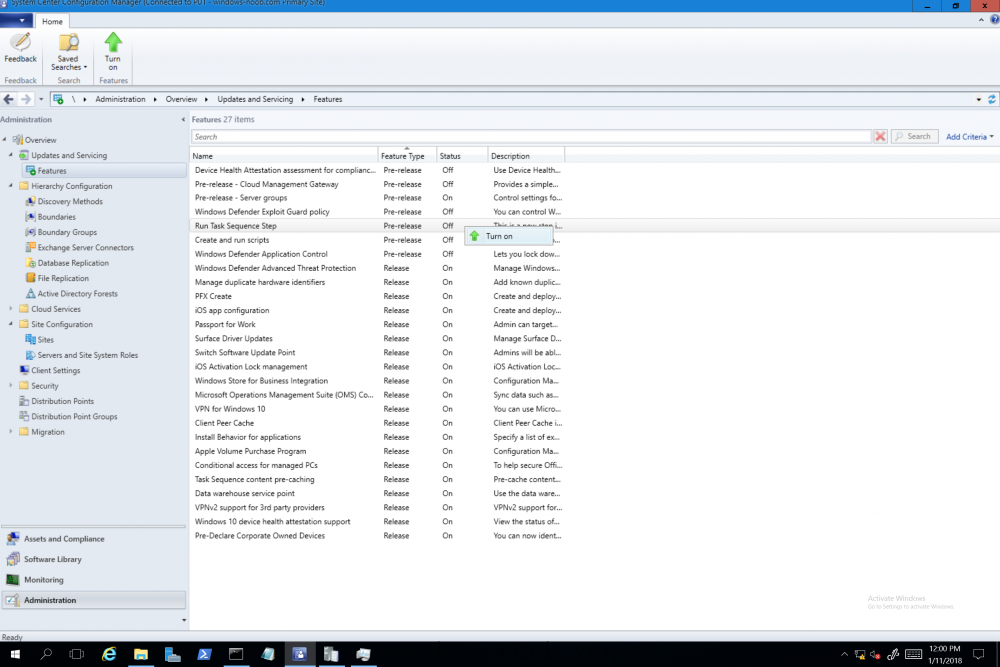
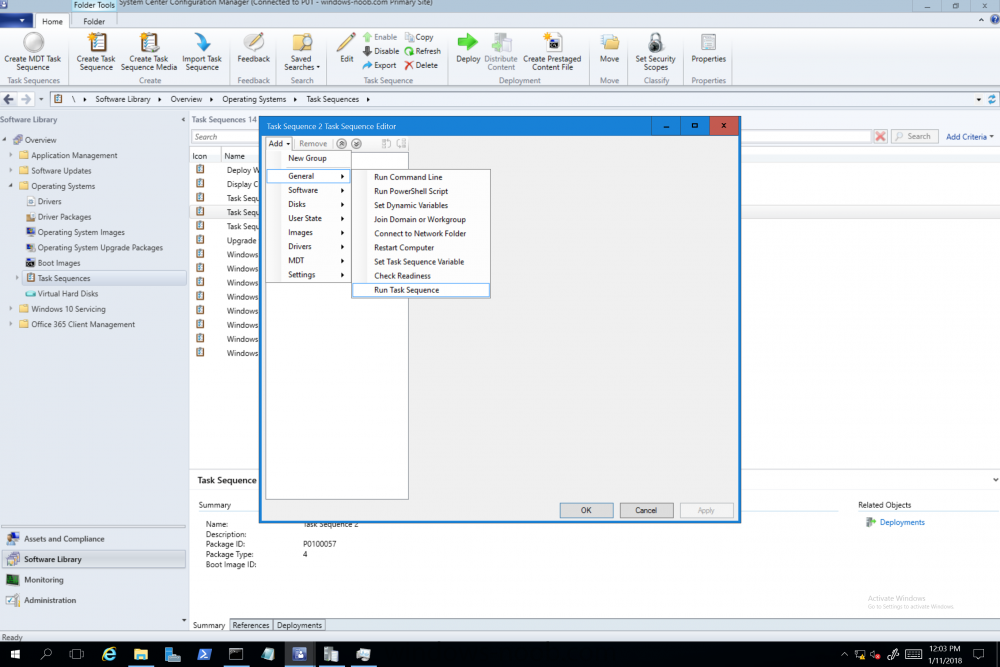
Good question, so i'll pin this topic ! You first need to consent to use Pre-Release features as shown here.. (in Administration, Hierarchy settings) Once done Turn on the Run Task Sequence step Then, close the ConfigMgr console, and open it again, and the new step will appear
-
Configuring BitLocker in Intune - Part 2. Automating Encryption
anyweb replied to anyweb's topic in Microsoft Intune
hi Nielsvd I'll have to test it in my lab and come back to you, so that's what i'll do now... -
Configuring BitLocker in Intune - Part 2. Automating Encryption
anyweb replied to anyweb's topic in Microsoft Intune
hi Nielsvd I created two msi's did you use the user based msi ? -
please re-download the main scripts and tell me is it working as designed
-
thanks for checking, i've now updated the main script with the fix
-
yup that's it ! mystery solved If objSysInfo.RebootRequired = "False" then i've rewritten it, it's a boolean operator, please try this code instead If objSysInfo.RebootRequired = False then does it work ? checkreboot.vbs
-
if you want to host the SUP on the standalone server then you'll still need to install WSUS, otherwise if you host the SUP role elsewhere or if you don't intend to manage software updates you are ok The software update point is required on the central administration site and on the primary sites in order to enable software updates compliance assessment and to deploy software updates to clients. The software update point is optional on secondary sites. The software update point site system role must be created on a server that has WSUS installed. The software update point interacts with the WSUS services to configure the software update settings and to request synchronization of software updates metadata. When you have a Configuration Manager hierarchy, install and configure the software update point on the central administration site first, then on child primary sites, and then optionally, on secondary sites. When you have a stand-alone primary site, not a central administration site, install and configure the software update point on the primary site first, and then optionally, on secondary sites. Some settings are only available when you configure the software update point on a top-level site. There are different options that you must consider depending on where you installed the software update point. via > https://docs.microsoft.com/en-us/sccm/sum/get-started/install-a-software-update-point
-
it works for me, I\ve tried both the PowerShell and a snippet of vbs code to test for reboot, can you please run it and check what it reports back ? here\s the test script... checkreboot.vbs

-
can you do a remote session over teamviewer so i can take a look ?
-
it states reboot pending based on the results of this check, so you probably do indeed need another reboot. Set objSysInfo = CreateObject("Microsoft.Update.SystemInfo") 'msgbox "Reboot required? " & objSysInfo.RebootRequired If objSysInfo.RebootRequired = "False" then ' msgbox "The computer did not need a reboot"
-
that sounds very likely, so it's working fine now apart from the unexplained past failures ?
-
hi, no you only attached a screenshot of the error, i need the entire smsts.log file
-
First of all: Great post! is so helpfull! thanks ! It's working like a charm but i have some issue when checks for pending reboot, can you expand on this, do you mean that it is not detecting pending reboots for you or ?
-
Set Local Admin Password During OSD TS
anyweb replied to bonVoyage's topic in Configuration Manager 2012
did you see this bit ? Specifies the local administrator password. This value is ignored if the Randomly generate the local administrator password and disable the account on all supported platforms option is enabled. -
hard to tell without reading the entire log to see the failure properly can you attach it ?
-
is the ps1 script actually available in the package mentioned ?
-
Configuring BitLocker in Intune - Part 2. Automating Encryption
anyweb replied to anyweb's topic in Microsoft Intune
ok i've modified the msi again please re-download it and let me know