anyweb
-
Posts
9269 -
Joined
-
Last visited
-
Days Won
371
Everything posted by anyweb
-
 yeah ok, then go with upgrading to 1606cb first...
 -
you can upgrade from SCCM 2012 SP2 directly to the 1702 CB baseline. In-place upgrade paths Upgrade to version 1702 When you have version 1702 baseline media, you can upgrade the following to a fully licensed version of System Center Configuration Manager version 1702: An evaluation install of System Center Configuration Manager version 1702 System Center 2012 Configuration Manager with Service Pack 1 System Center 2012 Configuration Manager with Service Pack 2 System Center 2012 R2 Configuration Manager System Center 2012 R2 Configuration Manager with Service Pack 1 Once done with the upgrade to 1702, you can upgrade the Operating System of the server.
-
you should not upgrade the server os until SCCM can support it, and that means SCCM needs to be at version 1602 or later When you use Configuration Manager version 1602 or later, it is also supported to upgrade Windows Server 2008 R2 to Windows Server 2012 R2 (See additional details. more details below https://docs.microsoft.com/en-us/sccm/core/servers/manage/upgrade-on-premises-infrastructure#bkmk_from2008r2 Upgrade Windows Server 2008 R2 to Windows Server 2012 R2 This operating system upgrade scenario has the following conditions: Before upgrade: Uninstall WSUS 3.2. Before you upgrade a server operating system to Windows Server 2012 R2, you must uninstall WSUS 3.2 from the server. For information about this critical step, see the New and changed functionality section in Windows Server Update Services Overview in the Windows Server documentation. After upgrade: Ensure the Windows Deployment Service is started and running for the following site system roles (this service is stopped during upgrade): Site server Management point Application Catalog web service point Application Catalog website point Ensure the Windows Process Activation and WWW/W3svc services are enabled, set for automatic start, and running for the following site system roles (these services are disabled during upgrade): Site server Management point Application Catalog web service point Application Catalog website point Ensure each server that hosts a site system role continues to meet all of perquisites for site system roles that run on that server. For example, you might need to reinstall BITS, WSUS, or configure specific settings for IIS. After restoring any missing prerequisites, restart the server one more time to ensure services are started and operational. Unsupported upgrade scenarios The following Windows Server upgrade scenarios are commonly asked about, but not supported by Configuration Manager: Windows Server 2008 to Windows Server 2012 or later Windows Server 2008 R2 to Windows Server 2012
-
try this, it should help https://www.niallbrady.com/2016/05/17/introducing-the-windows-10-uefi-bitlocker-frontend-for-system-center-configuration-manager-current-branch/
-
Curious I see that for the pending reboot you returned it to Exit99 I thought you said for the task sequence to kick off after the reboot it would have to be Exit0. Either way I will test and adjust. yes, i tested it some more and decided it's the best option for now, however i have some ideas to improve upon it going forward, and if i get time i'll script the, but for now this will have to do I will suggest for sanity of the end user to do the hardware check before disk space, vpn, etc. no sense having them clean up disk space, connect power or disconnect from VPN if they are then going to be told their hardware is not compatible with the upgrade. Just a thought. good point, i've modified it again so that the check if model supported is the first check, i've uploaded the modified scripts thanks.
-
ok bug found and fixed, please re-download the scripts, retest and let me know is it ok for you
-
i've changed the code order so it performs the checks like this, i'll upload the updated code shortly
-
gotcha ! thanks for posting this i'll modify the code shortly
-
good thoughts, i'll look at it and possibly reorder things, thanks for the comments check for power, vpn and disk space will endlessly prompt the end user until resolved, so that leaves hardware support, but i'll look at it again
-
the user must login, and no the wrapper won't run again, the ts should start after the user logs in, please test, verify and report any issues
-
if it exit's with 99 the ts will never start, the ts can only start if it exits with exit code 0, and as we know we are about to start the ts we clear the numberofupgradedefers reg key
-
and i've updated the main script with that fix now fyi
-
good point, fix added, here's the fix ' delete the number of deferals left, so the next forced upgrade will start with 5 deferrals KeyToDel = "NumberOfUpgradeDefers" DeleteRegKey(KeyToDel) i'll update the script with this fix shortly
-
Build failures on SCCM 1710
anyweb replied to Config Mangler's topic in System Center Configuration Manager (Current Branch)
is the hardware old, have you tried upgrading the bios in the start of the task sequence on models that are failing -
Build failures on SCCM 1710
anyweb replied to Config Mangler's topic in System Center Configuration Manager (Current Branch)
new computer install or upgrade ? -
boot.sdi won't load
anyweb replied to xerxes2985's topic in System Center Configuration Manager (Current Branch)
mine is loading boot.sdi fine and even the boot wim, but it takes 20 minutes or so to load that boot wim, so it's painful -
Question about SCCM CB Alerts
anyweb replied to cylonsurfer's topic in System Center Configuration Manager (Current Branch)
according to this link the following actions are available for alerts So have your alerts state changed to cancel ? can you show a screenshot ? cheers niall -
boot.sdi won't load
anyweb replied to xerxes2985's topic in System Center Configuration Manager (Current Branch)
thanks for posting the solution ! i'm also seeing really slow network boot on some vmware workstation labs I have... it would be great to increase that speed somehow -
Choosing upgrade path
anyweb replied to Jorin's topic in System Center Configuration Manager (Current Branch)
you can upgrade directly but you'll need to be running a supported version of SQL server, the path to SCCM 1710CB is roughly as follows upgrade SQL to a supported version Upgrade SCCM 2012 R2 SP1 to SCCM 1702CB Upgrade SCCM 1702 CB to SCCM 1710CB Apply the SCCM 1710CB hotfix you can also do an inplace upgrade of server 2012r2 to server 2016 but you'll need to uninstall WSUS 3.2 first and reinstall WSUS after the upgrade -
once again, don't create a test environment in production, you'll regret it later. Get a laptop or desktop with 16GB or ram and 500GB ssd and install AD and SCCM virtual machines on that, can you not do that instead ? if you use the production environment to do your test environment then all i can say is read what i said above cheers niall
-
you should separate your test environment from production entirely, i.e. use a separate test vm environment with separate AD, SCCM, etc virtual machines that you test with, I wouldn't mix or recommend using a test lab in production here's a guide to setup your test environment
-
How can I customize the start menu in Windows 10 using Intune
anyweb replied to anyweb's topic in Microsoft Intune
hi Zer0, you need to enroll your devices before they get policy, and it's policy which decides what get's managed, installed and so on, to enroll the device click on All Settings, Accounts, Access work or school, Connect and enter the credentials of a user that is licensed to use Intune, once it is enrolled you should be able to sync policy and get office installed (and the start menu), to automate enrollment, follow my guide here. fo -
Question about SCCM CB Alerts
anyweb replied to cylonsurfer's topic in System Center Configuration Manager (Current Branch)
hi are you saying your alert status has not changed since you posted originally ? what version of sccm cb are you on ? -
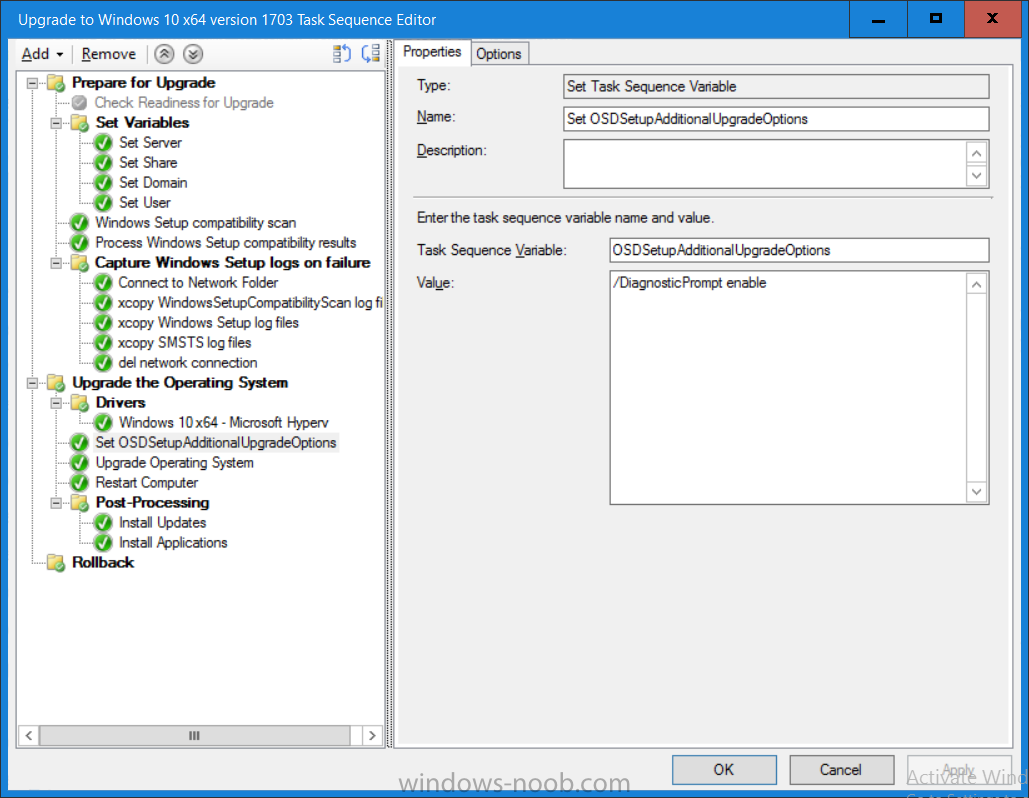
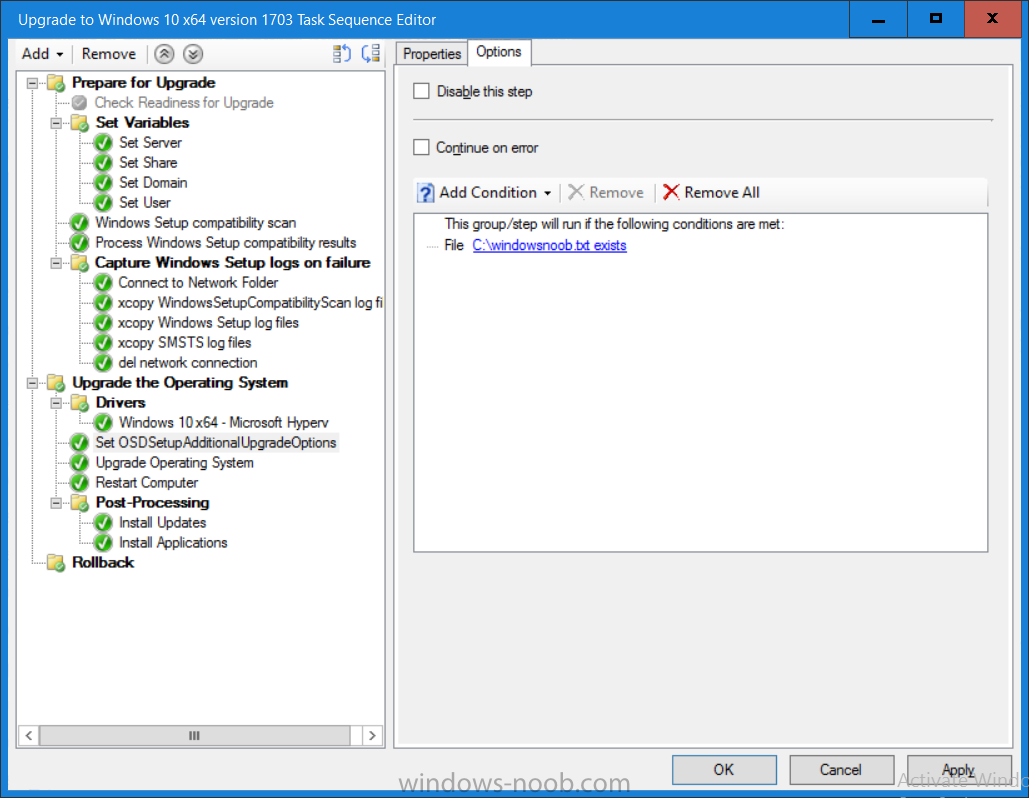
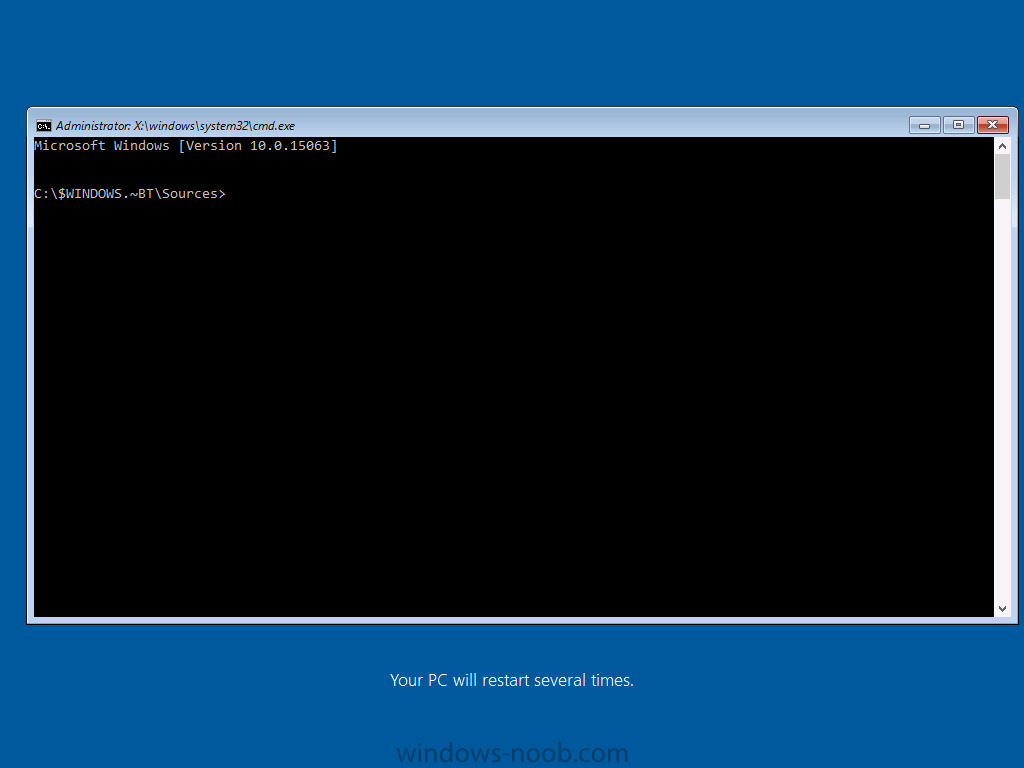
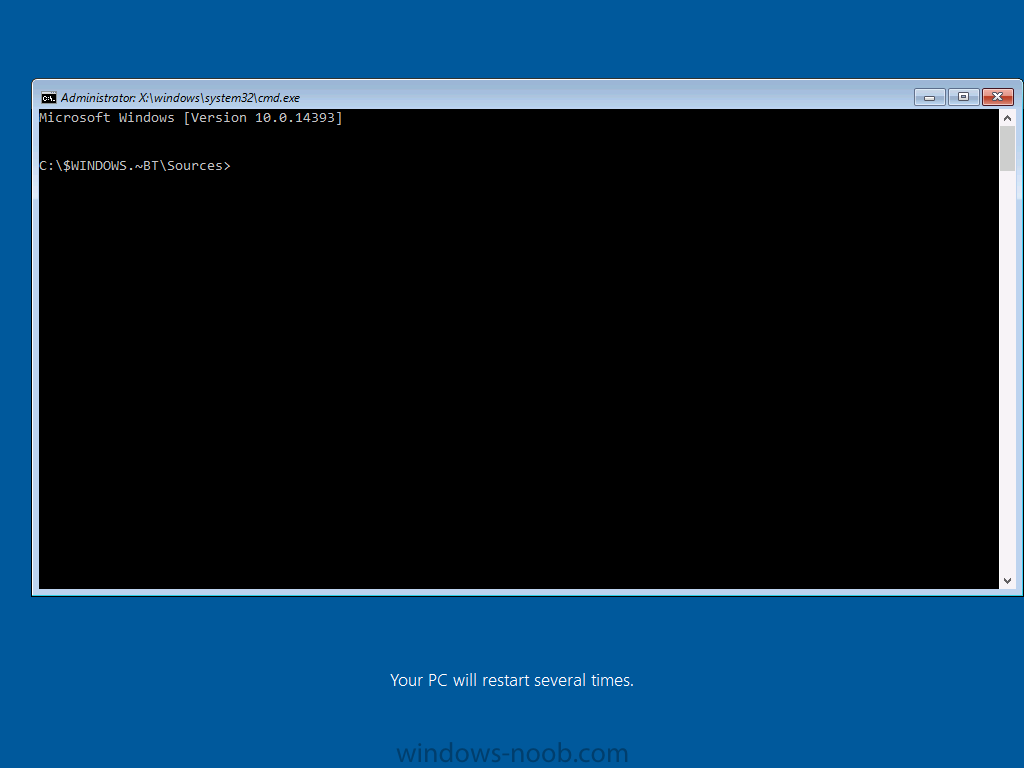
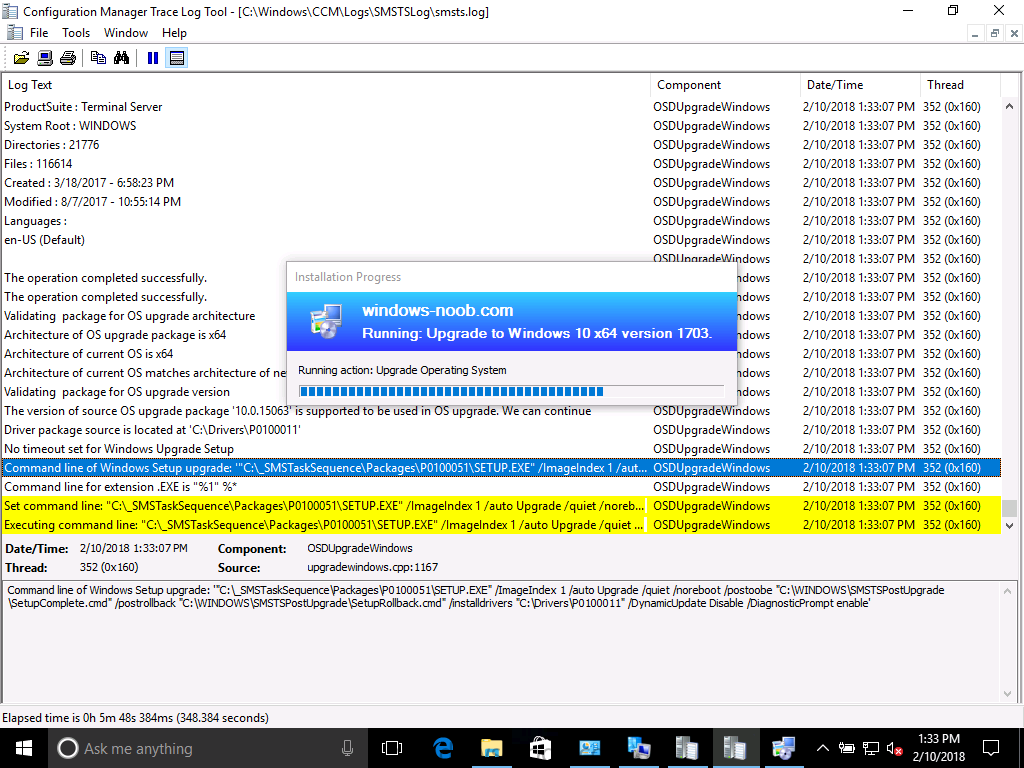
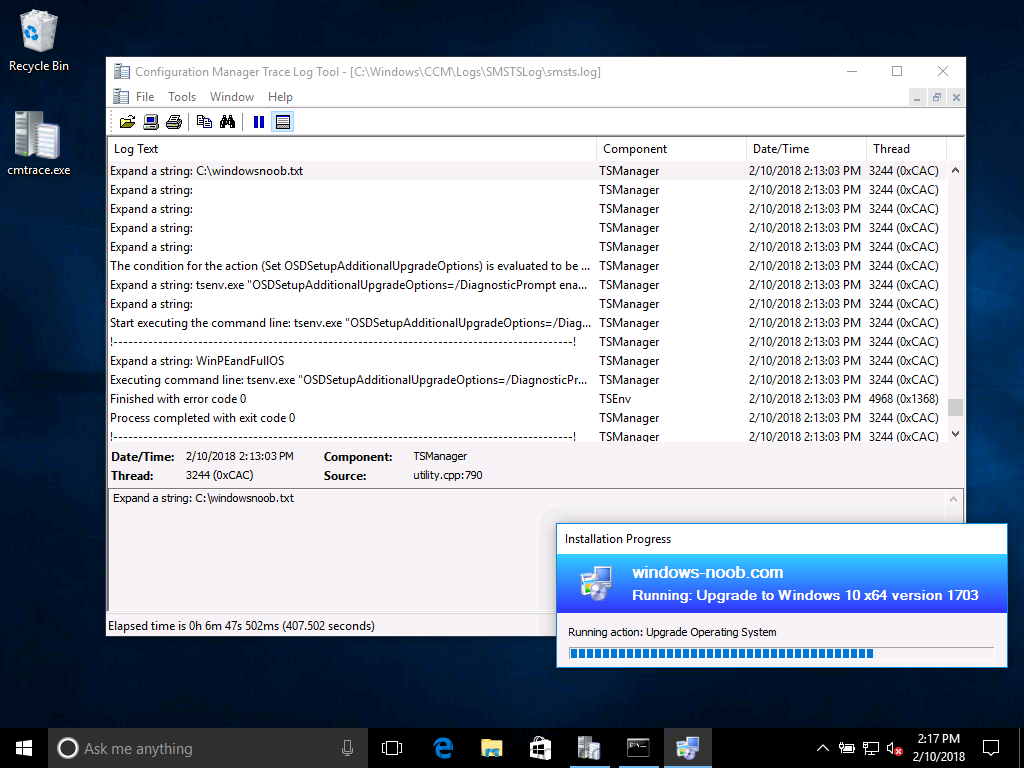
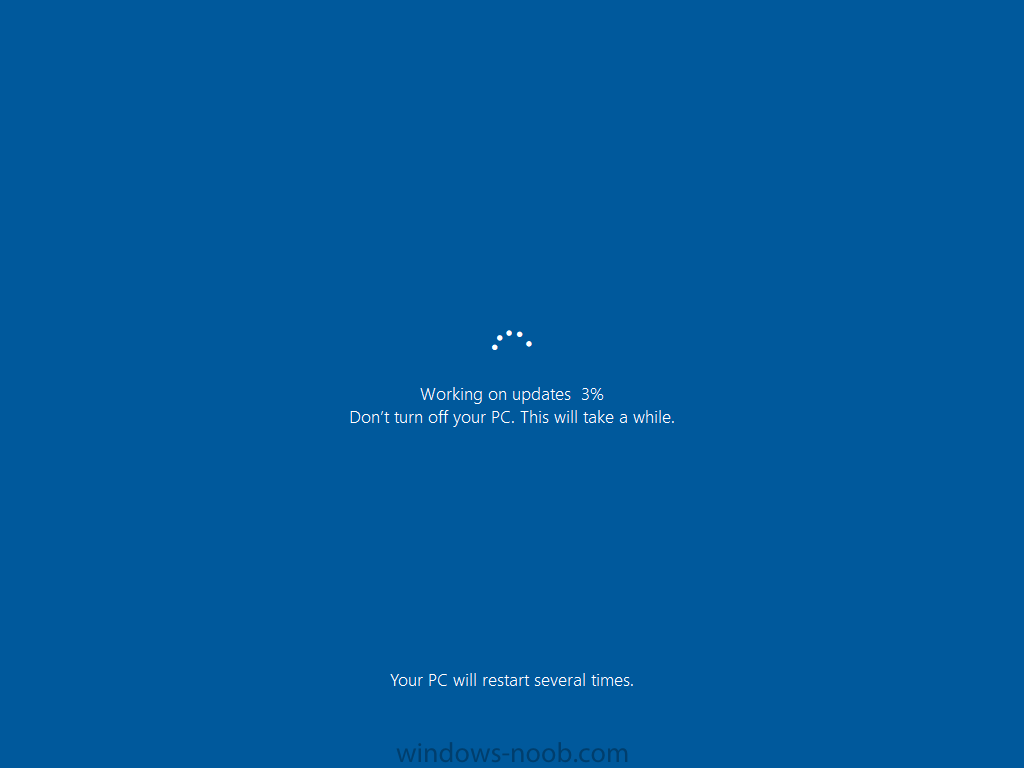
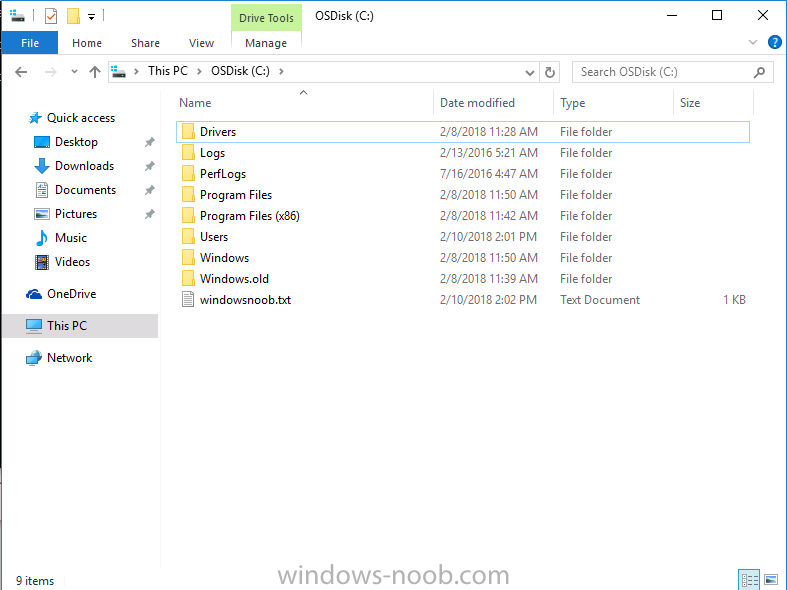
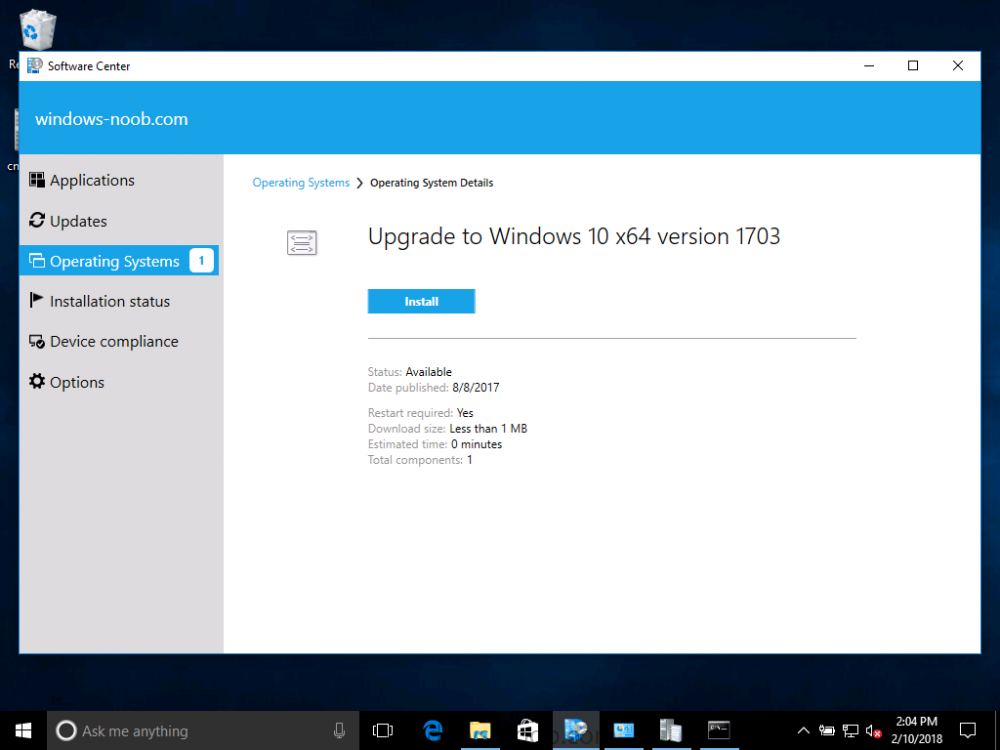
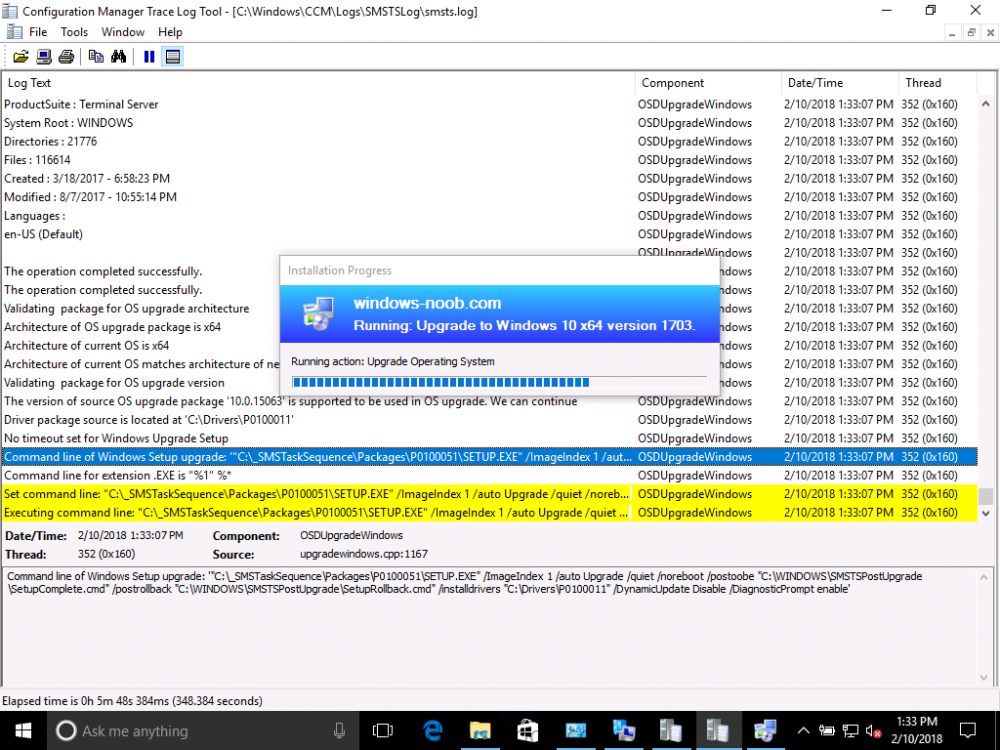
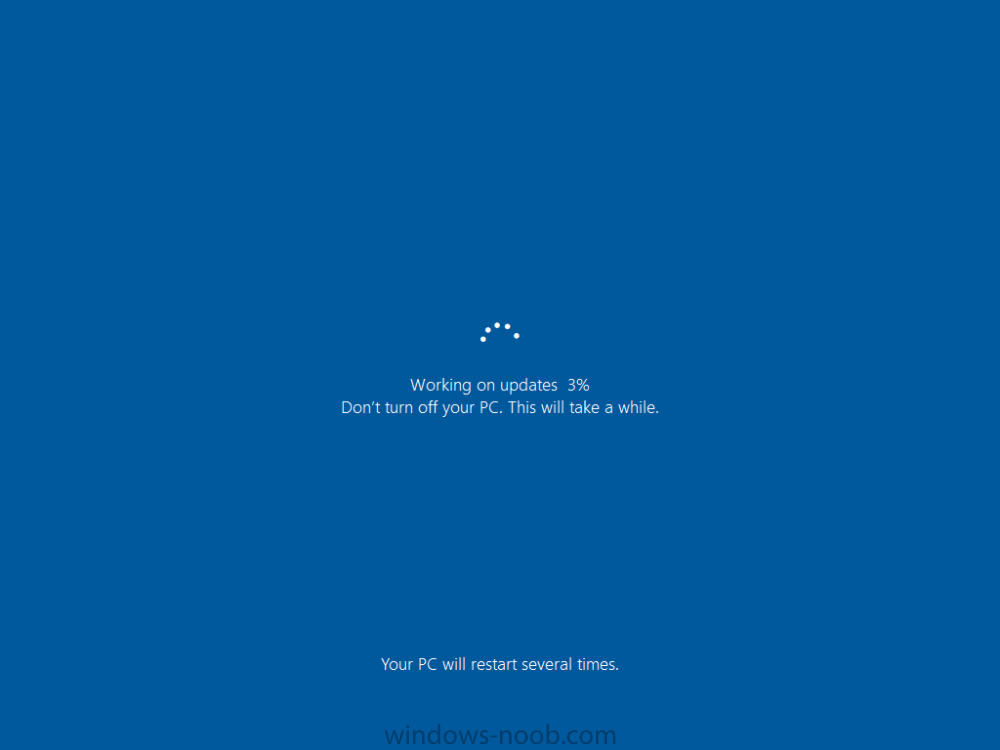
Introduction On Windows 10 version 1607 and earlier during Windows 10 upgrades from one version to another, after the computer reboots to upgrade the operating system you'll see a screen similar to the below At this point you could press Shift and F10 to bring up a command prompt, which is extremely useful if you need to check a log file, verify driver installation or to do troubleshooting. The screenshot below is from Windows 10 version 1607 which was being upgraded from Windows 10 version 1511. Security changes everything However there's a downside to this, having the ability to open a command prompt in the wrong hands could mean elevation of privileges or data theft. We all know that security is a big focus with Microsoft and as a direct result of the concerns above, the diagnostic prompt ability was disabled by default in Windows 10 version 1703 and later. That's all well and good for Joe public, but what about the SCCM admin who is trying to debug a task sequence ? Fear not, help is at hand. To re-enable the Diagnostic command prompt (Shift F10 during Windows setup in an upgrade scenario) you need to modify your task sequence to set a variable, and that variable is called OSDSetupAdditionalUpgradeOptions which is described here. This variable allows us to pass command line options to Windows setup during the upgrade and that's how we'll re-enable the diagnostic command prompt, however we don't want it available to everyone, except those 'in the know', aka the SCCM admins who need more info while troubleshooting. Step 1. Set a task sequence variable To make this work you need to add a Set Task Sequence Variable step before the Upgrade Operating system step in the Upgrade Task Sequence, like so. Task Sequence Variable: OSDSetupAdditionalUpgradeOptions Value: /DiagnosticPrompt enable Step 2. Add Options to limit exposure (optional) To limit the exposure of this diagnostic command prompt to only you (or your admins), you can add an option on the step to check for a file, reg key, variable or something that works for you, in this example, you'll look for the presence of a file on C:\ called windowsnoob.txt. Note: As stated, you can use whatever method you wish to limit exposure, Mike Terril has a nice blogpost on using collection variables to achieve something similar here. Step 3. Test it ! That's it, apply the changes and optionally create a file called windowsnoob.txt on C:\ on a computer you intend to test this on. Here's the file, created by the SCCM admin who plans on troubleshooting an Upgrade. Starting the upgrade... Before the reboot you can see the check for the file presence step is here, and as the file was present, the set task sequence variable step will run and here you can see the option has been appended to the Setup.exe command line by opening C:\Windows\CCM\Logs\SMSTSLOG\smsts.log in CMTrace After rebooting into the Windows Setup portion, try pressing Shift and F10 together, if everything went ok you'll see this. So that's it, now you know how to re-enable the Diagnostic command prompt during Windows 10 1703 or later upgrades and to do it in a reasonably limited way. Related reading https://docs.microsoft.com/en-us/sccm/osd/understand/task-sequence-action-variables https://docs.microsoft.com/en-us/windows-hardware/manufacture/desktop/windows-setup-command-line-options


-
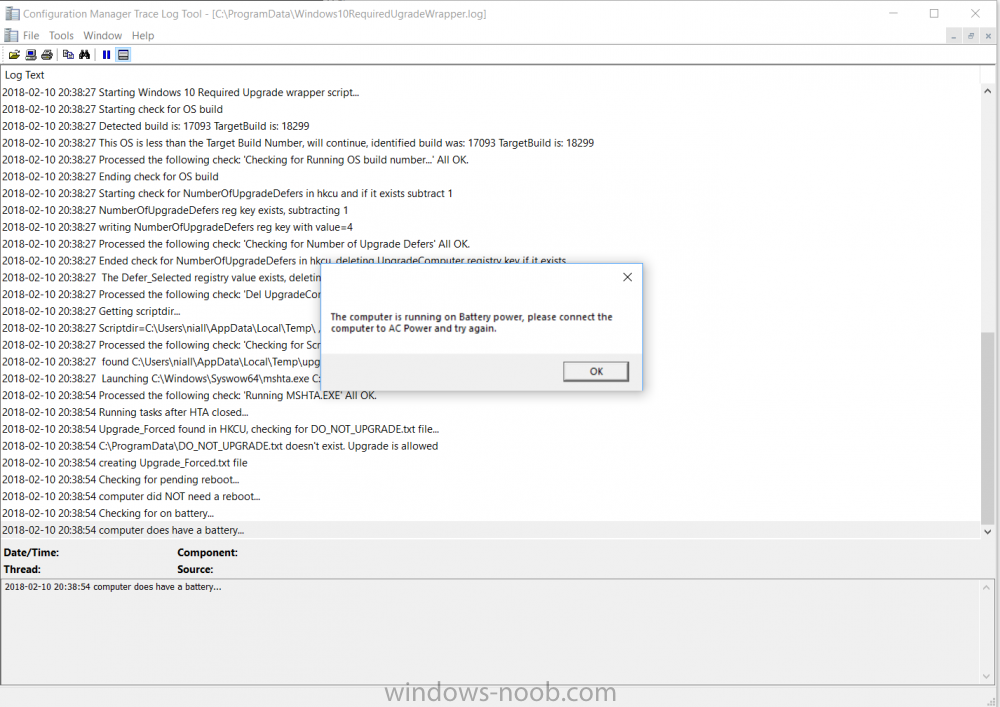
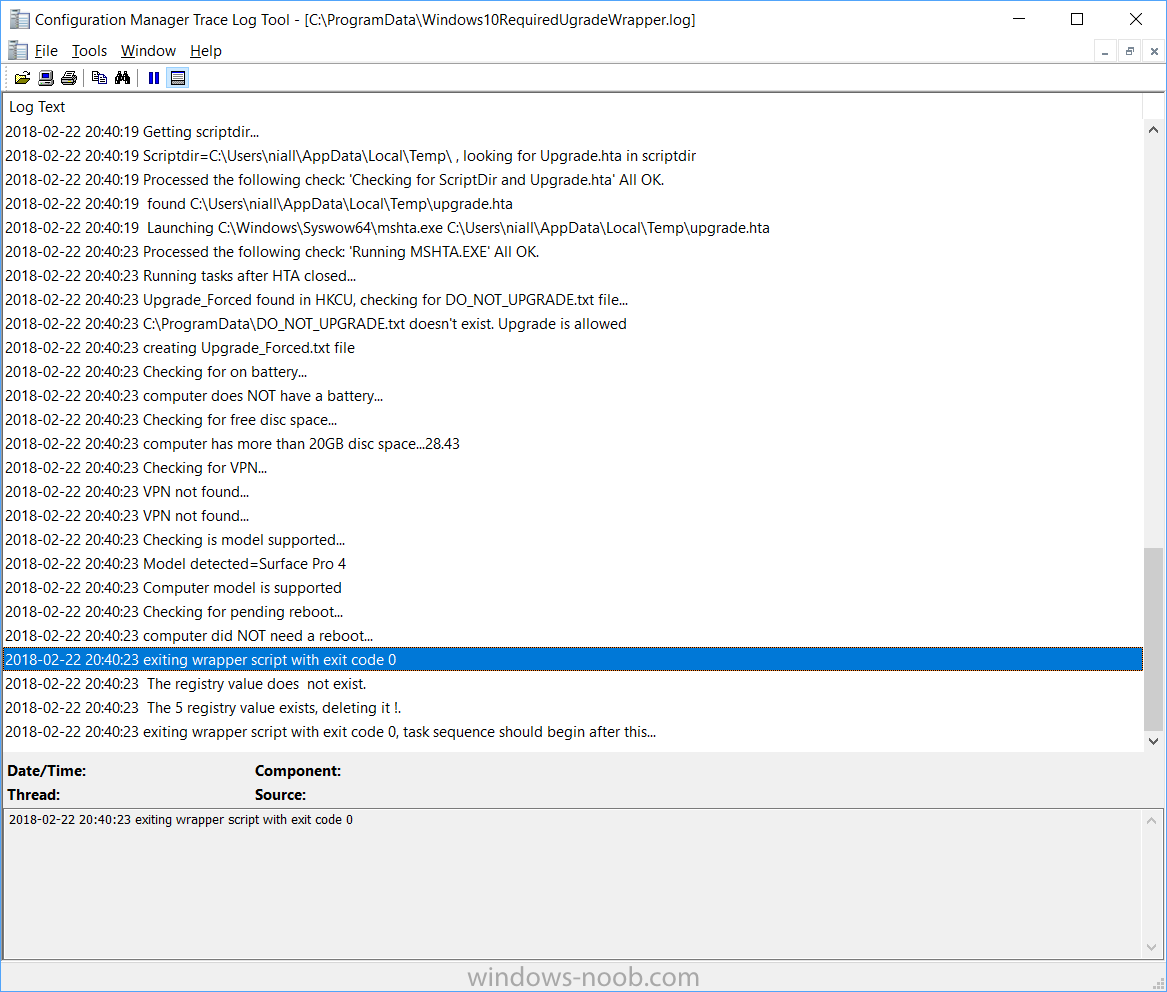
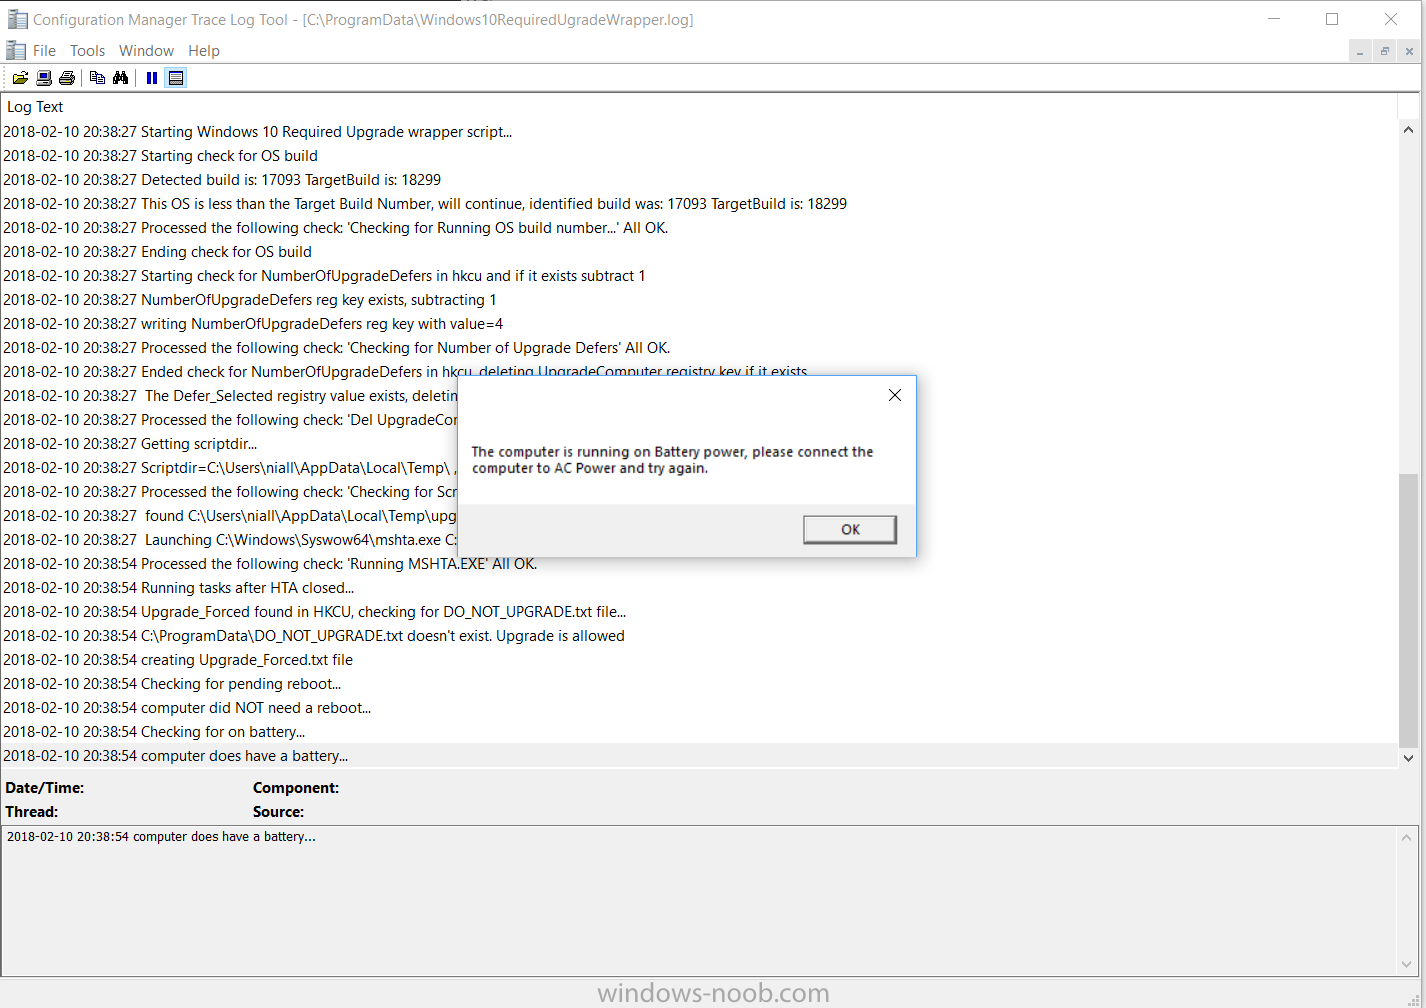
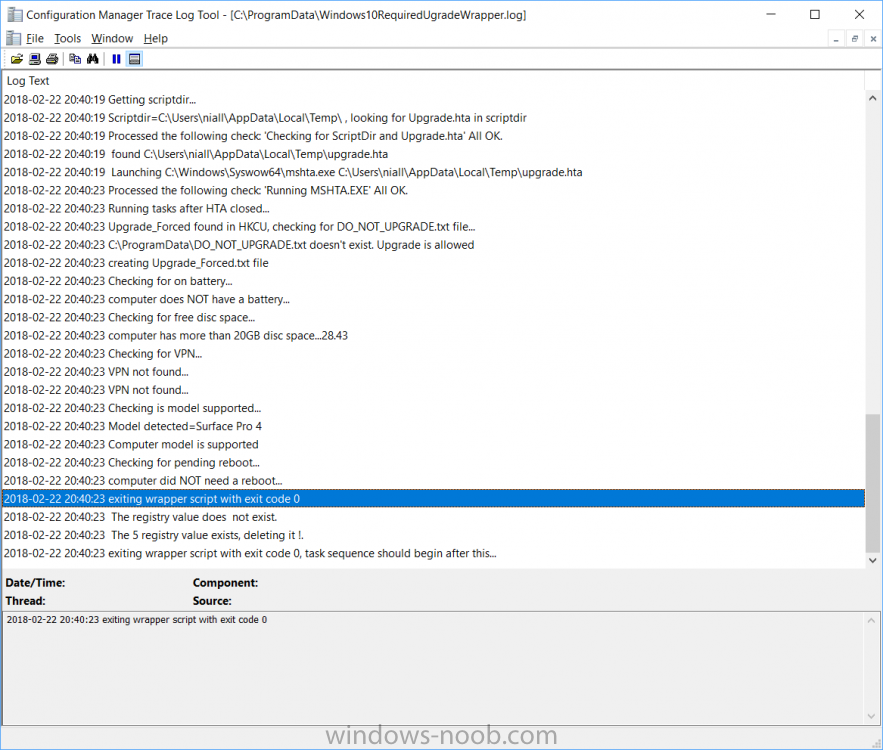
i've just downloaded it, and tested it on my surface Pro 4 with power not connected and i see this, in other words, it's working fine...by the way the battery check only occurs AFTER the user clicks on Upgrade Now... or the 5 defers and 4 hours timeout are done, can you checek the Windows10RequiredUpgradeWrapper.log file and see what it states for that check ? also, did you make any modifications to my script ? maybe you accidently bypassed that step somehow