anyweb
-
Posts
9182 -
Joined
-
Last visited
-
Days Won
366
Everything posted by anyweb
-
the order is wrong, you need to upgrade to SCCM 1702 (Current Branch) first and then upgrade the operating system, here's a couple of posts that should help:- https://social.technet.microsoft.com/Forums/en-US/ef2ea9a9-5d0d-4c03-ae14-3eb936fdbfb6/os-upgrade-on-sccm-servers-from-2k8r2-to-2016?forum=configmanagergeneral http://ccmexec.com/2016/03/configmgr-cb-1602-server-2008-r2-in-place-upgrade-to-2012-r2/ https://docs.microsoft.com/en-us/sccm/core/servers/deploy/install/upgrade-to-configuration-manager https://sccmentor.com/2016/09/21/in-place-upgrade-sccm-cb-1602-site-server-from-windows-2008-r2-to-2012-r2/
-
did you validate your account ?
-
 yes but you'd have to edit the powershell script and change the function that displays the message box, the link below has a function to generate what you want https://stackoverflow.com/questions/32827376/how-to-create-a-popup-message-in-powershell-without-buttons
 -
and are you using the latest and greatest version of MBAM ?
-
we've deployed Windows 7 with UEFI enabled, TPM enabled and with CSM mode enabled, but of course Secure boot DISABLED, on Lenovo laptops so something else is going wrong for you, maybe you need to share some logs...
-
good luck, but you'll still need to disable Secure boot in the bios in order to boot Windows 7, Windows 7 can work with UEFI mode when the CSM option is set in the bios, but you must disable Secure boot which while related to UEFI, is a separate component
-
Windows 7 does not support Secure boot in any way, so that's a big no no, you need Windows 8 or later to work with Secure Boot.
-
Security Update .NET KB2894854 (W2k8R2) insistently returns
anyweb replied to a topic in Windows Server General
is something removing the update, does windowsupdate.log or the event log give you any clues -
3. will only work if you've a backup of the site created using the maintenance task, do you ?
-
yes with some work and editing of the scripts you could
-
this is the supported way to recover a site https://docs.microsoft.com/en-us/sccm/protect/understand/recover-sites When you use DPM to back up your site database, use the DPM procedures to restore the site database to a specified location before you continue the restore process in Configuration Manager. For more information about DPM, see the Data Protection Manager Documentation Library on TechNet.
-
as Garth says, can you link to the post in question please ?
-
can you attach your cmupdate.log please
-
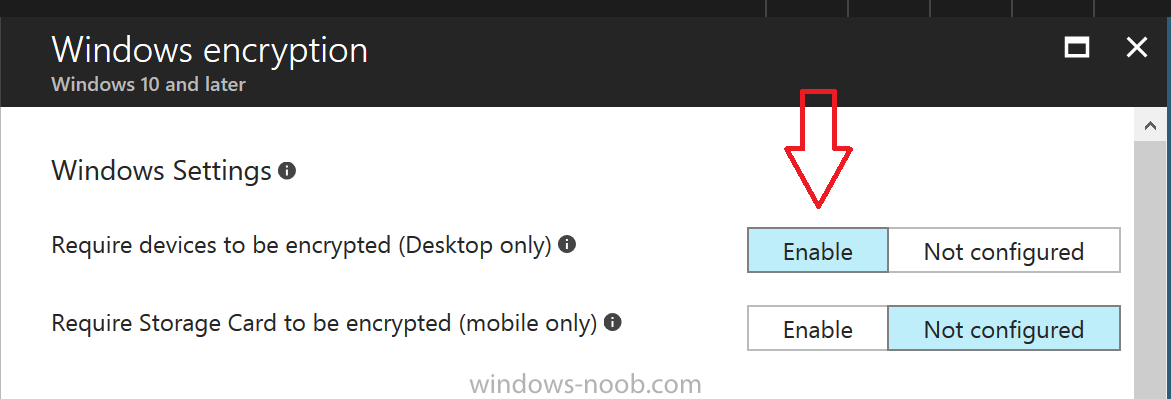
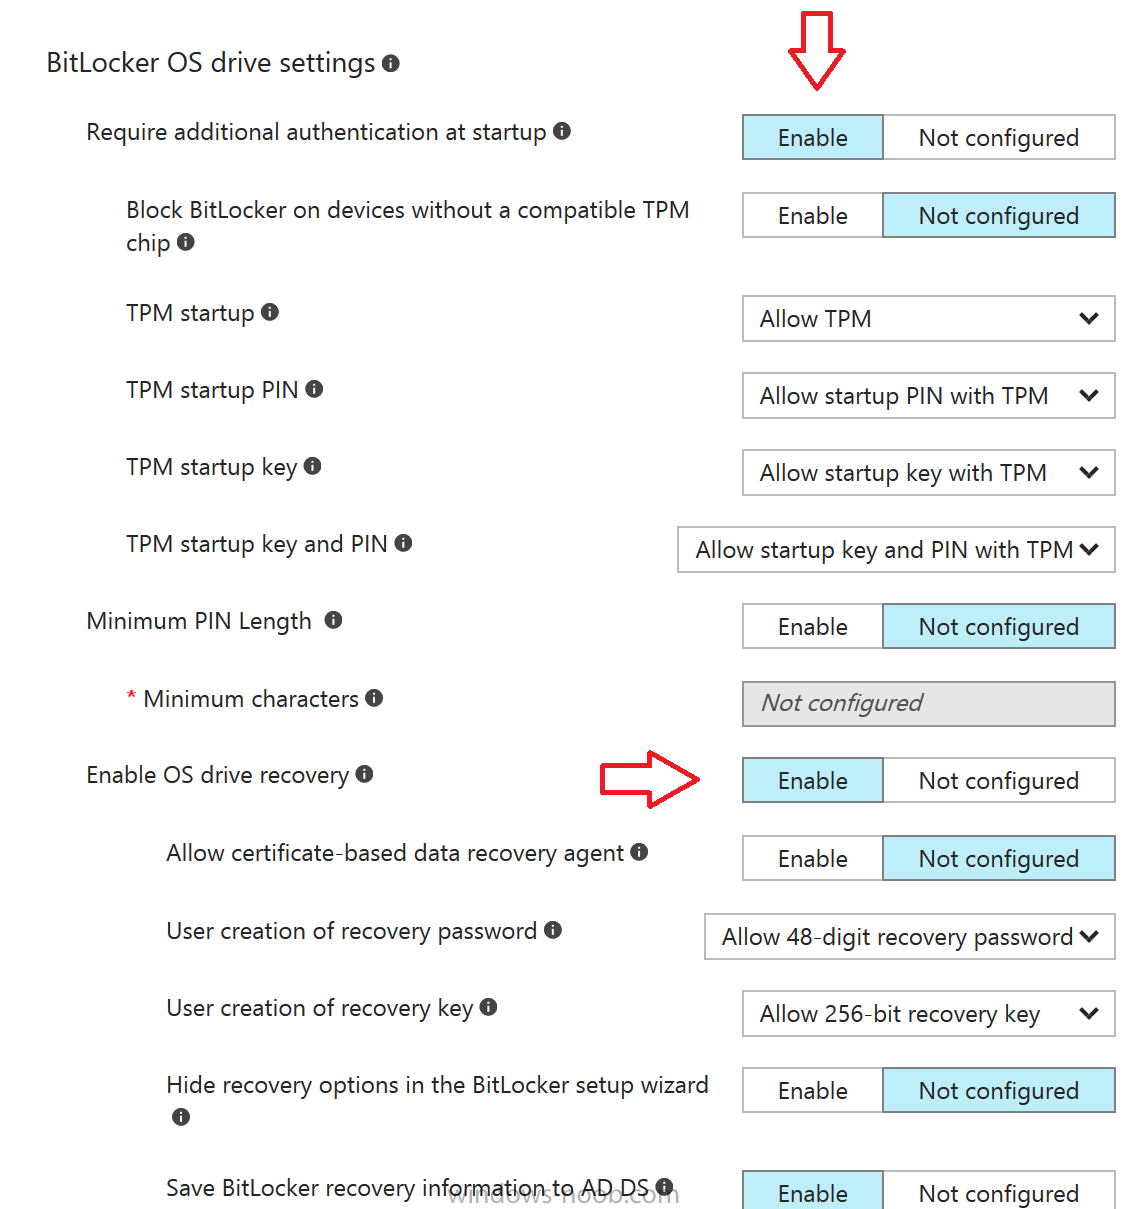
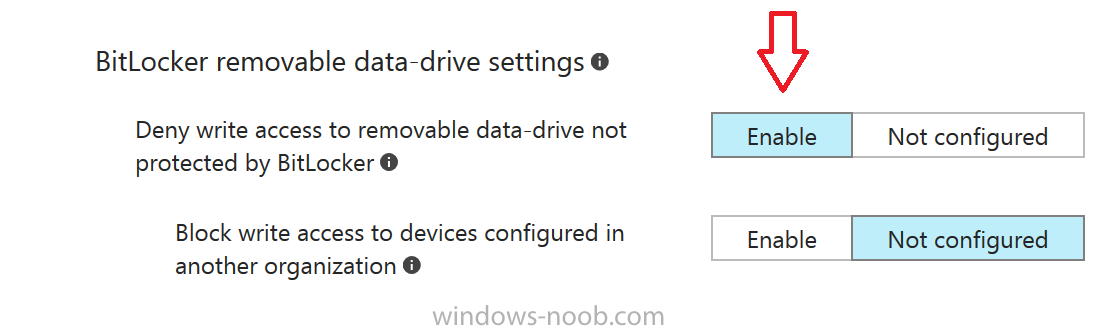
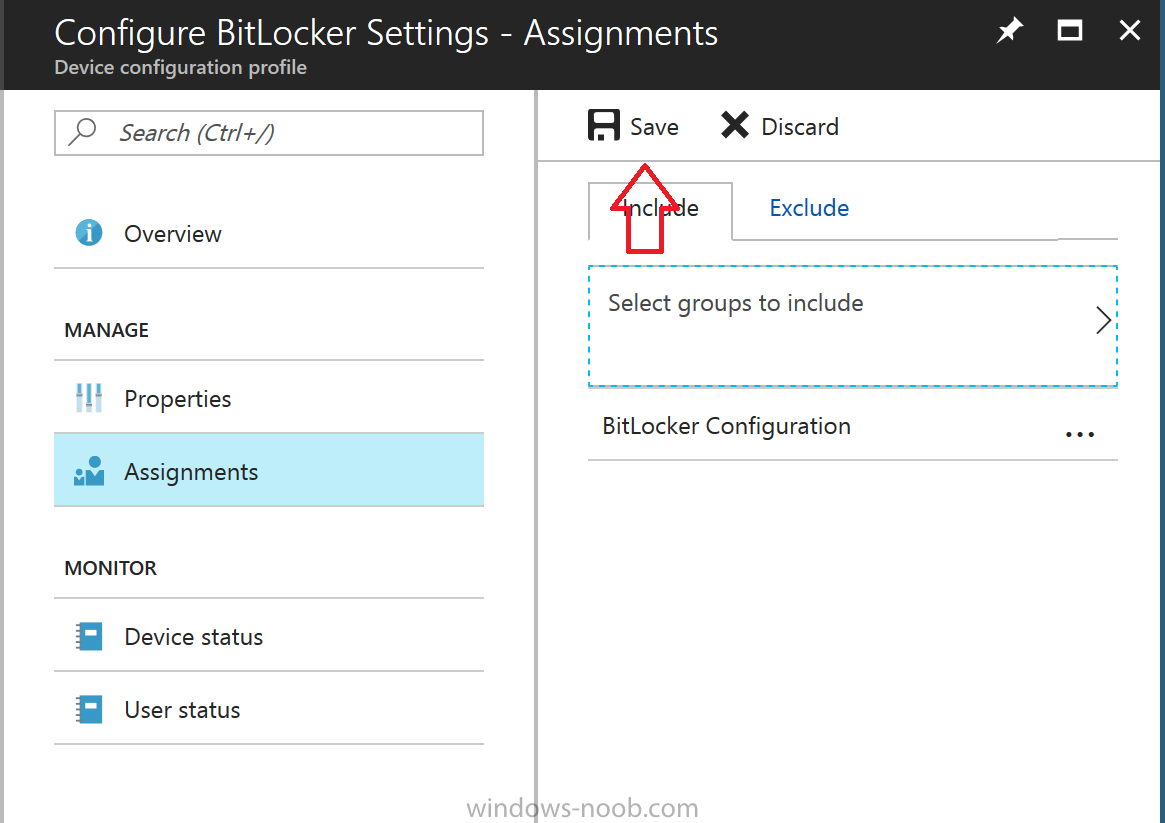
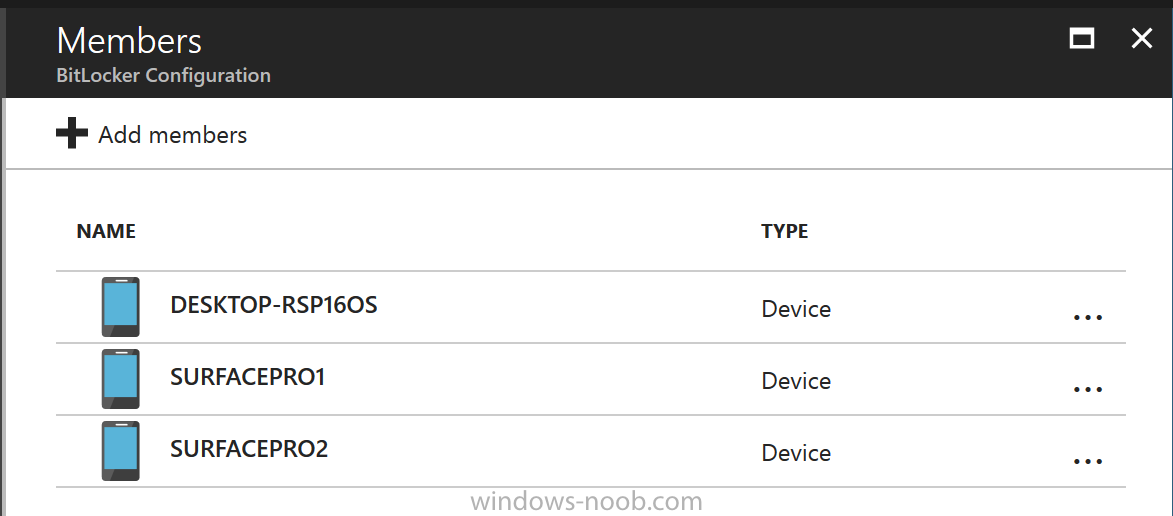
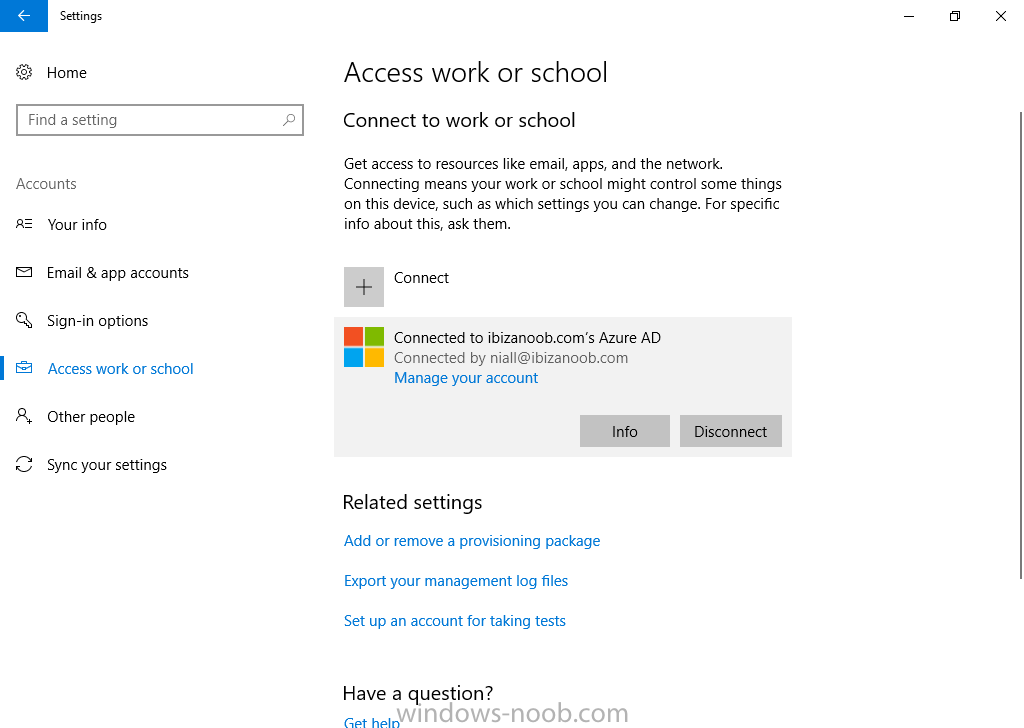
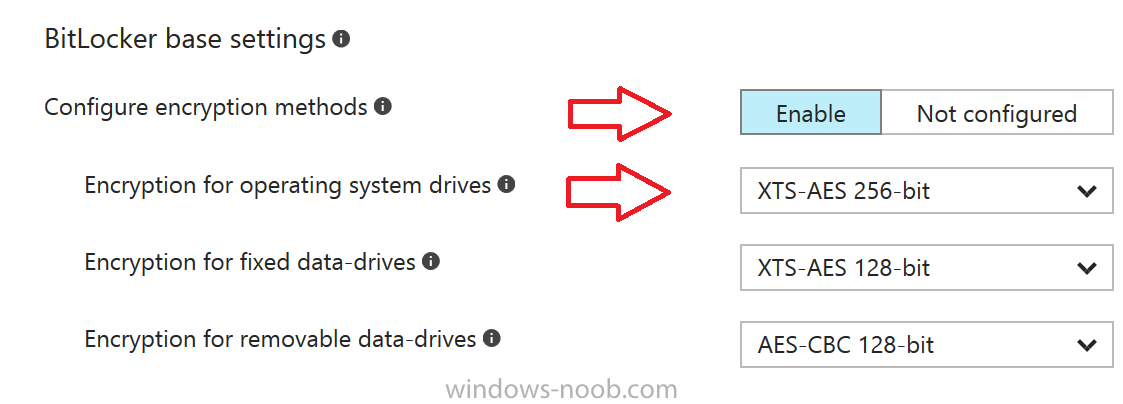
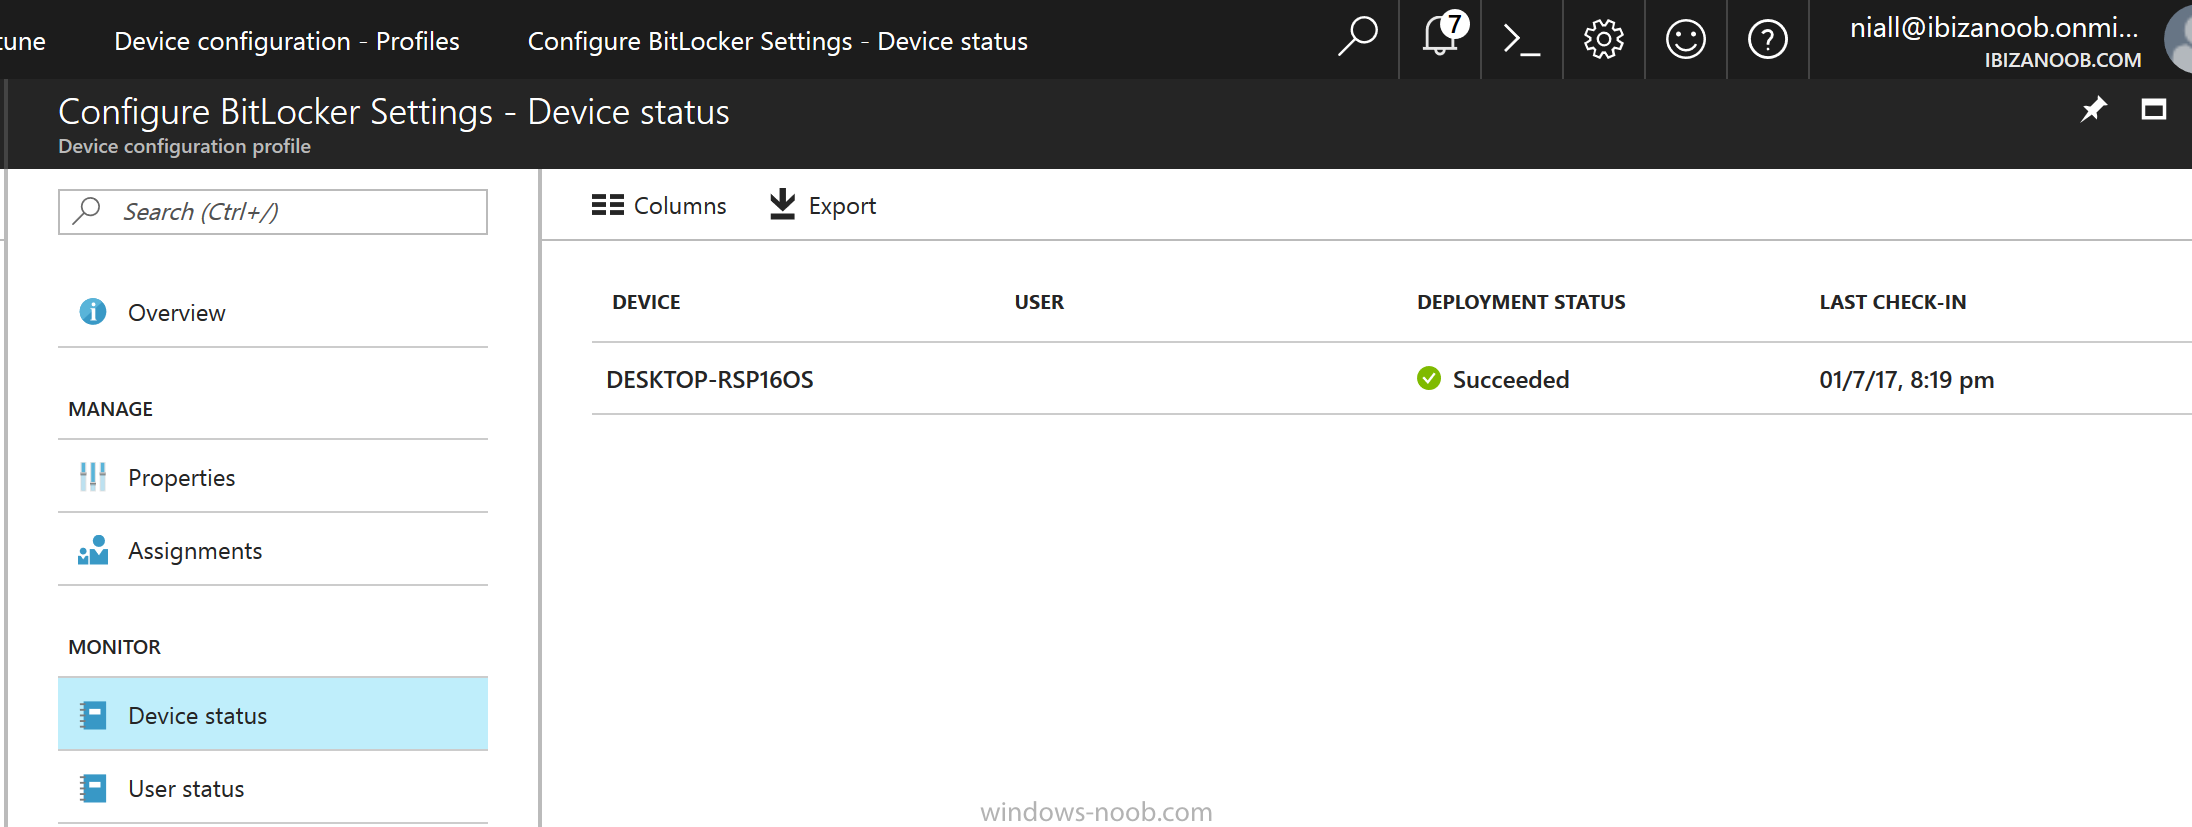
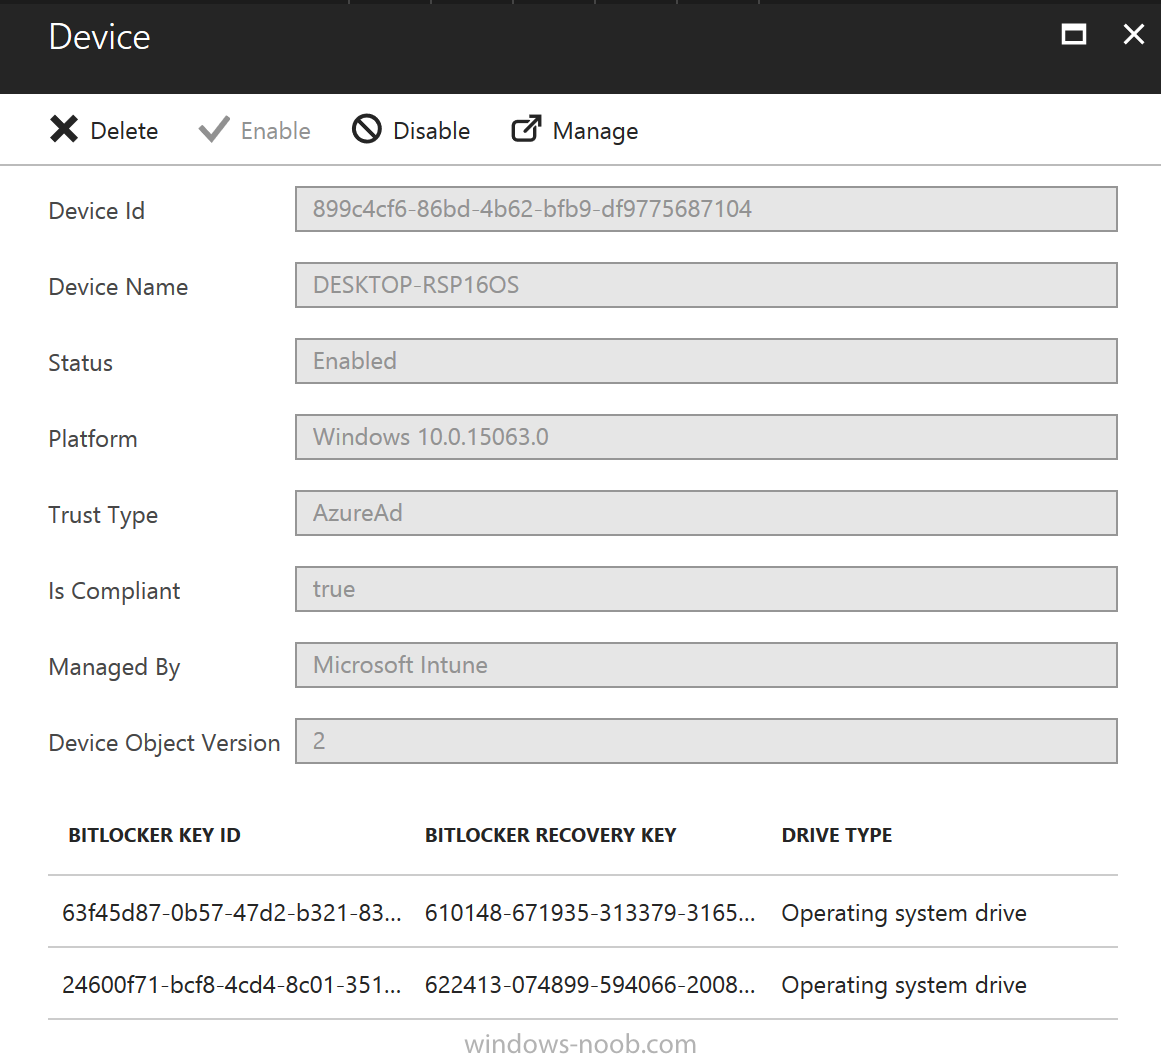
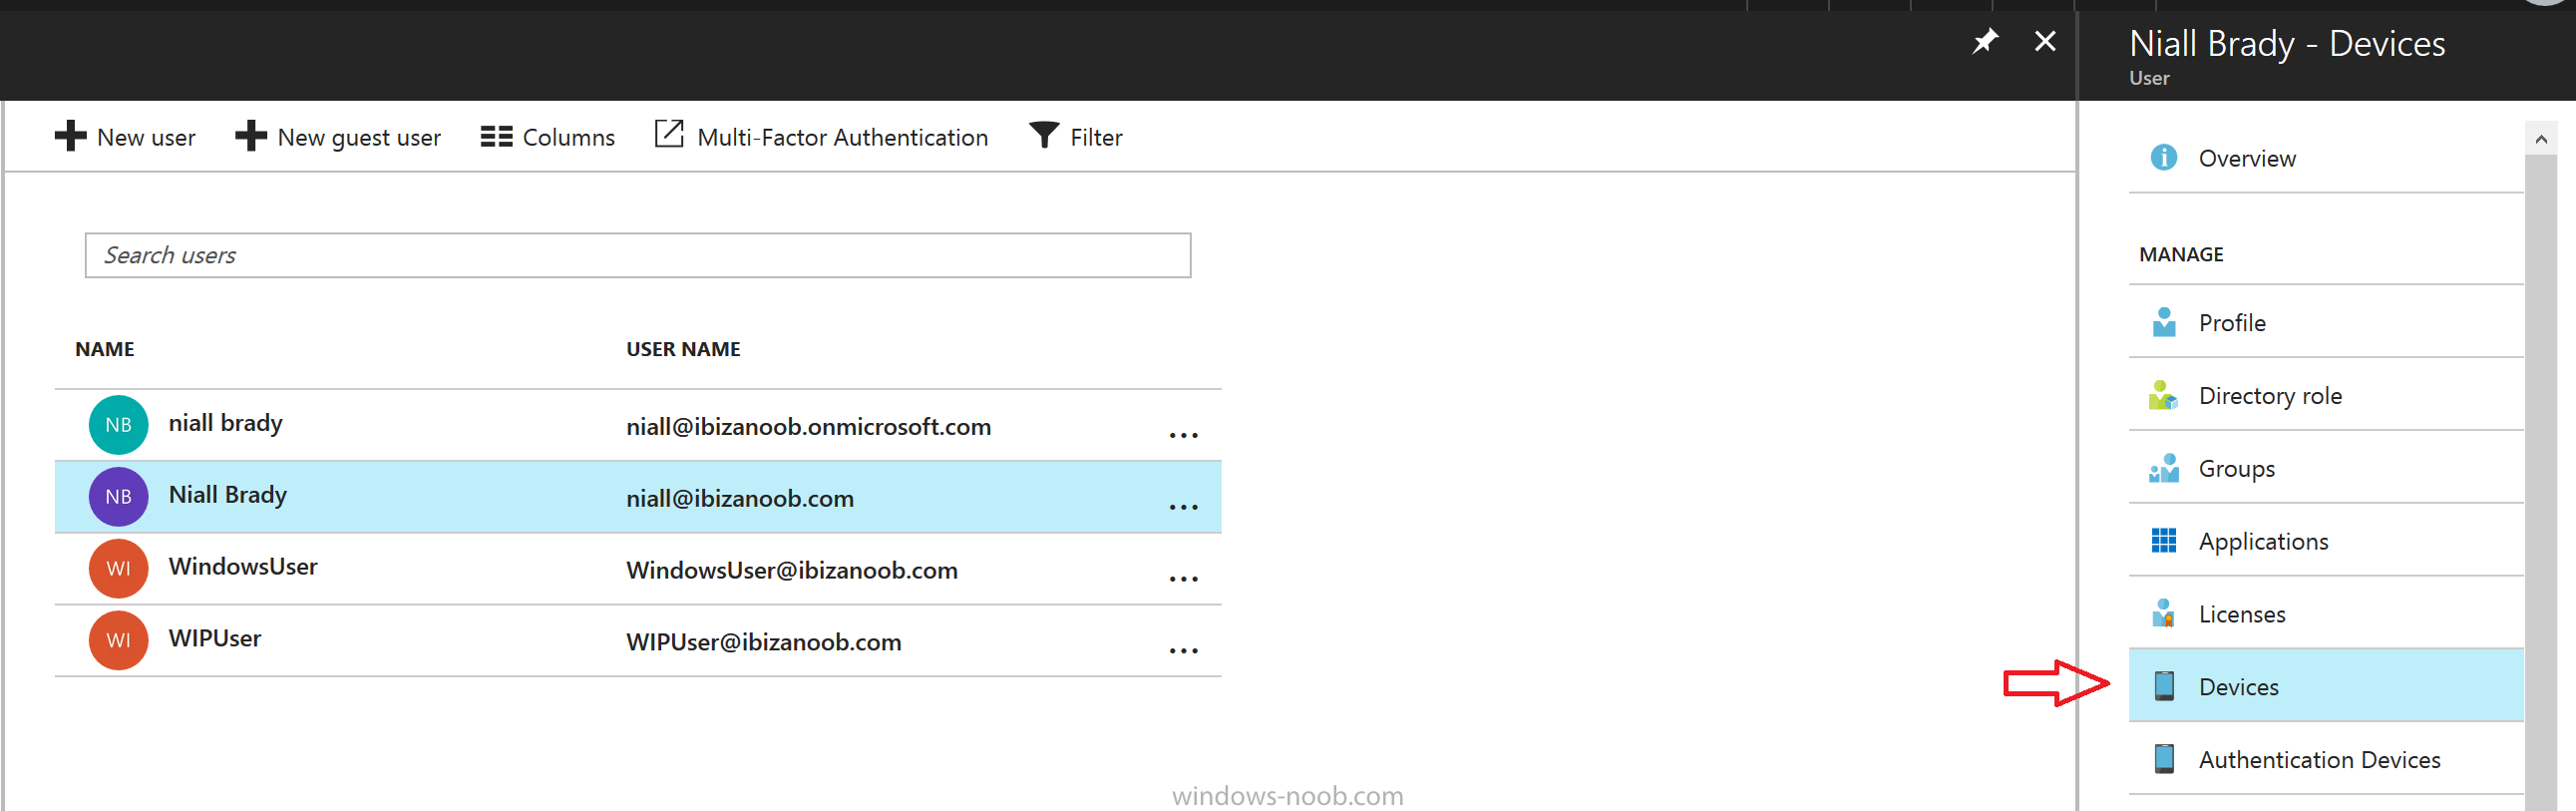
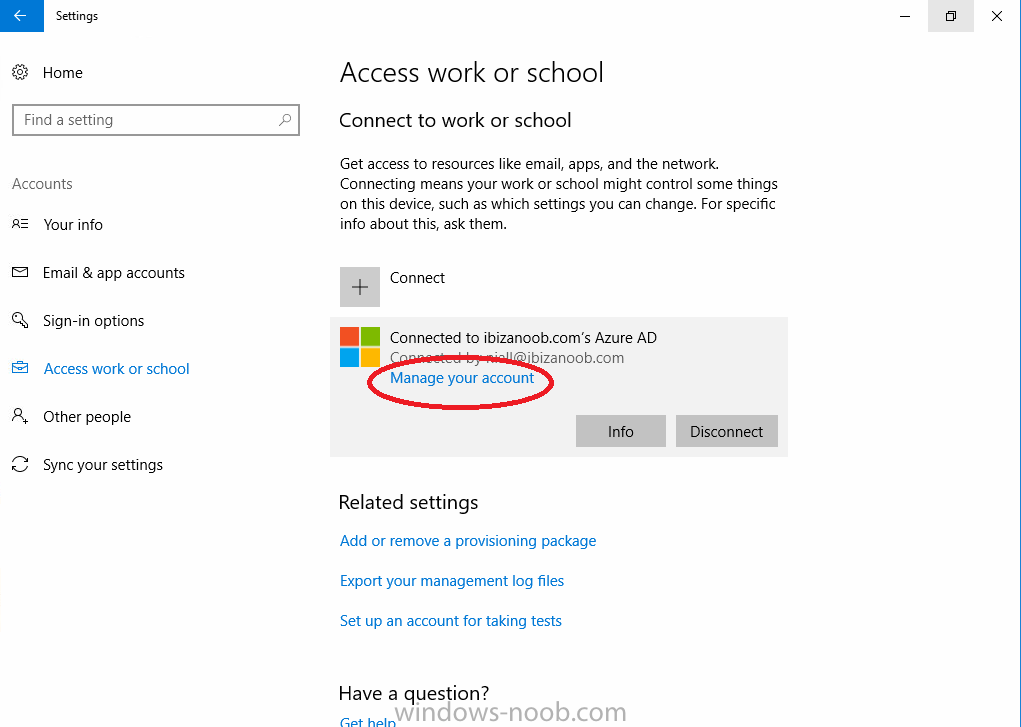
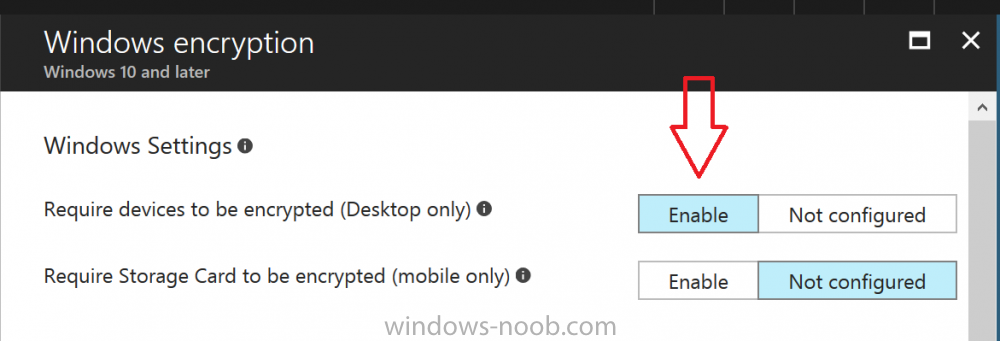
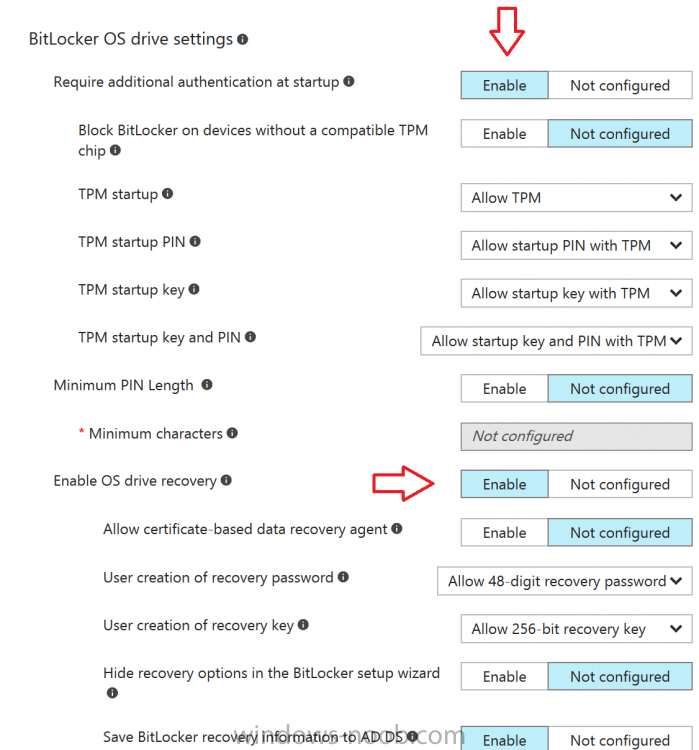
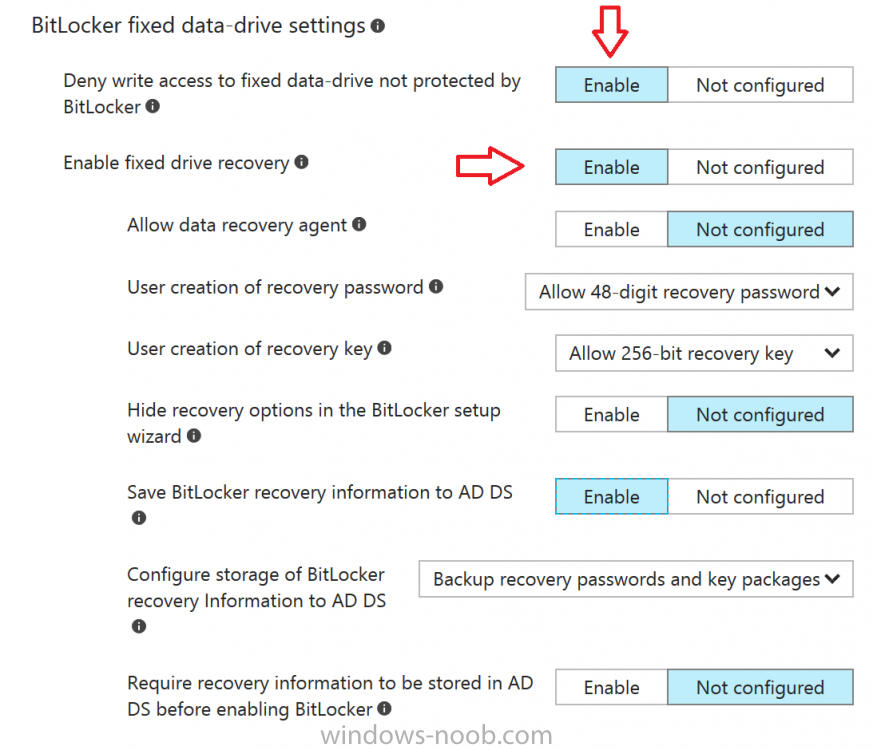
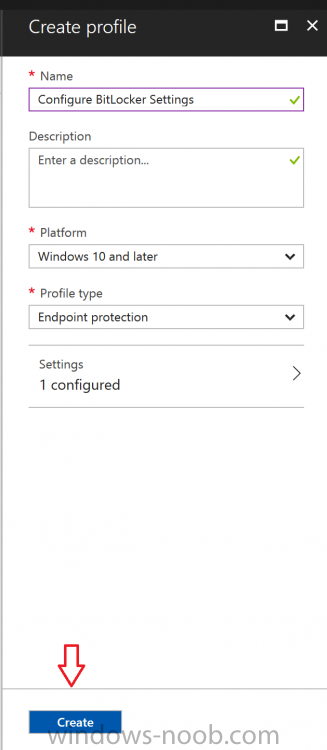
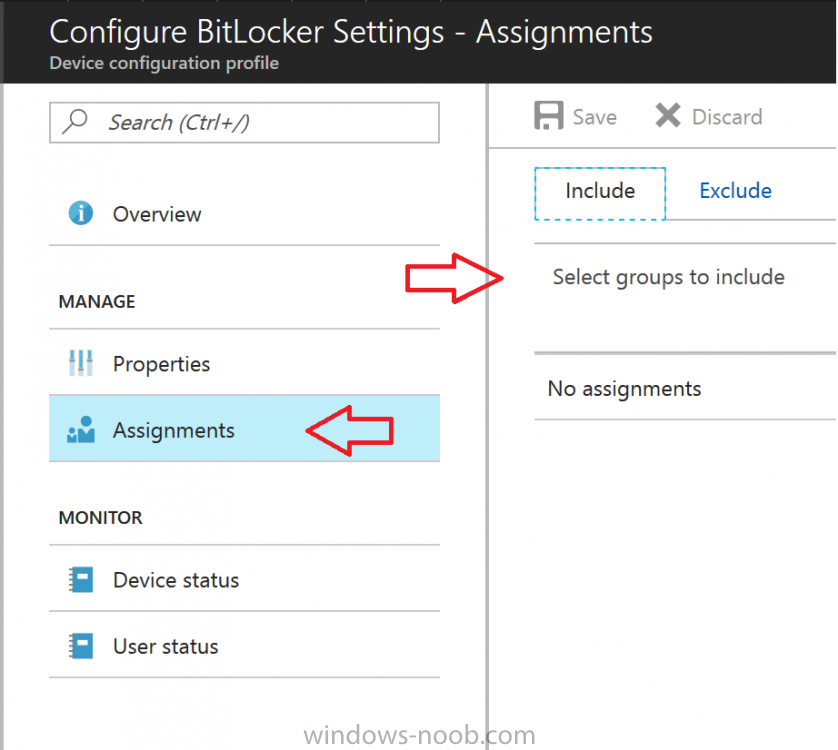
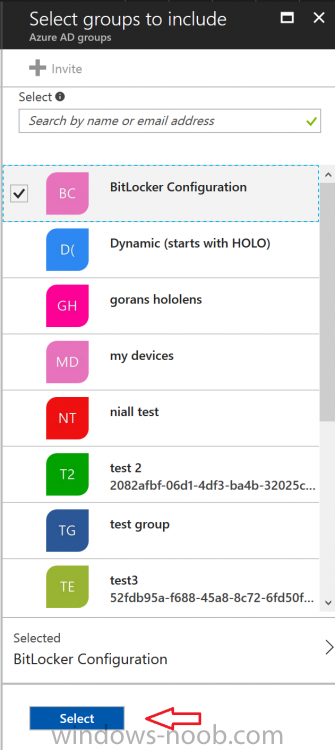
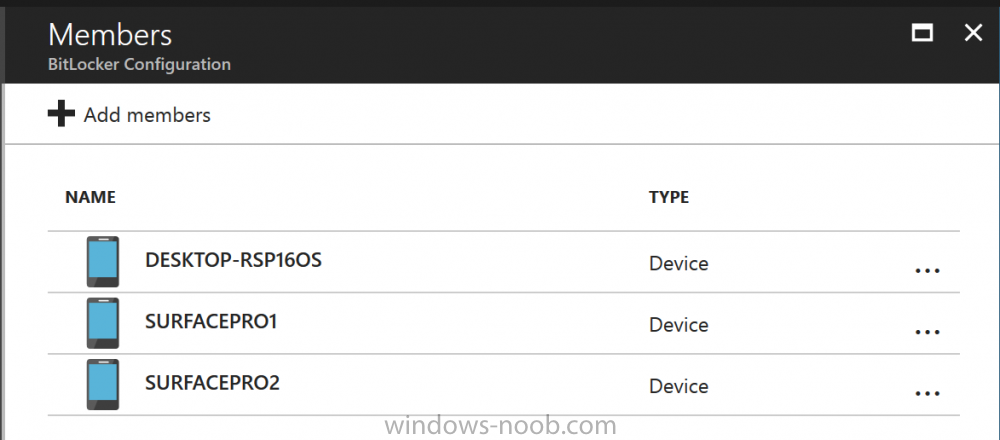
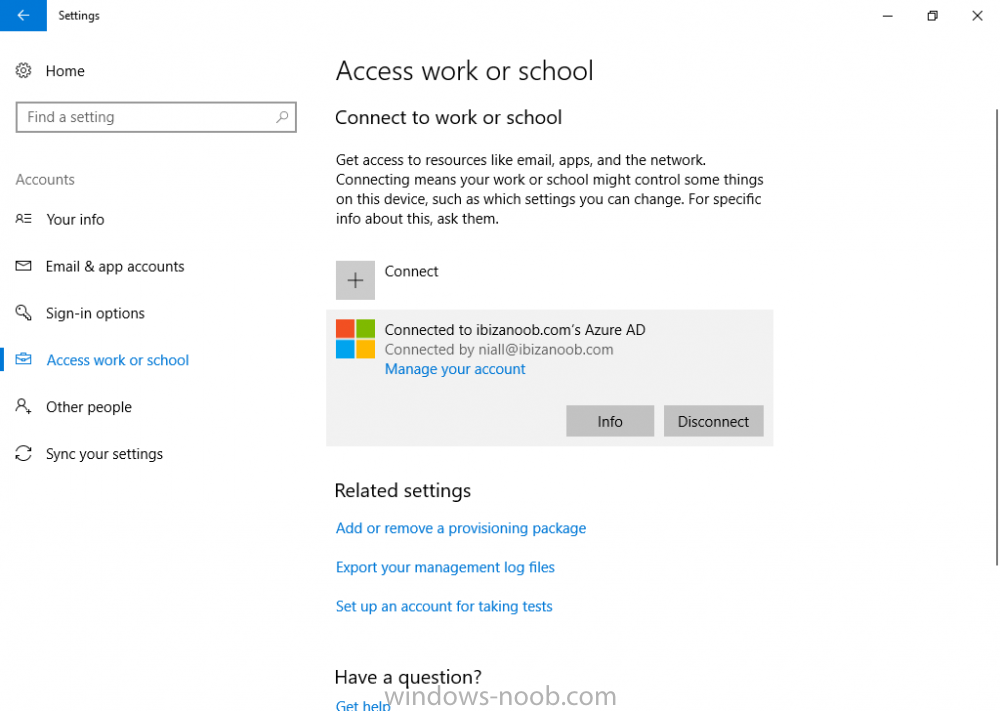
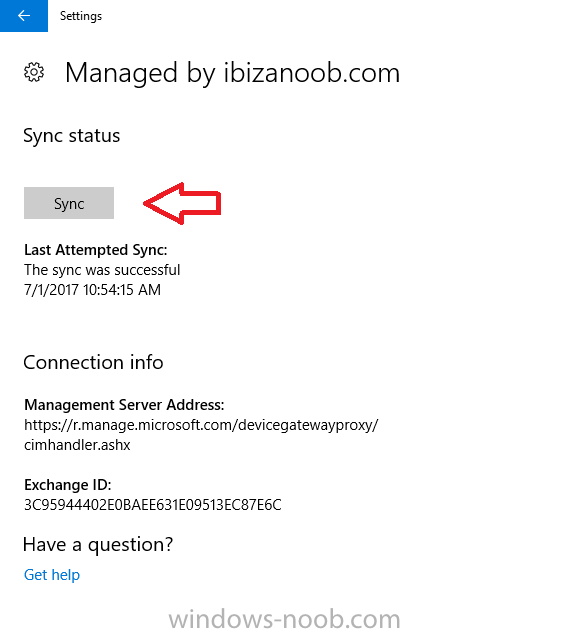
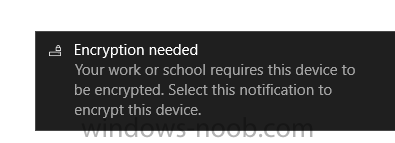
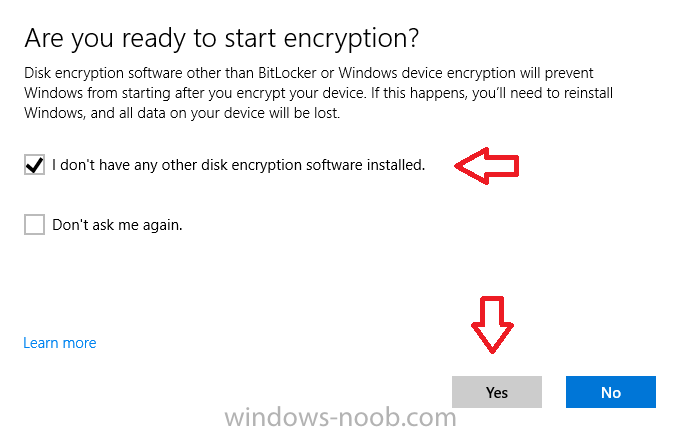
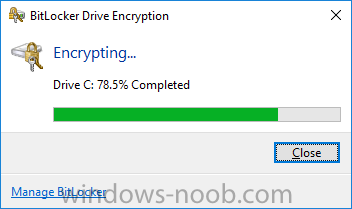
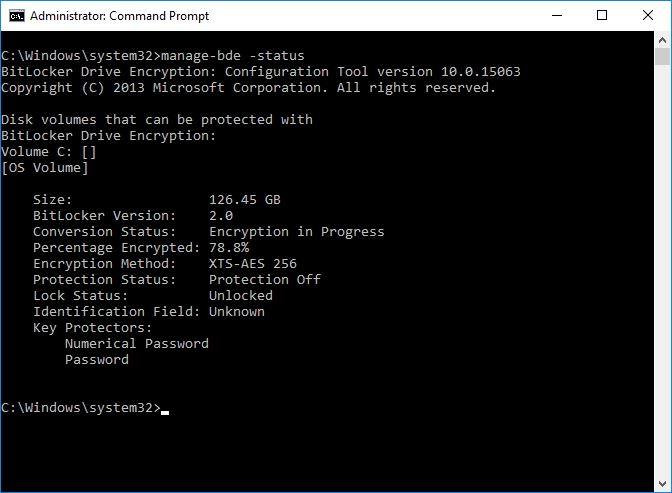
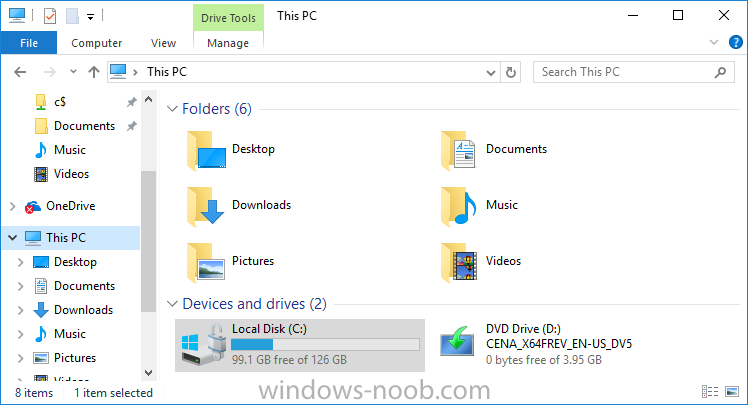
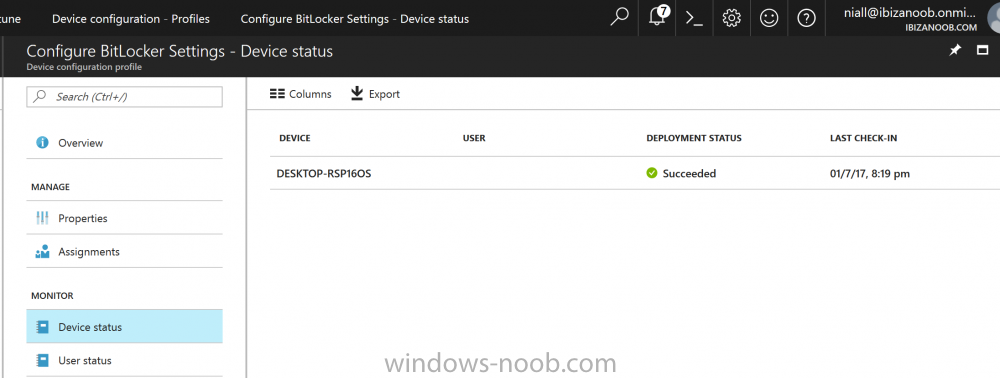
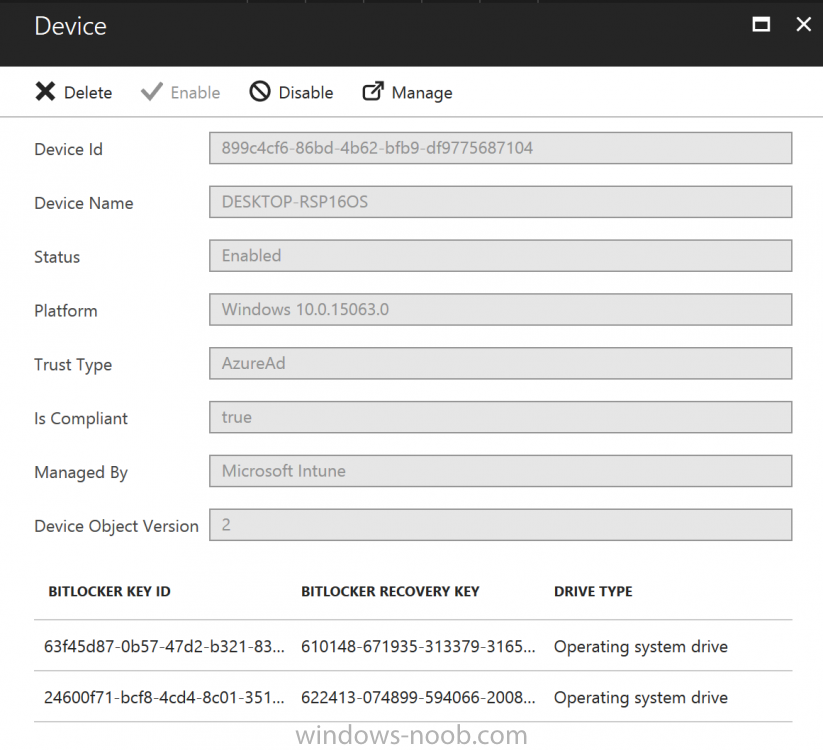
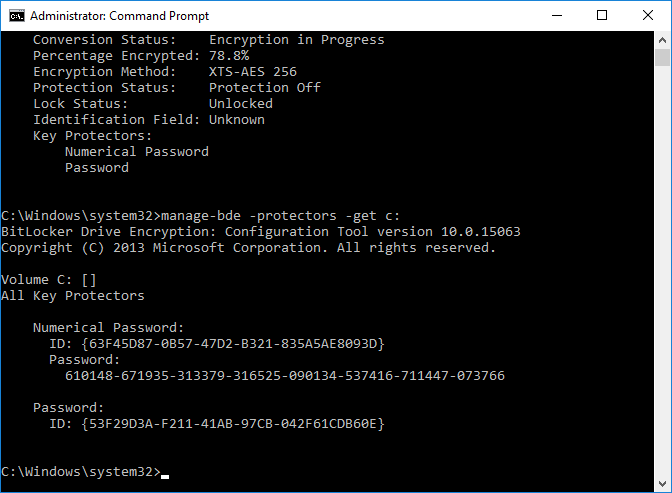
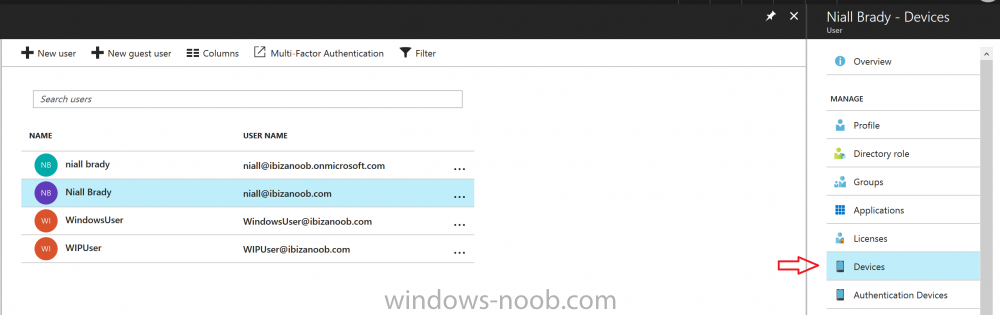
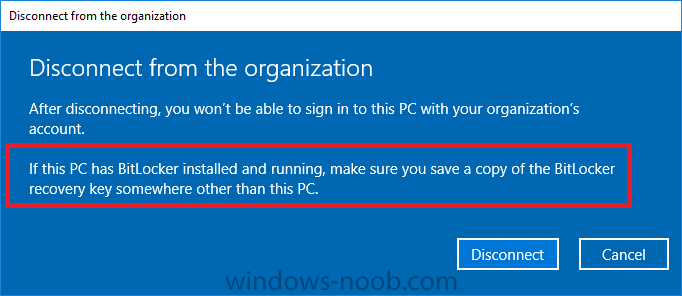
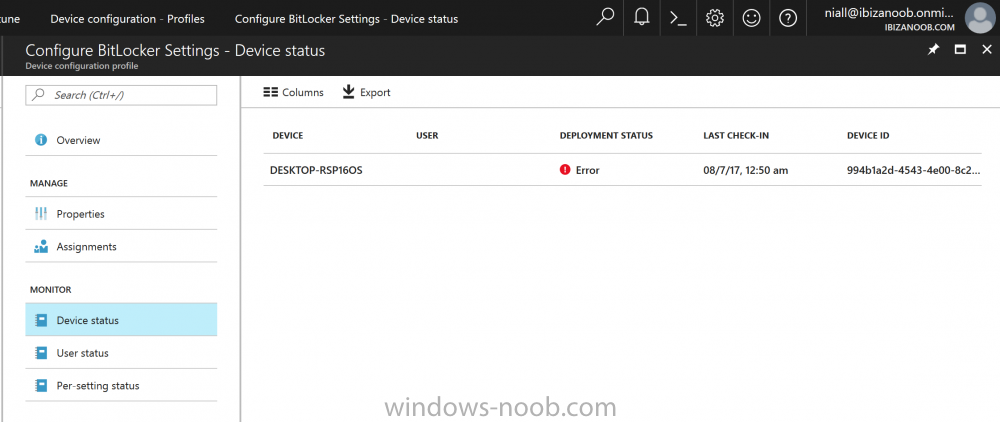
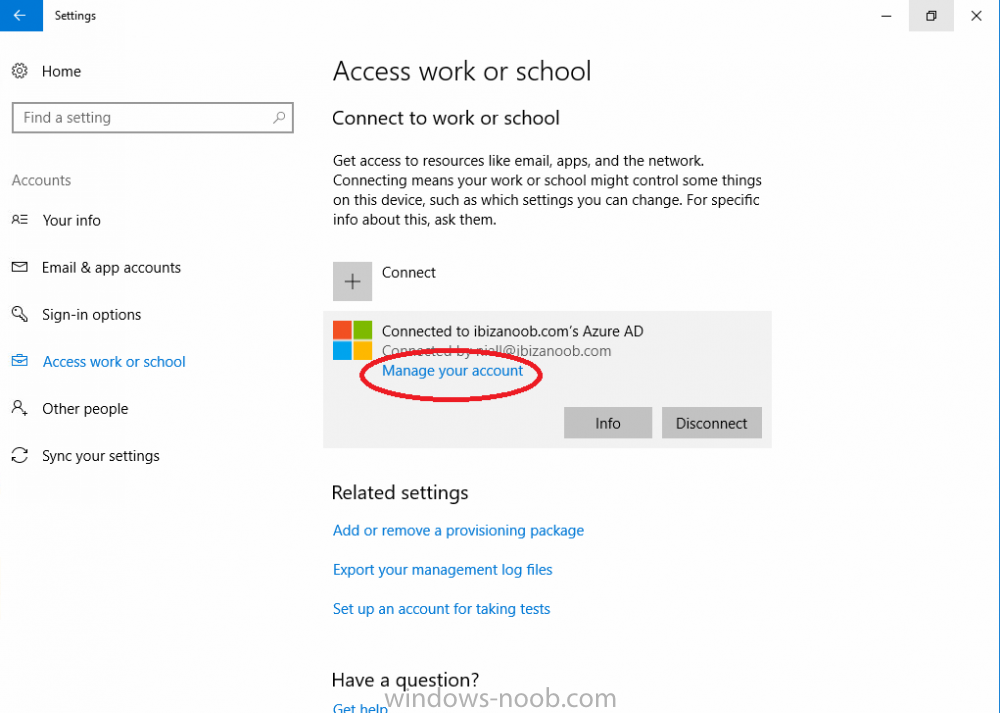
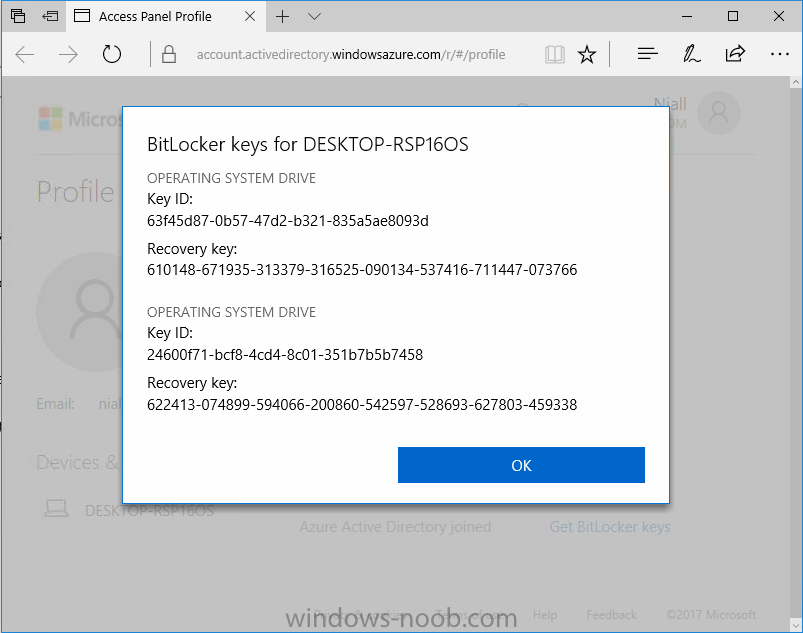
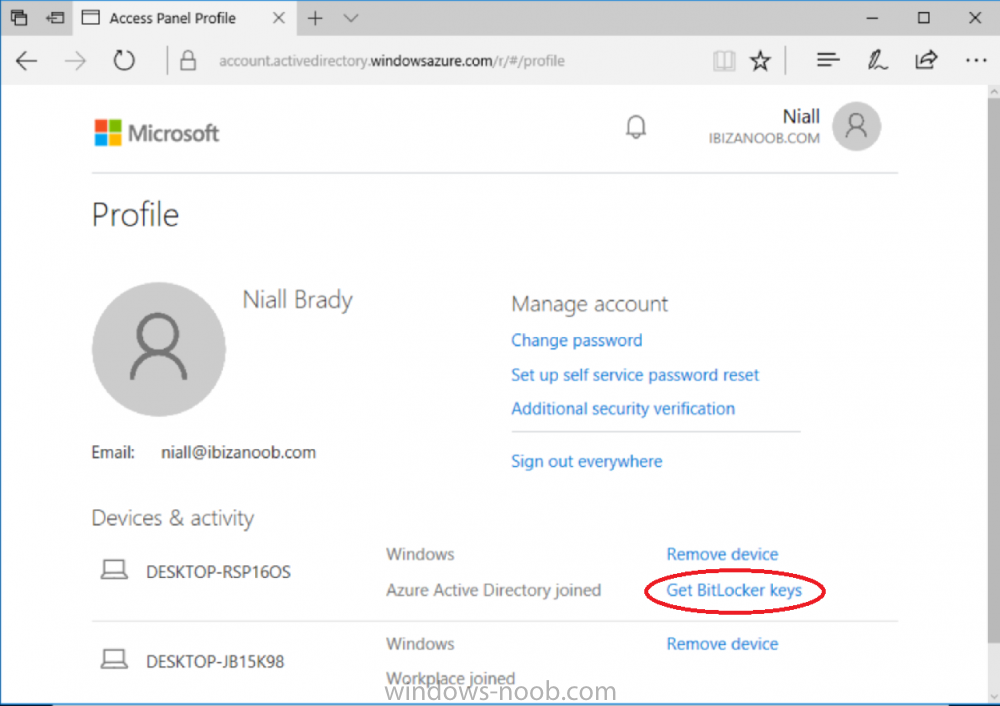
Introduction Security is a big focus for many companies, especially when it comes to data leakage (company data). Encrypting data on Windows 10 devices using BitLocker means that data is protected ("data at rest") . Microsoft Intune got yet more updates on June 30th, 2017, one of which was the ability to configure BitLocker settings detailed here. This ability was initially raised as a uservoice item. So let's take a look at how it works. Step 1. Create a Device Configuration Profile In the Azure Portal, navigate to Intune, and select Device Configuration, then click on Profiles and then click on Create Profile, and fill in the following details: Name: Configure BitLocker Settings Platform: Windows 10 and later Profile type: Endpoint Protection Note: Endpoint Protection is the profile type for BitLocker configuration, not to be confused with System Center Endpoint Protection. as shown below. Step 2. Configure Settings in the profile Next, in the Windows Encryption pane that appears, make your choices for Windows Settings, Set the Require devices to be encrypted (Desktop only) option to Enable. Make note of the note (the 'i', you can hover over it to see the info it contains), and I've bolded part of that statement below: So by requiring BitLocker encryption, your users will need to confirm the above prior to encryption taking place. Hopefully in the future we'll be able to automate it 100% so that no user interaction is required. For BitLocker base settings, set Configure encryption methods to Enable and then set the desired encryption level via the drop down menus for each drive connected. For BitLocker OS drive settings make your choices after setting Require additional authentication at startup to Enable. Note: For Enable OS drive recovery, although it states that you can Save BitLocker recovery information to AD DS it actually saves the recovery information to Azure AD if you enable the option (and you should). In other words, if you want to be able to retrieve a BitLocker key from an Azure AD and MDM enrolled device, make sure to Enable OS drive recovery and Save BitLocker recovery information to AD DS. For BitLocker fixed data-drive settings, you can deny write access to drives not BitLockered by enabling the option. And for BitLocker removable data-drive settings, make your choices. Once you've finished configuring the settings, click on OK and then click on Create, to Create the device configuration profile. Step 3. Assign the profile to a group Now that you've created the profile, you need to deploy it (assign it) to a Group containing Windows 10 devices. Select the profile created above, and click on Assignments, next click on Select groups to Include. Select a previously created Group (or groups if you wish), I selected one which I previously created called BitLocker Configuration but you can select whichever Group you want, and then click on the Select button at the bottom of that pane, if it's not visible, zoom out (browser zoom). Finally, click on Save to save the changes. If you haven't done so already, add some Windows 10 Device members to the Group. Step 4. Monitor the device configuration on a Windows 10 device Login to a MDM connected (and in this case Azure AD joined) device that is not yet encrypted, and trigger a Sync. To trigger a policy sync, select All Settings Accounts, select Access Work or School, select your MDM account and click on Info. Next, click on Sync Once the sync is done you should see an Encryption Needed notification in the systray. Click on the notification and you'll see the following screen. Select I don't have any other disk encryption before clicking on Yes. and off it goes... And you can open an administrative command prompt to verify the encryption algorithm using the following manage-bde -status As you can see from the above, encryption is in progress and the Encryption method matches the XTS-AES 256 setting selected in the device configuration. After it's done encrypting, you'll be notified. And in Windows File Explorer you can see the BitLocker icon on the operating system drive. Step 5. Verify device is configured with BitLocker in Azure At this point trigger another Sync on the device. After the sync is complete, click on the Device configuration profile, and select Device status as shown below. Devices targeted by the profile will be listed along with the Deployment Status of the configuration profile. If the user has allowed BitLocker to complete the deployment status will be listed as "Succeeded" as shown below. If the user did not start encryption (or if there was some other problem), it will be listed with a Deployment Status of "Error". If the Deployment Status is listed as Error, you can click on the device listed, and it will take you to the devices' properties. From there click on Device configuration and then click on the Device Configuration error on the right side of this screenshot. Here you see that it mentions the user needs to click on Yes to start the encryption, so it's likely (in this case) that the user ignored the notifications which is why an error is reported. To enforce this, or rather to force the user to do what we want (in regards to starting the BitLocker encryption via the notification), please see the comments in the summary at the bottom of this guide. Step 6. Retrieving the BitLocker key as the admin in Azure AD To locate the BitLocker protector key, select the User that enrolled into MDM, and click on Devices. Then select the device in question. The BitLocker key id and BitLocker recovery key will be listed. Which can be double checked against the actual computer using this command (in an administrative command prompt on the client computer that is BitLocker encrypted) manage-bde -protectors -get c: Note: If the user un-enrolls the device, the BitLocker recovery keys will be removed from Azure AD. Step 7. Retrieving the BitLocker key as the user The user can also check their BitLocker keys on any of their enrolled devices by clicking on Settings, Accounts, Access work or school, highlight the connection, and select Manage your account or by going to https://myapps.microsoft.com in a web browser and clicking on their username, and then clicking on Profile, select the device and then click on Get BitLocker Keys. From there they can click select the device in question, and click on Get BitLocker Keys and the BitLocker keys will be listed Note: If you want to automate this and remove user choice then use the windows-noob.com custom MSI in Part 2. Recommended reading https://docs.microsoft.com/en-us/intune/endpoint-protection-windows-10 https://docs.microsoft.com/en-us/windows/device-security/bitlocker/bitlocker-management-for-enterprises https://en.wikipedia.org/wiki/Data_at_rest https://docs.microsoft.com/en-us/azure/active-directory/active-directory-conditional-access https://nhogarth.net/2017/07/17/intune-denying-access-to-windows-10-without-bitlocker-enabled/ https://blogs.technet.microsoft.com/home_is_where_i_lay_my_head/2017/06/07/hardware-independent-automatic-bitlocker-encryption-using-aadmdm/ Summary It's great that we've finally got the ability to enable BitLocker in Intune but forcing encryption is not that straight forward. To force your users to be compliant you can either use Conditional Access (1) to deny those machines access to email and associated office applications unless they are encrypted, to do that you'll need to configure a Device Compliance policy (2) to verify that the device is encrypted, and based on that the user can access the applications specified. Or, you can automate the encryption like I do in Part 2 of this series of blog posts about BitLocker in Intune. (1) Thanks Jan Ketil Skanke (2) Thanks Nick


-
can you check your Redist folder for any non-downloaded files, or files with 0 bytes, such as the file listed below .. due to WindowsUpdateAgent x86 version not being downloaded the Redist folder will be in a path such as ...but the GUID will most likely be different. D:\Program Files\Microsoft Configuration Manager\CMUStaging\7B7E6E7B-3A61-4E84-A5E1-B5DCB514ADED\redist
-
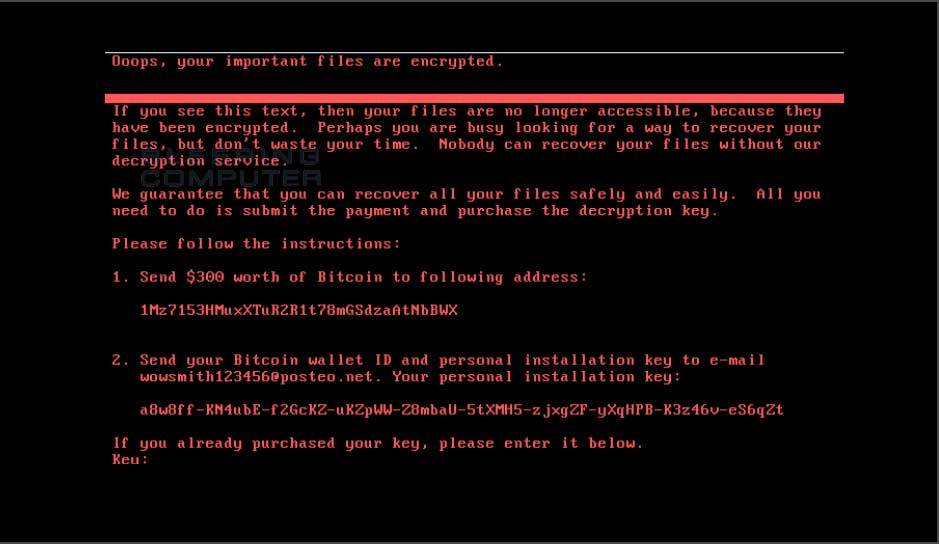
The return of EternalBlue On June 27th 2017, another RansomWare attack took hold targeting the same eternal blue (SMBv1) vulnerabilities as WannaCry before it. This attack however doesn't reach out to the internet like WannaCry did, it's an internal network attack. However, this attack seems to have deliberately targeted businesses in Ukraine, and as the email address used for encryption keys was disabled almost immediately, there's no point in anyone paying ransom if their files are encrypted as they'd never get a reply (with the decryption info). Patch Patch Patch If you haven't done it already (and if you have not, why not especially after WannaCry), head over to this Technet link and apply the patches, do it. Stopping the damage That said, a security researcher found a way of stopping the ransomware from encrypting machines affected by placing a read-only file called Perfc in the Windows directory, eg: C:\Windows\Perfc The presence of that file will be enough to stop the contents of the hard disc from being encrypted by this malware, however the reason this malware spread in the first place is down to vulnerabilities (unpatched) in the operating system. Those vulnerabilities include two from the leaked NSA exploits, so if you've patched your operating systems against those known vulnerabilities you should be safe. Protection against this new ransomware attack Microsoft have advised the following to keep you protected against this (and similar) RansomWare attacks: "We recommend customers that have not yet installed security update MS17-010 to do so as soon as possible. Until you can apply the patch, we also recommend two possible workarounds to reduce the attack surface: Disable SMBv1 with the steps documented at Microsoft Knowledge Base Article 2696547 and as recommended previously Consider adding a rule on your router or firewall to block incoming SMB traffic on port 445 As the threat targets ports 139 and 445, you customers can block any traffic on those ports to prevent propagation either into or out of machines in the network. You can also disable remote WMI and file sharing. These may have large impacts on the capability of your network, but may be suggested for a very short time period while you assess the impact and apply definition updates. Windows Defender Antivirus detects this threat as Ransom:Win32/Petya as of the 1.247.197.0 update. Windows Defender Antivirus uses cloud-based protection, helping to protect you from the latest threats. For enterprises, use Device Guard to lock down devices and provide kernel-level virtualization-based security, allowing only trusted applications to run, effectively preventing malware from running. Monitor networks with Windows Defender Advanced Threat Protection, which alerts security operations teams about suspicious activities. Download this playbook to see how you can leverage Windows Defender ATP to detect, investigate, and mitigate ransomware in networks: Windows Defender Advanced Threat Protection – Ransomware response playbook." Recommended Reading https://technet.microsoft.com/en-us/library/security/ms17-010.aspx?utm_campaign=windows-noob.com https://www.theregister.co.uk/2017/06/28/petya_notpetya_ransomware/ https://blogs.technet.microsoft.com/mmpc/2017/06/27/new-ransomware-old-techniques-petya-adds-worm-capabilities/ https://www.binarydefense.com/petya-ransomware-without-fluff/ http://blog.coretech.dk/swo/petya-ransomware-the-attack-method-and-preventing-it/ https://azure.microsoft.com/en-us/blog/petya-ransomware-prevention-detection-in-azure-security-center/ https://www.welivesecurity.com/2017/06/30/telebots-back-supply-chain-attacks-against-ukraine/ http://blog.uk.fujitsu.com/information-security/petya-medoc-and-the-delivery-of-malicious-software/#.WVeKWCmxXD4 https://www.1e.com/blogs/2017/06/30/stop-future-petya-attacks/?utm_content=56869130&utm_medium=social&utm_source=windows-noob.com
-
so did you make a mistake when you edited the script, can you post it here ?
-
hi, i've updated this guide with a brand new one, so please use that one instead (shown below), but as regards your questions... 1. yes,. it's designed for Server 2016 2. works for me, what error do you get ? 3. The blog post assumes you have sql on the same server as SCCM, so it should work just fine, adjust the sql ini file to decide where it gets installed
-
the package folder source in your case should be pointing to "some UNC path...\german" and that folder should have a sub folder in it called de-de with the appropriate cab file in it
-
hi Kevin that is easy to repress using Custom Client settings deployed to the collection containing these computers that you want to upgrade, to hide notifications for new software, once they have upgraded they'll fall out of the collection and popup as normal in your organization...
-
Microsoft issued a “highly unusual” patch for Windows XP last month to help prevent the spread of the massive WannaCry malware. At least 75,000 computers in 99 countries were affected by the malware which encrypts a computer and demands a $300 ransom before unlocking it. Microsoft stopped supporting Windows XP in April 2014, but the software giant is now taking the unprecedented move of including it in the company’s Patch Tuesday round of security updates today. “In reviewing the updates for this month, some vulnerabilities were identified that pose elevated risk of cyberattacks by government organizations, sometimes referred to as nation-state actors, or other copycat organizations,” says Adrienne Hall, general manager of crisis management at Microsoft. “To address this risk, today we are providing additional security updates along with our regular Update Tuesday service. These security updates are being made available to all customers, including those using older versions of Windows.” read the story @ TheVerge

-
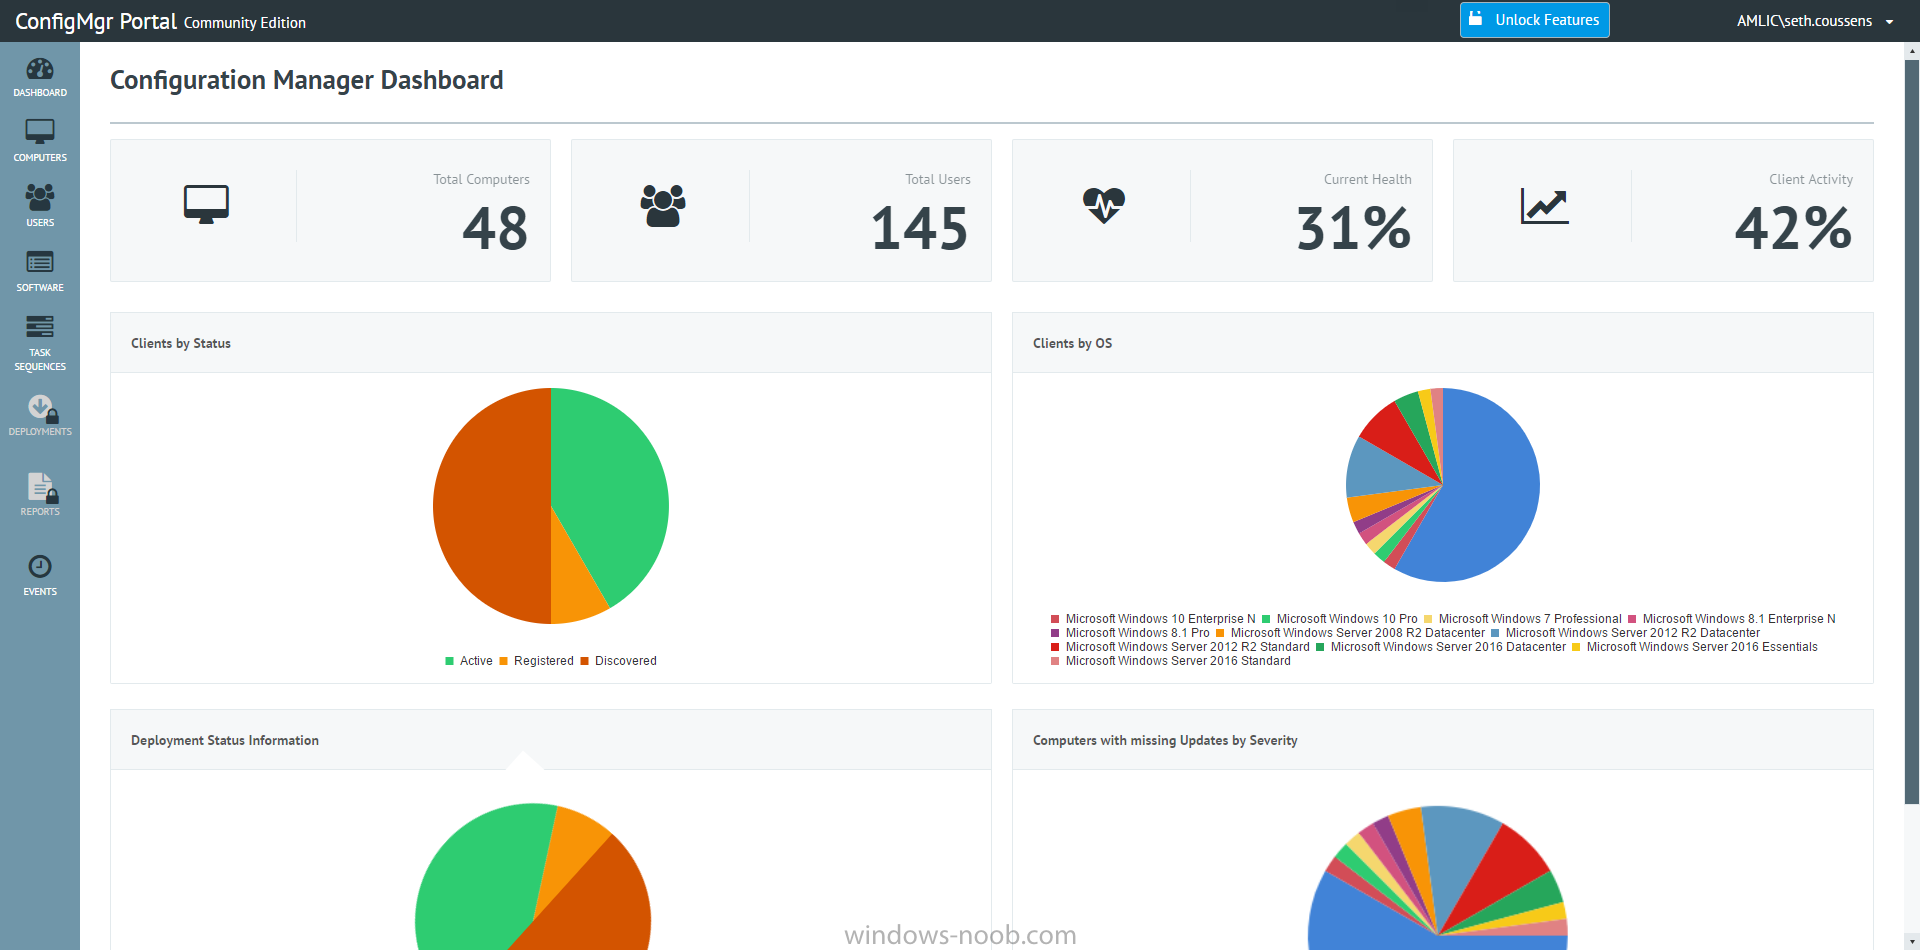
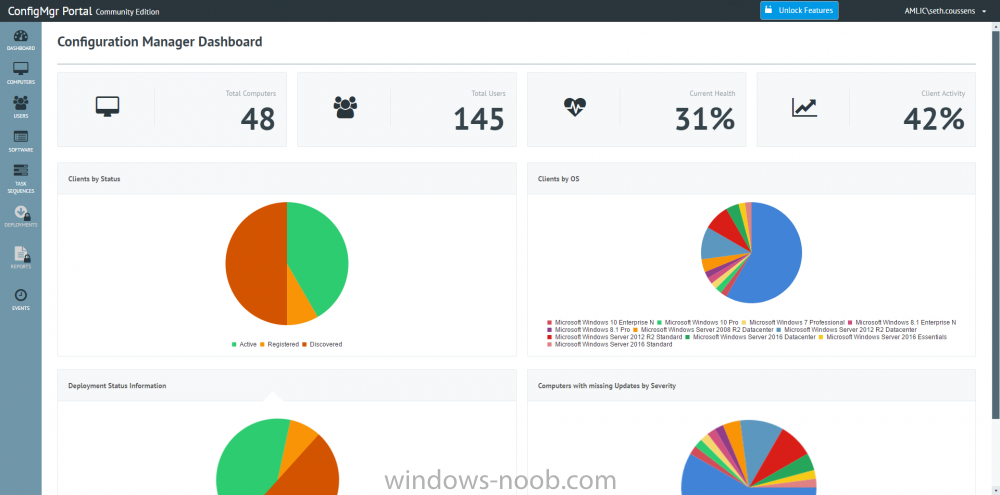
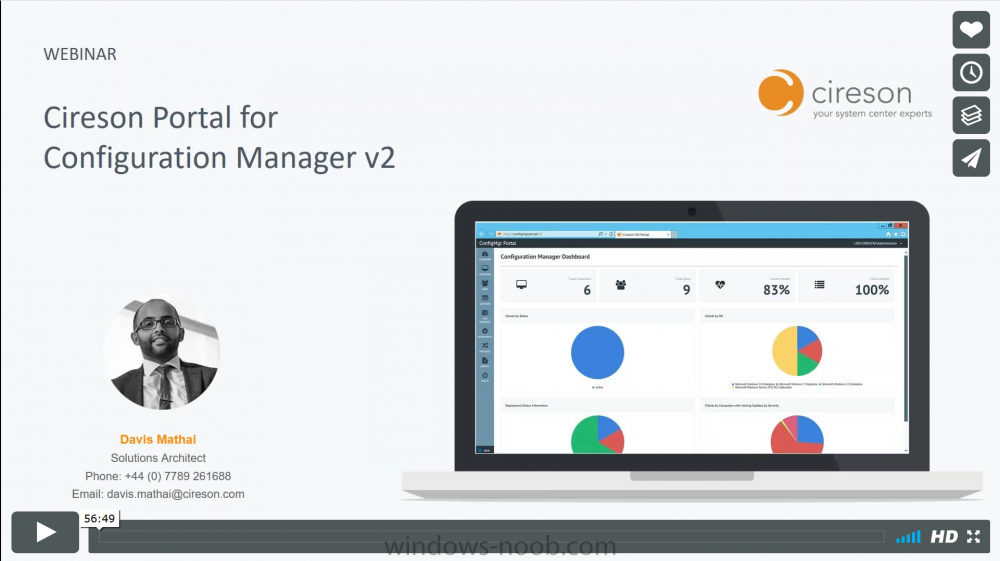
Introduction Back in March 2017, I reviewed Cireson's ConfigMgr Portal, and it is a great product, however it's not free there is a license cost involved. That said, Cireson have now released a new free version of the Portal called the free community Portal for Configuration Manager and that will make a lot of people happy. What's different between the two releases ? So what's the deal here ? well obviously if you like using the free version then you are inclined to move to the full edition, so let's see what the two versions offer. Community features: Quickly and easily know user details by viewing software and hardware information View a detailed inventory summary of any selected computer in the Computers View Understand deployment status for individual users and computers, along with other relevant organizational information with dashboards No Configuration Manager Console installation required Wizard-based installer to setup in minutes Beautiful and intuitive web interface ConfigMgr Portal edition features: Everything in Community, plus: Inventory data visibility including hardware, software, network, client information, applied updates User device affinity management from within the Portal Computer cloning and cleaning – copy/remove targeted software deployments from one computer to another Interface with external remote tools from your browser, including Remote Manage, Ping, and Remote Desktop Push software on-demand to any client with collection targeted deployments Enhanced software, OS, and MDT deployment and management Create deployment templates for software applications and OS updates Monitor the status of any deployment Simplified role-based administration to control who has access to certain features and to govern the size of deployments Built-in report viewer Dashboards to view summary information for your environment Commence integration for quick and easy computer provisioning Ability to integrate the Cireson Analyst Portal for Service Manager with the Portal for Configuration Manager to better align the support experience In addition to the Community edition, Cireson also released some updates to the ConfigMgr Portal edition: New dashboards to easily see the health of your IT systems Extended remote tools functionality A new wizard-based installer to make it easy to setup the Portal in minutes Commence integration (OS deployment frontend): Windows Pre-Execution Environment (WinPE) application that allows quick and easy computer provisioning through integration with Configuration Manager Portal templates and settings during the provisioning process. Learn more Check out this webinar which explains the new features, and gives an overview of the community edition as well: cheers ! niall
-
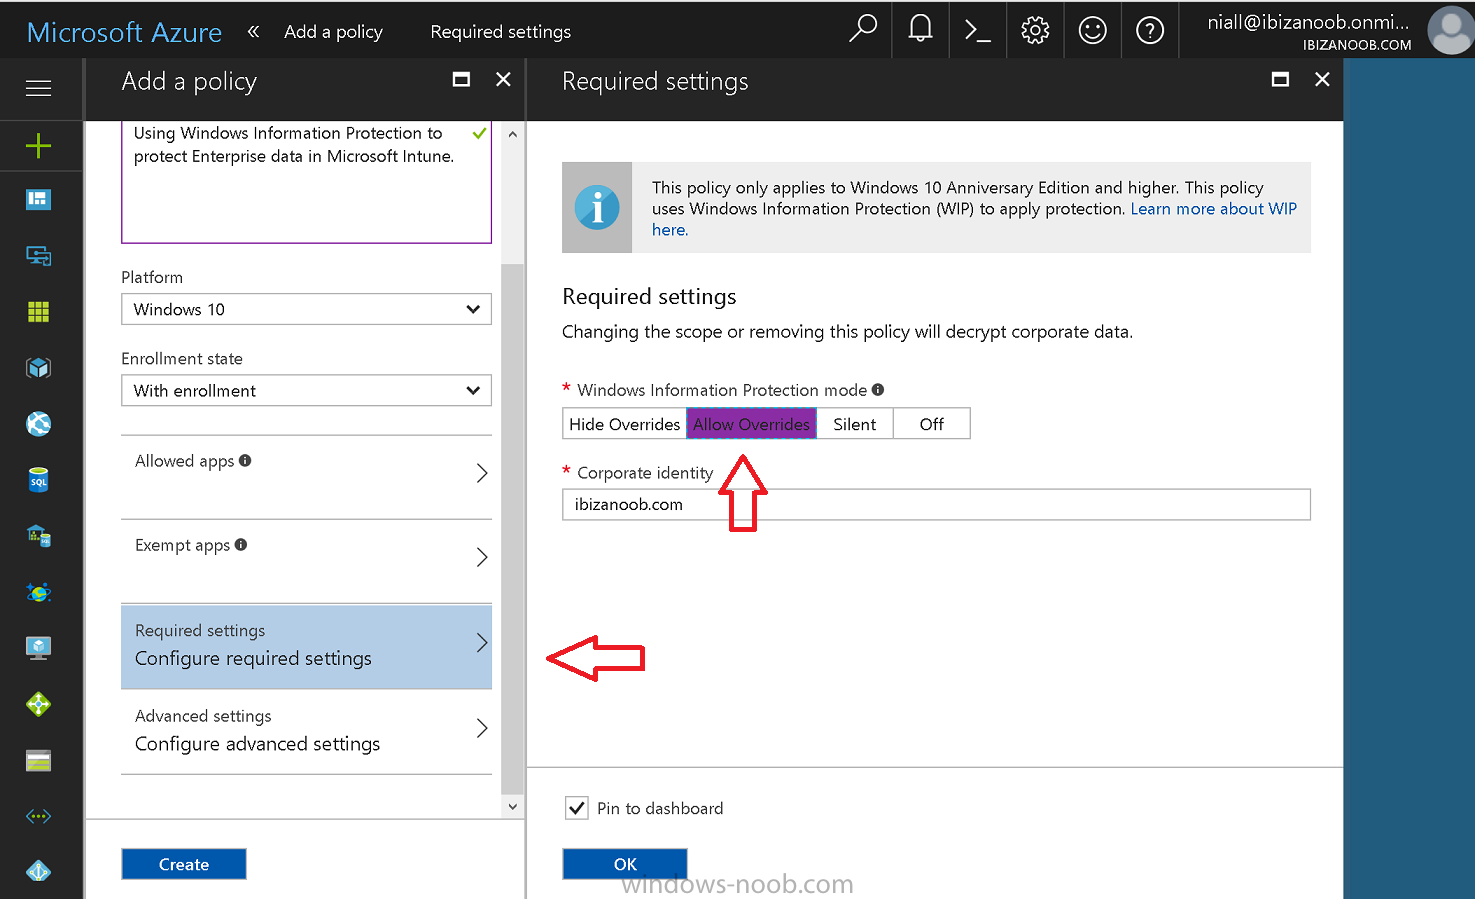
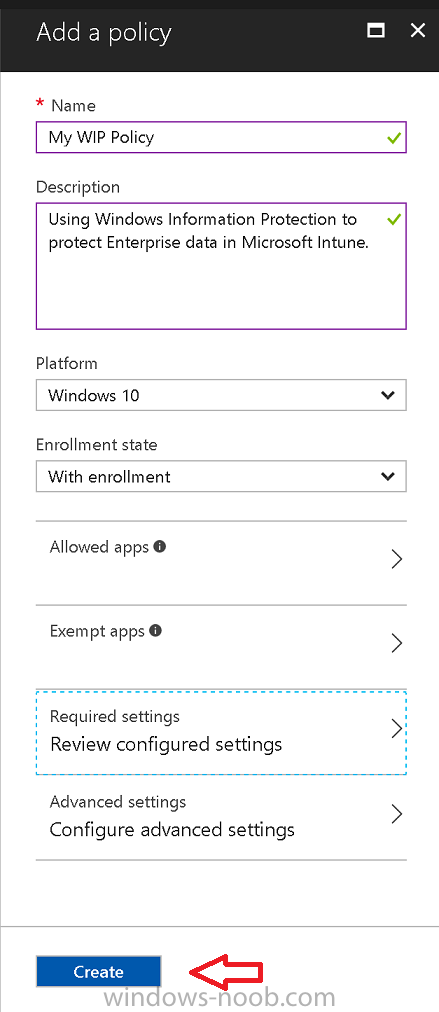
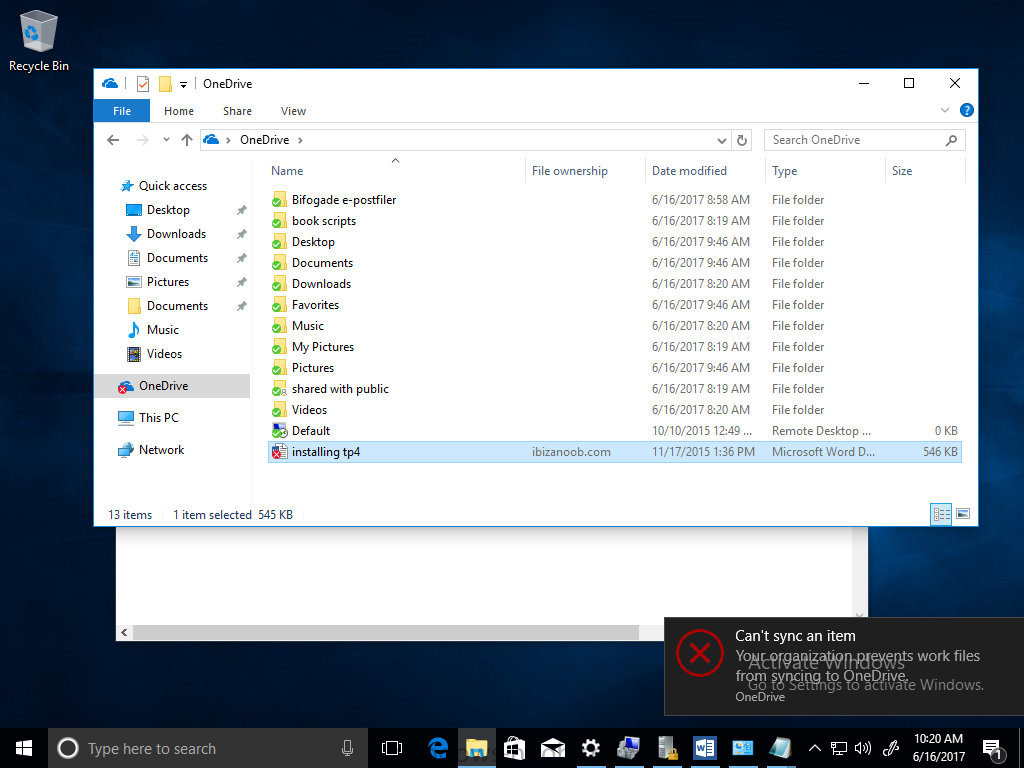
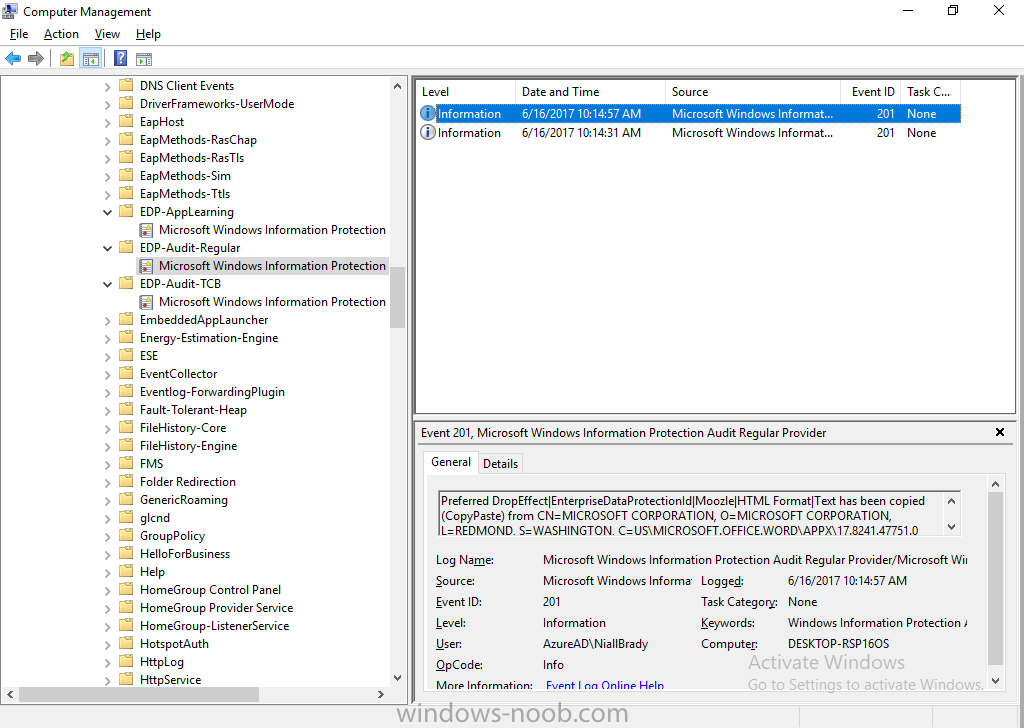
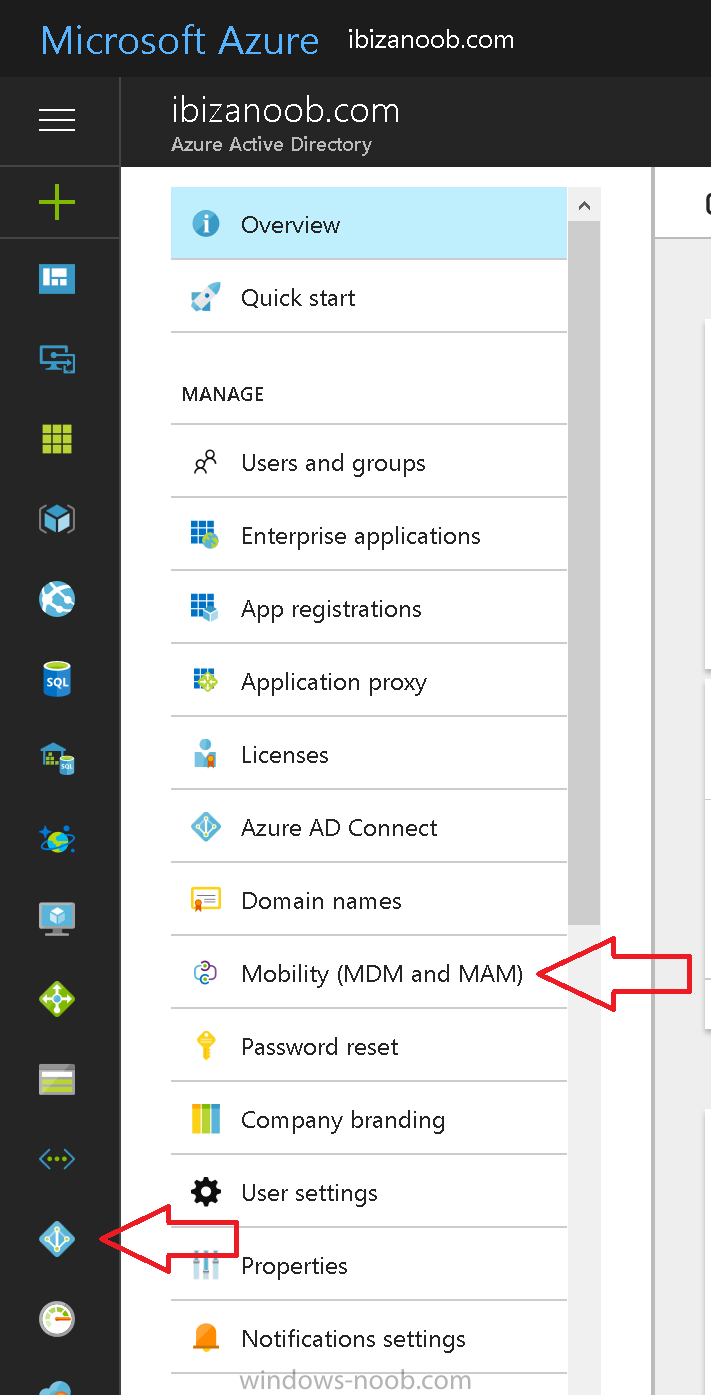
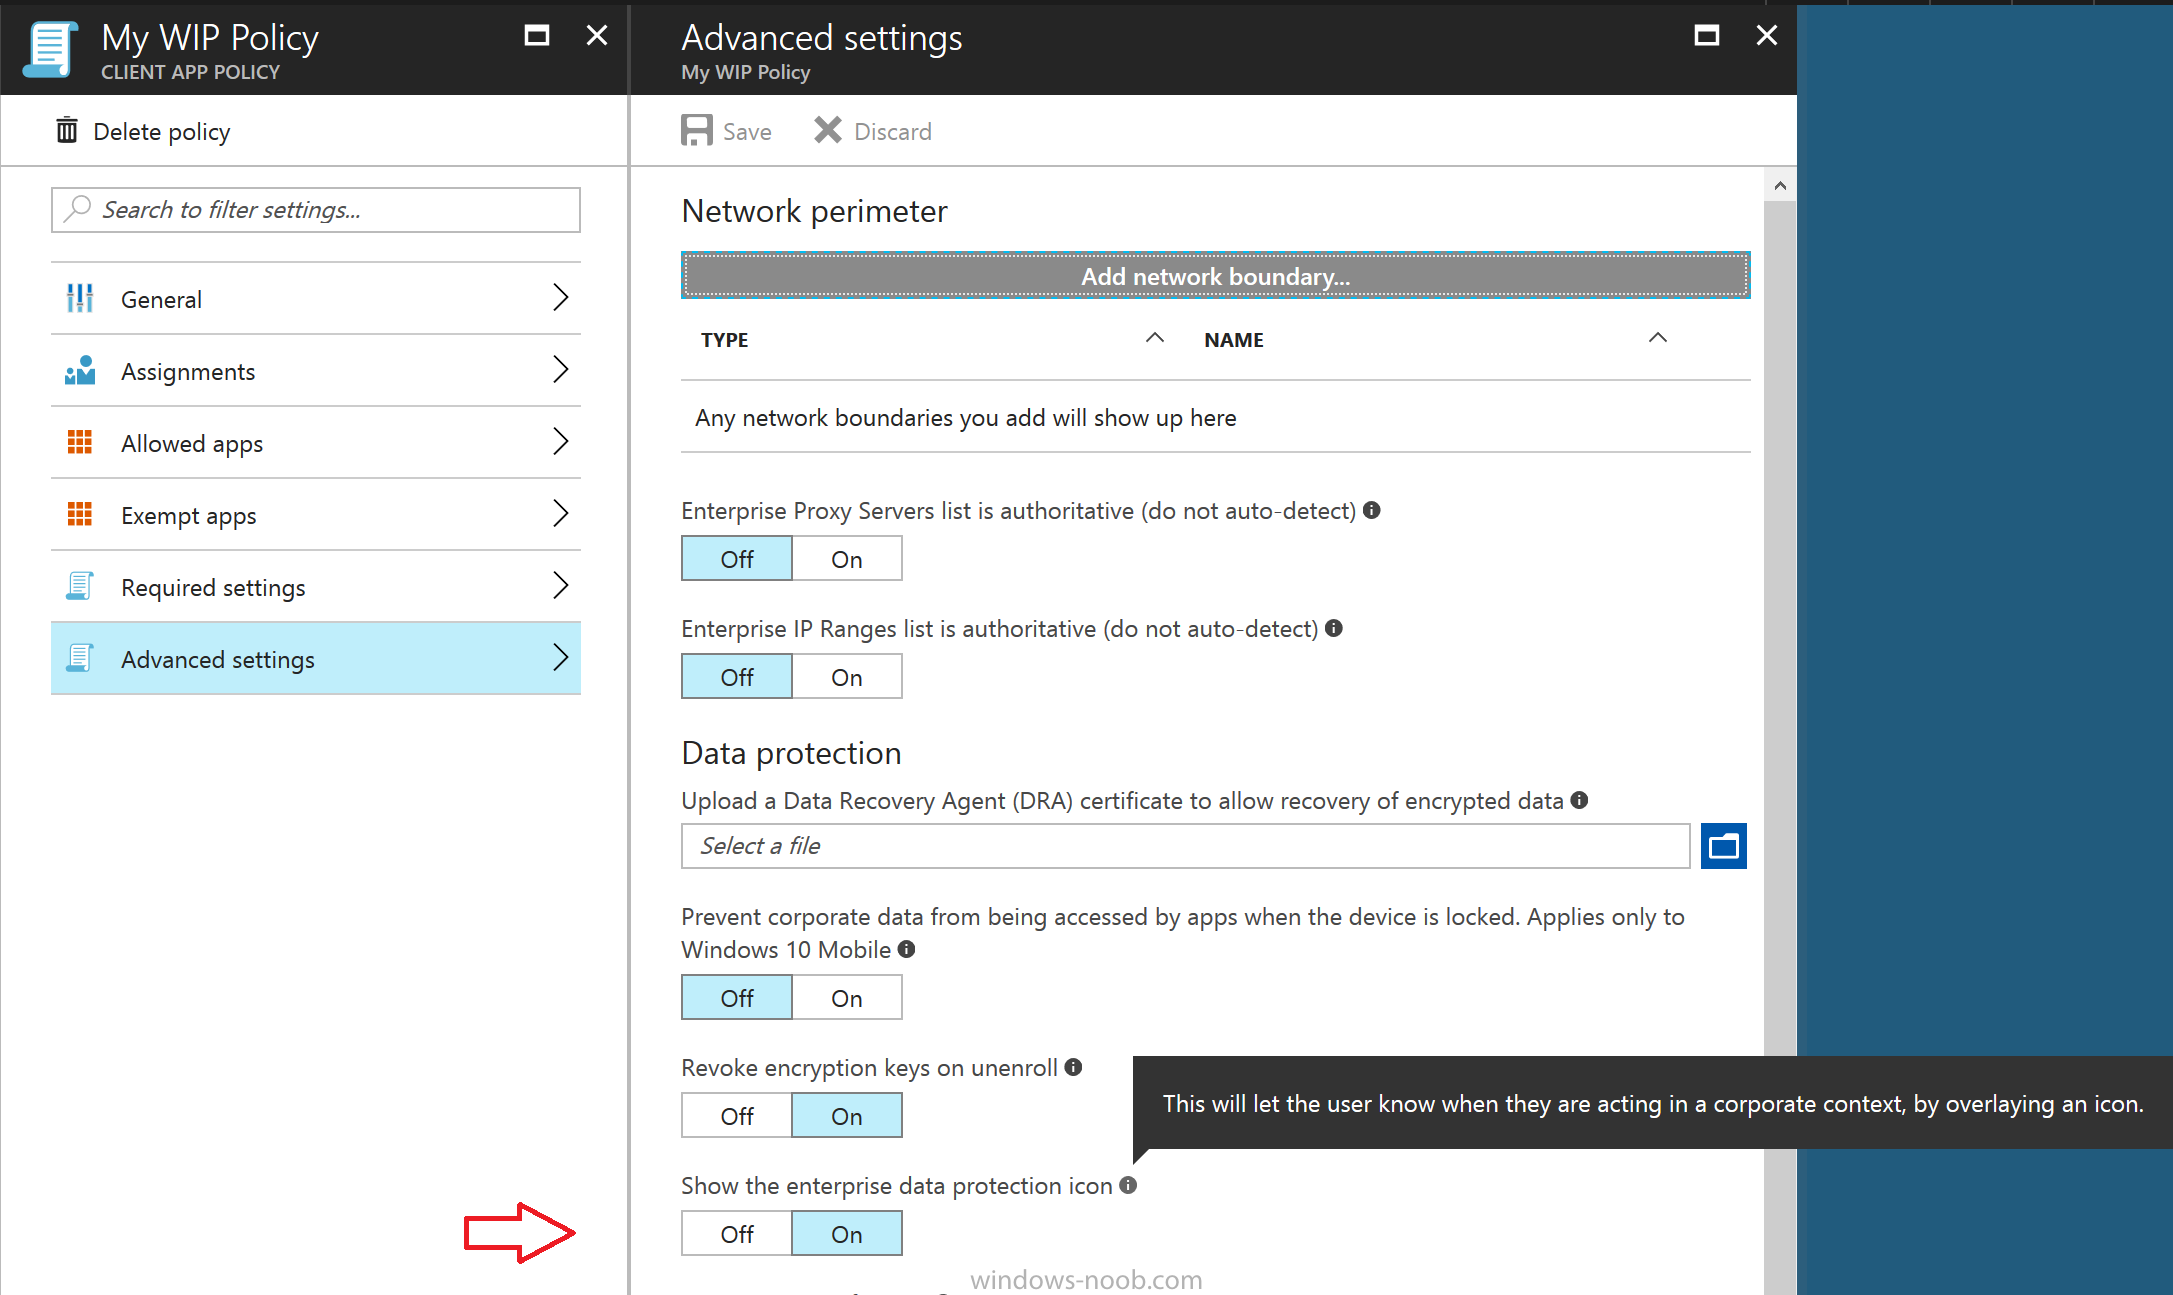
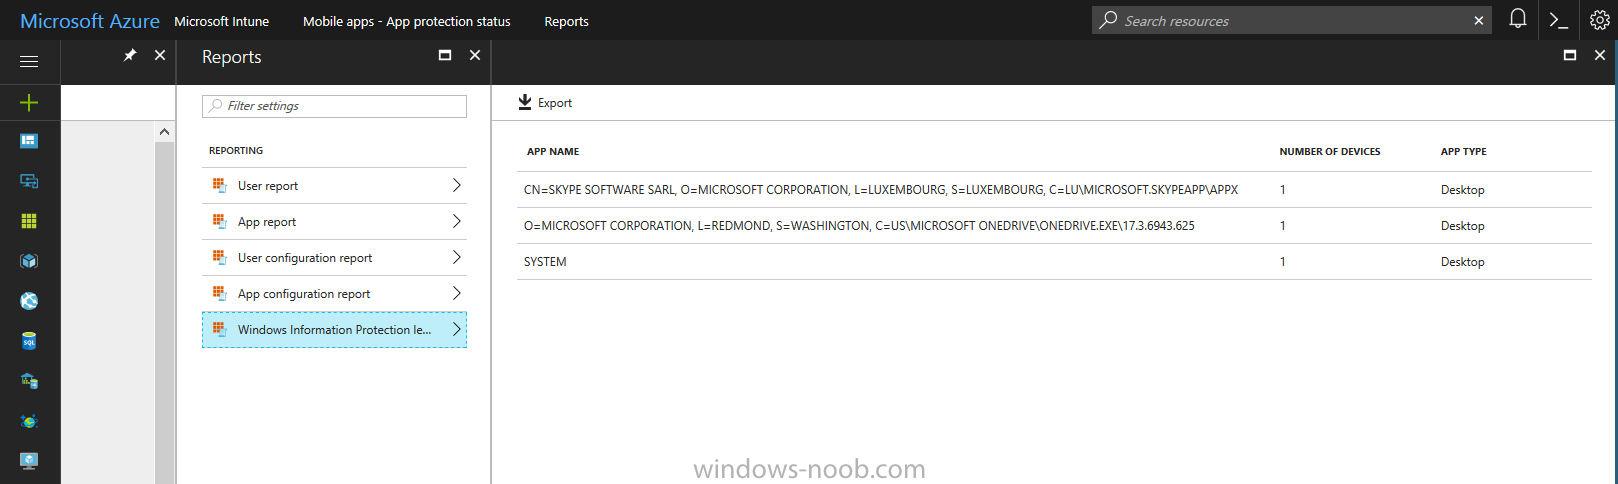
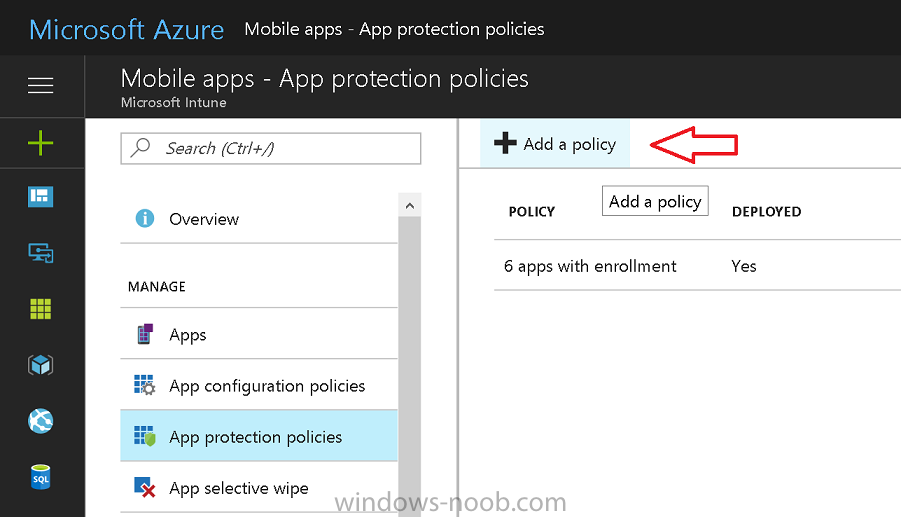
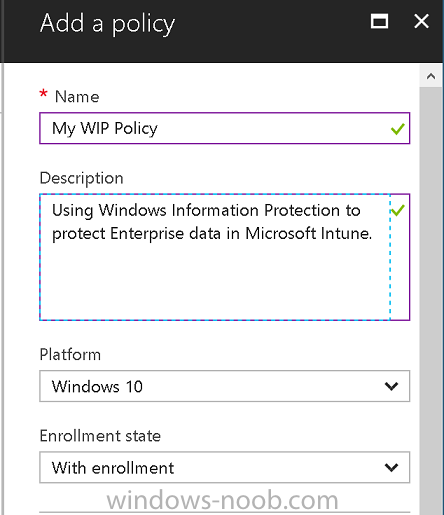
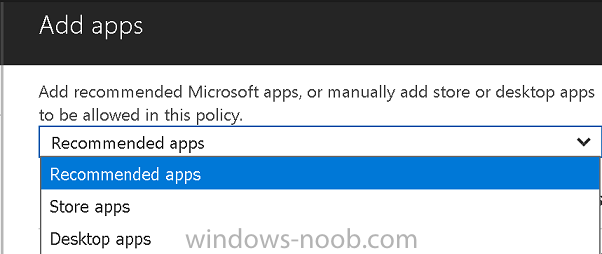
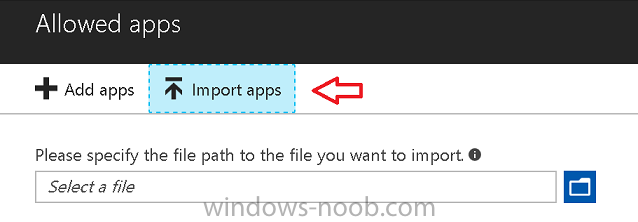
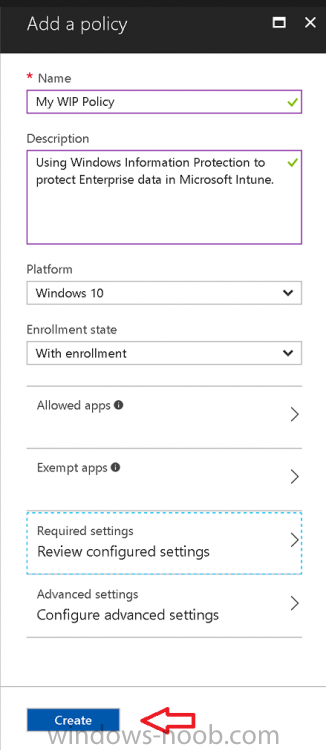
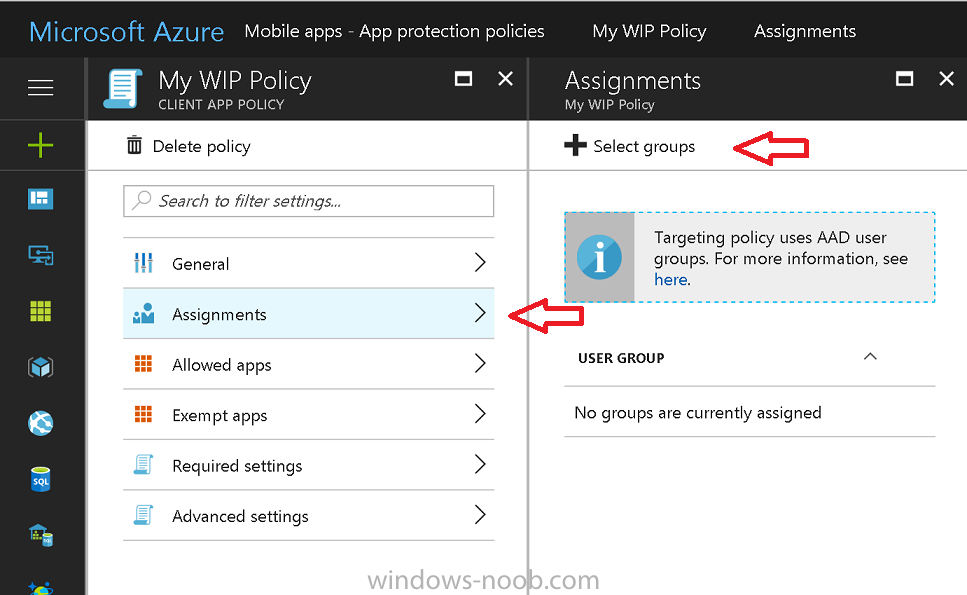
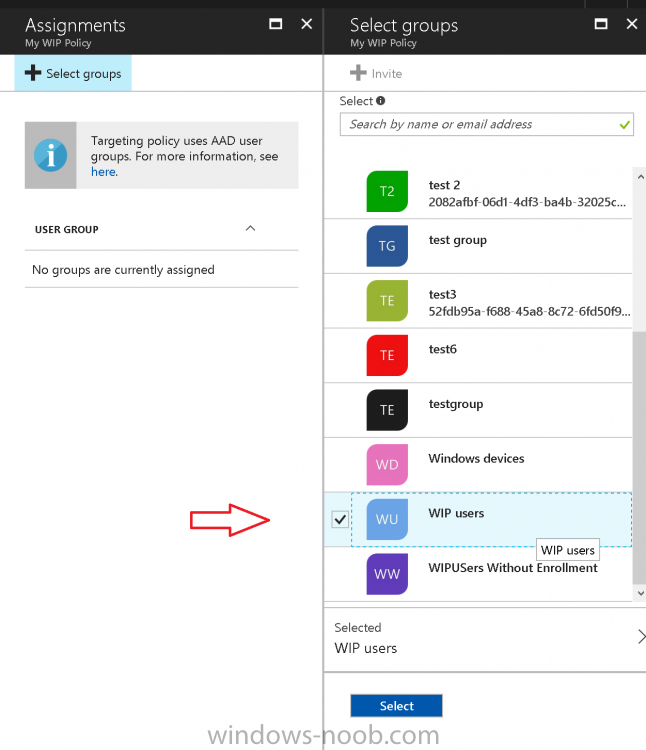
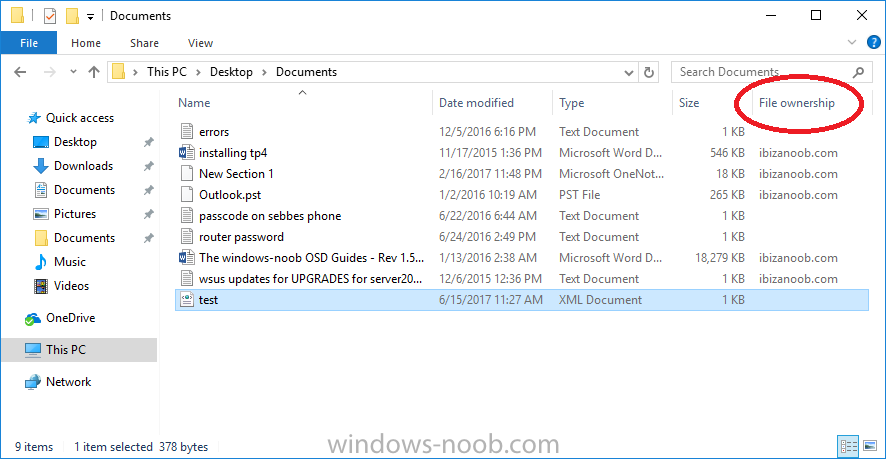
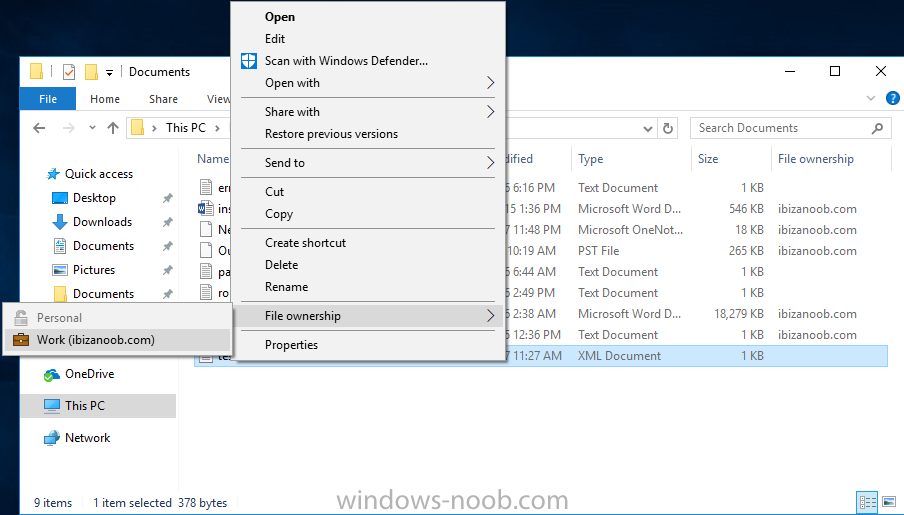
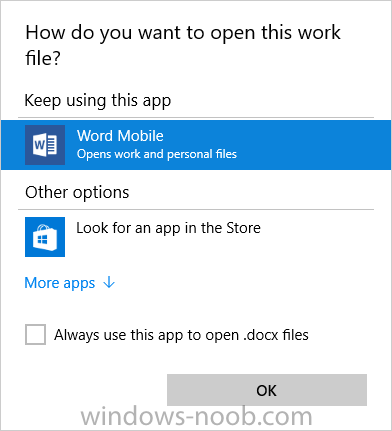
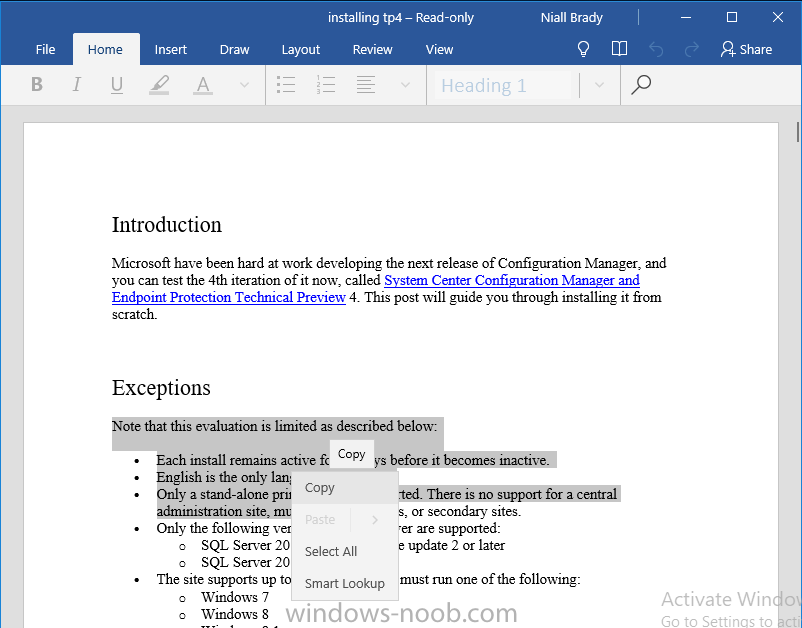
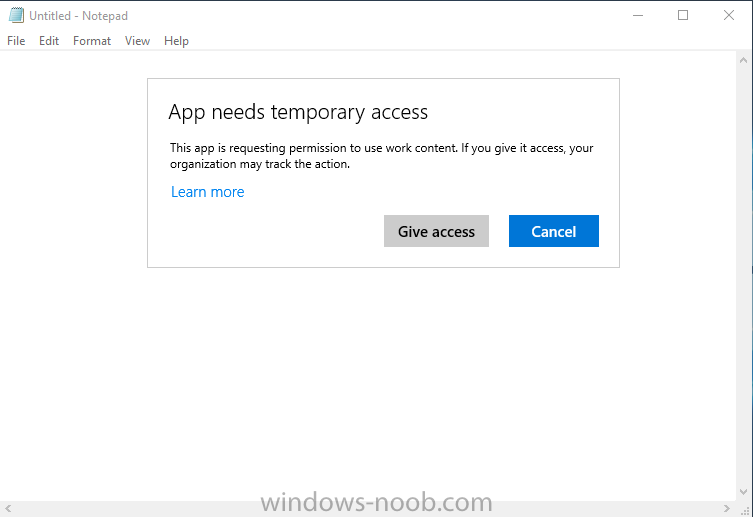
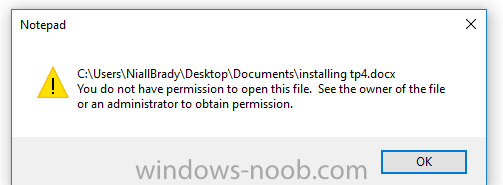
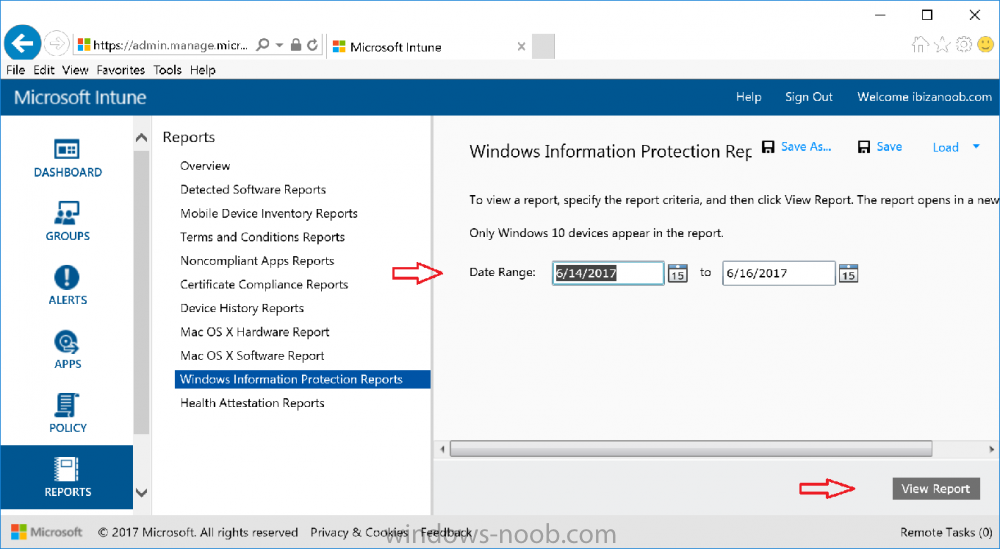
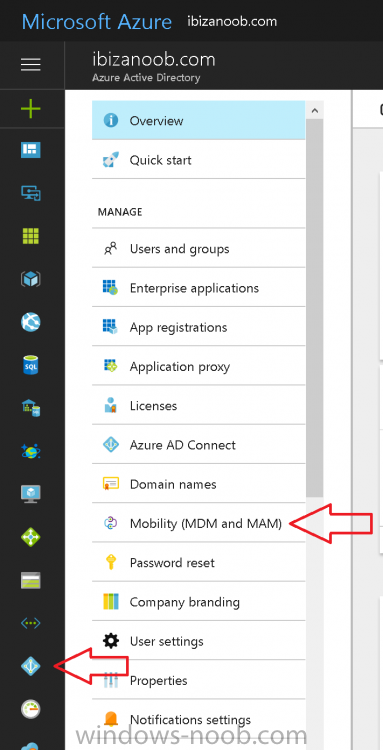
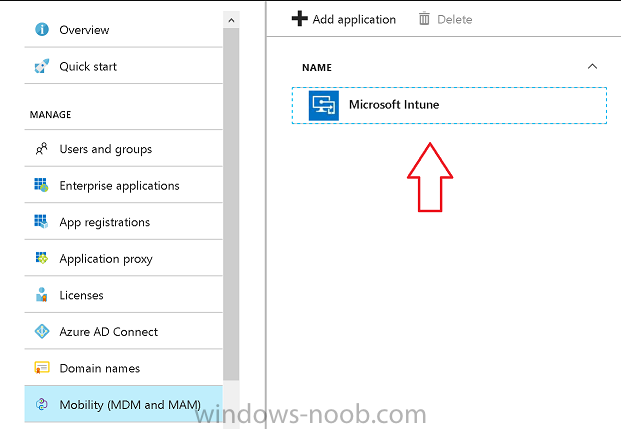
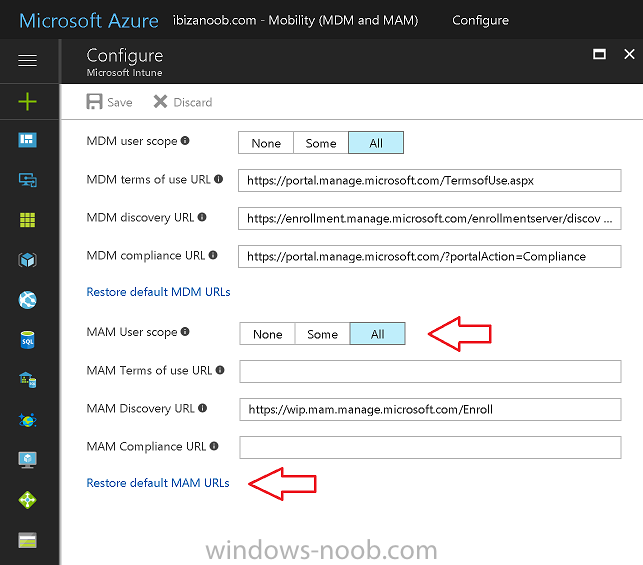
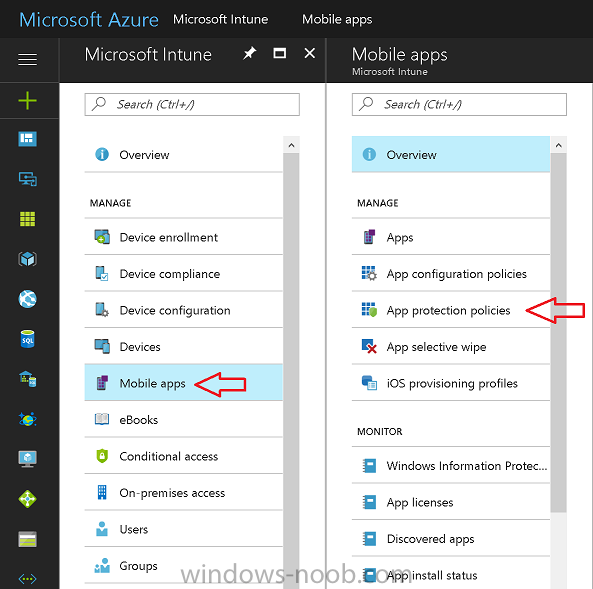
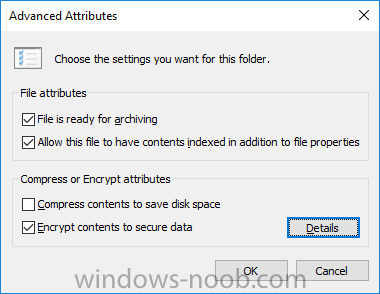
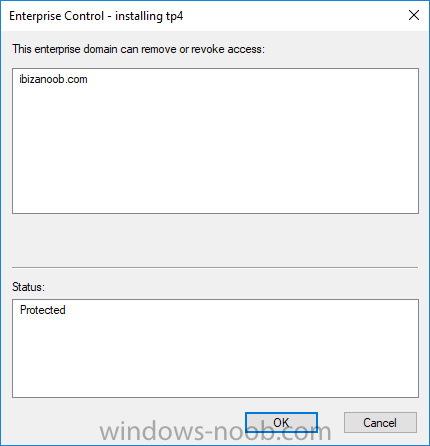
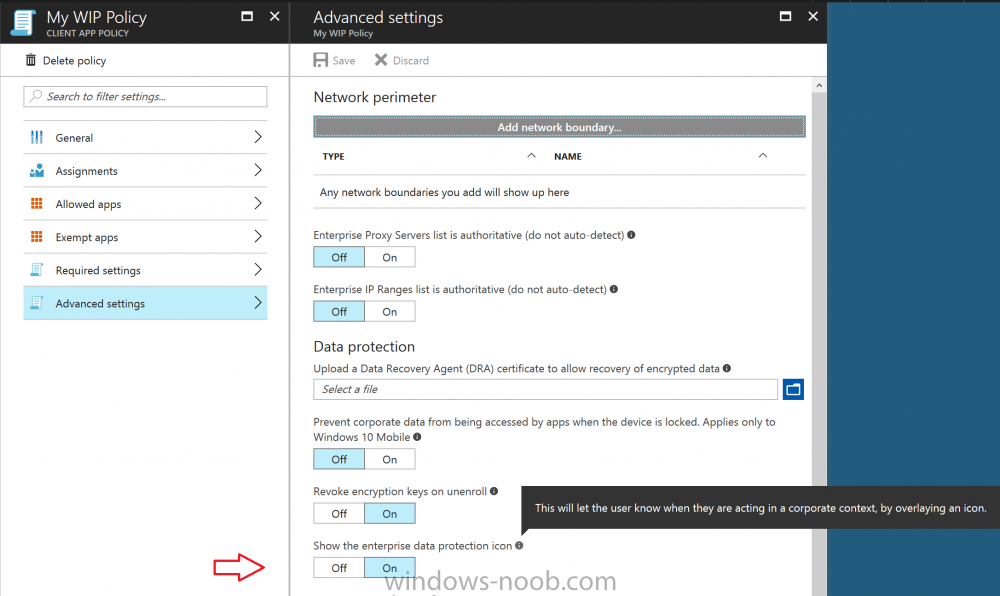
Introduction Windows Information Protection or WIP (formally known as Enterprise Data Protection or EDP) is explained nicely in Microsoft's own words and i've included a quote of that below:- In other words, you can use WIP to protect enterprise data from leaving the enterprise. The prerequisites for WIP are as follows, you'll need a Windows 10 operating system (that is version 1607 or later) and you'll need a management solution such as Intune or SCCM or a 3rd party MDM solution. in addition, you'll need a license for Azure AD Premium. To gain access to the latest capabilities in Intune you should use Windows 10 Creators Update (version 1703). In this article I'm going to show you how to set this up with Intune (in Azure) and I'll give some examples of how enterprise protected data acts when in different scenarios, in addition, I'll explain how you can audit or review logs about this and have a quick glance at the reporting capabilities in Intune. I've already configured Azure for Automatic Enrollment but it's up to you whether you want to use that option (or not). In this guide I assume you've already got an Azure subscription (trial or otherwise) and Intune. If you don't have one you can sign up for a 30 day free Intune trial here. I used Enterprise Mobility + Security E3 licenses for the users in this lab. Making sure Azure is ready for WIP In Azure, select Azure Active Directory from Services and click on Mobility (MDM and MAM). Next Click on Microsoft Intune From the choices listed, choose Restore default MAM URLs and then select the scope. You can add your own urls too (for the MAM Terms of use URL and MAM Compliance URL) if you wish but in this example I did not. Save your settings when done. Create a WIP Policy Now that you've configured MAM in Azure, it's time to create your first WIP policy. To do that, in the Microsoft Intune service in Azure, select Mobile Apps then click on App protection policies. And click on Add a policy. Give the policy a descriptive name, and optionally a description of what it does, in the Platform drop down select Windows 10 from the choices available. Next choose your enrollment option for Enrollment State, select With Enrollment for this guide. In a later guide I will cover Without Enrollment where you can protect data in Enterprise apps (such as outlook) without being MDM enrolled. Next, there are two sections related to Apps. Allowed apps - These are the apps that must adhere to the policy Exempt apps - These apps are exempt from the policy and can access enterprise data freely. Note: Apps can be enlightened or unenlightened. Enlightened apps can differentiate between corporate and personal data, correctly determining which to protect, based on your policies. Unenlightened apps consider all data corporate and encrypt everything. For a list of Enlightened apps see here. Click on Allowed apps and then click on Add apps to add one or more apps that you want to adhere to the policy. There's a drop down with Recommended apps selected as default and those apps are listed below the drop down. If you want to add your own Store apps or Desktop apps manually then you'll need to select the appropriate option and fill in the blanks. Recommended apps: a pre-populated list of (mostly Microsoft Office) apps that allow admins easily import into policy. Store apps: Admin can add any app from the Windows store to policy. Windows desktop apps: Admin can add any traditional Windows desktop apps to the policy (e.g. exe, dll, etc.) To get information about how to generate the info needed for manually adding Store and Windows desktop apps see this post. You can also import apps from an XML file generated in AppLocker by clicking on Import Apps. But before doing so you'll need to create an AppLocker policy and then export the policy. To create an AppLocker policy follow this advice. To export an AppLocker policy to an XML file do as follows: Click Start, type secpol.msc in the Search programs and files box, and then press ENTER. In the console tree, expand Application Control Policies, right-click AppLocker, and then click Export Policy. Browse to the location where you want to save the XML file. Below you can see the process of selecting some apps from the list of the Recommended apps. Next you might want to exempt some apps from this WIP policy, to do so click on Exempt apps and add apps the same way as you did above except this time select those apps that you do NOT want the WIP policy to apply to. After adding apps to your WIP policy, you need to configure required settings, so click on Required Settings. In this guide I selected Allow Overrides which means that the user will be prompted when they try to relocate data from a protected to a non-protected app. Corporate identify should be auto-populated. You can add more domains by separating them using the | symbol. The 4 available Windows Information Protection mode settings are listed below. Hide Overrides WIP looks for inappropriate data sharing practices and stops the user from completing the action. This can include sharing info across non-corporate-protected apps, and sharing corporate data between other people and devices outside of your organization. Allow Overrides WIP looks for inappropriate data sharing, warning users if they do something deemed potentially unsafe. However, this mode lets the user override the policy and share the data, logging the action to your audit log. Silent WIP runs silently, logging inappropriate data sharing, without blocking anything that would’ve been prompted for employee interaction while in Allow Override mode. Unallowed actions, like apps inappropriately trying to access a network resource or WIP-protected data, are still stopped. Off (not recommended) WIP is turned off and doesn't help to protect or audit your data. After you turn off WIP, an attempt is made to decrypt any WIP-tagged files on the locally attached drives. Be aware that your previous decryption and policy info isn’t automatically reapplied if you turn WIP protection back on. After configuring the Required Settings, click on Create to Create the WIP Policy. Note: There are also Advanced settings that you can configure which control things like Network Boundary, IP ranges, DRA certificate and other options such as the ability to show the Enterprise data protection icon, however I am not using any of these settings in this blog post. Deploying the policy Now that you've created your WIP policy, it needs to be deployed (assigned) to a group of users that you intend to target with this policy. To deploy the policy, select it and then click on Assignments. Next click on Select Groups to select a previously created Azure Group containing one or more users. Select a User Group containing the users you want to target this policy to and then click on Select. The policy is now deployed. Review how WIP works Logon to a device as a user that is a member of the WIP Users user group (the user group that you deployed the WIP policy to). In this example I am reviewing how WIP works on an Azure AD registered device that is auto-MDM enrolled into Intune. Using Windows File Explorer, browse a bunch of documents. If the File Ownership column is not present you can add it. In this example, You can see that some files are marked with the Enterprise name, and some or not. Those that are not are considered personal documents. You can right click any file and change file ownership from Enterprise (work) to Personal or vice versa. Here we are making a document 'Work' owned. The other option will always be greyed out. Now that we have a mix of Personal and Work documents, let's see what happens when the user attempts to copy Enterprise data from Word Mobile to Notepad. Right click on a protected document and choose Open with, select Word Mobile. As we can see, this application opens both Work and Personal files as we have assigned the WIP policy to it. Mark some text and right click, choose Copy. Next open Notepad. Right click in a new document and choose Paste. Thanks to WIP, and the Required Settings you configured, the user is prompted about pasting this data. In this case, clicking on Give access allows you to copy the data but the action will be logged and can be reported on. If you attempt to open the same protected document with Notepad directly you'll see this. Next, try copying a protected document to somewhere personal, such as OneDrive personal. You'll be informed that OneDrive can't sync the file. If you look at a protected files' Properties (right click the file), and then click on Advanced in the General tab, you should see that the file is encrypted. Clicking on the Details button will give you more info. What about reporting ? Currently (as of August 2017) only Intune SA (Standalone) has reporting for WIP, but hopefully that will change soon. In Intune Standalone you can review the built in WIP report in Reports, Windows Information Protection reports, View Report. and you'll see something like this: Note: You'll need to wait about 24 hours before WIP data shows up. Windows Information Protection Learning. Windows Information Protection Learning allows you to gather data in Intune in Azure, to review what applications your users are using, maybe you want to add or remove access to those apps. To review WIP Learning, select Mobile Apps, and in the Monitor section select App Protection Status, then click on Reports and finally select Windows Information Protection learning. Note: There is an App Protection status node that contains reports for users and apps but it is currently only applicable to iOS and Android. To get more data on the clients, you can peruse event viewer logs in the Applications and Services logs, see below. EDP-Applearning EDP-Audit-Regular EDP-Audit-TCP Well that's it, I hope this gives you a good overview of WIP in Intune. Until next time, adios. Recommended reading 30 day Intune trial Protect Enterprise data with WIP Enlightened apps versus unenlightened apps Enterprise Mobility and Security Blog Set up Windows device management with Microsoft Intune Windows Information Protection Policy create How to setup MAM for Windows 10 1703 Windows 10 MAM Without Enrollment and Office Desktop Apps Windows 10 and MAM-WE – Part 1: Configuration


-
Importing Customized Start Menu
anyweb replied to xerxes2985's topic in System Center Configuration Manager (Current Branch)
sounds like it, try the same thing without copyprofile, I havent tested this with LTSB, so maybe that could be part of your issue also... -
attach the smsts.log and i'll get some clues