Search the Community
Showing results for tags 'AirServer'.
-
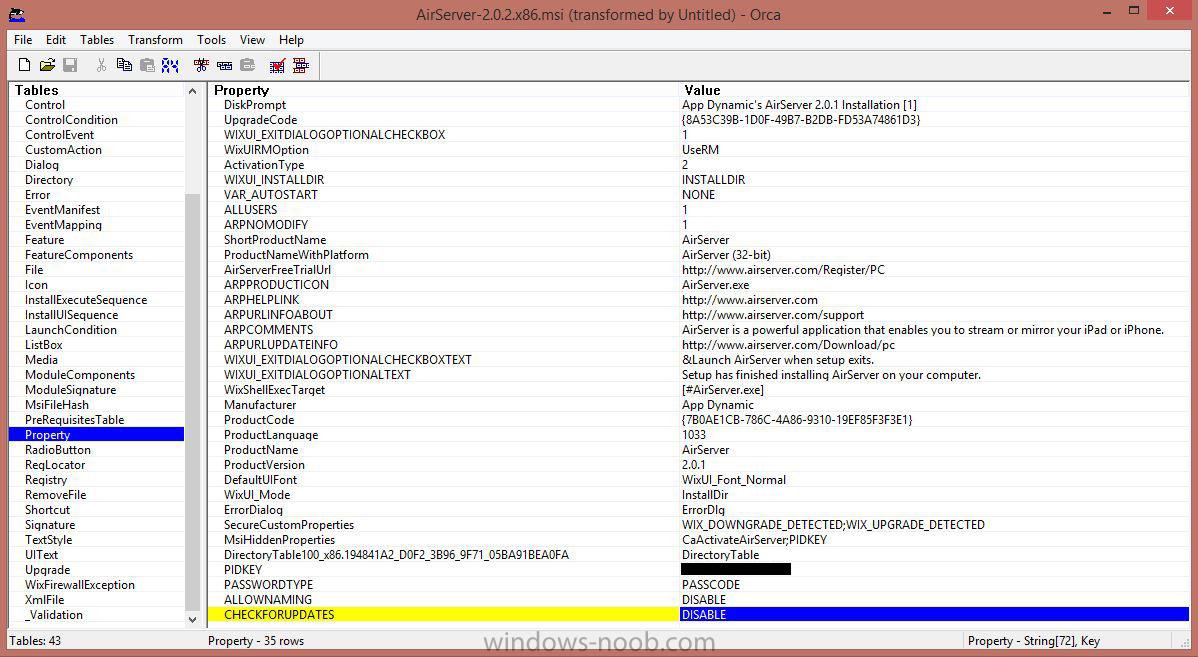
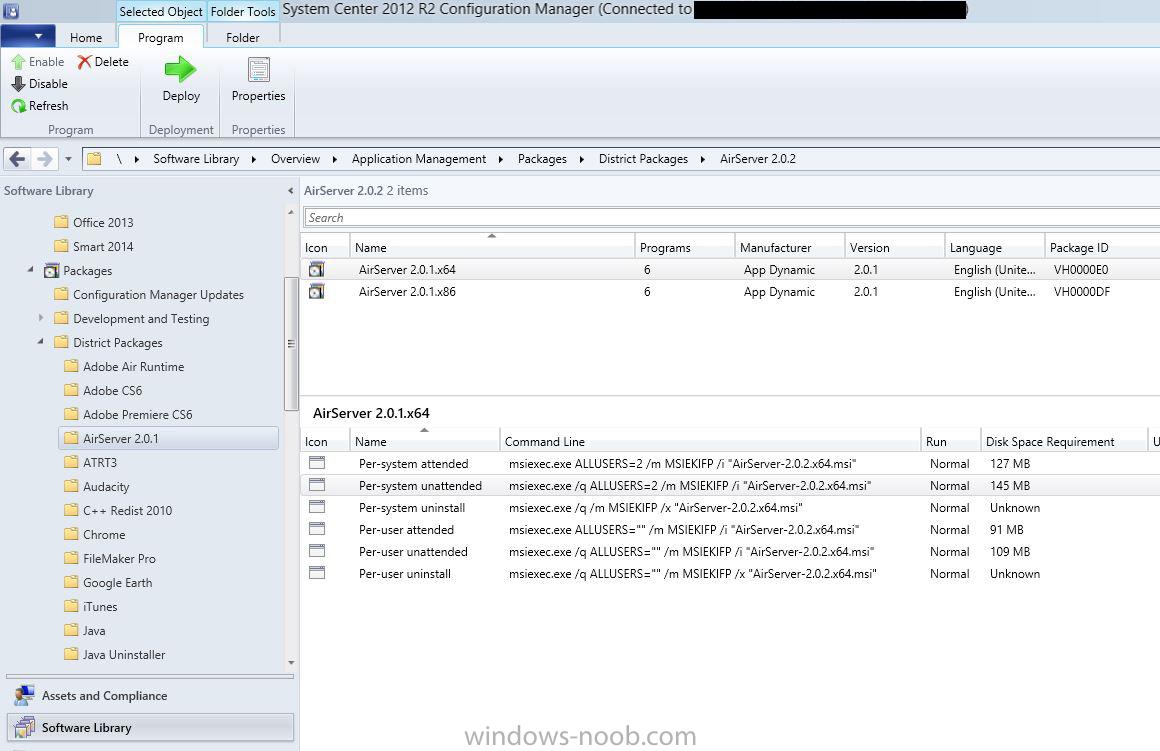
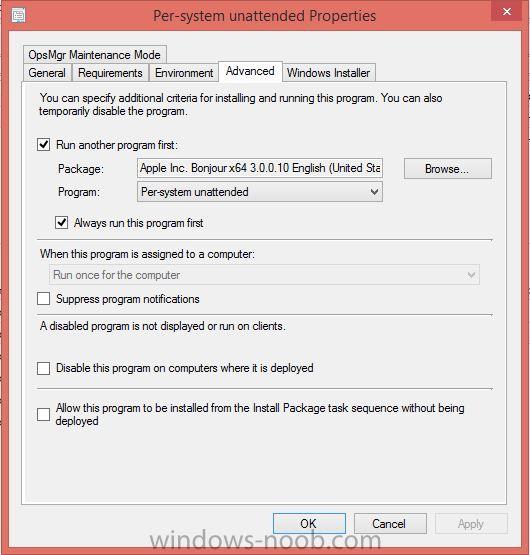
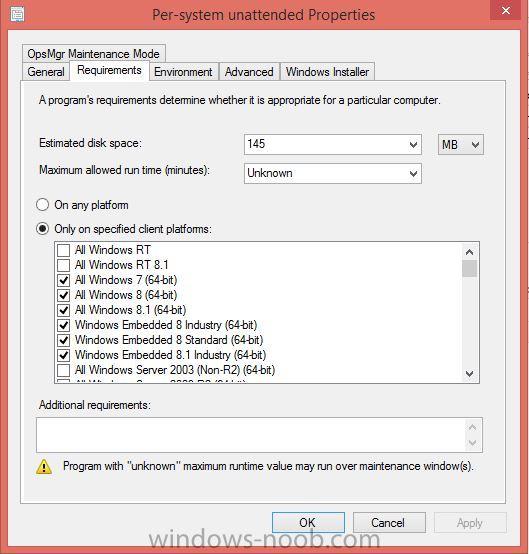
This is my first post on Windows-Noob.com so go easy on me please AirServer is being used in schools heavily, especially where Smartboards by Smart Tech are used with PCs in classrooms. Our School District has installed a Smartboard in every classroom across the School District. (110 in total). With the number of iPads in use in schools, AirServer not only functions beautifully on the Smartboard computers, but is significantly cheaper than Apple TV's for the purpose of showing the iOS device screen on the PC Desktop being projected onto the Smartboard. This latest version 2.0.1 also adds the ability to record the activity on the screen to video and be redistributed later. There hasn't been extensive how to's on packaging and deploying this application, so I thought I'd add one here, hopefully you find it useful. The MSI available from App Dynamic hasn't changed a whole lot since earlier versions, and I've tested the options that App Dynamic sent me for version 1.8.x and they still apply on version 2.0.1 that this tutorial is using. Here is a list of options from App Dynamic that can be set in the MSI, using Orca MSI editor I've made the changes that worked best for our users.Installing_AirServer_Document.pdf So in our environment, users do not have admin rights to the desktop, so I've included the security feature of PASSCODE in the MSI, as well as our Product Key in the PIDKEY setting. We also use a strict computer naming convention, so I've restricted the users ability to change the broadcast name in AirServer so it is easy to identify based on the room number included in their computer name. I also disabled the Check for Updates since users don't have the admin rights required to run the updates Just make the changes you want in the Properties settings of the MSI's and save.(might be an idea to make a copy of the original MSI's and make changes to the copies in case you need the originals again) Here's a screenshot of the modifications of both the 32bit and 64bit MSI: Then in SCCM you can Create Package from Definition to point to the MSI, I used the Per System Unattended program that gets created from the definition. Bonjour from Apple is also needed for AirServer to run, so I created a package of Bonjour.msi that was extracted for the iTunes package I created previously. Also a 32 and 64 bit options. I've set the AirServer Per System Unattended program to run the Bonjour package first so that it is always on a system before AirServer can be run by the user. Here's a screenshot of the package by definition in SCCM: And here is a screenshot of the Bonjour package install requirement in the AirServer Per System Unattended program. So one last step in this for me was to define which Operating Systems each of these two versions of AirServer would be allowed to be installed on. I did this mostly because I already have an existing collection of systems that earlier 32bit only versions were deployed to. I want to keep that collection to target with this, but now I want to simply deploy both to the same collection but know that only 32bit OS will get the 32bit AirServer, and the like for 64bit. I've set that in both versions Per System Unattended (didn't bother with the other programs since I won't be using those in deployment). Here's a screenshot of that, so you know what I mean. So that's what I have prepared for you, if you have a question or anything that I've skipped over, just let me know.


