Search the Community
Showing results for tags 'Integration'.
-
Move MDT DS from physical PC to SCCM 2012
imfusio posted a question in Microsoft Deployment Toolkit (MDT)
We began creating our Win 7 image in MDT 2012, but the image was created with MDT on a physical Win7 x64 machine in my cubicle. The image and deployment share look good, LTI task sequence, drivers, base OS and scripts are all set - it's ready to go! But we want to deploy it with SCCM. We have an SCCM 2012 SP1 Hierarchy w/CAS environment setup. I searched around a lot, looked through guides, but haven't found a solution for this scenario yet: Q: What would I need to do to take my existing MDT deployment share from this physical PC, and move it to SCCM? So that there would be no dependency on the original physical PC. I assume I'd need to install MDT on the SCCM CAS and copy the entire DS to it? I'm a bit lost at where to start from this point, and would appreciate any input. Thanks! -
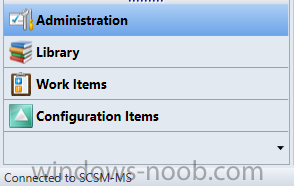
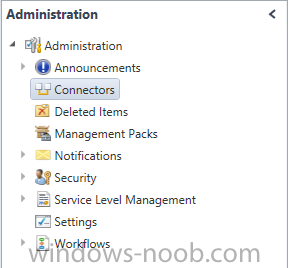
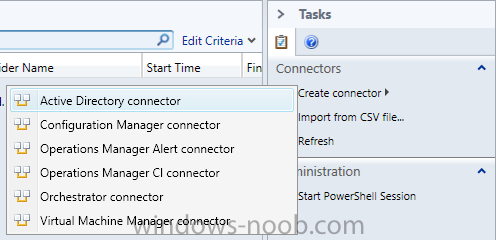
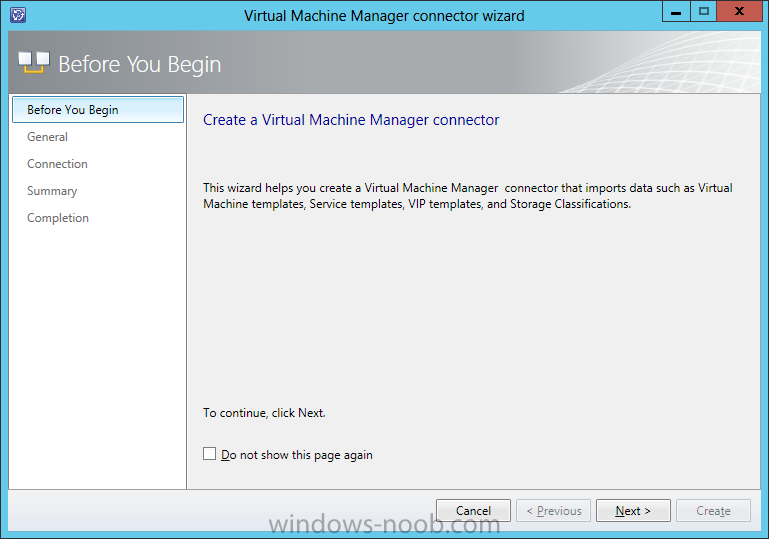
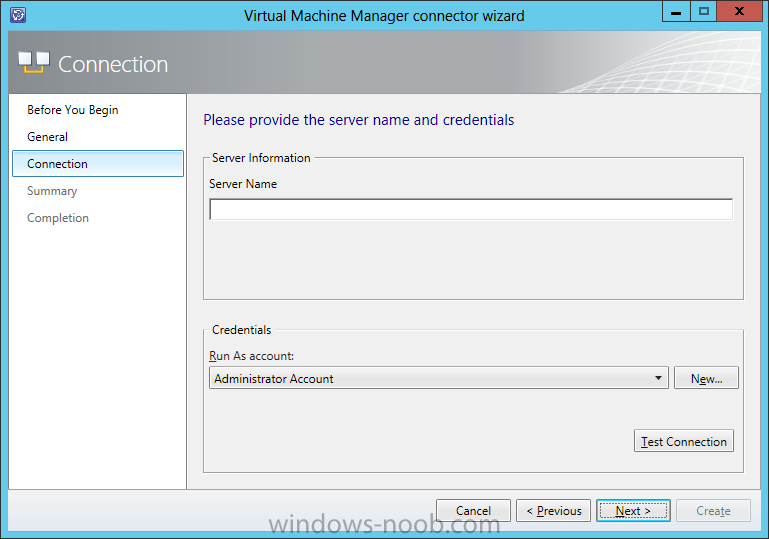
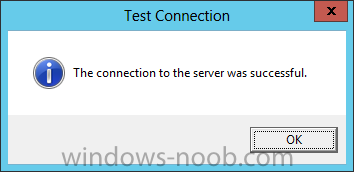
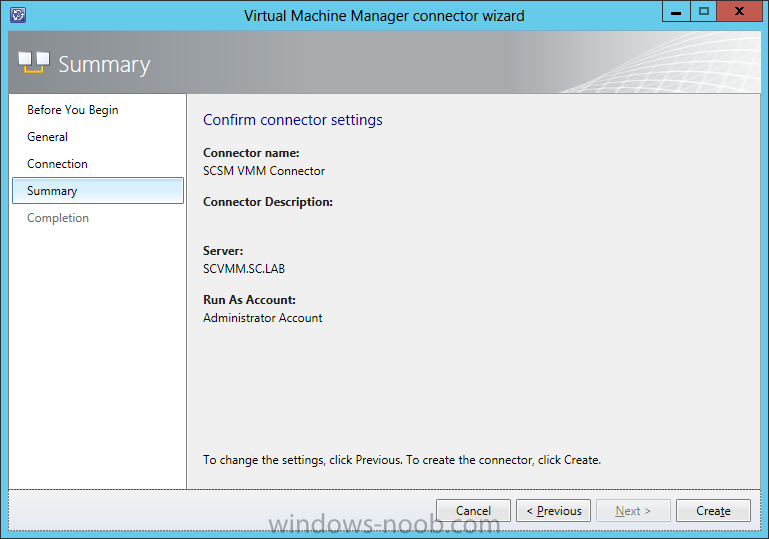
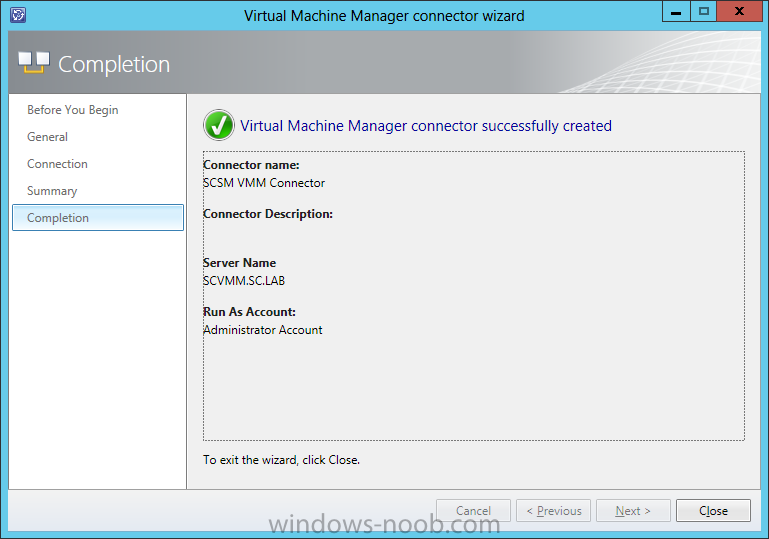
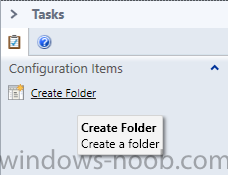
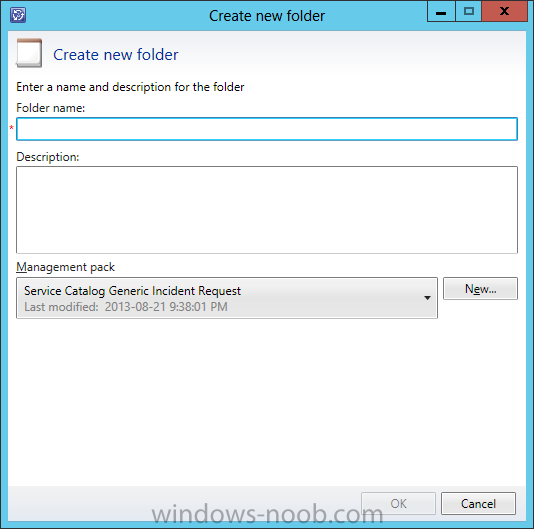
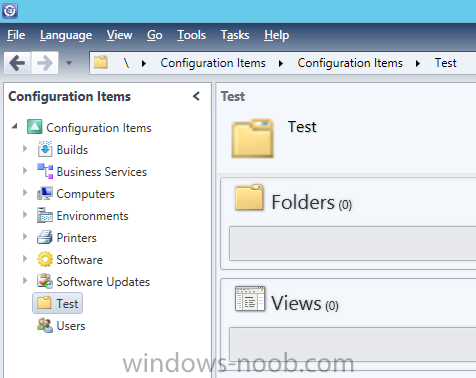
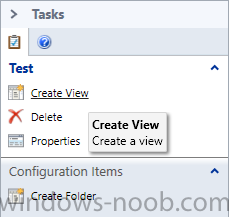
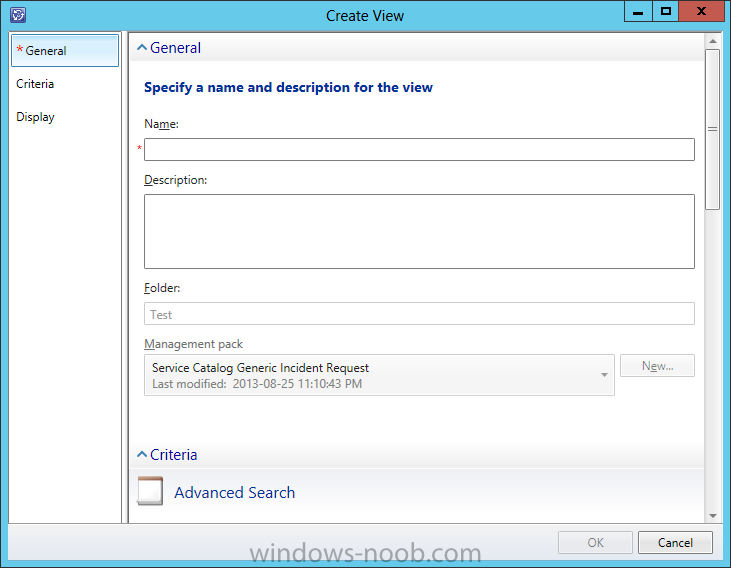
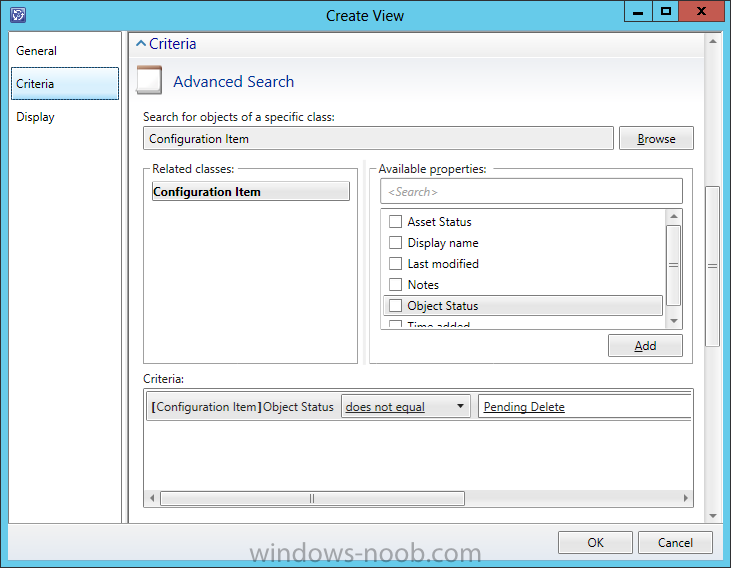
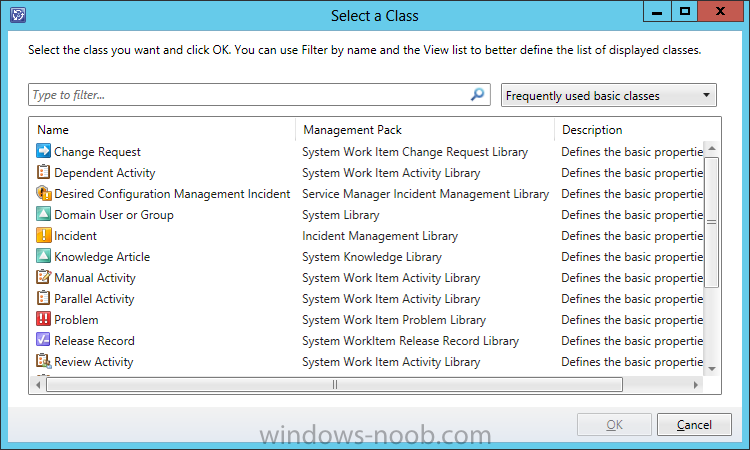
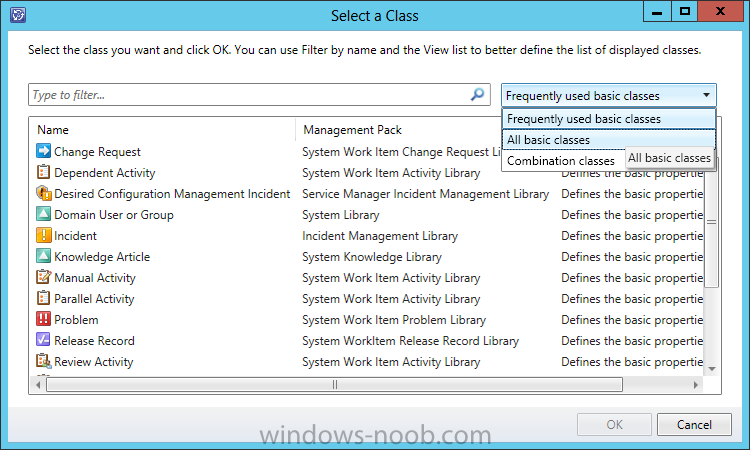
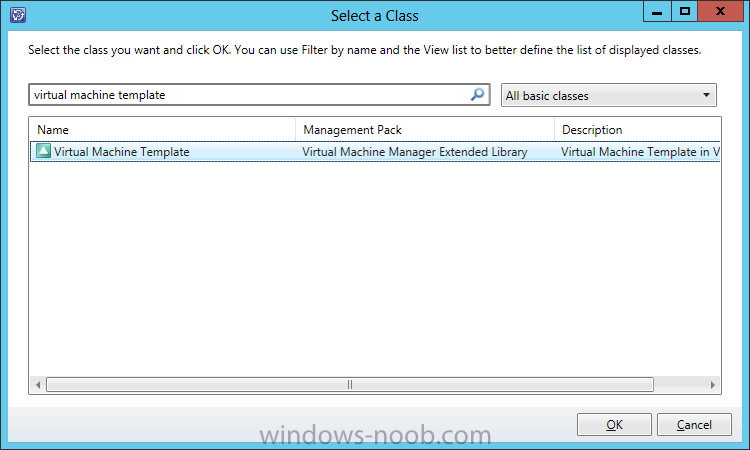
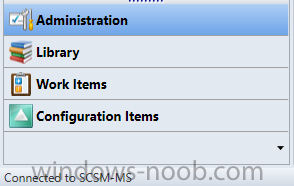
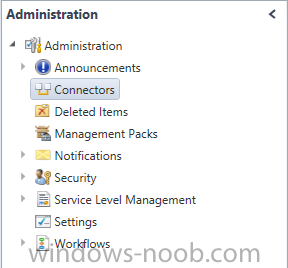
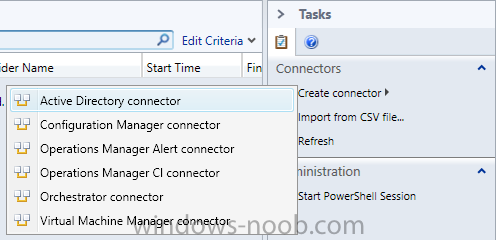
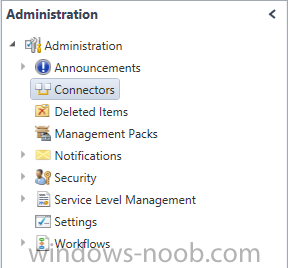
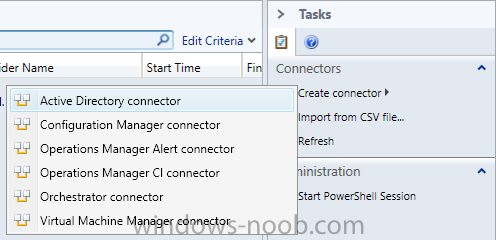
To create a System Center Virtual Machine Manager connectorIn the Service Manager console, click Administration. In the Administration pane, expand Administration, and then click Connectors. In the Tasks pane, under Connectors, click Create Connector, and then click Virtual Machine Manager connector. Complete these steps to complete the Virtual Machine Manager Connector Wizard: On the Before You Begin page, click Next. On the General page, in the Name box, type a name for the new connector. Make sure that Enable this connector is selected, and then click Next. On the Connection page, in the Server Information area, type the same of the computer hosting Virtual Machine Manager (VMM). On the Connection page, in the Credentials area, either select an existing account or click New, and then do the following: In the Run As Account dialog box, in the Display name box, type a name for the Run As account. In the Account list, select Windows Account. Enter the credentials for an account that has rights to connect VMM, and then click OK. On the Connection page, click Test Connection. In the Test Connection dialog box, make sure that The connection to the server was successful appears, and then click OK. On the Connection page, click Next. On the Summary page, make sure that the settings are correct, and then click Create. On the Completion page, make sure that you receive a “Virtual Machine Manager connector successfully created” message, and then click Close. To validate the creation of a System Center Virtual Machine Manager connectorIn the Connectors pane, locate the System Center Virtual Machine Manager connector that you created. Review the Status column for a status of Running. NOTE: Allow sufficient time for the import process to finish if you are importing a large number of virtual machines or clouds. In the Service Manager console, click Configuration Items. In the Tasks pane, click Create Folder. In the Create New Folder Wizard, do the following: In the Folder name box, type a name for the folder. For example, type Test. In the Management pack area, make sure that an unsealed management pack of your choice is selected, and then click OK. For example, select Service Catalog Generic Incident Request. In the Configuration Items pane, click the folder you just created. For example, click Test. In the Tasks pane, click Create View. In the Create View Wizard, do the following: On the General page, in the Name area, type a name for this view. For example, type VMMTemplates. In the Management pack area, make sure that an unsealed management pack of your choice is selected. For example, select Service Catalog Generic Incident Request. In the navigation pane of the wizard, click Criteria. In the Advanced Search area, click Browse. In the drop-down list (located to the right of the Type to filter box), select All basic classes. In the Type to filter box, type virtual machine template, click Virtual Machine Template, click OK, and then click OK to save and close the form. In the Configuration Items pane, expand the folder you created, and then click the view you created. For example, expand Test, and then click VMMTemplates In the VMMTemplates pane, you will see the Virtual Machine Manager templates that have been created.
-
- Service Manager
- System Center 2012
- (and 4 more)
-
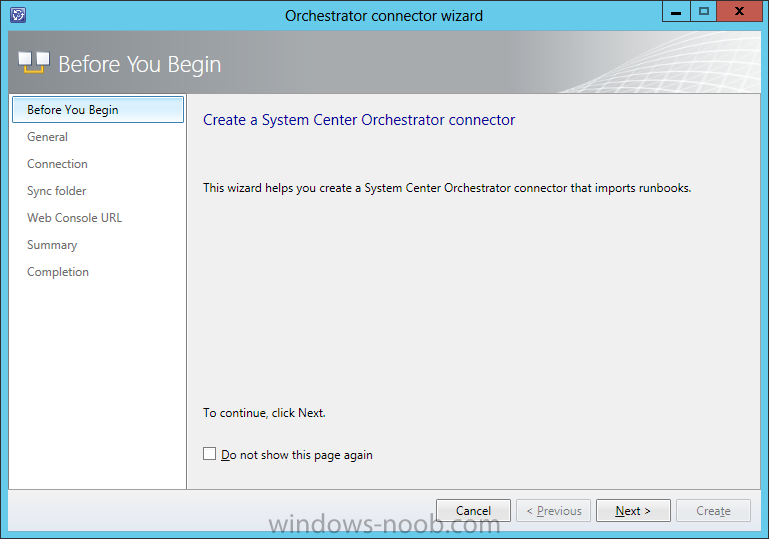
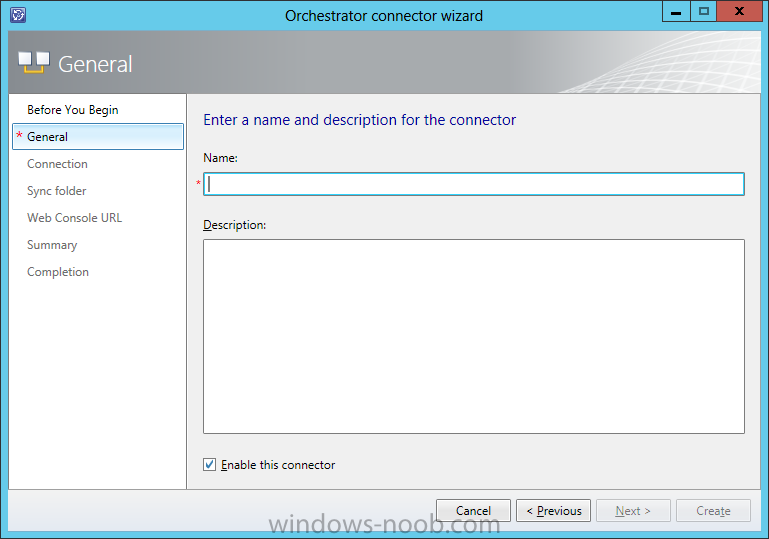
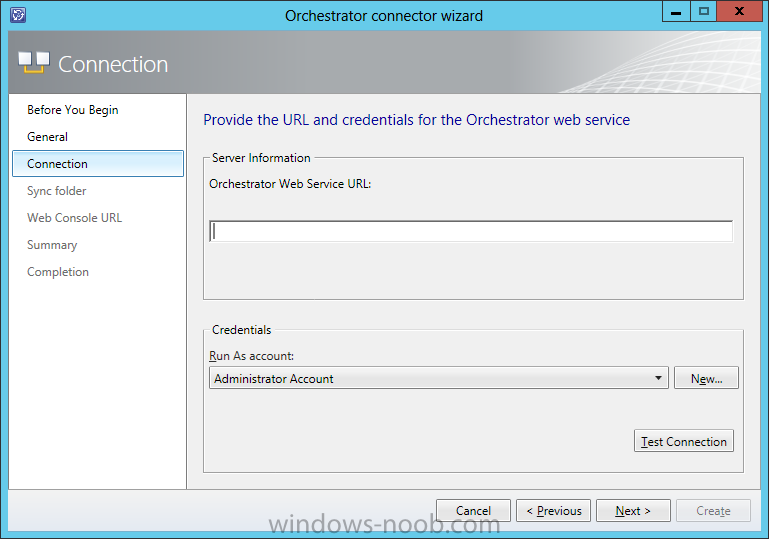
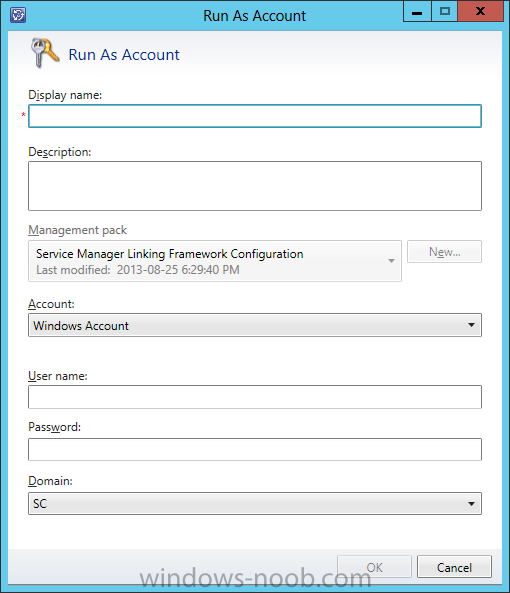
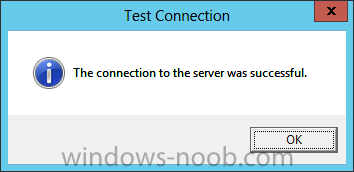
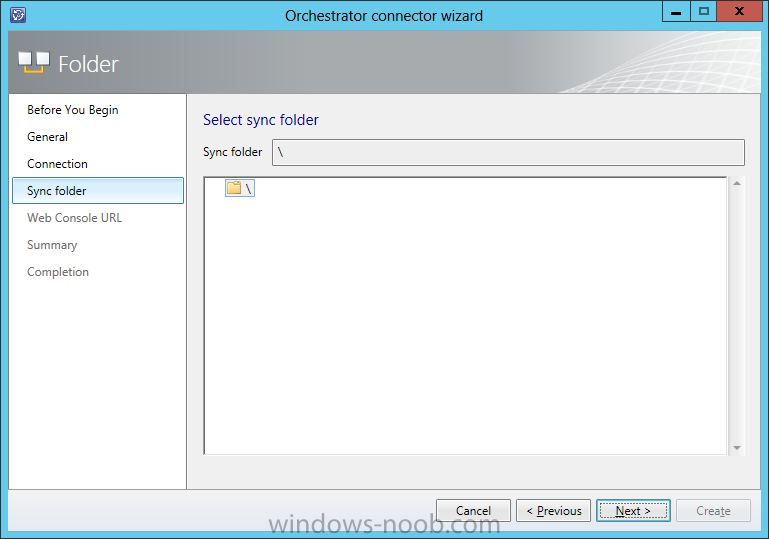
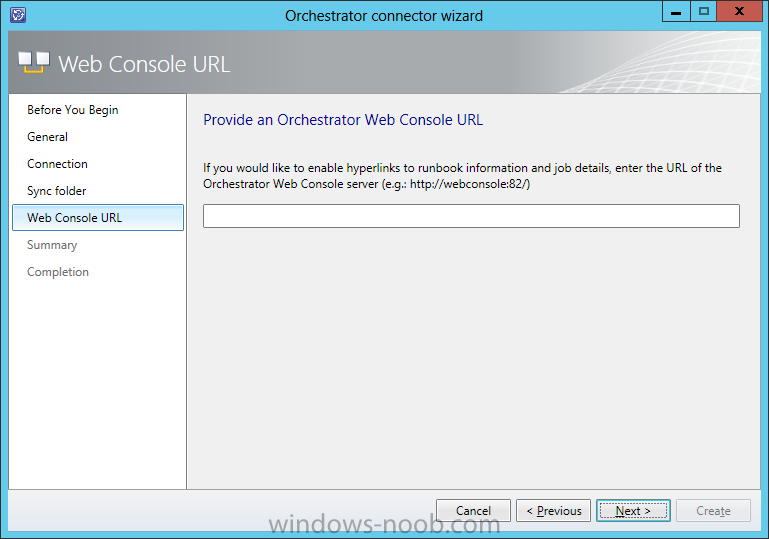
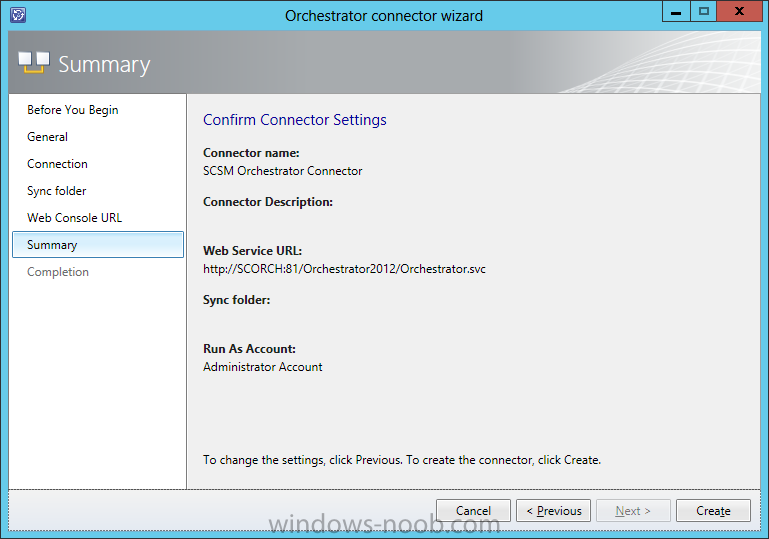
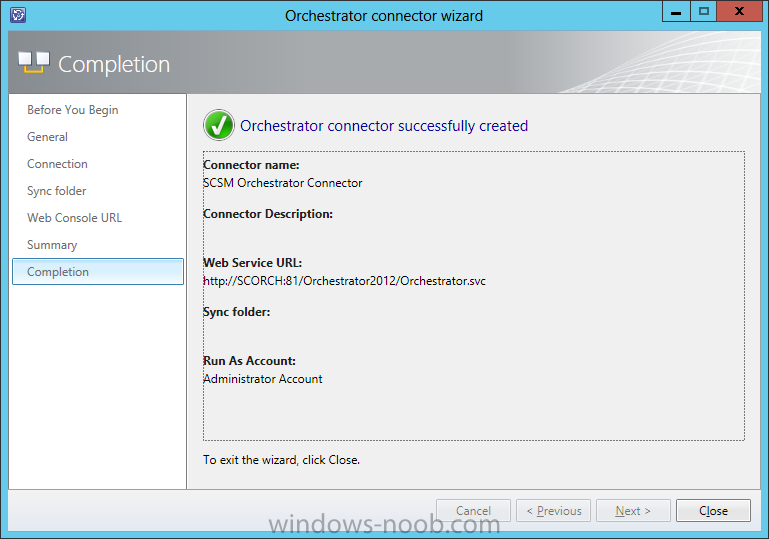
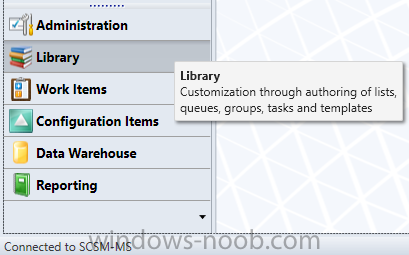
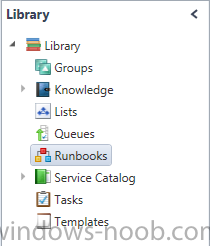
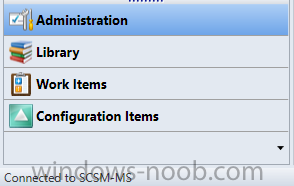
To create an Orchestrator connectorIn the Service Manager console, click Administration. In the Administration pane, expand Administration, and then click Connectors. In the Tasks pane, under Connectors, click Create Connector, and then click Orchestrator connector. Perform these steps to complete the Orchestrator Connector Wizard: On the Before You Begin page, click Next. On the General page, in the Name box, type a name for the new connector. Make sure that Enable this connector is selected, and then click Next. On the Connection page, in the Server Information area, type the URL of the Orchestrator Web service. On the Connection page, in the Credentials area, either select an existing account or click New, and then do the following: In the Run As Account dialog box, in the Display name box, type a name for the Run As account. In the Account list, select Windows Account. Enter the credentials for an account that has rights to connect Orchestrator, and then click OK. On the Connection page, click Test Connection. In the Test Connection dialog box, make sure that the message “The connection to the server was successful” appears, and then click OK. On the Connection page, click Next. On the Folder page, select a folder, and then click Next. On the Web Console URLNext. On the Summary page, make sure that the settings are correct, and then click Create. On the Completion page, make sure that you receive the message “Orchestrator connector successfully created,” and then click Close. To validate the creation of an Orchestrator connectorIn the Connectors pane, locate the Orchestrator connector that you created. Review the Status column for a status of Finished Success. NOTE: Allow sufficient time for the import process to finish if you are importing a large number of runbooks. In the Service Manager console, click Library. In the Library pane, expand Library, and then click Runbooks. Review the Runbooks pane, and note that your runbooks have been imported.
-
- Service Manager
- System Center 2012
-
(and 3 more)
Tagged with:
-
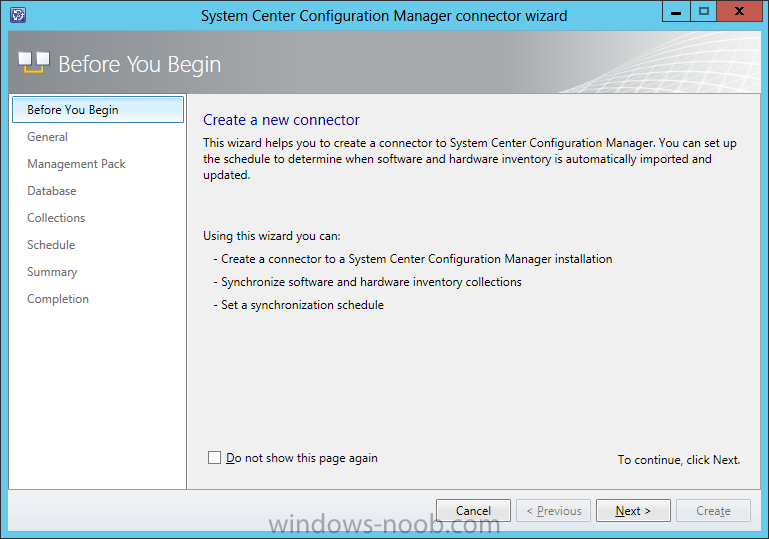
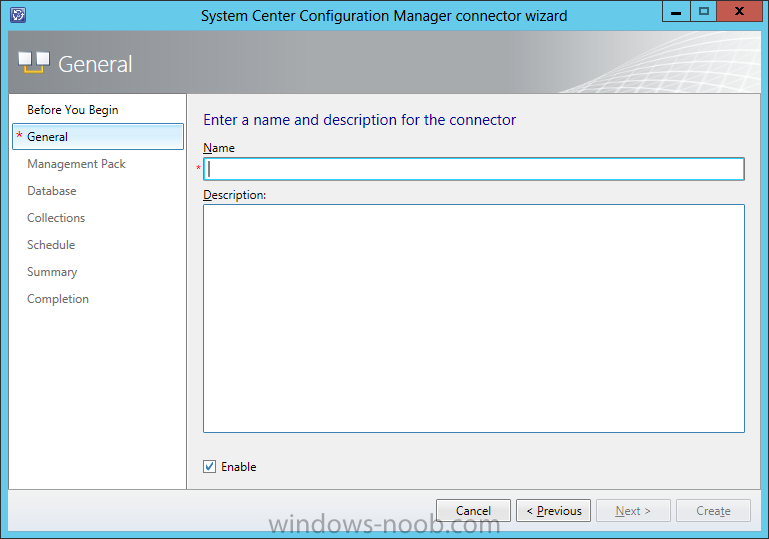
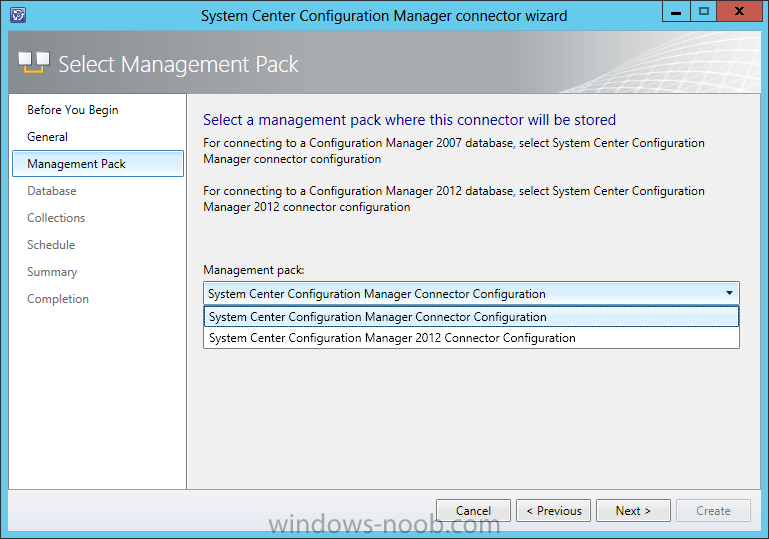
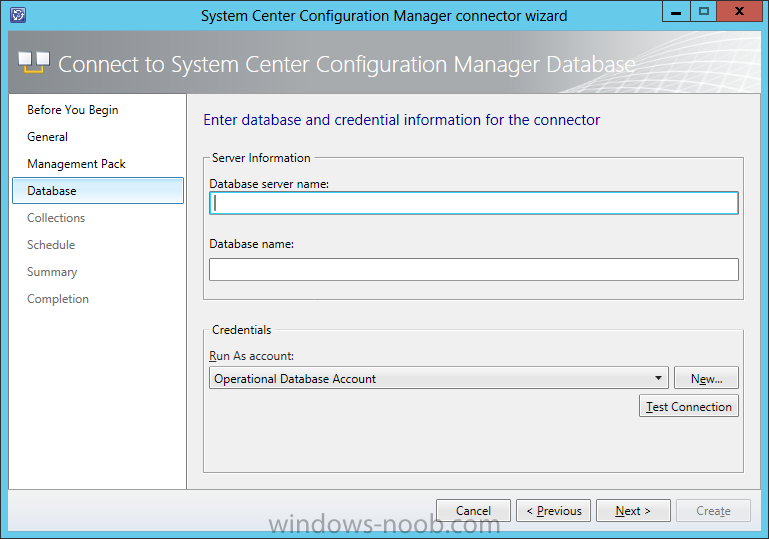
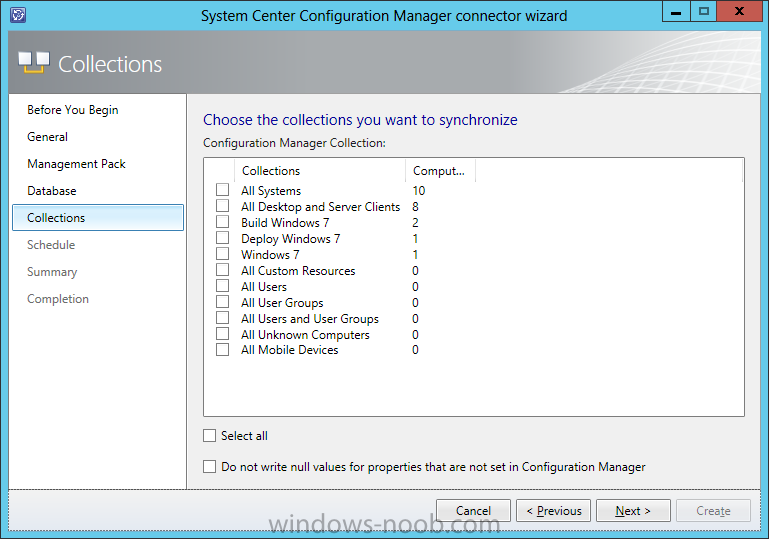
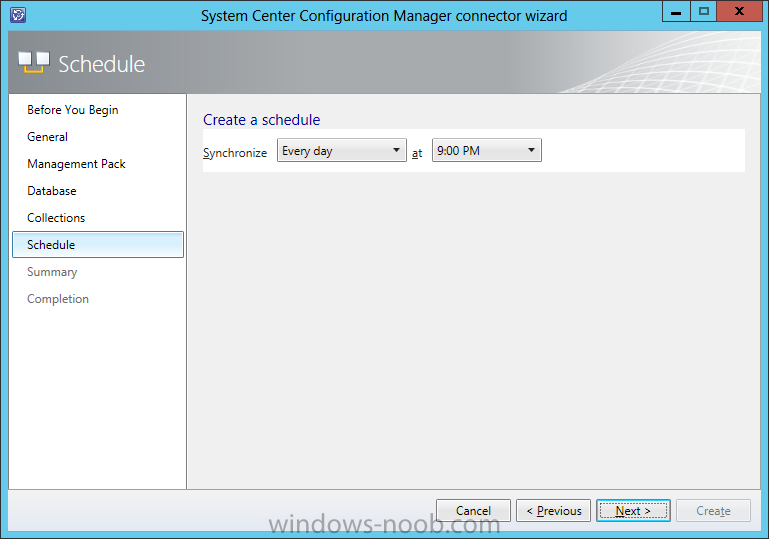
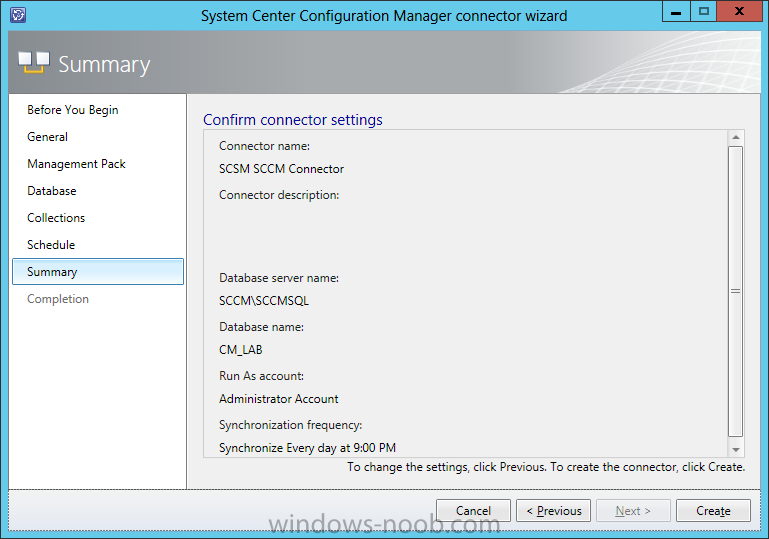
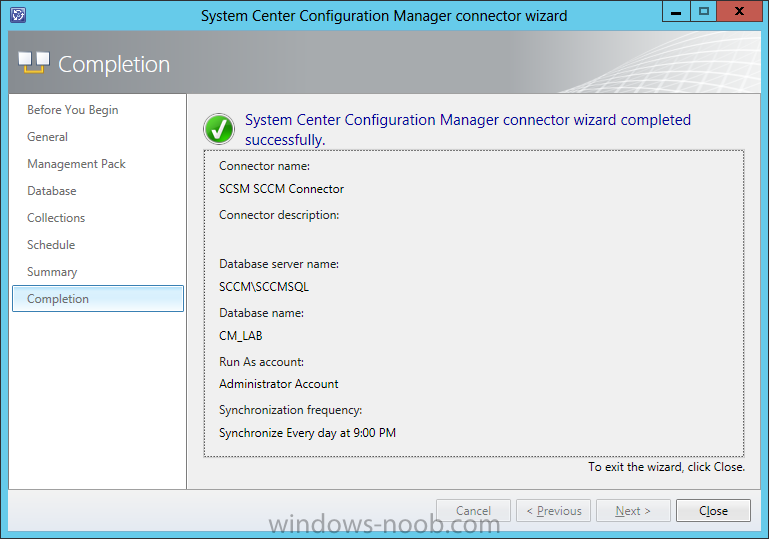
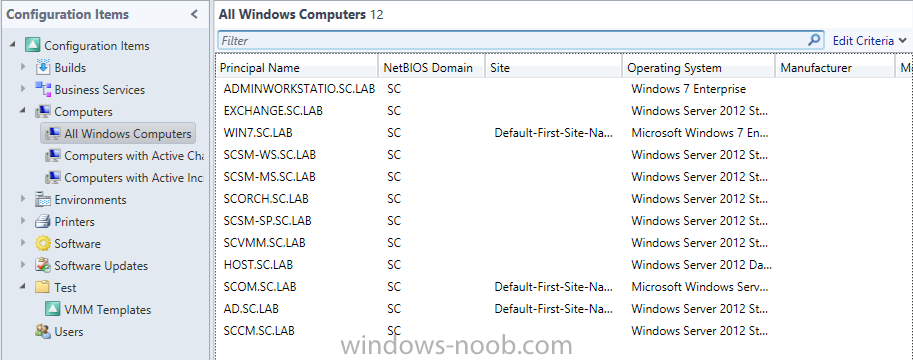
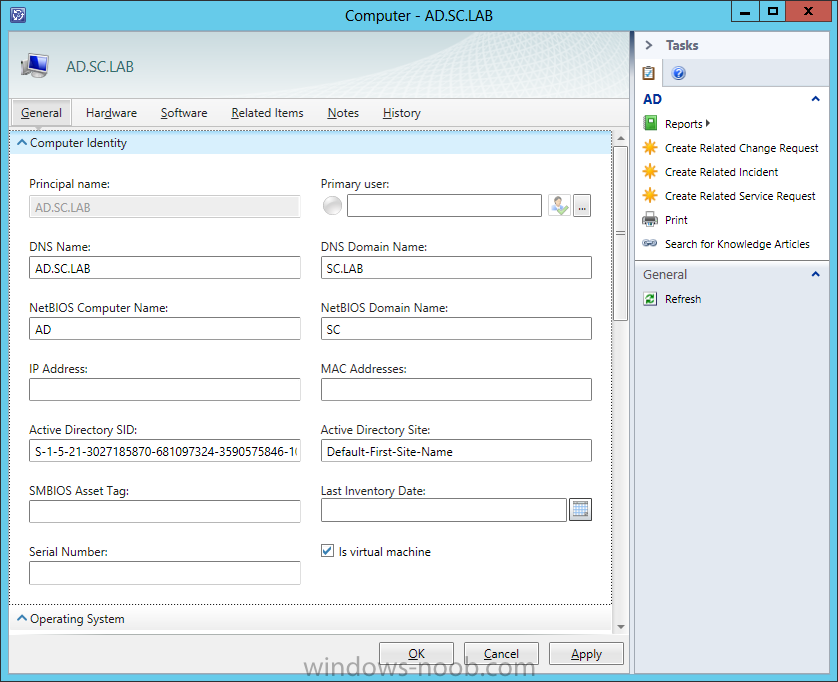
Important: Before you can create the Configuration Manager connector, you have to verify that System Center Configuration Manager is installed in your environment, and you have to turn on Windows User Account Control (UAC). To create a Configuration Manager connectorIn the Service Manager console, click Administration. In the Administration pane, expand Administration, and then click Connectors. In the Tasks pane, under Connectors, click Create Connector, and then click Configuration Manager Connector. The System Center Configuration Manager Connector Wizard starts. On the Before You Begin page, click Next. On the General page, do the following: In the Name box, type a name for the new connector. In the Description box, type a description for the new connector. Make sure that the Enabled check box is selected, and then click Next. On the Select Management Pack page, in the Management Pack list, select either System Center Configuration Manager Connector Configuration or System Center Configuration Manager 2012 Connector Configuration, and then click Next. On the Connect to System Center Configuration Manager Database page, do the following: In the Database Server Name box, type the server name of the server that is hosting the System Center Configuration Manager site database and the database named instance, if applicable. In the Database Name box, type the name of the System Center Configuration Manager site database. In the Credentials area, select a Run As account, or create a new Run As account. The user account that you specify as the Run As account must be a member of the smsdbrole_extract and the db_datareader groups for the Configuration Manager site database. In the Credentials area, click Test Connection. In the Credentials dialog box, in the Password box, type the password for the account, and then click OK. In the Test Connection dialog box, if you receive the following confirmation message, click OK: The connection to the server was successful. Click Next. On the Collections page, select the appropriate collection, and then click Next. On the Schedule page, in the Synchronize list, set the frequency and time of synchronization, and then click Next. On the Summary page, confirm the connector settings you made, and then click Create. On the Confirmation page, make sure that you receive the following confirmation message: “You have successfully completed the System Center Configuration Manager Connector Wizard.” Then, click Close. NOTE: The System Center Configuration Manager Connector Wizard may take several hours to import data from System Center Configuration Manager. To validate the creation of a Configuration Manager connectorConfirm that the Configuration Manager connector that you created is displayed in the Connectors pane. In the Service Manager console, click Configuration Items. In the Configuration Items pane, expand Configuration Items, expand Computers, and then click All Windows Computers. Verify that the intended computers from Configuration Manager appear in the All Windows Computers pane. In the middle pane, double-click a newly imported computer. Verify that the appropriate computer details appear in the computer form. To confirm the status of a Configuration Manager connectorView the columns in the Connector pane; the columns contain information about the start time, the finish time, the status, and the percentage of completion.
-
- Service Manager
- System Center 2012
- (and 4 more)


