Search the Community
Showing results for tags 'standalone offline root ca'.
-
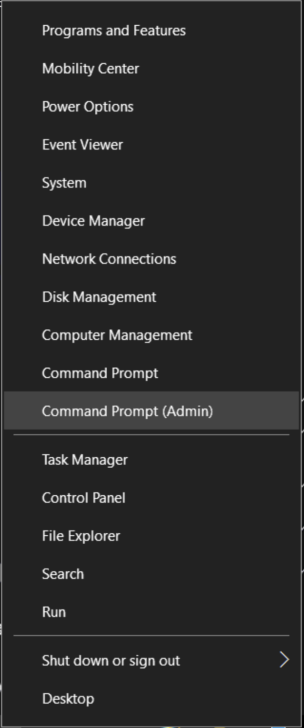
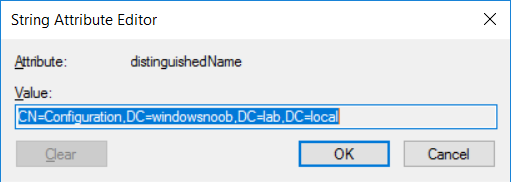
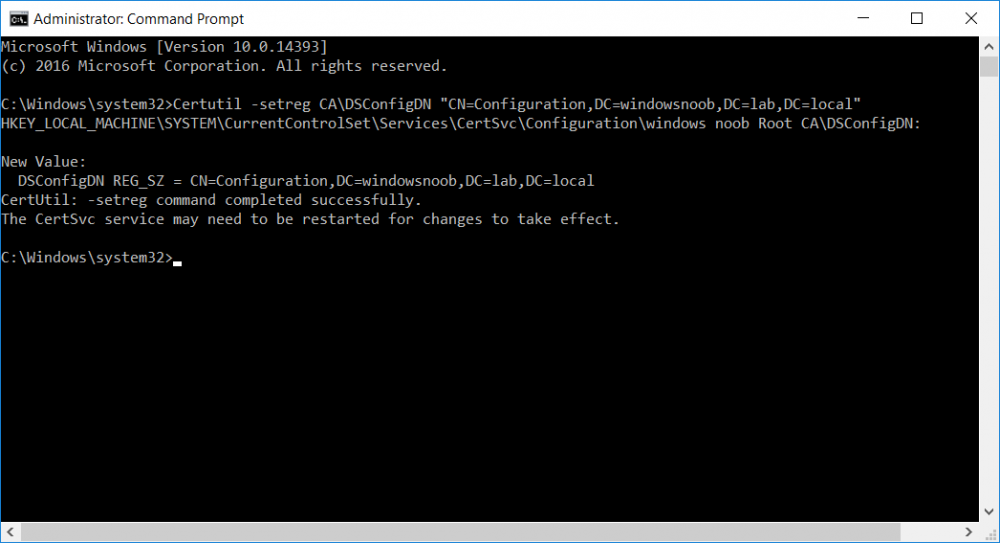
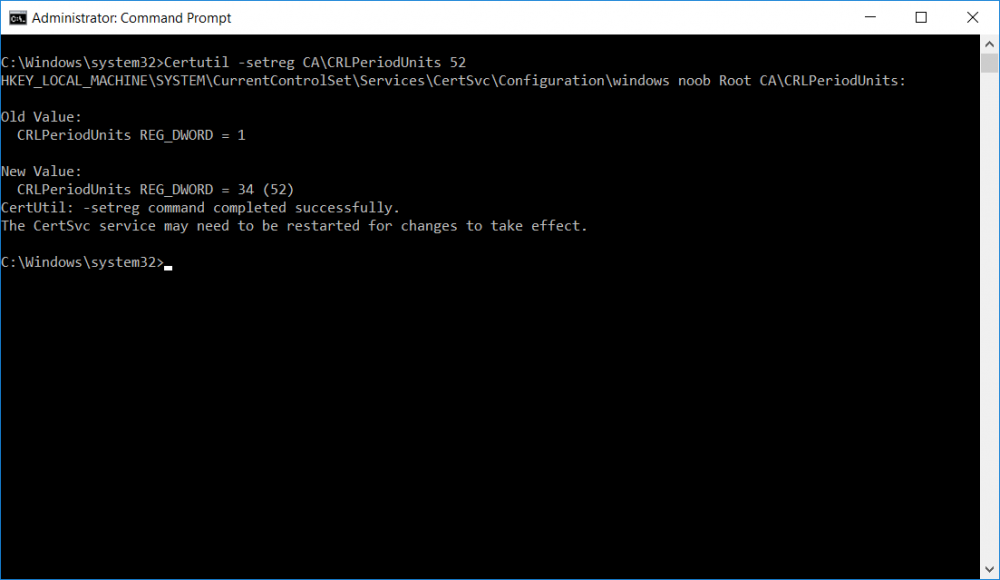
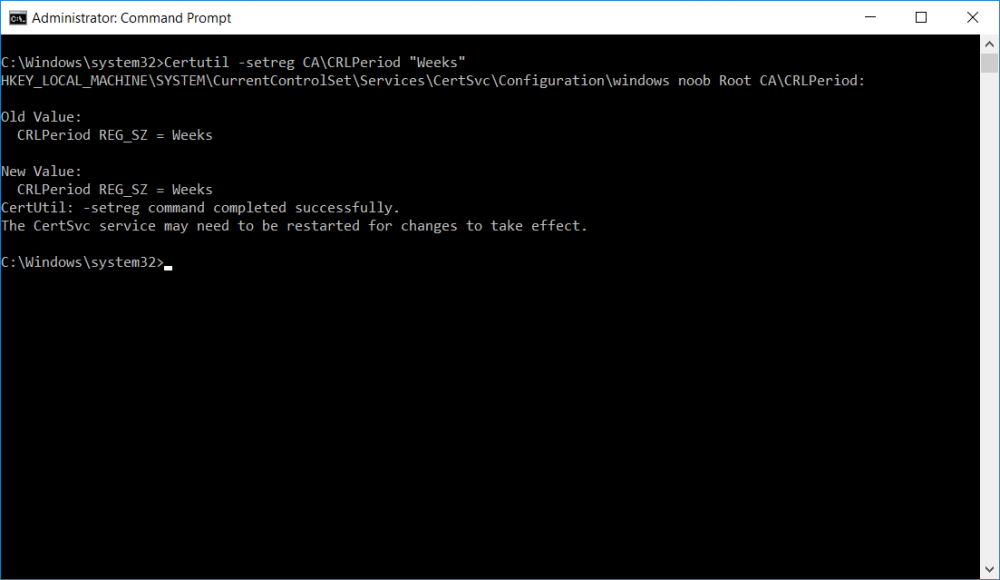
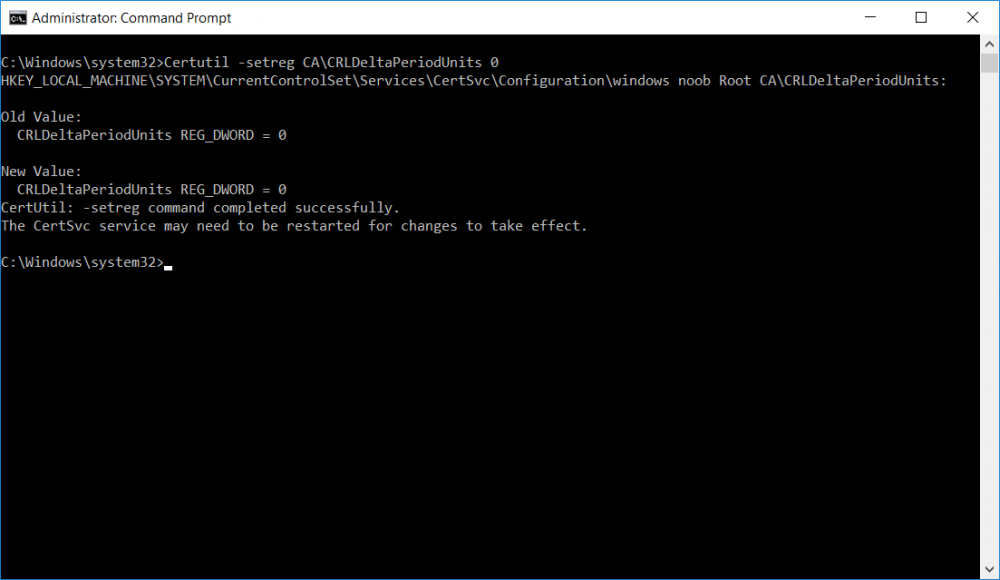
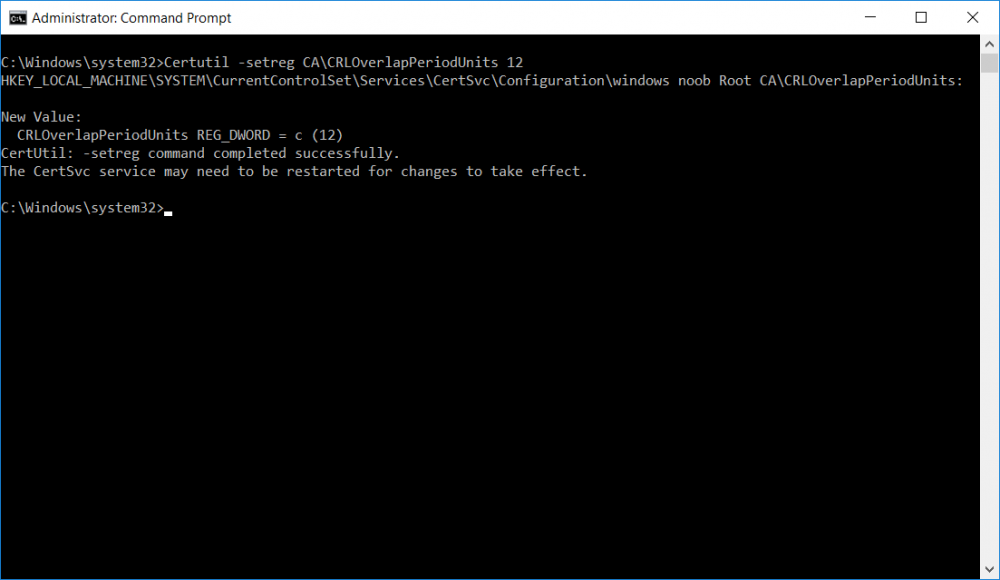
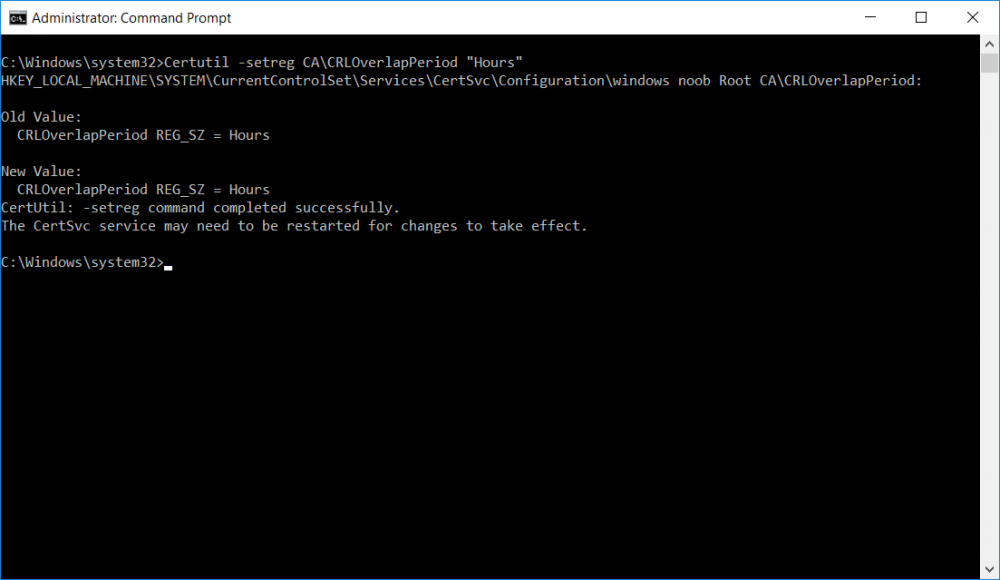
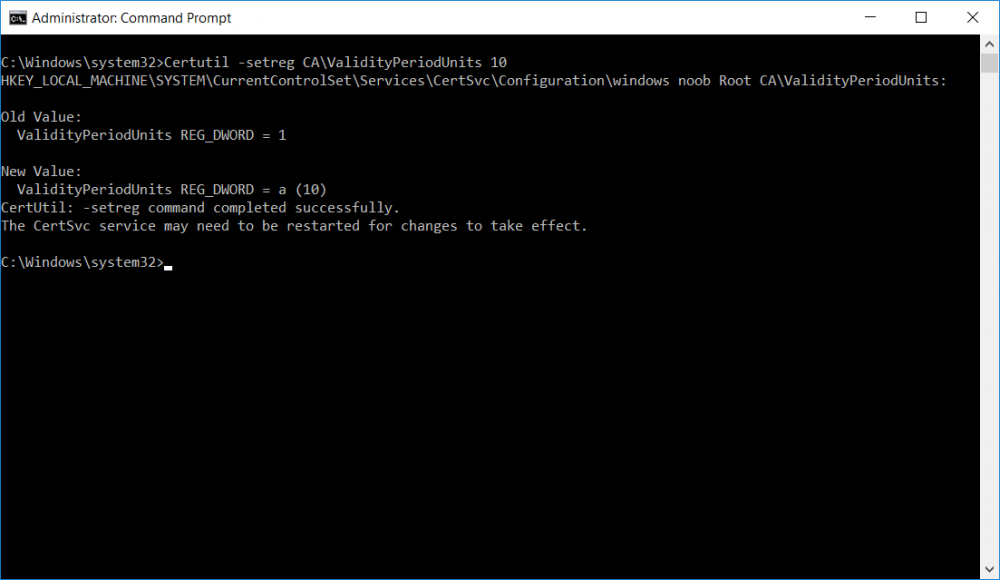
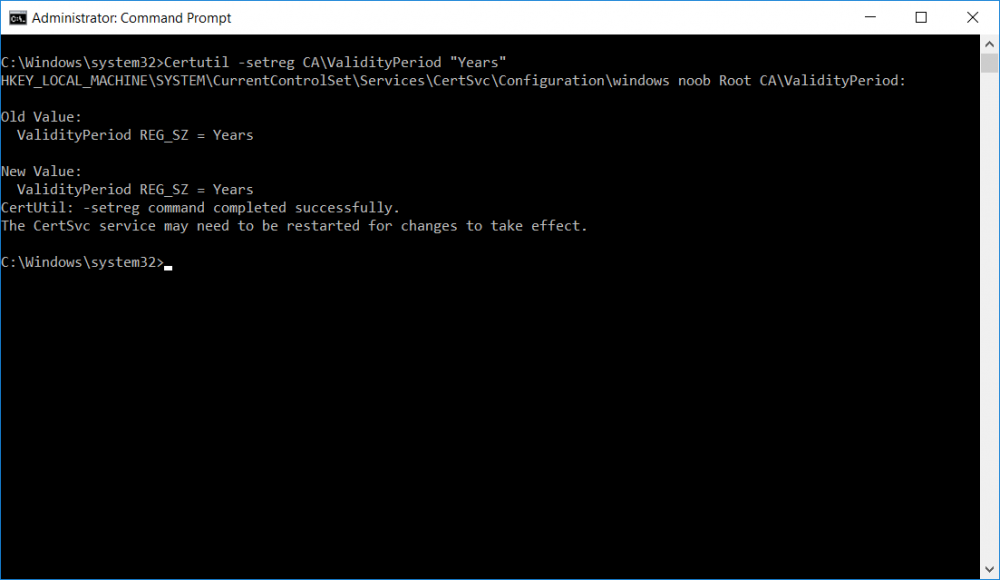
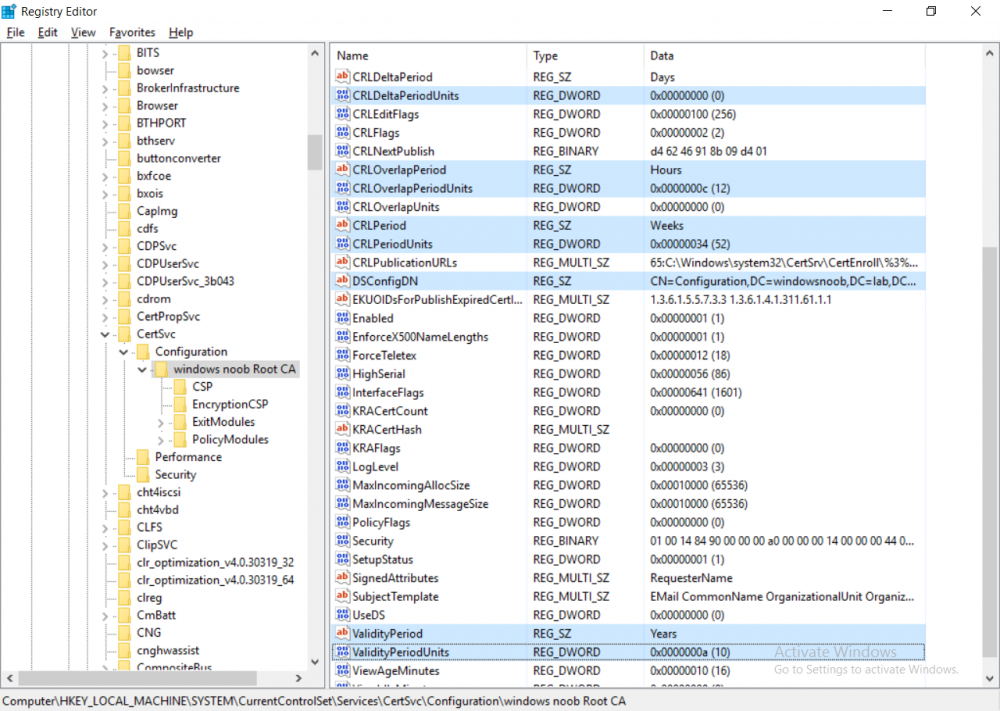
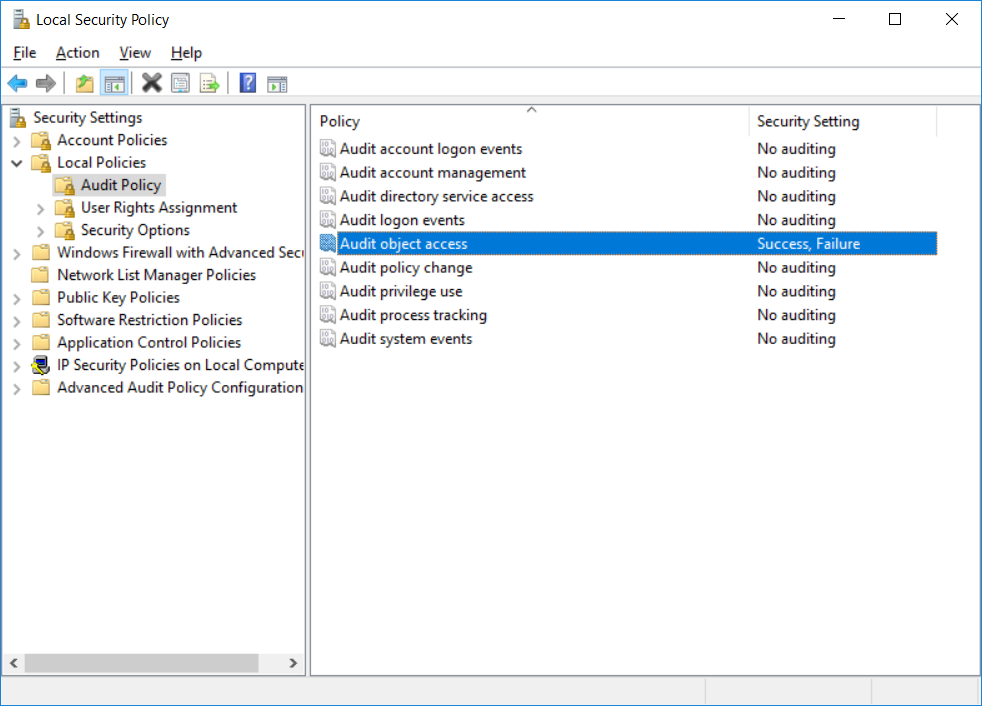
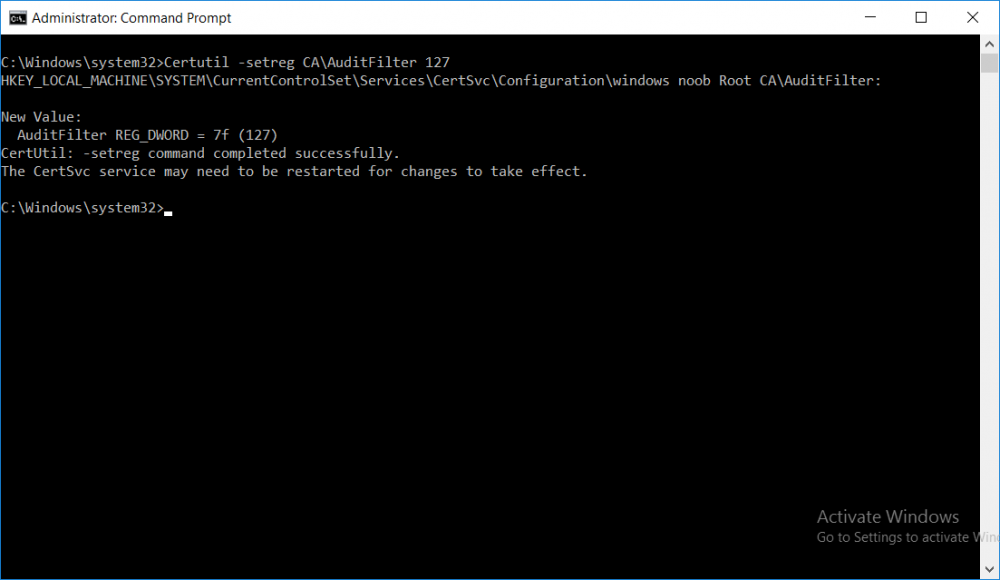
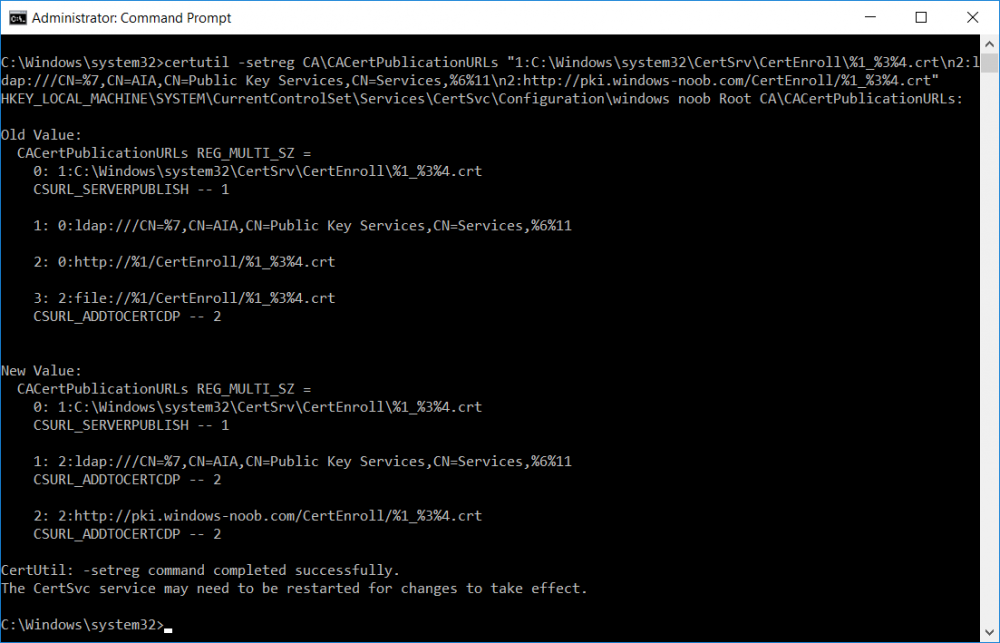
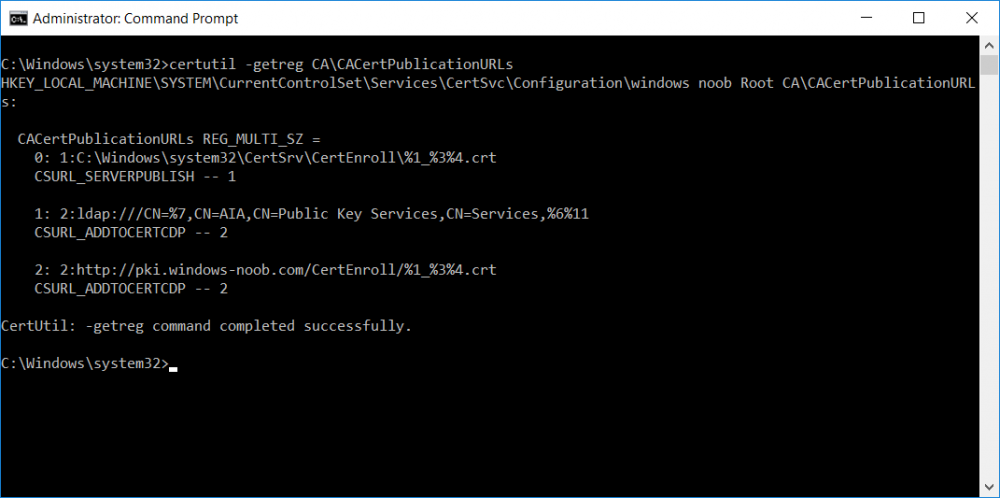
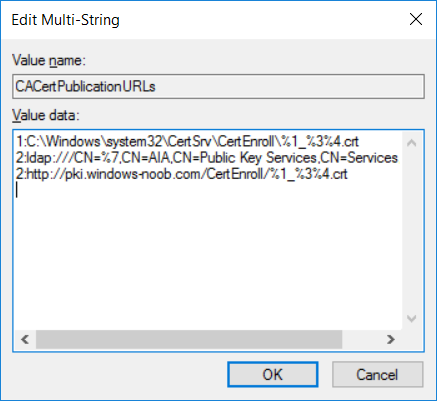
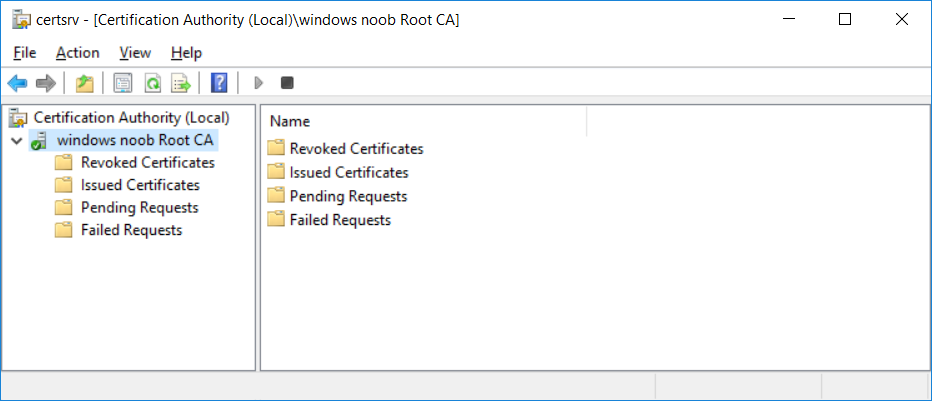
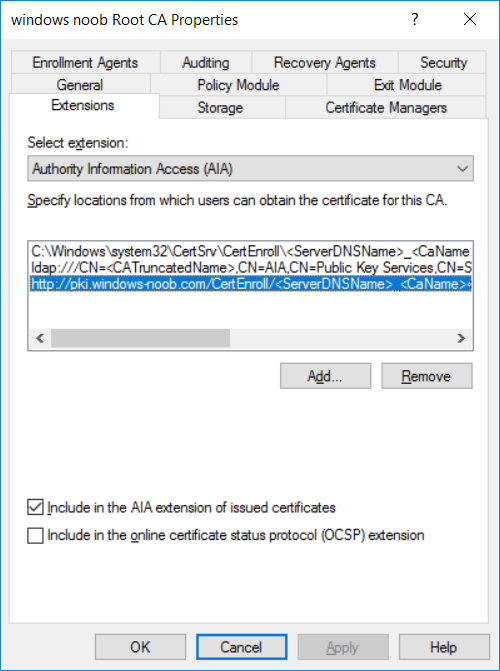
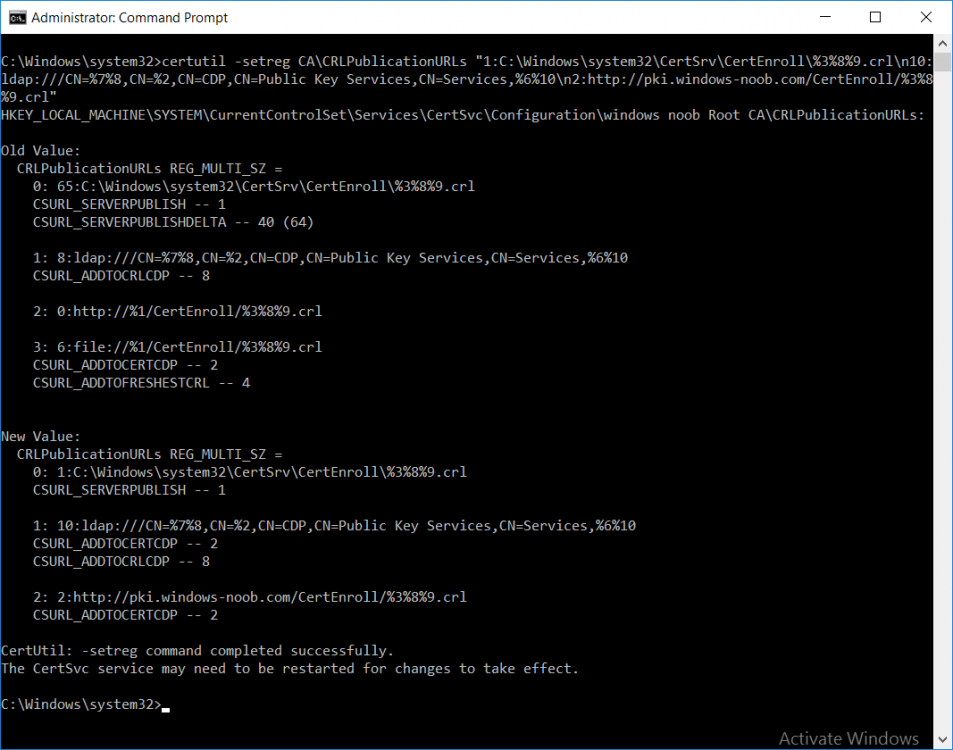
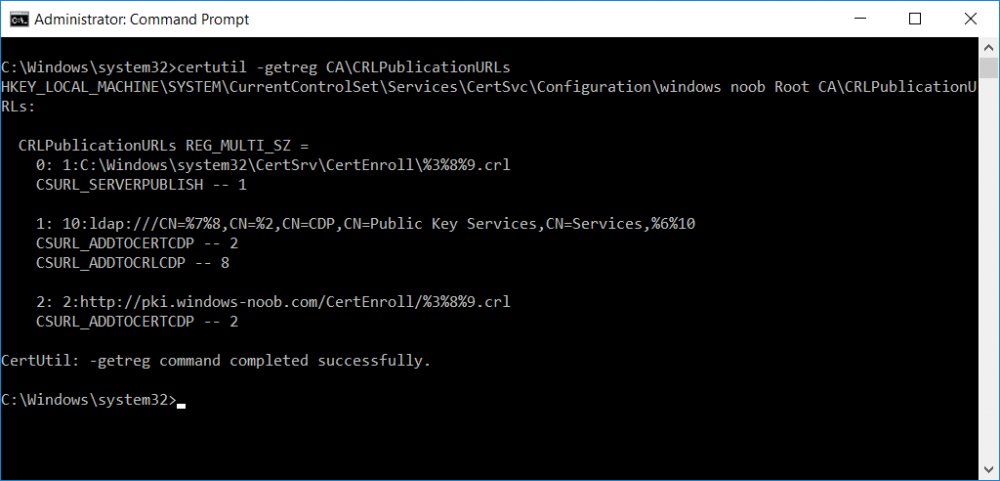
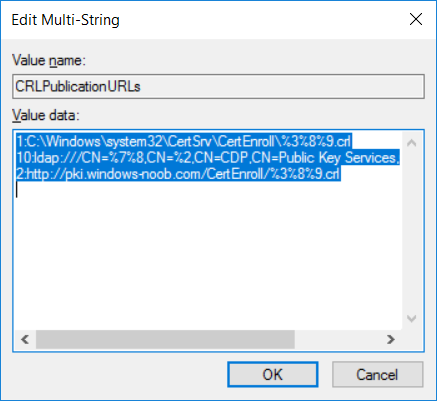
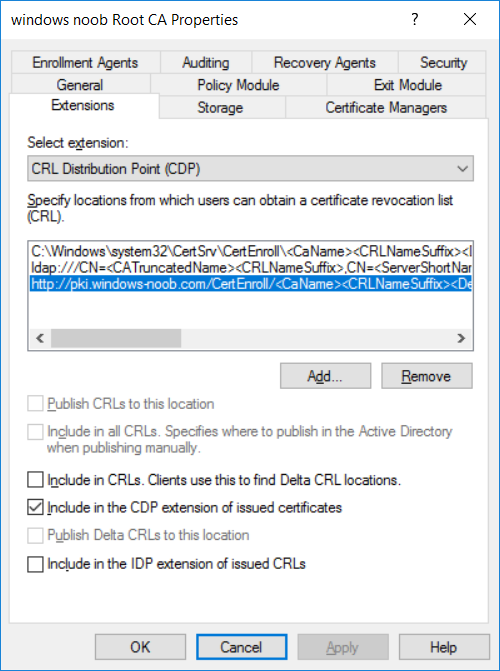
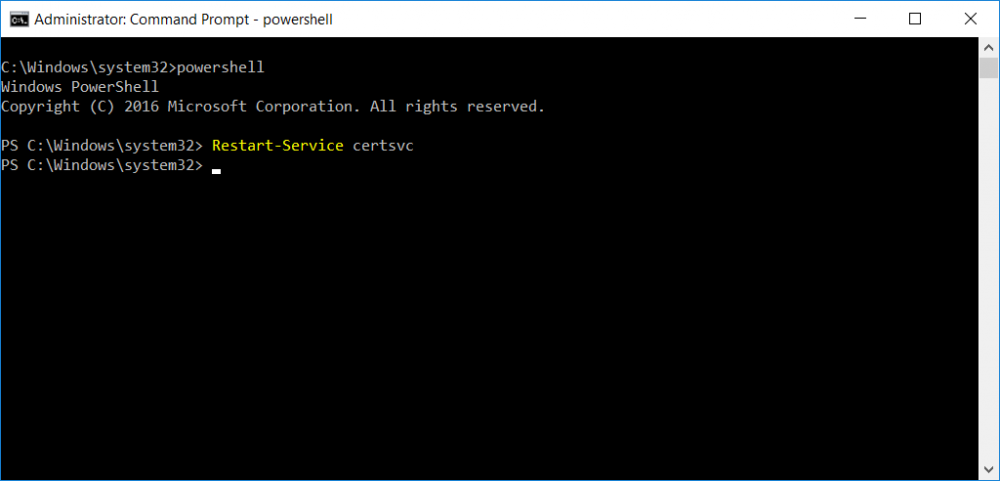
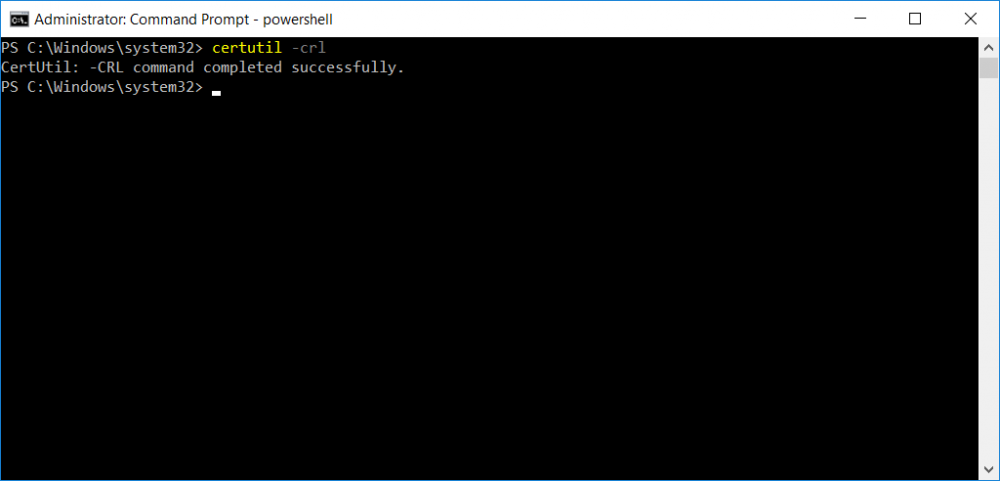
This series is comprised of different parts, listed below. Part 1 - Introduction and server setup Part 2 - Install and do initial configuration on the Standalone Offline Root CA Part 3 - Prepare the HTTP Web server for CDP and AIA Publication Part 4 - Post configuration on the Standalone Offline Root CA (this part) Part 5 - Installing the Enterprise Issuing CA Part 6 - Perform post installation tasks on the Issuing CA Part 7 - Install and configure the OCSP Responder role service Part 8 - Configure AutoEnroll and Verify PKI health In part 1 of this series, you configured your LAB for a 2 tier PKI hierarchy running on Windows Server 2016. You used PowerShell to create some virtual machines, and then installed Windows Server 2016, Windows 10 Enterprise version 1803 and optionally Smoothwall 3.1 before configuring the IP address scheme and Computer Names on the virtual machines. Finally you configured ADDS on DC01 so that you have a working Domain Controller for the rest of this LAB. In part 2 you installed and did the initial configuration on the Standalone Offline Root CA. In part 3 you prepared the HTTP Web Server for CDP and AIA Publication and you created a DNS record for the publicly available web server. Now you will perform post configuration on the Standalone Offline Root CA to set certificate revocation list (CRL) period registry settings using CertUtil, and then enable object access Auditing and finally, to configure three locations for the Authority Information Access (AIA) and four locations for the Certificate revocation list Distribution Point (CDP), again using CertUtil. Step 1. Configure CRL period registry settings using CertUtil In this step, you'll use CertUtil to set various related registry settings for the Certificate Revocation List periods in the registry on the Standalone Offline Root CA. Logon to the Standalone Offline Root CA as RootCA\Administrator. Right-click on Start, and choose Command Prompt (admin). I'll show screenshots of the output of each command separately so that you can compare it to your environment. To start off, you need to define the Active Directory Configuration Partition Distinguished Name, and to do that using certutil enter the following command: Certutil -setreg CA\DSConfigDN "CN=Configuration,DC=windowsnoob,DC=lab,DC=local" Note: You can determine what the configuration path should be (for your LAB) for the command above by logging on to the Domain Controller (DC01), and by opening Adsi Edit, and click on Action then select Connect to. In the window that appears, change Select a well known naming context to Configuration. In the Adsi Edit pane, right click on CN=Configuration,DC=windowsnoob,DC=lab,DC=local and choose Properties, scroll down and double click on Distinguished Name, copy the Value listed in the String attribute editor. The results of the certutil -setreg command on the Standalone Offline Root CA are shown below. Be sure that it states CertUtil: -setreg command completed successfully. Next you will define the Certificate Revocation List (CRL) Period Units, CRL Period and CRL Delta Period Units. To do so run the following commands from an administrative command prompt: Certutil -setreg CA\CRLPeriodUnits 52 Press Enter. The output of the above command is shown below. Certutil -setreg CA\CRLPeriod "Weeks" Press Enter. The output of the above command is shown below. Certutil -setreg CA\CRLDeltaPeriodUnits 0 Press Enter. The output of the above command is shown below. To define the CRL Overlap Period Units and the CRL Overlap Period, run the following commands from an administrative command prompt: Certutil -setreg CA\CRLOverlapPeriodUnits 12 Press Enter. The output of the above command is shown below. Certutil -setreg CA\CRLOverlapPeriod "Hours" Press Enter. The output of the above command is shown below. To define the Validity Period Units for all certificates issued by this CA, type following command and then press Enter. In this lab, the Enterprise Issuing CA should receive a 10 year lifetime for its CA certificate. To configure this, run the following commands from an administrative command prompt: Certutil -setreg CA\ValidityPeriodUnits 10 Press Enter. The output of the above command is shown below. Certutil -setreg CA\ValidityPeriod "Years" Press Enter. The output of the above command is shown below. Note: You can confirm all these 8 settings that you have just set on the Standalone Offline Root CA, by using CertUtil -getreg (and query the appropriate setting, for example Certutil -getreg CA\CRLPeriod), or simply browse the registry using RegEdit to the following address. HKLM\SYSTEM\CurrentControlSet\Services\CertSvc\Configuration\windows noob Root CA You can see those values highlighted in the screenshot below. Can the above all be done with PowerShell ? yup, and i'll add the commands later, check back for that. Step 2. Enable Auditing on the Standalone Offline Root CA Note: You cannot configure these setting via Group Policy as the Standalone Offline Root CA should not be connected to any Domain and is Offline (disconnected from the network). Auditing is the ability to log successful or failed attempts when performing certain actions, and as the Standalone Offline Root CA is an important security resource, you want to enable auditing. To enable auditing on the Standalone Offline Root CA click start, select Administrative Tools, and then select Local Security Policy. Expand Local Policies and then select Audit Policy. Double click Audit Object Access and then select Success and Failure then click OK (2). After configuring this, you'll see the following. To enable auditing for the CA you can select which group of events to audit in the Certificate Authority MMC snap-in or by configuring the AuditFilter registry key setting. To configure Auditing for all CA related events, run the following command from an administrative command prompt: Certutil -setreg CA\AuditFilter 127 Press Enter. The output of the above command is shown below. Step 3. Configure the AIA There are multiple different methods for configuring the Authority Information Access (AIA) and certificate revocation list distribution point (CDP) locations. You can use the user interface (in the Properties of the CA object), the certutil command, or directly edit the registry. The Authority Information Access (AIA) is used to point to the public key for the certification authority (CA). To configure the Authority Information Access (AIA) using certutil to set the following three locations on the Standalone Offline Root CA: Static file system LDAP (lightweight directory access path) HTTP Note: Edit the command below to use your public facing HTTP web server address, I'm using http://pki.windows-noob.com, you should use your own address. Open an administrative command prompt and do as follows: certutil -setreg CA\CACertPublicationURLs "1:C:\Windows\system32\CertSrv\CertEnroll\%1_%3%4.crt\n2:ldap:///CN=%7,CN=AIA,CN=Public Key Services,CN=Services,%6%11\n2:http://pki.windows-noob.com/CertEnroll/%1_%3%4.crt" Press Enter. The output of the above command is shown below. To confirm the output you can issue the following command: certutil -getreg CA\CACertPublicationURLs Press Enter. The output of the above command is shown below. If you look in the registry, under the following path: HKEY_LOCAL_MACHINE\System\CurrentControlSet\Services\CertSvc\Configuration\windows noob RootCA, you can confirm the CACertPublicationURLs by opening that REG_MULTI_SZ value. You should see the following: 1:C:\Windows\system32\CertSrv\CertEnroll\%1_%3%4.crt 2:ldap:///CN=%7,CN=AIA,CN=Public Key Services,CN=Services,%6%11 2:http://pki.windows-noob.com/CertEnroll/%1_%3%4.crt as shown in the screenshot below. You can also see this in the the Certification Authority console (certsrv) . To open the console, click Start, click Administrative Tools, and then click Certification Authority. In the navigation pane, expand the Certificate Authority (Local). Right-click windows noob Root CA and then click Properties. On the Extensions tab, under Select extension, click Authority Information Access (AIA) and you will see the graphical representation of the AIA settings that you've just configured using certutil. In the above step, you have used the following three different methods to confirm the specified settings. certutil registry certsrv.msc Step 4. Configure the CDP The CDP is where the certificate revocation list is maintained, which allows client computers to determine if a certificate has been revoked. To configure the Certificate revocation list Distribution Point (CDP) using certutil to set the following four locations on the Standalone Offline Root CA: Static file system LDAP (lightweight directory access path) HTTP File system The file system location (4th option) that you will set will allow the CRL to be copied over the network to the web server (webserver), which is why we earlier allowed the Cert Publishers group access to the share and folder. All CAs are members of the Cert Publishers group, so we effectively allowed all CAs to copy to the CertEnroll folder on the webserver computer. You may wish to grant a specific group rights to access this share instead, it's up to you. Note: Edit the command below to use your public facing HTTP web server address, I'm using http://pki.windows-noob.com, you should use your own address. certutil -setreg CA\CRLPublicationURLs "1:C:\Windows\system32\CertSrv\CertEnroll\%3%8%9.crl\n10:ldap:///CN=%7%8,CN=%2,CN=CDP,CN=Public Key Services,CN=Services,%6%10\n2:http://pki.windows-noob.com/CertEnroll/%3%8%9.crl" Press Enter. The output of the above command is shown below. After you run that command, run the following certutil command to verify your settings: certutil -getreg CA\CRLPublicationURLs Press Enter. The output of the above command is shown below. You can also verify it in the following registry location: HKEY_LOCAL_MACHINE\SYSTEM\CurrentControlSet\Services\CertSvc\Configuration\windows noob Root CA and in CertSrv.msc Step 5. restart the CertSvc service On the Standalone Offline Root CA, open an Administrative command prompt and type PowerShell. In the PowerShell command prompt issue the following command: Restart-Service certsvc Press Enter. The output of the above command is shown below. Step 6. Publish the CRL On the Standalone Offline Root CA, open an Administrative command prompt and type PowerShell. In the PowerShell command prompt issue the following command: certutil -crl Press Enter. The output of the above command is shown below. That's it for this part, please continue to Part 5 where you will Install the Enterprise Issuing CA. Recommended reading (1) - https://docs.microsoft.com/en-us/windows-server/administration/windows-commands/certutil (2) - https://docs.microsoft.com/en-us/previous-versions/windows/it-pro/windows-server-2003/cc776774(v=ws.10)
-
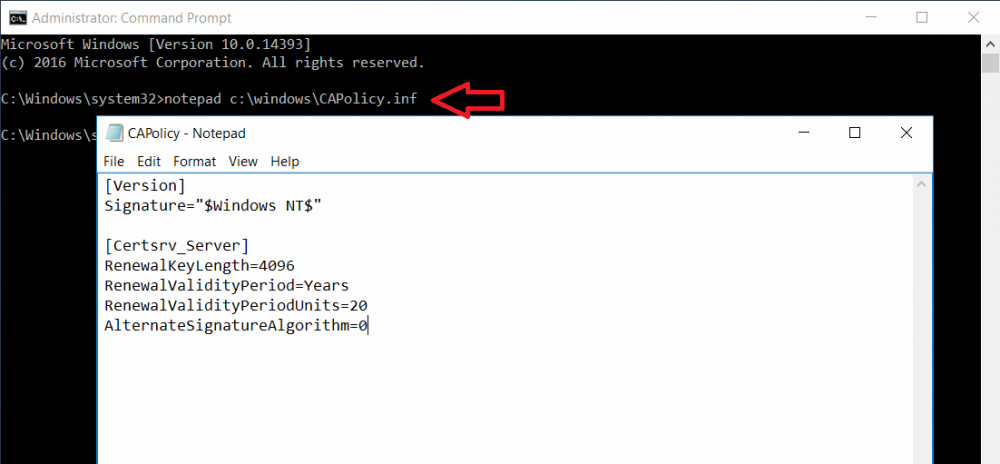
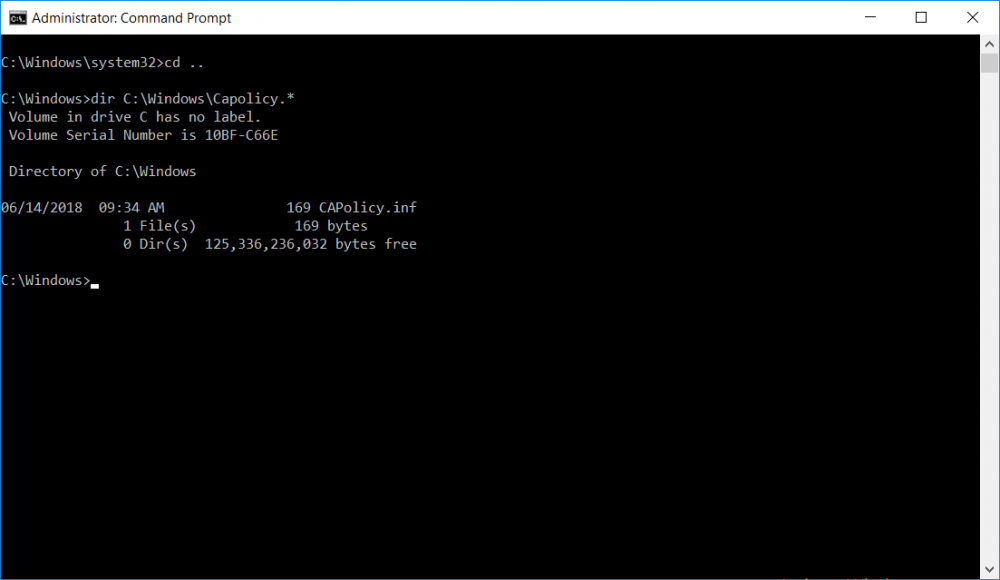
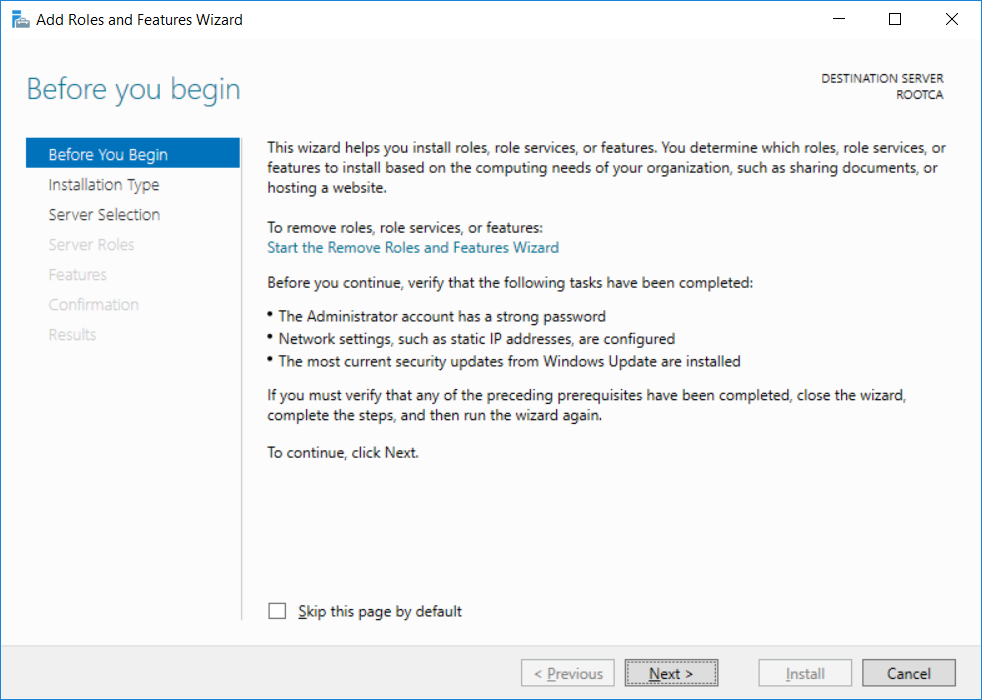
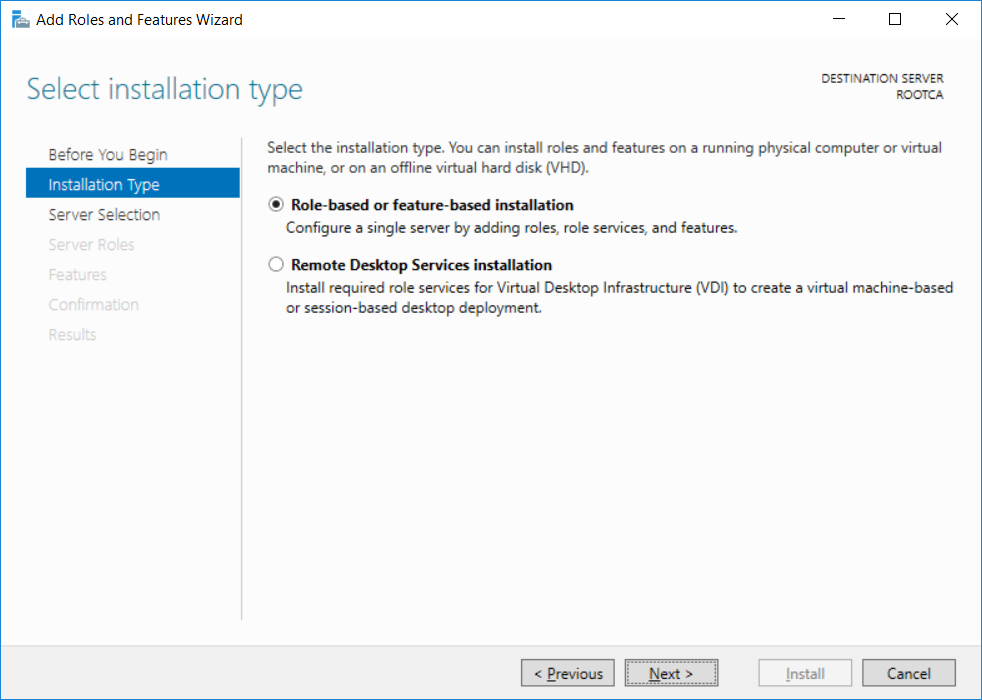
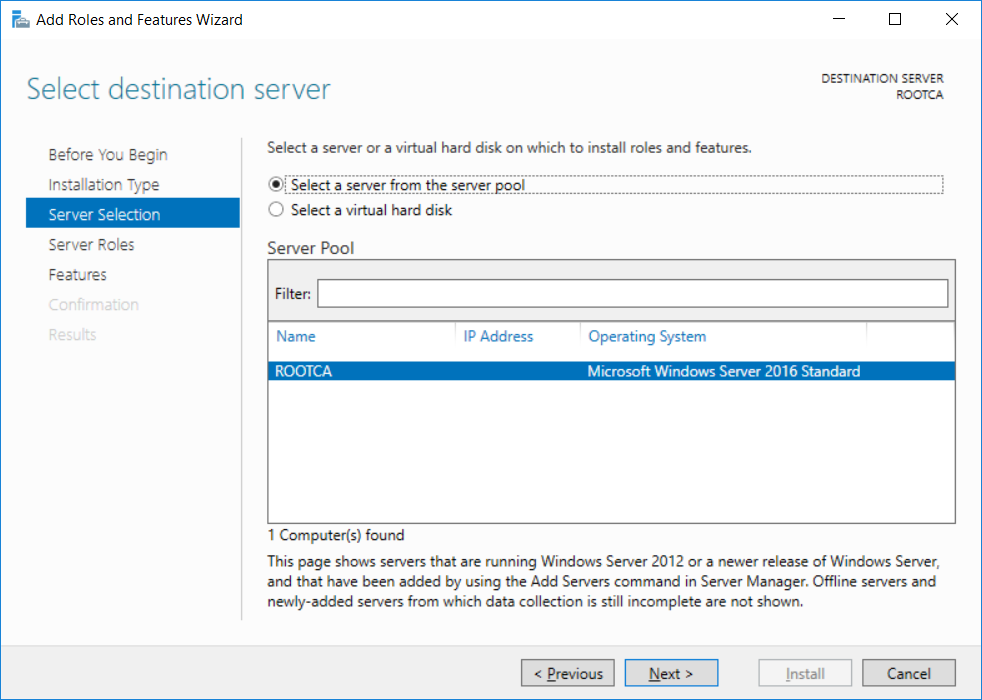
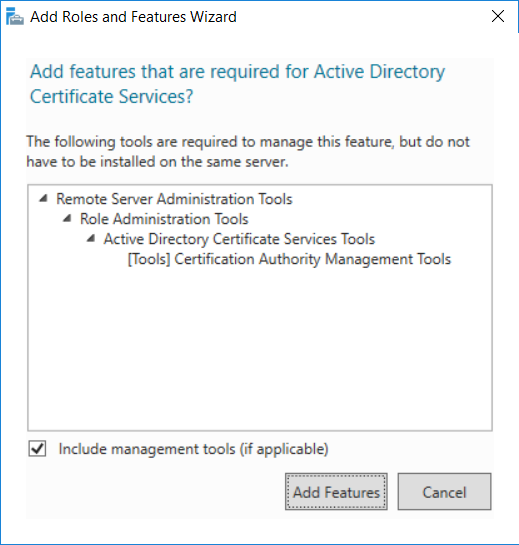
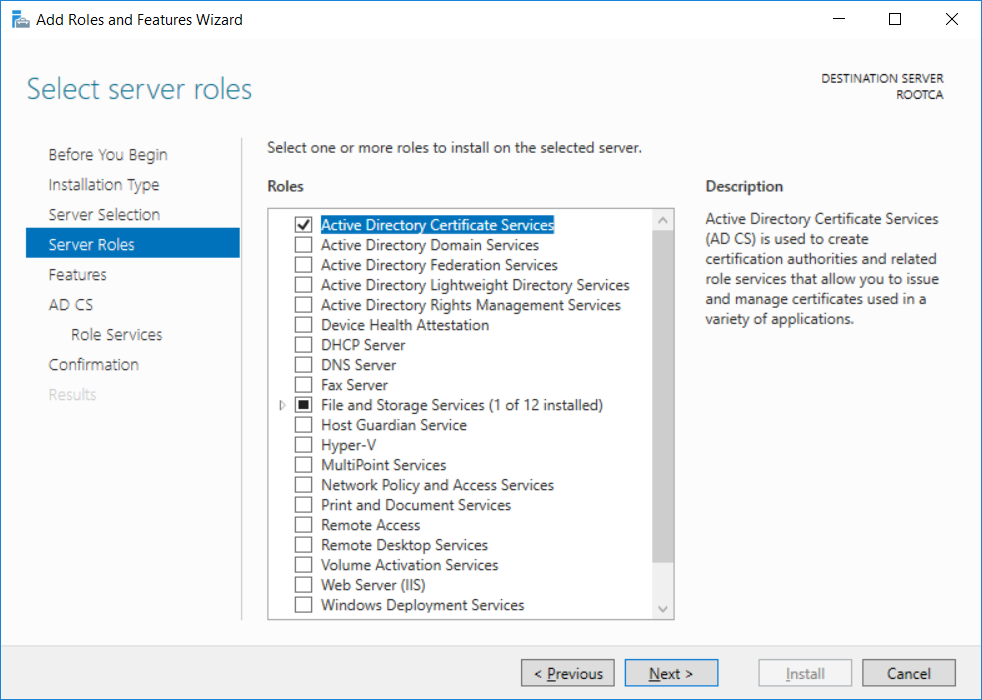
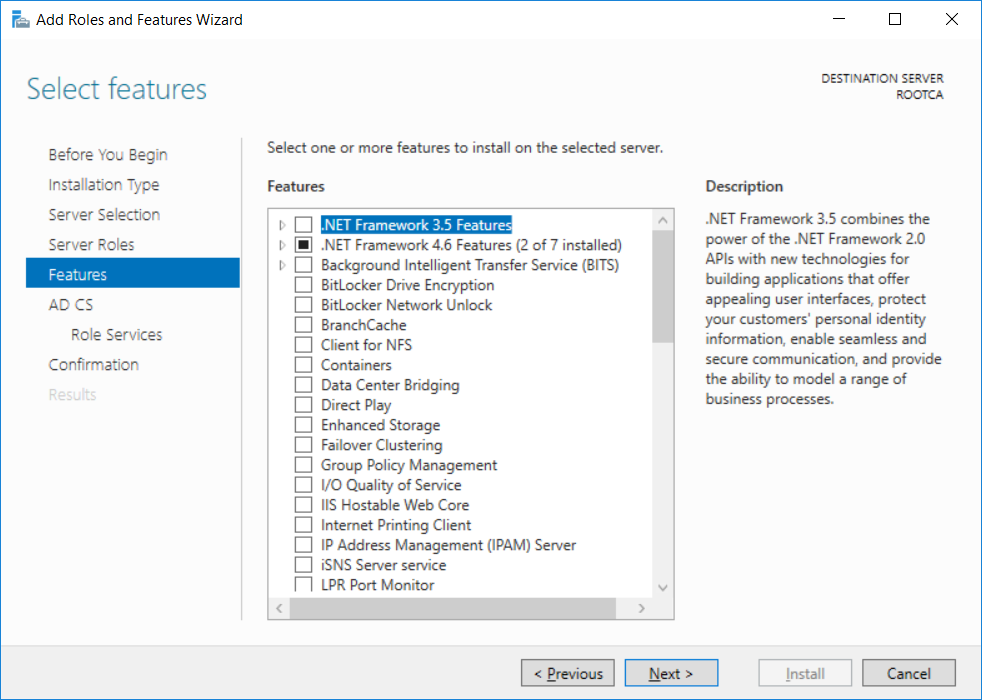
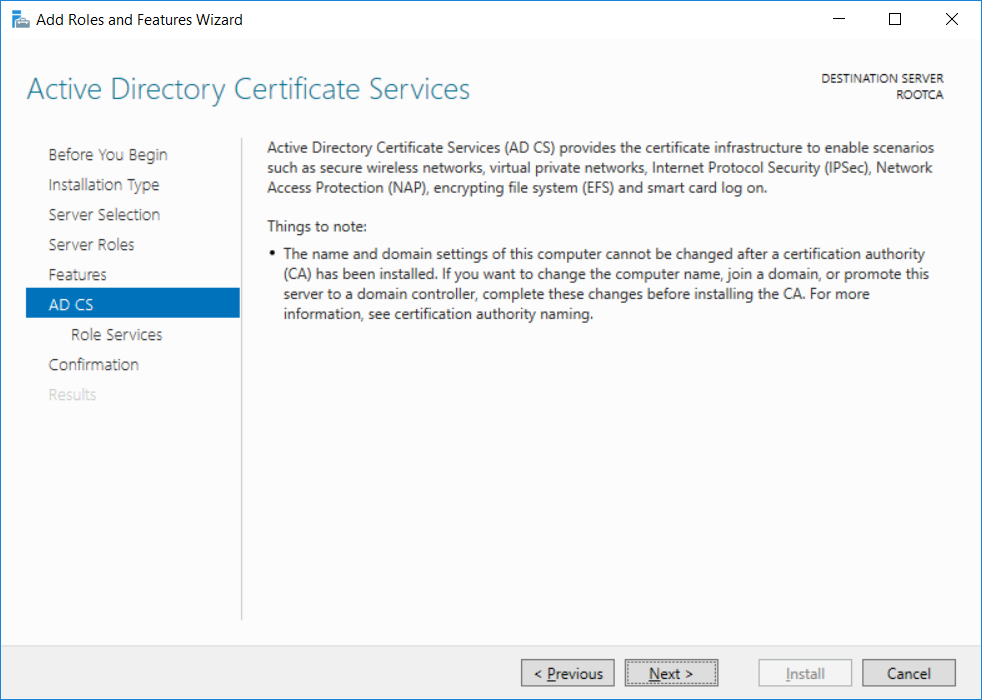
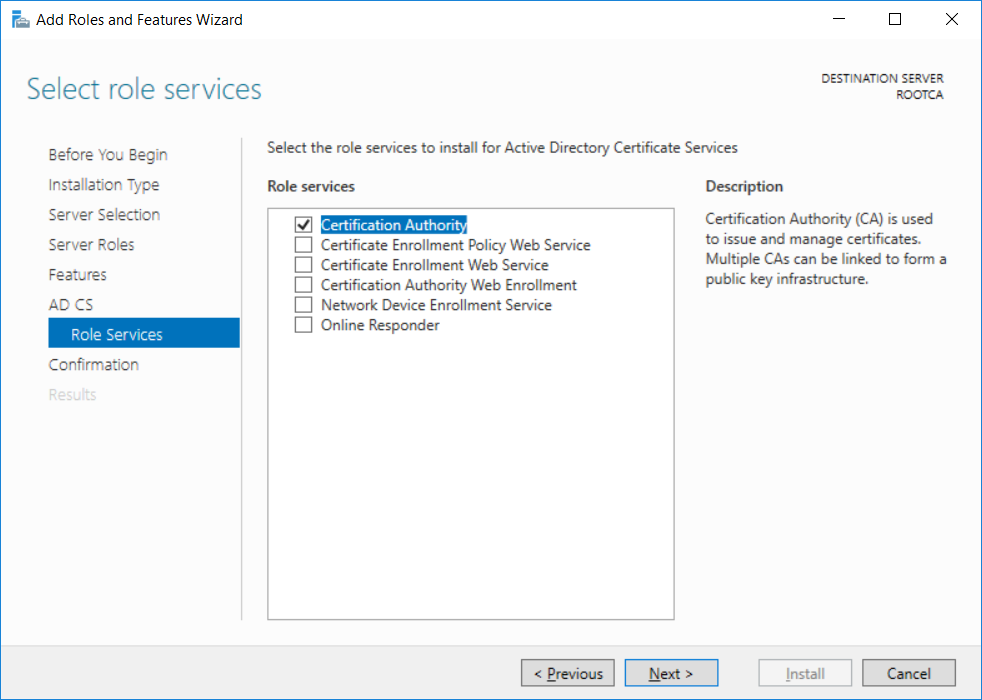
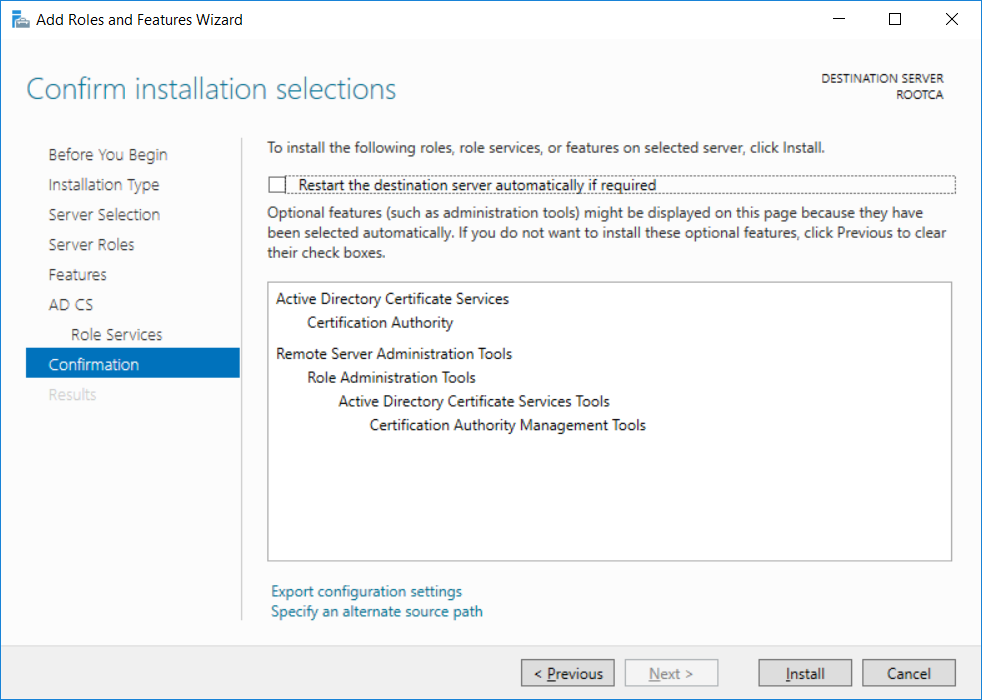
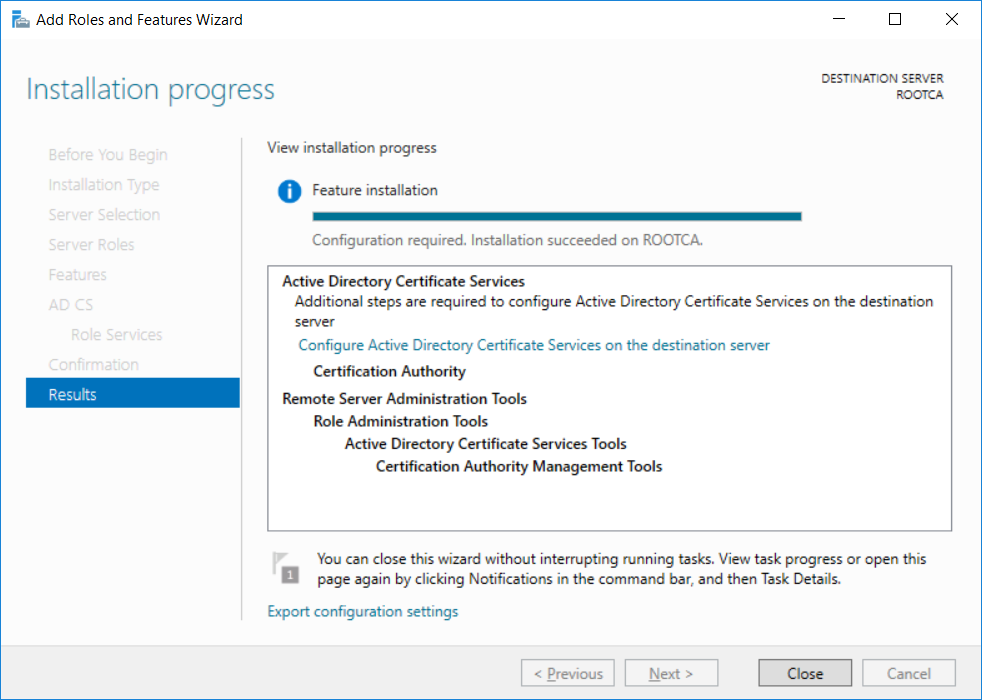
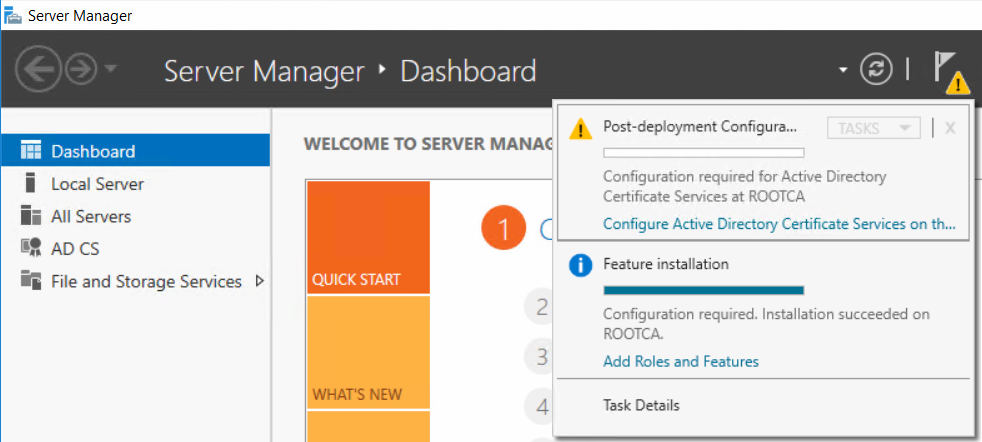
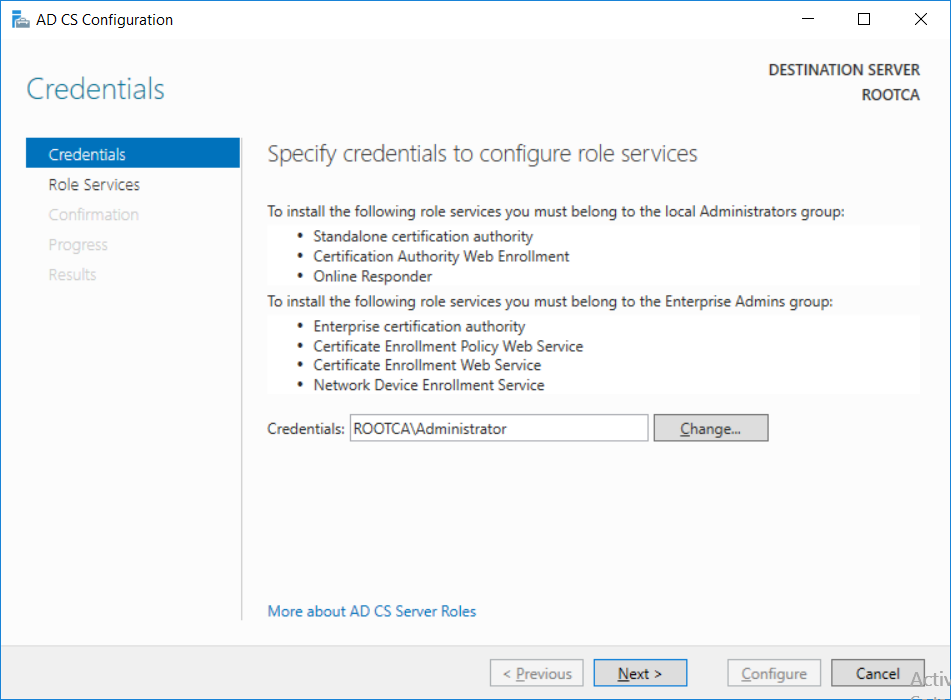
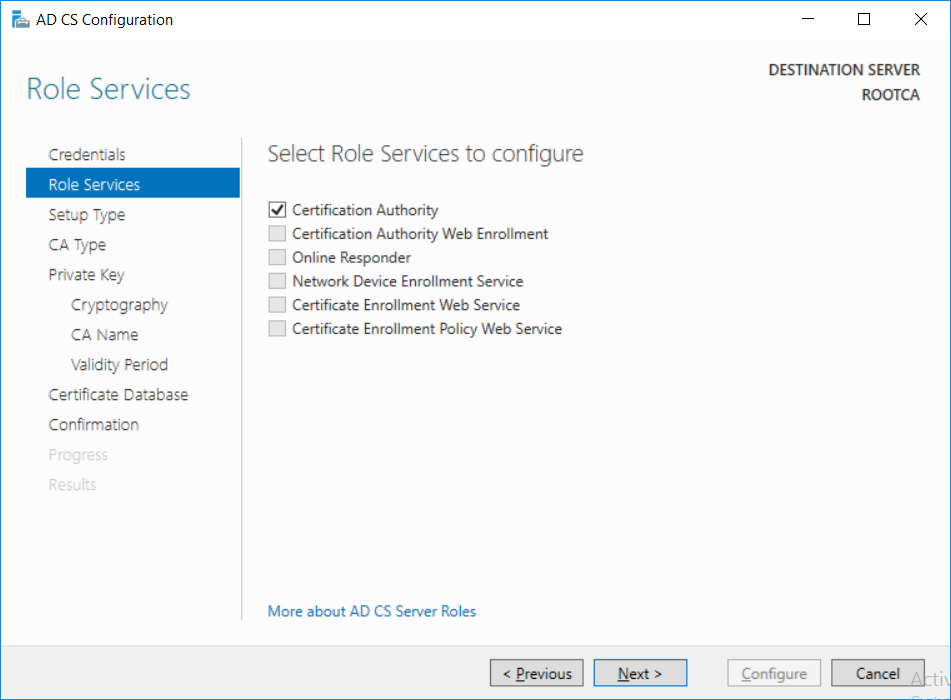
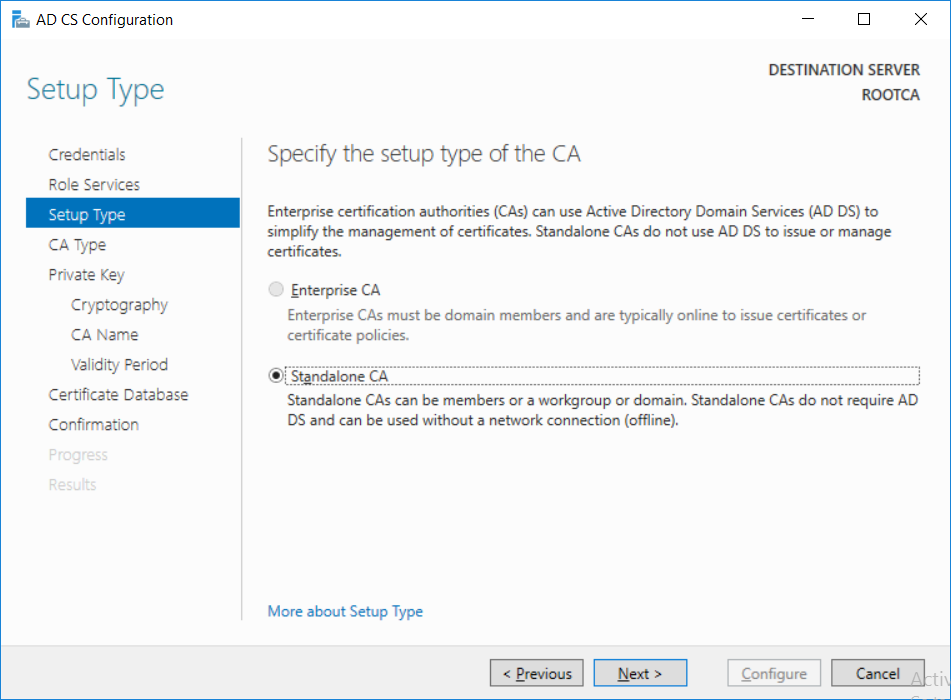
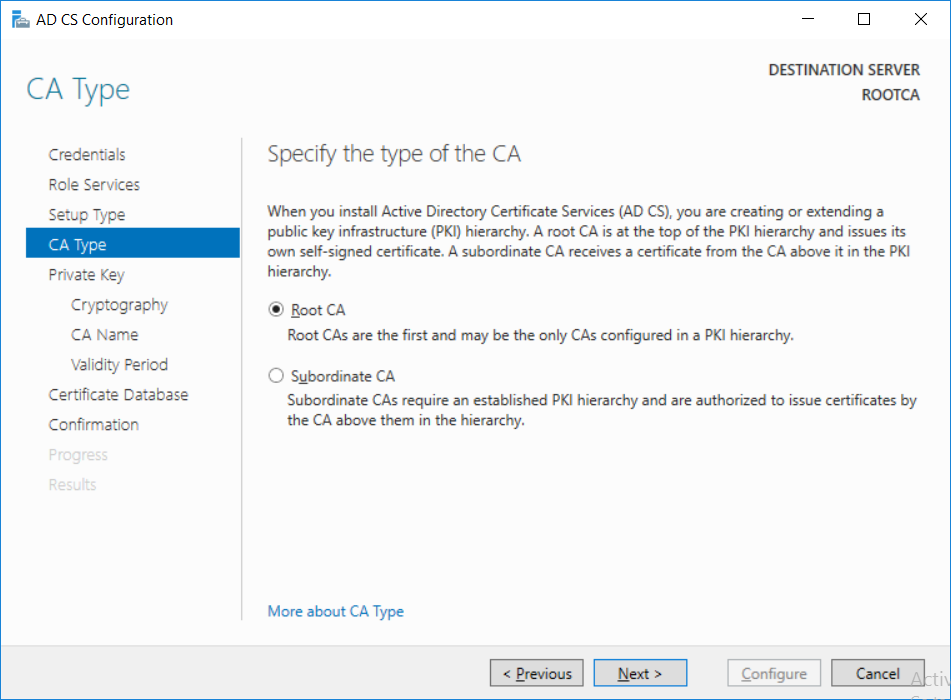
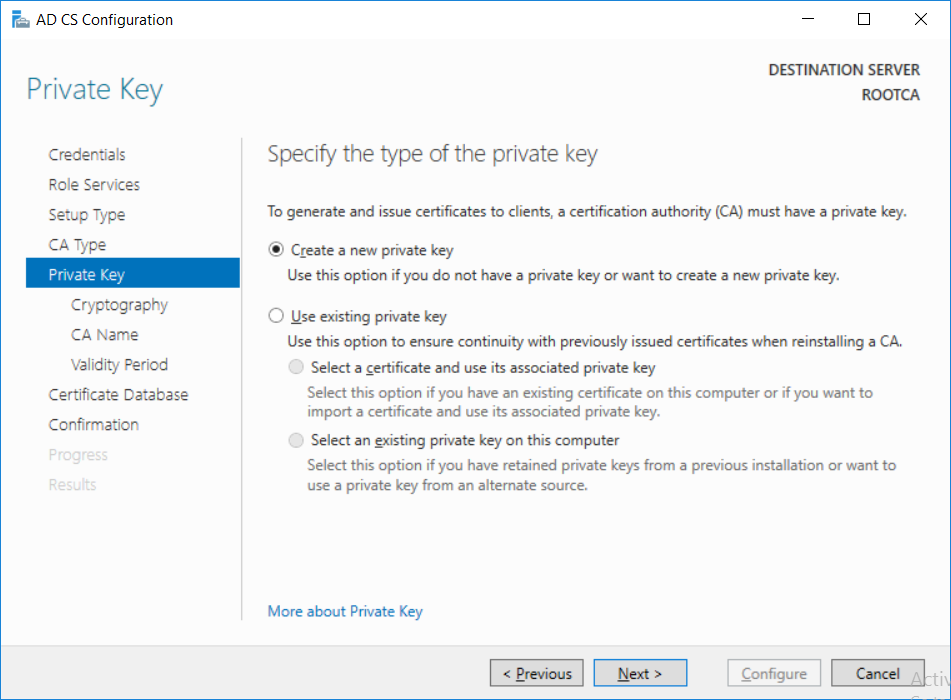
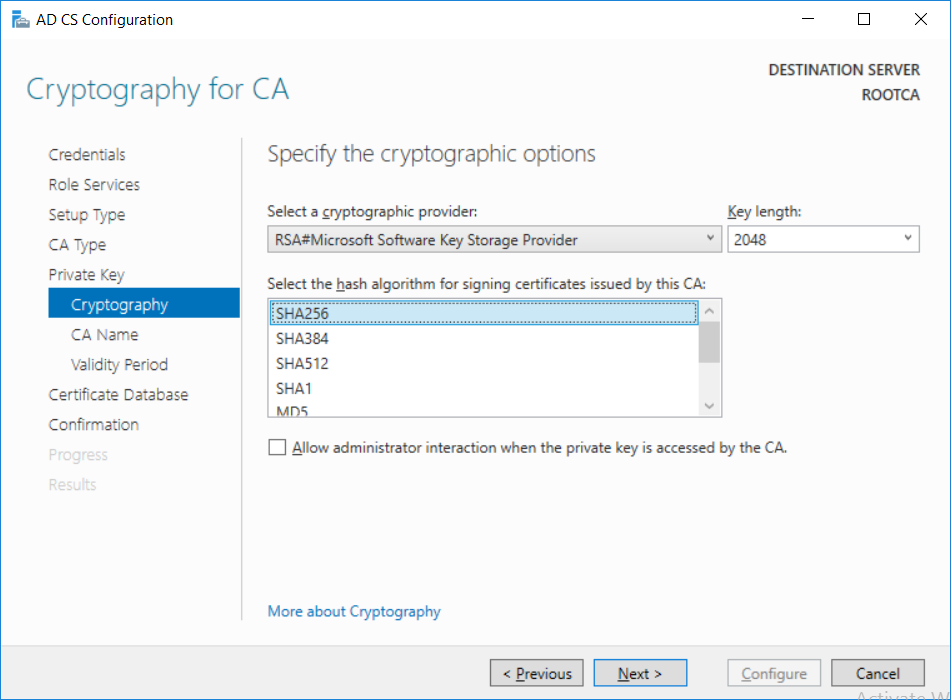
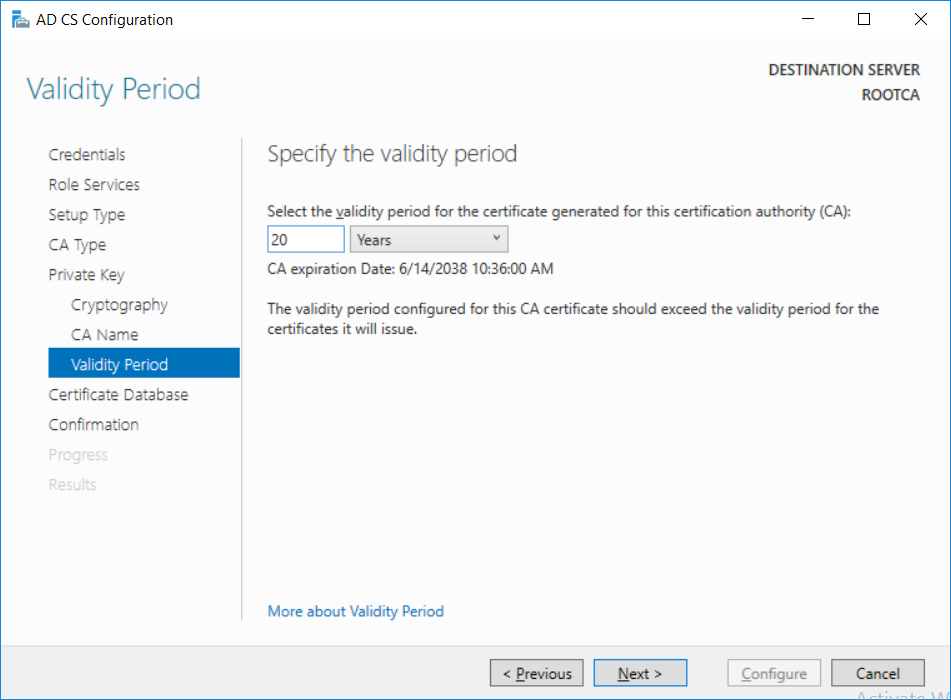
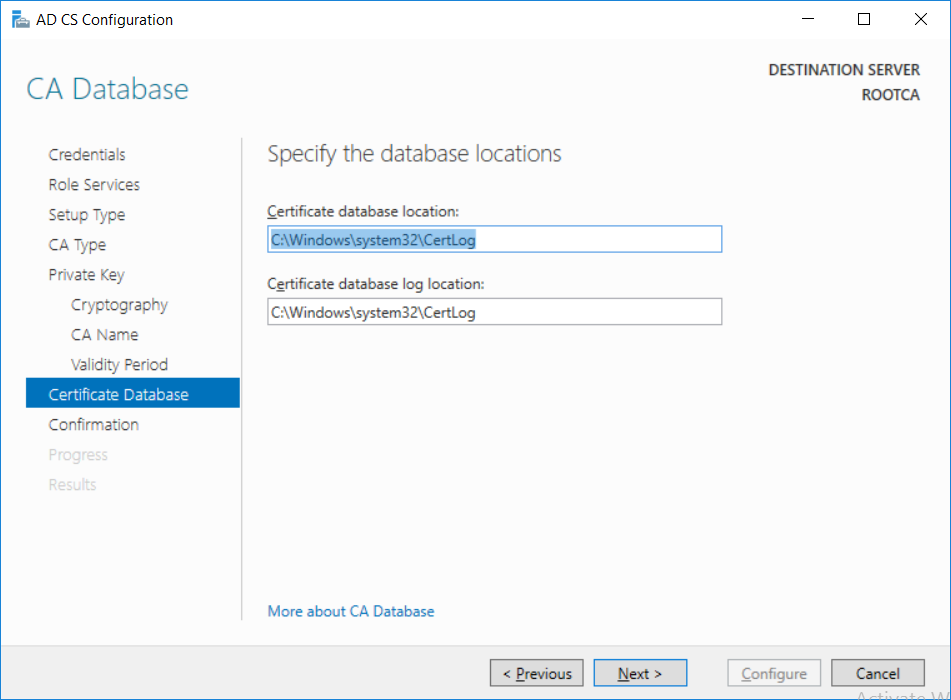
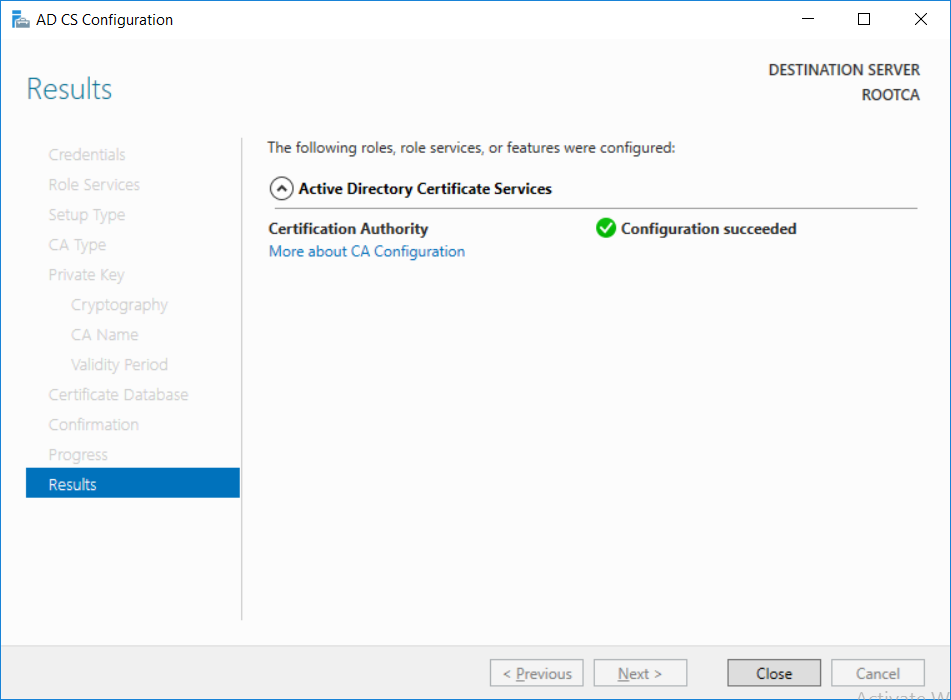
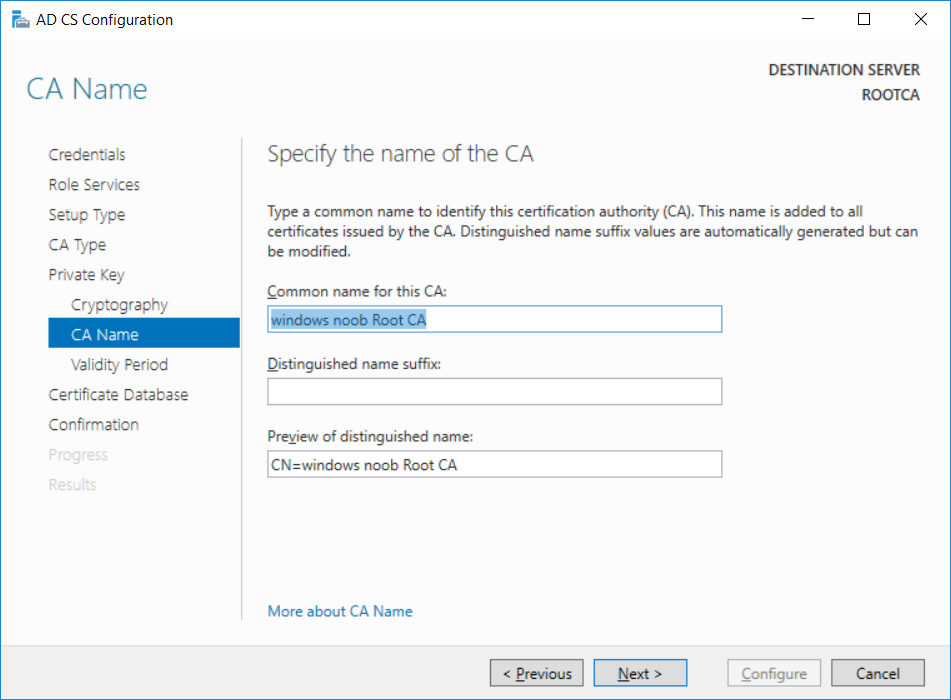
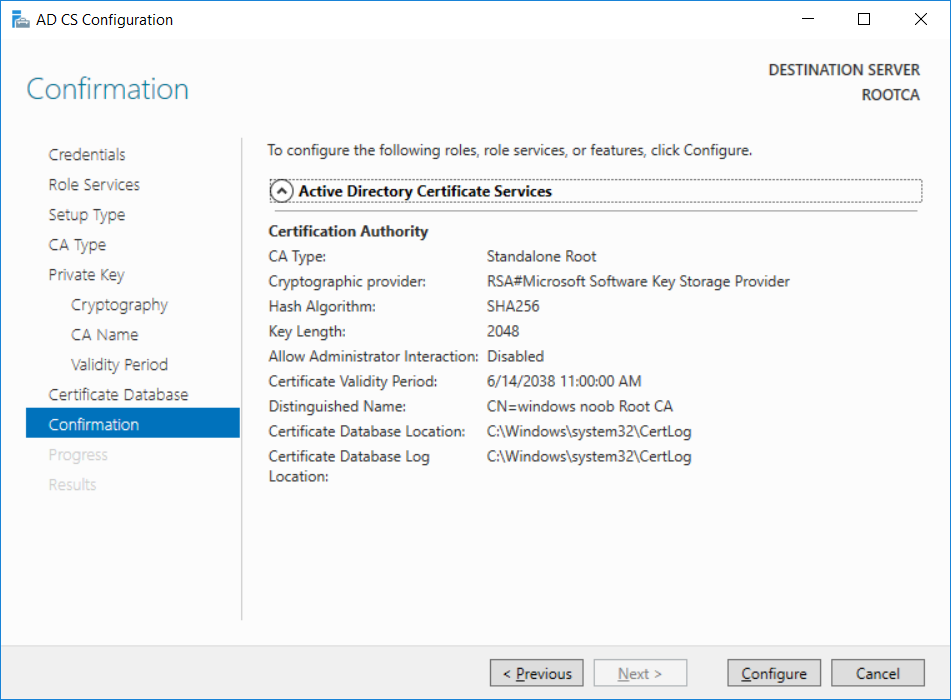
This series is comprised of different parts, listed below. Part 1 - Introduction and server setup Part 2 - Install and do initial configuration on the Standalone Offline Root CA (this part) Part 3 - Prepare the HTTP Web server for CDP and AIA Publication Part 4 - Post configuration on the Standalone Offline Root CA Part 5 - Installing the Enterprise Issuing CA Part 6 - Perform post installation tasks on the Issuing CA Part 7 - Install and configure the OCSP Responder role service Part 8 - Configure AutoEnroll and Verify PKI health In part 1 of this series, you configured your LAB for a 2 tier PKI hierarchy running on Windows Server 2016. You used PowerShell to create some virtual machines, and then installed Windows Server 2016, Windows 10 Enterprise version 1803 and optionally Smoothwall 3.1 before configuring the IP address scheme and Computer Names on the virtual machines. Finally you configured ADDS on DC01 so that you have a working Domain Controller for the rest of this LAB. In this part you'll install and do initial configuration on the Standalone Offline Root CA. What is a Standalone Offline Root CA ? If you've never dealt with PKI before you are probably wondering what a Standalone Offline Root CA is and why do you need it. I'll quote the following paragraph from the excellently written article about a Standalone Offline Root CA here. If you don't read the article itself, at least read the Quote below. To cut a long story short, you should use a Standalone Offline Root CA because it lowers the possibility of compromise and ensures reliability of your Certificate Authority infrastructure. Step 1. Create a CAPolicy.inf file Before installing the Standalone Offline Root CA, you should create a CAPolicy.inf to define 'default' settings for CA templates, some of these settings cannot be changed later and you want them in place before creating any certificates on the Standalone Offline Root CA. So now that you know that you should create the file as a first step, let's go and do that. On the #11_RootCA virtual machine (RootCA), login as Administrator using the password specified. Open an administrative command prompt and type the following: notepad C:\Windows\CAPolicy.inf and press ENTER, when prompted to create new file, click Yes. Paste in the following text into the new CAPolicy.inf file. [Version] Signature="$Windows NT$" [Certsrv_Server] RenewalKeyLength=4096 RenewalValidityPeriod=Years RenewalValidityPeriodUnits=20 AlternateSignatureAlgorithm=0 Once done, save the file. Note: Any misspellings or mistakes will be ignored, so please copy/paste carefully. To understand what these values are, and why you are using them please see the following link, but in a nutshell, you are telling the CA that by default the Root CA should issue certificates that are valid for 20 years, feel free to adjust accordingly if you think it's appropriate but be aware of the consequences (having to re-issue certificates etc.). I'd recommend your verify that the file is indeed correctly named and in the C:\Windows folder. You don't want .TXT appended to it or it will be ignored. To verify, do the following: dir C:\Windows\Capolicy.* The file has the right name and is in the right location. Step 2. Install Active Directory Certificate Services Now that you've created the CAPolicy.inf file you are ready to install Active Directory Certificate Services on the Standalone Offline Root CA. To do so, open Server Manager and select Add Roles and Features. Click Next and select Role-based or feature-based installation. Click Next and Select Select a server from the server pool, ensure that ROOTCA is selected. Click Next and select Active Directory Certificate Services from the choices available on the Select server roles page, if prompted to Add features that are required for Active Directory Certificate Services, click Add features. And here you see the Active Directory Certificate Services role is selected. Click Next to continue. on the Select features screen, click Next. Click Next, On the Active Directory Certificate Services introduction page, read the Things to note before clicking on Next. Insure that Certificate Authority is selected on the Confirmation screen, click on Install. Wait for the installation progress to finish successfully before clicking on Close. Click Close to close the wizard. Step 3. Configure Active Directory Certificate Services After the installation succeeded in the previous step, click on Configure Active Directory Certificate Services on the destination server in Server Manager. On the Specify credentials to configure role services screen, ensure your credentials are ROOTCA\Administrator and then click Next. Select the Certificate Authority role to configure… by default it is not selected. Click Next and select Standalone CA Click Next and on the Specify the type of the CA select Root CA Click Next. On the Specify the type of private key select Create a new private key and click Next. On the Specify the cryptographic options screen pay attention to the settings before clicking Next. For example, ensure that sha-256 is selected as sha-1 is dead (3). The key length defaults to 2048 but only change to 4096 if you are sure it doesn't break communication with your Switches and legacy applications. On the Specify the name for this CA, change Common Name for this CA to suit your needs, for example enter the following windows noob Root CA but do not change the other values. For more info about the CA Name see here (4). Click Next. On the Specify the validity period page, select 20 years instead of the default of 5. Click Next. On the Specify the database locations click Next. On the Confirmation screen review the details and change if necessary or if you are satisfied, click Configure. and you should see Configuration Succeeded. Click Close when done. Configuring the above with PowerShell To configure the above using PowerShell, use the following commands. First install the ADCS role Add-WindowsFeature Adcs-Cert-Authority -IncludeManagementTools Edit as necessary before running the below (which configures the ADCS role). Install-AdcsCertificationAuthority -CAType StandaloneRootCA -CACommonName "windows noob Root CA" -KeyLength 2048 -HashAlgorithm SHA256 -CryptoProviderName "RSA#Microsoft Software Key Storage Provider" -ValidityPeriod Years -ValidityPeriodUnits 20 -Force That's it for this part, in Part 3 you'll configure the Web server for CDP and AIA Publication. Recommended reading (1) - https://social.technet.microsoft.com/wiki/contents/articles/2900.offline-root-certification-authority-ca.aspx (2) - https://docs.microsoft.com/en-us/windows-server/networking/core-network-guide/cncg/server-certs/prepare-the-capolicy-inf-file (3) - https://blogs.technet.microsoft.com/askpfeplat/2015/03/15/sha-1-deprecation-and-changing-the-root-cas-hash-algorithm/ (4) - http://go.microsoft.com/fwlink/?LinkId=218063
-
- common name
- sha-1
-
(and 4 more)
Tagged with:


