In part one of this guide, we prepared Office 2010 X86 by downloading the files required (including the OCT), and created our own MSP file. Now we will add that customised package to ConfigMgr.
Step 1. Create the Office 2010 Package
Note: Before starting this step, copy the c:\Office2010x86 folder we created in part one of this guide, to your application sources share on your SCCM server, eg:
\\WIN-CILZXI45G1Q\apps\office2010x86
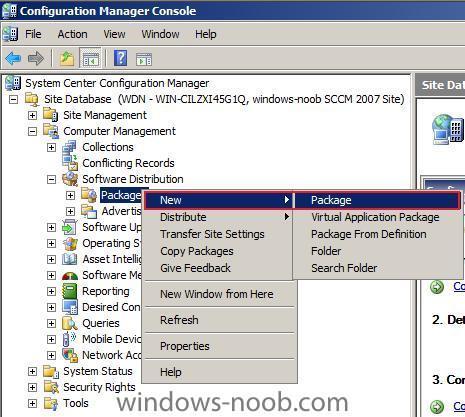
Open your ConfigMgr console, and expand Computer Management, Software Distribution. Right click on Packages and choose New Package.
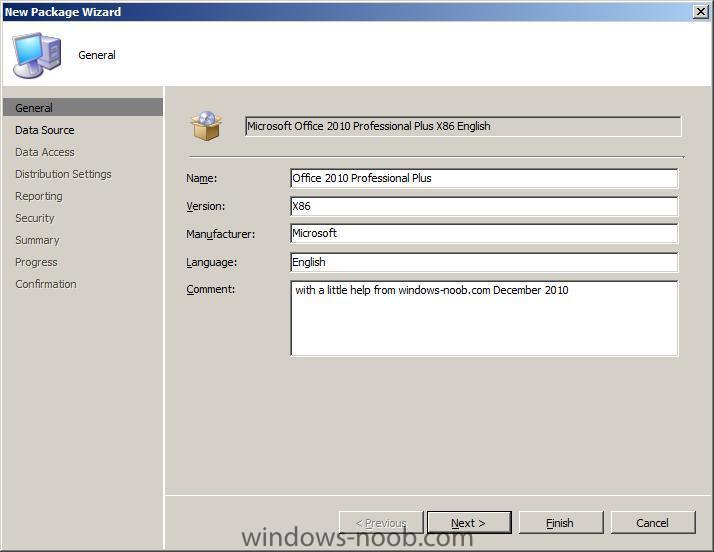
Fill in your package details on the wizard screen
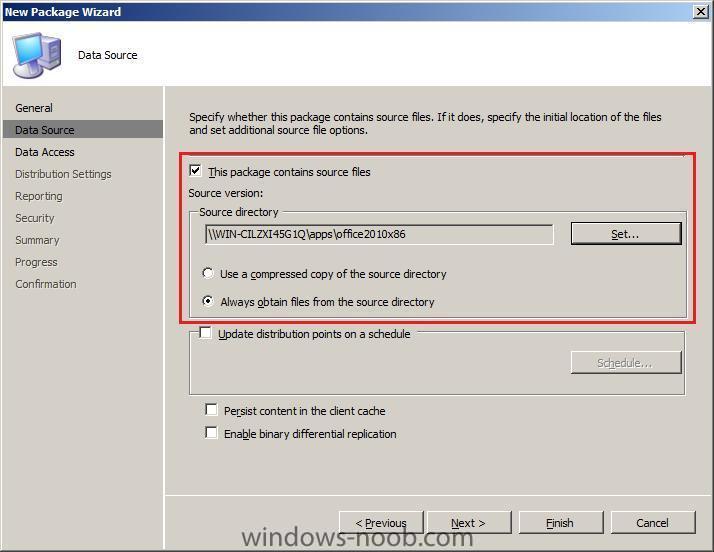
point it to the data source on your network share
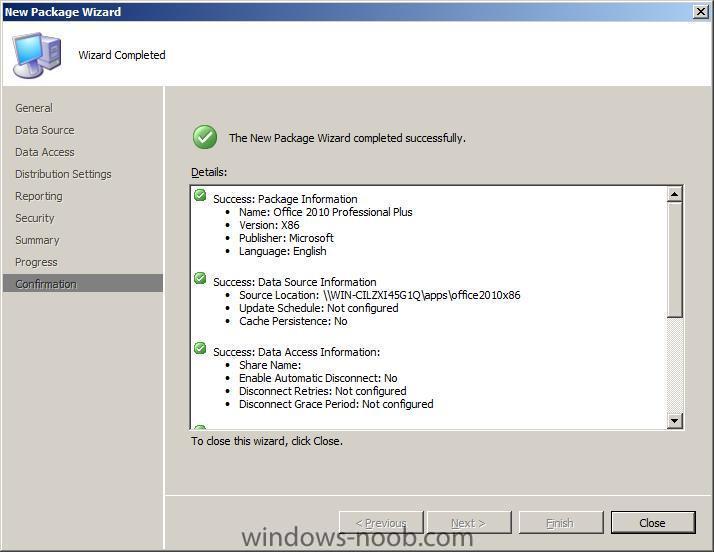
and click next through the wizard until you see the confirmation screen.
We have placed cookies on your device to help make this website better. You can adjust your cookie settings, otherwise we'll assume you're okay to continue.
In part one of this guide, we prepared Office 2010 X86 by downloading the files required (including the OCT), and created our own MSP file. Now we will add that customised package to ConfigMgr.


Step 1. Create the Office 2010 Package
Note: Before starting this step, copy the c:\Office2010x86 folder we created in part one of this guide, to your application sources share on your SCCM server, eg:
\\WIN-CILZXI45G1Q\apps\office2010x86
Open your ConfigMgr console, and expand Computer Management, Software Distribution. Right click on Packages and choose New Package.
Fill in your package details on the wizard screen
point it to the data source on your network share
and click next through the wizard until you see the confirmation screen.
Share this post
Link to post
Share on other sites